other

Three Safe-to-Eat Cookie Doughs: Chocolate Chip, Sugar, and Cake Batter!

I’m siiiiick. If you follow Willow Bird Baking on Facebook or Twitter (you do, right?), you’ve probably heard me whining about it lately (okay, maybe this isn’t the best way to encourage you to follow).

It started with a sore throat and has turned into a beastly, phlegmatic ogre of a cold that has taken up residence in my chest and commenced hanging draperies and such. I have protested this development with various hot teas, soups, and my favorite home remedy suggested by readers: complaining.

Three Safe-to-Eat Cookie Doughs: Chocolate Chip, Sugar, and Cake Batter!

Three Safe-to-Eat Cookie Doughs: Chocolate Chip, Sugar, and Cake Batter!

I know my students are to blame for this plague! They’ve been dropping like flies recently. A wave of 6th graders was sick early in the year, and then 7th grade took a nose dive. At one point almost half the class was home in bed, weeping at the thought of missing their fantastic language arts class and writing pickup essays in fond remembrance of healthier days. That’s what students do when they’re home sick, right?
Three Safe-to-Eat Cookie Doughs: Chocolate Chip, Sugar, and Cake Batter!

I can’t stay home until I’m better, but I do tend to baby myself when I’m sick. Take, for instance, the vat of spicy crab chowder and loaf of sourdough bread I allowed myself to eat yesterday under the guise of “feeding a cold” (not that I starve a fever or anything).

And I’m not even going to mention the amount of this cookie dough I consumed over the weekend. I’m sure cookie dough has, like, vitamins and stuff.
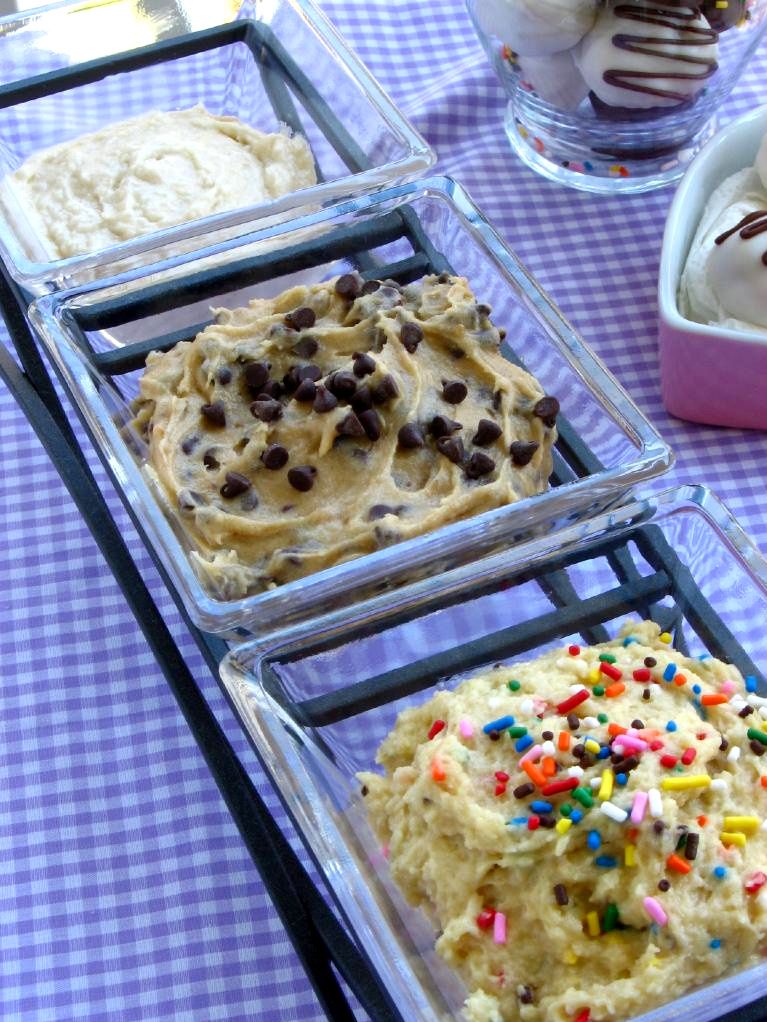
Three Safe-to-Eat Cookie Doughs: Chocolate Chip, Sugar, and Cake Batter!

If nothing else, cookie dough is good for the soul. As a child, my idea of adulthood was finally getting to sit down with a tube of technically-unsafe-to-eat-before-baking cookie dough, slice it open, and eat the whole thing — no parental scolding involved.

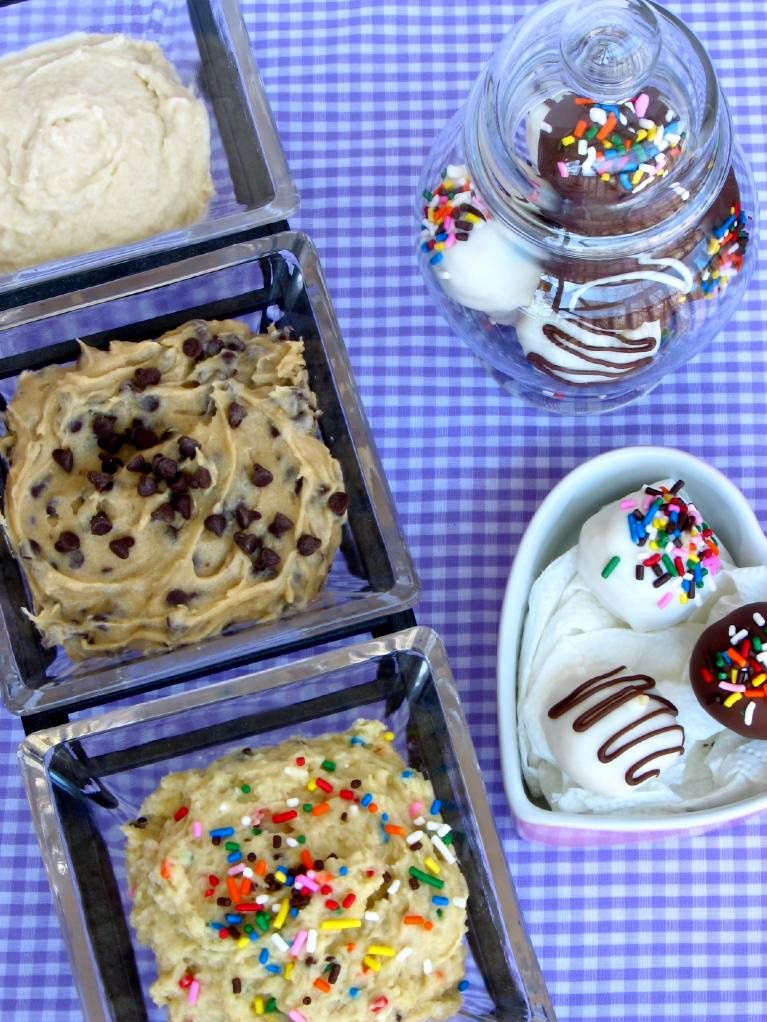
And now, look how far I’ve come: this weekend I made not one, but three kinds of cookie dough! Not only that, but they’re all eggless and therefore actually safe to eat*.
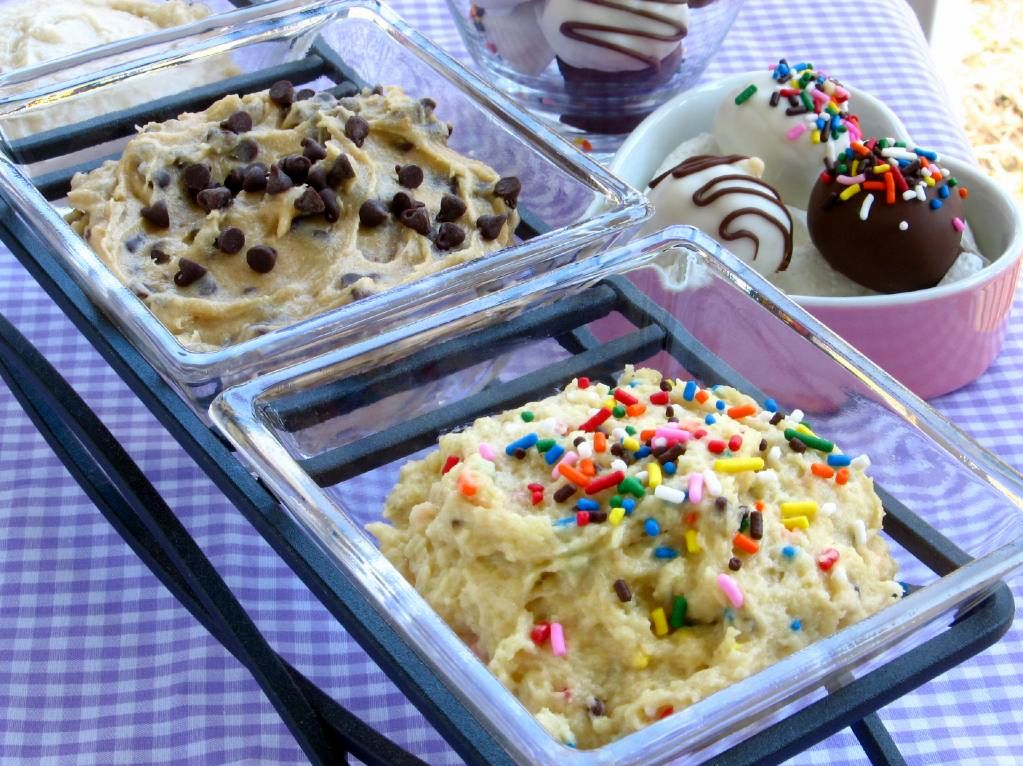
Three Safe-to-Eat Cookie Doughs: Chocolate Chip, Sugar, and Cake Batter!

Chocolate chip cookie dough recipes are popular and easy to find, but safe-to-eat sugar cookie dough is a bit more elusive. I developed the recipe below from a regular sugar cookie recipe. But the dough that really takes the cake (literally!) is the Cake Batter Cookie Dough.

Jessica at How Sweet It Is has been going cake batter crazy lately, and I’m loving it! Inspired, I decided to create a rich cookie dough that tastes like buttery yellow cake batter, complete with sprinkles. There’s just something wonderful about food that tastes like a birthday party.

Oh, and are you wondering about those truffles in the photos? Stay tuned — I’ll tell you all about those soon, along with yet another awesome use for cookie dough!

So, in summary: I’m sick. My students are sick. We’re all sick. Eat cookie dough.

5 from 1 reviews
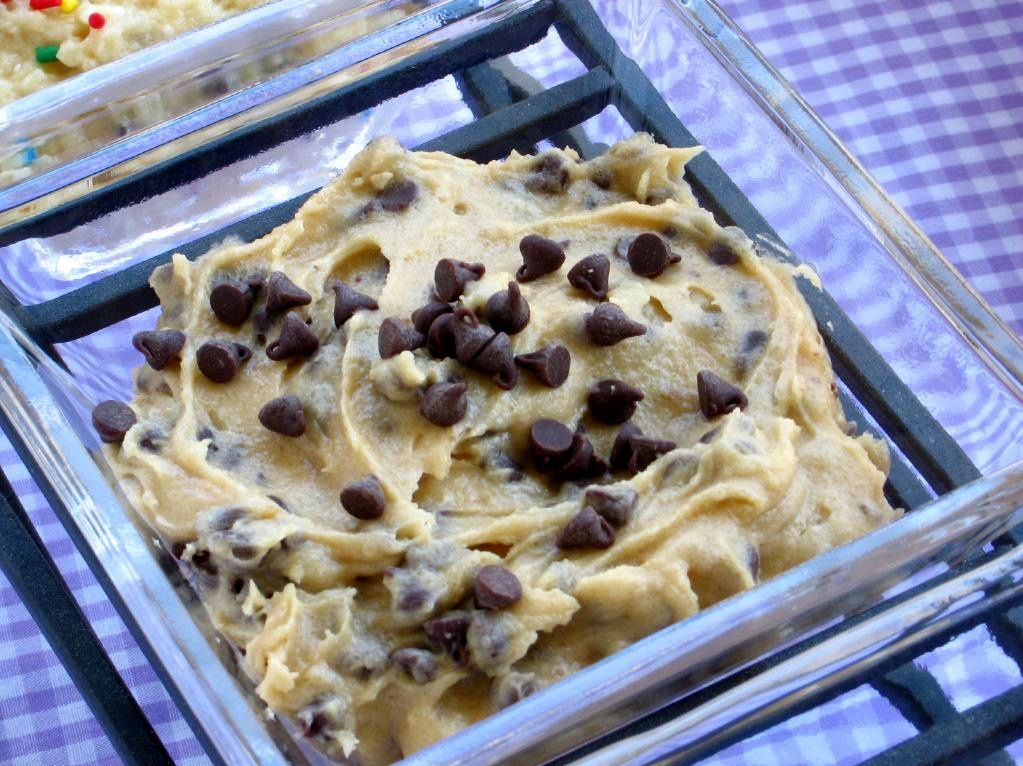
Safe-to-Eat Chocolate Chip Cookie Dough
 
Prep time
Total time
 
Chocolate chip cookie dough you can eat on a spoon!
Author:
Ingredients
  • 1/2 cup butter, softened
  • 3/4 cup light brown sugar, packed
  • 1 cup all-purpose flour
  • 1/2 teaspoon salt (a few people have found this to be too much; if you want, just add a pinch and increase to taste. I add the full 1/2 teaspoon and enjoy it!)
  • 1 tablespoon vanilla extract (again, you might want to add this a teaspoon at a time to taste. I add the full tablespoon and enjoy it!)
  • 1 cup semisweet chocolate chips
  • water
Instructions
  1. In a medium bowl, cream together the butter and sugar. Stir in the flour, salt, vanilla and chocolate chips. Add water one tablespoon at a time (stirring between each) until the dough reaches cookie dough consistency.
 

5 from 1 reviews
Safe-to-Eat Sugar Cookie Dough
 
Prep time
Total time
 
Ingredients
  • 1 1/3 cups and 1 tablespoon all-purpose flour
  • 1/2 cup butter, softened
  • 3/4 cup white sugar
  • 1-2 tablespoons water
  • 1/2 teaspoon vanilla extract
Instructions
  1. In a medium bowl, cream together butter and sugar for 2-3 minutes until light, fluffy, and pale yellow. Mix in flour and vanilla. Add water one tablespoon at a time, mixing after each, until you reach cookie dough consistency.

5 from 1 reviews
Safe-to-Eat Cake Batter Cookie Dough
 
Prep time
Total time
 
Ingredients
  • 1 1/2 cups all-purpose flour
  • 2/3 cup yellow cake mix
  • 1/4 teaspoon salt
  • 1/2 cup unsalted butter, room temperature
  • 1/2 cup granulated white sugar
  • 1 teaspoon pure vanilla extract
  • 2 tablespoons sprinkles
  • 4-8 tablespoons water
Instructions
  1. In a medium bowl, cream together butter and sugar for 2-3 minutes until light, fluffy, and pale yellow. Mix in salt, flour, cake mix, sprinkles, and vanilla. Add water one tablespoon at a time, mixing after each, until you reach cookie dough consistency.

*Note: Since posting this recipe, scientisty types have also found that raw flour — just like produce — can carry E.coli if it’s been contaminated with it. This article suggests that the risk is even smaller than the tiny risk of getting Salmonella from eating cookie dough with raw eggs, but it’s still there and I wanted you to know about it. At least eggless cookie dough is safer — and no reason to waste the eggs when you just want to eat it with a spoon, right?!

Soft Pretzel Dogs (an homage to Auntie Anne’s Pretzels)

I have this embarrassing salad bar practice. You’re going to think I’m silly (or else you’re going to leave me a comment saying, “I DO THAT EXACT SAME THING!” and make me feel a little better. No pressure.)

See, I’m a little shy about how much salad dressing I eat. I was never one of those mostly-veggies-with-a-spritz-of-lemon-juice salad people. I was (am!) one of those bacon-cheese-and-crouton salad people, where the dressing has to touch every leaf with its creamy goodness. But I can never quite shake the feeling that the person behind me at the salad bar is watching me pour my bleu cheese dressing with thinly veiled disgust, silently tabulating the calories I’m about to consume.

To deal with this uncomfortable situation, I developed a little pantomime routine in which I dump as much salad dressing as I want on my salad before giving a little gasp and jerking the bottle up as if to say, “Oops! Of COURSE I didn’t mean to pour that much salad dressing — it just came out so fast!” Then I snap up my salad and hastily head to my seat.

I’m sure the lemon-spritzers in line behind me think I’m disappointed that my salad got drenched and that I’m really only eating it because I hate to waste food . . . right?! Okay, maybe I’m not fooling anyone.

The truth is, while I eat reasonably all week, I go all out on the weekends. And I can eat a lot. Like, enough so that more than one waitress has been driven to exclaim over the amount I have consumed (they better be glad I don’t believe in docking tips). Like, enough that I can almost always out-eat any fully grown, healthy, hungry man around me.

In college, the impressive amount I could eat would become glaringly apparent in the dining hall, where most gals were ordering half a grapefruit for breakfast and my plate was overflowing with bacon and eggs. And a waffle. With, like, butter and syrup and stuff. This disparity produced lots of food embarrassment. For some reason, perhaps especially as a woman, I always feel like I should be, um, daintier or something.

Sometimes, though, a certain food compels me to stop caring about what other people are thinking. Recently, that food was Auntie Anne’s Pretzel Dogs. I first saw them in the Dallas airport on a layover. I was reserved, ordering only one along with a couple of other small snacks.

But my first bite of that buttery, yeasty pretzel wrapped around a juicy hot dog was a surreal experience — and I don’t think it was just the medicine I take for my flight anxiety. I was hooked. I talked about the pretzel dogs throughout my entire weekend trip, and when I found myself flying back home to Charlotte through Dallas, I was prepared.

As soon as we touched down, I hastily disembarked and headed straight for the nearest Auntie Anne’s. There, I immediately threw caution and food embarrassment to the wind, ordering 3 pretzel dogs and a big soft pretzel on the side to, um, balance out my meal. And cheese sauce. I was in pretzel dog heaven.

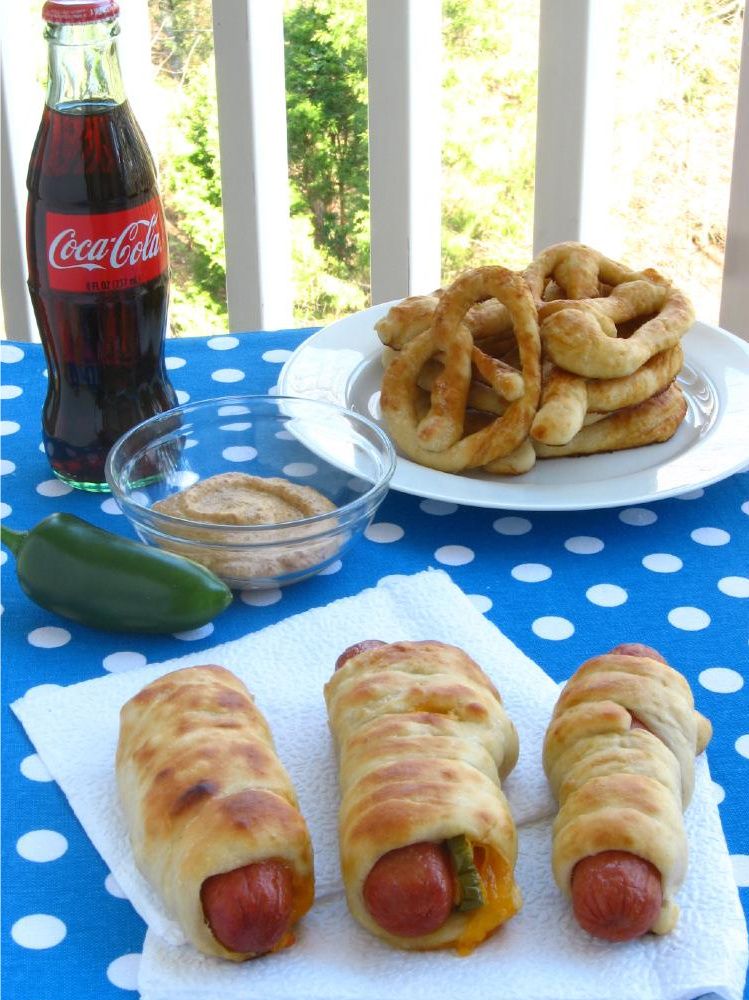
Clearly, the next step was to figure out how to make pretzel dogs at home in Charlotte. I found the following recipe and, while not perfect, it’s pretty darn close, not to mention pretty darn easy!

The baking soda solution I dipped my pretzels in didn’t seem strong enough to give them a nice deep brown color, so I tweaked it below. I also had a lot of fun with flavors. I made soft pretzels, pretzel dogs, cheddar pretzel dogs, and jalapeno pretzel dogs. And all bashfulness aside, over the course of a weekend, I ate almost every single one of them myself.

Do you ever feel any food embarrassment, or are you an unabashed eater?

Soft Pretzel Dogs


Recipe by: Adapted from CDKitchen
Yields: 8 pretzel dogs and 5-6 pretzels

Ingredients:
1 1/2 cup warm water
1 1/8 teaspoon active dry yeast
2 tablespoons brown sugar
1 1/8 teaspoon salt
1 cup bread flour
3 cups regular flour
2 cups warm water
2 tablespoons baking soda
3 tablespoons butter, softened to room temperature
8 Nathan’s all-beef hot dogs (do yourself a favor and don’t use anything but Nathan’s!)

Toppings:
cheddar cheese
jalapeno slices (wear gloves to handle, and don’t touch your eyes!)
coarse salt, to taste
4 tablespoons butter (melted)

Directions:
Place warm water in mixing bowl and sprinkle yeast in, stirring to dissolve. Add the sugar and salt and stir. Add the flour and mix until combined. Knead until the dough is smooth and elastic (this took a few minutes on high speed with my KitchenAid mixer equipped with a dough hook). Place the dough in a greased bowl and cover it. Place it in a warm area to rise at least 1/2 an hour.

Preheat oven to 450 degrees F. When dough’s almost finished rising, prepare a baking soda water bath. I used one that I don’t think was strong enough (from the original recipe) to brown the pretzels appropriately, so I’ve poked around and found a better one for you. Mix the warm water and baking soda and continue to whisk periodically as you work with your dough.

Once your dough is risen, spray cooking spray over a spot on your counter and turn the dough out onto it. Use a sprayed pizza cutter to slice off a strip of dough. Roll it, starting from the middle and working outward with greased hands, into a thin rope — the thinner you get it, the more like Auntie Anne’s pretzels it’ll be. I even gently picked it up and let gravity help me lengthen it every now and then. For inspiration, watch this awesome video from the folks at Auntie Anne’s on shaping, dipping, and baking pretzels.

Form your strand into a pretzel shape OR wrap it around a hot dog OR wrap it around a hot dog and strip of cheese OR wrap it around a hot dog with a strip of cheese and some jalapenos. When you wrap it around the hot dogs, just slightly overlap the dough so there aren’t many gaps. Now dip the pretzel into your soda solution and place on a parchment-lined baking sheet. Sprinkle with coarse salt. Bake for 7-10 minutes or until golden brown. Brush with melted butter and serve immediately with hot mustard or Cheez Whiz (tastes just like Auntie Anne’s cheddar dip!) for dipping.

P.S. Don’t forget about the Cheesecake Challenge! Choose any one of 9 cheesecake recipes to prepare within the next month. Email a photo to me by 4/5/2011 to be featured on Willow Bird Baking! Get more details about the challenge here.

If you liked this post, please:
Subscribe to Willow Bird Baking
Follow Willow Bird Baking on Twitter
Follow Willow Bird Baking on Facebook
Give this post a thumbs up on StumbleUpon


ShareOther ways to share this post with friends!

Bright, Fun Blackberry Trifle

I made a trifle! Otherwise known as a big bucket o’ fun!

Okay, no one calls them that except me. But they should! Look at this thing! Bright, fluffy, moist layers of cake, custardy cream, splushy berries, crunchy toasted almonds, and to top it all off, a smattering of sprinklessss!

Joyce served individual versions of this trifle after a delicious lunch of Cream of Mushroom Soup a couple of weeks ago, and as soon as I took a bite, I felt a little more jolly. I found myself craving the trifle’s cool, creamy brightness in the days following, and finally whipped one up for myself.

One of the things I loved most about Joyce’s trifle is that she used a Funfetti Cake. Do you remember Funfetti Cake? The boxed cake mix so many of us loved as a kid? My favorite was always the Funfetti Frosting, with inexplicably colorful beads of goodness mixed throughout. What were those things? Do I even want to know?!

Whatever they were, I loved them. And Food Blogger Confession #84: I kind of want to go to the store in my PJs right this minute, buy a tub of that frosting, and eat the entire thing with a spoon. In one sitting. While watching Supernanny.

But I digress — it’s easy to get distracted by trashy midnight snack fantasies. Can I dip Twinkies into my tub o’ Funfetti Frosting? Okay, I’ll stop. Ahem.

The story behind Joyce’s cake choice actually involves her son. When he was growing up, she’d always made him a homemade cake from scratch. One day, however, he visited a friend of hers and came home raving about an amazing cake he’d eaten. She decided to make it for his birthday that year and called up her friend to ask about it — only to find out it was a regular ol’ Funfetti Cake from a box! Since then, needless to say, she hasn’t bothered with a homemade cake when his birthday rolls around!

It just so happened my lunch date with Joyce was the day before her son’s birthday this year. She’d already been doing birthday baking, so she had Funfetti cake leftover to use in the trifle. If you have a favorite homemade cake you love, you can use it (a clementine cake, coconut cake, or lemon cake would be so good!), but I loved the blast from the past so much that I used a Funfetti cake in my trifle as well. Every polka dot of color made me happy.

Regardless of your cake choice, a trifle is a simple way to inject some fun into dessert. If you’re looking for something both casual and indulgent to welcome the coming spring, grab a cake and your favorite berries and start layering.

What food item is a “blast from the past” for you?

Bright, Fun Blackberry Trifle


Recipe by: Adapted from Phyllis Hoffman’s Celebrate Magazine
Yields: 8 servings

Ingredients:
4 cups berries of your choice (Joyce and I used blackberries)
1 tablespoon sugar
2 tablespoons orange juice
1 teaspoon vanilla
2 layers of Funfetti or other cake, prepared and cooled
1/2 cup chopped toasted almonds
1 teaspoon lime zest (optional)
2 cups ricotta cheese
2 cups plain Greek yogurt
2 cups confectioners’ sugar

Whipped Cream Ingredients:
2 cups heavy whipping cream
3-4 tablespoons confectioners’ sugar (to taste)

Directions:
Combine washed berries, sugar, orange juice, and lime zest. Set aside. In a separate bowl, mix ricotta cheese, yogurt, confectioners’ sugar, and vanilla until well combined. In a trifle dish, layer torn pieces of cake, cheese mixture, and berries. Repeat layers. Cover and chill overnight.

When ready to serve, whip cream and confectioners’ sugar together until you have soft peaks. Pile whipped cream on top of trifle and top with almonds. Serve with leftover whipped cream for topping individual portions.

If you liked this post, please:
Subscribe to Willow Bird Baking
Follow Willow Bird Baking on Twitter
Follow Willow Bird Baking on Facebook
Give this post a thumbs up on StumbleUpon


ShareOther ways to share this post with friends!

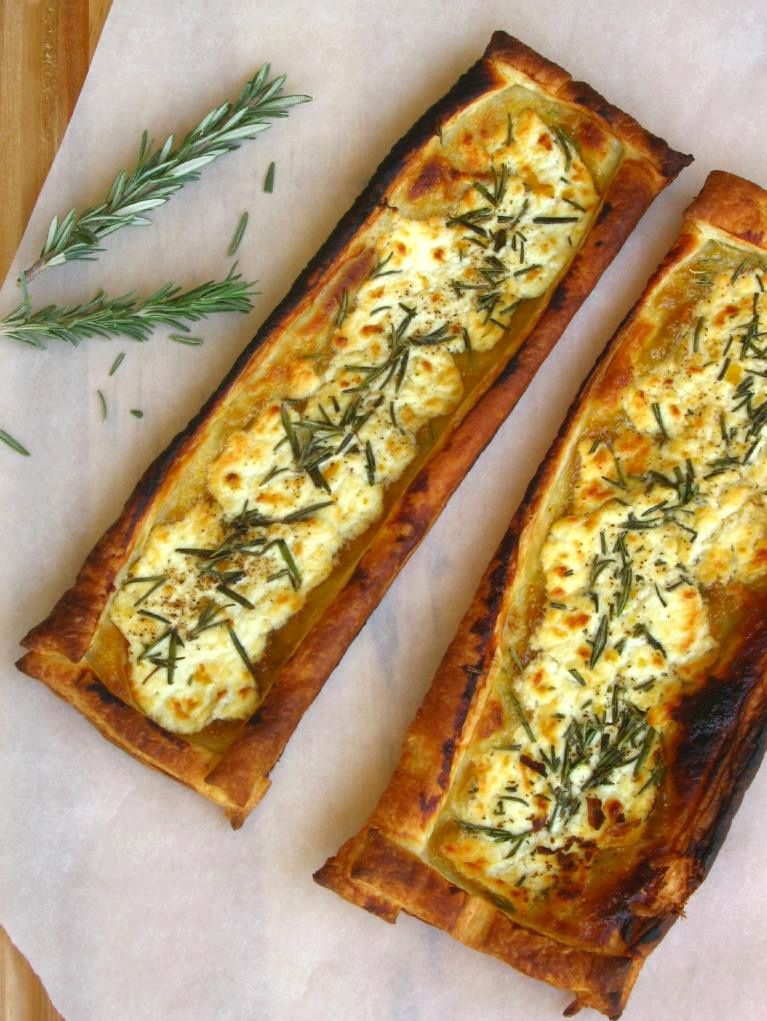
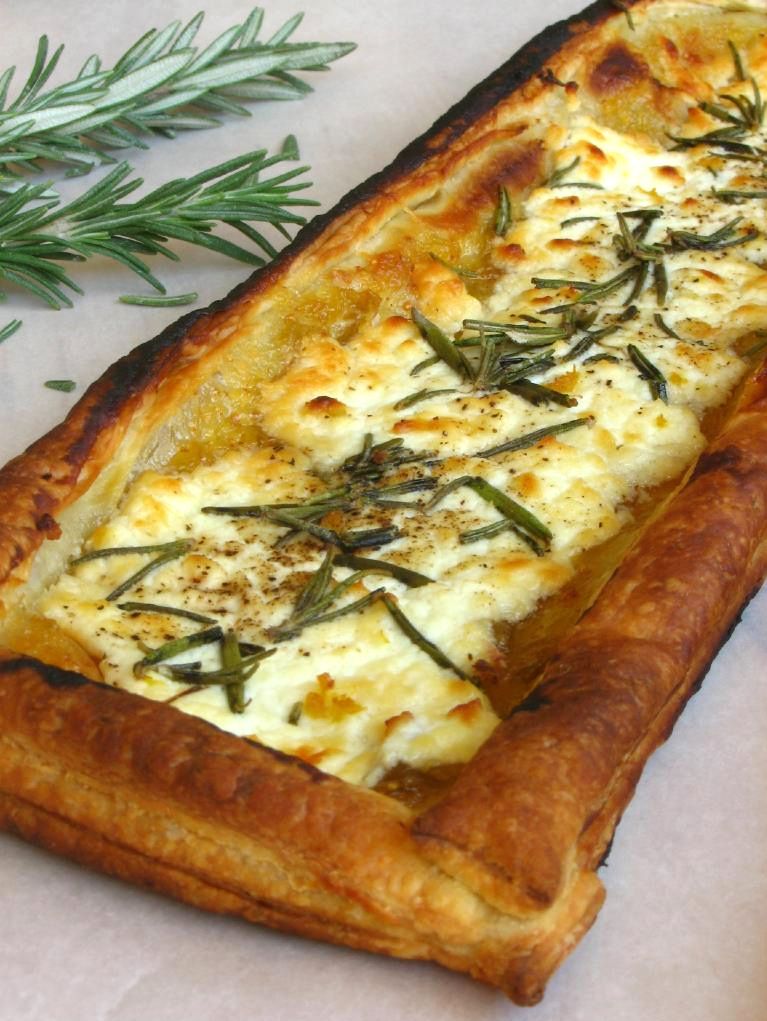
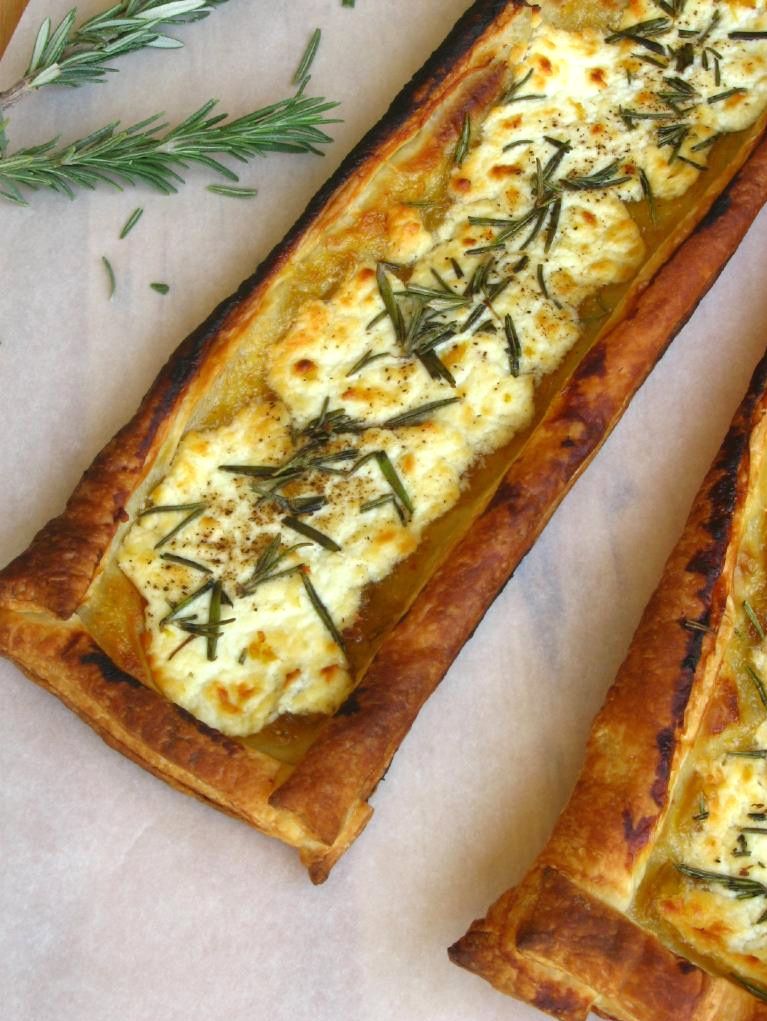
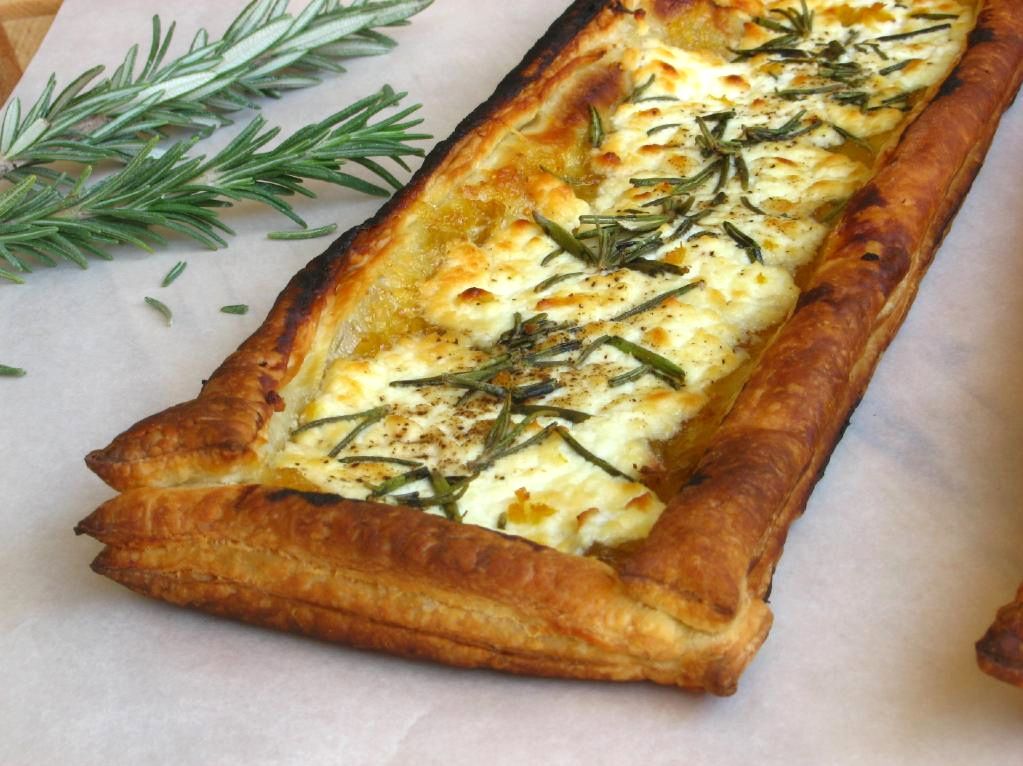
Quick Rosemary, Fig, and Goat Cheese Tarts

I’m a simple girl. I like complicated poetry and intricate novels and things like that, don’t get me wrong. But for the most part, I’m the sort of girl that puts my hair up so I don’t have to fiddle with it, forgets to wear earrings, and floats about in flip-flops whenever possible. (By the way, not to brag, but we’ve almost made it to flip-flop weather in North Carolina lately!)

I love a cute high heel every now and then, but for the most part (besides middle school dances), they sit in my closet.

But one day I bought these shoes. I cannot explain it.

These shoes were unlike anything I’d ever owned (or ever wanted to own). First off, they were bright flippin’ gold. And they were pointy-toed. And they had 4-inch heels. And, um, they might have been faux snakeskin.

Any one of these characteristics on its own (well, except maybe the snakeskin) might have worked for me. But all together?

What was I thinking?

Well, I know what I was thinking. I was thinking of how hot they’d look on, say, Cindy Crawford. And then my brain went off to the food court for FroYo while my imagination thought, “Hey, maybe they’d make you look like Cindy Crawford!” So I shelled out way more cash than appropriate on my then-college-student budget, and ta-da, they were mine.

Can you guess what happened next?

If you guessed that those hot gold faux-snakeskin pointy heels sat in my closet until I finally tried to sell them online, you would be correct. If you guessed that no one bought them because everyone else has prohibited their brains from frolicking off to the food court, you would be correct.

If you guessed that I do not look like Cindy Crawford, you would be correct.

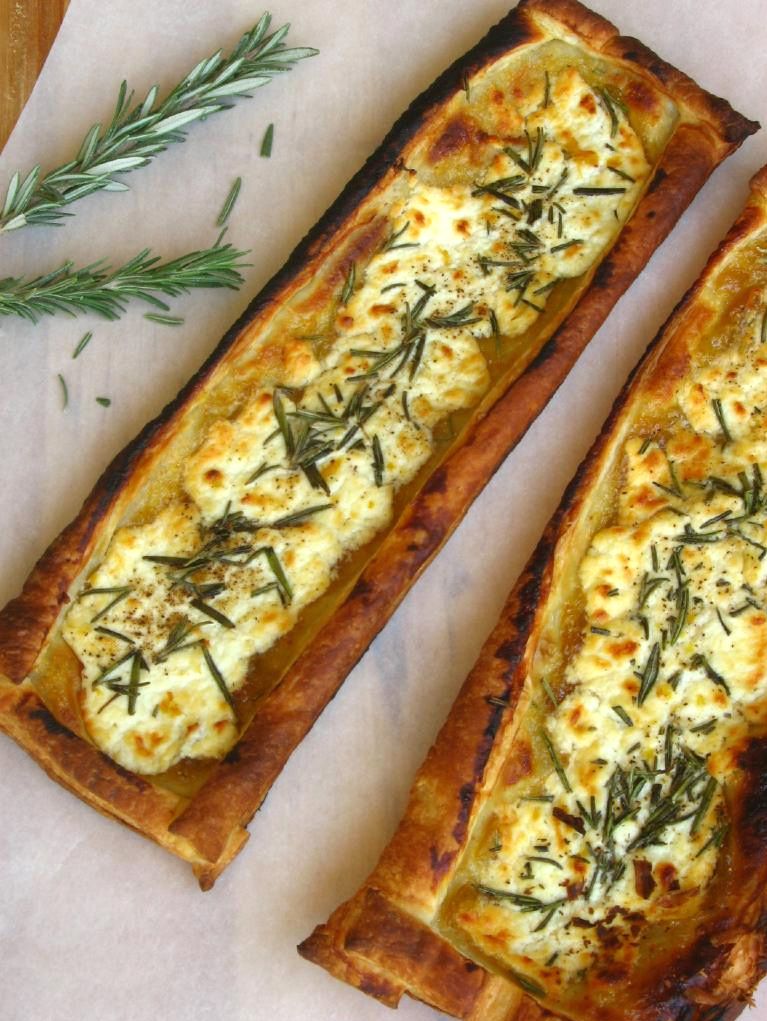
Why do I ever forget that simpler is usually better? In honor of simplicity, here’s a fantastic and fantastically simple tart to serve with your next meal (I ate it with Cream of Mushroom Soup!)

This recipe originally called for just rosemary and goat cheese, but the reviews said it needed more flavor. I added a generous layer of fig jam and that really knocked it right out of the park! It’s a sweet and savory, buttery-but-light combination that will complement many meals and be ready in 20 minutes flat. If you’re feeling a little rebellious, though, feel free to make your own homemade puff pastry — and perhaps go buy some faux snakeskin heels?

What’s the silliest thing you’ve bought in recent years?

Quick Rosemary, Fig, and Goat Cheese Tarts


Recipe by: Adapted from Fine Cooking
Yields: about 8-9 servings

Ingredients:
3 ounces Bûcheron goat cheese (or fresh goat cheese)
4-5 tablespoons fig jam
3 tablespoons heavy cream
1 sheet frozen puff pastry, thawed (or use homemade puff pastry!)
flour, for dusting
1 lemon
3 tablespoons fresh rosemary leaves, only very roughly chopped
Freshly ground black pepper

Directions: Preheat the oven to 450 degrees F. In a small bowl, mash the goat cheese (crumbled) and cream with a fork together until combined.

On a lightly floured surface, roll the puff pastry sheet out into a 12 x 17-inch rectangle. Using a pizza cutter (and a ruler for a straight edge, if desired), cut the pastry in half lengthwise to form two rectangles. Measure off a 3/4-inch strip on each side of each rectangle and use a straight edge to cut each strip off. Use a pastry brush to brush water around the edges of the rectangles that will act like a “glue” to hold a border on. Now stack each 3/4-inch wide strip onto the damp area of the dough, creating the raised border.

Spoon the fig jam inside the border of each rectangle and spread it. Then spoon and gently spread the cheese mixture inside the border, over the fig jam. This is a little hard to spread, but it’s okay if some areas have more cheese than others. Remember, it’s supposed to be rustic, y’all. Then evenly grate lemon zest over the cheese, scatter the rosemary leaves on top, and grind some pepper evenly over everything else. Bake until the tarts are puffed and deep golden brown, rotating the pan about halfway through baking. The original recipe said this would take around 17 minutes, but they were a tad overdone around 15 minutes, so keep an eye on them! Cut the tart into pieces and serve while hot.

If you liked this post, please:
Subscribe to Willow Bird Baking
Follow Willow Bird Baking on Twitter
Follow Willow Bird Baking on Facebook
Give this post a thumbs up on StumbleUpon


ShareOther ways to share this post with friends!

Heart-Shaped Palmiers and a Pesto Giveaway

What does it say about me that I have more fun at middle school dances as a grown-up than I ever did as a middle schooler?

Woodlawn’s 7th graders hosted a February dance last night. The theme was BRIGHT COLORS to avoid any romantic drama involving Valentine’s Day, so everyone dressed in their rainbow best.

I waltzed in fashionably late in a magenta and turquoise get-up, danced with a gaggle of my 6th grade students to “Fly Like a G6” (though we sing, “now I’m feelin’ so fly / like a fruitbat,” which we feel more accurately characterizes us), and filmed all the hair-whipping that occurred when “Whip My Hair” came on.

We stopped mid-dance to run outside and play freeze tag. I ditched my heels and joined the math teacher, also named Julie, as “it.” Once our feet and hands were frozen, we all filed back in for more dancing. Julie and I sang a duet of “Ice Ice Baby” at one point, showing our age.

Every now and then I’d have a chaperonely duty to perform: directing cleanup, vetoing a song or two, telling the 6th graders to stop screaming. But in general, the dance was exactly what a middle school dance should be: fun and happy. Why didn’t I have this much fun when I was actually in middle school?

I vividly recall my 7th grade Valentine’s dance. My teachers were apparently not as sensitive to the delicate hormonal phase we were in, so they thought it’d be a great idea to make the dance as sappy as possible. Everything was covered in red and pink, with hearts papering the walls. It looked like cupid had thrown up love and romance on every available surface of the multipurpose room where the dance was held. Not only that, but a table was set up outside the bathrooms where the PTA was selling roses and candy for the suave middle school boys who had come to the dance unprepared for their dates.

Someone had asked me to this particular dance. We’ll call him Jeb, and he was not my type. I told him I would go with him as a friend because I wanted to be nice, but once I arrived at the dance, the middle school social pressure overwhelmed me. I didn’t want to be seen with Jeb, much less have to, like, dance with him and stuff.

Just after walking in, I caught sight of him at the aforementioned table buying a rose for me and I booked it to the girls’ bathroom, where I hid for the majority of the night. Every now and then I’d poke my head out and watch him wandering around quizzically, looking for me in the crowd, and then I’d duck back in to hide some more. Part of me felt guilty, but the part that felt mortified won out.

Jeb moved away shortly thereafter, and I felt so bad for having ditched him at the dance. Thankfully, he returned in high school and I got the opportunity to apologize. I chalk the whole experience up to middle schoolitis, the inflammation of your social nerve. For some reason when you’re a middle schooler, it matters so much what others are thinking about you. You don’t want to dance, because what if people think you dance funny? You don’t want to hang out with certain people, because what if people think you’re like them? You don’t want to wear certain clothes, because what if they send the message that you’re uncool?

Phew, I’m so glad that’s over. And so glad that I, unlike a lot of grown-ups, have a second chance at the middle school dance! Call it one of the perks of being a teacher.

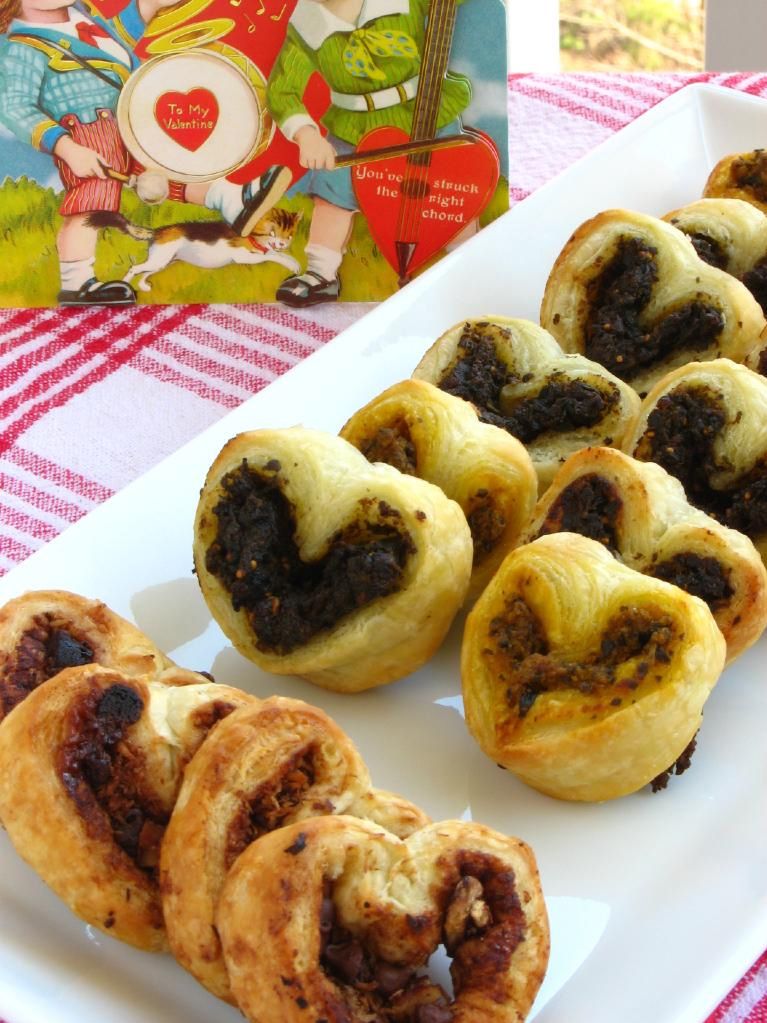
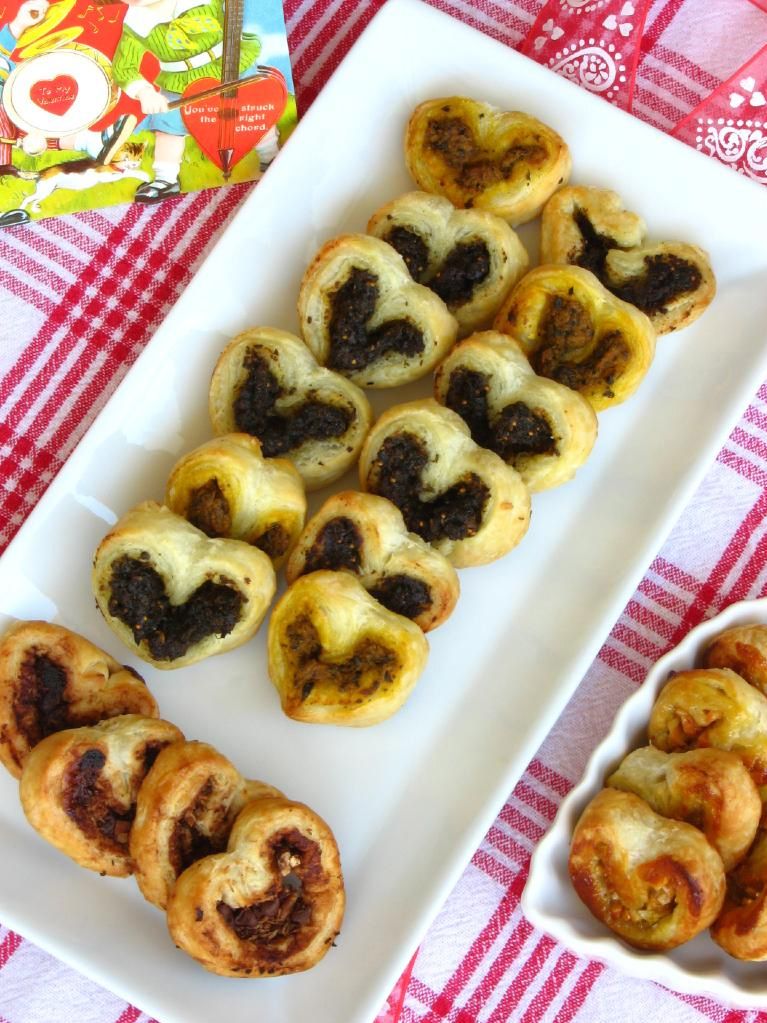
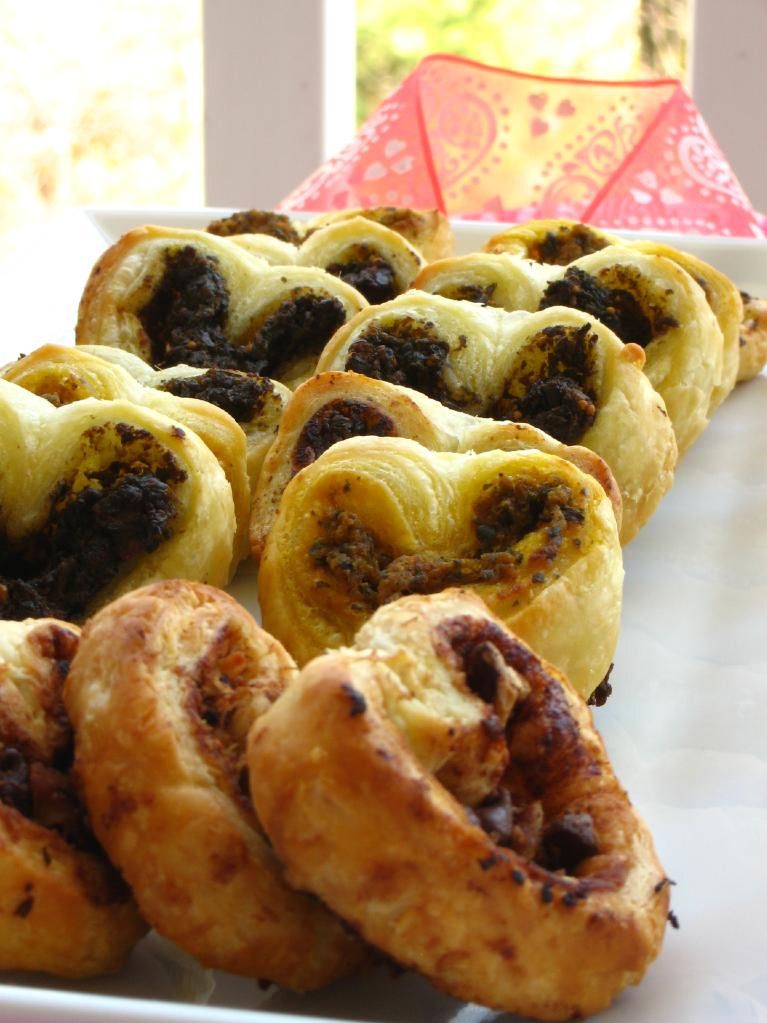
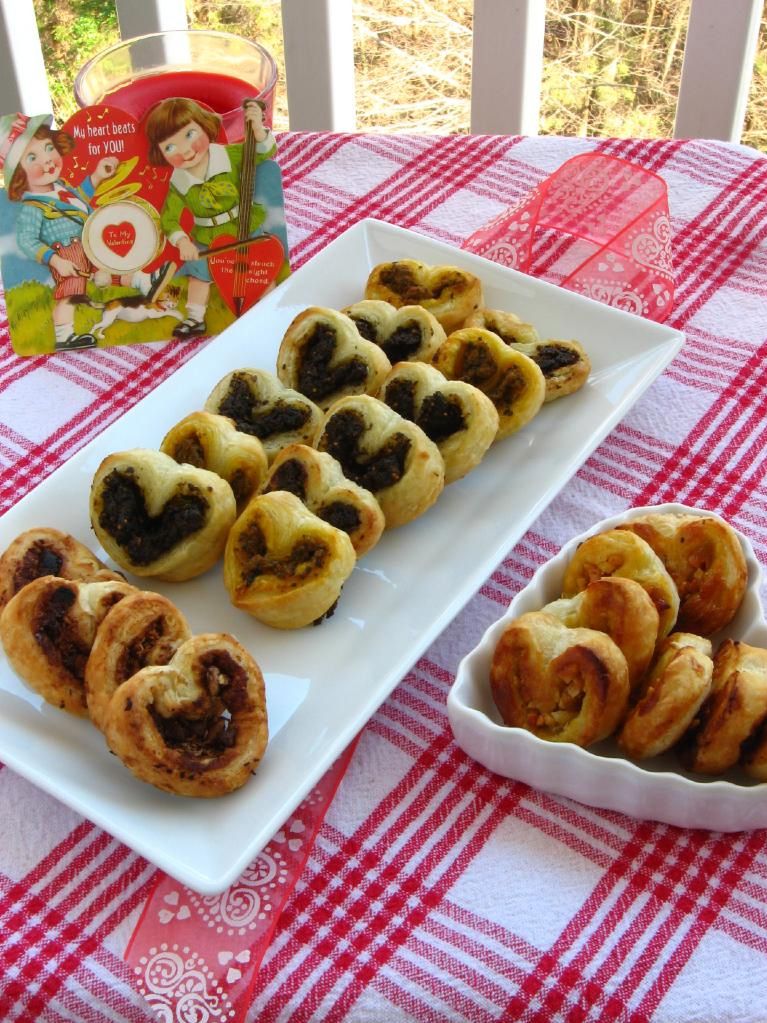
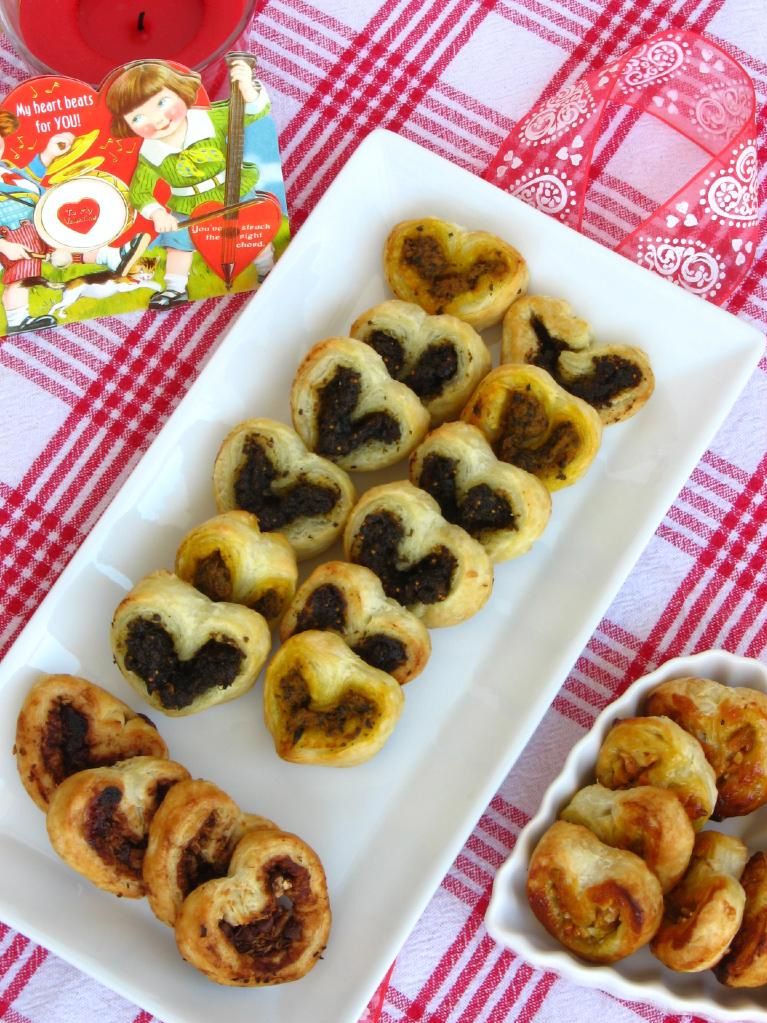
Anyway, after all that fun last night, I didn’t have much time for baking. I knew I wanted to make something sweet and Valentinesy, but it also needed to be quick. Voila: easy heart-shaped palmiers that can be sweet or savory depending on what you spread in them.

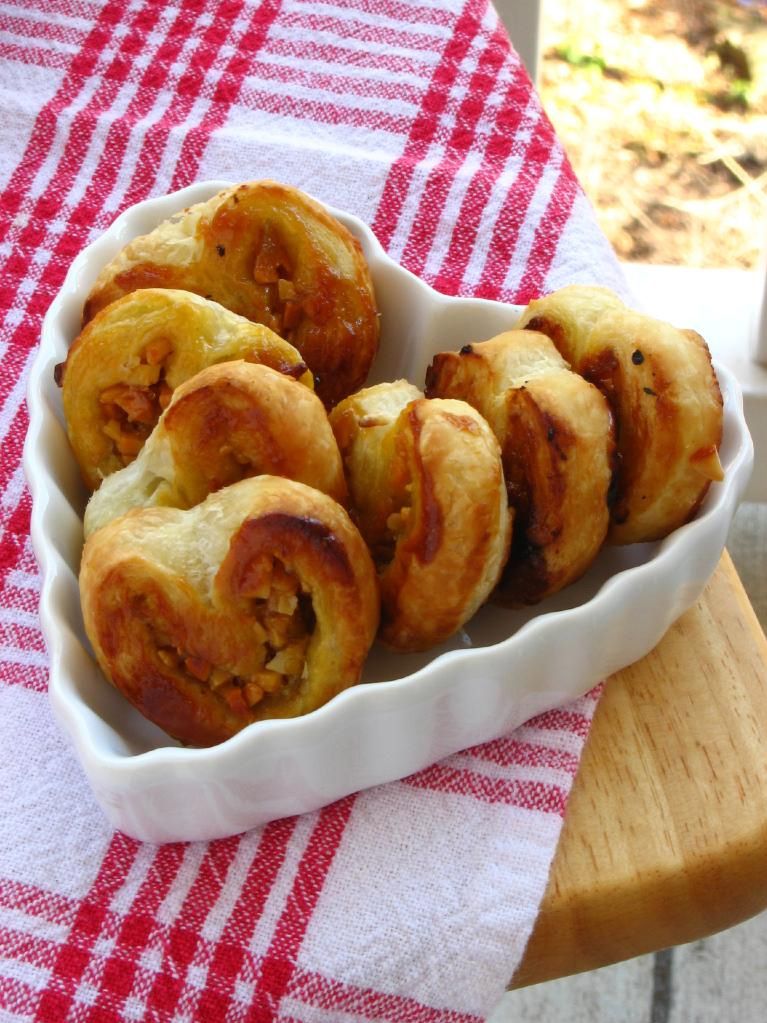
Pestos With Panache by Lauren sent me two pesto flavors to review, Fig & Gorgonzola and Pumpkin Chipotle, so I decided to make two varieties of pesto palmiers. To satisfy my sweet tooth (who’m I kidding? it’s insatiable), I also made Fig Jam & Almond Palmiers and Chocolate, Pecan, & Coconut Palmiers. I love that palmiers are so customizable that you can create a variety of them at once (the method below will inspire you to get creative!), but what I love even more is that you can whip up a batch of these cuties in 20 minutes. Perfect for a last-minute addition to your Valentine’s meal!


Speaking of Valentines — the Valentine’s Fairy heard my lamentations about not getting any valentines as an adult, so I got this in the mail from my Sunday school teacher, Joyce. Too sweet!

Regarding the pesto, Pestos With Panache by Lauren has all-natural, preservative free products. The pestos keep well in the freezer for up to two years, and the company boasts a number of zany, creative flavors.

I wasn’t wild about the Pumpkin Chipotle Pesto; it combined mild pumpkin with some heat, and it seemed like it would work better in a recipe with bolder flavors to complement it. The Fig & Gorgonzola Pesto, though, was deep and delicious, and I can’t wait to try some of the other fruity flavors. I can imagine lots of creative uses for them, including (of course) palmiers!

Would you like to win two of the fun pesto flavors from Pestos With Panache? They’d love to send one lucky commenter a sample. To enter:

1. Required Main Entry (your other entries won’t count unless you do this one!): Visit Pestos With Panache by Lauren and tell me what 2 pesto flavors you’d love to try.

To get up to five extra entries, do each of the following items (one entry per item). Please be sure to leave a separate comment for each item you complete, or you will not receive the entry for that item. If you already do these things, it still counts (just leave me a comment and tell me so).
2. “Like” Pestos With Panache on Facebook.
3. “Like” Willow Bird Baking on Facebook.
4. Follow Pestos With Panache on Twitter.
5. Follow Willow Bird Baking on Twitter.
6. Tweet the following message: “Just entered to win 2 pesto flavors from @PestosWPanache on Willow Bird Baking! http://su.pr/2diNLK #giveaway @julieruble”

The contest will close at 12 noon (EST) on February 19, 2011, and the winner will be chosen via random.org. In the meantime, make some palmiers!

Heart-Shaped Palmiers


Recipe by: Willow Bird Baking
Yields: 25-28 palmiers

Ingredients:
1 frozen puff pastry sheet, thawed (or use homemade puff pastry!)
sprinkle of flour
moist spread*
toppings**

*you can use pestos, jellies, Nutella, thicker sauces, etc.
**such as cheeses, toasted nuts, chocolate chips, etc.

Directions:
Preheat oven to 425 degrees F. Line two baking sheets with parchment paper. Roll out the puff pastry sheet on a lightly floured surface so that it’s just slightly longer, and then cut it in half horizontally with a pizza cutter. You now have two rectangles of puff pastry.

Spread your pesto, jelly, or other moist spread onto the puff pastry sheets leaving about 1/4-inch border around the edges. Sprinkle toppings on lightly, taking care not to overstuff and make your palmiers difficult to roll. Apart from my two pesto palmiers, I made palmiers spread with fig jam and sprinkled with toasted almonds, and palmiers sprinkled with sugar, cocoa powder, toasted pecans, mini chocolate chips, and toasted coconut. The sky’s the limit in terms of the combinations you can create.

Once you’ve spread and topped your pastry rectangle, grab the long edge and fold it in toward the middle. Repeat with the other long edge, such that they meet in the middle:

Now fold one side of the dough onto the other:

At this point, stick the dough in the freezer on wax paper for about 10 minutes so that it’s easier to cut. Using a sharp knife, cut the log into 1/2-inch slices:

Set each slice on one of the prepared baking sheets with one of the cut sides up. If the knife smooshed them a little, prod them back into shape. Bake at 425 degrees F for 8 minutes before turning the temperature down to 400 degrees F and gently flipping each palmier. Bake for 4-5 minutes extra. Remove the palmiers from the oven and transfer them to a cooling rack. Serve slightly warm.

Note: Pestos With Panache by Lauren provided me with 2 pesto flavors to review at no cost to me and offered to sponsor this giveaway. I’m committed to giving you my honest opinion about any product mentioned on Willow Bird Baking.

If you liked this post, please:
Subscribe to Willow Bird Baking
Follow Willow Bird Baking on Twitter
Follow Willow Bird Baking on Facebook
Give this post a thumbs up on StumbleUpon


ShareOther ways to share this post with friends!

1 52 53 54 55 56 69