other

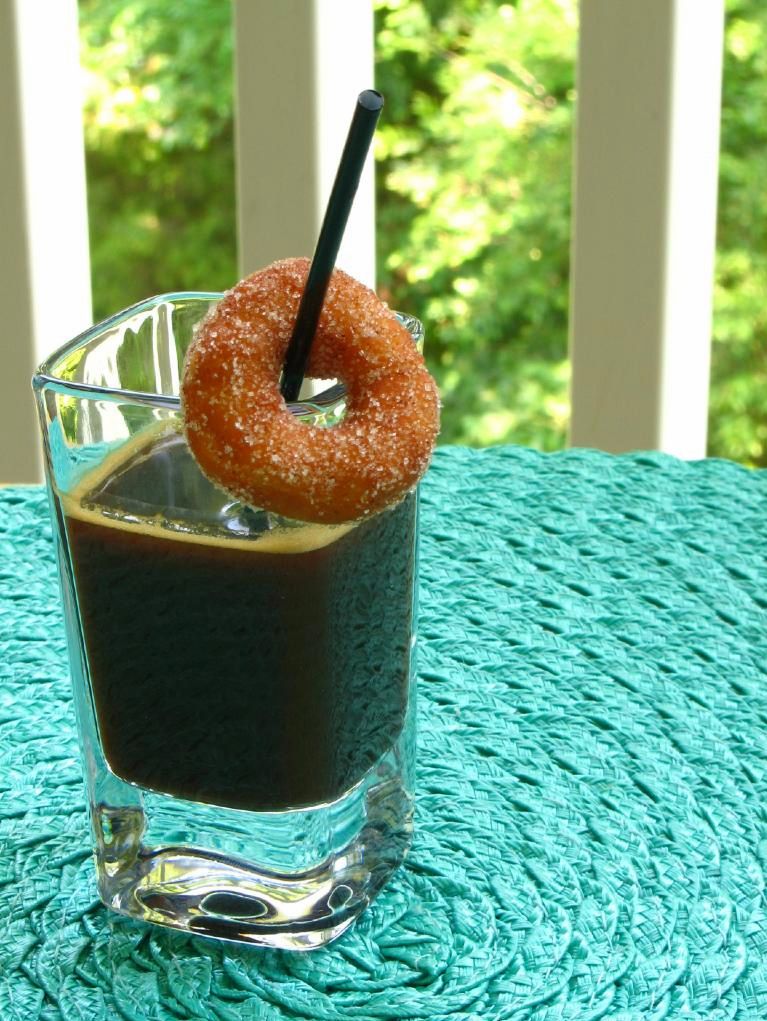
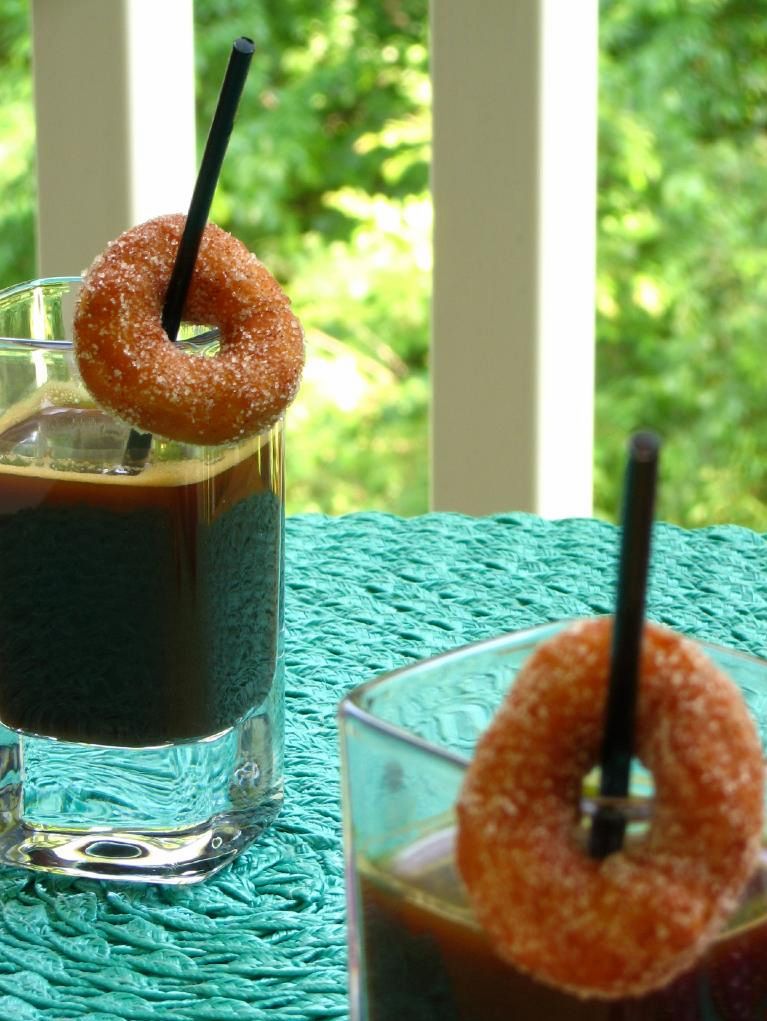
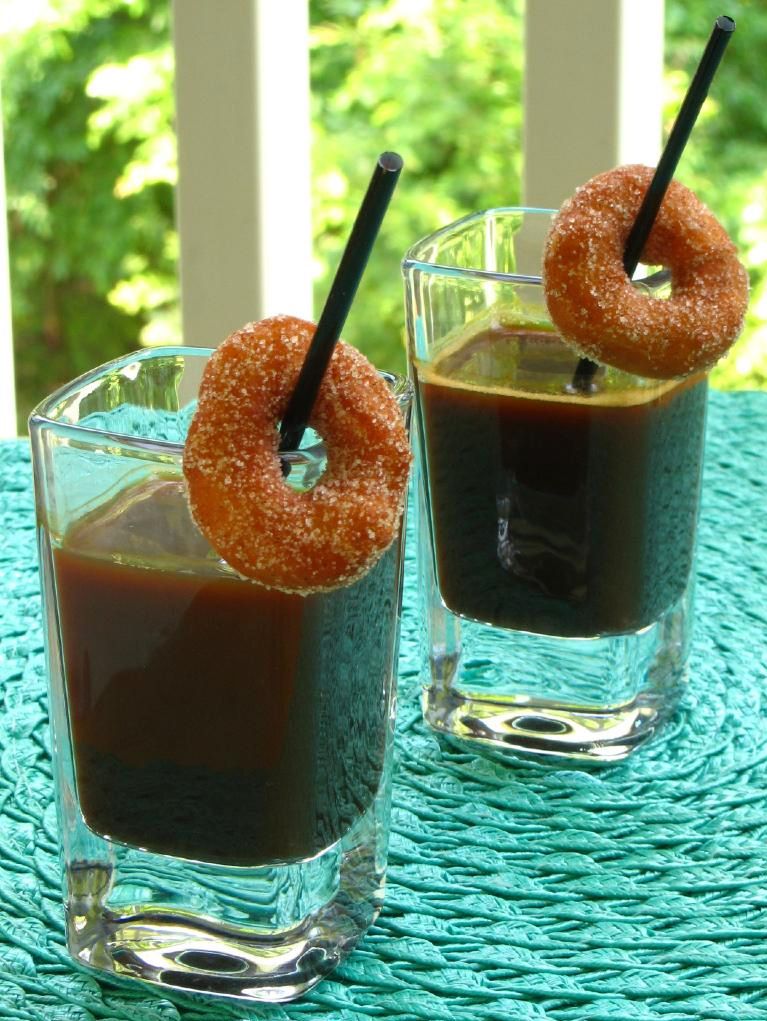
Mini Doughnuts for Your Coffee Cup (a creative use for yeast dough scraps!)

I baked something so flippin’ fantastic this weekend that I cannot wait to tell you about it. Except that telling you about it involves a video tutorial. And a video tutorial involves hours of editing. So while that’s going on, I’ll share this other flippin’ fantastic idea.

Naturally, you’re planning to make doughnuts, right? Or perhaps you have some other yeast dough plans in the works? After rolling and cutting, you’re bound to have scraps of dough lying about unused.

Personally, I’ve always been a re-roller, piling the dough scraps together and rolling them out again to try to get a few more pastries. The resulting goods will be a little tougher, but it seems like a waste otherwise.

As I was browsing through doughnut recipes, however, I saw these sweet miniature doughnuts used as coffee (or hot chocolate!) cup decorations. They were the perfect use for dough scraps!

After cutting out all of my doughnuts, I used a couple of smaller cookie cutters to cut out these minis. I proofed them with my regular doughnuts, fried them quickly on both sides in 350 degree oil, drained them on a paper towel lined plate, and then rolled them in a mixture cinnamon and sugar. They were hot, fluffy, and as cute as a button on a kitten carrying a cupcake. Translation: adorable.

P.S. – While poking about, I found a fun tip for using yeast dough scraps for savory dishes. Now you have sweet and savory ideas in your tool belt!

P.S. 2 – I wish I could find the site where I originally saw these coffee cup doughnuts; I like to put up a link if something inspires me. If you stumble across it, let me know.

If you liked this post, please:
Subscribe to Willow Bird Baking
Follow Willow Bird Baking on Twitter
Follow Willow Bird Baking on Facebook
Give this post a thumbs up on StumbleUpon


ShareOther ways to share this post with friends!

Maple Bacon Doughnuts

My mom trudged through four years of college with four kids to earn her nursing degree (and graduated magna cum laude, she will promptly — and repeatedly — inform you).

Her job as a nurse left her with little time or energy to spend on being an extraordinary entertainer, something she’s always had an innate talent for. One day as a small girl, though, I went to forage in the kitchen and found her frantically frying doughnuts.

There was literally a multi-tiered tower of doughnuts on the kitchen table. There were more doughnuts bouncing around in hot oil on the stove. There were pale, puffy rings on the counter waiting for their turn in the stock pot.

And then there was little Julie in the middle of the madness — and I was all about eating some doughnuts.
Mom immediately shattered my doughnut devouring dreams, though, explaining that her friends from work were on their way to discuss some adultish, worky things, and that the doughnuts were for them. I had thoughts of launching an all-out siege à la Hyperbole and a Half, but managed to control myself.
When the ladies arrived, Mom was somehow curled and coiffed, standing in a clean kitchen, and wearing a cute outfit. The tower of doughnuts beckoned enthusiastically from the table as she invited each of her friends to sit and poured them coffee. I watched in eager anticipation, certain they were about to notice the doughnuts and react with appropriate awe.

But they didn’t.

No worries. My mom would offer them the doughnuts in a moment, and they were probably just waiting on that polite social cue to reveal their utter amazement. Sure enough, she gestured toward one of tiers resplendent with multicolored rings, saying, “Would you like a doughnut?” But the unthinkable happened.

“Oh, no thanks.”

That’s right. Those ladies did not eat a single doughnut. They were dieting, or they weren’t hungry, or some such something.

My mom carried on warm conversation, refilling their coffee like nothing had happened. Like fresh homemade doughnuts just appeared on her kitchen table any old day! Like she hadn’t just spent literally hours making them from scratch!

At 7 or 8 years old, I was not so deft a hostess. I sort of wanted to grab one of those ladies by both shoulders and give her a good shaking, screaming, “SHE MADE YOU HOMEMADE DOUGHNUTS, WOMAN!” I had seen Mom’s hours of hard work, and I was heartbroken for her.

The ladies left before too long, having accomplished their adulty, workish business, and the doughnuts still sat undisturbed on the table. I could tell Mom was sad about it, despite my assurances that I would both eat and enjoy every last one.

Seriously, who turns down a homemade doughnut?! In fact, who turns down ANY version of a yeast doughnut?! (Those cakey things are another story altogether; you’ll have to forgive my obvious bias.)

Indeed, Mike’s mom told me a story years ago about when she was in school. She and her friends would wait for the “Hot Doughnuts Now” sign to come on at the nearby Krispy Kreme, drive over, and eat a dozen doughnuts each. That’s the power of a yeast doughnut. (And youthful metabolism).

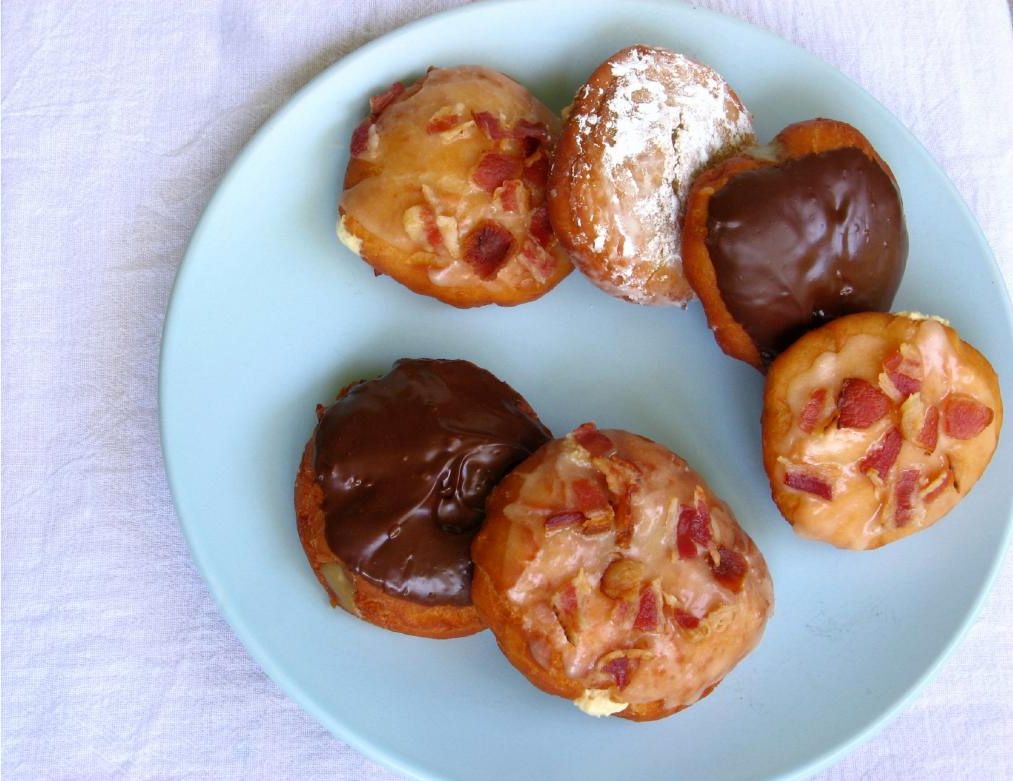
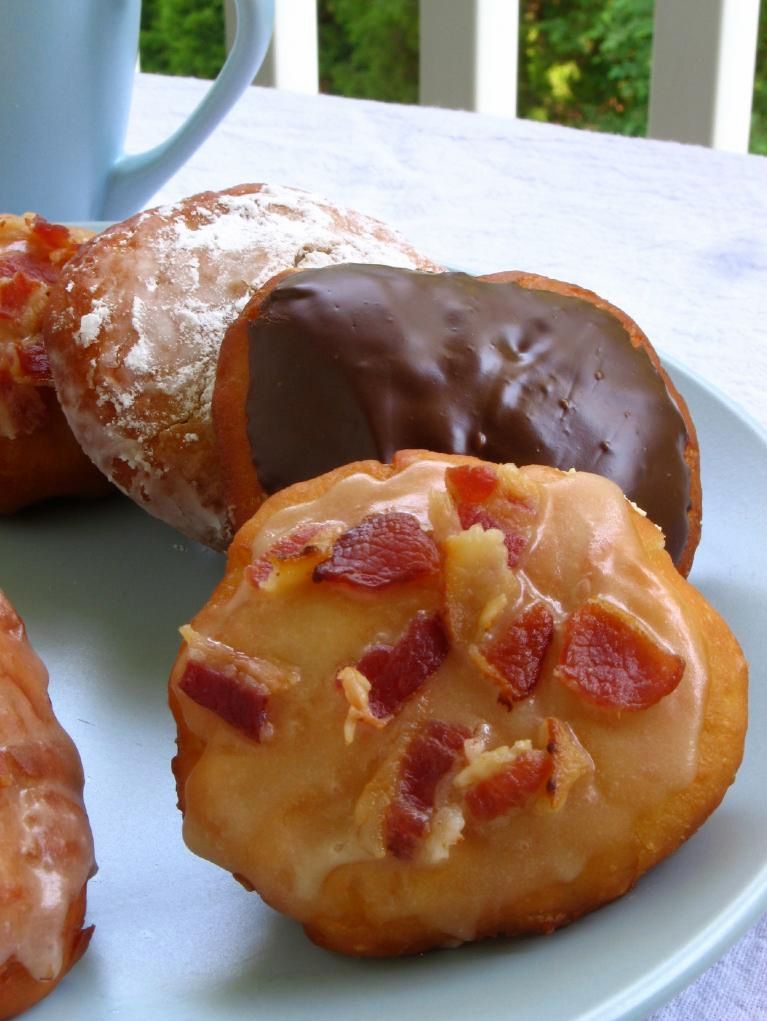
Well, in honor of my mother and doughnut lovers everywhere, I made a variety of filled doughnuts last weekend. I’m still tweaking my super secret version — and will share it soon, along with a great little trick for using yeast dough scraps — but this flavor combination I found on Cherry Tea Cakes had me immediately intrigued. Maple Bacon Doughnuts!

They don’t just sound amazing; they are amazing! And even though it may seem like a trendy flavor combination, these are not simply novelty doughnuts — they taste flippin’ awesome. They’re pillows of salty-sweet, doughnut-pancake, breakfast-dessert heaven. I feel like I should be confused, but I’m not. I just want another one.

While we’re talking doughnuts, we might as well jump in the fray: Are you a cake doughnut or yeast doughnut person?

Maple Bacon Doughnuts


Recipe by: Adapted from Cherry Tea Cakes
Yield: about 12 3-inch doughnuts

Doughnut Ingredients:
1 0.25-ounce package yeast
2 tablespoons hot water, roughly 110 degrees in temperature
3/4 cups milk, scalded (heated to a slight simmer-not a boil) and cooled
1/4 cup sugar
1/2 teaspoon kosher salt
1 egg
2 tablespoons and 2 teaspoons shortening
2 1/2 cups all-purpose flour
vegetable oil for frying

Maple Mousse Filling Ingredients:
1/2 cup pure maple syrup
2 large egg yolks
1 1/4 teaspoon unflavored gelatin
3/4 cup whipping cream

Maple Glaze Ingredients:
2 tablespoons plus 2 teaspoons bacon grease/melted butter
1 cups powdered sugar
5-6 tablespoons maple syrup
about 1/2 pound bacon, for topping

Directions: Make the doughnut dough: Dissolve the yeast in warm water in the bowl of your stand mixer, and then let it sit for about 5 minutes. The yeast should foam to show that it’s active. Beat in milk, sugar, salt, eggs, shortening, and 1 cup flour (scraping down bowl when needed). Beat on medium speed for 2 minutes to fully combine. Mix in remaining flour completely. Cover this dough and let it rise in a draft-free place (I warm my oven for a few seconds on 200 degrees just to get the chill out — make sure it’s not hot! — and then put my dough in there to rise) until doubled, about 50-60 minutes.

Make the Maple Mousse: While the dough is rising, bring maple syrup to a boil over medium-high heat. In a separate bowl, whisk together egg yolks. Pour about 1/4 cup of the hot maple syrup into the egg yolks, whisking constantly, to temper them and be sure they won’t cook from the heat. Then whisk the egg yolks into the maple syrup. Whisk constantly until the mixture reaches about 170 degrees F on a candy thermometer. In a separate bowl, measure out 1/4 cup of the whipping cream and sprinkle the gelatin over it to soften. Let it sit for about 5 minutes before mixing a couple of tablespoons of the warm syrup mixture in and stirring to dissolve the gelatin. You can heat for 10 seconds at a time, stirring between each, to ensure the gelatin is dissolved. Whisk this mixture into the syrup mixture, and then whisk it occasionally for the next hour while it cools.

Beat the remaining cream to soft peaks. Stir about a third of it into your now-cool maple syrup mixture to lighten it, and then gently fold the remaining cream into it. Refrigerate for at least an hour while you complete the rest of the components.

Make your doughnuts: Flour a surface well and turn your doughnut dough out onto it, flouring the dough as well. Gently roll the dough out to 1/2-inch thick and cut into solid rounds with a 3-inch cooking cutter. Place each round on a baking sheet and let these rise until doubled, about 30-45 minutes. About 25 minutes into their rise time, start heating your oil in a heavy, deep stock pot to 350 degrees F on a candy/fry thermometer.

Cook bacon topping: Preheat oven to 400 degrees (only once your doughnuts aren’t in there rising!) Cover a baking sheet with aluminum foil and lay your bacon slices out side by side. Bake for 15-20 minutes or until crisp. Remove bacon to a paper towel lined plate, reserving the bacon grease in a small bowl. When cool, crumble bacon up.

Fry your doughnuts: Gently lower 2-3 doughnuts at a time into hot oil with a slotted spoon. Fry about 1 minute on each side or until golden brown. Remove to a paper towel lined plate to drain.

Make the Maple Bacon Glaze: Add enough melted butter to your bacon grease to make it 2 tablespoons and 2 teaspoons worth. Whisk this together with the confectioner’s sugar until combined. Add maple syrup one tablespoon at a time until you reach desired consistency. Set aside.

Assemble doughnuts: Use a chopstick or butter knife to poke into each doughnut and “sweep” gently to create a pocket. Pipe mousse into each doughnut using a piping bag. Then dip them in the glaze and sprinkle cooked bacon on top. Best eaten the same day.

If you liked this post, please:
Subscribe to Willow Bird Baking
Follow Willow Bird Baking on Twitter
Follow Willow Bird Baking on Facebook
Give this post a thumbs up on StumbleUpon


ShareOther ways to share this post with friends!
Cream of Ketchup and Mustard Soup

I almost experienced the most embarrassing moment of my culinary life last weekend. I’d gotten together with my dear friend Sonya, a connoisseur of crazy scarves and — lucky for me — cheeseburgers, to plan a cookout extravaganza. The weather has been so nice in Charlotte lately, and we wanted to celebrate.

We piled hamburgers, hot dogs, and cheddarwursts on the grill as our friends started to arrive. That’s when we realized the problem.

One of the gals we invited is a passionate vegetarian, a fact that had somehow completely slipped my mind. As soon as I saw her walking into the backyard with a pitcher of iced tea to share, I remembered her dietary restrictions like being hit with a freight train.

You’re probably thinking this was not a big deal. She can just eat side dishes, right? She can have dessert, right? WRONG. We didn’t have a single vegetarian option. The potato salad had sausage in it. The macaroni and cheese was made with chicken broth. The cupcakes were flippin’ maple bacon cupcakes! DRAT.

I panicked. At first I piled some lettuce, tomatoes, and onions on a plate to make a salad of sorts. That seemed insulting, though, and I knew I had to whip her up a more impressive vegetarian entrée. I scurried into the kitchen as Sonya sipped some lemonade and chatted to keep everyone occupied.

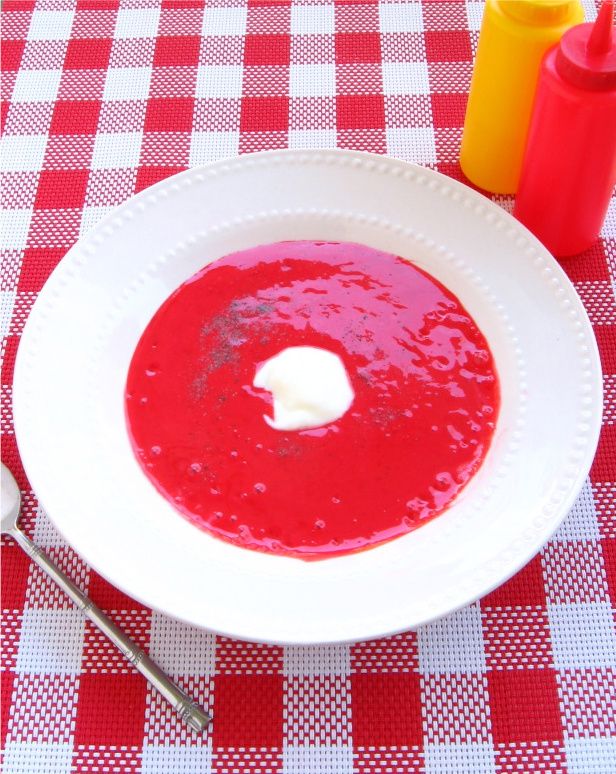
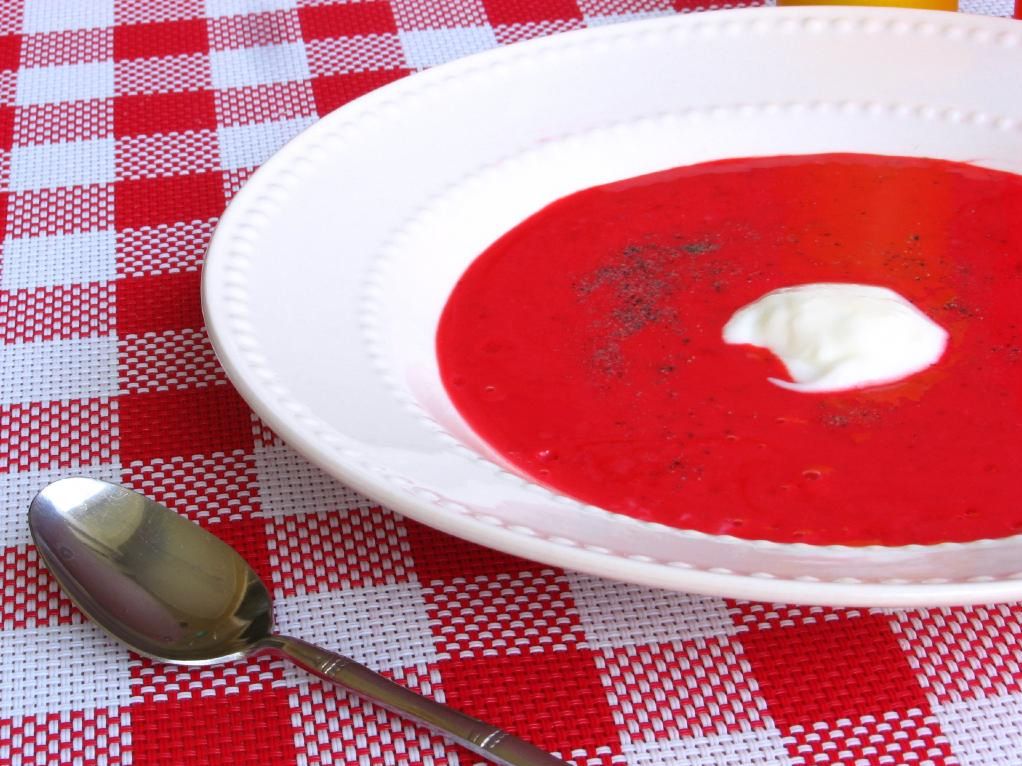
That’s when this masterpiece occurred to me. It’s the perfect vegetarian option at a cookout, because it tastes like a burger-free burger. It’s Cream of Ketchup and Mustard Soup! The ketchup is bright but undercut by the tang of the sultry mustard. Just a smidge of pepper for bite, and this soup was a carnival of creamy condiment deliciousness.

Our vegetarian friend raved with every sip, and asked for the recipe before she left. What a sweet success! I hope you’ll try it for yourself and enjoy.

Cream of Ketchup and Mustard Soup*


Recipe by: Willow Bird Baking
Yields: 2 servings

Ingredients:
1 cup ketchup
1 cup yellow mustard
1/2 cup heavy cream
salt and pepper to taste
sour cream for serving (optional)

Directions:

Mix ingredients together over medium-high heat. Simmer for 10 minutes before separating soup into two soup bowls, topping with sour cream, and serving.

*April Fool’s! I did not hold a cookout, the weather has been cold and rainy in Charlotte, I do not own a grill, I did not make this soup, I definitely did not ingest this soup, and I don’t even know anyone named Sonya (unfortunately — what a fun name).

This soup is probably gross, so for Heaven’s sake, please don’t serve it to your vegetarian friends as a meat alternative at a cookout. Unless you don’t want to have any more vegetarian friends, that is.


If you liked this post, please:
Subscribe to Willow Bird Baking
Follow Willow Bird Baking on Twitter
Follow Willow Bird Baking on Facebook
Give this post a thumbs up on StumbleUpon


ShareOther ways to share this post with friends!
Deep Fried Cake Batter Cookie Dough

Cake Batter Cookie Dough is like a birthday party. A sweet, colorful, happy birthday party with balloons and trick candles.

Cake Batter Cookie Dough Truffles are like a birthday party that, in addition to those things, has a bouncy house and pony rides from a pony named Whinny.

That’s nice and all.

But Deep Fried Cake Batter Cookie Dough is like a birthday party with all of those things — held on a flippin’ yacht in the French Riviera, with David Beckham serving you lemonade while Posh Spice feeds Whinny sugar cubes.

Oh, and with Prince performing “Raspberry Beret” in one of his funky outfits.

And with Nigella Lawson in the galley whipping up cupcakes.

And with one of those little bendy straws in the lemonade.

What I’m trying to say is that Deep Fried Cake Batter Cookie Dough is one of the best things I’ve ever had the pleasure of devouring. I mean, it was so good — an absolutely magical bite. I think it tasted a little like Heaven would taste.

And now that I’ve accidentally equated Heaven to a nautical birthday party with assorted celebrities (and Whinny!), I’m going to stop with that train of thought.

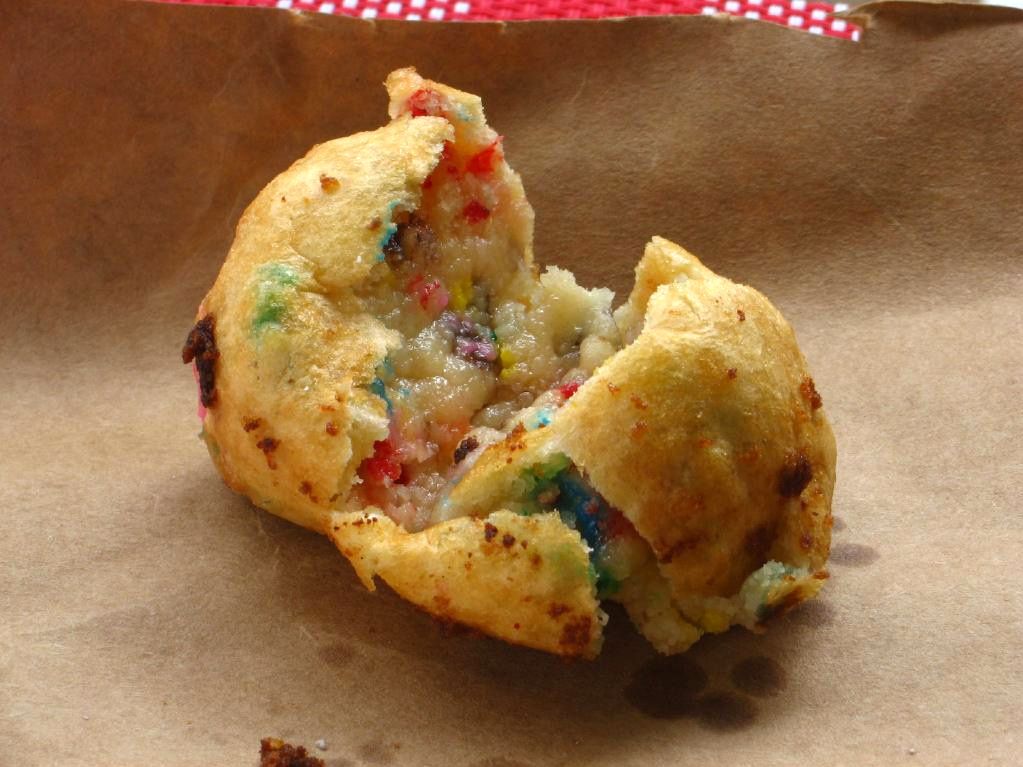
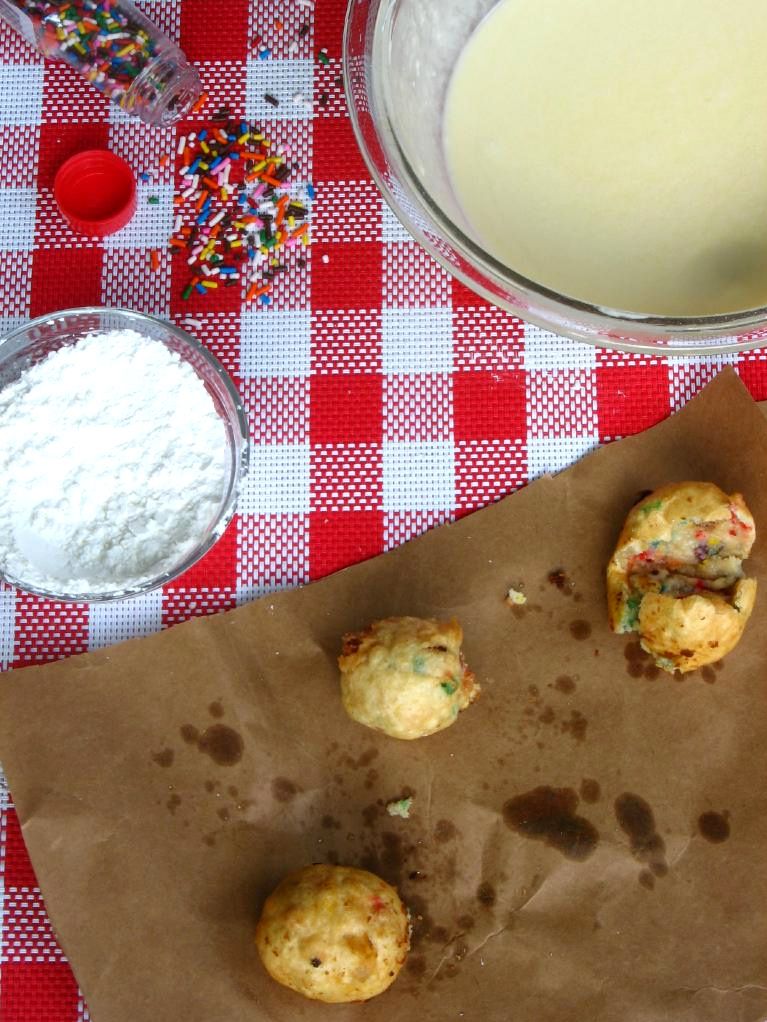
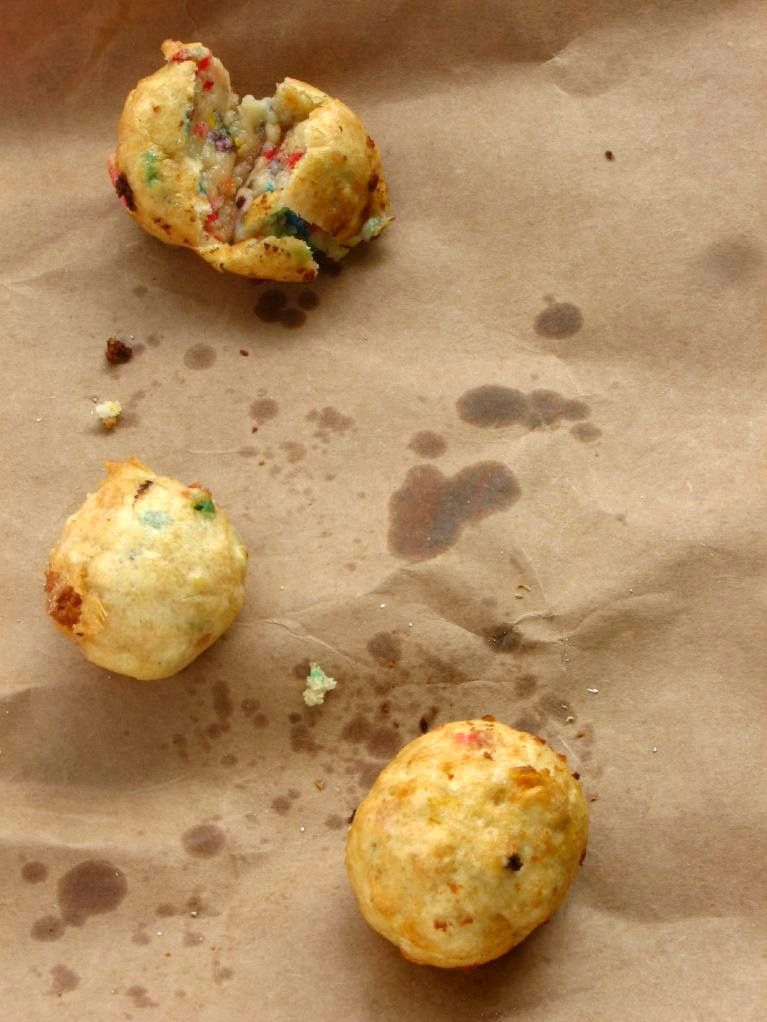
Back to deep fried dough. The buttery, cake batter-flavored dough encased in a thin, crispy shell was surprisingly light and pop-able. Despite being indulgent, it didn’t feel heavy or overwhelming.

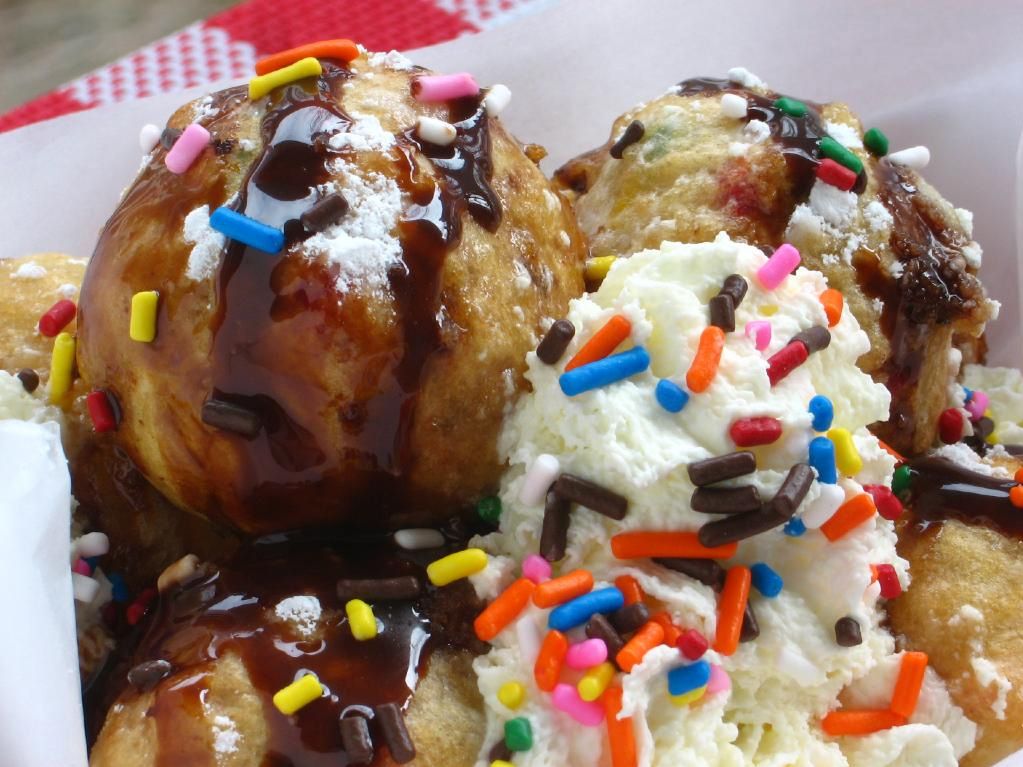
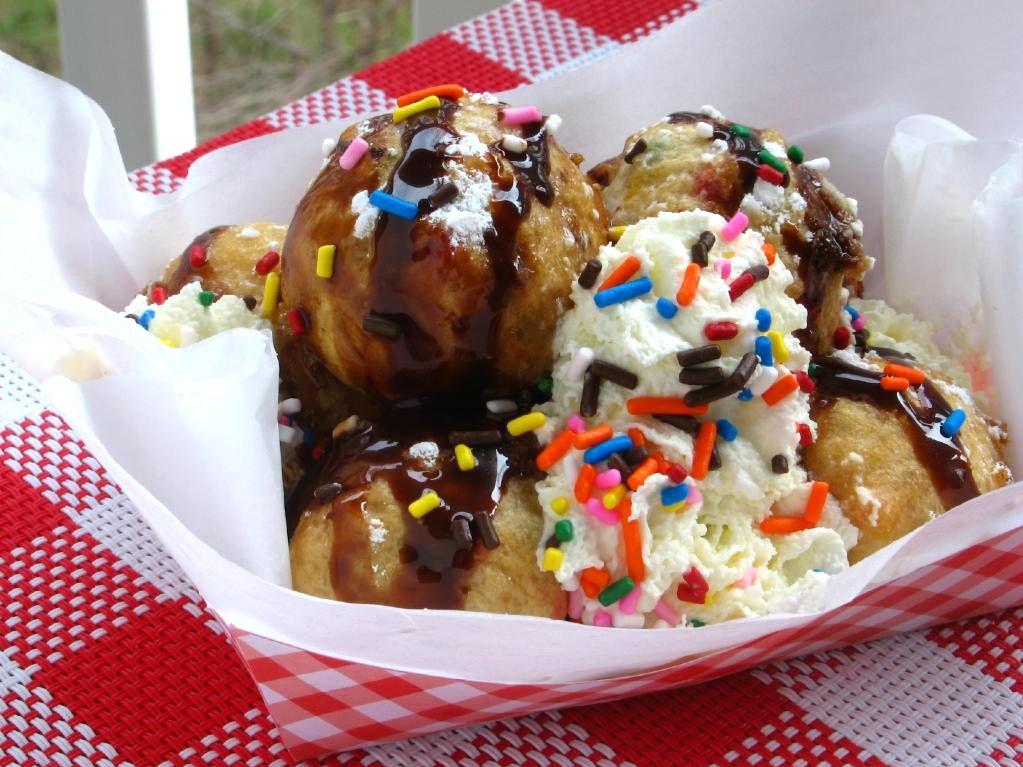
Of course, I stuck several of them in a paper tray with chocolate sauce, whipped cream, and sprinkles to really round out the experience.

I know some of you are going to say, “Well, I’m not really a fan of frying things.” Me neither! Frying things is scary business. Hot oil splatters can result in burnt fingers and forearms, and the whole process kind of smells weird. And maybe you’re health conscious and frying is a dirty word in your house.

Listen, these fried dough balls are beyond worth it! I suited up in goggles, put my hair up, plugged in my GranPappy, got down to business — and came out unscathed. And maybe, in terms of health, we shouldn’t eat deep fried dough balls every day; but then again, we shouldn’t have tricked out birthday parties every day either. It would spoil the fun of the occasional indulgence.

I want to leave you with a parting plea. Turn on your inner state-fair-attending, carnival-loving, birthday-party-throwing child and deep fry some cookie dough.

Time to get a little crazy: What’s your ideal birthday party?

Deep Fried Cake Batter Cookie Dough


Recipe by: Willow Bird Baking (cake batter cookie dough) and Taylor Takes a Taste (deep frying)
Yields: about 12 fried dough balls, depending on size

Dough Ingredients:
1 1/2 cups all-purpose flour
2/3 cup yellow cake mix
1/4 teaspoon salt
1/2 cup unsalted butter, room temperature
1/2 cup granulated white sugar
1 teaspoon pure vanilla extract
2 tablespoons sprinkles
4-8 tablespoons water

Batter Ingredients:
1 egg
1 cup ice cold water
1 cup self-rising flour
2 tbsp confectioners’ sugar

Other Ingredients:
small bowl of cornstarch for rolling dough balls in
oil or shortening for frying
confectioners’ sugar for sprinkling (optional)
chocolate sauce (optional)
whipped cream (optional)
sprinkles (optional)

Directions:
To make dough, in a medium bowl, cream together butter and sugar for 2-3 minutes until light, fluffy, and pale yellow. Mix in salt, flour, cake mix, sprinkles, and vanilla. Add water one tablespoon at a time, mixing after each, until you reach cookie dough consistency. Roll your dough into balls and chill until your batter and oil are ready.

Heat your oil to 375 degrees. To make batter, mix together egg and water. Add flour and sugar and mix. Roll each dough ball in cornstarch, shaking off the excess, and then dip into the batter, making sure the ball is entirely coated. Use a slotted spoon to place 3 or 4 balls at a time into the hot oil. Fry for 1-3 minutes or until golden brown. Drain on paper towels and serve with confectioners’ sugar, chocolate sauce, whipped cream, and sprinkles.

P.S. Love that cute little checkered paper tray? Download the template here, print it on cardstock, cut around the outside borders, fold the tabs over and glue them.

P.S. 2 Only 1 week left in my Cheesecake Challenge! Choose any one of 9 cheesecake recipes to prepare within the next month. Email a photo to me by 4/5/2011 to be featured on Willow Bird Baking! Get more details about the challenge here.

If you liked this post, please:
Subscribe to Willow Bird Baking
Follow Willow Bird Baking on Twitter
Follow Willow Bird Baking on Facebook
Give this post a thumbs up on StumbleUpon


ShareOther ways to share this post with friends!
Cake Batter Cookie Dough Truffles

What a mess of a weekend. While I was blowing my nose repeatedly and hacking unattractively on Saturday night, I noticed that Byrd was lethargic. After a little investigating (read: walking around the apartment), I found that she had eaten about a metric ton of kleenex from the trash can. Her tissue escapades must have been her attempt at staying occupied while I tried to sleep off my cold; alas, it was a bad life decision. She was one unhappy puppy.

She curled up next to me and tried to look as pitiful as possible while I massaged her sick little body. Every now and then she’d look up at me as if to say, “Why aren’t you fixing it, Mommy?” Then I’d cry a little and she’d lick my face a little and we’d continue spooning.

Finally the tissues worked their way out of her system, but not until the entire weekend had been spent fretting and giving her sips of olive oil. I’m ready for everyone in the apartment to be healthy now! At least my turtle hasn’t contracted any plagues as of yet.

Needless to say, the safe-to-eat cookie dough I posted on Sunday has been a welcome ray of sunshine in an otherwise germy, sickly sort of week. In fact, I found two recipes in which to use said cookie dough that almost made everything feel downright cheery. And here’s one of them now: cookie dough truffles.

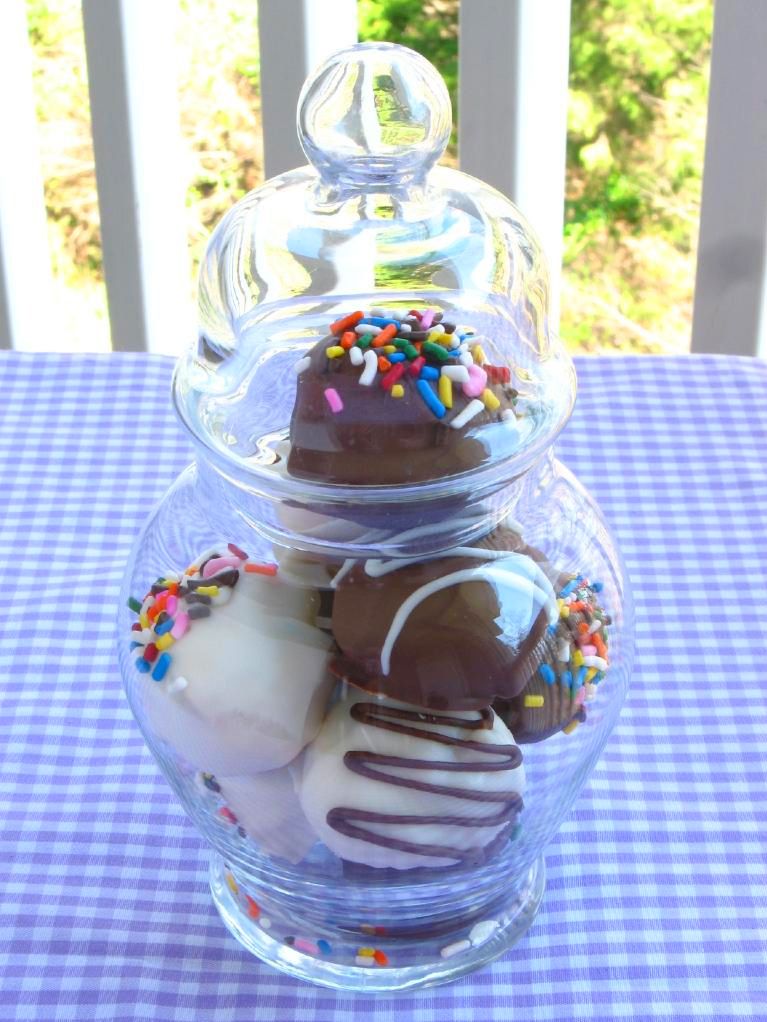
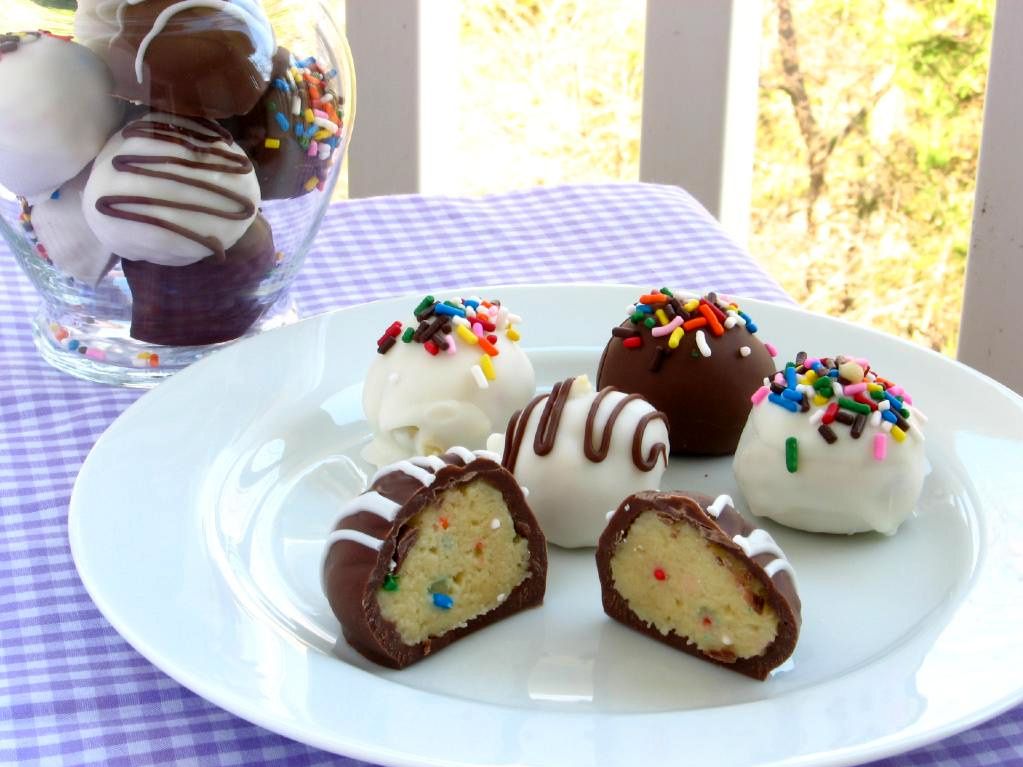
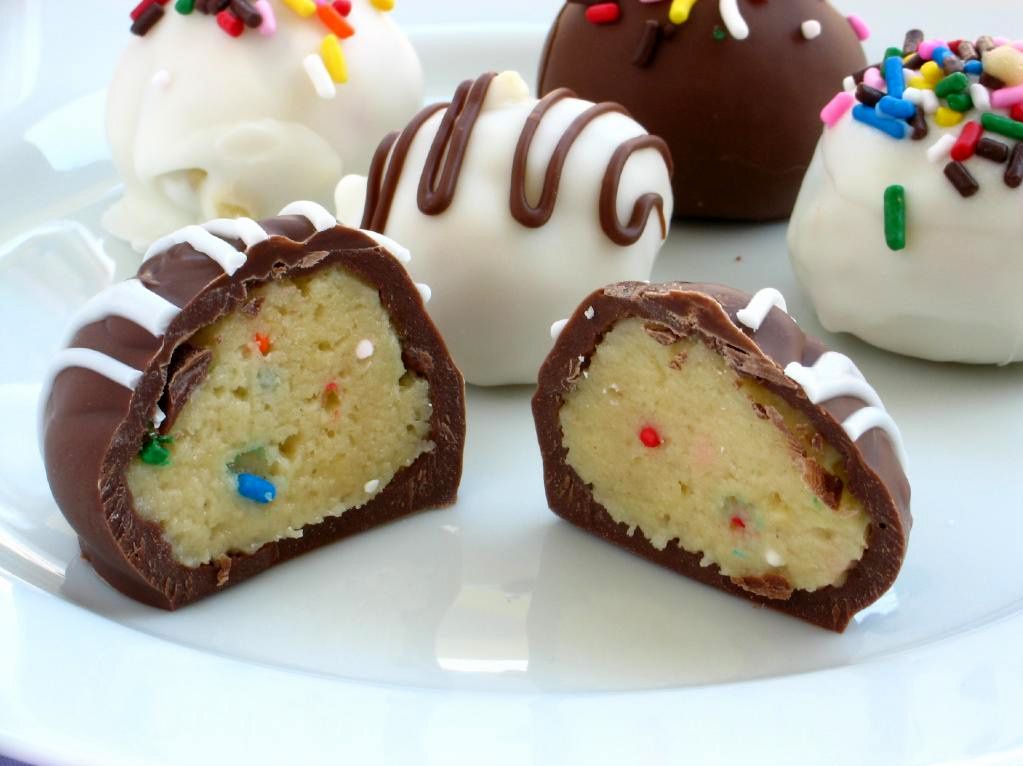
I usually use the eggless chocolate chip cookie dough in my Coffee Cookie Dough Fudge Cheesecake — a noble purpose, for sure. But if you’re not feeling making an entire cheesecake, you can whip up a batch of these simple truffles. I made them with each type of cookie dough and unsurprisingly, the cake batter cookie dough truffles were my absolute favorite. The cake batter cookie dough was the perfect buttery and festive filling inside of the rich chocolate shell. I’m just sorry poor Byrd couldn’t join in for a bite!

Cake Batter Cookie Dough Truffles


Recipe by: Willow Bird Baking
Yields:about 12 truffles, depending on size

Ingredients:
one recipe cake batter cookie dough (or other flavor)
chocolate candy melts (I use Candiquik)
sprinkles!

Directions: Roll your cookie dough into 1 inch balls and refrigerate for a few hours or overnight.

Melt candy melts according to package instructions. I place the bowl of melted candy melts into a bigger bowl with hot water in it. This keeps the candy melts warm and viscous as you work. Just be careful not to get any water in the chocolate, which will cause it to seize and be unusable. Prepare a sheet of wax paper to let your truffles dry on.

Take only a few dough balls out of the fridge at a time. Spear one with a toothpick and dip it, using a spoon to help you coat the outside and wiggling it a little over the bowl to let the excess drip off. Now wiggle it off onto your wax paper and top with sprinkles, chocolate chips, crushed oreos, or other cute toppings. Let them harden. Serve immediately or keep in an airtight container in the fridge.

If you liked this post, please:
Subscribe to Willow Bird Baking
Follow Willow Bird Baking on Twitter
Follow Willow Bird Baking on Facebook
Give this post a thumbs up on StumbleUpon


ShareOther ways to share this post with friends!

1 51 52 53 54 55 69