other

Fresh Open-Faced California Sandwich

This past weekend I attended the Foodbuzz Blogger Festival in San Francisco, California, 2,700 miles away from my home. Traveling alone is always a meaningful, reflective experience for me, and over the next couple of weeks, I’ll be sharing vignettes that I hope are meaningful to you, as well.

. . .

“Can you tell we’re tourists?” the gossamer-haired man asked the woman at the BART (Bay Area Rapid Transit) information desk after she guided him through the process of purchasing a ticket. He chuckled toward his smiling wife, and they walked over toward the ticket machine.

I walked up to the information desk, wondering if I was about to annoy the attendant by asking a question she’d already been asked a hundred times this morning. Like everyone else I’d met so far in the Bay City, though, she cheerfully offered detailed advice. With some help from the tourist couple who’d gone before me, I successfully purchased a subway ticket and stepped onto the escalator to descend into the rumbling belly of the city.

After a posing a few more clueless questions to kind San Franciscans, I stepped onto a BART train and settled into my seat with a self-congratulatory sigh. We sped off only to hear a robotic voice a few seconds later announcing the next stop: “Montgomery.”

Oh. Montgomery? I looked at the map on the wall. I was trying to head to the Mission area to visit the gorgeous, iconic Tartine Bakery. Montgomery, however, was in the opposite direction — toward Oakland across the bay. Once again I turned to a stranger. “If I’m trying to get to 16th and Mission–” I began.

“Oh, you’re headed the wrong way,” she said with a smile. “You needed the train on the other side of the tracks.” It suddenly dawned on me that of course the trains, like cars, would go in two different directions. I felt a little sheepish.

“Oh, thanks! I guess it’s a good thing I realized after only one stop,” I said.

“Definitely. You’re fine. You’re not under the water yet!” she replied.

Her reassurance at once comforted me and alerted me to an alarming fact that I hadn’t considered about the trains: they go under the water. Under the San Francisco Bay. Seriously? I could hear my mom’s voice in my head saying, “What if there’s an earthquake while you’re under there?!” I jumped off at the next stop and changed trains, relieved that I didn’t have to go under the water until I visited Oakland later in my trip.

A couple of hours later I stood at a bus stop, blissful after devouring a frangipane croissant, a gruyere and black pepper gougere, and a Mexican Coke at the communal table in Tartine. I hurriedly grabbed $2 out of my pack as the bus pulled up, but I had the good sense to pause on the bus steps and ask, “Do you head toward Lombard?”

I expected the bus driver to wave me onto the bus, impatient with silly tourist questions, but again, I was met with generosity: “Oh, you want the 22 that runs on the other side of the street.” He pointed to the bus stop across the way. A kind man at the bus stop confirmed the bus driver’s words, “Just wait over there and another bus will be along in a moment.” Buses, it seemed — like trains! and cars! and everything else, Julie! — ran in both directions. Since you might be wondering at this point, I promise I’m not dumb.

I walked across the street, once again redirected by the kindness of others.

Are you plowing ahead on your own power lately? Personally, I never grew out of that independent toddler stage of life — the one where you’re constantly insisting, “I’ll do it myself!” There’s nothing quite like being alone in a strange city across the country from your home to break you of that intransigence, though.

I found my way to Tartine and then up to the Golden Gate Bridge on Friday because I was willing to accept the generosity and support of others. (And if I hadn’t found my way to Tartine, what a tragedy that would’ve been!)

Reach out for help when you need to. You don’t have to handle everything alone. And hey, you’re not under the water yet.

. . .

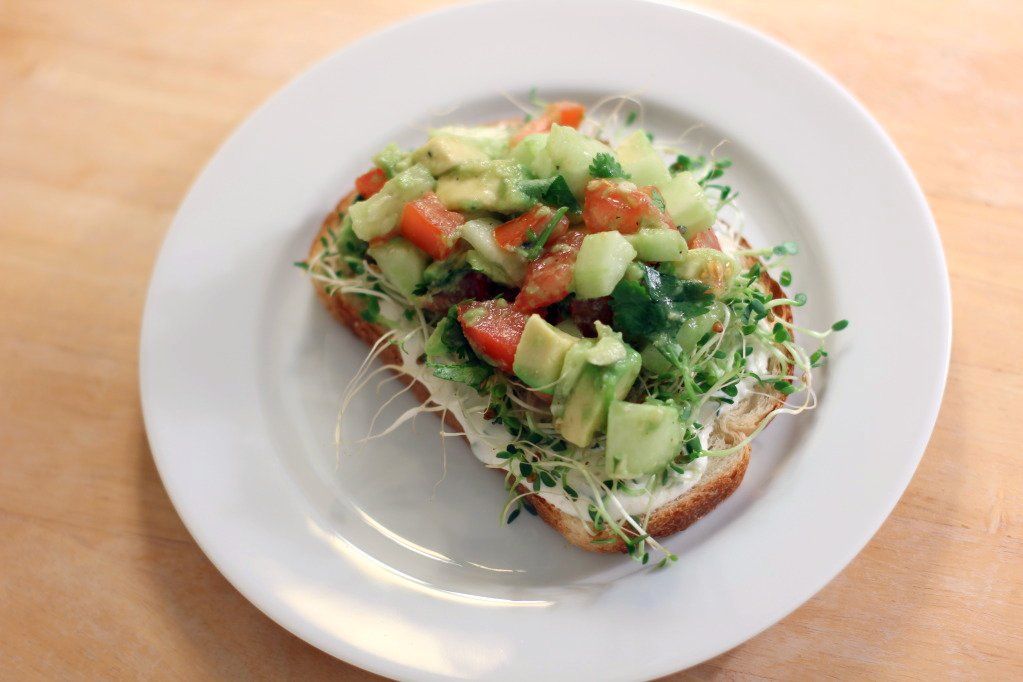
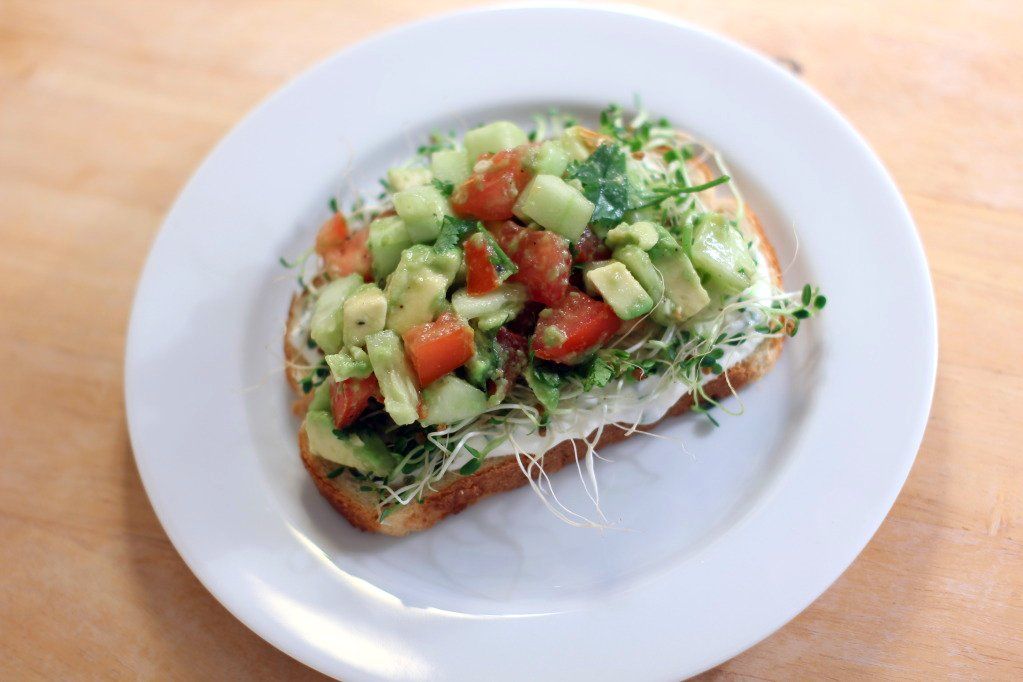
What better way to kick off my California posts than with a gorgeous open-faced California Sandwich? It’s just as healthy as it looks, but don’t worry — it doesn’t lack a thing in the taste department. In fact, it’s one of the best sandwiches I’ve ever made in my kitchen. It’s a fresh, tangy combination of flavors that you just feel good eating. I made it on sourdough bread, which I love — and how appropriate for all this talk of San Francisco.

Was there a time in your life when you’ve had to break down and accept the help and kindness of others?

Fresh Open-faced California Sandwich


Recipe by: Adapted from Ezra Pound Cake
Yield: 2 open-faced sandwiches

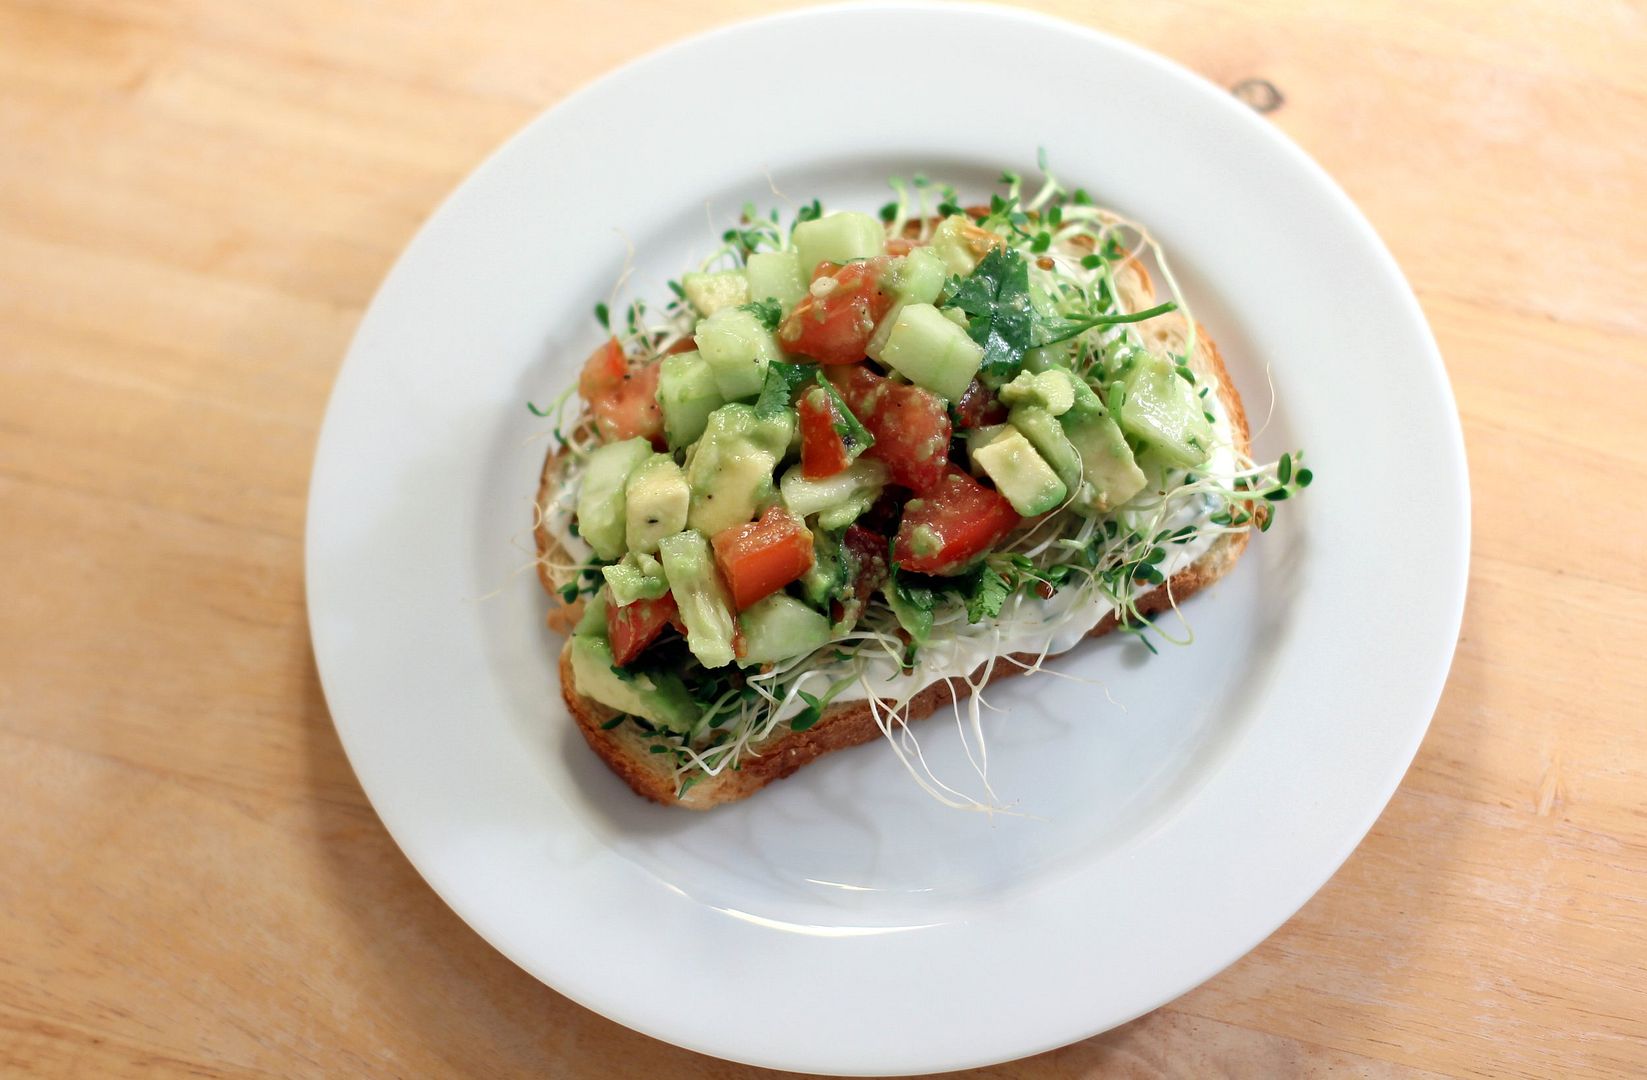
This quick sandwich is cool and refreshing. The bright California salad is comprised of tomatoes, cucumbers, cilantro, and avocado bathed in lime juice. It rests on a tangy chive spread and a thick, toasty slice of sourdough bread. I was pleasantly surprised at how delicious the finished product was considering how little effort went into assembly. This sandwich would make the perfect lunch or light dinner.

Chive Spread Ingredients:
2 tablespoons plain yogurt
2 tablespoons mayonnaise
1 tablespoon finely chopped fresh chives
Salt and pepper, to taste

California Salad Ingredients*:
1 avocado, peeled, pitted and diced
1 tomato, cored and chopped
1 cucumber, peeled, seeded and diced
Squeeze of lime juice
2 tablespoons chopped fresh cilantro
Salt and pepper, to taste
*This makes enough salad for 4 sandwiches, if you wanted to put a smaller amount on each, but I really heaped it on. I wanted more salad and less bread per sandwich. Yum!

Other Things You Need:
2 slices of thick sourdough bread
1/2 cup alfalfa sprouts

Directions:
Make the chive spread by mixing the yogurt, mayonnaise, chives, salt, and pepper in a small bowl. Set aside. Toast the 2 slices of bread in toaster or in a buttered skillet over medium heat. Lay these out on a plate.

Make the California salad by tossing avocado, tomato, cucumber, lime juice, cilantro, salt, and pepper together in a bowl. Spread each slice of bread with half of your chive spread and pile on half of the alfalfa sprouts. Then top with half of the California salad, piled high. I ate mine with a knife and fork and considerable enthusiasm.

If you liked this post, please:
Subscribe to Willow Bird Baking
Follow Willow Bird Baking on Twitter
Follow Willow Bird Baking on Facebook
Give this post a thumbs up on StumbleUpon
Pin It


ShareOther ways to share this post with friends!

Quick Dinner: Garlicky Peanut Noodles with Crunchy Vegetables

I was a mess of elbows and ankles today as I ran around school, the grocery store, the bank, and my apartment desperately trying to tug loose ends together.

In the store, I deftly ran over my own foot with a grocery cart just minutes before dropping not one but two 12-packs of diet Sunkist.

People stared. I acted nonchalant: Whatever, don’t act like you’ve never thrown some soda around. Totally under control over here.

I’m now doing laundry, packing Byrd’s things, packing my things, fixing up lesson plans, adjusting my budget, wrestling with Squirt’s stupid filter, and trying to find a moment to shave my legs. Oh, and writing a blog post, naturally.

All of this craziness came about because tomorrow I’m waking up at 3 in the flippin’ morning, collecting my mountain of luggage, and heading to San Francisco (with flowers in my hair! Except not really.) The 3rd annual Foodbuzz Blogger Festival is this weekend, and I can’t wait to eat lots of good food and see some sweet people.

Well, I can totally wait for the airplane part, though. In fact, can we just delete that part altogether? I’m one of those hyperventilating-just-a-little, having-occasional-panic-attacks, making-weird-faces people you hope you don’t have to sit next to on the plane. It’s cool; as long as I take my pills I should be able to limit the panic to some periodic weeping in the window seat.

I kid, I kid. The pills actually knock me straight out. I may snore, but at least I won’t be convulsing?

Anyway, back to the current chaos. Even with all the hubbub tonight, I threw together a homemade dinner. I’ve been eating this quick, 15 minute pasta dish like it’s goin’ out of style since I saw it on Not Without Salt. It checks all of my most important boxes for a weekday meal: it’s low calorie, it’s almost effortless, it’s tasty, and it’s piled sky-high with fun toppings.

The peanut butter and soy sauce together form a hearty, savory sauce that’s saved from straight-up bitterness by a few glugs of white wine and some gorgeous carrot curls. I threw on some green onions, chopped peanuts, lime juice, and tons and tons of bean sprouts before mixing the whole dish together and digging in. I love that gorgeous salty soy sauce flavor in every bite.


crunch.

All right, my loves. On that crunchy, delicious note, I’m off to ‘Frisco (I know, don’t worry. I’ve already read all the blogs about how much locals hate it when tourists call it that) for a food adventure. Stay safe, and stay off airplanes, you crazies! If people were meant to fly, God would’ve given us jet engine biceps. Or helium-filled love handles. Or, like, wings or something.

P.S.: My apartment will be occupied and supervised while I’m gone. Probably by robots that throw themselves into bonfires so they can incinerate you in a fiery embrace. Nice try, thieves of the interwebz!

P.S. 2: AHHHHHHHH AIRPLANES.

Garlicky Peanut Noodles with Crunchy Vegetables


Recipe by: Adapted from Not Without Salt‘s recipe inspired by Nigel Slater
Yields: 4 servings

These noodles are bathed in a salty, garlicky peanut sauce before being topped with an array of crunchy toppings: carrot curls, bean sprouts, green onions, chopped peanuts, sesame seeds. A spritz of lime juice and a good toss finishes the dish in just 15 minutes. I love simple weekday meals.

Ingredients:
3 tablespoons peanut butter (or tahini if you’d rather, but I haven’t tried it)*
1/3 cup soy sauce*
2 tablespoons rice wine (or dry white wine)
1 tablespoon rice wine vinegar
1 1/2 tablespoons Sesame oil
4 cloves garlic, minced
1 tablespoon chopped shallot
4 servings’ worth of spaghetti (or other long noodle)
*You may need to adjust peanut butter and soy sauce to your taste preferences (more peanut butter for sweetness, more soy for saltiness)

Optional Toppings:
carrot curls (just take a vegetable peeler to a peeled carrot to get these)
bean sprouts (boil these for a few minutes and then rinse in cold water for safety)
chopped green onions
chopped peanuts
sesame seeds
squeeze of lime

Directions:
Boil salted water over medium-high heat and cook pasta to al dente according to package instructions. Drain, return to pan, and set aside.

In a food processor, combine the garlic and shallots and process until fine. Scrape down the sides of the processor bowl with a spatula and then add the peanut butter, soy sauce, wine, vinegar, and sesame oil and process until combined. Add this sauce to pasta in pan and toss to coat.

Serve pasta on plate topped with shredded carrots, green onions, chopped peanuts, sesame seeds, bean sprouts, and a slice of lime.

If you liked this post, please:
Subscribe to Willow Bird Baking
Follow Willow Bird Baking on Twitter
Follow Willow Bird Baking on Facebook
Give this post a thumbs up on StumbleUpon
Pin It


ShareOther ways to share this post with friends!

Dark Chocolate Pumpkin Truffles

Despite the fact that I’ve been inexplicably bought and paid for by the Son of God Himself, I feel guilty all the time. Call it a complex.

adorable napkins courtesy of sweet Erin

Sometimes it’s Byrd’s fault. She does this thing when I’m leaving for work every morning — do your dogs do this? — where she ramps up her cute factor by 200%. Suddenly she seems fluffier and snugglier. She’ll kiss my ankles and roll over for belly rubs. She’ll look up at me with eyes that I could swear weren’t that adorable yesterday.

It’s as if she’s saying, “You’re not gonna LEAVE me, are you mom? You couldn’t possibly leave your innocent wittle baby puppy, could you?”

But every morning, I break her heart by telling her goodbye and shutting her up in my bedroom. Then I walk out to my car feeling like a heel.

Other times it’s my own fault that I feel guilty. I’ll have a mile-long list of things I need to accomplish, but I’ll allow myself 5 or 10 minutes to check Facebook. And, you know, I have to check Pinterest. And what if something important happened in the world? I’ll read CNN online for just a minute or two. And what if something important happened to Reese Witherspoon? I’ll hop over to People.com for a bit. Of course I need to check my site traffic. And gosh, it’s been forever since I’ve checked Facebook . . .

Suddenly it’s 1 o’clock in the morning and my to-do list suddenly looks a lot like an accusation staring up at me from my notepad.

Last night my guilt was even more justified. I always feed my turtle, Squirt, in a plastic storage container on the kitchen counter. I usually keep an eye on him so he doesn’t climb out and get hurt, but yesterday I was just so preoccupied. I had piles of 7th grade essays, 6th grade quizzes, and 6th grade projects to grade. Modern Family was playing in the background. Byrd was playing in the floor. My head was lost in a cloud of thesis statements and Gloria’s Colombian accent.

Suddenly, I heard a thump. I walked into the kitchen and found Squirt not in his feeding tank on the counter where I left him, but standing in the middle of the kitchen floor, looking around thoughtfully.

He had fallen off the counter.


quick, think of something happy. like pumpkin truffles.

MY BABY FELL OFF THE COUNTER BECAUSE I WAS TOO BUSY TO WATCH HIM CLOSELY. After bursting into tears, repeatedly checking all of his little turtle limbs for injuries, hugging him (much to his dismay), and investigating the scene of the accident, I sat in floor, awash in a sea of guilt. I promised myself I’d be a better mother. I thanked God profusely that he’d fallen on the carpet and not the linoleum. I called Mike and confessed my negligence.

Meanwhile, Squirt swam around in his tank and chomped at carrots, pleased as a plum to be back in the water and apparently none the worse for the wear.

The truth is, guilt is useful insofar as it leads us to make a change. The discomfort I felt after Squirt’s fall has convicted me to never leave him unsupervised again. For some people, discomfort about the way they’re living is what leads them to submit to Christ and be changed. It’s a good thing.

But beyond that, guilt is a disease. Once you’ve made a change, lingering guilt serves no purpose but to cripple you. It’s a lying voice telling you that you’re unworthy, incapable. Don’t believe it.

Today as Squirt basks under his sun lamp, I’m going to ignore the deceitful voice of guilt. I’m going to believe that I’m the best mommy for that reptile. I’m going to give myself a blank slate. And I might even try to cut down on the Facebook…

…after I post another status update about pumpkin truffles.

Since we’re on the topic of guilt, here are some truffles for you to eat way too many of — and to forgive yourself for later!

They’re worth it. In this super simple recipe, rich pumpkin cheesecake middles are coated in indulgent dark chocolate. The resulting truffles are adorable and totally poppable. Give yourself a break and make some dessert.

What kinds of things do you feel guilty about sometimes?

Chocolate Pumpkin Truffles


Recipe by: Adapted from Whole Foods
Yields: About 30 truffles

A creamy pumpkin mixture spiced up with gingersnap and graham cracker crumbs is rolled into a ball and coated with rich dark chocolate. These delectable truffles would make a lovely autumn gift since they’re so cute and poppable, but don’t feel guilty saving them all for yourself!

Ingredients:
2 cups dark chocolate chips (see note below recipe)
1/2 cup white chocolate chips
1/4 cup pumpkin puree
3/8 cups finely ground gingersnaps
3/8 cup graham cracker crumbs
1 tablespoon powdered sugar
1/8 teaspoon ground cinnamon
Pinch of orange zest (I used a dash of orange extract)
2 ounces cream cheese, softened
pretzel sticks (optional, for pops)
sprinkles or extra cookie crumbs (optional, for decoration)

Directions:
Make the pumpkin middles: In a large bowl, melt the 1/2 cup of white chocolate chips according to instructions on package (usually in the microwave on half power in about 30 second intervals, stirring between each). When the white chocolate is melted, let it cool down for a bit before adding the gingersnap crumbs, pumpkin, graham cracker crumbs, sugar, extract or zest, cinnamon, salt and cream cheese. Beat this mixture until it’s completely smooth. Cover it and refrigerate it for about 2 hours until it’s firm enough to roll into balls.

Roll ’em: Roll the pumpkin mixture into balls and place them on a wax-paper lined baking sheet. Refrigerate them for another hour to let them firm up. When you’re ready to make your truffles, melt your dark chocolate according to the instructions on package (usually in the microwave on half power in about 30 second intervals, stirring between each).

Insert the pretzel sticks: (Obviously skip this step if you’re making truffles and not pops!) Take a few pumpkin balls out of the fridge at a time. Poke the end of pretzel sticks into the melted chocolate and stick one in the center of each pumpkin ball, placing them back in the fridge to set. Repeat with all of the pumpkin balls.

Dip ’em: Take out a few pumpkin pops at at time (if you just inserted pretzel sticks, use the ones that have been chilling the longest) and carefully dip the balls into the melted chocolate while holding the pretzel, using a spoon to help you coat them. Gently bounce and turn the pop (while supporting the whole pretzel stick) to let the excess drain off. Sprinkle on some sprinkles, graham cracker crumbs, or gingersnap crumbs if desired, and then stick the pop into a foam block in the fridge to dry. Alternatively, if you’re making truffles instead of pops, use two forks to dip the pumpkin ball into the chocolate and pass it between the forks to drain the excess. Roll it carefully onto a sheet of wax paper in the fridge to dry. Chill the pops about an hour, until they’re completely dry and set.

NOTE ON COATING CAKE POPS OR TRUFFLES: When it comes to coating cake pops or truffles, there are several options. My favorite coating is usually Candiquik or candy melts, because they have a lovely texture when melted, dry quickly, and don't melt if they sit out of the fridge. In this recipe, though, I chose to use plain dark chocolate to coat my truffles. Though it takes longer to dry and can get melty in your hands even once it's set, I wanted the taste of rich dark chocolate to contrast with the pumpkin. My chocolate of choice is always Ghirardelli 60% cacao chips — they are seriously delectable.

OTHER TIPS:
– If you need to thin your chocolate or candy melts, stir in a scant spoonful of shortening until it’s melted. Add more as needed until desired consistency is reached.
– Don’t ever put water or water-based substances in chocolate or candy melts, or they’ll seize and become unusable.
– Keep your bowl of melted chocolate or candy melts inside of a larger bowl filled halfway with hot water. The heat from the water will keep your chocolate liquid while you’re dipping all of your truffles, so that you won’t have to keep reheating.
– See this video for a visual of how to dip cake pops and truffles.

If you liked this post, please:
Subscribe to Willow Bird Baking
Follow Willow Bird Baking on Twitter
Follow Willow Bird Baking on Facebook
Give this post a thumbs up on StumbleUpon


ShareOther ways to share this post with friends!

Naked Vegan Tacos with Corn Relish and Cilantro-Lime Slaw

Do not make naked vegan tacos while naked.

Yes, I know it’d be clever. I know it’d be a fun story to tell your friends (who would then promptly decline all future dinner invitations). But if one splatter of hot oil goes awry, all amusement you had hoped to gain from the experience will promptly disintegrate (along with patches of your skin, I’m just sayin’).


Make me with clothes on, please.

Also, do not assume Naked Vegan Tacos are made specifically for naked vegans. You may certainly eat these if you are a naked vegan, but clothed vegans are also welcome to partake. Even you omnivorous folks (clothed or otherwise) can enjoy this recipe if you’re so inclined.

This is an equal opportunity blog, y’all.

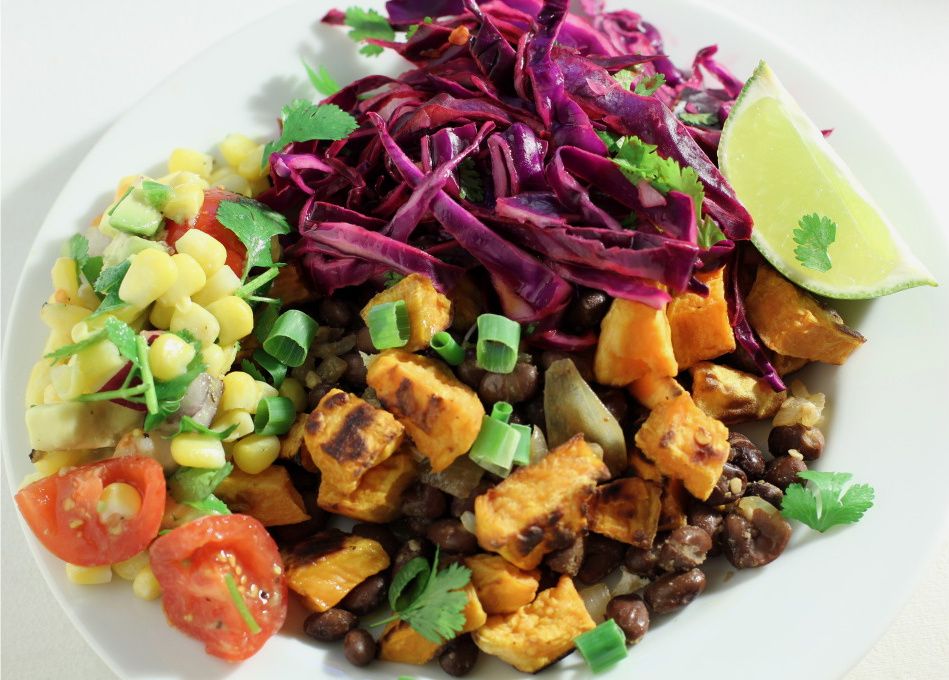
So why are Naked Vegan Tacos called Naked Vegan Tacos? ‘Cause they’re not wearing their taco shells! All the lovely stuffins of a vegan taco are included, but engineered for your fork instead of your hands.


Exposed.

This quick dinner was a take on sweet potato and black bean tacos, a dish I’ve had on my to-make list forever. Just as I expected, the sweetness of the roasted sweet potatoes was fantastic with the heat and cumin in the black beans. The cilantro-lime slaw added acid and crunch. The corn relish — boasting bright corn, tomatoes, and creamy hunks of avocado — cooled things off.

This huge, cheap, flavorful meal was so satisfying; I ate it over the course of 4 days and loved every bite, even though the avocados were oxidizing (i.e. turning all brown and creepy) after the first day.


Not vegan anymore.

Since it’s full of veggies, only 451 calories per serving, and includes components to make up complete proteins, I’m also going to decree that this meal is healthy (though I’m no expert). Serve it atop your favorite grain for an even more filling dinner. Heck, you could even go crazy and serve the tacos in flippin’ taco shells. You know, if you’re that kind of person.

What’s your favorite fresh vegetable?

Naked Vegan Tacos with Corn Relish and Cilantro-Lime Slaw


Recipe by: Adapted from Joy the Baker and Paula Deen
Yields: 4 servings

The focus of this meal is flavor. Roasted sweet potatoes sweeten, black beans with cumin bring the heat, cilantro-lime slaw adds crunch and acid, and a bright corn relish with creamy avocado and juicy tomatoes lends freshness. Filling my plate with all of these lovely bits and pieces and then spending my entire dinner creating various perfect “bites” was so satisfying — especially since it was also healthy.

Sweet Potatoes Ingredients:
2 sweet potatoes, peeled and cut into small cubes
1 tablespoon olive oil
salt and red chili flakes to taste
juice of 1 lime

Cilanto-Lime Slaw Ingredients:
2 heaping cups finely shredded cabbage
1/4 cup finely diced yellow onions
2 heaping tablespoons chopped cilantro
juice of 2 limes
salt and red chili flakes to taste

Black Beans Ingredients:
1 teaspoon olive oil
1/4 cup finely diced yellow onion
1 teaspoon ground cumin
1 (15-ounce) can black beans, drained and rinsed
juice of 1 lime

Corn Relish Ingredients:
2 cups cooked corn, fresh or frozen
1 avocado, cut into 1/2-inch cubes
1 pint cherry tomatoes, halved
1/2 cup finely diced red onion
1 teaspoon finely diced jalapeno (or to taste)
2 tablespoons olive oil
1 tablespoon fresh lime juice
1/4 cup chopped cilantro
1/4 teaspoon salt
1/4 teaspoon pepper

Optional Extras:
Fried or poached egg (obviously this makes it un-vegan)
salsa, fat free sour cream, green onions, fresh cilantro, limes

Directions:
Make sweet potatoes: Preheat oven to 400 degrees F. In a bowl, toss sweet potato cubes with oil, salt, chili flakes, and lime juice. Spread out on a baking sheet. Roast 40-45 minutes (stirring/flipping gently a couple of times during the process) or until tender and brown. Remove the potatoes from the oven and set aside.

Make Cilanto-Lime Slaw: While the potatoes are roasting, place shredded cabbage, onions, cilantro, lime juice, salt, and chili flakes in a bowl. Toss them together and set aside to let the cabbage soften.

Make Black Beans: Heat oil in a saucepan over medium-high heat. When the oil shimmers, add the onions and cook them for a few minutes until they’re soft and translucent. Add the cumin and garlic and toast these for a few seconds until fragrant. Finally, add the beans and lime juice and cook until they’re heated through.

Make the corn relish: Mix the corn, avocado, tomatoes, jalapenos, and onion in a large bowl. Whisk together the oil, lime juice, cilantro, salt, and pepper in a separate bowl. Pour it over the corn mixture and gently toss.

Assemble: Serve your naked tacos by heaping sweet potatoes and black beans on a place and garnishing with a big spoonful of cilantro-lime slaw and corn relish. Accompany your meal with a dollop of sour cream, fresh cilantro, chopped green onions, and salsa. If you fancy some added protein and aren’t vegan, you can top with a poached or over-easy fried egg.

If you liked this post, please:
Subscribe to Willow Bird Baking
Follow Willow Bird Baking on Twitter
Follow Willow Bird Baking on Facebook
Give this post a thumbs up on StumbleUpon


ShareOther ways to share this post with friends!

Pumpkin Pecan Streusel Breakfast Braid

Today is “Nerdy Day” at Woodlawn, the school where I work. All of my students are sporting taped glasses, suspenders, pants hitched up to their eyeballs, pocket protectors, and bow ties. They asked me why I didn’t dress up and I replied honestly, “What do you mean? I did.”

I don’t need a pocket protector to dress like a nerd. I’m naturally a nerd, through and through. Like I told my students: I love to read. I love to write. I love technology. I love obscure art. I love learning. I write essays for fun. I annotate the books I read in my spare time. I often ruminate on literary theory, politics, and feminism. I was born a nerd and I’ll die a nerd. Amen.

Ooh. Amen!

Such was my nerdiness as a child that I detested the outdoors and was a bit of a cave-dweller. Have you ever met a kid like that? My friends usually wanted to play some wildly active (often destructive) game outdoors: Who can run down this hill the fastest, completely oblivious of oncoming traffic? Who can climb to the very highest, most excruciatingly tenuous limb of this tree? Who wants to tumble pell-mell through snakes and venomous spiders in the woods?

Not me. I was a pale, chubby child who preferred to sit and read in an air-conditioned, artificially lit corner. I always bossily petitioned for an orderly indoor game: a board game, perhaps, or a polite game of snack-eating.

My aversion to the outdoors and to all athletic activity was particularly strong when it came to my dreaded elementary P.E. class. Far from “educating” me on much besides torture and pain, my Physical Education class struck fear deep into the air-conditioned depths of my heart. For one thing, we went outside all the time (much to the glee of most other students). For another, I was a klutz.

I remember standing on a dusty, grassless kickball field one hot day in May. My friend and I were watching the game cynically and whining about our circumstances. First off, we were hot, sweaty, and red-faced. Worse still was the fact that we were almost up to the plate. Unless we got another “out” — and fast! — we were going to have to try to kick the ball in front of all of our classmates (including all of the cute boys in class). We’d then have to walk back to the team in shame, enduring their fervent, angry shouts about our athletic ineptitude.

I suggested we try to imagine ourselves jumping into a cool swimming pool. The power of visualization and positive thinking, I noted to my friend, was immense. We both scrunched up our eyes and started to visualize with all our might. One of our teammates kicked the ball into the outfield. We visualized harder. Another teammate kicked the ball even farther. We visualized with all our might. Another teammate kicked the ball into the stratosphere.

We gave up with a sigh, and I walked up to the plate. Lame.

Kickball wasn’t the worst, though. The worst activity — the one that sent chills of absolute terror down my lazy little spine — was the mile run. What sort of sadist decided to try and make us run an entire mile?

Y’all, I don’t care if I were getting chased by a gigantic black bear. I don’t care if he were breathing down my neck with bloody bear fangs and breath that smelled of my impending doom. I don’t care if he were as hungry as a hippo with razor claws and rabies. If my only hope of salvation were to run a mile, I would plop myself down on a plate and sprinkle some salt and pepper on my head.

I hate running.

As it was, I did get chased, so to speak, by my rabid elementary P.E. teacher. She was fit as a fiddle and always barked encouragement at us from the sidelines as we dragged ourselves around the track. I remember talking to myself out loud (more nerd points?) as I struggled to put one foot in front of the other. My monologue went something like this: “If I just keep pushing myself, I’ll pass out and probably die. But then at least I’ll never have to do the mile run again. In fact, they’ll probably ban the mile run from schools everywhere. If I can just run hard enough to pass out, that can be my legacy: eliminating the mile run for the children of the future.”

If that seems twisted, you ought to have heard me at home the night before the mile run. I would literally plead with my parents to somehow break my toe. Stomp on it, perhaps? Run over it with the car, maybe? Does that sound drastic?

I figured a broken toe wouldn’t be that inconvenient, and it would heal before too long. In the meantime, though, my quality of life would increase a thousandfold as a result of missing the mile run. I lay in the floor and whined when my parents refused. Didn’t they realize they were consigning me to pass out in the middle of a gigantic dirt field? Didn’t they want to spare me all of my anguish? Didn’t they LOVE me?

I may be 27 years old now, and I may have started to appreciate the outdoors, but I still maintain that my fragile constitution was built for reading, writing, and recipes — not for running. In fact, I’d still prefer an injury to an athletic event. This coming Friday, at the end of Woodlawn’s spirit week, there’s a faculty vs. students soccer game, and you can imagine my utter terror when I was asked to participate. All of these years thinking I was finally free from that school field . . .

Thankfully, though (I’m so weird), the other day I was stretching and I felt something twist in my knee. My first thought was, “Ow!” followed immediately by, “Ooh, now I don’t have to play in the soccer game!” Some things never change.

I’ll settle for being a clumsy nerd. Some of my students are geniuses on the soccer field, some are geniuses on horseback, some are geniuses in ballet shoes, some are geniuses on stage. I’ll settle for being at home with a book, at home with words, and at home in the kitchen. We all have our talents, right?

In that spirit, I offer you not my soccer savvy (hahahahaha, for which you should be thankful) but my breakfast braid. I couldn’t wait to tell you about this recipe! I dreamed about posting this braid the entire time I was baking it, photographing it, transporting it to Raleigh, and eating it with Mike while watching past episodes of Parks and Recreation and drinking lots of milk.

What I most want to emphasize about this recipe is that it’s EASY! The first time I made a breakfast braid with this dough, I fell in love. It’s the perfect beginning pastry, since it doesn’t involve any yeast or rise time, or even much kneading. It’s not sticky or stubborn. If you’ve ever used canned crescent rolls, this dough is a textured a lot like that.

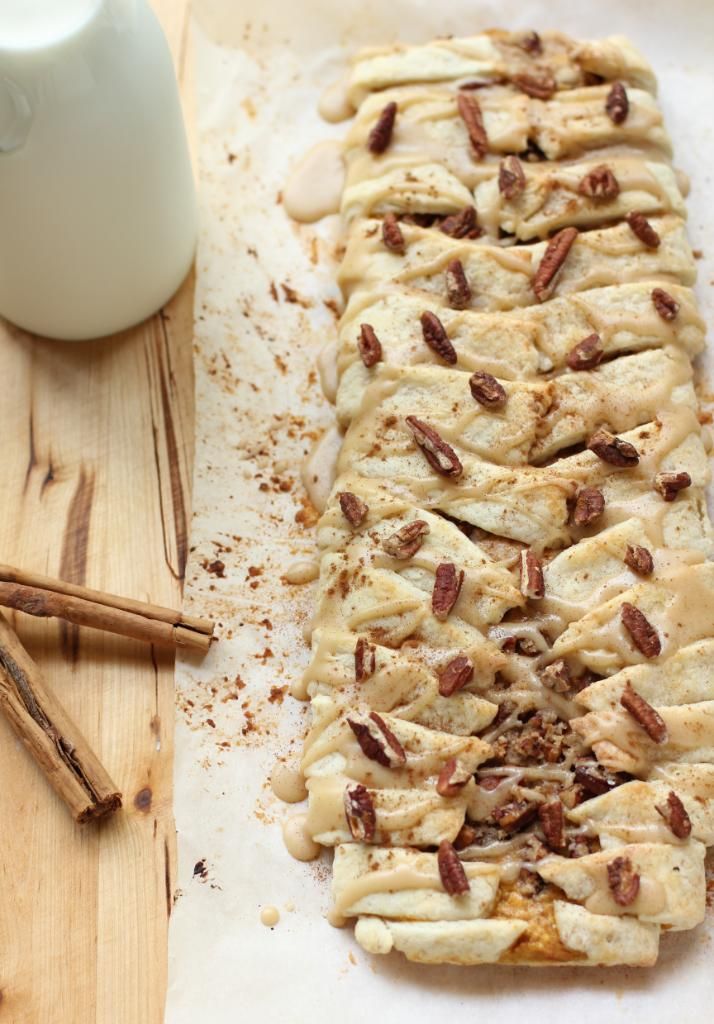
Naturally, in addition to being easy (SO EASY. DID I MENTION HOW EASY?), it was delectable. I call it a breakfast braid, but it’s an eat-anytime-you-can-possibly-shove-it-in-your-face braid. It’s a mind-blowing combination of flaky pastry, autumn pumpkin, cinnamon and spice, buttery streusel, toasted pecans, and a rich maple brown sugar glaze. I may not be able to kick a soccer ball, but I can make a mean pumpkin braid. That’s good enough for me.

Are you nerdy?

Pumpkin Pecan Streusel Breakfast Braid with Maple Brown Sugar Glaze


Recipe by: Willow Bird Baking. Inspired by The Luna Cafe, with glaze from Caitlin Cooks
Yield: About 4-5 servings of 2 slices each

In this breakfast braid, tender, flaky, almond-scented pastry envelops a delicious pumpkin pie custard topped with buttery cinnamon pecan streusel. An addictive maple brown sugar glaze and toasted pecans top the whole shebang, creating a perfect autumn breakfast (or dessert, or lunch, or dinner…!) This braid looks fancy, but don’t be fooled. It’s one of the easiest things I make. The dough is lovely to work with — it doesn’t need to rise, barely needs any kneading, and isn’t sticky or finicky. I’m always amazed that such gorgeous results can be achieved with such little effort.

Easy Dough Ingredients:
2 cups all-purpose flour, sifted
1 teaspoon baking powder
1/2 teaspoon salt
1/2 cup unsalted butter, cold and cut into cubes
3 ounces cream cheese, cold and cut into cubes
1/2 cup milk, minus 1/2 teaspoon
1/2 teaspoon almond extract

Pumpkin Pie Filling Ingredients:
(this makes a little more filling than you need)
6 ounces cream cheese, softened
3/8 cup sugar
3/4 cup pumpkin puree
3/4 teaspoon vanilla extract
1 egg
1 1/8 teaspoons cinnamon*
1/4 teaspoon nutmeg*
1/4 teaspoon ginger*
1/8 teaspoon allspice*
*You could probably substitute a teaspoon or so of pumpkin pie spices for these.

Pecan Streusel Ingredients:
1/8 cup firmly packed light brown sugar
1/8 cup all-purpose flour
1/2 teaspoon cinnamon
1 tablespoon cold butter
1/2 cup chopped pecans

Maple Brown Sugar Glaze Ingredients:
1 tablespoon butter
2 tablespoons milk
1/4 cup brown sugar
1 tablespoon real maple syrup
pinch salt
3/4 – 1 cup powdered sugar
cinnamon for sprinkling

Directions:
NOTE: To prepare this braid in advance, complete all steps and assemble the braid but do not bake. Cover the braid on its parchment lined baking sheet with plastic wrap and refrigerate overnight. Set out in the morning as you preheat the oven and then bake as usual.

Preheat the oven to 350 degrees F.

Make the creamy pumpkin pie filling. In your electric mixer, or with a hand mixer, beat the cream cheese until smooth. Add the sugar and beat until fluffy and smooth. Add the pumpkin, egg, and vanilla extract, cinnamon, nutmeg, ginger, and allspice and mix until combined. Set in fridge while you make your braid.

Toast your pecans. Spread them out in a single layer on a baking sheet and toast for about 6 minutes or until fragrant, stirring about halfway through the cook time. Transfer nuts to a plate to cool. Raise oven temperature to 425 degrees F.

Make your pastry dough. In the bowl of a food processor, mix the flour, baking powder, and salt. Add the cream cheese and butter into the flour mixture and pulse to cut the fat into the flour (about 6 pulses). Add the milk and almond extract and blend into a loose dough.

Turn the dough onto a sheet of lightly-floured parchment paper and knead very lightly for just 4-5 strokes (be careful not to overwork the dough or it’ll be tough! Don’t worry about getting it smooth — just knead for these few strokes and let it stay a little rough.)

Very lightly flour the top of the dough and place another sheet of parchment paper on top. Between two sheets of parchment paper, roll the dough to an 10- by 12-inch rectangle (I lift the paper off every now and then and flip the dough and repeat on the other side, to ensure the dough isn’t sticking). Remove the top sheet of parchment and discard. Measure and mark the dough lengthwise into thirds. Glop your creamy pumpkin pie filling down the middle third of the dough — try to keep your filling about 1/4 inch from the mark on both sides. I piled it up a bit (not so much that it was overflowing, but plenty!)

Make the streusel topping. Combine the flour and brown sugar in a medium bowl and using two knives or a pastry cutter, cut in the butter until you have crumbly streusel. Mix in 1/4 cup of toasted pecans (save the rest for decorating the finished braid). Sprinkle streusel over top of pumpkin mixture in center of dough. Really pile it on!

Continue assembling the braid (see photos at the bottom of this recipe, which show the process of marking and assembling a raspberry almond braid, for guidance). Make diagonal cuts at 1-inch intervals on each the long sides. Do not cut into the center pumpkin-filled area. Fold strips, first one from one side and then one from the other side in a rotating fashion, over the filling. It will now resemble a braid. Don’t worry if it doesn’t completely hide your filling — it’s actually nice when the filling is peeking out. Use the sheet of parchment to carefully transfer your braid to a baking sheet (at this point, you can brush the pastry with a mixture of 1 beaten egg and a teaspoon of water if you want it darker than mine. I didn’t bother). Bake in the 425 degree oven for 12-15 minutes, until the dough is cooked through, the pumpkin filling is set, and the top is lightly browned. Let the braid cool slightly while you make your glaze.

Make the Maple Brown Sugar Glaze. Combine the butter and milk in a small saucepan over medium heat. When the butter melts, whisk in the brown sugar, syrup, and salt, stirring until the brown sugar melts. Remove the pan from the heat and whisk in the powdered sugar, starting with 3/4 cup and adding more to thicken per your preference (taste as you go to ensure you don’t oversweeten). Drizzle the glaze over the top of your braid. Sprinkle the braid with toasted pecans and a dusting of cinnamon. Serve immediately. Refrigerate leftovers in an airtight container and microwave for about 20 seconds to serve.
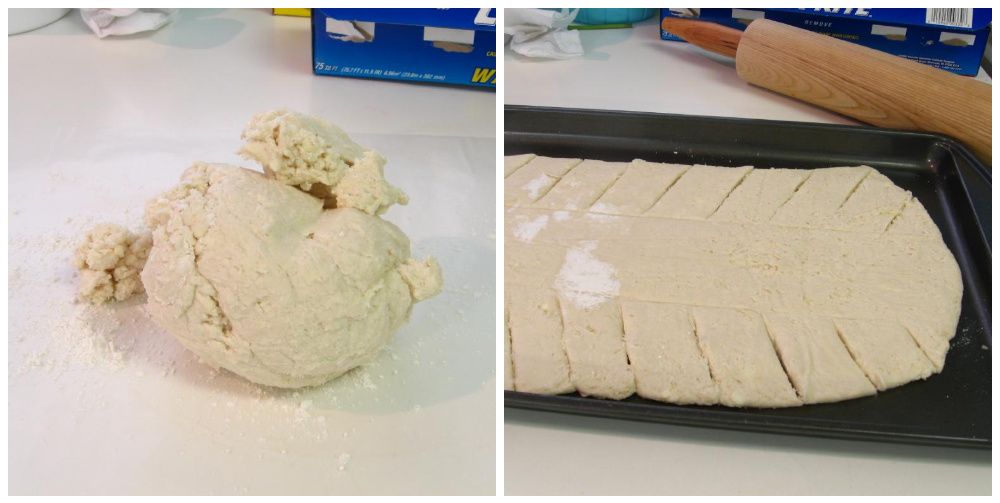
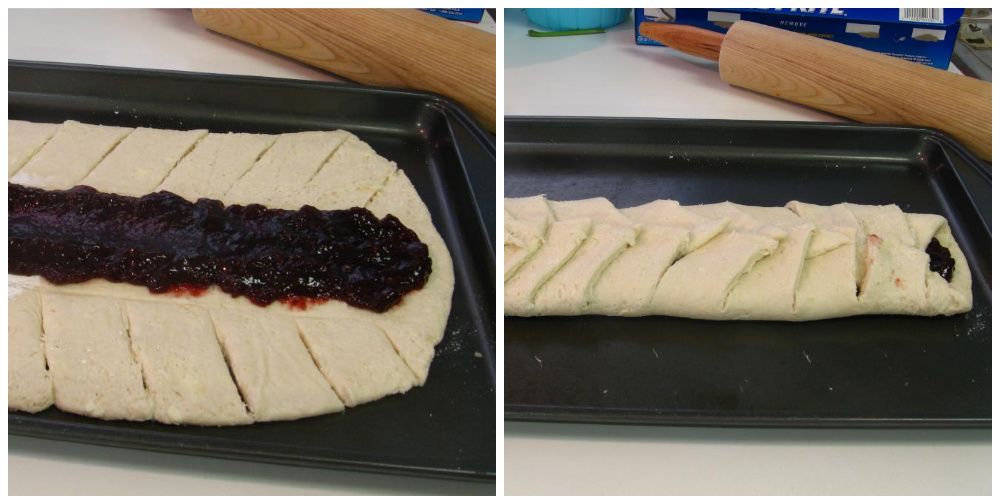

Example of how to cut and assemble braid.

Other breakfast braids you’ll love:
Raspberry Almond Breakfast Braid
Blueberry Cream Cheese Almond Breakfast Braid

If you liked this post, please:
Subscribe to Willow Bird Baking
Follow Willow Bird Baking on Twitter
Follow Willow Bird Baking on Facebook
Give this post a thumbs up on StumbleUpon


ShareOther ways to share this post with friends!
1 47 48 49 50 51 69