
This month’s Daring Bakers challenge was spectacular, at least in part because I felt like a cross between Indiana Jones and MacGyver at various points in the process. Minus the archaeological skillz and/or mullet.
Picture this: a flaming-hot, caramel-dipped cream puff goes flying out of my hands. I instinctively reach up to stop its trajectory across my kitchen, only to be reminded angrily by my neurons that burning sugar is HOOOOTTTTTT (imagine this being screamed in the highest-pitched neuronal voice you can conjure up). I bat the cream puff into the sink (with some panache, I like to think) and plunge my fingers into the nearby bowl of ice water, saving my skin by mere milliseconds. Adrenaline-pumpin’ music plays in the background as I do a double backflip out of the kitchen for a bandaid. Okay, I made that whole last part up. I’m a pretty horrid gymnast.
There were several flyin’ flamin’ cream puffs, though. Which would make a good band name, if you’re in the market for one. Seriously, hot sugar, architecture, and time sensitivity put the “daring” in this Daring Bakers challenge, thus providing me with a comeback for Facebook friends who scoff at my daring baking status updates:

Okay, that last part might not help my case.
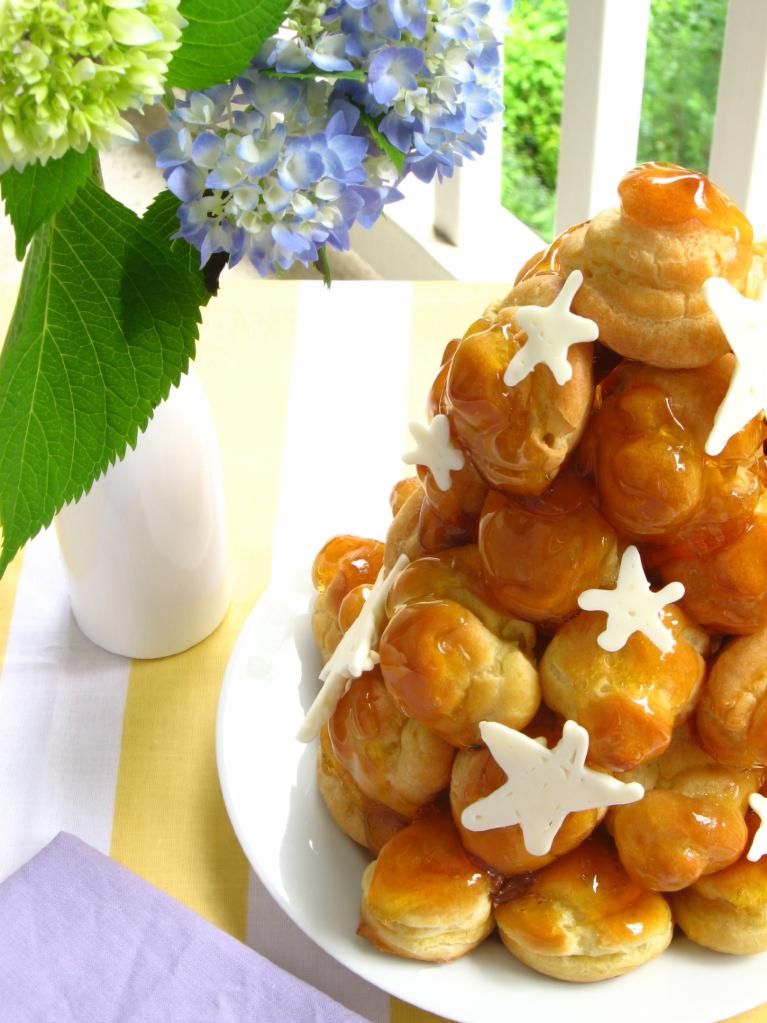
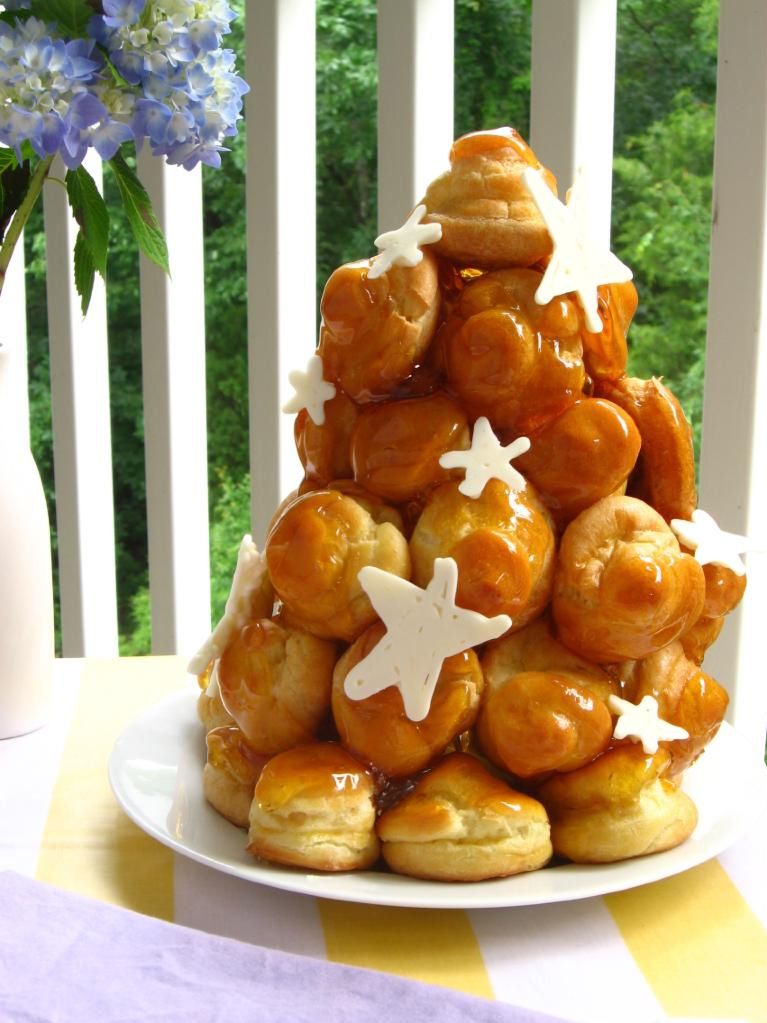
Anyway, I bet you’re dying to know . . . what exactly is this scary beast of an edible sculpture? The May 2010 Daring Bakers’ challenge was hosted by Cat of Little Miss Cupcake. Cat challenged everyone to make a piece montée, or croquembouche, based on recipes from Peter Kump’s Baking School in Manhattan and Nick Malgieri.
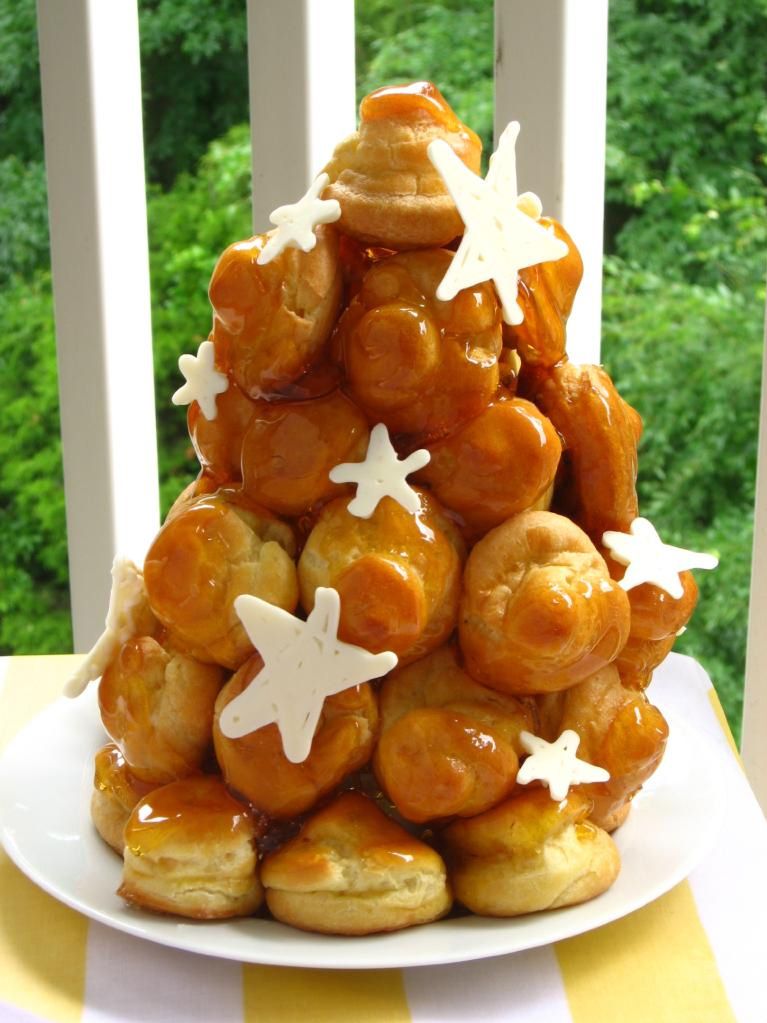
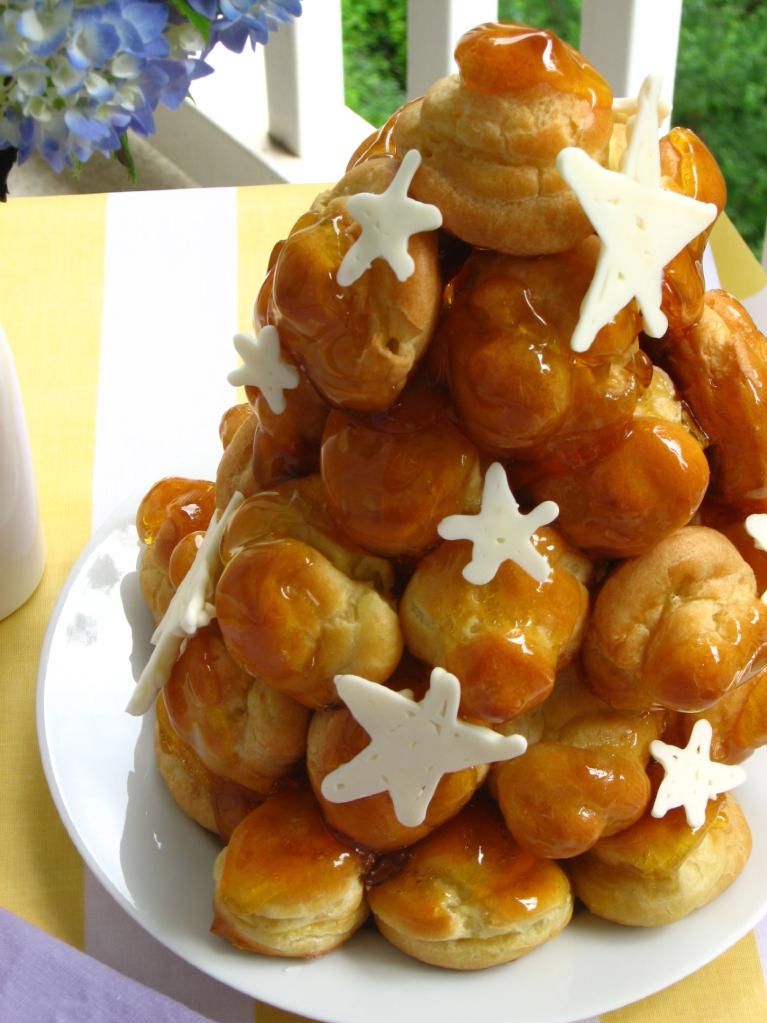
Croquembouche is literally translated, “crunch in mouth,” and incidentally, is a fun word to sing in various overly-dramatic ways while you cook. Besides being a pretty cool word, it’s a pretty cool party trick. You bake up some buttery, light, delectable puff shells that are naturally hollow (so convenient). You resist eating too many of these straight from the oven, let them cool, and stuff them plumb full of light, blissful caramel cream. You then use a hard caramel glaze as mortar to build them into a lovely cone, from which your guests can gingerly pluck their dessert.
This particular combination — the caramel cream and caramel glaze — was heavenly, especially the cream. I’m having fits wanting to stuff the caramel cream into all sorts of confections — cupcakes, tarts, other pastries, my mouth with a spoon. It has a buttery, silky caramel flavor.
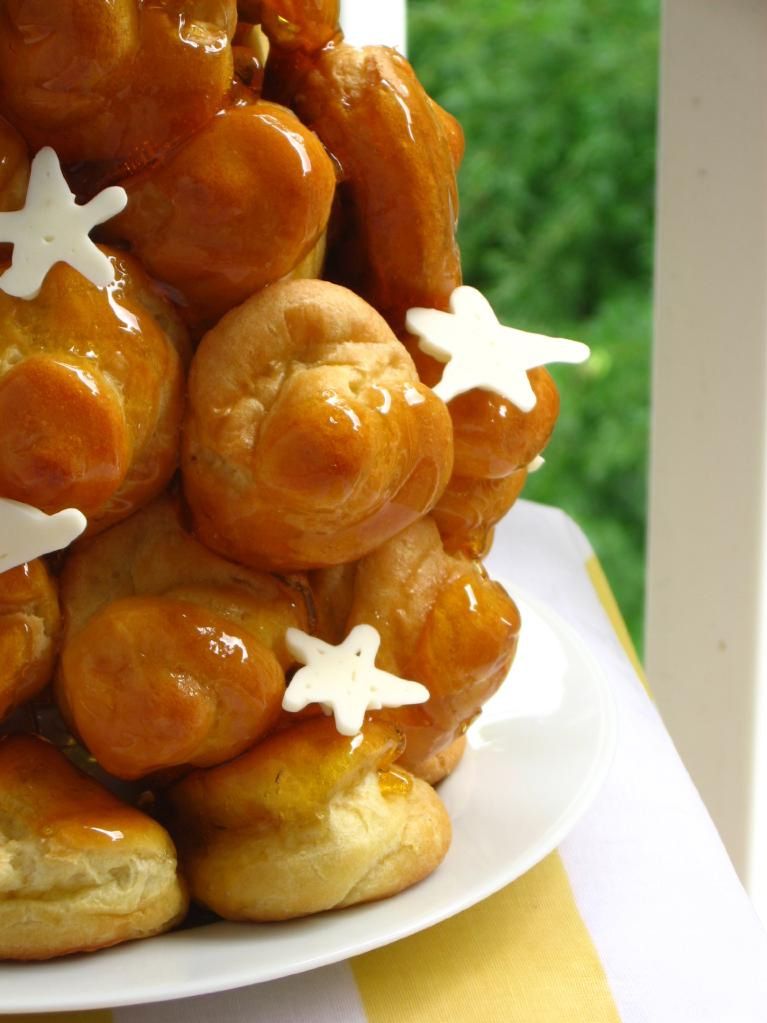
As for the caramel glaze, I’m downright torn as to whether to recommend it to you or not. On one hand, it became very brittle and, as it cooled, left a thicker and thicker layer on the puffs I was dipping. This was fine, except that when it hardened, it was sometimes sharp to bite into.
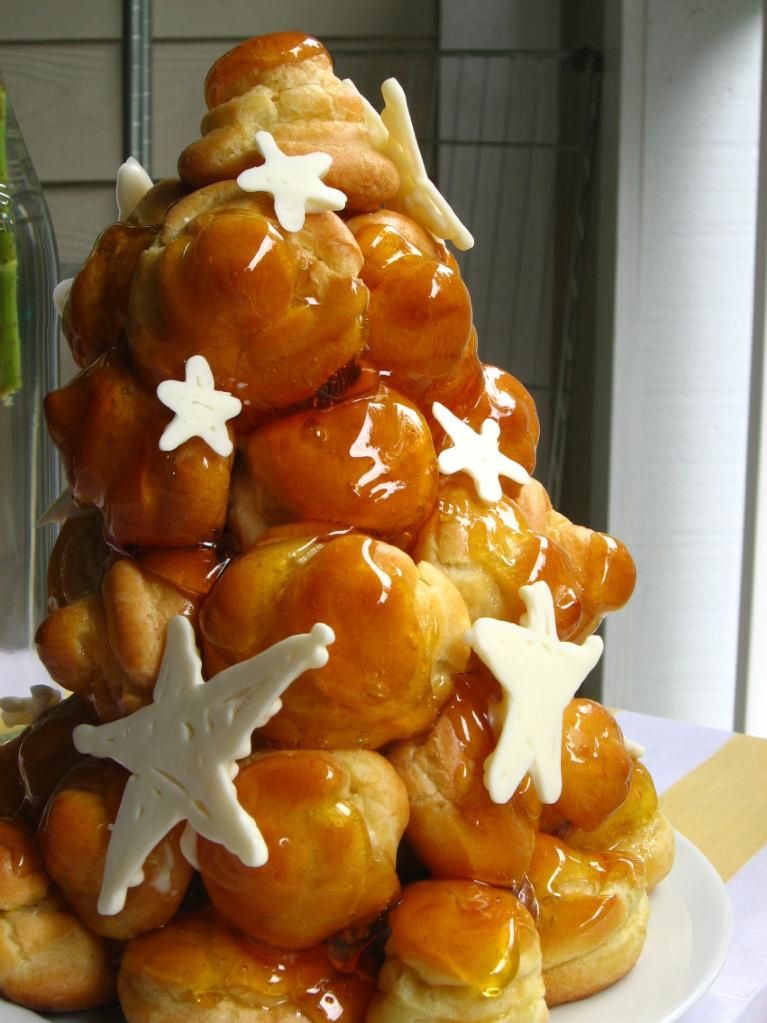
On the other hand, as I ate over half of this croquembouche all by my lonesome (did I just admit that?), I fell in love with the incredible deliciousness of it. And though you can use melted chocolate to assemble your ‘bouche, I have a feeling this caramel was a much better mortar. It hardened in mere seconds and kept the puffs nearly immobile, creating a sound structure. So, I’m tempted to say . . . just make it and chew carefully? Is that weird? Feel free to substitute if you’re a cautious eater.
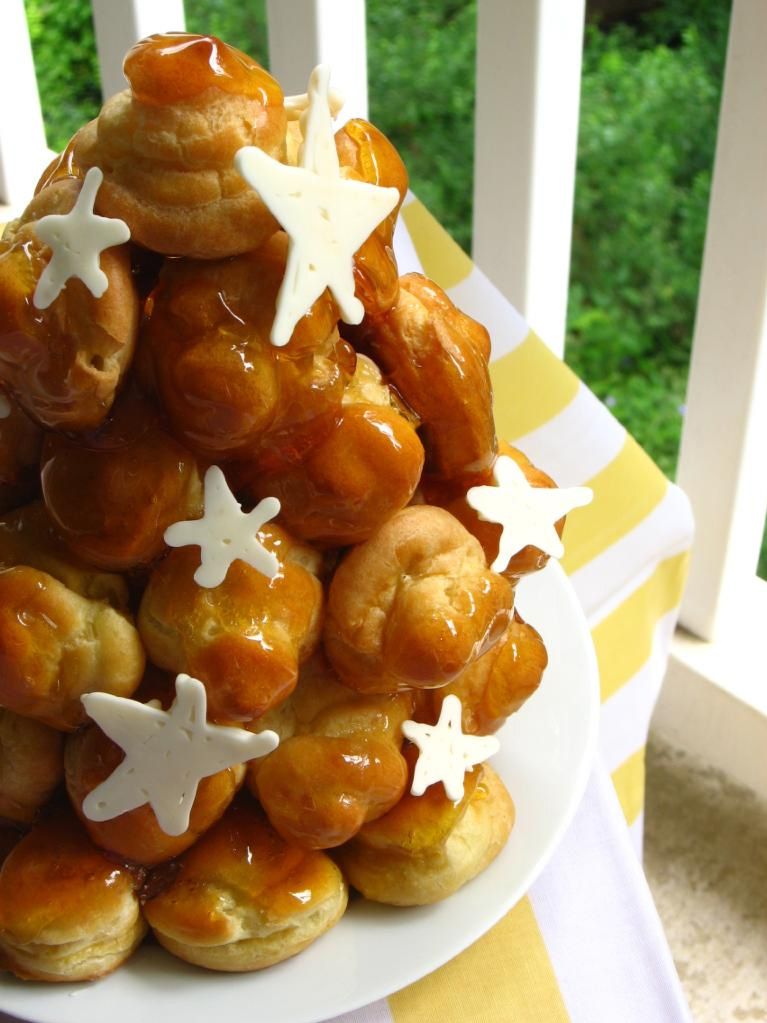
The cream puffs with a thin coating of caramel did have a pleasant crunch instead of sharp shards, so another tip is to dip puffs very quickly while your caramel is fluid and the excess can drain off. Then, instead of reheating the caramel if it gets thick (which wasn’t that effective for me), I might make a new batch. You could work in half-batches of caramel to reduce waste.
Don’t be nervous because this recipe seems fussy. The actual cream puffs and tower were surprisingly simple to create, and if you have trouble with caramel, the addition of sugar temperatures in the recipe below should help. Activate your inner-architect/daredevil, impress your friends, and enjoy your scrumptious structure!
Caramel Cream Croquembouche
Recipe by: Adapted from Peter Kump, Nick Malgieri (puffs), and Martha Stewart (caramel cream and glaze)
Yields: a tower of about 51 puffs
Pâte à Choux (Puffs) Ingredients:
1 1/8 cups water
9 tablespoons unsalted butter
3/8 teaspoons salt
1.5 tablespoons sugar
1.5 cups all-purpose flour
6 large eggs
Egg wash (1 egg yolk and 1/2 cup heavy cream, lightly beaten)
Caramel Cream Filling Ingredients:
3/4 cup sugar
1/8 cup water
1 cup heavy cream
1/8 cup creme fraiche or sour cream
1/4 teaspoon pure vanilla extract
Pinch of coarse salt
Caramel Glaze Ingredients:*
2 cups sugar
4 tablespoons water
2 teaspoons fresh lemon juice
white chocolate bark for decorating (optional)
Directions: Make the caramel cream at least a few hours ahead of time to give it a chance to chill before its final step (I made mine 3 days in advance). Prepare an ice-water bath. Heat sugar and water in a medium saucepan over medium-high heat until mixture boils and sugar dissolves, washing down sides of pan often with a wet pastry brush to prevent crystals from forming. Reduce heat to medium, and cook until sugar turns dark amber (about 345 degrees on a candy thermometer), 5 to 7 minutes more. Immediately remove from heat, and carefully whisk in 1/2 cup cream. Return to medium heat, and cook until sugar melts completely and mixture boils.
Remove from heat, and pour into a bowl set in ice-water bath. Let caramel cool, stirring often, for 10 minutes. Stir in creme fraiche, vanilla, and salt. Cover and refrigerate at least 2 hours or up to 5 days.
Just before you are ready to fill the cream puffs, beat remaining 1/2 cup cream until stiff peaks form. Gently fold into caramel sauce, using a rubber spatula, until incorporated. Whisk to thicken, about 1 minute.
Make the pâte à choux. Combine water, butter, salt and sugar in a saucepan over medium heat. Bring to a boil and stir occasionally. At boil, remove from heat and sift in the flour, stirring to combine completely.
Return to heat and cook, stirring constantly until the batter dries slightly and begins to pull away from the sides of the pan. Transfer to a bowl and stir with a wooden spoon 1 minute to cool slightly.
Add 1 egg. The batter will appear loose and shiny. As you stir, the batter will become dry-looking like lightly buttered mashed potatoes. It is at this point that you will add in the next egg. Repeat until you have incorporated all the eggs.
Pipe the batter using a pastry bag and a plain tip. Pipe choux about 1 inch-part in the baking sheets. Choux should be about 1 inch high about 1 inch wide. Using a clean finger dipped in hot water, gently press down on any tips that have formed on the top of choux when piping. You want them to retain their ball shape, but be smoothly curved on top. Brush tops with egg wash while trying not to drip the wash down the puffs onto the pan (which could somewhat inhibit rise).
Bake the choux at 425 degrees F until well-puffed and turning lightly golden in color, about 10 minutes. Lower the temperature to 350 degrees F and continue baking until well-colored and dry, about 20 minutes more. Remove to a rack and cool (tip from a pro: poke each puff with a toothpick while cooling to release the steam inside. It shouldn’t cause your cream to leak, but will help the puffs stay crisp). Can be stored in a airtight box overnight, but I recommend, if you aren’t using them right away to create your croquembouche, that you freeze them. When you’re ready to use them, bake them at 350 degrees F for 5-6 minutes to refresh and recrisp them. When puffs are cool, use a thin, plain tip to fill them generously with caramel cream.
Prepare the plate your croquembouche will be assembled on with wax paper around the edges to catch excess caramel. Set up your work area: two baking sheets covered in parchment for the caramel-covered puffs to dry on, an ice-water bath to stop the caramel from cooking and for any burnt fingers. Once you’re set up, you’re ready to begin assembly.
Make the caramel glaze: Prepare an ice-water bath. Bring all ingredients to a boil in a small saucepan over medium heat, washing down sides of pan often with a wet pastry brush to prevent crystals from forming. Cook, without stirring, until sugar dissolves, 5 to 6 minutes. Raise heat to high, and cook, swirling pan to color evenly, until syrup is amber (about 325 on a candy thermometer), about 5 minutes. Remove caramel from heat, and set bottom of pan in ice-water bath for a few seconds to stop the cooking. Use immediately, working as quickly as possible.*
Assembly: Dip top half of each filled puff into caramel (be careful not to burn your fingers), letting excess drip back into pan. Transfer to a parchment-lined baking sheet. Let stand until caramel is set.
Carefully dip bottom half of 1 puff into caramel, letting excess drip into pan. Transfer puff, hot caramel side down, to a serving platter. Repeat with more puffs, forming a connected ring as you work. Repeat with more puffs, layering rings to form a pyramid, using 45 or 50 puffs total. (If the caramel begins to harden, reheat briefly over low heat.)*
*Note: Reheating the caramel did not work so well for me, and even qorking quickly wasn’t quickly enough — and as mentioned above, when the caramel cools, it settles thickly on the puff and can become a brittle hazard. Thus, you may want to make a half batch of the caramel at a time, starting over if your caramel gets cool/thick, so that you can ensure a thin coating on each puff.

Enjoy!
P.S. Don’t forget to go see the stupendous structures of other Daring Bakers!
41 Comments on Caramel Cream Croquembouche
2Pingbacks & Trackbacks on Caramel Cream Croquembouche
-
[…] Recipe Index Caramel Cream Croquembouche […]
-
[…] my last croquembouche, I used caramel as the building glue. It stuck a lot quicker and was easier to work with in that […]
Angela
May 27, 2010 at 12:54 am (16 years ago)Great job! And you were more Daring than me – I was scared to try the caramel glaze with my 2 year-old under my feet so went with the chocolate! Hope your burns heal quickly – there were so many casualties this month!
chef_d
May 27, 2010 at 1:06 am (16 years ago)It looks gorgeous with those white chocolate (?) stars. And I was entertained reading your adventures with it. Great job!
Karen
May 27, 2010 at 1:52 am (16 years ago)Damn those infernal hot flying cream puffs! And believe me, nobody’s judging if you want to eat a croquembouche by yourself 🙂
Ellie (Almost Bourdain)
May 27, 2010 at 2:02 am (16 years ago)Very nicely done! love it!
Linda V
May 27, 2010 at 2:11 am (16 years ago)I really love caramel, bet the filling was delicious, and the puffs are such a lovely golden colour. They look so light and fluffy I bet it was pretty easy to eat a few (or more).
wic
May 27, 2010 at 5:12 am (16 years ago)oh wow it looks stunning but not only do I love your version of this months challenge I adore your post. you make me smile even if my finger is still hurting.
Renata
May 27, 2010 at 5:47 am (16 years ago)Your Pièce Montée looks so light and the chocolate stars are charming!
Emma @ Poires au Chocolat
May 27, 2010 at 8:04 am (16 years ago)Looks great! I love the story about the flying puffs 🙂
The chocolate stars are awesome too.
Shelley
May 27, 2010 at 8:38 am (16 years ago)I loved reading about your adventures in croquembouche-making! Sounds quite daring. I almost did caramel cream, too – it sounds so delicious. And awesome work with the caramel glaze, too. Your pictures look beautiful. Wonderful work on the challenge!
Natalie
May 27, 2010 at 9:31 am (16 years ago)Mmmm wow this looks so amazingly good, your caramel glaze on the choux buns looks heavenly!
Maranda
May 27, 2010 at 10:09 am (16 years ago)Oh my gosh this is amazing! It looks so delicious and beautiful! I might have to do one of these just because! Oh wow. Thanks for sharing. It’s gorgeous and I want to eat it right off my screen.
I hope your fingers get back to normal soon. 🙂
Julie
May 27, 2010 at 10:38 am (16 years ago)Thank you, Maranda!! You should definitely make one — a lot of bang for your buck in this recipe, in that it’s not as hard as it ends up LOOKING like it was 🙂 Love recipes like that!
Jennifer M.
May 27, 2010 at 11:40 am (16 years ago)Wow! Quite impressive, Julie! I always enjoy your baking adventures. Bravo!
Julie
May 27, 2010 at 3:01 pm (16 years ago)Thank you, Jennifer!!
Cristine
May 27, 2010 at 2:56 pm (16 years ago)Your croquembouche looks beautiful!
outoftheoven
May 27, 2010 at 4:45 pm (16 years ago)Love those stars! Looks fantastic!
Stella
May 27, 2010 at 6:26 pm (16 years ago)Oh no. I followed the link on the bakebakebake post you made and now I’m freaking out. I feel the sudden urge to bake. And eat.
In other words, your stuff is amazing. I am going to try to make eggy in a basket this weekend thanks to you! (I’d actually been looking for a recipe for quite a while, so thanks!)
I will definitely stay tuned to your blog. 🙂
Ruth H.
May 27, 2010 at 8:00 pm (16 years ago)Oh my goodness… Now I want caramel cream!! Your croquembouche is beautiful, and it was so much fun reading about the adventures of making it! This looks almost too good to eat… almost…!
Maybelles mom
May 27, 2010 at 8:09 pm (16 years ago)Love the story about the caramel. Looks great
deeba
May 27, 2010 at 9:45 pm (16 years ago)Oh your stack is heavenly indeed, and the pictures gorgeous! Beautifully done on the challenge Julie! They know not who do not bake!!
Barbara Bakes
May 27, 2010 at 10:03 pm (16 years ago)Another fun post to read! A gorgeous, delicious looking tower! I have to admit my brain didn’t kick in quiet as quickly as yours. When I got hot caramel on my finger I put it in my mouth and burnt my tongue too.
procrastinatingbaker
May 28, 2010 at 6:21 am (16 years ago)This looks sensational, and the caramel filling sounds delicious. Nice photos too! Out of curiousity, what is the plant in the background?
Julie
May 28, 2010 at 6:49 am (16 years ago)Thank you! Those are hydrangeas my mom clipped for me from her gigantic hydrangea bush.
Meeta
May 28, 2010 at 8:23 am (16 years ago)amazing! this looks gorgeous i especially like the stars!
art and lemons
May 28, 2010 at 11:51 am (16 years ago)Great story of your baking adventures, which turned out beautifully in the end!
Wolf
May 28, 2010 at 1:25 pm (16 years ago)I get all my snarky comments on LJ.}:/ Most people on my Facebook know better by know.}:P
bakingaddict
May 28, 2010 at 5:33 pm (16 years ago)It looks really beautiful. Love the little stars
whatnomints
May 28, 2010 at 9:38 pm (16 years ago)That looks delicious!! It seems a bit more than my baking skill level, but I was cracking up at your gymnast flip out of the kitchen 🙂
Jenni
May 28, 2010 at 10:21 pm (16 years ago)Great job Julie! Your tower looks heavenly!! I am glad to hear that someone else had trouble with the caramel, but your tower looks significantly prettier than mine turned out!
marcellina
May 29, 2010 at 2:09 am (16 years ago)Caramel cream filling! YUM! That sounds absolutely delicious. Yes, I could probably eat half of it myself. Great Work!
Monica H
May 29, 2010 at 6:27 pm (16 years ago)This has to be one of the prettiest croquembouches I’ve seen so far. It’s so tall and perfectly golden- well done.
Natalie (The Sweets Life)
May 29, 2010 at 9:32 pm (16 years ago)hahaa love the facebook post and responses 🙂
you daring bakers sure impress me–especially this time around! yours looks lovely!
Patri
May 30, 2010 at 6:07 pm (16 years ago)Your croquembouche looks so pretty 🙂 Well done!
Lorraine @ Not Quite Nigella
May 30, 2010 at 8:52 pm (16 years ago)Gorgeous work Julie! Hehe I know what you mean, when you risk burning fingers and all sorts of things (I had caramel strands on my top at one stage) then it’s definitely Daring with a capital D! 😛
lisamichele
June 1, 2010 at 5:51 am (16 years ago)Not only is your croquembouche stunning, but seeing that those stars are made of white chocolate and your profiteroles are filled with caramel cream, has made me want to date it..ok..eat it..whatever..lol Beautiful job!
Megan
June 1, 2010 at 7:44 pm (16 years ago)Julie, this is beautiful! I love croquembouche.
Heather
September 10, 2010 at 5:51 pm (16 years ago)So, out of curiosity, after you filled and assembled the tower, how long will it stay delicious and (dare I say it) not soggy? I’ve half a mind to attempt this for a potluck I’m attending tomorrow, but it will need to last several hours (presuming that it’s not completely consumed on sight, and that I don’t eat it all myself). Any thoughts or suggestions? Thank you!
Julie
September 10, 2010 at 10:50 pm (16 years ago)Hi Heather! There are a few issues to consider. Most suggest serving right away, but honestly, I enjoyed it after a few hours in the fridge just fine. The caramel was crunchy and hard when first made, and softer (and honestly, more edible — not as sharp) after being in the fridge. It wasn’t soggy, though. There’s always a chance my taste is wonky, but I thought it was just fine.
Sitting out might be tougher, because the cream might not last more than a couple of hours at room temperature.
ayudiahrespatih
July 26, 2015 at 7:37 pm (11 years ago)Its awsome… And i love the addition off white chocollate… 🙂