marshmallow

No-Bake Fruity Cereal Treat Cupfakes

I’m deep in the trenches: sprinkles flying at my face, frosting smeared up to my elbows, dried batter caked on every surface. No, I’m not on the set of Cupcake Wars (though producers should feel free to contact me; I’ll bring my A-game).

I’m in the middle of Cupcake Capers.


naked cupfakes!

Cupcake Capers is a 5-day camp where I teach campers to bake, fill, and frost cupcakes. You have to admit, cupcake camp beats pup tents and mosquitoes.

Each year at Cupcake Capers, I’m unsurprised by how much kids love cupcakes, oreos, chocolate chips, whipped cream, and sprinkles. That’s normal. I am surprised, however, by how weird kids are. I should probably be used to this by now — after all, I’m a middle school teacher — but I’m still continually impressed.

Last year, if you’ll remember, two of my kiddos created a pet powdered sugar pile. They religiously guarded it, giving it a wide berth when wiping the counters. They used their fingers to scrawl threatening messages to anyone who dared clean it up. They drew a little face on it à la Tom Hanks’s friend Wilson in the movie Castaway.

There weren’t any powdered sugar piles this year, but there was still plenty of weirdness. This time around it all started with an egg and a sharpie. One of my campers was intent on using said marker to give “Mr. Egg” a face. Despite her pleading, I wouldn’t let her do so before we cracked it for sanitary reasons . . . so she gave the empty eggshell a face afterwards, instead. A surprised face, naturally, because he was shocked at having been split open so unceremoniously.

This was strange enough, but the next day she and her friend showed up to cupcake camp with Mr. and Mrs. Lemon. You can probably guess that these were two lemons with faces drawn on in sharpie. Mrs. Lemon has a bow. Oh, but you’re probably pronouncing their names wrong: it’s lem-OHN, with a French accent.

Yeah. These kids are strange.

Strange in the best way, though. So far (besides indulging in their food anthropomorphization), we’ve made Fauxstess Cupcakes, Creamsicle Cupcakes, Cookie Dough Cupcakes, and Red Velvet Cupcakes. The campers are baking fiends! Every day they get tons better at mixing, filling, and piping frosting onto cupcakes.

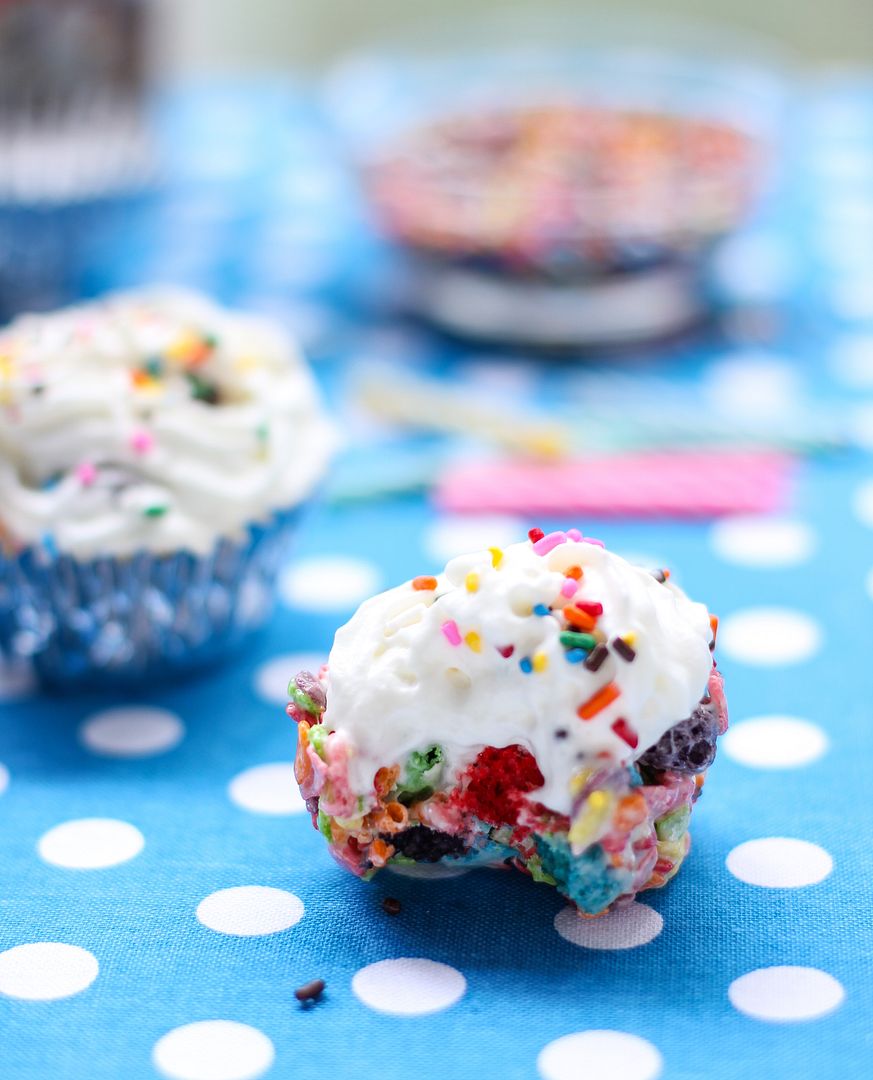
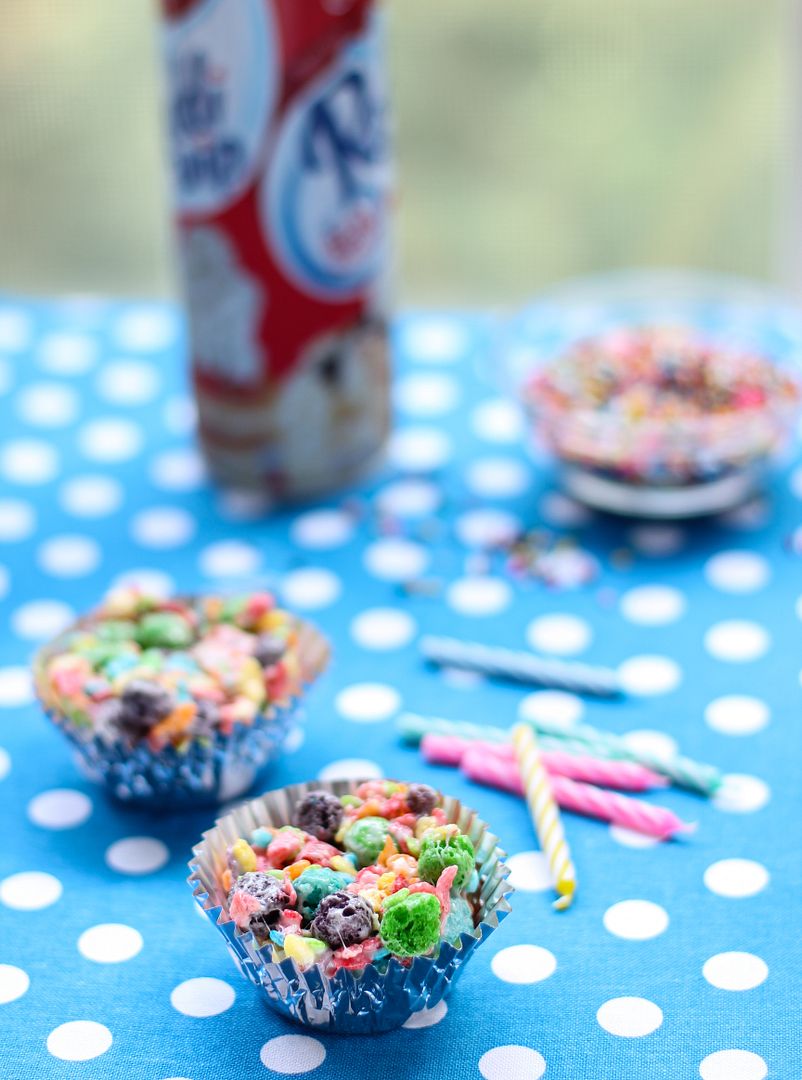
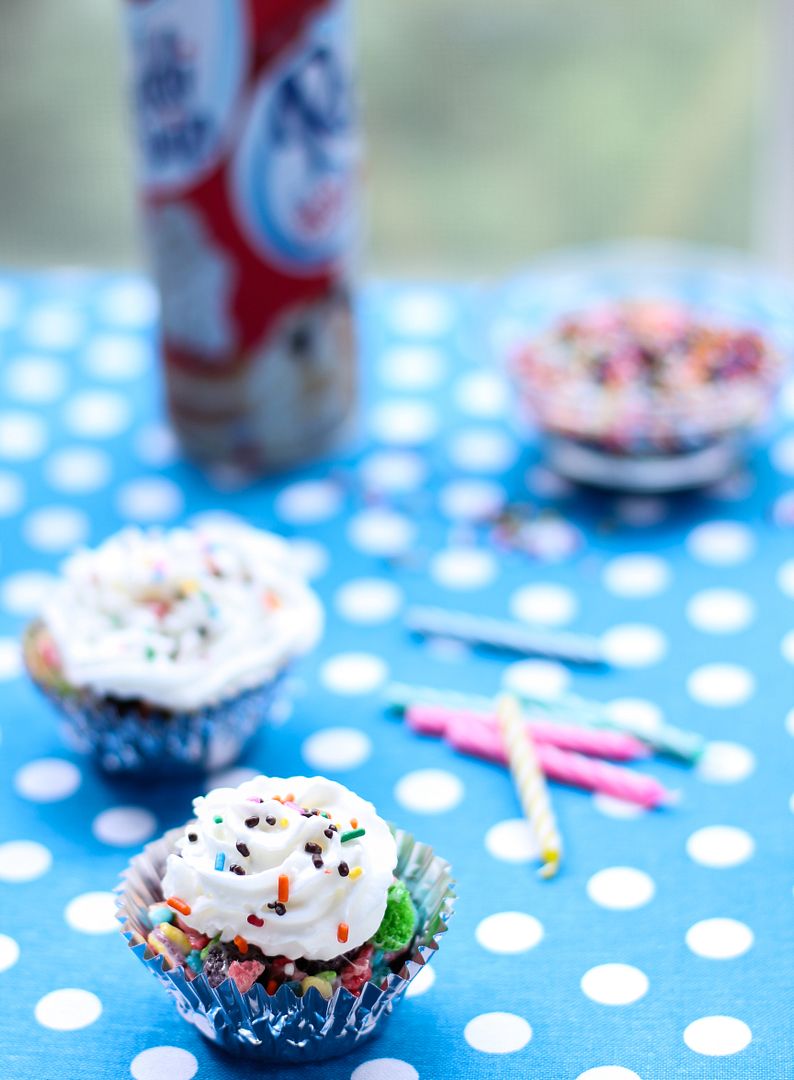
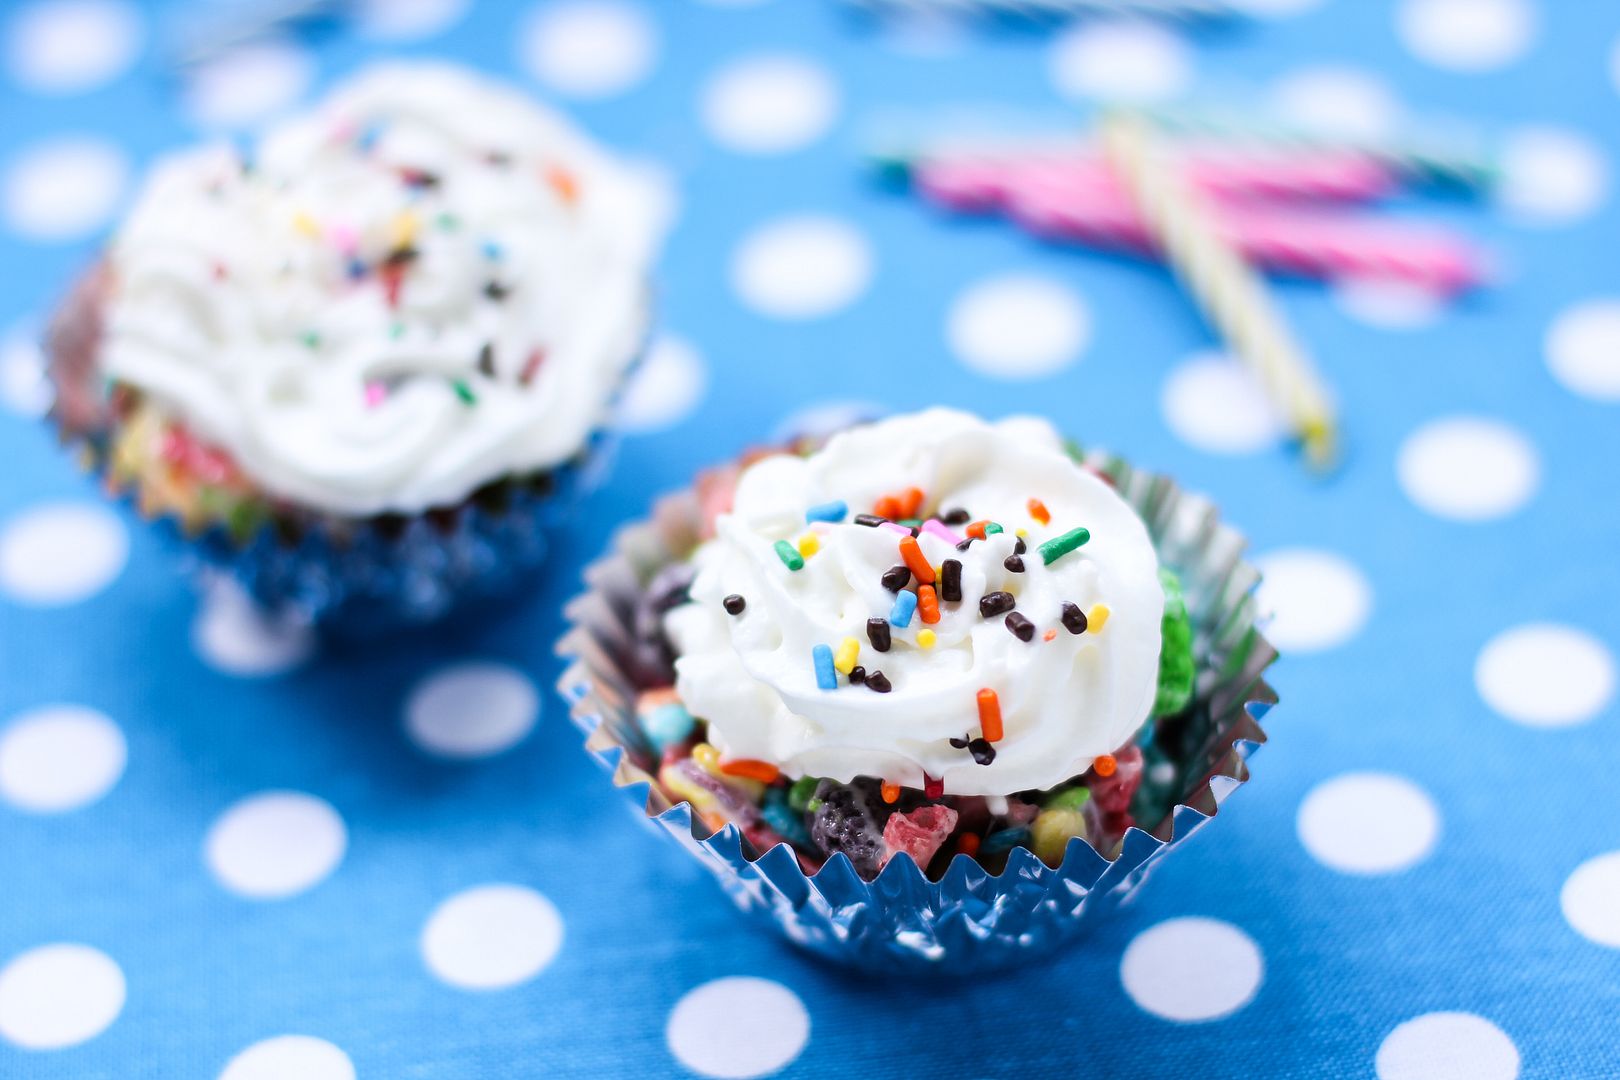
Today we also tried something a little different. With our extra time, we made some cupFAKES. Cupfakes are just cupcakes that aren’t actually made of cake. I make several savory versions, but this cupfake was a dessert treat. We used a regular Rice Cereal Treat recipe molded into a cupcake pan to make little cupfakes that we “frosted” with spray whipped cream and topped with sprinkles. Instead of rice cereal, we used fruity varieties: Fruity Pebbles and Cap’N Crunch’s Oops! All Berries.

Apart from being adorable and extremely easy, I was shocked at how flippin’ awesome these things taste! The fruity cereal treats and whipped cream are pretty insane together. After we’re finished, you know, decorating oranges or whatever the heck the kids come up with tomorrow, I know they’re gonna love chowing down on these!

What weird things did you play with as a kid? What weird things have your kids made into toys?

One year ago: Chocolate Pistachio Cream Cupcakes
Two years ago: Tumbleweed Burger
Three years ago: Mango Raspberry Rosecakes

Easy Fruity Cereal Treat Cupfakes


Recipe by: Adapted from Kellogg’s
Yield: about 10-11 cupfakes

These no-bake treats are super quick, easy, and CUTE! Best of all, they are so, so tasty. They would make sweet little birthday “cakes” for a colorful party.

Ingredients:
1/4 cup butter
4 cups miniature marshmallows or 1 package (10 oz) large marshmallows
4 cups fruity cereal (I used 2 cups of Fruity Pebbles and 2 cups of Cap’N Crunch’s Oops! All Berries)
whipped cream for “frosting”
sprinkles

Directions:
Line a cupcake pan with plastic wrap (press it down into each well) and spray it with cooking spray. In a saucepan over low heat, melt the butter. Stir in the marshmallows until they’re completely melted and then remove the pan from the heat. Add the cereal and stir (I use a spoon coated in cooking spray) until the cereal is completely coated. Spoon a big glob into each cupcake well. Use a sheet of wax paper to press the mixture down and mold it into each well. Let it cool completely.

Remove each “cupfake” and “frost” it with whipped cream. Top with sprinkles. Serve in cupcake papers if you wish! You can store unfrosted cupfakes for two days in an airtight container or in the freezer (separated by wax paper) for up to 6 weeks.

If you liked this post, please:
Subscribe to Willow Bird Baking
Follow Willow Bird Baking on Twitter
Follow Willow Bird Baking on Facebook

Gooey Cookies & Cream Bars

On top of a sheet of felt-and-glitter tabletop snow, wooden blades were spinning, propelled by steam from tiny candles. Below the windmill but carved from the same light wood, tiny German townspeople busied themselves preparing for a wooden winter. I stood there for a few minutes, watching the delicate dance of the Christmas Pyramid: wood and fire, fuel and hunger.

It was my first visit to Mike’s great-aunts’ house, and thankfully, I was just in time to see their earnest and intricate Christmas display. Rose and Martha had been adding to their holiday collection over the course of many years and many travels, and their home now good-naturedly bore its heavy load of cheer.

Along with the Christmas Pyramid, a yuletide scene adorned every available surface in the house. The sturdy 1950s countertop in the kitchen boasted a full Christmas village. Warm orange lights glowed from miniature, snowy-silled windows. Plastic children, round with winter wool and red-nosed beneath fur caps, constructed snowmen in the yard. Figurines of all shapes and sizes skated on a mirrored glass pond thanks to tiny unseen magnets. And, in my favorite tableau, kids posed with St. Nick before a toy camera that gave a CLICK-FLASH! every few seconds as if snapping their photo.

The entire house was busy with whirring, chirruping, chiming, ringing. Understated carols rung out at regular intervals from mysterious origins. I would turn my head to find the source only to see a Christmas train, a Christmas snowman, a Christmas door hanging, a pudgy Christmas Santa statue, lights, bells, snow — Christmas chaos!

Imagine yourself as a child. Imagine that one day you really did get to step through your mirror, like you’d always dreamed might be possible. All it took was a little shimmy, a heel click or two, maybe a wink, and you were finally allowed to flow right through the glass. Imagine that when you stepped in, you stepped straight into a world of candy and jolly Santas and benevolent holiday rabbits and secret gardens and fairies and talking animals.

The joy of this house was that same joy. Walking into the door of this house was like walking into a fantastic place you knew existed somewhere, but could never seem to find as a child.

If the house was a Christmas fairyland, Rose and Martha were the magnificent queens of the domain. Martha was lovely, humble, and meticulous, welcoming and distributing presents. And Rose was mischievous, adventurous, and excited, whispering sly comments and shaking gifts. Together, what a pair.

They weren’t just wonderful on Christmas, either, and not just the first time I met them. We would celebrate their birthdays together at a boisterous gathering at Trio, one of their favorite restaurants. Folks from far and wide would turn up and share stories of the things they’d accomplished.

Both were teachers that poured out their time and energy for their students. Rose spent 11 years in night school to earn her degree in History. She then spent several more years learning about computers as she taught, creating a computer lab for her elementary school students. Rose and Martha traveled around the world together, sometimes preferring a foreign country, and sometimes heading to Chetola, a beloved spot in the North Carolina mountains, instead.

It was hard to believe things could ever be difficult for Rose. It seemed impossible that her pure fire-engine gumption couldn’t propel her through just about anything, including health problems and age and, good grief, probably a wall of fire and a mountain of steel at that.

She did slow down, though. At one point she broke a bone and had to recover in a nursing home, and I remember going to see her and realizing her gumption was willing, but her body demanded rest. When you see a pillar of strength and realize it’s fragile, it shakes you. Your whole frame of reference starts to bend just a bit.

Rose’s bone slowly healed. She went home and continue living her beautiful life. We went to dinner and a basketball game with her and Martha months later — her beloved UNCC 49ers — and though she had grown more frail, we could still see the spark of her heart.

This past Saturday, though, just hours before Mike was planning on visiting her, Rose passed away. The book of Greek myths he planned to take and read to her still sits where I tucked it quietly away once I heard. There’s nothing I can say to fully eulogize this sort of burning life. I wish, instead, you could’ve heard Martha’s strong voice at Rose’s funeral singing Amazing Grace with unexpected verve.

And I hope that Rose feels just now as if she’s stepped, finally, through a looking glass. I hope the real presence of Christ is stronger even than the joy of a billion Christmas wonderlands on a billion countertops. I hope she feels like, finally, she’s home.

Gooey Cookies & Cream Bars


Recipe by: Willow Bird Baking, inspired by S’mores Bars
Yield: About 12 bars

I made these Gooey Cookies & Cream Bars as a treat for Mike, ditching a previous plan involving pumpkin (which he’s not fond of). I’m so glad I did. They’re rich and heavenly, crunchy and gooey, and altogether full of warm niceness for a cool autumn day. Apart from tasting amazing, they’re super quick and simple — something I value more and more lately. Heat up one or two of these and enjoy them with some cold milk.

Ingredients:
1/2 cup butter, room temperature
1/2 cup plus 2 tablespoons sugar
1 large egg
1 teaspoon vanilla extract
1 1/3 cups all-purpose flour
3/4 cup chocolate sandwich cookie crumbs (i.e. crumbs of about 10 Oreos)
1 teaspoon baking powder
1/4 teaspoon salt
2 king-sized Cookies ‘n Cream candy bars (e.g. Hershey’s)*
1 1/2 cups marshmallow creme
*can substitute a regular white chocolate bar if these are unavailable where you live!

Directions:
Preheat the oven to 350°F. Grease an 8-inch square baking pan and create a foil sling: tear off 4, 16-inch long pieces of aluminum foil and fold them in half. Situate two side-by-side in the pan, covering the bottom of the pan to the edge (they will overlap). Situate the other two strips in the same manner, but perpendicular to the first. The overhanging foil of the sling will make it easy to remove the bars from the pan after baking and cooling. Grease the foil as well.

Cream the butter and sugar together in a large bowl until fluffy and pale yellow (2-3 minutes). Beat in the egg and vanilla. In a small, separate bowl, whisk together the flour, cookie crumbs, baking powder and salt. Add the dry ingredients to the butter mixture and mix until just combined. Divide the dough roughly in half, placing half the dough in your prepared pan and the other half in the fridge to chill until you’re ready for it.

Use the back of a spoon sprayed with cooking spray and to press and spread the dough in the pan until it covers the bottom of the pan in an even layer. Place the Cookies ‘n Cream bars side by side over the dough (if they fit; if not, break them and arrange) such that you have a full single layer of chocolate (about 1/4 inch thick). Glop on marshmallow creme and use a greased offset spatula to spread it evenly across the candy bars. Take the remaining dough out of the fridge and place it on top of the marshmallow layer (to do so, take a small handful at a time and flatten it into a “shingle” in greased fingertips. Lay these side by side over the top. They’re a little sticky so it takes some fiddling, but just clean your fingers off if the dough starts sticking to them too much and continue).

Bake for 25 to 30 minutes or until lightly browned. Let cool completely in pan before gently using the overhang of the foil sling to lift the bars out of the pan and place them on a cutting board to slice. When ready to serve, heat each bar in the microwave for about 25-30 seconds. Store extras in an airtight container. Enjoy!

If you liked this post, please:
Subscribe to Willow Bird Baking
Follow Willow Bird Baking on Twitter
Follow Willow Bird Baking on Facebook
Give this post a thumbs up on StumbleUpon


ShareOther ways to share this post with friends!

Gooey S’mores Bars

GUESS WHAT I JUST BOUGHT. Can you guess?! First, let me tell you a story. Maybe I’ll drop some hints here and there . . .

I got my first camera in high school. It was a Polaroid I-Zone, and I had no idea how cool it was. It took grainy, gorgeous photos full of unintentional auras and printed them instantly on adhesive-backed paper. You’ll have to forgive my poetic heart for the example below — a triptych (am I allowed to call it that?) of a goose that had been hit by a car. The middle frame is my hand full of its oversaturated feathers. Morbid, I know, but isn’t it pretty?

My next camera was a little Kodak film camera. I carried it everywhere with me, hoping to capture some gritty reality. I took photos of the outcast crowd at my high school (I wasn’t cool enough to fit in, even with them), of my feet, of neon lights. I filled rolls of film and convinced my parents to get them developed only to find, again and again, that my photos weren’t this or this or this. They were flat snapshots.

I gave up.

Fast forward to food blogging. I’m a baker and I’m a writer, so food blogging suits me nicely. But, I told everyone who asked, I am not a photographer.

Photography was the red-headed stepchild (what’s so bad about one of those, anyway?) of Willow Bird Baking. It was an ill-behaved upstart of a stepchild at that — one that I often had to drag along behind me as it kicked its tiny mismatched-stocking feet.

Since WBB’s inception in June 2009, I’ve used a Canon PowerShot A540 to shoot all of my photos. That faithful little point-and-shoot was powerful, don’t get me wrong, but the fiddling that went in to my hours-long photo shoots was extremely stressful. I shot in manual mode and it went something like this:

Make food for hours. Style food. Wait until the perfect time of day. Go out onto the balcony to freeze and/or sweat. Set up my camera on its tripod. Set all camera settings: manual mode, white balance, macro mode, exposure time, self-timer. Hold up white boards to bounce light in crazy directions. Change all settings repeatedly, taking photos with varying exposures, camera angles, and lighting setups. Run into the apartment to upload the photos every 50 or so snaps to see if I’m on the right track, usually to find that ALL of the photos were out of focus. Hours and hundreds of photos later, drag myself inside and clean up. Go through the hundreds of photos looking for the 6 or 7 acceptable ones. Edit them. Write my post.

Even while I loved my camera (so much so that I decided I’d stick with Canon whenever I upgraded), it’s not hard to see why photography stressed me out. There was a teensy (and sometimes nonexistent) yield for all the sweat I put into it.

When Willow Bird Baking was featured recently in the Davidson Journal, Meg Kimmel was kind enough to mention my “burgeoning skills as a food photographer.” They even printed my photo of my Coffee Cookie Dough Fudge Cheesecake for good measure. But oh, did I have a love-hate relationship with photography.

That is, until now.

Have you guessed yet? I think I set you up pretty well, and hopefully the photos were helpful hints. I bought a new camera!

A Canon Rebel T2i with a 50mm f/1.4 lens, to be exact. By no means did the camera make me an instant photographer extraordinaire, but when I styled and photographed these Gooey S’mores Bars (inside! with air conditioning!), I marveled at how fun and exciting and creative it felt!

I wasn’t doing acrobatics to get an acceptable shot in 100 degree heat — the camera was doing more than its fair share of work! I wasn’t forcing the photos — I was making artistic decisions! I wasn’t fretting and uploading a dozen times to check my shots — I was contentedly fiddling with various camera settings and enjoying the results! For the first time in years, I think I’ve almost recaptured the joy of snapping a photo with that old Polaroid I-Zone and sticking it in my poetry notebook surrounded by walls of messy handwriting.

. . . Almost.

P.S. Will you look at the number of exclamation points in that last paragraph? I must be in love.

P.S. 2 There’s just over a week left in the Willow Bird Baking Cupcake Challenge! Bake your creation and email photos to juruble ‘at’ gmail.com by Wednesday, September 7, 2011. I’ll feature your cupcake on WBB! Find more details and some cupcake inspiration here.

Gooey S’mores Bars


Recipe by: Adapted from Lovin’ From the Oven
Yield: 9-12 bars depending on your appetite

These Gooey S’mores Bars were more than worthy of being the first dish snapped by my new camera. They combine a chewy, graham cracker-flavored base with melty marshmallow creme and a hearty dose of chocolate. I heated each bar in the microwave for 25 seconds and then used a kitchen torch to toast the sides before serving, resulting in the perfect s’more flavor. Don’t worry if you don’t have the torch, though — they’d be delicious without.

Ingredients:
1/2 cup butter, room temperature
1/4 cup brown sugar
1/2 cup sugar
1 large egg
1 teaspoon vanilla extract
1 1/3 cups all-purpose flour
3/4 cup graham cracker crumbs
1 teaspoon baking powder
1/4 teaspoon salt
2 king-sized milk chocolate bars (e.g. Hershey’s)
1 1/2 cups marshmallow creme/fluff

Directions:
Preheat the oven to 350°F. Grease an 8-inch square baking pan and create a foil sling: tear off 4, 16-inch long pieces of aluminum foil and fold them in half. Situate two side-by-side in the pan, covering the bottom of the pan to the edge (they will overlap). Situate the other two strips in the same manner, but perpendicular to the first. The overhanging foil of the sling will make it easy to remove the bars from the pan after baking and cooling. Grease the foil as well.

Cream the butter and sugar together in a large bowl until fluffy and pale yellow. Beat in the egg and vanilla. In a small, separate bowl, whisk together the flour, graham cracker crumbs, baking powder and salt. Add the dry ingredients to the butter mixture and mix until just combined. Divide the dough roughly in half.

Press half of the dough (using clean fingers is easiest) into the pan. Place the chocolate bars side by side (if they fit; if not, break them and arrange) over the dough such that you have a full single layer of chocolate (about 1/4 inch thick). Glop on marshmallow creme and use a greased offset spatula to spread it evenly across the chocolate. Place the remaining dough on top (to do so, take a small handful at a time and flatten it into a “shingle,” laying these side by side over the top). Bake for 25 to 30 minutes or until lightly browned. Let cool completely in pan before gently using the overhang of the foil sling to lift the bars out of the pan and place them on a cutting board to slice.

When ready to serve, heat each bar in the microwave for about 25-30 seconds and use a kitchen torch to lightly “toast” the exposed marshmallow (optional). Enjoy!

If you liked this post, please:
Subscribe to Willow Bird Baking
Follow Willow Bird Baking on Twitter
Follow Willow Bird Baking on Facebook
Give this post a thumbs up on StumbleUpon


ShareOther ways to share this post with friends!

Mallows

As I mentioned in my previous post, the July Daring Bakers’ challenge was hosted by Nicole at Sweet Tooth. She chose Chocolate Covered Marshmallow Cookies and Milan Cookies from pastry chef Gale Gand of the Food Network. While the Milan cookies were delicious and dainty, the Mallows were scrumptious and indulgent. They were two very different types of cookies, but I learned from each recipe and enjoyed the variety! If I had to choose a favorite, though — and you know I do — it would be these Mallows.


Four types of Mallows (from back): Almond Mallows, Hazelnut Mallows, Cinnamon Mallows, and Plain Mallows

Mallows are chocolate-covered, marshmallow-topped cookies. The wonderful thing about these Mallows (besides the amazing flavor) is how versatile they are. Homemade marshmallows are very easily flavored and customized, so I was able to make four Mallow “flavors” with hardly any more trouble than just making one. I chose Almond, Hazelnut, and Cinnamon Mallows in addition to the plain.


Almond Mallows

Almond Mallows have an almond sliver between the cookie and marshmallow, and another atop the cookie. In addition, their marshmallows are flavored with vanilla, almond, and butter flavorings. The marshmallow is as rich as a buttercream frosting, and so tasty! I bet this version would also be delicious with some creamy almond butter piped on under the marshmallow.


Hazelnut Mallows

Hazelnut Mallows (my favorite!) have Nutella piped on under plain marshmallow, and are topped with toasted hazelnuts.


Cinnamon Mallows

Cinnamon Mallows have cinnamon and nutmeg flavored marshmallow, and a light dusting of cinnamon and cocoa powder on top.

Enjoy experimenting with flavors! Different sorts of nuts, spices, and extracts are all tools for tweaking your mallows. Some Daring Bakers piped a bit of jam or nut butter below their marshmallows for an added surprise. Use food coloring to denote different flavors of marshmallow. There’s a lot of room for creativity here.


All four types of Mallows again (from left): Cinnamon Mallows, Almond Mallows, Plain Mallows, and Hazelnut Mallows

Gale Gand’s original recipe seemed to need some tweaking, since Daring Bakers typically ended up with — I kid you not — hundreds of cookies, and only enough marshmallows to cover around 50. I’ve adjusted the recipe below to hopefully yield the correct amounts! Also, Gand’s original recipe called for melting semisweet chocolate and vegetable oil to make your coating. After reading that about half of the Daring Bakers’ were having trouble with their chocolate not setting — especially those who live in warm or humid climates — I decided not to take a chance with it. Instead, I used my beloved CandiQuik dipping chocolate, which dries in literally minutes! You can probably find this at Lowes Food or SuperTarget. A friend of mine over at Barbara Bakes uses Ghiradelli dipping chocolate, which is another option.

Enjoy playing with your Mallows! My family and friends loved these cookies, and I hope yours will too.

Mallow Cookies


Recipe By: Gale Gand (tweaked quite a bit!)
Yields: about 80 small (bite-sized) Mallows

Cookie Ingredients:
1.5 cups all purpose flour
1/2 cup white sugar
1/2 teaspoon salt
3/8 teaspoon baking powder
1.5/8 teaspoon baking soda (this is an odd measurement — eyeball it as best you can!)
1/4 teaspoon ground cinnamon
6 tablespoons unsalted butter
1.5 eggs, whisked together (to get half an egg, crack it into a separate cup and lightly beat it; then discard 1.5 tablespoons and add the rest to the recipe)
Dipping chocolate (I used 2 bags of chocolate CandiQuik)

Homemade Marshmallow Ingredients:
1/4 cup water
1/4 cup light corn syrup
3/4 cup (168.76 grams/5.95oz) sugar
1 tablespoon powdered gelatin
2 tablespoons cold water
2 egg whites , room temperature
Flavoring (either Plain, Almond, or Cinnamon)

-Plain = 1/4 teaspoon vanilla extract
-Almond = 1/8 teaspoon vanilla extract, 1/8 teaspoon almond extract, 1/8 teaspoon imitation butter flavoring, and 4 drops of yellow food coloring (optional).
-Cinnamon = 1/4 teaspoon vanilla extract, 1/4 teaspoon cinnamon, and a pinch nutmeg

Directions:

Begin by making cookies:
1. In a mixer with the paddle attachment, blend the dry ingredients.
2. On low speed, add the butter and mix until sandy.
3. Add the eggs and mix until combine.
4. Form the dough into a disk, wrap with clingfilm or parchment and refrigerate at least 1 hour and up to 3 days.
5. When ready to bake, grease a cookie sheet or line it with parchment paper or a silicon mat.
6. Preheat the oven to 375 degrees F.
7. Roll out the dough to 1/8-inch thickness, on a lightly floured surface. Use a 1 1/2 inches cookie cutter to cut out small rounds of dough (see my tips for rolling out dough, below).
8. Transfer to the prepared pan and bake for 8 minutes or until light golden brown. Let cool to room temperature.

While cookies are cooling, make your marshmallows:
1. In a saucepan, combine the water, corn syrup, and sugar, bring to a boil until “soft-ball” stage, or 235 degrees on a candy thermometer (though soft ball stage can be eyeballed with a simple cold water test, I love having a candy thermometer around. Mine even has a line marked “soft-ball stage”).
2. Sprinkle the gelatin over the cold water and let dissolve.
3. Remove the syrup from the heat, add the gelatin, and mix.
4. Whip the whites until soft peaks form and pour the syrup into the whites.
5. Add the flavoring of your choice and continue whipping until stiff (it will take around 15 minutes, so I hope you took your vitamins this morning!). Note: You can also separate the marshmallow into multiple bowls and make multiple flavors, but if you do, reduce the amounts of the ingredients so they don’t overpower the smaller volume they’re flavoring.
6. Transfer to a pastry bag.

Now to finish the cooled cookies:
1. Pipe a “kiss” of marshmallow onto each cookie. Let set at room temperature for 2 hours.
2. Line a cookie sheet with parchment or silicon mat and cover with a cooling rack — this will be your drying rack!
3. Melt dipping chocolate according to package instructions. I like to set my bowl of chocolate in a larger bowl of hot water to keep it melted while I work. Just be careful not to let the water touch the chocolate, or it will seize and you won’t be able to work with it.
3. One at a time, gently drop the marshmallow-topped cookies into the hot dipping chocolate (see my video demonstration below!).
4. Lift out with a fork and let excess chocolate drip back into the bowl. Now’s the time to add toppings if you wish, while the coating is wet. For a chocolate squiggle, let coating dry and use a ziplock of CandiQuik with the corner cut off to drizzle over cookies.
13. Place on the prepared pan and let set at room temperature until the coating is firm, about 10 minutes. Store in an airtight container at room temperature (unless you’re in a very hot environment and notice melting, in which case, store in fridge).

Note: if you don’t want to make your own marshmallows, you can cut a large marshmallow in half and place on the cookie base. Heat in a preheated 350-degree oven to slump the marshmallow slightly, it will expand and brown a little. Let cool, then proceed with the chocolate dipping.

Julie’s tips for rolling, gathered from various internet sources, my mother, and some lovely friends during a moment of panic:

  • Work with small batches (about 1/3 of the dough) at a time, while keeping the rest chilling in the refrigerator.
  • You can coat your workspace in equal parts confectioners’ sugar and flour if you’re worried about using too much flour (which can cause dough to get dry/tough).
  • Roll dough immediately from the refrigerator, turning it often and redusting lightly with flour mixture to prevent sticking.
  • If you don’t have a cool metal counter or marble slab (which I don’t), set some frozen vegetables out on your counter for a bit before you roll to cool it off. Then dry your workspace and roll. You can also refrigerate or freeze your rolling pin for a few minutes.
  • Have a sheet pan in the freezer. If you sense your dough is getting sticky/warm, put a sheet of wax paper on the dough and press the frozen sheet pan on top to cool it down quickly.

The One Minute Dipping Demonstration!
[youtube=http://www.youtube.com/watch?v=dvyI3i4nYLY&hl=en&fs=1&rel=0&color1=0x2b405b&color2=0x6b8ab6&border=1]

Process Photos!


Ready to roll!


Fresh from the oven and not so pretty.


Getting organized to make my four types of Mallows (and not confuse them!)


Is it soft-ball stage yet? (notice my faithful Coke Zero in the background!)


Piping Nutella filling onto my Hazelnut Mallows. The more you can fit, the better!


For Almond Mallows, I used a bit of the almond marshmallow mixture to “glue” an almond sliver on the cookie before piping my marshmallow.


Marshmallows of all flavors piped on.


Dipping — see video above for a demonstration!


Finished!


Mmm! Have one of each!

Visit the Daring Bakers (temporary) Blogroll to see more of these treats from amazing bakers!