
What’s your favorite color?
Alex‘s answer is pink. He’s the son of fellow Charlotte food blogger Julie of Mommie Cooks, and he just celebrated his 6th birthday in style with a gorgeous rainbow cake. Things haven’t all been rainbows lately, though, because Alex was recently informed by some kids at school that boys aren’t supposed to wear pink.

Julie’s post beautifully captures the struggle of a mom trying to empower her kid to hold tight to his unique personality when the world is trying to tuck him into a bright blue mold. It’s hard to explain to a 6-year-old that pink wasn’t always considered “girly.” Or that part of the reason pink is a “girl color” now is so businesses can make more money. Maybe Riley can help explain?
I shared Julie’s post with my 7th grade students, who wrote a reflection on it before we discussed their thoughts. Middle school is a particularly difficult time for finding your own way, so we talk a lot about bullying and how to be ourselves and love others. Given this (and the fact that they’re sweethearts), I wasn’t surprised at all that they were touched by Alex’s story.
Their indignant and protective voices cried, “He can like whatever color he wants to like!” and “He’s just a little boy! Why does it matter what color he wears?” Then someone — I think it was Matt — raised their hand with an idea. “We should all wear pink tomorrow to support him!”
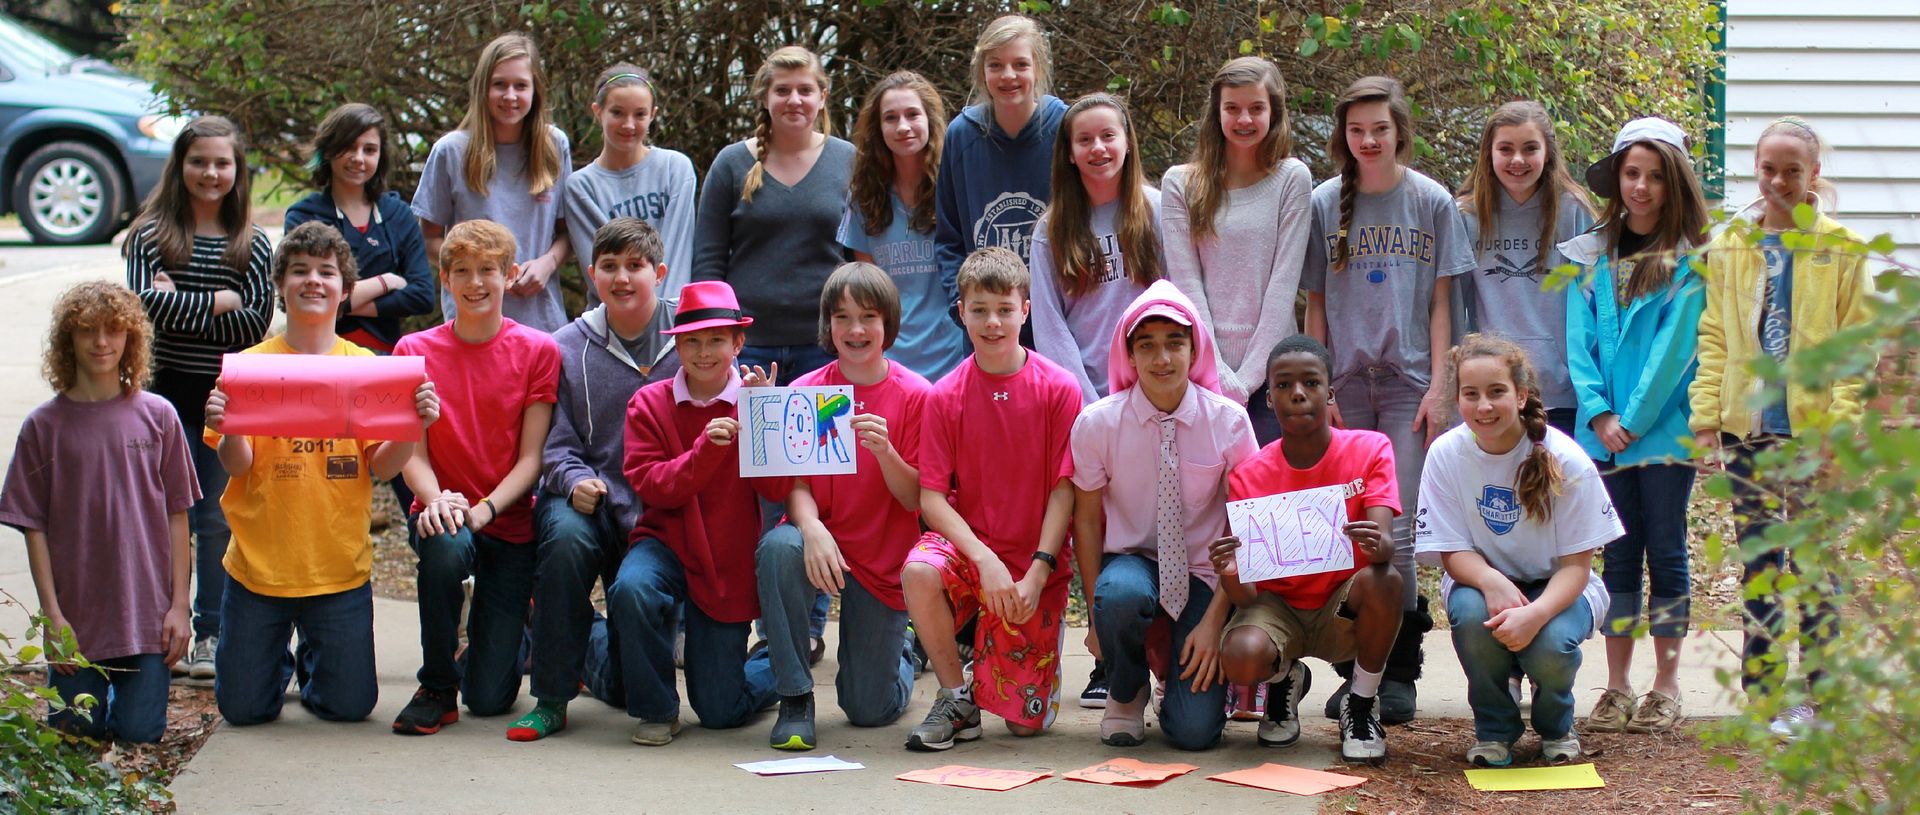
And just like that, a plan was born: the 7th grade “color swap.”
That’s how it came to pass that the 7th grade boys filed into my room this morning in every shade of pink and red. The 7th grade girls donned blues, grays, greens, and browns, complete with sneakers and baseball caps. One boy snazzed his outfit up with a pink tie. Another topped off his ensemble with a pink fedora. Yet another wore cute socks. Their message was clear: colors don’t belong to a certain gender, and you should always be able to be yourself.

The 7th grade. Be yourself, love others!
This Valentine’s Day, don’t limit yourself to celebrating romantic love. Why not celebrate pink for Alex? Find a way this week to be your unique self, or to show support for someone else’s individual choices. Maybe you can find a day to wear pink for all the Alexes of the world, who shouldn’t ever have to conform to an arbitrary idea of normal.

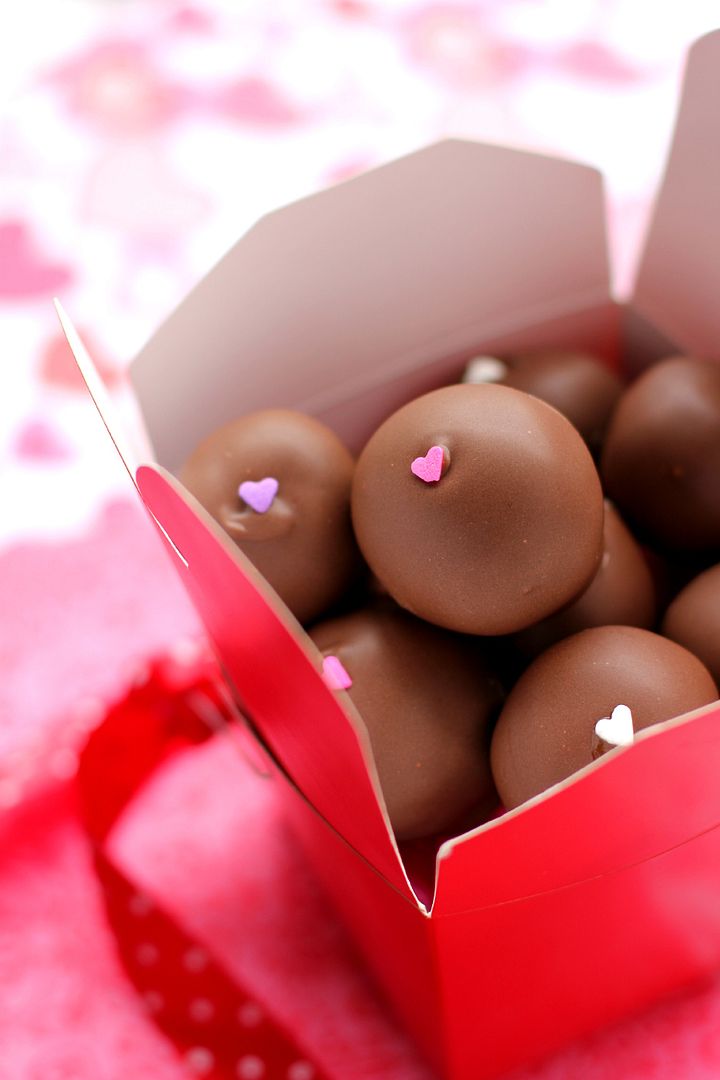
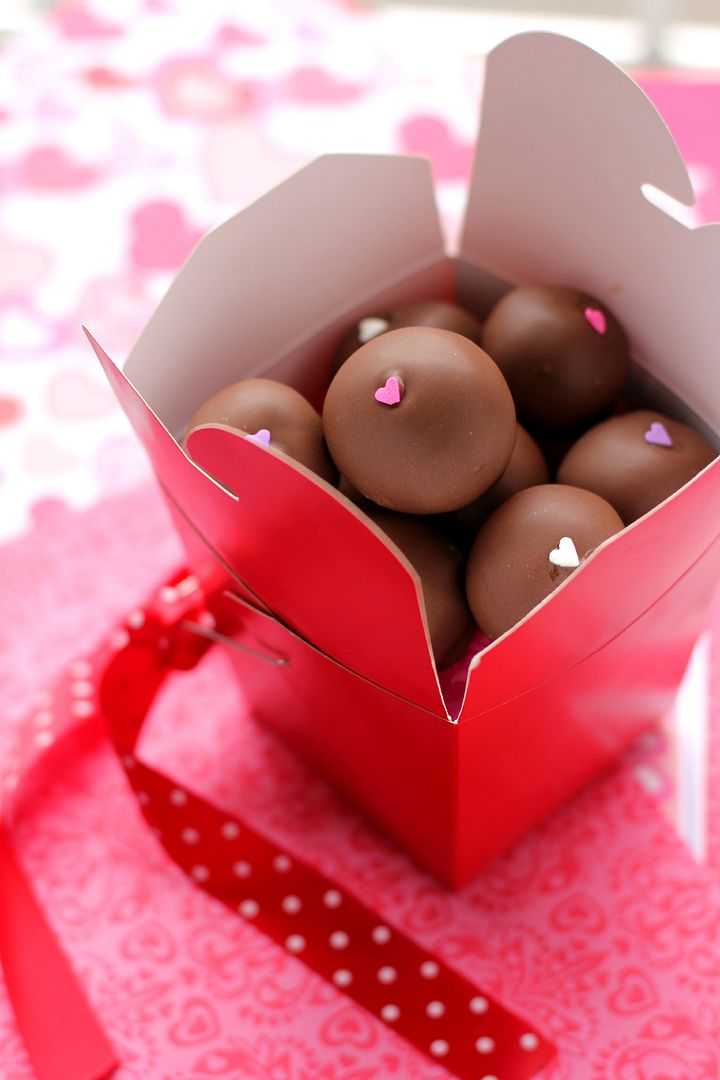
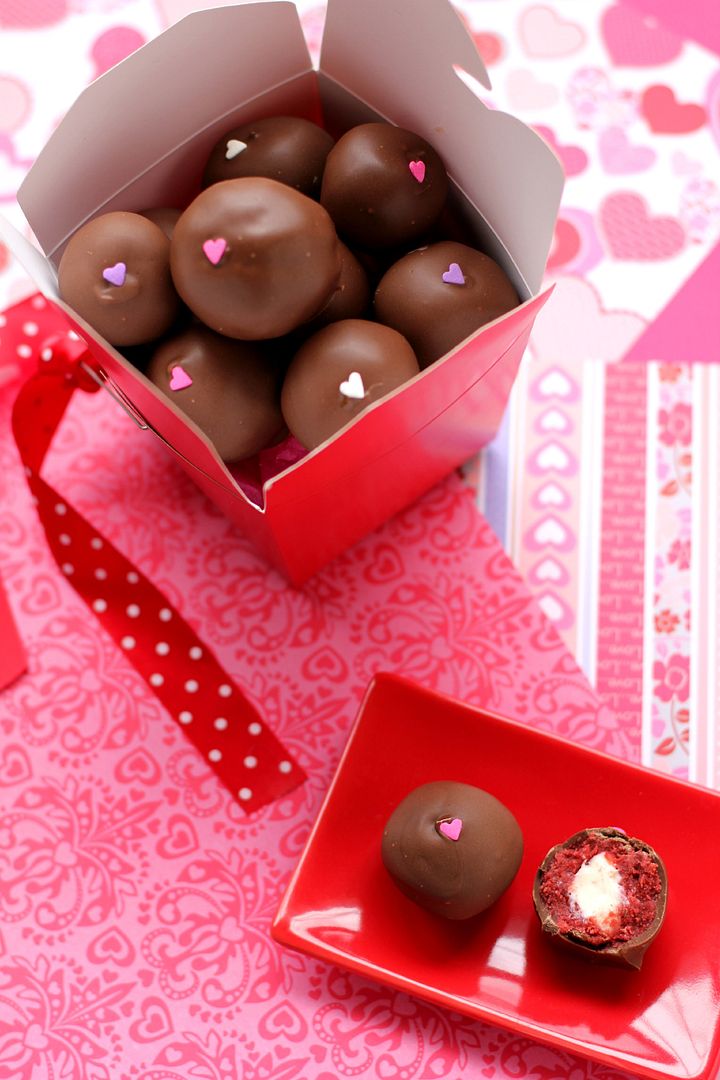
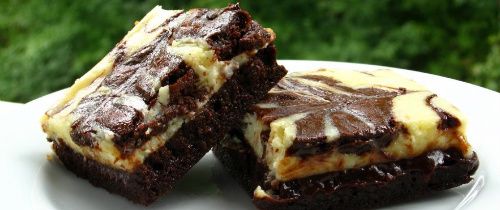
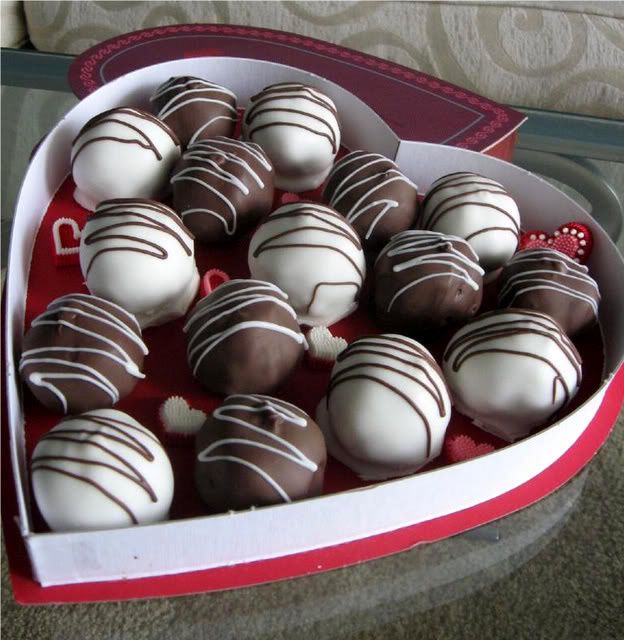
In the spirit of loving yourself and others, here are some Valentine’s Day Red Velvet Cheesecake-Stuffed Cake Balls. Nothing says I love you like cheesecake, red velvet, and chocolate, am I right? And I definitely got some I love yous from the folks who devoured these.
How can you be yourself and love others?
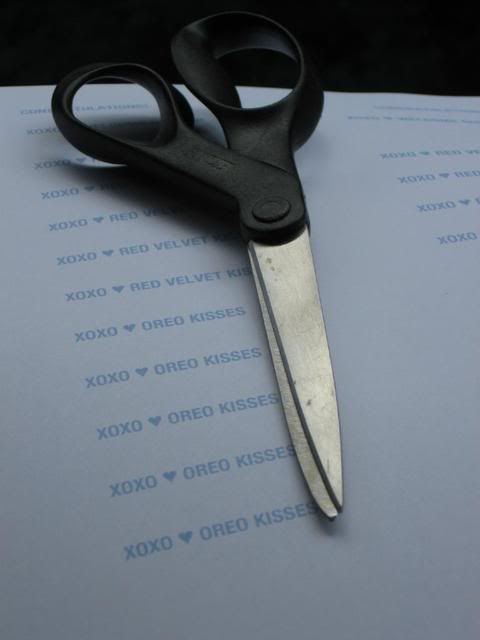
Red Velvet Cheesecake-Stuffed Cake Balls
Recipe by: Willow Bird Baking
Yield: 30+ cake balls
People will seriously swoon when you show up with these cake balls. SWOON, I tell you. Red velvet cake and cheesecake and chocolate?! They’re also, despite looking really fancy, surprisingly straightforward to make. That being said, cake balls and pops are always fiddly the first time you make them and they require a little trial and error (should I dip with a toothpick or a spoon? Should I dry them at room temperature or in the fridge?), but the great thing about them is that they always taste amazing. The “recipe” below is more of a technique than a recipe. I’ve included lots of hints and even have a video tutorial to help you make these cuties! Also be sure to check out Candiquik’s great post on Common Cake Pop Problems.
Cake Ball Ingredients:
Your favorite red velvet cake recipe*, prepared and cooled
Chocolate candy coating (I love Candiquik or candy melts)
sprinkles
Cheesecake Filling Ingredients:
1 8-ounce package cream cheese, softened
2 tablespoons sugar
Cream Cheese Frosting Ingredients:
2 ounces cream cheese, at room temperature
2 tablespoons unsalted butter, at room temperature
1 3/4 cups powdered sugar
1/2 teaspoon vanilla extract
Directions:
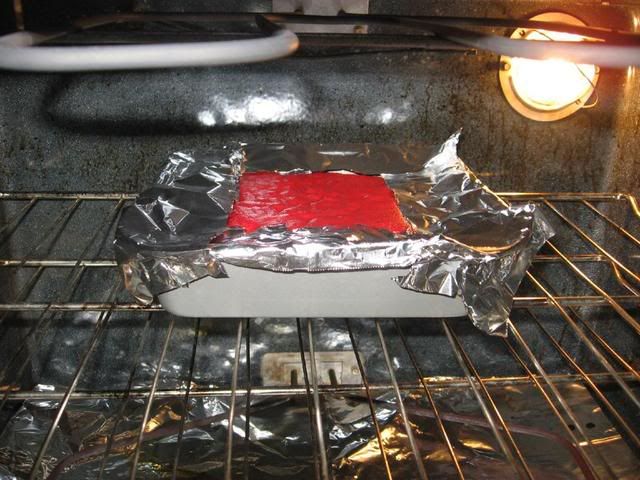
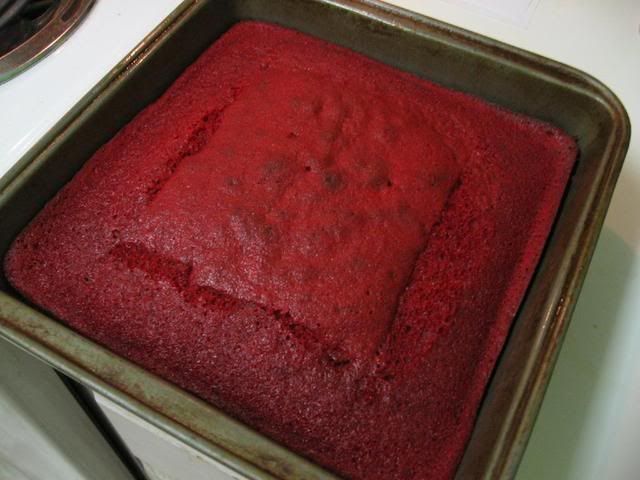
*Note: I used a half recipe for these red velvet whoopie pies for my cake balls. They’re delicious as whoopie pies but were too oily for the cake balls, so mine cracked if I didn’t keep them in the fridge. I’d recommend using the red velvet cake recipe I used for these cake balls, which has always worked well for me. It might be more red velvet than you need, so you could try halving it and baking it in a loaf pan, but I haven’t attempted this. What the heck is too much red velvet, anyway?
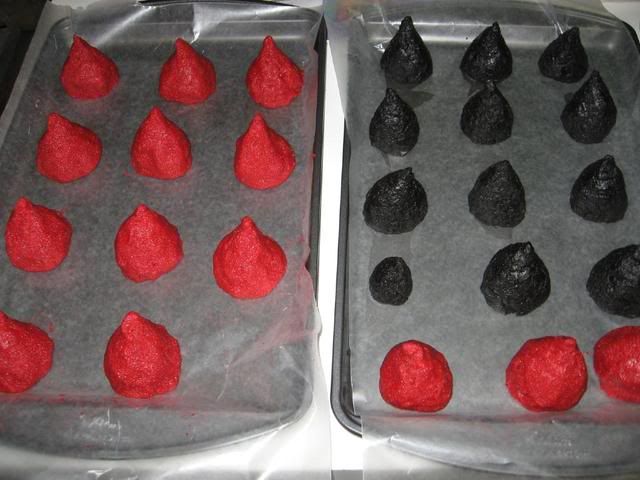
Make the cheesecake middles: While the cake you chose is baking and cooling, mix all the cheesecake filling ingredients for 3-4 minutes or until fluffy. Fill a plastic zip bag with the mixture and cut off the corner. Pipe the cheesecake mixture into small swirls on a silicone mat or wax paper. Freeze these until firm (mine only took about 45 minutes).
Make frosting: Whip cream cheese until fluffy. Mix in all other frosting ingredients and mix on medium-high speed until combined. When cake is cooled and crumbled, start mixing frosting in. Start with about 1/2 cup of frosting and mash/stir with your fingers, pressing together to feel the texture. You’re looking to reach a playdough-like consistency. I think I used about 3/4 cup of frosting total, but the amount you use will depend on how much cake you have crumbled in your bowl.
Make cake balls: Once your cake mixture is ready and your cheesecake middles are frozen firm, you’re ready to assemble your cake balls! Take a frozen cheesecake middle and pack some cake around it. Roll it into a ball and place it on a silicone mat or wax paper. Continue until all cake balls are rolled. Chill these in the refrigerator overnight. I don’t freeze mine like some sites suggest, because I find chilling them in the fridge instead reduces cracking after I dip them.
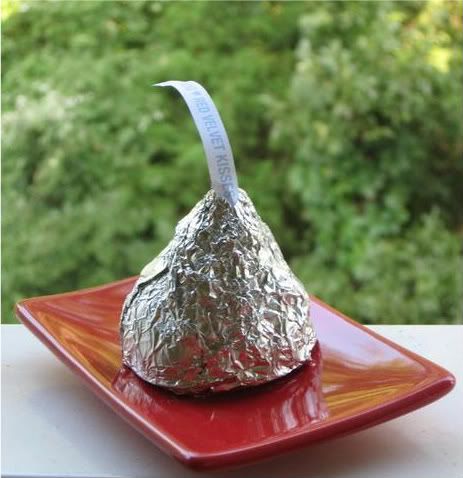
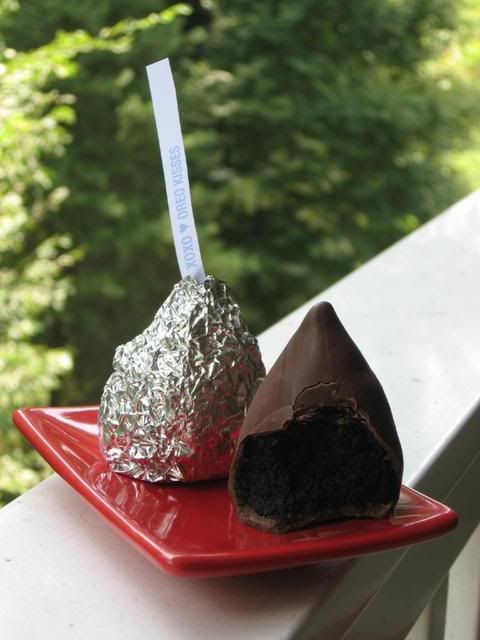
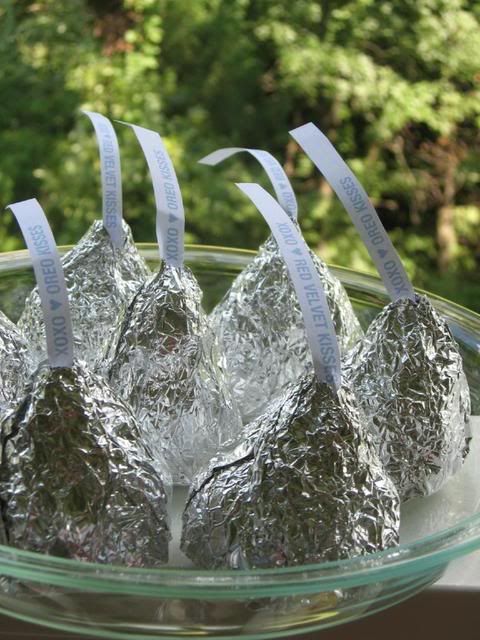
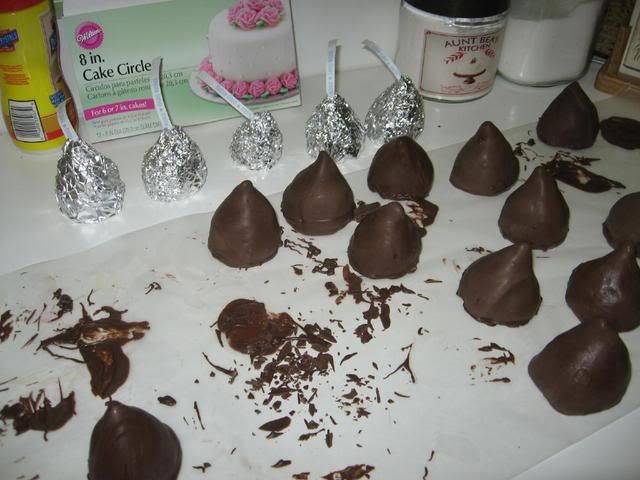
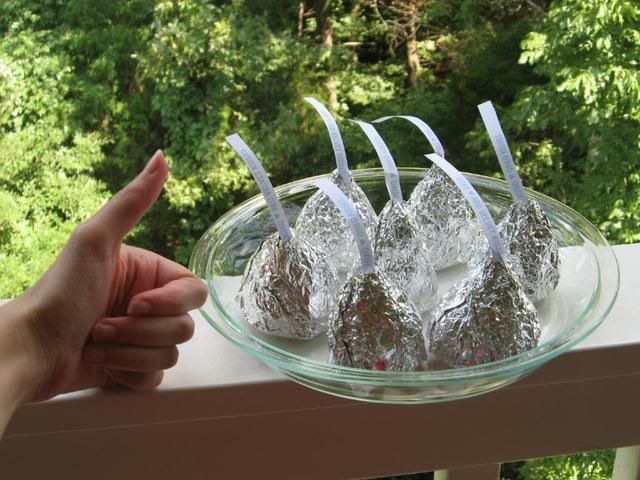
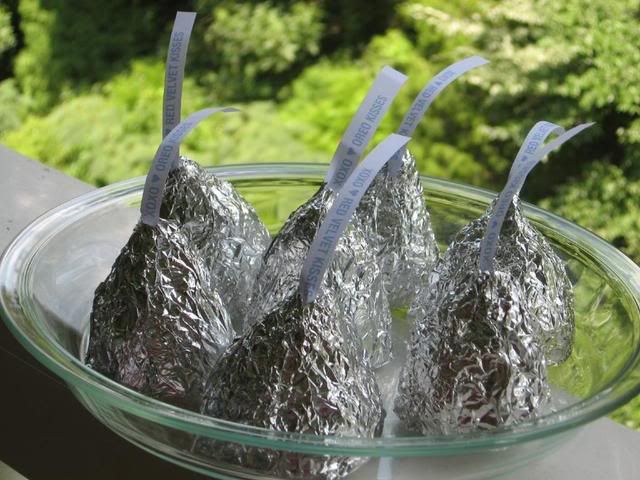
Dip cake balls: After cake balls have chilled overnight, melt your candy melts or candy coating according to the package directions. I keep my bowl of candy melts situated in a bigger bowl of hot water to keep them warm and fluid, but be careful no water gets into the melts or they’ll seize!
To dip cake balls, I insert a toothpick into the center and dip them in the candy coating, using a spoon to help coat them. I then hold my cake ball over the bowl, gently bouncing and turning it to drain the excess coating off (letting them drain a good long while — but not long enough to fall off the toothpick — is how I avoid having a huge chocolate “foot”). When well-drained, I gently wiggle the cake ball off my toothpick onto a sheet of wax paper and add any sprinkles. I noticed my cake balls cracking (because I used an oilier cake), so I stuck them in the fridge as soon as they were dry to prevent this (it always helps for some reason). Serve immediately or store in an airtight container in the refrigerator.
VARIATIONS:
-You can leave the cheesecake middles out of this recipe and roll the cake into a solid ball if you want traditional cake pops.
-You can use any flavor of cake (or even a cake mix) for your cake.
-You can add chopped berries to your no-bake cheesecake mixture or even add in chocolate or other flavoring to produce different flavors of cheesecake in the center.
-You can use lollipop sticks or pretzel sticks to make these into cake pops.
-You can decorate with chocolate drizzle instead of (or in addition to) sprinkles.
Alex, this is for you. Be yourself! We think you’re awesome just the way you are.
Rainbows for Alex
If you liked this post, please:
–Subscribe to Willow Bird Baking
–Follow Willow Bird Baking on Twitter
–Follow Willow Bird Baking on Facebook
–Give this post a thumbs up on StumbleUpon
–Pin It


