nuts

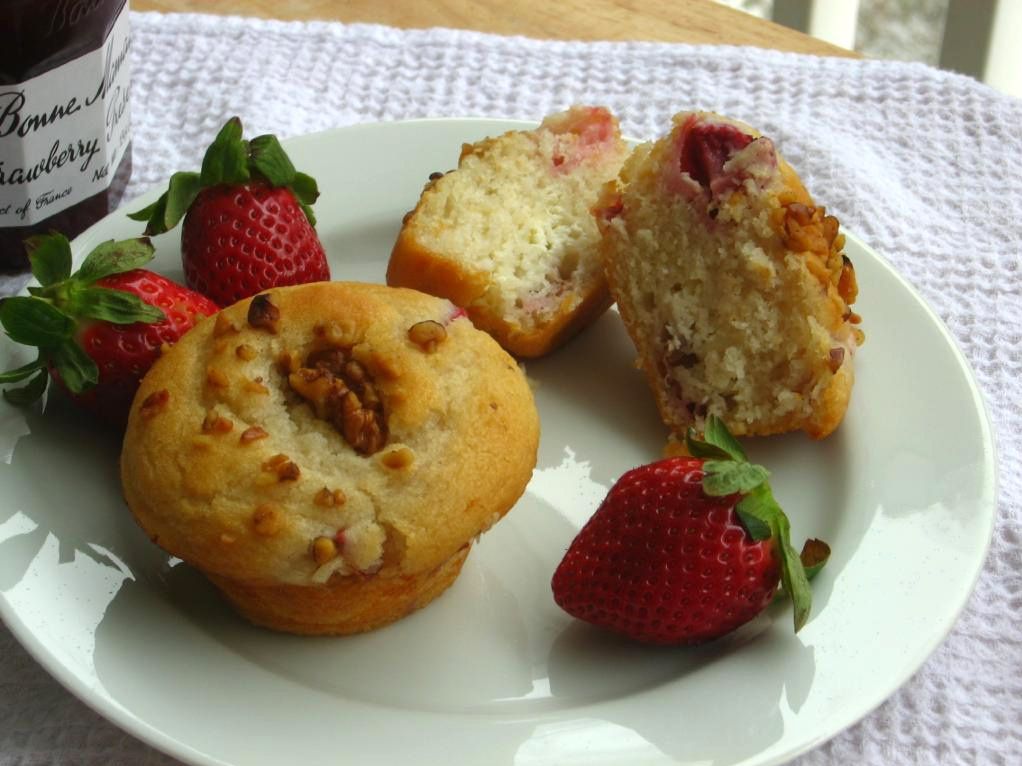
Strawberry Walnut Ricotta Muffins

I’m detecting a pattern here: something about cold weather makes me want a big, hot breakfast. Usually my breakfast is a small, rushed affair: a couple of turkey sausages and I’m on my way. This weekend, though, promised inches of snow and icy conditions in Charlotte. Breakfast had to stand up to the cold!

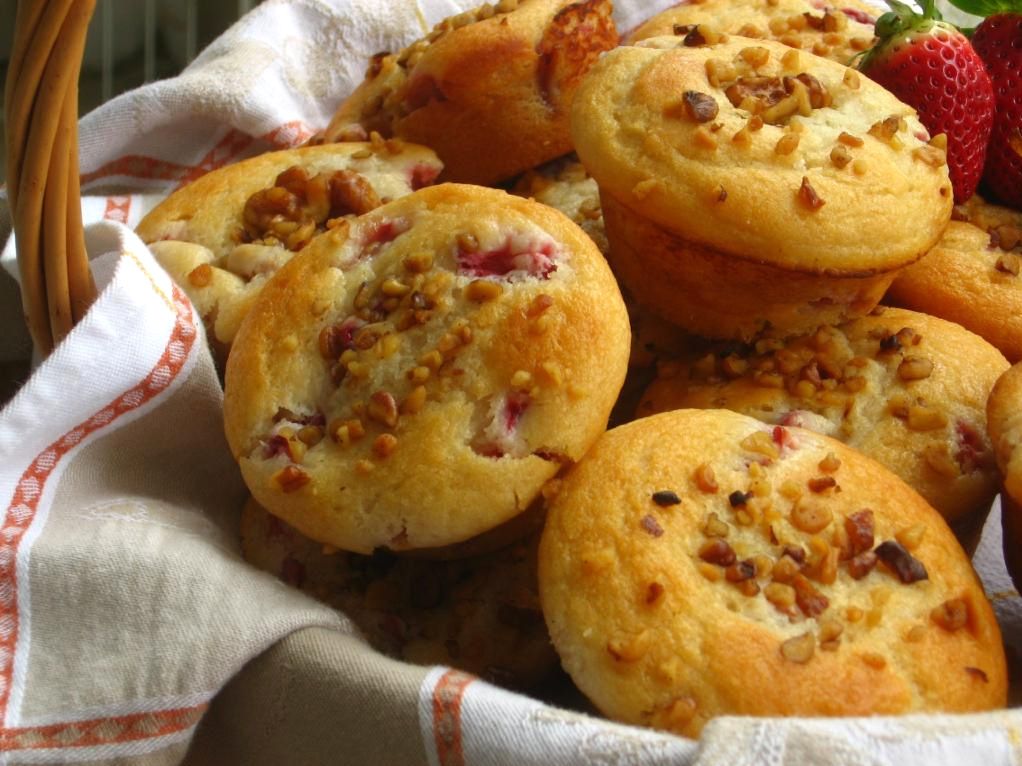
Thankfully, Smitten Kitchen had recently equipped me with a killer muffin recipe. Deb posted these fantastic-looking Ricotta Muffins last week. They were billed as a very slightly sweet, nutty muffin with a surprising hint of fennel. Very intriguing, but I fiddled with the idea a bit to produce more what I was craving. I ditched the fennel, sweetened these babies up a bit, and added in some fresh strawberries. The result is really a whole different beast: sweet, fruity, light, cheesy, nutty, hearty . . . a breakfast superstar!

…but a beast, nonetheless. These things are fussy. The ricotta and sour cream filling is runny (as Deb mentions in her post, perhaps it’d be different if you were to use fresh ricotta and crème fraiche), so the batter has to be piped on top of it, which is quite a mess.

The muffins are also very tender (what with the ricotta mixture in the middle, as well as strawberries breaking up the muffin, in my case) and so they can’t be scooped out of their wells. Instead, I had to let them cool in the pan for about 20 minutes before inverting them onto the cooling rack. They cooled with their cute little muffin bottoms in the air, and finally, they were firm enough to turn over and stick in the fridge. My kitchen was a disaster area — bowls, beaters, pans, cutting boards, berries — but I wouldn’t be writing this if they weren’t worth it.

Like so many fruity baked goods, these were amazing after being refrigerated overnight. Wonderful news, because you probably don’t want to spend the time and effort required to make these first thing in the morning. I popped them into the microwave for 30 seconds before Mike and I managed to devour, oh, 11 of them. Full disclosure! The two of us ate ELEVEN MUFFINS! I told you they were worth the trouble. The ricotta makes for a fluffy, moist, gooey muffin, and the strawberries were lovely with the tang from the yogurt and sour cream. They weren’t too sweet — perfect for breakfast (though who am I kidding . . . I can definitely do dessert for breakfast on occasion).

Muffins freeze well, too, so why not make a double batch and freeze up a few for later? I actually intended to do just that (my double batch made 27 muffins), but at the rate Mike and I are going . . . yeah, we’ll see how many of these make it to the freezer! I hope you’re enjoying some hearty, warm breakfasts of your own this winter (and for all my friends enjoying summer across the globe right now, run through a sprinkler or two for me!)

Strawberry Walnut Ricotta Muffins


Recipe by: Pastries from La Brea Bakery (adapted by Smitten Kitchen, and then by Willow Bird Baking)
Yields: 12-14 muffins

Ingredients:
1/2 cup (2 ounces) walnuts (can substitute pecans)
3 cups unbleached pastry flour or unbleached all-purpose flour
3/4 cup granulated sugar
1 tablespoon plus 1 teaspoon baking powder
3/4 teaspoon baking soda
1 1/2 cups plain yogurt
3/4 cup vegetable oil
1/2 cup (4 ounces) ricotta cheese
6 tablespoons crème fraîche or sour cream
3 tablespoons confectioners’ sugar
1 1/4 cup chopped strawberries
Kosher salt, to taste

Adjust the oven rack to the center position and preheat oven to 325°F. Lightly butter a 1/2-cup capacity muffin tin (I used Cake Release. Butter and flouring the tin will also work. Make sure that when you invert the pans, these babies are going to come out!)

Spread the nuts on a baking sheet and toast in the oven until lightly browned, about 8 to 10 minutes. Shake the pan halfway through to ensure that the nuts toast evenly. Cool, chop finely and set aside. Turn the oven up to 350°F.

In a large bowl, sift the flour, sugar, baking powder and baking soda together to combine. Make a large well in the center and pour in the yogurt and oil. Whisk together the liquids and gradually draw in the the dry ingredients, mixing until incorporated. Fold in chopped strawberries.

To prepare the filling: Place the ricotta in a mixing bowl and, if stiff, break it up wtih a rubber spatula to loosen. Stir in the sour cream or crème fraîche, confectioners’ sugar, and a pinch of salt.

Using a pastry or plastic bag with the corner cut off, fill each muffin tin one-third of the way with batter. Place one tablespoon of the ricotta filling into the center of each muffin. Pipe the remaining batter into the cups, filling them to just below the rim (resist the urge to overfill). Sprinkle about 1 teaspoon of the nuts over the top of each muffin.

Bake for 25 to 30 minutes, until lightly brown and firm to the touch. Let cool in pan for about 15-20 minutes before inverting over a cooling rack. Let cool upside down. When completely cool, refrigerate in an airtight container until it’s time to eat! Heat for a few seconds in the microwave before eating.


Mixing up the batter and some overfilled muffins fresh from the oven.


Cooling off upside down, and then getting packed up for the fridge.


See that snow in the background? Brrr!


Share Share this post with friends!

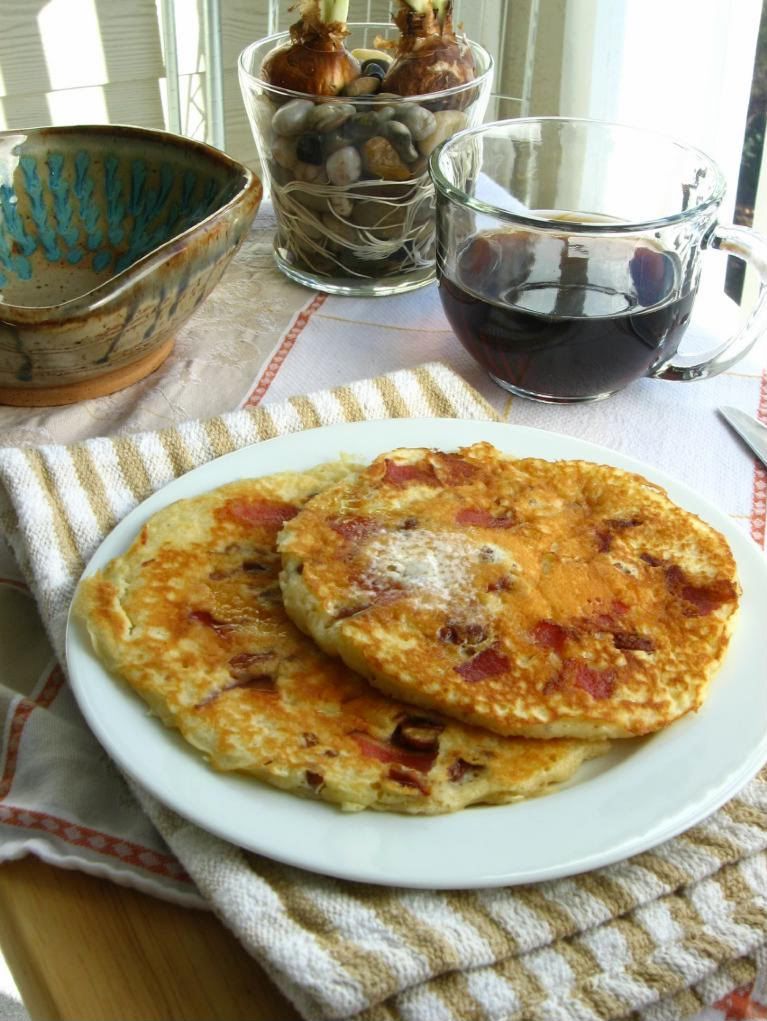
Pecan Maple Bacon Pancakes

I don’t care what my Buffalonian roommate says, it has been cold in Charlotte. She chokes back laughter as I layer on two pairs of pants, a nightgown, a long-sleeve tee, my rubber duckie bathrobe, a scarf, mittens, and fuzzy socks to take Byrd out in the 20 degree weather every morning. A winter coat would be nice right about now, but I don’t own one. Thankfully, you can usually get by with a thick jacket and a scarf in the Carolinas.

Then again, I’m “that girl” who used to wear flip-flops all winter. One day I looked down at my exposed toes standing in the few inches of snow we’d accumulated and thought to myself . . . well, it was something like, “I am stupid.” So maybe I’m just not a good judge of what sort of clothing one should have on hand. At any rate, I was not prepared for this icy blast. I’ve been Grumpy McGrumpster carrying a snuggie-wrapped Byrd down three flights of stairs every morning (she hurt her wittle knee, and so she is now transported everywhere like a princess).

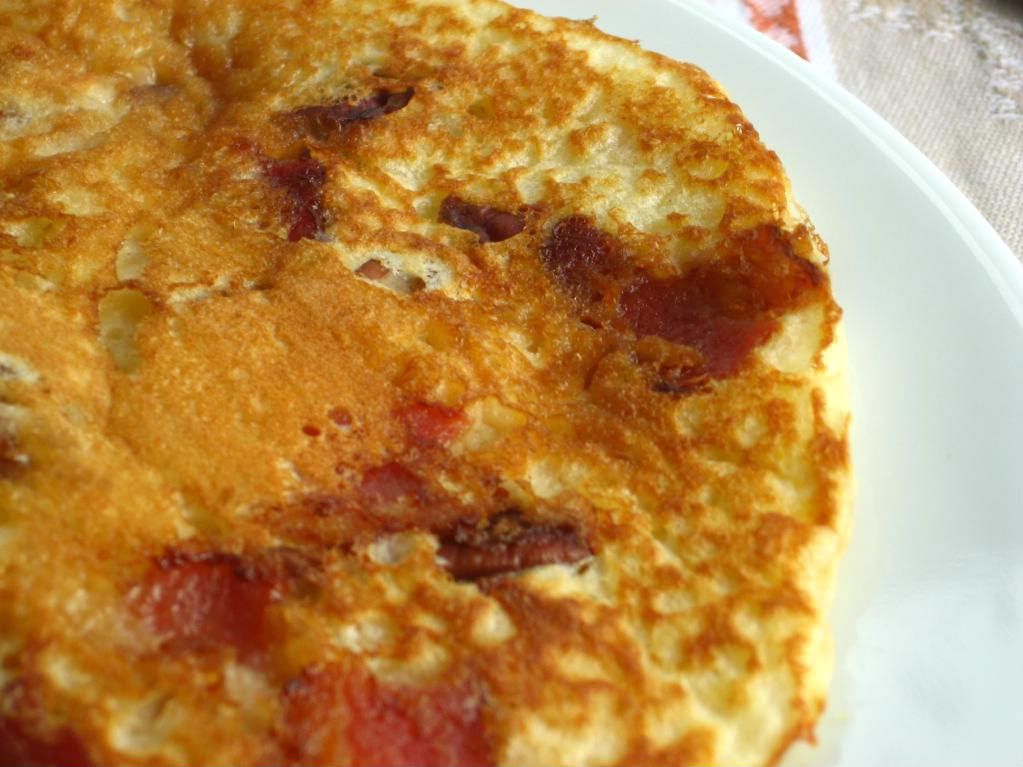
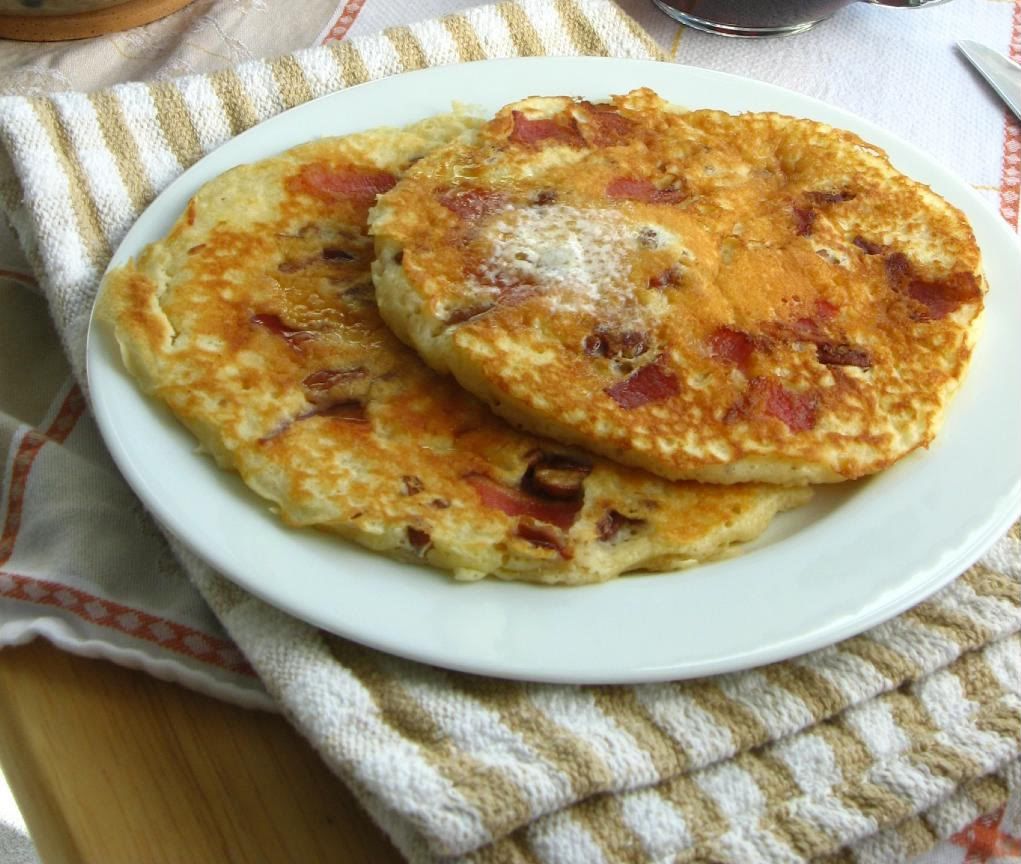
After a week of shivering, I needed a big, hot breakfast on Saturday. I found a fantastic collection of pancake tippery over at Deb’s Smitten Kitchen and invited Mike over for a pancake marathon. I got a little sassy and decided to make Pecan Maple Bacon Pancakes: fluffy, light flapjacks filled with chopped pecans, shreds of freshly cooked bacon, and a drizzle of maple syrup cooked right in. They were the perfect sweet and savory breakfast treat.

Of course, pancakes aren’t pancakes without a little customization. We also indulged in Pecan Chocolate Chunk, Peanut Butter, Peanut Butter Chocolate Chunk, and finally, Peanut Butter Bacon Pancakes — all of which were well-received! I loved the idea of freezing my freshly cooked, cooled pancakes for a homemade alternative to packaged convenience breakfasts, but it didn’t work out. Oh, they froze beautifully in their ziplock bag, separated by sheets of waxed paper . . . but we got hungry again Saturday night, ripped them open, and devoured them all! Perhaps I’ll make a bigger batch next time around.

Our pancakes were lovely served with maple sausage on the side, but next time, maybe I’ll cook it right into the pancakes as well! Oh, and I’m not the only one who had a craving for breakfast this week, according to my Google Reader. For delicious breakfast ideas to accompany your flapjacks, try Barbara Bakes’ Breakfast Hashbrown Casserole, Lick The Bowl Good’s Banana Pecan Butter Buns, or My Baking Addiction’s Breakfast Parfaits. Great minds bake alike!

Pecan Maple Bacon Pancakes


Recipe by: Martha Stewart’s Original Classics Cookbook, with adaptations from Smitten Kitchen and Willow Bird Baking
Yields: about 9 6-inch pancakes

Ingredients:
2 cups all-purpose flour
2 teaspoons baking powder
1 teaspoon baking soda
1/2 teaspoon kosher salt, or slightly less table salt
3 tablespoons sugar
2 large eggs, lightly beaten
3 cups buttermilk
4 tablespoons unsalted butter, melted, plus 1 tablespoon extra for brushing griddle
6-7 slices brown sugar bacon
1/2 cup pecans, chopped (and toasted, optionally)
maple syrup for drizzling

Directions:
1. Preheat oven to 400°F. Place bacon on a foil-lined baking sheet and bake for 15-20 minutes or until crispy. Allow to cool and crumble on a paper towel. If desired, toast pecans in a dry skillet over low-medium heat, shaking constantly.
2. Preheat an electric griddle to 375°F, or place a griddle pan or cast-iron skillet over medium-high heat. Whisk together the flour, baking powder, baking soda, salt, and sugar in a medium bowl. In a separate bowl, mix the eggs and buttermilk. Pour the buttermilk mixture and 4 tablespoons melted butter into the dry ingredients and whisk until just combined. The batter should have small to medium lumps.
2. Test the griddle by sprinkling a few drops of water on it. If the water bounces and spatters, the griddle is hot enough. Using a pastry brush, brush the remaining 1/2 teaspoon butter onto the griddle. Wipe off the excess with a folded paper towel.
3. Using a 4-oz. ladle, about 1/2 cup (for a 6-inch pancake), pour the batter in pools 2 inches apart. Drop some pecans and some bacon crumbles onto each pancake. Using a spoon, drizzle a small amount of maple syrup over the top of the pancake.* When the pancakes have bubbles on top and are slightly dry around the edges, about 2 1/2 minutes, flip over. If any batter oozes, push it back under with your spatula. Cook until golden on bottom, about 1 minute.
4. Repeat with the remaining batter. You can keep the finished pancakes on a heat-proof plate (or baking sheet) in the oven at 175°F. Serve warm with butter and maple syrup.

*NOTE: Other delicious toppings include berries, chocolate chunks, other nuts, peanut butter chips, or cinnamon chips. We love a variety, so we made several Pecan Maple Bacon Pancakes and then went crazy with the rest of the batter!


Fresh bacon sizzling, and then a Pecan Maple Bacon Pancake waiting for a drizzle of maple syrup and a flip!


Good Morning, Sunshine!


Share Share this post with friends!

Cannoli

If there were ever a hard month to work a Daring Bakers challenge into the schedule, November would be it! This past week has been filled to the brim with cooking pies, cakes, enchiladas (no one ever said I was normal). And I was only responsible for a small part of my family’s Thanksgiving meal — I don’t know how folks responsible for the entire dinner manage to get everything finished!

Speaking of Thanksgiving, it was grand — lovely food and a lovely time with family. The yeast rolls, as always, were my favorite part, but the turkey made a fine showing:


The juicy stuffed bird my parents made. That’s my mother’s china in the background, which I promised her I would not sell on eBay after she dies (isn’t this the sort of discussion everyone has over Thanksgiving dinner?)

Back to the Daring Bakers Challenge, though!

The November 2009 Daring Bakers Challenge was chosen and hosted by Lisa Michele of Parsley, Sage, Desserts and Line Drives. She chose the Italian Pastry, Cannolo (Cannoli is plural), using the cookbooks Lidia’s Italian-American Kitchen by Lidia Matticchio Bastianich and The Sopranos Family Cookbook by Allen Rucker; recipes by Michelle Scicolone, as ingredient/direction guides. She added her own modifications/changes, so the recipe is not 100% verbatim from either book.

What’s funny about this challenge is that just a couple of days prior to Lisa’s announcement, I was walking through the grocery store pondering cooking techniques I wanted to try. I settled on deep frying as one thing that still really mystified me. When this challenge was issued, it just confirmed for me what I’ve remarked every month about the Daring Bakers; that is, that the group helps me stretch my skills with each new “daring” recipe.

I enthusiastically shopped around online for some cannoli forms, though other daring bakers got inventive with tinfoil. Look, he even has a little blueprint drawn out! Leave it to an engineer, right? Other than the forms, I was all set: big heavy saucepan, candy/fry thermometer, big round cookie cutter, and bottle after bottle of vegetable oil.
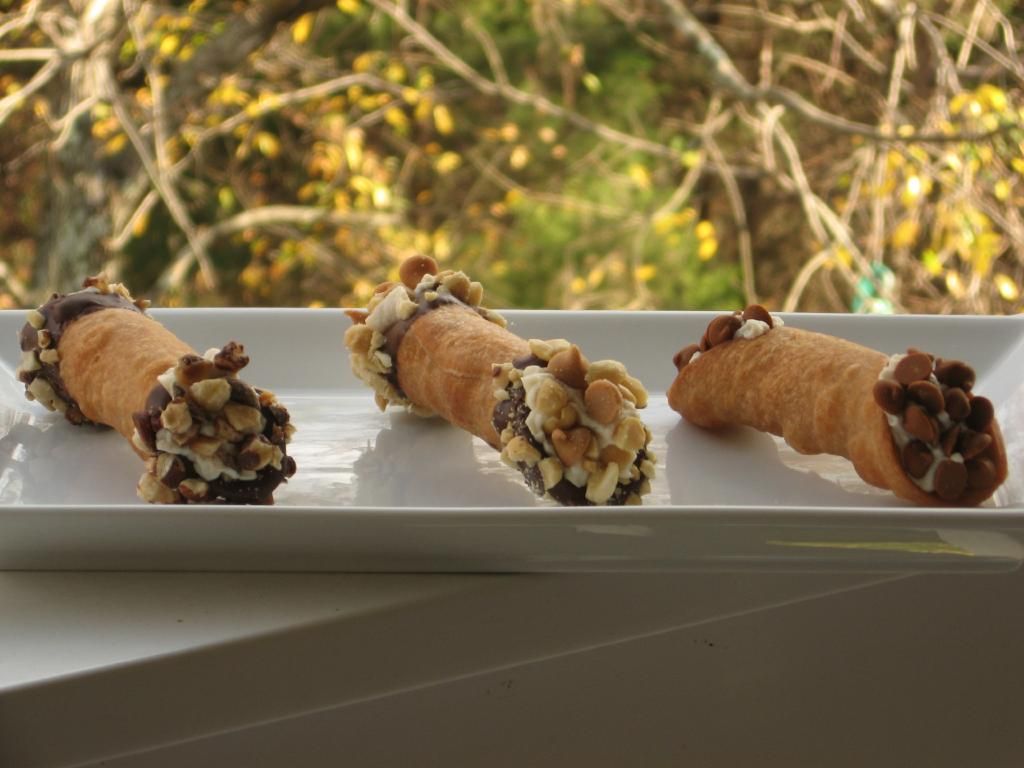
Turns out cannoli are quite simple! After mixing and chilling the dough, I rolled it out (springy, but otherwise nice to work with), cut some circles, and rolled them out until they were extremely thin. While my first shell turned out a little dark (you really have to remove them a touch before you think they’re done), overall, they were a success!


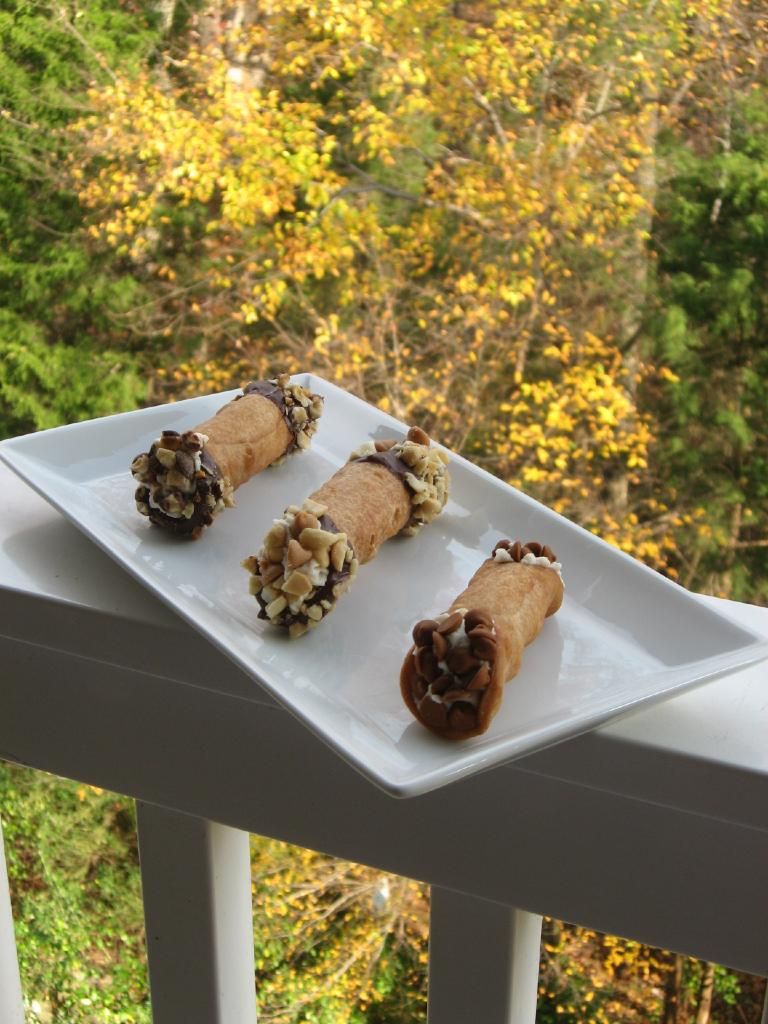
Three topping selections and some chocolate-dipped edges!

I filled my shells three ways. All started with the same traditional sweetened ricotta base, but one group was then covered in chopped hazelnuts and hunks of dark Ghirardelli chocolate. The next batch was covered with chopped peanuts and Reese’s Peanut Butter Chips. Finally, the last group of cannoli were coated with a big handful of Hershey’s Cinnamon Chips. These were my favorite; the cinnamon chips amplified the subtle cinnamon flavor of the shells. No matter which way we ate them, though, they were delectable little three-bite desserts, with the perfect ratio of crunch to cream.

No need to be intimidated by this Daring Bakers Challenge. While it pushed me out of my comfort zone, it was relatively simple and definitely a lot of fun. Thanks to Lisa for a delicious mission!


My favorite topping: cinnamon chips!

Cannoli


Recipe by: adapted from Lidia Matticchio Bastianich, Allen Rucker, Michelle Scicolone
Yields: 22-24 4″ cannoli
Printable version of this recipe

Cannoli Shells Ingredients:
2 cups (250 grams/8.82 ounces) all-purpose flour
2 tablespoons(28 grams/1 ounce) sugar
1 teaspoon (5 grams/0.06 ounces) unsweetened baking cocoa powder
1/2 teaspoon (1.15 grams/0.04 ounces) ground cinnamon
1/2 teaspoon (approx. 3 grams/0.11 ounces) salt
3 tablespoons (42 grams/1.5 ounces) vegetable or olive oil
1 teaspoon (5 grams/0.18 ounces) white wine vinegar
Approximately 1/2 cup (approx. 59 grams/approx. 4 fluid ounces/approx. 125 ml) sweet Marsala or any white or red wine you have on hand (I used Sauvignon Blanc)
1 large egg, separated (you will need the egg white but not the yolk)
Vegetable or any neutral oil for frying – about 2 quarts (8 cups/approx. 2 litres)
1/2 cup (approx. 62 grams/2 ounces) toasted, chopped pistachio nuts, mini chocolate chips/grated chocolate and/or candied or plain zests, fruits etc.. for garnish
Confectioners’ sugar
*Note – If you want a chocolate cannoli dough, substitute a few tablespoons of the flour (about 25%) with a few tablespoons of dark, unsweetened cocoa powder (Dutch process) and a little more wine until you have a workable dough (Thanks to Audax Artifex).

Cannoli Filling Ingredients:
2 lbs (approx. 3.5 cups/approx. 1 kg/32 ounces) ricotta cheese, drained
1 2/3 cups cup (160 grams/6 ounces) confectioner’s sugar, (more or less, depending on how sweet you want it), sifted
1/2 teaspoon (1.15 grams/0.04 ounces) ground cinnamon
1 teaspoon (4 grams/0.15 ounces) pure vanilla extract or the beans from one vanilla bean
3 tablespoons (approx. 28 grams/approx. 1 ounce) finely chopped good quality chocolate of your choice
2 tablespoons (12 grams/0.42 ounces) of finely chopped, candied orange peel, or the grated zest of one small to medium orange
3 tablespoons (23 grams/0.81 ounce) toasted, finely chopped pistachios
*Note – If you want chocolate ricotta filling, add a few tablespoons of dark, unsweetened cocoa powder to the above recipe, and thin it out with a few drops of warm water if too thick to pipe.

DIRECTIONS FOR SHELLS:
1. In the bowl of an electric stand mixer or food processor, combine the flour, sugar, cocoa, cinnamon, and salt. Stir in the oil, vinegar, and enough of the wine to make a soft dough. Turn the dough out onto a lightly floured surface and knead until smooth and well blended, about 2 minutes. Shape the dough into a ball. Cover with plastic wrap and let rest in the fridge from 2 hours to overnight.

2. Cut the dough into two pieces. Keep the remaining dough covered while you work. Lightly flour a large cutting or pastry board and roll the dough until super thin, about 1/16 to 1/8” thick (An area of about 13 inches by 18 inches should give you that). Cut out 3 to 5-inch circles (3-inch – small/medium; 4-inch – medium/large; 5-inch;- large. Your choice). Roll the cut out circle into an oval, rolling it larger and thinner if it’s shrunk a little.

3 Oil the outside of the cannoli tubes (You only have to do this once, as the oil from the deep fry will keep them well, uhh, oiled..lol). Roll a dough oval from the long side (If square, position like a diamond, and place tube/form on the corner closest to you, then roll) around each tube/form and dab a little egg white on the dough where the edges overlap. (Avoid getting egg white on the tube, or the pastry will stick to it.) Press well to seal. Set aside to let the egg white seal dry a little.

4. In a deep heavy saucepan, pour enough oil to reach a depth of 3 inches, or if using an electric deep-fryer, follow the manufacturer’s directions. Heat the oil to 375°F (190 °C) on a deep fry thermometer, or until a small piece of the dough or bread cube placed in the oil sizzles and browns in 1 minute. Have ready a tray or sheet pan lined with paper towels or paper bags.

5. Carefully lower a few of the cannoli tubes into the hot oil. Do not crowd the pan. Fry the shells until golden, about 2 minutes, turning them so that they brown evenly.

8. Lift a cannoli tube with a wire skimmer or large slotted spoon, out of the oil. Using tongs, grasp the cannoli tube at one end. Very carefully remove the cannoli tube with the open sides straight up and down so that the oil flows back into the pan. Place the tube on paper towels or bags to drain. Repeat with the remaining tubes. While they are still hot, grasp the tubes with a potholder and pull the cannoli shells off the tubes with a pair of tongs, or with your hand protected by an oven mitt or towel. Let the shells cool completely on the paper towels. Place shells on cooling rack until ready to fill.

9. Repeat making and frying the shells with the remaining dough. If you are reusing the cannoli tubes, let them cool before wrapping them in the dough.

DIRECTIONS FOR FILLING:
1. Line a strainer with cheesecloth. Place the ricotta in the strainer over a bowl, and cover with plastic wrap and a towel. Weight it down with a heavy can, and let the ricotta drain in the refrigerator for several hours to overnight.

2. In a bowl with electric mixer, beat ricotta until smooth and creamy. Beat in confectioner’s sugar, cinnamon, vanilla and blend until smooth. Transfer to another bowl and stir in chocolate, zest and nuts. Chill until firm.(The filling can be made up to 24 hours prior to filling the shells. Just cover and keep refrigerated).

ASSEMBLE THE CANNOLI:
1. When ready to serve..fill a pastry bag fitted with a 1/2-inch plain or star tip, or a ziplock bag, with the ricotta cream. If using a ziplock bag, cut about 1/2 inch off one corner. Insert the tip in the cannoli shell and squeeze gently until the shell is half filled. Turn the shell and fill the other side. You can also use a teaspoon to do this, although it’s messier and will take longer.

2. Press or dip cannoli in chopped pistachios, grated chocolate/mini chocolate chips, candied fruit or zest into the cream at each end. Dust with confectioner’s sugar and/or drizzles of melted chocolate if desired.

LISA’S TIPS AND NOTES:
– Dough must be stiff and well kneaded
– Rolling the dough to paper thinness, using either a rolling pin or pasta machine, is very important. If the dough is not rolled thin enough, it will not blister, and good cannoli should have a blistered surface.
– Initially, this dough is VERY stubborn, but keep rolling, it eventually gives in. Before cutting the shapes, let the dough rest a bit, covered, as it tends to spring back into a smaller shapes once cut. Then again, you can also roll circles larger after they’re cut, and/or into ovals, which gives you more space for filling.
– Your basic set of round cutters usually doesn’t contain a 5-inch cutter. Try a plastic container top, bowl etc, or just roll each circle to 5 inches. There will always be something in your kitchen that’s round and 5-inches if you want large cannoli.
– Oil should be at least 3 inches deep and hot – 360°F-375°F, or you’ll end up with greasy shells. I prefer 350°F – 360°F because I felt the shells darkened too quickly at 375°F.
– If using the cannoli forms, when you drop the dough on the form into the oil, they tend to sink to the bottom, resulting in one side darkening more. Use a slotted spoon or skimmer to gently lift and roll them while frying.
– DO NOT crowd the pan. Cannoli should be fried 2-4 at a time, depending on the width of your saucepan or deep fryer. Turn them once, and lift them out gently with a slotted spoon/wire skimmer and tongs. Just use a wire strainer or slotted spoon for flat cannoli shapes.
– When the cannoli turns light brown – uniform in color, watch it closely or remove it. If it’s already a deep brown when you remove it, you might end up with a really dark or slightly burnt shell.
– Depending on how much scrap you have left after cutting out all of your cannoli shapes, you can either fry them up and sprinkle with confectioner’s sugar for a crispy treat, or let the scraps rest under plastic wrap and a towel, then re-roll and cut more cannoli shapes.
– Push forms out of cannoli very gently, being careful not to break the shells as they are very delicate. DO NOT let the cannoli cool on the form, or you may never get it off without it breaking. Try to take it off while still hot. Hold it with a cloth in the center, and push the form out with a butter knife or the back of a spoon.
– When adding the confectioner’s sugar to the filling, TASTE. You may like it sweeter than what the recipe calls for, or less sweet, so add in increments.
– Fill cannoli right before serving! If you fill them an hour or so prior, you’ll end up with soggy cannoli shells.
– If you want to prepare the shells ahead of time, store them in an airtight container, then re-crisp in a 350°F (176 °C) oven for a few minutes, before filling.
– Practice makes perfect. My first batch of shells came out less than spectacular, and that’s an understatement. As you go along, you’ll see what will make them more aesthetically pleasing, and adjust accordingly when rolling. My next several batches turned out great. Don’t give up!!


Cutting out cannoli and getting ready to fry.


My first little cannoli! Then all the cannoli ready for dipping and filling.

Don’t forget to check out the Daring Bakers blogroll for other fantastic cannoli!
Thanksgiving Recipe Ideas

The students have all closed their novels and packed up their supplies for Thanksgiving Break, so it’s time for me to take a deep breath and relax — until the baking begins tomorrow, of course! Because I enjoyed reading Jillicious‘s list of things she’s thankful for this year, here are a few of my own:

  1. Jesus, who made the greatest sacrifice for me.
  2. My family — they’re crazy, wonderful, and so supportive.
  3. Mike, who has never disliked anything I’ve ever cooked, whether overseasoned, underseasoned, burnt, or weird.
  4. Cake.
  5. Friends, for joining me in ridiculous escapades.
  6. My students, who make me laugh every day and (usually) make me feel like I’m making a difference through my teaching.
  7. Writing.
  8. Byrd and Squirt, my poodle and red-eared slider. One is fluffy and hyper, the other is scaly and . . . frowny; nevertheless, they’re both the sweetest pets anyone could ask for, and have made my little apartment a home.
  9. My snuggie. Shut up; it’s comfortable!
  10. Food, which is one language through which history, family, culture, and emotion has been communicated to me. I love joining the conversation.

On that note, here are some dishes that have warmed the pages of Willow Bird Baking in the past months that would be lovely on your Thanksgiving dinner table. May you enjoy the sharing of mirth, love, and calories with your family this year!


Mini-Pies: Pumpkin, Peach Crisp, and Sour Cream Apple — Add some variety to your Thanksgiving pie choices! Everyone gets to choose their own flavor. The pumpkin and peach pies are especially scrumptious.


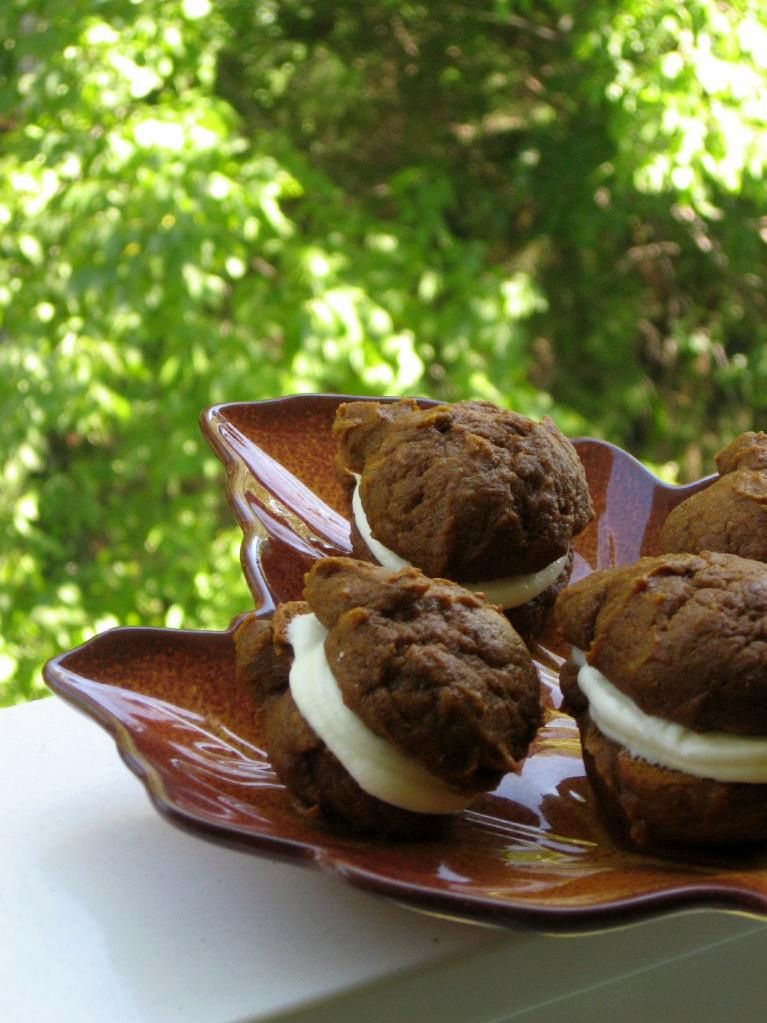
Jack-O’-Lantern Whoopie Pies — These cakey cookies are hearty, moist, spicy, and addictive. Whoopie pies should be part of every family’s Thanksgiving tradition.


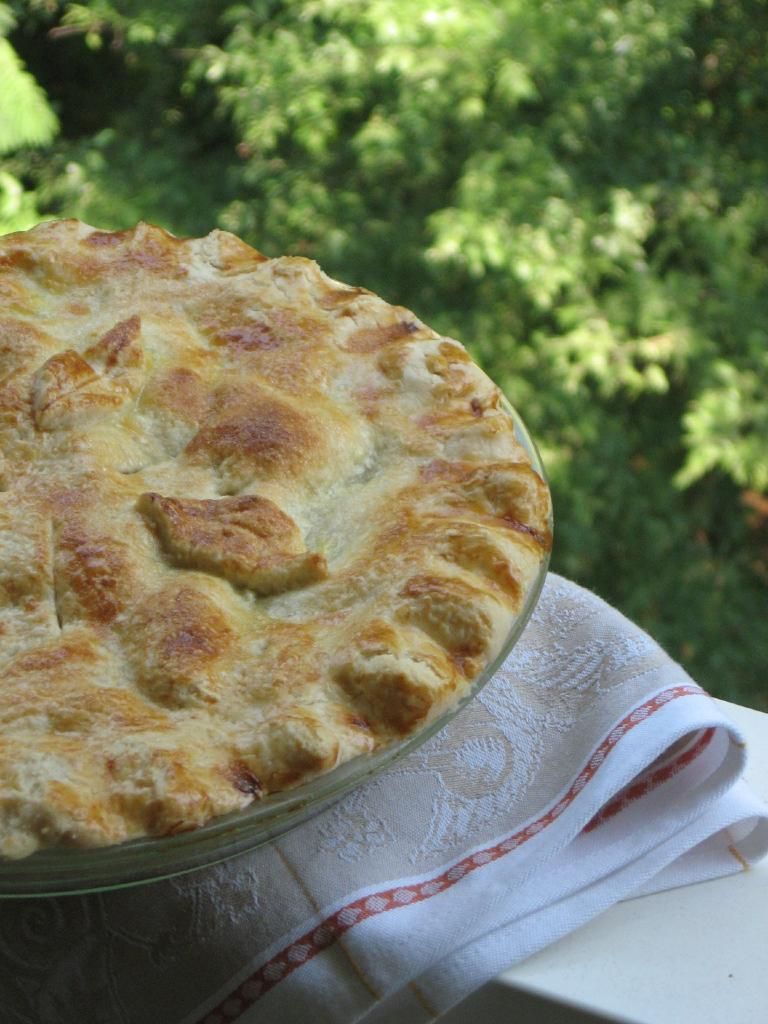
Peach Crisp Pie — Delicious, gooey peaches and crispy oats fill a tender, flaky crust. This is my favorite pie of all time!


Best Ever Cream Cheese Pound Cake with Easy Caramel Frosting and Spiced Apples — This moist, dense, finely-crumbed cake is heavenly with or without some spicy cinnamon apples on the side. “Best Ever” is not an exaggeration!


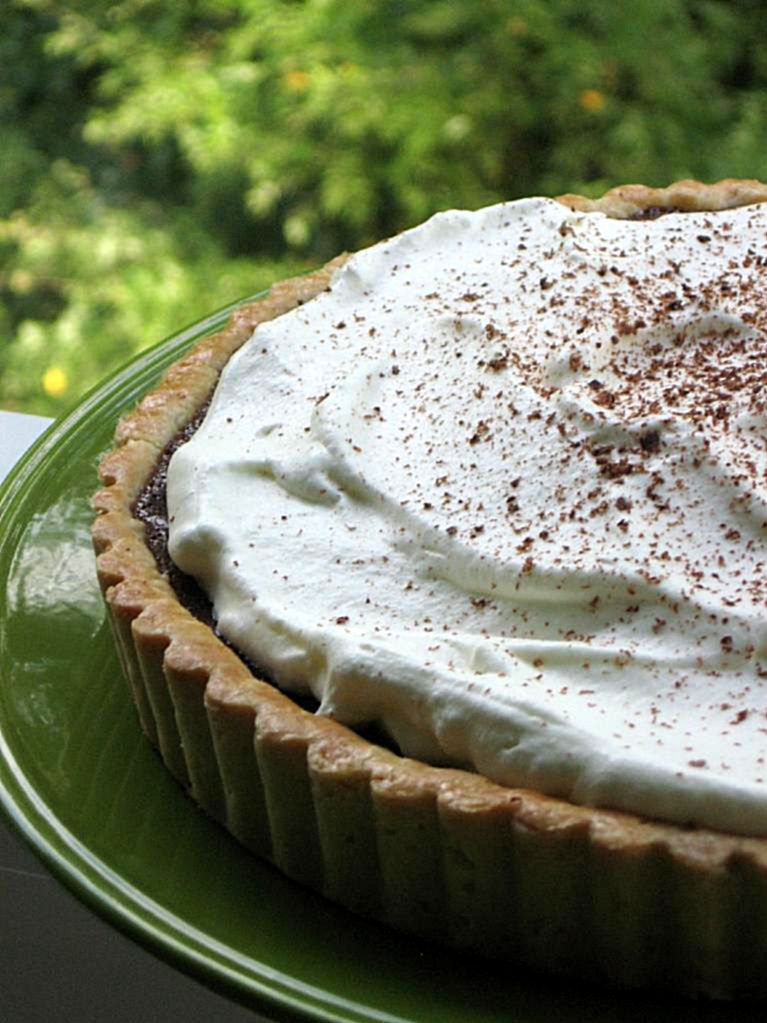
Chocolate Tart — Tired of pumpkin? If you’re a chocolate lover, this tart is a must-eat. Rich, indulgent chocolate fills the buttery tart crust, and a pile of freshly whipped cream accompanies each bite. This post also includes a bright and tangy Raspberry Cream Cheese Tart.


Overnight Yeast Rolls — These fluffy, delicious, buttery yeast rolls are part of my family’s annual Thanksgiving tradition. When I realized I was old enough to make them myself (and at any time of year, too), it was one ecstatic day in the kitchen!


Cardamom Pumpkin Macarons — Having an elegant Thanksgiving? These gluten-free cookies combine cardamom with traditional Thanksgiving pumpkin. Macarons are the perfect bite: crisp on the outside, chewy on the inside.


Barefoot Contessa’s Carrot Pineapple Cake — Looking for a big, beautiful cake to adorn your Thanksgiving table? Barefoot Contessa’s Carrot Pineapple Cake is brimming with hunks of pineapple, carrot, walnut, and raisin. With cream cheese frosting slathered on in a thick layer, it’s an elegant and decadent Thanksgiving dessert.

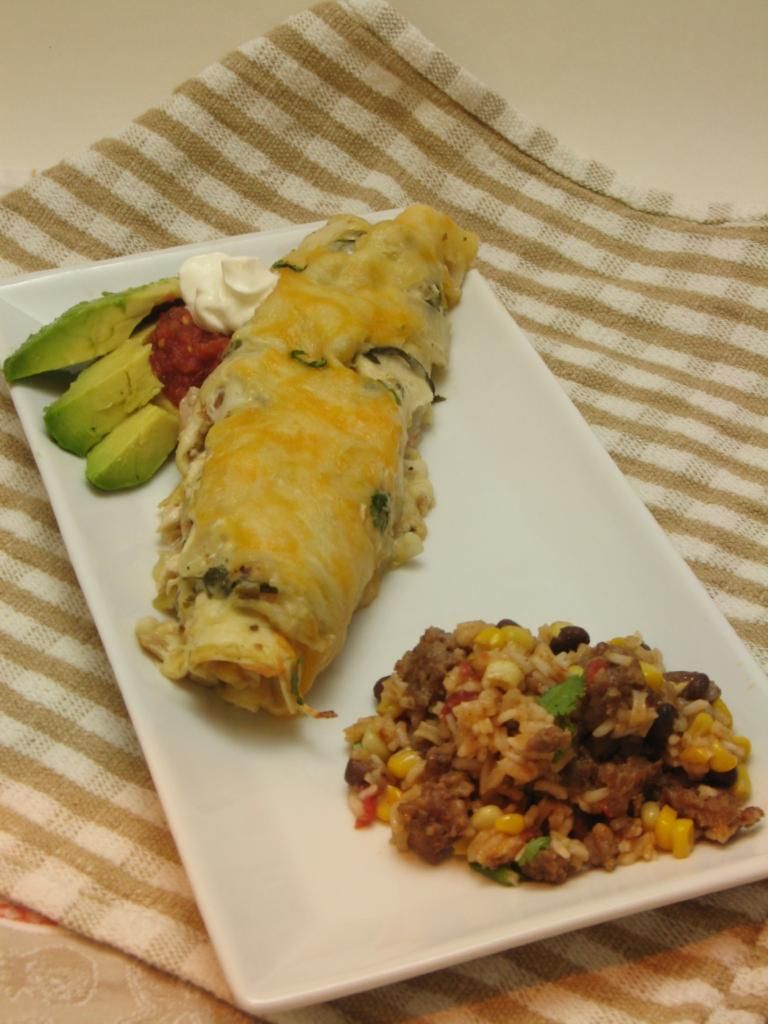
Green Chile TURKEY Enchiladas — Okay, these don’t quite fit on the Thanksgiving dinner table, but maybe you find yourself wondering what to do with all your juicy turkey leftovers? These Green Chile Chicken Enchiladas can be transformed into turkey-filled treats, and what a great way to spice up leftovers. The recipe is so seductive, yet very simple — it won’t take up all of your Black Friday!


Share Share this post with friends!

Gâteau aux Noix

Am I the only one who’s already drowning in holiday plans? I’ve got so many things up my sleeve that there’s no room for my arm in there. Warm, comforting things like grandmothers’ pies, flaky croissants, and freshly baked bread. Fun, festive things like visiting the Southern Christmas Show, trimming the tree, and popping the orange Chipmunks’ Christmas cassette tape into the player. Laborious, time-consuming things like catching up on grading my Mt. Everest of student work. My calendar is full of a variety of things, but what it comes down to is one word: BUSY.

Or maybe three words: BUSY BUSY BUSY.

All that BUSYness coming up is partly why this past weekend was so wonderful. Mike and I enjoyed our trip to Greensboro in our favorite way: with food! We hastily devoured McGriddles and Krispy Kremes, a delicious Thai lunch, and even a fancy dinner in downtown Greensboro. Obviously, we’re professionally trained to handle major consumption. Please don’t try this at home.


Hot doughnuts now! Two hot glazed originals, two raspberry filled, a pumpkin spice, and a chocolate custard-filled.


Sweet Mike before his test, and Thai food afterward!

We also got a chance to just relax. Well, okay, I relaxed. Mike practiced math, was tested on math, and then reflected/brooded about math. I felt a little guilty leisurely browsing the poetry section of a Borders bookstore while he took his math GRE a few blocks away! Thankfully, the test is over, and Mike can finally rest — until he gets his scores back and has to finish up grad school applications, that is. Eek, I’m getting stressed out again — back to this past weekend . . .

I browsed high and low to find the perfect cake for Mike and I to enjoy together on our trip. I wanted something hearty and rustic that could travel without much fuss. I also wanted something homey and special — something we’d remember a few months from now. When a friend sent me Molly of Orangette’s post about Gâteau aux Noix, it sounded perfect.

In fact, this very cake had made a warm home in Molly’s own travel memories — in her case, of visiting Les Eyzies-de-Tayac in southwestern France. The hotel baked these cakes and packaged slices in cellophane for them to eat during a long day outdoors. Since that trip, she’d been looking for a recipe to recreate the memory. After reading her recollections, I couldn’t wait to bake the “brown, humble, nutty” cake she described.

Indeed, she had described the gâteau aux noix perfectly. The cake retains the subtle, sophisticated flavor of dry white wine, while the nuts taste homey and familiar. It’s a simple cake that you can wrap up and cart about until you’re ready to enjoy it. I can also see this being an ideal pantry staple from which to swipe a hunk after each meal.

Mike and I first tried the cake with cinnamon whipped cream, but I decided that accompaniment eclipsed the gentle wine flavor. We then popped open a jar of pears in white grape juice (Trader Joe’s) to slice up with our cake instead. The flavors were perfect together. If you’re dying for creaminess, though, feel free to add a small dollop of whipped cream — just be sure it’s not heavy on the vanilla.

If you need a bit of simplicity in your life, then from my home to yours, here’s the cake for you!

Gâteau aux Noix, or French Walnut Cake


Recipe by: Orangette, adapted slightly from Saveur Cooks Authentic French
Yields: 1, 9-inch cake.

Ingredients:
½ cup chopped walnuts, or a touch more
3 eggs
1 cup granulated sugar
1/3 cup walnut oil
1/3 cup dry white wine
1 ½ cups unbleached all-purpose flour
2 tsp baking powder
1/8 tsp salt

Directions:
Preheat oven to 350. Place walnuts in a small dry saucepan and toast over medium heat, shaking pan, until nuts are fragrant, 5-10 minutes. Set aside.

Beat eggs in a medium bowl with an electric mixer. Gradually add sugar and beat until mixture is pale yellow, light, and fluffy. Add walnut oil and wine and mix well.

Generously grease a 9” cake pan (I used an 8-inch with no problem, by the way; your cake will just be a bit thicker). Sift flour, baking powder, and salt together into a large bowl. Add egg mixture to flour mixture and mix with a wooden spoon until just combined. Gently fold in walnuts, and then pour batter into prepared pan. NOTE: Mixing a touch of the flour with the walnuts before folding them in may help evenly distribute them.

Bake cake until a toothpick can be inserted and pulled out clean, about 40 minutes (mine took only 30-35, however, and required a bit of tenting with foil for the last five). Remove from oven, cool for ten minutes, and then turn out onto a cooling rack. Allow to cool completely and serve in wedges. Loosely whipped cream would be a nice accompaniment, if possible.

NOTE: We served this with cinnamon whipped cream, which may have proven too bold a flavor for this subtle cake. We then switched to serving it with jarred pears in white grape juice (Trader Joe’s), which was a perfect complement!


Mixing up the batter.


Baking and fresh out of the oven!


Share Share this post with friends!

1 17 18 19 20 21