cream cheese

Two Terrific Tarts: Chocolate and Raspberry Cream Cheese

You may have realized by now that I’m prone to bouts of exuberance over kitchen achievements. There’s something about tackling a recipe you’re inexperienced with, doing some kitchen acrobatics, and actually succeeding that just brightens the whole week. After crossing puff pastry off my to-bake list, my next goal was a tart. Ohhhh, tarts. They’re so gorgeous — those lovely scalloped edges; dense, golden brown shells; and artfully arranged fillings. I’d never tasted a homemade tart before, so I didn’t even realize that in addition to being beautiful, they’re also heavenly and scrumptious. I definitely found a new favorite dessert, and around this apartment, that’s saying a lot!
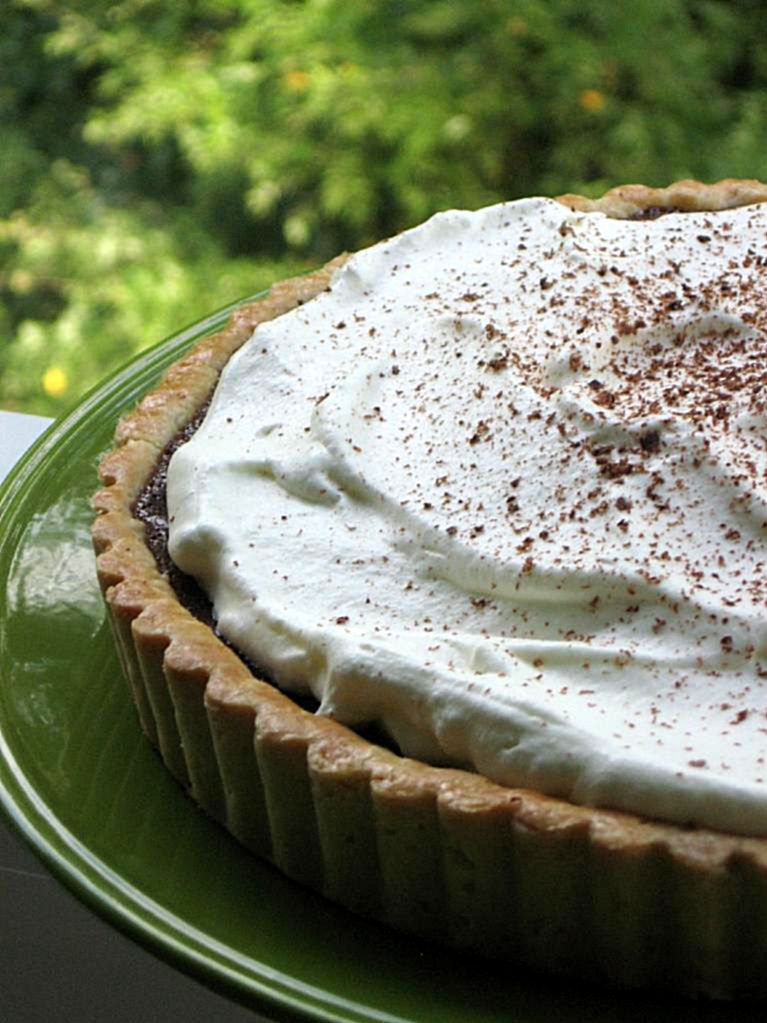


I decided on a Chocolate Tart and a Raspberry Cream Cheese Tart for my adventure. Both tarts use the same tart dough, a version of pâte sucrée from Tyler Florence. Pâte sucrée, also called “sweet dough,” is popular for dessert tarts, whereas it’s sibling, pâte brisée (“short dough”) is widely used for both dessert and savory tarts.

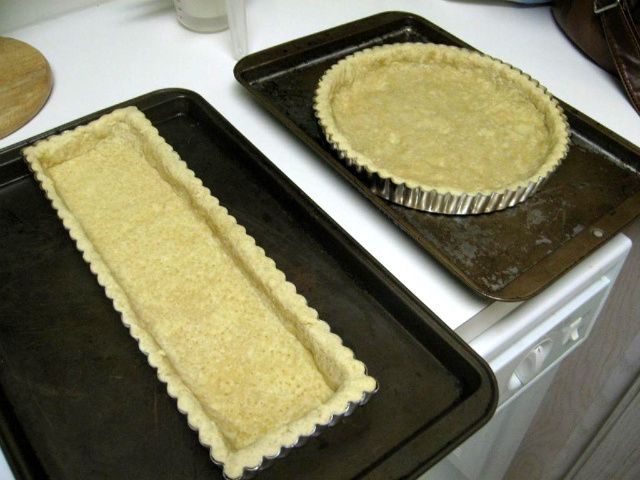
Pâte sucrée is apparently notoriously difficult to roll, and after trying once, I decided not to bother. Martha Stewart recommends (and she makes it looks very easy, of course) grating the chilled dough into your tart pan and gently pressing it into place. I found my dough too soft for this (even after freezing). In fact, when I pressed the dough against the grater, it gave way and I sliced my pinky on my tart pan — they’re not kidding when they say those edges are sharp! It’ll come as no surprise that after almost slicing off a finger, I only grated some of my dough. I tore the rest of it into smaller pieces and pressed them into the pan. After this struggle, I found the perfect technique: simply don’t let the dough come together in a ball in the food processor, but stop processing while it’s still in large crumbly pieces. Then pour these pieces into your tart pan and press them out. Perfect, easy, safe. Watch your fingers!
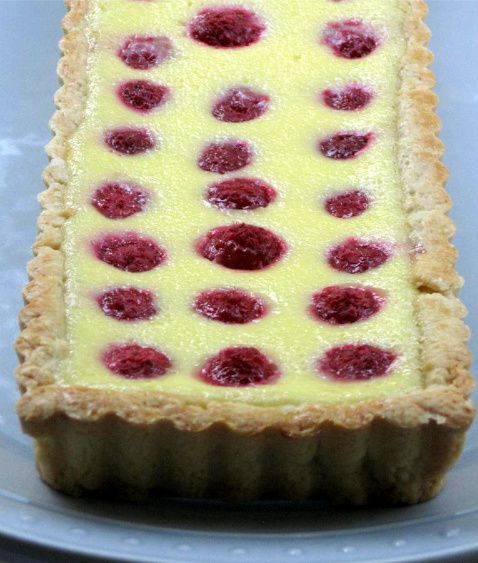
Once in the pan, the tart dough is chilled and blind-baked into a delicious, buttery crust. You end up with a dense but flaky, beautiful edge surrounding whatever sumptuous filling you choose. Want to know which of these two tarts I think you should make? Follow me on a little tangent . . .

I’m addicted to rating things. I’m always creating arbitrary rating scales in my head for movies, outfits, books, restaurants, nail polish colors . . . the list goes on! After eating a meal, I can instantly rank every component on the plate from favorite to least favorite, and am appalled when Mike can’t do the same (this often results in a conversation about my brain being weird).

In fact, you know the little clicky stars for rating things on Goodreads and Netflix? I love those! I wish there were little rating stars floating around in real life; imagine the rating convenience! You could walk around and poke at the stars next to stores, food, people . . . okay, maybe rating people isn’t the best idea. Yikes! At any rate (ha ha), despite the fact that Mike thinks it’s weird, I love to rate. But why am I telling you all this? Here’s why: I want you to know how impressive it is that I cannot decide which one of these amazing tarts I like the best. They’re very different flavors, and both so indulgent and delicious — I just can’t choose! Hopefully this is all the persuading you need to make both of them. You know you want to!
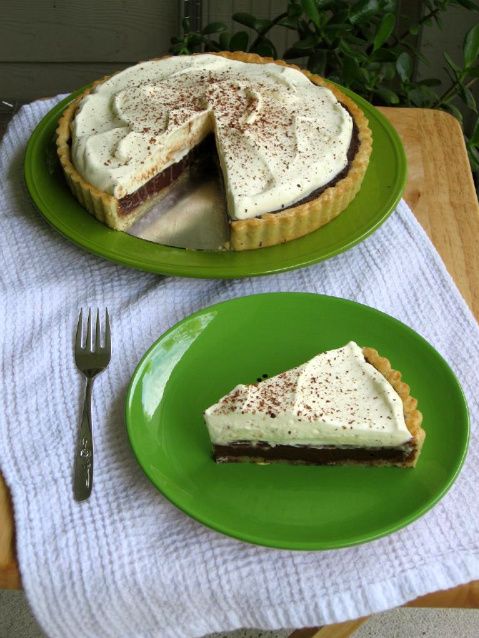
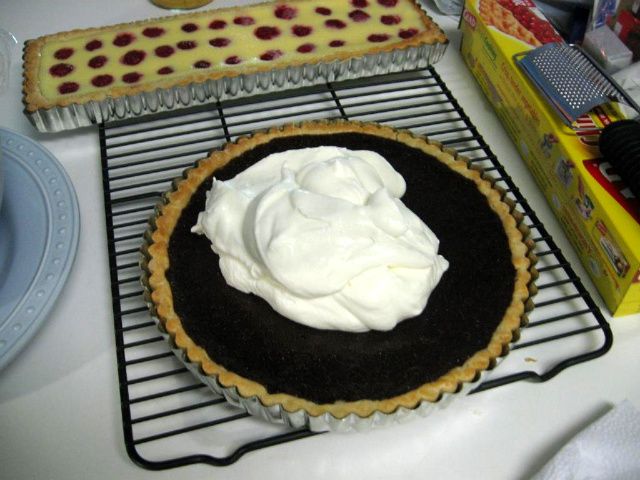
The Chocolate Tart is rich, decadent, and fudgy. The original recipe actually doesn’t include the mounds of fluffy whipped cream, but I knew we’d need more than just the crust to cut the richness of the filling. I have trouble believing even the biggest chocoholic could eat a piece of this tart without a pile of whipped cream or a scoop of vanilla ice cream. Then again, maybe other folks don’t eat a gigantic slab o’ tart like I do (I don’t have the restraint to do slivers, y’all). Regardless, the balance here of the chocolate with the whipped cream topping was perfect — and beautiful.
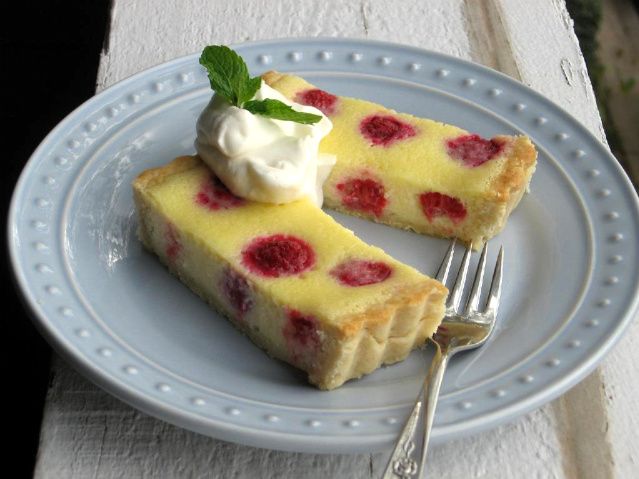
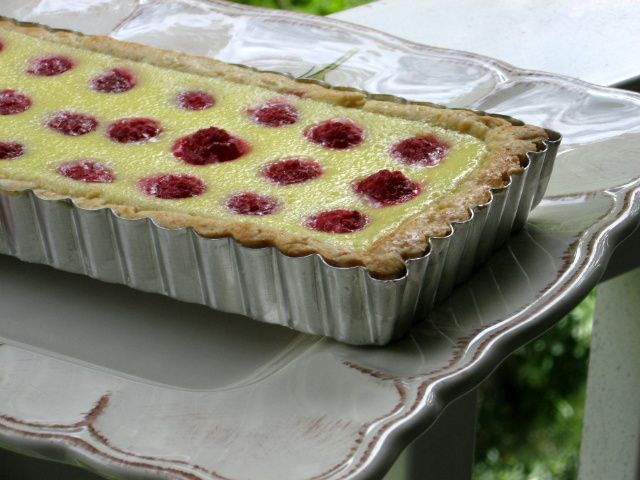
I picked the raspberry tart because I love combining raspberries with mellow cheeses: brie, ricotta, and (obviously) cream cheese. The tart berries in the luxurious, sweet cream cheese were the perfect flavors to pile into my fancy rectangular (!) tart crust once it was cooled from the oven. (Can you tell I’m excited about this tart being a gigantic rectangle? Oh, how I love Williams-Sonoma! I should’ve taken a fan-girl picture with the sales associate that recommended the rectangular pan. Do you think that would’ve seemed creepy? Nah, I’m sure she gets it all the time.) Anyway, once baked, each little raspberry peeks up from its creamy bed just begging to be slathered with whipped cream and devoured. Of course, Mike and I were willing to oblige.

Both of these tarts were so fantastic that I know you’re going to love them. If you don’t own a tart pan, pick one up — mine was only $9 even at fancy Williams-Sonoma, a price well worth the beauty and enjoyment a tart brings. Then roll up your sleeves and create a beautiful dessert.

Chocolate Whipped Cream Tart


Recipe by: Tyler Florence (adapted by me)
Yields: one standard tart, serves about 10

Tart Shell Ingredients:
2 cups all-purpose flour, plus more for dusting
3 tablespoons sugar
1/4 teaspoon salt
3/4 cup (1 1/2 sticks) unsalted butter, cold and chopped
1 large egg, separated
2 tablespoons ice water, plus more if needed

Filling Ingredients:
1 cup heavy cream
1/2 cup milk
10 ounces semisweet chocolate, chopped
2 tablespoons sugar
1/4 teaspoon salt
2 large eggs, at room temperature

Whipped Cream Topping Ingredients:
2 cups heavy cream
5 tablespoons granulated sugar
1/2 teaspoon vanilla extract

Directions:
To make the pastry: combine the flour, sugar, and salt in a large mixing bowl (or food processor). Add the butter and mix with a processor or hands until the mixture resembles coarse crumbs. Make a well in the middle of the pastry. Combine the egg yolk with the ice water in a small bowl, whisking to blend; pour it into the well and work it in to bind the dough until it holds together without being too wet or sticky. Squeeze a small amount together, if it is crumbly, add more ice water, 1 tablespoon at a time. When the dough is coming together but still in crumbs, pour the crumbs into your tart pan and press them out to fill the pan. Press them up the sides evenly and trim off any excess. Dock the dough (prick it slightly) with a fork all over. Put the tart shell in the refrigerator for at least 15 minutes to relax.

Preheat the oven to 350 degrees F. Place the tart pan on a sturdy cookie sheet so it will be easy to move in and out of the oven. Line the tart with aluminum foil and add pie weights or dried beans to keep the sides of the tart from buckling. Bake for 30 minutes, then remove the foil and weights. Using a pastry brush, lightly coat the crust with a beaten egg white. Return to the oven and continue to bake for another 8 minutes until the tart is golden in color, but not brown. Remember the tart will be cooked again with the filling. It should be cooked but light in color so that it will not burn on the second bake. Set aside to cool and lower the oven temperature to 325 degrees F.

To make the filling: Heat the heavy cream and milk in a pot over medium-low flame, until it simmers slightly around the edges. Remove from the heat; add the chopped chocolate and stir until melted and smoothed out. Add the sugar and salt and whisk until well incorporated. Beat the eggs in a small bowl until blended and add them to the chocolate mixture, stir until completely blended. Pour the filling into the cooled tart shell and bake at 325 degrees F for 15 to 20 minutes until the filling is set (wiggle the pan to test) and the surface is glossy. If you see any bubbles or cracks forming on the surface, take the tart out right away – that means it is beginning to become over baked. Cool completely before topping with whipped cream.

To make the whipped cream, beat all ingredients together until cream thickens to correct consistency. Pile the mound of whipped cream onto your cooled tart and use a spatula to spread it (messy = more rustic). Shave some leftover chocolate over the cream for decoration.
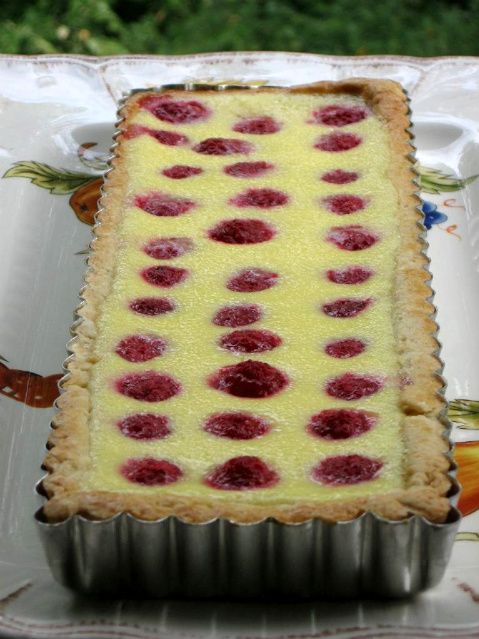

Raspberry Cream Cheese Tart still cooling in its pan.

Raspberry Cream Cheese Tart


Recipe by: Joy of Baking (with crust by Tyler Florence)
Yields: one standard tart, serves about 10

Tart Shell Ingredients:
2 cups all-purpose flour, plus more for dusting
3 tablespoons sugar
1/4 teaspoon salt
3/4 cup (1 1/2 sticks) unsalted butter, cold and chopped
1 large egg, separated
2 tablespoons ice water, plus more if needed

Filling Ingredients:
4 ounces (125 grams) cream cheese, room temperature
1/2 cup (100 grams) granulated white sugar
2 large eggs
3/4 cup (180 ml) light cream or half-and-half (coffee cream)
1/2 teaspoon pure vanilla extract
zest of 1 medium lemon or lime (I used just a spritz of lemon juice)
1 – 1 1/2 cups (110 – 165 grams) fresh raspberries

Whipped Cream Ingredients:
1 cup heavy cream
3 tablespoons granulated sugar
1/4 teaspoon vanilla extract

Directions:
To make the pastry: combine the flour, sugar, and salt in a large mixing bowl (or food processor). Add the butter and mix with a processor or hands until the mixture resembles coarse crumbs. Make a well in the middle of the pastry. Combine the egg yolk with the ice water in a small bowl, whisking to blend; pour it into the well and work it in to bind the dough until it holds together without being too wet or sticky. Squeeze a small amount together, if it is crumbly, add more ice water, 1 tablespoon at a time. Form the dough into a disk and wrap in plastic; refrigerate for at least 30 minutes.

Roll out the pastry* on a lightly floured surface into a 12-inch circle, about 1/4-inch thick. Carefully roll the dough up onto the pin (this may take a little practice) and lay it inside a 9-inch tart pan with a removable bottom. Press the dough into the pan so it fits tightly; press the edges into the sides of the pan. It is important to press the dough evenly into every nook and corner of the ring, especially the scalloped edges. Shave off the excess hanging dough with a knife. Dock the dough (prick it slightly) with a fork all over. Put the tart in the refrigerator for 15 minutes to relax.

*Note: As mentioned above, I found it very difficult to roll the dough, and instead carefully grated as much chilled dough as possible into the pan, tearing the rest. I then pressed it into all areas of the pan, being absolutely sure it covered every surface.

Preheat the oven to 350 degrees F. Place the tart pan on a sturdy cookie sheet so it will be easy to move in and out of the oven. Line the tart with aluminum foil and add pie weights or dried beans to keep the sides of the tart from buckling. Bake for 30 minutes, then remove the foil and weights. Using a pastry brush, lightly coat the crust with a beaten egg white. Return to the oven and continue to bake for another 8 minutes until the tart is golden in color, but not brown. Remember the tart will be cooked again with the filling. It should be cooked but light in color so that it will not burn on the second bake. Set aside to cool.

To make the filling: In a food processor or electric mixer place the cream cheese and process until smooth. Add sugar and beat until incorporated. Add eggs, one at a time, and process until thoroughly combined. Add remaining ingredients and beat until well blended and smooth.

Place the tart pan on a larger baking pan. Carefully pour the filling into the pre-baked tart shell. Arrange the raspberries evenly around the tart shell and then bake the tart for about 30 – 35 minutes or until the filling is set (test by gently shaking the pan). Transfer tart to wire rack to cool. Serve warm or cold accompanied by softly whipped cream and fresh raspberries. Refrigerate leftovers.

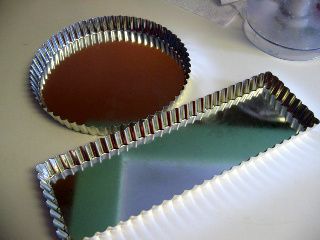
Off to Williams-Sonoma for some tart pan shopping!
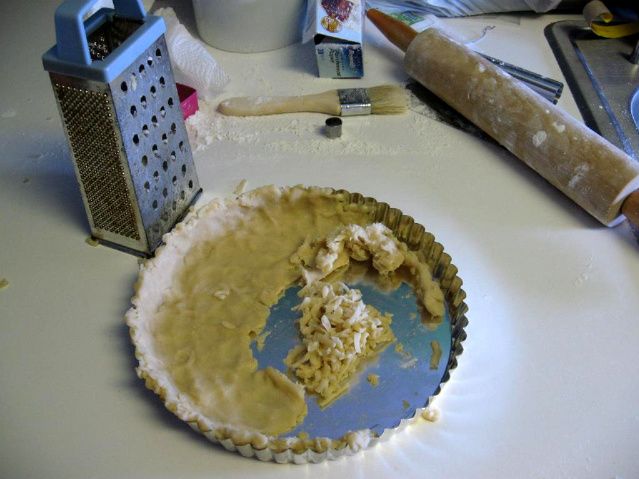
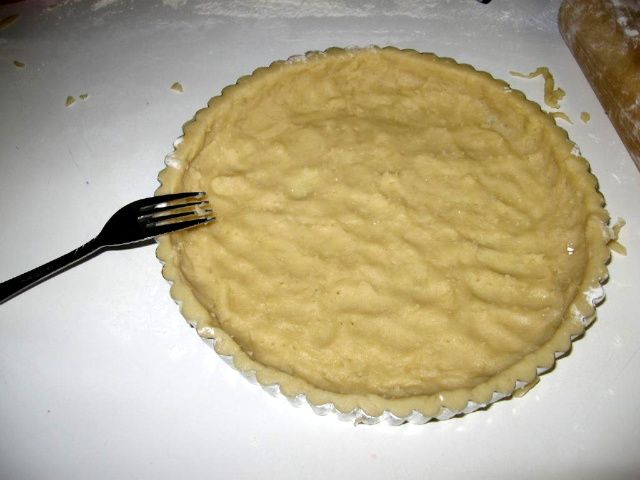

Grating and docking the tart dough (and trying not to lose any digits).
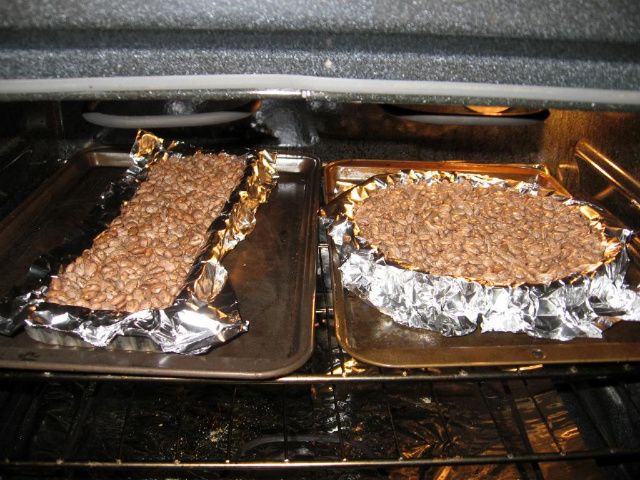


Blind baking the crust with beans as weights.
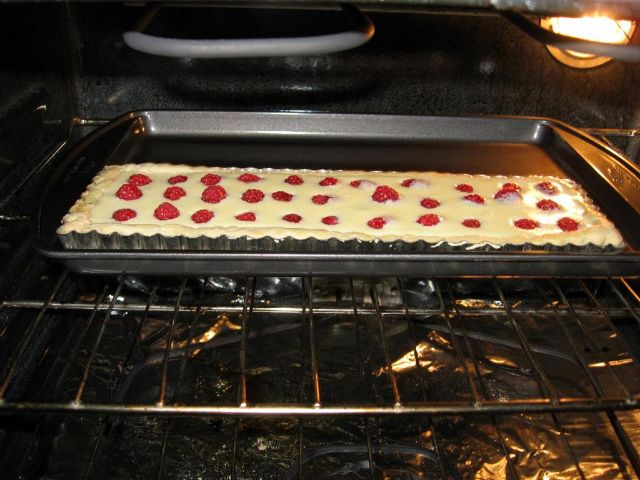


Raspberry Cream Cheese Tart baking and fresh from the oven.
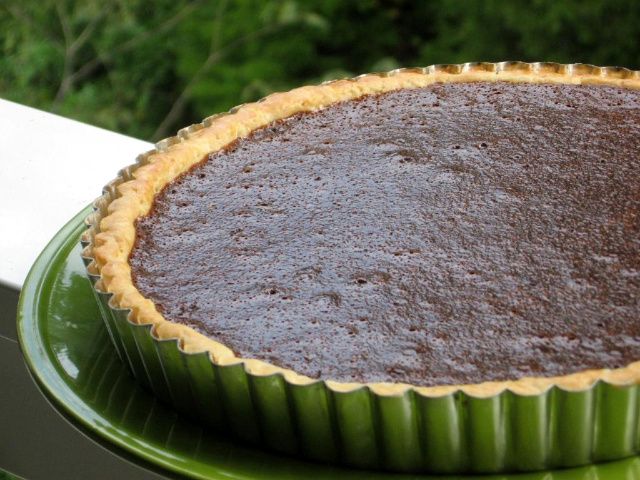


Chocolate Tart cooling, and then getting the whipped cream treatment.

Want to read more about crusts? My article, “Journey Towards a Perfect Crust,” chronicles my quest for buttery, flaky pies and tarts. Read it at The Daring Kitchen.

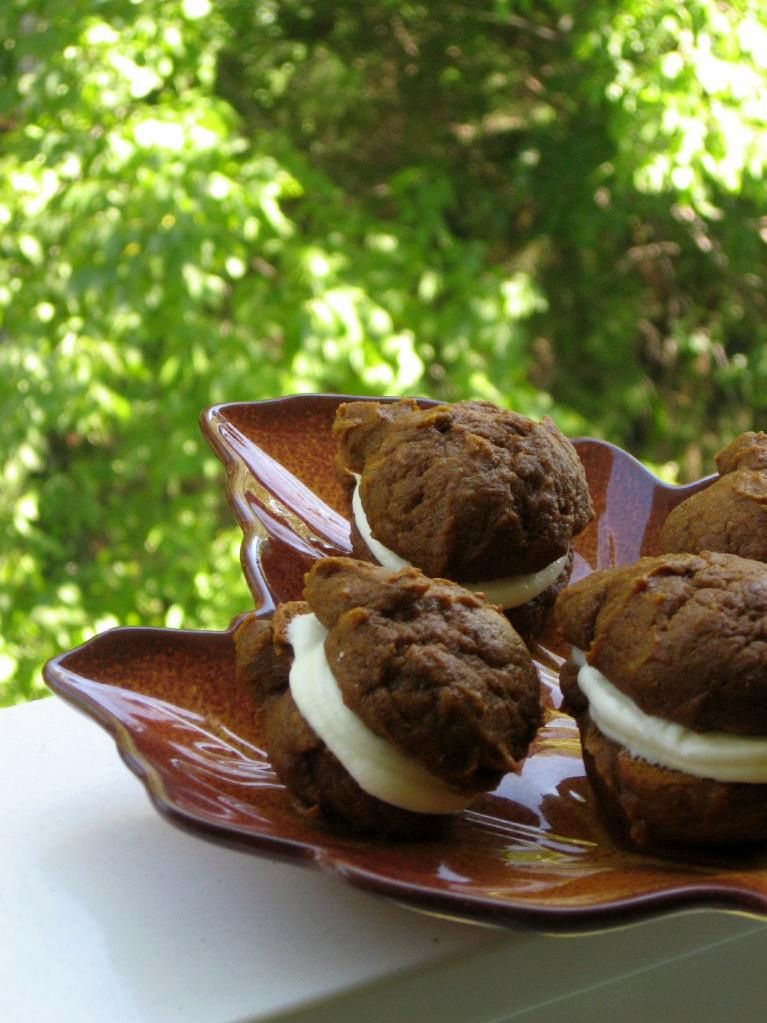
Jack-o’-Lantern Whoopie Pies

I love how the vibrant online community of food blogs has erupted into autumnal flavors. A flickering fireplace on a chilly day has nothing on the cinnamon-and-spice glow of recipes flickering across my computer screen. The latter keeps not my toes but my tastebuds warm and cozy. Okay, okay, I’ll admit we haven’t had much need of it lately in Charlotte. The South still can’t make up its mind about the season, so temperatures have been in the 80s the past few days! Sorry to those in New England who are grumbling a bit right now. Soon enough, the chill will settle into North Carolina. In the meantime, I’ll enjoy fall flavors without the appropriate meteorological accoutrement.

My friend Katie and I had a date to bake together last weekend, and I was thrilled to hear that she was craving pumpkin just like I was. You may have heard about the pumpkin shortage, but thankfully I’d stocked up on a few cans of pumpkin before even hearing about it! So Katie and I brainstormed via email and decided to use our scarce squash to bake these gorgeous pumpkin whoopie pies. The recipe is from Matt Lewis of Baked bakery in New York City.

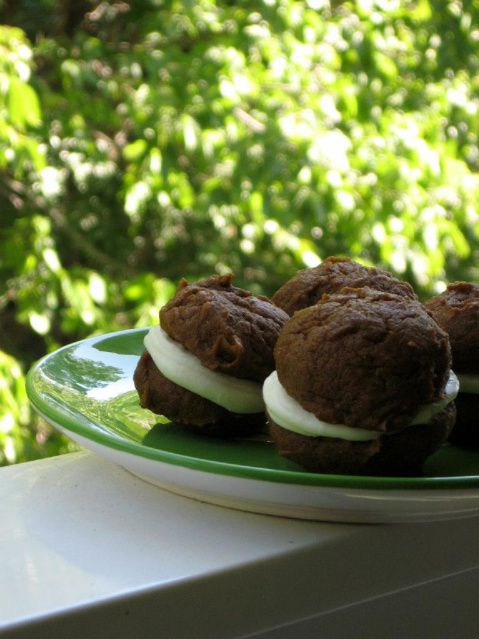
I’m a huge whoopie pie fan. My mom makes traditional whoopie pies each Thanksgiving and the rich, cakey chocolate and cream combination is something I look forward to all year. Imagine that same extremely moist, cakey texture with a beautiful pumpkin spice flavor instead: rich, dark brown sugar; ginger; ground cloves; and cinnamon. The result is a darker than average, plump pie that when slathered with sweet cream cheese spread, is the perfect fall bite.

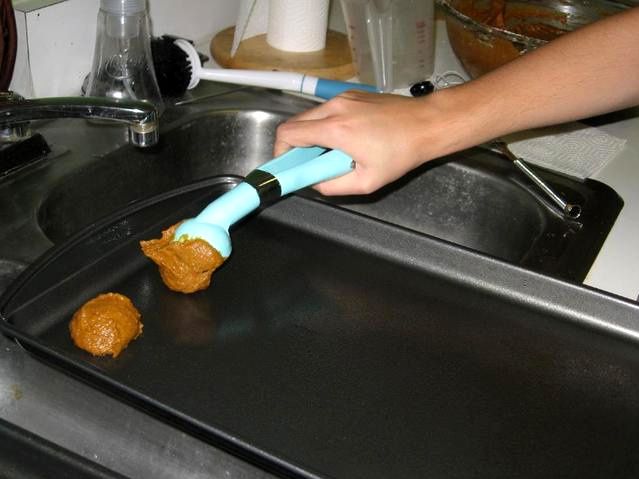
This is also the perfect recipe for cooking in partners. Katie measured out dry ingredients while I whisked pumpkin and sugars together. We found that she (with previous ice cream shop experience) was an expert cookie scooper — wonderful, especially since I quickly realized I was lousy at it!


Katie showing off her scooping skills.

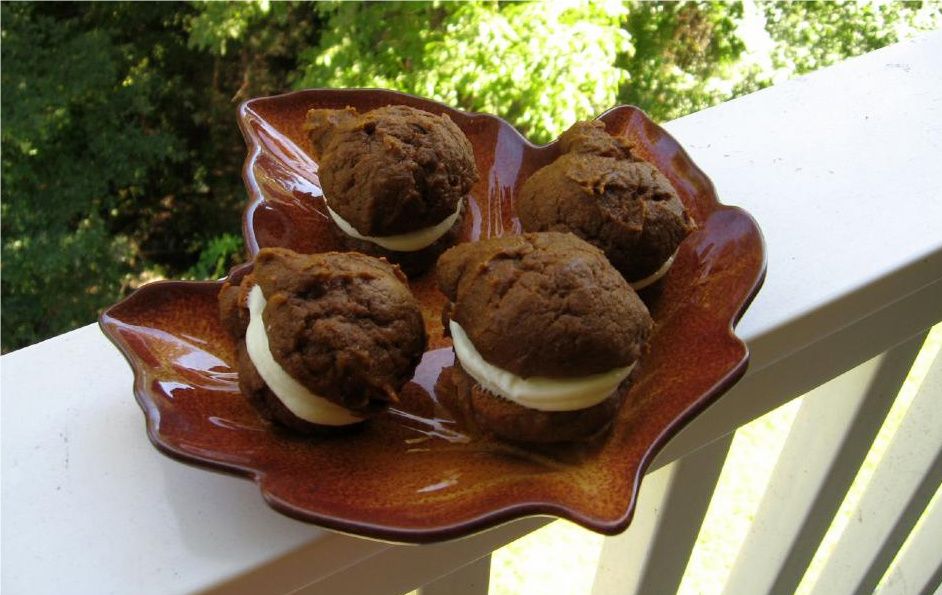
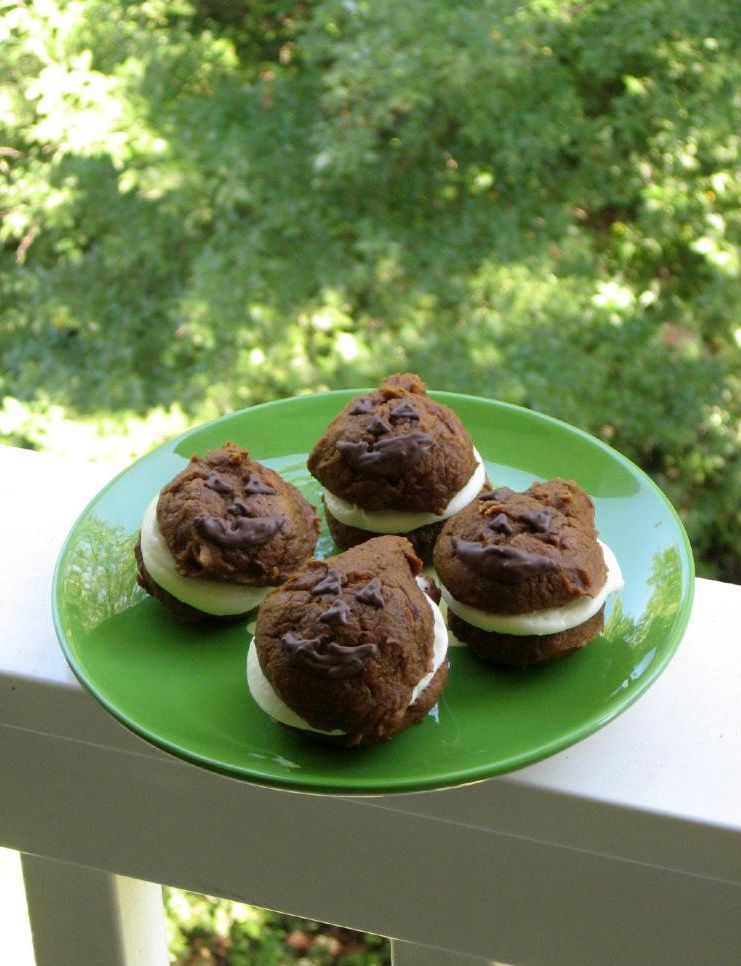
I went behind her and sculpted batter in the shape of pumpkin stems on each pie in hopes that they’d look like little pumpkins after baking. Sometimes this worked beautifully. Sometimes we ended up with whoopie pies shaped like triangles, snowmen, or the state of Idaho. It was a cute little Idahoan whoopie pie, don’t get me wrong, but the pumpkins were cuter:

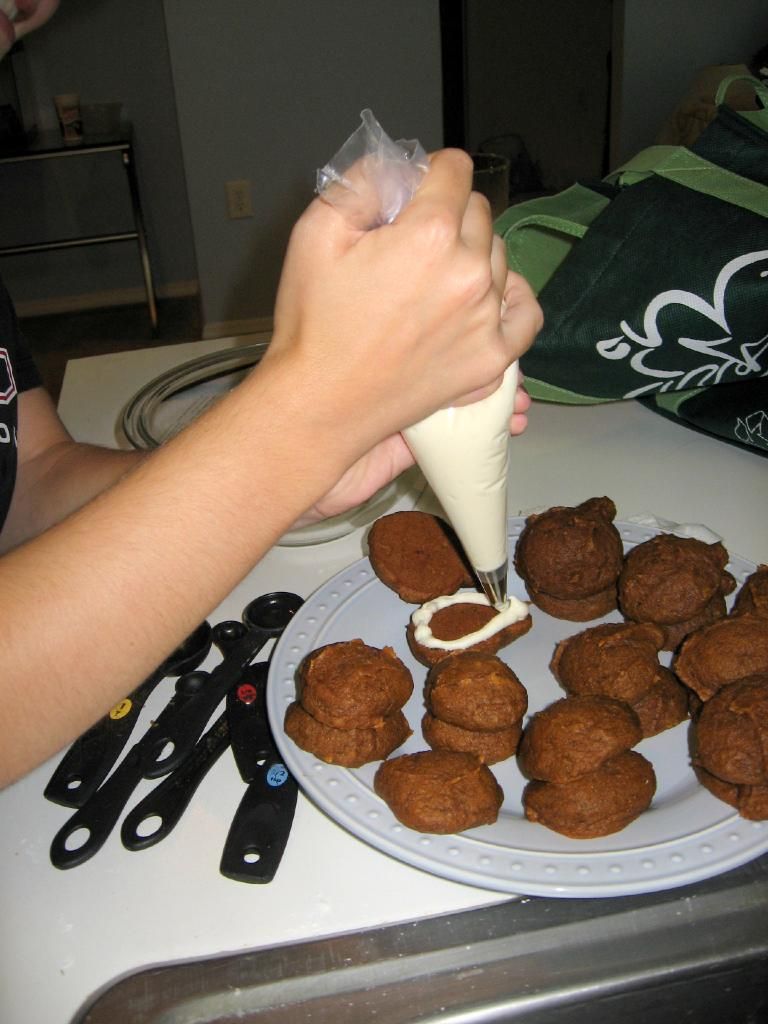
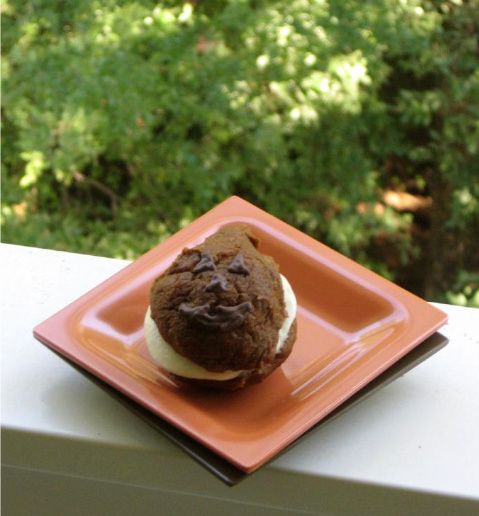
After seeing Bakerella’s cute twist on her pumpkin pie bites (Jack-o’-lantern faces drawn on in chocolate), I knew I wanted to try faces on our whoopie pies. Katie piped cream cheese filling into each sandwich while I melted up some Candiquik (any chocolate candy melt will do) and set to work. When finished, the faces were adorable — but a little hard to see against the dark whoopie pies! Perhaps using light brown sugar in the pies would make the faces stand out more, but then you’d lose a bit of that great molasses flavor. Use your personal tastebuds and aesthetic to decide!


Katie doing some fantastic filling.


Jack-o’-lantern face!

One thing I didn’t anticipate was how good chocolate and pumpkin taste together! Y’all already knew this, didn’t you?! Why didn’t anyone tell me?! The richness of the milk chocolate was a perfect partner to the spicy pumpkin flavor, and I’ve even been inspired to search for more recipes that use this combination. Give it a try if you haven’t already!

There are so many satisfying facets of these whoopie pies: the simple recipe, the deep and indulgent fall taste, the cute Jack-o’-lantern grins. The most satisfying part, though, was definitely the time spent baking with a friend. I hope you’ll invite a friend over (or maybe just invite a husband, wife, son, or daughter into the kitchen) to help you make some of these sweet pun’kins!

Jack-o’-Lantern Whoopie Pies
Recipe by: Matt Lewis of Baked Bakery (adapted slightly by me)
Yields: 24 medium whoopie pies or about 34 small-scoop whoopie pies


Pumpkin Whoopie Pie Ingredients:
3 cups all-purpose flour
1 teaspoon salt
1 teaspoon baking powder
1 teaspoon baking soda
2 tablespoons ground cinnamon
1 tablespoon ground ginger
1 tablespoon ground cloves
2 cups firmly packed dark-brown sugar
1 cup vegetable oil
3 cups pumpkin puree, chilled (chilling ensures pies won’t spread too much)
2 large eggs
1 teaspoon pure vanilla extract


Cream Cheese Filling Ingredients:
3 cups confectioners’ sugar
1/2 cup (1 stick) unsalted butter, softened
8 ounces cream cheese, softened
1 teaspoon pure vanilla extract
melted chocolate for piping on Jack-o’-Lantern faces


Directions:
1. Make the cookies: Preheat oven to 350 degrees. Line two baking sheets with parchment paper or a nonstick baking mat; set aside.
2. In a large bowl, whisk together flour, salt, baking powder, baking soda, cinnamon, ginger, and cloves; set aside. In another large bowl, whisk together brown sugar and oil until well combined. Add pumpkin puree and whisk until combined. Add eggs and vanilla and whisk until well combined. Sprinkle flour mixture over pumpkin mixture and whisk until fully incorporated.
3. Using a small ice cream scoop with a release mechanism, drop heaping tablespoons of dough onto prepared baking sheets, about 1 inch apart. Transfer to oven and bake until cookies are just starting to crack on top and a toothpick inserted into the center of each cookie comes out clean, about 15 minutes. Let cool completely on pan.
4. Make the filling: Sift confectioner’ sugar into a medium bowl; set aside. In the bowl of an electric mixer fitted with the paddle attachment, beat butter until smooth. Add cream cheese and beat until well combined. Add confectioners’ sugar and vanilla, beat just until smooth. (Filling can be made up to a day in advance. Cover and refrigerate; let stand at room temperature to soften before using.)
5. Assemble the whoopie pies: Line a baking sheet with parchment paper and set aside. Transfer filling to a disposable pastry bag and snip the end. When cookies have cooled completely, pipe a large dollop of filling on the flat side of half of the cookies. Sandwich with remaining cookies, pressing down slightly so that the filling spreads to the edge of the cookies. Use a ziplock bag with a tiny corner cut off to pipe on melted chocolate in the shape of Jack-o’-Lantern faces. Allow these to harden (stick them in the fridge for a bit to speed it up). Transfer sandwiched and decorated cookies to a prepared baking sheet and cover with plastic wrap. Refrigerate cookies at least 30 minutes before serving and up to 3 days.

NOTE: There’s a lovely video of Matt Lewis making these whoopie pies located here (click on “Watch Video.”) Though the recipe above seems to have a lot of spice, it’s really the perfect balance — don’t skimp.

Best Ever Cream Cheese Pound Cake with Easy Caramel Frosting and Spiced Apples

Last Saturday served as a perfect example of why I dread the coming winter. It was a frigid day filled with misty rain and capped by a gloomy, gray sky. The slick streets were inundated with horrible Charlotte traffic. Depressed by the lack of sunlight for taking photos, I was nevertheless trekking to the store and to my parents’ house to gather materials for a cake. If you’d caught a glimpse of me, you might’ve mistaken me for a little black raincloud; in fact, all I needed was to take Winnie’s cue and strap a balloon around myself for the illusion to be complete. I scowled about the drivers who neglected to use their turn signals, griped to myself about the parking situation at the store, stepped in a billion ice-cold puddles, and bought a plate for my cake only to find it was “not for food use.” Humpf harrumpf humpflumpf! Finally, I grumpily turned into my parents’ neighborhood to borrow a tube pan from my mom.

[youtube=http://www.youtube.com/watch?v=XP1vPfSCYQs&hl=en&fs=1&]

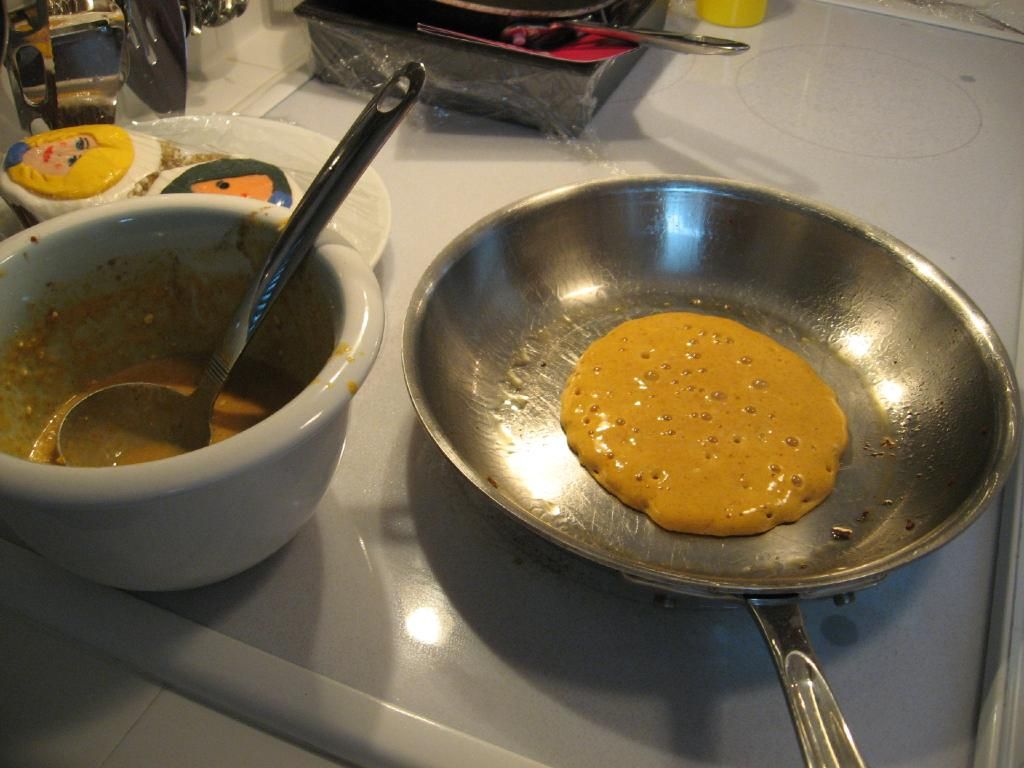
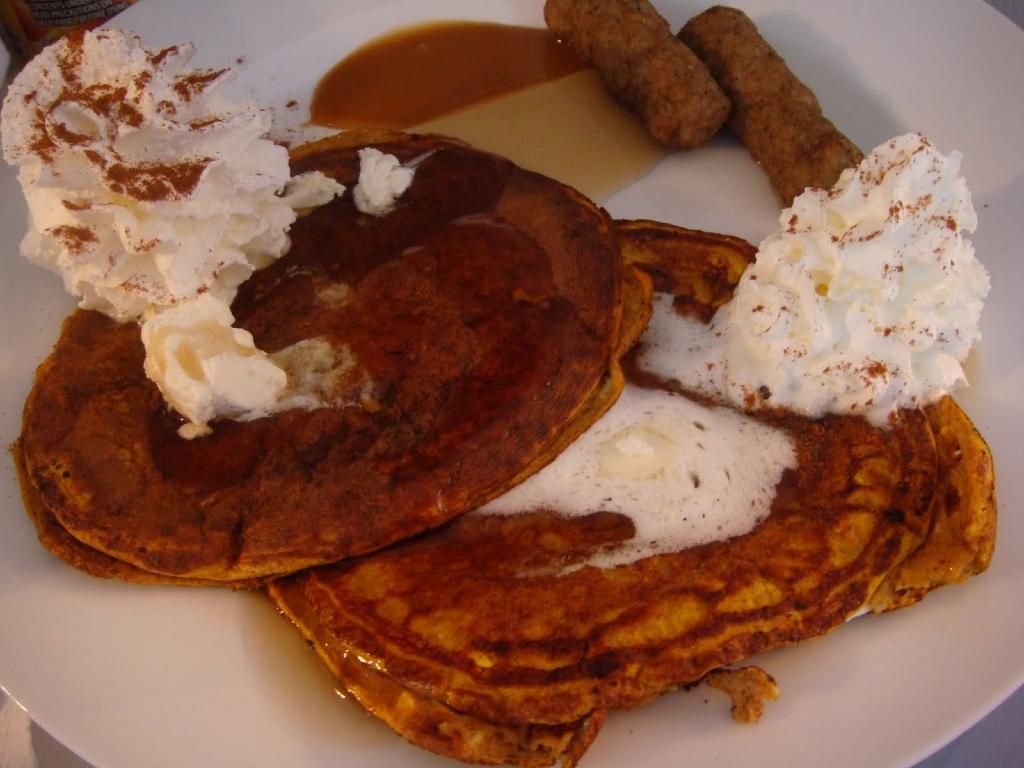
When I finally arrived at my parents’ house, I was thrilled to see the warm, orange glow of the kitchen cut through the side windows into the gray morning light. Finally, some relief and refuge from the weather and from my mood. Indeed, I walked in the door and what should greet me but the smell of freshly made pumpkin pancakes oozing with butter, syrup, sugar-free caramel sauce, and whipped cream. And don’t forget the sizzle of turkey sausages on the side! My mom was standing there channeling June Cleaver (who am I kidding? June has nothing on her) flipping delicious Low-Carb Pumpkin Pancakes while my dad read the paper and anticipated his plateful. Shame on me for wallowing in my mood! My faithful God had arranged such a sweet homecoming for me despite my scowl.


Flipping some delicious Low-Carb Pumpkin Pancakes. If you look closely, you can see my mom’s Mii Cupcakes in the background!


Low-Carb Pumpkin Pancakes served with butter, syrup, sugar-free caramel, and sugar-free whipped cream. Side of turkey sausage.


Dad enjoying his breakfast.

Food plays such a prominent role in my family, and certain dishes in my mind are associated with comforting or joyful memories. The smorgasbord of silly appetizers at our New Year’s Eve game night, the cinnamon rolls and egg casserole on Christmas morning, Dad’s amazing pork butt and slaw, the chicken and dumplings we always clamored for, monkey bread! Milk toast! Sausages, peppers and onions! I could go on and on. It’s no wonder that walking into a comforting kitchen filled with delicious scents and a welcoming plate of breakfast truly felt like coming home — not just coming to borrow a tube pan. My spirits were lifted, and as I drove home, I was prepared for a day of baking another lovely family memory: the richest, most dense and moist pound cake you’ve ever tasted. It’s iced with a simple caramel frosting and served alongside some Southern fried apples.


The best pound cake ever in the history of the universe, hands down. I’m not even worried about overselling it.

Let me see if I can explain how amazing this cake is. The cream cheese imparts a richness to the already buttery batter, and results in a very dense, smooth cake. Cutting into the cake is like slicing into butter, and it’s lovely served slightly chilled. My usual complaint with pound cakes is that they’re dry even with a glaze, but this one stays perfectly moist throughout its entire baking time. The frosting has a sultry caramel flavor without the fuss of normal caramel making, and is the perfect complement to the buttery cake. As for the apples, those were my addition! What with the nice fall days we’ve been having (well, except for the miserable weather from last week), warm Southern spiced apples sounded like a delicious accompaniment to a cool cake. And maybe there was a scoop of vanilla bean ice cream in there somewhere too!

This is absolutely one of those must-bake recipes. One bite and you’ll be daydreaming all day about slicing yourself off another piece! And what a lovely dessert to share with family. I drove back to my parents’ house on Sunday to drop some off for them, and my dad sent me an email from work the next day saying he was enjoying a slice. I hope once you taste your first forkful, this cake will become part of your family’s own food memories.

Cream Cheese Pound Cake with Easy Caramel Frosting


Recipe By: Southern Living
Yields: 12

Cream Cheese Pound Cake Ingredients:
1 1/2 cups butter, softened
8 ounces cream cheese, softened
3 cups sugar
6 large eggs
1 1/2 tsp vanilla
3 cups flour
1/8 teaspoon salt

Caramel Frosting Ingredients:
1/4 cup whipping cream
1 cup firmly packed brown sugar
1 teaspoon vanilla
2 1/2 cups powdered sugar
1/2 cup butter

Directions:
Make the pound cake: beat butter and cream cheese at medium speed of an electric mixer 2 minutes or until creamy. Gradually add sugar and beat 5-7 minutes until light and fluffy. Add eggs, one at a time and beat only until yellow disappears. Stir in vanilla.

Combine flour and salt and add to creamed mixture beating on low speed of electric mixture just until blended after each addition. Pour into greased and floured 10-inch tube pan. Fill a 2-cup ovenproof measuring cup with water and place in oven with cake (keeps it moist!). Bake at 300 degrees for 1 hour and 45 minutes or until a wooden toothpick comes out clean (check in several areas of the cake to be sure it’s completely done). Let cool on wire rack for 10 minutes then remove from pan (invert onto a plate and then invert onto another so that it’s upright) and let cool completely. When cool, spread caramel frosting over the sides.

Make the caramel frosting: melt butter in a heavy saucepan. Add brown sugar; cook over low heat, stirring constantly, 1 1/2 to 2 minutes or until sugar dissolves (do not boil). Remove from heat.

Stir in whipping cream. Add powdered sugar and vanilla. Beat at high speed of an electric mixture until spreading consistency (do not overbeat, or your frosting will develop a play-doughy, “crunchy” consistency. It’ll still taste good, but won’t look very nice or be easy to spread). Spread immediately on top and sides of cake.


Care for some Southern Fried Apples with your cake?

Southern Fried Apples


Recipe by: Diana Rattray (slightly adapted and halved)
Yields: about 4 cups of fried apples

Ingredients:
4 medium Granny Smith apples, cored, peeled, chopped
1/8 cup butter
1/4 – 1/2 cup brown sugar (to taste)
1/4 teaspoon cinnamon
pinch nutmeg (about half of 1/8 teaspoon)

Preparation:
Melt butter in a heavy skillet over medium-low heat. Add apples, brown sugar, cinnamon and nutmeg. Sauté 15 to 20 minutes, or until apples are tender.

Julie’s Note: I made double this and had way too many apples. Three or four tender spiced apple slices are perfect to accompany a single slice of cake, so you don’t need many. You can keep these refrigerated in an airtight container and just warm them up in the microwave before serving with cold cake (and ice cream or whipped cream, if desired). Finally, plenty of websites told me not to bother peeling my apples, so I didn’t, but I wished I had. Even though the peel got tender, it was still a different texture than the apple flesh and wasn’t “a-peel-ing.” Ha ha!


Enjoy!


Share Share this post with friends!

Plum and Cream Mini Tortes

I was reading over the William Carlos Williams poem, “This is Just to Say,” again this weekend after a sweet reader made my Blueberry Lemon Cheesecake Cupcakes and thoughtfully sent me a picture. Those blueberry gems were the first entry on Willow Bird Baking, and I still remember the ice cold blueberries; the cool, dense crumb; the frigid frosting . . . all that cool deliciousness is what led me to paste Williams’ poem into the entry. What was really lovely about reading the poem again is the word that jumped out at me this time around.

This Is Just to Say

I have eaten
the plums
that were in
the icebox

and which
you were probably
saving
for breakfast

Forgive me
they were delicious
so sweet
and so cold

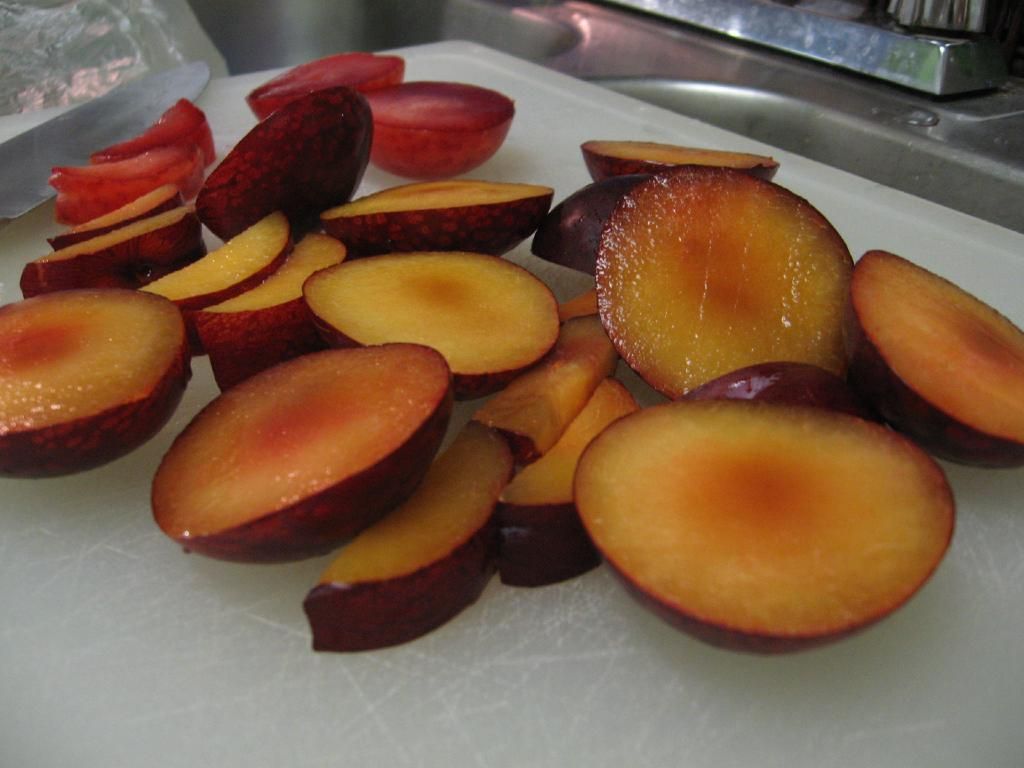
PLUMS. Ice cold plums. Purple orbs bursting with juice, beaded with water, basking in my colander. Bulging indigo skins covering deep orange-red flesh, plucked up to the cutting board and sliced with a splush. Plush, perfect, plump plums perforated between my . . . teeth. If only there were a p-word for teeth! But you get the idea, alliterated or not. I began fantasizing about performing great culinary feats with those delicious spheres.

A friend told me about an Original Plum Torte recipe she has fond childhood memories of. The recipe sounded delicious: cinnamon and sugar sprinkled over roasted plums inside a spongy cake. The recipe also sounded gorgeous: I love the look of naked plum halves baked until they bubble with fruity sugar. It’s a lovely presentation. I was sold.

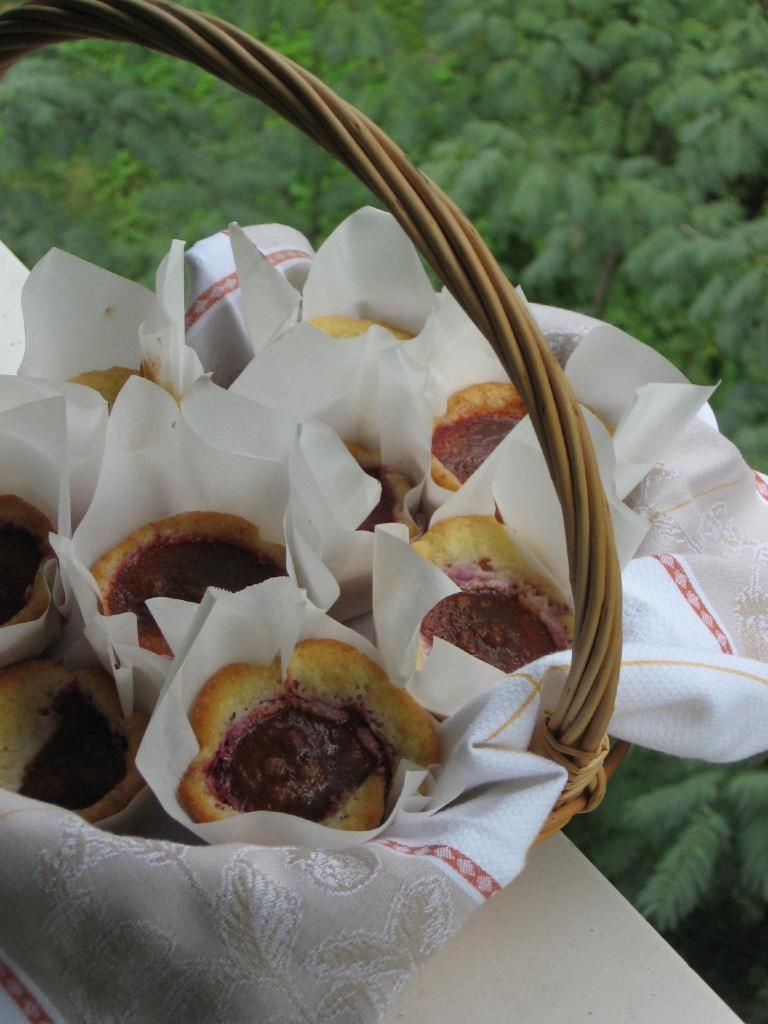
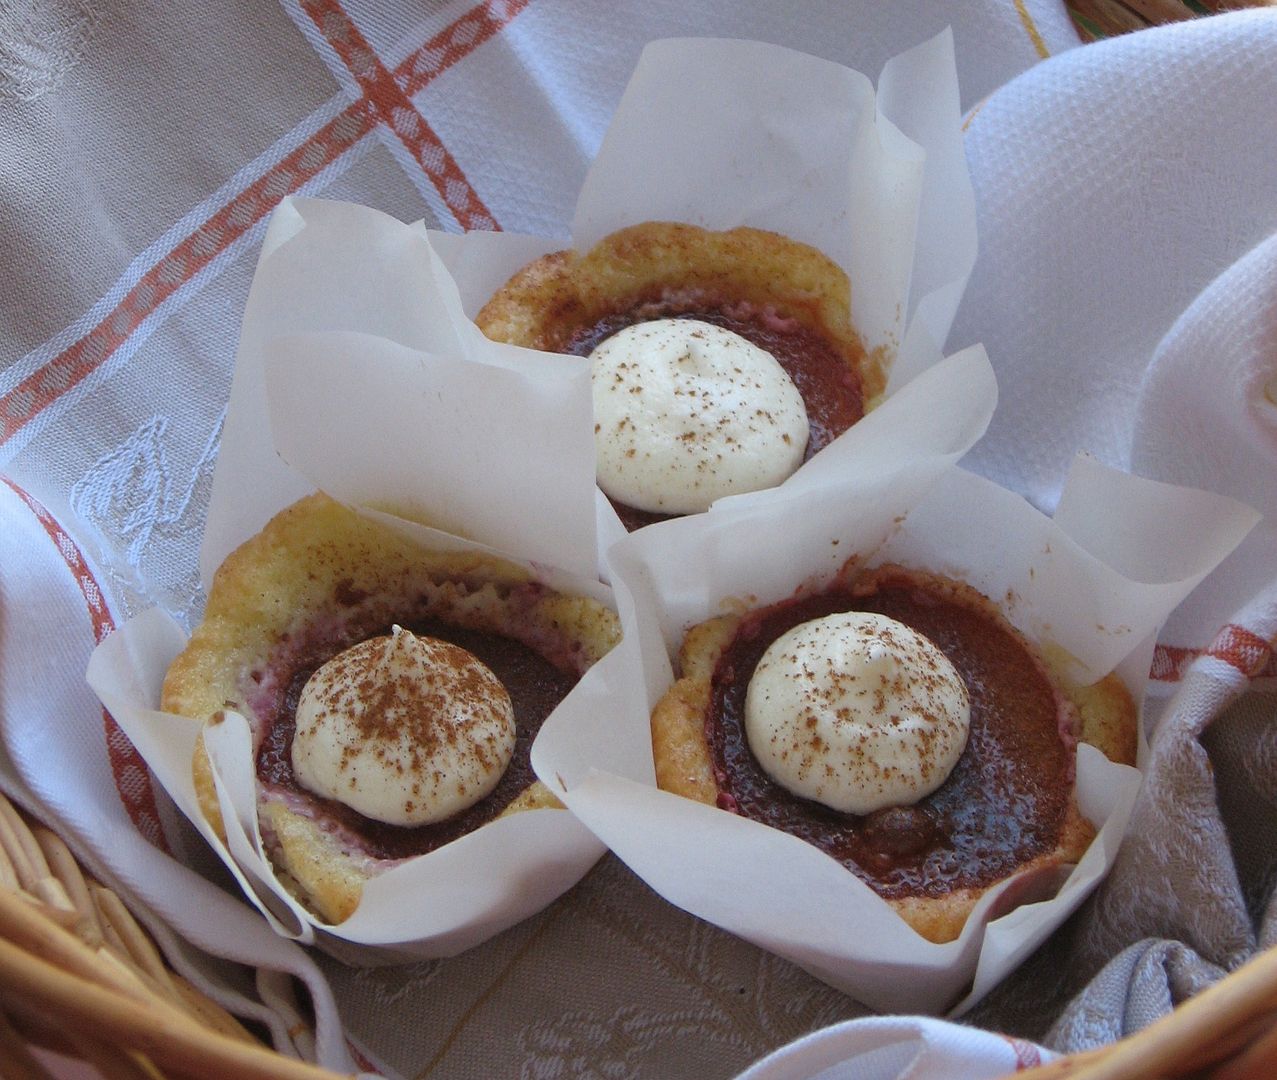
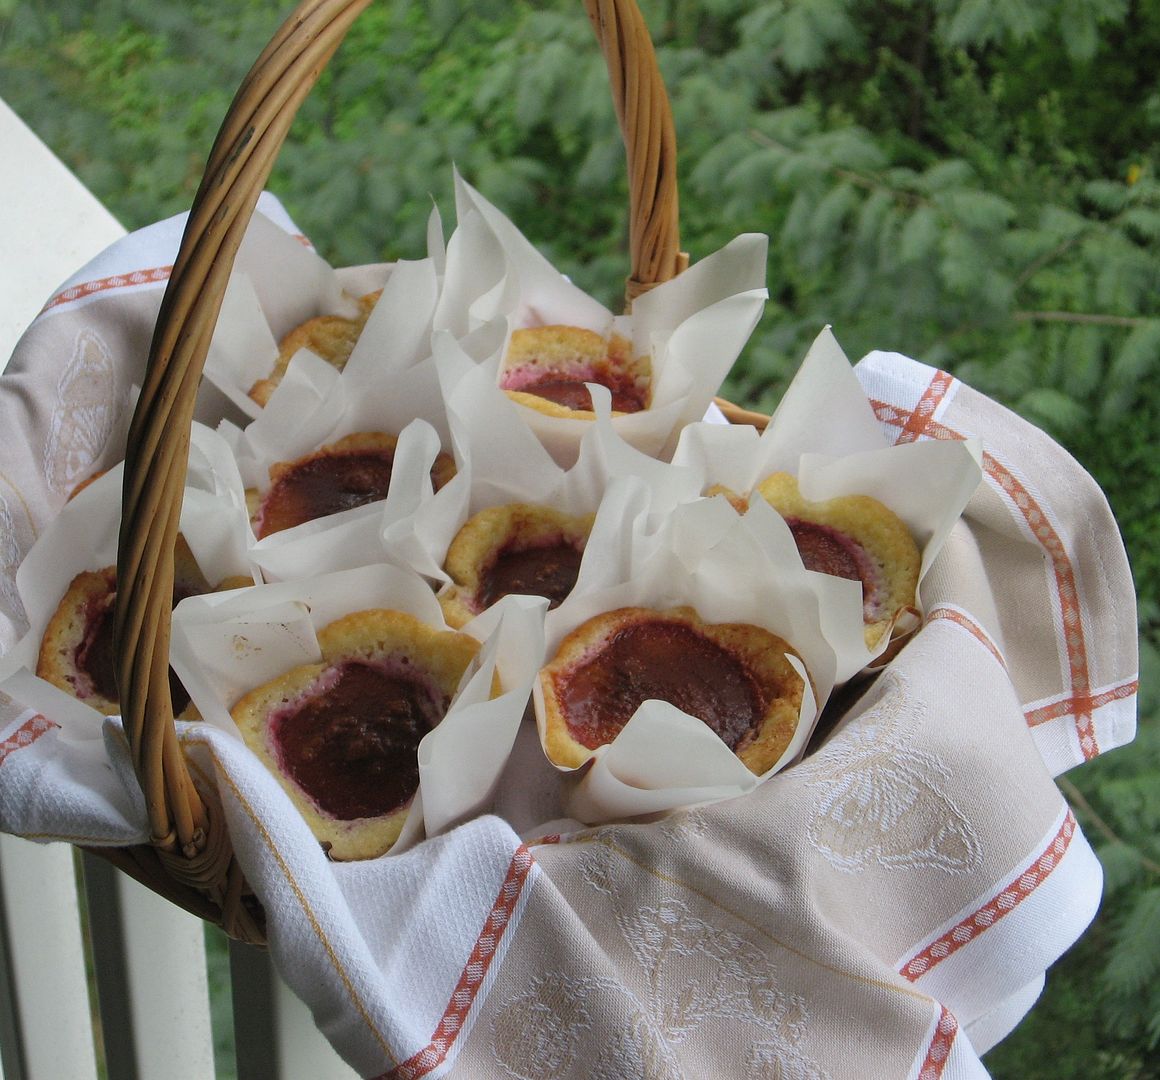
To add to the charm, I decided to turn the torte into rustic mini-tortes in parchment paper liners, topped with a dollop of Ricotta Cream Cheese Frosting and a dusting of cinnamon. I wanted to hand each person their own rich, juicy little plum, surrounded by cake and wrapped like a present in crisp paper.

The Ricotta Cream Cheese Frosting is just something I whipped up today. I wanted a creamy component to slather on like clotted cream on a scone. I decided to use ricotta because I love the texture and flavor, especially with fruit, and I wanted to give the mini tortes a rustic Italian feel. I was sorry more of the ricotta flavor didn’t come through — it’s just so mild, and perhaps I shouldn’t have added vanilla — but the cheese did add a rich facet to the flavor and mellow the sugar. This ensured that the frosting had just the right amount of sweetness for this hearty dessert.

I say all this like it was a given that these were going to be amazing. But really, I was nervous. I bought big plums; what if the torte didn’t rise around them enough? What if they simply fell apart when unwrapped (some were a little messy)? What if Ricotta Cream Cheese Frosting is disgusting? My lovely friend Katie can attest to my uncertainty — today at an amazing Beth Moore simulcast, we caught up after not seeing each other in over a year! While chatting about our lives (by the way, Katie bakes, so expect some joint baking endeavors! Yay!), I mentioned these mini tortes only to immediately disclaim: they could be kitchen failures, I hadn’t tried them yet, they looked wonky, and so on and so forth.

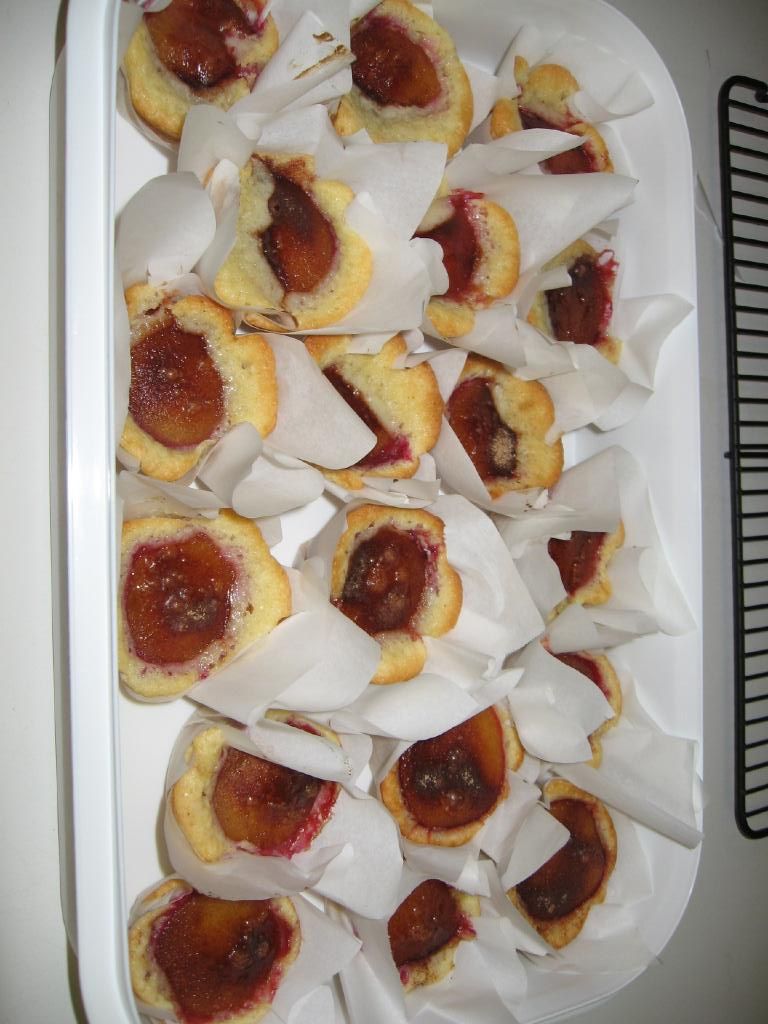
Thankfully, my fears have now been allayed. Every beautiful, splushy Plum and Cream Mini Torte I bit into (I won’t bother telling you how many I ate . . . ahem) resulted in mmmms and ahhhhs. Sometimes it’s hard to read between the lines on a food blog and decide if a given dish was really fantastic or just good. In the interest of clearing up confusion: these are fantastic, and perhaps one of my favorite desserts of all time. And since the recipe is so simple (so glad my friend shared it), you should definitely give them a try. Hope you love them!

Plum and Cream Mini Tortes


Recipe By:

The New Elegant But Easy Cookbook, by Marian Burros and Lois Levine (plum torte, adapted by me)
-Me (frosting)

Yields: About 12-15

Mini Torte Ingredients:
1/4 pound (1 stick) unsalted butter, softened
3/4 cup plus 1 or 2 tablespoons sugar
1 cup unbleached flour, sifted
1 teaspoon baking powder
2 eggs
Pinch salt
6-8 halves small, pitted Italian (prune or purple) plums
1 teaspoon cinnamon or more, to taste

Ricotta Cream Cheese Frosting Ingredients:
4 ounces cream cheese, softened
1/4 cup butter, softened
3/4 cup ricotta cheese
1/2 teaspoon vanilla
2 1/2 cups confectioners’ sugar
1/4 teaspoon cream of tartar

Directions:
1. Arrange a rack in the lower third of the oven. Preheat the oven to 350 degrees. Line a cupcake pan with paper liners or parchment paper.

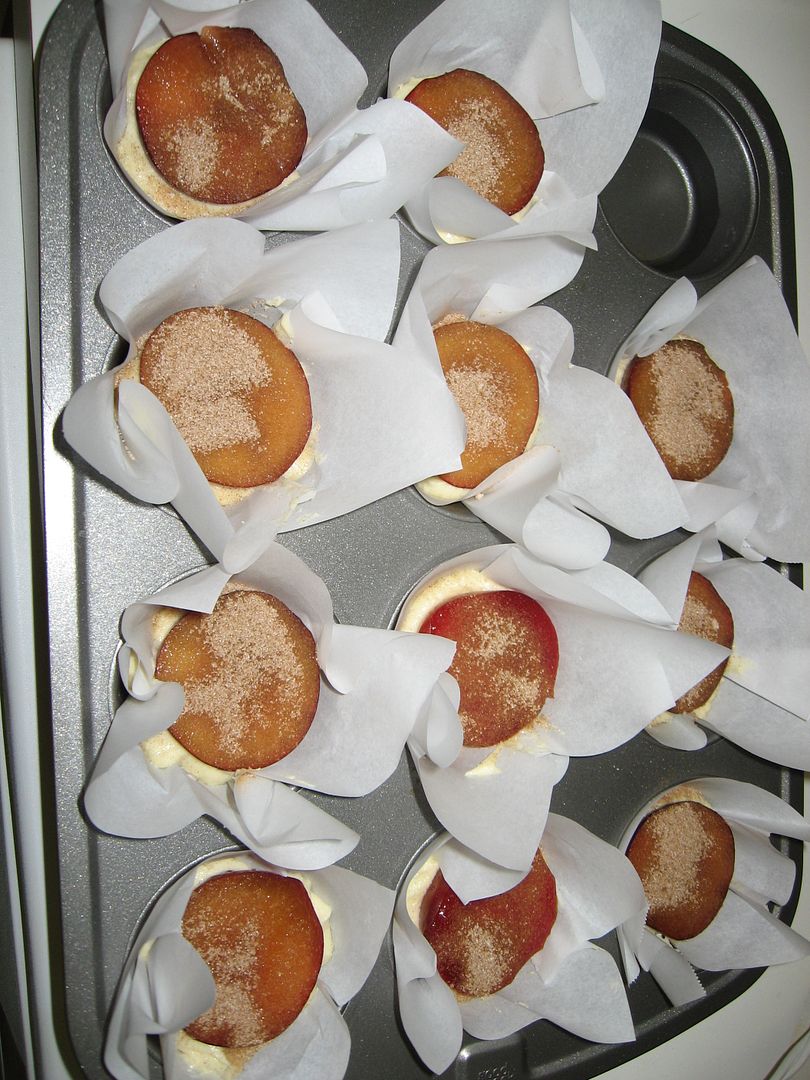
2. Cream the butter and the 3/4 cup of sugar. Add the flour, baking powder, eggs, and salt and beat to mix well. Spoon about a tablespoon of batter into each well. Resist the urge to overfill — the batter will rise! Gently press a plum, skin side down, into each well. Mix the cinnamon with the remaining 1 or 2 tablespoons of sugar and sprinkle over the top.

3. Bake for about 18-20 minutes, until a cake tester inserted in the center of the cake part comes out clean. Remove from the oven and let cool; refrigerate or freeze if desired. (If not adding frosting, serve as follows: let the torte return to room temperature and reheat at 300 degrees until warm. Serve plain or with vanilla ice cream.)

4. Make the frosting: mix all ingredients together until fluffy. Pipe or dollop frosting onto the center of each plum mini torte.

Notes: Try to buy small plums and cut them about 1/4 inch away from the center or a little more. You want small rounds to fit in the center of your mini-tortes without making the cake spread too much. If the cake spreads too much, it won’t snuggle around the plum as it rises and may fall apart when you peel off the paper.


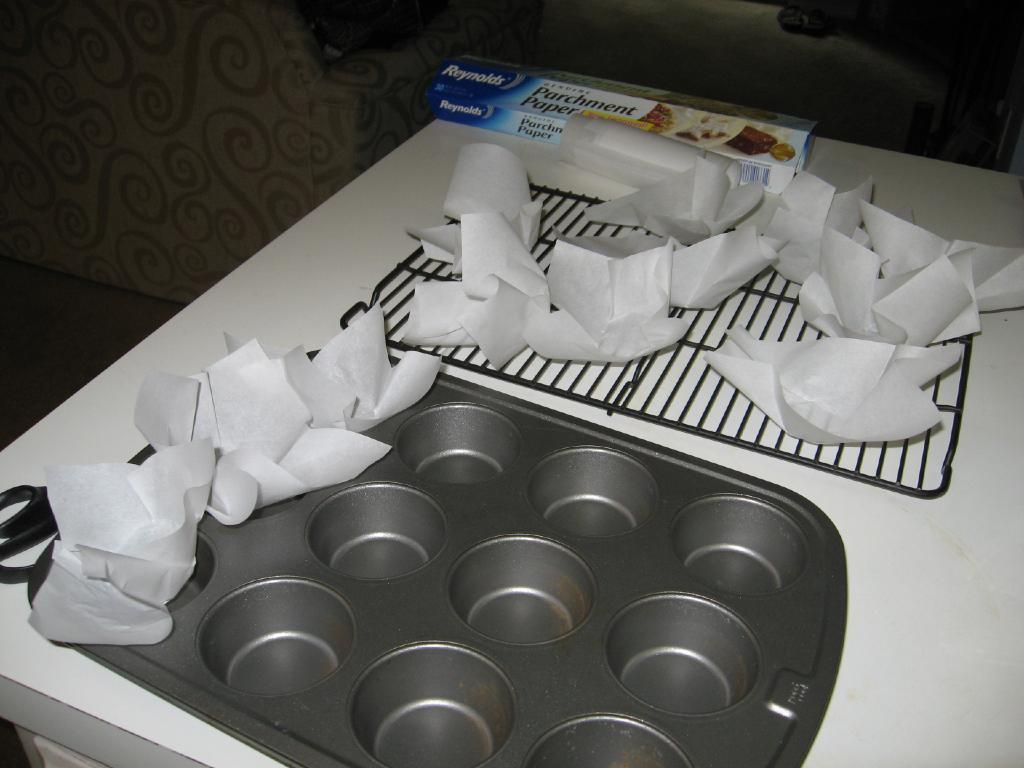
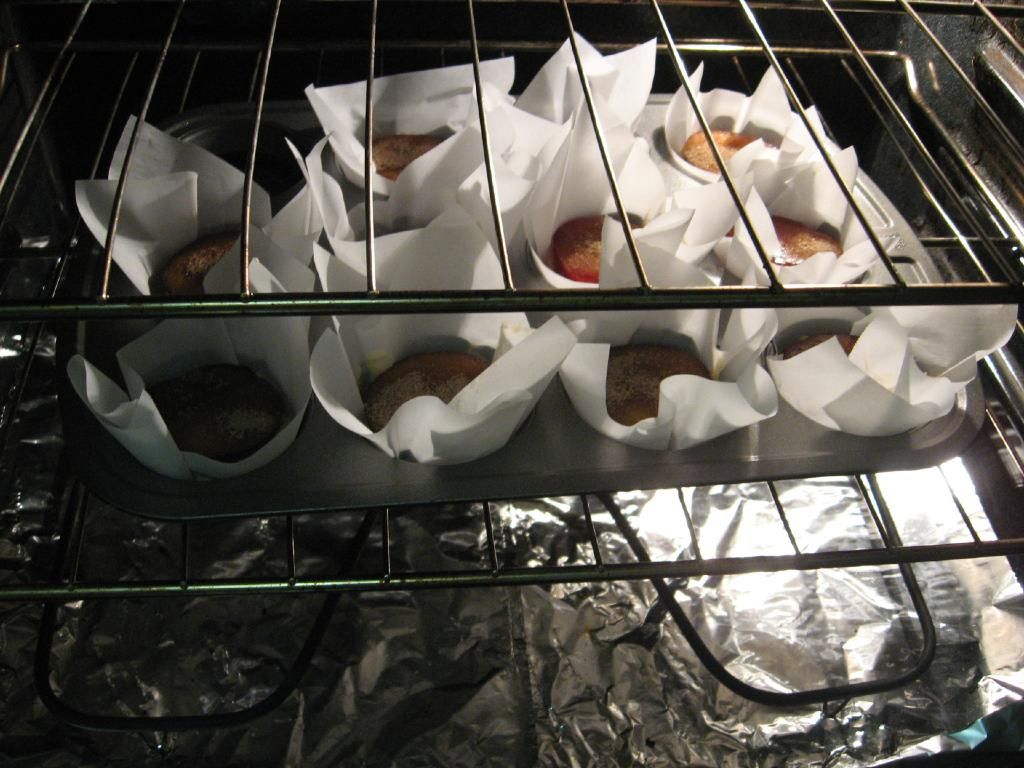
Making my parchment paper liners and readying my mini tortes for the oven.


Baking and fresh out of the oven.


Red Velvet and Oreo Kisses

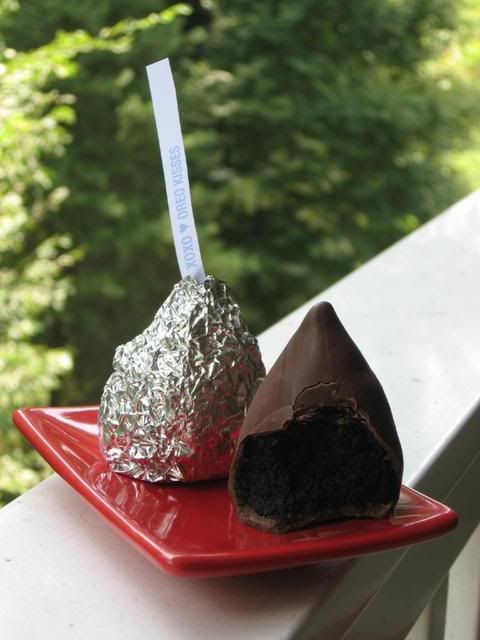
Need a kiss? Everyone does sometimes, and these past few weeks, it was Mike. He’s been studying intensely for the math GRE this summer. He’s interested in stellar grad schools, so he needs to hit the ball (or the sphere, perhaps? or the open ball? or the unit circle? okay, enough with the bad math jokes) out of the park on this exam. I have complete faith in his ability to do so, but he needs some encouragement now and then. What’s better for encouragement than a little kiss? Well, maybe a BIG kiss!
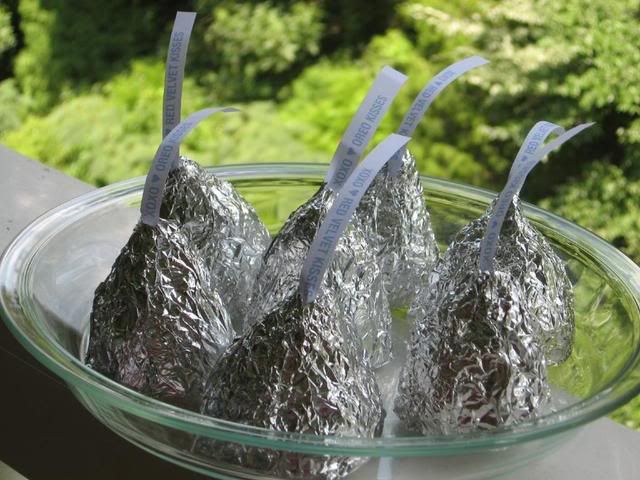
I think I’ve mentioned before that Bakerella is one of my heroes. I love cuteness, and she’s the Queen of Cute. When I saw her Oreo Kisses, I knew they couldn’t wait until Valentine’s Day. They were the perfect surprise to lift Mike’s spirits.

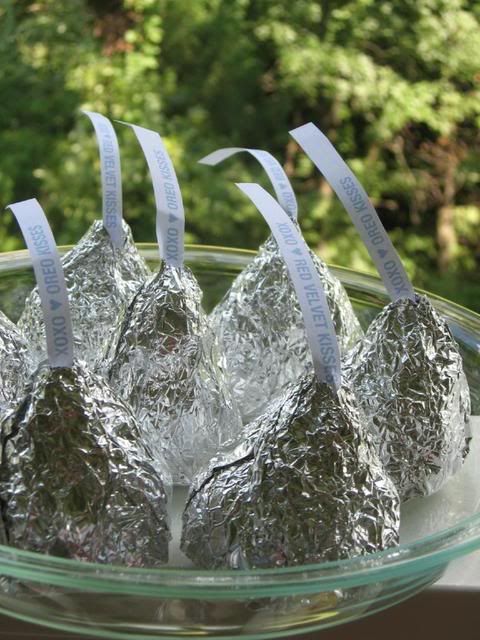
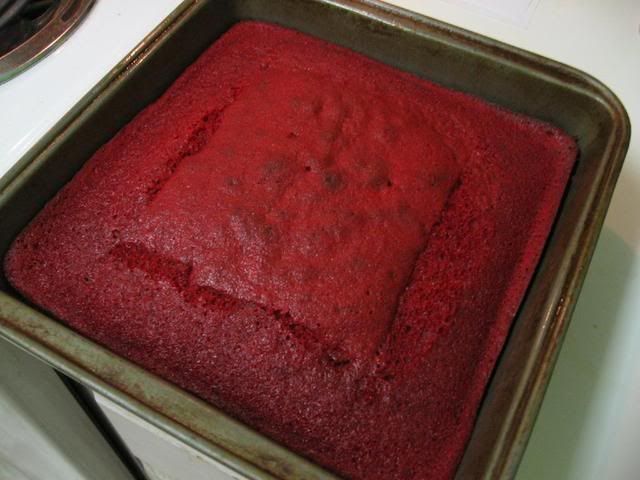
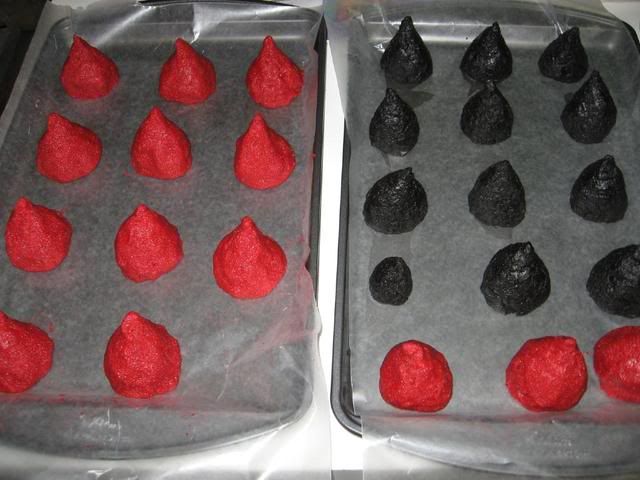
In addition to Oreo, I decided to make some red velvet kisses. While the Oreo version is a no-bake combo of crushed cookies and cream cheese, the red velvet version is essentially a cake ball (or a cake cone in this case). You bake a cake, rip it up (heartbreaking, I know), add frosting, and form the mixture into balls (or cones, or hearts, or zebras) and dip into your candy coating (incidentally, if you try out the zebra shape, please do send a photo). Any flavor combination of cake and frosting will do. And don’t let the idea of baking a cake deter you; while I bake mine from scratch, cake mixes and canned frosting work just fine!


Oreo Kisses


Red Velvet Kisses

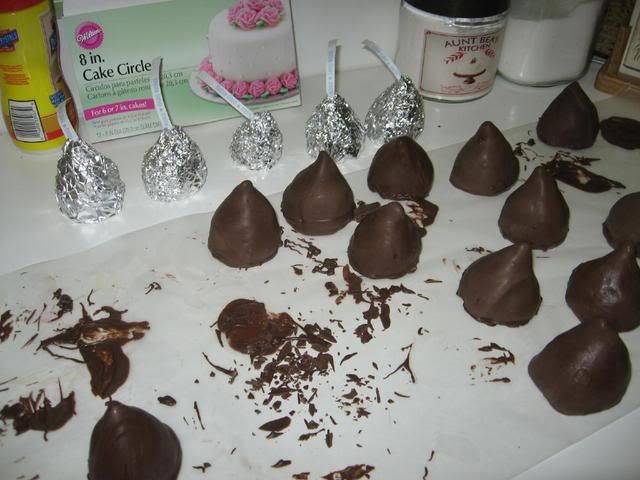
Dipping these kisses (or any cake ball) is always the most (ahem) interesting part of the process. I use Candiquik as my chocolate coating of choice, but you can use any chocolate bark or dipping chocolate. I don’t recommend baker’s chocolate or chocolate chips, however, as they don’t form the same hard shell. You should be able to find Candiquik at Lowes Food, SuperTarget, or (I recently discovered) Bloom.

Regarding the act of dipping itself, you’re going to have to get a little creative. Bakerella’s instructions (below) say to use a spoon to dip your kisses and then drain the excess chocolate against the side of the bowl. This hasn’t ever worked for me, though; I’ve used everything from forks to toothpicks to bamboo skewers to dip cake balls. I’ll go ahead and admit that I’ve had visions of standing on the counter lowering a cake ball into chocolate with dental floss (thankfully, I haven’t resorted to this just yet). For dipping these kisses, I used a two-tined grill fork to support the kiss while I spooned chocolate over it. I then let the excess drain off for a long while before sliding the kiss onto wax paper. When it was dry, I went back and re-dipped the bottom. You can try this technique, but the most important message to take home is this: experiment with your kitchen supplies. Necessity is the mother of invention and all that, so try any utensil that looks promising and keep your sense of humor!

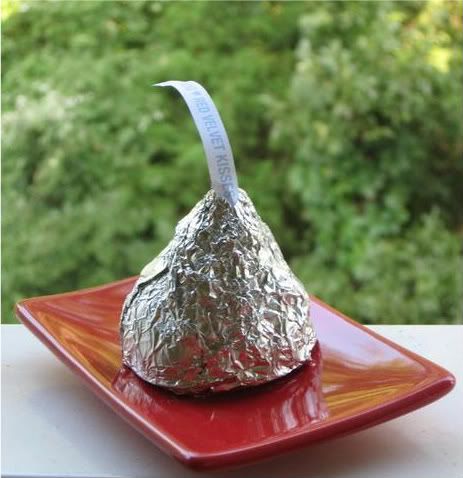
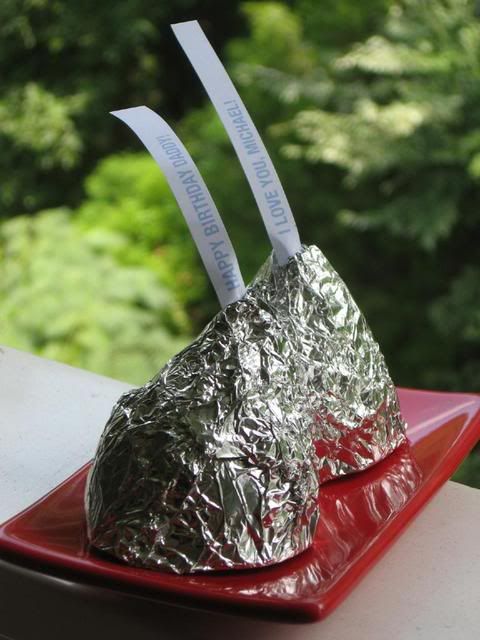
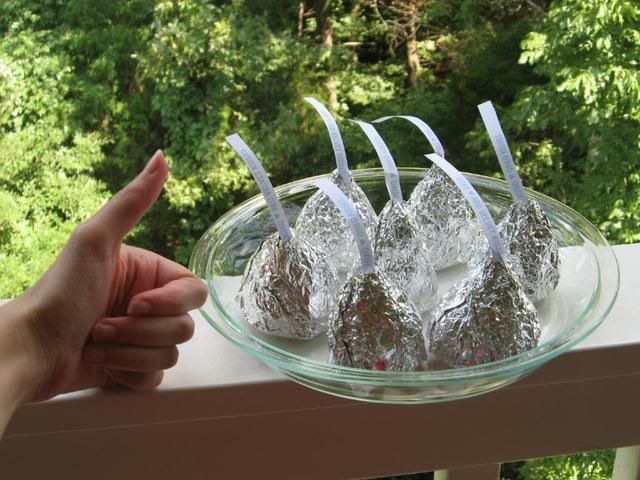
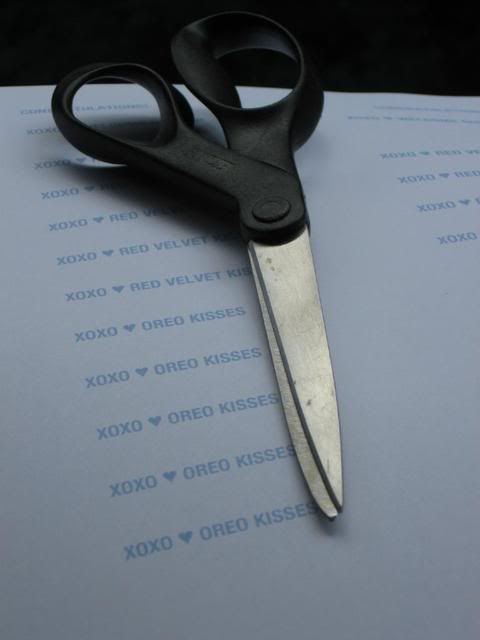
One thing I love about these sweet kisses (apart from, oh, everything about them) is the messages you can attach. I used a word processing program (font: light blue, 14 point, Helvetica Neue Bold) to create the little strips of paper that sail out of each kiss. Get creative: you can label various kiss flavors; send encouragement, congratulations, and thank yous; or even say happy birthday. My wonderful Dad’s birthday is this coming Monday — the perfect occasion for a special message! Whether with Oreo kisses, cake kisses, or plain old hugs and kisses, tell someone you love them today!

Oreo Kisses


Recipe By: Bakerella (kisses decoration/assembly)
Yields: About 11 2-inch high kisses

Oreo Kisses Ingredients:
1 package oreo cookies (divided; use cookie including the cream center)
1 8-ounce package cream cheese (softened)
chocolate bark (chocolate candy coating)

Directions

1. Finely crush all but seven cookies in a food processor or place them in a ziploc bag and crush into a fine consistency. Note: As for the extra 7 cookies, just eat them. Or, if you have extra dipping chocolate, make some chocolate covered oreos.
2. Stir in softened cream cheese. Use the back of a large spoon to help mash the two together.
3. Roll the mixture into 1-2″ balls and place on wax paper covered cookie sheet.
4. Then, begin to form the shape of a kiss. Flattening the bottom and forming a point at the top. Note: mine ended up about 2 inches tall and 1.5 inches wide.
5. It helps to put the uncoated balls in the freezer for a few minutes to keep the mixture from starting to fall apart when you drop into the melted chocolate. Note: I refrigerated mine overnight and then froze for a couple of minutes before dipping.
6. Melt chocolate as directed on package and then dip “kisses” one at a time into chocolate, tap off extra and slide them off spoon onto wax paper covered cookie sheet to dry. Note: Dipping is often the most difficult part. These are Bakerella’s instructions, but find what works for you. Let your kitchen be your playground. Look through your utensils for useful tools, and be creative. I used a grill fork to hold my kisses while spooning chocolate over them, and then redipped the bottoms separately.

To decorate:
1. Handwrite your messages or create them on the computer. Cut out the strips (about 1/4″ tall and however wide you need).
2. Cut up some square sheets of aluminum foil (about 6″ square)
3. Place dry kiss in center and start wrapping the foil around the base. Insert message near top and secure it by pressing the foil together at top. Note: It really helps to use cheap foil here! The thinner and more malleable the better. Crush it a little first to make it more flexible.
4. Refrigerate in an airtight container.

Red Velvet Kisses


Recipe By:

Bakerella (kisses decoration/assembly)
-Mom (red velvet cake)
Paula Deen (cream cheese frosting)

Yields: About 28 2-inch high kisses

Red Velvet Cake Ingredients:
1/2 cup Crisco shortening
2 eggs
2 tablespoons cocoa
1/2 teaspoon salt
1 1/2 cups sugar
1 teaspoon vanilla
1 cup buttermilk
2 1/2 cups flour
1 teaspoon baking soda
1 tablespoon white vinegar
2 ounces red food coloring
chocolate bark (chocolate candy coating; for kisses)

Cream Cheese Frosting Ingredients:
8 ounces cream cheese, softened
1 stick butter, softened
1/2 teaspoon vanilla extract
2 cups sifted confectioners’ sugar

Directions

Make the cake: Preheat oven to 350 degrees. Cream Crisco, sugar, and eggs. Make a paste of the cocoa and coloring and add to the Crisco mixture. Add salt and vanilla. Add buttermilk alternately with the flour, beginning and ending with flour. Mix vinegar and soda right before using and add to mixture by folding in. Pour batter into a 9 x 13 in. pan and bake at 350 degrees for 25-30 minutes (check periodically, and if the edges are getting too done, you might want to shield them with foil while the middle continues to bake). Cool completely.
Make the frosting: In a large mixing bowl, beat the cream cheese, butter and vanilla together until smooth. Add the sugar and on low speed, beat until incorporated. Increase the speed to high and mix until very light and fluffy.

Make the kisses:
1. After cake is cooked and cooled completely, crumble into large bowl.
2. Mix thoroughly with about 2 cups cream cheese frosting. (It may be easier to use fingers to mix together, but be warned it will get messy.)
3. Roll mixture into 1-2″ size balls and lay on cookie sheet.
4. Then, begin to form the shape of a kiss. Flattening the bottom and forming a point at the top. Note: mine ended up about 2 inches tall and 1.5 inches wide.
5. It helps to put the uncoated balls in the freezer for a few minutes to keep the mixture from starting to fall apart when you drop into the melted chocolate. Note: I refrigerated mine overnight and then froze for a couple of minutes before dipping.
6. Melt chocolate as directed on package and then dip “kisses” one at a time into chocolate, tap off extra and slide them off spoon onto wax paper covered cookie sheet to dry. Note: Dipping is often the most difficult part. These are Bakerella’s instructions, but find what works for you. Let your kitchen be your playground. Look through your utensils for useful tools, and be creative. I used a grill fork to hold my kisses while spooning chocolate over them, and then redipped the bottoms separately.

To decorate:
1. Handwrite your messages or create them on the computer. Cut out the strips (about 1/4″ tall and however wide you need).
2. Cut up some square sheets of aluminum foil (about 6″ square)
3. Place dry kiss in center and start wrapping the foil around the base. Insert message near top and secure it by pressing the foil together at top. Note: It really helps to use cheap foil here! The thinner and more malleable the better. Crush it a little first to make it more flexible.
4. Refrigerate in an airtight container.

Process Photos:


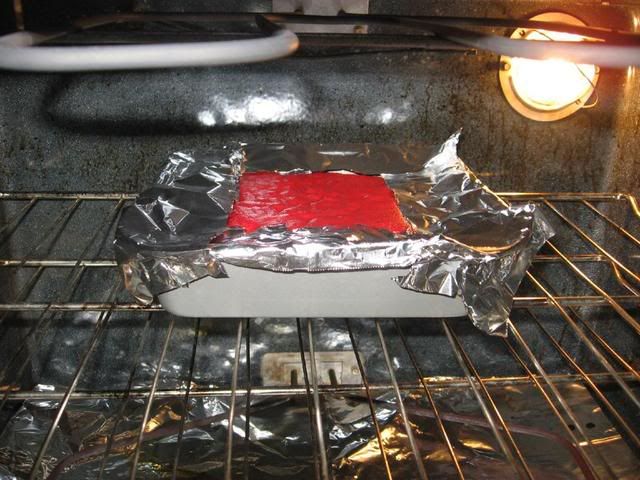
You may need to shield the sides of the red velvet cake if they’re done before the middle. I halved my cake recipe since I was making two kinds of kisses; if you do this, half the frosting too.


Shaped into cones and then dipping.


Cutting messages into strips.


Did I mention that they were giant?


XOXO


Share Share this post with friends!

1 16 17 18 19 20