cream cheese

Bittersweet Marbled Chocolate Cheesecake Brownies

Sometimes it’s easier to skip the hard stuff. Maybe you know what I mean. Maybe you never read Marley and Me because you saw your friends (or in my case, students) feeling weepy towards the end. Maybe you switch off the sad songs, avoid the poignant movies. Maybe you make a joke in the difficult moments to defend yourself from the truth of your emotions, but also keep a secret stash of tissues in your purse for when it doesn’t work.

Some things you can’t skip, though. Some trials are ordained for you. God has known them — and you — since before the foundation of the world, and when He says you’re going through and not around, it’s the right path. Go.
One of the things I can’t skip is the fact that Mike is no longer a Charlottean. Wonderfully and sadly, he moved to Raleigh at the beginning of August to start his graduate program in math.

Mike and I have been together for 11 and a half years now. He saw me complete my first year of high school, get my license, graduate, enroll at Davidson College. He sat with me the morning before my Teach for America interview, picked up the pieces with me as I quit my first real job and moved on to my second real job, and shared my joy when I found Woodlawn, where I teach now. He saw the demise of my first website, the beginning of my blogs, the constant ebb and flow of my poetry. He’s been there.

During my difficult high school years, I’d sometimes drive straight to his apartment after school and play housewife, making Hamburger Helper and eating it on the couch with him while watching Star Trek. On a trip to Charleston in 2003, he bought me flowers that I still have dried in my closet. I saw him eat his first funnel cake in Gatlinburg. During our relationship, I’ve been the girlfriend of a cable guy, a dental technician, a programmer, a mathematician, a college student, a college grad, and now a graduate student. I can’t explain how his transition has inspired me.
What with all that “being there” we’ve done for over a decade, it was particularly difficult to see him pack up his things and move at the beginning of August. While I haven’t been able to ignore the fact that he now lives three hours away and can’t pop over as needed, I have been able to skip talking about it much, so instead I’ve been talking about popsicle molds and Piers Morgan. I know you understand.

The week before he moved, Mike came over and we made going-away brownies. He loves brownies, but I’d never made him any — something I felt I had to remedy before he moved. We mixed and baked together, another thing I’d always meant to do with him, and the final product was sweeter for it.

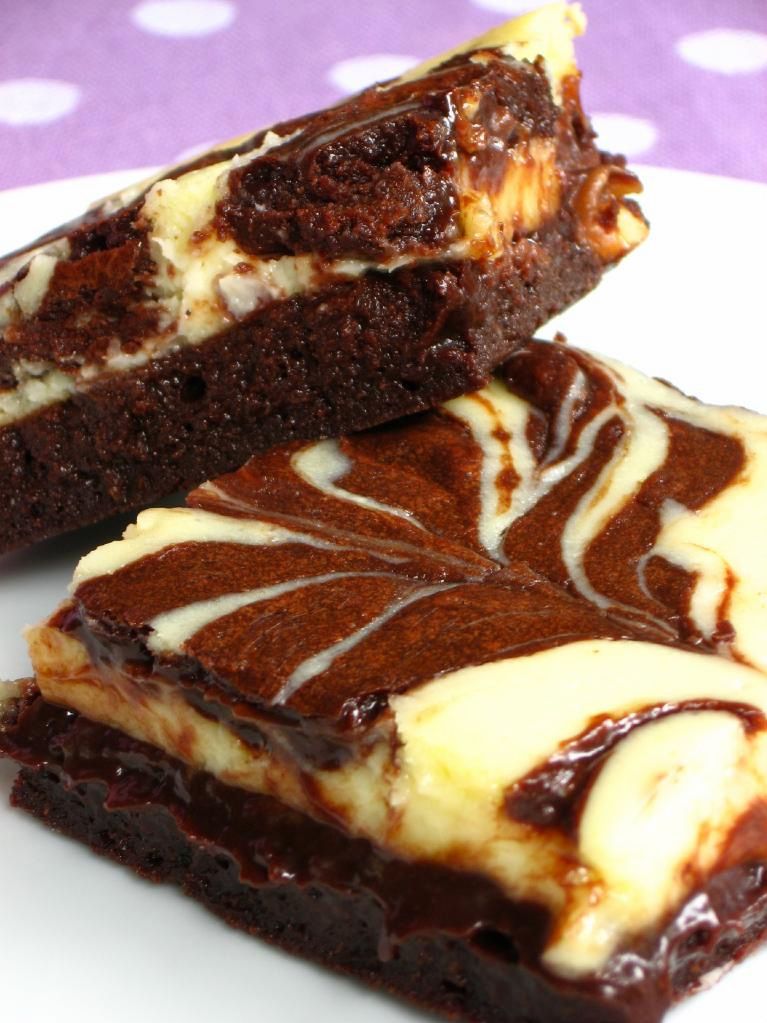
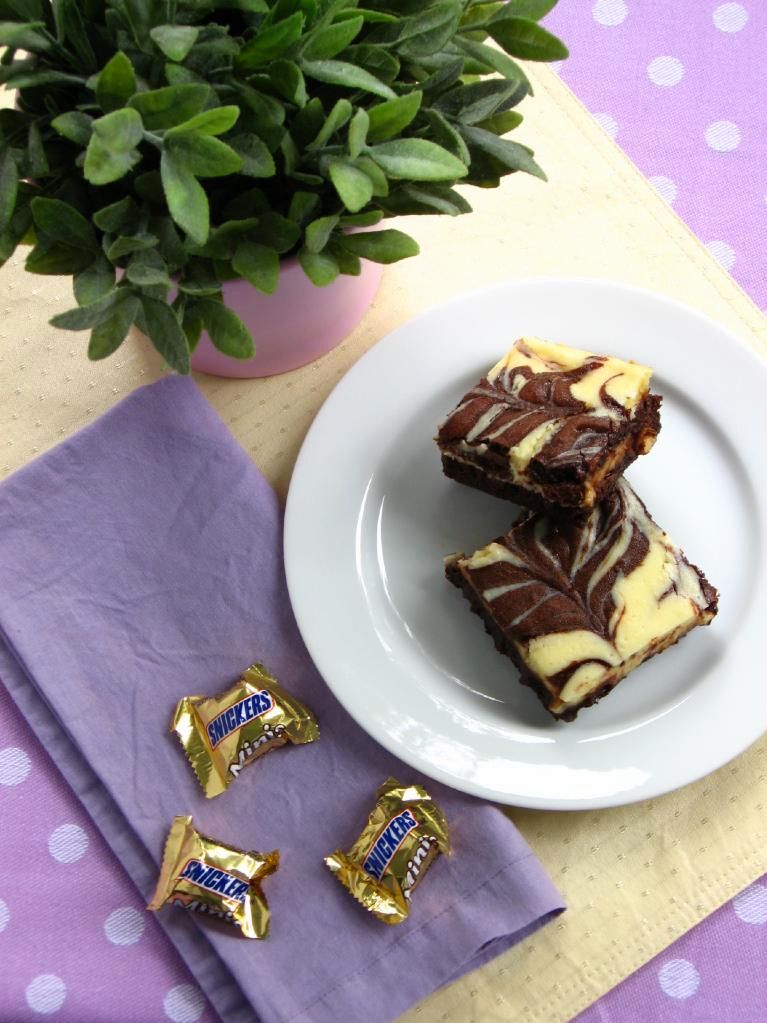
These brownies were a great choice — they’re indulgent and fudgy, with the gorgeous tang of cream cheese that I love. The marbling on top looks fancy, but is extremely easy to accomplish. In half the pan, we embedded funsize Snickers in the batter, which added a superb nutty, caramelly crunch to the brownie base. Naturally, knowing he was moving in a week made each bite a bittersweet experience, but the brownies themselves were the perfect treat for us to enjoy together.

Marbled Chocolate Cheesecake Brownies


Recipe by: adapted from Joy of Cooking
Yield: 9 large or 16 smaller brownies

Brownie Layer Ingredients:
1/2 cup (113 grams) unsalted butter, cut into pieces
4 ounces (115 grams) unsweetened chocolate, coarsely chopped
1 1/4 cups (250 grams) granulated white sugar
1 teaspoon pure vanilla extract
2 large eggs
1/2 cup (65 grams) all purpose flour
1/4 teaspoon salt
funsize Snickers (optional)

Cream Cheese Layer Ingredients:
8 ounces (227 grams) cream cheese, at room temperature
1/3 cup (65 grams) granulated white sugar
1 teaspoon pure vanilla extract
1 large egg

Directions: Preheat oven to 325 degrees F (160 degrees C) and place the rack in the center of the oven. Prepare a 9-inch square baking pan: Spray pan with nonstick cooking spray. Create a foil sling for the pan by cutting two 16-inch lengths of foil and fold them to widths of 5 inches each. Fit foil pieces into baking dish, one overlapping the other, pushing them into corners and up sides of pan; allow excess to overhang pan edges. This creates a sling that will help you remove the brownies after baking and cooling. Spray foil lightly with nonstick cooking spray.

Place a heat-proof stainless steel bowl over a saucepan of simmering water to create a double-boiler. Place the butter and chocolate in the bowl to melt. Remove from the heat and stir in the sugar and vanilla extract. Add the eggs one at a time and beat well with a wooden spoon after adding each. Add the flour and salt and continue stirring with the wooden spoon until the batter is glossy, smooth, and pulls away from the side of the bowl (about one minute). Reserve 1/2 cup of brownie batter for topping. Pour the rest of the batter carefully into prepared pan (here, you can stud the batter with rows of funsize Snickers if desired.

In a separate bowl, use a hand mixer to blend the cream cheese until smooth. Add the sugar, vanilla extract, and egg and blend just until smooth. Spread this mixture carefully over the brownie layer, and then place dollops of the 1/2 cup reserved brownie batter at even intervals over the top. Use a table knife or wooden skewer to carefully marble the dollops through the cream cheese, careful not to mix the batters.

Bake for about 25 minutes or until the brownies just begin to pull away from the sides of the pan and are just starting to brown. Remove from the oven and cool on a wire rack until almost cool. Then, chill the brownies in the refrigerator for about two hours, until they’re firm enough to cut into squares. Once chilled, remove the brownies from the pan by lifting the ends of the foil sling carefully. Transfer to a cutting board and cut into 9 or 16 squares as desired, cleaning the knife with a warm, damp cloth between cuts. You can store leftovers in airtight container in the refrigerator for several days.

P.S. – Some people are experiencing even greater trials right now. Erika of Ivory Hut just lost her house and all her possessions in a horrific house fire. Would you consider donating to help her through this difficult time?

P.S. 2 – In the midst of a trial, there is great blessing. We received news recently that my dad is still cancer-free!

If you liked this post, please:
Subscribe to Willow Bird Baking
Follow Willow Bird Baking on Twitter
Follow Willow Bird Baking on Facebook
Give this post a thumbs up on StumbleUpon


ShareOther ways to share this post with friends!

Caramel Fudge Brownie Cheesecake

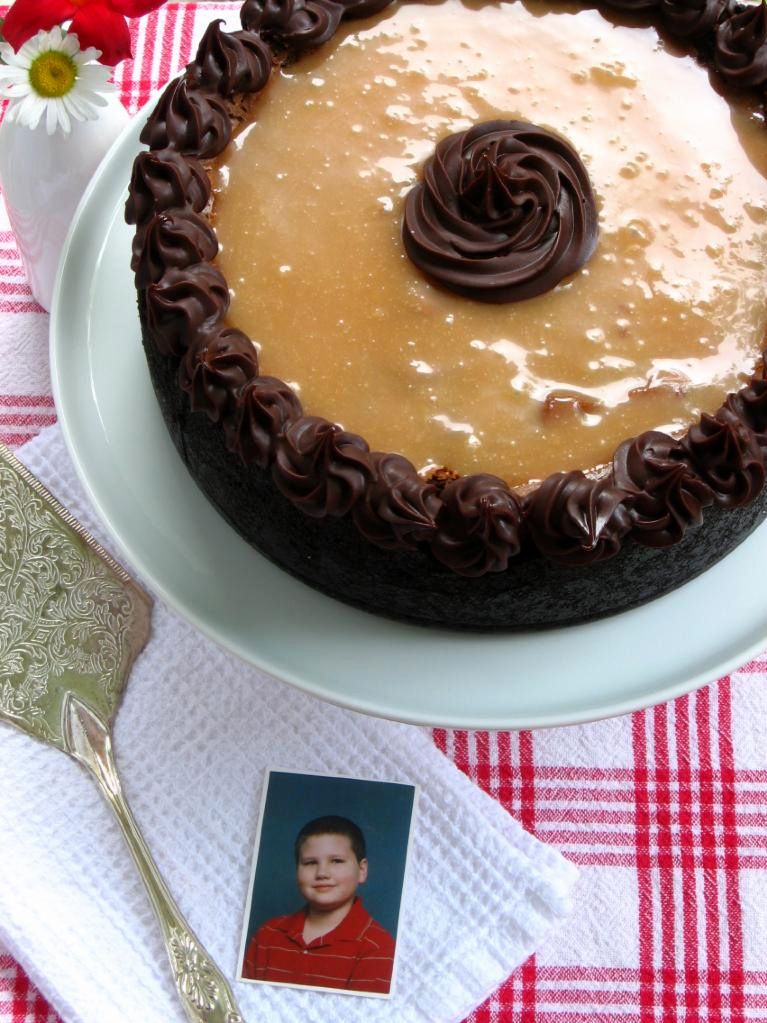
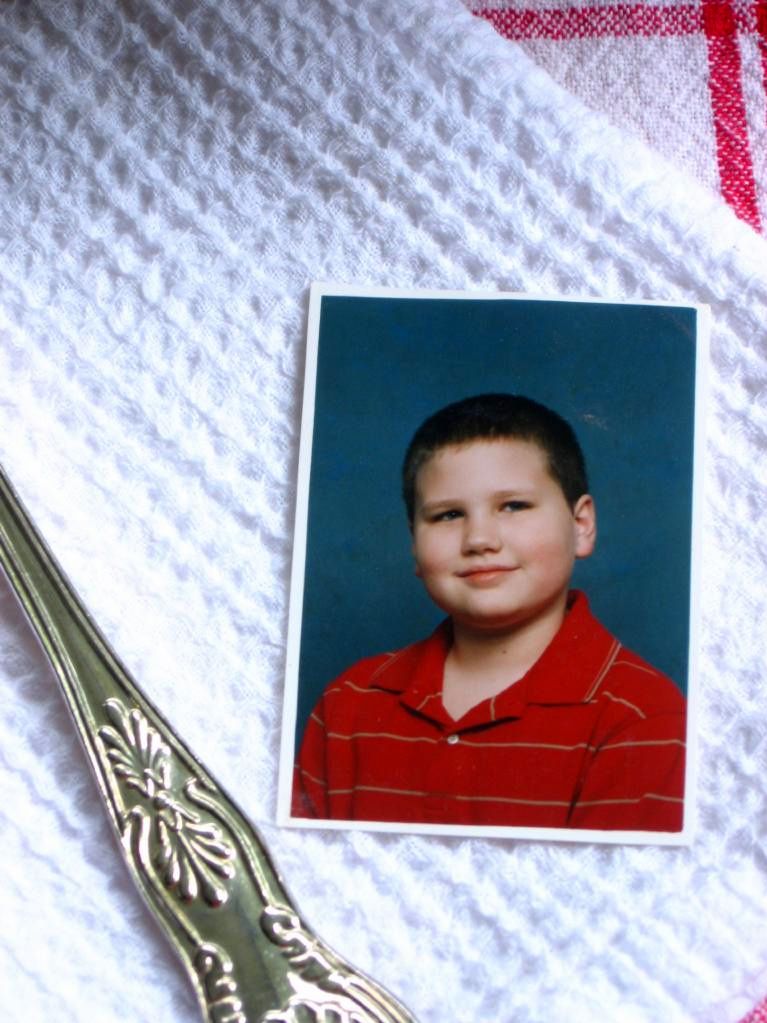
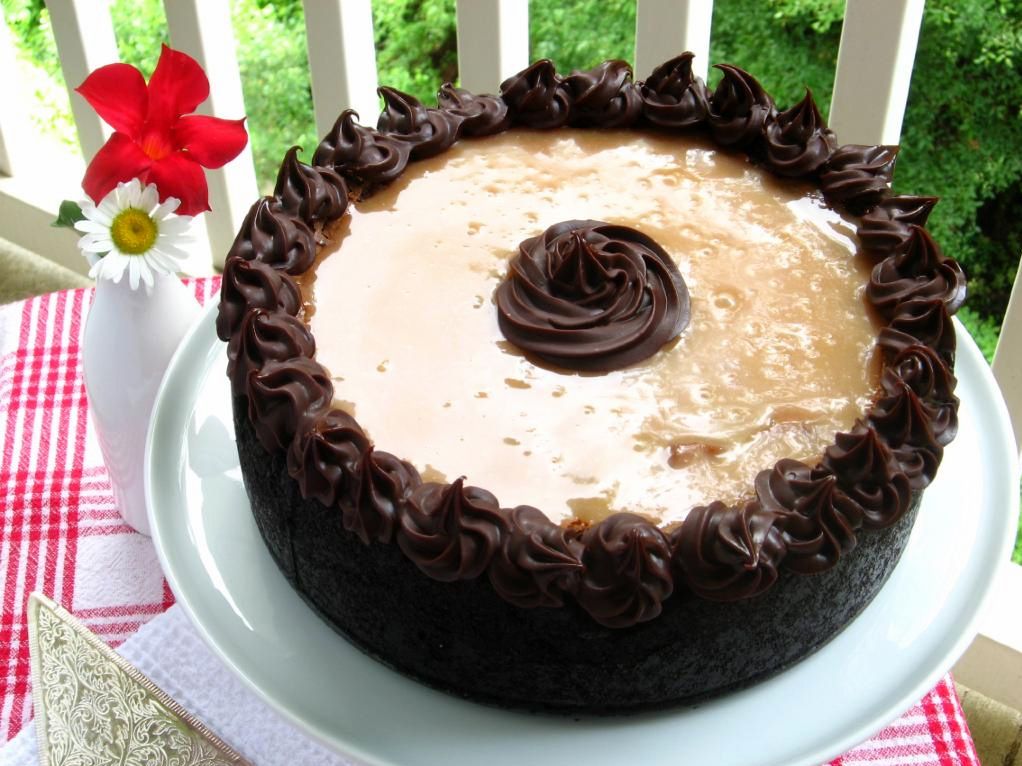
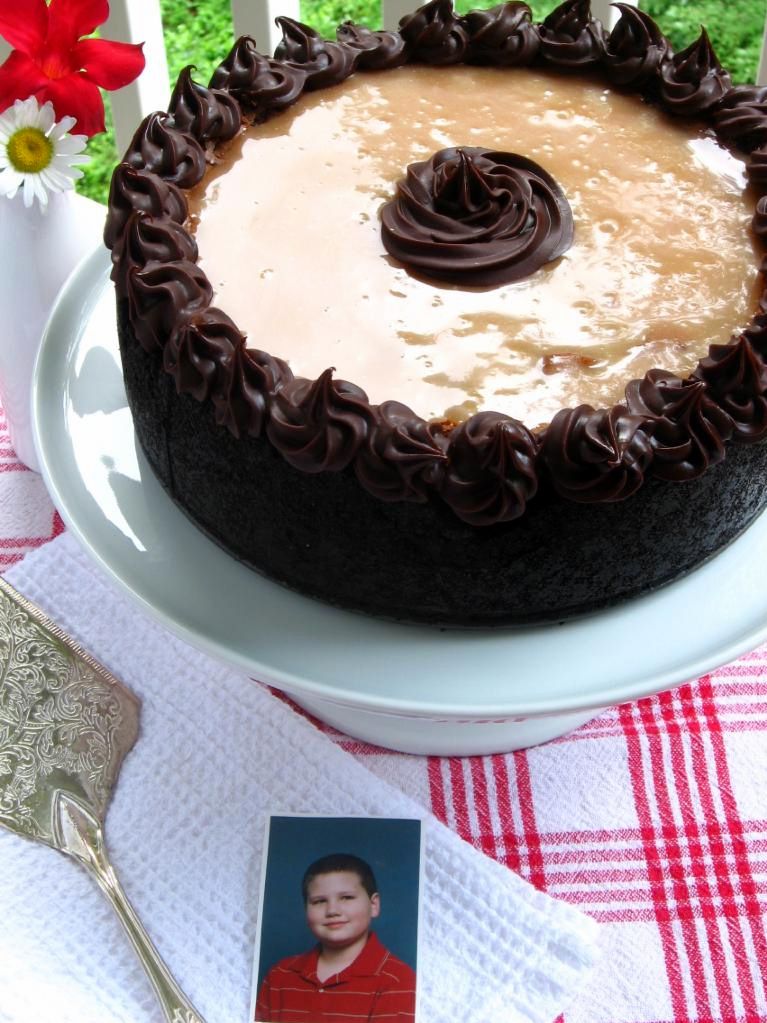
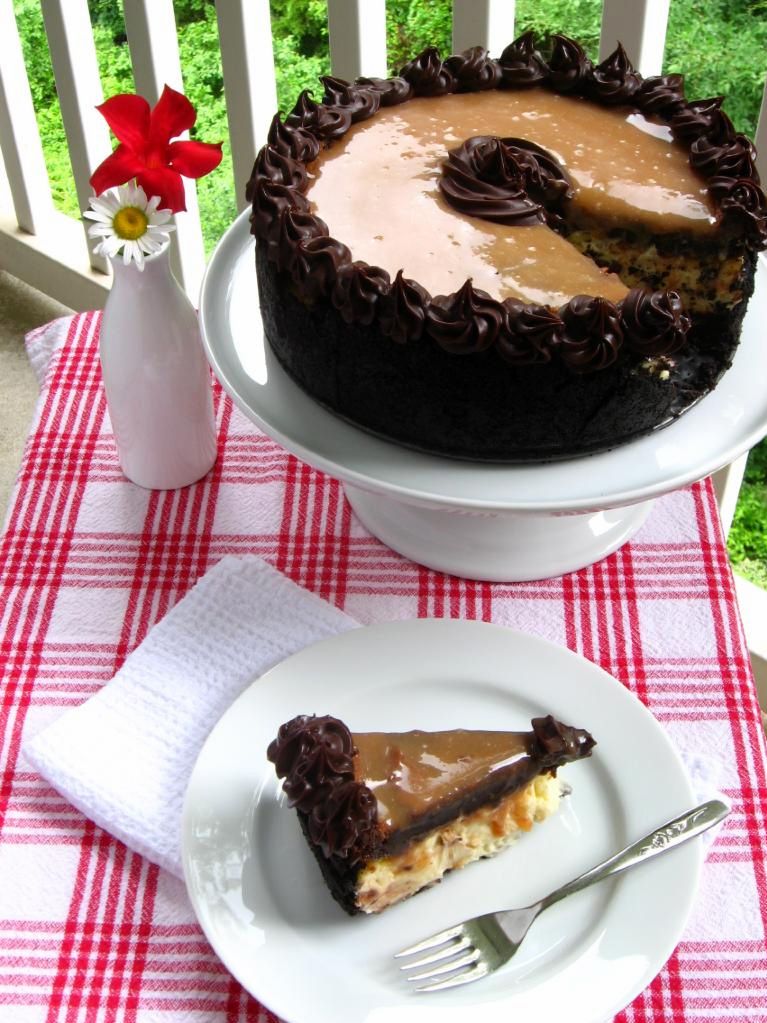
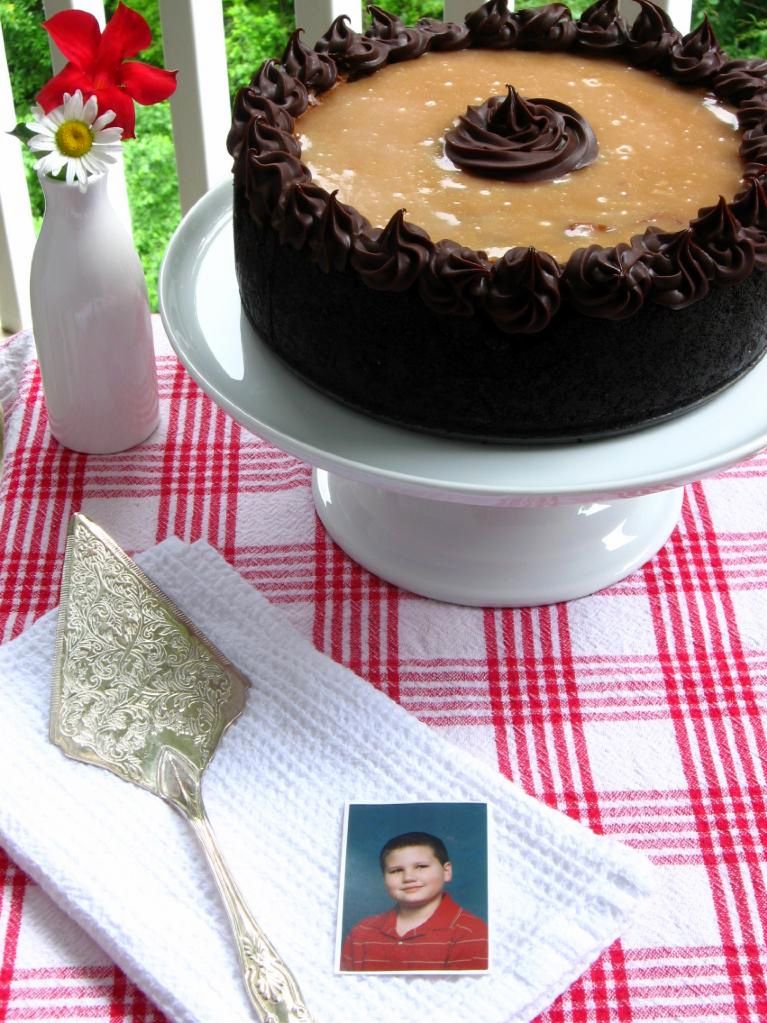
I’ve got to tell you about a special guy. He was shorter than me for most of his life, but suddenly, a couple of years ago, I came home to visit and he was looking down at me. He’s got bright blue eyes and a head full of curls, a dry wit, and really fat rabbit he calls Pilfer. I am not brave enough to wear skinny jeans, but he is. He is my little brother, Joel-called-Alex, and that little chubby cheeked guy you see in the photo next to my Caramel Fudge Brownie Cheesecake . . . that would be him about a decade ago. (Speaking of Caramel Fudge Brownie Cheesecake, it may be the best thing I’ve ever eaten — which is probably not surprising considering it’s a Caramel Fudge Brownie Cheesecake).

It’s hard to decide which is cuter . . . ganache rosettes or little boy smiles. Look below for a closer view to help you decide. Cakes are nice, but I think he wins!


Alex at 8 years old and now!

Something pretty exciting happened in his life on Thursday night: he graduated high school as part of the Hickory Grove Christian School Class of 2010. My family gathered for the occasion, although honestly, I don’t think I really believed that my little brother was actually graduating until this moment:

[youtube=http://www.youtube.com/watch?v=uGLvtJkwDtw&hl=en_US&fs=1&]

And just like that, little Alex — who I remember driving around in his red PowerWheels jeep and running through sprinklers with me as a kid — was a graduate. In the fall, he’ll begin his undergraduate education at N.C. State, the same school Mike is attending for grad school — now I have two reasons to be a Wolfpack fan! I can already tell you that plenty of school nights will find them playing video games together and acting like goofballs.

To fully express my feelings about this momentous occasion, I wrote the following letter and gave it to Alex this week. I thought you might like to read it, too.

DEAR ALEX,

What is this I hear about you graduating high school? I could have sworn that someone told me you were a senior in high school and were graduating this week. But that’s silly. There must be some mistake.

See, you are just a baby. You love your swing, Ernie from Sesame Street, and your older sister, Julie (duh). Soon you will develop a few motor skills and begin arranging your toys: gummy bears and matchbox cars sorted by color (your favorite being “lellow”). You will start using words like “definitely” way before you’re old enough to know four-syllable words. I will be proud to be the sister of such a smart kid. You’re still just a baby!

Or maybe you are still 6 years old. You’re a stout, silly little guy with bright blond curls. Just last week I dressed you up in high heels, a green nightie, a poofy hair bow, and took pictures for future blackmail. You love Barney and Friends, and will soon start watching the Power Rangers movie more times than any human being really ought to.

Or, okay, maybe you’re a little older than that. Maybe you’re a tween. You are obsessed with Pokemon – movies, drawings, you name it. Yu-Gi-Oh is all right too. In a little while, you’ll be admitted into Hickory Grove Christian School for high school. You’ll start staying up late on the internet, playing lots of video games, and hanging out with friends. You’ll become an amazing writer, an excited reader, and an all-around brilliant guy. You’ll be a 9th grader. Suddenly a 10th grader. Maybe even an 11th grader. Maybe you’ll even go to your senior prom.

But graduating? You cannot be graduating. Except . . . you are. In just two days time, you’ll walk across the stage and get your high school diploma. I never thought this day would come (and no, not because I thought you’d flunk out of high school).

Nevertheless, since this day is undeniably upon us, there are a couple of things I want to say. First off, I’m so proud of what a smart kid you are; I hope you’ll continue being an amazing writer and reader. Second, and more importantly, you’re a compassionate kid. Third, you have an amazing personality and amazing character. I expect you to do incredible things at N.C. State next year (GO WOLFPACK!) and beyond. Fourth, and most importantly, I love you and always will.

Oh, and fifth, sorry about that poofy hair bow.

Love, your big sister,
Julie

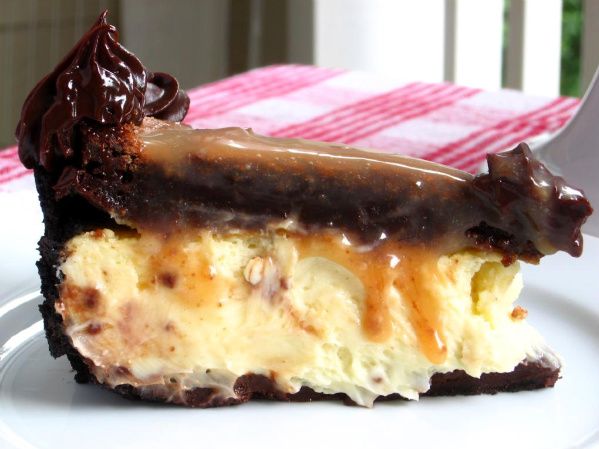
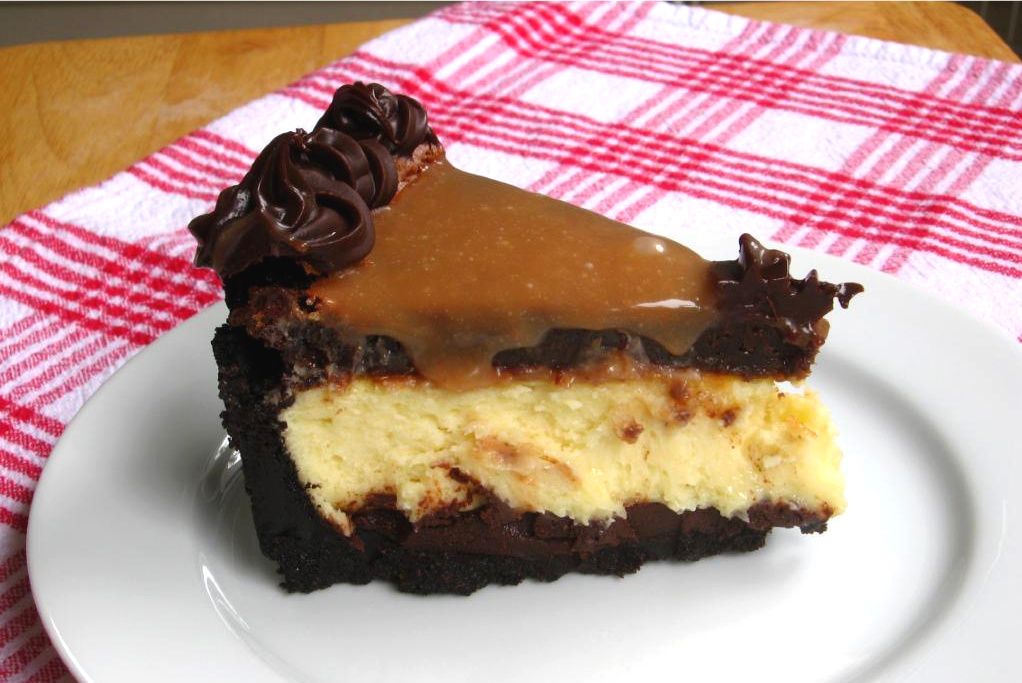
In addition to a boring ol’ letter, Alex will get a nice slab of this Caramel Fudge Brownie Cheesecake on Sunday. This was inspired by my Coffee Cookie Dough Cheesecake, and I love it just as much! While making this cheesecake certainly does require time and energy, it’s a relatively straightforward recipe and is perfect for a special occasion. The multistep procedure produces a thick layer of rich brownie drowning in gooey, buttery-tasting caramel sauce, all on top of creamy cheesecake. It also boasts an oreo crust and decadent ganache.
I think Alex will approve.


Tell me about your graduates! Anyone have a loved one in the Class of 2010?

Caramel Fudge Brownie Cheesecake


Recipe by: Willow Bird Baking, using cheesecake adapted from Bon Appétit, caramel adapted from Martha Stewart, and brownies adapted from a post on Simply Recipes
Yields: one 9-inch cheesecake

Crust Ingredients:
32 chocolate sandwich cookies, finely processed into crumbs
5 1/3 tablespoons unsalted butter, melted and cooled
Small pinch of salt

Ganache Ingredients*:
1½ cups heavy cream
20 oz. bittersweet or semisweet chocolate, finely chopped (I used 3/4 semisweet and 1/4 bittersweet)

Filling Ingredients:
3 (8 oz.) packages cream cheese, at room temperature
1 cup sugar
1½ tablespoons all-purpose flour
2 teaspoons vanilla extract
3 large eggs

Caramel Ingredients:
3/4 cup sugar
1/8 cup water
1/2 cup heavy cream
1/8 cup creme fraiche or sour cream
1/4 teaspoon pure vanilla extract
Pinch of coarse salt

Brownie Ingredients:
10 tablespoons (1 1/4 sticks) unsalted butter
1 1/4 cups sugar
3/4 cup plus 2 tablespoons unsweetened cocoa powder (natural or Dutch-process)
½ teaspoon coffee granules (I added this small amount to impart a richness without a pronounced coffee flavor)
1/4 teaspoon salt
2 teaspoons vanilla extract
2 cold large eggs
1/2 cup all-purpose flour

Directions:
Make the caramel: Prepare an ice-water bath. Heat sugar and water in a medium saucepan over medium-high heat until mixture boils and sugar dissolves, washing down sides of pan often with a wet pastry brush to prevent crystals from forming. Reduce heat to medium, and cook until sugar turns dark amber (about 345 degrees on a candy thermometer), 5 to 7 minutes more. Immediately remove from heat, and carefully whisk in 1/2 cup cream. Return to medium heat, and cook until sugar melts completely and mixture boils. Remove from heat, and pour into a bowl set in ice-water bath. Let caramel cool, stirring often, for 10 minutes. Stir in creme fraiche, vanilla, and salt. Cover and refrigerate at least 2 hours or up to 5 days.

Make the brownie layer: Preheat oven to 325°F with rack positioned in the lower third of the oven. Line the bottom and the sides of an 9-inch round cake pan with parchment paper, leaving an overhang on two opposite sides to make it easier to lift the brownies out of the pan when they are done.

Combine the butter, cocoa, sugar, coffee granules, and salt in a medium heatproof bowl. Set the bowl in a wide skillet of barely simmering water. Stir the butter cocoa mixture from time to time until the butter is melted and the mixture is smooth and hot enough that you want to remove your finger quickly after dipping it in to test. Remove the bowl from the skillet and set aside briefly until the mixture is only warm, not hot.

Using a wooden spoon, stir in the vanilla extract. Add the eggs one at a time, stirring quickly after each one. When the batter looks shiny, thick, and well mixed, add the flour and stir until you cannot see it any longer, then beat for 40 strokes with the wooden spoon. Spread the batter evenly in the lined pan (I used most of the batter, but poured a bit in a separate dish to bake, since I wanted to make my brownie layer a certain thickness – just use your judgment).

Bake until a tester inserted into the center comes out just slightly moist with batter, about 25 minutes. Let the brownies cool completely on a rack and then freeze. When ready to use, lift up the ends of the foil or parchment paper liner, and peel foil away.

Make the cheesecake: To make the crust, preheat the oven to 350˚ F. Position a rack in the middle of the oven. Butter a 9-inch springform pan and place it on a baking sheet. Combine the chocolate cookie crumbs, melted butter and salt in a small bowl. Toss with a fork to moisten all of the crumbs. Press into a thin layer covering the bottom and sides of the springform pan (at least 3 inches up the sides).

Bring the cream to a simmer in a medium saucepan. Place the chocolate in a medium bowl. Once the cream reaches a simmer, pour the cream over the chocolate and let stand 1-2 minutes. Whisk in small circles until a smooth ganache has formed. Pour 1 – 1.5 cups of the ganache over the bottom of the crust. Freeze until the ganache layer is firm, about 30 minutes. Reserve the remaining ganache; cover and let stand at room temperature for later decorating.

In the bowl of an electric mixer fitted with the paddle attachment, beat the cream cheese and sugar on medium-high speed until well blended. Beat in the flour. Add in the vanilla and beat until well incorporated, scraping down the sides of the bowl as needed. Beat in the eggs one at a time, scraping down the bowl between each addition.

Pour the filling over the cold ganache in the crust. Place the springform pan on a rimmed baking sheet. Bake until the top is lightly browned, puffed and cracked at the edges, and the center moves only very slightly when the pan is lightly shaken, about 1 hour. Transfer to a wire cooling rack. Cool at room temperature for at least 30 minutes. Transfer to the refrigerator and let cool at least 3 hours, until completely chilled and set.

Assemble the cheesecake: Wrap a warm towel around the outside of the springform pan to help loosen the crust from the sides. Carefully remove the springform. Transfer the cake to a serving platter. Spread a thin layer of caramel over cheesecake to adhere the brownie layer. Place brownie layer on top of cheesecake (right side up). My brownie layer was almost cup-shaped since the middle didn’t rise as much as the sides, so I poured the rest of my caramel into the concave area and spread it gently (to avoid disturbing the delicate top of the brownies). Place the reserved ganache in a pastry bag fitted with a decorative tip and use to garnish the top of the cake as desired. Chill until the ganache is completely firm, at least 6 hours.

*NOTE: This recipe makes extra ganache. I usually just make it and save the rest for truffles, but feel free to make about 3/4 of this recipe if you’d rather not have leftovers.

P.S. — Sorry for picking your flowers, Mom, but aren’t they pretty?

P.S. 2 — A serving suggestion for those that want to make this dessert extra-ridiculous: instead of serving with regular whipped cream, whip up some caramel cream.

P.S. 3 — (Am I starting to sound like the evolution of a gaming console?) My talented sister, Laura, wrote a song for Alex’s graduation. It’s called “Alarm of the Freshman,” it’s sung to the tune of “Eye of the Tiger,” and the video I shot of her singing it would be perfect blackmail material, if she had any shame. Love you, Laura! Enjoy, y’all:

[youtube=http://www.youtube.com/watch?v=9tXOCUFGjGo&hl=en_US&fs=1&]


Share Share this post with friends!

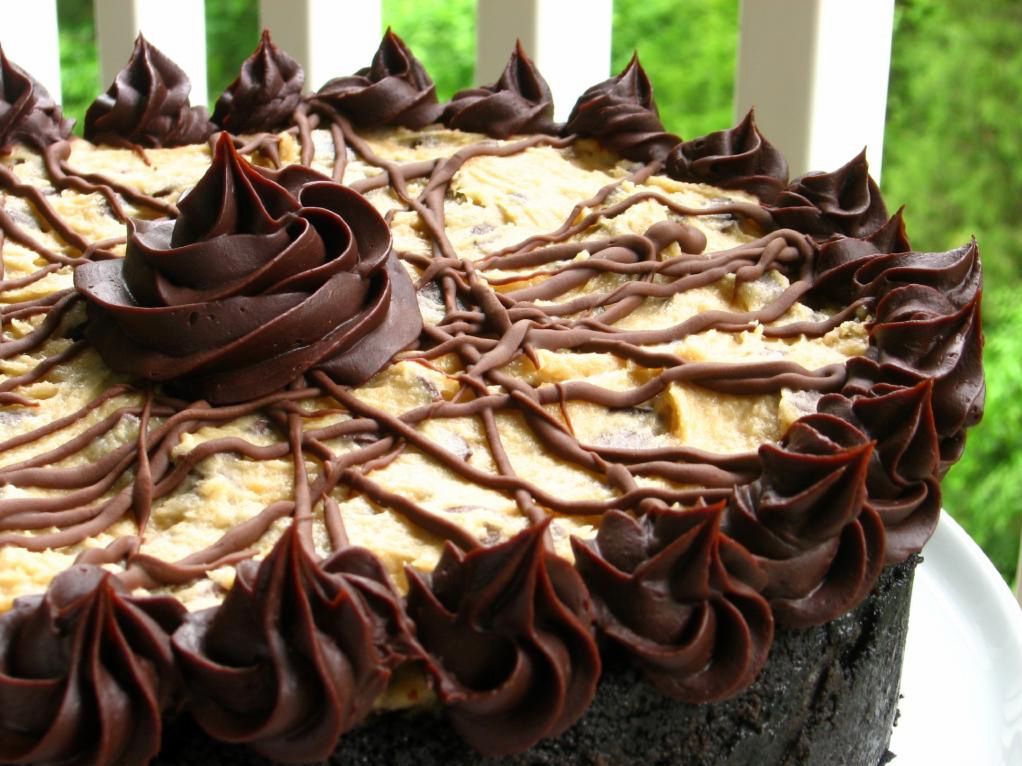
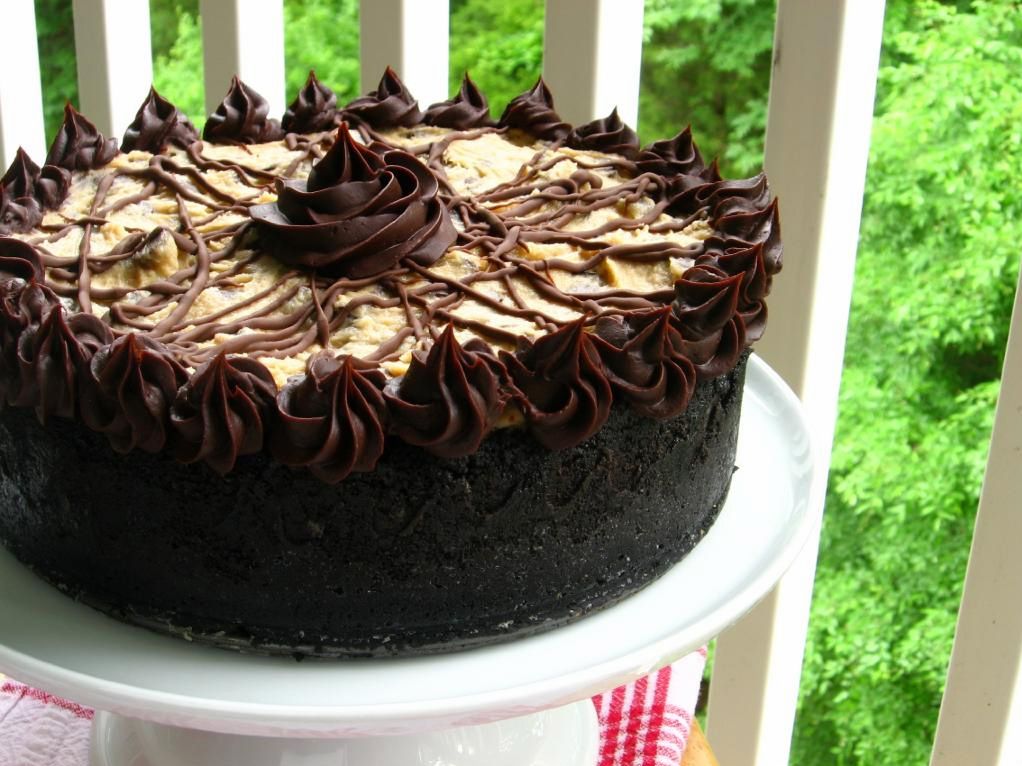
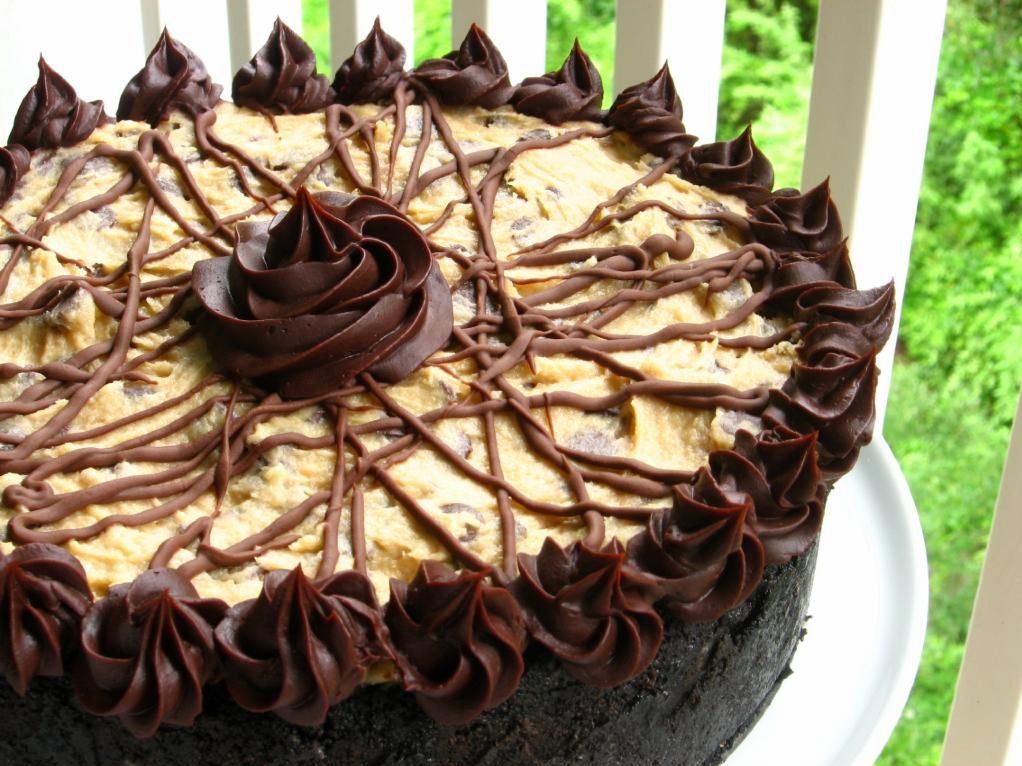
Coffee Cookie Dough Fudge Cheesecake

Coffee Cookie Dough Fudge Cheesecake


Recipe by: Willow Bird Baking, adapted from Annies’ Eats’ Cappucino Fudge Cheesecake with eggless cookie dough by Family Fun

Yields: one 9-inch cheesecake
Crust Ingredients:
32 chocolate sandwich cookies, finely processed into crumbs (use whole cookies, filling and all)
5 1/3 tablespoons unsalted butter, melted and cooled
Small pinch of salt

Ganache Ingredients:
1½ cups heavy cream
20 oz. bittersweet or semisweet chocolate, finely chopped (I combined both)

Filling Ingredients:
3 (8 oz.) packages cream cheese, at room temperature
1 cup sugar
1½ tablespoons all-purpose flour
1 tablespoons instant coffee granules
2 teaspoons vanilla extract
1½ teaspoons mild-flavored (light) molasses
3 large eggs

Topping Ingredients:
1½ cups sour cream
1/3 cup sugar
2 teaspoons vanilla extract

Cookie Dough Layer Ingredients:
1/2 cup butter, softened
3/4 cup light brown sugar, packed
1 cup all-purpose flour
1/2 teaspoon salt
1 tablespoon vanilla extract
1 cup semisweet chocolate chips
4 to 6 tablespoons water (I used 4)

Directions:
To make the crust, butter a 9-inch springform pan. Combine the chocolate cookie crumbs, melted butter and salt in a small bowl. Toss with a fork to moisten all of the crumbs. Press into a thin layer covering the bottom and sides of the springform pan (at least 3 inches up the sides). I did this using a smooth glass to press crumbs into place.

Bring the cream to a simmer in a medium saucepan. Place the chocolate in a medium bowl. Once the cream reaches a simmer, pour the cream over the chocolate and let stand 1-2 minutes. Whisk in small circles until a smooth ganache has formed. Pour 1.5-2 cups of the ganache over the bottom of the crust. Freeze until the ganache layer is firm, about 30 minutes. Reserve the remaining ganache; cover and let stand at room temperature for later decorating.

Preheat the oven to 350˚ F and position a rack in the middle of the oven. In the bowl of an electric mixer fitted with the paddle attachment, beat the cream cheese and sugar on medium-high speed until well blended. Beat in the flour. In a small bowl, combine the coffee granules, vanilla and molasses, stirring until the coffee dissolves. Add to the cream cheese mixture and beat until well incorporated, scraping down the sides of the bowl as needed. Beat in the eggs one at a time, scraping down the bowl between each addition.

Pour the filling over the cold ganache in the crust. Enclose the bottom of the springform pan in tightly wrapped foil and place it in a baking dish. Fill the baking dish with hot water about halfway up the cheesecake pan, careful not to let the moisture touch the cheesecake. Bake until the top is lightly browned, puffed and cracked at the edges, and the center moves only very slightly when the pan is lightly shaken, about 1 hour. Transfer to a wire cooling rack. Cool 15 minutes while preparing the topping (maintaining the oven temperature.)

To make the topping, whisk together the sour cream, sugar and vanilla in a small bowl. Pour the topping over the hot cheesecake, spreading to cover the filling completely. Bake until the topping is set, about 10-15 minutes. Return to the cooling rack and let cool at room temperature for at least 30 minutes. Transfer to the refrigerator and let cool at least 3 hours, until completely chilled and set.

To make cookie dough layer, cream together the butter and sugar in a large bowl. Stir in the flour, salt, vanilla and chips. Add the water, one tablespoon at a time, until you have reached a cookie dough consistency. Line a 9-inch cake pan with parchment paper. Spoon the cookie dough into the pan and flatten to an even layer. Freeze the cookie dough layer until ready to use (at least 30 minutes).

To finish, wrap a warm towel around the outside of the springform pan to help loosen the crust from the sides. Carefully remove the springform. Transfer the cake to a serving platter. Turn cookie dough out of cake pan and place layer on top of cheesecake, pressing it gently into place. Place the reserved ganache in a pastry bag fitted with a decorative tip and use to garnish the top of the cake as desired. Chill until the ganache is completely firm, at least 6 hours.


Happy Anniversary, Mike!

Banana Nut Bread Waffles

I have a ton of different nicknames for my little poodle, Byrd, and I can’t really explain any of them. Who knows why we call her Byrdle-bee (or Byrdle-bee Tuna, Willow Byrd, Sweetie Wheatie, Little One, Wittle Byrd, Willa Byrd, Bog, or Mike’s favorite, Dyrb)? One day we’ll just be staring at her sweet little face and our tongues will get all twisty and coo-y and she’ll end up with another moniker. And I know I’m not alone in this: my parents’ toy poodle, Abbey, was at one point called Abbey-Jo Louisiana Lewinsky Lorax. Unfortunately, I’m not kidding.

At any rate, regardless of what you call her, Byrd has gotten into the spring spirit with a fresh new haircut. Isn’t she sweet?


Look at her big puppy grin after getting a new toy for being such a good girl at the groomer! Note to Charlotteans: her pretty ‘do is from The Dog Salon, which I love.

My turtle (who has not made any appearance changes for the spring weather besides shedding a few scutes) also has some fun nicknames. He’s Squirt, Squirtle-bee, Mommy’s Little Sandwich, Little Bear, and Squirtle the Myrtle Turtle. Mike tried for awhile to make Bowser stick, but it just never caught on. I don’t see him as the demon turtle type.

I could go on (and on) about how adorable my creatures have been lately, but I know y’all are here for some WAFFLES, and neither animal was allowed to partake. I promise they had their own entertaining breakfast (kibble and meat pellets sound good too, right?) Byrd did look on adoringly as we took every waffly bite, trying her best to make me feel like a bad mother for not indulging her. Somehow I managed to enjoy my breakfast regardless.

Okay, so with golden waffles staring you in the face, you could probably enjoy breakfast while someone repeatedly threw darts at your noggin.

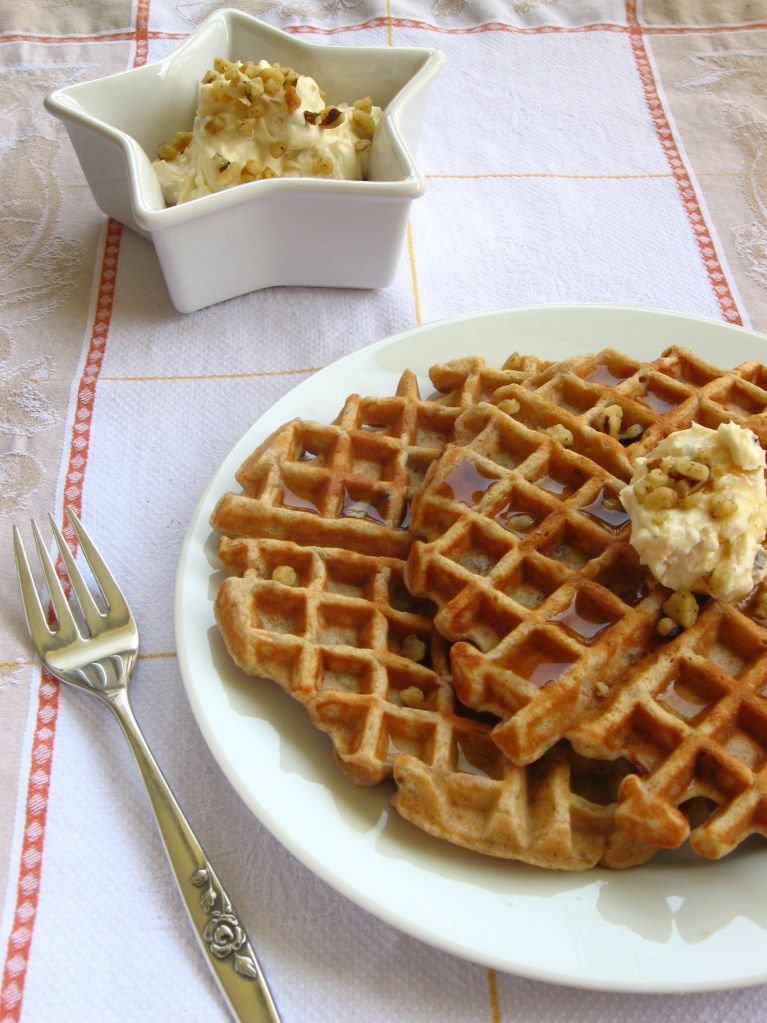
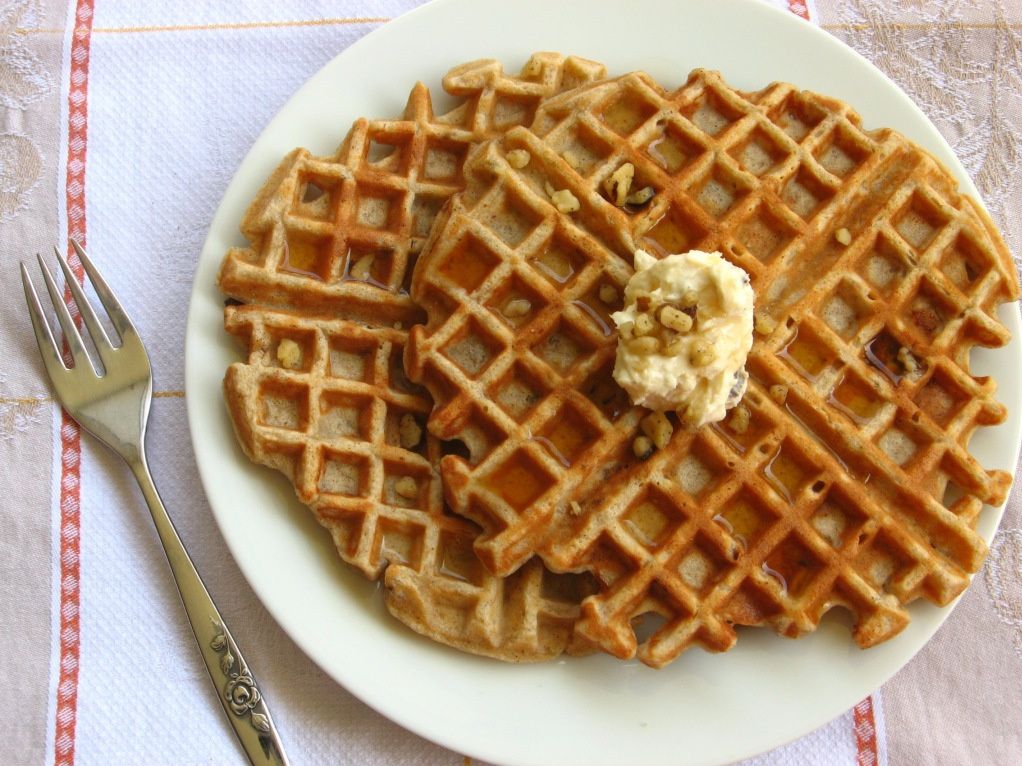
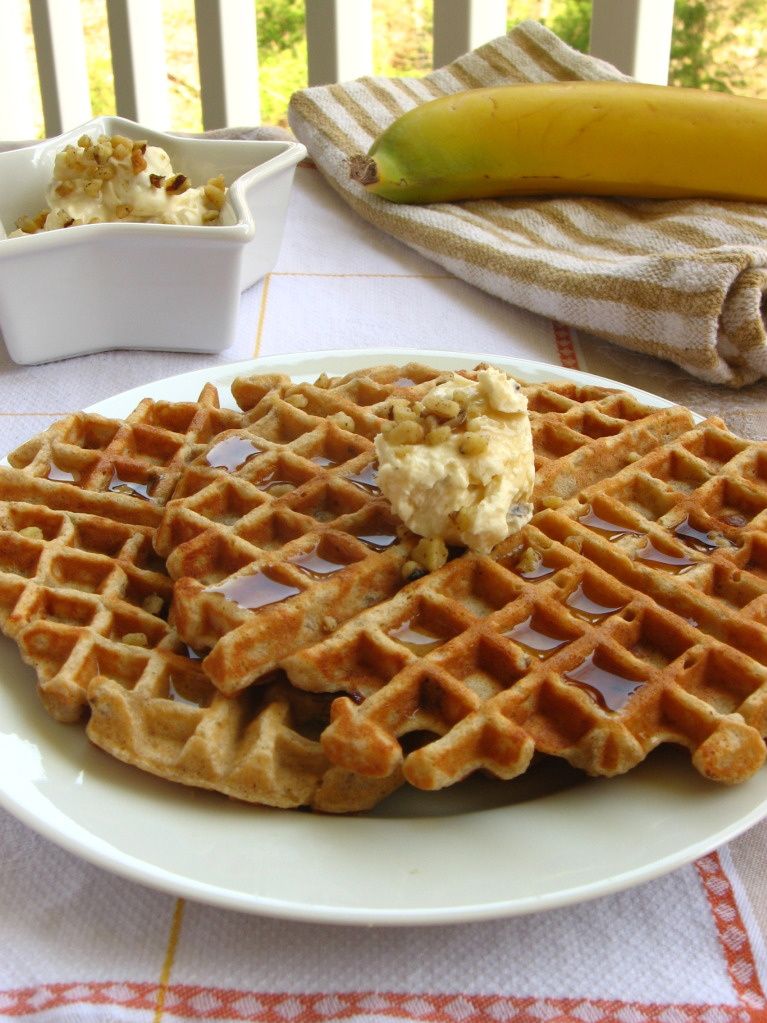
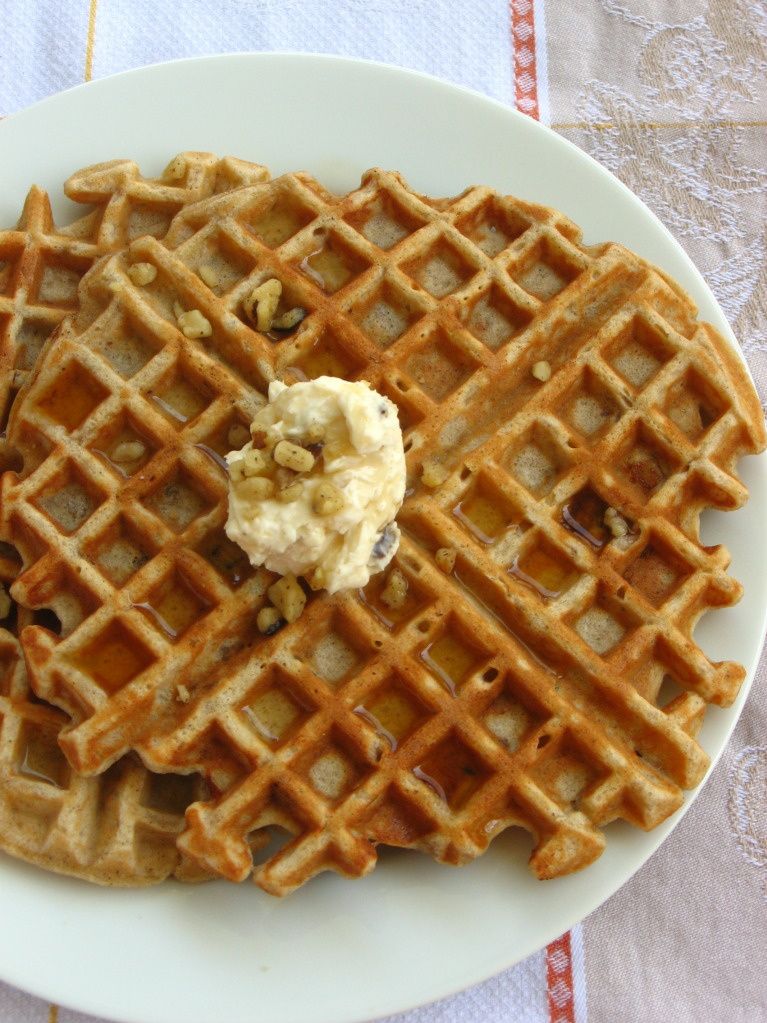
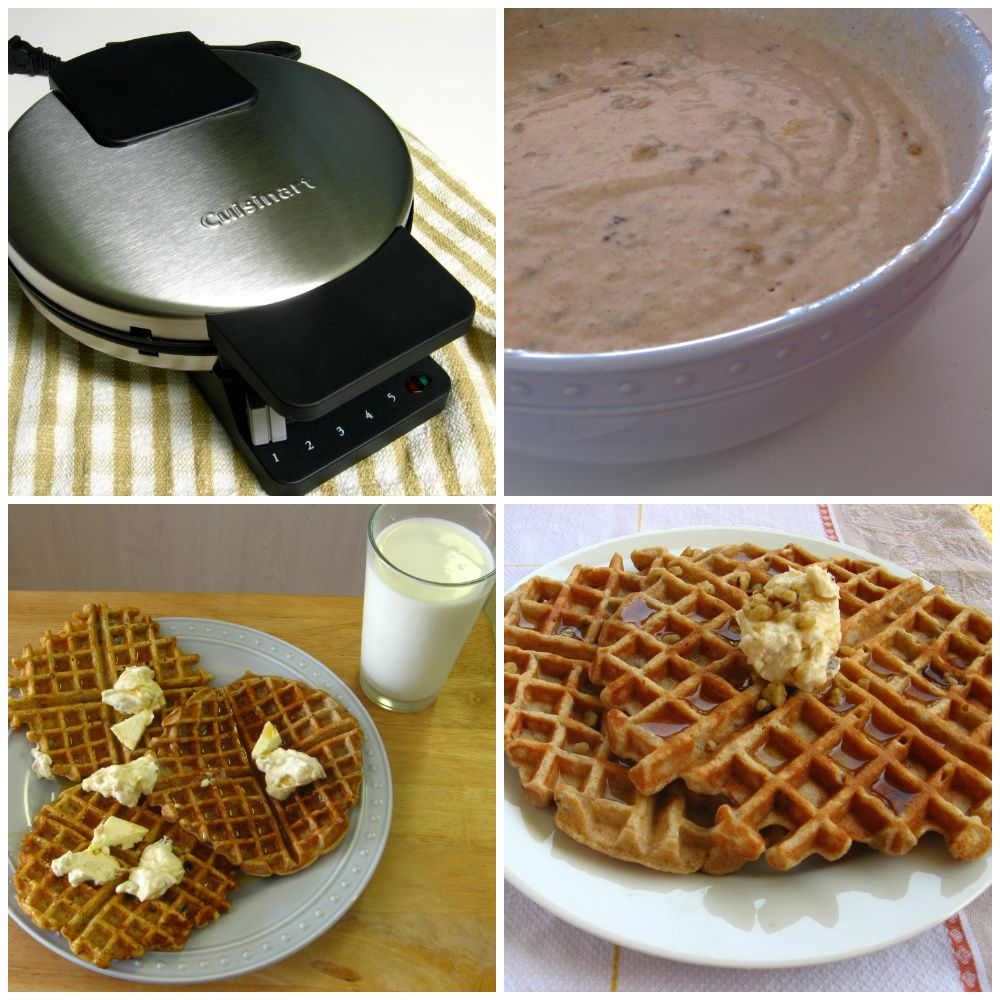
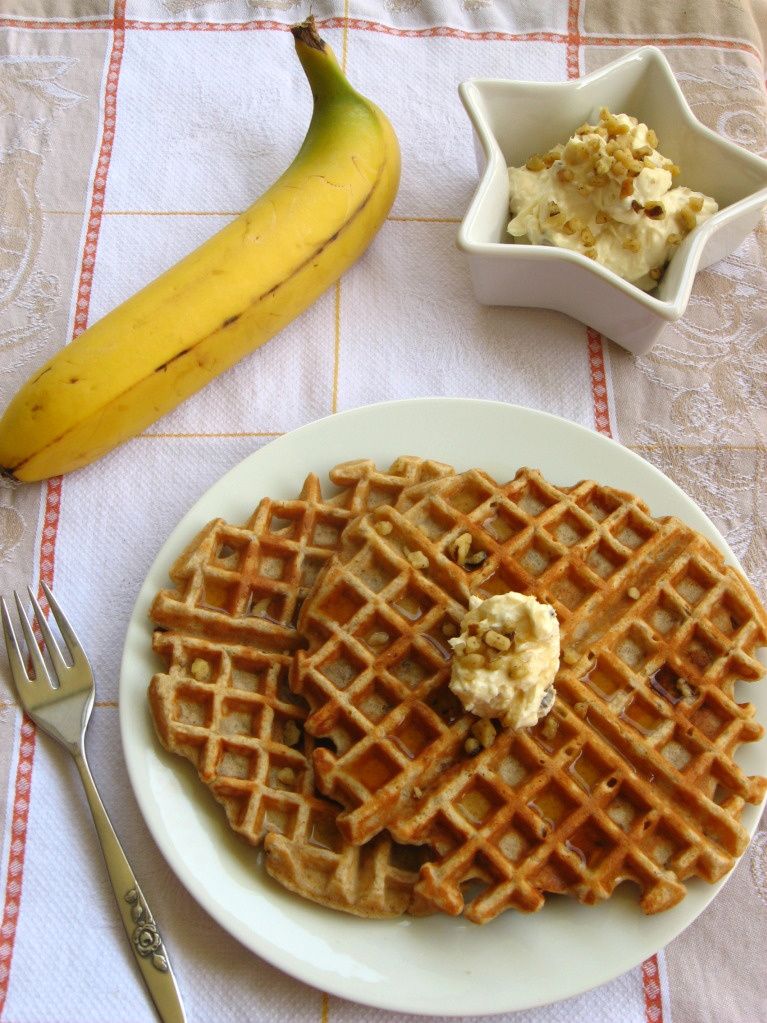
I know you guys are just as excited about fun waffles as I am, since my post on Carrot Cake Waffles was my most popular yet! I promised in that post that another waffle creation was coming up, so here you go (drumroll): Banana Nut Bread Waffles. And if you can believe it, we liked these even better than their carrot cake cousins! They were amazing!

The basic premise was the same. I took two dishes I loved, banana nut bread and waffles, and smushed the recipes together (well, sort of). To a rich buttermilk waffle base, I added the goodies typically found in hearty banana nut bread: mashed ripe bananas, cinnamon, and chopped walnuts. These waffles were the perfect warm, comforting breakfast when served with . . . you guessed it . . .

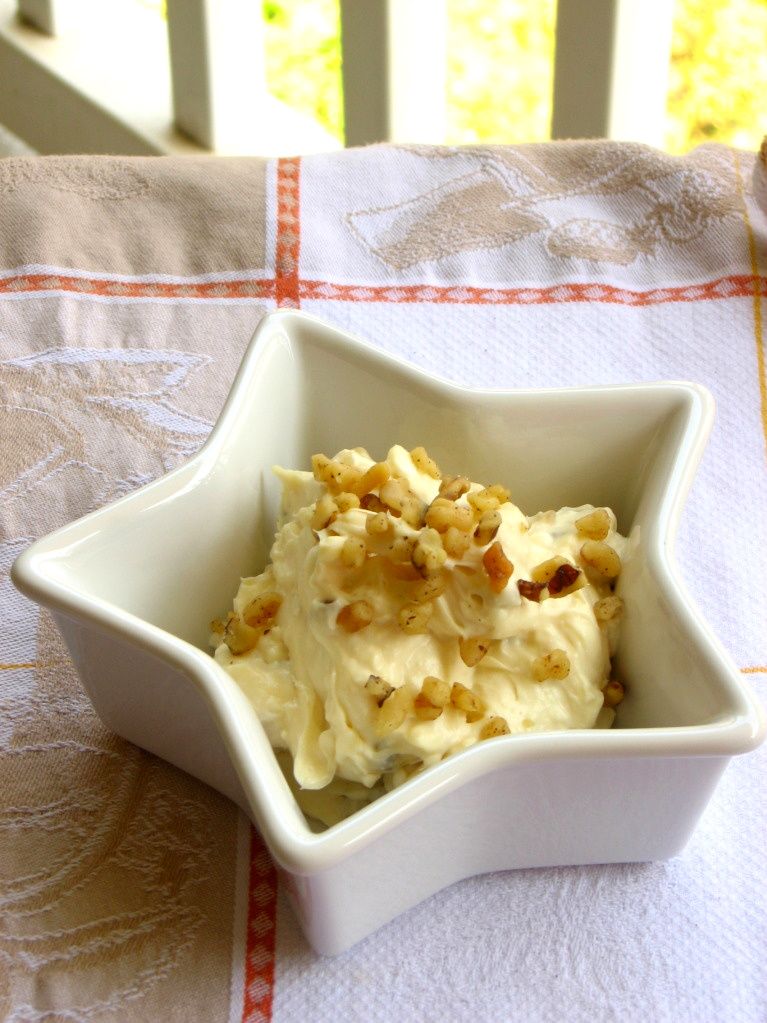
MAPLE NUT CREAM CHEESE SPREAD! I can’t repeat it enough — this spread is so tasty! It was a perfect complement to the flavors of the Banana Nut Bread Waffles what with the slight tang of the cream cheese and the sweetness of the maple.

Banana Nut Bread flavor with a clean loaf pan should excite you. Hearing that this is a quick and simple waffle recipe should excite you even more! Sometimes you want a fancy breakfast for company — sometimes you just want to hurry up and EAT. These Banana Nut Bread Waffles are perfect for both situations. Frilly enough for a guest, fuss-free enough for a relaxing morning.

Oh, and of course I have to ask: what are your pet nicknames? Don’t just share the kosher ones, either! We want the embarrassingly ridiculous ones! We’ll only laugh a little bit.

Banana Bread Waffles


Recipe by: Adapted using the following recipes:

-Rich Buttermilk Waffles: Smitten Kitchen’s adaptation of Mark Bittman.
-Maple Cream Cheese Spread by Carolyn R. Shaw.
Yields: 4 to 6 servings

Waffle Ingredients:
2 cups all-purpose flour
1/2 teaspoon salt
2 tablespoons sugar
1 1/2 teaspoons baking soda
1 teaspoon cinnamon
1 3/4 cups buttermilk* or 1 1/2 cups sour cream or plain yogurt thinned with 1/4 cup milk
2 eggs, separated
4 tablespoons (1/2 stick butter, melted and cooled)
1/2 teaspoon vanilla extract
3 ripe bananas, mashed
3/4 cup walnuts, chopped
Cooking spray for waffle iron

Maple Nut Cream Cheese Spread Ingredients:
8 oz. cream cheese, softened
3-4 tablespoons maple syrup
1/8 cup chopped walnuts

Directions:
Combine the flour, salt, sugar, baking soda, and cinnamon. Mix together the buttermilk (or buttermilk substitute) and the egg yolks. Stir in the butter, mashed banana, and vanilla.

Spray the waffle iron lightly with oil and preheat it. Stir the wet into the dry ingredients. Beat the egg whites in a separate bowl with a whisk or electric mixer (make sure bowl and mixer are spotlessly clean) until they hold soft peaks. Stir them gently into the batter. Stir gently to combine.

Spread a ladleful or so of batter onto the waffle iron and bake until the waffle is done, usually 3 to 5 minutes, depending on your iron. Mix ingredients for Maple Nut Cream Cheese Spread together. Serve waffles immediately with a schmear of Maple Nut Cream Cheese, or keep warm for a few minutes in a low oven.

* The buttermilk can be substituted with 1 1/4 cups of milk at room temperature, mixed with two tablespoons white vinegar, left to clabber for 10 minutes.


Happy breakfasting!

P.S. Say happy happy birthday to Mike! Yesterday was a big birthday for him. More on that and his fancy schmancy birthday dinner soon!


Share Share this post with friends!

Raspberry Almond Braid

20 things I love about SPRING BREAK:

1. Wearing sundresses and new dollar store flip-flops.

2. Playing with a dollar store Frisbee in the parking lot with Mike (and realizing that we are truly terrible at Frisbee).

3. Mike’s family’s Easter egg hunt. I ended up with polleny toes and a scraped up arm — but it was worth it. I found 6 eggs! Who says this stuff is just for kids?

4. Playing fetch with Byrd, who has been following me around with her pink rubber bone in her mouth.

5. Running through soft grass barefoot.

6. Witnessing an all-out wasp vs. bees war on my balcony. The gigantic humble bees are bouncing around the new nest the wasps are building, causing an uproar. All of this goes on overhead while I try to focus on photographing my food!

7. Reading books with wet hair after an evening shower.

8. Watching marathons of Undercover Boss online and bawling the entire time. I can’t help it! I’m a softie. Thanks Heidi and Shannon for recommending the show to me!

9. Reminiscing about April Fool’s Day. My 6th grade students received a fake test that they diligently tried to complete with sad looks on their little faces until I finally revealed my trickery (sample question: “What happened on page 148 of the novel?”). The 7th graders were redirected from room to room via signs before finally arriving and being “chewed out” for being late — I’m a good actor when I need to be! They got me pretty good, too: a fake cup of hot chocolate “spilled” all over my desk.

10. Photographing food outside in WARM, SUNNY weather. Such a difference from shivering on my balcony, fiddling with my tripod with numb fingers!

11. Leaving my hair down and letting it swing around my shoulders. Or tying my hair up in pigtails and feeling only a little silly.

12. Eating delicious Indian food before coming home and devouring cheesecake squares.

13. Getting the BEST parking spot outside my apartment building, because everyone else is at work! Mwahaha!

14. Sitting at my desk with the windows thrown open beside me, birds singing, squirrels nesting in the trees, and the occasional lawnmower revving in the distance.

15. Waking up, eating breakfast . . . and then taking a nap.

16. Planning Mike’s BIRTHDAY DINNER and DESSERT for this upcoming weekend! And actually having the time and energy to make it fancy!

17. The spring part.

18. The break part.

19. Everything . . .

20. . . . including this Raspberry Almond Braid.

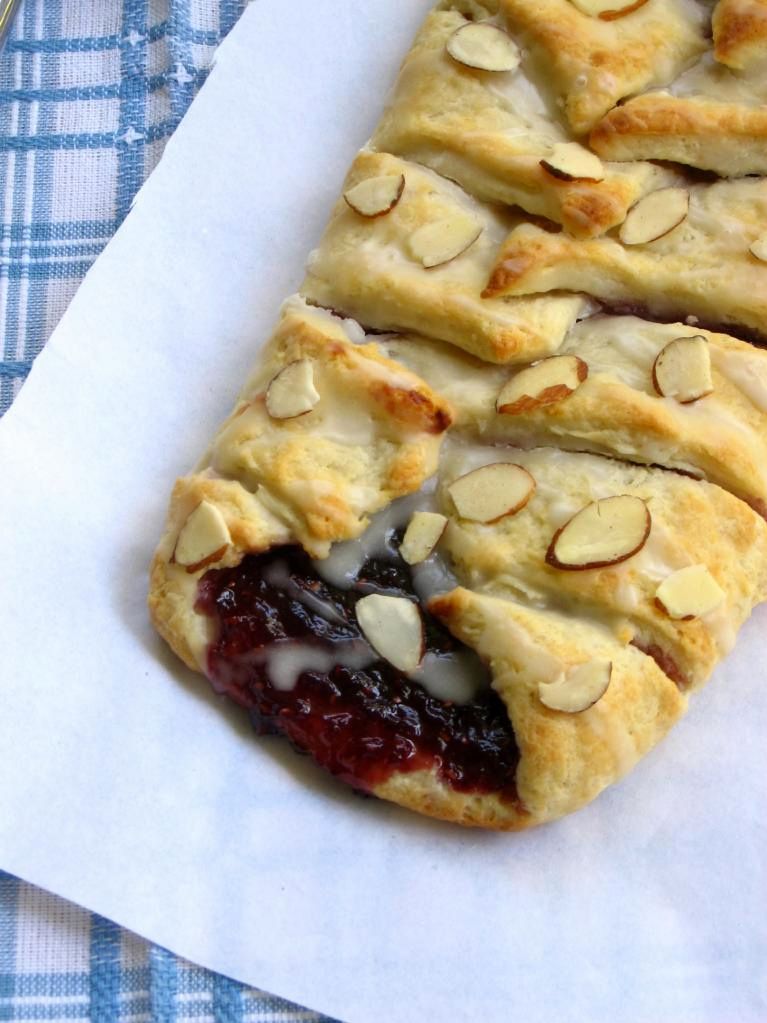
This Raspberry Almond Braid is a tender, flaky, almond-flavored pastry enveloping rich raspberry preserves and topped with a sweet glaze. I was hunting for something simple and comforting to take to the ladies in my Bible study and decided a raspberry cream cheese coffee cake would be perfect . . . only I couldn’t settle on any of the recipes I found. Some were too heavy and cakey; some involved yeasted dough, which felt too finicky for me today. So when I found this braid — made with a quick cream cheese dough — I was sold.

The cream cheese dough was lovely to work with in that it didn’t stick to my rolling pin or the sheets of wax paper I rolled it out between. It actually felt a lot like the crescent roll dough you can buy in stores, so I’m sure you could whip this braid up with one of those cans — but this tasted a ton better! It was almondy and had an almost creamy flavor. The entire dessert was subtly sweet, rich, satisfying, and created in less than an hour.

And you know what I love the most about this braid? In addition to being easy, fast, and delicious, it’s so pretty! Don’t you love simple recipes that look fancy? Make this Raspberry Almond Braid for a quick breakfast one morning this spring, or for a light dessert. I’ll definitely be rounding up my favorite flavors of preserves to make this again!

Raspberry Almond Braid


Recipe by: Adapted from Luna Cafe
Yields: 10-12 1-in. slivers of braid, or about 4 servings

Dough and Filling Ingredients:
2 cups all-purpose flour, sifted
1 teaspoon baking powder
1/2 teaspoon salt
1/2 cup unsalted butter
3 ounces best quality cream cheese
1/2 cup milk, minus 1/2 teaspoon
1/2 teaspoon almond extract
1/2 cup raspberry preserves (or your favorite preserves)

Icing Ingrdients:
1/2 cup powdered sugar
1 tablespoon milk
1/8 teaspoon vanilla
1/8 teaspoon almond extract
2 tablespoons toasted sliced almonds (optional)

Directions:
NOTE: To prepare this braid in advance, complete all steps and assemble the braid but do not bake. Cover the braid on its parchment lined baking sheet with plastic wrap and refrigerate overnight. Set out in the morning as you preheat the oven and then bake as usual.

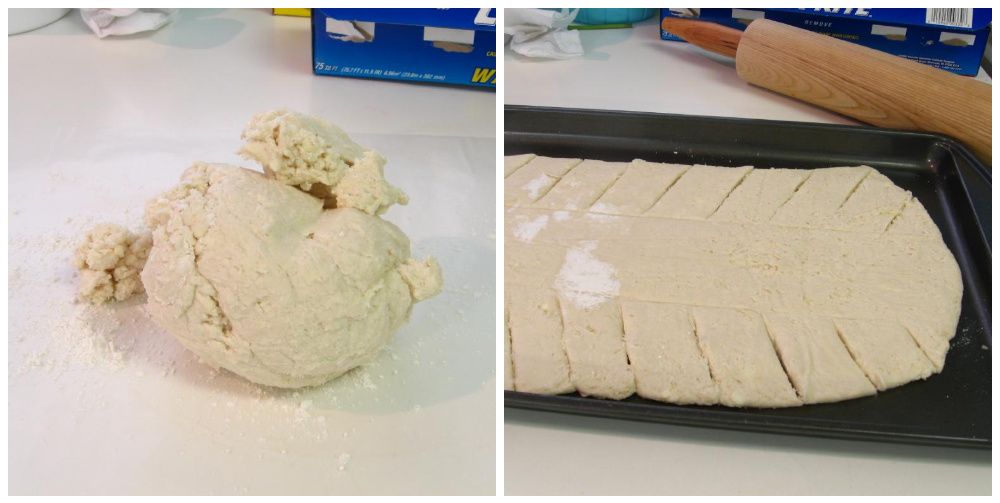
Preheat oven to 425 degrees F. In the bowl of a food processor, mix the flour, baking powder, and salt. Add the cream cheese and butter into the flour mixture and pulse to cut the fat into the flour (about 6 pulses). Add the milk and almond extract and blend into a loose dough.

Turn the dough onto a floured surface and knead VERY LIGHTLY for 4-5 strokes. (NOTE: This is the step at which you can ruin the braid. If you overwork the dough, the pastry will be tough. Just gather the dough together and don’t worry about making it smooth. It will still look a little rough. That’s perfect.)

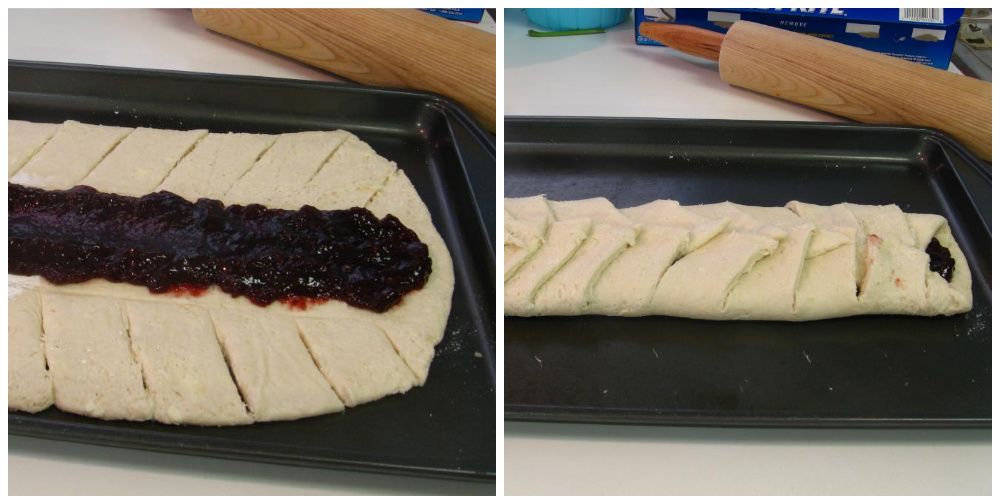
Between two sheets of waxed paper, roll the dough to an 8- by 12-inch rectangle. Turn dough out onto a lightly greased baking sheet and remove the waxed paper. Measure and mark the dough lengthwise into thirds. Spread preserves down the middle third of the dough, keeping it about ½ inch from the mark on both sides.

Make 2¾-inch slight diagonal cuts at 1-inch intervals on each the long sides. Do not cut into the center jam-filled area. Fold strips, first one from one side and then one from the other side in a rotating fashion, over the filling. It will now resemble a braid. Bake in a 425° oven for 12-15 minutes, until the dough is cooked through and the top is lightly browned.

In a small glass measuring cup with a pouring spout, combine the sugar, milk, vanilla, and almond extract. Drizzle over the top of the braid. If desired, sprinkle on the toasted sliced almonds while the icing is still wet. Serve warm.


Enjoy!


Share Share this post with friends!

1 13 14 15 16 17 20