cream cheese

Red Velvet Cheesecake

Every year around this time, I get the urge to build a mailbox.

Don’t look at me like that. I blame my elementary school teachers. At the beginning of almost every February, my teachers would pull out construction paper, glue, stickers, markers, and paint, and we’d all set to work constructing mailboxes. Sure it wasn’t the most glamorous construction job I’ve ever been a part of, but I was very serious about it nonetheless, because this wasn’t just any mailbox — this was a Valentine’s Day mailbox.

On February 14, we’d all bring in our packets of valentines and circulate about the classroom uncomfortably, dropping one in each of the waiting mailboxes. We tried not to pause too long at anyone’s desk or — heaven forbid — make any accidental eye contact, lest it be misinterpreted during this socially charged process.

Secretly, though, I’d probably spent the night before carefully selecting the perfect Strawberry Shortcake Valentine for the boy I liked. One that could be interpreted as being totally casual — plausible deniability in case he had no interest in me whatsoever — but was also slightly on the mushy side, in case he was just waiting for a sign of my interest. If I was appending candy to my valentines that year, I probably spent another eternity choosing the candy heart or chocolate that I thought he’d like the very best.

(Yes, I now realize that the boy I liked, in contrast, had probably spent the night before Valentine’s Day being hounded by his mother to at least write his classmates’ names somewhere on the valentines she’d bought for him, eating most of his valentine candy before it got attached to anyone’s card, and playing a Teenage Mutant Ninja Turtles video game until bed.)

Anyway, when every valentine was passed out and the time had finally come to sit down and empty our mailboxes, I was always breathless with suspense. Imagine the possibilities! Forget bills and junk mail — these mailboxes were carefully crafted to hold L-O-V-E. Every year I fully expected to receive a long letter handwritten by the boy I liked (actually, any boy would’ve done. Or a secret admirer? Yes, please!) detailing the many, MANY reasons he was smitten with me. He might even include a phone number. Maybe a special conversation heart. Maybe an engagement ring! You never know.

Reality was a little disappointing. I’d dump out all the valentines and quickly shuffle through the boring ones — Scooby Doo holding a bunch of flowers and saying, “Rees are for Roo, Valentine!” or Power Rangers crying, “It’s Morphin’ Time, Valentine!” My eagle eyes were looking for two things: candy and handwritten messages. Candy because it would sustain me on my arduous journey toward discovering the love of my life, and handwritten messages from said love.

Was his heartfelt letter to me in this envelope? Nope, a smurf card. How about this one? Nope, an I Love Lucy valentine — you can tell Mom picked those out. How about the envelope with a heart drawn on the front? Nope, that was from my BFF. Thanks a lot for getting my hopes up, girl. Slowly but surely, my stack dwindled. One after another, the valentines were slapped down onto my “read” pile with barely more than a glance. Finally, the fateful moment came when I’d read and dismissed the very last card.

No proposal. No secret admirer. Not even a lousy paragraph about my eyes being like the sun or something. Nothin’. At this point I’d probably look at my crush across the classroom and sigh, appreciating the suave way in which he used his lollipop as a sword to launch attacks against his friend’s ear.

Childhood is rough. Adulthood is a lot better. Yes, there are bills and junk mail in my mailbox now. And unfortunately, I didn’t get to MAKE my mailbox. And, okay, I’m not going to get a pile of colorful valentines, some of which are boasting candy.

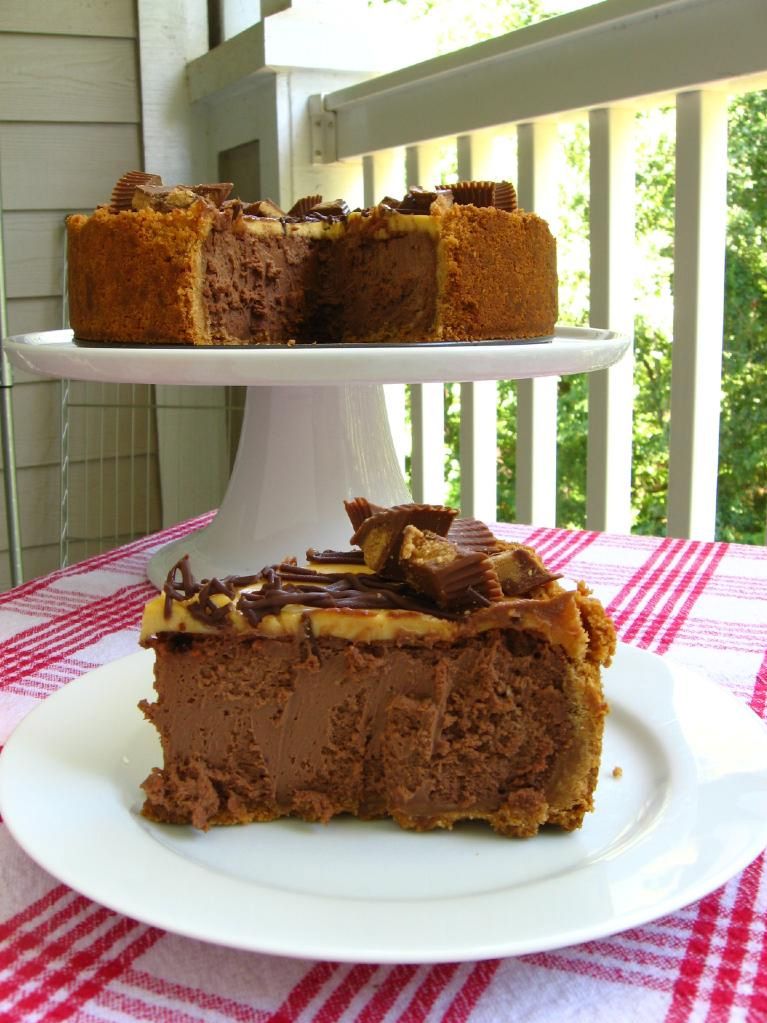
But here’s why adulthood rocks. This year, when Christof Van Snufterplucken (names changed to protect the innocent — or lame) doesn’t turn off his video game long enough to write me a love letter about how awesome I am, I can remedy my disappointment in a mature, adult way: by making and eating a ridiculous amount of cheesecake. Red Velvet Cheesecake, to be exact.

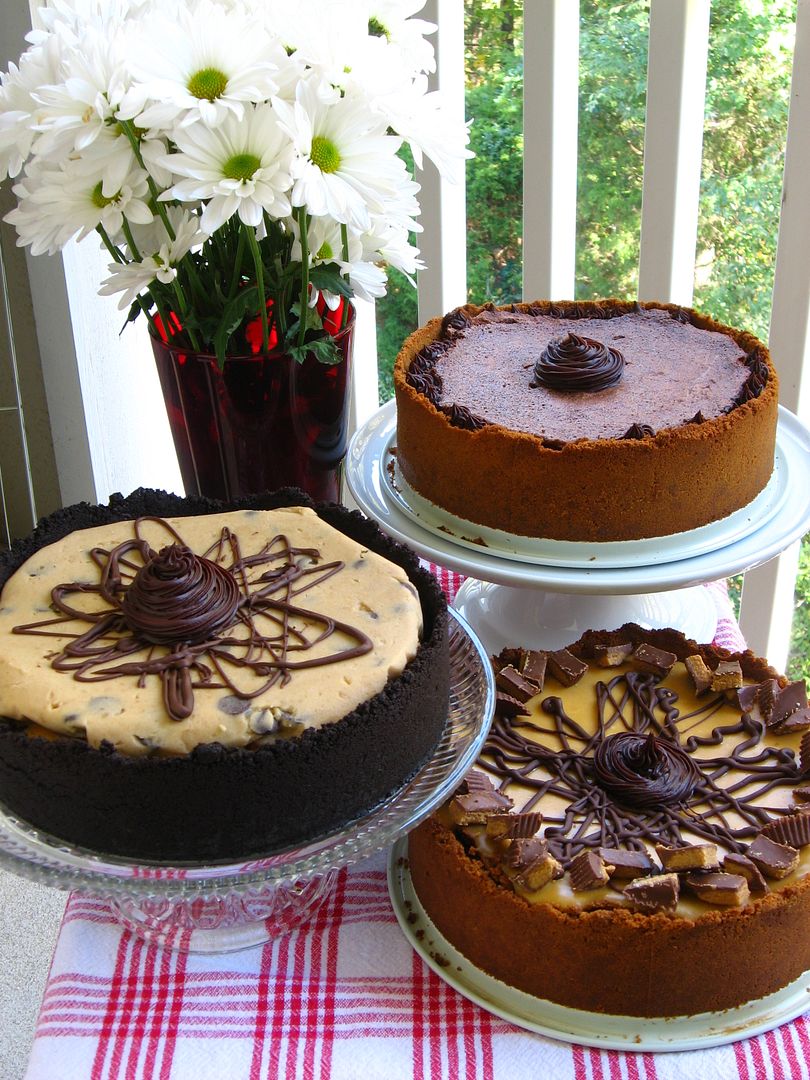
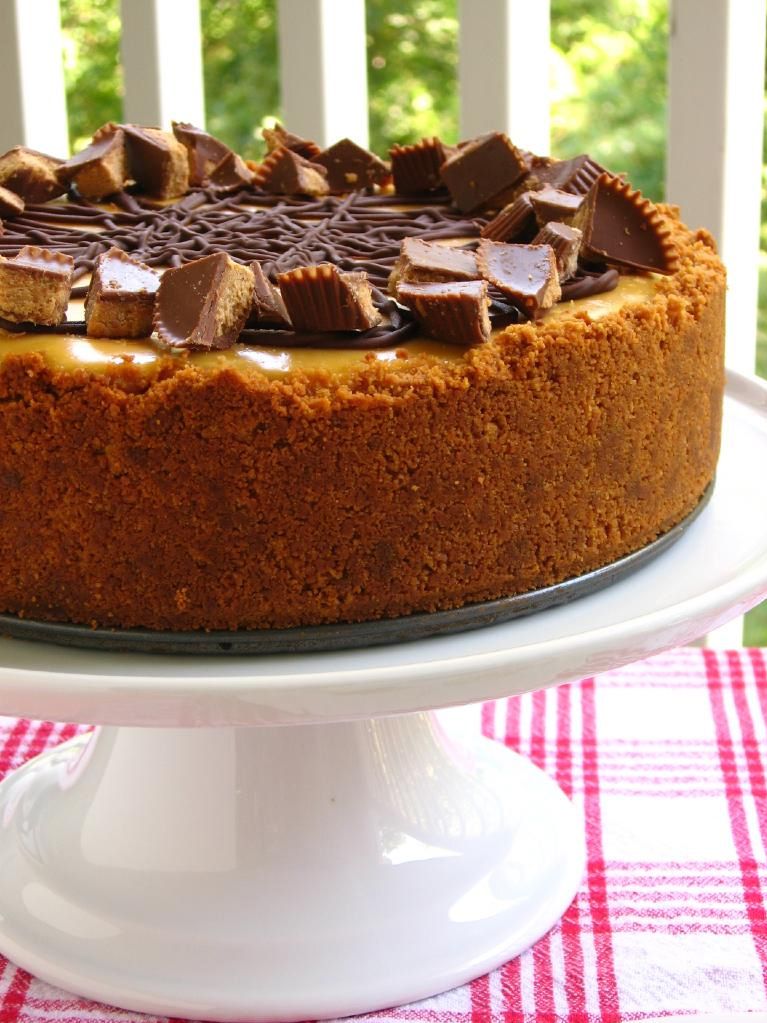
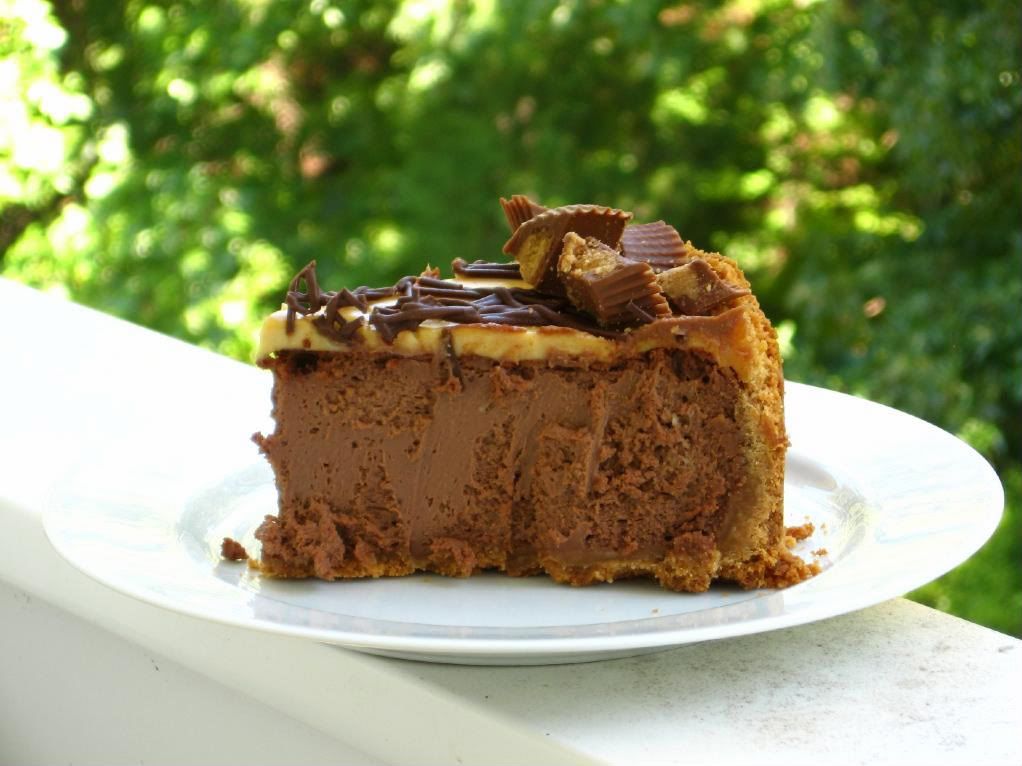
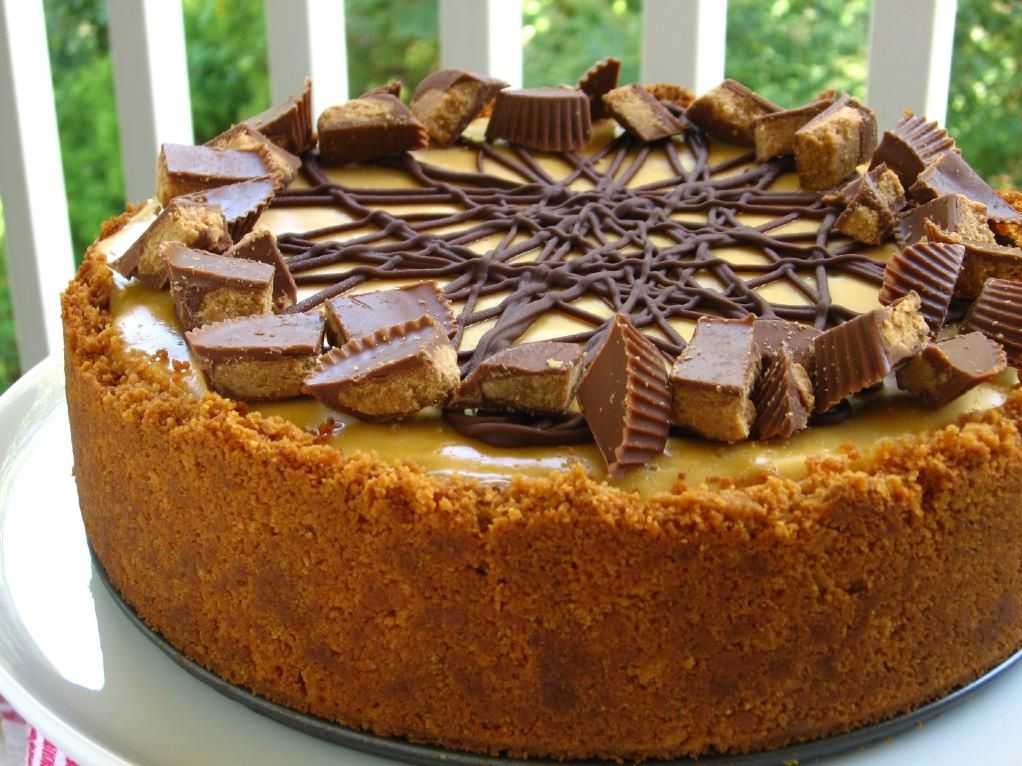
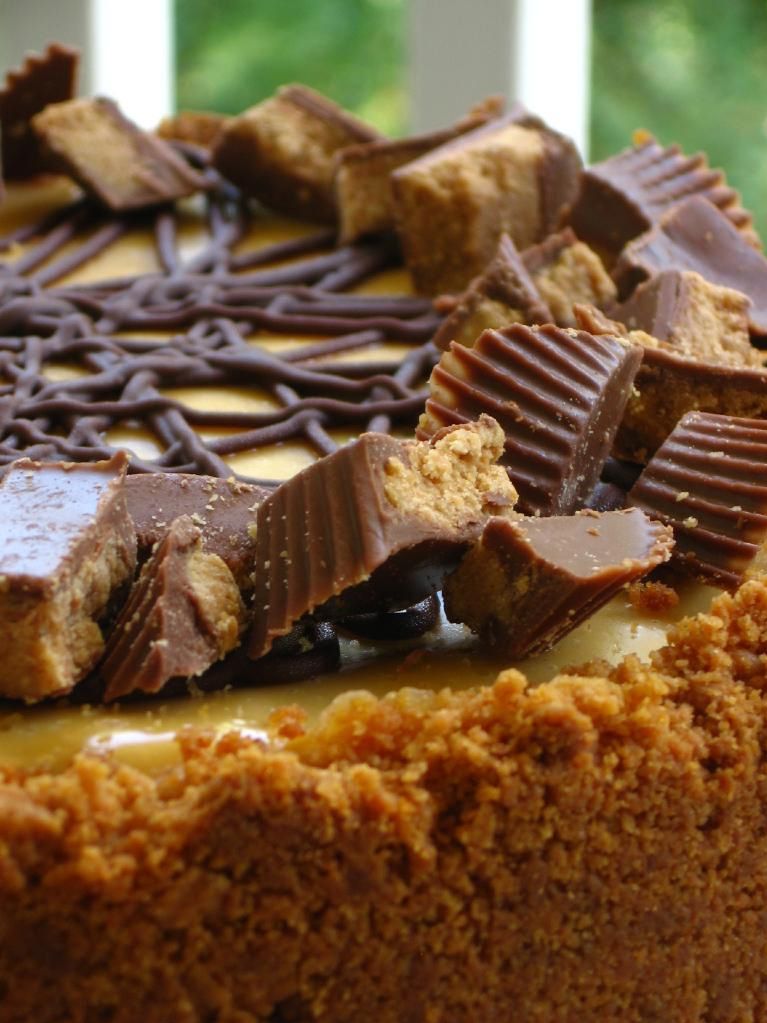
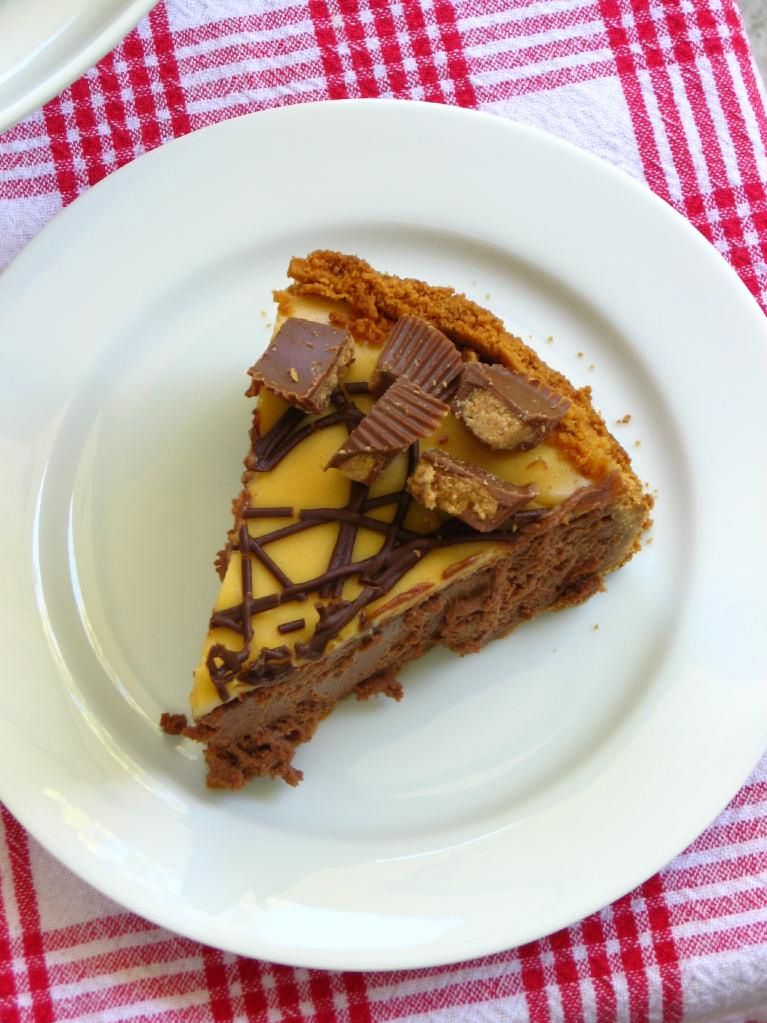
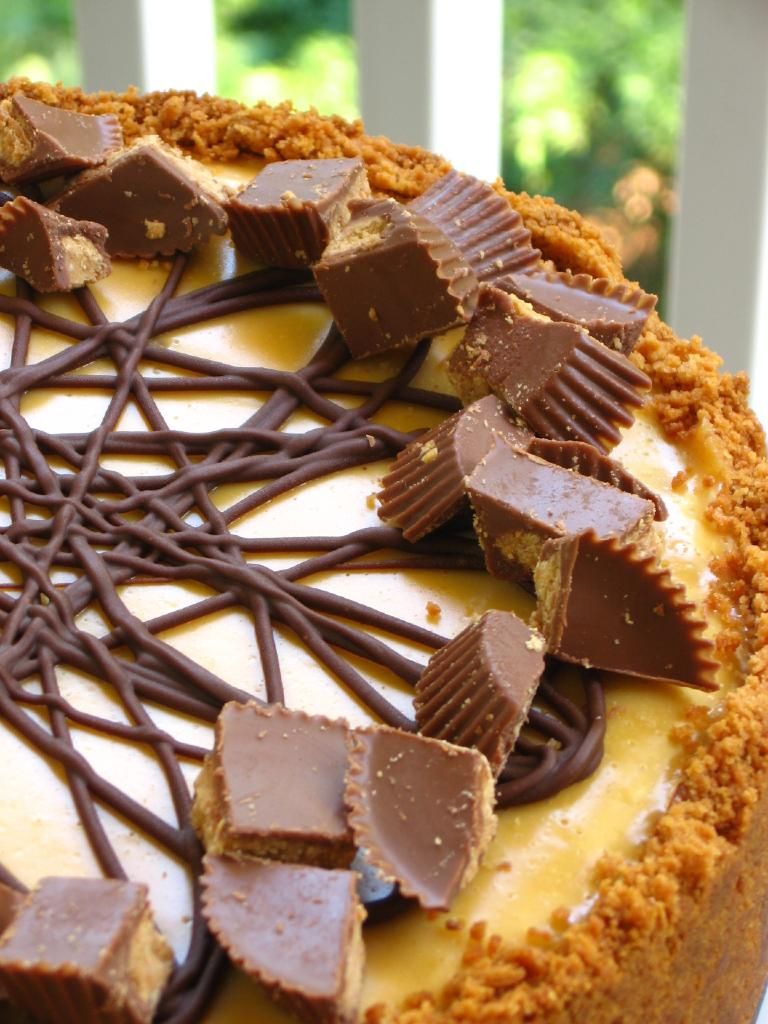
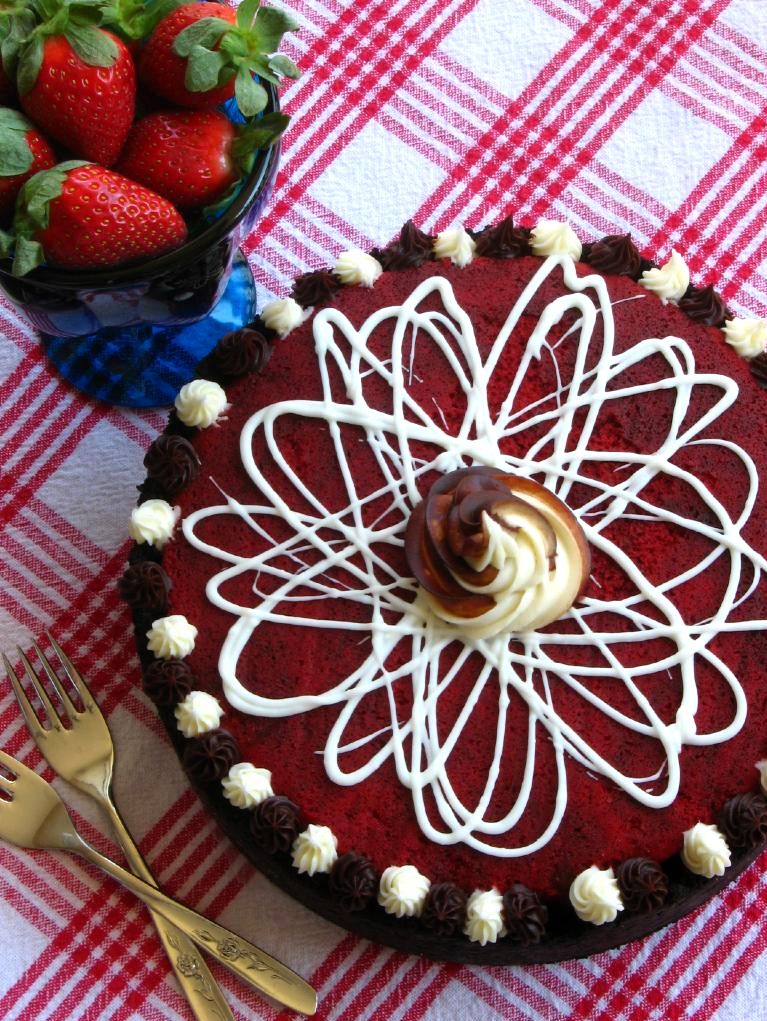
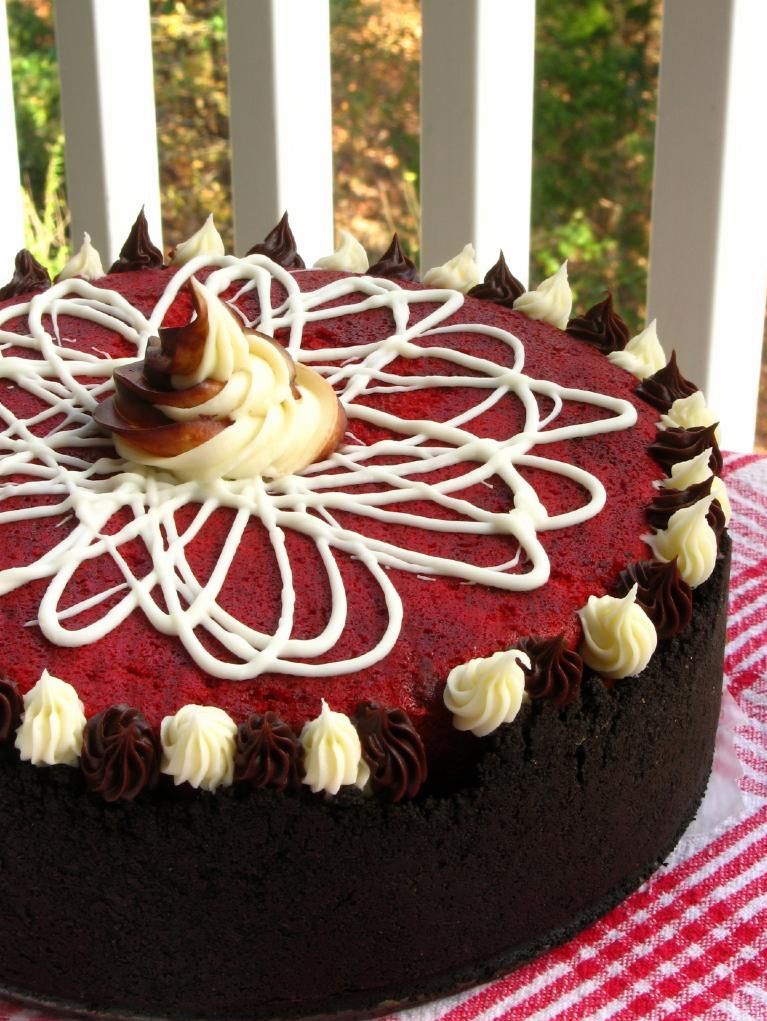
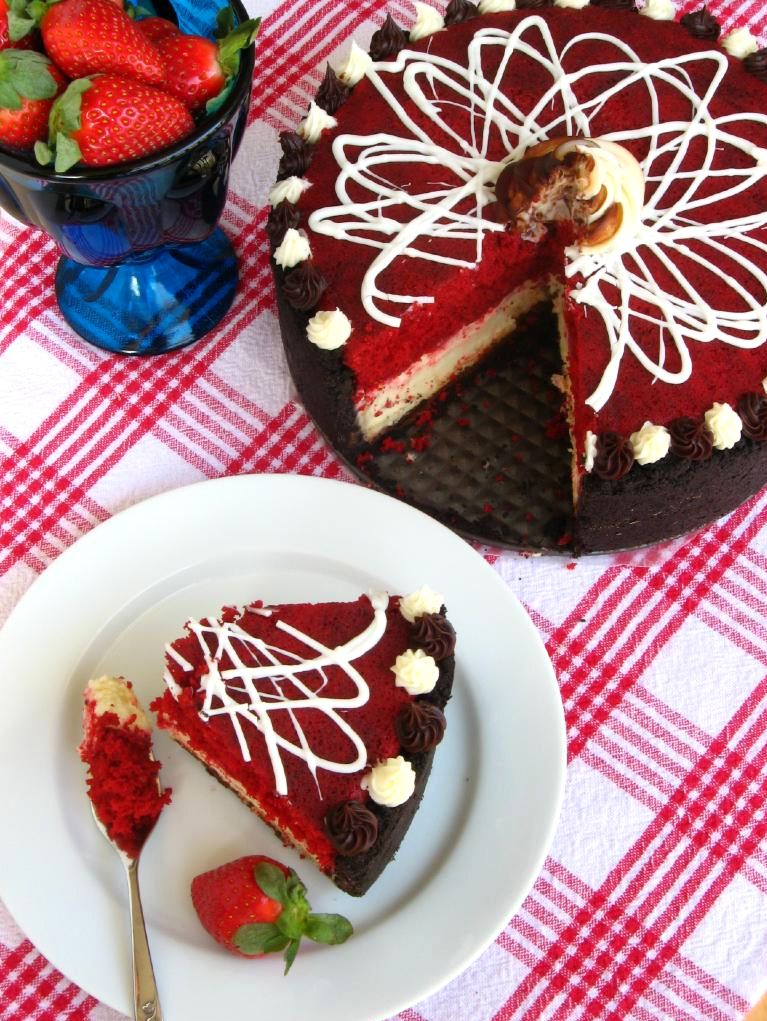
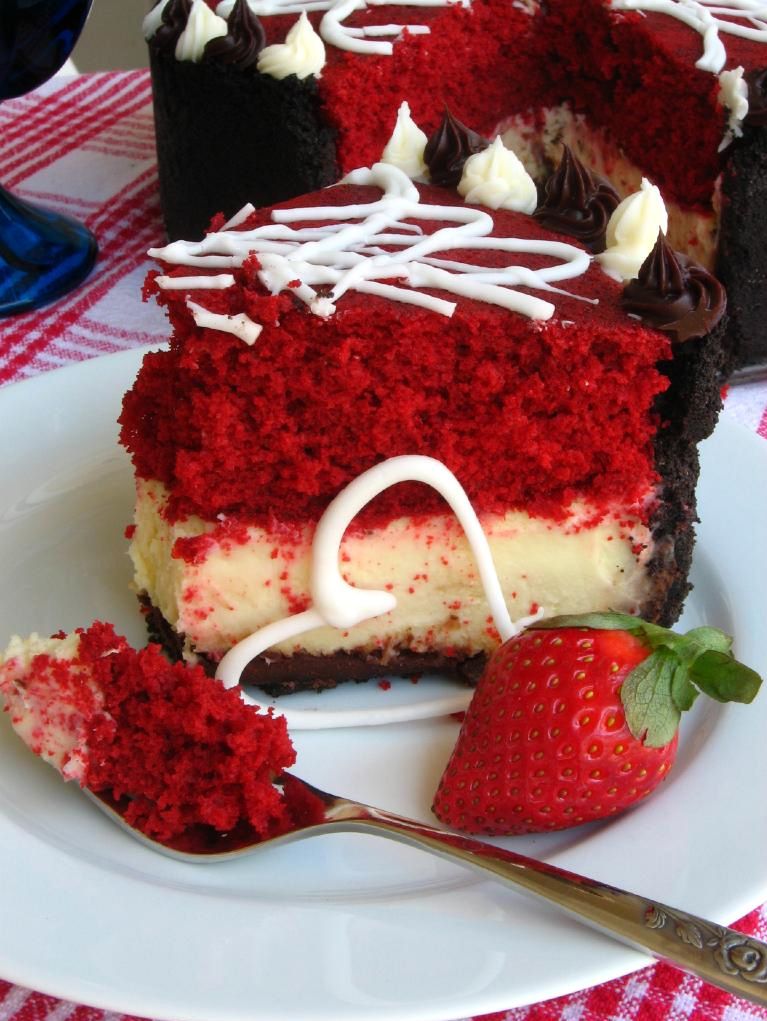
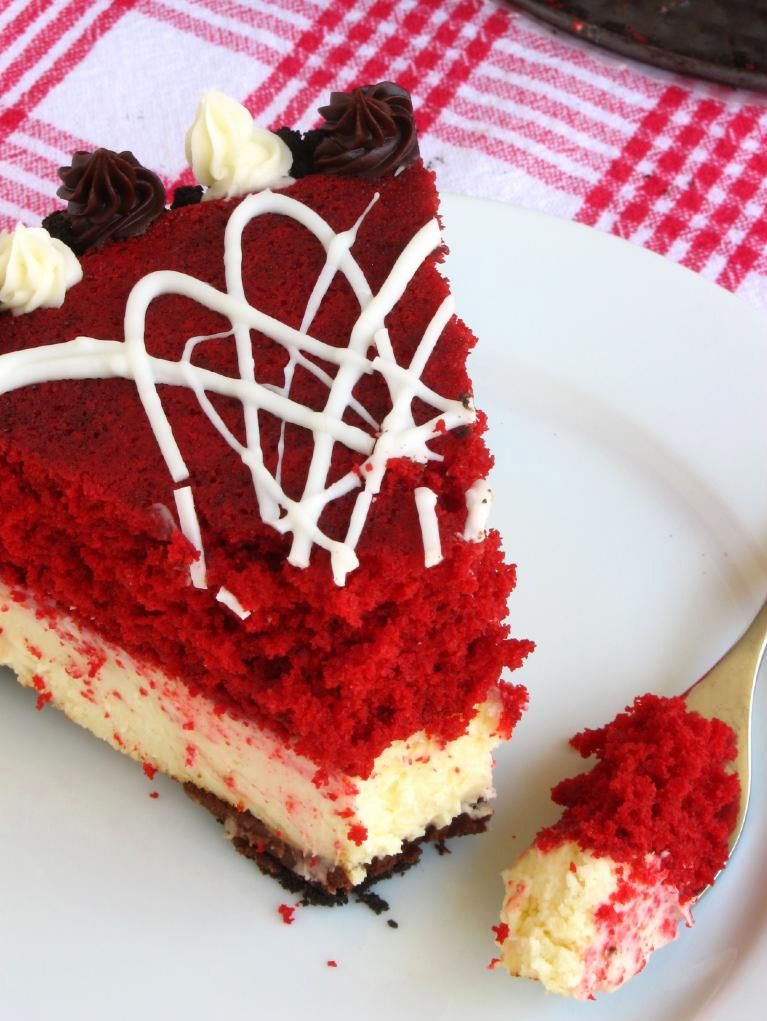
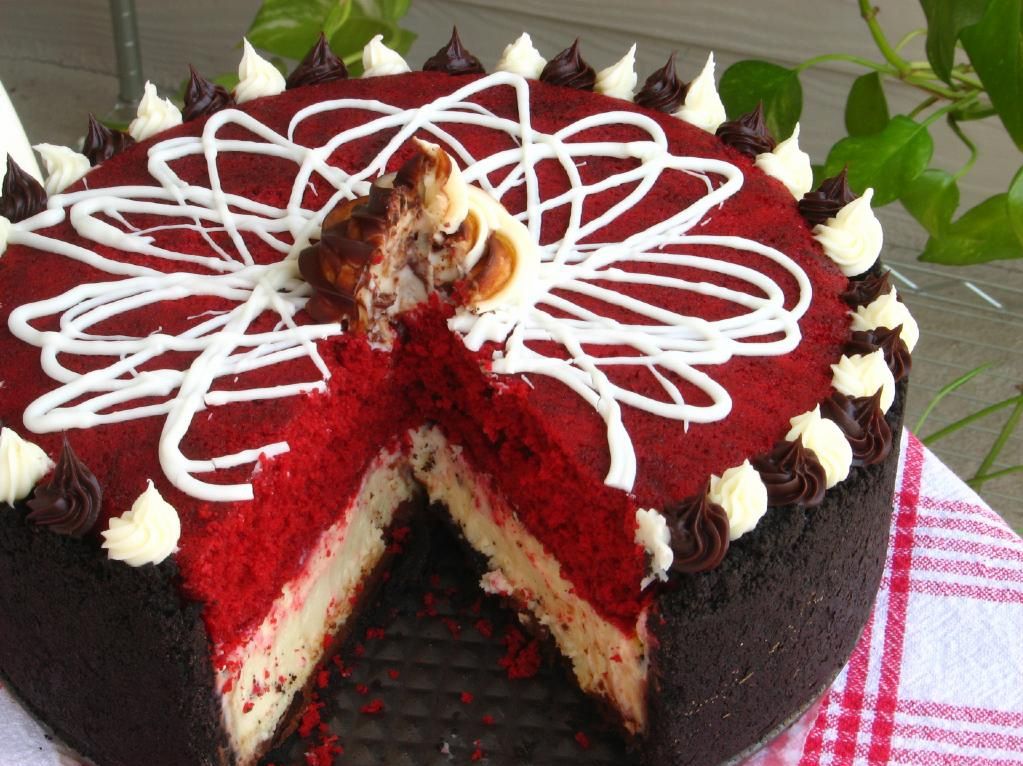
Reader Victoria first gave me the idea for a Red Velvet Cheesecake back in November and I thought it sounded fantastic! She made a beautiful layer-cake-like version, and I went the cheesecake-like route. This ultimate Valentine’s dessert includes an oreo crust filled with layers of ganache, creamy cheesecake, and moist red velvet cake decorated with ganache and cream cheese frosting. Perhaps this is obvious, but apart from being pretty (especially when served with chocolate-covered strawberries and white chocolate hearts), this thing is delicious, indulgent, and yes, romantic. So even if your crush loves radioactive reptilian ninjas more than you, you can have your own little slice o’ love.

Tell me about one of your elementary school crushes. Did you ever receive a fantastic valentine in school?

5 from 1 reviews
Red Velvet Cheesecake
 
Prep time
Cook time
Total time
 
A delicious dessert that combines two of your favorites into one! Note on cheesecake making: Cheesecakes are simple and super customizable. New to cheesecake making? Watch my 6-minute Cheesecake Video Tutorial for visual assistance! Note on scheduling: This cake is easily separated into two days of preparation, and can be prepared ahead of time. On day one, prepare the red velvet cake, cool it, and freeze it. On day two, prepare the cheesecake. You can then assemble and decorate right away, or leave this for day three.
Serves: 14-16
Ingredients
Crust Ingredients:
  • 32 chocolate sandwich cookies, finely processed into crumbs (cream and all – it’ll disappear when you crush them up!)
  • 5 1/3 tablespoons unsalted butter, melted and cooled
  • pinch of salt
Ganache Ingredients:
  • 3/4 cups heavy cream
  • 10 ounces bittersweet or semisweet chocolate, finely chopped (I used half semisweet and half bittersweet chocolate chips)
Cake Ingredients:
  • 1/4 cup vegetable shortening
  • 1 egg
  • 1 tablespoon cocoa
  • 1/4 teaspoon salt
  • 3/4 cups sugar
  • 1/2 teaspoon vanilla extract
  • 1/2 cup buttermilk
  • 1 1/4 cups flour
  • 1/2 teaspoon baking soda
  • 1/2 tablespoon white vinegar
  • 1 ounce red food coloring
Filling Ingredients:
  • 3 (8-ounce) packages cream cheese, at room temperature
  • 1 cup sugar
  • 1½ tablespoons all-purpose flour
  • 2 teaspoons vanilla extract
  • 3 large eggs
Decorative Toppings (optional):
  • 2 ounces cream cheese, at room temperature
  • 2 tablespoons butter, at room temperature
  • 1 cup powdered sugar, sifted
  • white chocolate for drizzling
  • strawberries
Instructions
  1. Make the cake: Preheat oven to 350 degrees F. Line the bottom and the sides of an 9-inch round cake pan with parchment paper, leaving an overhang on two opposite sides to make it easier to lift the cake out of the pan when it’s done. Cream shortening, sugar, and eggs. Make a paste of the cocoa and coloring and add to the shortening mixture. Add salt and vanilla. Add buttermilk alternately with the flour, beginning and ending with flour. Mix vinegar and soda right before using and add to mixture by folding in. Pour batter into the cake pan and bake at 350 degrees for 20-25 minutes, or until a toothpick inserted into the center of the cake comes out clean. Cool completely, cover in wax paper, and freeze for 30 minutes or until firm.
  2. Make the cheesecake: To make the crust, preheat the oven to 350˚ F. Butter a 9-inch springform pan and place it on a baking sheet. Combine the chocolate cookie crumbs, melted butter and salt in a small bowl. Toss with a fork to moisten all of the crumbs. Press into a thin layer covering the bottom and sides of the springform pan (at least 3 inches up the sides).
  3. Bring the cream to a simmer in a medium saucepan. Place the chocolate in a medium bowl. Once the cream reaches a simmer, pour the cream over the chocolate and let stand 1-2 minutes. Whisk in small circles until a smooth ganache has formed. Pour 1 – 1.5 cups of the ganache over the bottom of the crust. Freeze until the ganache layer is firm, about 30 minutes. Reserve the remaining ganache; cover and let stand at room temperature for later decorating.
  4. Preheat the oven to 350˚ F and position a rack in the middle of the oven. In the bowl of an electric mixer fitted with the paddle attachment, beat the cream cheese and sugar on medium-high speed until well blended. Beat in the flour. Add in the vanilla and beat until well incorporated, scraping down the sides of the bowl as needed. Beat in the eggs one at a time, scraping down the bowl between each addition.
  5. Pour the filling over the cold ganache in the crust. Place the springform pan on a rimmed baking sheet. Bake until the top is lightly browned, puffed and cracked at the edges, and the center moves only very slightly when the pan is lightly shaken, about 1 hour. Transfer to a wire cooling rack. Cool at room temperature for at least 30 minutes. Transfer to the refrigerator and let cool at least 3 hours, until completely chilled and set (it’ll sink as it cools).
  6. Assemble topping: Whip room temperature ganache to create a fluffy texture perfect for piping. In a separate bowl, mix together cream cheese, butter, and powdered sugar to make a small amount of cream cheese frosting for decorating.
  7. Assemble the cheesecake: Wrap a warm towel around the outside of the springform pan to help loosen the crust from the sides. Carefully remove the springform. Transfer the cake to a serving platter. Here, you can schmear some ganache on the cheesecake to help the red velvet cake adhere. I didn’t, but it’s a good idea. Then place your red velvet cake layer on top of cheesecake (right side up). If for some reason you seem that your cake layer will stick up beyond your crust, you can use a long serrated knife to reduce its width (freezing it first makes it easier to cut). Decorate top of cake with drizzled white chocolate, piped cream cheese frosting, whipped ganache, and strawberries.

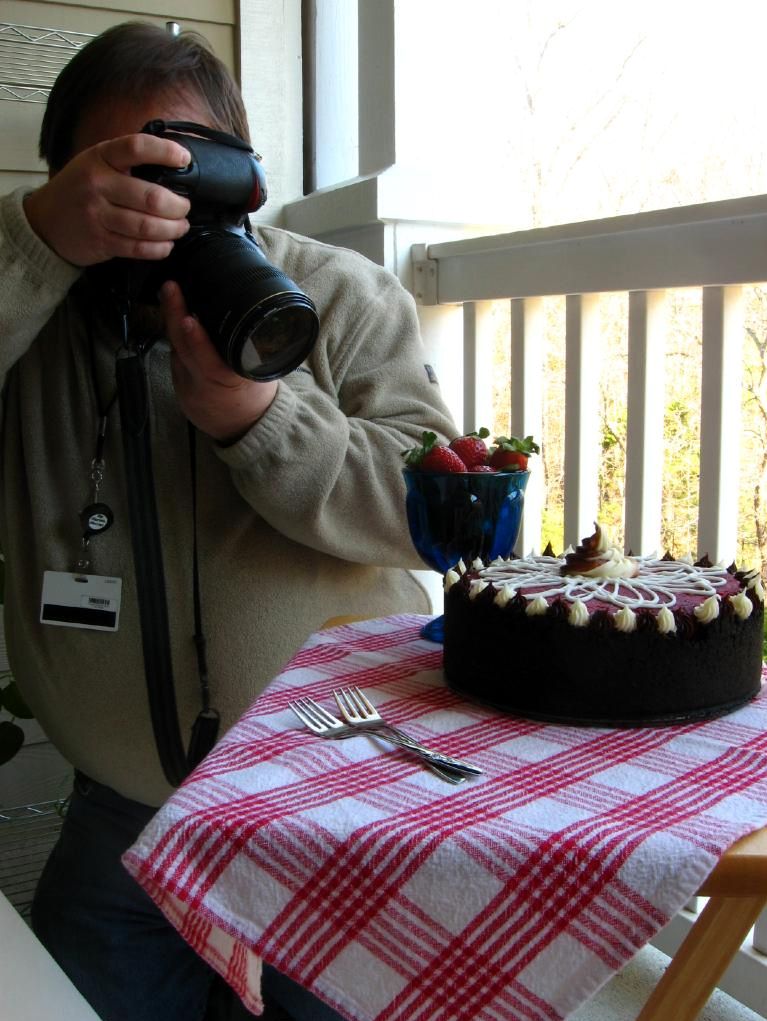
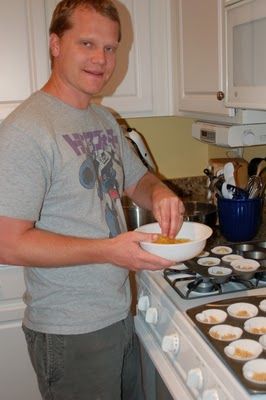
P.S. Who could this photographer be shooting my cheesecake? Find out this coming Wednesday!


Secret Garden Recipe: Two Exquisite Tea Sandwiches

When I was little, I didn’t lust after coins or stamps or postcards or anything particularly, ah, collectible. Instead, I coveted tiny things. When my mother would head to torturous craft stores to pick up sewing supplies, the dollhouse aisle was a haven. Package after package boasted teensy soda bottles, itty bitty magazines (with readable headlines!), miniature lamps, pint-sized armoires, and on and on. I always tried to pick a particularly adorable item to ask Mom for, but then I’d realize with a measure of disgust that I didn’t really know what I’d do with a set of tiny kitchen utensils. At any rate, miniatures have always had my heart.

Maybe I am secretly a gnome.

One sort of miniature that did frequently end up coming home with me was tea sets. I sought them out everywhere I went — toy stores, souvenir shops, craft stores, department stores, gas stations. You’d be surprised where you can find tea sets. I had medium sets, tiny sets, super-ultra-tiny sets. There were teapots with elegant designs, cutesy designs, holiday designs, and even one where every dish was shaped like a flower.

Despite my plethora of tea sets, I never once sat down and had tea. I displayed them, fiddled with them, and every now and then acted out a sad little version of a teddy bear tea party, but I don’t think a drop of tea or a crumb of a crumpet ever touched a single dish. What a shame, because there are very few food events more classy and sweet than a tea party.

For my sister’s Secret Garden Party, I remedied the situation. It was a tea party to the extreme, complete with a colorful tablecloth, Mom’s best china, some sweet decor, and the most important part: an elaborate spread of indulgent finger foods. These savory, delicate finger sandwiches were one of the biggest hits on the table.

Cucumber Tea Sandwiches


Recipe by: Great Party Recipes
Yields: about 40 finger sandwiches

Ingredients:
1 large cucumber, peeled and sliced very thinly
3/4 cup butter, room temperature so it’s soft and spreadable
2 teaspoons minced fresh garlic
20 pieces thin-sliced bread with crusts removed
1 tablespoon lemon juice
1 tablespoon olive oil
Salt
Pepper to taste

Directions:
Place the cucumber slices in a colander, lightly salt them, and let them drain for 1-2 hours to remove some of the moisture.

Combine the soft butter and garlic in a bowl and spread onto one side of each slice of bread. In a separate bowl, stir together lemon juice, olive oil, and pepper. Place the cucumber slices into this mixture and toss to coat them well. On each of 10 slices of bread, arrange overlapping cucumber slices. Top with remaining 10 slices and quarter. Serve immediately.

Classic Cucumber Tea Sandwiches were cool, buttery, and satisfyingly crisp. Providing the perfect complement was the salty, bold flavor of Smoked Salmon Tea Sandwiches with a kick of paprika. Both sandwiches were devoured (daintily, of course) in between scones, croissants, and lemonade.

Smoked Salmon Tea Sandwiches


Recipe by: Great Party Recipes
Yields: about 40 finger sandwiches

Ingredients:
1 cup cream cheese, room temperature so it’s soft and spreadable
20 slices bread, thin-sliced with crusts removed
1/2 cup capers
12 ounces thin-sliced smoked salmon
lemon juice
Pepper to taste
mayonnaise (optional)
paprika (optional)

Directions:
Spread cream cheese on each slice of bread (one side only) and dot with capers (I liked quite a few capers). Arrange the smoked salmon on 10 bread slices, with a squeeze of lemon juice on each. Pepper generously (to taste), top with remaining 10 bread slices, and quarter (using a serrated knife). Brush long side of each tea sandwich with mayonnaise very lightly and dip into paprika to coat. Tap to remove excess paprika. Serve immediately.

Don’t repeat my childhood mistake of overlooking the tea party. Whether it’s for a gardenful of guests, a roomful of family, or a handful of (conveniently disinterested) stuffed animals, whip up some of these simple tea sandwiches. With minimal kitchen time and a short ingredient list, they provide a ton of pinky-pointing deliciousness. How about you? What’s your favorite tea party friendly dish? Scones, croissants, muffins, pastries, petit fours? Or are you a savory tea sandwich person yourself?

If you liked this post, please:
Subscribe to Willow Bird Baking
Follow Willow Bird Baking on Twitter
Follow Willow Bird Baking on Facebook
Give this post a thumbs up on StumbleUpon


ShareOther ways to share this post with friends!

How to Make 27+ Cheesecakes and Look Awesome While Doing It

…or at least, feel like you look awesome while doing it?

Thank you so much for voting me into Project Food Blog Round 7 — I’m so grateful for your support! Challenge #7 was to create a video tutorial. I think you guys know by now that I’m a little obsessed with soupedup cheesecakes, so without further ado (okay, with a little more further ado), I’m about to show you how to create flippin’ awesome cheesecakes.

LIGHTS

What went into creating this video? Lots and lots of planning — dozens of pages worth! Lots and lots of time — 35+ hours worth! And lots and lots of fun — probably more than I should’ve had. Ahem. You’ll see.

CAMERA

Cheesecakes are incredibly customizable. In the video below, I’ll show you 3 different crusts, 3 different fillings, and 3 different toppings. By mixing and matching these components, you can feasibly create over 27 different cheesecakes! So, um, if you ever need 27 different cheesecakes . . . I got ya covered.

ACTION

Enough of the suspense! What do you get when you combine stop-motion animation, a music video, some ridiculousness, and a whole lotta cheesecake? Watch and see.

http://www.youtube.com/watch?v=7Dj3msQYjOQ&fs=1&hl=en_US&color1=0x402061&color2=0x9461ca

(please click here to see bigger version)

You can print the recipes for these cheesecakes here: Coffee Cookie Dough Fudge Cheesecake, Caramel Fudge Brownie Cheesecake, Chocolate Peanut Butter Bliss Cheesecake.

(Note: Voting is now open! I would so appreciate if you’d take a moment to pop over and vote for me by clicking the heart on this page once you’re signed into your Foodbuzz account. Registering for a Foodbuzz account is quick, easy, and free if you don’t have one already! Thanks, y’all!)

THE BLOOPER REEL

…wherein I prove that I’m basically tone deaf, drop my brownie layer in the floor, yell a lot at my piece-of-crap hand mixer, and eat bacon.

http://www.youtube.com/watch?v=a4D3hOu0DOM&fs=1&hl=en_US&color1=0x402061&color2=0x9461ca

(please click here to see bigger version)

STRIKE THE SET

After the video camera was tucked away, the tripods were folded up, and my smudgy lipstick had faded, there was still one itty bitty order of business to attend to. What the heck does one do with three cheesecakes?! Turns out there was something awesome to do with them!

My friend Carol has a heart the size of Jupiter. She’s worked with children with special needs for several years now, and recently, while browsing Reece’s Rainbow, a website that connects orphans with special needs to adoptive homes, she laid eyes on Quinton. Quinton is a tiny, precious baby boy in Eastern Europe with Downs Syndrome. At first, Carol half-jokingly asked her husband if they could adopt him. As time went on, though, it became clear that neither she nor her husband could stop thinking about Quinton.

They posted his picture on her refrigerator and decided they were going for it. They’re currently beginning the process to bring him home! This miracle is not without a cost — it will take thousands of dollars. I decided my huge, decadent cheesecakes were perfect for a little fundraising. I gave two of them away in return for donations to Quinton’s fund. I can’t tell you what an honor it is to be a tiny part of Carol’s journey — and how humbling it is to see other friends donating their time, goods, services, energy, and love to them! Little Quinton is already changing our lives. Would you like to help as well? You can see Quinton and donate to his adoption fund here.

ROLL THE CREDITS

A big thank you to: ALL Willow Bird Baking readers who have been so supportive, Sarah for the use of her camera, Kim for loaning me a second tripod, Byrd for being willing to hang out with me while I edited video for about a decade, Royalty-Free Music, Carol for already being an amazing mommy even though her little one is still across the world, my 7th grade students for inspiring my stop-motion animation, and everyone who helped me eat cheesecake!

P.S. – Did you have a chance to see my Teaser Video?
P.S. 2 – Dear Coworkers, if you make fun of me about this, no more cheesecake for you!

If you liked this post, please:
Subscribe to Willow Bird Baking
Follow Willow Bird Baking on Twitter
Follow Willow Bird Baking on Facebook
Give this post a thumbs up on StumbleUpon


ShareOther ways to share this post with friends!

Blueberry Stuffed French Toast Bowls

This is a two-post kind of day, y’all. You don’t mind, do you?

Good. Because this recipe involves some of my favorite things: French toast, blueberries, and cream cheese. Oh my goodness, I love cream cheese.

Nature’s Pride bread is an official sponsor of the Foodbuzz Blogger Festival this year, and as such, they issued a challenge to Featured Publishers to create a recipe using their products. I want to go to San Francisco as much as anyone, so I decided to give it a go. I pondered and brainstormed and debated and considered until, finally, I decided that I couldn’t think of a creative recipe and I gave up.

What? Don’t look at me like that! I was planning a ginormous dinner party, after all; cut me some slack!

It bothered me, though. When I was picking up supplies for the dinner party, I stuck some marshmallow cream and peanut butter in my basket, thinking perhaps I’d make a chocolate-covered fluffernutter. It still didn’t seem original enough, however, and in the shower this morning before church, I had almost convinced myself to give up again — when it hit me.

I’d already thought of and rejected stuffed French toast because sandwich bread is sliced too thin to cut open and stuff. Someone did it last year with two slices of bread, but I wouldn’t want to replicate something that had been that’d already been done.

Sometime between shampooing and conditioning, I realized that I could bake French toast into sweet little breakfast cups and fill them instead of stuffing them. They’d be topped with fresh berries with some maple syrup on the side for drizzling or dipping. Suddenly, a breakfast star was born.

There were still some obstacles — like how to create the French toast cups. In my first attempt, I dipped the bread into the custard and placed it uncooked into the muffin tin. I can’t really even describe the outcome, but they were something like soggy, bulbous custard balloons. Not San Francisco-worthy.

But my second attempt? Save me a seat on the trolley, because they were amazing! In this version, I cooked my French toast completely before cooling it and baking it into French toast cups. I then filled it with the sweetened cream cheese filling and berries to finish the dish.

Here’s hoping I win a trip to San Francisco to schmooze with some of my food blog faves, and that YOU make some stuffed French Toast Bowls immediately! Mike just polished off the last one for dessert, and if his reaction is any indication, you won’t regret it.

Blueberry Stuffed French Toast Bowls


Recipe by: Willow Bird Baking, with inspiration from Alton Brown
Yield: 8 bowls, or about 4 servings

Ingredients:
1/2 cup heavy cream
1/2 cup milk
3 large eggs
2 tablespoons honey, microwaved for 20 seconds (but not while still IN THE BEAR, y’all!)
1 teaspoon cinnamon
1/4 teaspoon salt
8 slices day-old or stale sandwich bread (I used Nature’s Pride Honey Wheat Bread)
4 tablespoons butter
2 8-ounce packages cream cheese, room temperature
4 tablespoons sugar
blueberries
maple syrup, for serving

Directions:
Preheat oven to 400 degrees F. In medium bowl, whisk together the milk, cream, eggs, honey, cinnamon, and salt (this step can be done the night before and refrigerated). When you’re ready to cook your French toast, pour this mixture into a cake pan or pie dish.

Prepare your bread: remove crusts and roll with a rolling pin to slightly flatten. Dip the bread into your custard mixture for about 8-10 seconds on each side before carefully removing it with a spatula to a cooling rack over a sheet pan. Allow excess moisture to drain off of the slices for 1-2 minutes.

Melt 1 tablespoon of butter over medium heat in a skillet. Put 2 slides of bread at a time into the pan to toast gently to golden brown (about 2-3 minutes per side). Remove the French toast to a cooling rack to cool completely. Repeat with all slices of bread.

While French toast cools, make your stuffing mixture by combining cream cheese and sugar into a bowl and mixing until fluffy. (When I tasted this at first, it was grainy, but then the sugar seemed to dissolve. I was going to suggest using confectioners’ sugar instead, but since the graininess was completely gone when we ate it, I don’t think there’s a need). Set aside.

Take each piece of cooled French toast and gently tuck into the well of a greased muffin tin, forming a bowl. Bake at 400 degrees F for 10-12 minutes, watching carefully. Pull them out of the oven and allow the bowls to cool in the pan for at least 10 minutes. Remove them to cool on a cooling rack (the first time I did this, they started to fall apart because I pulled them out of the oven too soon, so I baked them a little longer and they were perfect). Once cool, fill them with the cream cheese mixture, top with berries, and serve with maple syrup for dipping.

Note: As part of Foodbuzz’s Tastemaker program, I received a coupon for a free package of Nature’s Pride Bread. But, um, actually I left it in my mailbox, so I bought this loaf with my own money. So I don’t know why I’m telling you this. Except that I may snag the coupon now and use it for another loaf to make hummus sandwiches. Ahem.

If you liked this post, please:
Subscribe to Willow Bird Baking
Follow Willow Bird Baking on Twitter
Follow Willow Bird Baking on Facebook
Give this post a thumbs up on StumbleUpon


ShareOther ways to share this post with friends!

Chocolate Peanut Butter Bliss Cheesecake and Project Food Blog

I have something important to tell you.

In a world that boasts thousands upon thousands of food blogs, I have to tell you what makes my little corner of the web something special.

Foodbuzz is hosting Project Food Blog, a competition to crown the next food blog star. Willow Bird Baking is a contestant, and the first challenge isn’t a challenge for me at all. It’s simply to tell you why I’m here, and what I stand for — something I’ve been convicted of over and over again.

Listen, I cook accessible food. I try to take lovely photos. I write in tune with my personal life — sometimes laughing, sometimes crying, always eating. Those things are special, but they’re not what makes me unique.

What really makes me unique are two things: Chocolate Peanut Butter Bliss Cheesecake, and a stranger’s 91-year-old grandfather.

This rich cheesecake was more than just a cheesecake. It was an experiment. It was a gift. It was an experience. It embodies what makes Willow Bird Baking unique:

1. I believe in creativity. I dream of combining individual desserts into super desserts, mixing dessert with breakfast, and drizzling caramel all over everything. Maybe a few dollops of cookie dough, too? I’m constantly creating and improving food. Over the past year, it’s been so rewarding to see photos and read accounts of how your creativity was sparked by a recipe here!

This cheesecake was born of my desire to innovate. A peanut butter sandwich cookie crust instead of an chocolate sandwich cookie crust? Sure! I’m smitten with fun ideas. Sure enough, with a creamy chocolate cheesecake slapped into that crust and a cool, soft peanut butter mousse spread on top, it was the best peanut butter and chocolate dessert combo I’d ever tasted.

2. I believe in challenging yourself. Like any home cook, I have family recipes I love to make, but I’m also adamant about the value of trying new things. Especially fancy things that make you want to say, “Oh, that’s lovely, but I could never do that.”

My culinary journey was one of continually tackling challenging recipes, and with every puffy puff pastry or foot-ed macaron, I felt proud of myself. It’s an incredible feeling to know that by encouraging you to take on these challenges as well, I can give you that sense of pride and accomplishment. For instance, the Croissant Challenge on Willow Bird Baking inspired 17 readers to make homemade croissants in their own kitchens for the very first time — and many more have committed to do so! I have never had a prouder blogging experience than seeing those beautiful croissant pictures roll in.

3. I believe in cooking impressive meals for those you love. This Chocolate Peanut Butter Bliss Cheesecake was made on a whim. Mike was coming to visit and I knew I wanted to make him dessert, but having just started teaching with a heavier load than usual, I was exhausted. I decided to make some simple bar cookies and began gathering supplies in the grocery store.

Somewhere near the butter aisle, though, I realized that we only get so much time to show our love to the special people in our lives. After imagining his face upon seeing a ridiculous surprise cheesecake in the fridge, I replaced the bar cookie ingredients and set about gathering cheesecake supplies. I worked all evening to create this recipe for him. It was so worth the effort to see him enjoying each bite, and I think it did more for my heart than it did for his.

You can have take-out days. We all do that. But every now and then, you need a recipe that you can set in front of your family to say, you are so important to me. I’ve got those for you.

Speaking of sharing love through food, there’s one last story to tell: the story of how a stranger’s 91-year-old grandfather reminded me of my blogging purpose.

Almost a month ago, I went to explore a blog post that had linked to my Peach Cobbler Cupcakes.

What I found was Songs of the Self, a blog by Jessica, a mom from Georgia. The post recounted how she’d made the Peach Cobbler Cupcakes for her grandfather’s 91st birthday party. As I read about her experience, I saw a photo that gave me pause — one of her husband helping her to sprinkle streusel on each cupcake and smiling for the camera.


photos used with permission by Jessica

I don’t know why it hit me like it did, but suddenly I was reading through tears. I realized that this was a family somewhere, working together to make a recipe that I created, following each little direction. The post from the next day shows the birthday party: her sweet grandfather in a silly party hat blowing out candles, her grandmother laughing, her tiny daughter Olivia representing the youngest generation.

At the end of her post, Jessica noted, “My cupcakes were beyond a hit! Everyone ranted and raved about them! …Yippee for crafty me!” Being able to participate in her special occasion in some meaningful way, and especially knowing that my recipe had a part in making her feel proud of herself reminded me of why I blog. As I closed her post with a filled heart, I thought of my friend Maranda’s proud post after making her first batch of homemade croissants — a post that inspired a similar effect in me.

The truth is, I blog to create a virtual communal table. Come sit, bake, eat, learn, and enjoy. Come try new things within a comfortable web of support. Come forgive yourself for your flaws, laugh at your kitchen flops, and ponder your life with a popsicle in hand.

Perhaps most of all, come and eat some Chocolate Peanut Butter Bliss Cheesecake. I saved a piece just for you.

Please take a look at my Project Food Blog profile and consider voting for Willow Bird Baking on September 20, 2010. Thank you so much for your support — you are precious to me!

Chocolate Peanut Butter Bliss Cheesecake


Recipe by: Willow Bird Baking, pieced together from Jerome Chang (peanut butter mousse), Joelen (chocolate cheesecake)
Yields: 15-20 pieces

Crust Ingredients:
1 pack (32) of peanut butter sandwich cookies, processed into crumbs
5 and 1/3 tablespoons butter, melted

Cheesecake Ingredients:
4 packages (8 oz. each) of cream cheese, room temperature
1 cup sugar
1 teaspoon of vanilla extract
4 eggs, room temperature
3 (1oz) squares semisweet bakers chocolate (melted and cooled)

Peanut Butter Mousse Ingredients:
1/2 teaspoon powdered gelatin
2 tablespoons cold water
1 cup heavy cream
2 large egg yolks
1 1/2 tablespoons sugar
3 tablespoons salted smooth peanut butter

Optional decorations:
Reese’s cups
melted chocolate
whipped cream

Directions: Preheat the oven to 350 degrees. For the crust, mix the crust ingredients together and press into bottom and up the sides (about 3 inches) of a springform pan. Set aside.

For the cheesecake: Mix cream cheese and sugar in a large bowl until well blended and creamy. Add the eggs and continue mixing until combined. Add chocolate and continue mixing until combined. Pour mixture into prepared crust and smooth top with a spatula.

Bake for 55 minutes or until center of cake is almost set. The top may crack, but it doesn’t particularly matter, since you’ll be covering it anyway. Let the cake fully cool. When almost cool, place it in refrigerator to chill while you prepare peanut butter mousse.

For peanut butter mousse, dissolve the gelatin over the water in a small bowl and let stand for 5 minutes. In a saucepan over moderate heat, cook the cream until it bubbles around the edges. In another bowl, whisk together egg yolks and sugar. Temper the eggs: pour about 1/2 cup hot cream into the egg yolks slowly while whisking vigorously. Then slowly pour the egg mixture into the saucepan of cream (whisking constantly). Cook over low heat, stirring constantly, until thickened, about 3 minutes. Remove from the heat and whisk in the peanut butter and the gelatin. Place mixture into a wide bowl to allow it to cool for a bit, then chill it for just a little while — not until set, but until it’s not so runny. Pour the mixture onto the top of the pie and refrigerate at least one hour or overnight. You can pipe on melted chocolate and decorate with chopped Reese’s cups, if desired.

When completely chilled, loosen the cake from rim of springform pan by wrapping the pan in warm dishtowels. The remove the springform pan. Refrigerate the cheesecake for one day or overnight before serving. Garnish with fresh whipped cream if desired.

If you liked this post, please:
Subscribe to Willow Bird Baking
Follow Willow Bird Baking on Twitter
Follow Willow Bird Baking on Facebook
Give this post a thumbs up on StumbleUpon


ShareOther ways to share this post with friends!

1 12 13 14 15 16 20