coconut

Magic Bars and a Tate’s Bake Shop Giveaway!

I can be kind of a trainwreck sometimes. I don’t mean a lose-my-pencil or knock-over-my-milk trainwreck (although I can be those too). I mean a National Lampoon trainwreck.

Christmastime always reminds me of this fact, mostly because of something that happened a few years ago. My parents had decided to travel to South Korea for the holiday to visit my sister, who was living there at the time. I was sullen about having to spend Christmas alone, and on top of that, I had been appointed petsitter.


Magical, magical Magic Bars

Everything would have been okay if this position merely entailed taking care of my parents’ toy poodle, Abbey, who — while getting crotchety in her old age — is still a little scoop o’ sweetness. But no. Petsitting meant taking care of the dog, the finch, the very animated Roomba, and THE RABBIT.

THE RABBIT, y’all, who — I KID YOU NOT — eats two freshly made salads per day. I don’t even eat two freshly made salads per day! Or, uh, even one freshly made salad per day.

THE RABBIT, who snuggles and kisses everyone EXCEPT ME, because he hates my guts.

THE RABBIT, who attacks me whenever I’m within range.

THE RABBIT, who was THIS CLOSE to being turned into a stew and not making it out of the experience alive.


Don’t worry — no rabbit in the Magic Bars.

It was clear from the very beginning that this was going to be an interesting week, but I had no idea what kind of shenanigans were in store for me. I thought the worst of my troubles was THE RABBIT. Not even close. Because:

1. In the middle of one of my first nights at my parents’ house, I woke up to a waterfall raining down from the living room ceiling. There was apparently a leak in an upstairs bathroom. Over the next few days, what started as a tiny crack in the downstairs ceiling became a gaping hole.

2. The Roomba stopped working after a few days. It already required daily maintenance to manually clean out the gobs of bunny hair it had to consume, but halfway through the week, it gave up the ghost. I barely fiddled with it before giving up, which meant being buried in bunny fluff the rest of the week. It was EVERYWHERE. Covering every article of clothing, stuck in my eyelashes, garnishing every bite of food.

3. Abbey decided to start spontaneously bleeding from her head midweek, staining the couch and sheets. Still no idea what happened there.

4. Speaking of Abbey, she and Byrd (my toy poodle) were mortal enemies all week long. Byrd likes to pester Abbey. Abbey wishes Byrd would fall into a hole and get swallowed by the earth. This makes for interesting interactions, including what I like to call “the great potty war,” during which each dog was determined to out-pee the other.

5. That $#@*% RABBIT attacked me and almost broke my hand as I was cleaning up his gross cage. Apparently he’s territorial about his hay. Noted.

6. The bird died. IT JUST UP AND DIED. I promise I fed it, watered it, milleted it, cooed at it, kept the temperature steady. Mom later assured me that it was an old bird. At this point I kind of felt like telling her that she was an old bird. Just kidding, Mom. Love you!

7. The day had finally arrived when I was supposed to pick my parents up from the airport after school. Everything was going to be okay! I was on my way to work, gleeful at the prospect of leaving the demolished ceiling, bleeding dog, dead bird, and vicious Monty Pythonesque bunny behind — when I totaled my car. TOTALED. Some dude pulled out in front of me leaving me no room to stop, and bang! Cue the airbags, the traffic jam, the police report, etc.

All of this occurred without a reliable way of contacting my parents since they were, you know, across the globe and all. I picked them up from the airport that night in Mike’s car, and I’ll bet you can imagine how well that went: “Hi guys. Your ceiling’s destroyed, your bird is dead, your house is one giant furball, your dog may or may not still be bleeding, and I just totaled my car. How was your trip?”

Anyway, I can be a trainwreck of epic proportions. That’s why when I received a copy of Tate’s Bake Shop Cookbook to review a few weeks ago and promptly failed at the first recipe I made from it, I knew I needed to give it another go.

My first try was the Lemon Wafers. They’re described as “cake like,” but mine were thin, crisp, and burnt around the edges. They still tasted amazing (I may or may not have eaten half a batch by myself), but they were quite the ugly ducklings. With no photographs of some of the recipes, it was hard to decide how they were supposed to look; nevertheless, I’m pretty sure they weren’t supposed to look like that.

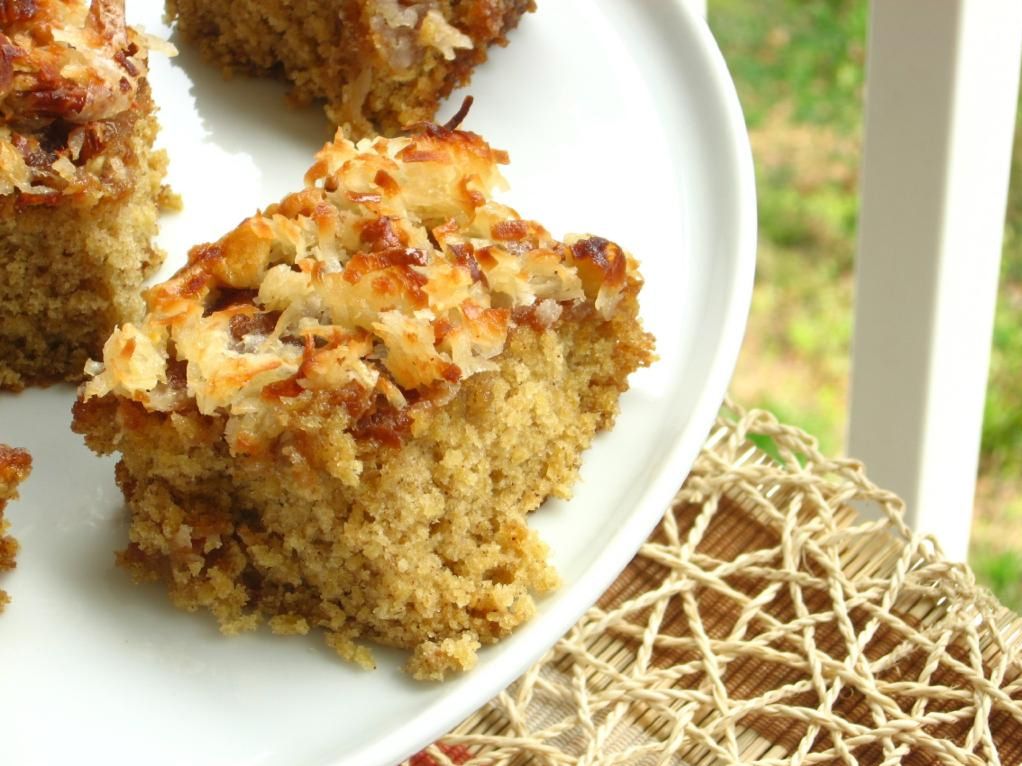
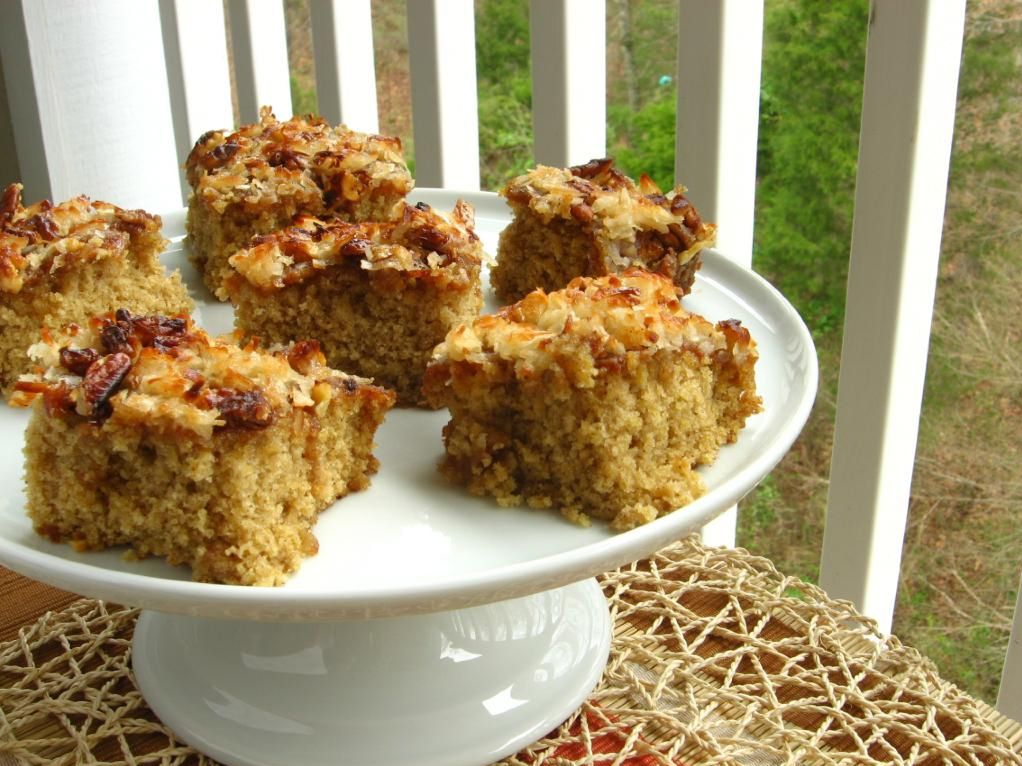
I’m so glad I tried again, because the next recipe was a winner. Magic Bars consist of pecans, bittersweet chocolate, and coconut bound by sweetened condensed milk on a graham cracker crust. They were so simple and quick to make, but were definitely magical! I took them to a crafting party (I feel so hip to have gone to a crafting party – did you see how deftly I slid that tidbit into this post? Am I ruining it now? Oh.) and they were a huge hit.

Pocket Review


Book Stats: 156 pages, $25.99 list price (~$18 on Amazon), indexed.
Accessibility: Perfect for a beginning baker!
Examples of Recipes: Mocha Pecan Muffins, Ginger Scones, Zvi’s Cinnamon Swirl Bread, Double Chocolate Almond Cookies, Peanut Butter Squares, Apple Cream Cheese Tart, Hummingbird Cake, Raspberry Charlotte, etc.
Overall Impression: I love the simplicity and accessibility of the recipes, but I would’ve preferred more photos — particularly to see how things were supposed to turn out.
Overall Rating: 3.5 out of 5 stars

Kathleen King, the author of the cookbook and owner of Tate’s Bake Shop in the Hamptons, has received recognition from Ina Garten, Everyday with Rachael Ray, The Gourmet Retailer, and The Boston Globe for her simple handmade treats. The cookbook is filled with easy, accessible recipes perfect for whipping up at a moment’s notice. In addition, the lovely folks at Tate’s sent me some buttery, thin and crisp cookies to sample. I loved them, and can’t wait to make some of the famous chocolate chip cookies to share with family.

Would you like to try some Tate’s Bake Shop goodies? One Willow Bird Baking reader will win a gift-pack of cookies including oatmeal raisin, white chocolate macadamia nut, and chocolate chip, as well as a copy of the Tate’s Bake Shop Cookbook. To enter, leave a comment on this post answering the question, “What’s your favorite cookie?” To receive up to three extra entries:

1. Become a fan of Tate’s Bake Shop on Facebook and leave a separate comment telling me you did so (or if you’re already a fan, just say so in your comment!)
2. Become a fan of Willow Bird Baking on Facebook and leave a separate comment telling me you did so (or if you’re already a fan, just say so in your comment!)
3. Tweet about the giveaway using this message: “Just entered to win a Tate’s Bake Shop gift pack and cookbook at Willow Bird Baking! Enter here: http://bit.ly/eFtQi6 @julieruble” and leave a separate comment telling me you did so.

This contest will run through December 28, 2010 at noon EST, but even if you don’t win, you can still enjoy some cookies! Tate’s Bake Shop is offering a 15% discount for Willow Bird Baking readers on tatesbakeshop.com from now until December 31. Just use the code “cookie” at checkout. Enjoy!

Magic Bars


Recipe by: Kathleen King of Tate’s Bake Shop
Yield: 24 bars

Ingredients:
1/2 cup salted butter
1 1/2 cups graham cracker crumbs
1 1/3 cups dessicated shaved coconut (unsweetened)
1 1/2 cups bittersweet chocolate chunks (I use Ghirardelli)
1 1/4 cups pecans, chopped
1 can (14 ounces) sweetened condensed milk

Directions:
Preheat the oven to 350 degrees F. In a 9 x 13 inch pan, mix the melted butter and graham cracker crumbs. Press the mixture evenly to cover the bottom of the pan. Sprinkle the coconut over the crumb base. Sprinkle the chocolate chunks over the coconut. Sprinkle the pecans over the chocolate chunks. Drizzle sweetened condensed milk evenly over the top. Bake it for 25 minutes. Cool it completely and cut it into bars. I like these magic bars served cold.

If you liked this post, please:
Subscribe to Willow Bird Baking
Follow Willow Bird Baking on Twitter
Follow Willow Bird Baking on Facebook
Give this post a thumbs up on StumbleUpon


ShareOther ways to share this post with friends!

Banana Coconut Cream Cakes

We went off on a brief romantic tangent to celebrate my anniversary with Mike (thanks for all your congratulations!), but now we need to get back to some serious business. SERIOUS business. I told you after making my Coconut Cream Tart that I had some of that heavenly coconut pastry cream leftover. The dessert I came up with to use that leftover pastry cream is now (drumroll, please . . . are you drumrolling?) MY FAVORITE DESSERT OF ALL TIME.

Wow. I eat a lot of desserts, so you know this must be big.

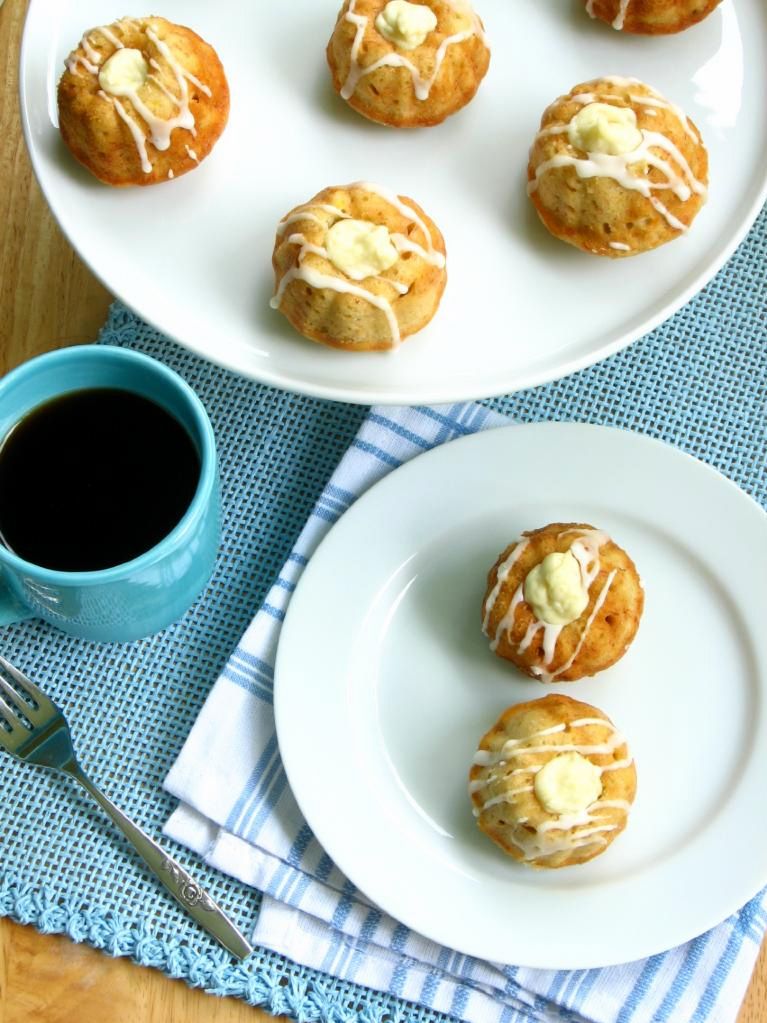
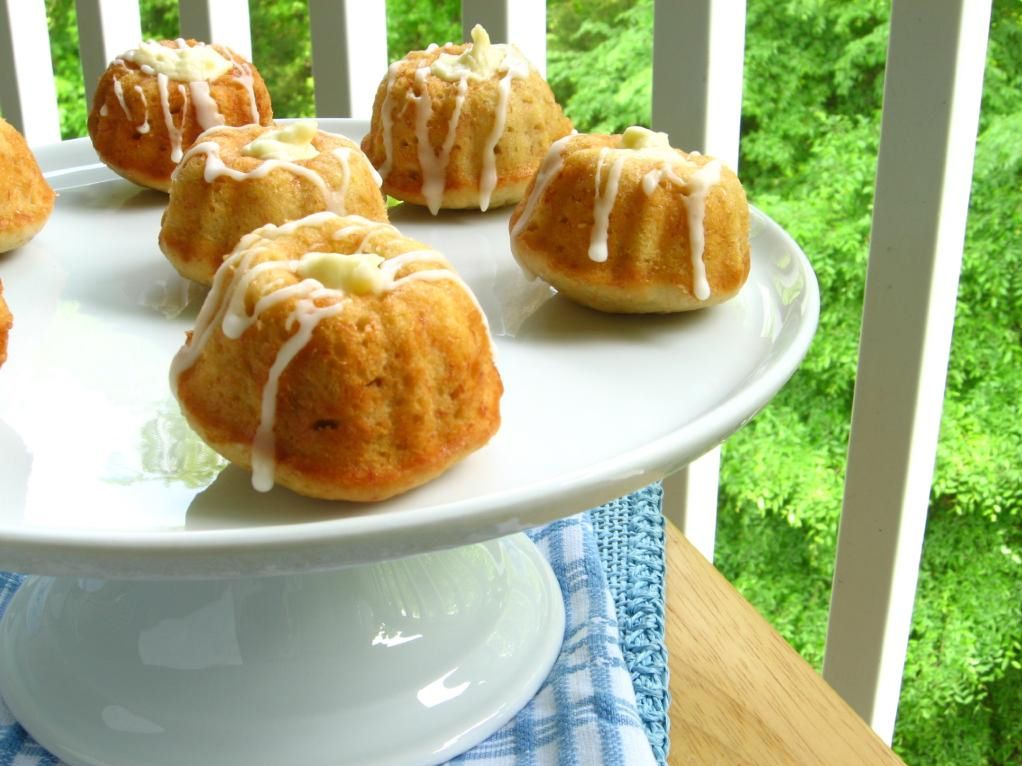
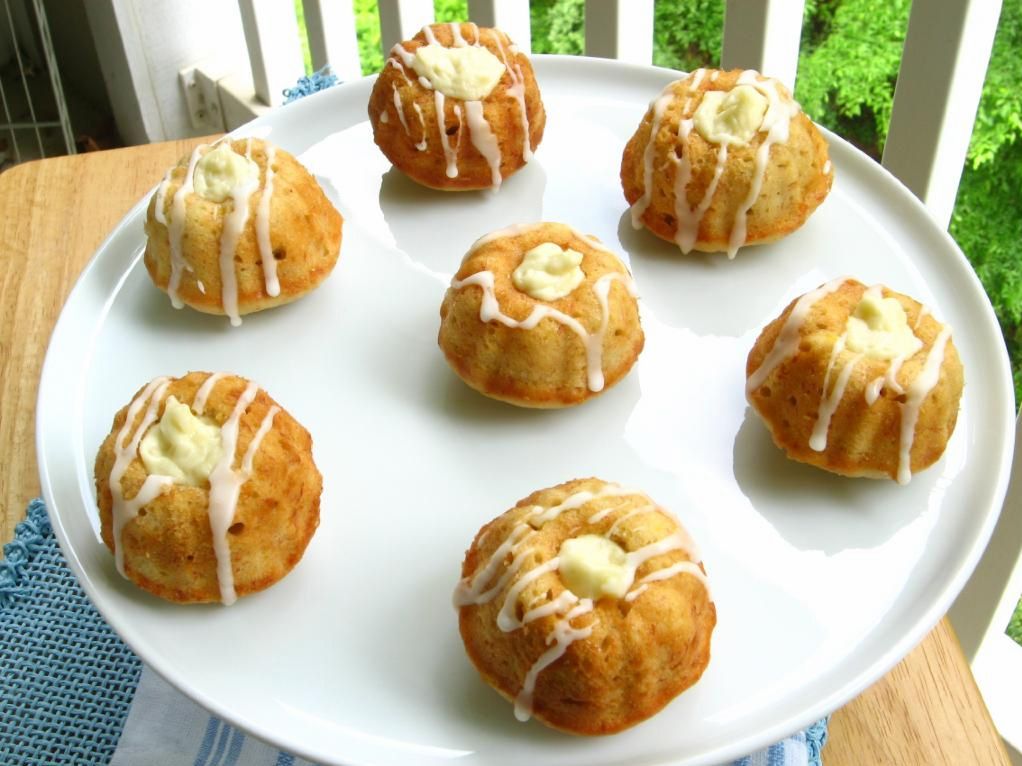
Well, actually it’s small and cute. But BIG in taste!

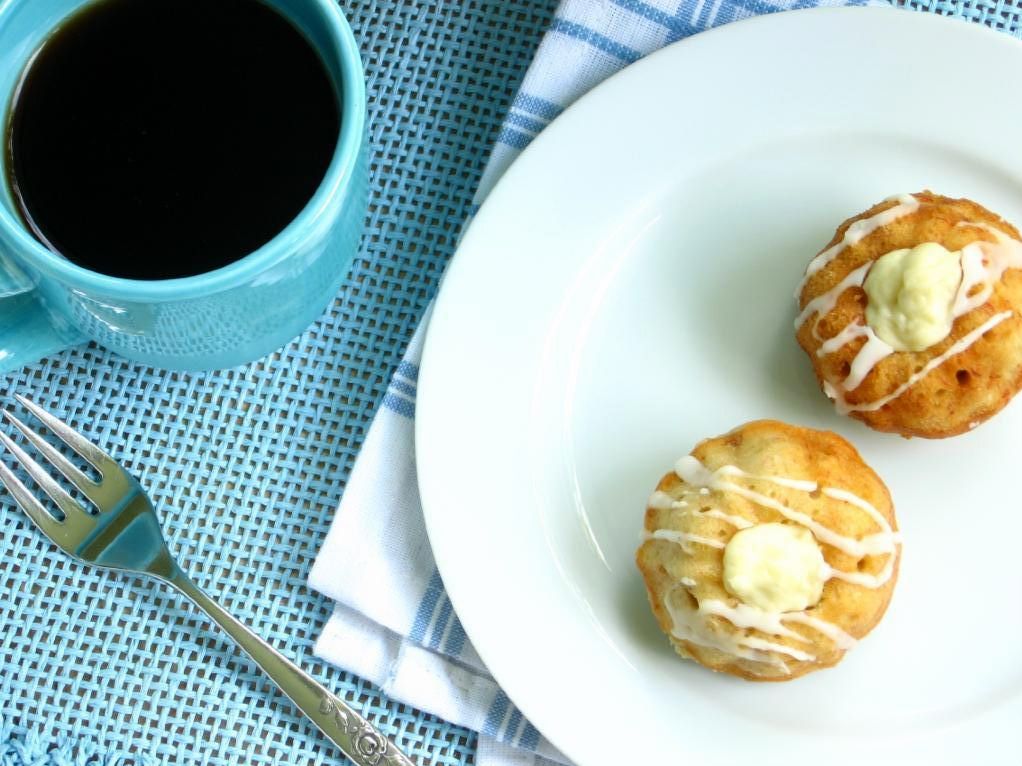
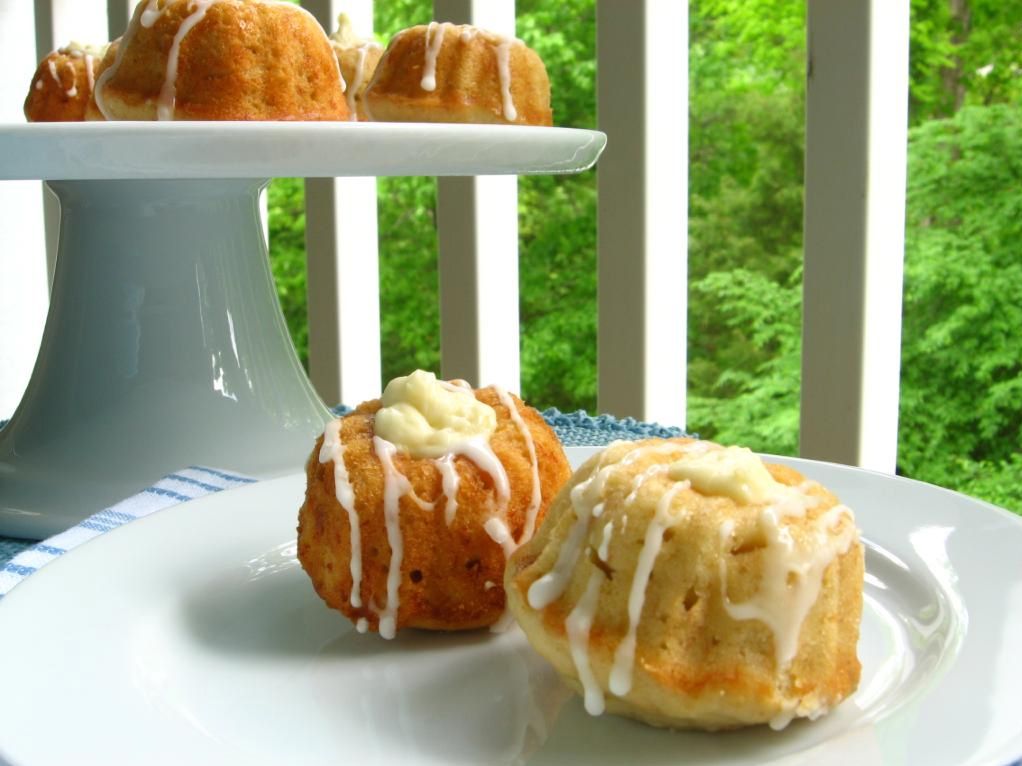
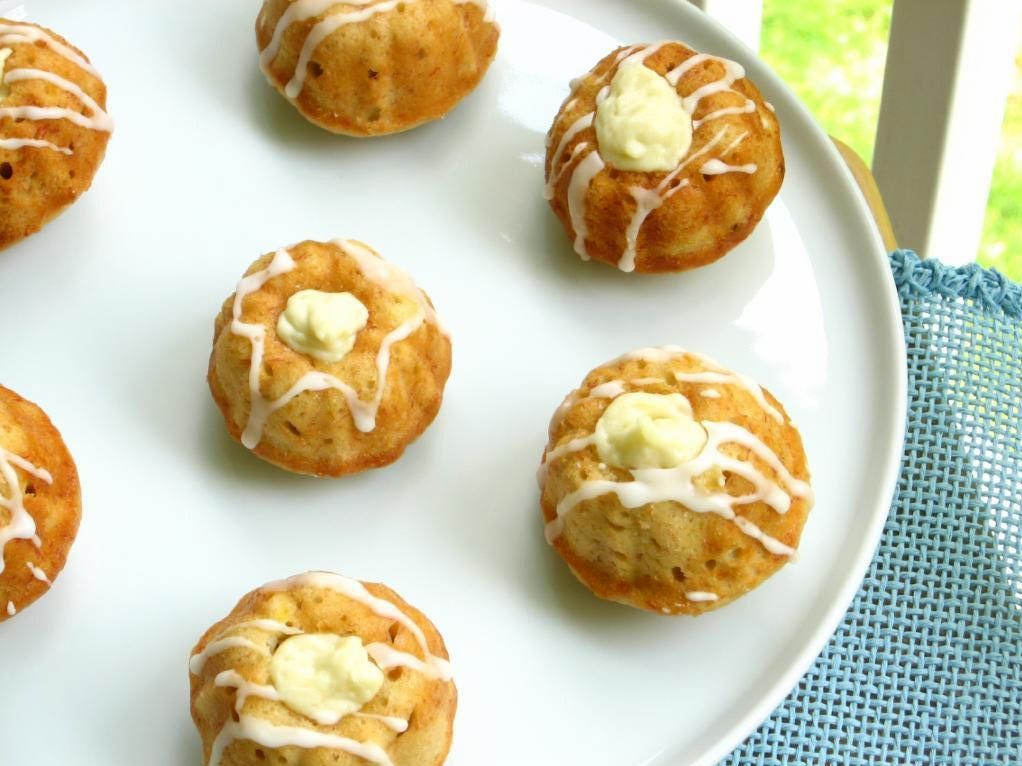
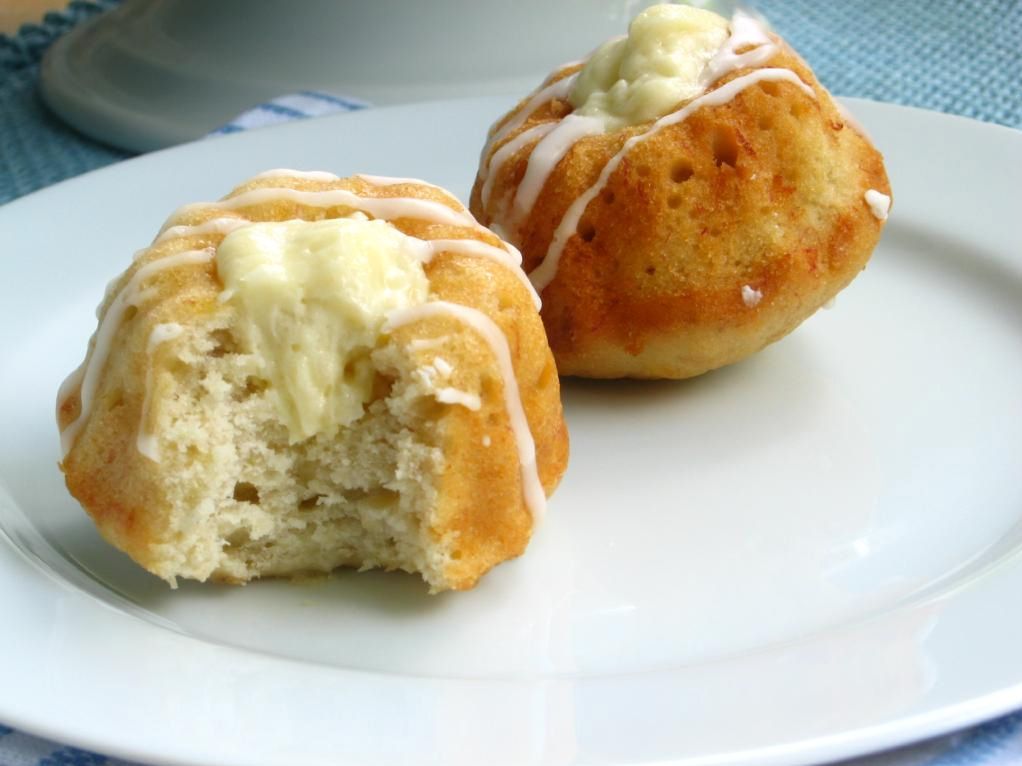
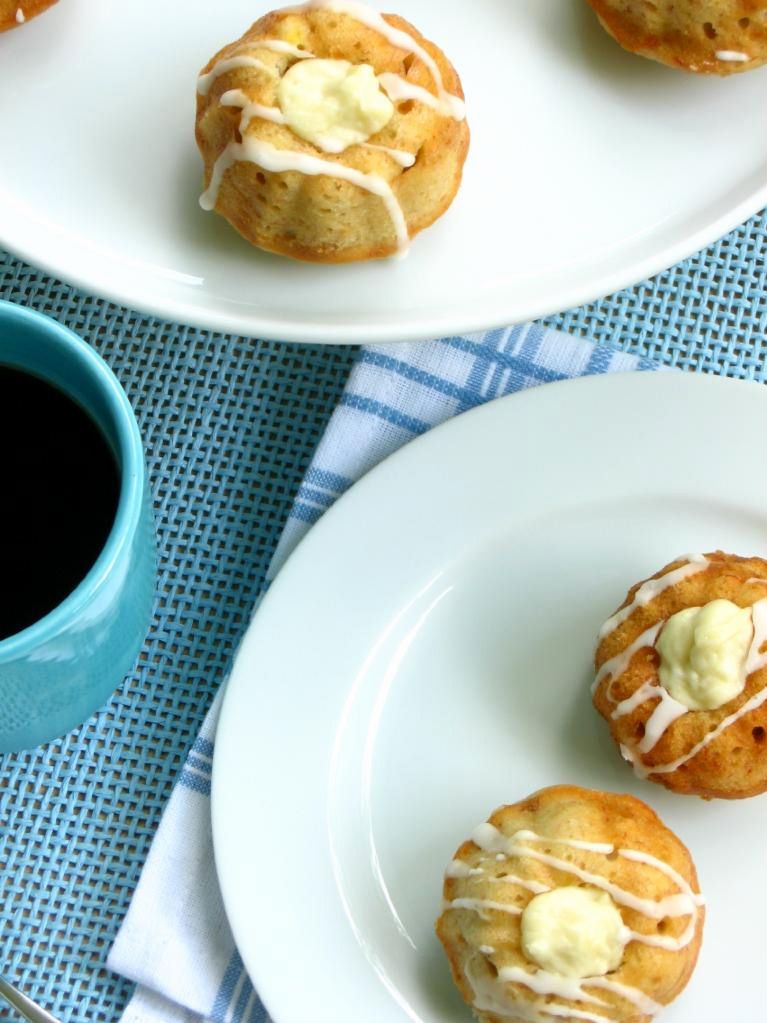
These sweet little cakes are Banana Mini-Bundt Cakes filled with Coconut Cream and topped with a sweet pineapple glaze. My sister describes the coconut pastry cream as “tylenol PM that tastes good” because it’s so soporifically sweet and creamy. Imagine that deliciousness stuffed into the center of a bright, dense, moist banana cake. Now add the slight tang of pineapple. NOW MAKE THAT AMAZING DESSERT SO SMALL AS TO ALMOST BE BITE-SIZED. That, my friends, is a winner.

Some of you are getting all whiny right about now. Hey, there’s no shame in that; I get whiny sometimes, too. You’re thinking, “Oh well, I don’t like bananas,” or “Ew, coconut,” and it’s even POSSIBLE that there’s someone out there thinking, “Gross, pineapple.” Weirdo.

Kidding, kidding — I don’t think any less of you pineapple haters! BUT before you write off this dessert for any of the reasons above, let me give you a run-down of why you should try it anyway.

1. I dislike bananas. They’re odd. Nevertheless, I still love these cakes more than I can really explain.

2. My roommate hates coconut with a passion. She would barely consent to try one of these. Nevertheless, she loves these cakes more than almost anything I’ve ever made.

3. Mike loves both banana and coconut, and also adored every bite of these cakes. (Just so you know there’s not some strange phenomenon goin’ on with the flavors!)

4. You will love these cakes. YOU WILL.

Some of you, instead of whining, are mourning right now: “I don’t have a mini-bundt cake pan!” I didn’t either until my roommate bought me one (thanks, Barb!), so one option is to be really sweet to the folks you live with and keep your fingers crossed. The other (more realistic) option is to simply make these as cupcakes. I think they’d work out just fine — maybe not quite as adorable, but still just as tasty.

To reiterate how amazing these cakes are, let me tell you about my little mixup while making them. I was hoping to get 12 mini-bundt cakes out of this recipe but, because I failed to check the size of the pan in the original recipe, I ended up with 32. At first I was annoyed — who on earth was going to eat the extra 20 CAKES?!

Yeah, that did not turn out to be a problem. They were DEVOURED. In fact, as Mike and I polished off the last few cakes, we wept a little. Okay, maybe we didn’t actually cry, but we were crying on the inside. I can’t wait to make these again. Please, if you make one thing from this willowy, birdbrain blog of mine, make these! I’m anxious to hear what you think.

Banana Coconut Cream Cakes


Recipe by: Compiled by Willow Bird Baking from Piggly-Wiggly (banana cake), Zoë Bakes (coconut pastry cream), and The Neely’s (pineapple glaze)
Yields: About 32 mini-bundt cakes using the pan size pictured below

Mini-Bundt Cake Ingredients:
3 cups all-purpose flour
2 tsp baking soda
1/2 tsp salt
2 sticks (8 ounces) unsalted butter at room temp
2 cups sugar
2 tsp pure vanilla extract
2 large eggs, preferably at room temp
~4 very ripe bananas, mashed (about 1.5-1.75 cups)
1 cup sour cream or plain yogurt

Coconut Pastry Cream Ingredients: *
1 can (14 fluid ounces) unsweetened coconut milk
3/4 cup sugar
1 vanilla bean
pinch kosher salt
3 large egg yolks
2 tablespoons corn starch
2 tablespoons unsalted butter
1 cup sweetened coconut flakes
1/2 cup whipping cream

Pineapple Glaze Ingredients:
2 cups powdered sugar
4 tablespoons pineapple juice

Directions:
Preheat the oven to 350. Generously butter a mini-bundt cake pan or cupcake pan.

In a medium bowl, whisk the flour, baking soda and salt together. In a separate, large bowl, beat the butter until creamy. Add the sugar and beat at medium speed until pale and fluffy. Beat in the vanilla, then add the eggs, one at a time, beating for about 1 minute after each egg goes in. Reduce the mixer speed to low and mix in the bananas.

Mix in half the dry ingredients (the mixture may look curdled — just keep mixing), followed by all the sour cream and finally, the rest of the flour mixture. Fill each well of your prepared pan about 1/2 to 2/3 of the way full and rap the pan on the counter to remove bubbles from the batter and smooth the top.

Bake for 25 to 30 minutes, or until a toothpick inserted deep into the center of the cakes comes out clean. Transfer the pan to a rack and cool for 10 minutes before unmolding on the rack. Let cool to room temperature before adding cream filling and glaze.

While cakes are baking and cooling, make coconut pastry cream. Heat the coconut milk, sugar, salt and vanilla bean or extract in a medium saucepan over medium heat. In a bowl, whisk together the egg yolks and corn starch. Once the cream is hot, remove the vanilla bean (if used), scraping out any remaining seeds and returning them to the cream. Add 1/2 cup of the hot cream slowly to the yolks, whisking as you add, to temper the eggs so they won’t cook into an omelette in the middle of your pastry cream. That would be a bummer. Then pour the yolk mixture into the pot of hot cream and whisk. Continue to whisk with heat on medium-high for 3 more minutes. The mixture will turn thick and bubble. You need to continue to whisk for the full 3 minutes or the pastry cream will separate once it is cool. After the 3 minutes, whisk in the butter. Add the coconut flakes. Pour into a shallow dish to cool.

Cover with plastic wrap pressed right against the pastry cream. This will prevent a thick skin from forming on the surface. Refrigerate for at least an hour or freeze for 30 minutes. Once it is cold, stir the pastry cream to loosen. Whip the 1/2 cup cream to medium peaks. Stir in 1/3 to the pastry cream to lighten. Fold in the remaining cream until the pastry cream is nice and light.

When cakes are cool, hollow out the center of each mini-bundt cake (or, for cupcakes, you can use the cone method). Pipe in as much of the coconut pastry cream as will fit.

Whisk confectioners’ sugar and pineapple juice together to form glaze. Drizzle over filled mini-bundt or cupcakes. Store in an airtight container in the refrigerator for 5-7 days.

NOTE: These things are aaaaamazing served cold straight from the refrigerator! They’re dense, creamy, cool hunks o’ bright flavor.

*NOTE 2: This recipe actually makes twice as much coconut pastry cream as you need to fill the cakes. I split my pastry cream and made these with half, and a Coconut Cream Tart with the other half. If you’re not keen on a tart, you can also just double the number of banana cakes you make to fill, or find some other creative use for the excess cream. I suppose you could also try halving the coconut pastry cream recipe, but I didn’t want to fiddle with halving three yolks and a can o’ coconut milk.


Enjoy!


Share Share this post with friends!

Coconut Cream Tart

I could have easily become a picky eater. I am compulsive in so many ways . . . the way my glass has to be completely clean or I won’t drink from it, the way I hate to get my hands dirty, the way I have to brush my teeth before my shower, not after. I can’t tell you how glad I am that I like all foods. There’s not much I won’t try, and once I’ve tried it, not much I don’t like! Except beets . . . ew, beets.

I wasn’t always so open to food. I was never picky, per se, but I had my list — like many kids — of things I didn’t like. Tomatoes, onions, lima beans, olives, bananas, and coconut. I hated coconut! What was wrong with me? Looking back, I think my aversions were almost always related to texture. Lima beans and bananas are oddly smushy. Shredded coconut just feels weird . . . too many paper-like pieces in your mouth, I guess!

Anyway, I’ve heard people say that their tastes “gradually” changed as they got older . . . well, mine usually change instantaneously. It’s an odd and wonderful phenomenon. For instance, last year I was driving home from school and realized I wanted sushi, something that until that moment, I was relatively sure I hated. I picked some up, enjoyed every bite, and have enjoyed it ever since. The same thing recently happened with olives and lima beans . . . and coconut! All of a sudden it hit me that light, sweet, wonderful COCONUT, when combined with milky or creamy flavors, was one of the best tastes in the world. I’m hooked.

Mike loves coconut too, thank God! After making him two birthday dishes that included ingredients he wasn’t too keen on (smart choice), I needed to hedge my bets.

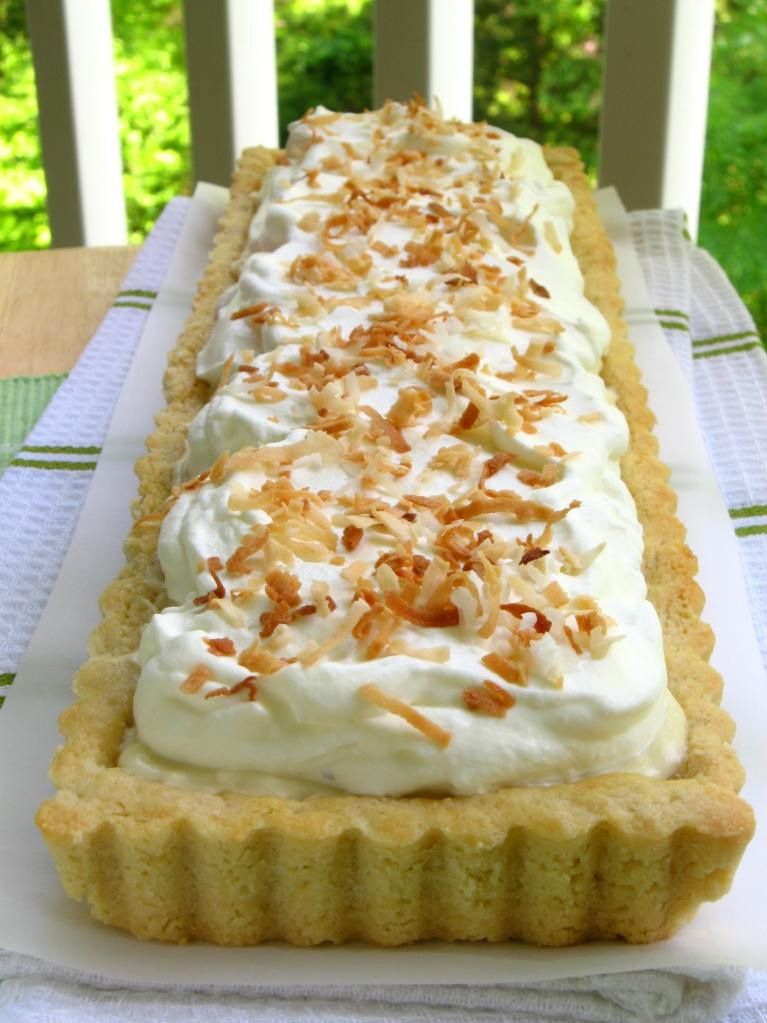
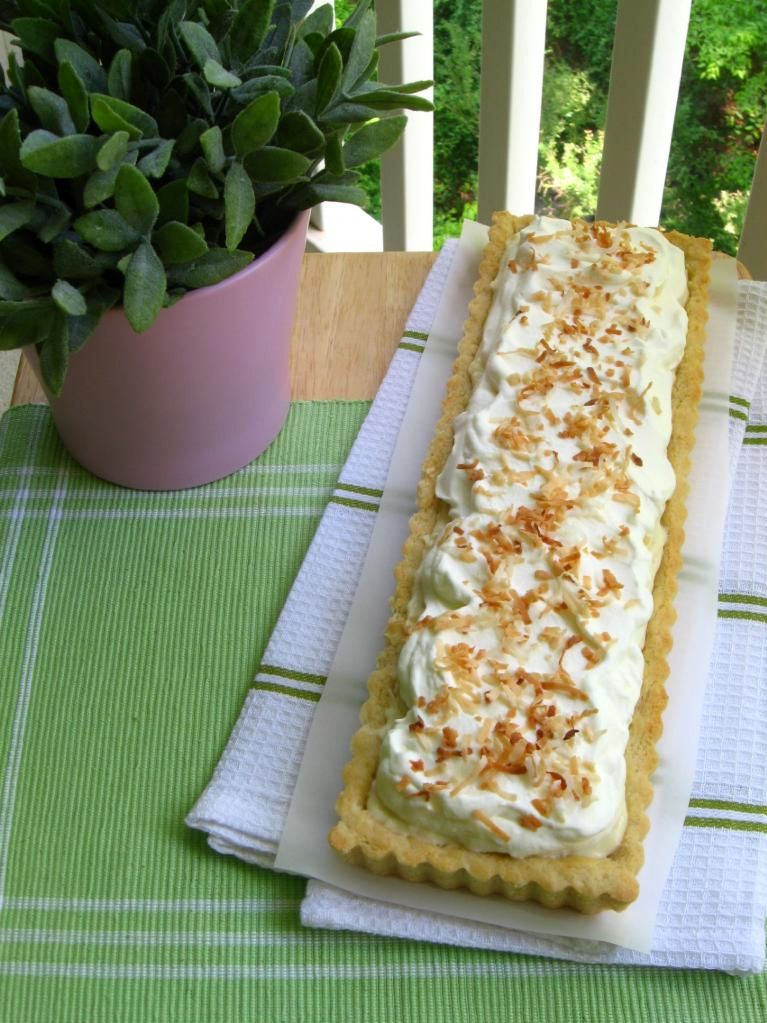
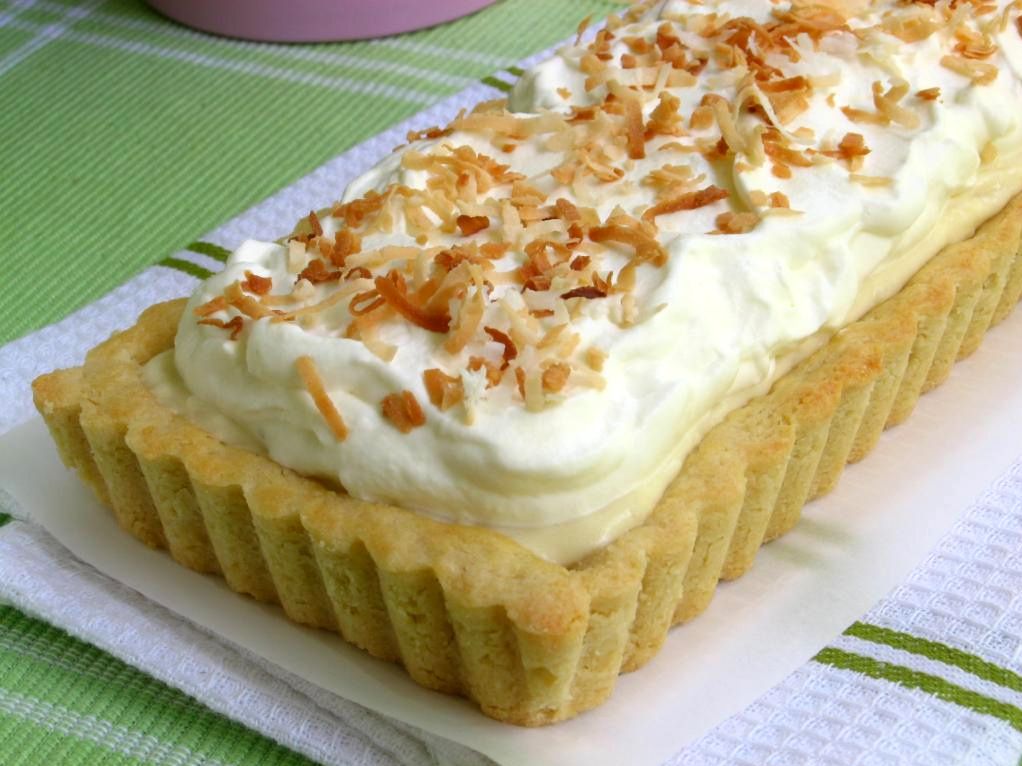
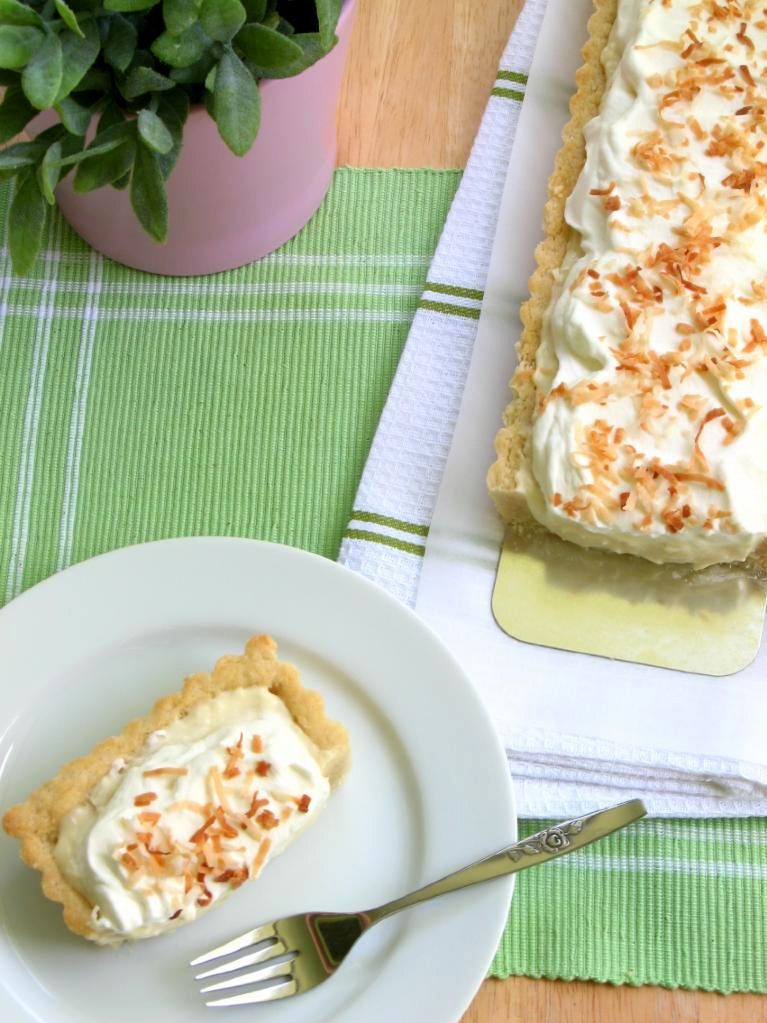
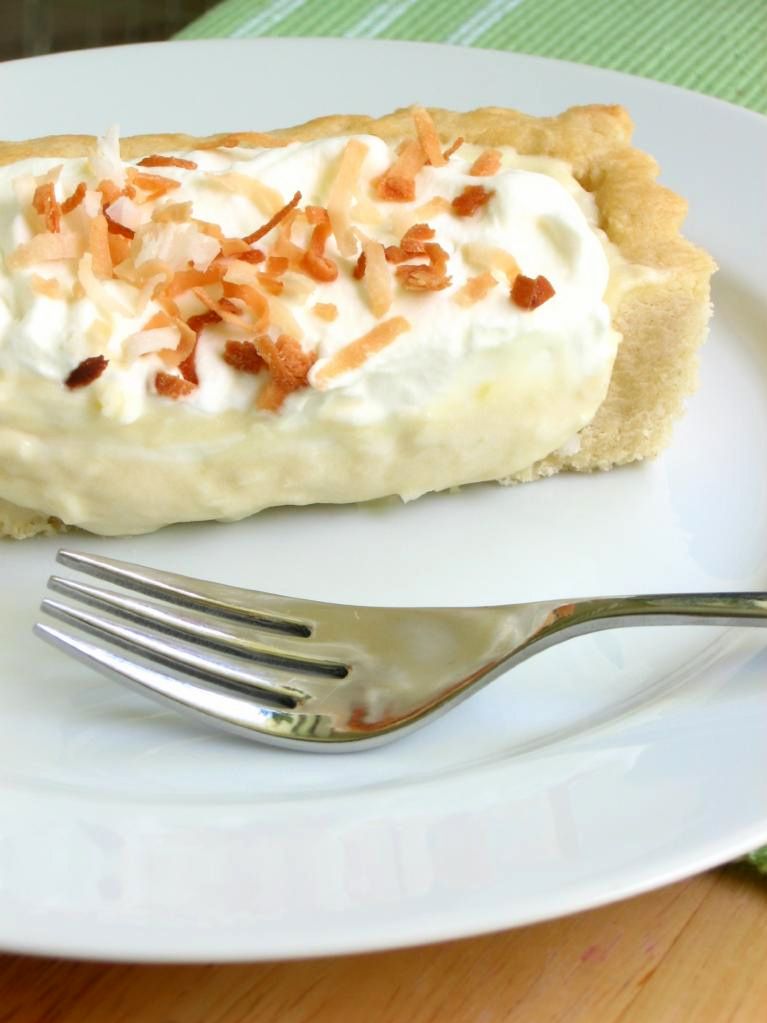
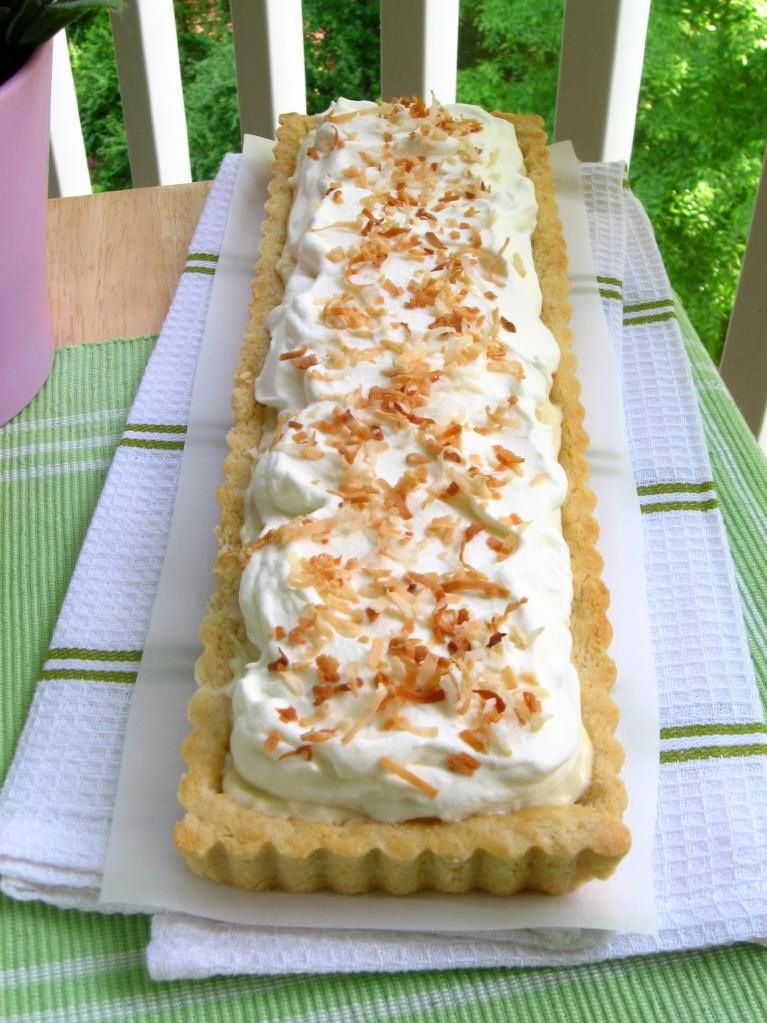
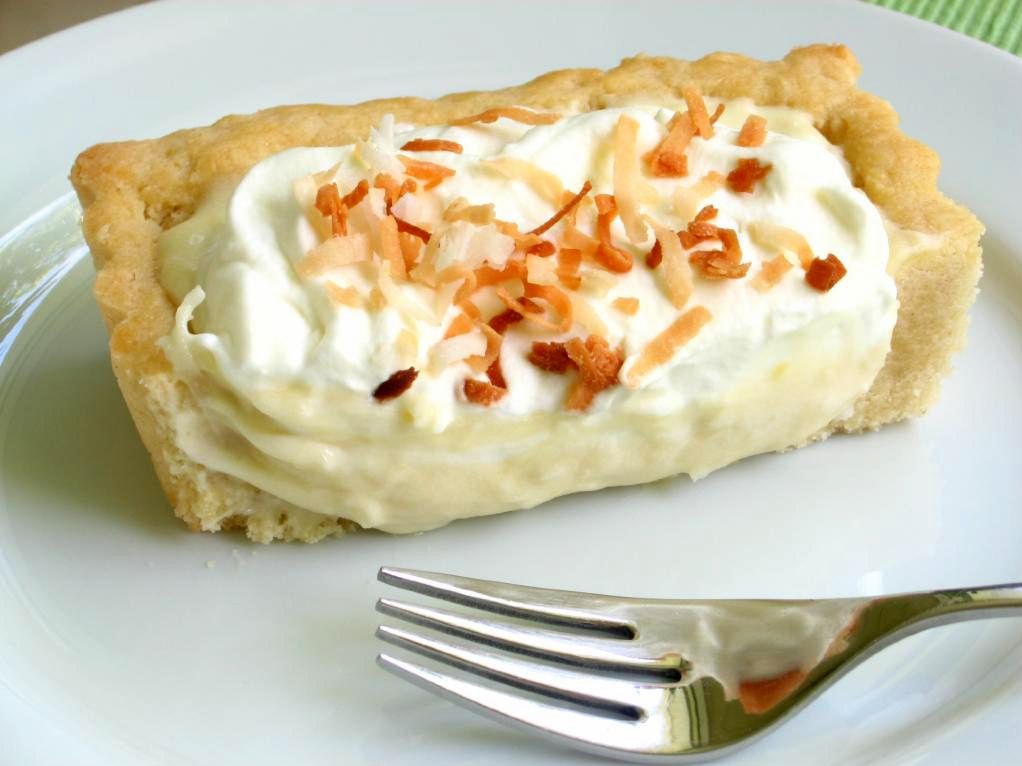
This gorgeous tart was a sure thing. It has all the appeal of a coconut cream pie with an even better texture. The coconut pastry cream is thick, rich, buttery, and altogether one of the best tasting things I’ve ever put in my mouth. I filled my favorite buttery, flaky tart shell with it and topped it with lightly sweetened whipped cream and toasted coconut. Mike actually liked the Chocolate Tart better, but I’m voting for this one all the way!

Coconut fans (and even those who don’t think they’re coconut fans) have to whip up one of these tarts. It’ll work just the same in a round tart pan, but this rectangular tart pan was only $18 at my Williams-Sonoma if you’re into corners. Even though the recipe below makes enough pastry cream to fill two tarts, feel free to just make one tart shell — I have another amazing recipe coming up shortly to use the extra pastry cream!

Coconut Cream Tart


Recipe by: Compiled by Willow Bird Baking from Zoe Bakes (coconut pastry cream) and Tyler Florence (tart shell)
Yields: makes one tart (but enough pastry cream for two, if you want to double the tart shell recipe — otherwise use leftover pastry cream for something fun!)

Tart Shell Ingredients:
2 cups all-purpose flour, plus more for dusting
3 tablespoons sugar
1/4 teaspoon salt
3/4 cup (1 1/2 sticks) unsalted butter, cold and chopped
1 large egg, separated
2 tablespoons ice water, plus more if needed

Coconut Pastry Cream Ingredients*: (makes enough to fill two of the tart shells above)
1 can (14 fluid ounces) unsweetened coconut milk
3/4 cup sugar
1 vanilla bean
pinch kosher salt
3 large egg yolks
2 tablespoons corn starch
2 tablespoons unsalted butter
1 cup sweetened coconut flakes
1/2 cup whipping cream

Whipped Cream Ingredients:
1 cup heavy whipping cream
3 tablespoons powdered sugar (or more to taste)

Directions:
To make the pastry: combine the flour, sugar, and salt in a large mixing bowl (or food processor). Add the butter and mix with a processor or hands until the mixture resembles coarse crumbs. Make a well in the middle of the pastry. Combine the egg yolk with the ice water in a small bowl, whisking to blend; pour it into the well and work it in to bind the dough until it holds together without being too wet or sticky. Squeeze a small amount together, if it is crumbly, add more ice water, 1 tablespoon at a time. When the dough is coming together but still in crumbs, pour the crumbs into your tart pan and press them out to fill the pan. Press them up the sides evenly and trim off any excess. Dock the dough (prick it slightly) with a fork all over. Put the tart shell in the refrigerator for at least 15 minutes to relax.

Preheat the oven to 350 degrees F. Place the tart pan on a sturdy cookie sheet so it will be easy to move in and out of the oven. Line the tart with aluminum foil and add pie weights or dried beans to keep the sides of the tart from buckling. Bake for 30 minutes, then remove the foil and weights. Using a pastry brush, lightly coat the crust with a beaten egg white. Return to the oven and continue to bake for another 8 minutes until the tart is golden brown. Let cool completely before filling.

To make filling: Heat the coconut milk, sugar, salt and vanilla bean in a medium saucepan over medium heat. In a bowl, whisk together the egg yolks and corn starch. Once the cream is hot, remove the vanilla bean, scraping out any remaining seeds and returning them to the cream. Add 1/2 cup of the hot cream slowly to the yolks, whisking as you add. Then pour the yolk mixture into the pot of hot cream and whisk. Continue to whisk with heat on medium-high for 3 more minutes. The mixture will turn thick and bubble. You need to continue to whisk for the full 3 minutes or the pastry cream will separate once it is cool. After the 3 minutes, whisk in the butter. Add the coconut flakes. Pour into a shallow dish to cool.

Cover with plastic wrap pressed right against the pastry cream. This will prevent a thick skin from forming on the surface. Refrigerate for at least an hour or freeze for 30 minutes. Once it is cold, stir the pastry cream to loosen. Whip the 1/2 cup cream to medium peaks. Stir in 1/3 to the pastry cream to lighten. Fold in the remaining cream until the pastry cream is nice and light. When tart shell is cool, fill it with pastry cream.

To make whipped cream, beat all ingredients together until whipped cream reaches medium peaks. Pile onto coconut pastry cream filling and top with toasted coconut.

*NOTE: This recipe makes enough pastry cream for two tarts, so you can double the tart shell recipe if you want to make both. If you only want one tart, leave the tart shell recipe as-is and use your leftover pastry cream for something fun!

P.S. Not to oversell this weekend’s upcoming recipe, but um . . . it’s the best dessert I’ve ever eaten. Yeah.


Share Share this post with friends!

Oatmeal Cake with Broiled Icing

It was hard to get my baking accomplished this weekend, but if I could go back and do it all again, I wouldn’t change a thing. I just spent the weekend with 8 of the sweetest 6th graders on the planet. My church holds a youth conference each year called Disciple Now. Students travel to the homes of generous church members to spend two days worshiping God, studying His Word, and having fun. I was a family group leader, responsible for leading the gals through Bible studies and refereeing the occasional pillow fight.

My short time with those bright, silly, beautiful, brilliant young ladies was so rewarding — partly because at first, it didn’t feel like it was going very well. They were exhausted Friday when we arrived home after worship, and were in no state for the Bible study we had planned. Sleepiness, pointed watch-checking, and delirium ensued. I lay in bed that night and reiterated the prayer I’d prayed upon arriving at the event earlier in the afternoon: Lord, I know Your strength is made perfect in my weakness, and right now, I’m feeling very weak! Please come make this work for Your glory.

The next day, I spoke with other group leaders who had experienced that very same moment of brokenness late Friday night. My Bible study leader revealed that she had woken up at 3 am that morning with the urge to pray for us. I’m so thankful for her prayers and the faithfulness of God — because the fantastic time spent with the girls Saturday was not my doing, but His! Apart from wheelbarrow relay races, crabwalking, screaming contests, an obstacle course, and a whole lot of giggling, we had an amazing discussion of what it means to live a “backwards life” for Christ (here is a site where you can download a free copy of the devotional book we worked through on this topic). The girls revealed their hearts — friends they were praying for, their struggles in faith. At one point, we made a list of daring ways to share the gospel (“good news”) of Christ with our loved ones.

I’m adding one to my own personal list — posting the good news on Willow Bird Baking! You are all on my list of “loved ones”! You may not be a believer, but I challenge you to read and consider this message either way, in the spirit of allowing me to share something that’s important to my heart.

The central message of Christianity is this simple truth: we are all sinners, separated from God by our sins. We cannot remedy this by ourselves, but God so loved us that He sent His Son Jesus to live a perfect life and die in our place — paying the price for sin. Jesus was then resurrected to triumph over sin and death. If we confess with our mouth and believe in our heart that Jesus did this for us, we accept His free gift of what Christians call “salvation”: salvation from the price of sin, and an eternal relationship with God, who is a wonderful Father.

If this is the first time you’ve heard or understood what Christ did for you, will you take a moment right now and tell Him you’re accepting His gift? If you’re already a believer, will you take a moment and thank Him again? Lastly, if you’re reading this right now and have questions, please leave me a comment with your email address.

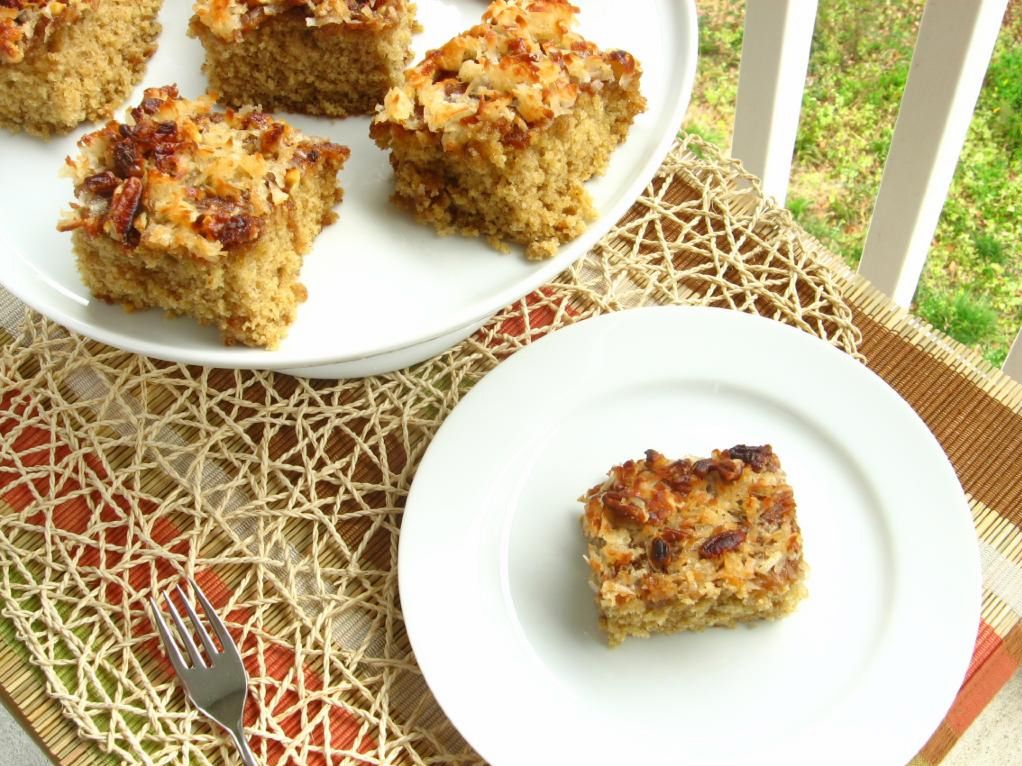
Okay, I know you’re ogling the pictures of the amazing Oatmeal Cake with Broiled Icing and wondering . . . how does Christ relate to Oatmeal Cake? Well, my jam-packed weekend resulted in a rushed baking session on Sunday. I needed a quick and simple recipe that I could make while bleary due to sleep deprivation. I cut calories during the week to splurge on the weekends, so I also wanted a recipe that could be easily devoured before Monday morning. This cake more than fit the bill — especially the easily devoured part!

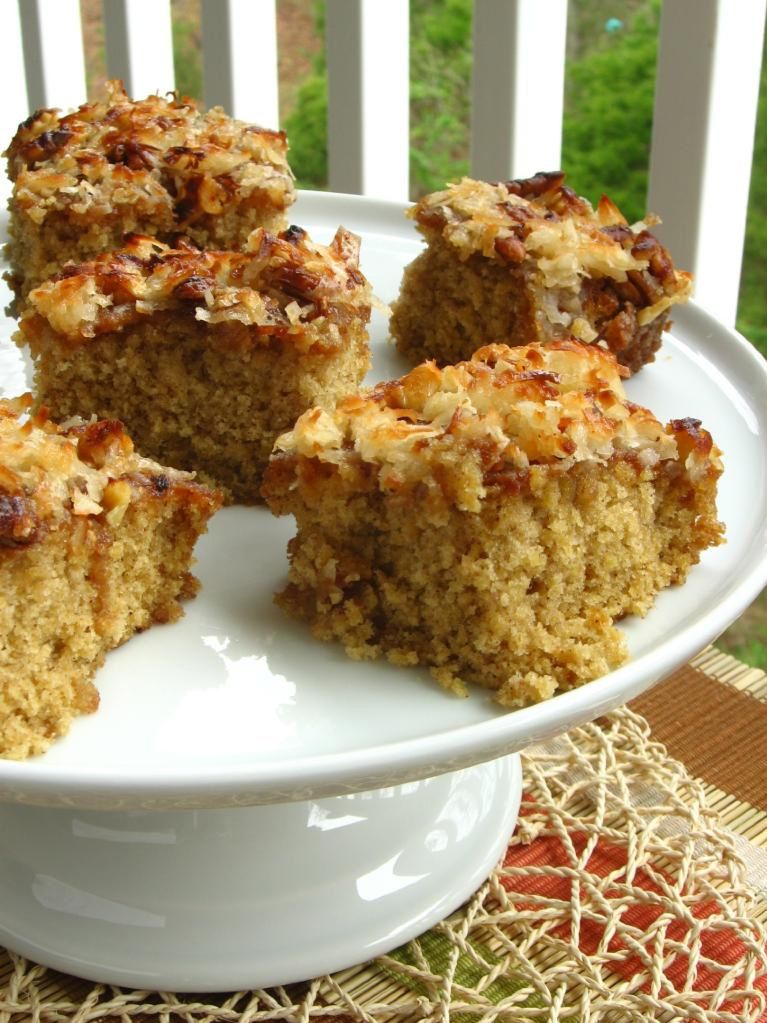
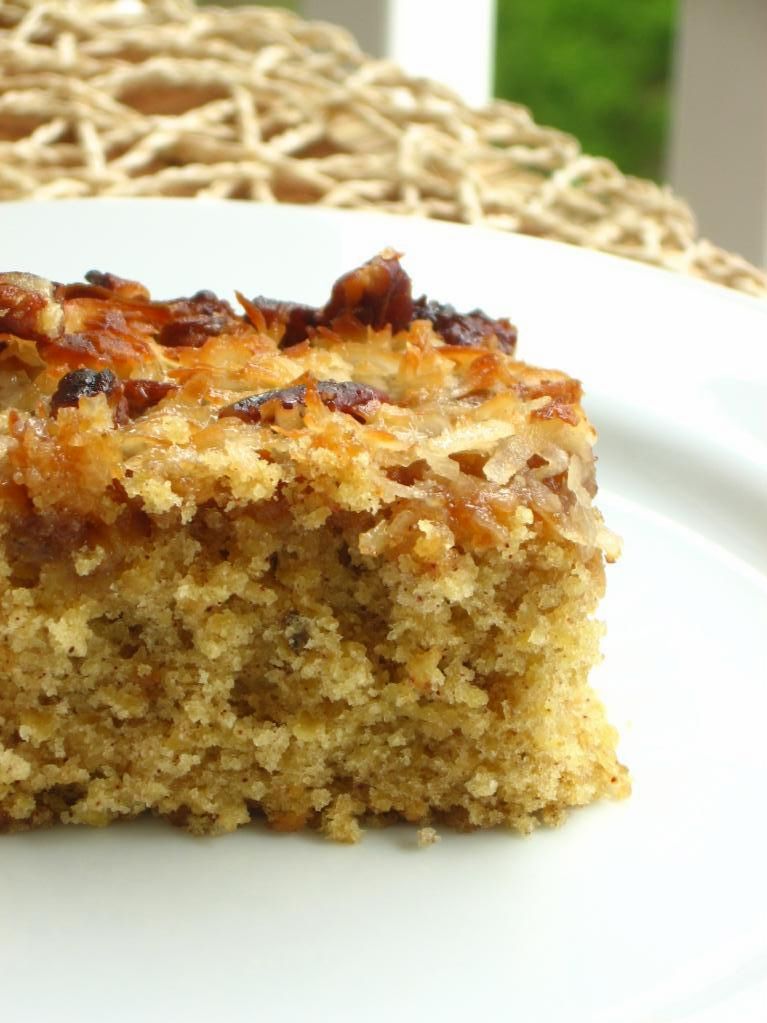
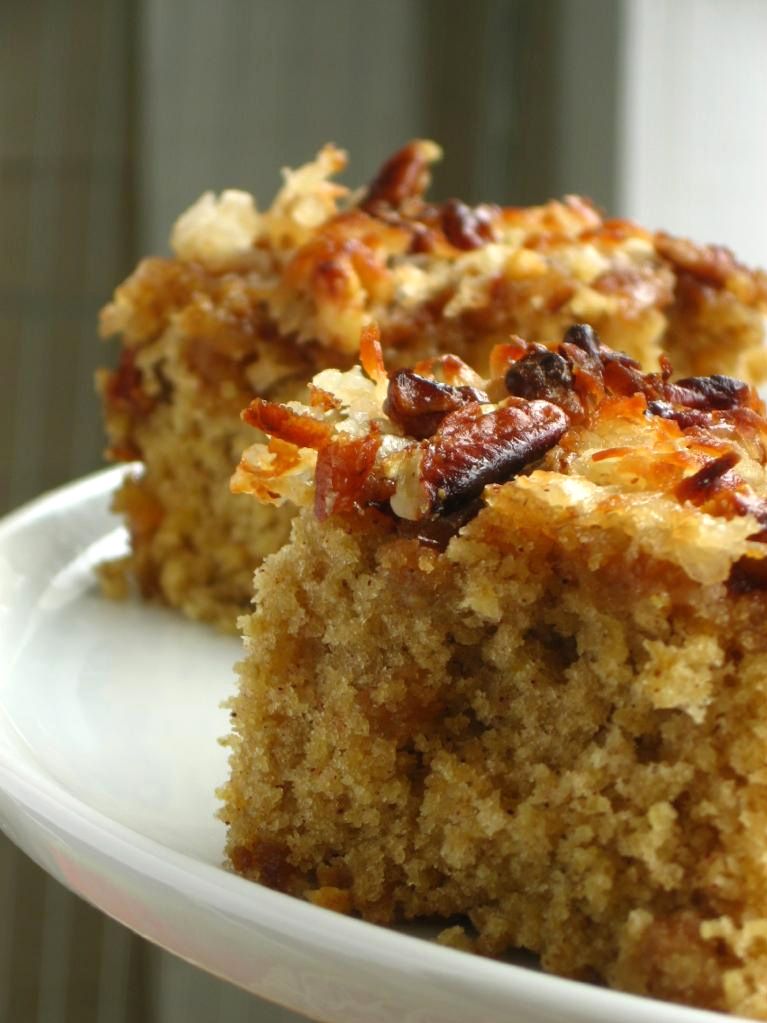
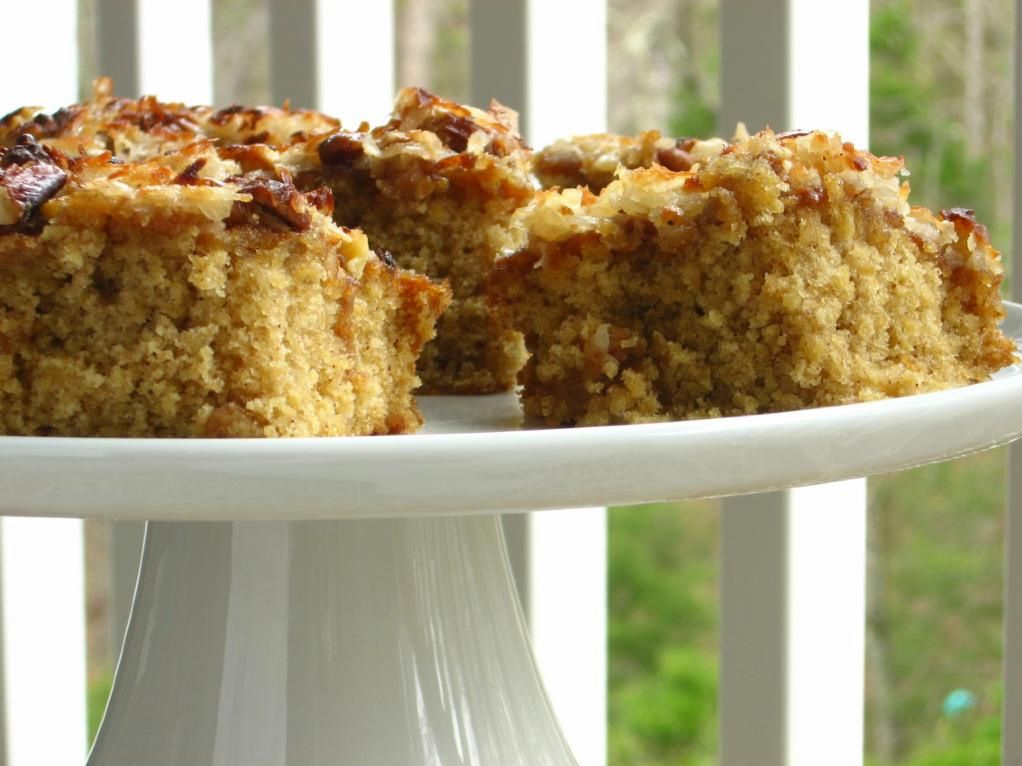
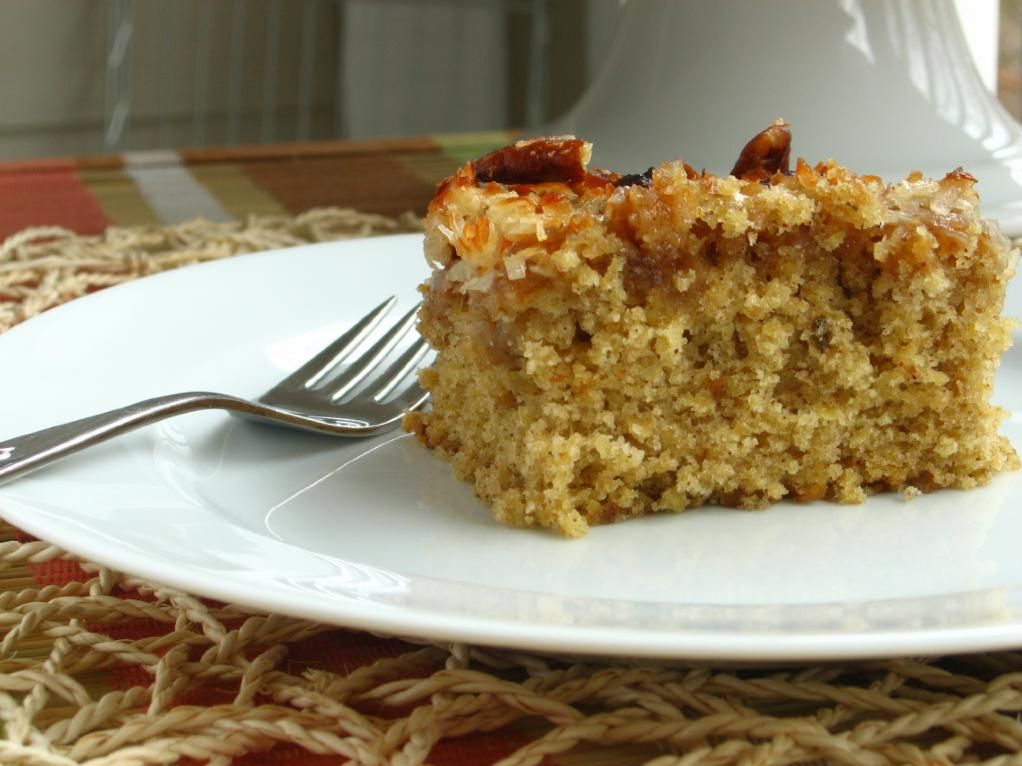
This recipe is heavenly, y’all (pun intended)! The cake is incredibly moist and delicate, with a mesmerizing blend of cinnamon, nutmeg, and oats. The broiled icing is insane: toasted coconut and pecans bound by a gooey almost-caramely mixture created by the broiled butter and brown sugar. On my Recipe Index, small hearts denote Willow Bird Baking favorites — the recipes I’m over the moon about. This hearty, filling cake has more than earned its heart!

One of the best parts is that it truly is a quick and easy recipe as well. The icing is spread on while the cake is warm, meaning that the entire recipe can be easily accomplished within an hour (not including cooling time). If I got through the entire process without a hitch while half-asleep, caffeinated, sore, and frazzled, it should be a breeze for you! Happy eating!

Oatmeal Cake with Broiled Icing


Recipe by: America’s Test Kitchen*
Yields: one 8-inch square cake (about 9 pieces)

Cake Ingredients:
1 cup (3 ounces) quick-cooking oats (see note)
3/4 cup water , room temperature
3/4 cup (3 3/4 ounces) unbleached all-purpose flour
1/2 teaspoon baking soda
1/2 teaspoon baking powder
1/2 teaspoon salt
1/4 teaspoon ground cinnamon
1/8 teaspoon ground nutmeg
4 tablespoons (1/2 stick) unsalted butter, softened
1/2 cup (3 1/2 ounces) granulated sugar
1/2 cup packed (3 1/2 ounces) light brown sugar
1 large egg, room temperature
1/2 teaspoon vanilla extract

Broiled Icing Ingredients:
1/4 cup packed (1 3/4 ounces) light brown sugar
3 tablespoons unsalted butter, melted and cooled
3 tablespoons milk
3/4 cup sweetened shredded coconut
1/2 cup (2 1/2 ounces) pecans, chopped

Directions:
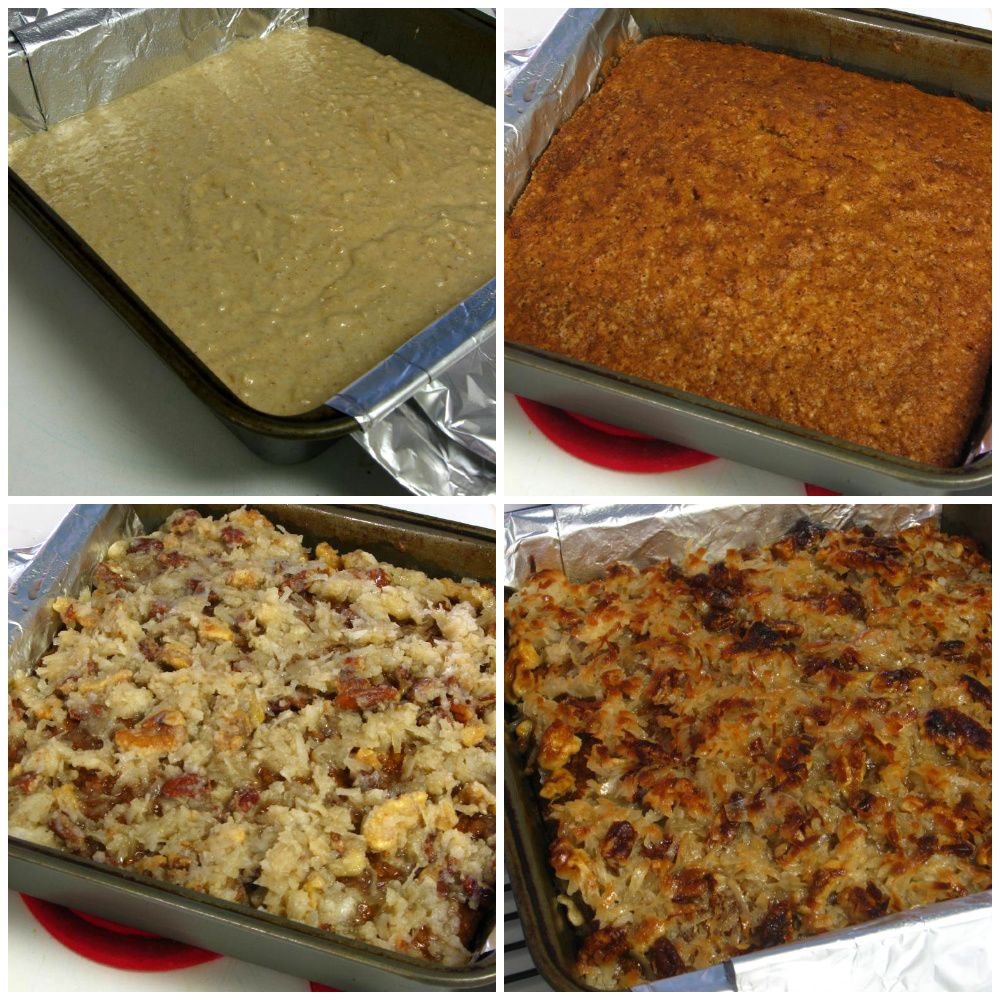
1. FOR THE CAKE: Adjust oven rack to middle position and heat oven to 350 degrees. Cut two 16-inch lengths aluminum foil and fold both lengthwise to 5-inch widths. Spray 8- by 8-inch metal baking dish with nonstick cooking spray. Create a foil sling for the pan: cut two 16-inch lengths of foil and fold them to widths of 5 inches each. Fit foil pieces into baking dish, one overlapping the other, pushing them into corners and up sides of pan; allow excess to overhang pan edges. This creates a sling that will help you remove the cake after baking and cooling. Spray foil lightly with nonstick cooking spray.

2. Combine oats and water in medium bowl and let sit until water is absorbed, about 5 minutes. In another medium bowl, whisk flour, baking soda, baking powder, salt, cinnamon, and nutmeg together.

3. In bowl of standing mixer, beat butter and sugars on medium speed until combined and mixture has consistency of damp sand, 2 to 4 minutes, scraping down bowl with rubber spatula halfway through mixing. Add egg and vanilla; beat until combined, about 30 seconds. Add flour mixture in 2 additions and mix until just incorporated, about 30 seconds. Add soaked oats and mix until combined, about 15 seconds.

4. Give batter final stir with rubber spatula to make sure thoroughly combined. Transfer batter to prepared pan and lightly tap against counter 3 or 4 times to dislodge any large air bubbles; smooth surface with spatula. Bake cake until toothpick inserted into center comes out with few crumbs attached, 30 to 35 minutes (careful: mine only took 28 minutes), rotating pan halfway through baking. Let cake cool slightly in pan, at least 10 minutes.

5. FOR THE BROILED ICING: While cake cools, adjust oven rack about 9 inches from broiler element and heat broiler. In medium bowl, whisk brown sugar, melted butter, and milk together; stir in coconut and pecans. Spread mixture evenly over warm cake. Broil until topping is bubbling and golden, 3 to 5 minutes.

6. Let cake cool in pan 1 hour. Following illustration 2, transfer cake to serving platter, then discard foil. Cut cake into squares and serve.

*ATK’s notes: Do not use old-fashioned or instant oats for this recipe. Be sure to use a metal baking dish; glass pans are not recommended when broiling. If you have a drawer-style broiler (underneath the oven), position the rack as far as possible from the broiler element and monitor the icing carefully as it cooks in step 5. A vertical sawing motion with a serrated knife works best for cutting through the crunchy icing and tender crumb.


Enjoy!

P.S. Reader comment: “Seriously this is the best cake I have ever baked or eaten. […] I cannot thank you enough for posting this. It is seriously amazing!” Hurray! GO MAKE THIS CAKE!


Share Share this post with friends!

Ugly as Sin Coconut Cake

There’s this CAKE. This beautiful, gorgeous, dramatic, heart-stopper of a CAKE. I’ve been dreaming about making it for weeks (2 weeks and 2 days, to be exact): scanning the recipe online, pondering it on my drive home, lying in bed and imagining each step, right down to torching the meringue. I’ve been a little obsessed, but you’ll understand why when you see how lovely it is. Here it is in all its glory, over at Zoë Bakes. I KNOW, RIGHT?! It is stunning.

So this past Friday I gathered together all my ingredients, donned the adorable retro apron my mom made for me, and became one busy bumblebee. I left the sour cream out of the recipe accidentally, so that was my first mistake. Ever set your cake out to cool on a wire rack only to turn your head and notice an ingredient still sitting on the counter waiting to be used? Oops. It wasn’t a big deal, as it turns out, because the cake was delicious. The coconut milk added an absolutely heavenly flavor — making this one of the best white cakes I’ve ever tasted.

The filling was similarly amazing: creamy, thick coconut pastry cream folded with rich whipped cream. I knew when stacking this cake up with the delectable filling between each layer that, no matter what, I had a dessert champion on my hands.

That’s about where the success story ends. Well, maybe that’s a bit dramatic — the cake was delicious and we adored every bite. But as the title of this post suggests, my version of Zoë’s lovely cake was ugly as sin. Now, you might be thinking, “Aw, you’re being too hard on yourself; it wasn’t that ugly!” Let me clarify:

It was ugly! Lopsided, striped, U-G-L-Y-it-ain’t-got-no-alibi, UGLY. The real reason I made this cake was to achieve those beautiful burnt meringue curls that Zoë’s cake had. That clearly didn’t happen.

My meringue was runny. At first I blamed it on humidity: it rained for days in Charlotte and I was whisking the meringue up right above my steamy dishwasher. But I tried again the next day in a steam-free kitchen to no avail: same results. I’m relatively sure my bowl and whisk was free of fat or residue, so I don’t think that was a problem. My mom blames the fact that I have a hand mixer rather than a stand mixer. This could be the culprit, but I sure beat until my arm was about to fall off. Maybe the most likely possibility is that I overheated my egg white and sugar mixture. The target temperature is 110-120F, but I’m pretty sure mine was past that when I removed it to whip. I’ll have to give it another shot with a cooler mixture.

Oh well. I love pretty food, cute food, sophisticated food. Mostly, though, I love food that tastes good — and this tastes good. Fantastic, even! If you don’t want to tackle the meringue, it would even be delicious covered in some slightly sweetened whipped cream and coconut. But I hope you’ll grab your stand mixer and give the meringue a try — I know I’ll be trying it again! As you can see from Zoë’s version, it’s worth it.

Coconut Cream Cake with Toasted Meringue Frosting


Recipe by: Zoë Bakes (coconut pastry cream, Swiss meringue) and Fine Cooking (cake), adapted by Willow Bird Baking
Yields: 9-in. 4-layer cake

Cake Ingredients:
8 ounces (1 cup) unsalted butter, softened
13 1/2 ounces (3 cups) unbleached all-purpose flour
1 tablespoon baking powder
1/2 teaspoon kosher salt
1 cup unsweetened coconut milk
2 teaspoons vanilla extract
2 cups granulated sugar
2 large eggs, at room temperature
1/2 cup sour cream, at room temperature (I left this out accidentally; still worked great)
6 large egg whites, at room temperature

Coconut Pastry Cream Ingredients:
1 can (14 fluid ounces) unsweetened coconut milk
3/4 cup sugar
1 vanilla bean
pinch kosher salt
3 large egg yolks
2 tablespoons corn starch
2 tablespoons unsalted butter
1 cup sweetened coconut flakes
1/2 cup whipping cream

Swiss Meringue Ingredients:
1 cup egg whites
2 cup sugar
pinch salt

Directions:
To bake the cake: Preheat oven to 350 degrees with rack in middle of the oven. Grease and line with parchment two 9×3-inch round cake pans. In a medium bowl whisk together the flour, baking powder and salt, set aside. Mix the coconut milk and vanilla, set aside.

In a stand mixer fitted with a paddle attachment, beat the butter and sugar on medium-high speed until light and fluffy, about 4 minutes (scrape down the bowl). Add the eggs one at a time and beat well after each addition.

Add 1/3 of the flour mixture and mix on low speed until incorporated. Add half the coconut milk and mix thoroughly. Continue to add the flour and coconut alternately, ending with flour. Add sour cream and mix until incorporated. Set aside in a large bowl if you don’t have a spare bowl for your mixer.

Beat the egg whites in your stand mixer with the whisk attachment (if you are using the same bowl, be sure it is VERY CLEAN or the whites will not whip up. Any fat on the bowl will prevent the whites from foaming). Beat the whites on high speed for 2-3 minutes, until it forms soft peaks. Don’t overdo it or the whites will get too stiff and not fold into the batter smoothly. Stir 1/3 of the egg whites into the cake batter to lighten it. Gently fold the remaining whites into the batter.

Divide evenly in the prepared pans. Bake for about 25-30 minutes or until the tester comes out clean. Cool on rack in pan and then invert to use.

To make the coconut pastry cream: Heat the coconut milk, sugar, salt and vanilla bean in a medium saucepan over medium heat. In a bowl, whisk together the egg yolks and corn starch. Once the cream is hot, remove the vanilla bean, scraping out any remaining seeds and returning them to the cream. Add 1/2 cup of the hot cream slowly to the yolks, whisking as you add. Then pour the yolk mixture into the pot of hot cream and whisk. Continue to whisk with heat on medium-high for 3 more minutes. The mixture will turn thick and bubble. You need to continue to whisk for the full 3 minutes or the pastry cream will separate once it is cool. After the 3 minutes, whisk in the butter. Add the coconut flakes. Pour into a shallow dish to cool.

Cover with plastic wrap pressed right against the pastry cream. This will prevent a thick skin from forming on the surface. Refrigerate for at least an hour or freeze for 30 minutes. Once it is cold, stir the pastry cream to loosen. Whip the 1/2 cup cream to medium peaks. Stir in 1/3 to the pastry cream to lighten. Fold in the remaining cream until the pastry cream is nice and light. Split the two cakes in half with a knife and add 1/3 of the filling to the first cake layer. Spread it out to the edge and repeat with the other layers.

To make the Swiss Meringue: Whisk together the egg whites, sugar and salt in the bowl of your stand mixer. Rest the bowl over a pot of simmering water to form a double boiler. Scrape down the sides of the bowl so that all the sugar is off the sides of the bowl. Continue to stir the mixture until all the sugar is melted into the eggs and you no longer feel any graininess when rubbed between your fingers, about 3-5 minutes.

Place the bowl onto your mixer and whisk on high speed until the meringue is thick and glossy and the bowl is just warmer than room temperature, about 8 minutes. Using a spatula, spread a nice thick layer of the meringue over the cake, make sure you have at least a cup of meringue left. Don’t worry about how it looks, you will be making spikes over the surface in a minute.

Take a glob of the meringue in your hand and press it against the meringue on the cake (Zoë has a great photo tutorial of this part on her blog). Pull that glob away from the cake and it will break off in a wispy curl. The more of a glob you lay down as a foundation on the cake, the bigger your curls will be. This may take a few times to get the hang of it, but then you’ll be off and running. Once you have the cake fully set with curls you will need a torch to toast the meringue. Hold the blow torch a ways from the cake and touch the flame down between the curls. The curls will set fire and you need to blow them out as you go. The burnt tips are lovely contrast and add a wonderful flavor.


Cake mixed, baked, and sliced into four layers.


Coconut pastry cream cooling and then spread onto a cake layer.


Cooking my Swiss meringue and preparing the cake for frosting!


Enjoy!

Want to help Haiti relief efforts? Want to learn some fantastic new recipes? Do both at once by purchasing the A Hand for Haiti E-Book (minimum donation of $10) or the hard copy of BlogAid (softcover $25; hardcover $50), two lovely cookbooks created to raise money for Haiti.


Share Share this post with friends!

1 9 10 11 12