chocolate

Heart-Shaped Palmiers and a Pesto Giveaway

What does it say about me that I have more fun at middle school dances as a grown-up than I ever did as a middle schooler?

Woodlawn’s 7th graders hosted a February dance last night. The theme was BRIGHT COLORS to avoid any romantic drama involving Valentine’s Day, so everyone dressed in their rainbow best.
I waltzed in fashionably late in a magenta and turquoise get-up, danced with a gaggle of my 6th grade students to “Fly Like a G6” (though we sing, “now I’m feelin’ so fly / like a fruitbat,” which we feel more accurately characterizes us), and filmed all the hair-whipping that occurred when “Whip My Hair” came on.

We stopped mid-dance to run outside and play freeze tag. I ditched my heels and joined the math teacher, also named Julie, as “it.” Once our feet and hands were frozen, we all filed back in for more dancing. Julie and I sang a duet of “Ice Ice Baby” at one point, showing our age.

Every now and then I’d have a chaperonely duty to perform: directing cleanup, vetoing a song or two, telling the 6th graders to stop screaming. But in general, the dance was exactly what a middle school dance should be: fun and happy. Why didn’t I have this much fun when I was actually in middle school?
I vividly recall my 7th grade Valentine’s dance. My teachers were apparently not as sensitive to the delicate hormonal phase we were in, so they thought it’d be a great idea to make the dance as sappy as possible. Everything was covered in red and pink, with hearts papering the walls. It looked like cupid had thrown up love and romance on every available surface of the multipurpose room where the dance was held. Not only that, but a table was set up outside the bathrooms where the PTA was selling roses and candy for the suave middle school boys who had come to the dance unprepared for their dates.
Someone had asked me to this particular dance. We’ll call him Jeb, and he was not my type. I told him I would go with him as a friend because I wanted to be nice, but once I arrived at the dance, the middle school social pressure overwhelmed me. I didn’t want to be seen with Jeb, much less have to, like, dance with him and stuff.

Just after walking in, I caught sight of him at the aforementioned table buying a rose for me and I booked it to the girls’ bathroom, where I hid for the majority of the night. Every now and then I’d poke my head out and watch him wandering around quizzically, looking for me in the crowd, and then I’d duck back in to hide some more. Part of me felt guilty, but the part that felt mortified won out.
Jeb moved away shortly thereafter, and I felt so bad for having ditched him at the dance. Thankfully, he returned in high school and I got the opportunity to apologize. I chalk the whole experience up to middle schoolitis, the inflammation of your social nerve. For some reason when you’re a middle schooler, it matters so much what others are thinking about you. You don’t want to dance, because what if people think you dance funny? You don’t want to hang out with certain people, because what if people think you’re like them? You don’t want to wear certain clothes, because what if they send the message that you’re uncool?

Phew, I’m so glad that’s over. And so glad that I, unlike a lot of grown-ups, have a second chance at the middle school dance! Call it one of the perks of being a teacher.
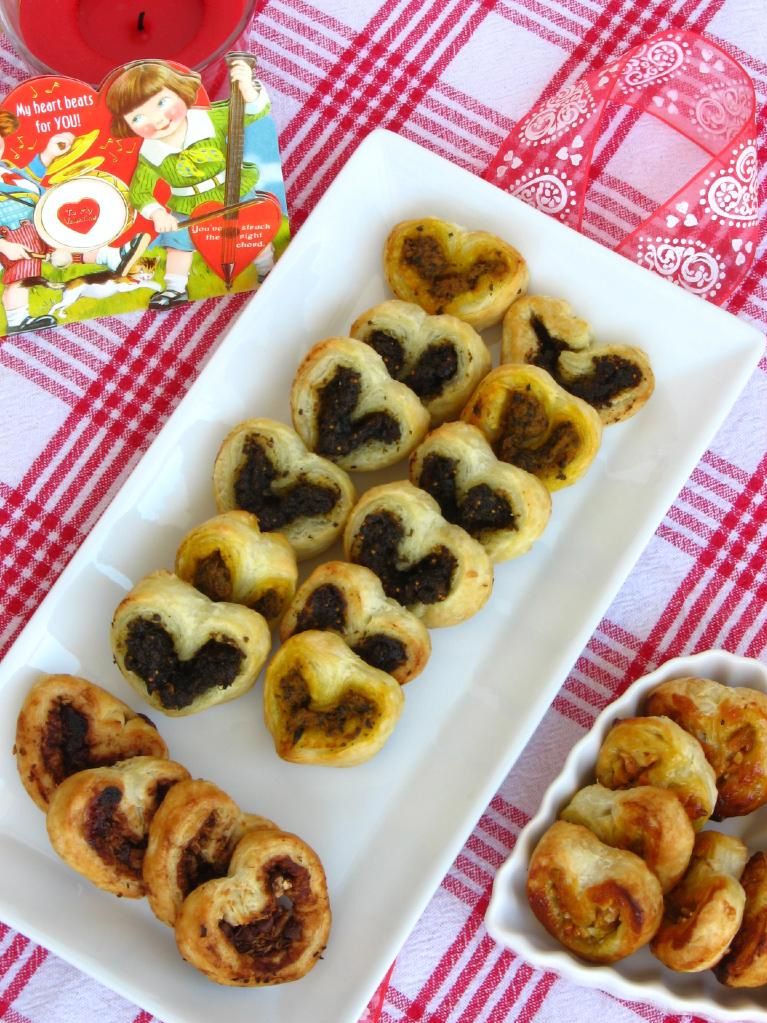
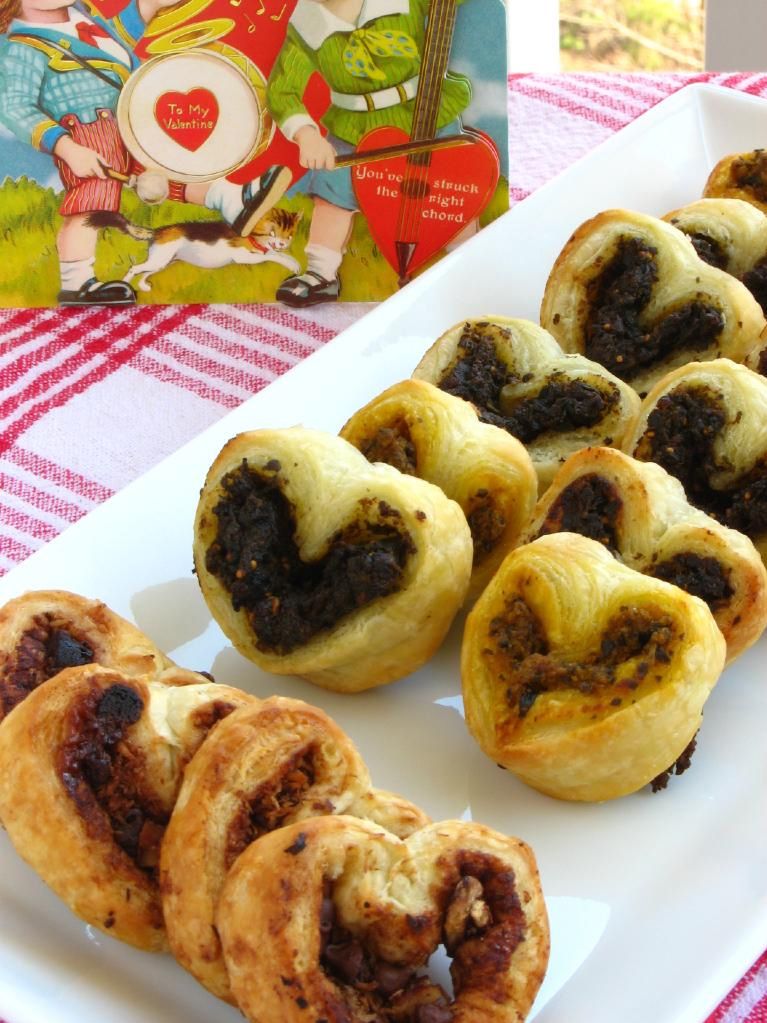
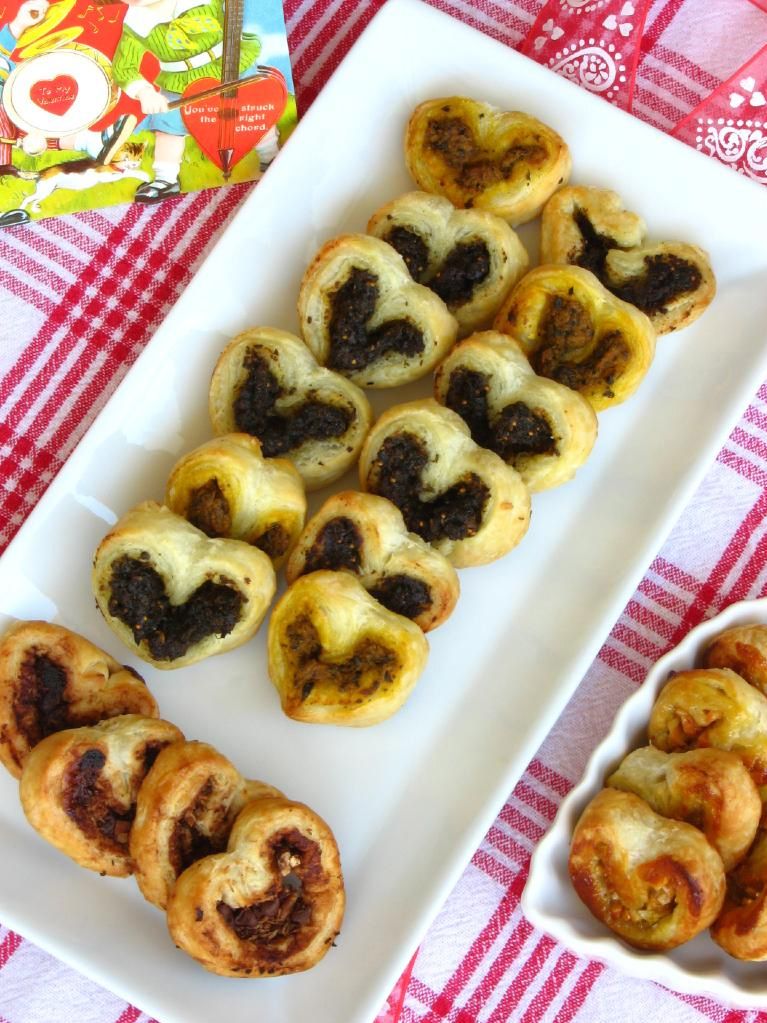
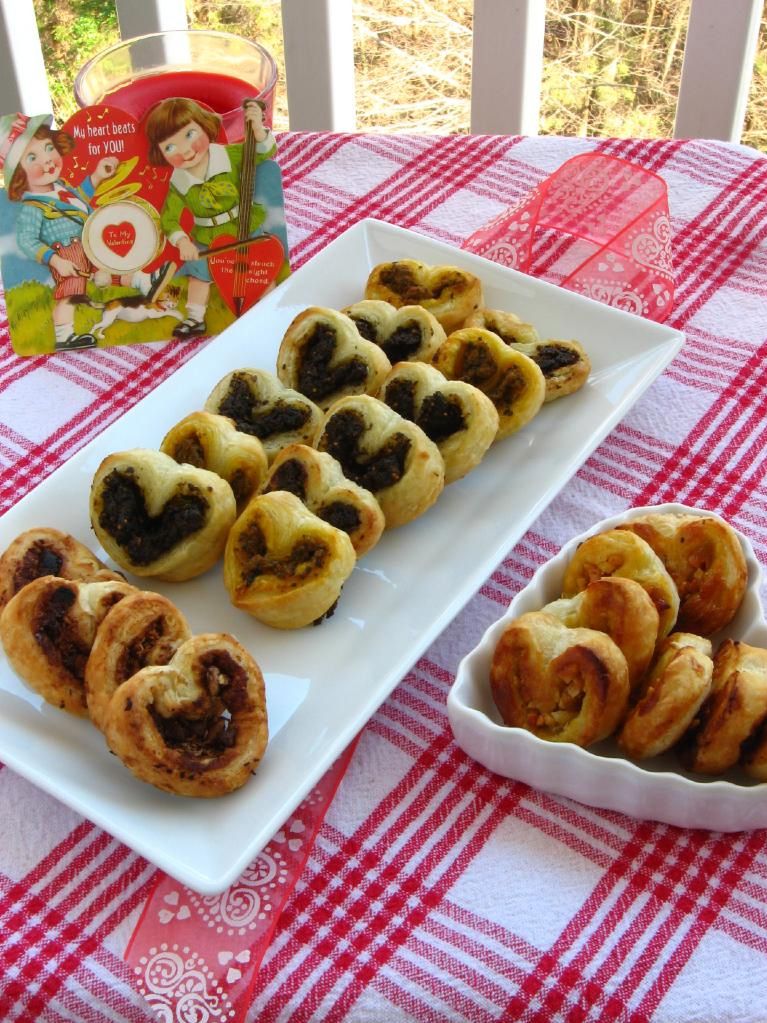
Anyway, after all that fun last night, I didn’t have much time for baking. I knew I wanted to make something sweet and Valentinesy, but it also needed to be quick. Voila: easy heart-shaped palmiers that can be sweet or savory depending on what you spread in them.

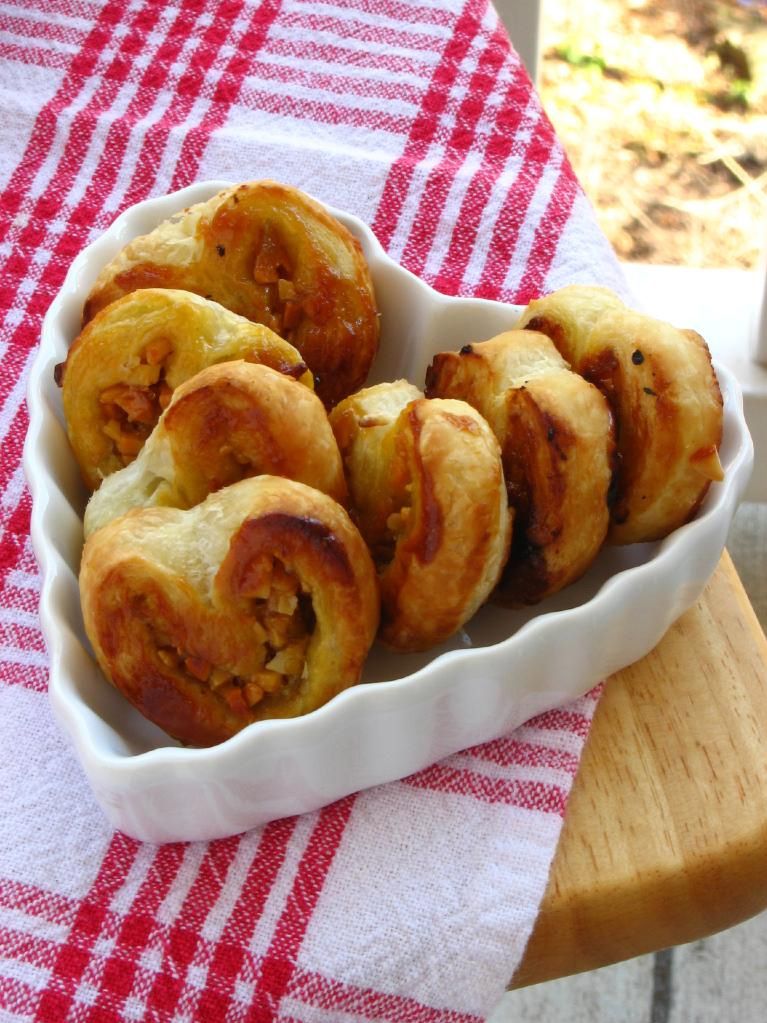
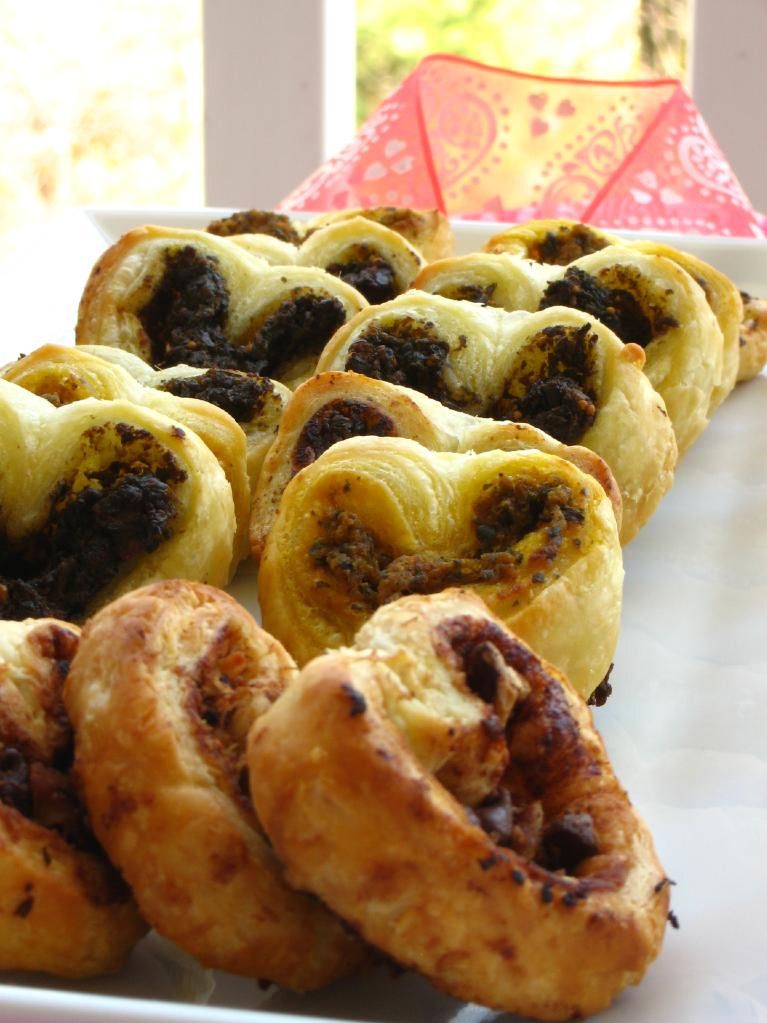
Pestos With Panache by Lauren sent me two pesto flavors to review, Fig & Gorgonzola and Pumpkin Chipotle, so I decided to make two varieties of pesto palmiers. To satisfy my sweet tooth (who’m I kidding? it’s insatiable), I also made Fig Jam & Almond Palmiers and Chocolate, Pecan, & Coconut Palmiers. I love that palmiers are so customizable that you can create a variety of them at once (the method below will inspire you to get creative!), but what I love even more is that you can whip up a batch of these cuties in 20 minutes. Perfect for a last-minute addition to your Valentine’s meal!
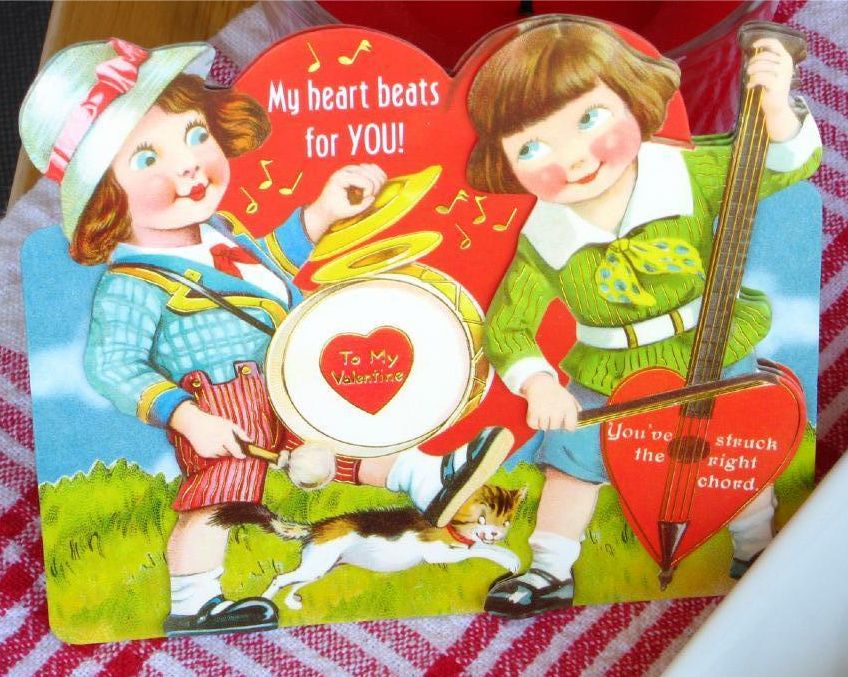

Speaking of Valentines — the Valentine’s Fairy heard my lamentations about not getting any valentines as an adult, so I got this in the mail from my Sunday school teacher, Joyce. Too sweet!

Regarding the pesto, Pestos With Panache by Lauren has all-natural, preservative free products. The pestos keep well in the freezer for up to two years, and the company boasts a number of zany, creative flavors.

I wasn’t wild about the Pumpkin Chipotle Pesto; it combined mild pumpkin with some heat, and it seemed like it would work better in a recipe with bolder flavors to complement it. The Fig & Gorgonzola Pesto, though, was deep and delicious, and I can’t wait to try some of the other fruity flavors. I can imagine lots of creative uses for them, including (of course) palmiers!

Would you like to win two of the fun pesto flavors from Pestos With Panache? They’d love to send one lucky commenter a sample. To enter:

1. Required Main Entry (your other entries won’t count unless you do this one!): Visit Pestos With Panache by Lauren and tell me what 2 pesto flavors you’d love to try.

To get up to five extra entries, do each of the following items (one entry per item). Please be sure to leave a separate comment for each item you complete, or you will not receive the entry for that item. If you already do these things, it still counts (just leave me a comment and tell me so).
2. “Like” Pestos With Panache on Facebook.
3. “Like” Willow Bird Baking on Facebook.
4. Follow Pestos With Panache on Twitter.
5. Follow Willow Bird Baking on Twitter.
6. Tweet the following message: “Just entered to win 2 pesto flavors from @PestosWPanache on Willow Bird Baking! http://su.pr/2diNLK #giveaway @julieruble”

The contest will close at 12 noon (EST) on February 19, 2011, and the winner will be chosen via random.org. In the meantime, make some palmiers!

Heart-Shaped Palmiers


Recipe by: Willow Bird Baking
Yields: 25-28 palmiers

Ingredients:
1 frozen puff pastry sheet, thawed (or use homemade puff pastry!)
sprinkle of flour
moist spread*
toppings**

*you can use pestos, jellies, Nutella, thicker sauces, etc.
**such as cheeses, toasted nuts, chocolate chips, etc.

Directions:
Preheat oven to 425 degrees F. Line two baking sheets with parchment paper. Roll out the puff pastry sheet on a lightly floured surface so that it’s just slightly longer, and then cut it in half horizontally with a pizza cutter. You now have two rectangles of puff pastry.

Spread your pesto, jelly, or other moist spread onto the puff pastry sheets leaving about 1/4-inch border around the edges. Sprinkle toppings on lightly, taking care not to overstuff and make your palmiers difficult to roll. Apart from my two pesto palmiers, I made palmiers spread with fig jam and sprinkled with toasted almonds, and palmiers sprinkled with sugar, cocoa powder, toasted pecans, mini chocolate chips, and toasted coconut. The sky’s the limit in terms of the combinations you can create.

Once you’ve spread and topped your pastry rectangle, grab the long edge and fold it in toward the middle. Repeat with the other long edge, such that they meet in the middle:

Now fold one side of the dough onto the other:

At this point, stick the dough in the freezer on wax paper for about 10 minutes so that it’s easier to cut. Using a sharp knife, cut the log into 1/2-inch slices:

Set each slice on one of the prepared baking sheets with one of the cut sides up. If the knife smooshed them a little, prod them back into shape. Bake at 425 degrees F for 8 minutes before turning the temperature down to 400 degrees F and gently flipping each palmier. Bake for 4-5 minutes extra. Remove the palmiers from the oven and transfer them to a cooling rack. Serve slightly warm.

Note: Pestos With Panache by Lauren provided me with 2 pesto flavors to review at no cost to me and offered to sponsor this giveaway. I’m committed to giving you my honest opinion about any product mentioned on Willow Bird Baking.

If you liked this post, please:
Subscribe to Willow Bird Baking
Follow Willow Bird Baking on Twitter
Follow Willow Bird Baking on Facebook
Give this post a thumbs up on StumbleUpon


ShareOther ways to share this post with friends!

Three Delicious Ways to Celebrate World Nutella Day

Groundhog Day’s okay. I mean, Punxsutawney Phil is kind of fat and cute. I like his handlers’ top hats. And Phil said winter was going to be shorter this year, so that’s cool, I guess. At least one of my students is determined to celebrate Groundhog Day (please head over to support his young blog).

But honestly, y’all, it’s hard to be too enthusiastic. Just three measly days later, it’s World Nutella Day. Pshhhh. Punxsutawney who?

If you’re anxious to celebrate today’s clearly superior holiday in creamy-chocolatey-hazelnutty style, here are three of Willow Bird Baking’s favorite Nutella treats!


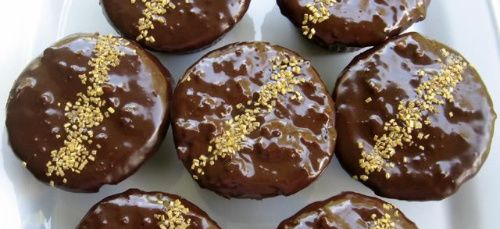
Wacky Candy Cupcakes


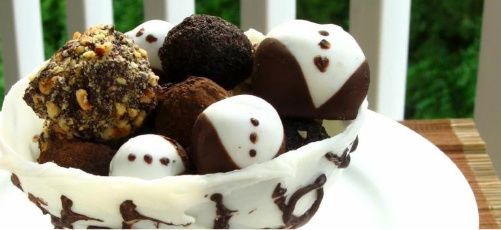
Nutella Truffles in a Chocolate Bowl


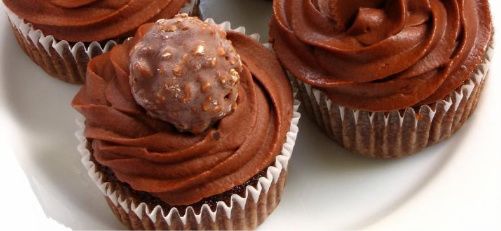
Ferrero Rocher Cupcakes

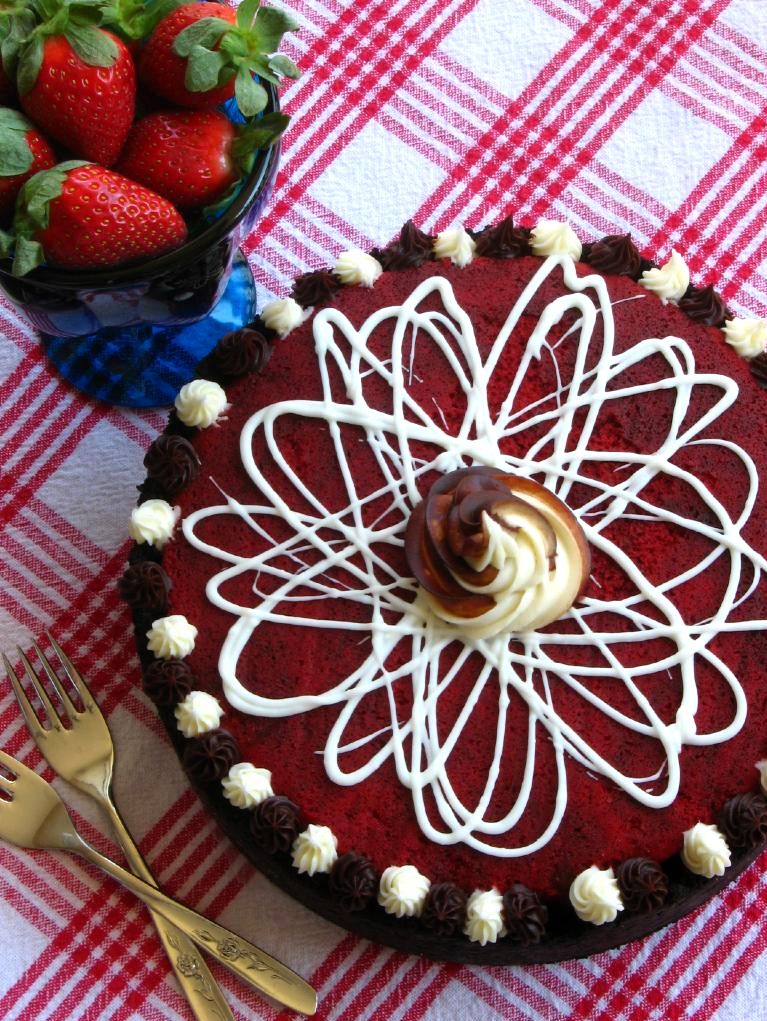
P.S. You may have noticed that I never revealed that announcement mentioned on my Red Velvet Cheesecake post — that’s because there’s been a slight change and I want to wait until things are settled. Can’t wait to let you know!

If you liked this post, please:
Subscribe to Willow Bird Baking
Follow Willow Bird Baking on Twitter
Follow Willow Bird Baking on Facebook
Give this post a thumbs up on StumbleUpon


ShareOther ways to share this post with friends!

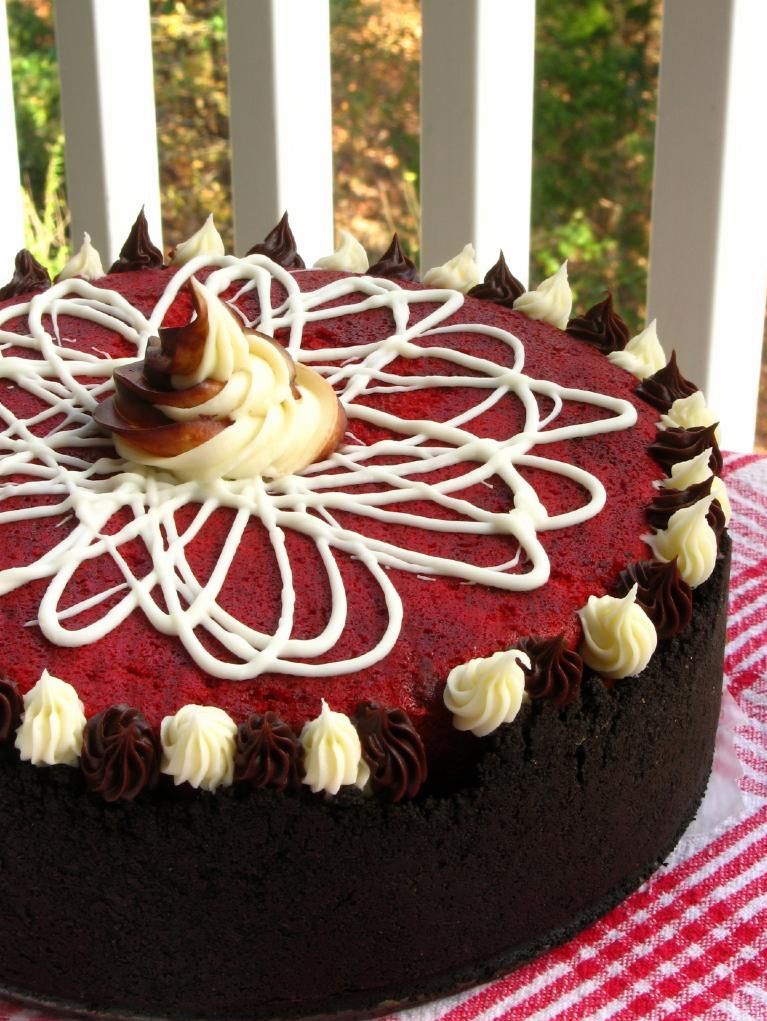
Red Velvet Cheesecake

Every year around this time, I get the urge to build a mailbox.

Don’t look at me like that. I blame my elementary school teachers. At the beginning of almost every February, my teachers would pull out construction paper, glue, stickers, markers, and paint, and we’d all set to work constructing mailboxes. Sure it wasn’t the most glamorous construction job I’ve ever been a part of, but I was very serious about it nonetheless, because this wasn’t just any mailbox — this was a Valentine’s Day mailbox.

On February 14, we’d all bring in our packets of valentines and circulate about the classroom uncomfortably, dropping one in each of the waiting mailboxes. We tried not to pause too long at anyone’s desk or — heaven forbid — make any accidental eye contact, lest it be misinterpreted during this socially charged process.

Secretly, though, I’d probably spent the night before carefully selecting the perfect Strawberry Shortcake Valentine for the boy I liked. One that could be interpreted as being totally casual — plausible deniability in case he had no interest in me whatsoever — but was also slightly on the mushy side, in case he was just waiting for a sign of my interest. If I was appending candy to my valentines that year, I probably spent another eternity choosing the candy heart or chocolate that I thought he’d like the very best.

(Yes, I now realize that the boy I liked, in contrast, had probably spent the night before Valentine’s Day being hounded by his mother to at least write his classmates’ names somewhere on the valentines she’d bought for him, eating most of his valentine candy before it got attached to anyone’s card, and playing a Teenage Mutant Ninja Turtles video game until bed.)

Anyway, when every valentine was passed out and the time had finally come to sit down and empty our mailboxes, I was always breathless with suspense. Imagine the possibilities! Forget bills and junk mail — these mailboxes were carefully crafted to hold L-O-V-E. Every year I fully expected to receive a long letter handwritten by the boy I liked (actually, any boy would’ve done. Or a secret admirer? Yes, please!) detailing the many, MANY reasons he was smitten with me. He might even include a phone number. Maybe a special conversation heart. Maybe an engagement ring! You never know.

Reality was a little disappointing. I’d dump out all the valentines and quickly shuffle through the boring ones — Scooby Doo holding a bunch of flowers and saying, “Rees are for Roo, Valentine!” or Power Rangers crying, “It’s Morphin’ Time, Valentine!” My eagle eyes were looking for two things: candy and handwritten messages. Candy because it would sustain me on my arduous journey toward discovering the love of my life, and handwritten messages from said love.

Was his heartfelt letter to me in this envelope? Nope, a smurf card. How about this one? Nope, an I Love Lucy valentine — you can tell Mom picked those out. How about the envelope with a heart drawn on the front? Nope, that was from my BFF. Thanks a lot for getting my hopes up, girl. Slowly but surely, my stack dwindled. One after another, the valentines were slapped down onto my “read” pile with barely more than a glance. Finally, the fateful moment came when I’d read and dismissed the very last card.

No proposal. No secret admirer. Not even a lousy paragraph about my eyes being like the sun or something. Nothin’. At this point I’d probably look at my crush across the classroom and sigh, appreciating the suave way in which he used his lollipop as a sword to launch attacks against his friend’s ear.

Childhood is rough. Adulthood is a lot better. Yes, there are bills and junk mail in my mailbox now. And unfortunately, I didn’t get to MAKE my mailbox. And, okay, I’m not going to get a pile of colorful valentines, some of which are boasting candy.

But here’s why adulthood rocks. This year, when Christof Van Snufterplucken (names changed to protect the innocent — or lame) doesn’t turn off his video game long enough to write me a love letter about how awesome I am, I can remedy my disappointment in a mature, adult way: by making and eating a ridiculous amount of cheesecake. Red Velvet Cheesecake, to be exact.

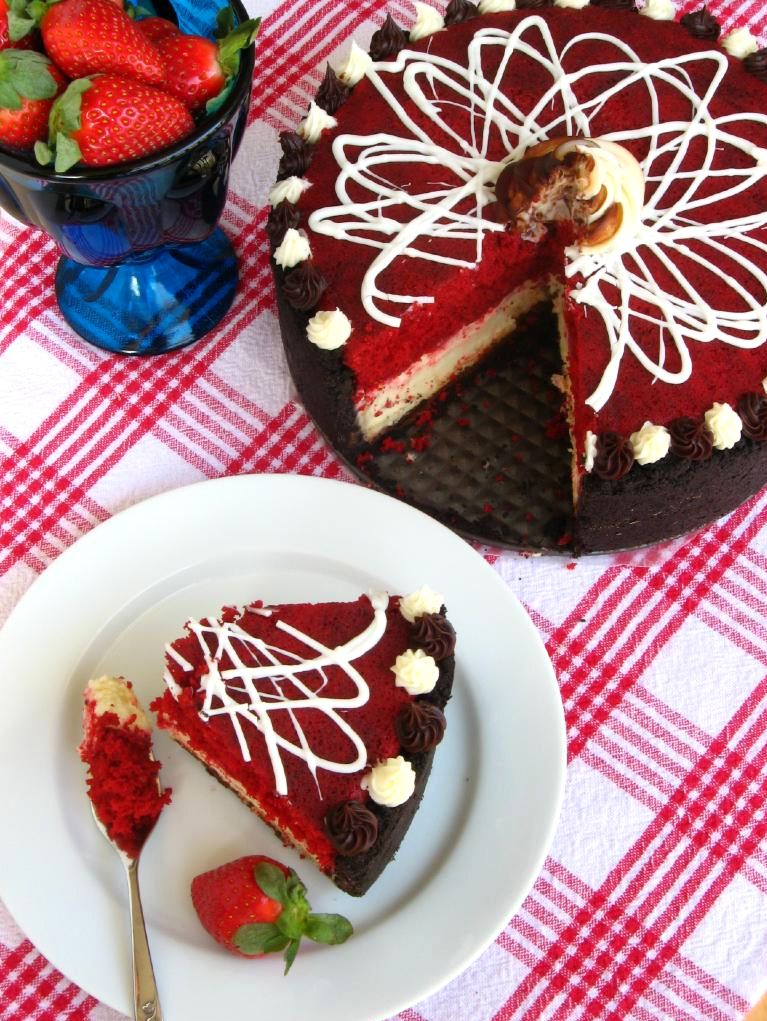
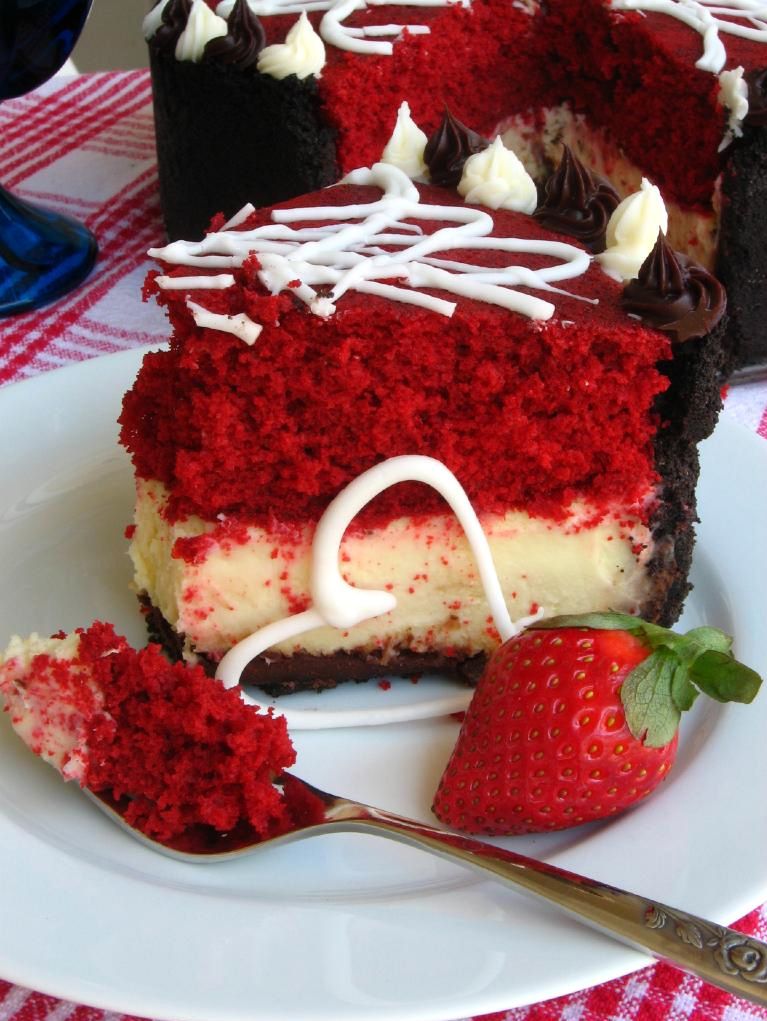
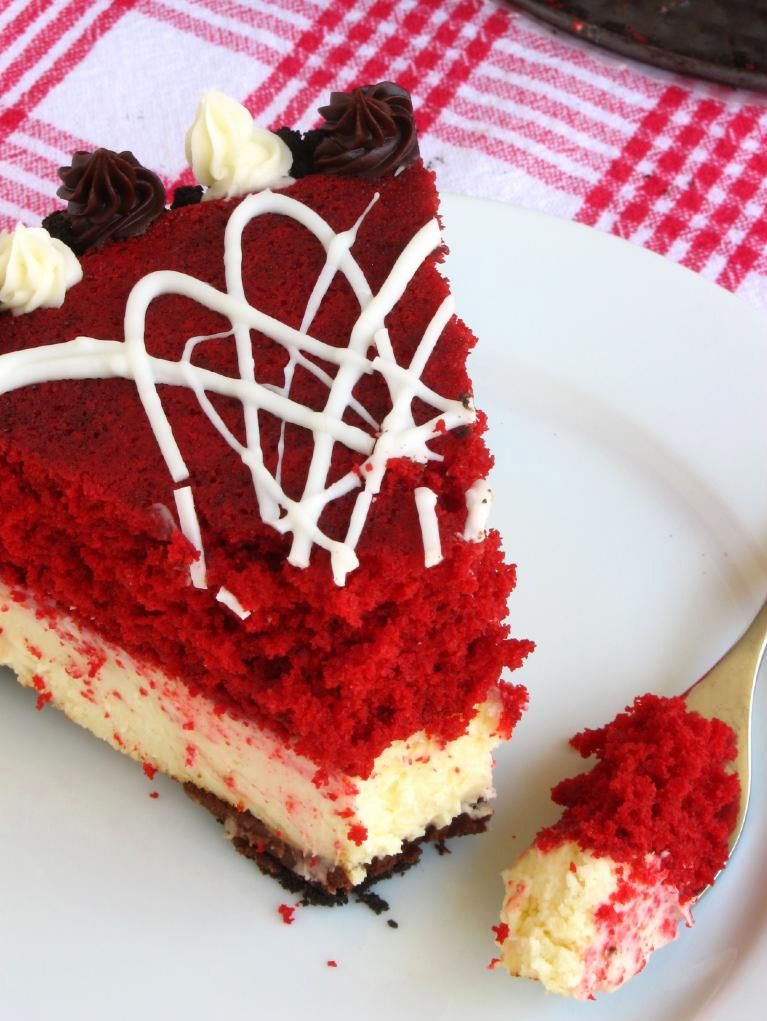
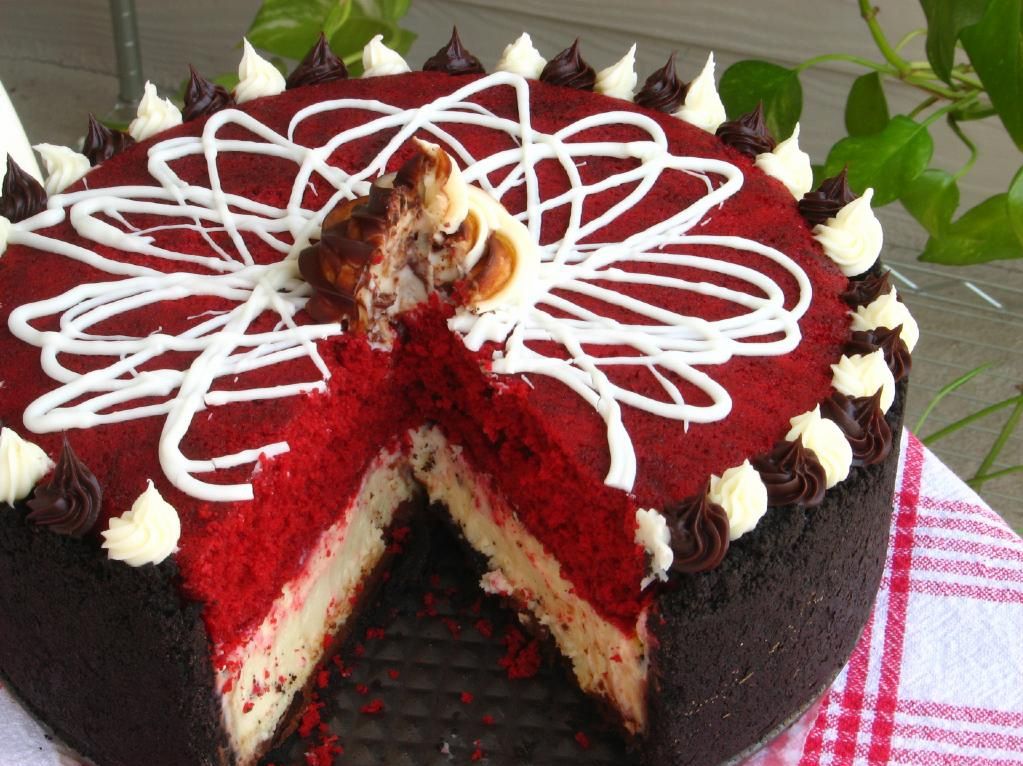
Reader Victoria first gave me the idea for a Red Velvet Cheesecake back in November and I thought it sounded fantastic! She made a beautiful layer-cake-like version, and I went the cheesecake-like route. This ultimate Valentine’s dessert includes an oreo crust filled with layers of ganache, creamy cheesecake, and moist red velvet cake decorated with ganache and cream cheese frosting. Perhaps this is obvious, but apart from being pretty (especially when served with chocolate-covered strawberries and white chocolate hearts), this thing is delicious, indulgent, and yes, romantic. So even if your crush loves radioactive reptilian ninjas more than you, you can have your own little slice o’ love.

Tell me about one of your elementary school crushes. Did you ever receive a fantastic valentine in school?

5 from 1 reviews
Red Velvet Cheesecake
 
Prep time
Cook time
Total time
 
A delicious dessert that combines two of your favorites into one! Note on cheesecake making: Cheesecakes are simple and super customizable. New to cheesecake making? Watch my 6-minute Cheesecake Video Tutorial for visual assistance! Note on scheduling: This cake is easily separated into two days of preparation, and can be prepared ahead of time. On day one, prepare the red velvet cake, cool it, and freeze it. On day two, prepare the cheesecake. You can then assemble and decorate right away, or leave this for day three.
Serves: 14-16
Ingredients
Crust Ingredients:
  • 32 chocolate sandwich cookies, finely processed into crumbs (cream and all – it’ll disappear when you crush them up!)
  • 5 1/3 tablespoons unsalted butter, melted and cooled
  • pinch of salt
Ganache Ingredients:
  • 3/4 cups heavy cream
  • 10 ounces bittersweet or semisweet chocolate, finely chopped (I used half semisweet and half bittersweet chocolate chips)
Cake Ingredients:
  • 1/4 cup vegetable shortening
  • 1 egg
  • 1 tablespoon cocoa
  • 1/4 teaspoon salt
  • 3/4 cups sugar
  • 1/2 teaspoon vanilla extract
  • 1/2 cup buttermilk
  • 1 1/4 cups flour
  • 1/2 teaspoon baking soda
  • 1/2 tablespoon white vinegar
  • 1 ounce red food coloring
Filling Ingredients:
  • 3 (8-ounce) packages cream cheese, at room temperature
  • 1 cup sugar
  • 1½ tablespoons all-purpose flour
  • 2 teaspoons vanilla extract
  • 3 large eggs
Decorative Toppings (optional):
  • 2 ounces cream cheese, at room temperature
  • 2 tablespoons butter, at room temperature
  • 1 cup powdered sugar, sifted
  • white chocolate for drizzling
  • strawberries
Instructions
  1. Make the cake: Preheat oven to 350 degrees F. Line the bottom and the sides of an 9-inch round cake pan with parchment paper, leaving an overhang on two opposite sides to make it easier to lift the cake out of the pan when it’s done. Cream shortening, sugar, and eggs. Make a paste of the cocoa and coloring and add to the shortening mixture. Add salt and vanilla. Add buttermilk alternately with the flour, beginning and ending with flour. Mix vinegar and soda right before using and add to mixture by folding in. Pour batter into the cake pan and bake at 350 degrees for 20-25 minutes, or until a toothpick inserted into the center of the cake comes out clean. Cool completely, cover in wax paper, and freeze for 30 minutes or until firm.
  2. Make the cheesecake: To make the crust, preheat the oven to 350˚ F. Butter a 9-inch springform pan and place it on a baking sheet. Combine the chocolate cookie crumbs, melted butter and salt in a small bowl. Toss with a fork to moisten all of the crumbs. Press into a thin layer covering the bottom and sides of the springform pan (at least 3 inches up the sides).
  3. Bring the cream to a simmer in a medium saucepan. Place the chocolate in a medium bowl. Once the cream reaches a simmer, pour the cream over the chocolate and let stand 1-2 minutes. Whisk in small circles until a smooth ganache has formed. Pour 1 – 1.5 cups of the ganache over the bottom of the crust. Freeze until the ganache layer is firm, about 30 minutes. Reserve the remaining ganache; cover and let stand at room temperature for later decorating.
  4. Preheat the oven to 350˚ F and position a rack in the middle of the oven. In the bowl of an electric mixer fitted with the paddle attachment, beat the cream cheese and sugar on medium-high speed until well blended. Beat in the flour. Add in the vanilla and beat until well incorporated, scraping down the sides of the bowl as needed. Beat in the eggs one at a time, scraping down the bowl between each addition.
  5. Pour the filling over the cold ganache in the crust. Place the springform pan on a rimmed baking sheet. Bake until the top is lightly browned, puffed and cracked at the edges, and the center moves only very slightly when the pan is lightly shaken, about 1 hour. Transfer to a wire cooling rack. Cool at room temperature for at least 30 minutes. Transfer to the refrigerator and let cool at least 3 hours, until completely chilled and set (it’ll sink as it cools).
  6. Assemble topping: Whip room temperature ganache to create a fluffy texture perfect for piping. In a separate bowl, mix together cream cheese, butter, and powdered sugar to make a small amount of cream cheese frosting for decorating.
  7. Assemble the cheesecake: Wrap a warm towel around the outside of the springform pan to help loosen the crust from the sides. Carefully remove the springform. Transfer the cake to a serving platter. Here, you can schmear some ganache on the cheesecake to help the red velvet cake adhere. I didn’t, but it’s a good idea. Then place your red velvet cake layer on top of cheesecake (right side up). If for some reason you seem that your cake layer will stick up beyond your crust, you can use a long serrated knife to reduce its width (freezing it first makes it easier to cut). Decorate top of cake with drizzled white chocolate, piped cream cheese frosting, whipped ganache, and strawberries.

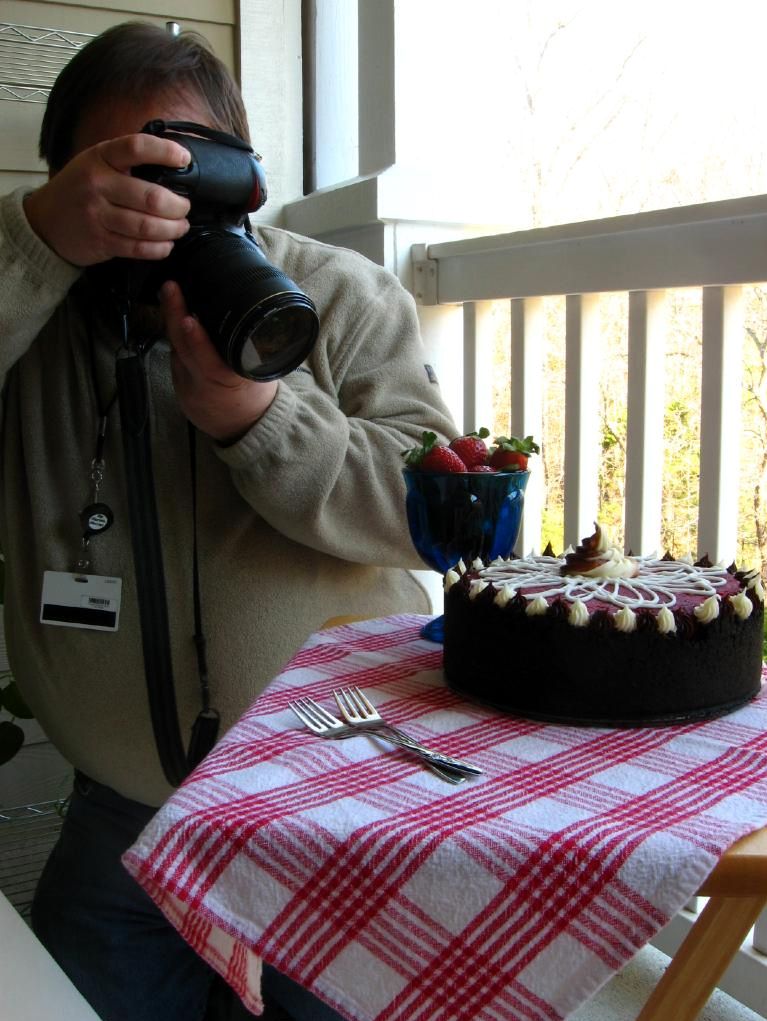
P.S. Who could this photographer be shooting my cheesecake? Find out this coming Wednesday!


Magic Bars and a Tate’s Bake Shop Giveaway!

I can be kind of a trainwreck sometimes. I don’t mean a lose-my-pencil or knock-over-my-milk trainwreck (although I can be those too). I mean a National Lampoon trainwreck.

Christmastime always reminds me of this fact, mostly because of something that happened a few years ago. My parents had decided to travel to South Korea for the holiday to visit my sister, who was living there at the time. I was sullen about having to spend Christmas alone, and on top of that, I had been appointed petsitter.


Magical, magical Magic Bars

Everything would have been okay if this position merely entailed taking care of my parents’ toy poodle, Abbey, who — while getting crotchety in her old age — is still a little scoop o’ sweetness. But no. Petsitting meant taking care of the dog, the finch, the very animated Roomba, and THE RABBIT.

THE RABBIT, y’all, who — I KID YOU NOT — eats two freshly made salads per day. I don’t even eat two freshly made salads per day! Or, uh, even one freshly made salad per day.

THE RABBIT, who snuggles and kisses everyone EXCEPT ME, because he hates my guts.

THE RABBIT, who attacks me whenever I’m within range.

THE RABBIT, who was THIS CLOSE to being turned into a stew and not making it out of the experience alive.


Don’t worry — no rabbit in the Magic Bars.

It was clear from the very beginning that this was going to be an interesting week, but I had no idea what kind of shenanigans were in store for me. I thought the worst of my troubles was THE RABBIT. Not even close. Because:

1. In the middle of one of my first nights at my parents’ house, I woke up to a waterfall raining down from the living room ceiling. There was apparently a leak in an upstairs bathroom. Over the next few days, what started as a tiny crack in the downstairs ceiling became a gaping hole.

2. The Roomba stopped working after a few days. It already required daily maintenance to manually clean out the gobs of bunny hair it had to consume, but halfway through the week, it gave up the ghost. I barely fiddled with it before giving up, which meant being buried in bunny fluff the rest of the week. It was EVERYWHERE. Covering every article of clothing, stuck in my eyelashes, garnishing every bite of food.

3. Abbey decided to start spontaneously bleeding from her head midweek, staining the couch and sheets. Still no idea what happened there.

4. Speaking of Abbey, she and Byrd (my toy poodle) were mortal enemies all week long. Byrd likes to pester Abbey. Abbey wishes Byrd would fall into a hole and get swallowed by the earth. This makes for interesting interactions, including what I like to call “the great potty war,” during which each dog was determined to out-pee the other.

5. That $#@*% RABBIT attacked me and almost broke my hand as I was cleaning up his gross cage. Apparently he’s territorial about his hay. Noted.

6. The bird died. IT JUST UP AND DIED. I promise I fed it, watered it, milleted it, cooed at it, kept the temperature steady. Mom later assured me that it was an old bird. At this point I kind of felt like telling her that she was an old bird. Just kidding, Mom. Love you!

7. The day had finally arrived when I was supposed to pick my parents up from the airport after school. Everything was going to be okay! I was on my way to work, gleeful at the prospect of leaving the demolished ceiling, bleeding dog, dead bird, and vicious Monty Pythonesque bunny behind — when I totaled my car. TOTALED. Some dude pulled out in front of me leaving me no room to stop, and bang! Cue the airbags, the traffic jam, the police report, etc.

All of this occurred without a reliable way of contacting my parents since they were, you know, across the globe and all. I picked them up from the airport that night in Mike’s car, and I’ll bet you can imagine how well that went: “Hi guys. Your ceiling’s destroyed, your bird is dead, your house is one giant furball, your dog may or may not still be bleeding, and I just totaled my car. How was your trip?”

Anyway, I can be a trainwreck of epic proportions. That’s why when I received a copy of Tate’s Bake Shop Cookbook to review a few weeks ago and promptly failed at the first recipe I made from it, I knew I needed to give it another go.

My first try was the Lemon Wafers. They’re described as “cake like,” but mine were thin, crisp, and burnt around the edges. They still tasted amazing (I may or may not have eaten half a batch by myself), but they were quite the ugly ducklings. With no photographs of some of the recipes, it was hard to decide how they were supposed to look; nevertheless, I’m pretty sure they weren’t supposed to look like that.

I’m so glad I tried again, because the next recipe was a winner. Magic Bars consist of pecans, bittersweet chocolate, and coconut bound by sweetened condensed milk on a graham cracker crust. They were so simple and quick to make, but were definitely magical! I took them to a crafting party (I feel so hip to have gone to a crafting party – did you see how deftly I slid that tidbit into this post? Am I ruining it now? Oh.) and they were a huge hit.

Pocket Review


Book Stats: 156 pages, $25.99 list price (~$18 on Amazon), indexed.
Accessibility: Perfect for a beginning baker!
Examples of Recipes: Mocha Pecan Muffins, Ginger Scones, Zvi’s Cinnamon Swirl Bread, Double Chocolate Almond Cookies, Peanut Butter Squares, Apple Cream Cheese Tart, Hummingbird Cake, Raspberry Charlotte, etc.
Overall Impression: I love the simplicity and accessibility of the recipes, but I would’ve preferred more photos — particularly to see how things were supposed to turn out.
Overall Rating: 3.5 out of 5 stars

Kathleen King, the author of the cookbook and owner of Tate’s Bake Shop in the Hamptons, has received recognition from Ina Garten, Everyday with Rachael Ray, The Gourmet Retailer, and The Boston Globe for her simple handmade treats. The cookbook is filled with easy, accessible recipes perfect for whipping up at a moment’s notice. In addition, the lovely folks at Tate’s sent me some buttery, thin and crisp cookies to sample. I loved them, and can’t wait to make some of the famous chocolate chip cookies to share with family.

Would you like to try some Tate’s Bake Shop goodies? One Willow Bird Baking reader will win a gift-pack of cookies including oatmeal raisin, white chocolate macadamia nut, and chocolate chip, as well as a copy of the Tate’s Bake Shop Cookbook. To enter, leave a comment on this post answering the question, “What’s your favorite cookie?” To receive up to three extra entries:

1. Become a fan of Tate’s Bake Shop on Facebook and leave a separate comment telling me you did so (or if you’re already a fan, just say so in your comment!)
2. Become a fan of Willow Bird Baking on Facebook and leave a separate comment telling me you did so (or if you’re already a fan, just say so in your comment!)
3. Tweet about the giveaway using this message: “Just entered to win a Tate’s Bake Shop gift pack and cookbook at Willow Bird Baking! Enter here: http://bit.ly/eFtQi6 @julieruble” and leave a separate comment telling me you did so.

This contest will run through December 28, 2010 at noon EST, but even if you don’t win, you can still enjoy some cookies! Tate’s Bake Shop is offering a 15% discount for Willow Bird Baking readers on tatesbakeshop.com from now until December 31. Just use the code “cookie” at checkout. Enjoy!

Magic Bars


Recipe by: Kathleen King of Tate’s Bake Shop
Yield: 24 bars

Ingredients:
1/2 cup salted butter
1 1/2 cups graham cracker crumbs
1 1/3 cups dessicated shaved coconut (unsweetened)
1 1/2 cups bittersweet chocolate chunks (I use Ghirardelli)
1 1/4 cups pecans, chopped
1 can (14 ounces) sweetened condensed milk

Directions:
Preheat the oven to 350 degrees F. In a 9 x 13 inch pan, mix the melted butter and graham cracker crumbs. Press the mixture evenly to cover the bottom of the pan. Sprinkle the coconut over the crumb base. Sprinkle the chocolate chunks over the coconut. Sprinkle the pecans over the chocolate chunks. Drizzle sweetened condensed milk evenly over the top. Bake it for 25 minutes. Cool it completely and cut it into bars. I like these magic bars served cold.

If you liked this post, please:
Subscribe to Willow Bird Baking
Follow Willow Bird Baking on Twitter
Follow Willow Bird Baking on Facebook
Give this post a thumbs up on StumbleUpon


ShareOther ways to share this post with friends!

Browned Butter Pumpkin Croquemcake with White Chocolate Chai Mousse (Project Food Blog Round 8!)

Because of YOU, Willow Bird Baking is one of only 24 blogs in Project Food Blog Round 8! I am so beyond grateful for your support and love throughout this process. Challenge #8 was to create a baked good using pumpkin. VOTING IS NOW OPEN! (Thank you for voting! Voting is now closed.) I’d love it if you’d pop over to cast a vote for me by clicking “Vote for this Entry” here. Thank you all!!

I am basically an architect. I know some folks who worked through countless hours of pesky schoolwork to call themselves architects and may disagree with me. But I think I have enough experience to go ahead and claim the title.

See, in 6th grade, my classmates and I were divided into teams and charged with a task of monumental proportions. We were to engineer a bridge out of toothpicks, string, and glue. Each of these “resources” was assigned a cost, and we were given a budget of imaginary money with which to purchase supplies. The team whose bridge could hold the most weight at the end of the competition would win epic bragging rights.


Moist, amazing Browned Butter Pumpkin Cake!

We must have been hyped up on marshmallowy breakfast cereal or something, because as soon as the teachers said GO, it was on.

We were ruthless. We pasted, chopped, measured, quarreled, budgeted, collaborated, and in a move that I’m still not sure was entirely legal, pilfered cast-off supplies from the trash can. Hey, we were just being green, right? Nowadays we’d obtain a high L.E.E.D. certification and get a pat on the back. I’m sure my teachers would’ve seen it that way . . .

I remember waxing intellectual about the structural integrity of domes, lecturing a classmate on how strong the ends of an egg were for this reason. Another peer gave an impromptu diatribe on the virtues of suspension bridges. We ended up with some sort of Frankesteinian hybrid, a bridge held up by suspension and bulky domes underneath. We were still furiously glopping on excess glue in hopes of bolstering the bridge’s integrity when the teachers called time.

We watched breathlessly as the teacher judging the competition picked up a thin book and placed it on our bridge. It held. Another volume was snapped up into her fingers and laid gingerly on our opponents’ bridge. It held.

One by one, she stacked books on top of our lopsided, aesthetically wreck-tastic but apparently strong-as-an-ox toothpick bridge. Every book our bridge held was matched by one on our opponent’s bridge — until the teacher picked up two textbooks. Ours held under the weight. Our opponents’ bridge collapsed — and so did we: we collapsed into cheers and giggles, inebriated with victory. We had done it! We were brilliant engineers! We had won!


Pumpkin profiteroles — with pumpkin in the choux dough itself — were filled alternately with White Chocolate Chai Mousse and ganache.

As the crowd thinned, we stood around and stared in wonder at our messy little Golden Gate. My friend Ashley was not yet satisfied. Sure, our bridge was stronger than the other team’s, but just how strong? With her hands on teammates’ shoulders for balance, Ashley stepped — first one foot, and then the other — onto the bridge.

It held.

I’ll never forget that moment standing in front of my elementary school, seeing Ashley’s huge grin, relishing the easy pulse of victory through our already-marshmallow-filled veins. So, yeah, I’m basically an architect. Right?

At least, it was this (misguided?) confidence that led me to believe that I could construct what I’ve officially dubbed the croquemcake.

I wanted to pull out all the stops for Project Food Blog Round 8 (do I say that every round? It’s definitely true every round!) The challenge was to create a baked good using pumpkin, and I was torn between building pumpkin profiteroles (made from pâte à choux) into a lovely croquembouche (mounted cream puff tower) or baking a pumpkin chai cake. Suddenly, it hit me. When in doubt, do both.


I may or may not have tweeted my desire to bathe in luxurious Swiss buttercream.

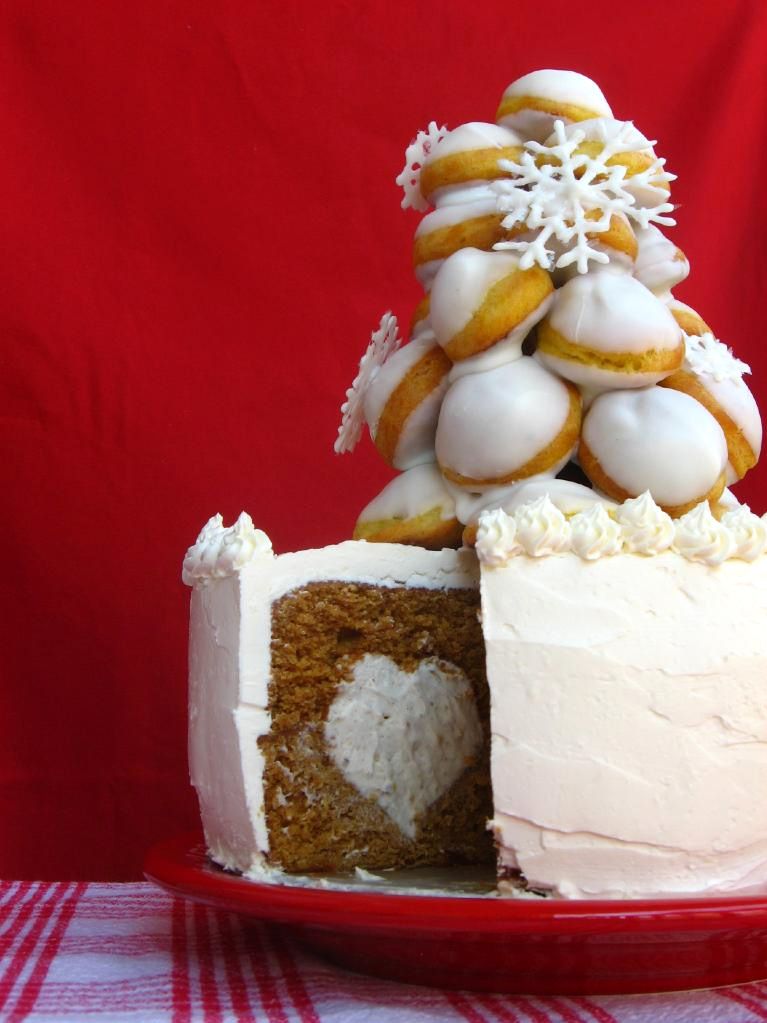
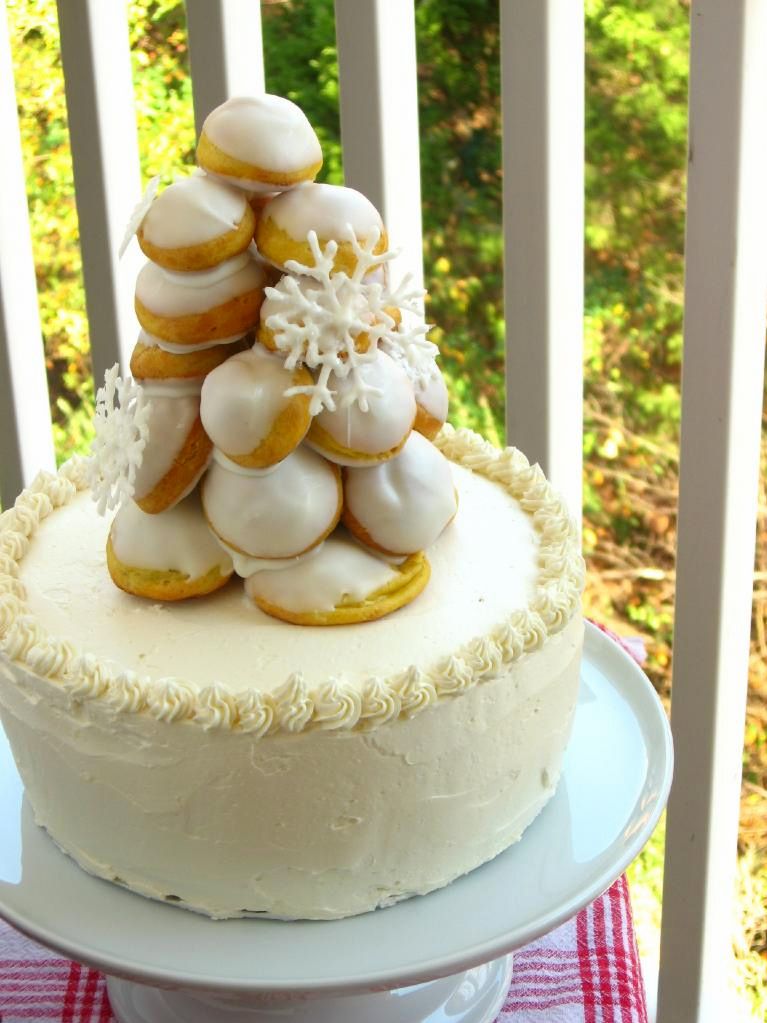
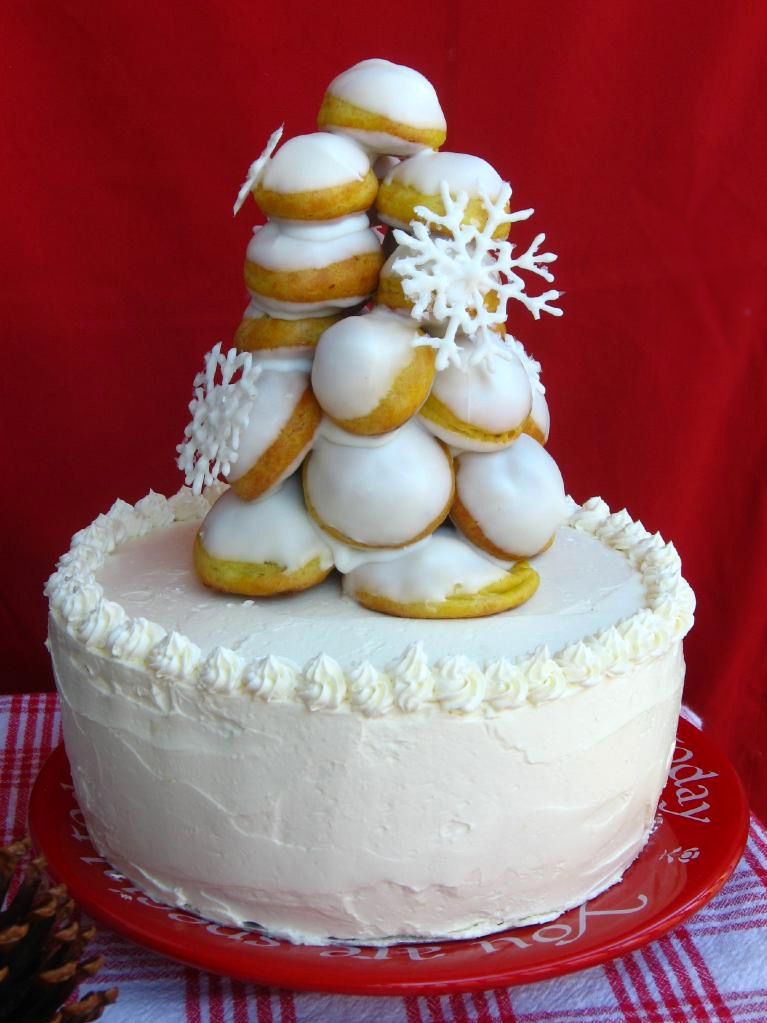
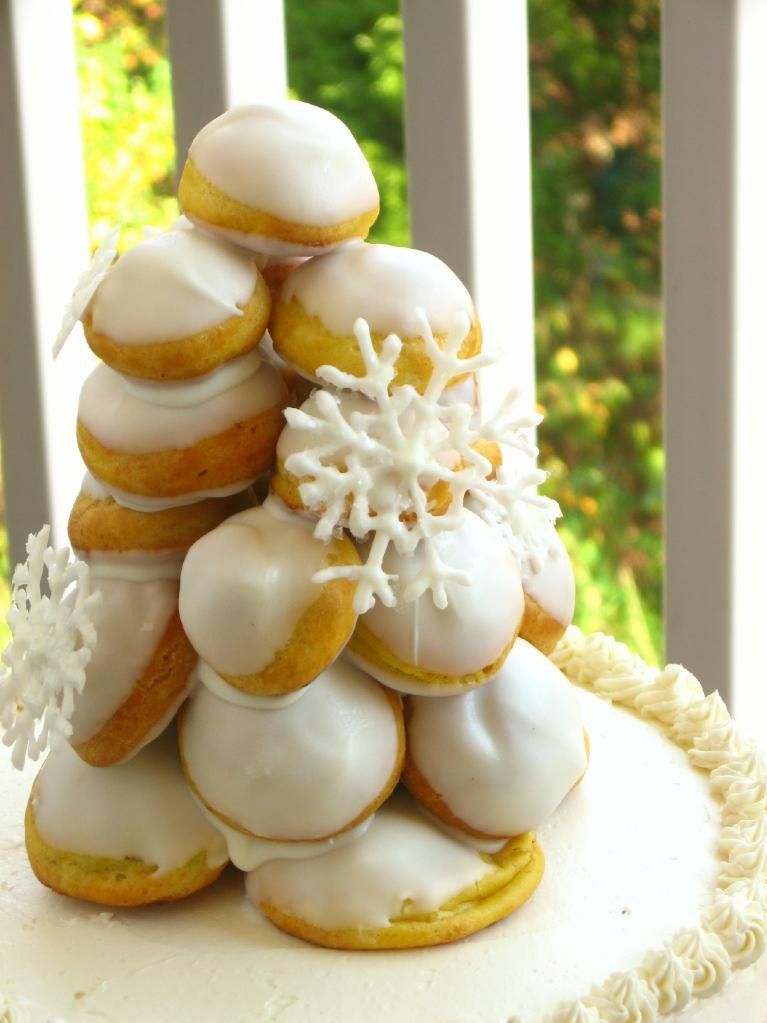
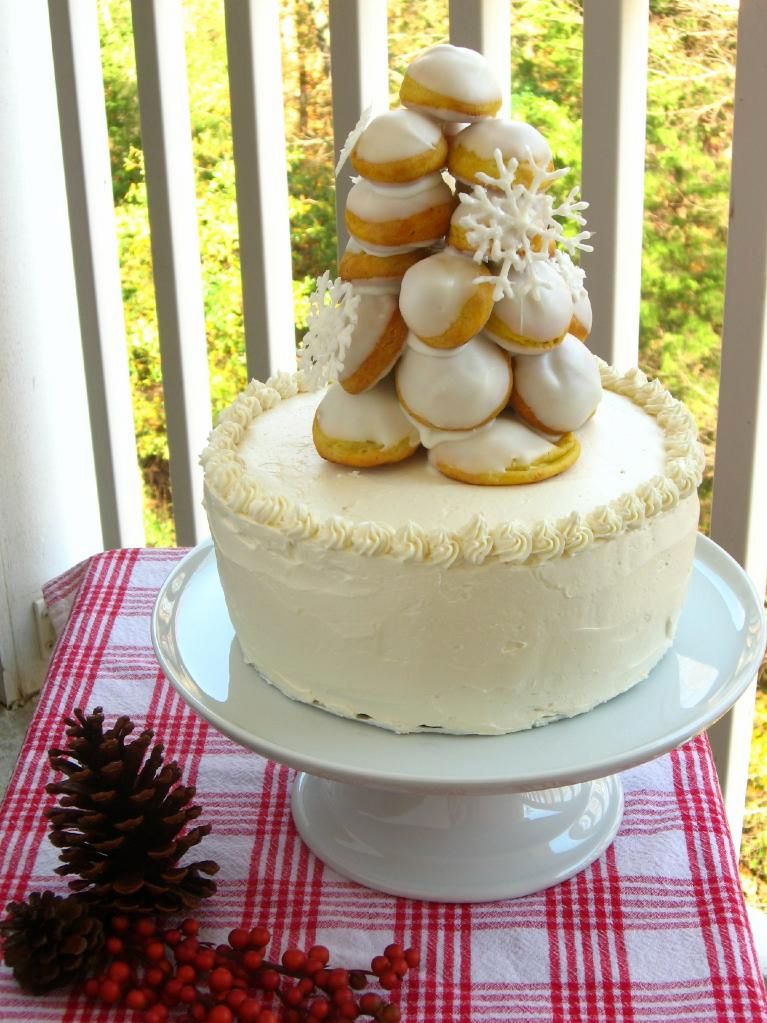
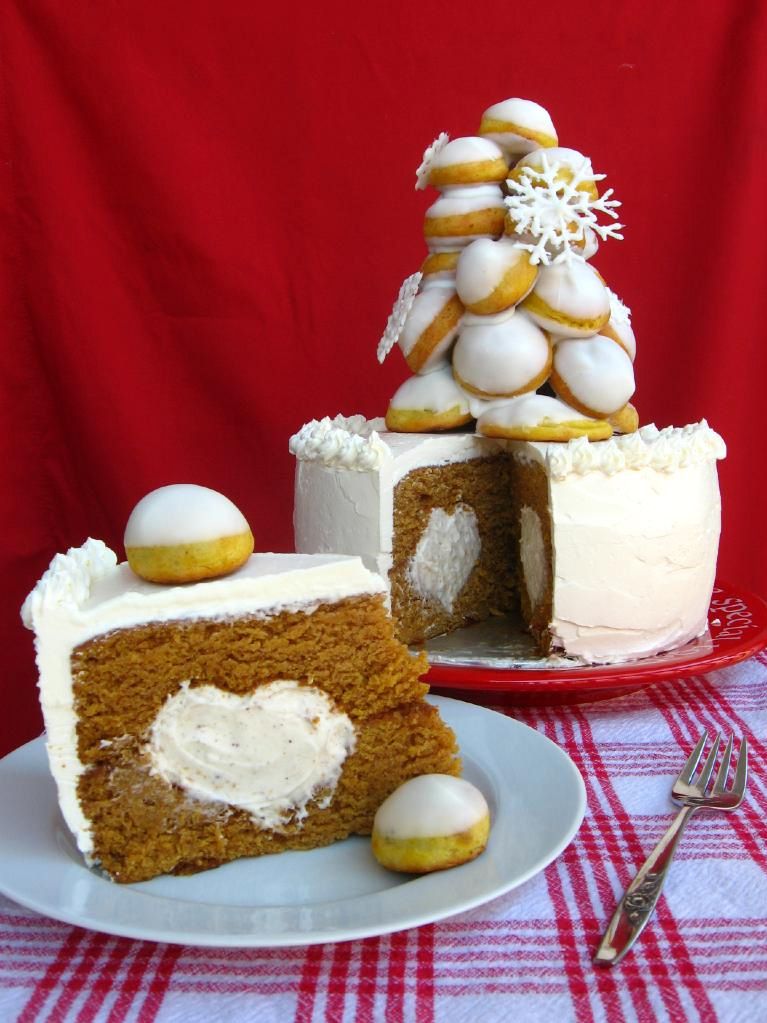
Thus, the croquemcake was born: a browned butter pumpkin cake filled with a comforting white chocolate chai mousse heart, frosted with velveteen Swiss buttercream frosting, and topped with a croquembouche of pumpkin profiteroles filled with chai mousse and ganache. The cake is served in slices accompanied by a few plucked cream puffs, and is essentially the embodiment of all things autumn.

At first I was panicky about trying to stack a tall, leany thing on top of a tall, frosted thing, but it turned out to be super easy, and it produced a ravishing effect.


The White Chocolate Chai Mousse is incredamazing, y’all. Even if you put off making the whole shebang until Christmas, you should make some bowls o’ mousse ASAP!

. . . oh, and it just might be my new favorite dessert ever. Every bite had an insanely satisfying combination of textures and flavors. This beautiful croquemcake would be the rockstar of any holiday table.

Don’t be scared of the length of the recipe. True to Willow Bird Baking’s mission, this dessert is also surprisingly easy to make. Let me qualify that: it takes three days and has tons of steps, but the steps themselves are simple and manageable. Use my note below on timing to space out the recipe steps into manageable chunks. It is so worth the effort.

What’s your favorite childhood memory?

Browned Butter Pumpkin CroquemCAKE with White Chocolate Chai Mousse


Recipe by: Willow Bird Baking, compiled and adapted from sources including Fine Cooking, Annie’s Eats, America’s Test Kitchen, Cookin’ Canuck, Martha Stewart, Gina DePalma, Alone and Unobserved
Yields: 15-20 servings, depending on your size o’ cake slices. You’ll have the topping croquembouche plus about 30 other cream puffs to serve alongside.

Pumpkin Puree Ingredients: (or use canned pumpkin puree)
about 7 pounds worth of sugar pumpkins (or pie pumpkins)
2-3 cups water

Browned Butter Pumpkin Cake Ingredients:
1 1/2 cups of your pumpkin puree
3/4 cup unsalted butter; more for the pans
2 cups unbleached all-purpose flour; more for the pans
1 1/2 teaspoon baking soda
1 1/2 teaspoon ground cinnamon
1 teaspoon ground ginger
3/4 teaspoon table salt
1/4 teaspoon ground cloves
1 1/2 cups granulated sugar
2/3 cup firmly packed light brown sugar
2 large eggs
1/3 cup buttermilk

White Chocolate Chai Mousse Ingredients: (I had a lot of leftover mousse; you could probably get by with 2/3 of this recipe)
2 1/4 teaspoons powdered gelatin
3 tablespoons water
18 ounces white chocolate chips (see note)
4 1/2 cups cold heavy cream
heaping 1/2 teaspoon ground cinnamon
heaping 1/2 teaspoon ground cardamom
1/4 teaspoon ground nutmeg
1/4 teaspoon ground ginger
1/4 teaspoon ground allspice
1/4 teaspoon ground pepper (white or black)
dash cayenne powder

Swiss Buttercream Frosting Ingredients:
1 cup sugar
4 large egg whites , at room temperature
24 tablespoons (3 sticks) unsalted butter, at room temperature
2 teaspoon vanilla extract

Profiterole (Cream Puff) Ingredients:
1 1/8 cups water
9 tablespoons unsalted butter
3/8 teaspoons salt
1.5 tablespoons sugar
1.5 cups all-purpose flour
6 large eggs
3/4 cup pumpkin puree
Egg wash (1 egg yolk and 1/2 cup heavy cream, lightly beaten)

Ganache Ingredients:
10 ounces bittersweet and semisweet chocolate chips
3/4 cup heavy whipping cream


Directions:
Note on timing: This dessert is easy to create, but involves many steps. For this reason, I divided the work over three days. On day 1, I roasted and pureed my pumpkins (you can nix this day if you use canned pumpkin). On day 2, I baked my cake and froze it, baked my profiteroles and froze them, and made my chai mousse. I also piped out white chocolate snowflake decorations to dry overnight. On day 3, I made my frosting, assembled and frosted my cake, made ganache, filled my profiteroles, and constructed my croquembouche.

To make pumpkin puree: Preheat oven to 350 degrees F. Cut the tops off of above 7 pounds worth of sugar pumpkins (also called pie pumpkins). Cut the pumpkins in half and scrape out the seeds and innards. Place the pumpkin halves peel-up, cut-side-down in a baking dish and fill the dish 1/4 inch deep with water (about 2-3 cups). Roast pumpkins for 60-90 minutes, or until flesh is fork tender. Allow them to cool for a bit before scooping all flesh out of the peel and placing it in a food processor. Puree for 2-3 minutes until completely pureed, then drain in a paper towel-lined colander for about an hour. Store your pumpkin puree in the fridge for up to 5 days or freeze it in 1-cup increments for later use. Alternatively, you can use canned pumpkin puree for this recipe.

To make browned butter pumpkin cake: I baked my cake in a pan that allows you to fill your cake with a heart-shaped tunnel of mousse (please comment if you’d like the details). If you don’t have one of these pans, you can still create the tunnel effect! You can use this technique by the fabulous Amanda, or this tunnel technique featured previously on my blog.

Preheat oven to 350 degrees F. Butter and flour two cake pans (either the heart-tunnel pan or regular 9-inch cake pans) very thoroughly. Melt the butter in a saucepan over medium heat and cook it, swirling occasionally, until it’s golden brown with a nutty aroma, around 4 minutes. Remove it from heat and pour it into a bowl to cool for about 15 minutes.
Whisk or sift together flour, baking soda, cinnamon, ginger, salt, and cloves in a small bowl. In a separate, large bowl, whisk together 1 1/2 cups of pumpkin puree, granulated sugar, brown sugar, eggs, and buttermilk until well combined. Use a spatula to stir in the dry ingredients until just combined, and then whisk in the browned butter. Pour batter evenly into prepared cake pans.

Bake the cakes until a toothpick inserted in the center comes out with just a few moist crumbs, around 28 minutes. Let cakes cool in their pans until mostly cool before turning them out onto wax paper to wrap and freeze. Freeze at least 30 minutes or until firm.

To make white chocolate chai mousse: Mix spices (cinnamon, cardamom, nutmeg, allspice, ginger, pepper, cayenne) together in a small bowl. Set aside.
Place 3 tablespoons of water in a small bowl and sprinkle the gelatin over top to dissolve and soften for at least 5 minutes. Place white chocolate in a medium bowl. Combine 1 1/2 cups of cream and spice mixture in a saucepan over medium heat and cook until simmering. Remove from heat, add gelatin, and stir to dissolve. Pour gelatin mixture over white chocolate and whisk in small circles until smooth. Cool completely to room temperature, stirring occasionally, around 5 to 8 minutes.

In a separate bowl, beat remaining cream to soft peaks. Use a whisk to fold about 1/3 of the whipped cream into white chocolate mixture to lighten. Then fold the rest of the whipped cream in until no streaks remain. Refrigerate your mousse until set, then stir slightly to break up before using.

To make profiteroles: Combine water, butter, salt and sugar in a saucepan over medium heat. Bring to a boil and stir occasionally. At boil, remove from heat and sift in the flour, stirring to combine completely.

Return to heat and cook, stirring constantly until the batter dries slightly and begins to pull away from the sides of the pan. Transfer to a bowl and stir with a wooden spoon 1 minute to cool slightly.

Add 1 egg. The batter will appear loose and shiny. As you stir, the batter will become dry-looking like lightly buttered mashed potatoes. It is at this point that you will add in the next egg. Repeat until you have incorporated all the eggs. Stir in pumpkin puree.

Pipe the batter using a pastry bag and a plain tip. Pipe choux about 1 inch-part in the baking sheets. Choux should be about 1 inch high about 1 inch wide. Using a clean finger dipped in hot water, gently press down on any tips that have formed on the top of choux when piping. You want them to retain their ball shape, but be smoothly curved on top. Brush tops with egg wash while trying not to drip the wash down the puffs onto the pan (which could somewhat inhibit rise).

Bake the choux at 425 degrees F until well-puffed and turning lightly golden in color, about 10 minutes. Lower the temperature to 350 degrees F and continue baking until well-colored and dry, about 20 minutes more. Remove to a rack and cool (tip from a pro: poke each puff with a toothpick while cooling to release the steam inside. It shouldn’t cause your cream to leak, but will help the puffs stay crisp). Can be stored in a airtight box overnight, but I recommend, if you aren’t using them right away to create your croquembouche, that you freeze them. When you’re ready to use them, bake them at 350 degrees F for 5-6 minutes to refresh and recrisp them.

To make ganache: Bring the cream to a simmer in a medium saucepan (or just stick it in the microwave for 2 minutes in a microwave-safe bowl). Place the chocolate in a medium bowl. Once the cream reaches a simmer, pour the cream over the chocolate and let stand 1-2 minutes. Whisk in small circles until a smooth ganache has formed. Let ganache stand at room temperature until fully cooled, then whip to frosting-like consistency for piping into cooled profiteroles.

To make Swiss buttercream frosting: Combine sugar and 1/2 cup water in a small saucepan and bring to a boil over medium-high heat, stirring to dissolve sugar. Boil without stirring until syrup reaches 240° on a digital thermometer, about 5 minutes.

Meanwhile, in a stand mixer with whisk attachment, beat egg whites on medium-high speed until soft peaks form. With mixer on medium speed, gradually pour in hot syrup in a thin stream; avoid pouring syrup on whisk. Increase speed to medium-high and beat until stiff peaks form and mixture is cool, about 8 minutes. Reduce speed to medium and add butter 1 tablespoon at a time, beating after each addition. (If at any time buttercream appears curdled, beat on high until smooth, then reduce speed to medium and continue beating in butter.) Once all butter is added, beat on high speed until buttercream is smooth and fluffy, about 1 minute. Beat in vanilla extract.

To assemble your cake: Line up cake layers and trim sides as needed with a long serrated knife. No need to thaw before you do this — it’s actually easier with frozen layers. Spoon white chocolate chai mousse into heart-shaped wells in your cake layers (if applicable — or spoon it into whatever shaped cavity you’re using). Carefully position the top layer on the bottom. Apply a thin coating of frosting all over as a “crumb coat” and refrigerate the cake for a half hour or so. Then frost the cake generously with the remaining frosting.

To assemble your croquembouche: Fill cooled profiteroles with leftover chai mousse and ganache as desired. Melt white chocolate bark and dip tops of each profiterole into the chocolate, lining up on wax paper to dry. Cover a plate with wax paper — this is where you’ll build your croquembouche. Start with bigger, broader profiteroles and use the white chocolate as “glue” to piece together a sturdy base. I refrigerate my croquembouche after the construction of each new layer, to harden the chocolate and avoid any toppling incidents! Continue building a cone, fitting the profiteroles together according to their shape. Use white chocolate to pipe snowflakes on wax paper, and to “glue” them onto your croquembouche once they’re dry. Refrigerate your croquembouche until you’re ready to assemble your final product.

To assemble your final croquemCAKE: Carefully ensure that your croquembouche isn’t sticking to your wax paper. Gently lift it onto the center of your cake. Surround your cake with leftover cream puffs for serving. Enjoy!


Roasting pumpkins! While there’s not a huge taste difference from using this process versus the canned stuff, it’s a fun, satisfying thing to try!

If you liked this post, please:
Subscribe to Willow Bird Baking
Follow Willow Bird Baking on Twitter
Follow Willow Bird Baking on Facebook
Give this post a thumbs up on StumbleUpon


ShareOther ways to share this post with friends!

1 13 14 15 16 17 22