candy

Wacky Candy Cupcakes: Ferrero Rocher and Reese’s Cup

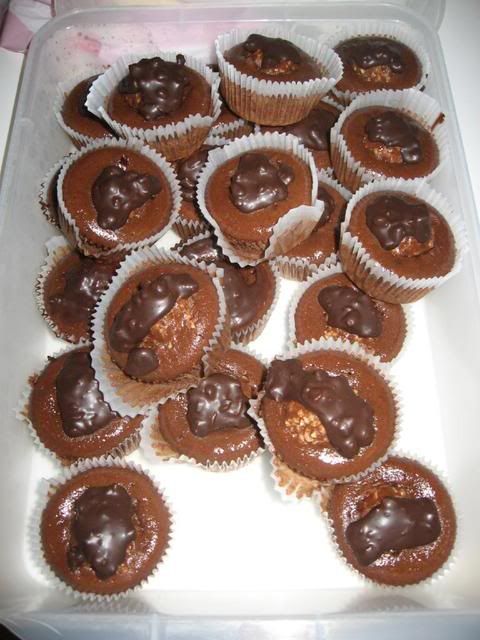
When my sister called and asked me to make a dessert for her office party, I jumped at the chance to recreate an old favorite. Way back toward the beginning of Willow Bird Baking, I made some fun Ferrero Rocher Cupcakes in which I stuck a whole frozen candy into each cupcake prior to baking. I enjoyed those (despite the candy losing a bit of crunch), but always wanted to find the time to tweak the concept a bit.

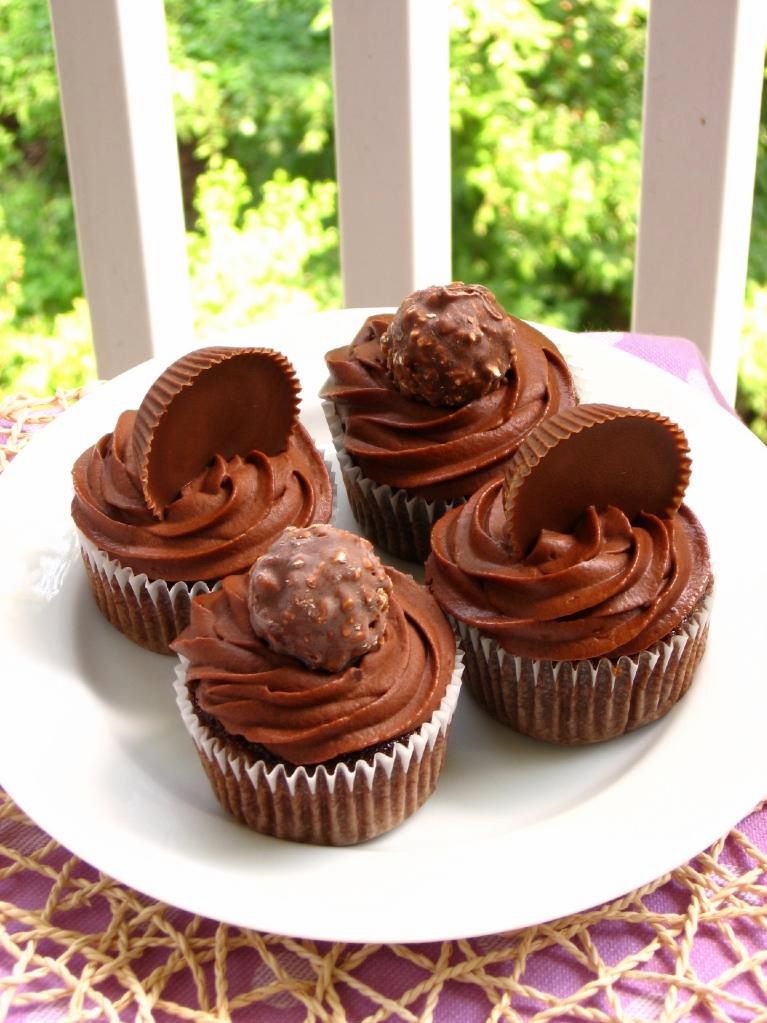
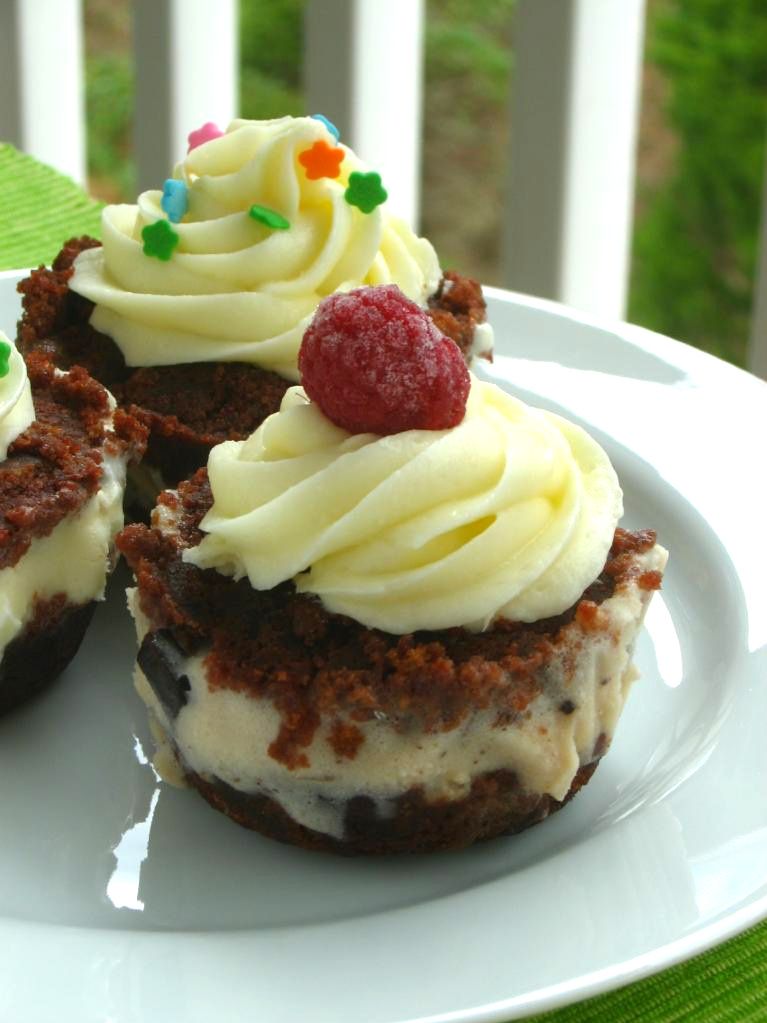
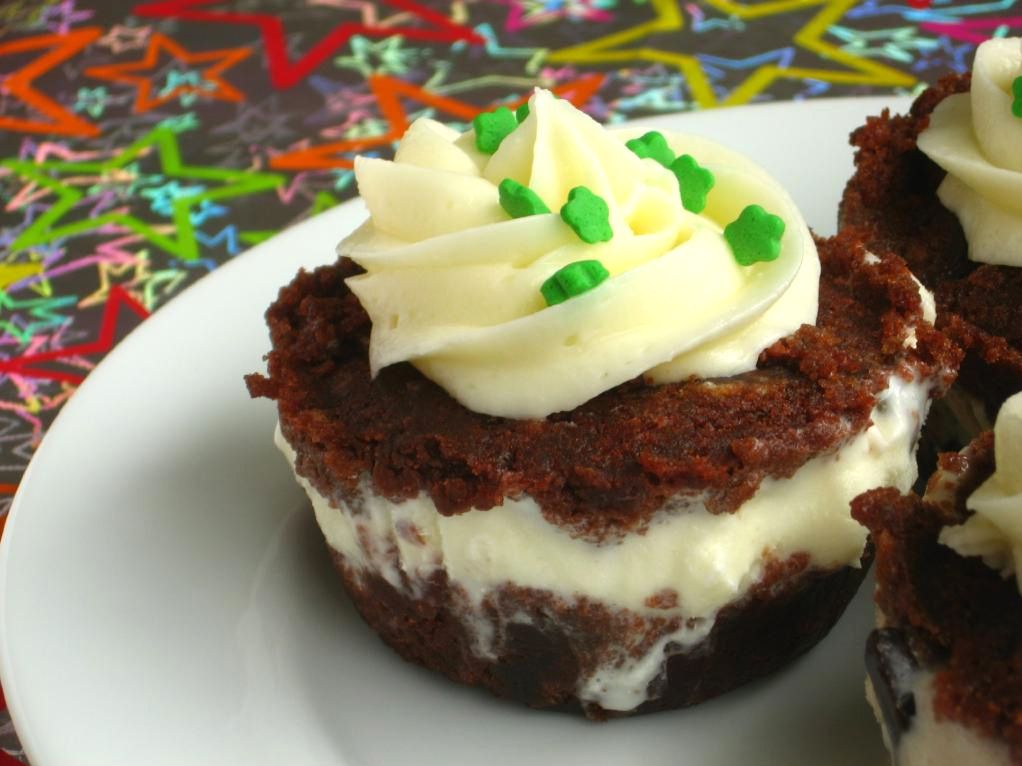
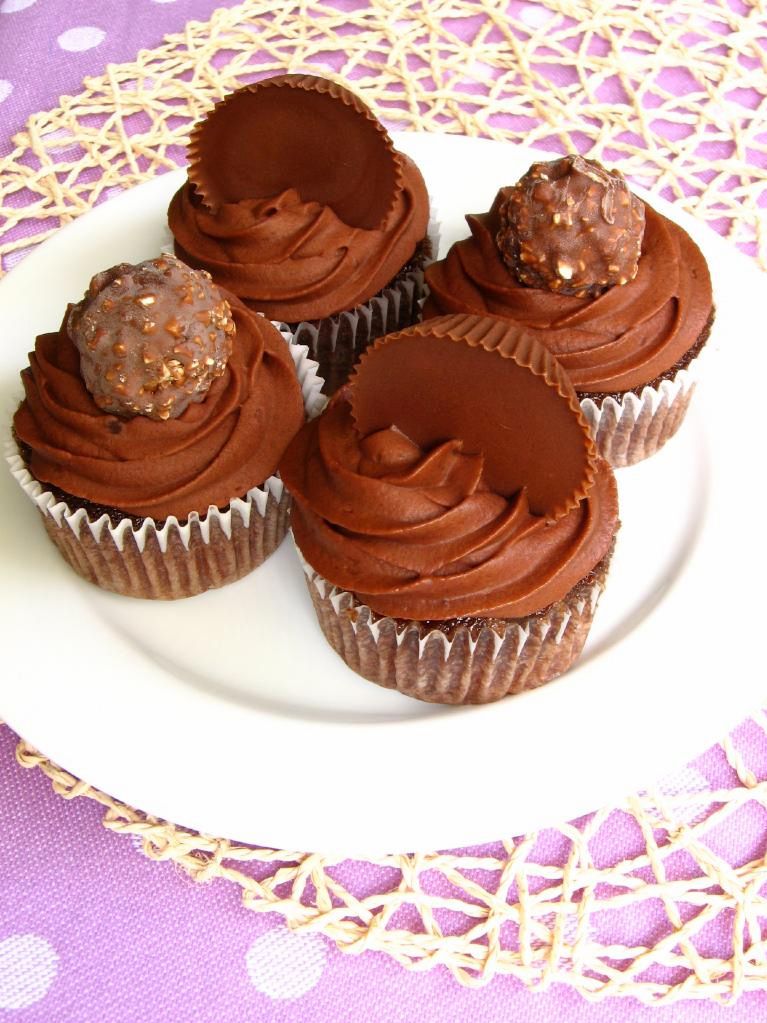
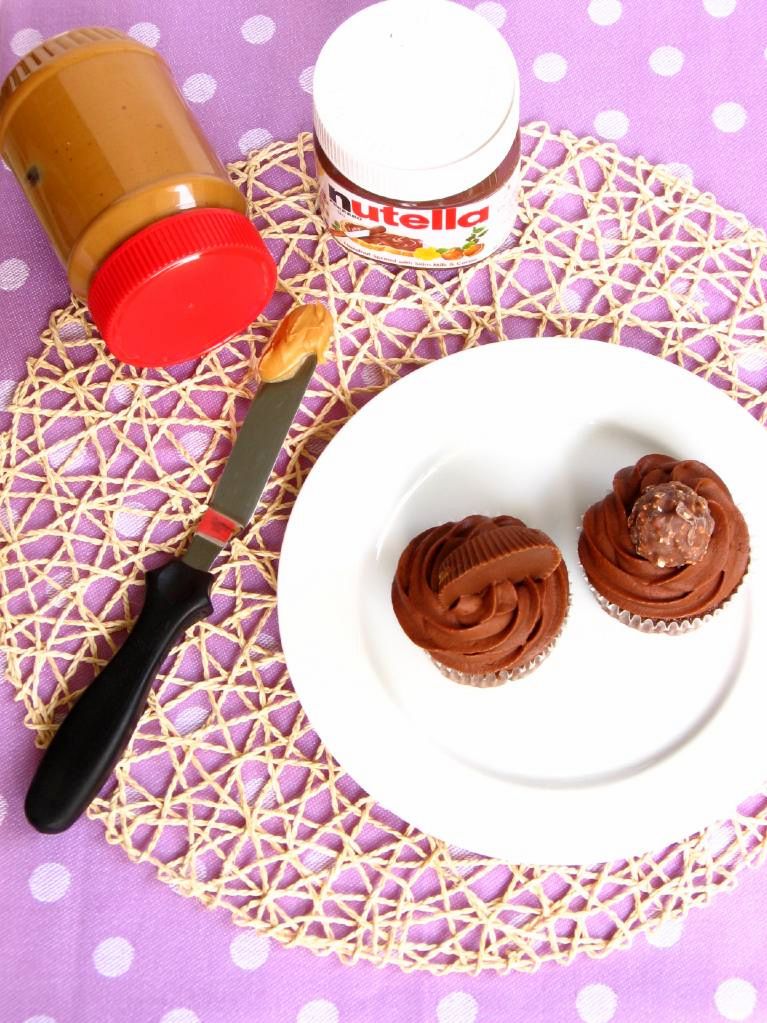
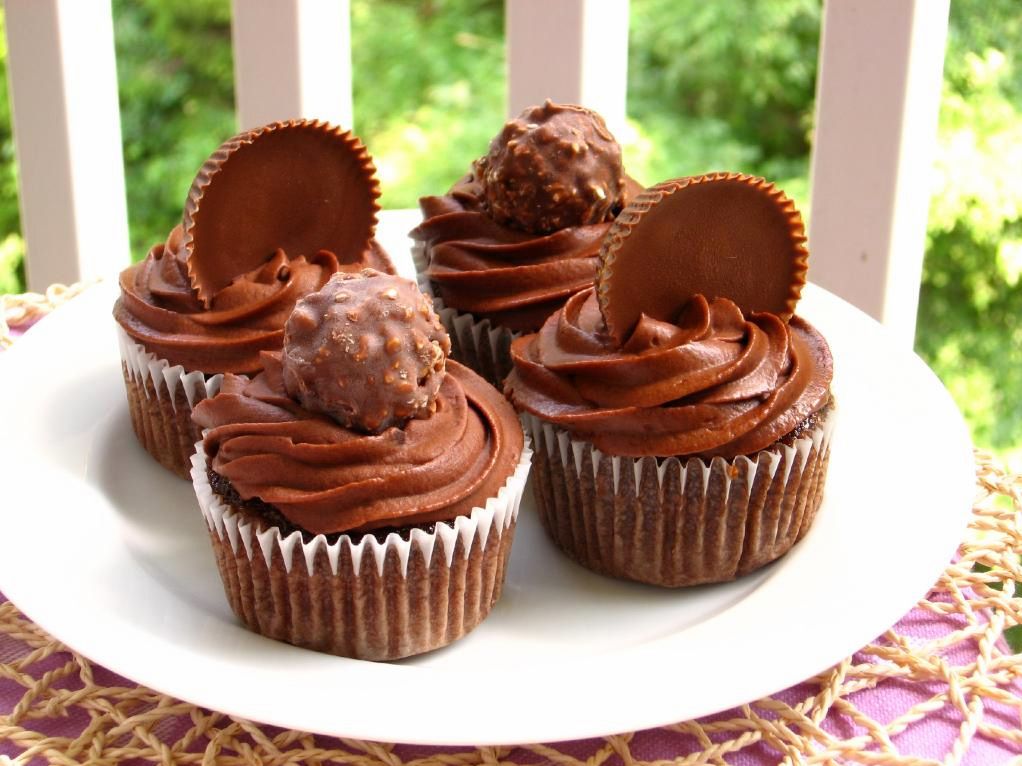
This was my chance! I wanted to take a moist chocolate cupcake, fill it with a giant dollop of the hazelnut-chocolate spread Nutella, ice it with rich chocolate frosting, and crown the whole thing with a Ferrero Rocher. The entire cupcake was designed to imitate the flavors in the candies themselves.

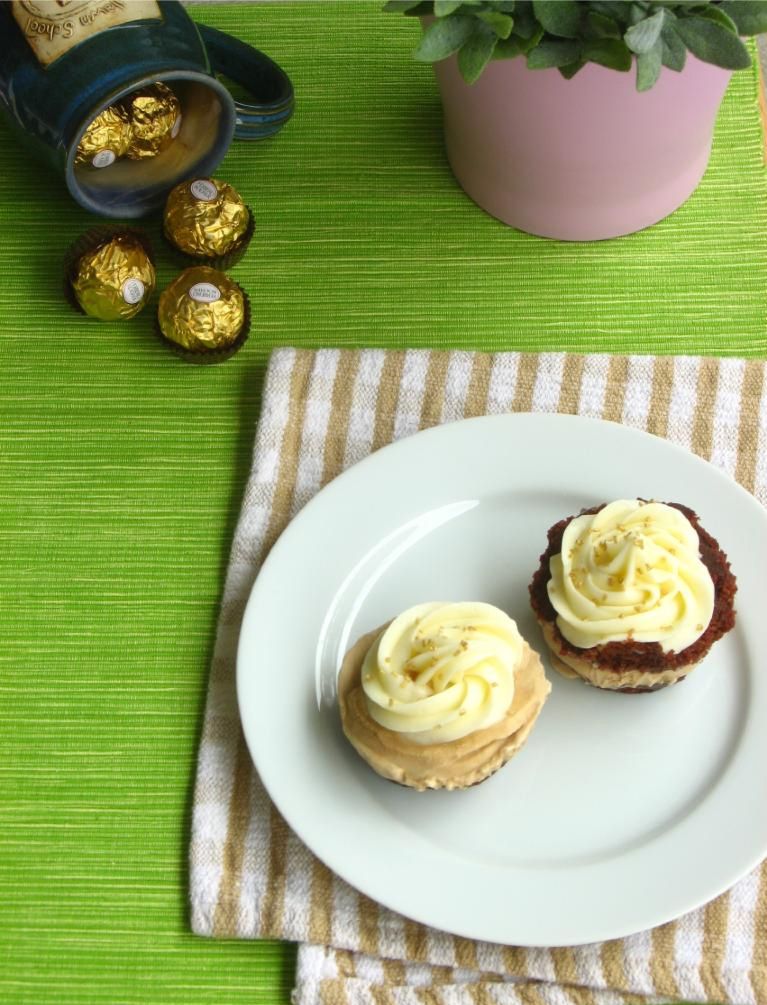
And why stop there? How easy would it be to fill some of the cupcakes with peanut butter instead, topping them with a huge Reese’s Cup? Hurray for candy cupcakes!

I could have gotten even more carried away (cupcakes filled with coconut pastry cream and topped with Mounds? Cupcakes filled with caramel and topped with Snickers?), but I reeled it in. That doesn’t mean we have to turn our imaginations off, though. What Candy Cupcake would you make?

Now, I am Wacky McWackerson. I’m as silly as they come. But that’s not why these cupcakes are called Wacky Candy Cupcakes instead of just regular ol’ Candy Cupcakes. Raise your hand if you’ve heard of Wacky Cake! Anyone?

Wacky Cake is NOT what you call the 2nd batch of cupcakes you make after ruining the previous batch and just barely convincing yourself not to throw your muffin pan across the apartment, spewing chocolate lava on your roommate’s couch (hey Barb!), but good guess. I did make these Wacky Cakes after a first batch of chocolate cupcakes flopped, but that’s not why they’re wacky.

Wacky Cake is actually just a vegan chocolate cake — no eggs, no milk — and is probably called “Wacky” ’cause vegans are just a little nutty sometimes . . . just kidding, just kidding! I love you, vegans! The truth is, no one really knows why it’s called wacky. Some say it’s because it’s a little wacky to make a cake with no eggs, which is just as good a reason as any, I guess. Regardless, Wacky Cake happens to be the perfect recipe to resort to after a flop that uses most of your eggs. Just call me MacGyver.

Turns out, Wacky Cake is also yummy and rich — the perfect cupcake base for my creation. I went and added un-vegan ingredients to complete the recipe, but if you’re a vegan looking for a great chocolate cupcake, the base recipe here is perfect for you. It’s also just plain easy to make.

The frosting, on the other hand, was a bit of a hassle. It doesn’t whip up very firm, so I had to refrigerate it for a bit and re-whip before frosting the cupcakes and sticking them in the fridge in a hurry. After sitting in the fridge overnight, though, the frosting is firm — and very chocolatey and delicious. I’d use it again for the taste, but I’d make sure to have refrigerator space cleared out ahead of time to chill the cakes immediately.

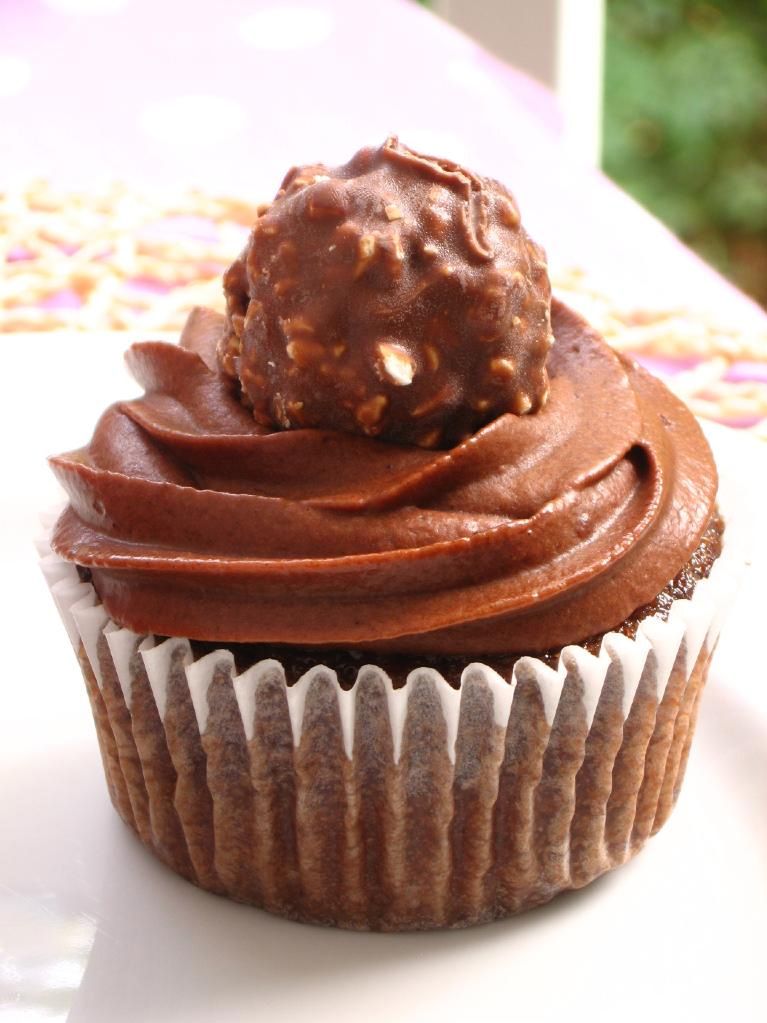
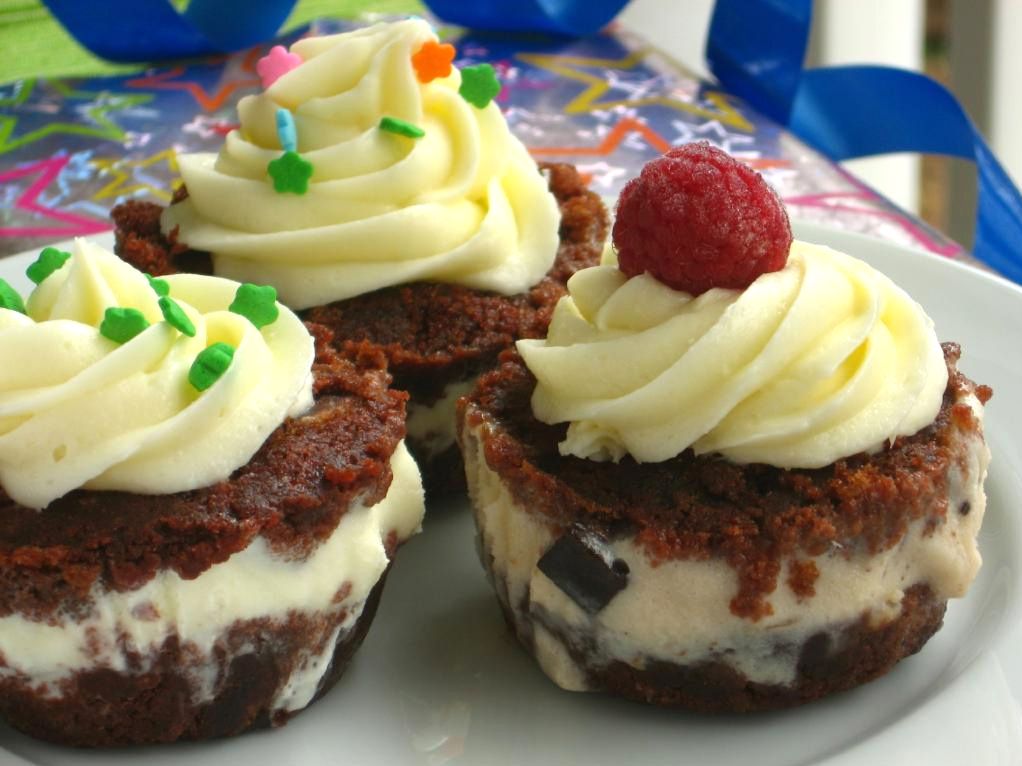
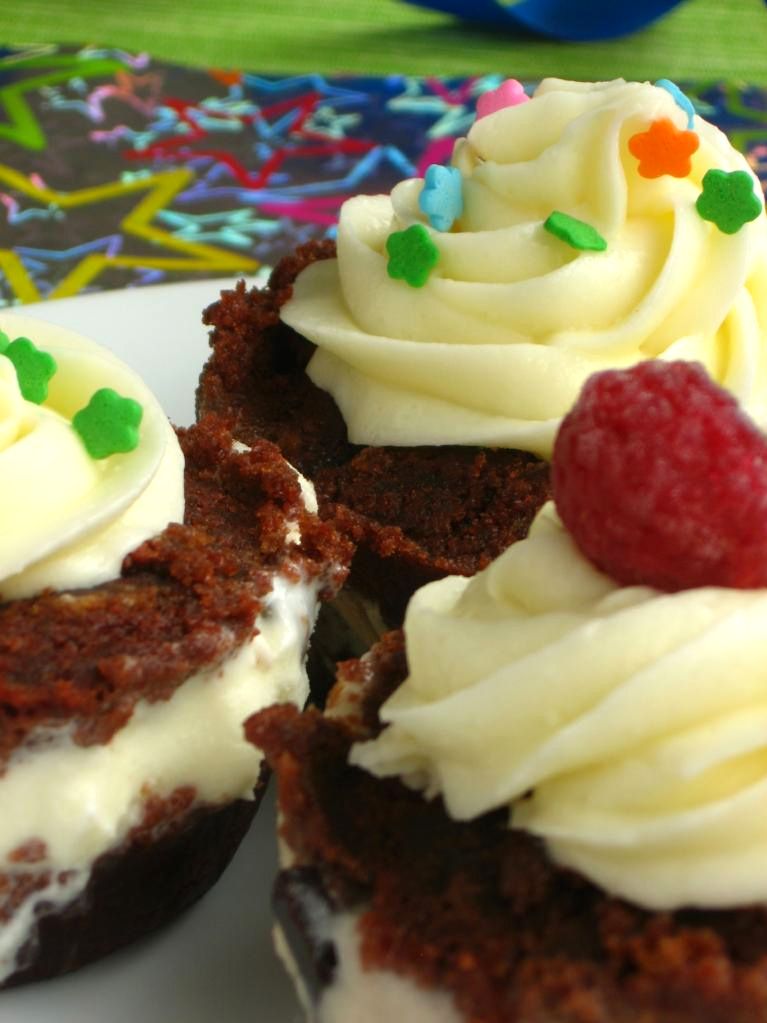
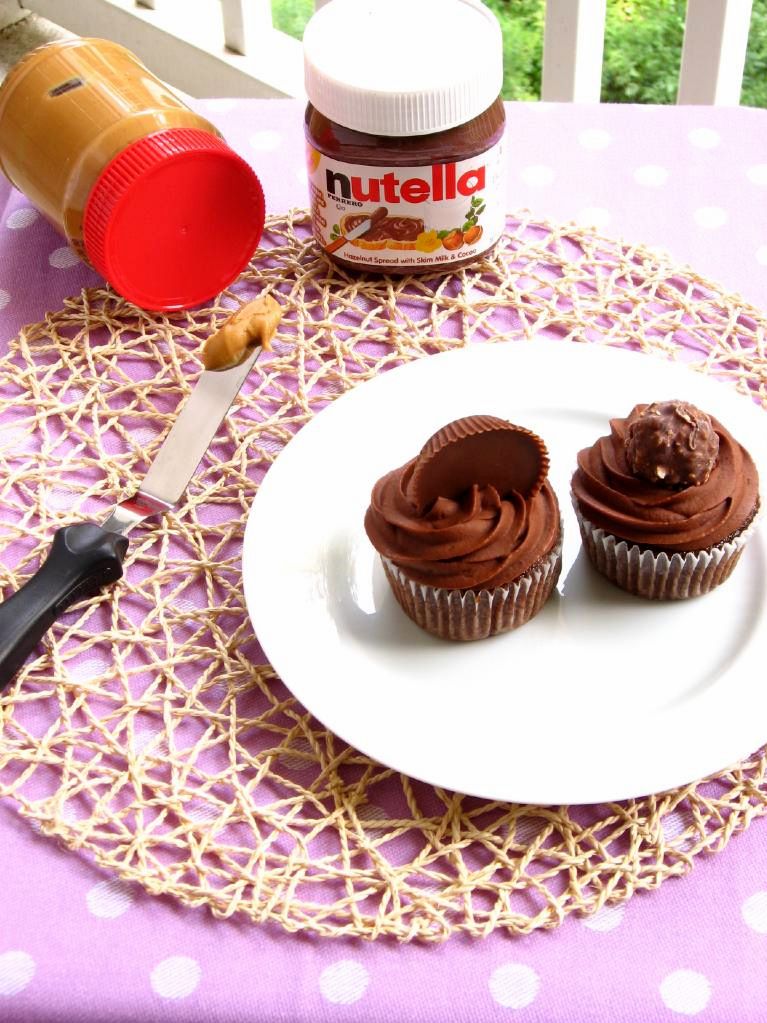
Speaking of refrigerating these cupcakes, the Nutella jar expressly says not to refrigerate Nutella. Don’t worry — it’s not because the product turns toxic or anything, but actually because it firms up into almost a nougat texture, which for our purposes, is awesome. The center of the Ferrero Rocher Cupcakes was a hunk of hazelnut-chocolate love.

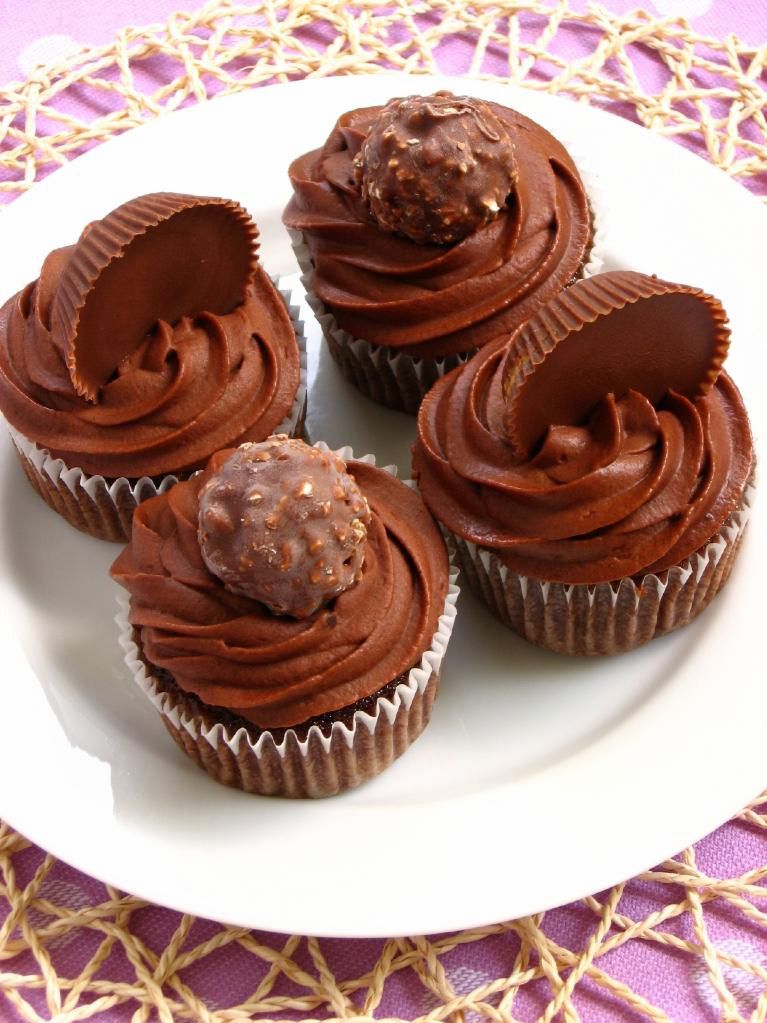
Overall, these cupcakes were tremendous! I greedily devoured the few I kept to sample, and Sarah says her coworkers were enthusiastic about them as well! Both varieties are the perfect imitations of their respective candies, incredibly indulgent, and simple to make. If you’re used to making a plain cupcake-n-frosting combo, why not get a little feisty, add a sweet filling and a candy topping, and pump up your cupcakes? It’s a quick and easy way to turn a dull dessert into something special.

Now it’s your turn: Think up a cupcake-version of your own favorite candy. Tell me about how you’d make it in the comments section — and bonus points for ACTUALLY DOING IT! Send me photos of your candy cupcake creations to post on Willow Bird Baking!

Ferrero Rocher and Reese’s Cup Cupcakes


Recipe by: Adapted Wacky Cake recipe from Being Wife and frosting from Hershey’s
Yields: about 30 cupcakes

Wacky Cake Ingredients:
3 cups flour
2 cups sugar
6 tablespoons cocoa
1/2 teaspoons salt
2 teaspoons baking soda
2 teaspoons vanilla extract
2 tablespoons vinegar
12 tablespoons of mazola or vegetable oil
2 cups water

“Perfectly Chocolate” Chocolate Frosting Ingredients:
1 cup (2 stick) butter
1 1/3 cup cocoa powder
6 cups powdered sugar
2/3 cup milk
2 teaspoon vanilla extract

Candy supplies needed:
Creamy peanut butter (I don’t use the natural sort for this because I kind of want a processed, sweet flavor)
Nutella
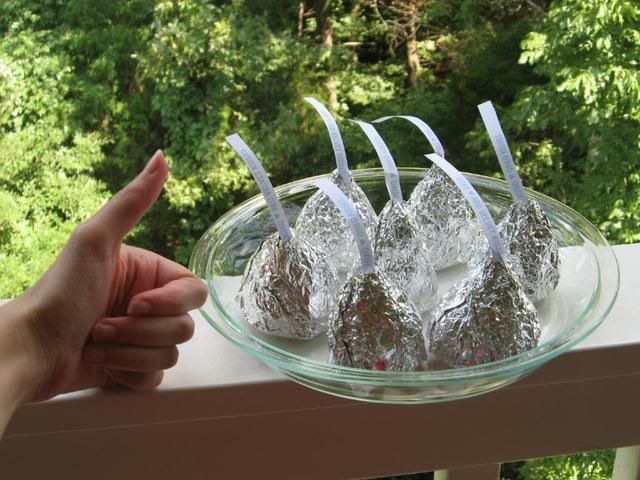
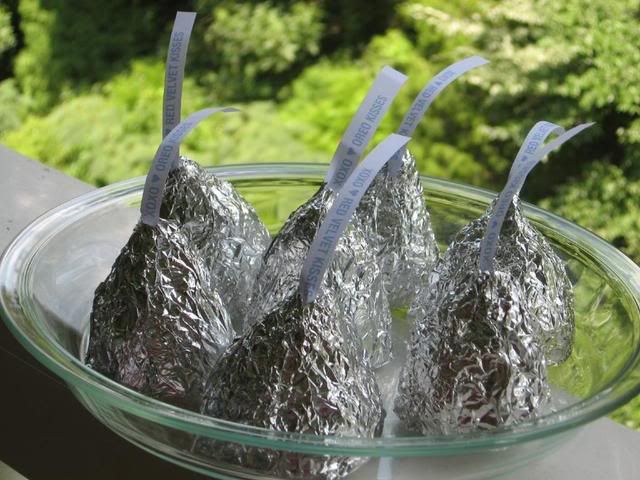
15 Ferrero Rocher candies
15 Reese’s Peanut Butter Cups (I use the big sort!)

Directions:
NOTE: You may want to make these cupcakes the night before you intend to serve them, since the frosting needs time to set in the refrigerator.

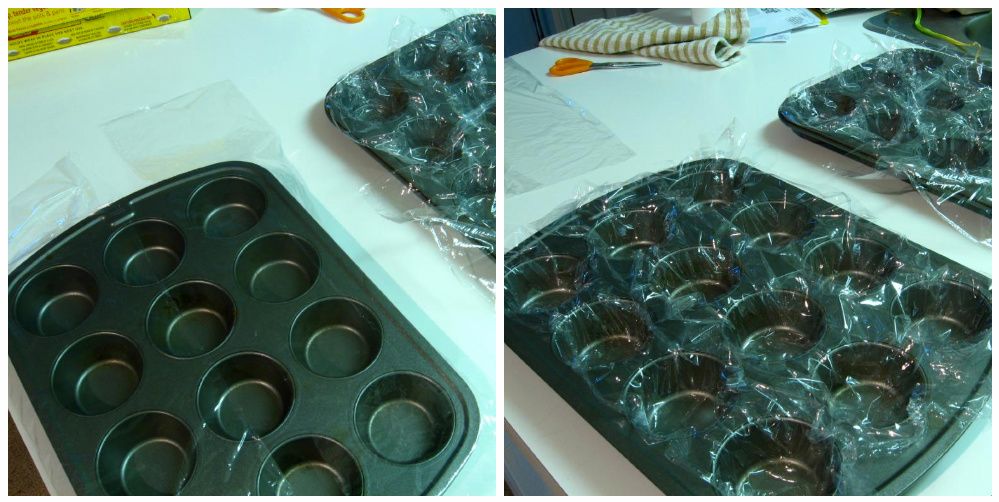
Preheat oven to 350 degrees. Line 30 cupcake wells with cupcake liners. In a large bowl, whisk together flour, sugar, cocoa, salt, and baking soda.

Add vanilla, vinegar and oil, stirring until smooth. It’s normal for the mixture to seem thick and pasty right now. Add the water and mix (carefully to avoid splattering) until there are no lumps in the batter.

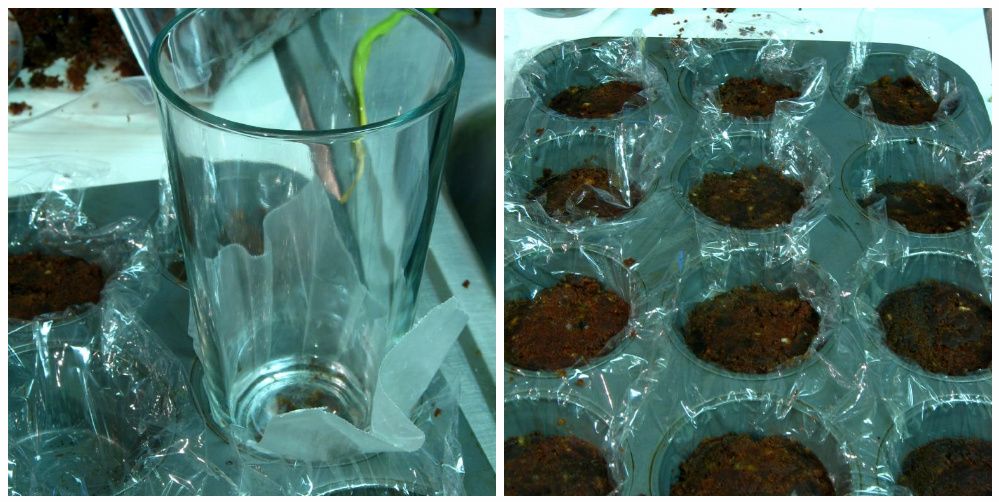
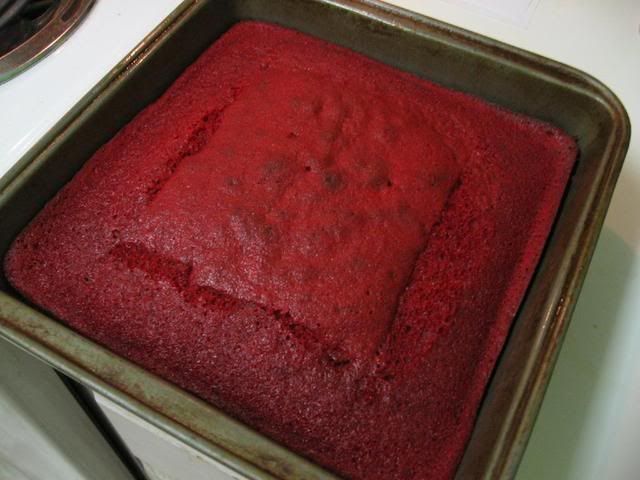
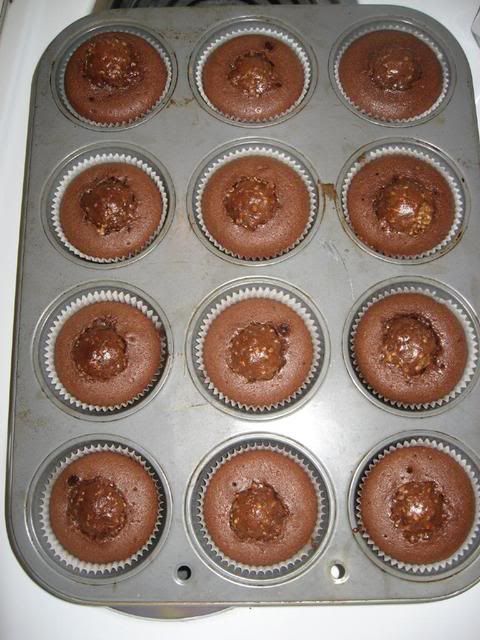
Pour mixture into prepared cupcake pans. Bake 12-15 minutes, or until toothpick comes out clean. Allow to cool completely.

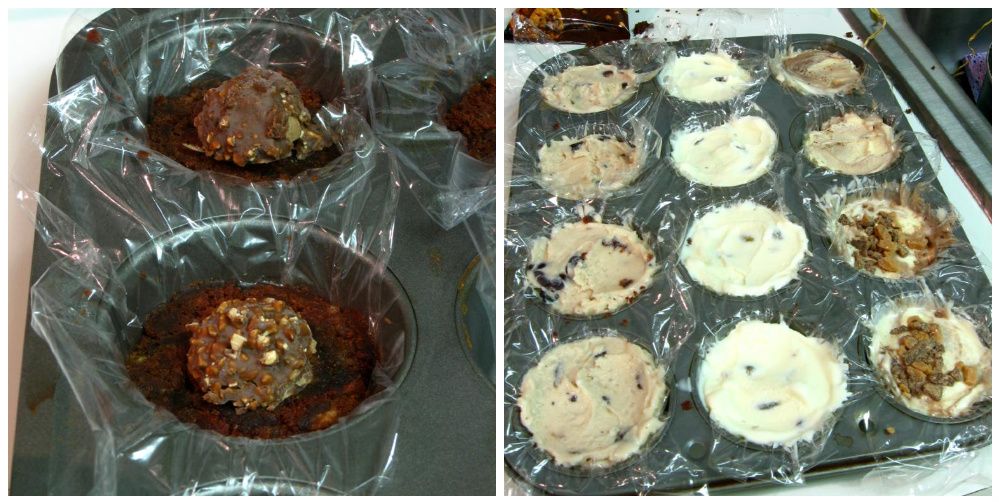
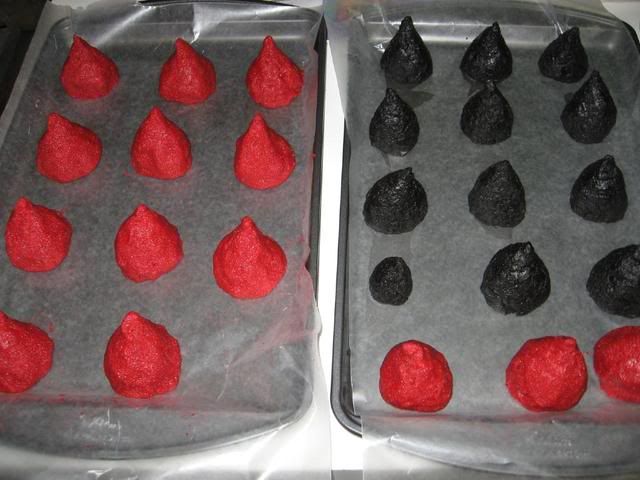
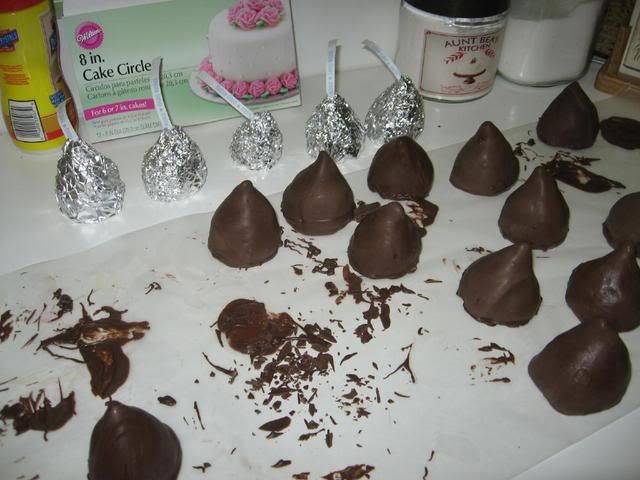
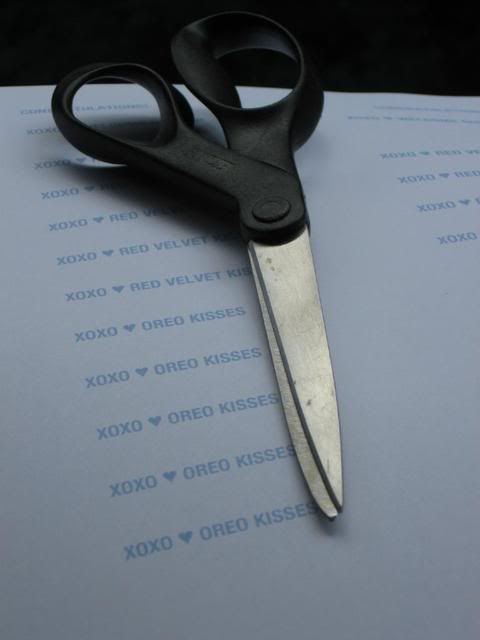
Carefully hollow out each cupcake using a table knife, and reserving the scraps for another use (maybe cake balls?). Using a piping bag or a ziplock with the corner cut off, fill half the cupcakes with peanut butter and the other half with nutella.

Make frosting: Melt the butter and stir in the cocoa. Alternate adding powdered sugar and milk, and beat to spreading consistency. Stir in vanilla. I refrigerated my frosting after beating to give it a thicker consistency, since it wasn’t as firm as I’d like. Unwrap all your candies while it refrigerates, because you’ll have to work quickly.

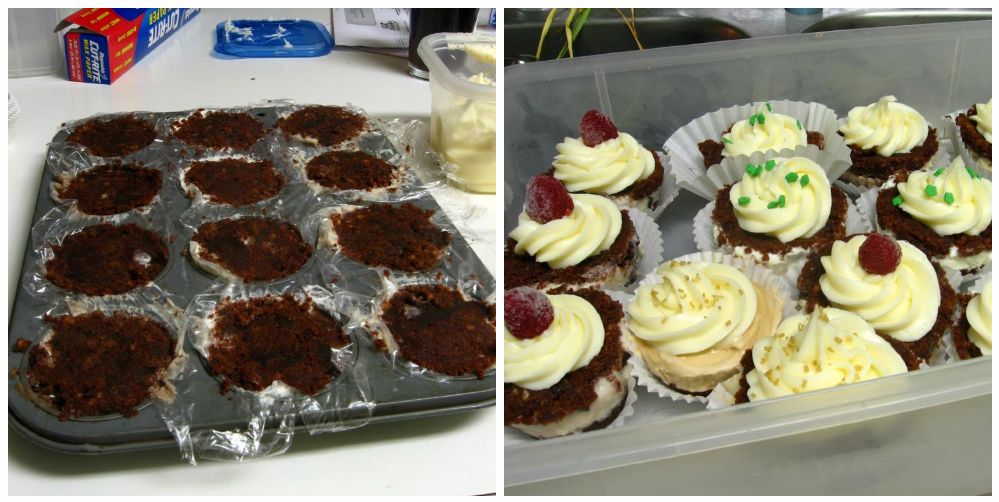
Have a platter ready in the fridge to receive finished cupcakes (the frosting is not very secure until it’s been refrigerated for at least a few hours). Pipe a big rosette onto each cupcake, covering your filling, and plop the appropriate candy onto the middle. Place finished cupcakes directly in the fridge to sit for a few hours, and take out immediately before serving.

Other fun candy cupcakes around the internet: 100 Grand Cupcakes, Snickers Cupcakes, another version of Ferrero Rocher Cupcakes.

If you liked this post, please:
Subscribe to Willow Bird Baking
Follow Willow Bird Baking on Twitter
Follow Willow Bird Baking on Facebook
Give this post a thumbs up on StumbleUpon


ShareOther ways to share this post with friends!

Assorted Truffles in a Chocolate Bowl

What sort of recipe starts off with a grocery list that includes plastic gloves, balloons, and turtle food? Okay, the turtle food is actually just something I picked up for my precious chelonian friend, so I guess we can ignore that. But I promise plastic gloves and balloons are both important tools when making this adorably fancy dessert.

I had leftover ganache from this indulgent dessert / monstrosity and considered tossing it. I’m so glad I didn’t! I stumbled across a discussion of using leftover ganache to make truffles and suddenly had a plan: I’d make a batch of simple truffles myself! As usual, my plan grew . . . and grew. Before long, my elaborate menu included four varieties of truffle, and, oh yes, wouldn’t it be sweet to serve them in a bowl made of chocolate? Marbled chocolate, even? Oh, yes.

Call me harebrained. I don’t mind; I like bunnies (well, except that louse of a pet rabbit my little brother owns . . . his name is Pilfer, and he frequently reminds me what a pity it is that I haven’t yet tried rabbit stew. But I digress.)

My ideas do get a little “hare-y,” but this time it worked out into a sweet little plan — and one that would be perfect for a simple but sophisticated Mothers’ Day gift!

My four truffle varieties all begin with the same base: a ball of rich, thick ganache. Mine had been stored in the fridge since I made it and was lovely to work with. After rolling the ganache into a ball, it got one of four treatments:

  1. Plain truffles: ganache coated in melted chocolate and rolled in cocoa.
  2. Oreo coated truffles: ganache coated in melted chocolate and rolled in pulverized oreos.
  3. Hazelnut truffles: ganache with a toasted hazelnut in the center, coated in nutella and rolled in chopped hazelnuts and melted chocolate.
  4. Tuxedo truffles: ganache coated in melted chocolate and then dipped in vanilla and chocolate candy coating.

Deb of Smitten Kitchen explained a truffle-making technique that I employed. In fact, the instructions below are really more of a method than a recipe. One of the most important things to note is that you should do some mise-en-place before starting! It’s no fun retrieving something you forgot with sticky, chocolatey hands.

My setup was relatively simple: bowl of ganache, bowl of melted chocolate, bowls of my multiple coatings (chopped nuts, cocoa, crushed oreos, vanilla candy coating), a sieve for shaking off excess coating, and finally, a big strip of waxed paper for drying. The truffle-making process is where those rubber gloves come in, by the way! To coat each ball of ganache in melted chocolate, you smear the chocolate on your glove and roll the chilled ganache therein.

And what about the balloons? Ah, yes. Those were for the chocolate bowls which looked so easy when I read about them, and turned out to involve a lot of trial and error! Out of 5 or 6 tries, I managed to obtain 3 reasonable-looking bowls. Not too shabby. Lessons I learned include blowing your balloon up small, using candy coating instead of regular melted chocolate that takes longer to dry, and double coating where possible. And just expect to shatter a few bowls — it seems almost inevitable. Take heart that with each bowl that collapsed, I had a better idea of what to do differently on my next try.

Chocolate Bowls


Recipe by: Technique found here
Yields: Depends on how much chocolate you melt!

Ingredients/equipment:
one package chocolate and/or vanilla candy coating (I use CandiQuik)
toothpicks if you plan on trying to marble your bowl
balloons

Directions:
Melt candy coating according to package directions and then pour into shallow container to let it cool slightly and get slightly less viscous. You want it to be a consistency where you can sort of “paint” it onto the balloon with a spoon and it won’t immediately pour right off — though it will slowly drain. When it’s cooled for a minute, carefully paint it onto the bottom of your balloon with a spoon, placing each balloon on wax paper to dry*. After they’ve dried for a few minutes, the candy coating should be starting to harden. If your first coating seems thin, paint another coat on and let it dry as well.

After letting the candy coating cool thoroughly, snip the top of the balloon with a pair of scissors, letting the air out slowly. The balloon will pull away from the bowl. When it stops, very gently continue pulling it away until your chocolate bowl stands alone!

*Note: If you’d like to try marbling your bowls, pipe thin lines of chocolate in a contrasting color on the still-wet chocolate after coating the bottom of the balloon. Use toothpicks to very carefully drag through the piped lines, creating a marbling effect. Let balloon dry.

Speaking of how fragile these bowls are (or at least, how fragile mine were), the above photo shows what happened in the midst of my photoshoot. It was almost dessert disaster, but when life hands you shards of chocolate bowls (life is strange), why not make an ice cream sundae? Yep, even broken bowls make for pretty desserts.

If you’re not that into edible bowls (weirdo), the truffles would also look adorable in a cellophane bag with a ribbon, or any sweet little container you have lying around — maybe even a heart-shaped box? If you love the bowls but aren’t that into truffles (weirdo), you could use these chocolate bowls for serving ice cream or even individual French silk pies (I want to give Dr. GG a hug for that brilliant idea)! Or follow in my bunny-brained footsteps and make both bowls and truffles for a fancy schmancy dessert.

Assorted Truffles


Recipe by: Bon Appétit (ganache) and Robert Linxe (method)
Yields: Perhaps around 30-40 truffles?*

Ganache Ingredients:
3/4 cups whipping cream
10 ounces bittersweet or semisweet chocolate, chopped (I use a combination)

Optional ingredients for Hazelnut Truffles:
whole hazelnuts
melted semisweet chocolate
Nutella

Optional Indredients for Oreo Coated Truffles:
7 pulverized oreo cookies
melted semisweet chocolate

Optional Ingredients for Plain Truffles:
cocoa powder
melted semisweet chocolate

Optional Ingredients for Tuxedo Truffles:
vanilla candy coating (I use CandiQuik)
chocolate candy coating (I use CandiQuik)
melted semisweet chocolate

Directions:
First, set up your work area to minimize the amount of chocolate you have on random kitchen surfaces when you finish. Then, for all truffle types, make ganache. Bring whipping cream to simmer in large saucepan. Remove from heat; add chocolate. Whisk until chocolate is melted and ganache is smooth. Let sit at room temperature for about 30 minutes before transferring it to the refrigerator.

Plain truffles: Roll chilled ganache into a ball of desired size. Don cute plastic gloves. Smear melted (and slightly cooled) chocolate on one glove and gently roll the ganache ball in the smear until coated. Toss into a bowl of cocoa powder and toss to coat with a fork. Transfer the truffle to a sieve and shake off excess cocoa powder. Store truffles in sealed container in the refrigerator.

Oreo truffles: Repeat plain truffle procedure, but instead of coating in cocoa powder, coat in oreo crumbs. Store truffles in sealed container in the refrigerator.

Tuxedo Truffles: Repeat plain truffle procedure, but instead of coating in cocoa powder, place chocolate-coated ganache ball on a plate and freeze for at least 10 minutes. When hard, use a toothpick to dip each ball into melted vanilla candy coating, wiggling the ball off onto wax paper to dry. You may have to double-dip if the white doesn’t fully cover. When dry, dip the sides of each white truffle into chocolate candy coating to form “lapels.” Use a toothpick to dab on chocolate candy coating “buttons,” forming a tuxedo design. Store truffles in sealed container in the refrigerator.

Hazelnut Truffles: Toast hazelnuts on a cookie sheet at 350 degrees F for about 5-7 minutes, checking and shaking the pan periodically. Save some of the hazelnuts whole to form the center of truffles. Chop the rest of the toasted hazelnuts up very finely and let cool. Place cooled, chopped hazelnuts in a bowl. Prepare another bowl of melted chocolate.

Roll chilled ganache into ball of desired size and poke a whole, toasted hazelnut into its center. Don cute plastic gloves. Smear nutella on one glove and gently roll ganache ball in the nutella until coated. Drop coated ball into bowl of chopped hazelnuts and toss with a fork to coat. Drop coated ball into the melted chocolate to coat. Finally, coat the ball in chopped hazelnuts one last time. Set on wax paper to dry. Store truffles in sealed container in the refrigerator.

*Note: Since I made this with leftover ganache, I used a different amount, and can’t say exactly how many this recipe will make; however 30-40 is my best estimate.


The messy process. By the way, do as I say and not as I do: those balloons are blown up too big!


Enjoy!


Share Share this post with friends!

Ice Cream Cupcakes

My sister Sarah is a Tetris addict. Something about spinning those awkwardly shaped blocks around and packing them together must release happy chemicals in her brain. It’s serious: she played Tetris in her wedding gown right before walking down the aisle, and she thinks this guy is totally hot.

I really can’t talk. I play real-life Tetris. All my errands have to be planned to ensure maximum efficiency: no driving out of my way or backtracking. My groceries are arranged on the checkout belt so that they fit together nicely. Periodically I’ll rearrange my fridge so that all the food is organized by shape (flat items on bottom, tall items shoved together in the back, and materials to make a quick dinner wrap all stacked together neatly for easy grabbing). But the fridge is nothing compared to the freezer.


Pistachio Ice Cream Cupcakes

My roommate and I are world champions at Freezer Tetris. We both overshop, and every now and then one of us will come home with a month’s worth of foodstuffs to shove into our already-full freezer (cue the excuses: “It was on sale! It’s cheaper when you buy in bulk!”). Let the games begin! We set to work emptying, rearranging, tossing, organizing, repackaging, and creatively stuffing until every last green pea has its own chilly little space in the freezer. There ought to be an international competition we can enter or something — why let all this talent go to waste?

I don’t know about other bakers, but the bulk of my freezer space is consumed by dessert scraps: leftover cake, extra frosting, the last piece of blueberry pie, curds, berries, ice creams, doughs. For someone who only eats dessert on the weekend, I have a lot of fixins! Well, my Freezer Tetris has served me well. This week I went out and bought some of my favorite ice cream flavors, grabbed out some of my scraps, and created Ice Cream Cupcakes. If you have sweet bits and pieces lying around your freezer, this is just the leftover makeover you need!


The Coffee Cupcake decided it was too sophisticated to be photographed with the others. Love that beautiful stamped mug as much as I do? It’s made by local artist Julie Payne. She also makes lovely clay pendants.

This post is actually more of a method than a recipe (as such, you’ll find detailed process photos below). You can use any ice creams, cakes, brownies, cookies, or creative add-ins that suit your fancy. The overall idea is to create a personal ice cream cupcake with three layers (two cake layers sandwiching a thick slab of ice cream), freezing the layers as you build. The whole thing is topped with icing and decorated before being stuck back in the freezer.


Clockwise from top: Cake Batter Ice Cream Cupcake, Cherry Garcia FroYo Cupcake, and Pistachio Ice Cream Cupcake.

Personally, I had some leftover chocolate sheet cake (the best cake in the world, and so easy!) and cream cheese frosting. I made four variations: Cake Batter Ice Cream Cupcakes (with and without toffee pieces added), Pistachio Ice Cream Cupcakes, Cherry Garcia FroYo Cupcakes, and Coffee Ice Cream Cupcakes (with and without Ferrero Rocher or toffee pieces added).


The ice cream line-up.

I can’t decide which was my favorite! The deep coffee flavor complemented the chocolate cake and Ferrero Rocher perfectly, creating a rich, indulgent cupcake. The cake batter cupcake tasted just like a big ice cream birthday cake. I think if forced to choose, though . . . I might have to go with the pistachio! Something about the sweet, otherworldly flavor of pistachio ice cream with toasted pistachios and chocolate cake just bowled me over. Speaking of bowls, that’s how we ate these: in a bowl with a spoon. No sticky fingers!


Shall we call this a Café au Lait Cupcake?

Grab a couple of pints of ice cream, some leftovers, and go wild! You could even whip up a small cake or some brownies just for the purpose of tearing it up and making some ice cream cupcakes! I won’t tell. What ice cream flavor would you pick for your cupcakes?

Ice Cream Cupcakes


Recipe by: Willow Bird Baking
Yields: Varies depending on amounts of ingredients

Ingredients:
Cake or brownie scraps, crumbled (I used Chocolate Sheet Cake)
Ice cream of your choice, softened slightly
Frosting of your choice (I used this delicious cream cheese frosting)
Add-ins (chocolate, peanut butter, cinnamon, or butterscotch chips; toffee; candy; nuts; frozen berries etc.)

Equipment:
muffin tin
plastic wrap
a glass with a bottom that fits into muffin wells
wax paper

Directions (also see process photos below):
1. Clean out some space in your freezer. You’ll need room for the muffin tins in addition to the container you’ll eventually store your cupcakes in. You don’t want to have to clear out space in the middle of the process while your cupcakes melt on the counter! Don’t ask me how I know this.

2. Line your muffin tins with plastic wrap, leaving an overhang. I did this by cutting a long sheet of plastic wrap in half lengthwise. I then used each long, thin strip to line one column of wells on my muffin tin — using 3 strips total.

3. Form the base cake layer: Place a heaping scoop of cake or brownie into each well. Lay a small square of wax paper over the wells one at a time, pressing on the cake with the bottom of the glass to flatten and pack it. Carefully peel wax paper away and continue until all wells have a base cake layer. You also might be able to put wax paper over all of the wells, press down with the bottom of another muffin pan, and pack cake into all the wells at once — but I didn’t try this.

4. Form the ice cream layer: Scoop a heaping spoonful of ice cream over the packed cake and level it with the back of a spoon. Sprinkle any add-ins over the ice cream layer. Try to leave some room at the top of the well for another cake layer!

5. Cover muffin tin with plastic wrap and freeze for a few hours.

6. Form final cake layer: Working quickly, scoop a final spoonful of cake over each well. Lay a small square of wax paper over the wells one at a time, pressing on the cake with the bottom of the glass to flatten and pack it. Carefully peel wax paper away and use a table knife to scrape away any uneven edges. Continue until all cupcakes have a top cake layer.

7. Cover muffin tin with plastic wrap and freeze for about an hour.

8. Frosting and decorating: Do this step in batches if possible! Things can get melty and messy if your cupcakes sit out too long waiting to be decorated. Don’t ask me how I know this. Pull 4 cupcakes out of your tin at a time using the plastic wrap overhang, keeping the rest of the cupcakes in the freezer. Place cupcakes carefully into cupcake papers if desired, or directly into storage container. Frost with a big star tip and decorate with sprinkles, nuts, or frozen berries as desired. Place finished cupcakes into your storage container and then into then freezer while you move on to the next batch. Keep cupcakes frozen until you’re ready to enjoy them (no need to soften before eating)!


Step 2: Cut long strips of plastic wrap to line columns of wells in your muffin tin.


Step 3: Spoon cake into the well, cover with a square of wax paper, and use the base of a glass to pack and flatten.


Step 4: This is a good time to add Ferrero Rocher halves! Add ice cream layer and freeze for a few hours.


Step 6 and final cupcakes! Pack another layer of cake on, cover and freeze, and then decorate!


Share Share this post with friends!

Red Velvet and Oreo Kisses

Need a kiss? Everyone does sometimes, and these past few weeks, it was Mike. He’s been studying intensely for the math GRE this summer. He’s interested in stellar grad schools, so he needs to hit the ball (or the sphere, perhaps? or the open ball? or the unit circle? okay, enough with the bad math jokes) out of the park on this exam. I have complete faith in his ability to do so, but he needs some encouragement now and then. What’s better for encouragement than a little kiss? Well, maybe a BIG kiss!

I think I’ve mentioned before that Bakerella is one of my heroes. I love cuteness, and she’s the Queen of Cute. When I saw her Oreo Kisses, I knew they couldn’t wait until Valentine’s Day. They were the perfect surprise to lift Mike’s spirits.

In addition to Oreo, I decided to make some red velvet kisses. While the Oreo version is a no-bake combo of crushed cookies and cream cheese, the red velvet version is essentially a cake ball (or a cake cone in this case). You bake a cake, rip it up (heartbreaking, I know), add frosting, and form the mixture into balls (or cones, or hearts, or zebras) and dip into your candy coating (incidentally, if you try out the zebra shape, please do send a photo). Any flavor combination of cake and frosting will do. And don’t let the idea of baking a cake deter you; while I bake mine from scratch, cake mixes and canned frosting work just fine!


Oreo Kisses


Red Velvet Kisses

Dipping these kisses (or any cake ball) is always the most (ahem) interesting part of the process. I use Candiquik as my chocolate coating of choice, but you can use any chocolate bark or dipping chocolate. I don’t recommend baker’s chocolate or chocolate chips, however, as they don’t form the same hard shell. You should be able to find Candiquik at Lowes Food, SuperTarget, or (I recently discovered) Bloom.

Regarding the act of dipping itself, you’re going to have to get a little creative. Bakerella’s instructions (below) say to use a spoon to dip your kisses and then drain the excess chocolate against the side of the bowl. This hasn’t ever worked for me, though; I’ve used everything from forks to toothpicks to bamboo skewers to dip cake balls. I’ll go ahead and admit that I’ve had visions of standing on the counter lowering a cake ball into chocolate with dental floss (thankfully, I haven’t resorted to this just yet). For dipping these kisses, I used a two-tined grill fork to support the kiss while I spooned chocolate over it. I then let the excess drain off for a long while before sliding the kiss onto wax paper. When it was dry, I went back and re-dipped the bottom. You can try this technique, but the most important message to take home is this: experiment with your kitchen supplies. Necessity is the mother of invention and all that, so try any utensil that looks promising and keep your sense of humor!

One thing I love about these sweet kisses (apart from, oh, everything about them) is the messages you can attach. I used a word processing program (font: light blue, 14 point, Helvetica Neue Bold) to create the little strips of paper that sail out of each kiss. Get creative: you can label various kiss flavors; send encouragement, congratulations, and thank yous; or even say happy birthday. My wonderful Dad’s birthday is this coming Monday — the perfect occasion for a special message! Whether with Oreo kisses, cake kisses, or plain old hugs and kisses, tell someone you love them today!

Oreo Kisses


Recipe By: Bakerella (kisses decoration/assembly)
Yields: About 11 2-inch high kisses

Oreo Kisses Ingredients:
1 package oreo cookies (divided; use cookie including the cream center)
1 8-ounce package cream cheese (softened)
chocolate bark (chocolate candy coating)

Directions

1. Finely crush all but seven cookies in a food processor or place them in a ziploc bag and crush into a fine consistency. Note: As for the extra 7 cookies, just eat them. Or, if you have extra dipping chocolate, make some chocolate covered oreos.
2. Stir in softened cream cheese. Use the back of a large spoon to help mash the two together.
3. Roll the mixture into 1-2″ balls and place on wax paper covered cookie sheet.
4. Then, begin to form the shape of a kiss. Flattening the bottom and forming a point at the top. Note: mine ended up about 2 inches tall and 1.5 inches wide.
5. It helps to put the uncoated balls in the freezer for a few minutes to keep the mixture from starting to fall apart when you drop into the melted chocolate. Note: I refrigerated mine overnight and then froze for a couple of minutes before dipping.
6. Melt chocolate as directed on package and then dip “kisses” one at a time into chocolate, tap off extra and slide them off spoon onto wax paper covered cookie sheet to dry. Note: Dipping is often the most difficult part. These are Bakerella’s instructions, but find what works for you. Let your kitchen be your playground. Look through your utensils for useful tools, and be creative. I used a grill fork to hold my kisses while spooning chocolate over them, and then redipped the bottoms separately.

To decorate:
1. Handwrite your messages or create them on the computer. Cut out the strips (about 1/4″ tall and however wide you need).
2. Cut up some square sheets of aluminum foil (about 6″ square)
3. Place dry kiss in center and start wrapping the foil around the base. Insert message near top and secure it by pressing the foil together at top. Note: It really helps to use cheap foil here! The thinner and more malleable the better. Crush it a little first to make it more flexible.
4. Refrigerate in an airtight container.

Red Velvet Kisses


Recipe By:

Bakerella (kisses decoration/assembly)
-Mom (red velvet cake)
Paula Deen (cream cheese frosting)

Yields: About 28 2-inch high kisses

Red Velvet Cake Ingredients:
1/2 cup Crisco shortening
2 eggs
2 tablespoons cocoa
1/2 teaspoon salt
1 1/2 cups sugar
1 teaspoon vanilla
1 cup buttermilk
2 1/2 cups flour
1 teaspoon baking soda
1 tablespoon white vinegar
2 ounces red food coloring
chocolate bark (chocolate candy coating; for kisses)

Cream Cheese Frosting Ingredients:
8 ounces cream cheese, softened
1 stick butter, softened
1/2 teaspoon vanilla extract
2 cups sifted confectioners’ sugar

Directions

Make the cake: Preheat oven to 350 degrees. Cream Crisco, sugar, and eggs. Make a paste of the cocoa and coloring and add to the Crisco mixture. Add salt and vanilla. Add buttermilk alternately with the flour, beginning and ending with flour. Mix vinegar and soda right before using and add to mixture by folding in. Pour batter into a 9 x 13 in. pan and bake at 350 degrees for 25-30 minutes (check periodically, and if the edges are getting too done, you might want to shield them with foil while the middle continues to bake). Cool completely.

Make the frosting: In a large mixing bowl, beat the cream cheese, butter and vanilla together until smooth. Add the sugar and on low speed, beat until incorporated. Increase the speed to high and mix until very light and fluffy.

Make the kisses:
1. After cake is cooked and cooled completely, crumble into large bowl.
2. Mix thoroughly with about 2 cups cream cheese frosting. (It may be easier to use fingers to mix together, but be warned it will get messy.)
3. Roll mixture into 1-2″ size balls and lay on cookie sheet.
4. Then, begin to form the shape of a kiss. Flattening the bottom and forming a point at the top. Note: mine ended up about 2 inches tall and 1.5 inches wide.
5. It helps to put the uncoated balls in the freezer for a few minutes to keep the mixture from starting to fall apart when you drop into the melted chocolate. Note: I refrigerated mine overnight and then froze for a couple of minutes before dipping.
6. Melt chocolate as directed on package and then dip “kisses” one at a time into chocolate, tap off extra and slide them off spoon onto wax paper covered cookie sheet to dry. Note: Dipping is often the most difficult part. These are Bakerella’s instructions, but find what works for you. Let your kitchen be your playground. Look through your utensils for useful tools, and be creative. I used a grill fork to hold my kisses while spooning chocolate over them, and then redipped the bottoms separately.

To decorate:
1. Handwrite your messages or create them on the computer. Cut out the strips (about 1/4″ tall and however wide you need).
2. Cut up some square sheets of aluminum foil (about 6″ square)
3. Place dry kiss in center and start wrapping the foil around the base. Insert message near top and secure it by pressing the foil together at top. Note: It really helps to use cheap foil here! The thinner and more malleable the better. Crush it a little first to make it more flexible.
4. Refrigerate in an airtight container.

Process Photos:


You may need to shield the sides of the red velvet cake if they’re done before the middle. I halved my cake recipe since I was making two kinds of kisses; if you do this, half the frosting too.


Shaped into cones and then dipping.


Cutting messages into strips.


Did I mention that they were giant?


XOXO


Share Share this post with friends!

Ferrero Rocher Failcakes

I showed you the pretty ones, but I thought you might also like to see my Ferrero Rocher Failcakes! I have my share of kitchen disasters. While I was happy with my second batch of Ferrero Rocher Cupcakes, the first batch didn’t quite turn out . . . to say the least!

The chocolate cupcake recipe I was using didn’t say anything about adding baking soda and powder (they were in the ingredients list, but not in the directions, which I always go by) and so . . . I didn’t! Oops. Lesson learned: always cross reference the ingredients list.

The failcakes still tasted okay, but were quite dense and not so pretty! I drizzled some extra ganache over them just in case we decided to eat them anyway. As of right now, though, they’re sitting in the fridge untouched.


1 2 3 4