cake

Chocolate Sheet Cake

My family and I like to joke that Pioneer Woman stole this recipe from us, since she has such a similar one on her blog. We know it’s not true by any stretch of the imagination, but I think it makes us feel a little smug. We think to ourselves, We had an amazing family recipe that Ree Drummond decided she was going to pilfer! Because it was so awesome, of course! We’ve been robbed by fantastic Pioneer Woman, of all people! Wouldn’t it sound cool to tell people that at dinner parties?

Ahem . . . but, as I mentioned . . . not actually true. In reality, the recipe for this amazing Chocolate Sheet Cake was created by who-knows-who, and was passed around, shared, and adapted to fit into many families’ recipe boxes. Here’s an interesting discussion about the origins of the cake. Several folks on Pioneer Woman’s blog recount where they came across the recipe first: some found it printed in a newspaper decades ago, some grew up eating it in their own kitchens. My family’s recipe was passed on to us by my great aunt, Linda Houts. Bless that woman.

Readers also shared their different names for the cake: Fabulous Sheet Cake, Cowboy Sheet Cake. Beth Moore and some other folks calls their version Texas Sheet Cake — and the flavor is, indeed, big enough for even Texas! As for my family, we always just called ours Chocolate Sheet Cake. But now I’m a little jealous of all those fancy names! I might have to come up with something a little more snappy. What do you think of Majestic Imperial Fantabulous Sheet Cake o’ Love? MIFSCOL for short? Okay, okay, fine . . . we’ll stick with Chocolate Sheet Cake.

But this is one fantabulous cake. It’s simple enough that I made it as a child (repeatedly — as in, any time my mom would hand over the cocoa powder and a spoon). My favorite time- and energy-saving characteristic of this cake is that you don’t have to wait for the cake to cool to pour the rich frosting all over it. So easy and quick!

But it’s not just simple — it’s also delicious enough that I still make it as an adult (wait, what? I’m an adult?!) when I want the absolute best chocolate cake flavor. Don’t you love it when the easiest also happens to be your favorite? The cake is fluffy and extremely moist with a gooey, deep chocolate frosting. I’m telling you . . . something magic happens when you put all these ingredients together, and the product is greater than the sum of its parts!

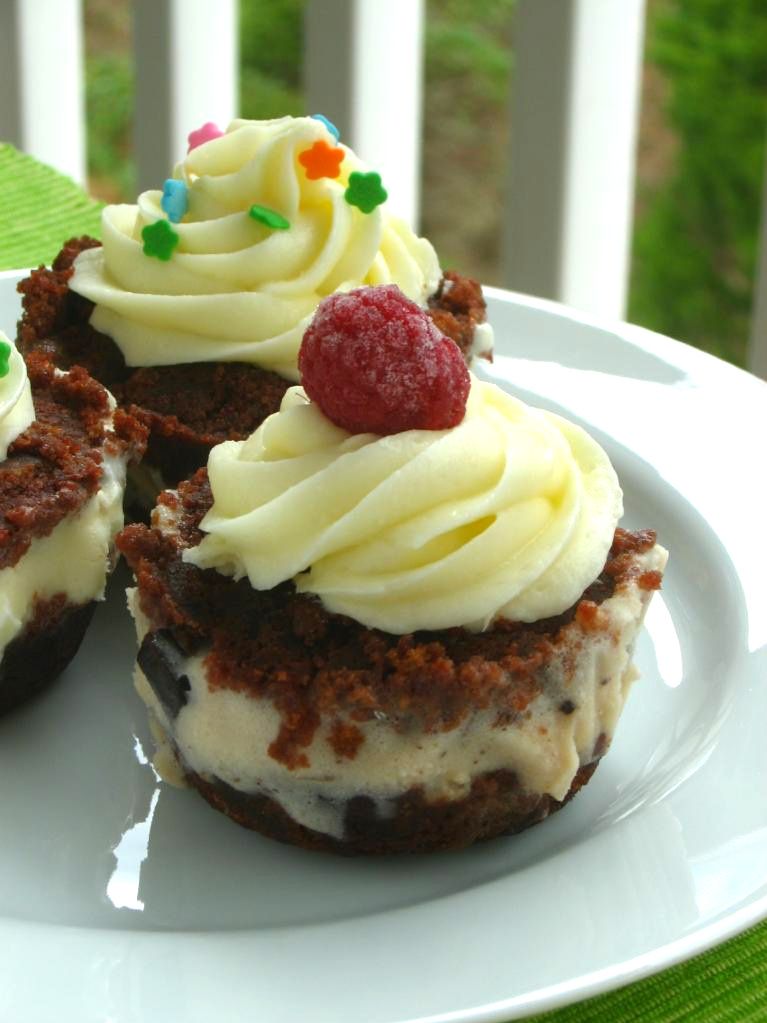
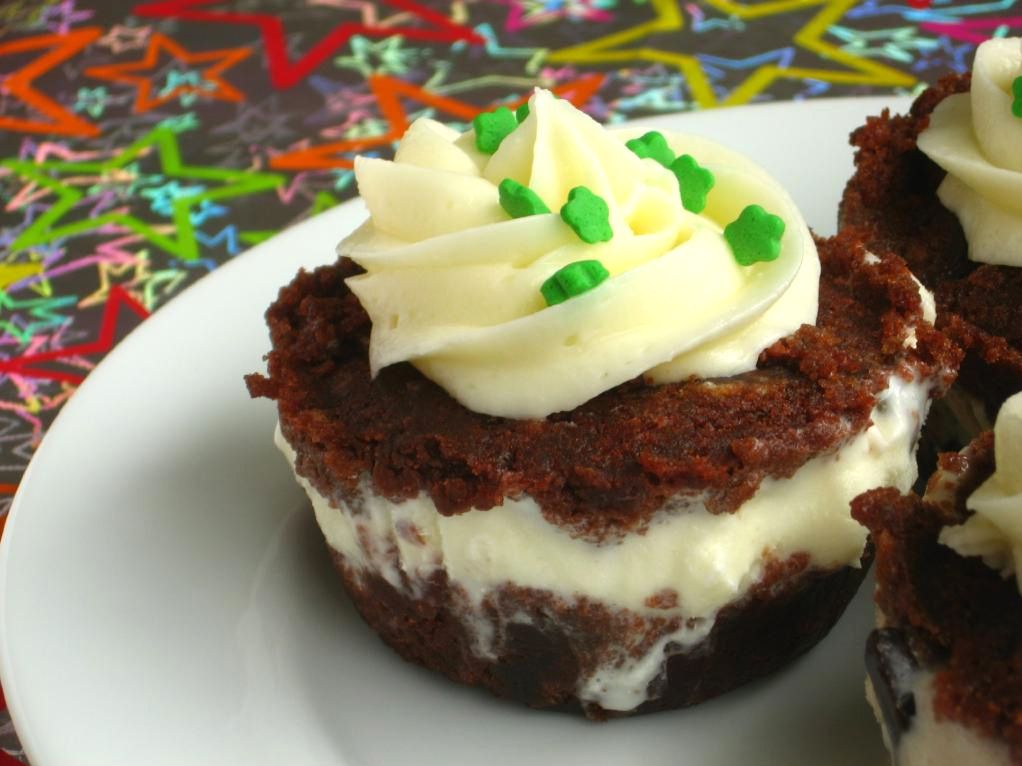
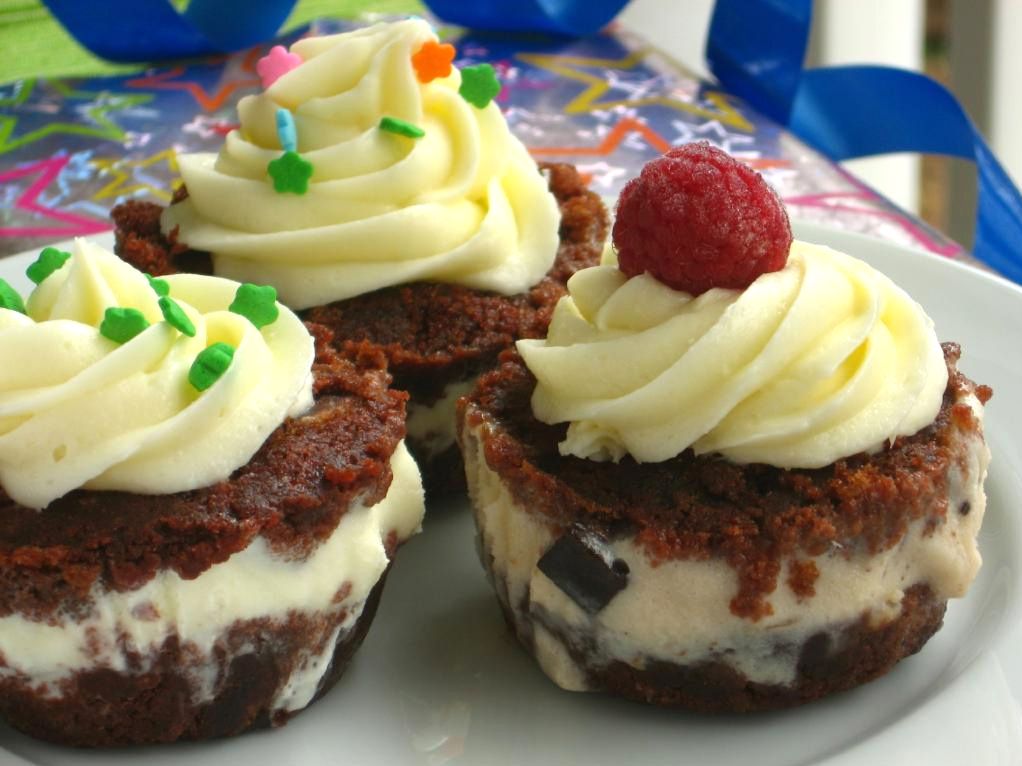
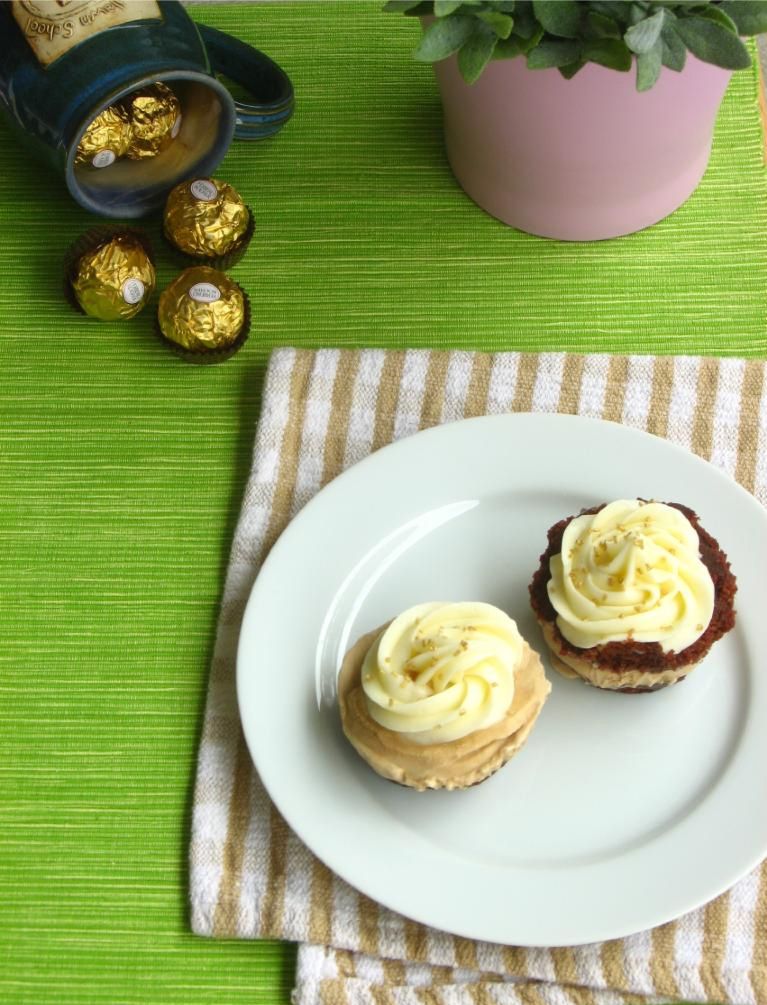
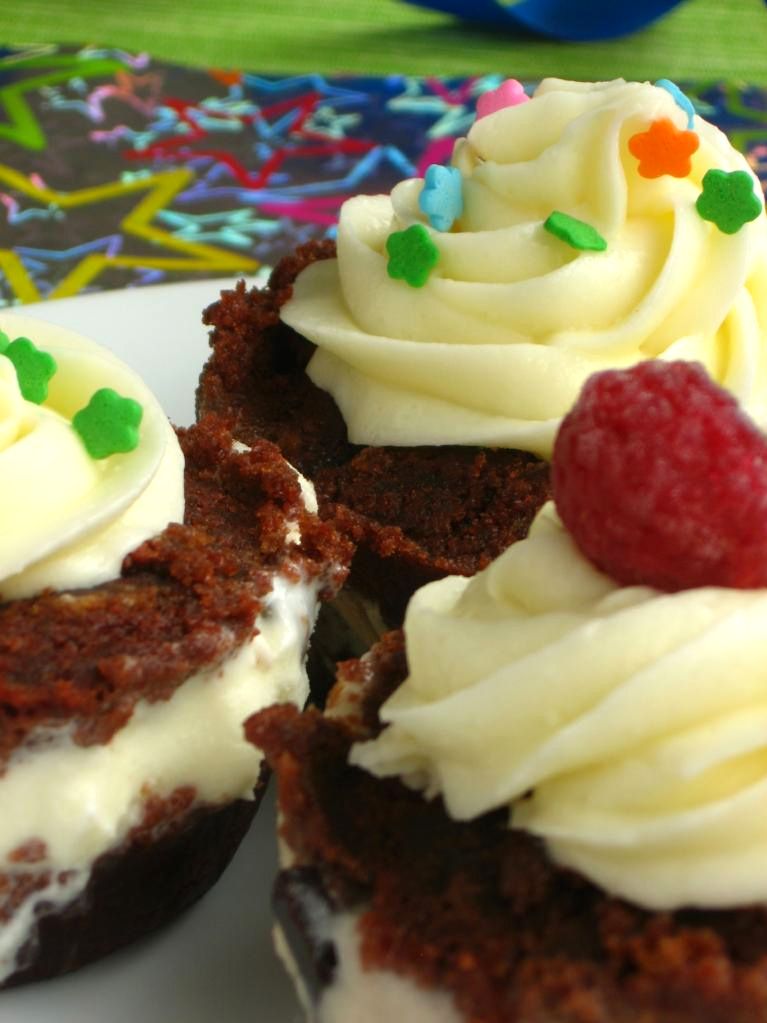
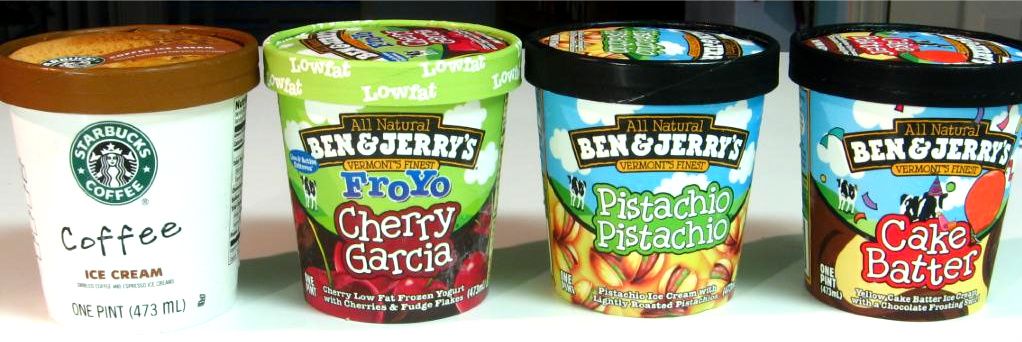
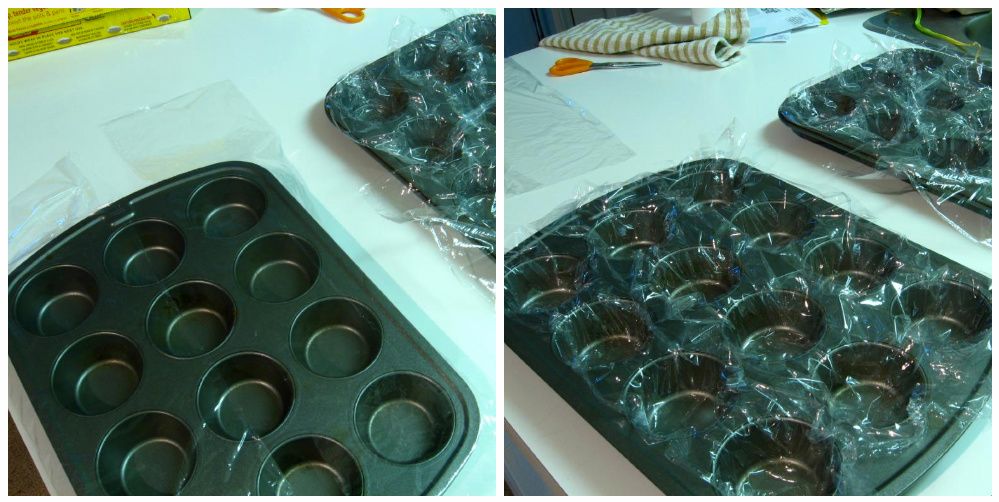
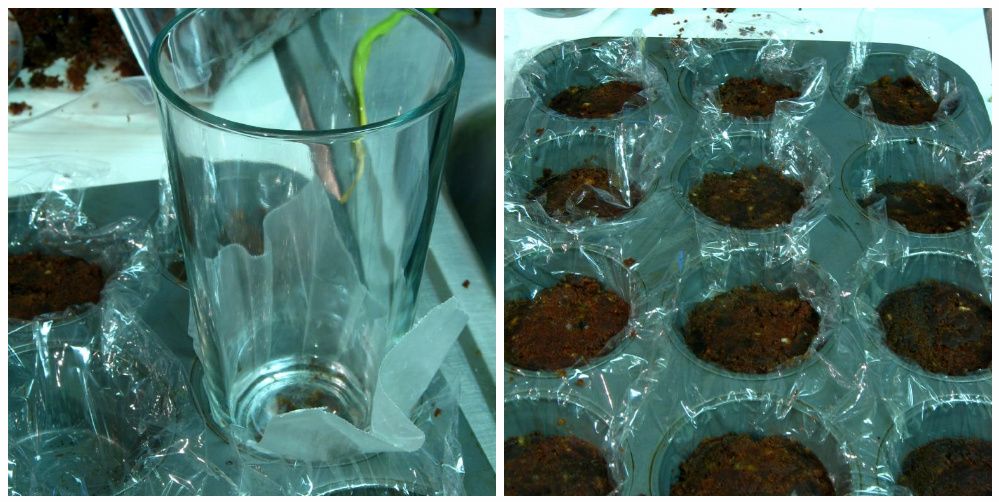
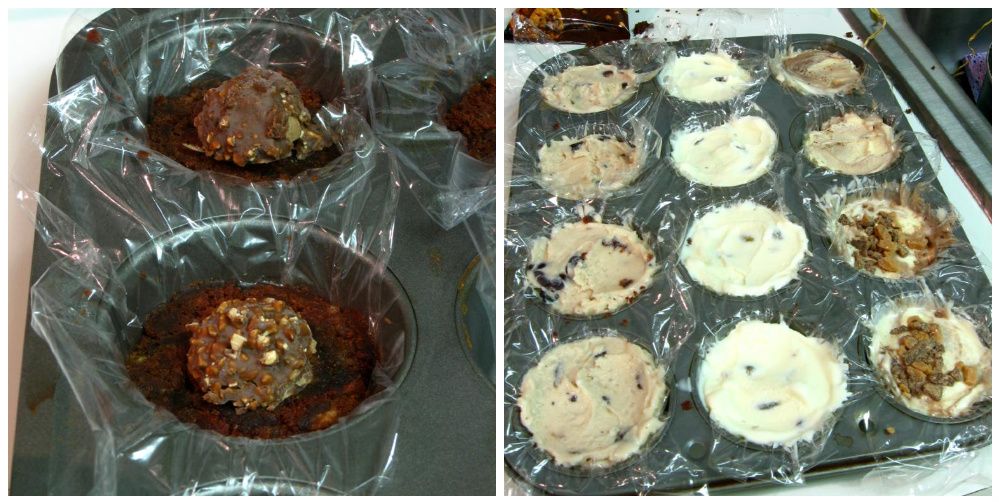
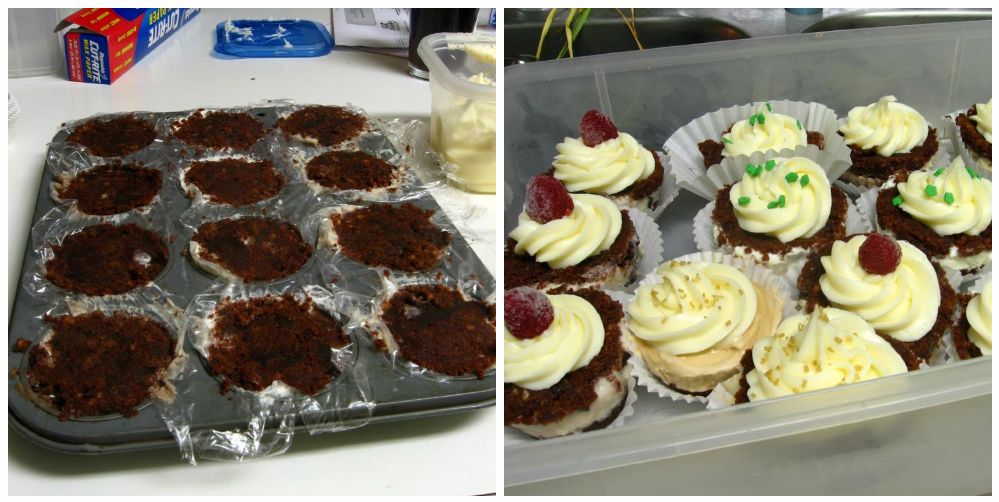
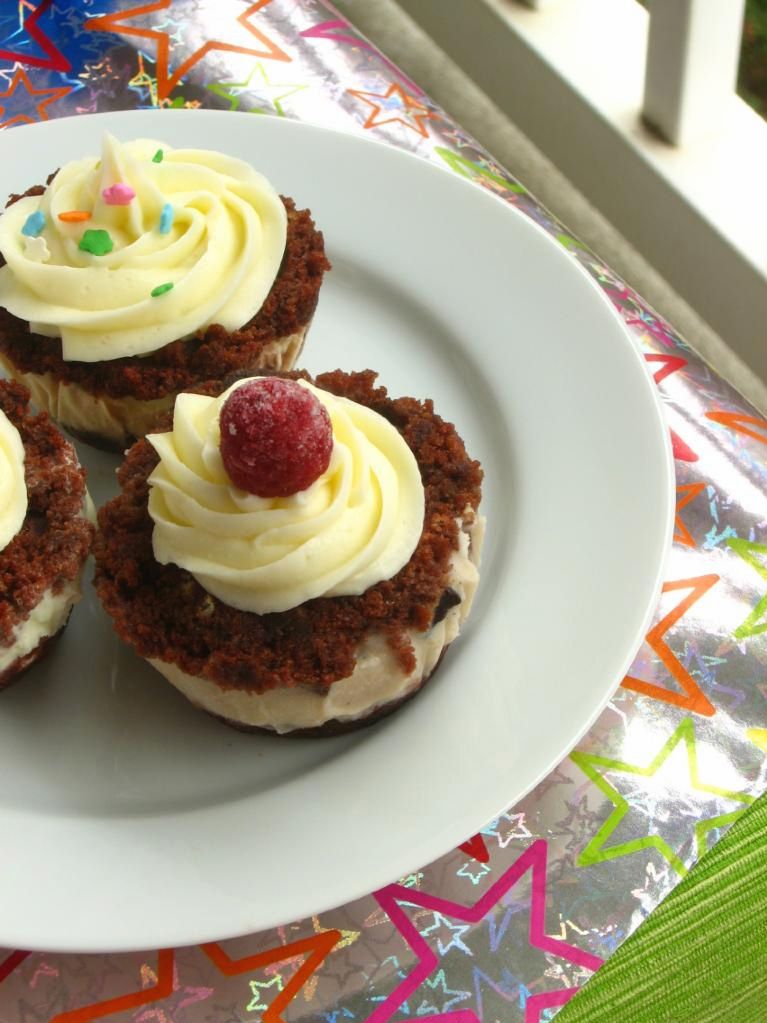
I’ve devoured this cake in Chocolate Chickie Cake Balls, in the Ice Cream Cupcakes I posted earlier this week, and (of course) all by its lovely lonesome. It’s also the perfect platform for a big ol’ scoop of vanilla bean ice cream. After my discussion of Freezer Tetris last post, I’m sure you’ll believe me when I say that there’s a big ziplock bag of Chocolate Sheet Cake in my freezer right now, just waiting for another fun recipe where I can sneak it in! Once you get a taste, you’ll be looking for any reasons you can find to bake it, too!

Chocolate Sheet Cake


Recipe by: Linda Houts
Yields: one half sheet cake (serves about 12)

Cake Ingredients:
2 cups flour
1 teaspoon baking soda
2 cups sugar
dash salt
1 stick butter
1/2 cup vegetable oil
4 tablespoons cocoa
1 cup water
1/2 cup buttermilk
2 eggs
1 teaspoon vanilla

Frosting Ingredients:
1 stick butter
4 tablespoons cocoa
6-8 tablespoons milk (as needed for consistency)
1 cup walnuts, chopped
1 lb. confectioners’ sugar
1 teaspoon vanilla

Directions:
Preheat oven to 350 degrees F. Whisk flour, baking soda, sugar, and salt together and set aside. Mix butter, vegetable oil, cocoa powder, and water together in a sauce pan and bring to boil. Pour over mixture of dry ingredients. Stir well, then add buttermilk, eggs, and vanilla. Mix to combine. Pour into a half sheet cake pan (12 x 18 in.) sprayed with cooking spray.

Bake at 350 degrees F for about 15 minutes. When a toothpick comes out with just a few moist crumbs, the cake is done. While cake starts to cool, make the frosting. Mix butter, cocoa, and milk and bring to boil. Remove from heat and add confectioner’s sugar, nuts, and vanilla. Stir to combine. Spread over warm cake.


Share Share this post with friends!

Ice Cream Cupcakes

My sister Sarah is a Tetris addict. Something about spinning those awkwardly shaped blocks around and packing them together must release happy chemicals in her brain. It’s serious: she played Tetris in her wedding gown right before walking down the aisle, and she thinks this guy is totally hot.

I really can’t talk. I play real-life Tetris. All my errands have to be planned to ensure maximum efficiency: no driving out of my way or backtracking. My groceries are arranged on the checkout belt so that they fit together nicely. Periodically I’ll rearrange my fridge so that all the food is organized by shape (flat items on bottom, tall items shoved together in the back, and materials to make a quick dinner wrap all stacked together neatly for easy grabbing). But the fridge is nothing compared to the freezer.


Pistachio Ice Cream Cupcakes

My roommate and I are world champions at Freezer Tetris. We both overshop, and every now and then one of us will come home with a month’s worth of foodstuffs to shove into our already-full freezer (cue the excuses: “It was on sale! It’s cheaper when you buy in bulk!”). Let the games begin! We set to work emptying, rearranging, tossing, organizing, repackaging, and creatively stuffing until every last green pea has its own chilly little space in the freezer. There ought to be an international competition we can enter or something — why let all this talent go to waste?

I don’t know about other bakers, but the bulk of my freezer space is consumed by dessert scraps: leftover cake, extra frosting, the last piece of blueberry pie, curds, berries, ice creams, doughs. For someone who only eats dessert on the weekend, I have a lot of fixins! Well, my Freezer Tetris has served me well. This week I went out and bought some of my favorite ice cream flavors, grabbed out some of my scraps, and created Ice Cream Cupcakes. If you have sweet bits and pieces lying around your freezer, this is just the leftover makeover you need!


The Coffee Cupcake decided it was too sophisticated to be photographed with the others. Love that beautiful stamped mug as much as I do? It’s made by local artist Julie Payne. She also makes lovely clay pendants.

This post is actually more of a method than a recipe (as such, you’ll find detailed process photos below). You can use any ice creams, cakes, brownies, cookies, or creative add-ins that suit your fancy. The overall idea is to create a personal ice cream cupcake with three layers (two cake layers sandwiching a thick slab of ice cream), freezing the layers as you build. The whole thing is topped with icing and decorated before being stuck back in the freezer.


Clockwise from top: Cake Batter Ice Cream Cupcake, Cherry Garcia FroYo Cupcake, and Pistachio Ice Cream Cupcake.

Personally, I had some leftover chocolate sheet cake (the best cake in the world, and so easy!) and cream cheese frosting. I made four variations: Cake Batter Ice Cream Cupcakes (with and without toffee pieces added), Pistachio Ice Cream Cupcakes, Cherry Garcia FroYo Cupcakes, and Coffee Ice Cream Cupcakes (with and without Ferrero Rocher or toffee pieces added).


The ice cream line-up.

I can’t decide which was my favorite! The deep coffee flavor complemented the chocolate cake and Ferrero Rocher perfectly, creating a rich, indulgent cupcake. The cake batter cupcake tasted just like a big ice cream birthday cake. I think if forced to choose, though . . . I might have to go with the pistachio! Something about the sweet, otherworldly flavor of pistachio ice cream with toasted pistachios and chocolate cake just bowled me over. Speaking of bowls, that’s how we ate these: in a bowl with a spoon. No sticky fingers!


Shall we call this a Café au Lait Cupcake?

Grab a couple of pints of ice cream, some leftovers, and go wild! You could even whip up a small cake or some brownies just for the purpose of tearing it up and making some ice cream cupcakes! I won’t tell. What ice cream flavor would you pick for your cupcakes?

Ice Cream Cupcakes


Recipe by: Willow Bird Baking
Yields: Varies depending on amounts of ingredients

Ingredients:
Cake or brownie scraps, crumbled (I used Chocolate Sheet Cake)
Ice cream of your choice, softened slightly
Frosting of your choice (I used this delicious cream cheese frosting)
Add-ins (chocolate, peanut butter, cinnamon, or butterscotch chips; toffee; candy; nuts; frozen berries etc.)

Equipment:
muffin tin
plastic wrap
a glass with a bottom that fits into muffin wells
wax paper

Directions (also see process photos below):
1. Clean out some space in your freezer. You’ll need room for the muffin tins in addition to the container you’ll eventually store your cupcakes in. You don’t want to have to clear out space in the middle of the process while your cupcakes melt on the counter! Don’t ask me how I know this.

2. Line your muffin tins with plastic wrap, leaving an overhang. I did this by cutting a long sheet of plastic wrap in half lengthwise. I then used each long, thin strip to line one column of wells on my muffin tin — using 3 strips total.

3. Form the base cake layer: Place a heaping scoop of cake or brownie into each well. Lay a small square of wax paper over the wells one at a time, pressing on the cake with the bottom of the glass to flatten and pack it. Carefully peel wax paper away and continue until all wells have a base cake layer. You also might be able to put wax paper over all of the wells, press down with the bottom of another muffin pan, and pack cake into all the wells at once — but I didn’t try this.

4. Form the ice cream layer: Scoop a heaping spoonful of ice cream over the packed cake and level it with the back of a spoon. Sprinkle any add-ins over the ice cream layer. Try to leave some room at the top of the well for another cake layer!

5. Cover muffin tin with plastic wrap and freeze for a few hours.

6. Form final cake layer: Working quickly, scoop a final spoonful of cake over each well. Lay a small square of wax paper over the wells one at a time, pressing on the cake with the bottom of the glass to flatten and pack it. Carefully peel wax paper away and use a table knife to scrape away any uneven edges. Continue until all cupcakes have a top cake layer.

7. Cover muffin tin with plastic wrap and freeze for about an hour.

8. Frosting and decorating: Do this step in batches if possible! Things can get melty and messy if your cupcakes sit out too long waiting to be decorated. Don’t ask me how I know this. Pull 4 cupcakes out of your tin at a time using the plastic wrap overhang, keeping the rest of the cupcakes in the freezer. Place cupcakes carefully into cupcake papers if desired, or directly into storage container. Frost with a big star tip and decorate with sprinkles, nuts, or frozen berries as desired. Place finished cupcakes into your storage container and then into then freezer while you move on to the next batch. Keep cupcakes frozen until you’re ready to enjoy them (no need to soften before eating)!


Step 2: Cut long strips of plastic wrap to line columns of wells in your muffin tin.


Step 3: Spoon cake into the well, cover with a square of wax paper, and use the base of a glass to pack and flatten.


Step 4: This is a good time to add Ferrero Rocher halves! Add ice cream layer and freeze for a few hours.


Step 6 and final cupcakes! Pack another layer of cake on, cover and freeze, and then decorate!


Share Share this post with friends!

Ugly as Sin Coconut Cake

There’s this CAKE. This beautiful, gorgeous, dramatic, heart-stopper of a CAKE. I’ve been dreaming about making it for weeks (2 weeks and 2 days, to be exact): scanning the recipe online, pondering it on my drive home, lying in bed and imagining each step, right down to torching the meringue. I’ve been a little obsessed, but you’ll understand why when you see how lovely it is. Here it is in all its glory, over at Zoë Bakes. I KNOW, RIGHT?! It is stunning.

So this past Friday I gathered together all my ingredients, donned the adorable retro apron my mom made for me, and became one busy bumblebee. I left the sour cream out of the recipe accidentally, so that was my first mistake. Ever set your cake out to cool on a wire rack only to turn your head and notice an ingredient still sitting on the counter waiting to be used? Oops. It wasn’t a big deal, as it turns out, because the cake was delicious. The coconut milk added an absolutely heavenly flavor — making this one of the best white cakes I’ve ever tasted.

The filling was similarly amazing: creamy, thick coconut pastry cream folded with rich whipped cream. I knew when stacking this cake up with the delectable filling between each layer that, no matter what, I had a dessert champion on my hands.

That’s about where the success story ends. Well, maybe that’s a bit dramatic — the cake was delicious and we adored every bite. But as the title of this post suggests, my version of Zoë’s lovely cake was ugly as sin. Now, you might be thinking, “Aw, you’re being too hard on yourself; it wasn’t that ugly!” Let me clarify:

It was ugly! Lopsided, striped, U-G-L-Y-it-ain’t-got-no-alibi, UGLY. The real reason I made this cake was to achieve those beautiful burnt meringue curls that Zoë’s cake had. That clearly didn’t happen.

My meringue was runny. At first I blamed it on humidity: it rained for days in Charlotte and I was whisking the meringue up right above my steamy dishwasher. But I tried again the next day in a steam-free kitchen to no avail: same results. I’m relatively sure my bowl and whisk was free of fat or residue, so I don’t think that was a problem. My mom blames the fact that I have a hand mixer rather than a stand mixer. This could be the culprit, but I sure beat until my arm was about to fall off. Maybe the most likely possibility is that I overheated my egg white and sugar mixture. The target temperature is 110-120F, but I’m pretty sure mine was past that when I removed it to whip. I’ll have to give it another shot with a cooler mixture.

Oh well. I love pretty food, cute food, sophisticated food. Mostly, though, I love food that tastes good — and this tastes good. Fantastic, even! If you don’t want to tackle the meringue, it would even be delicious covered in some slightly sweetened whipped cream and coconut. But I hope you’ll grab your stand mixer and give the meringue a try — I know I’ll be trying it again! As you can see from Zoë’s version, it’s worth it.

Coconut Cream Cake with Toasted Meringue Frosting


Recipe by: Zoë Bakes (coconut pastry cream, Swiss meringue) and Fine Cooking (cake), adapted by Willow Bird Baking
Yields: 9-in. 4-layer cake

Cake Ingredients:
8 ounces (1 cup) unsalted butter, softened
13 1/2 ounces (3 cups) unbleached all-purpose flour
1 tablespoon baking powder
1/2 teaspoon kosher salt
1 cup unsweetened coconut milk
2 teaspoons vanilla extract
2 cups granulated sugar
2 large eggs, at room temperature
1/2 cup sour cream, at room temperature (I left this out accidentally; still worked great)
6 large egg whites, at room temperature

Coconut Pastry Cream Ingredients:
1 can (14 fluid ounces) unsweetened coconut milk
3/4 cup sugar
1 vanilla bean
pinch kosher salt
3 large egg yolks
2 tablespoons corn starch
2 tablespoons unsalted butter
1 cup sweetened coconut flakes
1/2 cup whipping cream

Swiss Meringue Ingredients:
1 cup egg whites
2 cup sugar
pinch salt

Directions:
To bake the cake: Preheat oven to 350 degrees with rack in middle of the oven. Grease and line with parchment two 9×3-inch round cake pans. In a medium bowl whisk together the flour, baking powder and salt, set aside. Mix the coconut milk and vanilla, set aside.

In a stand mixer fitted with a paddle attachment, beat the butter and sugar on medium-high speed until light and fluffy, about 4 minutes (scrape down the bowl). Add the eggs one at a time and beat well after each addition.

Add 1/3 of the flour mixture and mix on low speed until incorporated. Add half the coconut milk and mix thoroughly. Continue to add the flour and coconut alternately, ending with flour. Add sour cream and mix until incorporated. Set aside in a large bowl if you don’t have a spare bowl for your mixer.

Beat the egg whites in your stand mixer with the whisk attachment (if you are using the same bowl, be sure it is VERY CLEAN or the whites will not whip up. Any fat on the bowl will prevent the whites from foaming). Beat the whites on high speed for 2-3 minutes, until it forms soft peaks. Don’t overdo it or the whites will get too stiff and not fold into the batter smoothly. Stir 1/3 of the egg whites into the cake batter to lighten it. Gently fold the remaining whites into the batter.

Divide evenly in the prepared pans. Bake for about 25-30 minutes or until the tester comes out clean. Cool on rack in pan and then invert to use.

To make the coconut pastry cream: Heat the coconut milk, sugar, salt and vanilla bean in a medium saucepan over medium heat. In a bowl, whisk together the egg yolks and corn starch. Once the cream is hot, remove the vanilla bean, scraping out any remaining seeds and returning them to the cream. Add 1/2 cup of the hot cream slowly to the yolks, whisking as you add. Then pour the yolk mixture into the pot of hot cream and whisk. Continue to whisk with heat on medium-high for 3 more minutes. The mixture will turn thick and bubble. You need to continue to whisk for the full 3 minutes or the pastry cream will separate once it is cool. After the 3 minutes, whisk in the butter. Add the coconut flakes. Pour into a shallow dish to cool.

Cover with plastic wrap pressed right against the pastry cream. This will prevent a thick skin from forming on the surface. Refrigerate for at least an hour or freeze for 30 minutes. Once it is cold, stir the pastry cream to loosen. Whip the 1/2 cup cream to medium peaks. Stir in 1/3 to the pastry cream to lighten. Fold in the remaining cream until the pastry cream is nice and light. Split the two cakes in half with a knife and add 1/3 of the filling to the first cake layer. Spread it out to the edge and repeat with the other layers.

To make the Swiss Meringue: Whisk together the egg whites, sugar and salt in the bowl of your stand mixer. Rest the bowl over a pot of simmering water to form a double boiler. Scrape down the sides of the bowl so that all the sugar is off the sides of the bowl. Continue to stir the mixture until all the sugar is melted into the eggs and you no longer feel any graininess when rubbed between your fingers, about 3-5 minutes.

Place the bowl onto your mixer and whisk on high speed until the meringue is thick and glossy and the bowl is just warmer than room temperature, about 8 minutes. Using a spatula, spread a nice thick layer of the meringue over the cake, make sure you have at least a cup of meringue left. Don’t worry about how it looks, you will be making spikes over the surface in a minute.

Take a glob of the meringue in your hand and press it against the meringue on the cake (Zoë has a great photo tutorial of this part on her blog). Pull that glob away from the cake and it will break off in a wispy curl. The more of a glob you lay down as a foundation on the cake, the bigger your curls will be. This may take a few times to get the hang of it, but then you’ll be off and running. Once you have the cake fully set with curls you will need a torch to toast the meringue. Hold the blow torch a ways from the cake and touch the flame down between the curls. The curls will set fire and you need to blow them out as you go. The burnt tips are lovely contrast and add a wonderful flavor.


Cake mixed, baked, and sliced into four layers.


Coconut pastry cream cooling and then spread onto a cake layer.


Cooking my Swiss meringue and preparing the cake for frosting!


Enjoy!

Want to help Haiti relief efforts? Want to learn some fantastic new recipes? Do both at once by purchasing the A Hand for Haiti E-Book (minimum donation of $10) or the hard copy of BlogAid (softcover $25; hardcover $50), two lovely cookbooks created to raise money for Haiti.


Share Share this post with friends!

Thanksgiving Recipe Ideas

The students have all closed their novels and packed up their supplies for Thanksgiving Break, so it’s time for me to take a deep breath and relax — until the baking begins tomorrow, of course! Because I enjoyed reading Jillicious‘s list of things she’s thankful for this year, here are a few of my own:

  1. Jesus, who made the greatest sacrifice for me.
  2. My family — they’re crazy, wonderful, and so supportive.
  3. Mike, who has never disliked anything I’ve ever cooked, whether overseasoned, underseasoned, burnt, or weird.
  4. Cake.
  5. Friends, for joining me in ridiculous escapades.
  6. My students, who make me laugh every day and (usually) make me feel like I’m making a difference through my teaching.
  7. Writing.
  8. Byrd and Squirt, my poodle and red-eared slider. One is fluffy and hyper, the other is scaly and . . . frowny; nevertheless, they’re both the sweetest pets anyone could ask for, and have made my little apartment a home.
  9. My snuggie. Shut up; it’s comfortable!
  10. Food, which is one language through which history, family, culture, and emotion has been communicated to me. I love joining the conversation.

On that note, here are some dishes that have warmed the pages of Willow Bird Baking in the past months that would be lovely on your Thanksgiving dinner table. May you enjoy the sharing of mirth, love, and calories with your family this year!


Mini-Pies: Pumpkin, Peach Crisp, and Sour Cream Apple — Add some variety to your Thanksgiving pie choices! Everyone gets to choose their own flavor. The pumpkin and peach pies are especially scrumptious.


Jack-O’-Lantern Whoopie Pies — These cakey cookies are hearty, moist, spicy, and addictive. Whoopie pies should be part of every family’s Thanksgiving tradition.


Peach Crisp Pie — Delicious, gooey peaches and crispy oats fill a tender, flaky crust. This is my favorite pie of all time!


Best Ever Cream Cheese Pound Cake with Easy Caramel Frosting and Spiced Apples — This moist, dense, finely-crumbed cake is heavenly with or without some spicy cinnamon apples on the side. “Best Ever” is not an exaggeration!


Chocolate Tart — Tired of pumpkin? If you’re a chocolate lover, this tart is a must-eat. Rich, indulgent chocolate fills the buttery tart crust, and a pile of freshly whipped cream accompanies each bite. This post also includes a bright and tangy Raspberry Cream Cheese Tart.


Overnight Yeast Rolls — These fluffy, delicious, buttery yeast rolls are part of my family’s annual Thanksgiving tradition. When I realized I was old enough to make them myself (and at any time of year, too), it was one ecstatic day in the kitchen!


Cardamom Pumpkin Macarons — Having an elegant Thanksgiving? These gluten-free cookies combine cardamom with traditional Thanksgiving pumpkin. Macarons are the perfect bite: crisp on the outside, chewy on the inside.


Barefoot Contessa’s Carrot Pineapple Cake — Looking for a big, beautiful cake to adorn your Thanksgiving table? Barefoot Contessa’s Carrot Pineapple Cake is brimming with hunks of pineapple, carrot, walnut, and raisin. With cream cheese frosting slathered on in a thick layer, it’s an elegant and decadent Thanksgiving dessert.

Green Chile TURKEY Enchiladas — Okay, these don’t quite fit on the Thanksgiving dinner table, but maybe you find yourself wondering what to do with all your juicy turkey leftovers? These Green Chile Chicken Enchiladas can be transformed into turkey-filled treats, and what a great way to spice up leftovers. The recipe is so seductive, yet very simple — it won’t take up all of your Black Friday!


Share Share this post with friends!

Gâteau aux Noix

Am I the only one who’s already drowning in holiday plans? I’ve got so many things up my sleeve that there’s no room for my arm in there. Warm, comforting things like grandmothers’ pies, flaky croissants, and freshly baked bread. Fun, festive things like visiting the Southern Christmas Show, trimming the tree, and popping the orange Chipmunks’ Christmas cassette tape into the player. Laborious, time-consuming things like catching up on grading my Mt. Everest of student work. My calendar is full of a variety of things, but what it comes down to is one word: BUSY.

Or maybe three words: BUSY BUSY BUSY.

All that BUSYness coming up is partly why this past weekend was so wonderful. Mike and I enjoyed our trip to Greensboro in our favorite way: with food! We hastily devoured McGriddles and Krispy Kremes, a delicious Thai lunch, and even a fancy dinner in downtown Greensboro. Obviously, we’re professionally trained to handle major consumption. Please don’t try this at home.


Hot doughnuts now! Two hot glazed originals, two raspberry filled, a pumpkin spice, and a chocolate custard-filled.


Sweet Mike before his test, and Thai food afterward!

We also got a chance to just relax. Well, okay, I relaxed. Mike practiced math, was tested on math, and then reflected/brooded about math. I felt a little guilty leisurely browsing the poetry section of a Borders bookstore while he took his math GRE a few blocks away! Thankfully, the test is over, and Mike can finally rest — until he gets his scores back and has to finish up grad school applications, that is. Eek, I’m getting stressed out again — back to this past weekend . . .

I browsed high and low to find the perfect cake for Mike and I to enjoy together on our trip. I wanted something hearty and rustic that could travel without much fuss. I also wanted something homey and special — something we’d remember a few months from now. When a friend sent me Molly of Orangette’s post about Gâteau aux Noix, it sounded perfect.

In fact, this very cake had made a warm home in Molly’s own travel memories — in her case, of visiting Les Eyzies-de-Tayac in southwestern France. The hotel baked these cakes and packaged slices in cellophane for them to eat during a long day outdoors. Since that trip, she’d been looking for a recipe to recreate the memory. After reading her recollections, I couldn’t wait to bake the “brown, humble, nutty” cake she described.

Indeed, she had described the gâteau aux noix perfectly. The cake retains the subtle, sophisticated flavor of dry white wine, while the nuts taste homey and familiar. It’s a simple cake that you can wrap up and cart about until you’re ready to enjoy it. I can also see this being an ideal pantry staple from which to swipe a hunk after each meal.

Mike and I first tried the cake with cinnamon whipped cream, but I decided that accompaniment eclipsed the gentle wine flavor. We then popped open a jar of pears in white grape juice (Trader Joe’s) to slice up with our cake instead. The flavors were perfect together. If you’re dying for creaminess, though, feel free to add a small dollop of whipped cream — just be sure it’s not heavy on the vanilla.

If you need a bit of simplicity in your life, then from my home to yours, here’s the cake for you!

Gâteau aux Noix, or French Walnut Cake


Recipe by: Orangette, adapted slightly from Saveur Cooks Authentic French
Yields: 1, 9-inch cake.

Ingredients:
½ cup chopped walnuts, or a touch more
3 eggs
1 cup granulated sugar
1/3 cup walnut oil
1/3 cup dry white wine
1 ½ cups unbleached all-purpose flour
2 tsp baking powder
1/8 tsp salt

Directions:
Preheat oven to 350. Place walnuts in a small dry saucepan and toast over medium heat, shaking pan, until nuts are fragrant, 5-10 minutes. Set aside.

Beat eggs in a medium bowl with an electric mixer. Gradually add sugar and beat until mixture is pale yellow, light, and fluffy. Add walnut oil and wine and mix well.

Generously grease a 9” cake pan (I used an 8-inch with no problem, by the way; your cake will just be a bit thicker). Sift flour, baking powder, and salt together into a large bowl. Add egg mixture to flour mixture and mix with a wooden spoon until just combined. Gently fold in walnuts, and then pour batter into prepared pan. NOTE: Mixing a touch of the flour with the walnuts before folding them in may help evenly distribute them.

Bake cake until a toothpick can be inserted and pulled out clean, about 40 minutes (mine took only 30-35, however, and required a bit of tenting with foil for the last five). Remove from oven, cool for ten minutes, and then turn out onto a cooling rack. Allow to cool completely and serve in wedges. Loosely whipped cream would be a nice accompaniment, if possible.

NOTE: We served this with cinnamon whipped cream, which may have proven too bold a flavor for this subtle cake. We then switched to serving it with jarred pears in white grape juice (Trader Joe’s), which was a perfect complement!


Mixing up the batter.


Baking and fresh out of the oven!


Share Share this post with friends!

1 26 27 28 29