cake

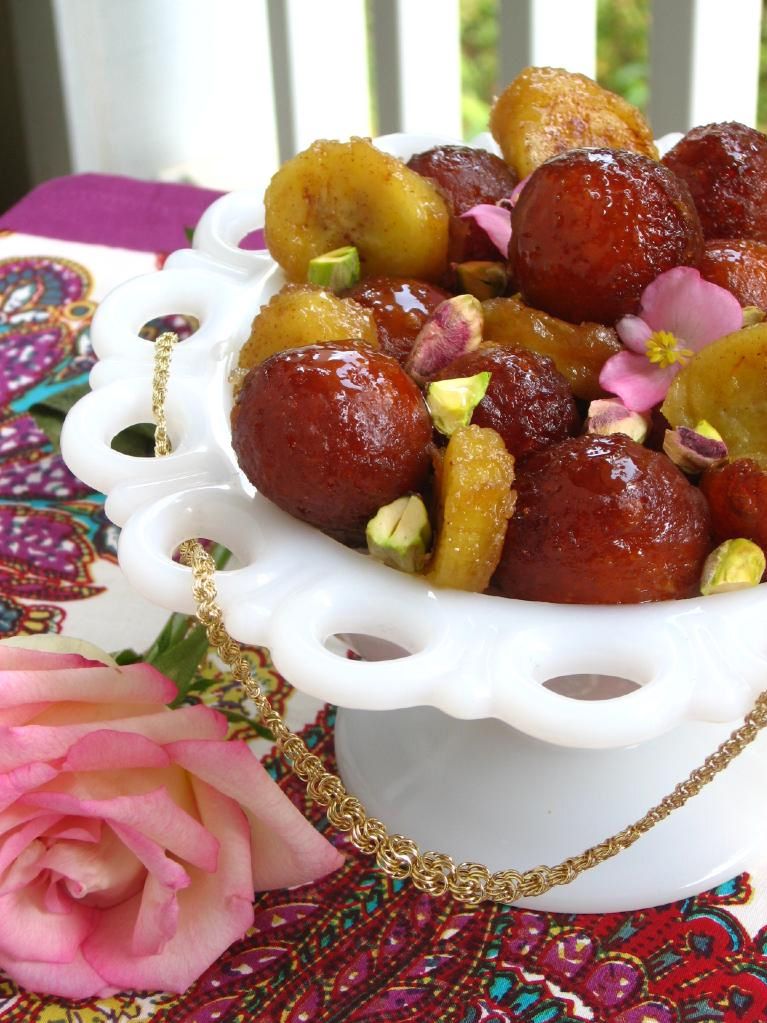
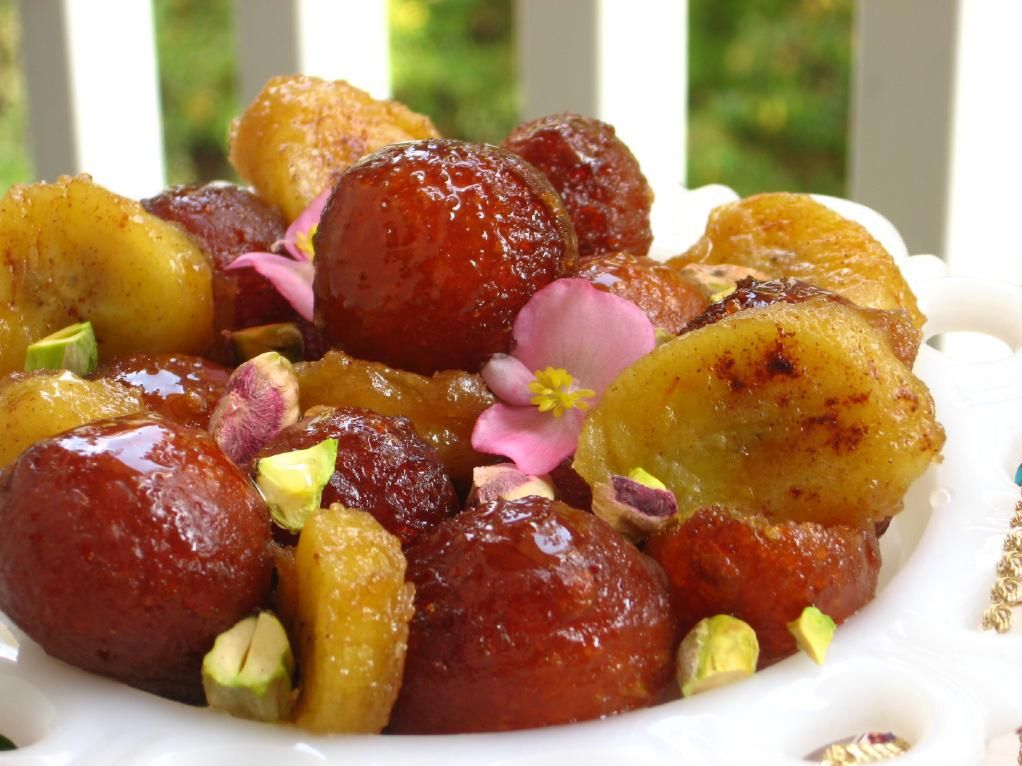
Gulab Jamun with Caramelized Bananas — and an Indian Buffet Love Story

I have heavy scent memories of an Indian restaurant Mike and I used to frequent called Jaipur. They must have burned incense every night for years. Maybe the scent is something the owner remembered but couldn’t place — something from when his synapses weren’t yet refined enough for memory. His mother burning it in the kitchen in a now-faraway home on the subcontinent, and he, just a baby then, lying swaddled in a room down the hall, his blankets collecting particles of sandalwood in each fold.
It’s sweet to imagine what the little restaurant means to him. It means something sweet to me, too. The orange and pink and gold, the weight of the incense, the guttural cry of otherworldly Indian music accompanied by sitar tones — all of it connected to a pseudo-memory for me. A memory of dust, colors, street food, and lights — an India I’ve never visited except in East Asian art classes, narrow Indian restaurants, the marigold-filled scenes of Monsoon Wedding, and the memories and photographs of friends.
Jaipur was also special to me and Mike because it was “our restaurant.” I remember weekend after weekend of trekking across town in my now-long-gone Altima, arriving at the buffet after dark. I remember rationing each plate so that I could have seconds of some of my favorites — palak paneer and red lentils — and sopping up every drop with warm naan.

I remember the shy waiter who knew our order before we sat down, and the chef who stopped us before we could serve ourselves from the buffet if he had a fresher, newer batch of bread. I remember smooth, sweet mango lassis, holding hands across the table . . . and spooning up warm, fragrant Gulab Jamun into tiny bowls alongside fruit-studded rice pudding.
It’s literally been years since I’ve been back to Jaipur now, and these neon and curry memories are even more poignant with Mike living across the state from me. When I saw that Project Food Blog Challenge #2 was to make a classic dish from another culture that’s out of your comfort zone, I knew I had to do some justice to Jaipur and our times there.

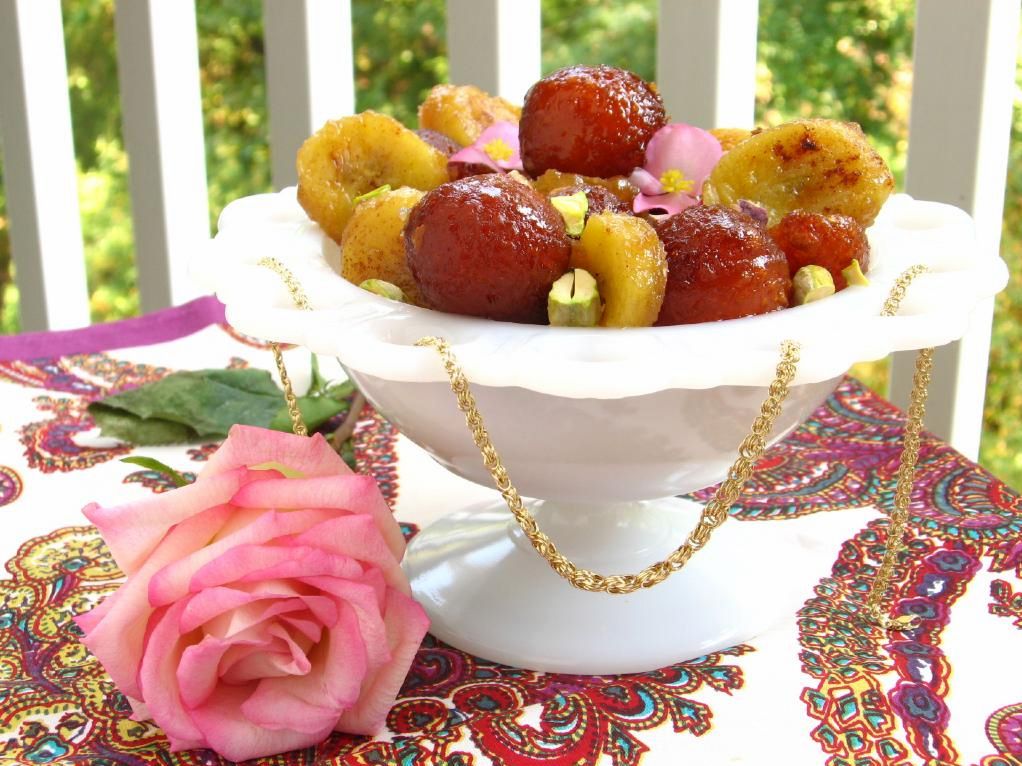
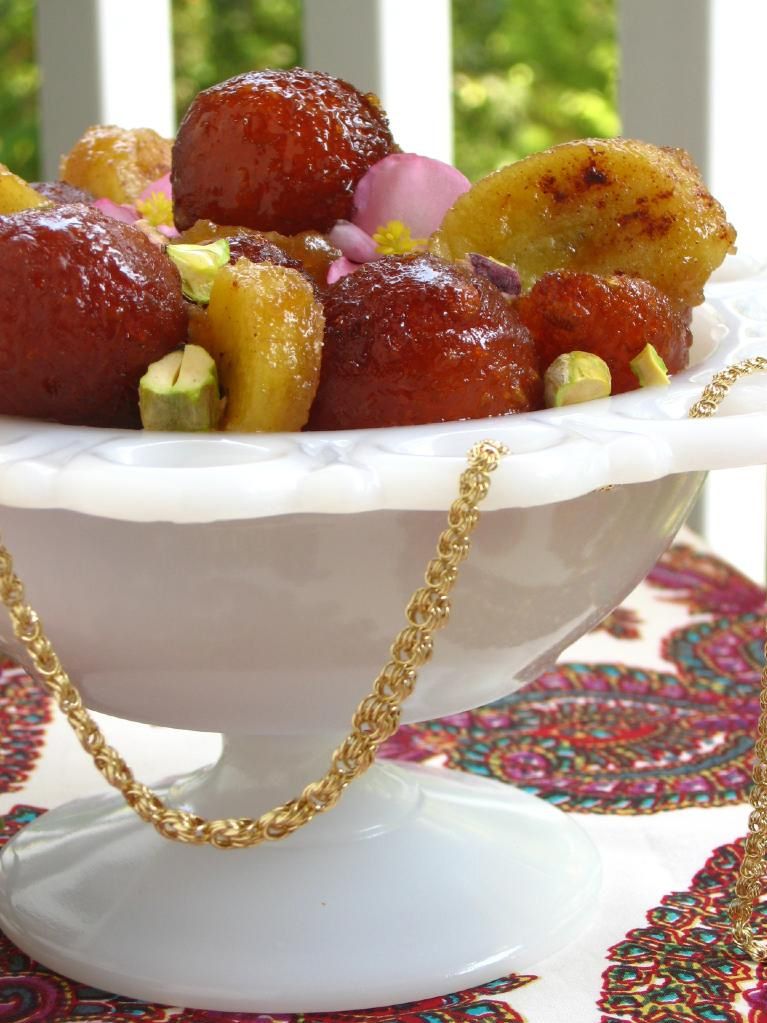
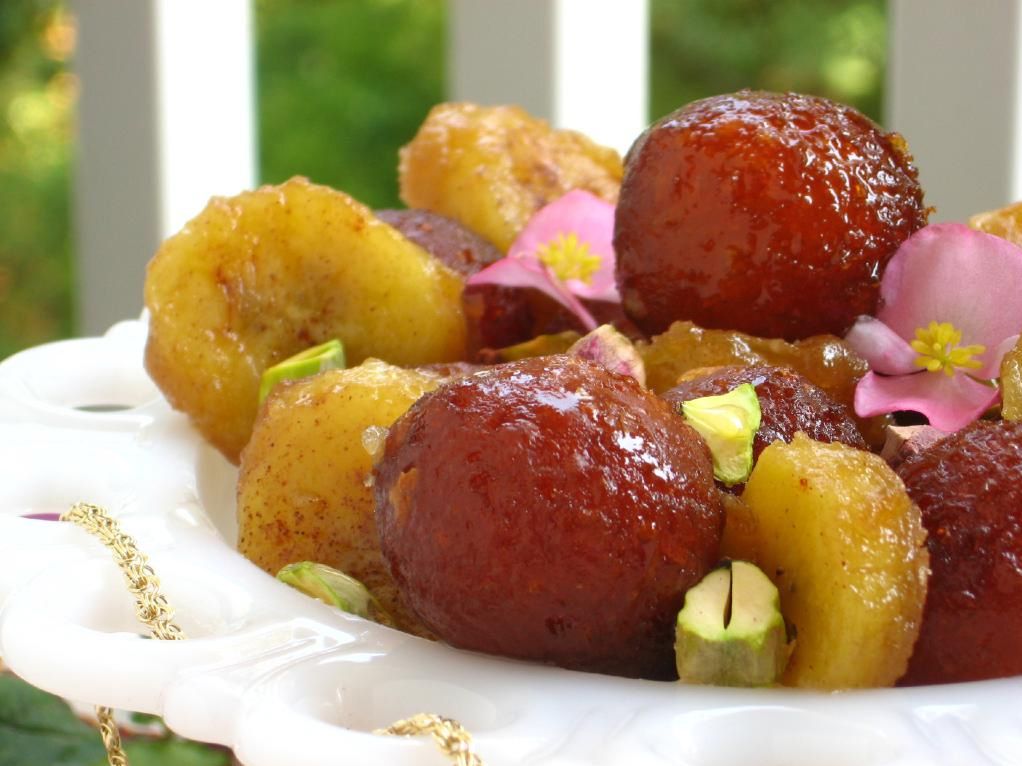
Gulab jamun, named for their rose flavoring and a fruit they resemble, are cake-like, juicy dumplings loaded with a sweet rose, cardamom, and saffron syrup. They’re common at Indian weddings and were often the highlight of our dinner at Jaipur. I savored mine in two bites, while Mike devoured each dumpling in one gulp.
While these rosy, sticky dumplings are a joyful memory for me, making them wasn’t something I considered before reading Project Food Blog’s Challenge #2. They’re fried — and frying things is not something I love. My fry-phobia not about the health considerations (have you seen my blog lately?), but rather, the difficulty of maintaining an appropriate oil temperature, the mess, and the inevitable burnt/undercooked disasters. Remember the Tumbleweed Burger post, where my attempt to fry onions produced a sum total of one halfway acceptable onion (okay, even that one was pretty pitiful) that I used in pictures and then threw away?

I’m fighting for something I love, though, and I hope my steps away from my comfort zone are steps towards becoming the next food blog star.

It wasn’t enough to recreate my favorite, sultry Indian dessert — I wanted to bring something of my taste to the table. I paired the gulab jamun with caramelized bananas and pistachios, hoping to create a rich, floral, indulgent product that would be incredible served warm over vanilla bean ice cream.

My first version was a little too sweet, though (sugar syrup AND caramelized bananas). I reduced the sugar in the bananas and the gulab jamun syrup in the recipe below in hopes that it balances out. I’ll try it this way next time — no loss if it doesn’t work, because the bananas and dumplings are both delicious on their own as well!

What about you? What food stirs up important memories for you? Is it a type of cuisine, a certain dish?
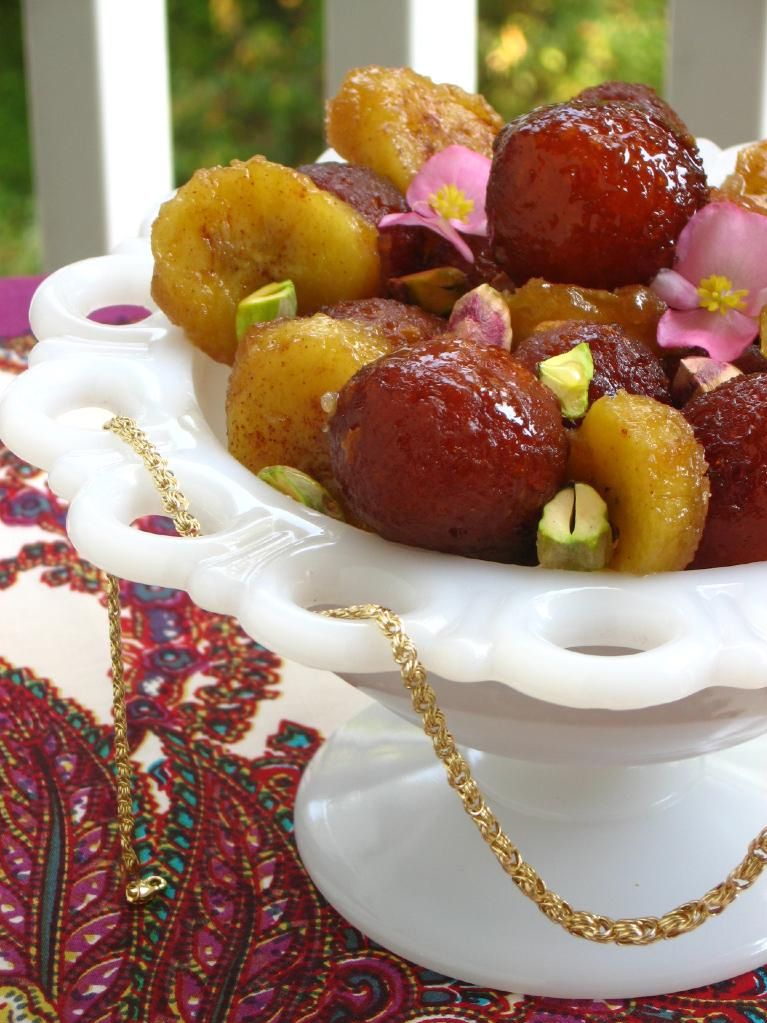
Gulab Jamun with Caramelized Bananas


Recipe by: Gulab jamun by Show Me the Curry, and caramelized bananas adapted by Willow Bird Baking
Yield: 10-15 gulab jamun, depending on the size

Syrup Ingredients:
1.5 cups sugar
2 cups water
a few drops rose essence (or about 4x the amount of rosewater)
1/2 teaspoon (or to taste) ground cardamom
a few strands saffron (optional)

Ball Ingredients:
1/2 cup instant dry milk powder
2 tablespoons all-purpose flour
2 tablespoons yogurt
1 tablespoon ghee, clarified butter, or vegetable oil
1/4 teaspoon baking soda
oil for frying (at least 1.5 inches deep)
pistachios for garnish

Caramelized Banana Ingredients:
1 banana, slightly green, not quite ripe, sliced crosswise into 1/4″ slices
1 tablespoon light brown sugar
1.5 tablespoons unsalted butter
dash of cinnamon

Directions:
First, make the syrup. Combine all syrup ingredients in a sauce pan and bring to a boil. Once it boils, reduce the heat and allow it to simmer while you prepare the rest of the recipe.

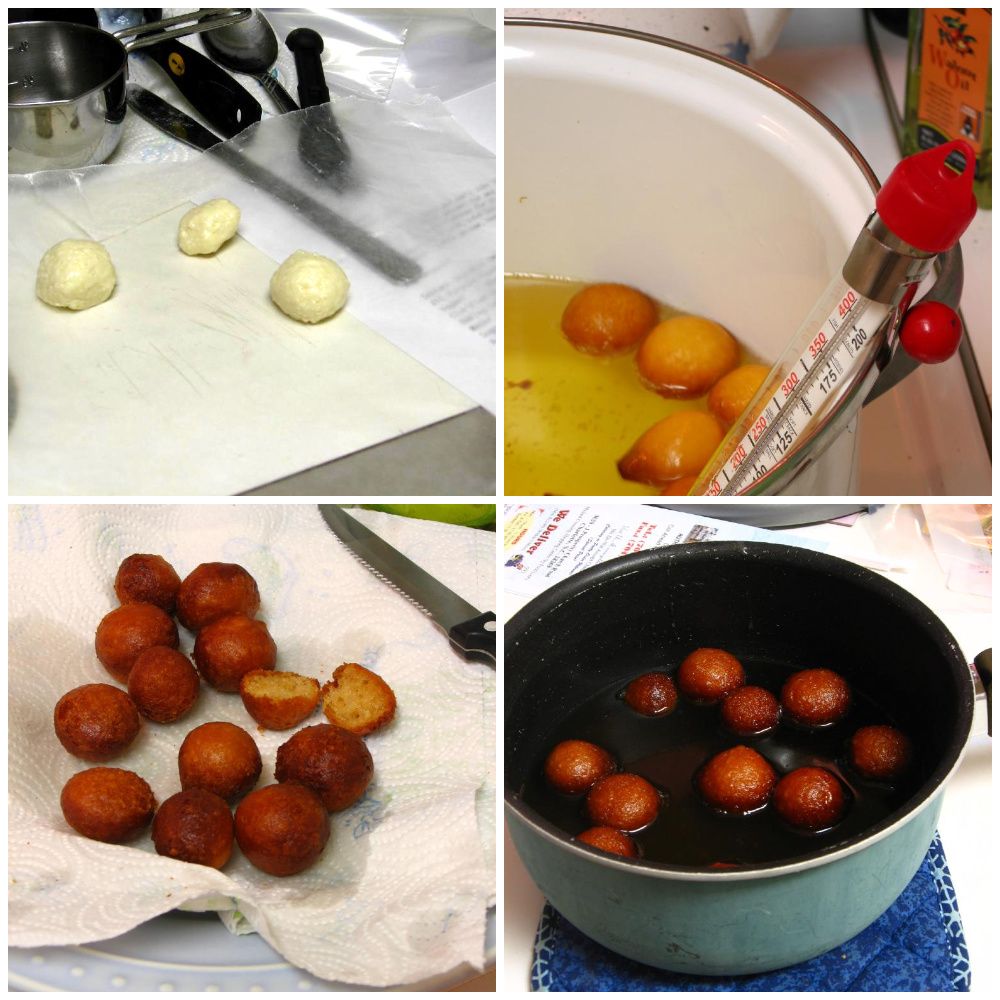
Begin heating the oil for deep-frying on low-medium heat. You want it to reach 230 degrees according to some websites, but I had more luck frying from 250-270. You want a slow, patient fry on these.

While oil heats, mix dry ingredients: milk powder, all-purpose flour, and baking soda. Add clarified butter (or ghee or vegetable oil) and then, slowly, the yogurt, mixing well to make a dough. Allow it to rest for 5-10 minutes (don’t worry if it looks wet at first — after resting it will be right). With oiled hands, form into 10-15 small balls (they will nearly double in size throughout the cooking and soaking process, so do make them smaller than you think you should).

Test the oil: drop in a small piece of dough. If it sits at the bottom of the pan for a moment before coming to the surface, the oil is ready. Drop in 3-4 balls at a time and, after they float up, rotate them continuously for an even color. Be patient — when the balls are a dark golden brown, remove them with a slotted spoon and let them drain on paper towels.

When all balls are draining, bring the syrup up to a boil again. Drop in the balls, turn off the heat, and cover the syrup. Allow balls to soak at least 45 minutes to overnight.

When about ready to serve, caramelize bananas. Heat a large, non-stick skillet over medium-high heat. When hot, add half of the butter and let it sizzle for a few seconds before adding bananas. These should brown for about 30 seconds without being disturbed. Then turn them over and add brown sugar, cinnamon, and last half of butter. Shake the pan to keep the bananas moving and cook about a minute more, until sugar is melted and bananas are caramelized, but still solid. Remove from heat. Serve gulab jamun with caramelized bananas and pistachios to garnish. You can also serve warm gulab jamun and caramelized bananas over vanilla ice cream.

Willow Bird Baking is a contestant in Project Food Blog, a contest comprised of a series of challenges to find the next food blog star. To see my contestant profile, please click here. Voting for Challenge #2 begins on September 27 — will you consider voting for me? I’ll post a reminder and instructions on how to do so on that date. I am so grateful for your support!
If you liked this post, please:
Subscribe to Willow Bird Baking
Follow Willow Bird Baking on Twitter
Follow Willow Bird Baking on Facebook
Give this post a thumbs up on StumbleUpon


ShareOther ways to share this post with friends!

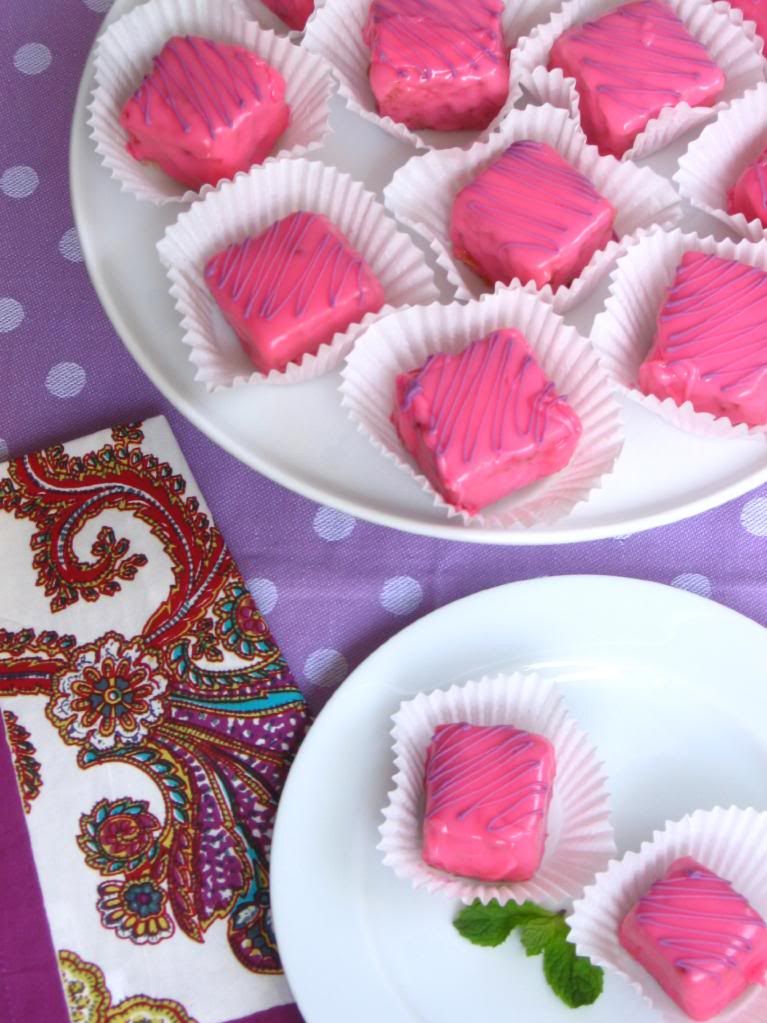
Secret Garden Recipe: Pink Ice Petit Fours

Want to have a tea party?

We’re going to find a garden enclosed in cool, moss-covered stone walls. We’ll lay out delicate china on a wrought-iron table with ivy growing up each leg. Arrayed in sweet sundresses and sandals, we’ll carry in platefuls of hot buttered scones, pitchers of raspberry and strawberry lemonade, and pots of fragrant orange tea. Every sip will be accompanied by a staunch pinky point. Twilight will find us still laughing, unwilling to let the summer daylight slip away.

Oh, and of course there’ll be petit fours. The dainty, sweet little cake squares will be the jewels of the tea table.

What a fantasy. In actuality, I’ve just finished my first week of teacher meetings. The past few days have been filled with book shelving, furniture moving, copy making, curriculum planning, sweet student meeting, and lots of teacher giggling. I’ve left with a headache nearly every day, relieved that headache with a nap nearly every day, and even still . . . gotten a ton of work done nearly every day!

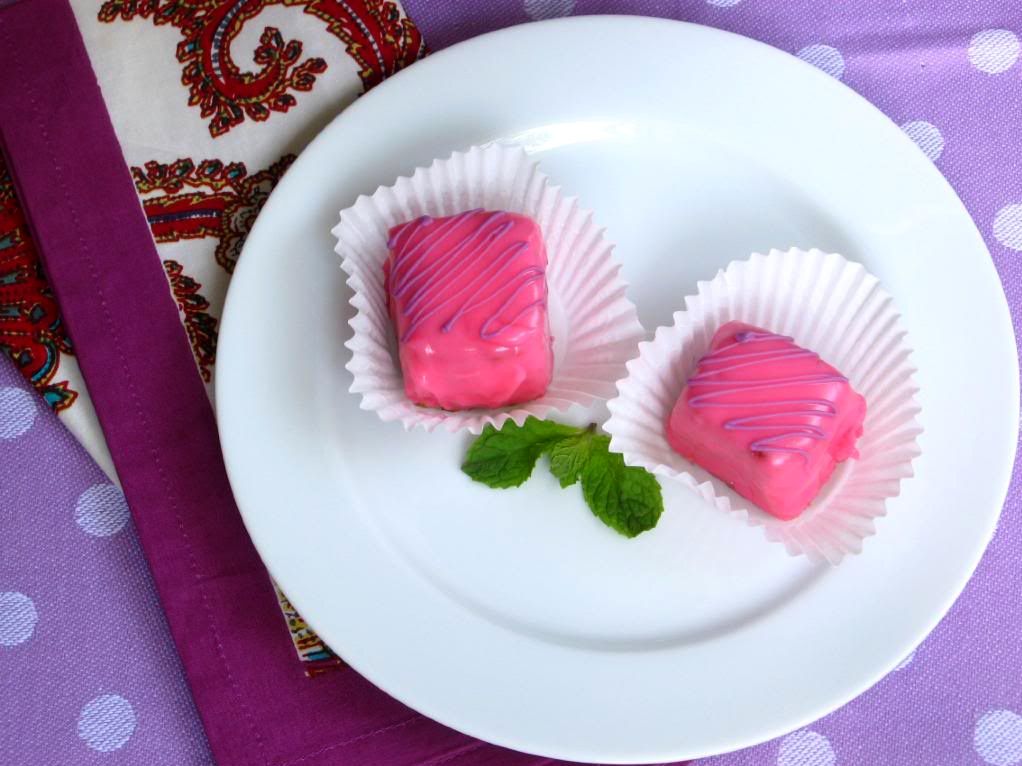
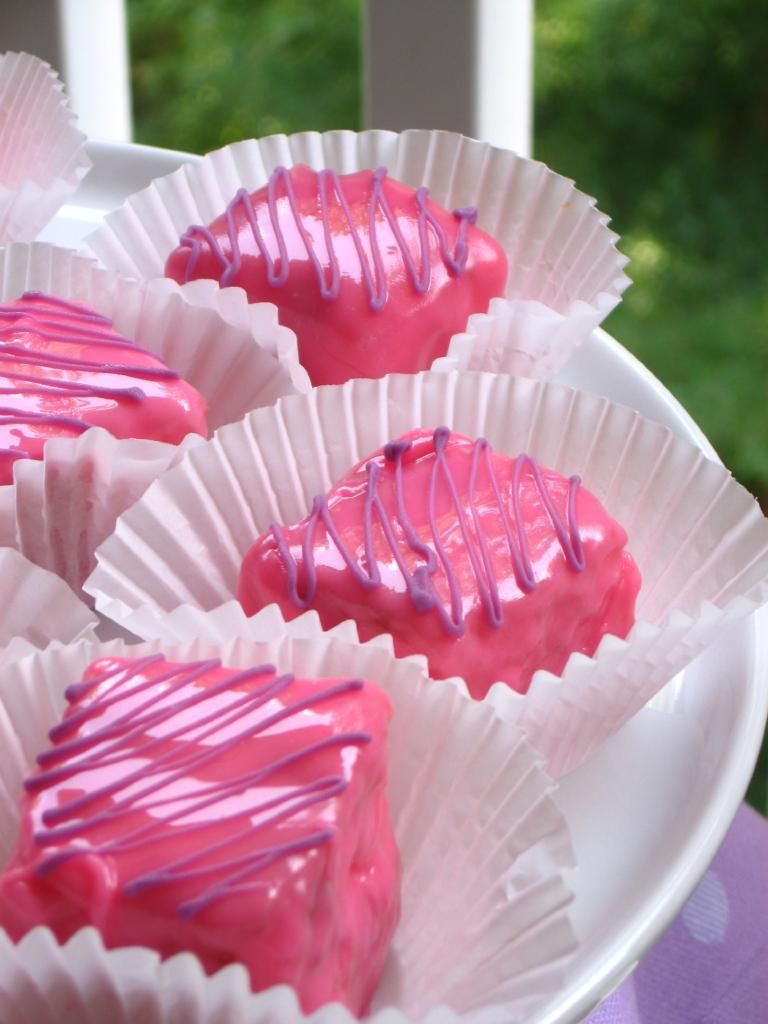
We can still have petit fours, though, right? Petit fours are sweet little tea time desserts that seem to specialize in being adorable. Any number of miniature desserts can be classified as petit fours (literally “small ovens” in French), but for my sister’s surprise garden party earlier this summer, I knew I wanted dense, fruity cake squares. Petit fours are sometimes filled with jams, and then are covered in poured fondant or chocolate.

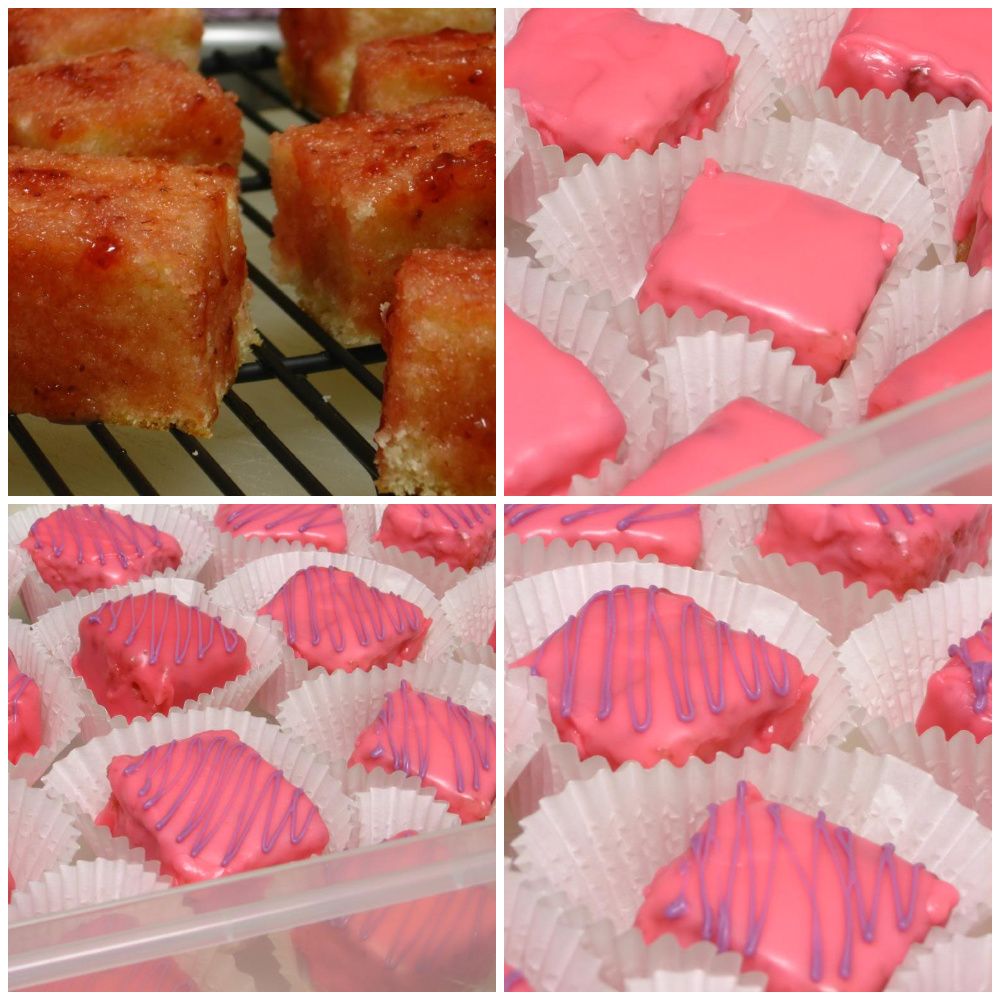
Now, before I gush, these bite-sized cakes were not perfect. More specifically, the poured fondant was not perfect. In fact, instead of “poured,” let’s call it glopped fondant. Shall we?

The thing is, fondant is going to be super sweet. There’s a cavity-inducing amount of confectioner’s sugar in it, not to mention the corn syrup. The only hope of this stuff covering your petit fours and not ending up with a cloying mess is making sure the poured fondant is heated enough to be very thin, so only a thin layer sticks to the outside of the cake square. This proved to be impossible with the recipe I used. It was warmed in a double boiler for gentle heating, but as soon as I started to pour, I was only able to cover a couple of cake squares before it was glop. Even when it was fully heated, it never really got thin enough to cover the squares in a reasonable way. As a result, they were too sweet.

Oh, and that color? That was not the color I was going for. I had a pale, rose petal pink in mind. Um, that’s all I’ll say about that.

While the petit fours weren’t perfect, the taste itself (beyond the fondant) was so wonderful. The cake was deliciously moist, cool, and dense with a gorgeous buttery almond flavor. The raspberry jam covering was the perfect complement to the almond (one of my favorite flavor combinations!) and was simple to brush on, though it never dried completely. Really, if you use poured white chocolate or a different poured fondant recipe (how about trying this one, which looks great?), these would be fantastic (and they’d probably look a little less “gloppy” as well). Even in their overly sweet state, I ate a ton of them due to their brilliant flavorings.

This is also one of those recipes that ends up looking fancy despite being relatively easy to make — and you know I love those. A few key steps (like freezing the cake before cutting it up and making sure your fruit glaze is very thin) ensure that the process is relatively simple.

Go have a tea party!

Pink Ice Petit fours


Recipe by: Adapted from Diana’s Desserts
Yield: 60 1-inch petit fours, or about 16 2-inch petit fours

NOTE: This recipe does not include the poured fondant recipe or instructions due to the aforementioned difficulties. If you want to try poured fondant, I’d recommend looking at this post on Cakes and Cupboards, which looks promising. Nevertheless, poured fondant might still be too sweet for you. Another option is a poured chocolate. You’ll probably need two coats if you use white chocolate. If you want completely smooth petit fours, I recommend using a thin layer of rolled marzipan under your icing, or the buttercream procedure outlined on Cakes and Cupboards, above.

Cake Ingredients:
1/4 cup butter, melted
1/4 cup shortening
1 cup sugar
1 teaspoon vanilla extract
1 teaspoon almond extract
1-1/3 cups all-purpose flour
2 teaspoons baking powder
1/2 teaspoon salt
2/3 cup milk
3 egg whites

Fruit Glaze:
12 ounces raspberry preserves (or heated jelly)
3 tablespoons water

Directions:
Prepare the cake. Preheat oven to 350 degrees F. Grease and flour a 9-inch baking pan, or use Wilton’s Cake Release.

Cream butter, shortening, and sugar together in a large bowl. Beat in vanilla and almond extracts. In a separate bowl, combine flour, baking powder, and salt. Add dry ingredients to the creamed mixture alternately with the milk. In another bowl, beat egg whites to soft peaks. Gently fold the egg whites into the batter.

Pour the batter into the cake pan and bake for 20-25 minutes, or until a toothpick inserted in the center comes out clean. Remove from oven and let cool in pan for 10 minutes. Turn cake out onto a cooling rack. When cooled, chill cake in refrigerator for a bit before freezing it for at least 1 hour.

Right before removing the cake from the freezer, prepare fruit glaze. In a medium saucepan, heat preserves with the 3 tablespoons water on low heat. If using jelly, judge whether or not you need any of the water to make it a thin consistency.

Remove cake from freezer. Using a long, serrated knife, cut a thin slice off each side of chilled cake. Cut cake into squares of desired size (for me, about 1.5-inch squares). Place squares 1/2 inch apart on a cooling rack over a sheet pan. Use a pastry brush to spread a thin layer of heated preserves over tops and sides of petit fours before icing. Allow excess to drip off. Let dry (I put them in the fridge and let them set up a bit — they never really “dry”). Repeat if necessary to thoroughly coat squares.

Prepare your desired poured fondant or chocolate and pour over the petit fours. Decorate the tops with different frostings, chocolates, sprinkles, candy, sugar flowers, etc. as you wish. Refrigerate until ready to eat — eat within a day or two.

If you liked this post, please:
Subscribe to Willow Bird Baking
Follow Willow Bird Baking on Twitter
Follow Willow Bird Baking on Facebook
Give this post a thumbs up on StumbleUpon

ShareOther ways to share this post with friends!

Ina Garten’s Lemon Loaf Cake and Raffaldini Vineyards

So what have you been up to this summer? As you know, up until this past weekend, I had not fulfilled my summer quota of fun sunshiney activities — no beach, no pool, no picnic. With school looming ahead of me (teacher meetings start tomorrow), something had to be done. Quickly.

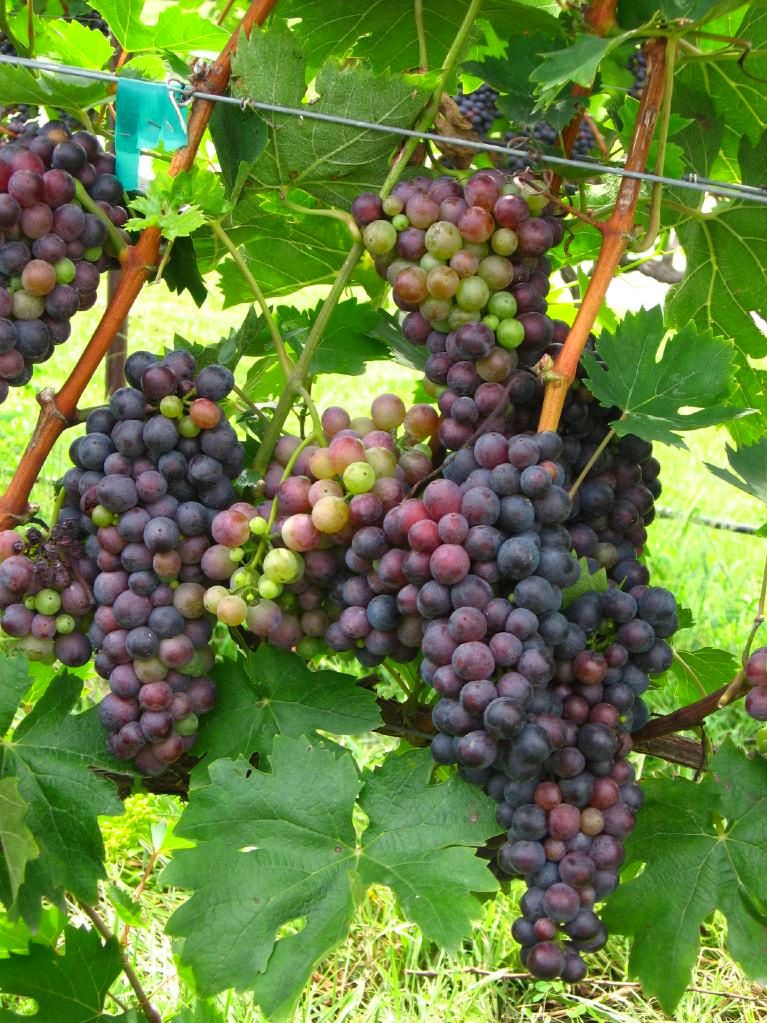
My friend Vada saved the day (er, the season?). We Jazzercise together and she invited me to join her and a group of her fun friends for a road trip. It was her friend Lori’s birthday and they were headed to Raffaldini Vineyards in Ronda, NC.

When she first suggested it, I wasn’t sure. I don’t drink, so what would I do at a vineyard? Would I end up counting grapes in the corner as everyone else played wine pong (that’s what they do at vineyards, right)? As it turns out, though, Vada doesn’t drink either, and she was certain it would still be fun. I’m up for fun! I told her to count me in.


Vada and Luca

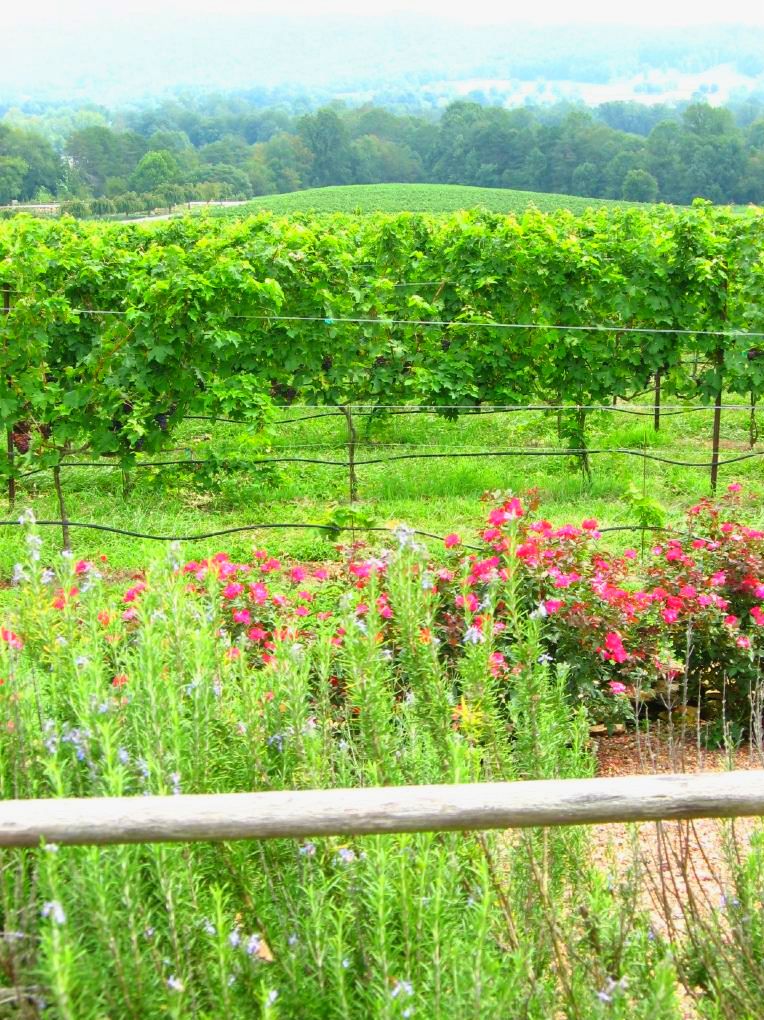
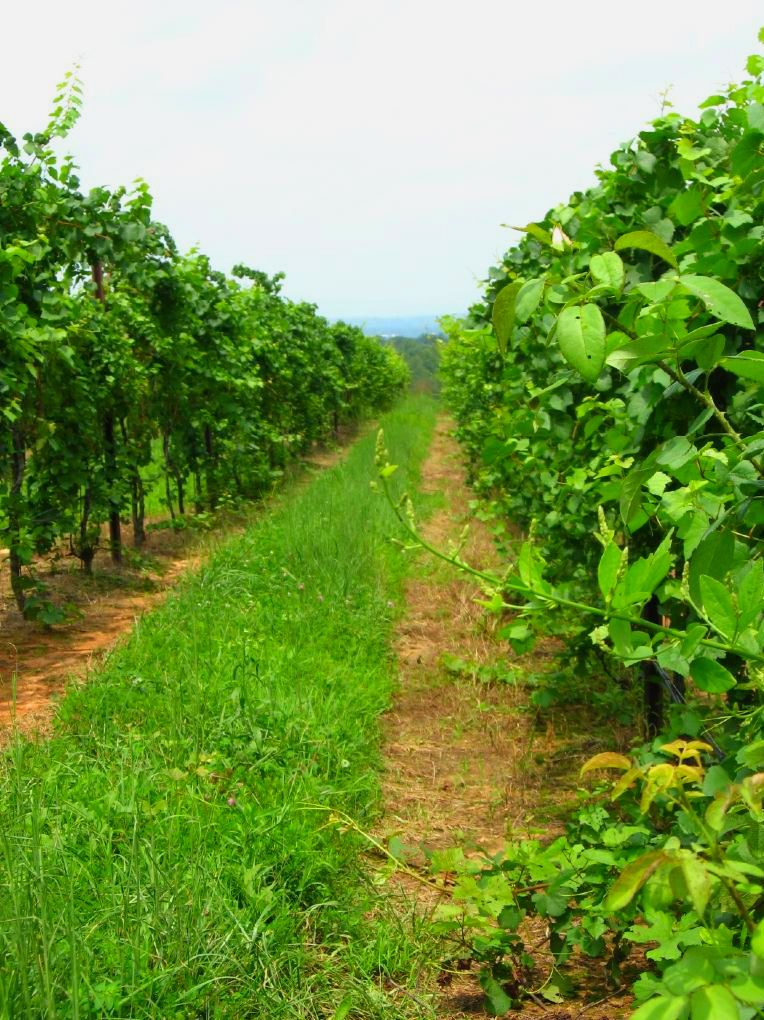
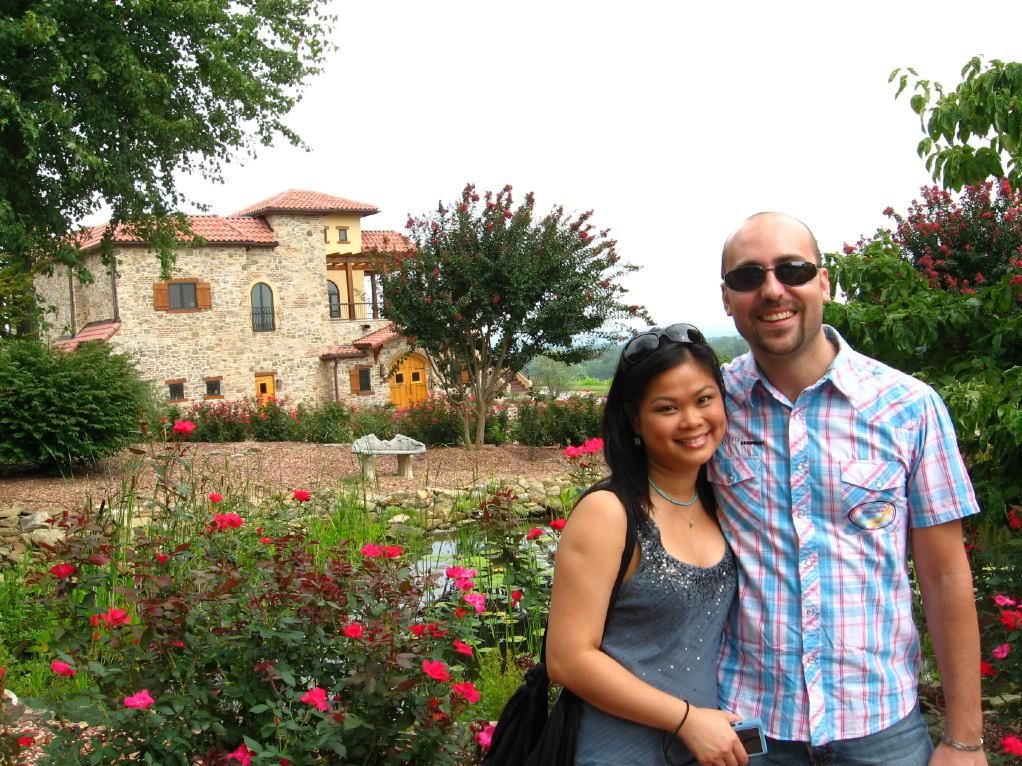
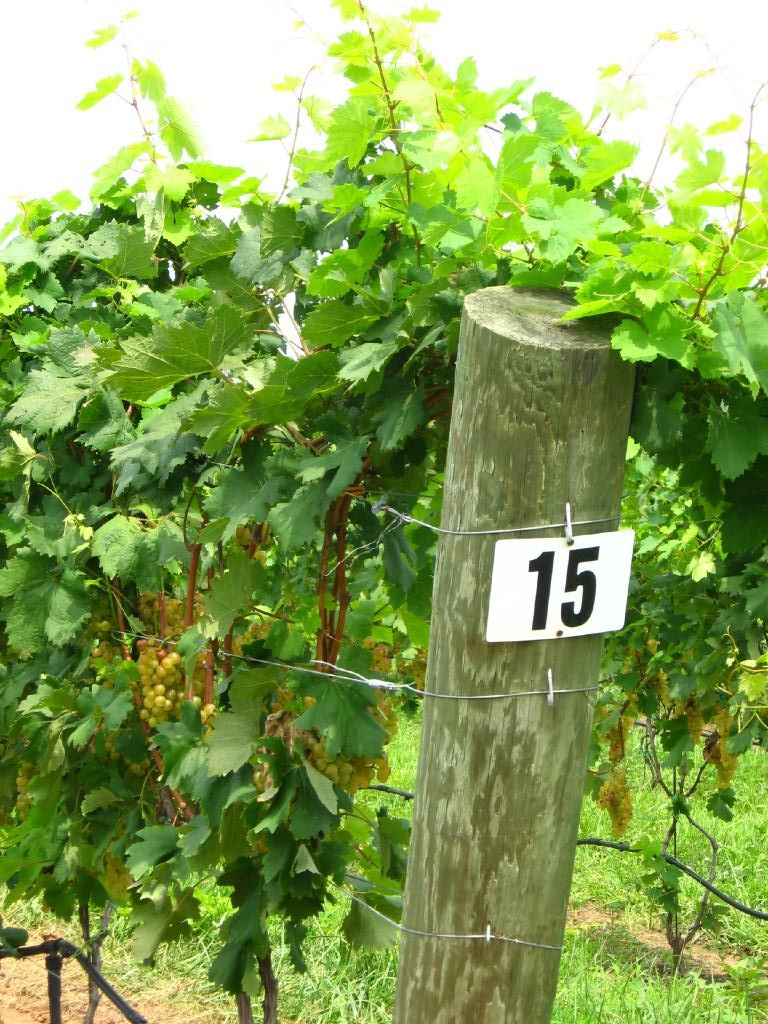
I’m so glad I went, because it was fun. Turns out, vineyards are beautiful — or at least Raffaldini Vineyards certainly were! We drove about an hour out of Charlotte and suddenly it felt like we were in Italy. Vada’s friend Luca, our resident Italian, agreed that it reminded him of home — a nice stamp of authenticity. As promised, fun ensued.

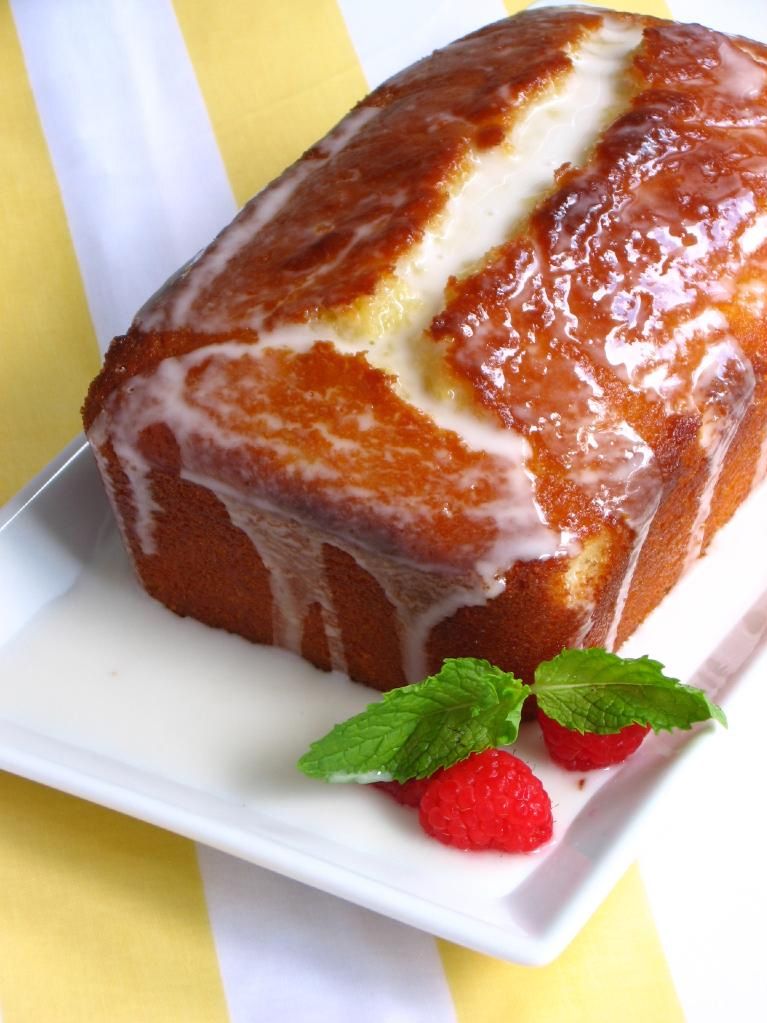
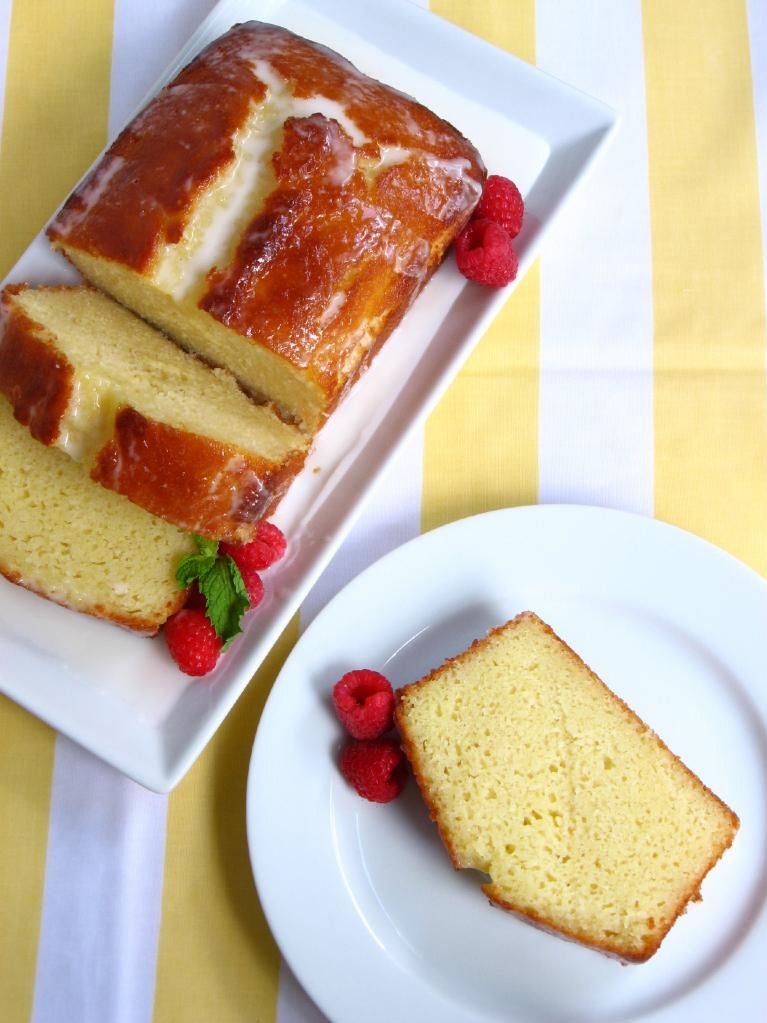
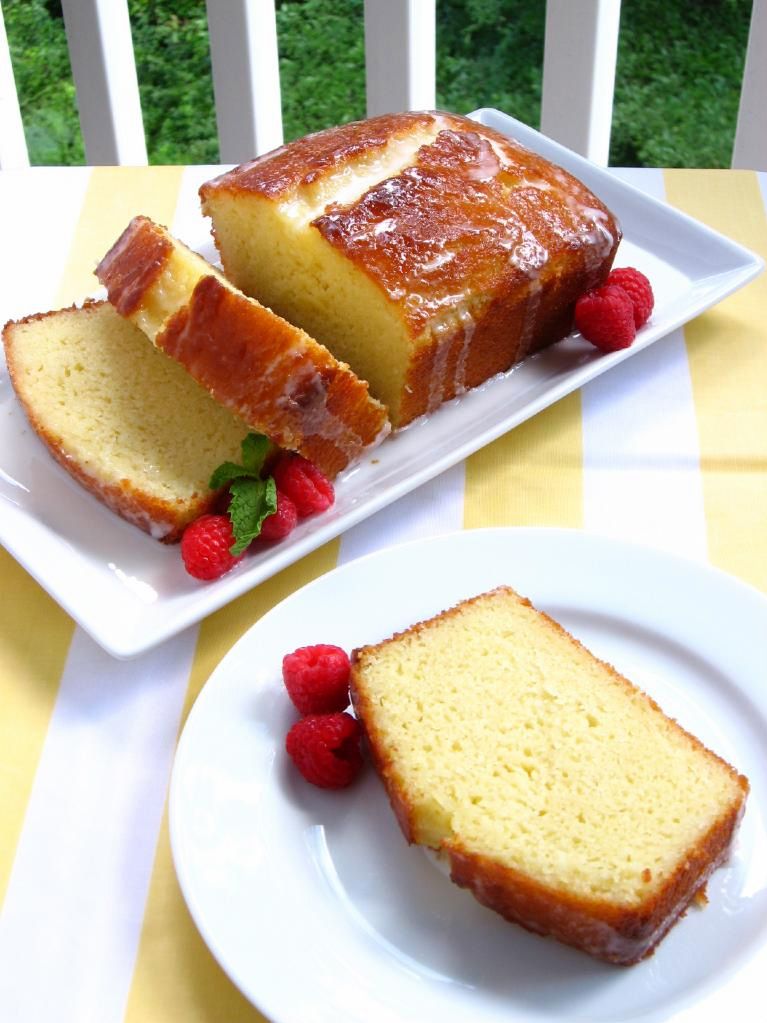
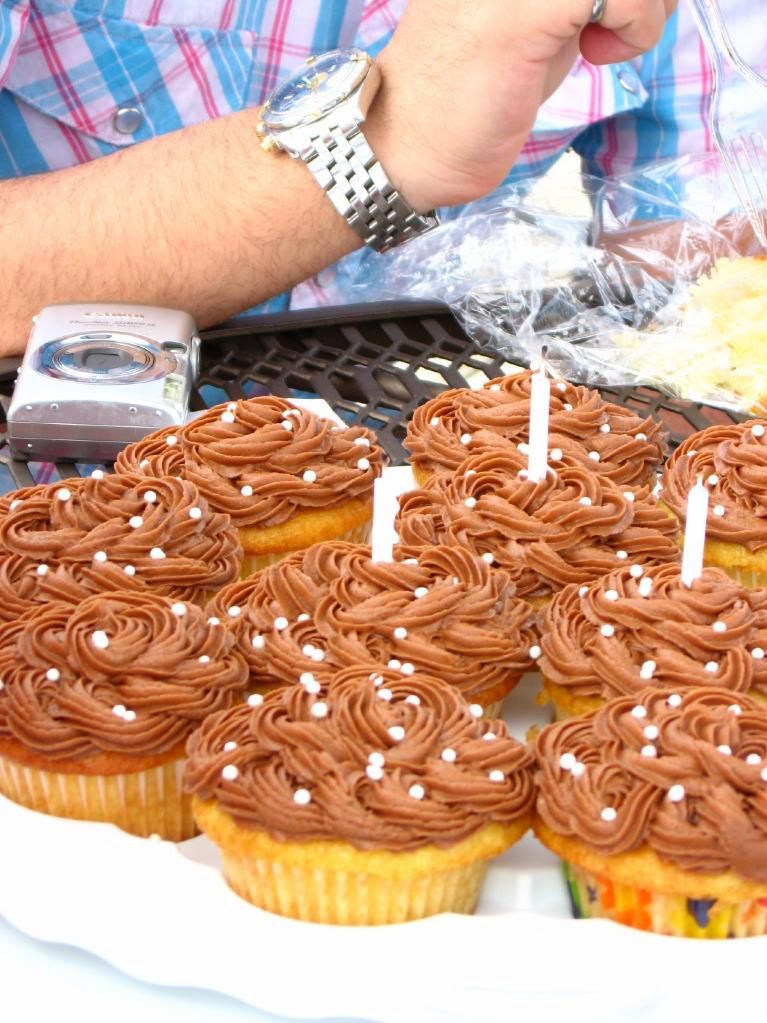
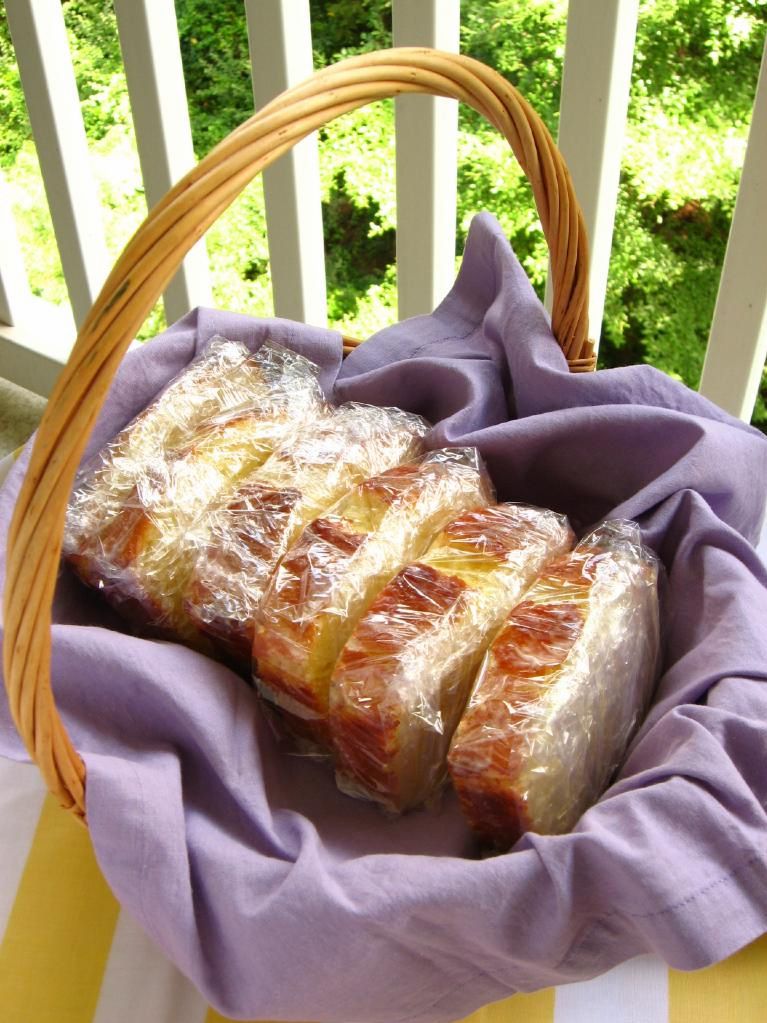
First, we ate a lovely picnic on an outdoor patio overlooking the vineyards and mountains in the distance. The vineyards offered a whole menu of food you could purchase on-site, but I brought a little packed lunch to save money. I also brought this bright, summery Lemon Loaf Cake, which was moist and traveled so well. Vada, who is an absolutely extraordinary cake decorator, brought cupcakes along. We had quite a feast!

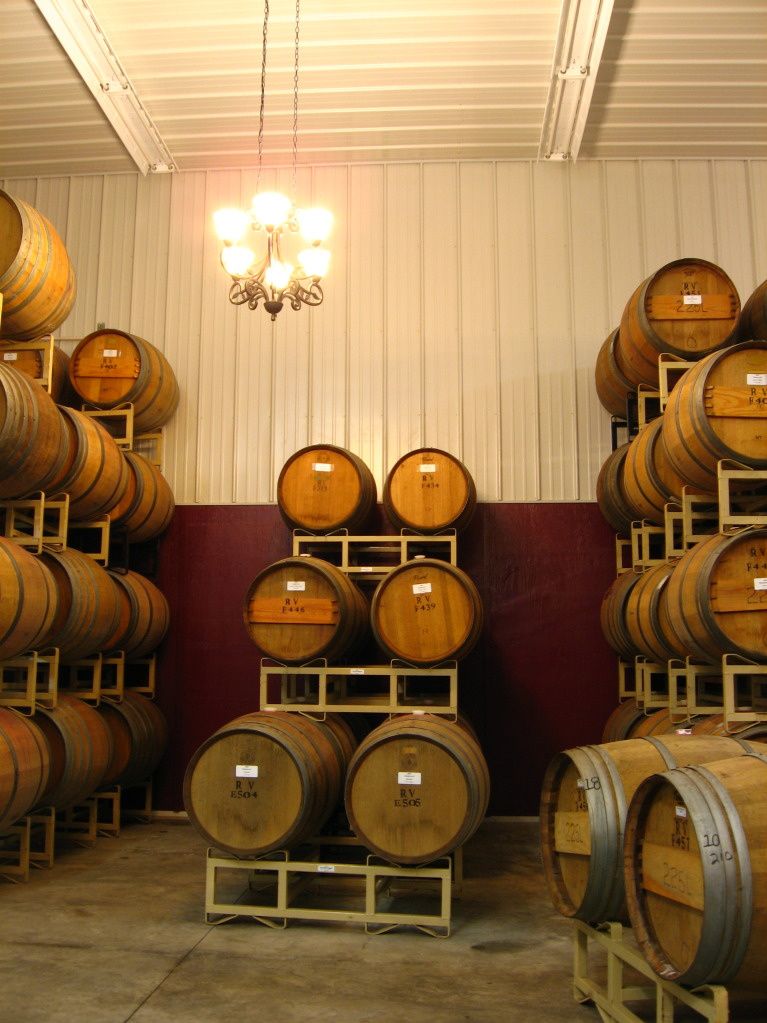
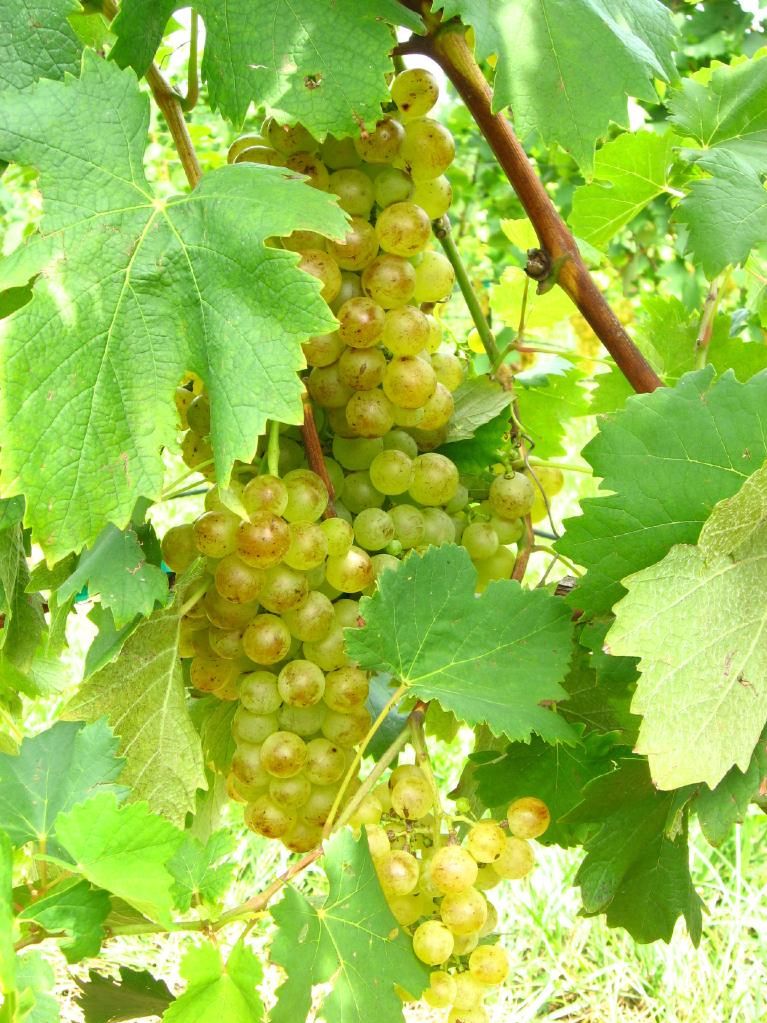
After our picnic, we took a brief tour of the vineyard, learning about the soil, growing practices, and types of grapes grown. While others enjoyed a wine tasting, Vada and I took a walk around the grounds and had a photo shoot. Finally, we took a tour of the winery and learned how the wines were made. It was so informative — not being a drinker, I tend to think of grapes as the basis of jelly and “tannin” as something you do at the beach. I learned a lot! The best part? The entire day only cost me $8 — and that included buying a bottled water on-site.


Vada’s gorgeous cupcakes and the quick Lemon Loaf Cake packed for traveling!

This one little day trip kind of made my summer! It was filled with sweet people, good food, beautiful surroundings. How about you? Does one event or activity this summer stand out as your favorite?

You can relive part of my end of summer fun by making this quick, simple loaf cake for yourself. It has a tangy, drenched lemon flavor that will help you kiss the summer days farewell.

5 from 1 reviews
Ina Garten's Lemon Loaf Cake
 
Prep time
Cook time
Total time
 
A delicious, tangy, easy lemon loaf cake. Be careful not to overbake!
Author:
Serves: 6
Ingredients
Cake Ingredients:
  • 1 1/2 cups all-purpose flour
  • 2 teaspoons baking powder
  • 1/2 teaspoons kosher salt
  • 1 cup plain whole-milk yogurt or sour cream
  • 1 1/3 cups sugar, divided
  • 3 eggs
  • 2 teaspoons grated lemon zest or 2 teaspoons lemon extract
  • 1/2 teaspoons pure vanilla extract
  • 1/2 cup vegetable oil
  • 1/3 cup freshly squeezed lemon juice
Glaze Ingredients:
  • 1 cup powdered sugar
  • 2 tablespoons freshly squeezed lemon juice
Instructions
  1. Preheat the oven to 350 degrees F. Grease an 8 1/2 x 4 1/4 x 2 1/2-inch loaf pan (I use Wilton’s Cake Release). Line the bottom with parchment paper and butter and flour the entire pan.
  2. Sift the flour, baking powder, and salt together into a medium bowl. In a large bowl, whisk together yogurt, 1 cup of the sugar, eggs, lemon zest or extract, and vanilla. Slowly add the dry ingredients into the wet, whisking to combine (I did this in 2-3 additions). Use a rubber spatula to fold the vegetable oil into the batter until it’s fully incorporated. Pour into the prepared pan and bake for about 50 minutes, or until a cake tester stuck in the center of the loaf comes out clean.
  3. While the cake is baking, combine the 1/3 cup lemon juice and remaining 1/3 cup sugar in a small saucepan over medium heat and cook until the sugar dissolves and the mixture is clear. Set aside.
  4. When the cake is done, allow it to cool in the pan for 10 minutes before removing it and placing it on a baking rack over a sheet pan. Use a cake tester, wooden skewer, or toothpick to carefully pierce holes throughout the cake (I used a toothpick so the holes wouldn’t be too obvious, but a skewer might have made deeper holes in the cake, allowing more syrup to get through). While the cake is still warm, pour the lemon-sugar mixture over the cake and allow it to soak in. Cool completely.
  5. In a small bowl, combine the powdered sugar and lemon juice, whisking to form a smooth glaze. Pour over the cake. Slice and serve with fresh berries, whipped cream, or ice cream.


Wacky Candy Cupcakes: Ferrero Rocher and Reese’s Cup

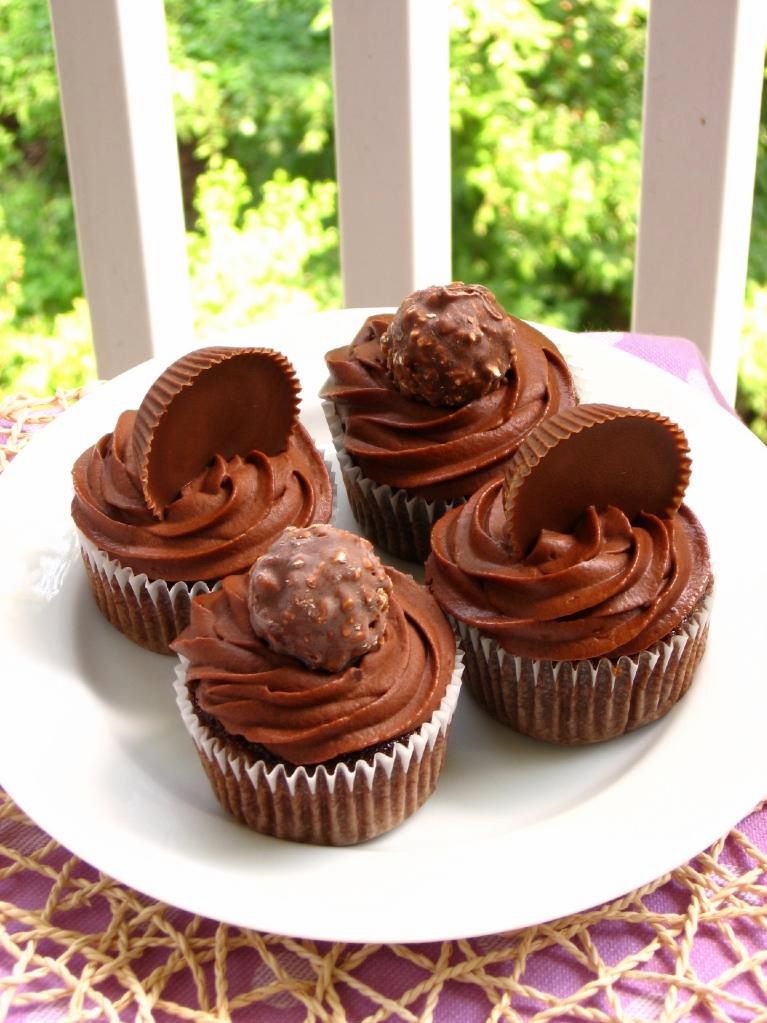
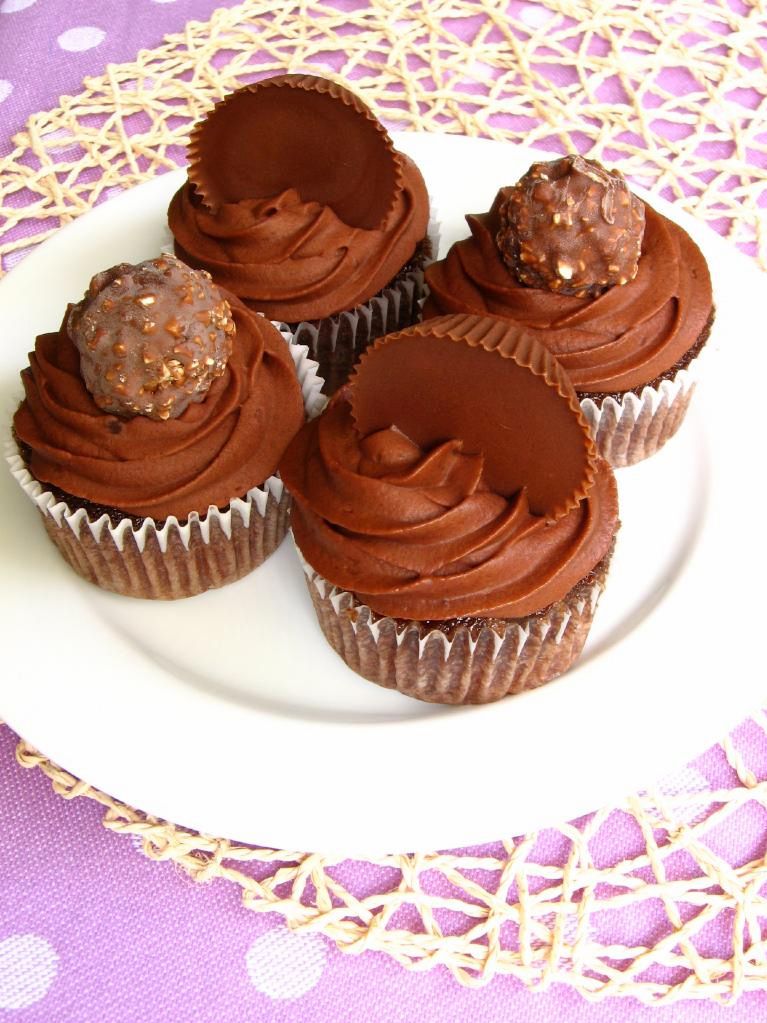
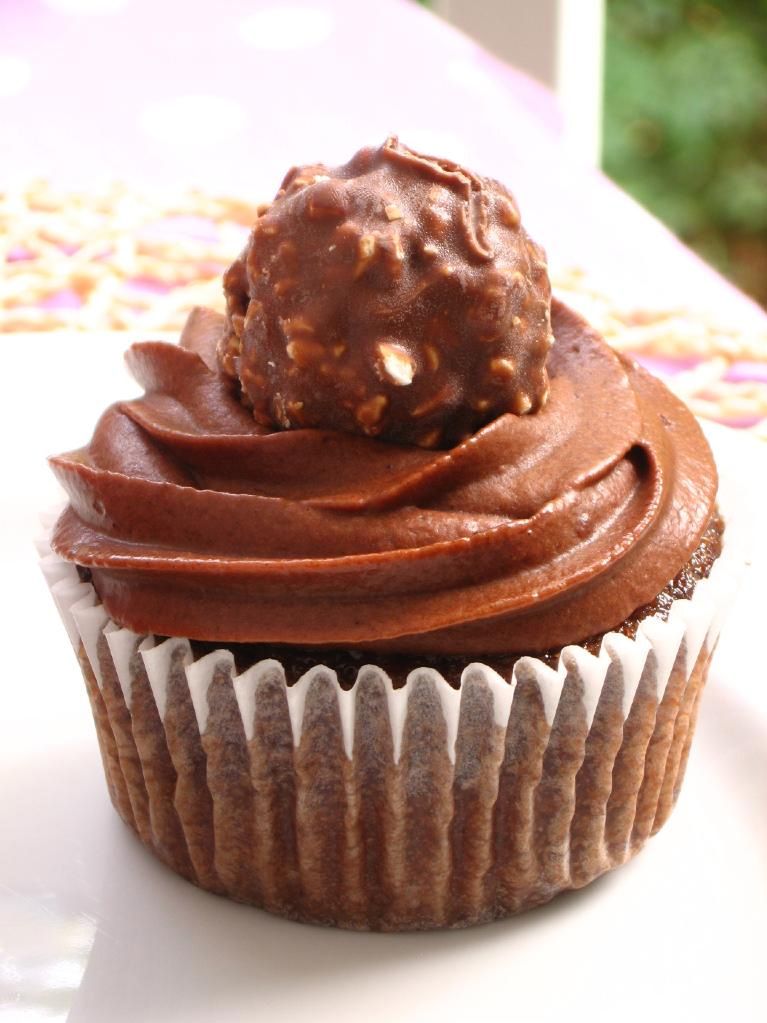
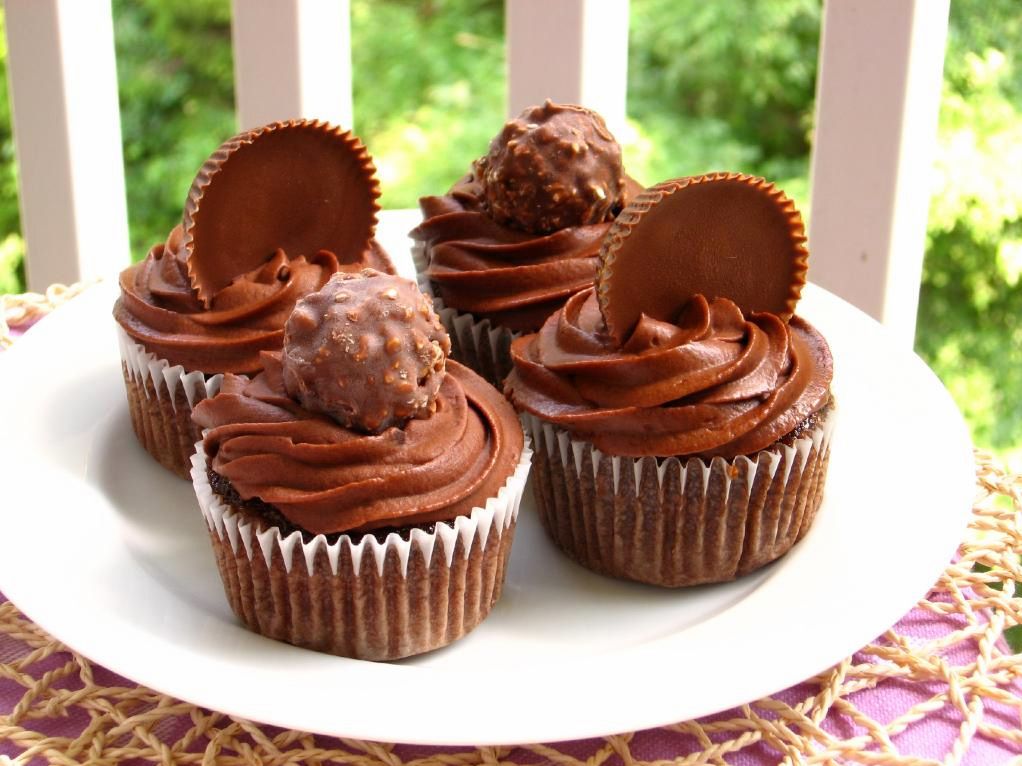
When my sister called and asked me to make a dessert for her office party, I jumped at the chance to recreate an old favorite. Way back toward the beginning of Willow Bird Baking, I made some fun Ferrero Rocher Cupcakes in which I stuck a whole frozen candy into each cupcake prior to baking. I enjoyed those (despite the candy losing a bit of crunch), but always wanted to find the time to tweak the concept a bit.

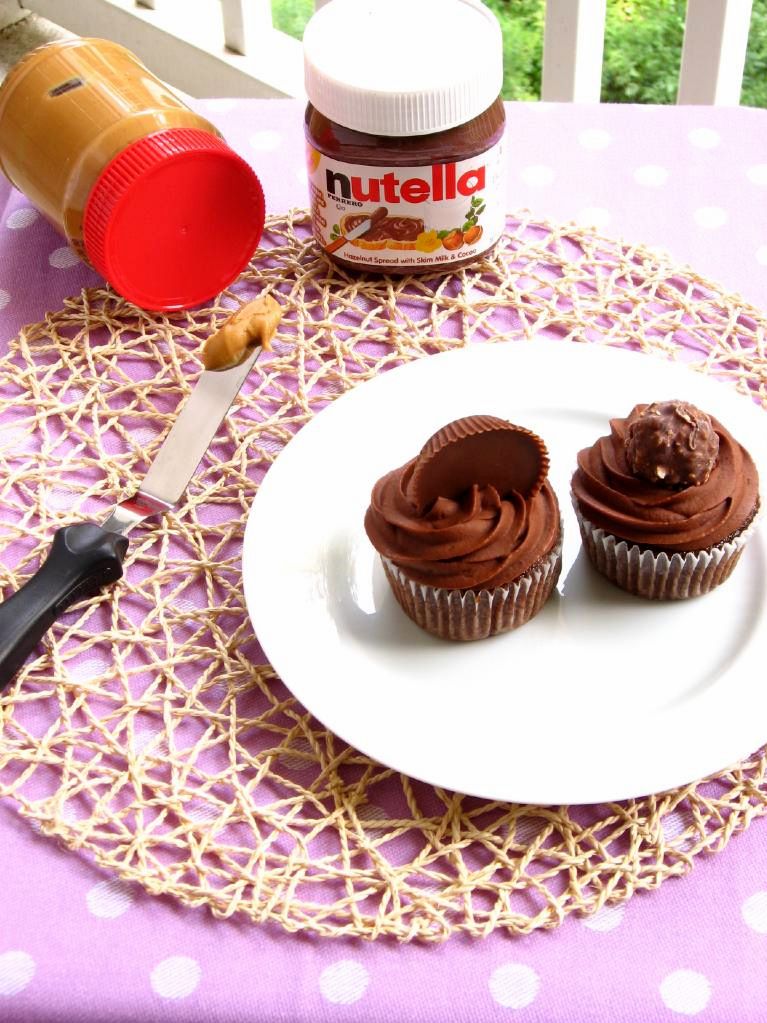
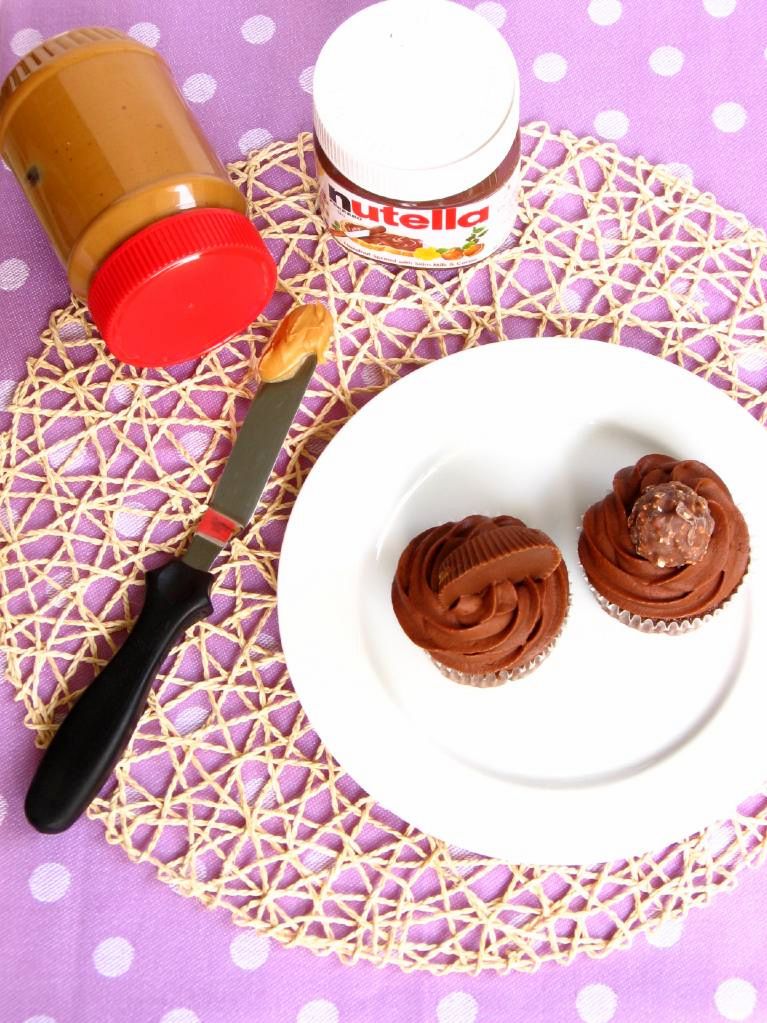
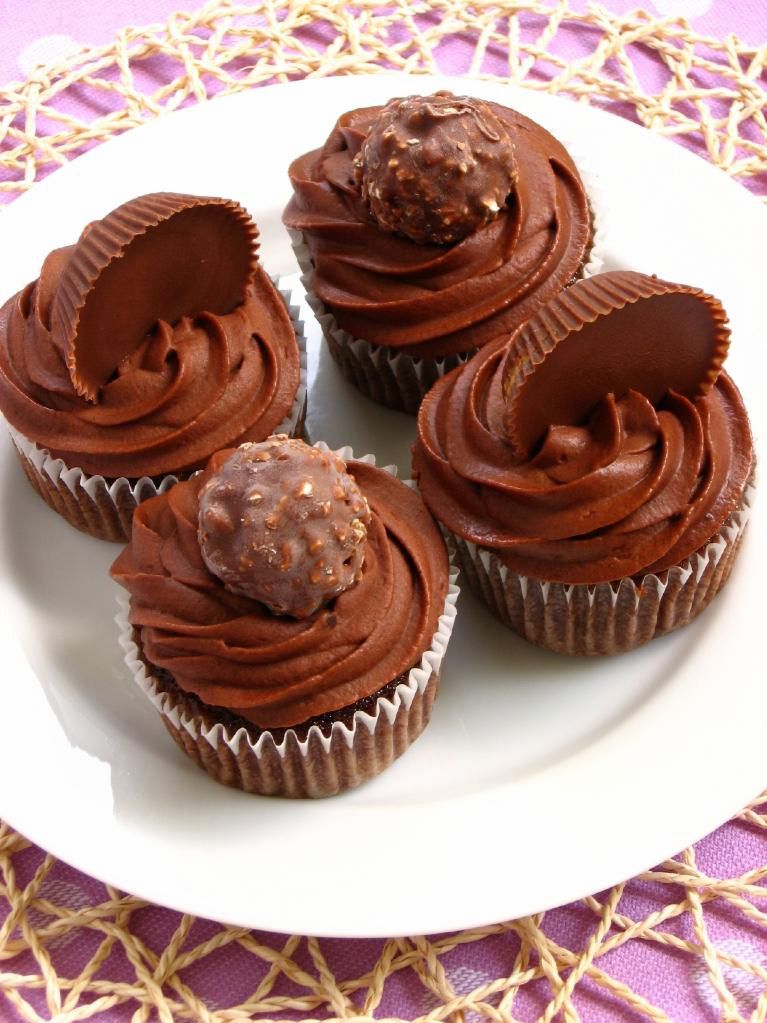
This was my chance! I wanted to take a moist chocolate cupcake, fill it with a giant dollop of the hazelnut-chocolate spread Nutella, ice it with rich chocolate frosting, and crown the whole thing with a Ferrero Rocher. The entire cupcake was designed to imitate the flavors in the candies themselves.

And why stop there? How easy would it be to fill some of the cupcakes with peanut butter instead, topping them with a huge Reese’s Cup? Hurray for candy cupcakes!

I could have gotten even more carried away (cupcakes filled with coconut pastry cream and topped with Mounds? Cupcakes filled with caramel and topped with Snickers?), but I reeled it in. That doesn’t mean we have to turn our imaginations off, though. What Candy Cupcake would you make?

Now, I am Wacky McWackerson. I’m as silly as they come. But that’s not why these cupcakes are called Wacky Candy Cupcakes instead of just regular ol’ Candy Cupcakes. Raise your hand if you’ve heard of Wacky Cake! Anyone?

Wacky Cake is NOT what you call the 2nd batch of cupcakes you make after ruining the previous batch and just barely convincing yourself not to throw your muffin pan across the apartment, spewing chocolate lava on your roommate’s couch (hey Barb!), but good guess. I did make these Wacky Cakes after a first batch of chocolate cupcakes flopped, but that’s not why they’re wacky.

Wacky Cake is actually just a vegan chocolate cake — no eggs, no milk — and is probably called “Wacky” ’cause vegans are just a little nutty sometimes . . . just kidding, just kidding! I love you, vegans! The truth is, no one really knows why it’s called wacky. Some say it’s because it’s a little wacky to make a cake with no eggs, which is just as good a reason as any, I guess. Regardless, Wacky Cake happens to be the perfect recipe to resort to after a flop that uses most of your eggs. Just call me MacGyver.

Turns out, Wacky Cake is also yummy and rich — the perfect cupcake base for my creation. I went and added un-vegan ingredients to complete the recipe, but if you’re a vegan looking for a great chocolate cupcake, the base recipe here is perfect for you. It’s also just plain easy to make.

The frosting, on the other hand, was a bit of a hassle. It doesn’t whip up very firm, so I had to refrigerate it for a bit and re-whip before frosting the cupcakes and sticking them in the fridge in a hurry. After sitting in the fridge overnight, though, the frosting is firm — and very chocolatey and delicious. I’d use it again for the taste, but I’d make sure to have refrigerator space cleared out ahead of time to chill the cakes immediately.

Speaking of refrigerating these cupcakes, the Nutella jar expressly says not to refrigerate Nutella. Don’t worry — it’s not because the product turns toxic or anything, but actually because it firms up into almost a nougat texture, which for our purposes, is awesome. The center of the Ferrero Rocher Cupcakes was a hunk of hazelnut-chocolate love.

Overall, these cupcakes were tremendous! I greedily devoured the few I kept to sample, and Sarah says her coworkers were enthusiastic about them as well! Both varieties are the perfect imitations of their respective candies, incredibly indulgent, and simple to make. If you’re used to making a plain cupcake-n-frosting combo, why not get a little feisty, add a sweet filling and a candy topping, and pump up your cupcakes? It’s a quick and easy way to turn a dull dessert into something special.

Now it’s your turn: Think up a cupcake-version of your own favorite candy. Tell me about how you’d make it in the comments section — and bonus points for ACTUALLY DOING IT! Send me photos of your candy cupcake creations to post on Willow Bird Baking!

Ferrero Rocher and Reese’s Cup Cupcakes


Recipe by: Adapted Wacky Cake recipe from Being Wife and frosting from Hershey’s
Yields: about 30 cupcakes

Wacky Cake Ingredients:
3 cups flour
2 cups sugar
6 tablespoons cocoa
1/2 teaspoons salt
2 teaspoons baking soda
2 teaspoons vanilla extract
2 tablespoons vinegar
12 tablespoons of mazola or vegetable oil
2 cups water

“Perfectly Chocolate” Chocolate Frosting Ingredients:
1 cup (2 stick) butter
1 1/3 cup cocoa powder
6 cups powdered sugar
2/3 cup milk
2 teaspoon vanilla extract

Candy supplies needed:
Creamy peanut butter (I don’t use the natural sort for this because I kind of want a processed, sweet flavor)
Nutella
15 Ferrero Rocher candies
15 Reese’s Peanut Butter Cups (I use the big sort!)

Directions:
NOTE: You may want to make these cupcakes the night before you intend to serve them, since the frosting needs time to set in the refrigerator.

Preheat oven to 350 degrees. Line 30 cupcake wells with cupcake liners. In a large bowl, whisk together flour, sugar, cocoa, salt, and baking soda.

Add vanilla, vinegar and oil, stirring until smooth. It’s normal for the mixture to seem thick and pasty right now. Add the water and mix (carefully to avoid splattering) until there are no lumps in the batter.

Pour mixture into prepared cupcake pans. Bake 12-15 minutes, or until toothpick comes out clean. Allow to cool completely.

Carefully hollow out each cupcake using a table knife, and reserving the scraps for another use (maybe cake balls?). Using a piping bag or a ziplock with the corner cut off, fill half the cupcakes with peanut butter and the other half with nutella.

Make frosting: Melt the butter and stir in the cocoa. Alternate adding powdered sugar and milk, and beat to spreading consistency. Stir in vanilla. I refrigerated my frosting after beating to give it a thicker consistency, since it wasn’t as firm as I’d like. Unwrap all your candies while it refrigerates, because you’ll have to work quickly.

Have a platter ready in the fridge to receive finished cupcakes (the frosting is not very secure until it’s been refrigerated for at least a few hours). Pipe a big rosette onto each cupcake, covering your filling, and plop the appropriate candy onto the middle. Place finished cupcakes directly in the fridge to sit for a few hours, and take out immediately before serving.

Other fun candy cupcakes around the internet: 100 Grand Cupcakes, Snickers Cupcakes, another version of Ferrero Rocher Cupcakes.

If you liked this post, please:
Subscribe to Willow Bird Baking
Follow Willow Bird Baking on Twitter
Follow Willow Bird Baking on Facebook
Give this post a thumbs up on StumbleUpon

ShareOther ways to share this post with friends!

Angelic Cherry Mousse Cloud Cake with Mascarpone Whipped Cream

What do you think about at night as you fall asleep? Lately, my thoughts during those last few moments of wakefulness have been occupied by vampires (of a non-sparkly variety), since I recently began Elizabeth Kostova’s premiere novel, The Historian. It’s good so far, but may ruin me for the first Twilight book, which I have coming in the mail. I teach 6th and 7th grade Language Arts — how have I not already read the Saga everyone’s either raving or raging about?


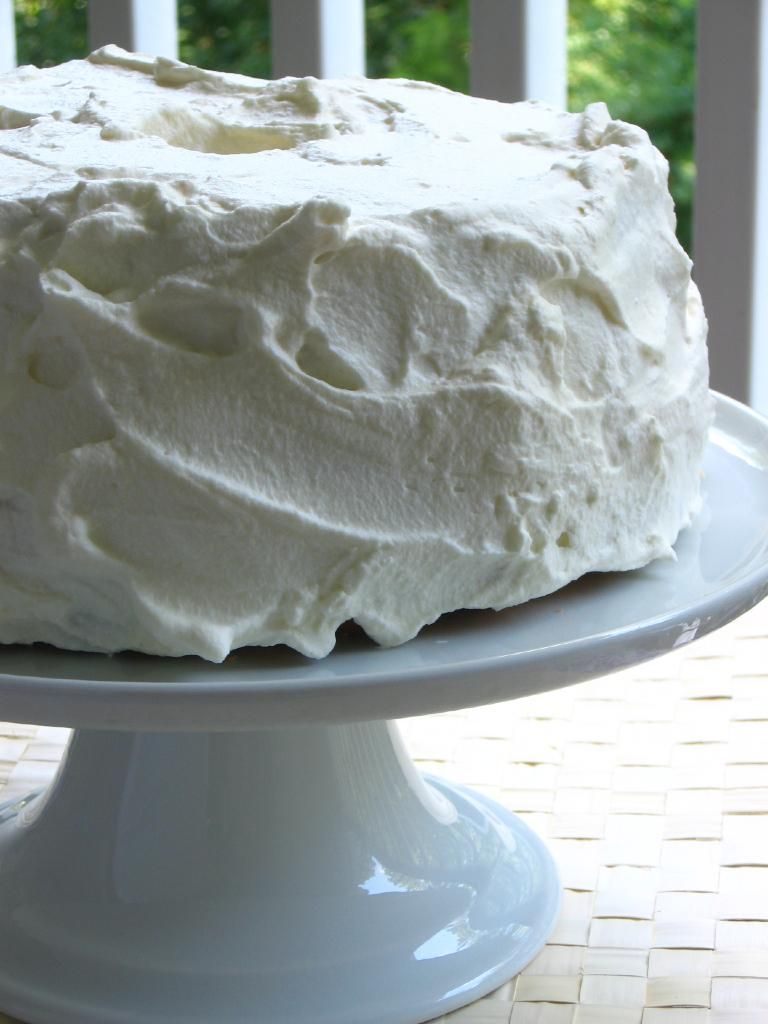
Don’t let that charming, pillowy exterior fool you — there’s a sultry surprise inside.

Though my bedtime thoughts have been rather sanguine of late, I usually try to dwell on something happy and hopeful before I drift off. More often than not, this tends to be baking related. Instead of counting wooly ruminants, I develop ideas for new desserts, visualize the photo styling of my next dish, and ponder new flavor combinations.

It was during this twilight of consciousness a few weeks ago that I first developed an inexplicable craving for angel food cake with cherry cream. (That’s one thing I can already say I dislike about the Twilight Saga — it’s taken a lovely word out of commission. The phrase “twilight of consciousness” probably afflicted over half of you with visions of Taylor Lautner’s werewolflike scowl or Robert Pattinson’s, uh, vampirical eyebrows?)

Perhaps the sudden onset of a cake-n-cherry-cream craving seems normal to you, but it was surprising to me. I haven’t had a cherry in literally years. I haven’t had an angel food cake in even longer. Why all of a sudden did I want to combine the two in a big creamy cherry-rific sandwich o’ love? Ah, the ways of the heart are mysterious — and in this case, spot on. Go heart!


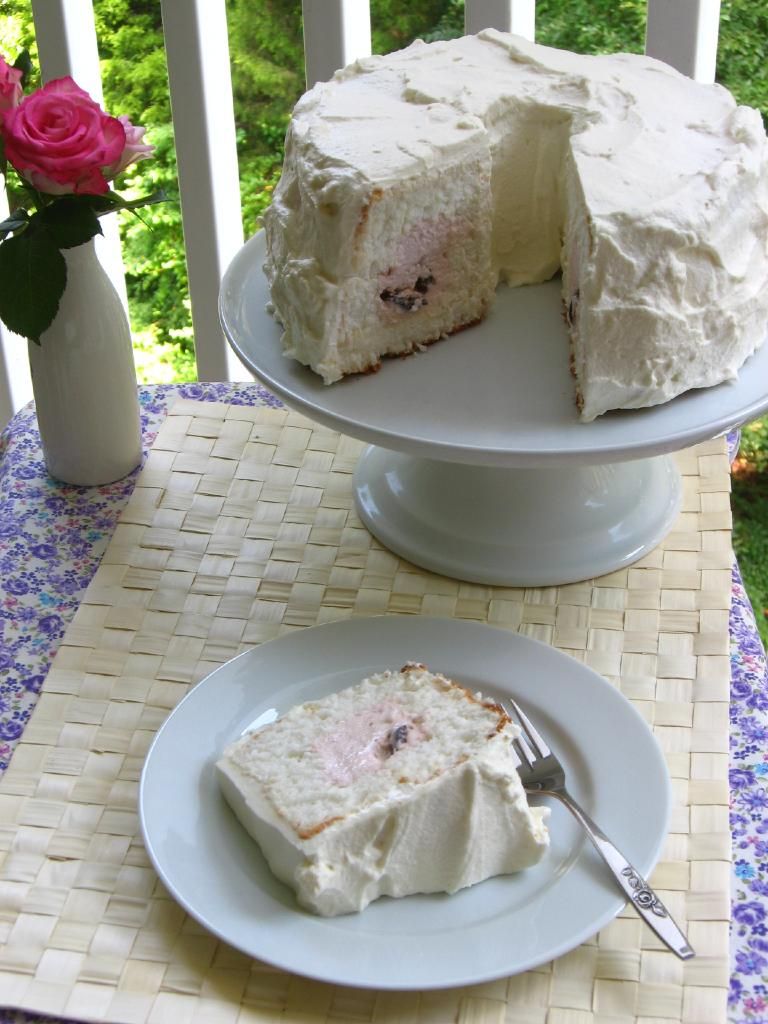
Surprise! A tunnel of love.

My previous experiment with a heart-shaped tunnel of lemon mousse inside a cake left me wanting to tunnel some more, so I decided to use that presentation here, too. It’s relatively simple to do. It also seemed like more fun than simply dolloping a swoosh of mousse on top of a piece of cake, but you’re welcome to do that instead, if you’re not the tunneling sort. Personally, my mole-like tendencies took over.

After cutting the freshly baked and cooled angel food cake in half using ye old dental floss trick, I used a 1-inch square cookie cutter and a serrated knife to mark off the location of my tunnels. I then carefully carved and scooped until I had a tunnel in each layer of the cake. Scooping the luscious cherry mousse into the tunnel, reuniting the layers, and slathering the entire confection with mascarpone whipped cream was a joyful experience.

But not quite as joyful as eating it. The angel food cake is a cloud of toasty, sweet almond flavor — almost like eating airy cotton candy. The tunnel provides the perfect cake-to-cream ratio, so each bite of cloud is accompanied by a tuft of bright cherry mousse. The fluffy mascarpone whipped cream is stable due to the addition of the mascarpone cheese and gelatin, but still has all the subtle sweetness and creaminess of a regular whipped cream frosting.

This cake has it all: it’s creamy, it’s pluffy, it’s moist, it’s fantastic. Mike’s dad commented that it was impressive something so tasty seemed so light, and that really is the magic of both angel food cake and mousse. Putting the two together is a dream.

. . . a dream that I might’ve had 4 slices of, give or take a slice. It’s very easy to keep shoveling forkfuls of this light dessert into your mouth. Pace yourselves, young padawans. I hope you’ll make this angelic summer dessert and serve it cool, right from the refrigerator, some nice, hot evening.

Angelic Cherry Mousse Cloud Cake with Mascarpone Whipped Cream


Recipe by: Adapted from Betty Crocker (Angel Food Cake), Paula Deen (cherry mousse), and Bon Appétit (frosting)
Yields: one angel food cake, or about 10 servings

Cake Ingredients:
1 1/2 cups powdered sugar
1 cup cake flour
1 1/2 cups egg whites (12), room temperature
1 1/2 teaspoons cream of tartar
1 cup granulated sugar
1 teaspoons vanilla
1 teaspoon almond extract
1/4 teaspoon salt

Cherry Mousse Ingredients:
1 envelope unflavored gelatin
1/4 cup cold water
1/3 cup boiling water
2 cup heavy whipping cream
2/3 cup sugar
1/2 cup bing cherries, pitted and chopped
3 tablespoons maraschino cherry juice or cherry pie filling juice

Mascarpone Whipped Cream Frosting Ingredients:
1 8-ounce container mascarpone cheese
2 cups chilled heavy whipping cream
6 tablespoons confectioners’ sugar
2 teaspoons vanilla extract
1 teaspoon gelatin
3 tablespoons cold water
1 tablespoon hot water

Directions:
Make cake: Move oven rack to lowest position. Heat oven to 375ºF. Mix powdered sugar and flour; set aside. Beat egg whites and cream of tartar in large bowl with electric mixer on medium speed until foamy. Beat in granulated sugar, 2 tablespoons at a time, on high speed, adding vanilla, almond extract and salt with the last addition of sugar. Continue beating until stiff and glossy meringue forms. Do not underbeat.

Sprinkle sugar-flour mixture, 1/4 cup at a time, over meringue, folding in just until sugar-flour mixture disappears. Push batter into ungreased angel food cake pan (tube pan), 10×4 inches. Cut gently through batter with metal spatula.

Bake 30 to 35 minutes or until cracks feel dry and top springs back when touched lightly. Immediately turn pan upside down onto heatproof funnel or bottle. Let hang about 2 hours or until cake is completely cool. Loosen side of cake with knife or long, metal spatula; remove from pan.

Make the mousse while cake is cooling: In a small bowl, soften gelatin in 1/4 cup cold water. Let stand 2 minutes. Add 1/3 cup boiling water, stirring until gelatin dissolves. Let this cool almost entirely.

In a medium bowl, beat whipping cream with an electric mixer until foamy; gradually add sugar, beating until soft peaks form. Gently stir in gelatin mixture, cherries, and juice. Cover and chill until cake is ready to fill.

Make frosting: Sprinkle teaspoon of gelatin over the cold water. Let stand for 2 minutes. Add hot water and stir to dissolve. Let cool while you mix the other ingredients.

Place mascarpone, whipping cream, vanilla, and confectioners’ sugar in a bowl and mix to soft peaks (do not overbeat or mixture will curdle). When gelatin mixture is cool, add it to the cream mixture and mix until combined. Place frosting in refrigerator until you’re ready to frost the cake.

Assemble the cake: Trim brown outside crust off of cake if you prefer. Use unflavored dental floss to slice the angel food cake in half. Use a serrated knife and spoon to gently cut a tunnel in the top and bottom of the cake (see photos below). I measured here and there to ensure that these would line up. Be sure to leave a 1-inch cake border on all sides of the tunnel. Fill the tunnel with cherry mousse and place top layer face down on bottom layer. Frost cake as usual. Keep refrigerated. Will hold up nicely for 2 days in refrigerator. Use a large, serrated knife to carve this cloud-like cake.

P.S. Many more Secret Garden recipe and craft posts coming soon!

If you liked this post, please:
Subscribe to Willow Bird Baking
Follow Willow Bird Baking on Twitter
Follow Willow Bird Baking on Facebook
Give this post a thumbs up on StumbleUpon

ShareOther ways to share this post with friends!

1 24 25 26 27 28 29