breakfast

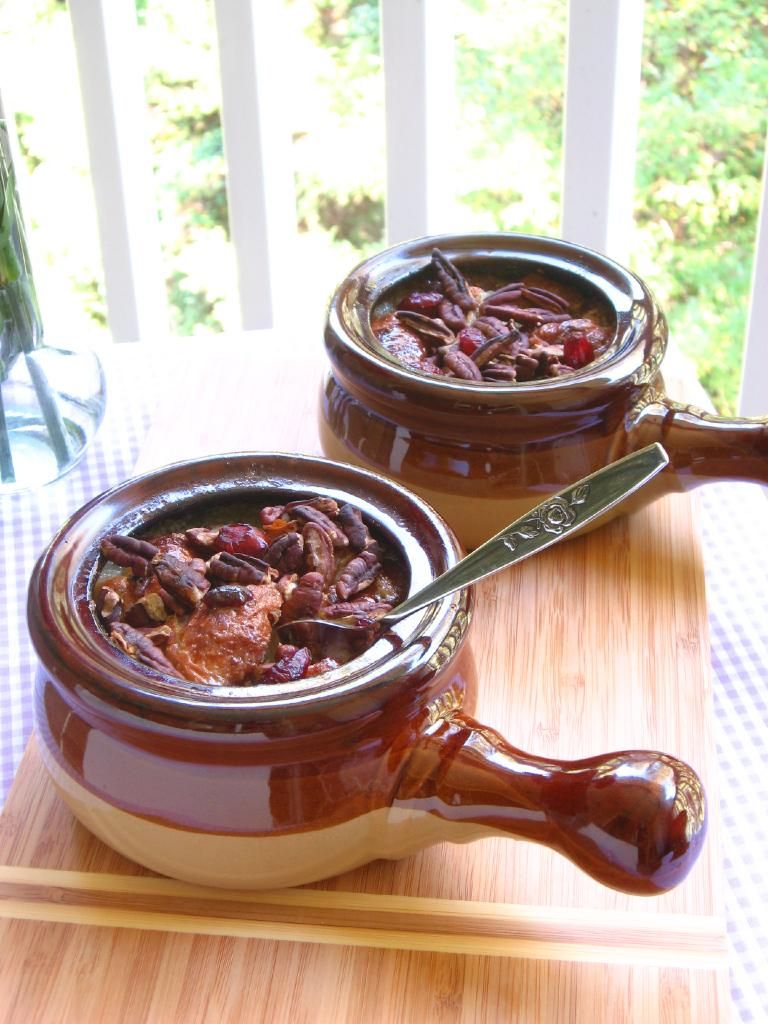
Pumpkin Pecan Streusel Breakfast Braid

Today is “Nerdy Day” at Woodlawn, the school where I work. All of my students are sporting taped glasses, suspenders, pants hitched up to their eyeballs, pocket protectors, and bow ties. They asked me why I didn’t dress up and I replied honestly, “What do you mean? I did.”

I don’t need a pocket protector to dress like a nerd. I’m naturally a nerd, through and through. Like I told my students: I love to read. I love to write. I love technology. I love obscure art. I love learning. I write essays for fun. I annotate the books I read in my spare time. I often ruminate on literary theory, politics, and feminism. I was born a nerd and I’ll die a nerd. Amen.

Ooh. Amen!

Such was my nerdiness as a child that I detested the outdoors and was a bit of a cave-dweller. Have you ever met a kid like that? My friends usually wanted to play some wildly active (often destructive) game outdoors: Who can run down this hill the fastest, completely oblivious of oncoming traffic? Who can climb to the very highest, most excruciatingly tenuous limb of this tree? Who wants to tumble pell-mell through snakes and venomous spiders in the woods?

Not me. I was a pale, chubby child who preferred to sit and read in an air-conditioned, artificially lit corner. I always bossily petitioned for an orderly indoor game: a board game, perhaps, or a polite game of snack-eating.

My aversion to the outdoors and to all athletic activity was particularly strong when it came to my dreaded elementary P.E. class. Far from “educating” me on much besides torture and pain, my Physical Education class struck fear deep into the air-conditioned depths of my heart. For one thing, we went outside all the time (much to the glee of most other students). For another, I was a klutz.

I remember standing on a dusty, grassless kickball field one hot day in May. My friend and I were watching the game cynically and whining about our circumstances. First off, we were hot, sweaty, and red-faced. Worse still was the fact that we were almost up to the plate. Unless we got another “out” — and fast! — we were going to have to try to kick the ball in front of all of our classmates (including all of the cute boys in class). We’d then have to walk back to the team in shame, enduring their fervent, angry shouts about our athletic ineptitude.

I suggested we try to imagine ourselves jumping into a cool swimming pool. The power of visualization and positive thinking, I noted to my friend, was immense. We both scrunched up our eyes and started to visualize with all our might. One of our teammates kicked the ball into the outfield. We visualized harder. Another teammate kicked the ball even farther. We visualized with all our might. Another teammate kicked the ball into the stratosphere.

We gave up with a sigh, and I walked up to the plate. Lame.

Kickball wasn’t the worst, though. The worst activity — the one that sent chills of absolute terror down my lazy little spine — was the mile run. What sort of sadist decided to try and make us run an entire mile?

Y’all, I don’t care if I were getting chased by a gigantic black bear. I don’t care if he were breathing down my neck with bloody bear fangs and breath that smelled of my impending doom. I don’t care if he were as hungry as a hippo with razor claws and rabies. If my only hope of salvation were to run a mile, I would plop myself down on a plate and sprinkle some salt and pepper on my head.

I hate running.

As it was, I did get chased, so to speak, by my rabid elementary P.E. teacher. She was fit as a fiddle and always barked encouragement at us from the sidelines as we dragged ourselves around the track. I remember talking to myself out loud (more nerd points?) as I struggled to put one foot in front of the other. My monologue went something like this: “If I just keep pushing myself, I’ll pass out and probably die. But then at least I’ll never have to do the mile run again. In fact, they’ll probably ban the mile run from schools everywhere. If I can just run hard enough to pass out, that can be my legacy: eliminating the mile run for the children of the future.”

If that seems twisted, you ought to have heard me at home the night before the mile run. I would literally plead with my parents to somehow break my toe. Stomp on it, perhaps? Run over it with the car, maybe? Does that sound drastic?

I figured a broken toe wouldn’t be that inconvenient, and it would heal before too long. In the meantime, though, my quality of life would increase a thousandfold as a result of missing the mile run. I lay in the floor and whined when my parents refused. Didn’t they realize they were consigning me to pass out in the middle of a gigantic dirt field? Didn’t they want to spare me all of my anguish? Didn’t they LOVE me?

I may be 27 years old now, and I may have started to appreciate the outdoors, but I still maintain that my fragile constitution was built for reading, writing, and recipes — not for running. In fact, I’d still prefer an injury to an athletic event. This coming Friday, at the end of Woodlawn’s spirit week, there’s a faculty vs. students soccer game, and you can imagine my utter terror when I was asked to participate. All of these years thinking I was finally free from that school field . . .

Thankfully, though (I’m so weird), the other day I was stretching and I felt something twist in my knee. My first thought was, “Ow!” followed immediately by, “Ooh, now I don’t have to play in the soccer game!” Some things never change.

I’ll settle for being a clumsy nerd. Some of my students are geniuses on the soccer field, some are geniuses on horseback, some are geniuses in ballet shoes, some are geniuses on stage. I’ll settle for being at home with a book, at home with words, and at home in the kitchen. We all have our talents, right?

In that spirit, I offer you not my soccer savvy (hahahahaha, for which you should be thankful) but my breakfast braid. I couldn’t wait to tell you about this recipe! I dreamed about posting this braid the entire time I was baking it, photographing it, transporting it to Raleigh, and eating it with Mike while watching past episodes of Parks and Recreation and drinking lots of milk.

What I most want to emphasize about this recipe is that it’s EASY! The first time I made a breakfast braid with this dough, I fell in love. It’s the perfect beginning pastry, since it doesn’t involve any yeast or rise time, or even much kneading. It’s not sticky or stubborn. If you’ve ever used canned crescent rolls, this dough is a textured a lot like that.

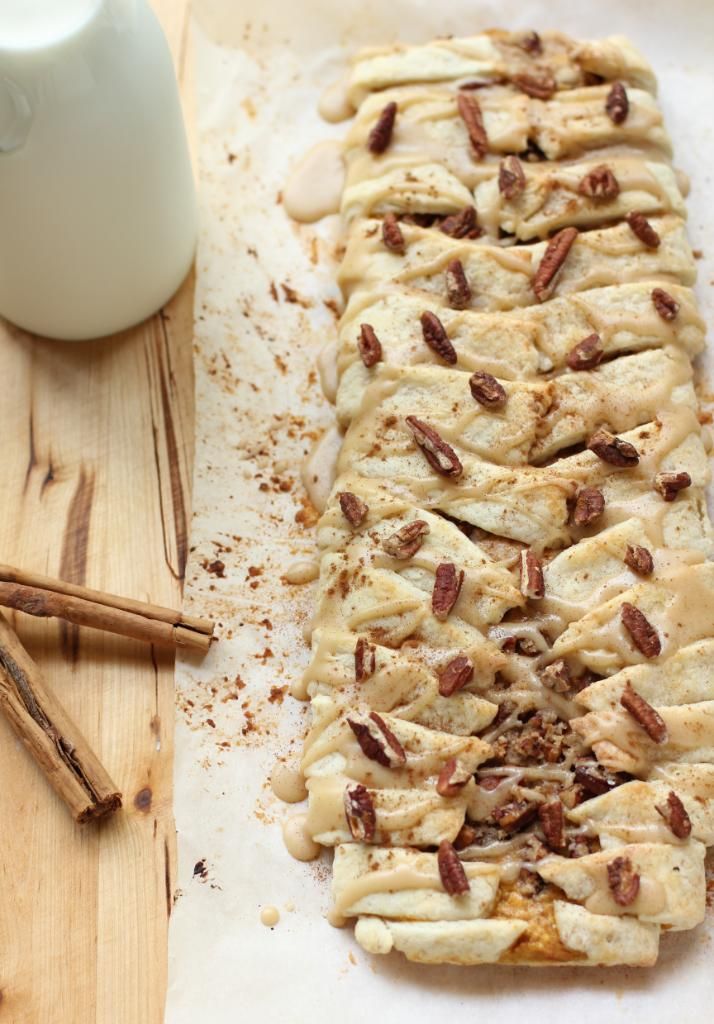
Naturally, in addition to being easy (SO EASY. DID I MENTION HOW EASY?), it was delectable. I call it a breakfast braid, but it’s an eat-anytime-you-can-possibly-shove-it-in-your-face braid. It’s a mind-blowing combination of flaky pastry, autumn pumpkin, cinnamon and spice, buttery streusel, toasted pecans, and a rich maple brown sugar glaze. I may not be able to kick a soccer ball, but I can make a mean pumpkin braid. That’s good enough for me.

Are you nerdy?

Pumpkin Pecan Streusel Breakfast Braid with Maple Brown Sugar Glaze


Recipe by: Willow Bird Baking. Inspired by The Luna Cafe, with glaze from Caitlin Cooks
Yield: About 4-5 servings of 2 slices each

In this breakfast braid, tender, flaky, almond-scented pastry envelops a delicious pumpkin pie custard topped with buttery cinnamon pecan streusel. An addictive maple brown sugar glaze and toasted pecans top the whole shebang, creating a perfect autumn breakfast (or dessert, or lunch, or dinner…!) This braid looks fancy, but don’t be fooled. It’s one of the easiest things I make. The dough is lovely to work with — it doesn’t need to rise, barely needs any kneading, and isn’t sticky or finicky. I’m always amazed that such gorgeous results can be achieved with such little effort.

Easy Dough Ingredients:
2 cups all-purpose flour, sifted
1 teaspoon baking powder
1/2 teaspoon salt
1/2 cup unsalted butter, cold and cut into cubes
3 ounces cream cheese, cold and cut into cubes
1/2 cup milk, minus 1/2 teaspoon
1/2 teaspoon almond extract

Pumpkin Pie Filling Ingredients:
(this makes a little more filling than you need)
6 ounces cream cheese, softened
3/8 cup sugar
3/4 cup pumpkin puree
3/4 teaspoon vanilla extract
1 egg
1 1/8 teaspoons cinnamon*
1/4 teaspoon nutmeg*
1/4 teaspoon ginger*
1/8 teaspoon allspice*
*You could probably substitute a teaspoon or so of pumpkin pie spices for these.

Pecan Streusel Ingredients:
1/8 cup firmly packed light brown sugar
1/8 cup all-purpose flour
1/2 teaspoon cinnamon
1 tablespoon cold butter
1/2 cup chopped pecans

Maple Brown Sugar Glaze Ingredients:
1 tablespoon butter
2 tablespoons milk
1/4 cup brown sugar
1 tablespoon real maple syrup
pinch salt
3/4 – 1 cup powdered sugar
cinnamon for sprinkling

Directions:
NOTE: To prepare this braid in advance, complete all steps and assemble the braid but do not bake. Cover the braid on its parchment lined baking sheet with plastic wrap and refrigerate overnight. Set out in the morning as you preheat the oven and then bake as usual.

Preheat the oven to 350 degrees F.

Make the creamy pumpkin pie filling. In your electric mixer, or with a hand mixer, beat the cream cheese until smooth. Add the sugar and beat until fluffy and smooth. Add the pumpkin, egg, and vanilla extract, cinnamon, nutmeg, ginger, and allspice and mix until combined. Set in fridge while you make your braid.

Toast your pecans. Spread them out in a single layer on a baking sheet and toast for about 6 minutes or until fragrant, stirring about halfway through the cook time. Transfer nuts to a plate to cool. Raise oven temperature to 425 degrees F.

Make your pastry dough. In the bowl of a food processor, mix the flour, baking powder, and salt. Add the cream cheese and butter into the flour mixture and pulse to cut the fat into the flour (about 6 pulses). Add the milk and almond extract and blend into a loose dough.

Turn the dough onto a sheet of lightly-floured parchment paper and knead very lightly for just 4-5 strokes (be careful not to overwork the dough or it’ll be tough! Don’t worry about getting it smooth — just knead for these few strokes and let it stay a little rough.)

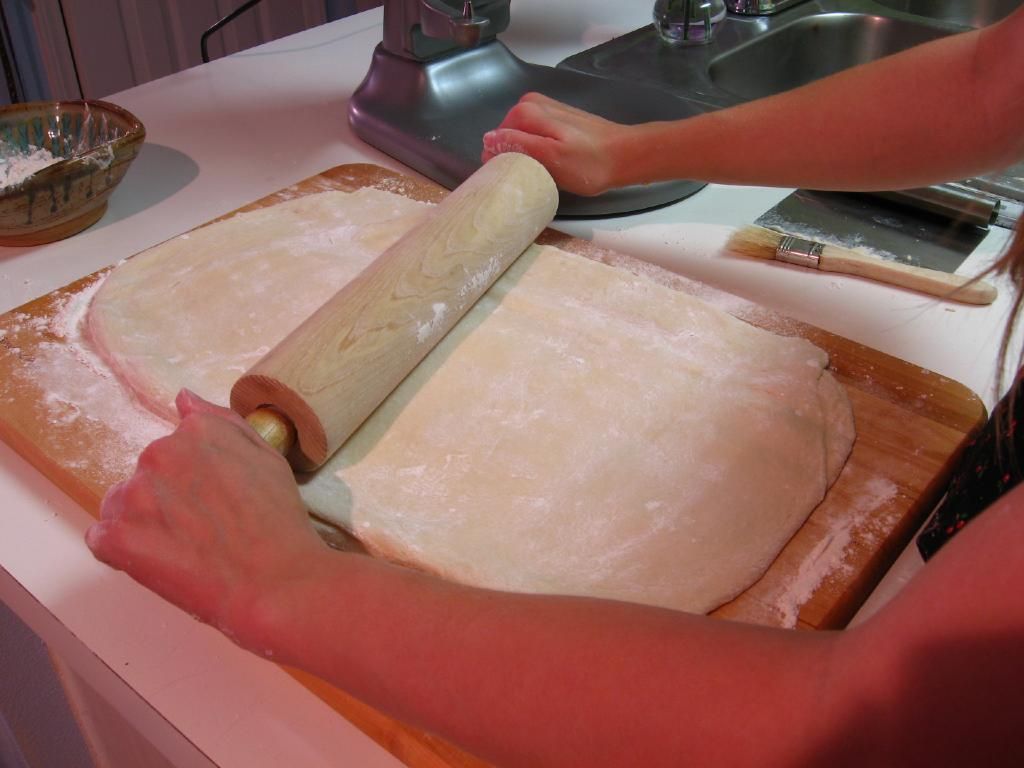
Very lightly flour the top of the dough and place another sheet of parchment paper on top. Between two sheets of parchment paper, roll the dough to an 10- by 12-inch rectangle (I lift the paper off every now and then and flip the dough and repeat on the other side, to ensure the dough isn’t sticking). Remove the top sheet of parchment and discard. Measure and mark the dough lengthwise into thirds. Glop your creamy pumpkin pie filling down the middle third of the dough — try to keep your filling about 1/4 inch from the mark on both sides. I piled it up a bit (not so much that it was overflowing, but plenty!)

Make the streusel topping. Combine the flour and brown sugar in a medium bowl and using two knives or a pastry cutter, cut in the butter until you have crumbly streusel. Mix in 1/4 cup of toasted pecans (save the rest for decorating the finished braid). Sprinkle streusel over top of pumpkin mixture in center of dough. Really pile it on!

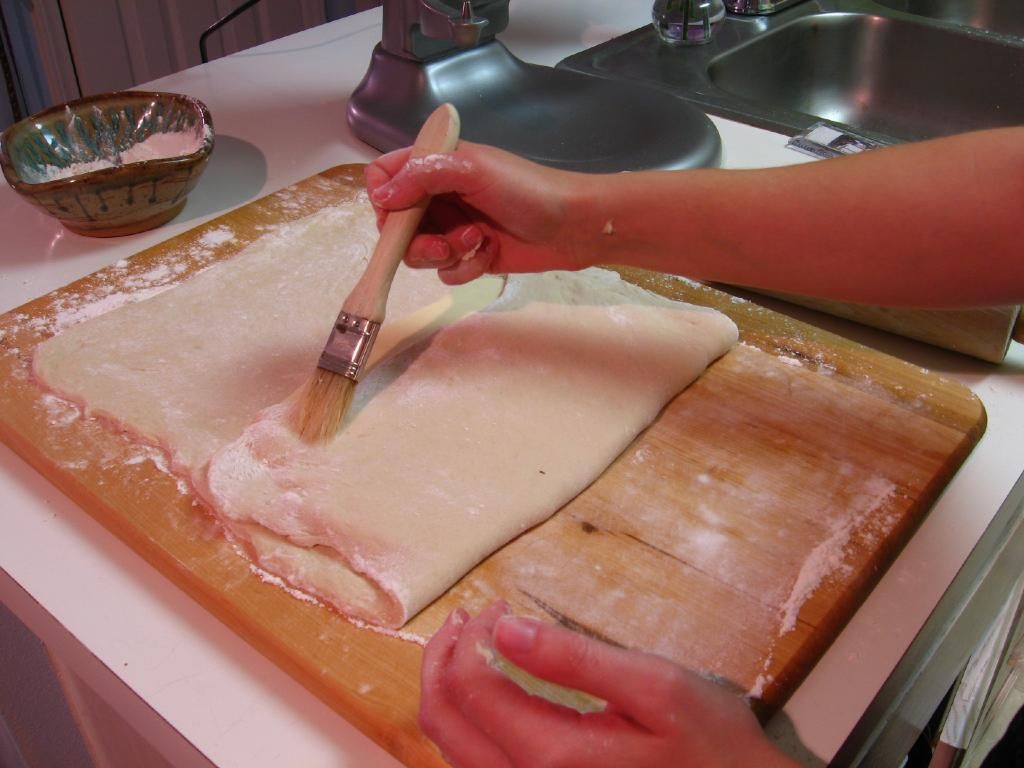
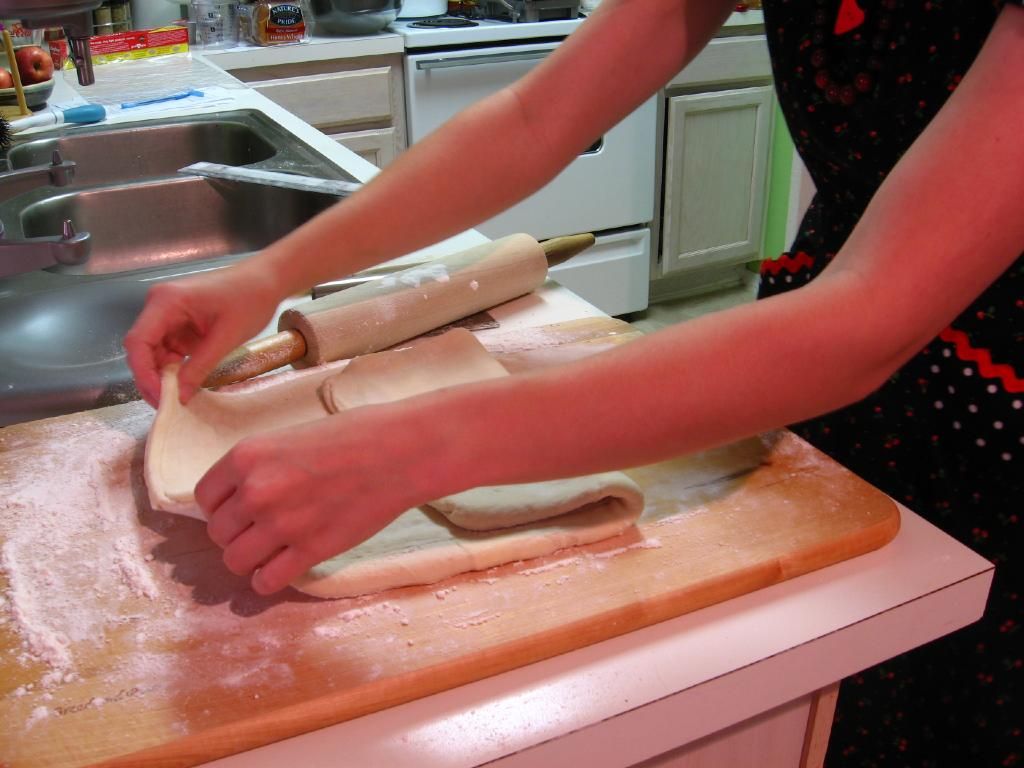
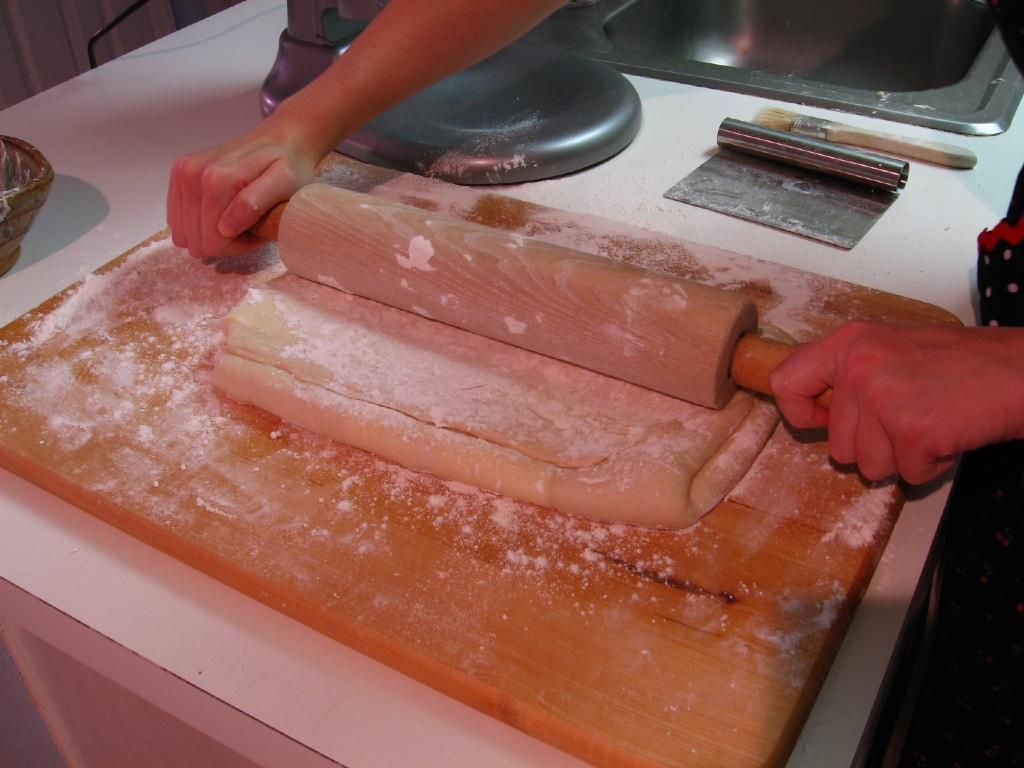
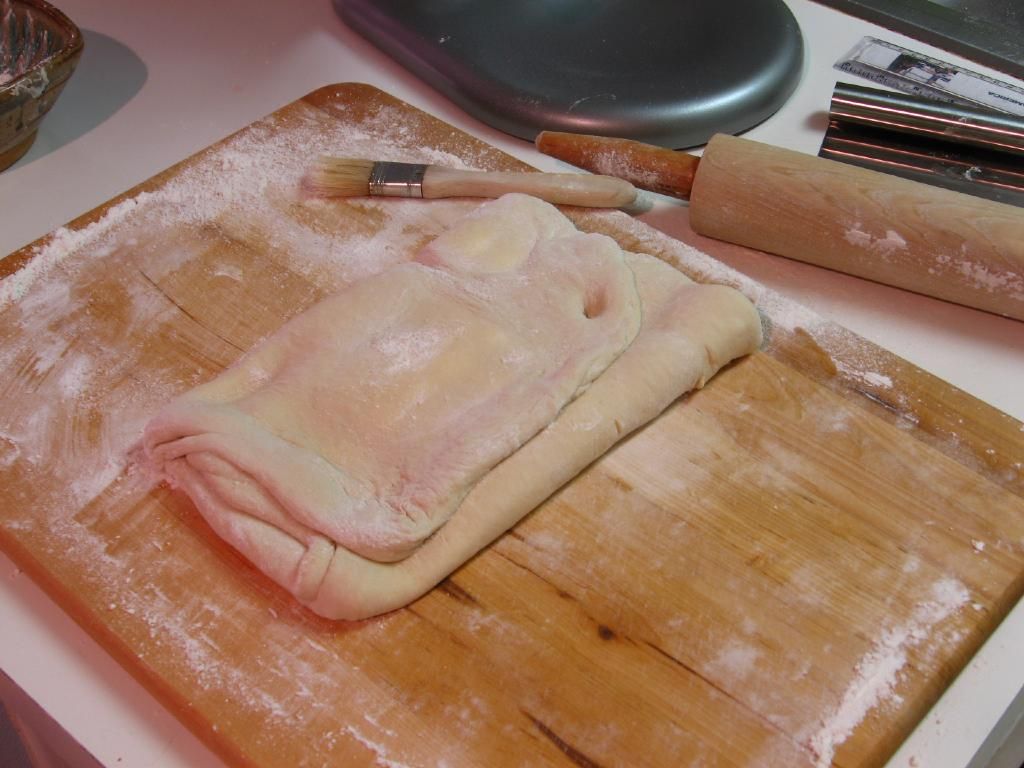
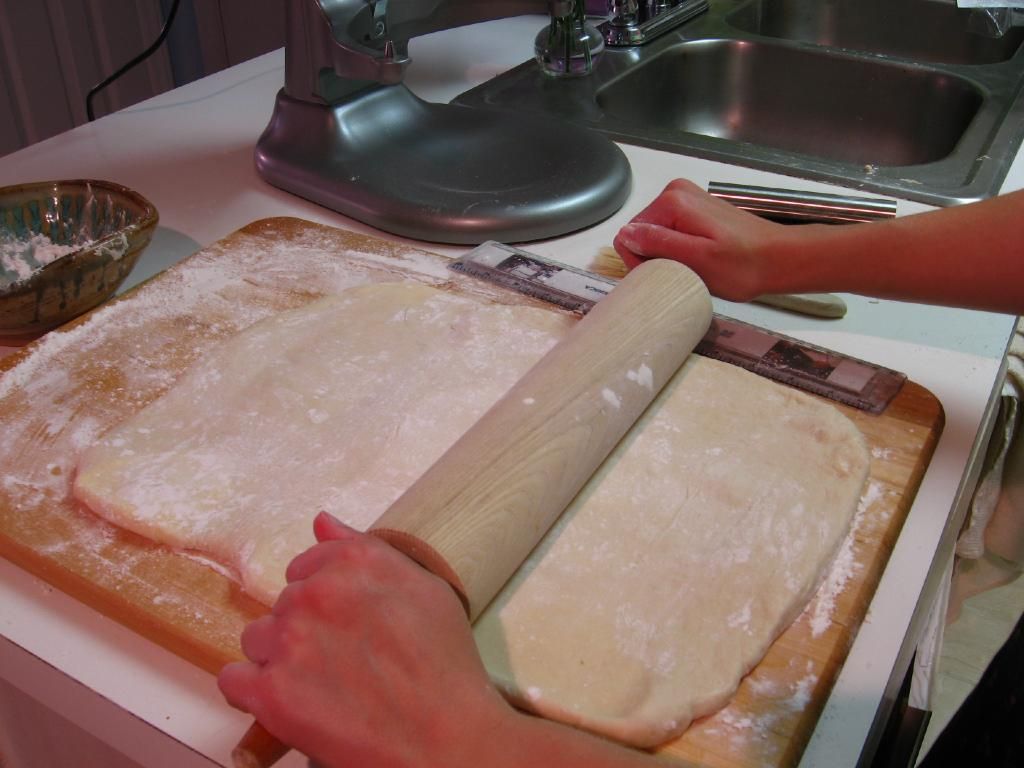
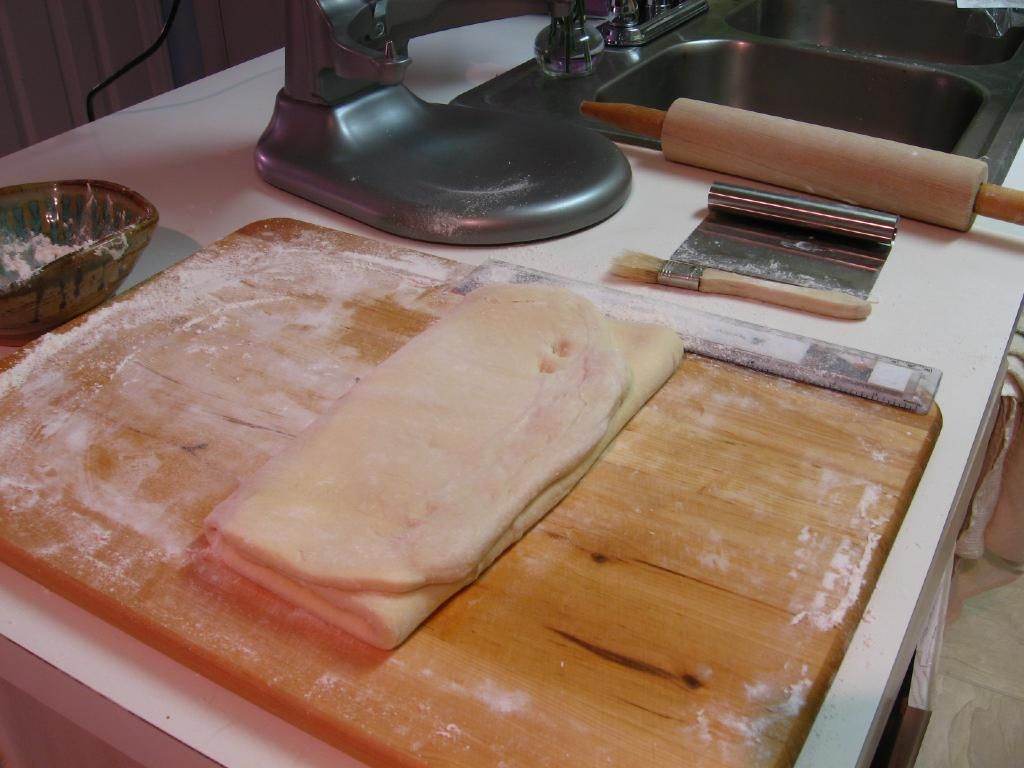
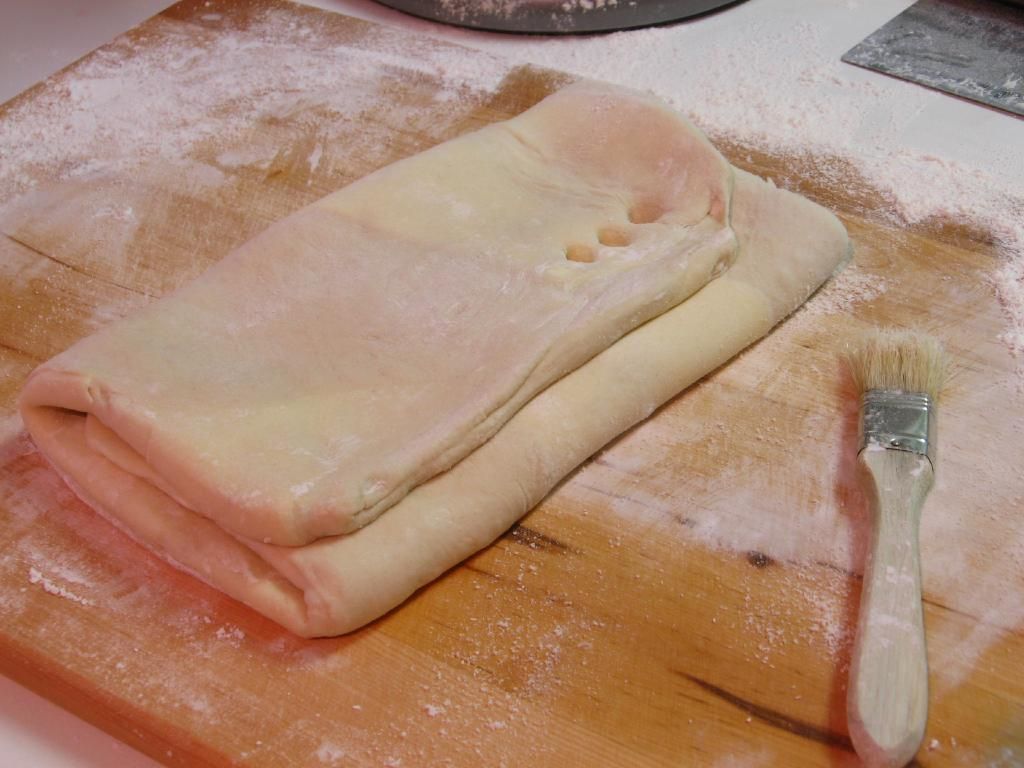
Continue assembling the braid (see photos at the bottom of this recipe, which show the process of marking and assembling a raspberry almond braid, for guidance). Make diagonal cuts at 1-inch intervals on each the long sides. Do not cut into the center pumpkin-filled area. Fold strips, first one from one side and then one from the other side in a rotating fashion, over the filling. It will now resemble a braid. Don’t worry if it doesn’t completely hide your filling — it’s actually nice when the filling is peeking out. Use the sheet of parchment to carefully transfer your braid to a baking sheet (at this point, you can brush the pastry with a mixture of 1 beaten egg and a teaspoon of water if you want it darker than mine. I didn’t bother). Bake in the 425 degree oven for 12-15 minutes, until the dough is cooked through, the pumpkin filling is set, and the top is lightly browned. Let the braid cool slightly while you make your glaze.

Make the Maple Brown Sugar Glaze. Combine the butter and milk in a small saucepan over medium heat. When the butter melts, whisk in the brown sugar, syrup, and salt, stirring until the brown sugar melts. Remove the pan from the heat and whisk in the powdered sugar, starting with 3/4 cup and adding more to thicken per your preference (taste as you go to ensure you don’t oversweeten). Drizzle the glaze over the top of your braid. Sprinkle the braid with toasted pecans and a dusting of cinnamon. Serve immediately. Refrigerate leftovers in an airtight container and microwave for about 20 seconds to serve.
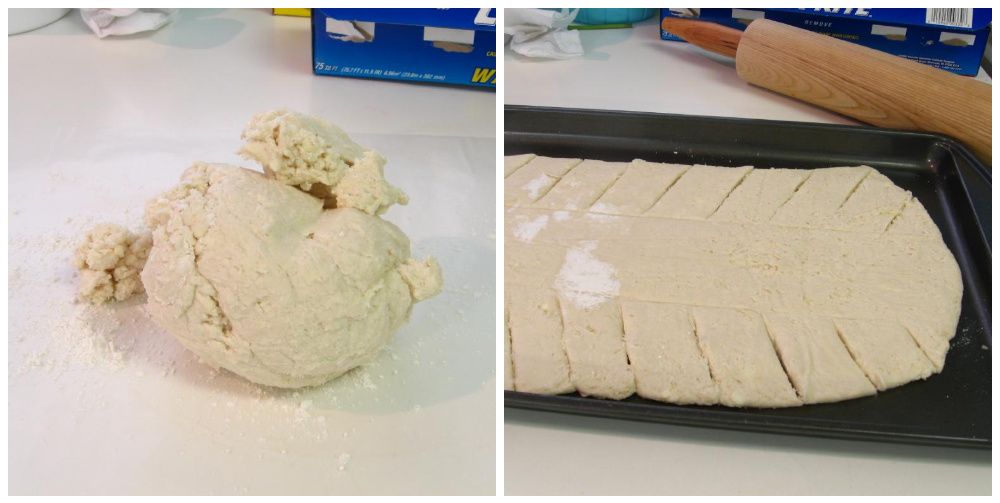
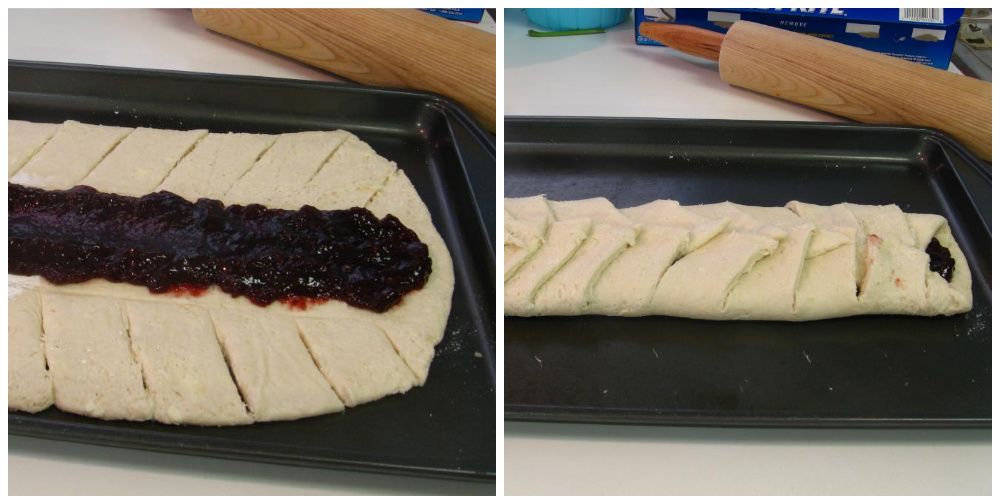

Example of how to cut and assemble braid.

Other breakfast braids you’ll love:
Raspberry Almond Breakfast Braid
Blueberry Cream Cheese Almond Breakfast Braid

If you liked this post, please:
Subscribe to Willow Bird Baking
Follow Willow Bird Baking on Twitter
Follow Willow Bird Baking on Facebook
Give this post a thumbs up on StumbleUpon


ShareOther ways to share this post with friends!

Sassy Sausage and Hash Brown Breakfast Bake

Things I learned from experience this week:

1. If you give in to the urge to take a nap after around 7pm, your body is going to decide it’s sleeping all night (and it won’t bother to consult with your blaring alarm clock). Drink some more caffeine and push through ’til bedtime.

2. Byrd might be certifiably insane. She now brings me pieces of her kibble to throw. She’ll fetch them once or twice before eating them. It’s gotten to the point where she almost won’t eat her food unless she’s played with it first.

I’m not going to lie; I’ve done this test on her. Just in case.

3. I might be certifiably insane. Because I throw that piece of kibble for her every. single. time.

And not only that, but if I’m paranoid she’s not eating enough, I’ll sit in the floor and feed her dinner to her piece by piece like I’m feeding grapes to a flippin’ Roman emperor.

4. Don’t ever say the word “menopause” to 7th graders. You will never get them back. They’re probably still somewhere doubled over in awkward laughter at this very moment.

5. Middle school children will come up with myriad excuses to be violent with each other. The game of “Punch buggy” has apparently expanded: there’s now “Honda Hit,” “Kia Kick,” “Chevy slap,” “Ford flick,” and “Toyota tap.”

6. There’s some sort of principle at work in the universe where, if you’re running late, the passing lane of the highway will be completely blocked by slow drivers. These lovely folks, instead of passing anyone, will be lackadaisically playing a game of “Tap Your Brakes Unnecessarily at Random Intervals.”

Their cars usually sport obnoxious bumper stickers designed to infuriate you while you almost run into them repeatedly. Today, it was a huge Sponge Bob decal that took up the entire rear window. I could not make this stuff up. I almost ran into them on purpose to wipe that oafish starfish grin off of Patrick’s face.

7. Condiments make everything more fun. Please give me dipping sauce, garnishes, toppings, relishes, creams, pastes, flakes, and herbs. I can’t decide if things actually taste better when they’re all dolled up, or if I just love the assembly process.

8. When you’re putting on your fancy dress and high heels, googling librettos, driving downtown, paying for parking, and running full-tilt to make it on time to your very first opera (Carmen, in case you’re wondering), do be sure to check the date on the tickets first. Turns out there was no chance of Mike and I arriving late, considering the opera is next week. We ate Lebanese food in our fancy clothes instead.

9. Always order extra tahini. See #7.

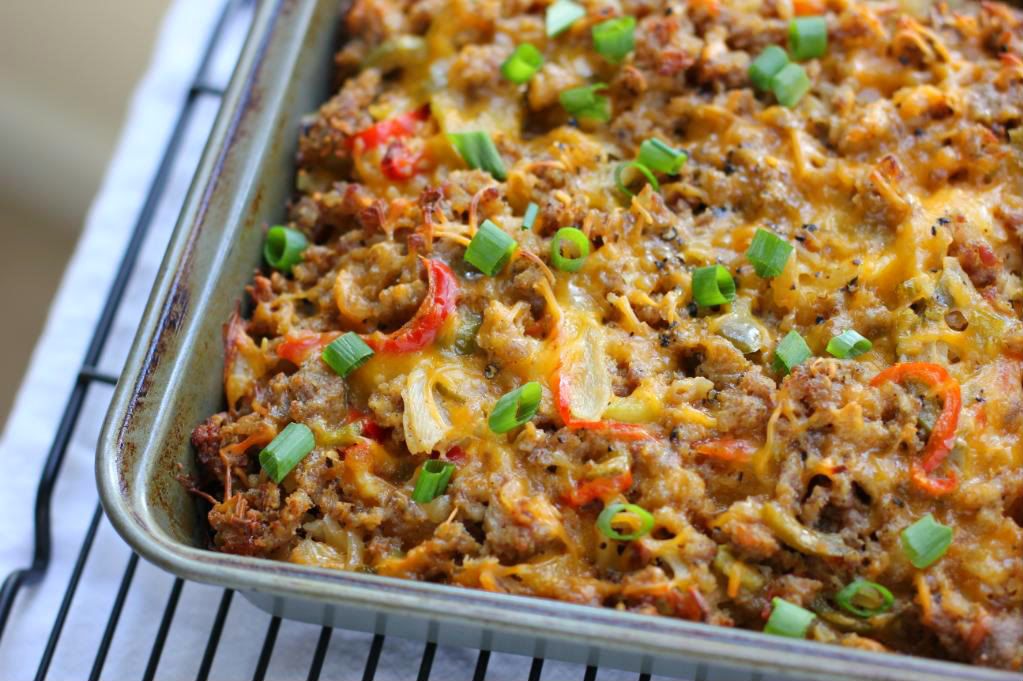
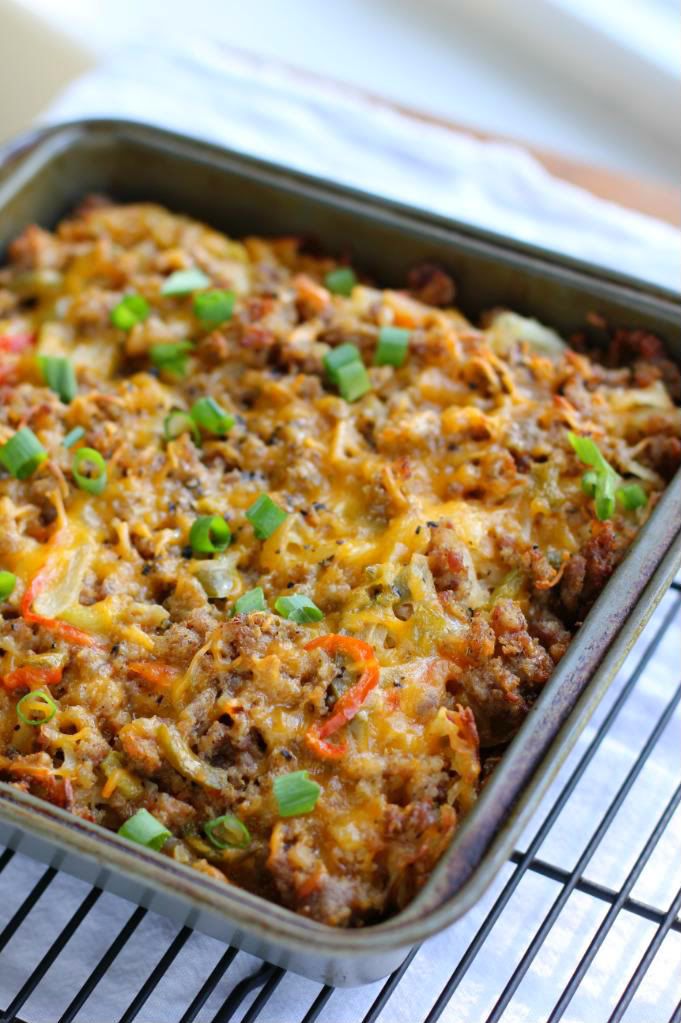
10. Breakfast is one of the best parts of the day. Sometimes I go to sleep early specifically to get to breakfast sooner. And I think you need to go to sleep RIGHT FLIPPIN’ NOW to get to this Sassy Sausage and Hash Brown Breakfast Bake ASAP.

This casserole is super easy, can be prepared in advance, and is one of the best sorts of breakfast to wake up to: hearty, spicy, warm, comforting, and filling. And one you can serve with lots of condiments.

What did you learn from your experiences this week?

Sassy Sausage and Hash Brown Breakfast Bake


Recipe by: Willow Bird Baking
Yields: 9 servings

Oh, this breakfast casserole is perfect. The slight heat of the peppers, sausage, and cayenne pepper are the perfect complement to the layers crisp hash browns and cheese. It’ll fill you with warmth and satisfaction on a cold autumn morning. Since it can be prepared days in advance and popped into the oven when you wake up, it’s perfect for brunches or family breakfasts where you’d rather not be trapped in the kitchen for hours!

Ingredients:
4 cups frozen shredded hash brown potatoes
16 ounces hot sausage
1/4 cup finely chopped onion
1/4 cup finely chopped green and red peppers
1/2 clove minced garlic
minced jalapeno to taste (I used about 1/2 teaspoon)
1 cup shredded, sharp cheddar cheese
1 (12-ounce) can evaporated milk
1 egg, lightly beaten
1/2 teaspoon cayenne pepper
1-2 tablespoons olive oil
dash paprika
salt and pepper to taste
Toppings: sour cream, diced jalapenos, hot sauce, salsa, chopped green onions, and some fresh cilantro or parsley

Directions:
Grease an 8-inch square baking pan and preheat the oven to 350 degrees F (if you’re baking the casserole on the same day). In a large skillet over medium-high heat, crumble and cook the sausage until completely browned and cooked through. Remove the sausage to a paper-towel lined plate to drain. Discard all but a couple of teaspoons of its grease.

Place peppers, jalapenos, and onions into the skillet and toss to coat them with the grease. Sauté them for about 5 minutes until they’re soft and the onions are beginning to turn translucent. Add the garlic and cook for about 30 seconds, stirring constantly, until it’s fragrant. Remove this mixture to the paper-towel lined plate with the sausage.

Add a couple of teaspoons of olive oil to the skillet. Brown the hash browns in batches by spreading out about a third of them over the bottom of the skillet in a flat layer. Cover the skillet and let them cook without stirring for around 10 minutes (double check the directions on your hash browns package). When one side is browned, flip the hash browns and brown the other side. Remove these to a separate paper-towel lined place. Continue until all hash browns are browned.

Place half of the hash browns into the baking pan in an even layer. Top with half of the sausage, peppers, and onions mixture and 1/2 cup of cheese. Repeat these layers once more. In a small bowl, whisk together the egg, evaporated milk, cayenne pepper, paprika, salt and pepper. Pour this mixture evenly over the hash brown casserole and cover it with aluminum foil. You can refrigerate the casserole overnight at this point or bake immediately. If you refrigerate it, let it sit out at room temperature while the oven preheats.

Bake the casserole for around 50 minutes before removing the foil and baking an additional 10-15 minutes. Let the casserole cool for 10 minutes before serving it with sour cream, diced jalapenos, hot sauce, salsa, green onions, and some fresh cilantro or parsley.

If you liked this post, please:
Subscribe to Willow Bird Baking
Follow Willow Bird Baking on Twitter
Follow Willow Bird Baking on Facebook
Give this post a thumbs up on StumbleUpon

ShareOther ways to share this post with friends!

Coffee Mousse Filled Doughnuts

Remember these?

What you may not remember (because, um, I didn’t tell you) is that the lovely Maple Bacon Doughnuts aren’t the only avant garde doughnuts in town. (Can you describe a doughnut as avant garde? I call poetic license.)

Introducing Coffee Mousse Filled Doughnuts!

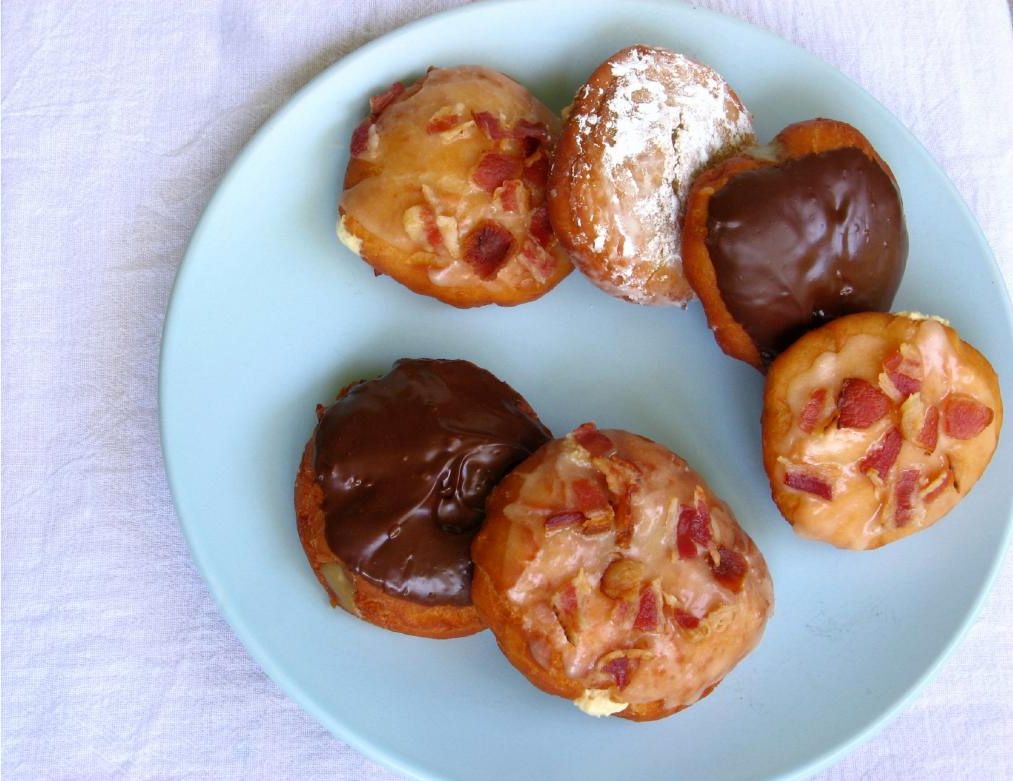
Much like their Maple Bacon cousins, these dreamboats are capitalizing on a quintessential breakfast pairing. The puffy, fried orbs are filled with a sweet coffee mousse and topped with either melted chocolate or rolled in powdered sugar. Serve them alone, or combine them with Maple Bacon doughnuts for a breakfast extravaganza!

What’s your favorite doughnut filling?

Coffee Mousse Filled Doughnuts


Recipe by: Doughnuts adapted from Cherry Tea Cakes, mousse adapted from coffee pastry cream by Rebecca Franklin
Yield: about 12 3-inch doughnuts

Doughnut Ingredients:
1 0.25-ounce package yeast
2 tablespoons hot water, roughly 110 degrees in temperature
3/4 cups milk, scalded (heated to a slight simmer-not a boil) and cooled
1/4 cup sugar
1/2 teaspoon kosher salt
1 egg
2 tablespoons and 2 teaspoons shortening
2 1/2 cups all-purpose flour
melted chocolate and/or powdered sugar for topping
vegetable oil for frying

Coffee Mousse Filling Ingredients:
1 ¼ cups whole milk
2 teaspoons instant coffee granules
3 egg yolks
5 tablespoons granulated sugar
1 tablespoon all-purpose flour
2 tablespoons plus 2 teaspoons cornstarch
1 teaspoon pure vanilla extract
1 cup whipping cream
1 teaspoon gelatin

Directions: Make the doughnut dough: Dissolve the yeast in warm water in the bowl of your stand mixer, and then let it sit for about 5 minutes. The yeast should foam to show that it’s active. Beat in milk, sugar, salt, eggs, shortening, and 1 cup flour (scraping down bowl when needed). Beat on medium speed for 2 minutes to fully combine. Mix in remaining flour completely. Cover this dough and let it rise in a draft-free place (I warm my oven for a few seconds on 200 degrees just to get the chill out — make sure it’s not hot! — and then put my dough in there to rise) until doubled, about 50-60 minutes.

Make the Coffee Mousse: While the dough is rising, whisk together the egg yolks, sugar, flour, and cornstarch until the mixture is completely smooth and set aside. Place the milk in a saucepan and sprinkle gelatin over it. Let it soften for 2 minutes before adding the coffee granules and setting the saucepan over low heat. Heat until it’s just hot enough to steam, stirring the gelatin in to dissolve.

Once the milk is steaming, add half of it, whisking constantly, to the egg mixture to temper the eggs (this ensures they won’t cook when you add them to the hot mixture). Add the milk and eggs back into the hot milk and continue stirring, and heat it for 1-2 minutes, until the custard reaches 170 F on a digital thermometer and is very thick. Remove from the heat, stir in the vanilla extract, and set the pan in a bowl of ice water, stirring every few minutes. Cool completely in this manner.

In the meantime, whip the cream in a chilled bowl until it holds stiff peaks. When the coffee mixture is cool, mix about 1/3 of the cream into it.

Make your doughnuts: Flour a surface well and turn your doughnut dough out onto it, flouring the dough as well. Gently roll the dough out to 1/2-inch thick and cut into solid rounds with a 3-inch cooking cutter. Place each round on a baking sheet and let these rise until doubled, about 30-45 minutes. About 25 minutes into their rise time, start heating your oil in a heavy, deep stock pot to 350 degrees F on a candy/fry thermometer.

Fry your doughnuts: Gently lower 2-3 doughnuts at a time into hot oil with a slotted spoon. Fry about 1 minute on each side or until golden brown. Remove to a paper towel lined plate to drain.

Assemble doughnuts: Melt some chocolate and/or prepare a plate of powdered sugar to coat doughnuts. Use a chopstick or butter knife to poke into each doughnut and “sweep” gently to create a pocket. Pipe mousse into each doughnut using a piping bag. Then dip them in the chocolate or roll in the powdered sugar. Best eaten the same day.

If you liked this post, please:
Subscribe to Willow Bird Baking
Follow Willow Bird Baking on Twitter
Follow Willow Bird Baking on Facebook
Give this post a thumbs up on StumbleUpon


ShareOther ways to share this post with friends!

Maple Bacon Doughnuts

My mom trudged through four years of college with four kids to earn her nursing degree (and graduated magna cum laude, she will promptly — and repeatedly — inform you).

Her job as a nurse left her with little time or energy to spend on being an extraordinary entertainer, something she’s always had an innate talent for. One day as a small girl, though, I went to forage in the kitchen and found her frantically frying doughnuts.

There was literally a multi-tiered tower of doughnuts on the kitchen table. There were more doughnuts bouncing around in hot oil on the stove. There were pale, puffy rings on the counter waiting for their turn in the stock pot.

And then there was little Julie in the middle of the madness — and I was all about eating some doughnuts.

Mom immediately shattered my doughnut devouring dreams, though, explaining that her friends from work were on their way to discuss some adultish, worky things, and that the doughnuts were for them. I had thoughts of launching an all-out siege à la Hyperbole and a Half, but managed to control myself.

When the ladies arrived, Mom was somehow curled and coiffed, standing in a clean kitchen, and wearing a cute outfit. The tower of doughnuts beckoned enthusiastically from the table as she invited each of her friends to sit and poured them coffee. I watched in eager anticipation, certain they were about to notice the doughnuts and react with appropriate awe.

But they didn’t.

No worries. My mom would offer them the doughnuts in a moment, and they were probably just waiting on that polite social cue to reveal their utter amazement. Sure enough, she gestured toward one of tiers resplendent with multicolored rings, saying, “Would you like a doughnut?” But the unthinkable happened.

“Oh, no thanks.”

That’s right. Those ladies did not eat a single doughnut. They were dieting, or they weren’t hungry, or some such something.

My mom carried on warm conversation, refilling their coffee like nothing had happened. Like fresh homemade doughnuts just appeared on her kitchen table any old day! Like she hadn’t just spent literally hours making them from scratch!

At 7 or 8 years old, I was not so deft a hostess. I sort of wanted to grab one of those ladies by both shoulders and give her a good shaking, screaming, “SHE MADE YOU HOMEMADE DOUGHNUTS, WOMAN!” I had seen Mom’s hours of hard work, and I was heartbroken for her.

The ladies left before too long, having accomplished their adulty, workish business, and the doughnuts still sat undisturbed on the table. I could tell Mom was sad about it, despite my assurances that I would both eat and enjoy every last one.

Seriously, who turns down a homemade doughnut?! In fact, who turns down ANY version of a yeast doughnut?! (Those cakey things are another story altogether; you’ll have to forgive my obvious bias.)

Indeed, Mike’s mom told me a story years ago about when she was in school. She and her friends would wait for the “Hot Doughnuts Now” sign to come on at the nearby Krispy Kreme, drive over, and eat a dozen doughnuts each. That’s the power of a yeast doughnut. (And youthful metabolism).

Well, in honor of my mother and doughnut lovers everywhere, I made a variety of filled doughnuts last weekend. I’m still tweaking my super secret version — and will share it soon, along with a great little trick for using yeast dough scraps — but this flavor combination I found on Cherry Tea Cakes had me immediately intrigued. Maple Bacon Doughnuts!

They don’t just sound amazing; they are amazing! And even though it may seem like a trendy flavor combination, these are not simply novelty doughnuts — they taste flippin’ awesome. They’re pillows of salty-sweet, doughnut-pancake, breakfast-dessert heaven. I feel like I should be confused, but I’m not. I just want another one.

While we’re talking doughnuts, we might as well jump in the fray: Are you a cake doughnut or yeast doughnut person?

Maple Bacon Doughnuts


Recipe by: Adapted from Cherry Tea Cakes
Yield: about 12 3-inch doughnuts

Doughnut Ingredients:
1 0.25-ounce package yeast
2 tablespoons hot water, roughly 110 degrees in temperature
3/4 cups milk, scalded (heated to a slight simmer-not a boil) and cooled
1/4 cup sugar
1/2 teaspoon kosher salt
1 egg
2 tablespoons and 2 teaspoons shortening
2 1/2 cups all-purpose flour
vegetable oil for frying

Maple Mousse Filling Ingredients:
1/2 cup pure maple syrup
2 large egg yolks
1 1/4 teaspoon unflavored gelatin
3/4 cup whipping cream

Maple Glaze Ingredients:
2 tablespoons plus 2 teaspoons bacon grease/melted butter
1 cups powdered sugar
5-6 tablespoons maple syrup
about 1/2 pound bacon, for topping

Directions: Make the doughnut dough: Dissolve the yeast in warm water in the bowl of your stand mixer, and then let it sit for about 5 minutes. The yeast should foam to show that it’s active. Beat in milk, sugar, salt, eggs, shortening, and 1 cup flour (scraping down bowl when needed). Beat on medium speed for 2 minutes to fully combine. Mix in remaining flour completely. Cover this dough and let it rise in a draft-free place (I warm my oven for a few seconds on 200 degrees just to get the chill out — make sure it’s not hot! — and then put my dough in there to rise) until doubled, about 50-60 minutes.

Make the Maple Mousse: While the dough is rising, bring maple syrup to a boil over medium-high heat. In a separate bowl, whisk together egg yolks. Pour about 1/4 cup of the hot maple syrup into the egg yolks, whisking constantly, to temper them and be sure they won’t cook from the heat. Then whisk the egg yolks into the maple syrup. Whisk constantly until the mixture reaches about 170 degrees F on a candy thermometer. In a separate bowl, measure out 1/4 cup of the whipping cream and sprinkle the gelatin over it to soften. Let it sit for about 5 minutes before mixing a couple of tablespoons of the warm syrup mixture in and stirring to dissolve the gelatin. You can heat for 10 seconds at a time, stirring between each, to ensure the gelatin is dissolved. Whisk this mixture into the syrup mixture, and then whisk it occasionally for the next hour while it cools.

Beat the remaining cream to soft peaks. Stir about a third of it into your now-cool maple syrup mixture to lighten it, and then gently fold the remaining cream into it. Refrigerate for at least an hour while you complete the rest of the components.

Make your doughnuts: Flour a surface well and turn your doughnut dough out onto it, flouring the dough as well. Gently roll the dough out to 1/2-inch thick and cut into solid rounds with a 3-inch cooking cutter. Place each round on a baking sheet and let these rise until doubled, about 30-45 minutes. About 25 minutes into their rise time, start heating your oil in a heavy, deep stock pot to 350 degrees F on a candy/fry thermometer.

Cook bacon topping: Preheat oven to 400 degrees (only once your doughnuts aren’t in there rising!) Cover a baking sheet with aluminum foil and lay your bacon slices out side by side. Bake for 15-20 minutes or until crisp. Remove bacon to a paper towel lined plate, reserving the bacon grease in a small bowl. When cool, crumble bacon up.

Fry your doughnuts: Gently lower 2-3 doughnuts at a time into hot oil with a slotted spoon. Fry about 1 minute on each side or until golden brown. Remove to a paper towel lined plate to drain.

Make the Maple Bacon Glaze: Add enough melted butter to your bacon grease to make it 2 tablespoons and 2 teaspoons worth. Whisk this together with the confectioner’s sugar until combined. Add maple syrup one tablespoon at a time until you reach desired consistency. Set aside.

Assemble doughnuts: Use a chopstick or butter knife to poke into each doughnut and “sweep” gently to create a pocket. Pipe mousse into each doughnut using a piping bag. Then dip them in the glaze and sprinkle cooked bacon on top. Best eaten the same day.

If you liked this post, please:
Subscribe to Willow Bird Baking
Follow Willow Bird Baking on Twitter
Follow Willow Bird Baking on Facebook
Give this post a thumbs up on StumbleUpon


ShareOther ways to share this post with friends!

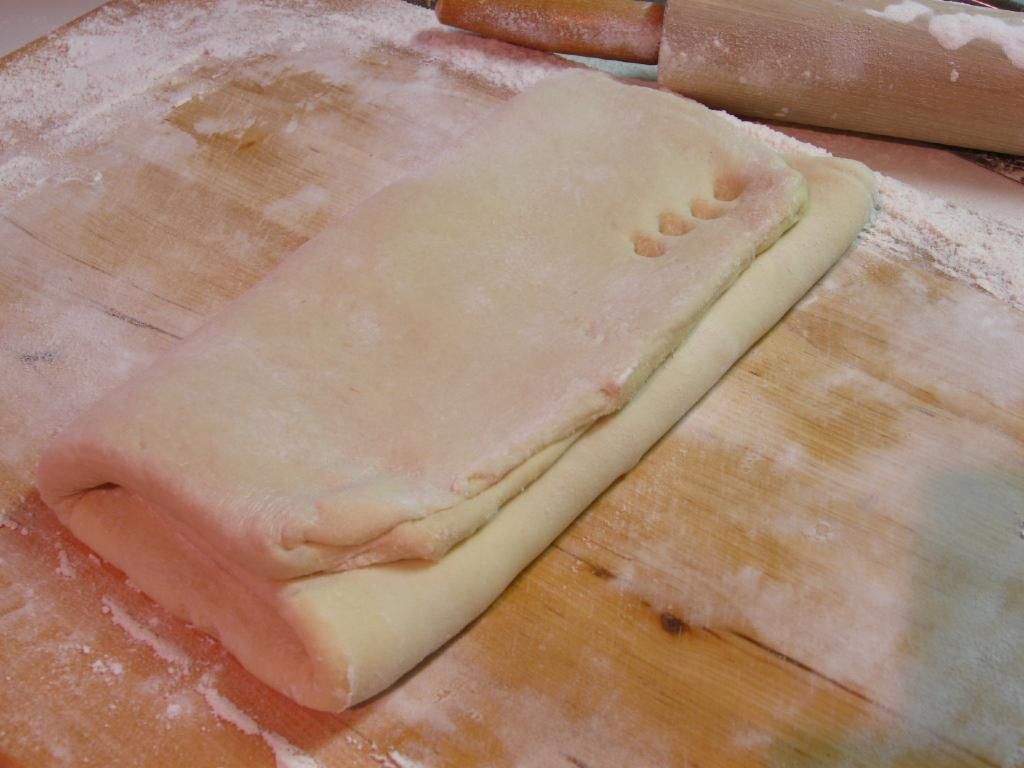
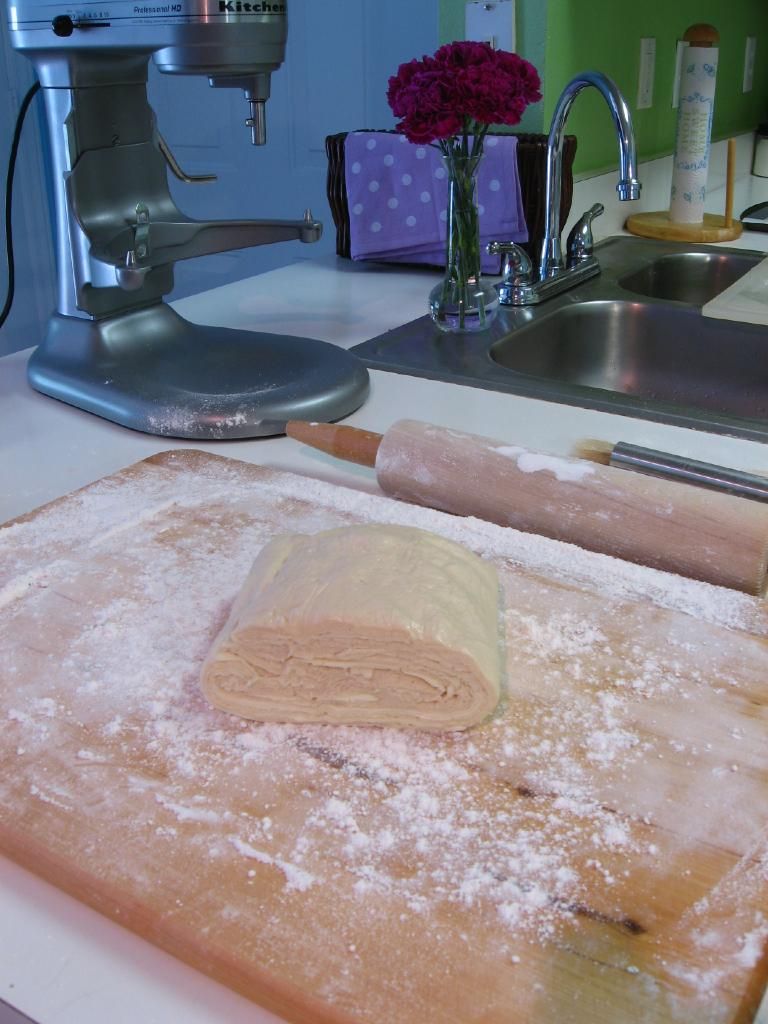
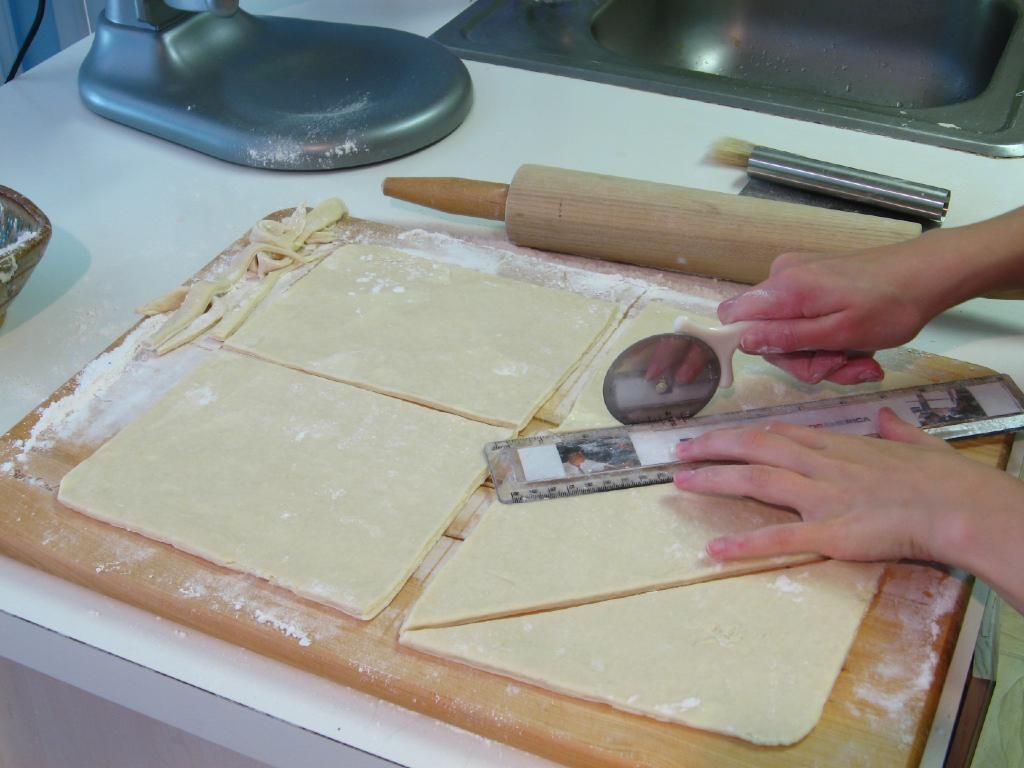
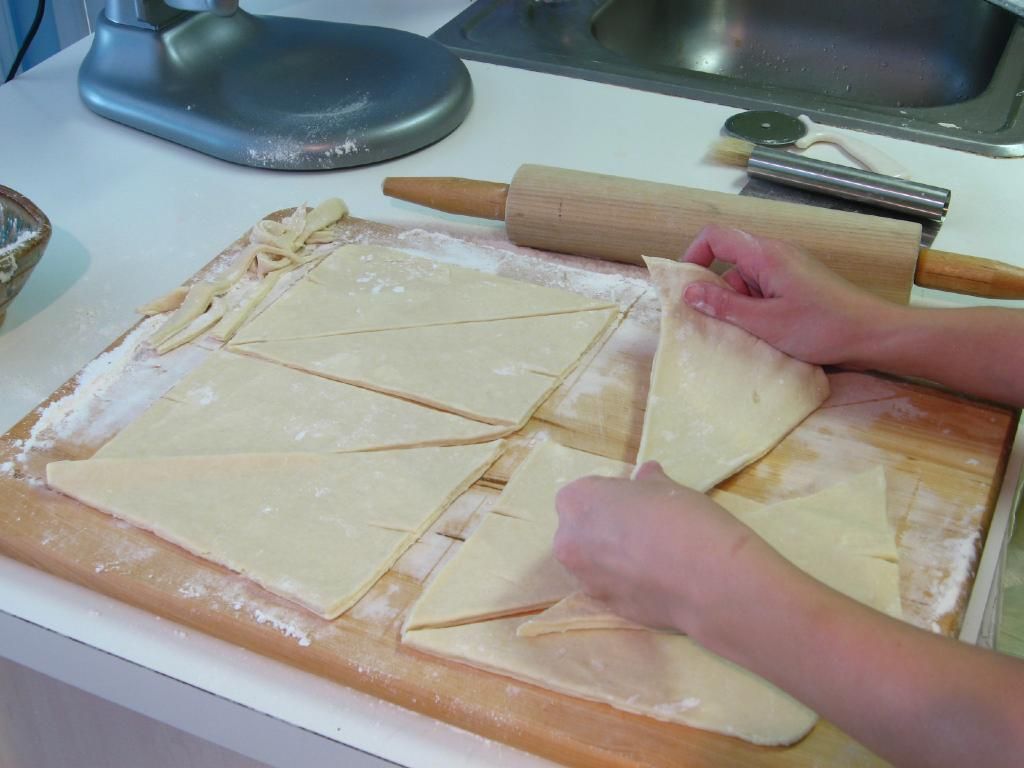
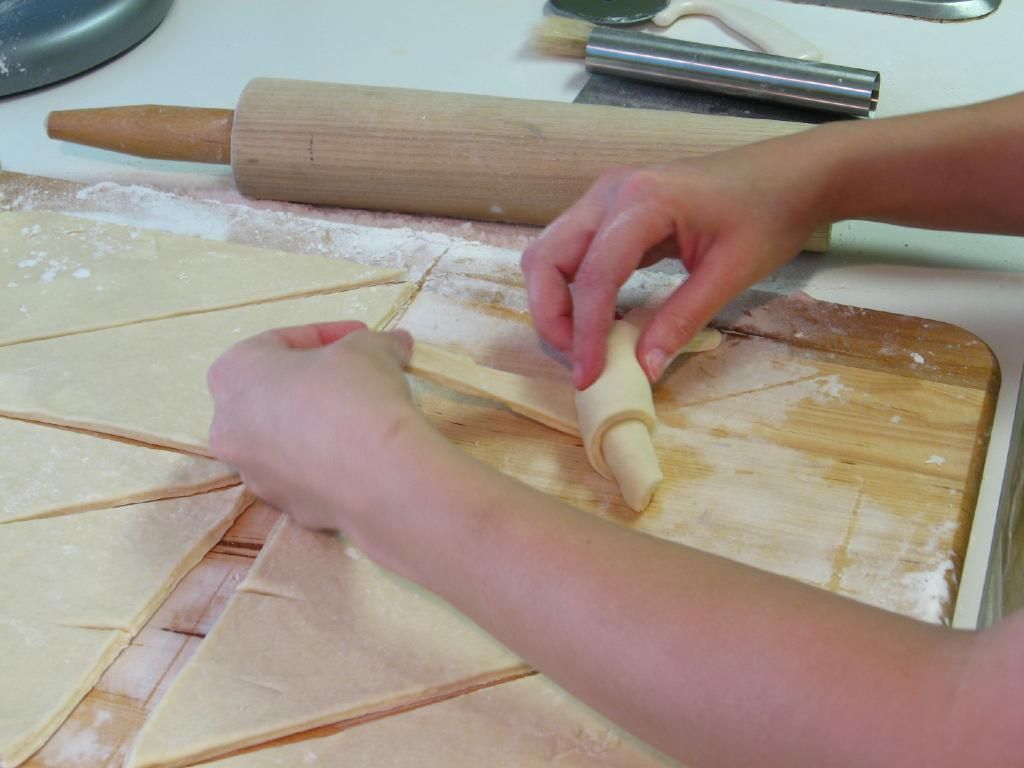
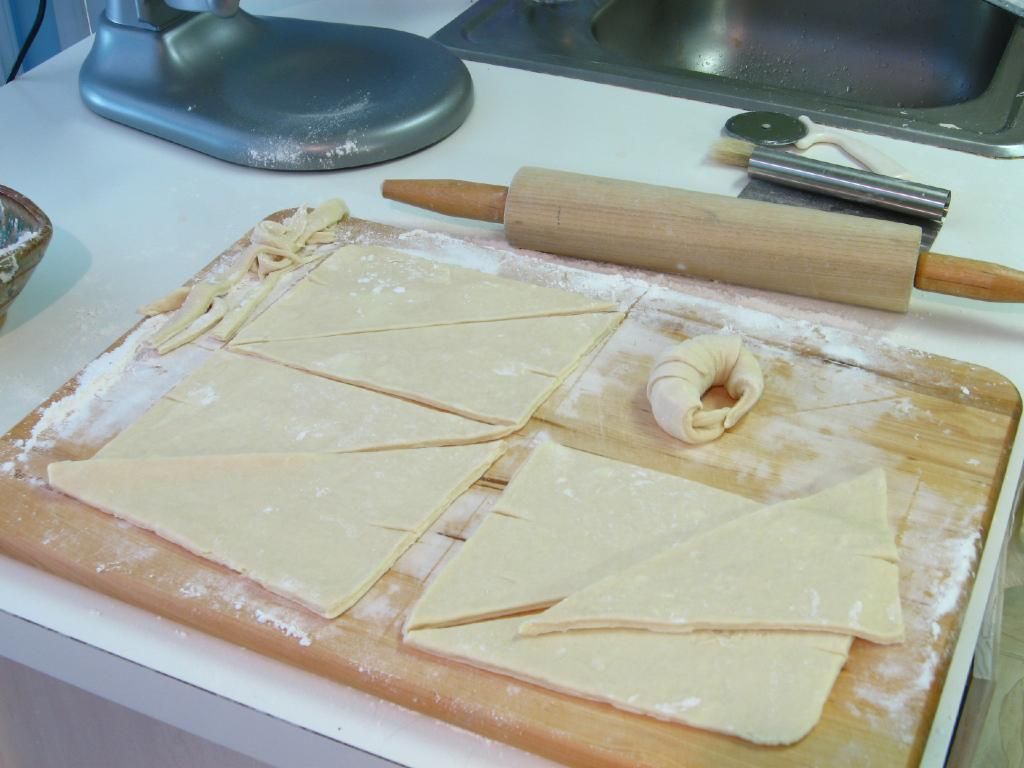
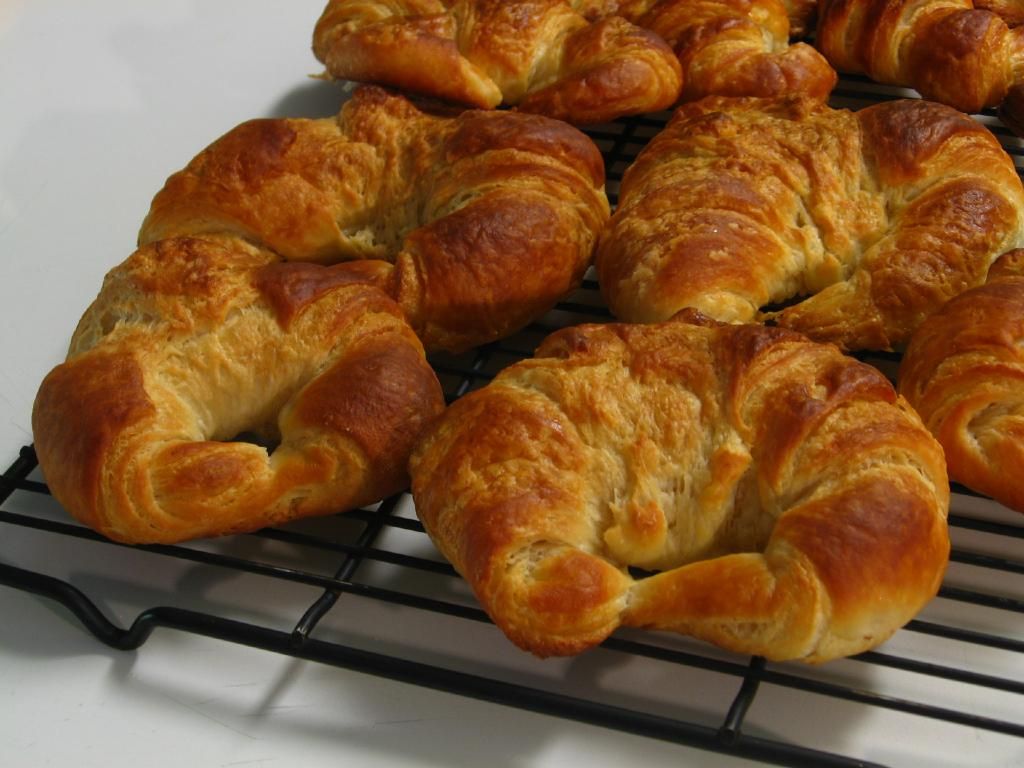
Homemade Croissant Phototutorial

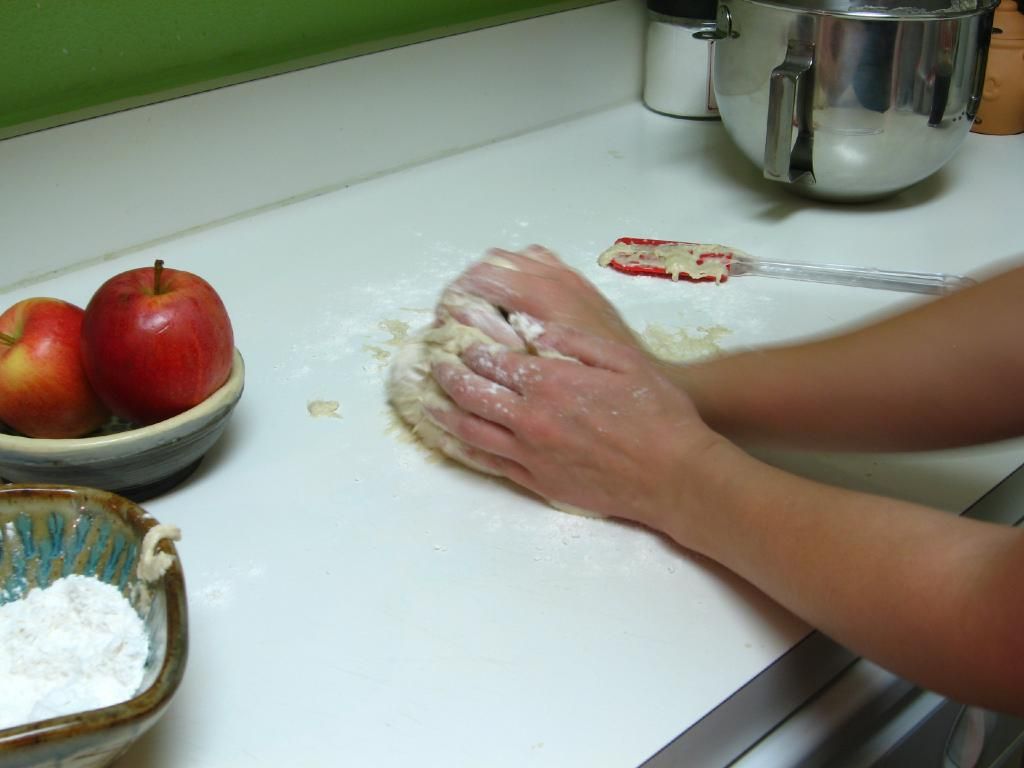
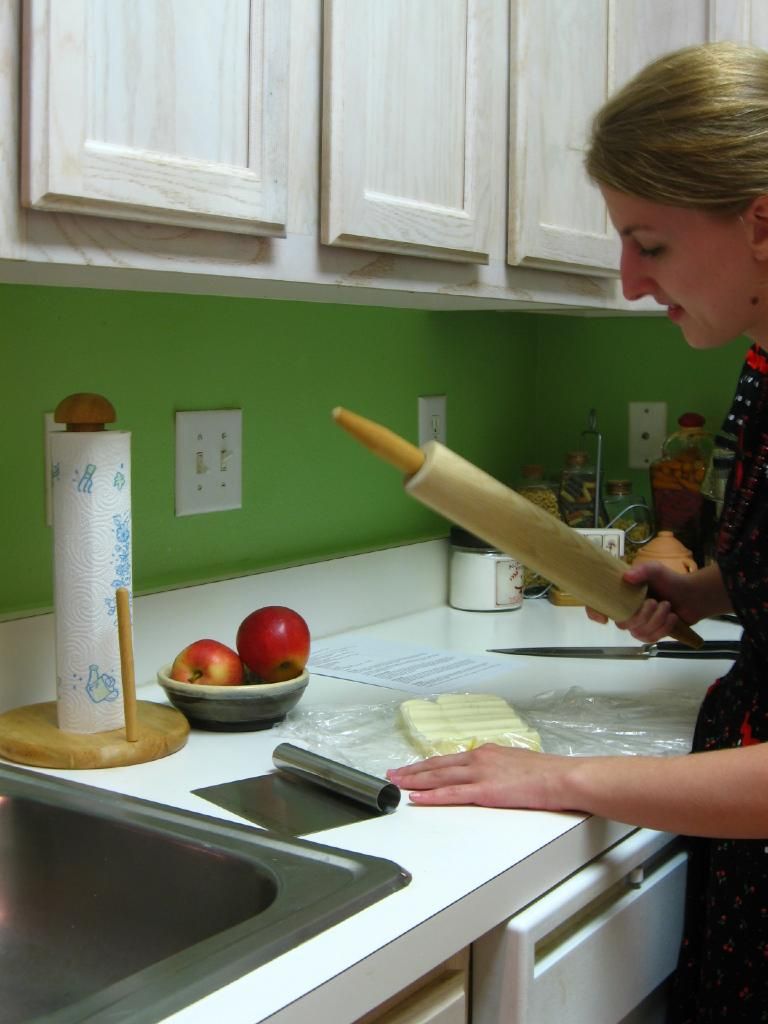
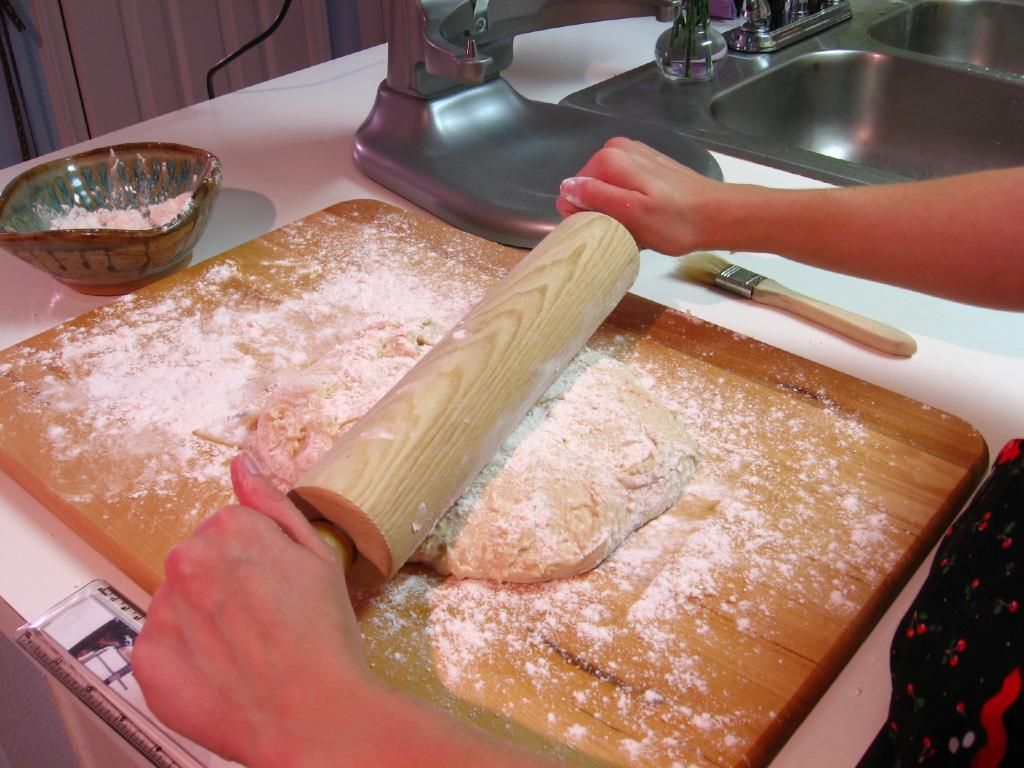
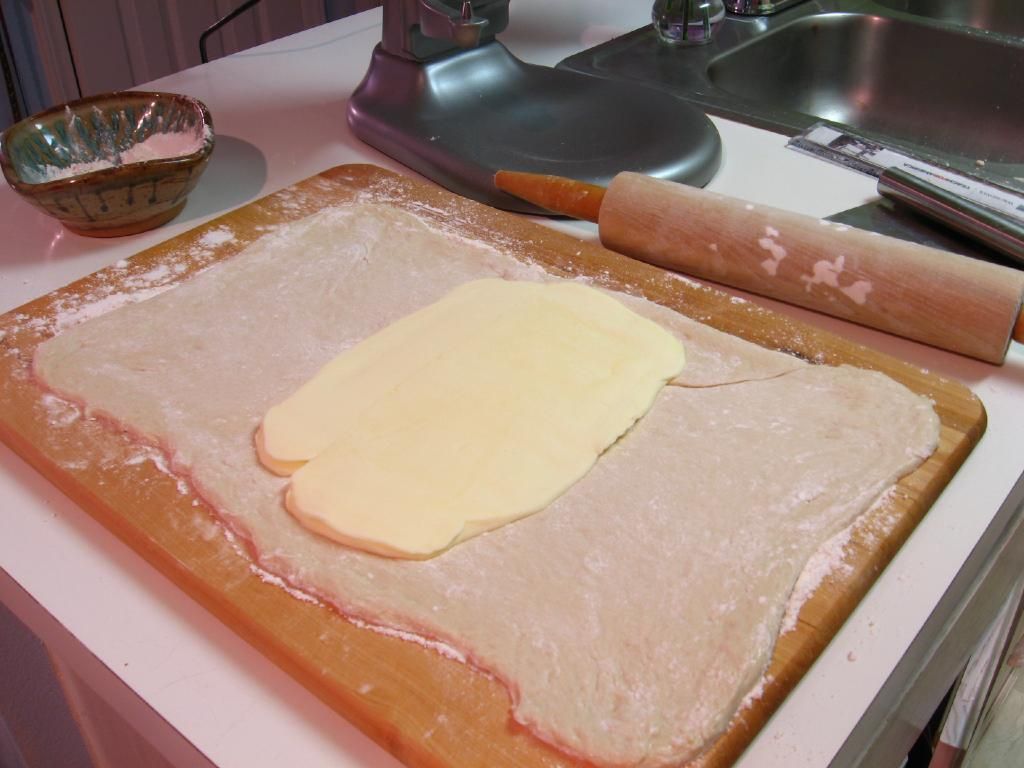
Croissants are not just pastries to me. They’re not just two days worth of work, careful rolling, and dough laminating. They’re not just butter-laden, flaky bits of heaven.

Croissants represent the mission of Willow Bird Baking: to inspire home cooks to build their kitchen confidence by repeatedly tackling challenging new recipes. In July, I issued the Croissant Challenge where I asked home cooks who had never made homemade croissants before to whip up a batch. Many croissant newbies jumped at the challenge and became Croissant Masters (see their work here: page 1, 2, 3). Their enthusiasm confirmed for me that successfully taking on a challenging recipe can be an exhilarating, satisfying, galvanizing experience.

Thank you so much for voting me through to Project Food Blog Challenge #4 to create a phototutorial. Now it’s time for me to turn the tables on you — because I’m not only completing a challenge, I’m issuing a challenge.

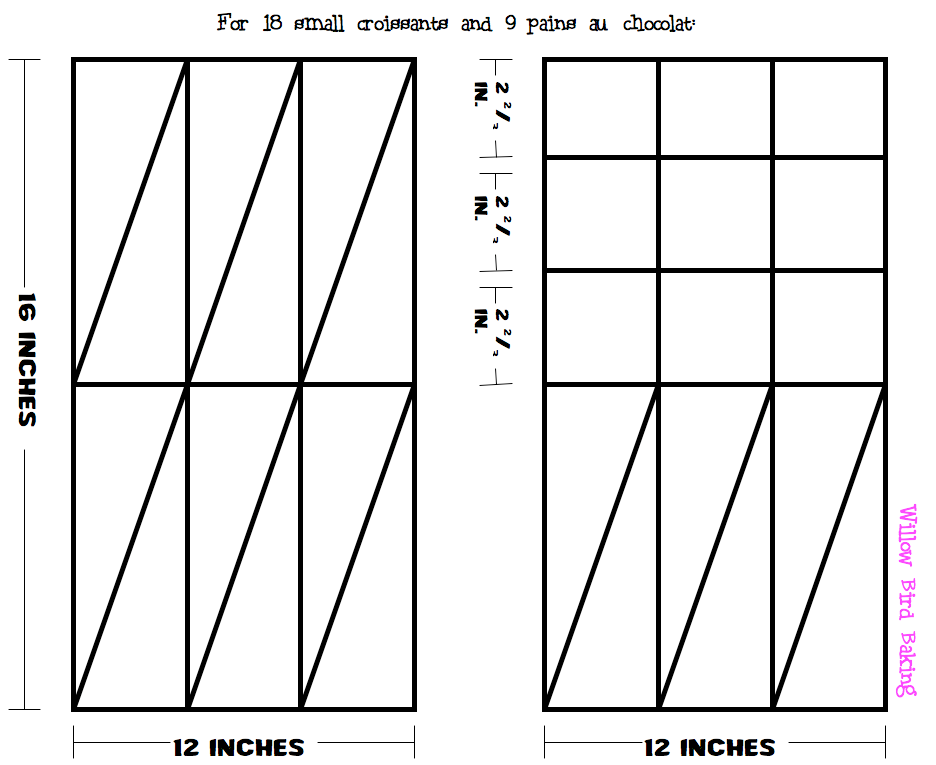
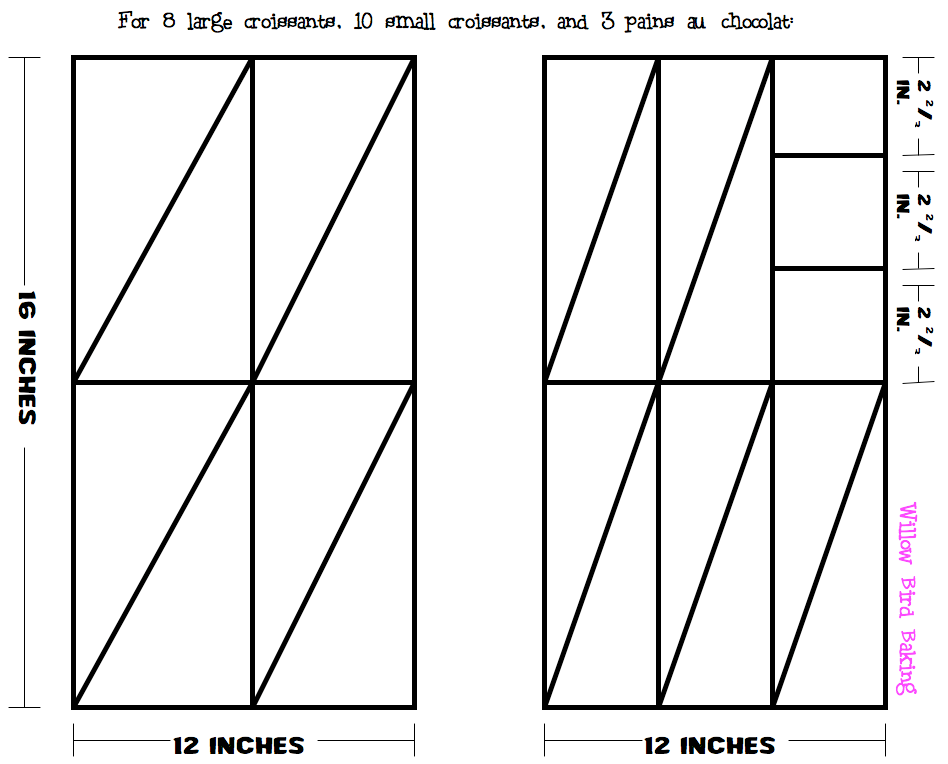
Will you join the proud group to have mastered croissants? No matter your skill level or experience, you can do it, and I’m here to help. If you’re willing to commit to croissant, leave a comment below! Let’s walk through my (slightly ridiculous) version of the process together.


Willow Bird Baking is a contestant in Project Food Blog, a contest comprised of a series of 10 challenges to find the next food blog star. Voting for Challenge #4 is now open! To vote for this Croissant Tutorial, register for a Foodbuzz account. Once you’re registered, sign in and go here. To vote, click the heart next to the words “Vote for this Entry.” I am so grateful for your support!


If you liked this post, please:
Subscribe to Willow Bird Baking
Follow Willow Bird Baking on Twitter
Follow Willow Bird Baking on Facebook
Give this post a thumbs up on StumbleUpon


ShareOther ways to share this post with friends!

1 6 7 8 9 10 11