breakfast

Blueberry Stuffed French Toast Bowls

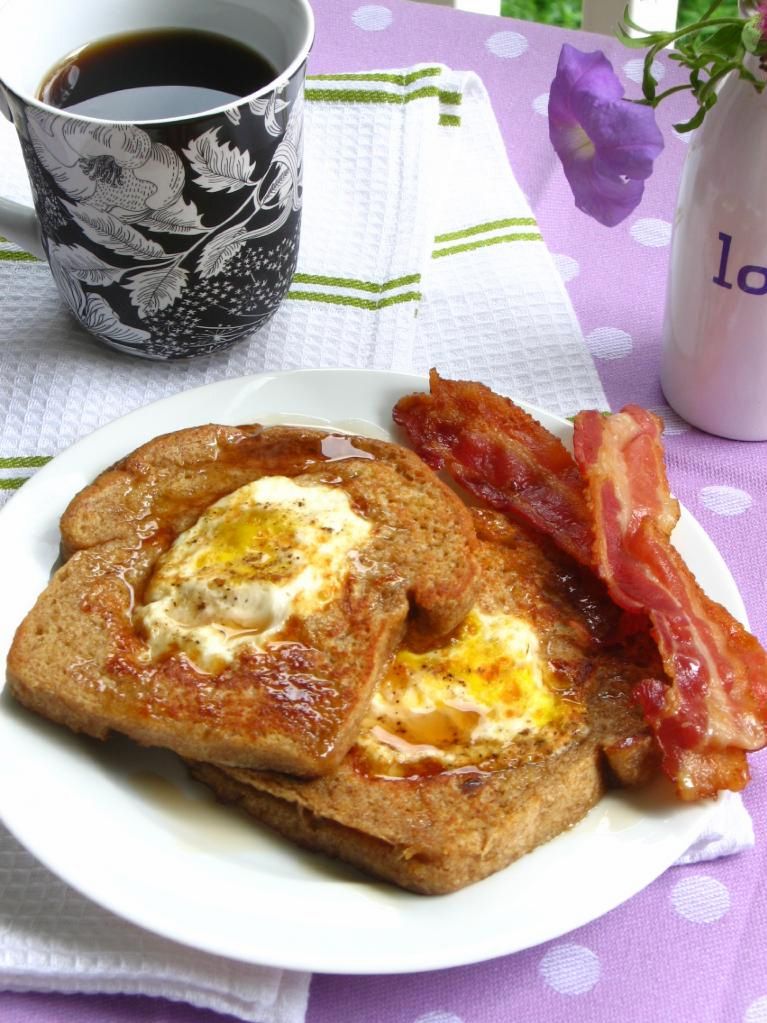
This is a two-post kind of day, y’all. You don’t mind, do you?

Good. Because this recipe involves some of my favorite things: French toast, blueberries, and cream cheese. Oh my goodness, I love cream cheese.

Nature’s Pride bread is an official sponsor of the Foodbuzz Blogger Festival this year, and as such, they issued a challenge to Featured Publishers to create a recipe using their products. I want to go to San Francisco as much as anyone, so I decided to give it a go. I pondered and brainstormed and debated and considered until, finally, I decided that I couldn’t think of a creative recipe and I gave up.

What? Don’t look at me like that! I was planning a ginormous dinner party, after all; cut me some slack!

It bothered me, though. When I was picking up supplies for the dinner party, I stuck some marshmallow cream and peanut butter in my basket, thinking perhaps I’d make a chocolate-covered fluffernutter. It still didn’t seem original enough, however, and in the shower this morning before church, I had almost convinced myself to give up again — when it hit me.

I’d already thought of and rejected stuffed French toast because sandwich bread is sliced too thin to cut open and stuff. Someone did it last year with two slices of bread, but I wouldn’t want to replicate something that had been that’d already been done.

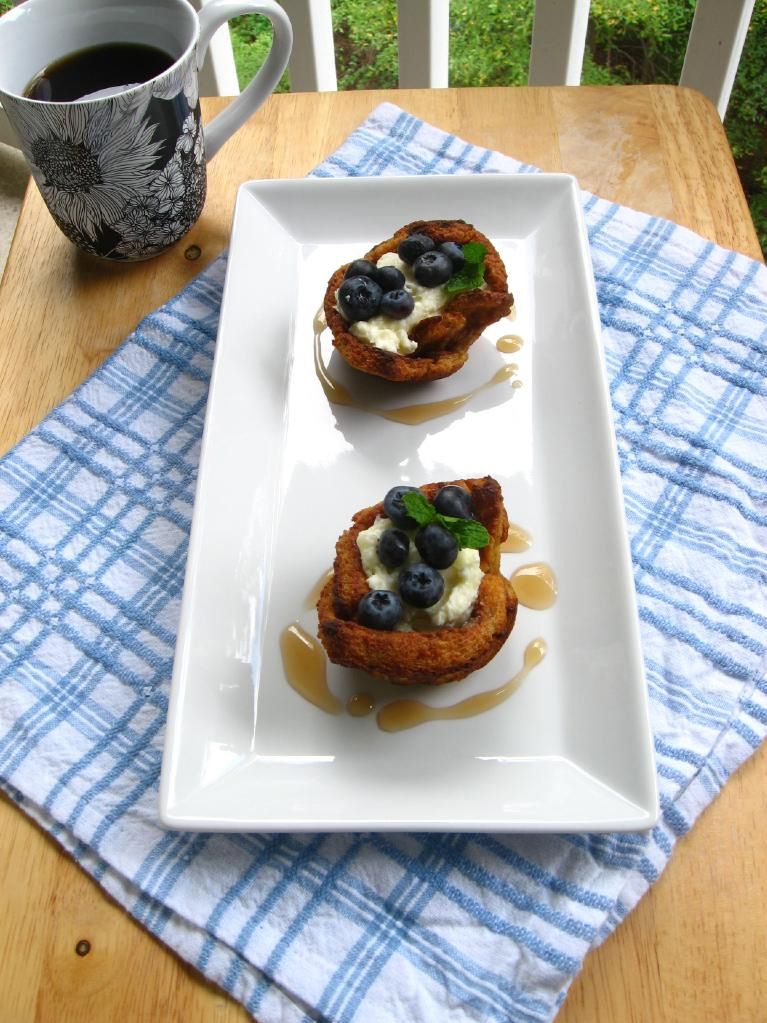
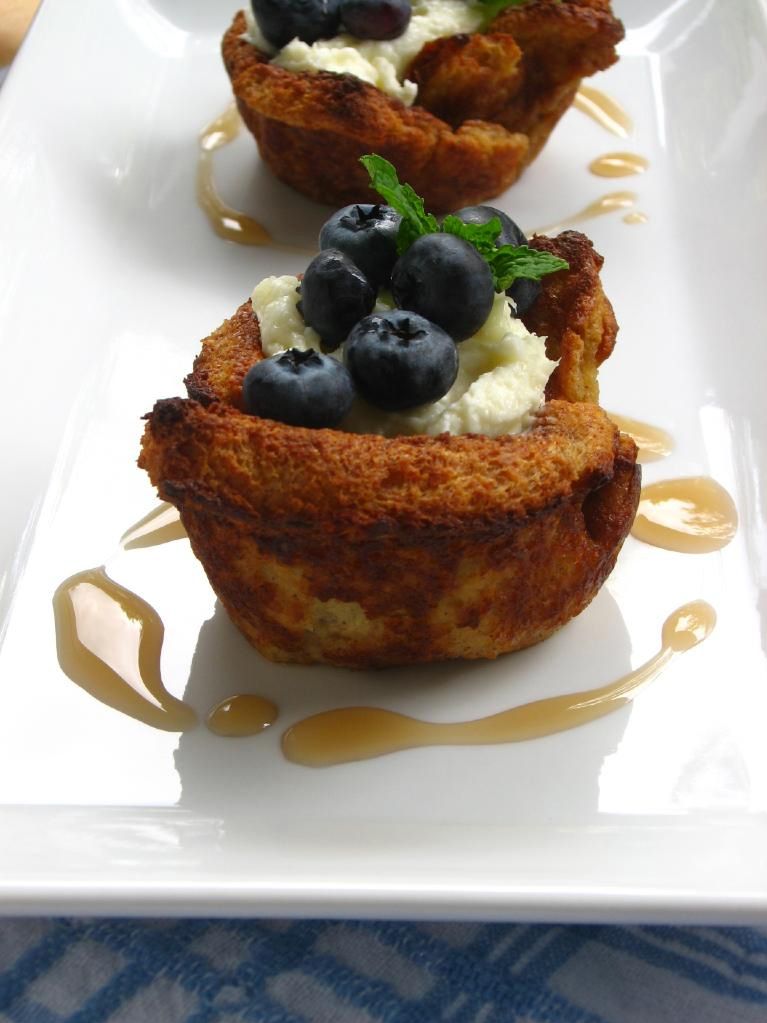
Sometime between shampooing and conditioning, I realized that I could bake French toast into sweet little breakfast cups and fill them instead of stuffing them. They’d be topped with fresh berries with some maple syrup on the side for drizzling or dipping. Suddenly, a breakfast star was born.

There were still some obstacles — like how to create the French toast cups. In my first attempt, I dipped the bread into the custard and placed it uncooked into the muffin tin. I can’t really even describe the outcome, but they were something like soggy, bulbous custard balloons. Not San Francisco-worthy.

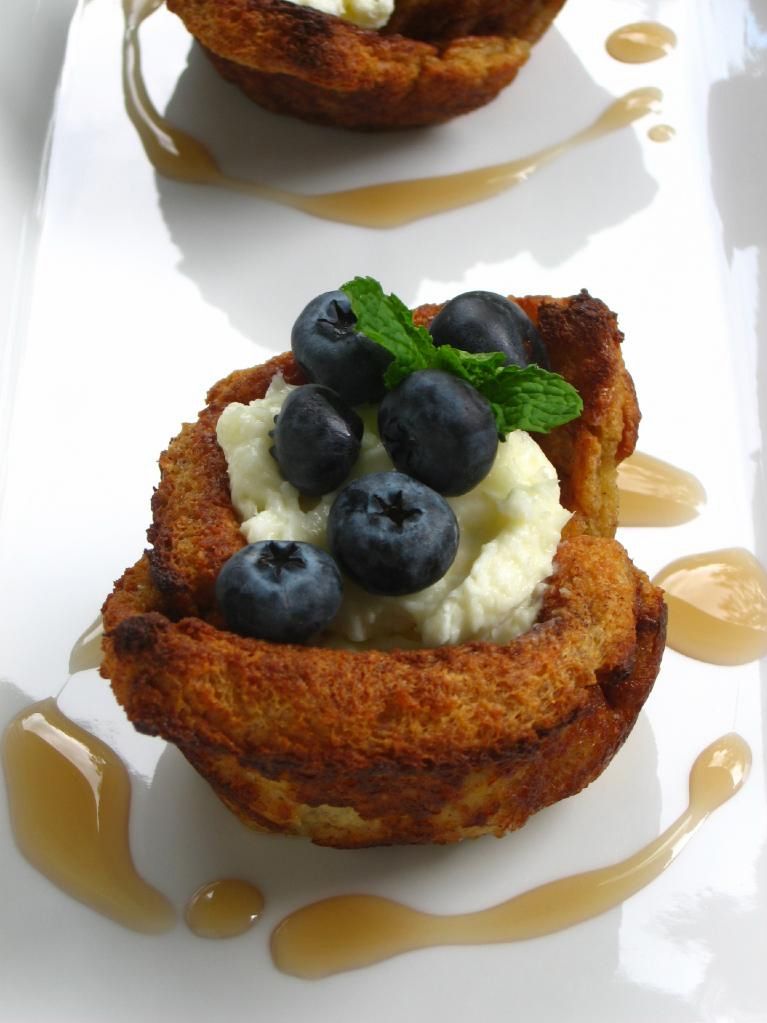
But my second attempt? Save me a seat on the trolley, because they were amazing! In this version, I cooked my French toast completely before cooling it and baking it into French toast cups. I then filled it with the sweetened cream cheese filling and berries to finish the dish.

Here’s hoping I win a trip to San Francisco to schmooze with some of my food blog faves, and that YOU make some stuffed French Toast Bowls immediately! Mike just polished off the last one for dessert, and if his reaction is any indication, you won’t regret it.

Blueberry Stuffed French Toast Bowls


Recipe by: Willow Bird Baking, with inspiration from Alton Brown
Yield: 8 bowls, or about 4 servings

Ingredients:
1/2 cup heavy cream
1/2 cup milk
3 large eggs
2 tablespoons honey, microwaved for 20 seconds (but not while still IN THE BEAR, y’all!)
1 teaspoon cinnamon
1/4 teaspoon salt
8 slices day-old or stale sandwich bread (I used Nature’s Pride Honey Wheat Bread)
4 tablespoons butter
2 8-ounce packages cream cheese, room temperature
4 tablespoons sugar
blueberries
maple syrup, for serving

Directions:
Preheat oven to 400 degrees F. In medium bowl, whisk together the milk, cream, eggs, honey, cinnamon, and salt (this step can be done the night before and refrigerated). When you’re ready to cook your French toast, pour this mixture into a cake pan or pie dish.

Prepare your bread: remove crusts and roll with a rolling pin to slightly flatten. Dip the bread into your custard mixture for about 8-10 seconds on each side before carefully removing it with a spatula to a cooling rack over a sheet pan. Allow excess moisture to drain off of the slices for 1-2 minutes.

Melt 1 tablespoon of butter over medium heat in a skillet. Put 2 slides of bread at a time into the pan to toast gently to golden brown (about 2-3 minutes per side). Remove the French toast to a cooling rack to cool completely. Repeat with all slices of bread.

While French toast cools, make your stuffing mixture by combining cream cheese and sugar into a bowl and mixing until fluffy. (When I tasted this at first, it was grainy, but then the sugar seemed to dissolve. I was going to suggest using confectioners’ sugar instead, but since the graininess was completely gone when we ate it, I don’t think there’s a need). Set aside.

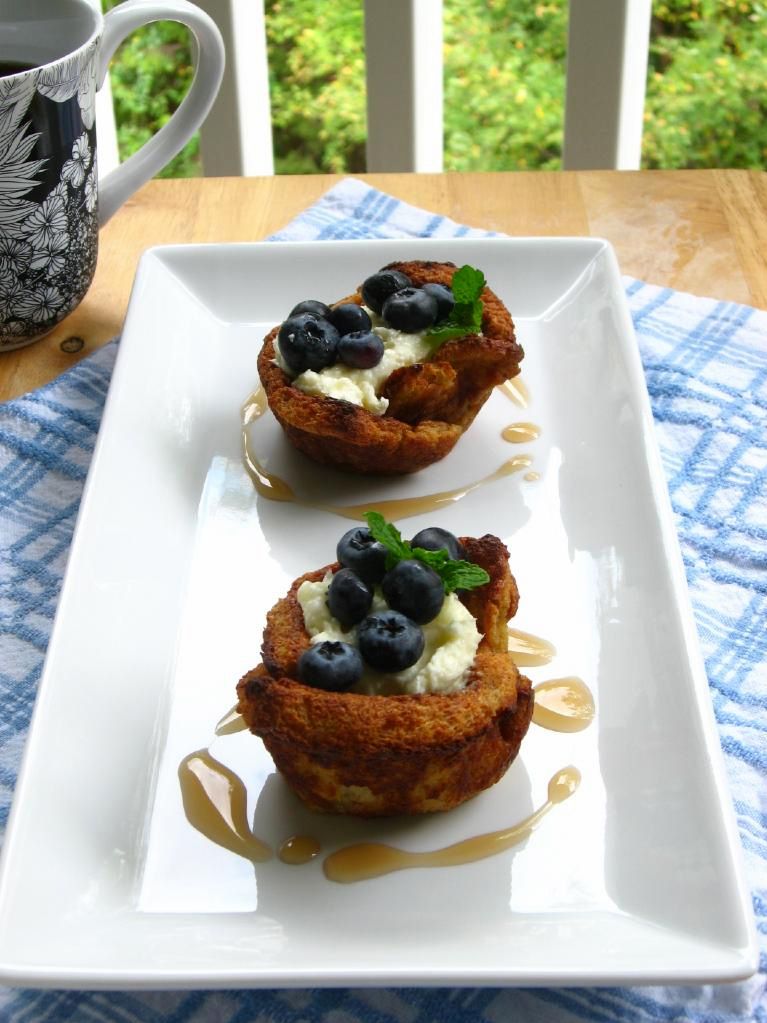
Take each piece of cooled French toast and gently tuck into the well of a greased muffin tin, forming a bowl. Bake at 400 degrees F for 10-12 minutes, watching carefully. Pull them out of the oven and allow the bowls to cool in the pan for at least 10 minutes. Remove them to cool on a cooling rack (the first time I did this, they started to fall apart because I pulled them out of the oven too soon, so I baked them a little longer and they were perfect). Once cool, fill them with the cream cheese mixture, top with berries, and serve with maple syrup for dipping.

Note: As part of Foodbuzz’s Tastemaker program, I received a coupon for a free package of Nature’s Pride Bread. But, um, actually I left it in my mailbox, so I bought this loaf with my own money. So I don’t know why I’m telling you this. Except that I may snag the coupon now and use it for another loaf to make hummus sandwiches. Ahem.

If you liked this post, please:
Subscribe to Willow Bird Baking
Follow Willow Bird Baking on Twitter
Follow Willow Bird Baking on Facebook
Give this post a thumbs up on StumbleUpon


ShareOther ways to share this post with friends!

48 Homemade Breakfast Cereals

I like variety. Sure, sometimes during the week I can get on a kick and eat the same thing every night for dinner (hellooo, lima beans, I’m lookin’ at you), but I also really appreciate mixing it up every now and then.

That’s why a few months ago when I decided I wanted some breakfast cereal, I went to the store and bought about 8 different boxes of the stuff. Each morning needed to have its own flavor — as long as the nutrition facts were acceptable. What? Don’t look at me like that. Sure, I may be the same girl who posted the Coffee Cookie Dough Fudge Cheesecake, but I do try to eat reasonably during the week!

The store-bought cereal was okay. At least, I thought it was okay at the time. But then something happened — I had one of those thunderous BIG IDEAS.

It all started when I was perusing one of my favorite blogs, Not So Humble Pie, and saw her (you’re not going to believe it) S’mores Candy Bar. I know. Insane.

The premise of her post was that she didn’t understand the excitement over this new company that makes customizable candy bars, since it’s so easy to make them at home. Having been excited about the customizable candy bar company, I felt admonished. And inspired.

Because even more than I had been excited about customizable candy bars, I was excited about customizable cereal. There’s this company on the web (I won’t link to them, since I’m about to tell you it’s silly to pay for their product) that allows you to choose all the ingredients you want in your own personal box of cereal — and even lets you pick a name for your new creation! Too fun!

BUT. I realized when I read Mrs. Humble’s candy bar post that it didn’t make any sense to pay for one kind of customized cereal (that was just like going to the grocery store), or even for eight kinds of customized cereal . . . what would really make sense is to make your own fully customizable cereal buffet — one that would allow you to have a different flavor every day if you wanted to!

A dream was born. I scrounged up recipes for homemade granola and nutty bran flakes (I’ll gush about these in a minute). And as if to emphasize that making homemade cereal was indeed my destiny, the folks at Oh! Nuts emailed to ask if I’d like to review some of their products. Uh, YES, NUT PEOPLE, YOU READ MY MIND. Pounds of nuts and dried fruits later, I was in the cereal-makin’ biz.

If you’re about to post a comment calling me a hippie for making my own bran flakes, hold it right there. This recipe is super easy, super cool, and super rewarding. You feel like a superhero (who makes their own cereal?! I MAKE MY OWN CEREAL! I AM CEREAL WOMAN!), you know exactly what healthy ingredients went into said cereal, and — this is the best part — you have bran flakes that don’t taste like a cardboard box. Every time I opened the jar they were stored in, I got a whiff of delicious nuttiness. They had texture! They had taste! Yes!

The granola is the flavor that really carries the cereal, though. I chose a Double Coconut Granola from Opera Girl Cooks that I’d heard a ton about. Once it cooled, it lived up to the hype — buttery, slightly sweet, coconutty, with a hint of salt to really amp it up.

Once you’ve made some flakes and granola, the fun starts. Possible add-ins are endless: dried fruits, fresh fruits, toasted nuts (do make sure to toast them — MUCH more flavor), seeds, chocolate chips, peanut butter or cinnamon chips, candy, marshmallows . . . be creative! Add a little, add a lot.

My favorite bowl was a straight-up combination of all my options: bran flakes, double coconut granola, dried cherries, dried blueberries, cinnamon pecans, and toasted walnuts. If you have just 2 dried fruits and two nut options along with your flakes and granola, you’ll have 48 possible breakfast cereal varieties — that’s a lot of options!

The Oh! Nuts products were a success in terms of taste — the blueberries had a pronounced, wonderful blueberry flavor, and the cinnamon pecans were so addictive that I almost ate my stash before I got my cereal made! The sour cherries did have an odd, slightly fishy flavor (I know, weird), but I still enjoyed eating them. Maybe a flavor compound of the cherries came out that isn’t as pronounced when they’re not dried?

To be honest, including the price of shipping, I probably wouldn’t spend the extra money to buy regular nuts or fruit from Oh! Nuts, but would just head to the grocery store. That being said, for specialty items or rare nuts/fruits/candies, they’re the place to go. The selection is huge, and the products are high quality.

If you, like me, love a big ol’ bowl of hearty, nutty, earthy, crunchy, chewy, flavorful, delicious breakfast cereal — and one that can change with whatever mood you’re in — I hope you’ll make your own personal cereal buffet! Or perhaps fix a cereal buffet in pretty jars as a gift for a friend. Even better, have a breakfast party: set up a cereal buffet for family and friends where each person can make their own cereal combination, perhaps supplemented with juice and muffins on the side. Have fun!

Oh, by the way, I did have to branch out a little in homage to my original inspiration. How about some S’mores Cereal?

Below you’ll find the recipes for granola and nutty bran flakes. I even included nutritional info so you can make healthy breakfast choices! Round up some of your favorite add-ins and place all the components in separate jars for storage. Enjoy!

5 from 1 reviews
Homemade Nutty Bran Flakes
 
Prep time
Cook time
Total time
 
These flakes are SO MUCH BETTER than the stale boxed kind, you'll be amazed. The only downside is that this recipe uses two full baking sheets and only makes 3-4 bowls of cereal. If you have the stamina for an all-day baking project, I'd grab out all your baking sheets and make a day of it, doubling or tripling the recipe. They really are delicious!
Author:
Serves: 3-4
Ingredients
  • 1/2 cup bran
  • 1/2 cup whole wheat flour
  • 1/3 cup almond flour (or other finely ground nuts)
  • 2 tablespoons sugar
  • 1/4 teaspoon baking powder
  • 1/4 teaspoon salt
  • 1/3 cup milk
  • 1/4 cup water
Instructions
  1. Preheat oven to 350 degrees. Sift all dry ingredients into a large mixing bowl and add milk and water. Stir to mix well. The resulting mixture will be a very wet “dough” (so wet, you can hardly call it a dough). Cut two sheets of parchment paper to fit two baking sheets, and set one sheet of parchment paper on the counter where you’ll be rolling — you won’t be able to transfer it without this!
  2. Glop half of the “dough” out onto the sheet of parchment paper and flatten it by hand. Place a piece of plastic wrap over the dough and “roll” it out (your rolling pin will almost just be smooshing it out into place) EXTREMELY THIN, almost transparent in some places. It will look like a giant bran flake — super fun!
  3. Remove the plastic wrap and transfer the parchment carefully to a baking sheet. Cook for 10 minutes, but check often after just 5, because such a thin dough can easily burn. You’re looking for a thin, leathery cracker that is crunchy at the edges. When it’s done, remove it and allow it to cool completely. While it cools, repeat the process with the other half of the dough.
  4. After both giant bran flakes have finished their first bake, reduce the oven temperature to 275 degrees. Tear the first, cooled bran flake into regular bran flake-sized pieces (about 3/4 of an inch), spreading them out on the parchment-covered baking sheet.
  5. Bake at the reduced temperature for 20 minutes, flipping and stirring the flakes around every 5 minutes. Repeat process with the second cooled, giant bran flake. Then allow all bran flakes to cool completely. Store well in a sealed container for up to two weeks.


Now that I’ve shared my favorites with you, I’m anxious to know: What sort of breakfast cereal would you make for yourself? Piña colada cereal with toasted coconut and dried pineapple? Cherry crumble cereal with dried cherries and cinnamon granola? A luscious combo of dates, coconut, and chocolate chips?

5 from 1 reviews
Double Coconut Granola
 
Prep time
Cook time
Total time
 
An absolutely delicious granola to supplement your bran flakes. Again, don't be shy about doubling this recipe!
Author:
Serves: 6
Ingredients
  • 3 cups rolled oats
  • 1 scant cup unsweetened shredded coconut
  • 1/4 cup clover honey
  • 1/6 cup virgin coconut oil (half of a 1/3 cup measure)
  • 1 tablespoon vanilla extract (I used almond because I was out of vanilla)
  • 1 teaspoon kosher salt
  • optional: I toasted another 1/2 cup of sweetened shredded coconut to add in for sweetness, but that was before I’d tasted the cooled batch. It’s probably unnecessary.
Instructions
  1. Heat oven to 300 degrees F. Combine oats and shredded coconut in a large bowl. In a small saucepan over medium heat, cook honey, coconut oil, vanilla, and salt until just simmering.
  2. Pour honey mixture over the oat mixture, stirring well with a wooden spoon until fully combined. Spread this mixture out over a large sheet pan, place in oven, and bake for 10 minutes before stirring the granola. Repeat 10 minute baking time, followed by stirring, until granola is well-toasted (takes about 4 cycles, or about 40 minutes).
  3. Cool the granola on the baking sheet, stirring occasionally. When cooled, you can store granola in an airtight container in the refrigerator for a few weeks, or at room temperature for two.


Other delicious breakfast ideas floating around the internet right now: Beer Waffles with Cinnamon Cardamom Apples, S’mores Oatmeal, Oatmeal Pancakes, Pecan Sticky Buns, and of course, from yours truly, Carrot Cake Waffles.

Note: I received the above mentioned products from Oh! Nuts free of charge to create these recipes.


Santa Fe Breakfast Bake

Mike and I love eating Sunday brunch together after church while watching nerdy television shows (Star Trek: Deep Space Nine, anyone?). Typically by Sunday, though, I’ve already cooked up a storm (a hurricane!) and don’t feel like cooking anything else. This means “brunch” for Mike may consist of some prepackaged Indian food from the grocery store. But every now and then, I have to change it up.

Making him a fresh meal for brunch is so rewarding. Imagine expecting your girlfriend to walk in with a reheated, vacuum-sealed pouch o’ chickpeas. Now imagine her sauntering in with a steaming hot plate of freshly-made brunch instead. I get lots of brownie points! Or in this case, egg points.

I saw this Santa Fe Breakfast Bake recipe a few days ago and was immediately enamored with how convenient it was. You throw everything together the night before and then just pop it in the oven in the morning. Talk about a stress-free breakfast! Besides the convenience, it seemed very similar to the Mexican Lasagna Mike and I both love — except now in breakfasty form!

I wanted a bit more “oomph,” so I added some sausage and corn to my version. The result was a lovely brunch that Mike had three huge helpings of! The golden cheese on top, spicy sausage, and hearty black beans and corn were a stick-to-your-ribs, comforting combination.

The only downside is that the casserole (as is common with egg casseroles in my experience) was a bit soupy in the bottom of the dish. I ladled out the “soup” into my first serving and after that the casserole had a nice texture. It was even great upon reheating, as Mike found out when he devoured the leftovers!

We served this with a big spoonful of salsa and sour cream. It’d also be delicious with some sliced avocado. If you love Tex-Mexy breakfasts and brunches like huevos rancheros and migas, I’m betting you’ll love this casserole too! Enjoy!

Santa Fe Breakfast Bake


Recipe by: Adapted from Summer in the Country
Yields: About 6 servings

Ingredients:
1 pound pork sausage
1 cup salsa
1 cup canned black beans, drained & rinsed
1/2 cup frozen corn kernels
8 corn or flour tortillas, cut into 1-inch strips
1 cup shredded mexican-style cheese
1 cup sour cream
1 cup milk
2 eggs, beaten
2 egg whites, beaten
1/2 tsp salt
1/4 cup green onions, thinly sliced

Directions:
Brown sausage and drain, discarding grease. Combine salsa, sausage, beans, and corn; set aside. Place one-third of tortilla strips in a lightly greased 11×7 baking dish. Top with 1/3 cup cheese and one cup salsa mixture. Repeat layering with one-third of tortilla strips, 1/3 cup cheese and remaining salsa mixture, ending with remaining tortilla strips. Whisk together remaining ingredients except green onions. Pour egg mixture over tortilla strips; sprinkle with remaining cheese. Cover with foil and chill overnight.

In the morning, preheat oven to 350 degrees F. Remove dish from refrigerator and let sit at room temperature for 10 minutes. Keep covered and bake for 20 minutes. Uncover, and bake for an additional 15 minutes or until lightly golden. Top with green onions and serve with salsa, sour cream, and avocado slices as desired.


Share Share this post with friends!

Baked Eggs with Salsa and Toast Points

I promised you in my previous post on Eggs in a French Toast Basket that another tasty breakfast was coming, and here it is! This recipe is as simple as sippin’ iced tea, and also happens to be one of my favorite morning treats. In only 15 minutes, you can be sitting down to a fresh-out-of-the-oven breakfast. Do I sound like a commercial? Good. I meant to.

There are actually tons of variations on baked eggs. My version is simplified from the Williams-Sonoma recipe for Baked Eggs with Tomatoes and Cream to include the things I normally have on hand: salsa, cheese, and sometimes cream. Oh, and eggs. Cage-free eggs, that is, which I firmly believe are worth the dollar extra — even during my financially lean times. Happy chickens make me feel better while I’m scooping up warm yolk with my toast.

Speaking of sopping things up with toast, toast points are so simple to make, and are a terrific accompaniment to this dish. Buttery, toasted triangles make the perfect little sponges for traces of salsa and egg left in your ramekin. However, if you’re on a lower-carb diet, omitting the toast makes this a completely low-carb treat!

Now, you can make this dish fancier for a weekend breakfast. If you have the time and want to mix up some homemade salsa (like the delicious recipe below, compliments of my Aunt Jo Anne), indulge yourself. If you’d rather keep it simple and go the store-bought route, I’m infatuated with the Tex-Mexy On the Border salsa. Don’t hate until you try it; it’s fantastic — can’t believe it’s from a jar!

Aunt Jo Anne’s Homemade Salsa


Recipe by: Jo Anne Ruble
Yields: A lot (how’s that for scientific?) — you can half it if you’re just using it for baked eggs here and there.

Ingredients:
2 cans tomato sauce
1 large banana pepper, seeded and split
2 jalapeno peppers (or to taste), seeded and split
1 teaspoon salt (or to taste)
cilantro
1 large onion, quartered

Directions:
Blacken 3 peppers in saute pan sprayed with Pam or rubbed with olive oil (Beware! When seeding peppers, use gloves and wash hands immediately. Do not rub your eyes or face. You may want to have a window open for ventilation, because they may make you cough.)

Put tomato sauce into blender along with the rest of the ingredients, dropping in peppers as they blacken. Pulse until combined, but leave a little chunky if desired. Add salt as needed to taste. My mom uses quite a bit of cilantro, so go wild! Store covered in refrigerator.

If you want to bake your own fresh bread for toast points, go for it. If you want to add fancy ingredients here and there (bacon or pancetta? artisan cheese?), I fully support you. But just know that even on those busy weekday mornings, you can throw together some of your favorite jarred salsa, eggs, and cheese and have a few moments of blissful breakfast.

Baked Eggs with Salsa and Toast Points


Recipe by: Adapted heavily from Williams-Sonoma
Yields: 2 3-in. ramekins, or 2 servings

Ingredients:
6-8 tablespoons of your favorite salsa (I use On the Border Salsa)
2 eggs
2 teaspoons heavy cream (optional — I leave this out if I don’t have it on hand)
sprinkle of cheddar cheese
salt and pepper to taste
fresh cilantro
bread for toast points (1-2 slices)
1 tablespoon melted butter for toasting

Optional accompaniments: avocado, sour cream

Directions: Preheat oven to 350 degrees F. Generously butter two ramekins (or spray with nonstick cooking spray).

Toast bread: Trim crusts if desired. Brush bread with butter on both sides and toast on a baking sheet in the oven for 1-2 minutes per side.Melt tablespoon of butter in a skillet over medium-high heat and toast bread, 1-2 minutes per side. Allow to cool slightly. NOTE: I actually usually toast my bread in the skillet, but I think the oven is a more reliable way to get a nice golden brown all over. And, you know, you’ve got it heated up for your eggs anyway!

Spoon 3-4 tablespoons salsa into each buttered ramekin (enough to cover the bottom). Break one egg over the salsa in each ramekin. Drizzle each egg with 1 teaspoon cream. Salt and pepper. Place ramekins on a baking sheet and bake until the egg whites are opaque and the yolks have firm edges and are soft in the center, about 15 minutes. Sprinkle each ramekin with cheddar cheese and return to the oven just to melt, about 1 minute. Sprinkle with torn fresh cilantro. Serve with toast points, avocado, sour cream, etc. as desired.


Happy morning!


Share Share this post with friends!

Eggs in a French Toast Basket

This is the first of two quick, easy, delectable breakfasts that I hope you’ll add to your menu for the coming weekend. Remember how I’m trying to avoid kitchen waste? This recipe dawned on me while driving to church last Sunday, and I didn’t have to buy a single thing to make it. An overabundance of eggs and some gifted honey wheat bread were a perfect breakfast foundation, to which I only added a few spices and things I had camping out in the fridge. Et voilà: Eggs in a French Toast Basket.

Or Moon Eggs, or Cowboy Eggs, or Camp Eggs, or any of the other weirdo names Wikipedia suggests are used for this concoction. Anyway, this is not your average version of this recipe. Toast is great and all, but as I was driving, I was thinking, Wouldn’t it be nice to spruce up the toast a bit? Maybe with that fantastic Alton Brown French toast recipe?

Oh, and it was nice — very nice! Mike and I love this crisp French toast recipe, and the included egg really bumped it up a notch. There is a slight issue; namely, French toast needs longer to cook overall than the egg, so the egg did get more done than usual (the yolk wasn’t hard, but wasn’t nice and gooey either). This is just one of those recipes where you fiddle with the timing after you cook your first slice to see how things go. For instance, you might start the French toast and wait a minute or so before adding the egg to achieve a softer yolk.

Nevertheless, Mike and I were over the moon (over the moon eggs, perhaps?) for this breakfast (or brunch, really, or maybe even lunch, since we ate ours after noon!). The sweet, rich French toast and the savory, salty egg were an out-of-this-world combination when hosed down with a bit of butter and some maple syrup.


Don’t forget the bacon.

If you haven’t let yourself sit back and enjoy a nice breakfast lately, here’s your inspiration! Happy breakfasting!

Eggs in a French Toast Basket


Recipe By: Willow Bird Baking, using Alton Brown‘s French toast as a basis.
Yields: 8 pieces; about 4 servings

Ingredients:
1 cup half-and-half
3 large eggs
2 tablespoons honey, warmed in microwave for 20 seconds
1/2 teaspoon nutmeg
1/2 teaspoon cinnamon
1/4 teaspoon salt
8 (1/2-inch) slices day-old or stale country loaf, brioche or challah bread (I used homemade honey wheat bread I received as a gift)
4 tablespoons butter
8 eggs for the baskets (I only used 4 eggs and made the other pieces plain French toast)

Directions:
In medium size mixing bowl, whisk together the half-and-half, 3 eggs, honey, cinnamon, nutmeg, and salt. You may do this the night before. When ready to cook, pour custard mixture into a pie pan and set aside.

Preheat oven to 375 degrees F. Cut a hole out of each bread slice using a cookie cutter. Dip bread into mixture, allow to soak for 30 seconds on each side, and then remove to a cooling rack that is sitting in a sheet pan, and allow to sit for 1 to 2 minutes.

Over medium-low heat, melt 1 tablespoon of butter in a 10-inch nonstick saute pan. Place 2 slices of bread at a time into the pan, breaking an egg into each slice’s hole. Carefully salt and pepper just the egg. Cook approximately 2 to 3 minutes on the first side, until the bread is golden brown on the bottom. Carefully flip and cook 2 to 3 minutes on the remaining side. Remove from pan and place on rack in oven for a few minutes. Repeat with all 8 slices. Serve immediately with butter and maple syrup.

P.S. Byrd Update: Byrd is doing well. I’ve been icing her little knees and keeping up with her pain medication, which she hates. She’ll get her stitches out on Tuesday, June 1, but still can’t run or play until July. Difficult for such a rambunctious critter. Thank you so much for your support!


Share Share this post with friends!

1 7 8 9 10 11