pies and tarts

Easy Apple Puff Pastry Tarts with Almond Whipped Cream (Voting Now Open in Project Food Blog!)

Willow Bird Baking is a contestant in Project Food Blog, a contest comprised of a series of 10 challenges to find the next food blog star. Voting for Challenge #7 is now open! I would be SO grateful if you’d consider voting for me in this round! Just sign in to your Foodbuzz account (or register if you don’t already have one). Then go to my cheesecake video entry here and vote by clicking the heart next to the words “Vote for this Entry.” I appreciate your support so much!

I just arrived in Orlando after 9 hours in a car (thankfully, I was accompanied by a fun coworker, Kyle). I’m in town to give a presentation at the National Council of Teachers of English convention, but after that road trip, I’m not even sure I can still speak English, much less teach others how to teach it.

I kind of expect the next few days to be a blur. Wayyy too much Coke Zero, wayyy too much work done this week, and wayyy too much bustling around this morning means that I’m currently feeling crumpled and headachy.

Kyle and I spent the last 45 minutes of the trip searching for food in a starvation-induced trance. We’d already ruled out Steak ‘n Shake, but every exit had one (and almost nothing else), as if taunting us. Lots of hotels, lots of outlet malls, lots of big-neon-lit-Orlandoy places — but no normal, honest-to-goodness FOOD. Lulled by hunger delirium and the soporific British accent of Kyle’s GPS, I had almost lost touch with reality when we finally spotted a Chick-fil-a. We definitely needed one of those easy buttons you see on TV. Easy dinner for people with currently confuzzled brains, please!

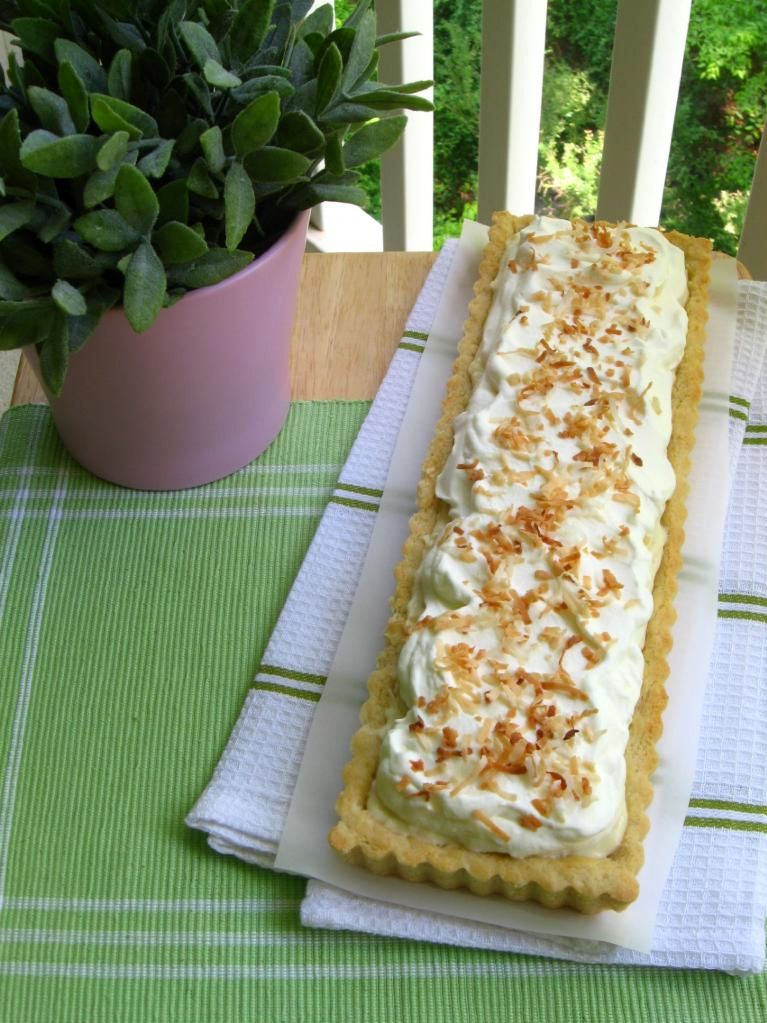
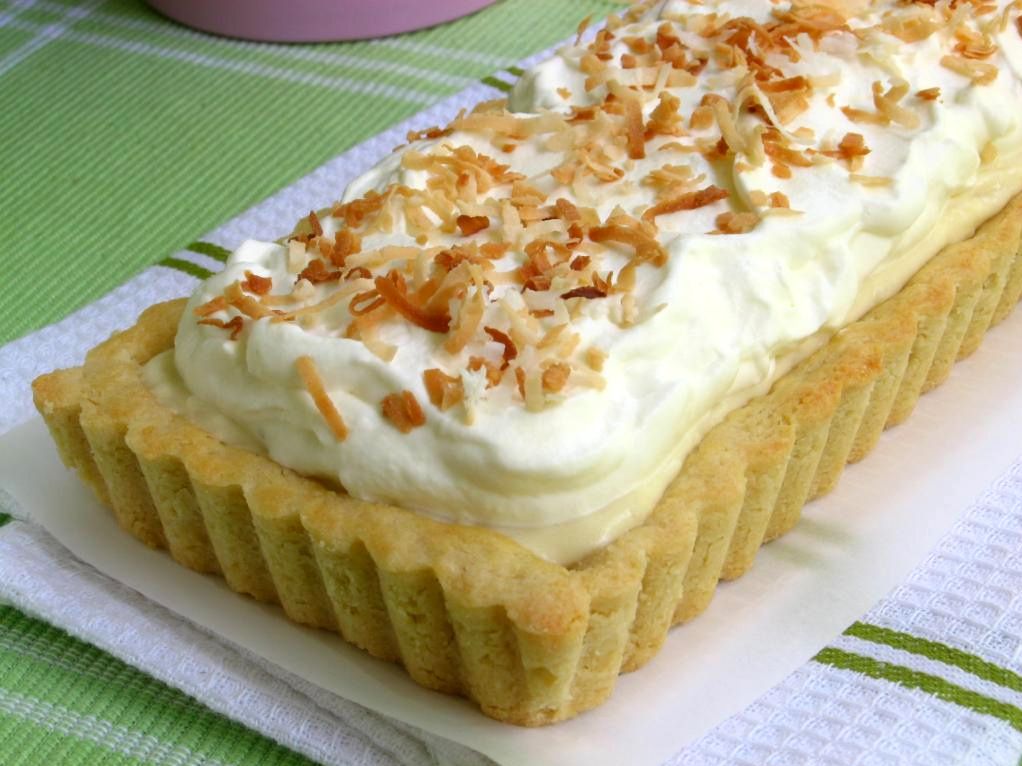
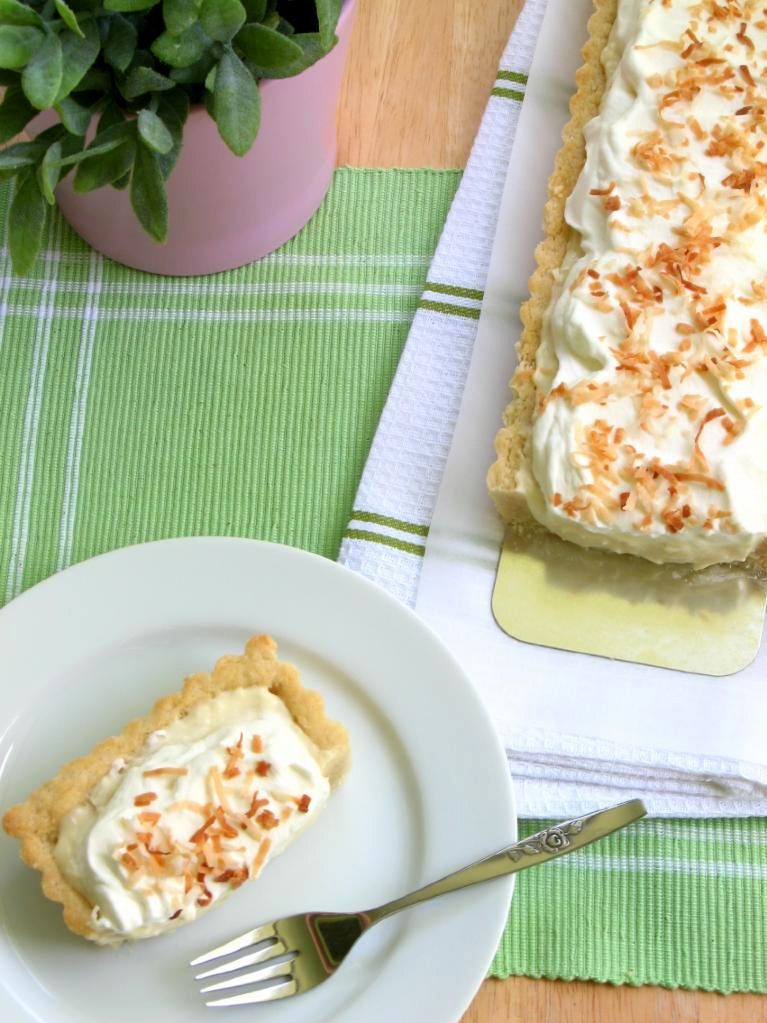
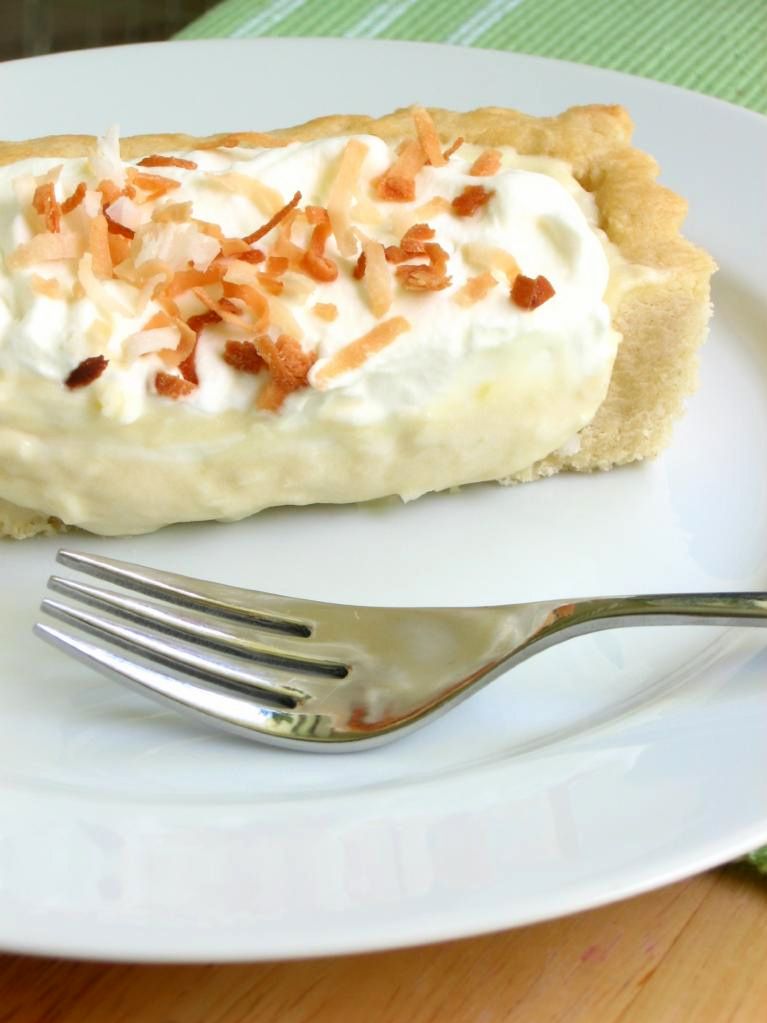
Well, an easy dinner didn’t happen, but here’s an “easy button” for dessert, at least. These apple puff pastry tarts are truly painless in addition to being warm and comforting. I served these treats at my parents’ anniversary dinner. Before beginning dinner prep, I made sure my puff pastry was thawed, cut into squares, and ready to go. After dinner, the family retired to the living room to relax while I mixed my apples and spices and baked up the tarts. Just before serving, we topped each tart with almond whipped cream, which turned out to be my favorite component.

The entire dessert was fancy-looking enough for company, but easy enough for any busy weeknight (easier, obviously, than my food quest with Kyle).

Okay, enough bleary-eyed blogging. Before I say anything too silly, I’m signing off and heading to bed (in the condo bedroom that’s decorated entirely in Disney characters — no confusion about what city I’m in!)

Make some tarts, y’all!

Easy Apple Puff Pastry Tarts with Almond Whipped Cream


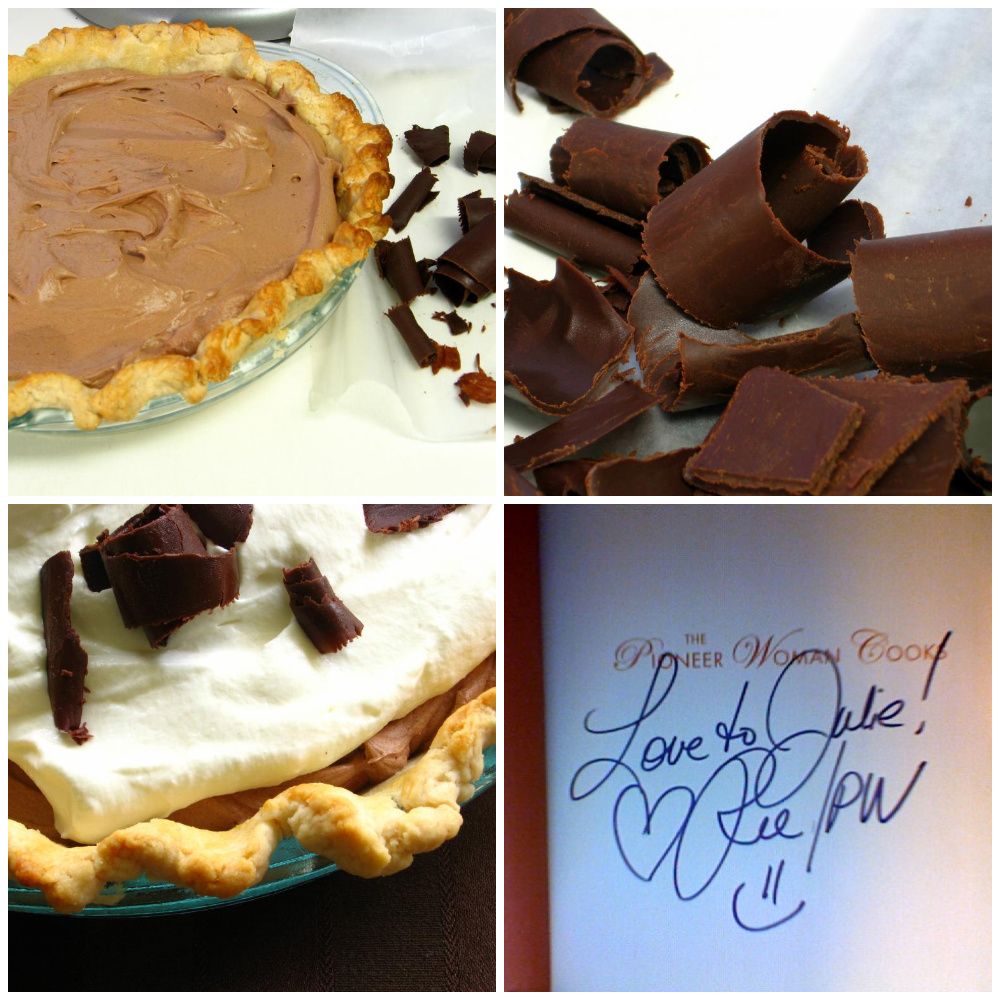
Recipe by: Pioneer Woman
Yields: about 6 individual tarts

Tart Ingredients:
homemade or store-bought puff pastry sheets, thawed and cut into rectangles
4 apples, cored and sliced but not peeled
1 cup brown sugar
1/4 teaspoon salt
optional spices to taste: cinnamon, nutmeg, etc.

Almond Whipped Cream Ingredients:
2 cups heavy whipping cream
5-6 tablespoons confectioners’ sugar (to taste)
1 teaspoon almond extract

Directions:
Preheat your oven to 415 degrees. Put the puff pastry rectangles on a greased baking pan (with edges, so the juices don’t run down and caramelize on your oven, or on your mom’s freshly cleaned oven . . . not that I’m speaking from experience, or anything. Combine apple slices, sugar, salt, and any spices you’re using in a bowl and allow them to sit for a few minutes. Then arrange the apple slices on the puff pastry in a straight line, overlapping.

Bake 18 – 20 minutes, or until pastry is puffy and golden brown. While pastry is baking, whip together cream, sugar, and almond extract in a medium bowl to soft peaks. Place this in the fridge until you’re ready to use it.

Remove pastries from the oven and immediately serve with a dollop of cold almond whipped cream (allow diners to place this on their own tarts to ensure it doesn’t melt before it gets to them!)

If you liked this post, please:
Subscribe to Willow Bird Baking
Follow Willow Bird Baking on Twitter
Follow Willow Bird Baking on Facebook
Give this post a thumbs up on StumbleUpon


ShareOther ways to share this post with friends!

Summer Strawberry Sour Cream Pie

I have a love-hate relationship with Twitter. Twitter is related to this big ol’ Strawberry Sour Cream Pie, I promise.

On one hand, I hate Twitter. Twitter moves at the speed of light during prime tweeting hours. My OCD urge to not “miss out” on what’s going on slams head-on into a wall built with millions of 140-character bricks. Suddenly, I realize I’ve been watching my twitter feed for the better part of an hour. My eyes glaze over, my back hurts, and my brain starts translating each thought into its shortest possible expression. At this point, I need to tweet myself:

@julieruble Time 2 get off twitter immediately #beforeyoureyeballsfallout

That hashtag’s gonna catch on, just you wait and see.

But I love Twitter. I’m connected to hundreds of great people — other bloggers, Willow Bird Baking readers, the occasional celebrity chef. I keep in touch with an extended web of lovely folks that I might not have time to call or write a lengthy email to. There’s a level of casual interaction that brooks folks jumping into a conversation that pertains to their interests. You can easily meet fabulous new people, keep up with the dynamic blogosphere, and support fellow writers. Cool.

Even more cool? Sometimes twitter magic happens, and someone amazing (cough cough Jaden Hair of wonderful Steamy Kitchen) finds your blog and drools over some S’mores Cereal. Now that’s cool.

Like most things, there’s a twitter balance — for me, it involves checking in a few times a day, and that’s it. Thankfully, during one of my forays into the land of tweets, I found a gem. Lovely Patti at Worth the Whisk posted that one of her pies had been chosen as Pie of the Day by KCRW Radio’s Good Food Blog: Strawberry Sour Cream Pie.

Listen, you don’t scroll past an award-winning Strawberry Sour Cream Pie. You just don’t.

You stop, you ogle, you marvel, you salivate a little (in a classy way, of course), and then you go pick up some sour cream.

I knew while baking that this pie, along with the heavier Chocolate Mousse Pie, would be the perfect treats to take in for my dear Sunday school leader Joyce’s birthday.

I love the combination of fruit and sour cream, and it really sings in this gorgeous, lazy-day treat. The strawberries stay juicy, and the tangy-sweet fruit is delicious against the buttery crust. And pies like this are the reason people started saying things were “easy as pie.” You don’t need to blind bake the crust, pre-cook the filling, or any other fussy stuff. You roll out your dough, fill it, bake it, cool it, eat it . . . lick the plate.

If you’ve never made a pie before, this is a lovely place to start. It’s a single crust pie and simple as can be. Tell me: what’s your favorite pie to eat during sweltering summertime?

Summer Strawberry Sour Cream Pie


Recipe by: Worth the Whisk
Yields: one 9-inch pie, serves 6-8

Pie Crust Ingredients: (or you can use an unbaked, prepared crust)
2 cups flour
1 teaspoons salt
1/4 cup cold lard (non-hydrogenated if available)*
1/2 cup cold butter, chopped
3-4 tablespoons ice cold water
1 egg and 1 teaspoon heavy cream for egg wash
*you can substitute vegetable shortening here if you wish, but I highly recommend the lard!

Filling Ingredients:
1 quart fresh strawberries
1 cup flour
1 1/4 cup sugar, reserve 1 tablespoon
Dash salt
1 cup sour cream (not fat-free)

Directions:
Preheat oven to 450 degrees F. To make the crust, pulse flour and salt together to combine. Add scoops of lard and pulse into the mixture has the texture of coarse sand, about 10 seconds. Add in chunks of butter and pulse until butter pieces are no larger than small peas, about 10 pulses. Add minimum amount of water and pulse on low. If dough remains crumbly and doesn’t come together, add another tablespoon of water. Add as little as is required to enable the dough to be rolled into a ball. Form the dough into a disk, wrap in plastic, and refrigerate for 20-30.

Roll disk of dough out to around 2 inches larger than your pie plate and transfer it, situating it in the plate. Fold the excess dough around the edges and crimp, trimming where necessary.

Hull and wash the strawberries and slice them in half. Set aside. Sift flour, sugar, and salt into a large mixing bowl. Add sour cream, blending until creamy. Gently fold in the berries without overmixing. Pour fruit into pie shell and spread to edges without packing down — there should be spaces throughout the filling. Sprinkle the top with the last 1 tablespoon sugar.

Bake the pie for 10 minutes, then reduce the heat to 350 degrees F (I leave the oven door open a minute during this period to let the temperature drop a little) and bake an additional 30 minutes or until crust is golden brown.

Broil the pie for 2-3 minutes to brown up the top. Allow to cool completely (4-5 hours in the fridge, I’d say) before cutting, and serve with fresh whipped cream or ice cream.

If you liked this post, please:
Subscribe to Willow Bird Baking
Follow Willow Bird Baking on Twitter
Follow Willow Bird Baking on Facebook
Give this post a thumbs up on StumbleUpon


ShareOther ways to share this post with friends!

Chocolate Mousse Pie

It was a warm Friday in May, and I left school in a hurry after teaching my last class. I swung through the drive-through of Arby’s, ordering a sandwich as large as my head and then wondering why I’d just ordered a sandwich as large as my head. No time to worry about that!

I barreled down the interstate with a quick stop at the UPS processing center to grab the package that should have been delivered to my apartment (sigh) but wasn’t. No time to wait for them to correct the problem — I would need the contents of this package in a matter of hours. I ripped it open to unveil the apron I’d just had printed:

To my great relief, there were no spelling errors, egregious or otherwise. Can you imagine handing an apron to Ree Drummond that said, “WILLOW BIRD BAKING <3 PINEER WOMUN." Actually, now that I think about it, she might've liked that.

That’s right, I was on my way to meet P-Dub herself at her Charlotte booksigning. Now, I’m not really fanatic about celebrities. I was in love with Isaac Hanson for about 2 weeks in middle school before realizing he was never even going to know I existed. So I snapped out of it, went about my business, and didn’t bother with this “fan” silliness anymore.

That being said, I love Ree Drummond. She’s warm, hilarious, genuine, and probably more deserving of her fame than any of the Hollywood crowd. And last time I mentioned her in a post, I got hate mail! From real, live, professional trolls! You know someone’s really “made it” when they have their own little official hate squad following mentions of them around the internet. Cool.

She was as lovely as I expected when I met her in person, but for me, it was one of those Christmas Story experiences. You know the Christmas Story movie, right? The one with the leg lamp? In the movie, little Ralphie stands in line for hours to meet Santa with one goal echoing incessantly in his brain: to ask for a Red Rider BB Gun. That gun is all he wants, and all he’s been able to think about for weeks. He rehearses his lines to perfection. Finally, he reaches the front of the line and stares up into the face of a jaded department store Santa. It’s time to ask for his dream! He musters the strength to speak and . . . he panics. He chokes. He stares. He asks for a football.

Thankfully, I didn’t ask Ree for a football. What I did do is shuffle about, hand her the apron shyly, sort of mention Willow Bird Baking, and then give a dazed grin to the camera. Suddenly we were walking out of the building and I thought about turning around to scream, “No! I wanted a Red Rider BB Gun!” Somehow I don’t think that would have helped.

Anyway, despite my stagefright, Ree was charming and interested in each and every one of the hundreds of people who came to see her. I hope she’s enjoying her apron, and I dedicate this big ol’ heaping Chocolate Mousse Pie to her.

Well, okay, I sort of messed that up too. But not too badly.

The pie was tasty: a buttery, flaky pie crust embracing a thick mess of pillowy, indulgent chocolate mousse and topped with slightly sweetened, loosely whipped cream and chocolate curls. There aren’t many things that taste better than that crust + chocolate combination, in my opinion. It reminded me of the French Silk pies I used to love at Perkins — anybody out there still have a Perkins in their town? Eat a slice of that French Silk for me, please.

But there was an issue; namely, my mousse was grainy. Two or three other commenters on P-Dub’s site had the same problem, but most obtained smooth mousse. I think it comes down to creaming your butter and sugar. Make sure your butter is room temperature, thoroughly softened, and that you cream the sugar in until it’s really dissolved and fluffy.

Regardless of the slight sugar crunch, the pie was a rich, luxurious treat. My Sunday school class got ahold of it and left an empty pie plate in its place — and if that’s not a good sign, I don’t know what is!

Chocolate Mousse Pie


Recipe by: Adapted from Pioneer Woman, crust by Willow Bird Baking
Yields: one 9-inch pie, serves about 8-9

Chocolate Mousse Ingredients:
4 ounces unsweetened baking chocolate
1 cup salted butter, softened
1-½ cup sugar
1 teaspoon vanilla extract
4 whole eggs (since they will be raw, you may want to use pasteurized eggs, and/or avoid serving this recipe to older or pregnant guests)

Pie Crust Ingredients: (you can use a prepared pie shell if desired)
2 cups flour
1 teaspoons salt
1/4 cup cold lard (non-hydrogenated if available)*
1/2 cup cold butter, chopped
3-4 tablespoons ice cold water
1 egg and 1 teaspoon heavy cream for egg wash
*you can substitute vegetable shortening here if you wish, but I highly recommend the lard!

Whipped Cream Ingredients:
2 cups heavy whipping cream
4 tablespoons confectioners’ sugar
1 teaspoon gelatin
3 tablespoons cold water
1 tablespoon hot water

chocolate curls, if desired, for garnish

Directions:
To make the crust, pulse flour and salt together to combine. Add scoops of lard and pulse into the mixture has the texture of coarse sand, about 10 seconds. Add in chunks of butter and pulse until butter pieces are no larger than small peas, about 10 pulses. Add minimum amount of water and pulse on low. If dough remains crumbly and doesn’t come together, add another tablespoon of water. Add as little as is required to enable the dough to be rolled into a ball. Form the dough into a disk, wrap in plastic, and refrigerate for 20-30.

Preheat oven to 450 degrees F. Roll disk of dough out to around 2 inches larger than your pie plate and transfer it, situating it in the plate. Fold the excess dough around the edges and crimp, trimming where necessary. Cover the dough with parchment paper and fill with pie weights or dried beans, pressing to the edges. Bake for around 20 minutes. Remove weights and paper, egg wash crust, and bake 5-10 minutes more, until golden brown (you won’t be baking it again, so make sure it has good color — shielding edges with foil if they begin getting too dark). Let crust cool completely.

In small microwave safe bowl melt 4 ounces of unsweetened baking chocolate until stirrable (about 45 seconds on high). Set aside to cool.

To make the mousse, in a large bowl with an electric mixer beat 1 cup (2 sticks) of butter (I used unsalted and added a dash of salt) and 1 ½ cups of white sugar until fluffy (about 2 to 4 minutes). NOTE: make sure butter is very soft and at room temperature, and beat until sugar is entirely dissolved, or the chocolate mousse will be grainy. When melted chocolate is cooled, drizzle it over the butter/sugar mixture. Add 1 teaspoon of vanilla extract. Beat the mixture thoroughly until combined (on a Kitchen Aid mixer, you will be using the whisk attachment).

Turn your mixer to a medium speed and over a period of 15 to 20 minutes add in the four eggs, one at a time, leaving about 5 minutes between each egg addition. Once the pie filling is well mixed, pour it into the baked pie shell, scraping every last speck of it out of the bowl. Smooth out the pie filling and place pie in the refrigerator to chill for at least two hours (preferably longer).

To make whipped cream, soften gelatin on 3 tablespoons cold water for about 2 minutes. Add 1 tablespoon hot water and stir to dissolve gelatin. Let cool while you mix other ingredients in a bowl to soft peaks. Add gelatin mixture to whipped cream and fold in gently. Pile whipped cream onto top of pie and refrigerate. Garnish with chocolate curls if desired.

If you liked this post, please:
Subscribe to Willow Bird Baking
Follow Willow Bird Baking on Twitter
Follow Willow Bird Baking on Facebook
Give this post a thumbs up on StumbleUpon


ShareOther ways to share this post with friends!

Coconut Cream Tart

I could have easily become a picky eater. I am compulsive in so many ways . . . the way my glass has to be completely clean or I won’t drink from it, the way I hate to get my hands dirty, the way I have to brush my teeth before my shower, not after. I can’t tell you how glad I am that I like all foods. There’s not much I won’t try, and once I’ve tried it, not much I don’t like! Except beets . . . ew, beets.

I wasn’t always so open to food. I was never picky, per se, but I had my list — like many kids — of things I didn’t like. Tomatoes, onions, lima beans, olives, bananas, and coconut. I hated coconut! What was wrong with me? Looking back, I think my aversions were almost always related to texture. Lima beans and bananas are oddly smushy. Shredded coconut just feels weird . . . too many paper-like pieces in your mouth, I guess!

Anyway, I’ve heard people say that their tastes “gradually” changed as they got older . . . well, mine usually change instantaneously. It’s an odd and wonderful phenomenon. For instance, last year I was driving home from school and realized I wanted sushi, something that until that moment, I was relatively sure I hated. I picked some up, enjoyed every bite, and have enjoyed it ever since. The same thing recently happened with olives and lima beans . . . and coconut! All of a sudden it hit me that light, sweet, wonderful COCONUT, when combined with milky or creamy flavors, was one of the best tastes in the world. I’m hooked.

Mike loves coconut too, thank God! After making him two birthday dishes that included ingredients he wasn’t too keen on (smart choice), I needed to hedge my bets.

This gorgeous tart was a sure thing. It has all the appeal of a coconut cream pie with an even better texture. The coconut pastry cream is thick, rich, buttery, and altogether one of the best tasting things I’ve ever put in my mouth. I filled my favorite buttery, flaky tart shell with it and topped it with lightly sweetened whipped cream and toasted coconut. Mike actually liked the Chocolate Tart better, but I’m voting for this one all the way!

Coconut fans (and even those who don’t think they’re coconut fans) have to whip up one of these tarts. It’ll work just the same in a round tart pan, but this rectangular tart pan was only $18 at my Williams-Sonoma if you’re into corners. Even though the recipe below makes enough pastry cream to fill two tarts, feel free to just make one tart shell — I have another amazing recipe coming up shortly to use the extra pastry cream!

Coconut Cream Tart


Recipe by: Compiled by Willow Bird Baking from Zoe Bakes (coconut pastry cream) and Tyler Florence (tart shell)
Yields: makes one tart (but enough pastry cream for two, if you want to double the tart shell recipe — otherwise use leftover pastry cream for something fun!)

Tart Shell Ingredients:
2 cups all-purpose flour, plus more for dusting
3 tablespoons sugar
1/4 teaspoon salt
3/4 cup (1 1/2 sticks) unsalted butter, cold and chopped
1 large egg, separated
2 tablespoons ice water, plus more if needed

Coconut Pastry Cream Ingredients*: (makes enough to fill two of the tart shells above)
1 can (14 fluid ounces) unsweetened coconut milk
3/4 cup sugar
1 vanilla bean
pinch kosher salt
3 large egg yolks
2 tablespoons corn starch
2 tablespoons unsalted butter
1 cup sweetened coconut flakes
1/2 cup whipping cream

Whipped Cream Ingredients:
1 cup heavy whipping cream
3 tablespoons powdered sugar (or more to taste)

Directions:
To make the pastry: combine the flour, sugar, and salt in a large mixing bowl (or food processor). Add the butter and mix with a processor or hands until the mixture resembles coarse crumbs. Make a well in the middle of the pastry. Combine the egg yolk with the ice water in a small bowl, whisking to blend; pour it into the well and work it in to bind the dough until it holds together without being too wet or sticky. Squeeze a small amount together, if it is crumbly, add more ice water, 1 tablespoon at a time. When the dough is coming together but still in crumbs, pour the crumbs into your tart pan and press them out to fill the pan. Press them up the sides evenly and trim off any excess. Dock the dough (prick it slightly) with a fork all over. Put the tart shell in the refrigerator for at least 15 minutes to relax.

Preheat the oven to 350 degrees F. Place the tart pan on a sturdy cookie sheet so it will be easy to move in and out of the oven. Line the tart with aluminum foil and add pie weights or dried beans to keep the sides of the tart from buckling. Bake for 30 minutes, then remove the foil and weights. Using a pastry brush, lightly coat the crust with a beaten egg white. Return to the oven and continue to bake for another 8 minutes until the tart is golden brown. Let cool completely before filling.

To make filling: Heat the coconut milk, sugar, salt and vanilla bean in a medium saucepan over medium heat. In a bowl, whisk together the egg yolks and corn starch. Once the cream is hot, remove the vanilla bean, scraping out any remaining seeds and returning them to the cream. Add 1/2 cup of the hot cream slowly to the yolks, whisking as you add. Then pour the yolk mixture into the pot of hot cream and whisk. Continue to whisk with heat on medium-high for 3 more minutes. The mixture will turn thick and bubble. You need to continue to whisk for the full 3 minutes or the pastry cream will separate once it is cool. After the 3 minutes, whisk in the butter. Add the coconut flakes. Pour into a shallow dish to cool.

Cover with plastic wrap pressed right against the pastry cream. This will prevent a thick skin from forming on the surface. Refrigerate for at least an hour or freeze for 30 minutes. Once it is cold, stir the pastry cream to loosen. Whip the 1/2 cup cream to medium peaks. Stir in 1/3 to the pastry cream to lighten. Fold in the remaining cream until the pastry cream is nice and light. When tart shell is cool, fill it with pastry cream.

To make whipped cream, beat all ingredients together until whipped cream reaches medium peaks. Pile onto coconut pastry cream filling and top with toasted coconut.

*NOTE: This recipe makes enough pastry cream for two tarts, so you can double the tart shell recipe if you want to make both. If you only want one tart, leave the tart shell recipe as-is and use your leftover pastry cream for something fun!

P.S. Not to oversell this weekend’s upcoming recipe, but um . . . it’s the best dessert I’ve ever eaten. Yeah.


Share Share this post with friends!

Chocolate Tart with Pretzels

Funny story: I decided to take a well-loved recipe for a chocolate tart and update it for Mike’s birthday by filling the shell with pretzels before pouring the chocolate in. While planning said tart, I started to have a nagging feeling that something was wrong. Hadn’t Mike said something before about not liking chocolate covered pretzels? Uh-oh.

Trying not to ruin the surprise, I nonchalantly brought up chocolate and pretzel combos on the phone with him while baking (try casually working chocolate and pretzels into a conversation — difficult!) “Did you say once you didn’t like chocolate covered pretzels?” I asked. His reply? “I don’t know. I don’t really like pretzels, period.” I stared at my pretzel-filled tart crust. “Oh.”

Well, it isn’t the first time I’ve boldly gone where Mike’s tastebuds hadn’t gone before. Or didn’t think they wanted to go. For instance, Mike thought he didn’t like lemon until he had Lemon Burst Fairycakes. He also thought he didn’t like plums until he took his first bite of Plum and Cream Mini-Tortes. And then there’s pumpkin, which he realized he enjoyed thanks to Jack-o’-Lantern Whoopie Pies (no comment on the recent pumpkin ravioli disaster that may have him reverting back to pumpkin hatred).

But this is the first time I pushed his taste boundaries on his birthday. On his freakin’ birthday! You know, the day when you’re supposed to make your boyfriend’s FAVORITE dessert, not a dessert featuring a food he currently dislikes. Oops. Happy birthday, Mike, here’s a tart filled with something you hate!

Thankfully, I reminded myself, I was making him two desserts. Surely if he didn’t like this one, he’d like the other (stay tuned for a post on that dish later this week), right? So it wasn’t so much of a gamble?

Turns out, I needn’t have worried at all . . . because first off, you couldn’t taste the pretzels! They got soft (should’ve seen that coming) and didn’t add too much to the overall texture or flavor. I ended up putting some pretzels on my piece before serving to experience the salty-n-sweet combo I was looking for, and Mike abstained. Perfecto!

The tart had the same amazing, rich, deep chocolate flavor as last time I made it, except with a slight bitter edge from adding in some bittersweet chocolate. I love the taste of a complex, bittersweet chocolate with a sweet whipped cream.

So, this post isn’t really a new recipe. It’s more of a serving suggestion and a reminder of an amazing old recipe. Go make this fantastic tart and serve it with a handful of pretzels for a tasty salty-n-sweet combination! You could also top the tart with a layer of pretzels after baking and before adding the whipped cream topping. Enjoy!

Chocolate Tart with Pretzels


Recipe by: Adapted from Tyler Florence
Yields: one standard tart, serves about 10

Tart Shell Ingredients:
2 cups all-purpose flour, plus more for dusting
3 tablespoons sugar
1/4 teaspoon salt
3/4 cup (1 1/2 sticks) unsalted butter, cold and chopped
1 large egg, separated
2 tablespoons ice water, plus more if needed

Filling Ingredients:
1 cup heavy cream
1/2 cup milk
8 oz. semisweet chocolate, chopped
2 oz. bittersweet chocolate, chopped (or use semisweet for the whole amount, if desired)
2 tablespoons sugar
1/4 teaspoon salt
2 large eggs, at room temperature
salted pretzels for serving

Whipped Cream Topping Ingredients:
2 cups heavy cream
5 tablespoons granulated sugar
1/2 teaspoon vanilla extract

Directions:
To make the pastry: combine the flour, sugar, and salt in a large mixing bowl (or food processor). Add the butter and mix with a processor or hands until the mixture resembles coarse crumbs. Make a well in the middle of the pastry. Combine the egg yolk with the ice water in a small bowl, whisking to blend; pour it into the well and work it in to bind the dough until it holds together without being too wet or sticky. Squeeze a small amount together, if it is crumbly, add more ice water, 1 tablespoon at a time. When the dough is coming together but still in crumbs, pour the crumbs into your tart pan and press them out to fill the pan. Press them up the sides evenly and trim off any excess. Dock the dough (prick it slightly) with a fork all over. Put the tart shell in the refrigerator for at least 15 minutes to relax.

Preheat the oven to 350 degrees F. Place the tart pan on a sturdy cookie sheet so it will be easy to move in and out of the oven. Line the tart with aluminum foil and add pie weights or dried beans to keep the sides of the tart from buckling. Bake for 30 minutes, then remove the foil and weights. Using a pastry brush, lightly coat the crust with a beaten egg white. Return to the oven and continue to bake for another 8 minutes until the tart is golden in color, but not brown. Remember the tart will be cooked again with the filling. It should be cooked but light in color so that it will not burn on the second bake. Set aside to cool and lower the oven temperature to 325 degrees F.

To make the filling: Heat the heavy cream and milk in a pot over medium-low flame, until it simmers slightly around the edges. Remove from the heat; add the chopped chocolate and stir until melted and smoothed out. Add the sugar and salt and whisk until well incorporated. Beat the eggs in a small bowl until blended and add them to the chocolate mixture, stir until completely blended. Pour the filling very carefully into the cooled tart shell. Bake at 325 degrees F for 15 to 25 minutes until the filling is set (wiggle the pan to test) and the surface is glossy. If you see any bubbles or cracks forming on the surface, take the tart out right away – that means it is beginning to become over baked. Cool completely before topping with whipped cream. You can layer pretzels on before topping with whipped cream, or sprinkle them on top afterward.

To make the whipped cream, beat all ingredients together until cream thickens to correct consistency. Pile the mound of whipped cream onto your cooled tart and use a spatula to spread it (messy = more rustic). Shave some leftover chocolate over the cream for decoration.

PS – Stay tuned for Mike’s birthday dessert number two!

PS 2 – There are also tarts out there with pretzel crusts if you wanted to go that route, but I wasn’t willing to give up this buttery, amazing tart shell!


Share Share this post with friends!

1 5 6 7 8 9