other

Old-Fashioned Burger Stand Burgers & Easy French Fries

I wish I were gymnastically inclined. If I could do a cartwheel or two or three hundred, maybe I could express how excited I am about sharing this recipe with you. Instead, I am the girl who, in middle school, somehow body-slammed herself onto the hard gym floor mid-cartwheel-attempt. They make gymnastics mats for a reason, gym teachers.

I will not be trying that again. You’ll have to trust me when I say I’m flipping around the room in spirit. Because these. burgers. are. amazing.

They are not gourmet burgers. They’re not sporting Gruyere, truffle oil, shallots, or mushrooms — not that those ingredients wouldn’t be tasty on some burger, somewhere. Just not this one.

They are not Texas-sized steakburgers. You do not need to dislocate your jaw to take a bite, they do not include exotic spices or a pile of complementary toppings — though you know I love a burger like that on occasion. It’s just not this burger’s style.

These are the burgers your fast food burger could taste like (you guys know the Old Spice commercial, right?). The burgers they’re trying their hardest to replicate in every establishment that owns a drive-thru.

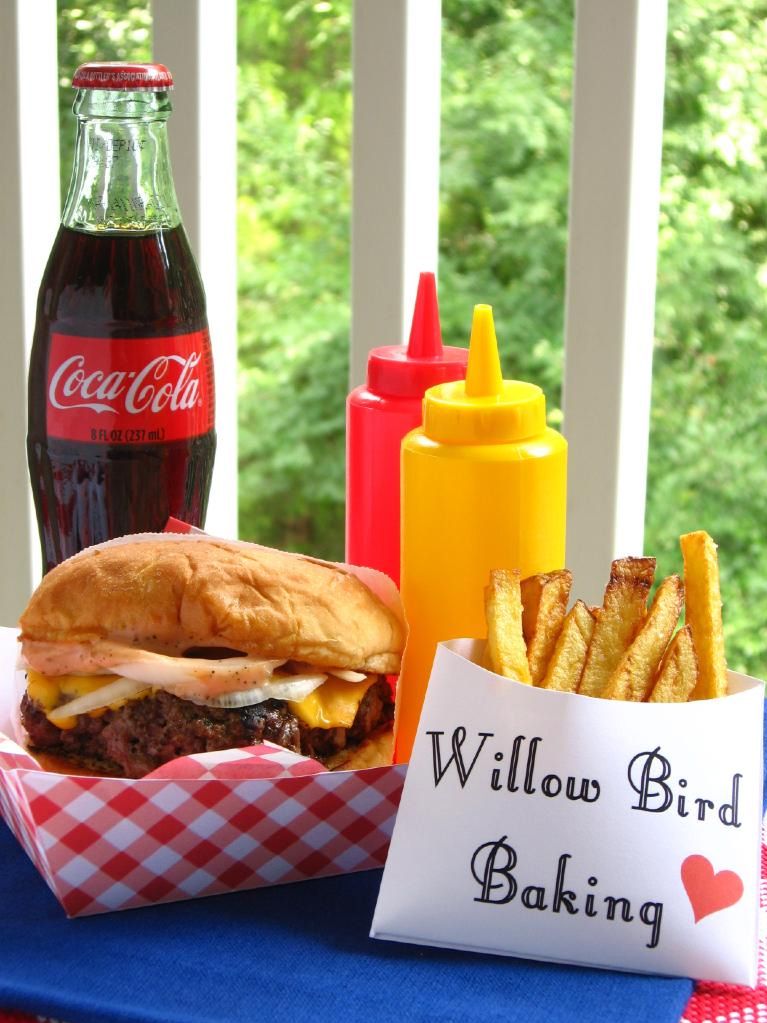
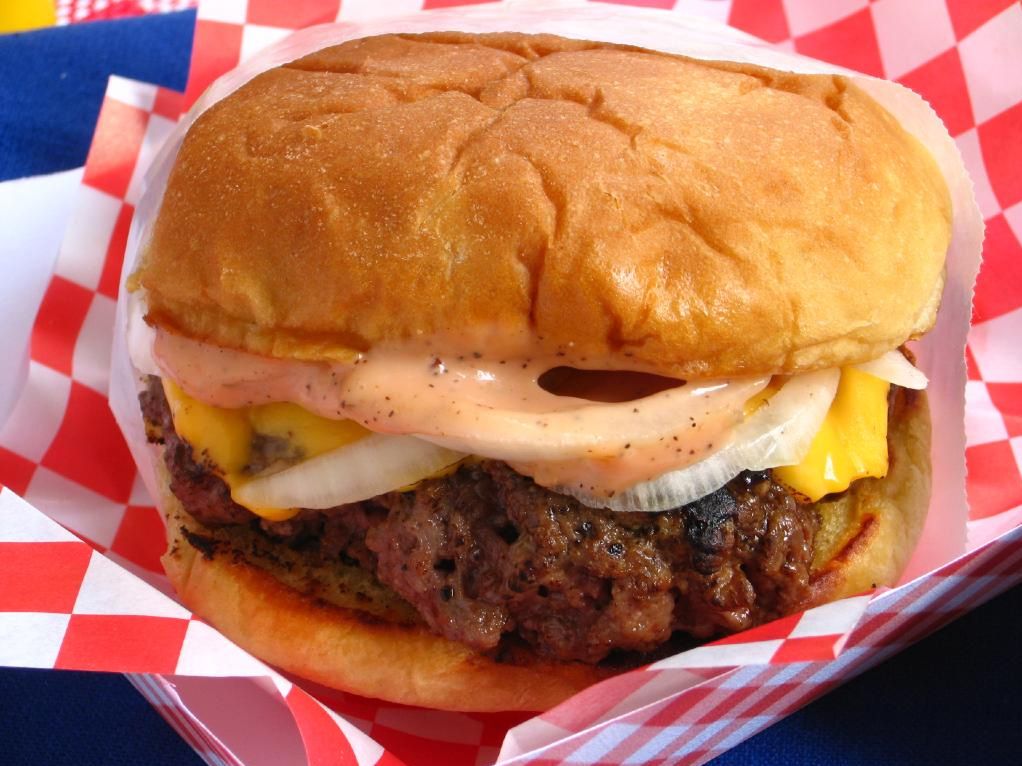
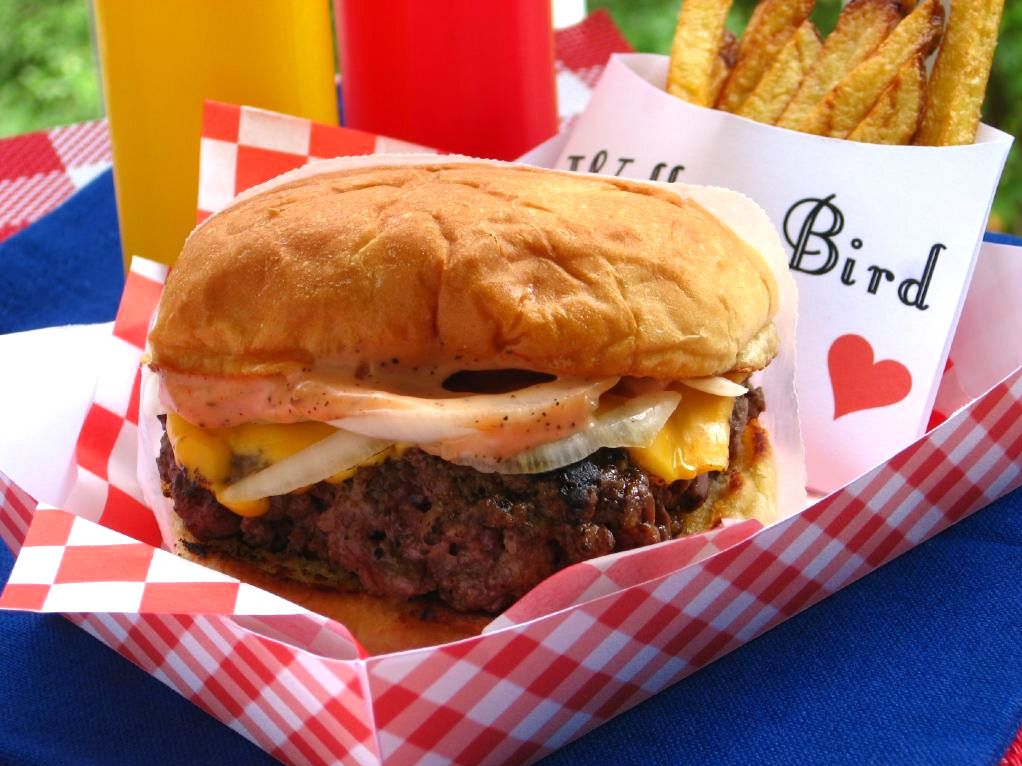
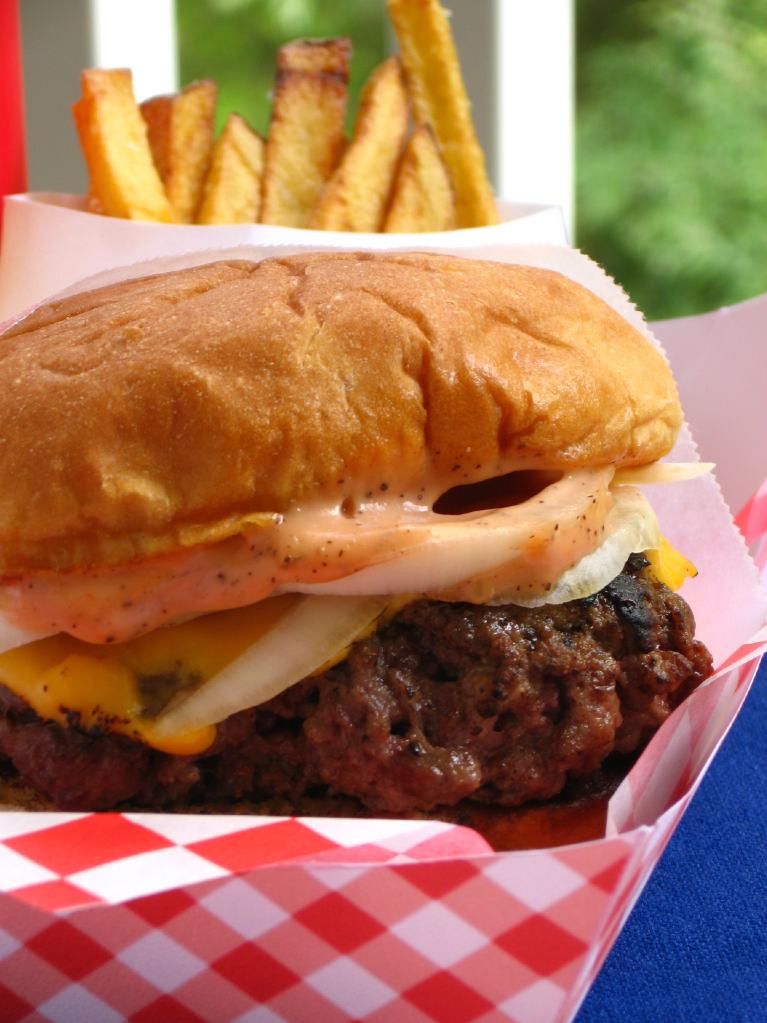
These are thin, fall-apart tender, juicy, salty burgers with a slight crisp crust, smothered in melty cheese, onions, and tangy burger sauce before being smooshed into a pillowy, sweet, toasted potato roll. Swoon.

Imagine the best 1950s burger stand — one that carefully wraps its burgers in wax paper and sends them out dripping in burger sauce with a side of crispy fries. Maybe via a roller skating waitress. These are those burgers. Christopher Kimball called them something like the “ultimate indulgence burgers” — exactly!

In case you’re nervous about the fact that you grind your own meat for this burger, I need to tell you that they’re also easy. I would stick these babies on the menu any weekend without a second thought. You can also make the patties and freeze them sandwiched between sheets of waxed paper, making this recipe perfect for weeknights as well (thaw for 30 minutes at room temperature before using).

The basic method is as follows: cut chunks of meat, freeze it for a bit, grind it in a food processor, gather your patties loosely, season, cook in hot skillet, melt cheesy goodness on top, and place on sauced, toasted bun. I made my sauce and sliced my onions the night before, and so the whole process was quick as a whip.

The burgers stay super tender because you don’t pack them into patties with your hands the way you might form other burgers. After grinding the meat, you try not to touch it much at all, gathering it into piles with your spatula and only then gently pressing it against a sheet pan or tray into a loose patty with plenty of crevices. You want it where it’s only just sticking together.

Heavy salting and a smoking hot pan make for a nice crisp crust on the patty. You don’t need to worry about cooking it to medium rare or medium or any of that — as Kenji from America’s Test Kitchen said, because of the way you form the patties, there’s no way to overcook this burger into toughness. No matter what, it’s tender and perfect.

Grab your glass bottles o’ coke and some roller skates, and let’s make some burger magic!

Old-Fashioned Burger Stand Burgers


Recipe by: Cooks Illustrated
Yields: 4 burgers

Ingredients:
10 ounces sirloin steak tips, cut into 1-inch chunks (look for meat that has a striated texture to be sure you have the right cut. Flank steak may be substituted)
6 ounces boneless beef short ribs, cut into 1-inch chunks
Kosher salt and ground black pepper
1 tablespoon unsalted butter
4 soft hamburger buns (potato rolls)
1/2 teaspoon vegetable oil
4 slices American cheese (don’t substitute! American cheese has the perfect texture for this recipe)
Thinly sliced onion

Classic Burger Sauce Ingredients:
2 tablespoons mayonnaise
1 tablespoon ketchup
1/2 teaspoon sweet pickle relish
1/2 teaspoons sugar
1/2 teaspoon white vinegar
1/4 teaspoon ground black pepper

Directions:
1. Mix ingredients for burger sauce and refrigerate it until you’re ready for it.
2. Place chunks of meat onto baking sheet about 1/2 inch apart. Freeze until very firm, hard around the edges, but still pliable (15-25 minutes).
3. Grind meat in a food processor in two batches, using 10 to 15 one-second pulses and redistributing meat in the processor as necessary. Transfer the meat to a tray or baking sheet without touching it — just overturn the processor bowl onto the tray. You want to touch the meat as little as possible from here on out. Discard gristle or hunks of fat.
4. Gently separate ground meat into 4 equal mounds using a spatula. Shape each mound gently (without picking it up) into a patty about 4 inches in diameter and thin (about 1/4 inch thick), leaving edges ragged and crevices in the burger. Season top of each patty liberally with salt and pepper. Use a spatula to flip patties and season the other side. Stick them in the refrigerator while you toast the buns.
5. Melt 1/2 tablespoon butter in a 12-inch skillet over medium heat until it foams. Toast 4 buns, tops and bottoms, in batches until golden brown. Set aside and wipe out the skillet.
6. Put skillet on high heat. Add oil and heat until just smoking. Using a spatula, put all 4 patties into the skillet and cook without moving for 3 minutes. Flip burgers over gently and cook for 1 minute. Top each with a slice of American cheese and cook for another minute.
7. Place patties onto bun bottoms and place sliced onions on top. Spread burger sauce on each bun top, cover burgers, and serve immediately.

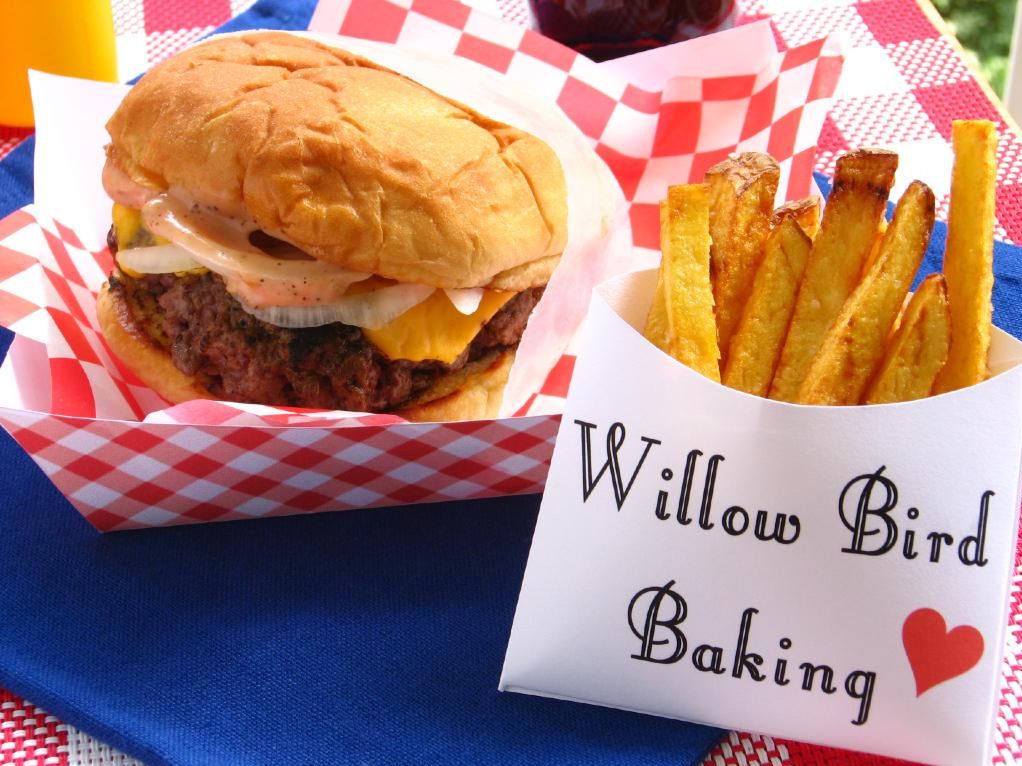
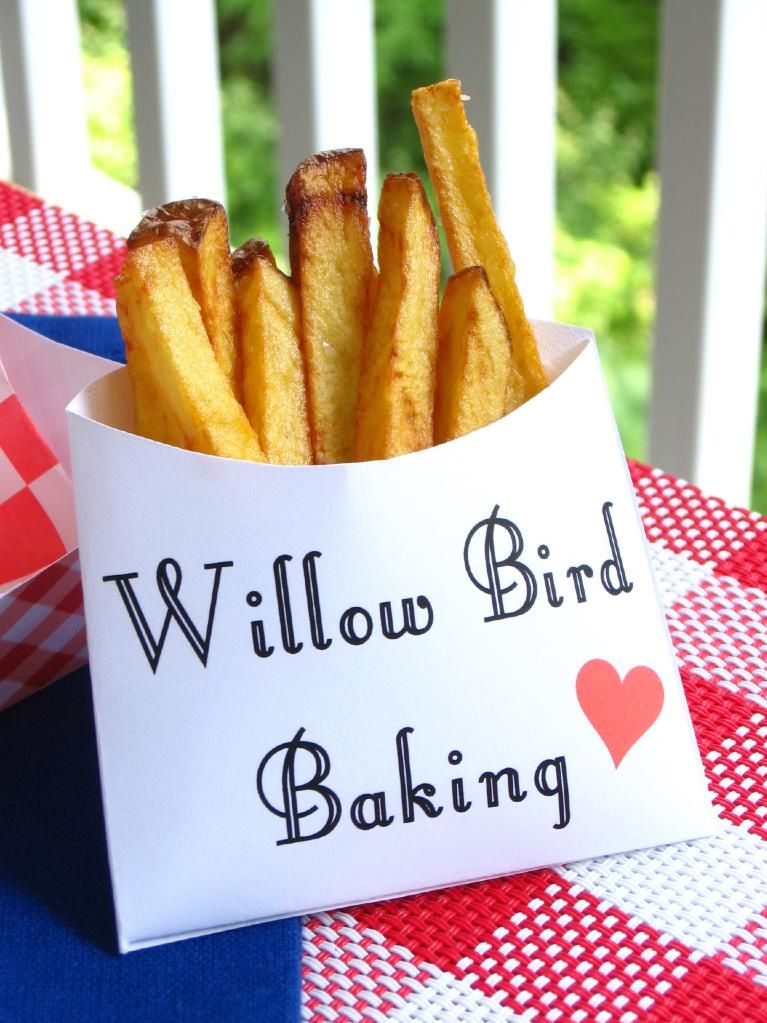
Oh yeah, and those fries! They’re crisp and lovely, and just as easy as the burgers, if not easier. You’re talking to someone who inevitably burns the first batch of anything she’s trying to fry, and often doesn’t get a single usable piece of food out of the entire experience. Nevertheless, these were simple even for me. You don’t even need to measure the temperature of the oil!

To make fries super simple, Cooks Illustrated starts them in cold oil. Surprisingly, they don’t get soggy or absorb oil. You’re then supposed to bring them to a boil, leave them for 15 minutes without touching them, make sure none are stuck to the bottom, and cook for a few minutes more until golden brown. The times were a little off for me and I feared 15 minutes left alone would be too long, so I started scraping them off the bottom a tad earlier and they didn’t break apart. I’d just recommend keeping your eye on them. If you can watch a pot, you can make these fries.

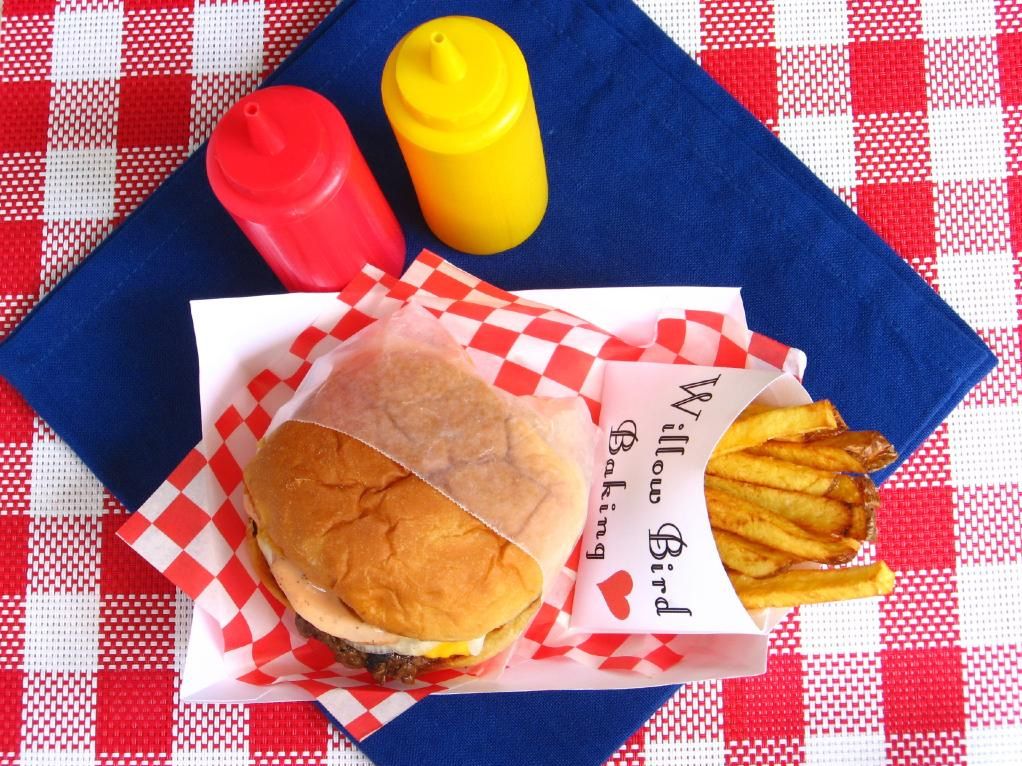
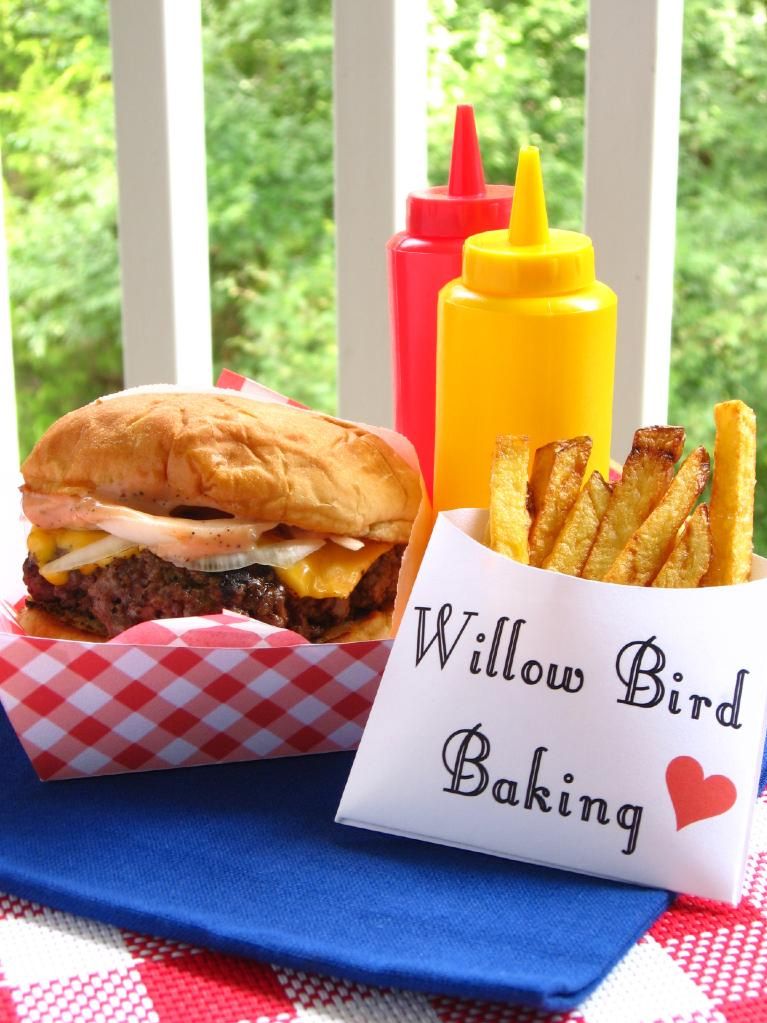
You may have noticed that I went a little crazy with my food stylin’ for this photo shoot. I couldn’t help it! I love these little burgers so much, I wanted to give them the star treatment. It added so much fun to the meal.

I bought some coke in glass bottles, sweet little mustard and ketchup dispensers, and food-grade checked wax paper. A lot of these great materials were on sale after Independence Day. I then downloaded and adapted the template for the burger tray and little fry pouch from Bakerella, who used it for her adorable faux-burgers.

Want to present a meal to your family in these sweet little checkered trays and fry pouches? Download the template here, print it on cardstock, cut around the outside borders, fold the tabs over and glue them. If you’d like to change what the fry pouch says, just crop out my logo and paste in your own.

Easy French Fries


Recipe by: Cooks Illustrated
Yields: about 2-3 servings

Ingredients:
2 1/2 lbs Yukon Gold Potatoes (about 6 medium), scrubbed, dried, sides squared off, and cut length-wise in 1/4 inch by 1/4 inch batons (strips)
6 cups peanut oil
1/4 cup bacon fat, strained, optional
Kosher salt

Belgian-Style Dipping Sauce Ingredients:
5 tablespoons mayonnaise
3 tablespoons ketchup
1 medium garlic clove, minced
1/2 teaspoon hot sauce
1/4 teaspoon table salt

Directions:
1. Mix all ingredients for Belgian-Style Dipping Sauce together and refrigerate until needed.
2. Put potatoes, oil, and bacon fat (if using) into a large Dutch oven or stock pot. Cook over high heat about 5 minutes or until the oil reaches a good rolling boil. Cook without stirring until potatoes are limp but their exteriors are firm enough to scrape stuck ones off the bottom without breaking. The original recipe says 15 minutes, but keep an eye on them and try a little early (gently).
3. Using tongs, stir potatoes, gently loosening any that are sticking to the bottom, and continue to cook, stirring occasionally, until golden the fries are golden brown and crisp, about 5 to 10 minutes longer. Use a slotted spoon to transfer fries onto a bed of paper towels over a baking sheet. Salt and serve immediately, while hot, which Belgian-Style Dipping Sauce.

If you liked this post, please:
Subscribe to Willow Bird Baking
Follow Willow Bird Baking on Twitter
Follow Willow Bird Baking on Facebook
Give this post a thumbs up on StumbleUpon


ShareOther ways to share this post with friends!

Black and White Croquembouche

One of the key components to elegance is often simplicity. An elegant science experiment is one that arrives at a significant conclusion using a simple, clever process. An elegant math proof is one that uses straightforward logical turns to simplify what seems to be a complicated concept. An elegant dress is classic, easy, timeless. An elegant dessert is . . . the cream puff. Dressed in chic black and white for our elegant occasion, of course.

Cream puffs are the sort of thing people buy in tubs from the freezer section. I actually love those icy little things, but they pale (and shiver) in comparison to these homemade, creamy little clouds. The distinct taste difference isn’t the only reason you should make some cream puffs, though.

You should make them because they’re easy. They look fancy, they’re classy enough for company, they’re impressive — but they’re easy! Not just the cream puffs, either, but the actual mounted cream puff tower (the croquembouche) is easy, too! If you can put some cookie-like dollops of batter in the oven, if you can pipe some cream, if you can dip something in chocolate . . . you can make this recipe.

Imagine the look on your husband’s (or wife’s, or sister’s, or dog’s) face when you carry this beauty to the table, calmly announcing, “Dessert’s ready!”

Cream puffs are made with a simple cooked dough called pâte à choux. It’s quick as a whip to make, and then it’s simply piped onto parchment paper, the little peaks are dabbed down with a wet finger, and the dough is egg washed. After a bit in the oven, the puffs are ready for action. I always make my puffs the day before and freeze them, baking them for a few minutes out of the freezer the next day and cooling them before filling (and serving immediately). It may seem odd to freeze the puffs for just one day’s storage, but they’ll get soggy otherwise, so it really is best.

This here lovely tower of creamy puffiness is suffering from a delicious identity crisis. I opted for two flavors of puffs: puffs filled with vanilla cream and dipped in chocolate, and puffs filled with strawberry cream and dipped in white chocolate. They were both delicious and cute, but the consensus was that the vanilla cream puff was best. Feel free to make just one flavor, both flavors, ten different flavors — maybe even a rainbow croquembouche? You go for it!

For my last croquembouche, I used caramel as the building glue. It stuck a lot quicker and was easier to work with in that way, but cooled off too quickly and became too viscous. This time I used melted chocolate, and had the opposite experience. It didn’t harden quickly and was a little shakier during the build, but stayed melty throughout the entire process.

I think the best of both worlds is using chocolate but refrigerating the structure periodically to harden, so that’s what I’ve written into the recipe below.

If you love cream puffs but are used to defrosting them first, it’s time to step out on a limb, get into your kitchen, and construct something beautiful! Tell me: what’s the most elegant dessert you’ve ever made?

Black and White Croquembouche


Recipe by: Willow Bird Baking, with help from: Mike’s Table (strawberry pastry cream), Chef Lou Jones (vanilla pastry cream), Peter Kump and Nick Malgieri (cream puffs)
Yields: 45-50 puffs

Pâte à Choux Ingredients:
1 1/8 cups water
9 tablespoons unsalted butter
3/8 teaspoons salt
1.5 tablespoons sugar
1.5 cups all-purpose flour
6 large eggs
Egg wash (1 egg yolk and 1/2 cup heavy cream, lightly beaten)
chocolate for dipping (I used white chocolate bark for the white puffs and a combo of bitter- and semisweet chocolate for the brown puffs — the bark hardened faster, but you can use whatever you like)

Vanilla Pastry Cream Ingredients:
2 1/4 cups whole milk
6 large egg yolks
2/3 cup sugar
1/3 cup cornstarch
1 vanilla bean, split lengthwise (or 2-3 teaspoons vanilla extract)
2 cups heavy cream

Strawberry Pastry Cream Ingredients:
1/2 recipe of vanilla pastry cream (above)
scant 1 cup strawberries, hulled and chopped
1/16 cup sugar (half of a 1/8 cup measure)

Directions:
I love to watch this video from Martha Stewart anytime I begin a croquembouche, to visualize the process of making pâte à choux, filling puffs, and constructing the tower — take a look at it before you begin.

Make vanilla pastry cream: In medium bowl, whisk together milk, egg yolks, sugar, and cornstarch.

Put remaining 1 3/4 cups milk in a heavy, medium saucepan. Scrape in seeds from vanilla bean; add pod (or add vanilla extract here). Sprinkle remaining 1/3 cup sugar over the milk, letting sugar sink undisturbed to bottom. Set pan over moderate heat and bring it to simmer without stirring.

Temper the egg yolk mixture by adding 1/4 cup of the hot milk mixture to it while whisking. Then, while whisking, gradually whisk egg yolk mixture into the hot milk. Cook over moderate heat, whisking constantly, until pastry cream simmers and thickens, about 1 minute. Remove from heat, discard vanilla pod (if used), and whisk cream until smooth. Transfer to bowl, removing half to another bowl for the strawberry pastry cream, and press plastic wrap directly onto surface (I let it cool a moment first).

Make strawberry pastry cream: toss sugar with strawberries and set aside for 15 minutes. Then simmer them over medium heat for 10-15 minutes, until they begin to thicken a bit. Let cool. Add into 1/2 recipe of pastry cream set aside above and stir to combine well. Press plastic wrap directly onto surface of both bowls of pastry cream, chilling until cold, about 4 hours.

After chilling, whip heavy cream into soft peaks. Add about 1/2 cup of whipped cream into each pastry cream to lighten. Now carefully fold the rest of the whipped cream into the pastry creams (about half into each). NOTE: Pastry cream can be made in advance and refrigerated, wrapped well with plastic wrap on surface, for up to 3 days.

Make the pâte à choux: Combine water, butter, salt and sugar in a saucepan over medium heat. Bring to a boil and stir occasionally. At boil, remove from heat and sift in the flour, stirring to combine completely.

Return to heat and cook, stirring constantly until the batter dries slightly and begins to pull away from the sides of the pan. Transfer to a bowl and stir with a wooden spoon 1 minute to cool slightly.

Add 1 egg. The batter will appear loose and shiny. As you stir, the batter will become dry-looking like lightly buttered mashed potatoes. It is at this point that you will add in the next egg. Repeat until you have incorporated all the eggs.

Pipe the batter using a pastry bag and a plain tip. Pipe choux about 1 inch-part in the baking sheets. Choux should be about 1 inch high about 1 inch wide. Using a clean finger dipped in hot water, gently press down on any tips that have formed on the top of choux when piping. You want them to retain their ball shape, but be smoothly curved on top. Brush tops with egg wash while trying not to drip the wash down the puffs onto the pan (which could somewhat inhibit rise).

Bake the choux at 425 degrees F until well-puffed and turning lightly golden in color, about 10 minutes. Lower the temperature to 350 degrees F and continue baking until well-colored and dry, about 20 minutes more. Remove to a rack and cool (tip from a pro: poke each puff with a toothpick while cooling to release the steam inside. It shouldn’t cause your cream to leak, but will help the puffs stay crisp). Can be stored in a airtight box overnight, but I recommend, if you aren’t using them right away to create your croquembouche, that you freeze them. When you’re ready to use them, bake them at 350 degrees F for 5-6 minutes to refresh and recrisp them.

Fill your puffs: When puffs are cool, use a thin, plain tip to fill them generously with plain or strawberry cream (the strawberry cream will have chunks, so use a wider tip).

Assemble your croquembouche: Melt chocolates in the microwave per packaging instructions (chips are usually melted on half power in increments of 30 seconds, stirring after each). I run a bit of hot water into a large bowl and set my bowl of chocolate down into the larger bowl to keep it melty, but be careful not to get water in the chocolate, which would cause it to seize.

Dip each puff’s head into the chocolate (white or brown as desired), setting them right-side up on wax paper to dry. After you’ve dipped all of the puff tops, begin with the largest puffs, dipping the bottoms and/or corners as needed to build the base of your croquembouche on a plate. After building each level, stick the croquembouche into the refrigerator to harden the chocolate a bit before moving on. Sudden temperature changes aren’t ideal for chocolate and may change the color a little (though it didn’t for me), but I find this preferable to my tower collapsing!

Once the tower is built, serve immediately. I refrigerated mine for a few hours and was fine with the texture, but it’s better served as quickly as possible so the puffs don’t get soggy. Enjoy!


Need to start simpler? Try one of these shortcuts:
-Filling puffs with just one flavor of pastry cream instead of two.
-Filling cooled puffs with simple whipped cream instead of pastry cream.
-Serving puffs on a platter instead of mounted.
-Only using one kind of dipping chocolate.


If you liked this post, please:
Subscribe to Willow Bird Baking
Follow Willow Bird Baking on Twitter
Follow Willow Bird Baking on Facebook
Give this post a thumbs up on StumbleUpon


ShareOther ways to share this post with friends!

Tumbleweed Burger

I’m not always a burger fan. I have to be in a mood, and even then, it has to be the right sort of burger with the right sort of fixins. A few weeks ago, I got a hankerin’ — but not for just any burger.

I wanted a burger with flavor the size o’ Texas (can you hear my cowgirl twang?), a mile high and a mile wide, with cheese runnin’ down the sides like the Rio Grande.

Too much? Okay, I’ll stop.

But I wanted a really good burger, y’all. And so I started dreaming. And I reckon this here Tumbleweed Burger (oops, I said I’d stop, didn’t I?) is what I dreamed.

I knew I wanted to season the meat, and dry seasonings are best to ensure you can still form a nice patty. I chose fresh cilantro and my favorite taco seasoning (you can make your own, but I’m not sure you can make it taste as good as this), McCormick’s Cheesy Taco. In case you’re wondering, McCormick’s isn’t compensating me to brag about their seasoning and I had to pay for that little packet o’ love straight out of my own bank account. Worth every penny of $1.09.

The patties were the best part. They were mouthwateringly juicy, and had such an amazing Tex-Mex flavor. The toppings sent it over the edge: tangy spicy mayonnaise, ripe tomato, dripping hot dog chili, smooth avocado, melty meunster cheese, and crispy fried onions.

Okay, actually, the fried onions might not have made it. They might have burned instantaneously because I didn’t measure the temperature of my oil. There might have only been one fried onion rescued from the carnage. I might have put it on the burger in this photo to salvage my reputation. But I might have too much integrity to let you believe my fried onions worked. So, um. You can skip the fried onions if, like me, you’re not a fan of frying. Or, if you do try them and they work wonderfully, you can email me and gloat (just make sure to tell me how they taste).

Failures happen. But they don’t have to ruin everything!

I served the burgers on Nature’s Pride buns that I was sent (to review, at no cost to me) as part of Foodbuzz’s Tastemaker program. They were 100% whole wheat, which was nice nutritionally and aesthetically — there’s something about brown bread that just feels tasty to me! I thought they were perfect for the burger once they were buttery and toasty.


Dad said he thought the avocado slices would be better served on the side — I tried it both ways and couldn’t decide!

Now I have to let you in on a little secret. My goal on Willow Bird Baking is to encourage you to get in the kitchen and make something you never dreamed you could make. I do it all the time, and sometimes fail, but when I succeed, I feel like I’ve “leveled up” in my kitchen confidence; I want you to feel that too. None of that is the secret, though. The secret is . . . this was the first time in my life I’d made a burger.

That shouldn’t shock you — most of the dishes I post are first tries for me — but maybe it does, since maybe everybody on the planet has made a burger before. I might not mention it at all, except that maybe there’s someone out there who also has a secret, who also hasn’t given burgers a shot. Maybe you thought you needed a grill, or just weren’t sure how to go about it. Maybe you thought they’d turn out tough. Maybe you gave up and went to a fast food drive-through instead.

If that’s you (I won’t tell anybody), I want you to make this burger! I’ve included detailed instructions below, and I’ve tested it out for you — I promise it’s a tasty one! What have you got to lose? Tell me, readers: are you a burger master, a burger beginner, or somewhere in between?

Tumbleweed Burger


Recipe by: Willow Bird Baking (spicy mayonnaise adapted from White on Rice Couple)
Yields: 6 burgers

Ingredients:
1.5 pounds ground beef
4-6 tablespoons taco seasoning (I use McCormick’s Cheesy Taco and highly recommend it)
1/4 cup cilantro, chopped
6 slices muenster cheese
hamburger buns
butter for toasting buns

Spicy Mayonnaise Ingredients:
3 tablespoons mayonnaise
1 tablespoon sriracha (chile sauce)
1 teaspoon lemon juice
fresh cilantro to taste

Burger toppings:
fried onion rings, if desired
hot dog chili (I used Texas Pete brand, warmed in the microwave)
tomato, avocado, romaine lettuce, chopped green onions

Directions:
Mix ground beef, taco seasoning, and cilantro and form into 6 patties (handling as little as possible, so you don’t toughen the meat). Broil for around 9 minutes until checking for doneness by splitting one of the thickest patties in half and examining the meat. You want them to be slightly pink in the middle (see how to tell if a burger is done). Place muenster cheese on each patty to melt when you pull them out of the oven.

While broiling, melt butter in a skillet and toast buns (alternatively, brush melted butter onto buns and broil them to toast, keeping a close watch so as not to burn them).

Assemble the burger: Mix spicy mayonnaise ingredients together. Spread generously onto toasted bun, topping with cooked burger, fried onion rings, avocado slices, tomato slice, a leaf of romaine lettuce. Enjoy!

If you liked this post, please:
Subscribe to Willow Bird Baking
Follow Willow Bird Baking on Twitter
Follow Willow Bird Baking on Facebook
Give this post a thumbs up on StumbleUpon


ShareOther ways to share this post with friends!

Secret Garden Recipe: Buttermilk Cranberry Scones

This post brought to you courtesy of Mike’s laptop. Who knew blogging while lounging around could be so much fun? My poor little computer chair is singing the “Baby Come Back” song from those Swiffer commercials.

Anyway, onto more important things. There’s been a bit of a turning point in my life recently. I’ve had a revelation regarding scones.

See, before I made these scones for my sister’s surprise garden party, I hadn’t really been interested in scones. From the pictures I’d seen, they just looked like dry, boring biscuits. Sometimes they almost appeared to have a biscotti-like texture — and I’m not a biscotti fan. Why bake all the moisture out of something? Some of you are scone enthusiasts, and you’re feeling smug right now, because you know exactly what I discovered when I took my first bite of a Buttermilk Cranberry Lemon Scone:

SCONES ROCK.

How have I missed out on these for so long?! Blog after blog tried to tell me that scones were actually amazing, but I didn’t believe them! Turns out, scones are not dry — they’re fluffy and soft. Scones are not boring — they’re flaky and heavenly. Scones are not flavorless — they’re bright and buttery! It’s like someone crossed a feather-light biscuit with a freakin’ pie crust, and set it on a plate in front of me with some clotted cream! I know I’m using too many exclamation points! I just can’t! help! it! SCONES!

Let me make this clear. (You’re probably thinking, “The 85th exclamation point clarified enough, thanks,” but humor me.) I had buttery, homemade croissants on my plate next to a Buttermilk Cranberry Scone. Those croissants are one of the best things I’ve ever tasted, but . . . I had a hard time deciding if I preferred them . . . or the scone.

The subtle lemon with that buttery, flaky scone texture made each piping hot biscuit a ball of sunshine. Cranberries provided a slightly tart complement, and a nice variation in texture. I tore into a hot scone, slathered it with mascarpone cheese, and devoured. Eat them with butter, orange marmalade, strawberry jam, or nothing at all. Especially if you’ve been skeptical about scones, you just have to give it a shot!

You can make these scones ahead of time, shape them, and freeze them for quick breakfasts throughout the week. They bake straight from the freezer and are lovely every time. Once I tasted one, I regretted not doubling the recipe, so keep that in mind!

How about you? Are you a smug scone lover that knew all along how amazing they are? Or have you been reluctant to try scones as well?

Buttermilk Cranberry Scones


Recipe by: Adapted slightly from Pinch My Salt
Yields: 8 scones

Ingredients:
2 cups all purpose flour
1/4 cup granulated sugar
1 1/2 teaspoons baking powder
1/4 teaspoon baking soda
1/2 teaspoon salt
1/2 cup cold unsalted butter, cut into small chunks
1/2 cup buttermilk
1 large egg
1/3 cup sweetened dried cranberries
2 teaspoons lemon extract
heavy cream (optional, for brushing tops of scones)

Lemon Glaze Ingredients: (optional)
1/2 cup confectioners’ sugar
2 teaspoons lemon juice

Directions:
1. Preheat oven to 425 degrees.
2. In a medium bowl, whisk or sift together flour, sugar, baking powder, soda and salt. Add butter chunks and toss lightly with flour; place bowl in fridge.
3. In a small bowl, whisk together egg, buttermilk, and lemon extract; place bowl in fridge.
4. Get organized: measure out the cranberries; set aside. Line a baking sheet with parchment or a silpat; set aside. Lightly dust a counter top with flour. Pour a little bit of heavy cream in a bowl and have a pastry brush handy.
5. Remove bowls of flour and buttermilk from fridge. Cut butter into flour with a pastry blender or rub together with your fingertips until it resembles coarse crumbs. Add cranberries and stir to combine.
6. Add buttermilk mixture all at once to flour mixture and stir until the mixture clumps together. Dump mixture out onto floured counter top and, with floured hands, gather into a ball and knead once or twice to combine everything. Pat into a circle about 1/2 inch thick. Cut into 8 slices, like a pie, or cut with biscuit or cookie cutters into whatever shape you prefer. Put scones on lined baking sheet and brush lightly with heavy cream (optional). NOTE: At this point, you can refrigerate the scones for up to a week before baking as directed straight from the fridge. Alternatively, you can freeze the scones on a lined baking sheet until solid and then transfer them to a ziplock bag to store in freezer. Do not thaw, but bake as directed straight from the freezer.
7. Bake in a preheated 425 degree oven for 13-15 minutes until lightly browned. Remove to cooling rack.
8. Once scones are mostly cool, mix ingredients for the glaze. Adjust proportions of sugar and lemon juice for thickness and taste, and then drizzle lightly over each scone.

If you liked this post, please:
Subscribe to Willow Bird Baking
Follow Willow Bird Baking on Twitter
Follow Willow Bird Baking on Facebook
Give this post a thumbs up on StumbleUpon


ShareOther ways to share this post with friends!

Spicy Peach and Cucumber Salsa

Byrd doesn’t know she’s a posh poodle. When her ears are all askew and she’s running through the apartment with a half-decapitated stuffed hedgehog in her mouth, posh is the last thing that comes to mind. She’s a rough and tumble fetchin’ machine, and in case you couldn’t tell, she is finally recovered enough from her knee surgery to play again! We couldn’t be more thrilled.

Though she’s not posh, Byrd does eat posh food of mommy’s choosing. In a roundabout way, I have her to thank for this Spicy Peach and Cucumber Salsa recipe. I was at the local organic grocery store last week picking up a bag of her select kibble when I noticed a bowl of this surprising salsa sitting out to sample. I usually pass up samples, but the unexpected combination of peaches and cucumbers caught my eye, so I took a small nibble.

Suddenly, it was the 4th of July all over again — fireworks in my mouth! Spicy chipotle; refreshing cucumbers; succulent peaches all mingled on a cayenne-pepper laced blue corn chip. There were so many experiences in each bite: tangy, sweet, hot, acidic, cool, juicy. I’d heard of mango salsa, pineapple salsa, but this salsa was a revelation for me. A delicious, tasty, yummy revelation. So much so that I thought about it the whole way home.

The next day after my Jazzercise class (are you still laughing about that?!), I drove back to the organic grocery determined to find the recipe’s creator. And find him I did! Michael works at the grocery and is quite the home chef himself. After spending months in Mexico, he now lives in North Carolina and has his own garden plot replete with tomatoes. He was kind enough to share his recipe, and I scrawled it down on the back of an old grocery list.

My aunt and uncle recently visited from Missouri (hello, Show Me State readers!) and I served them this salsa before a delicious cookout on a balmy day. Mine wasn’t as spectacular as Michael’s, but it was still a success. This is really one of those recipes where you have to add a little, taste a little, add a little more. Fiddle with it until it suits your taste, and then let it sit in the fridge for a half hour or so and meld. I’ll keep practicing until mine is as fantastic as the original!

Also, a note about chips. I tried this salsa on Garden of Eatin’ Red Hot Blues, and I can’t recommend them enough. This is not a sponsored endorsement (though I will accept as many free bags of these chips as they feel like sending me — are you out there, Garden of Eatin’?), just good ol’ fashioned personal opinion. These organic blue corn chips are coated in a fine speckle of cayenne pepper and were the perfect complement to the cool sweetness of the salsa. If you’re not a fan of heat, Garden of Eatin’ also makes a regular blue corn chip that I’m sure is fantastic as well. And everyone likes eating blue chips, right?

I know at first you might have some salsa skepticism — peach and cucumber is definitely an unusual combination — but give this recipe a try. One tiny bite of this salsa inspired a day of obsessive googling and a half-hour drive just to get the recipe. It must be good. And Michael, if you’re reading this, make sure to drop me an email or comment to let me know you saw the post — in true Julie fashion, I’ve lost your email address!

Spicy Peach and Cucumber Salsa


Recipe by: Michael
Yields: 3 cups of salsa

Ingredients:
1-1.5 cups diced, unpeeled cucumber (about 1-2)*
2-2.5 cups diced, peeled, pitted peaches (about 3-4)
1/4-1/2 can of chipotle peppers, diced (depending on your heat tolerance)**
2 tablespoons chopped mint
3 tablespoons lime juice
3 tablespoons peach preserves

Directions:
Mix all ingredients in a bowl. Season salsa to taste with salt. Prepare up to 2 hours ahead, cover, and refrigerate until serving. Stir to blend before serving.

*I recommend doing an even finer dice on your cucumber and peach than I did, for texture’s sake.
**Chipotle chiles come canned in adobo. Make sure to wear gloves while chopping and not to touch your face or eyes.

If you liked this post, please:
Subscribe to Willow Bird Baking
Follow Willow Bird Baking on Twitter
Follow Willow Bird Baking on Facebook
Give this post a thumbs up on StumbleUpon


ShareOther ways to share this post with friends!

1 58 59 60 61 62 69