cookies

Chocolate & Coconut Cream Pie Bars

Several months ago, I attended the Foodbuzz Blogger Festival in San Francisco, California, 2,700 miles away from my home. Traveling alone is always a meaningful, reflective experience for me. To process my trip, I periodically share vignettes that I hope are meaningful to you, as well.

. . .

Normally, I would have said no.

On-the-spot requests for money make me nervous, and I made a rule years ago to always say no. I give food or supplies freely, as I’m able, to anyone who asks me for them. But I only give money if I have a space to sit, read about the organization, and make a thoughtful choice. That’s my rule, anyway.
But I wasn’t standing at a check-out counter being asked to donate a dollar to a charity, or walking down the street being asked for change. I was sitting on the BART, the Bay Area’s system of trains, and the little boy in front of me was adorably nervous. I waited politely as he took a deep breath and began a clearly well-rehearsed speech. It came out as one halting sentence.
“Hi-I-am-part-of-the-Boys-&-Girls-Club-and-we-are-raising-money-to-go-to-our-basketball-tournament-in-Reno-I-have-already-collected-all-but-$55-can-you-help-by-donating-today?” He took another big breath, obviously relieved to have finished his spiel.
I saw his friend delivering a similar pitch across the car and briefly considered that this might be an elaborate scheme to get more video game or snack money. My innate cynicism comes from personal experience, since I may or may not have canvassed my neighborhood when I was a tiny entrepreneur telling folks that I was an orphan soliciting donations for cancer treatments. Not one of my prouder moments. Thankfully, I don’t think anyone was fooled. A few people tried to tame their amusement as they slipped me some change, which, in hindsight, was unnecessarily generous.
Regardless of my own childhood scheming, I instinctively felt the child in front of me on the train was being honest, and what’s more, I decided I didn’t care. He had mustered up plenty of pluck to come ask me for a few dollars, and I was going to give them to him. I opened up my envelope of cash (such a tourist) and pulled out a few bills for him. His relief turned into joy. “Thank you!” he cried as he walked across the car.

I heard him deliver his pitch to another woman with a satisfied emphasis on his new balance: “…and all I need is $48 now!” She grinned at me as she handed him a couple of bills as well.

A few minutes later, I saw another passenger on the train say no. The boy, clearly coached to deal with this politely, veiled his disappointment as best he could and gave a resigned little nod. I glanced over at the woman and noticed she’d been watching the exchange as well. When she looked over at me, her face had the same sympathetic smile I was sure my own face was wearing. I didn’t blame the other passenger — after all, any other day and any other mood and I might have decided to follow my own rule — but I did resolve to pray for all the boys to get to go to their basketball tournament.

(And you know what? If he’s playing video games or eating some cheesy poofs with my money at this very moment, by golly, I hope he’s enjoying them.)

. . .

It’s funny how sometimes things — like a brief exchange on a train — build a little nook in your heart. Some moments are like that. Some people are like that.

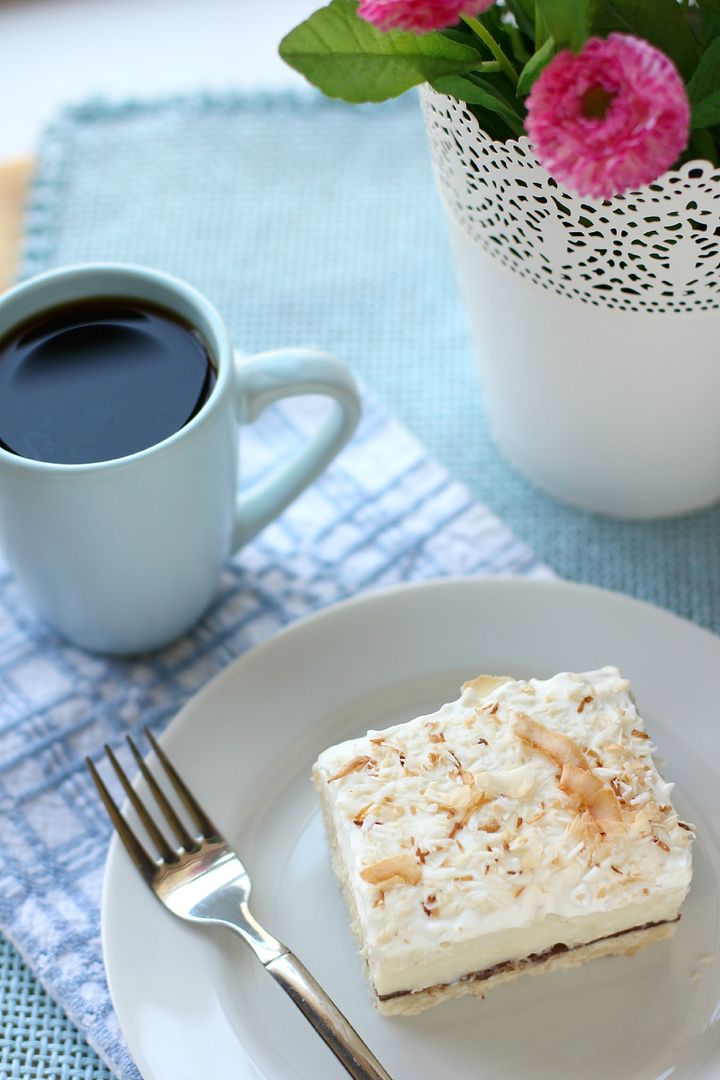
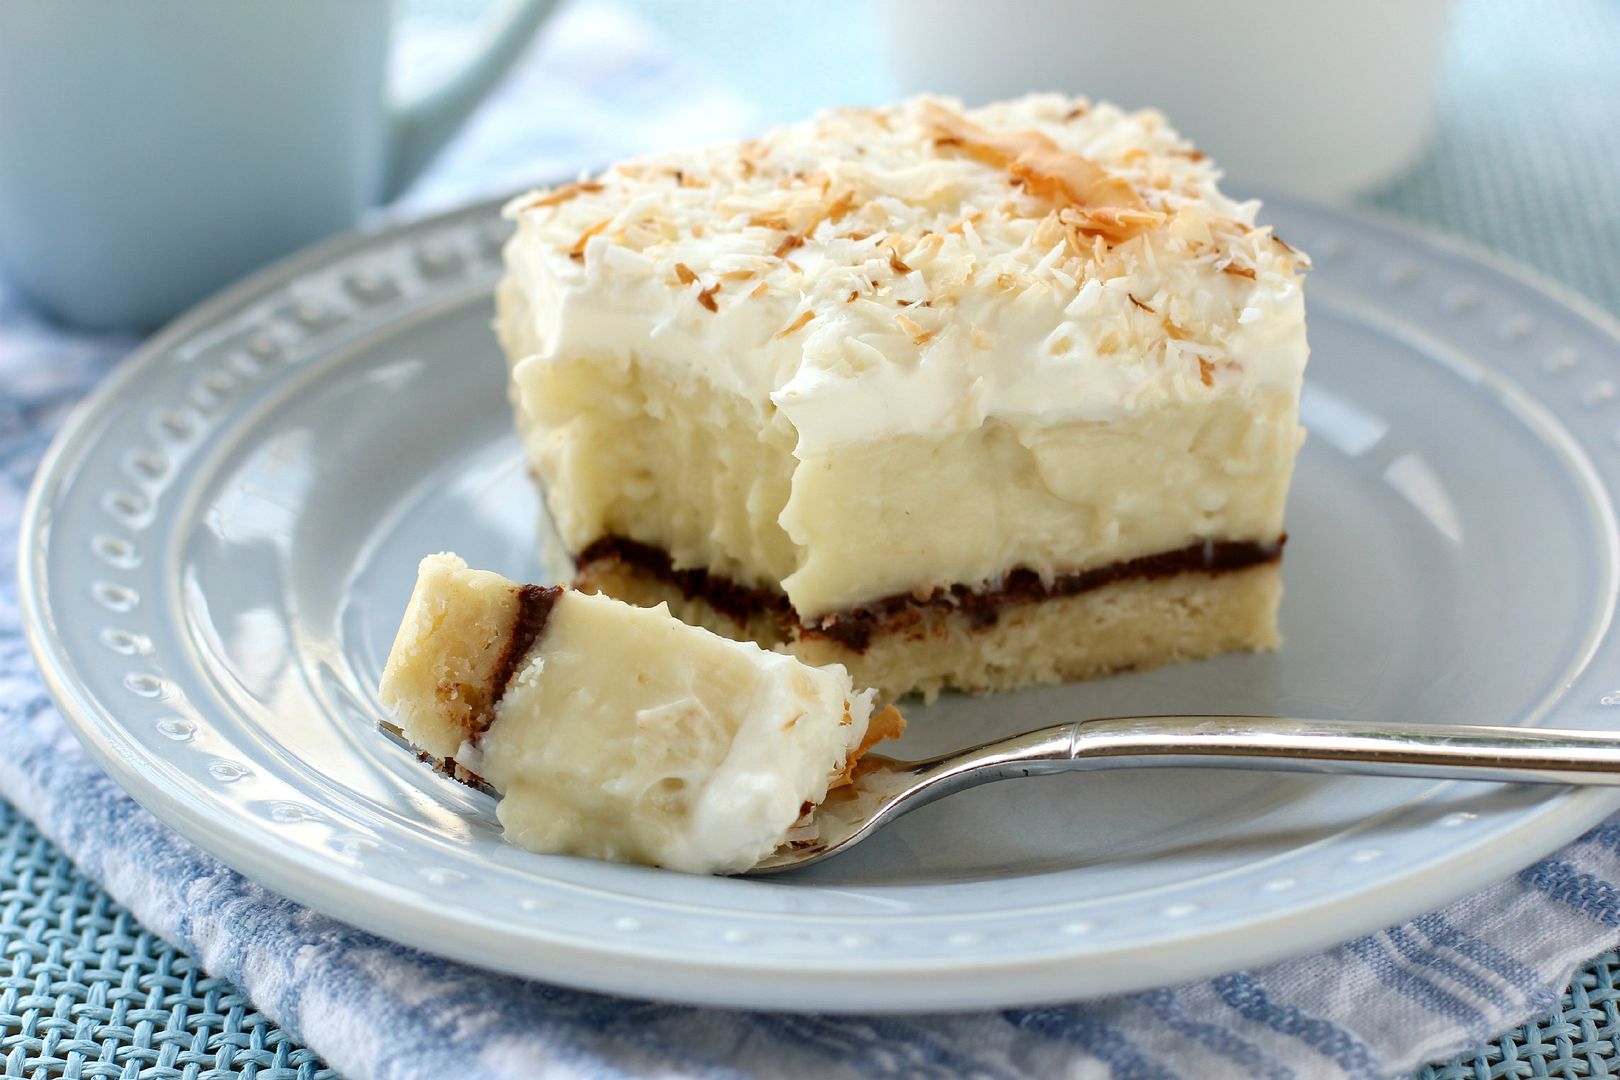
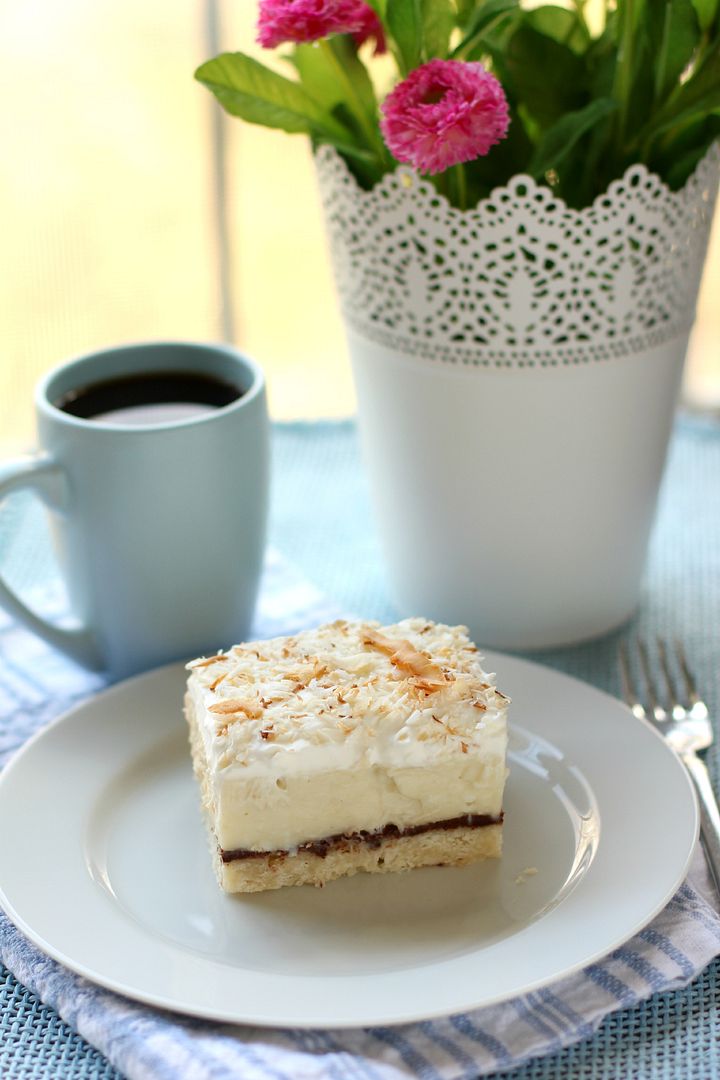
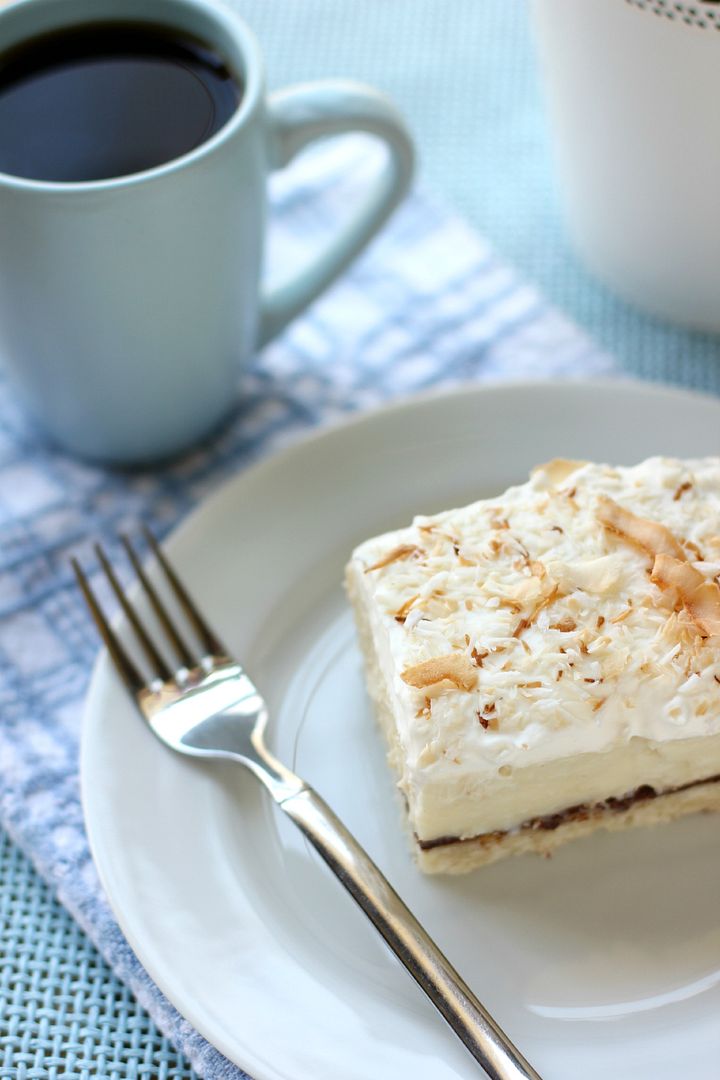
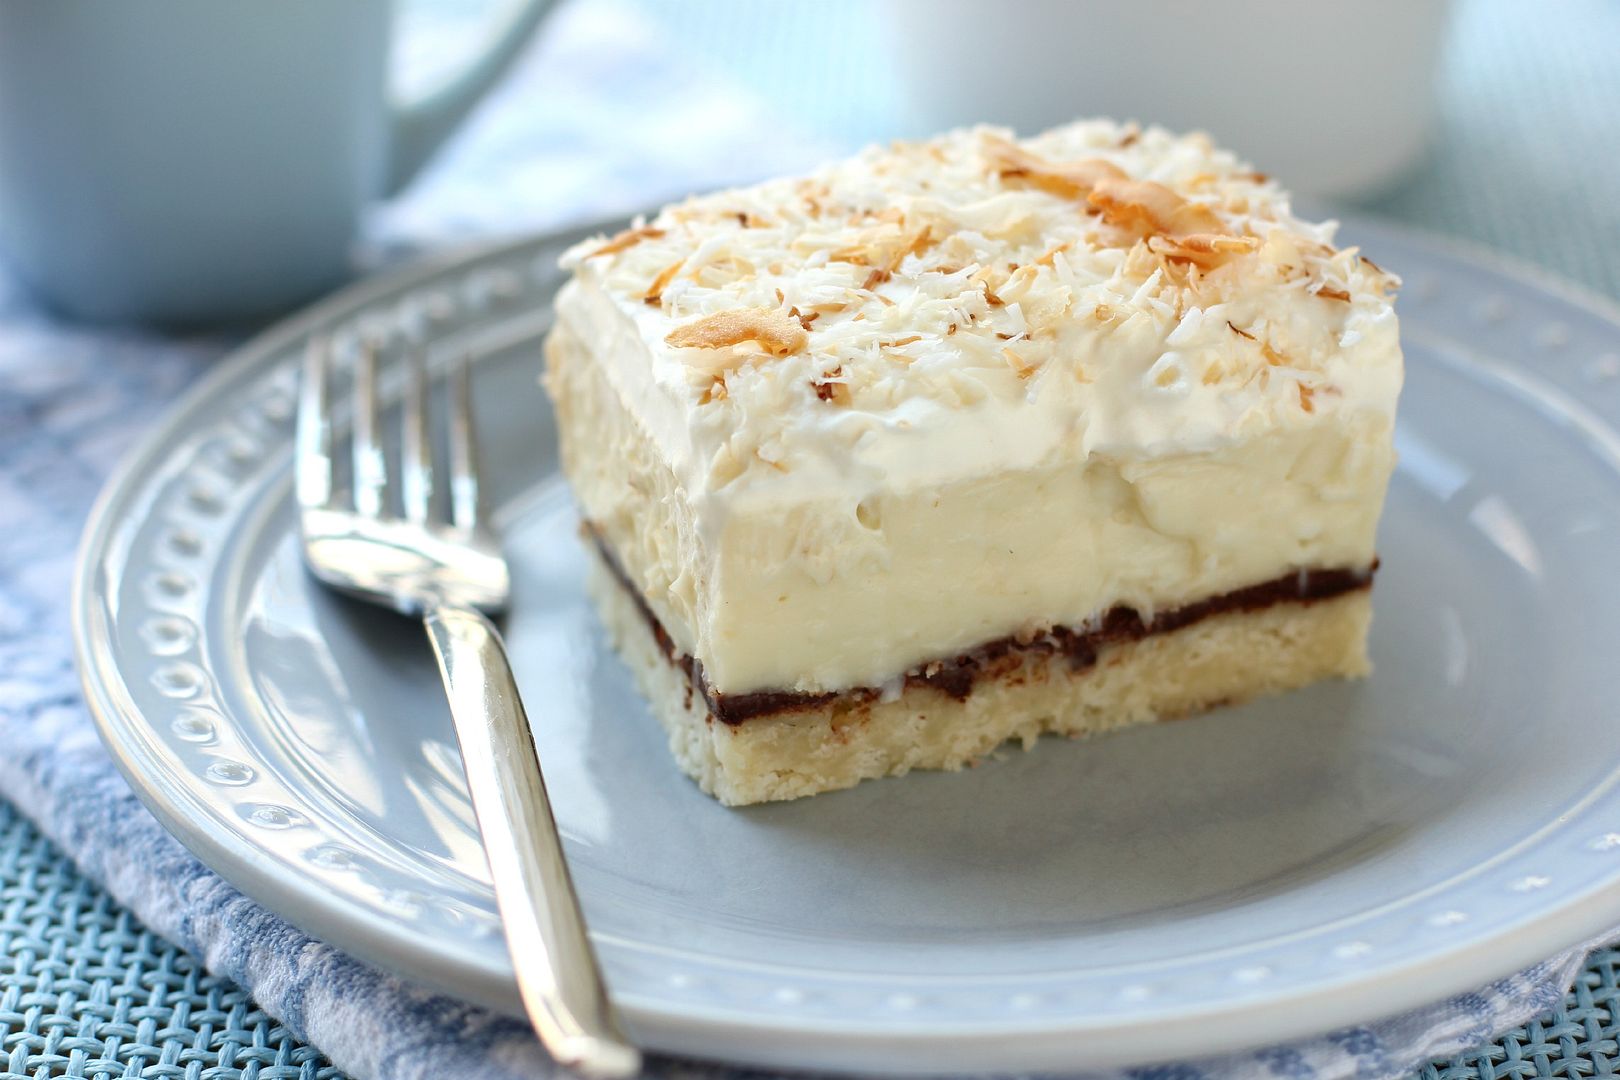
I made these Chocolate & Coconut Cream Pie Bars for a special person who occupies her own shelf in my heart. Martha is Mike’s great-aunt, for all intents and purposes, and she’s truly a crackerjack of a woman. She deserves all sorts of sweet things — video games and cheesy poofs, even! — but I decided on these bars for her birthday because I know she enjoys coconut. The chocolate layer was a whim, but what a great one — the bittersweet ganache is just enough to add a rich background flavor while still allowing the coconut cream to shine.

These bars take a little time and a little arm muscle, but they’re easy to assemble and more than worth the time spent by the stove. If you love a good coconut cream pie, you’ll love them.

Tell me about a moment when you broke one of your own rules.

Chocolate & Coconut Cream Pie Bars


Recipe by: Willow Bird Baking with filling adapted from All Recipes
Yield: 12-16 bars, depending on size

Okay, 30 minutes of stirring sounds like a lot. But now that I know how incredible these bars are, I would stir for an hour if I had to — maybe even two! They combine all the goodness of an old-fashioned coconut cream pie with the perfect amount of rich ganache. In short, these things are amazing. I used stabilized whipped cream on top of my bars, but if you’re serving them immediately and don’t anticipate keeping them long, feel free to just use plain whipped cream.

Crust Ingredients:
1 cup (2 sticks) butter
2 cups all-purpose flour
1/2 cup icing sugar

Ganache Ingredients:
3/8 cups heavy cream
about 3 ounces bittersweet chocolate chips (I love Ghirardelli’s 60% cacao chips)
about 3 ounces semisweet chocolate chips

Coconut Cream Filling Ingredients:
3 cups half-and-half
3 cups coconut milk
4 eggs
1 1/2 cups white sugar
2/3 cup cornstarch
1/2 teaspoon salt
1 1/2 cup flaked coconut
1/2 teaspoon coconut extract
1/2 teaspoon vanilla extract

Whipped Cream Topping Ingredients:
2 cups heavy whipping cream
1 tablespoon cold water (for stabilizing)
1 teaspoon gelatin (for stabilizing)
3-4 tablespoons icing sugar
1/2 cup coconut, toasted

Directions:
Make shortbread crust: Preheat your oven to 350°F. Prepare a 9 x 13 in. baking dish with a parchment paper sling (I use one long sheet across the length of my dish, and two overlapping short sheets across the width of my dish — just arrange it so that it has some overlap and overhang to help you pull the bars out after they’re finished). Cut the butter into the flour and icing sugar and press into the baking dish (I used a food processor to cut the fat into the flour — about 6 pulses — and then the bottom of a glass to press the mixture into the pan). Bake 18-20 minutes or until light brown. Set on a wire rack. Keep oven preheated for coconut toasting.

Make ganache: While the shortbread is baking, place the chocolate in a medium bowl. Bring the cream to a simmer in a medium saucepan (or microwave it for a couple of minutes). Once the cream reaches a simmer, pour the cream over the chocolate and let stand 1-2 minutes. Whisk in small circles until a smooth ganache has formed. Set it aside until your crust is finished and has cooled for a few minutes, and then pour it over the crust (it’s okay if it’s not cooled all the way). Place the chocolate covered crust in the fridge to chill until the ganache is set into a firm layer.

Toast coconut for the topping: Spread about 1/2 cup of the coconut flakes out on a baking sheet and toast for a few minutes, stirring every minute or so, until the coconut is golden brown. Spread it out on a plate to cool completely.

Make coconut cream filling: Combine the half-and-half, coconut milk, eggs, sugar, cornstarch, and salt in a large saucepan and bring it to a boil over medium-low heat, whisking constantly (this can take anywhere from 30-38 minutes. Some folks on All Recipes said you could zap it in the microwave for a minute at a time, stirring after every minute, until it was thickened. It was only supposed to take around 5-10 minutes, but I was too chicken to try. Let me know if you do.) Add coconut and vanilla extracts and the 1 1/2 cups of untoasted coconut and stir. Pour this filling over your chilled ganache and stick the whole thing in the fridge to chill until firm, about 2 to 4 hours.

Make whipped cream topping: Put 1 tablespoon cold water in a small bowl and sprinkle the gelatin evenly over the top. Let it soften for 2 minutes before microwaving it for 30 seconds and whisking to dissolve the gelatin. Using a chilled bowl and beater, whisk the 2 cups of heavy cream and icing sugar together until the cream forms stiff peaks, stopping to add gelatin mixture about halfway through. Dollop the cream over your bars and gently spread it around. Sprinkle on toasted coconut. Chill until ready to serve to let the whipped cream set up. Use the sling to pull the bars out of the dish, slice with a sharp knife, and enjoy!

If you liked this post, please:
Subscribe to Willow Bird Baking
Follow Willow Bird Baking on Twitter
Follow Willow Bird Baking on Facebook
Give this post a thumbs up on StumbleUpon
Pin It


Shareother ways to share this post with friends

Brown Butter Cookie Dough Pretzel Bars

I recently attended the Foodbuzz Blogger Festival in San Francisco, California, 2,700 miles away from my home. Traveling alone is always a meaningful, reflective experience for me. To process my trip, I periodically share vignettes that I hope are meaningful to you, as well.

. . .

“Would you be from Oakland, if you could?” he asked. There was silence for a moment before she answered.

“Oakland is hella dirty.”

I couldn’t help overhearing their conversation in the seat behind me on the train. Their voices suggested they were teenagers, and after a (hopefully inconspicuous) glance behind me, I decided they were dating. The lyrics pouring from the headphones they were sharing sounded metallic and harsh despite being unintelligible from where I sat.

Until this moment, their conversation and the emphatic beat of their music had been bothering me. But now I forced myself to soften a little. I looked out the window to evaluate her statement.

There was no question that we were speeding over a rough part of town. Graffiti covered most available surfaces, and industrial buildings spread like a concrete disease through the landscape. Still, I thought, with the bay in the distance and the sun-bleached streets, there was a real beauty to this outer edge of Oakland. Maybe you had to be from out of town to think so.

The young couple behind me left the train together at the next station, and I found to my surprise that I missed their chatter. What a sweet date for two kids with no car and not much money: riding the BART together and listening to music. I reminisced about the early days of my relationship with Mike as the train raced ahead awhile longer. The loudspeaker finally pulled me back to the present by announcing my stop and I disembarked.

I was getting used to feeling alone and out of place on this trip across the country, but stepping out of the station onto an Oakland street felt like stepping out into a dream. The houses were similar but different than the houses I was used to. The driveways were similar but different. The storefronts were similar but different. The people were similar but different.

I was standing in an urban neighborhood like I had many times before, but it was as if some shrewd and knavish sprite had twisted everything a half-inch off kilter. I didn’t mind — I quite like the feeling of getting used to a new space.

I walked down the sidewalk in the furious sunshine — where had all this sun suddenly come from? the trip thus far had been downright chilly — and enjoyed the pins and needles of newness.

A man rode past me on a bike leading a dog the size of a horse.

I passed a church and was startled as singing burst forth from its open windows. Pigeons standing nearby were startled too and burst into flight.

A man apologized from the open window of an old Volkswagen van for blocking the sidewalk.

A girl with a pretty scarf and a cute pair of flats locked her front door and walked off down the sidewalk.

I quietly stored up each new stimulus like slides in a slidebox. I would pull them out and examine them more carefully later, perhaps under a microscope — or perhaps in an essay surrounded by cookie dough bars. Whichever.

Before long I reached my destination: homeroom, a whimsical little restaurant devoted to my favorite food, macaroni and cheese. This was a pilgrimage of sorts, since I’d been determined to visit the restaurant ever since I heard of its opening in 2010. Now here I was, being seated at a little sun-drenched table next to its flung-open glass doors. I ordered some housemade limeade and a big dish of trailer mac (macaroni and cheese with hot dogs and potato chips) and settled in to jot down some slides — er, memories — for later.

As I sat and collected the flavors and sights around me, I considered the question from the boy on the train: “Would you be from Oakland, if you could?”

I think maybe so.

. . .

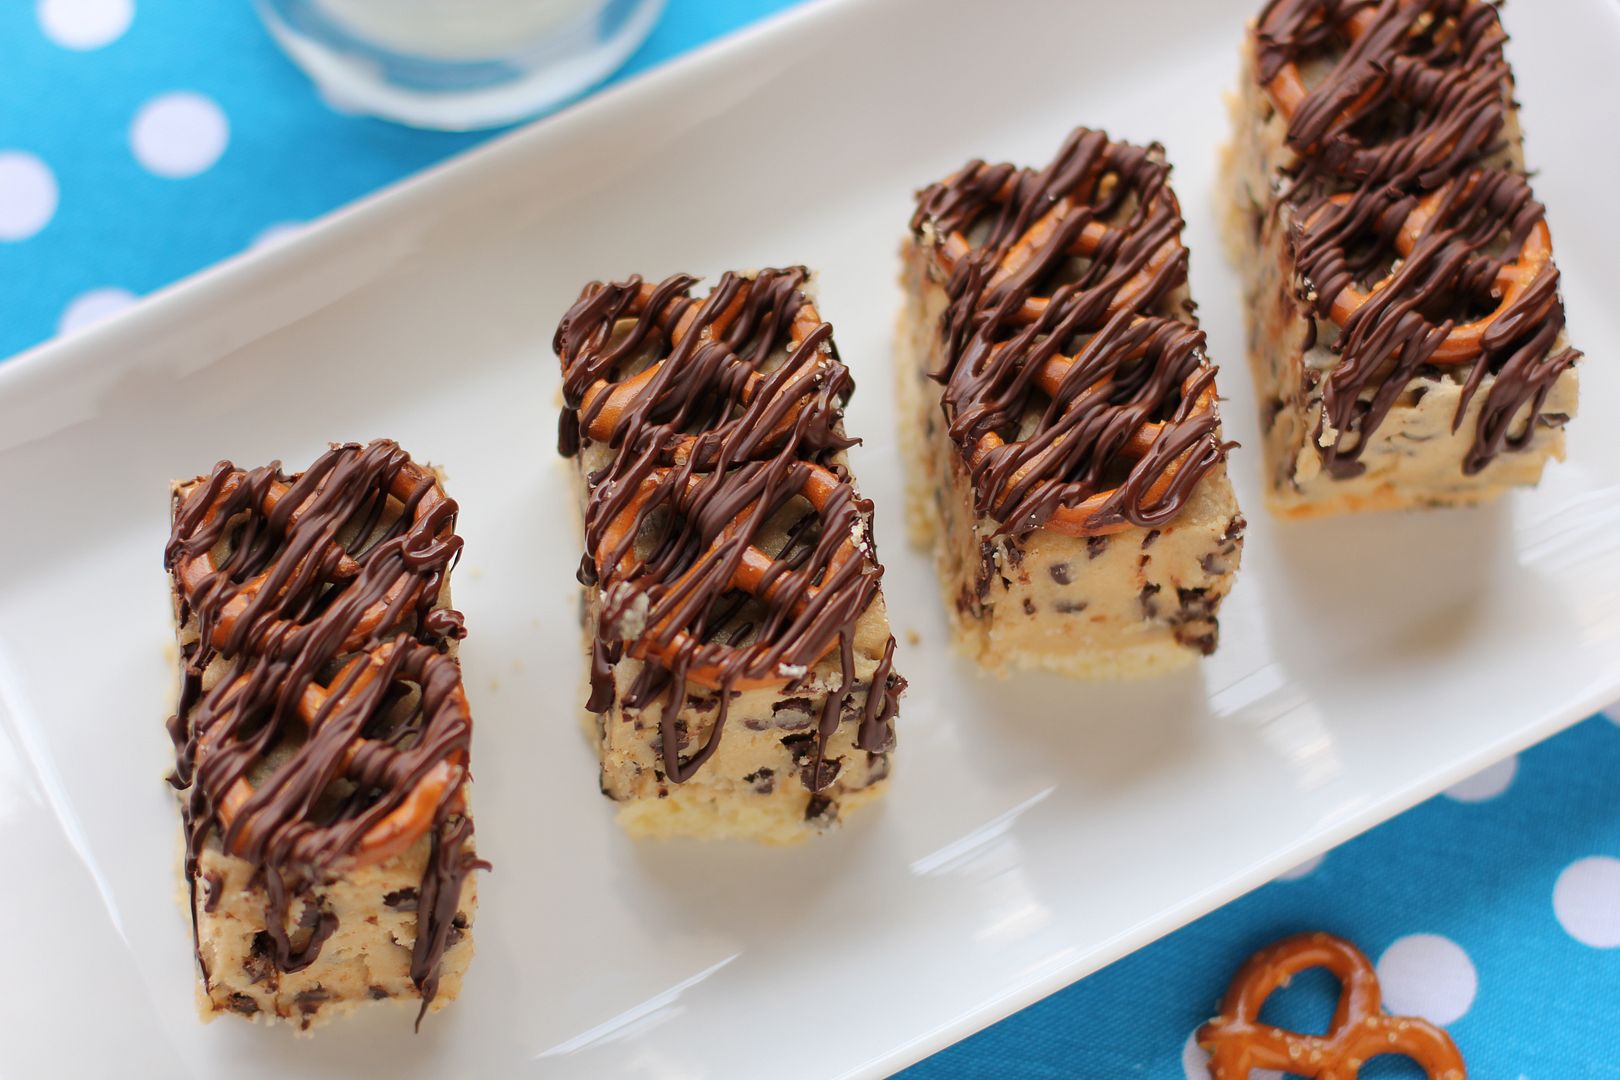
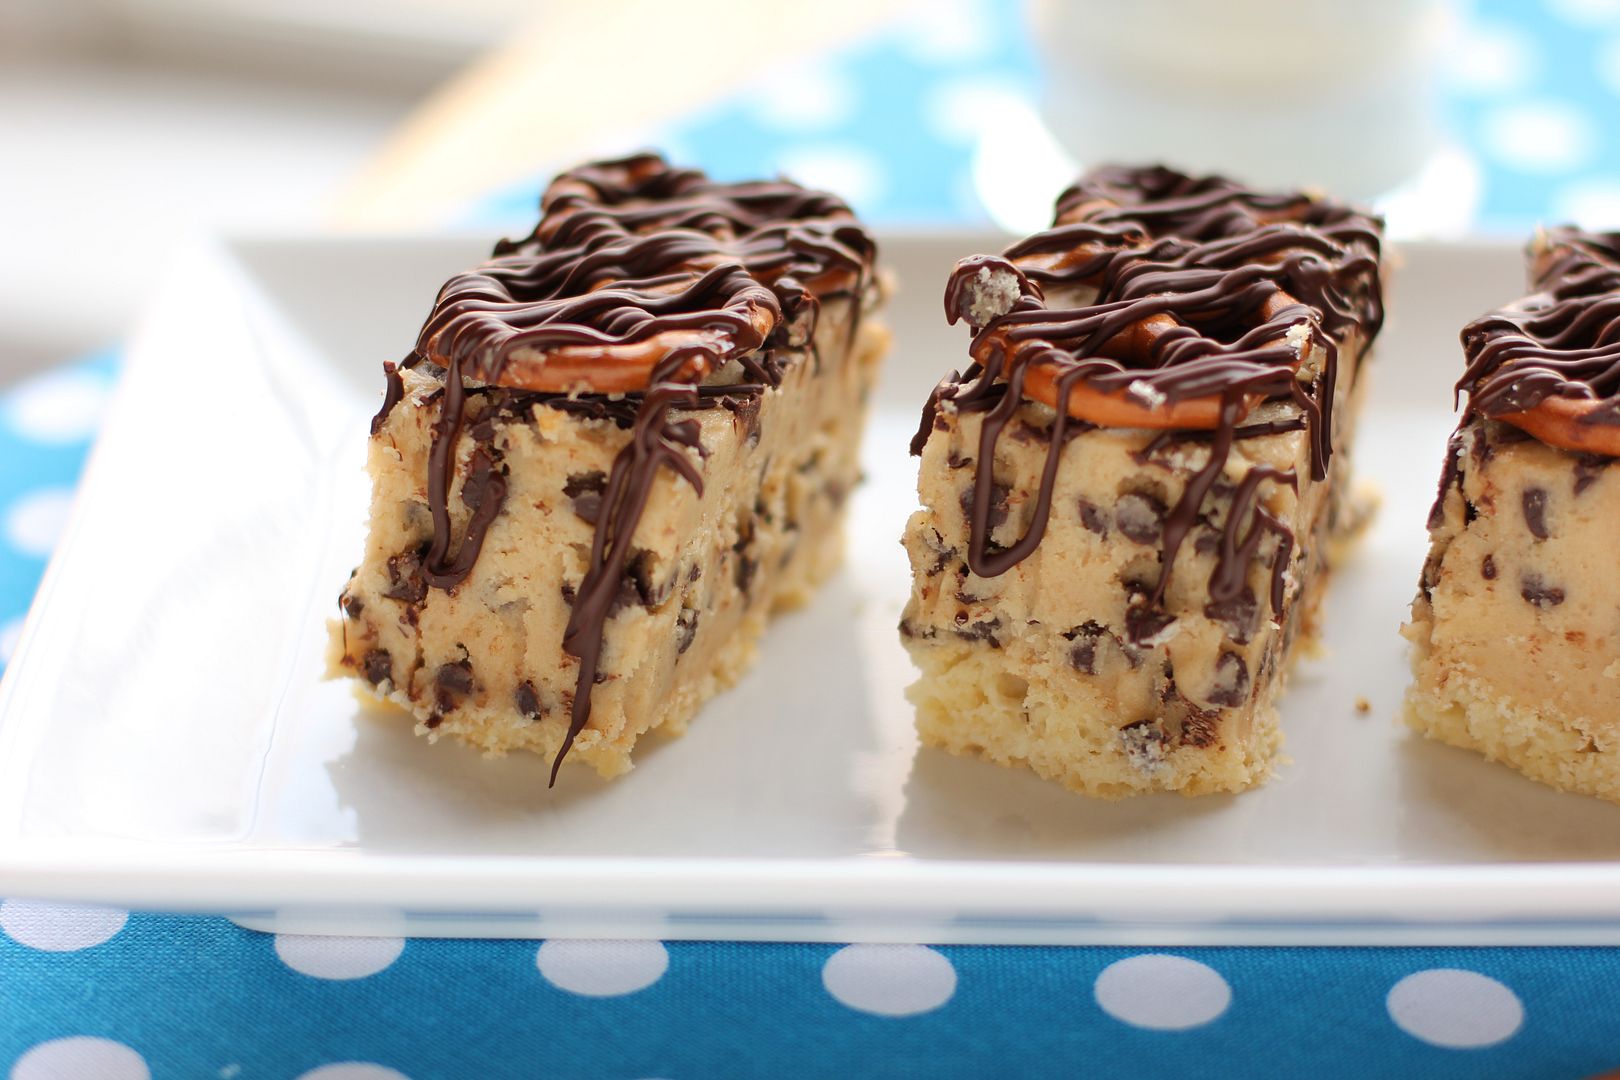
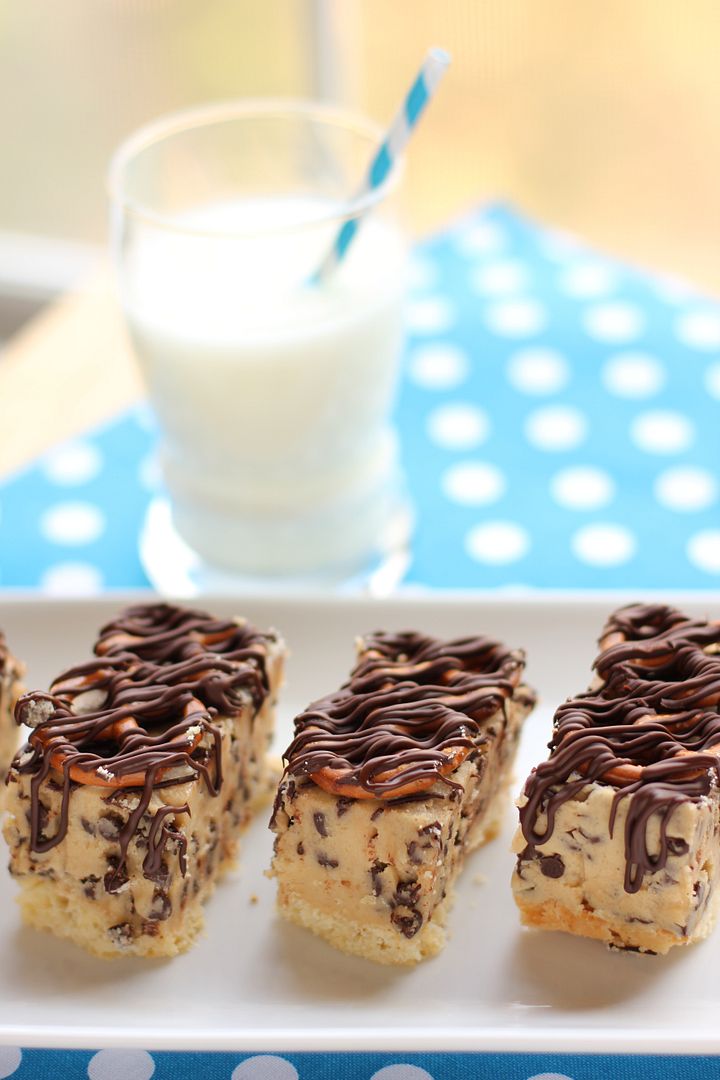
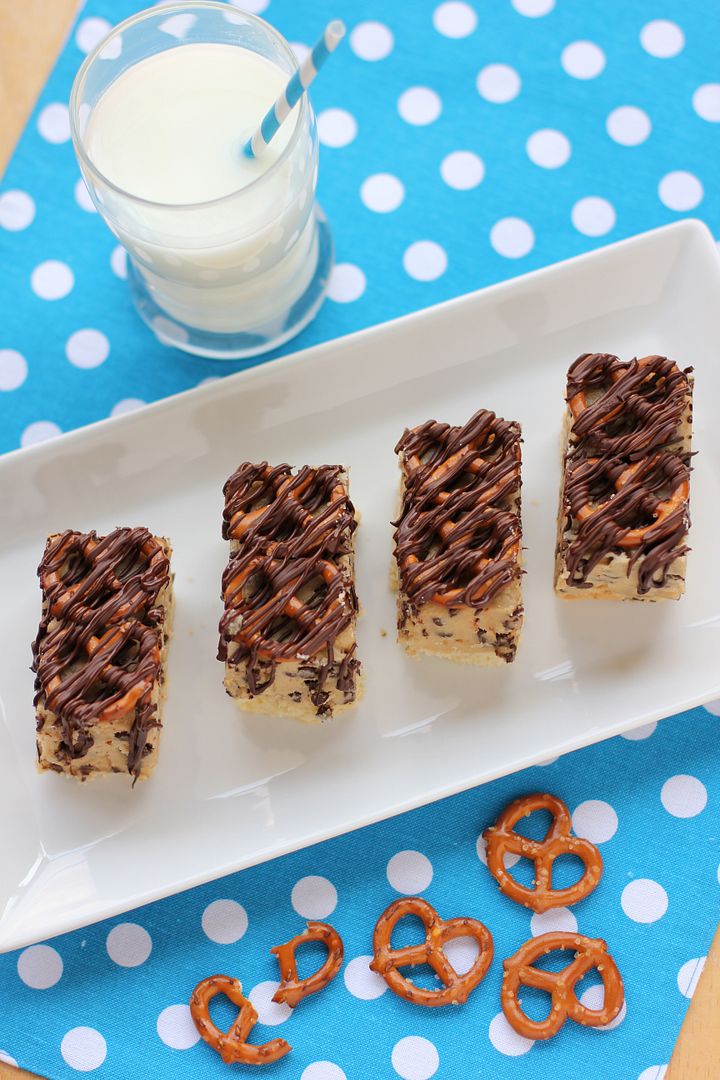
Little bits of happiness add up to joyful memories. These Brown Butter Cookie Dough Pretzel Bars were some little bits of happiness I contributed to a Sunday school Christmas party recently. They combine some of my favorite flavors — buttery shortbread, chocolate chip cookie dough, salty pretzels, and a chocolate drizzle just for fun. I decided they’d be easier to eat with half the cookie dough pictured here, so I cut it down in the recipe below, but feel free to make them either way.

And either way, send one or two my way. They’ve all been devoured over here and I kind of miss them.

Brown Butter Cookie Dough Pretzel Bars


Recipe by: Willow Bird Baking
Yield: about 30 squares

If you love sneaking bites of cookie dough, you’ll love these bars! Made with eggless cookie dough for safety, these bars combine some fantastic flavors: buttery shortbread, chocolate chip cookie dough, salty pretzels, and a drizzle of melted chocolate for good measure. I’ve adjusted the amount of cookie dough in the recipe below to make them the perfect finger food, so they’d be a hit at any party!

Crust Ingredients:
1/2 cup (1 stick) cold butter
1 cup all-purpose flour
1/4 cup confectioners’ sugar

Cookie Dough Ingredients:
1/2 cup butter, room temperature
4 ounces cream cheese, room temperature
3/4 cups light brown sugar, packed
1 cup all-purpose flour
1/2 teaspoon salt
1 tablespoon vanilla extract
1 cup semisweet chocolate chips (I like to use mini chips)
a few tablespoons water (as needed)

Other Ingredients:
about 30 pretzels
1/2 cup chocolate chips for assembly

Directions:
Note: I decided after making these bars that the cookie dough needed to be half as high to make them easier to eat and to better balance the flavors, so I’ve cut it in half in this recipe. That means your bars will only be half as high as in the photos. If you’d rather them be just like the photos, just double the cookie dough ingredients (not the crust or other ingredients).

Brown the butter for the cookie dough: Put the 1/2 cup of butter in a saucepan over medium heat. Melt it and heat until the butter begins to brown. Begin swirling so it will cook evenly. Brown it to a dark amber and then pour it out into a shallow dish. Stick this in the freezer to firm up a bit. When firm, set it out to soften slightly while you prepare your crust.

Make your crust: Preheat your oven to 350°F. Prepare a 9-inch square baking dish with a foil sling. To do this, tear off 4, 16-inch long pieces of aluminum foil and fold them in half. Situate two side-by-side in the pan, covering the bottom of the pan to the edge (they will overlap). Situate the other two strips in the same manner, but perpendicular to the first. The overhanging foil of the sling will make it easy to remove the cake from the pan after baking and cooling. Grease the sling with cooking spray or butter and flour.

In a big bowl using a pastry cutter (or in the bowl of a food processor), cut the cold butter into the flour and confectioners’ sugar. Press this mixture into your prepared pan using the bottom of a glass or something similar. Bake 20 minutes or until light brown. Let cool on wire rack.

Make your cookie dough: While the crust cools, in a medium bowl, cream together the softened brown butter and sugar. Add the cream cheese and whip the mixture until fluffy. Stir in the flour, salt, vanilla and chocolate chips. Add the water one tablespoon at a time stirring between each, until the dough reaches a consistency just a touch thinner than regular cookie dough (such that it will be thick but spreadable).

When your crust is completely cool, spoon cookie dough in big dollops around it and use an offset spatula to gently level it out into an even layer. Chill this while you prepare your chocolate.

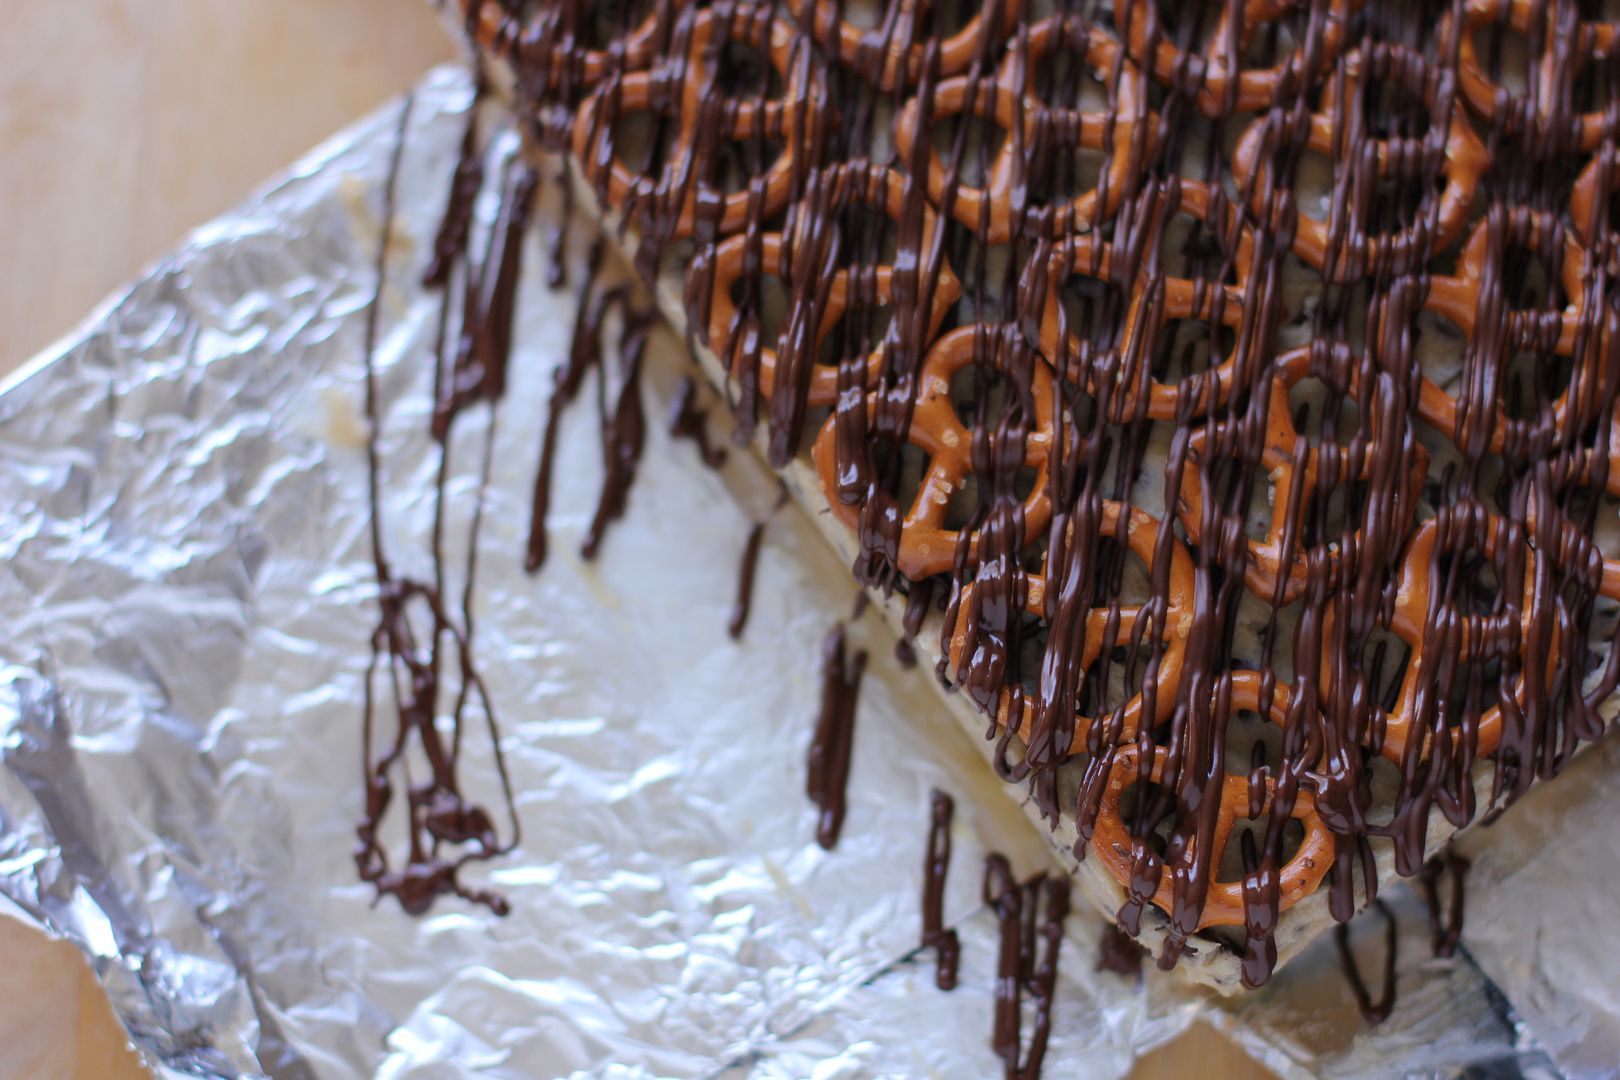
Assemble the bars: Melt chocolate chips according to package instructions in the microwave (usually you heat on half power for a minute and stir, followed by 15 second intervals until the chips are melted, stirring between each heating) and let them cool slightly before pouring the melted chocolate into a plastic zip bag and cutting off the tip of one corner. Drizzle chocolate across the surface of the cookie dough and use this as “glue” to lay your pretzels out in neat rows (working quickly so your chocolate doesn’t harden before you’ve finished laying your pretzels out).

Repeat the chocolate drizzle over the surface of the pretzels. Chill to set the chocolate, then use the ends of the foil sling to pull the bars out of the pan and then slice them to serve. I sliced them into two-pretzel bars for photos, but they’re so rich that one-pretzel squares are the serving size I’d recommend.

Cinnamon Sparkled Pastry Stix with Egg Nog Glaze

My caffeine tolerance has always been one of my favorite hidden talents (right up there with that funny thing I can do with my knuckle. Remind me to show you that sometime.)

The other day, however, I was bragging to Mike (again) about being able to chug a soda right before bed and I realized something. For years I’ve slurped my coke right up until bedtime. And for years I’ve had trouble getting enough sleep. Hrm.

Must be a coincidence.

My soda adoration is not a new thing. An entry in my baby book illustrates its rich history. When I was less than a year old, my mother records that I’d screech with joy upon receiving Coke and get obnoxious when it was taken away.

(We’ll generously assume that my mother was sleep deprived when she offered soda to a toddler. And gleefully recorded my reaction in my baby book.)

My love for cola has only grown. I love classic Coke, Coke in glass bottles, fountain Coke, Coke Zero, and a good diet Sunkist now and again. I love the tingly feeling of drinking soda after eating something sweet or just waking up. I love sodas on hot days and sodas on cold days. I love funky ginger sodas that burn my throat. I love diet orange creme soda. I can get a little carried away.

(The only thing I don’t love is Pepsi. Don’t even get me started on that mess. And sorry, Cheerwine tastes like cough syrup. Did I just get kicked out of the South? Maybe.)

My penchant for soda isn’t particularly healthy, but it’s served me well this week. I needed that caffeine boost. I don’t know about you, but I’ve had approximately eleventy-billion things to do in preparation for the holidays. Gift shopping, gift wrapping, baking, decorating, attending various gatherings, bathing the dog and trying not to kill her after a particularly messy incident involving puppy chow. You know. Typical Christmas preparations.

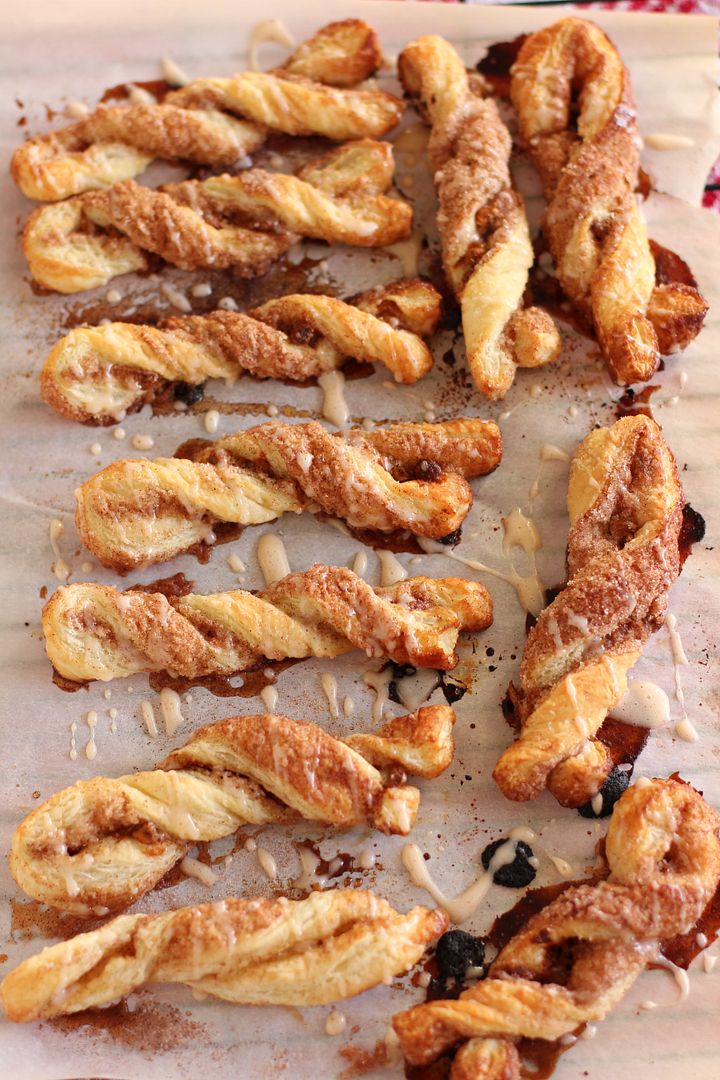
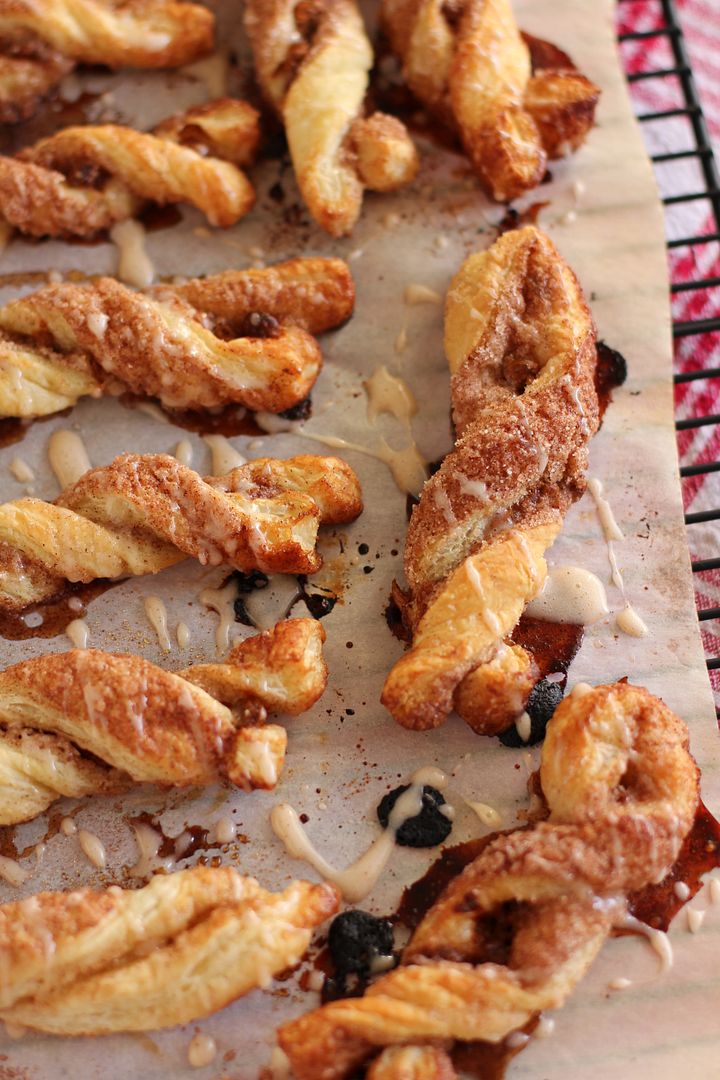
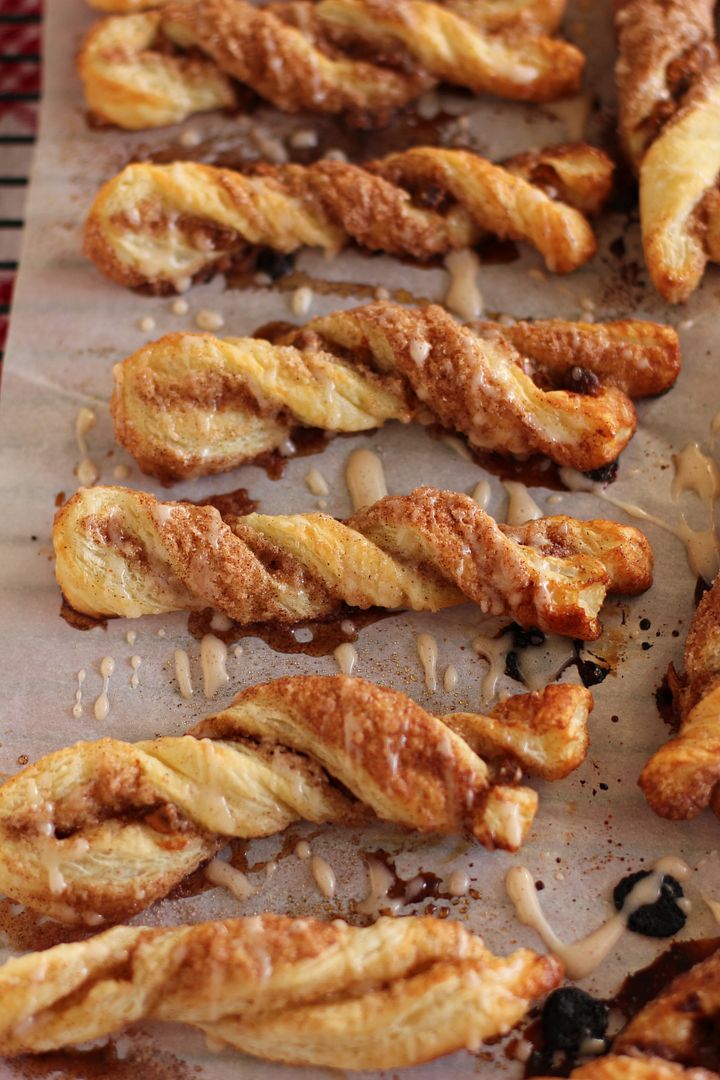
Good news if you’re a fellow headless chicken: These little Cinnamon Sparkled Pastry Stix are tasty, cute, and easy to make ahead. They can be prepped and refrigerated overnight to pop into the oven for a simple breakfast.

If you can plan a few days in advance to make your own homemade puff pastry, you should. They’re good either way, but I promise I’m not being a snob when I say there’s a pronounced difference between store-bought and homemade in this case! Once you have your pastry, it’s just a matter of brushing it with butter, sprinkling on some goodies, and making your twists. And then pouring yourself a celebratory glass of Coke, of course.

What’s been keeping you busiest this week?

Cinnamon Sparkled Pastry Stix with Egg Nog Glaze


Recipe by: Willow Bird Baking, with pastry inspired by King Arthur Flour and Gale Gand and glaze inspired by Betty Crocker
Yield: 20+ stix

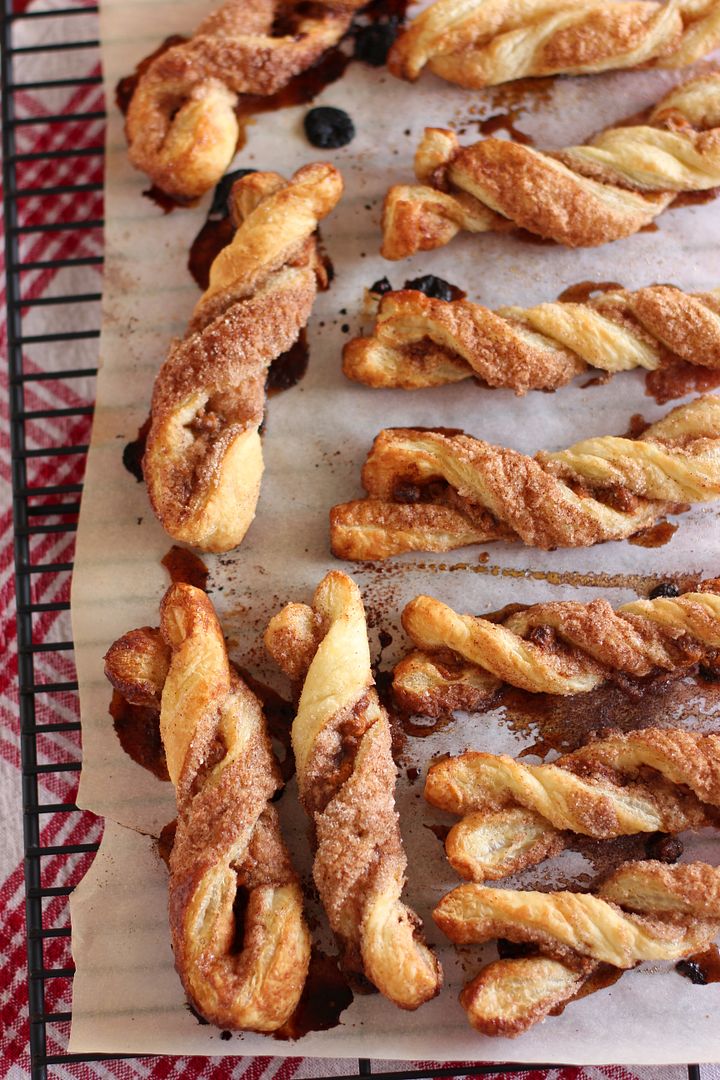
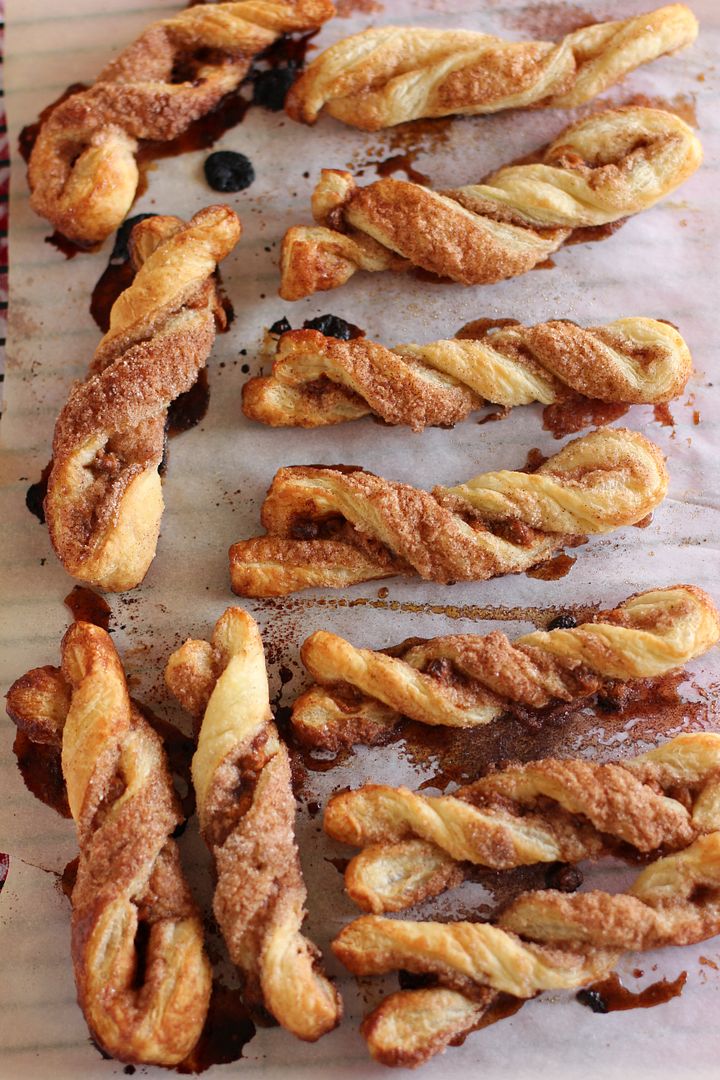
These puff pastry stix are sparkled with cinnamon, sugar, and buttery cinnamon chips. They’re simple to make ahead and chill in the fridge overnight. Pop them in the oven in the morning and drizzle on some sweet eggnog glaze for a quick, festive breakfast. If you can spare the time, make your own homemade puff pastry — it may seem like a lot of effort, but it really does pay off in flavor!

Stix Ingredients:
1 sheet puff pastry, thawed (or make homemade puff pastry!)
1/4 cup unsalted butter, melted
3/4 cup sugar
2 1/2 teaspoons cinnamon
1/4 cup cinnamon chips (you can replace these with more cinnamon-sugar if you don’t have them around)
2 tablespoons milk

Egg Nog Glaze Ingredients:
1/2 cup powdered sugar
2 tablespoons eggnog
cinnamon, nutmeg to taste

Directions:
NOTE: If you’re making homemade puff pastry from scratch, you’ll want to start that process 3 days before your meal.

1 day in advance: Mix sugar and cinnamon in a bowl. On a silicone mat or lightly floured surface, roll your puff pastry sheet out to a 10″ x 15″ rectangle. Brush half of it (a 5″ x 15″ strip) with melted butter and sprinkle on cinnamon chips and half of the cinnamon-sugar mixture. Fold the unfilled side of the pastry over and press to seal around the edges. Brush the top of the now 5″ x 15″ rectangle with the milk and sprinkle on the rest of the cinnamon and sugar.

With a pizza cutter (spray it a little with vegetable spray if it sticks to the dough), cut the square into 1/2″ stix (they’ll be 5″ long). Press them a little to ensure cinnamon chips are snug, but don’t fret when some inevitably fall out. Take each strip by both ends and gently, carefully twist like you’re wringing out a rag. Scoop up cinnamon and sugar that has fallen off the twists and resprinkle them. Place them on a parchment lined baking sheet and cover with plastic wrap. Stick them in the fridge overnight (you could also bake immediately).

The morning of: Take baking sheet out of the fridge and let it sit at room temperature while you preheat your oven to 400 degrees F. Remove plastic wrap and bake stix about 20 minutes, or until puffed and golden brown. Some of the cinnamon chips might leak out, but don’t worry about it. While the stix cool slightly, mix up your glaze. In a small bowl, mix all glaze ingredients until smooth. Add more eggnog if not thin enough to drizzle, tasting as you go. Drizzle over slightly warm pastry stix and serve.

Coca-Cola didn’t sponsor this post, but they probably should’ve, right?

If you liked this post, please:
Subscribe to Willow Bird Baking
Follow Willow Bird Baking on Twitter
Follow Willow Bird Baking on Facebook
Give this post a thumbs up on StumbleUpon
Pin It


Shareother ways to share this post with friends

Gingersnap Cheesecake Stuffed Snickerdoodles

Things you should know:

1. A guy doesn’t make you a sweater with working Christmas lights unless he kinda likes you. He just doesn’t.

2.You don’t have to sing well as long as you sing loudly and enthusiastically. The people you live with may pretend to disagree with this statement, but they’re just trying to hoard the fun. Disregard them.

3. A dog will never win an Ugly Christmas Sweater competition because any sweater becomes 100% adorable when placed on a dog.

4. Serving hot chocolate to 75 middle school students is a manageable task until the bottom falls out of one of the cups. Then things get dicey.

5. Trader Joe’s cocoa truffles are pure insanity. I just ate approximately 8 billion of them and I can’t even muster up some shame.

6. Mariah Carey’s All I Want For Christmas is You is the best Christmas song ever. Except for the ones about Jesus obviously, because even Mariah cannot compete.

7. Despite vivid memories of walking through Washington D.C. in the freezing rain with holey (not to be confused with holy, which would be kind of cool) shoes a few years ago, I cannot convince myself to purchase shoes more regularly. However, when my shoes basically disintegrated recently, I did finally visit the shoe store. I have a new pair of flats and some fluffy bootlike thingies. And warmer feet.

8. Peppermint is gross. I’m sorry that I’m not baking you crazies all sorts of peppermint things, but . . . I just can’t get into that mess. It’s like straight up eating toothpaste. Ew.

9. There is nothing sweeter than a freshly bathed, blow-dried pup (after they’ve done the whole run-around-the-house-like-a-banshee thing and calmed down, of course). They’re almost sweet enough to make you forget about the ginormous mess they created that made the bath necessary. Almost.

10. Christmas is the perfect excuse to eat loads of cookies, as if you needed one.


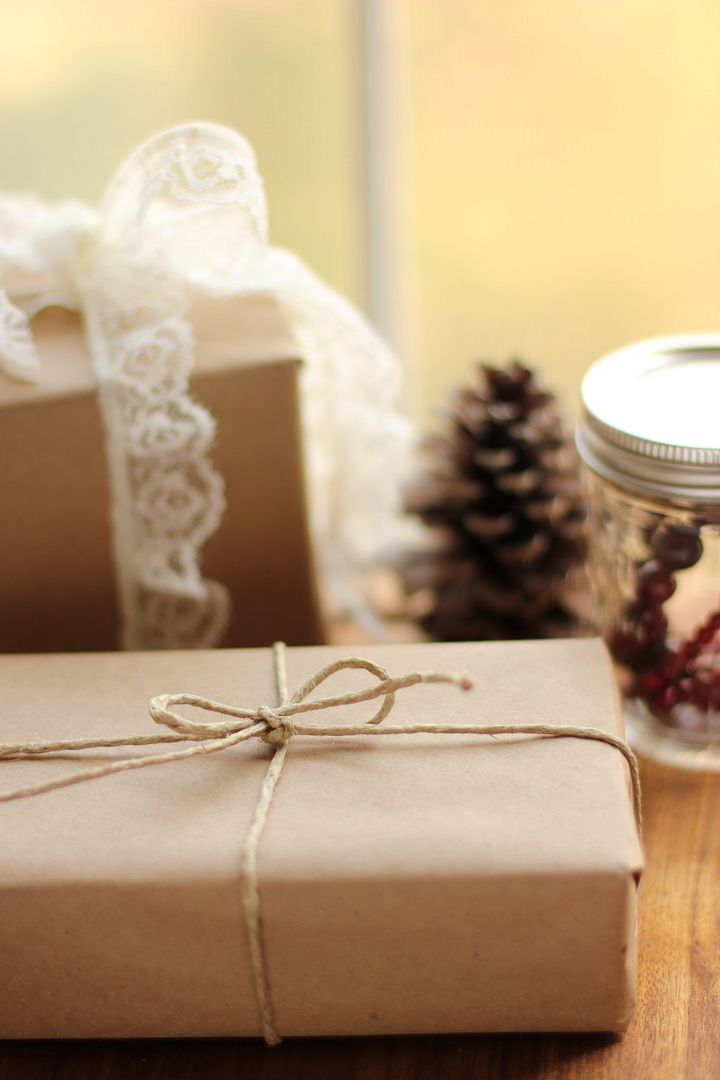
11. Present wrapping tip: plain brown paper and some hemp string or lace makes for a pretty parcel.
You can even reuse some old paper grocery bags.

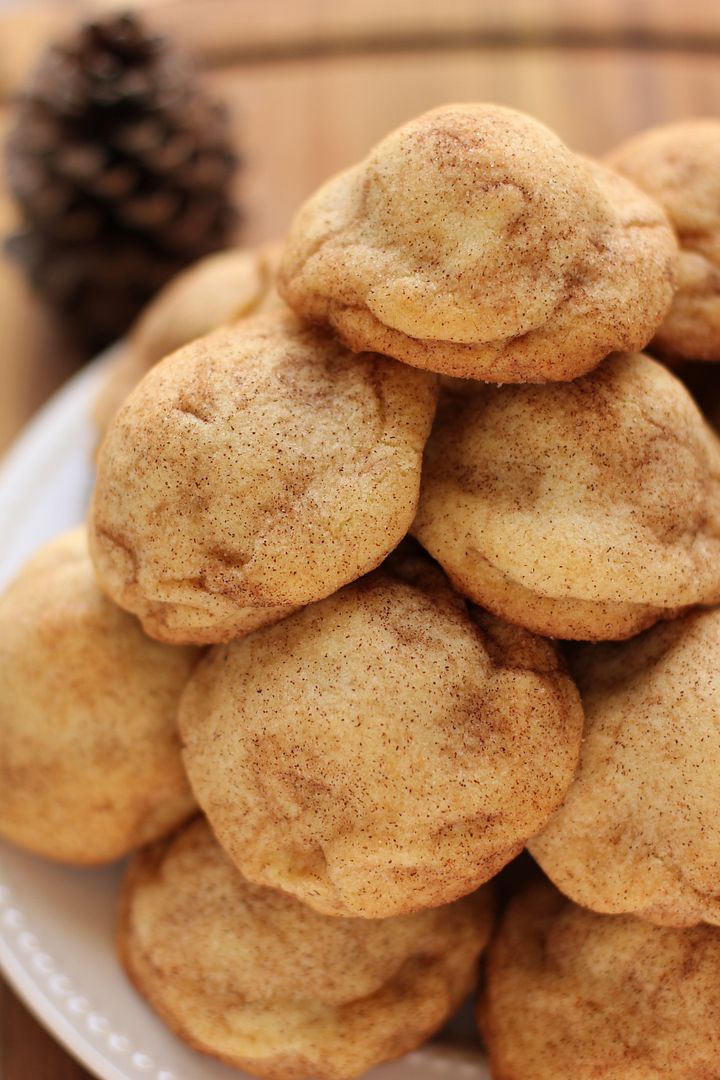
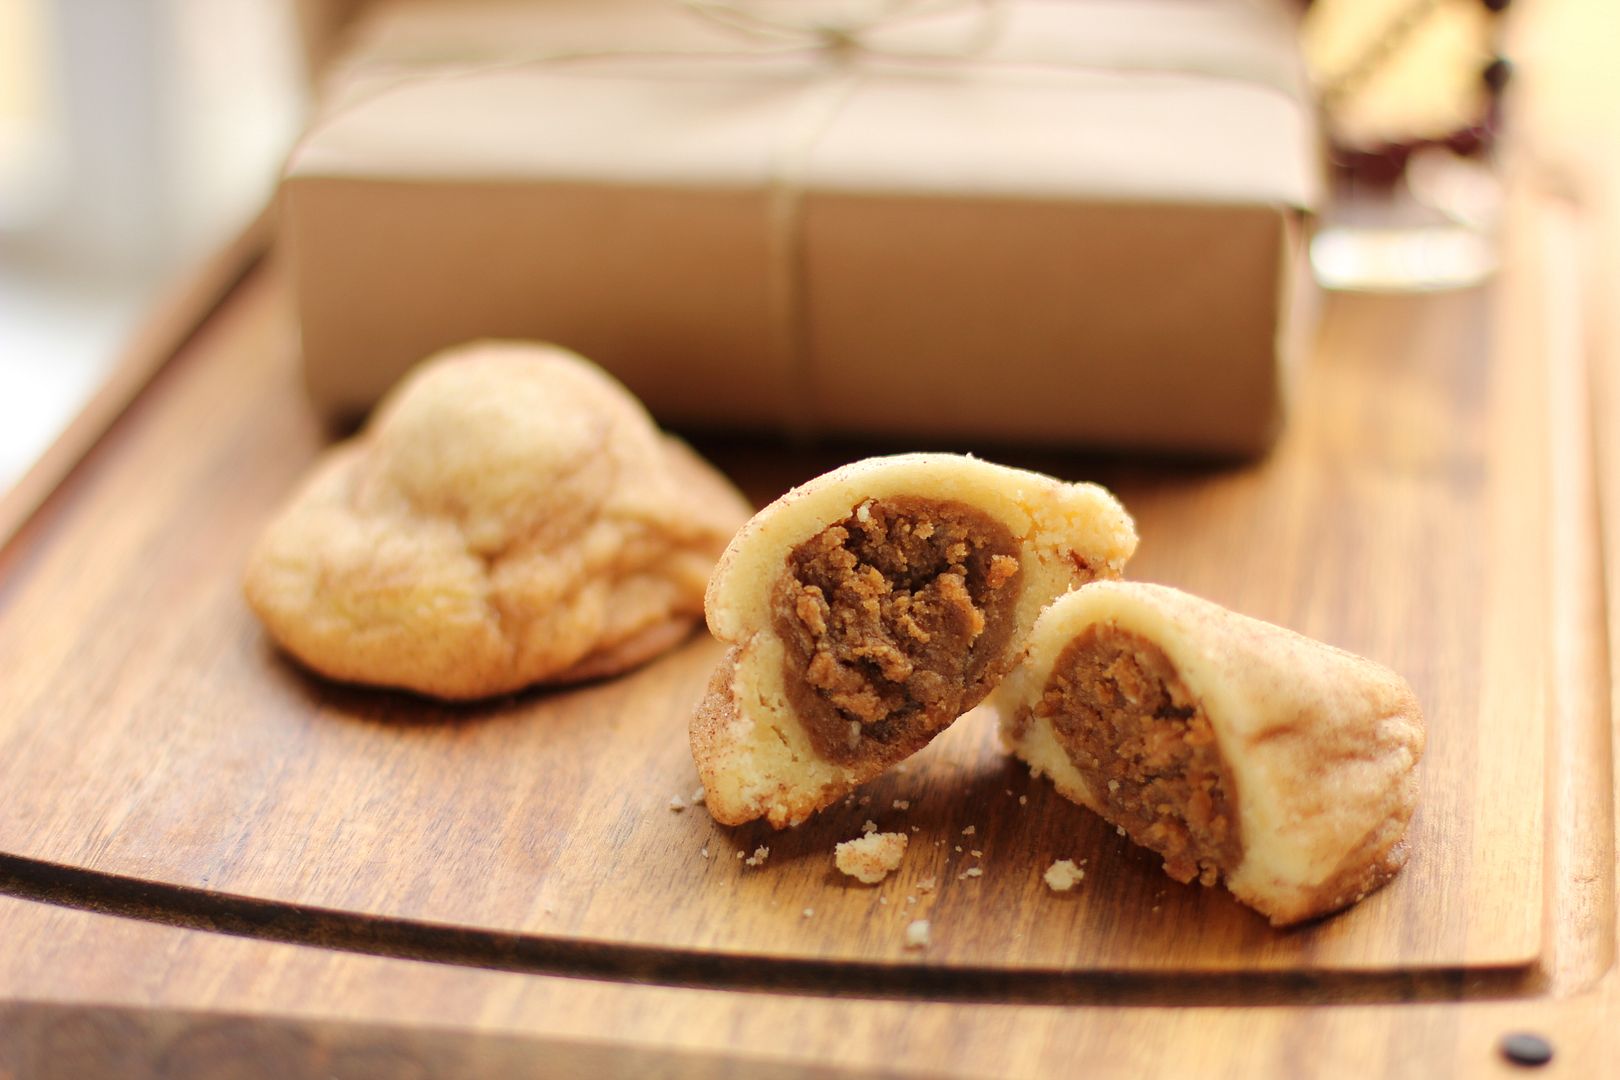
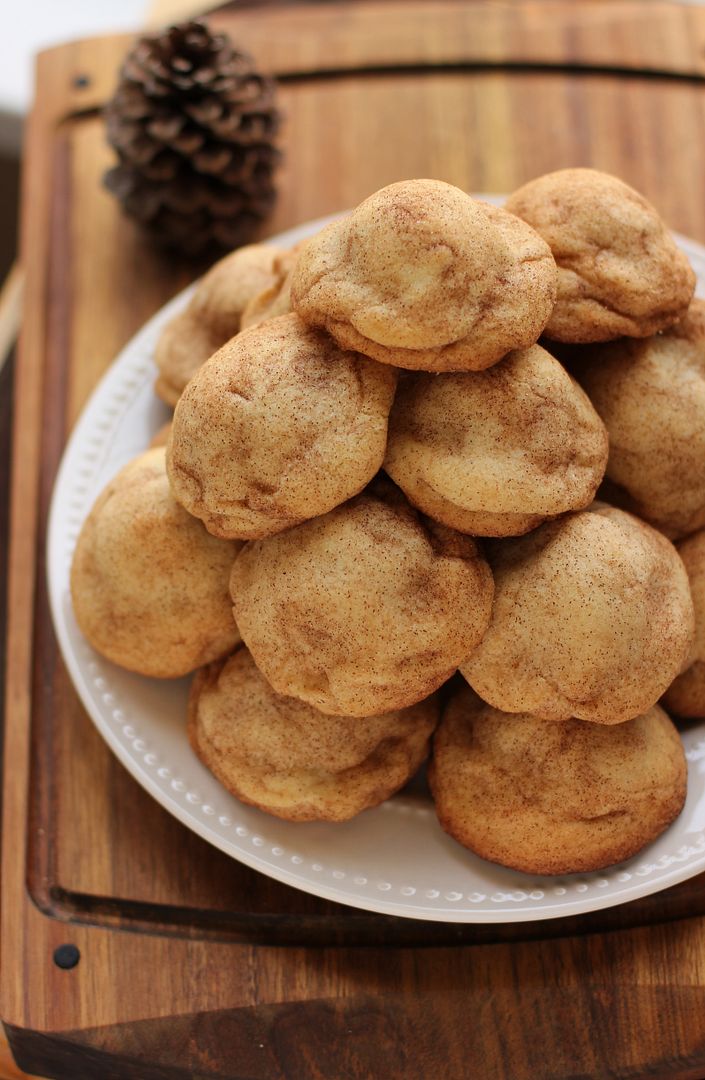
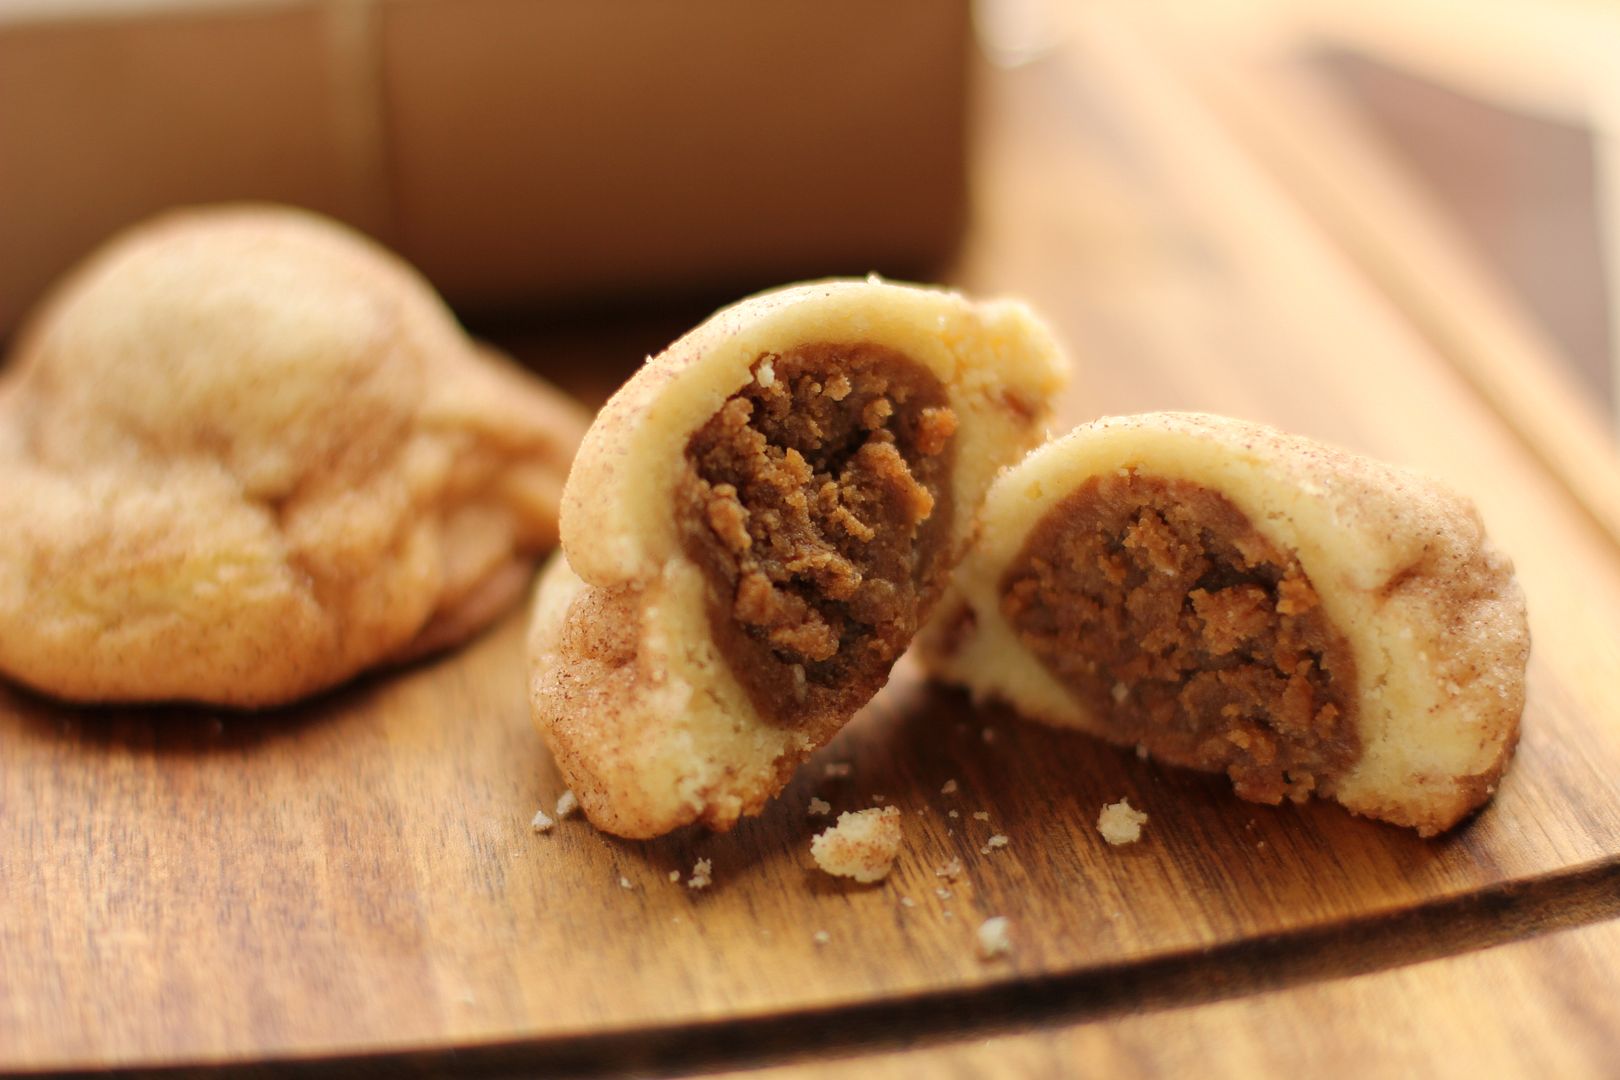
These Gingersnap Cheesecake Stuffed Snickerdoodles were modeled after my Pumpkin Cheesecake Stuffed Snickerdoodles. They were so delicious that I had to make a Christmas version! The dense gingersnap middles are sweet, spicy, and delicious inside the pillowy snickerdoodles.

These cookies are insane on their own, but I may have heated up a couple and eaten them over vanilla ice cream, and it may have been amazing. I think you should try it and see for yourself.

Gingersnap Cheesecake Stuffed Snickerdoodles


Recipe by: Willow Bird Baking, using cookies adapted from Sunset, 1998 via Bakergirl
Yield: 30-35 large cookies

Delicious gingersnap cheesecake truffles are enveloped in a pillowy snickerdoodle. These cookies are filled with holiday cheer and perfect for a cookie swap (or for hoarding and devouring beside the Christmas tree). Heat them before serving for maximum enjoyment, and I won’t judge you if you decide to serve them over a bowl of vanilla ice cream.

Snickerdoodle Ingredients:
1 cup butter, softened
1 cup vegetable oil
3/4 cup granulated sugar
1 cup powdered sugar
2 large eggs
4 1/4 cups all-purpose flour
1 teaspoon baking soda
1 teaspoon cream of tartar
1/2 teaspoon salt
1/2 cup granulated sugar + 1 tablespoon cinnamon for rolling cookies

Gingersnap Cheesecake Filling Ingredients:
2 cups white chocolate chips (about 10 ounces)
3 cups finely ground gingersnaps
1 teaspoon ground ginger
1 teaspoon cinnamon
1/2 teaspoon salt
1/4 teaspoon ground cloves
4 tablespoons powdered sugar
1 (8-ounce) package cream cheese, softened

Directions:
Make the gingersnap cheesecake filling: Melt the white chocolate chips in the microwave on half power. Start with 1 minute and stir. Continue to heat the chocolate in 15 second intervals, stirring well after each to aid the melting, until it is smooth (be careful not to overheat). Transfer this to a shallow pan to cool until just warm (but not until hardened).

In the meantime, mix gingersnap crumbs, confectioners’ sugar, ginger, cinnamon, salt, cloves, and cream cheese together. Add the white chocolate and mix well until thoroughly combined. Transfer the mixture to the fridge while you make the snickerdoodle dough.

Make snickerdoodle dough: Mix together the butter, vegetable oil, granulated sugar, powdered sugar, and eggs in a large bowl. In a separate large bowl, whisk together the flour, baking soda, cream of tartar, and salt. Add the flour mixture into the butter mixture in 3-4 additions, mixing until just combined between each. Place the finished dough in the refrigerator to chill. While the cookie dough chills, roll gingersnap mixture into balls and place the balls on a wax paper lined baking sheet. Cover, and chill until firm (about 1 hour).

In a small bowl, whisk together 1/2 cup granulated sugar and cinnamon. Preheat oven to 375 degrees F. Take a few gingersnap balls out of the fridge at a time to work in small batches (so they stay firm). Scoop out about a tablespoon of chilled cookie dough. Press a frozen gingersnap cheesecake ball into the center, then cover with another bit of dough, working the dough around the whole ball. Roll the ball in cinnamon-sugar (which will make the soft dough easier to handle, so you can firm up the shape here) and place it on a greased baking sheet. Repeat the process, placing cookies 2-3 inches apart. If cookie dough gets too soft, re-chill it for a bit and continue working. I made sure to stick it back in the fridge during any downtime (like when I had some cookies in the oven).

Bake for 12-15 minutes, or until edges are slightly browned. Let the cookies cool on the pan for a few minutes before removing them to a cooling rack to cool completely. Store in an airtight container in the fridge, reheating for 30 seconds to a minute before eating. Serve a few hot cookies over vanilla ice cream for a special treat!

If you liked this post, please:
Subscribe to Willow Bird Baking
Follow Willow Bird Baking on Twitter
Follow Willow Bird Baking on Facebook
Give this post a thumbs up on StumbleUpon
Pin It


Shareother ways to share this post with friends

A Dozen Pumpkin Recipes from Willow Bird Baking

My pumpkin craze is far from over, y’all. Just a fair warning.

The pumpkin shortage over the past two seasons must have really scarred me, because it seems like every time I pass a display I pick up a couple more cans. I don’t mind; my pumpkin stash has come in handy plenty o’ times. Here are a few of my favorite pumpkin recipes, hand-picked to be perfect for your Thanksgiving meal. Enjoy!

1. Jack O’ Lantern Whoopie Pies
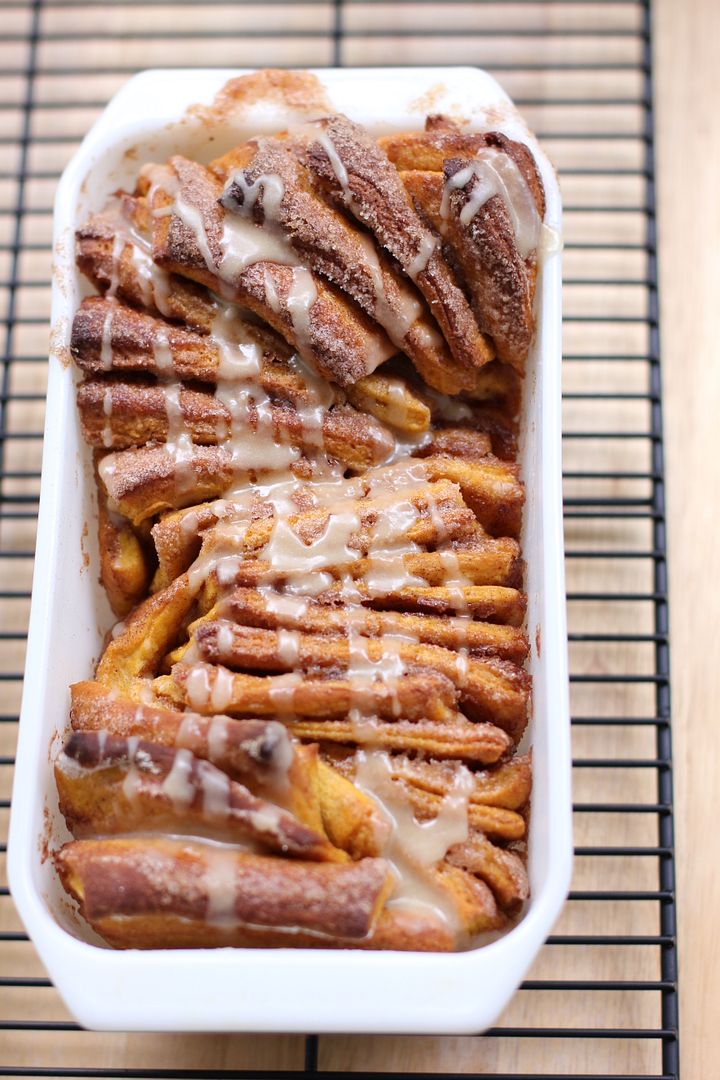
2. Pumpkin Spice Pull Apart Bread with Butter Rum Glaze
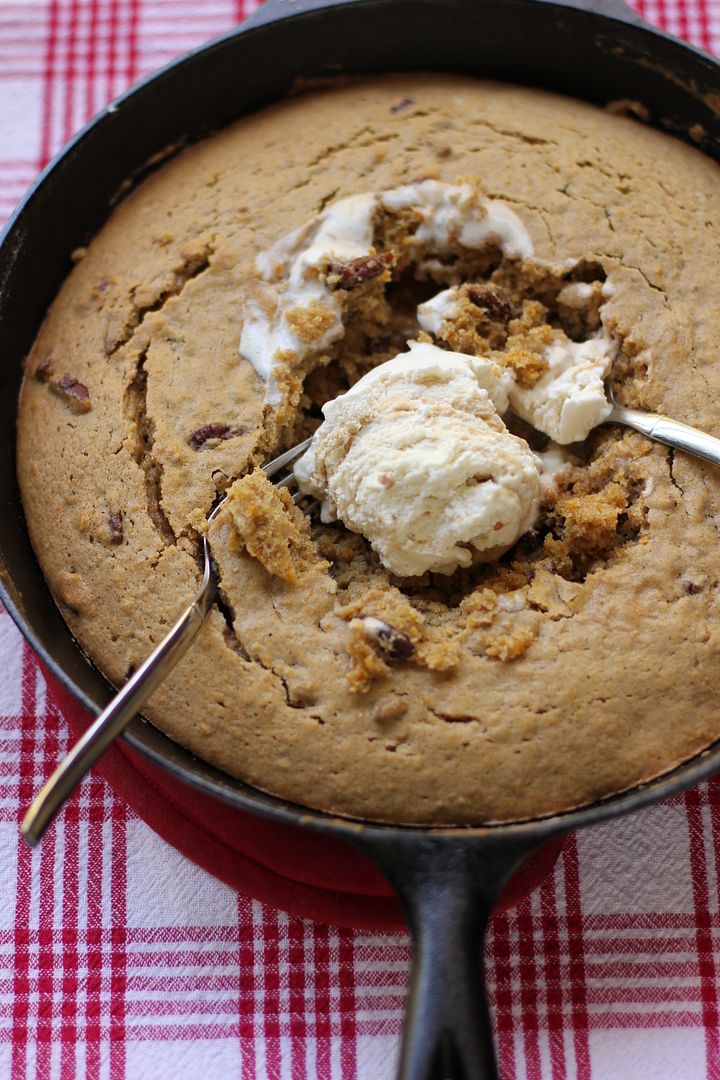
3. One-Skillet Gooey Pumpkin Cookie Cake

4. Mini Pumpkin Pies
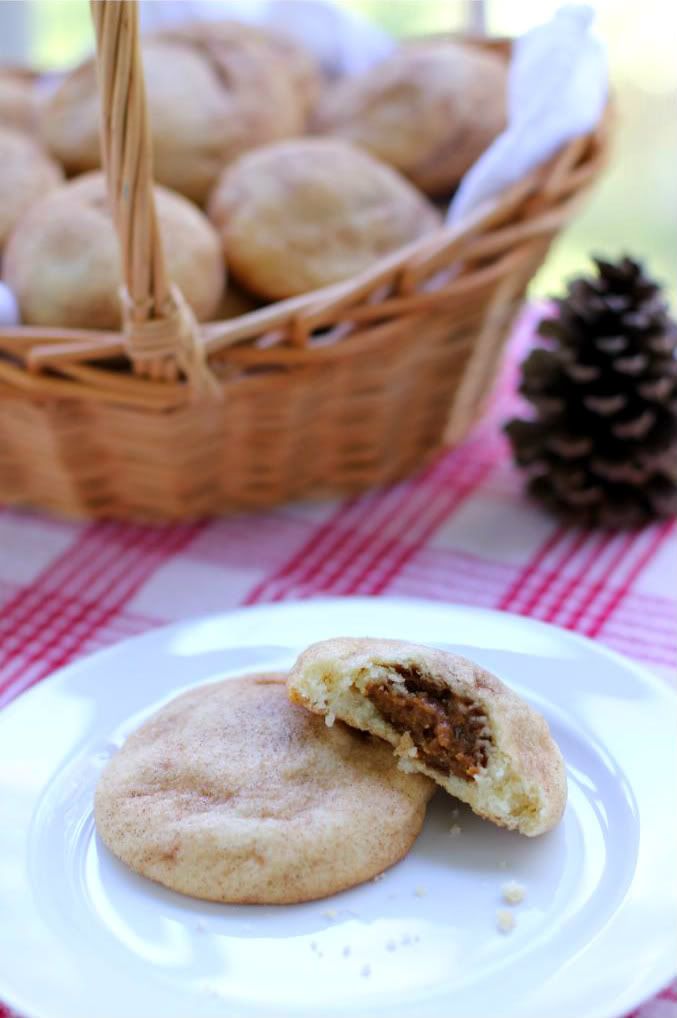
5. Pumpkin Cheesecake Stuffed Snickerdoodles
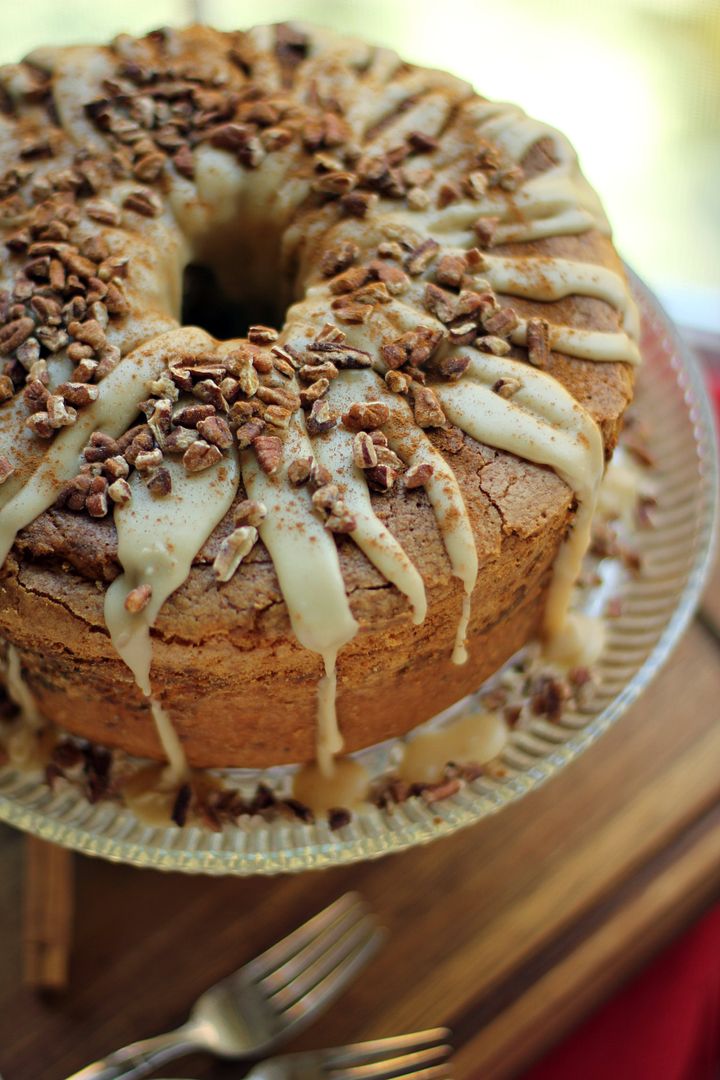
6. Pumpkin Streusel Swirled Cream Cheese Pound Cake

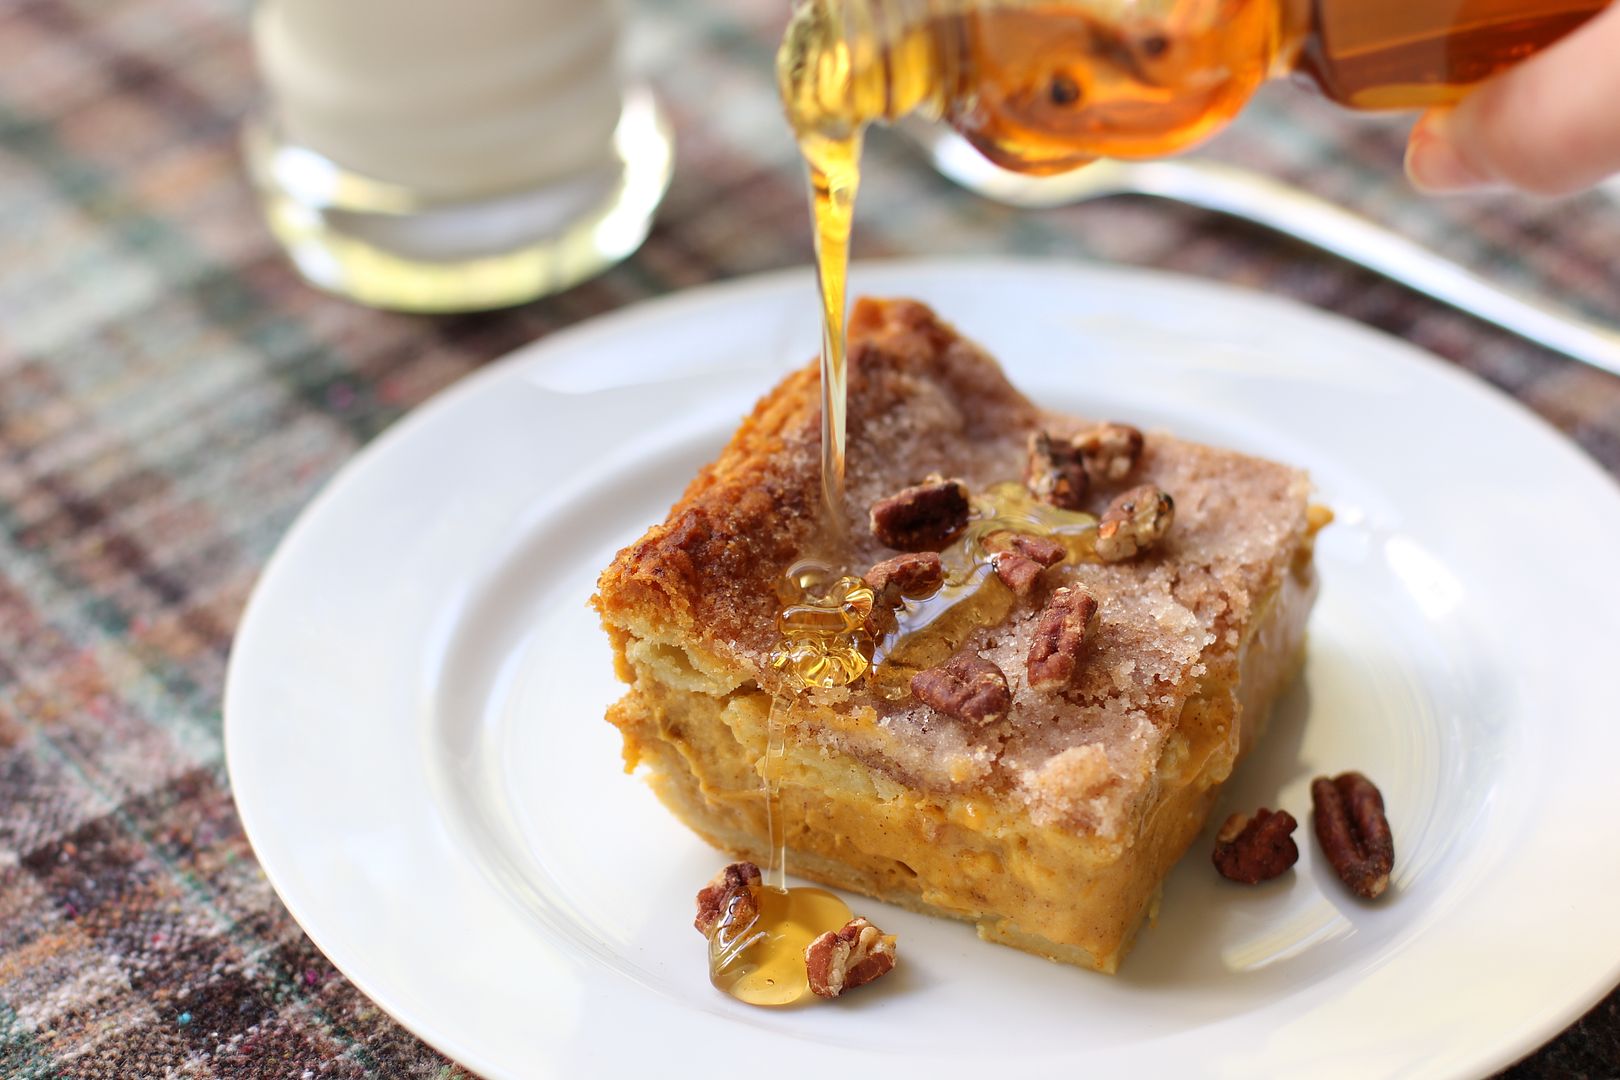
7. Pumpkin Cheesecake Bread Pudding
8. Vegan Pumpkin Nut Bread
9. Easy Sopapilla Pumpkin Cheesecake Bars

10. Chocolate Pumpkin Truffles
11. Pumpkin Pecan Streusel Breakfast Braid
12. Browned Butter Pumpkin Croquemcake with White Chocolate Chai Mousse

…and you guys know there’s more where that came from. Pumpkin and I are BFFs.

If you liked this post, please:
Subscribe to Willow Bird Baking
Follow Willow Bird Baking on Twitter
Follow Willow Bird Baking on Facebook
Give this post a thumbs up on StumbleUpon
Pin It


ShareOther ways to share this post with friends!

1 4 5 6 7 8 10