Month: March 2012

Sweet Tater & Chorizo Hand Tarts

In light of Willow Bird Baking’s Cooking Hard Stuff Challenge, I’ll be sharing some tips for tackling new or challenging recipes throughout the month of March. If you haven’t signed on for the challenge yet, make sure you read about it and join in the fun — there are still a few days left!

Cooking Hard Stuff Tip #3: Make a schedule.


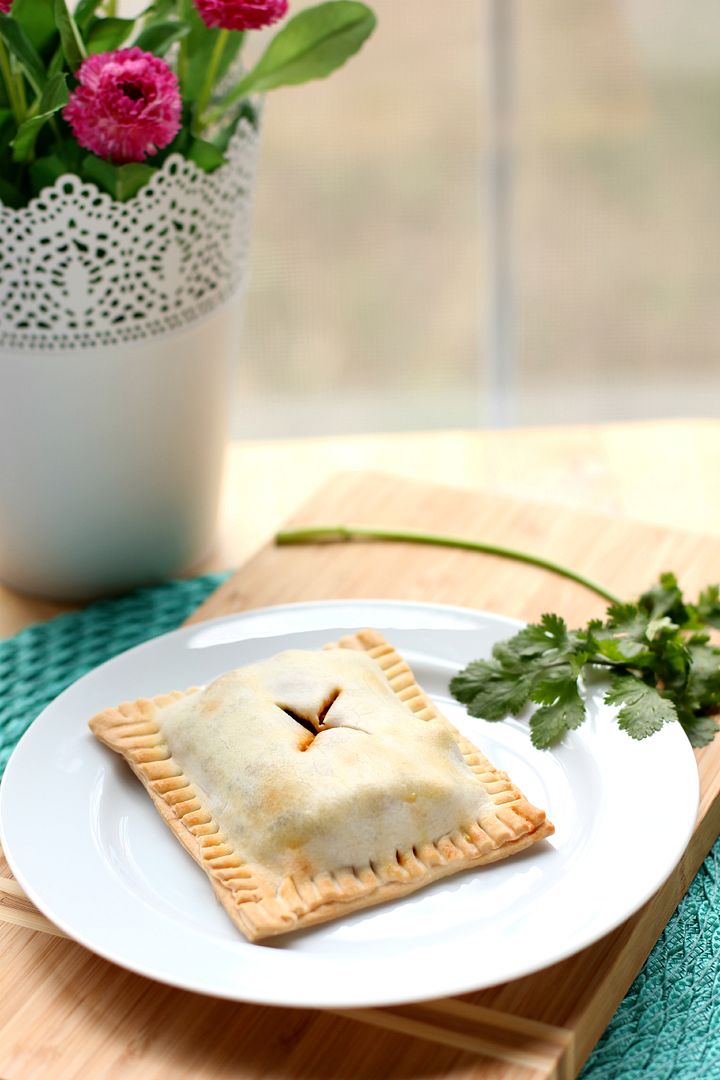
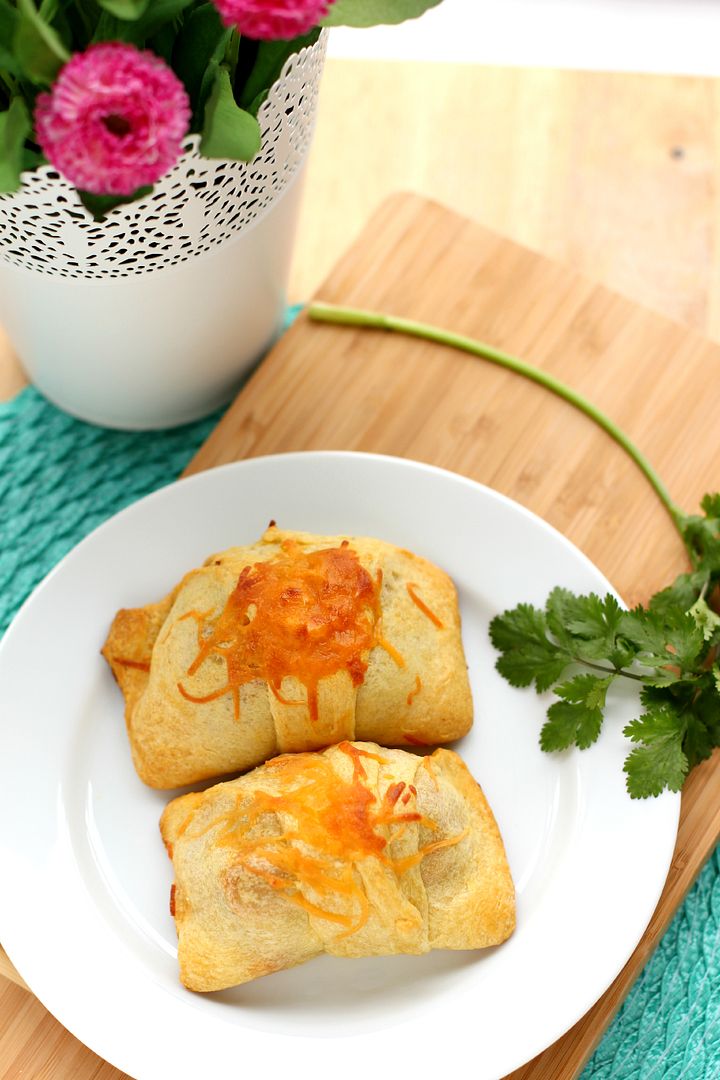
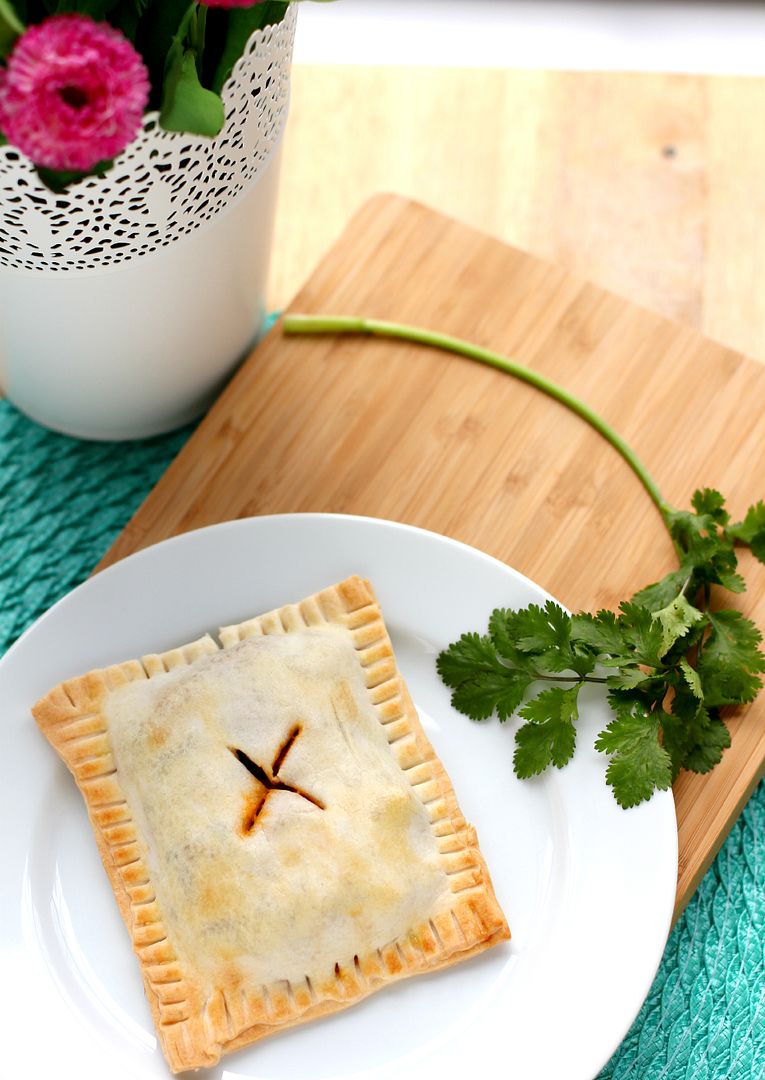
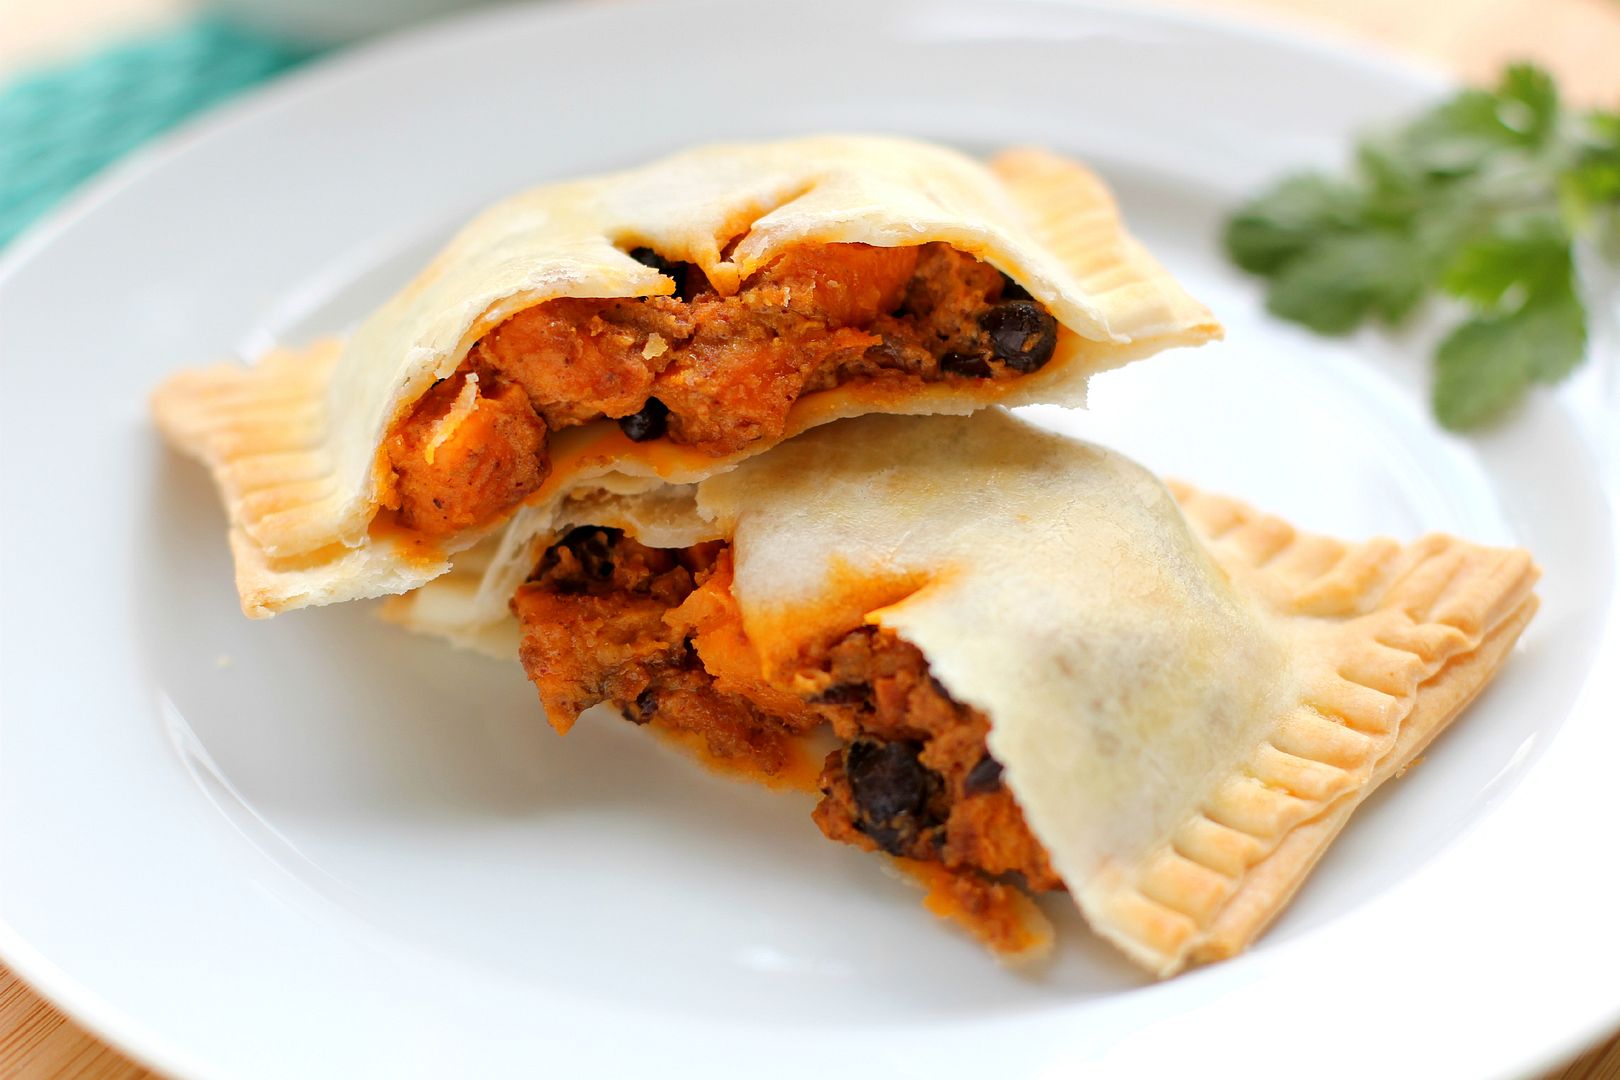
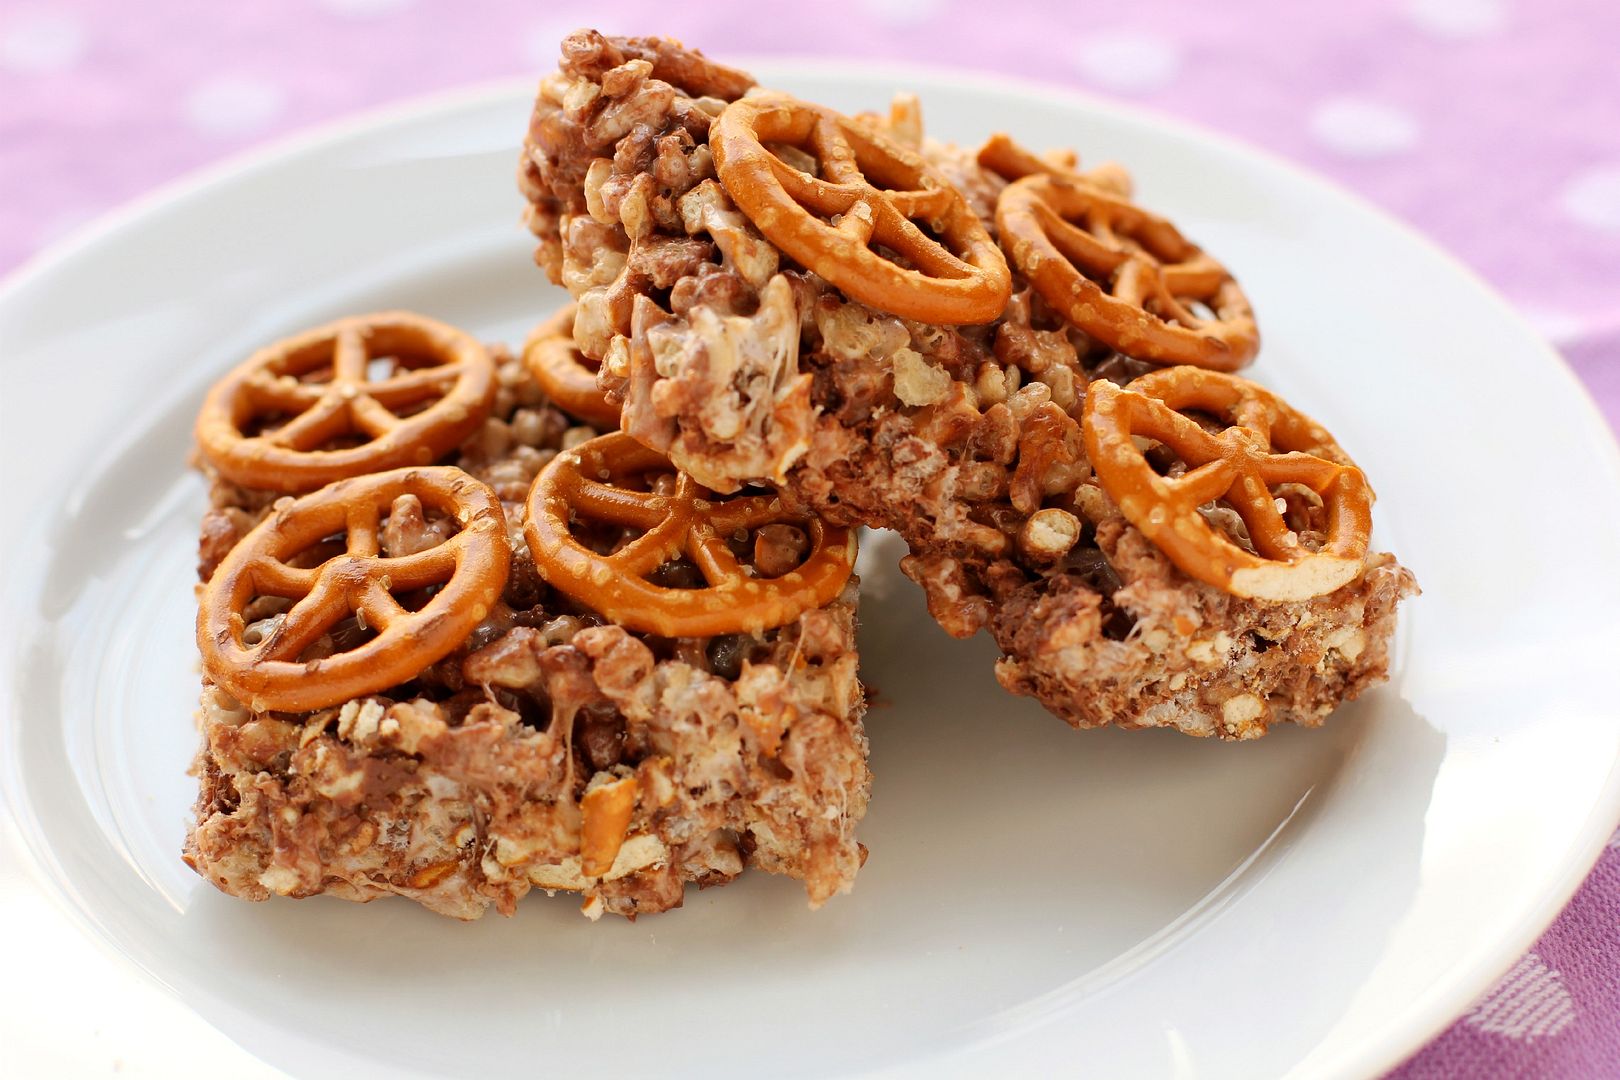
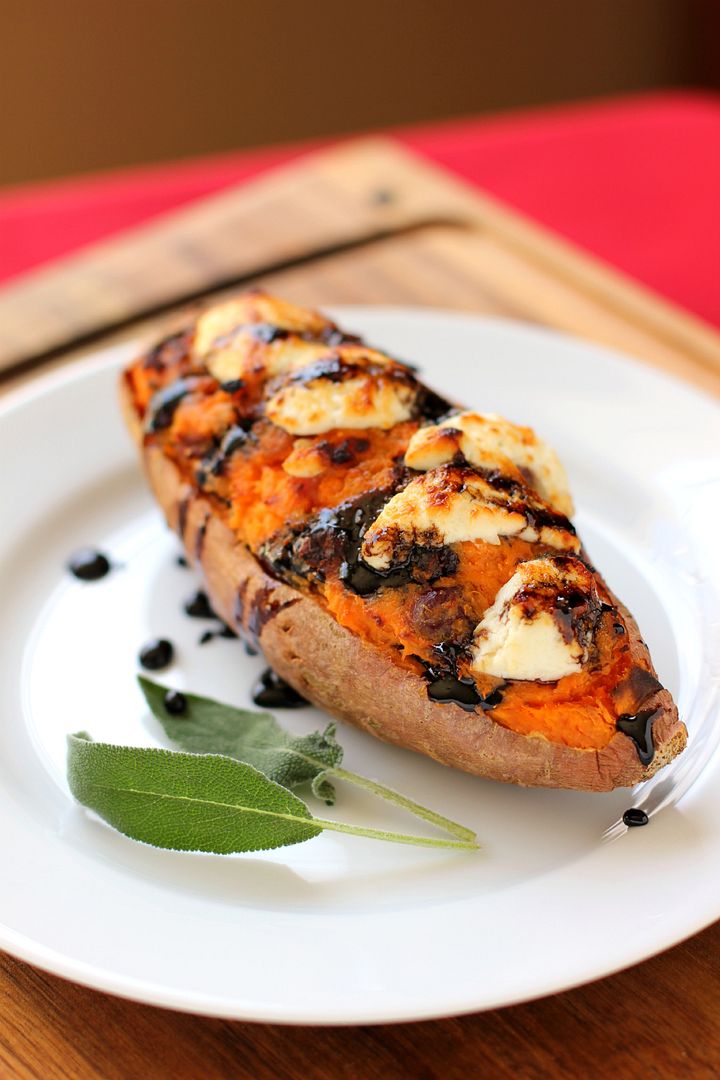
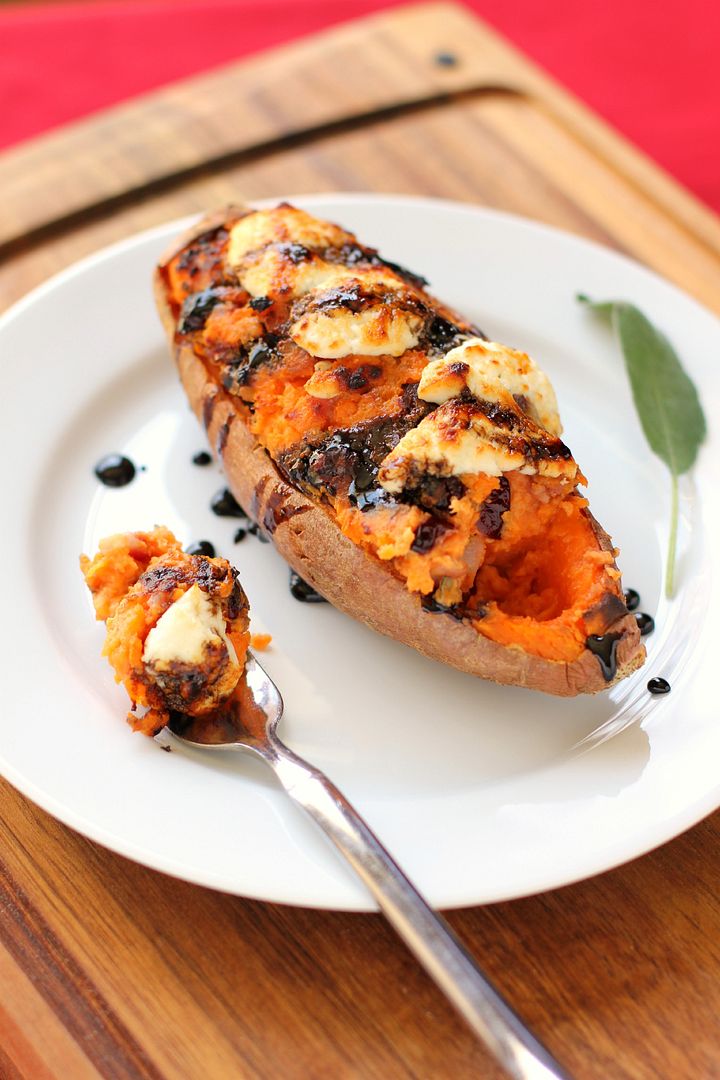
two sweet tater hand tart options

In college, my personality type changed. According to the Meyers-Briggs Personality Type Indicator, I went from an INFP to an INFJ. That tells you all sorts of things about me (maybe too much), but that little switch from P to J also tells you a lot about Davidson College, where I went to school. Davidson can make a P into a J in one semester flat (and the café can make a good PB&J, too, while we’re throwing letters around.)

P means “perceiving,” which means you make decisions and act while taking in information. P people present themselves as more spontaneous, since they like to continually take in new information and adapt to it. J people are “judging” (not judgmental!), which means they prefer to take in information and make a decision before acting. These people present themselves as more rigid and organized. They might be schedulers, for instance.

Davidson — where there was literally more work than there was time to complete it and get any reasonable amount of sleep — taught me to be a scheduler. Turns out that comes in handy when Cooking Hard Stuff.

Sometimes hard recipes take forever. That’s not a bad thing; besides the fact that time in the kitchen is edifying and therapeutic, the results of these recipes are often worth the extra effort. Croissants and puff pastry take two days to prepare. Yeast bread often has to rise for several hours. Mousses and cheesecakes sometimes have to chill overnight. Good things come to those who can stand to wait.

The problem for me is usually not being patient, but figuring out how and when to wait. For instance, I probably should not start a recipe late at night if it has to chill for three hours before the next step. Nevertheless, countless times I’ve found myself awake in the wee hours of the morning or canceling plans to babysit something in the oven or fridge. My solution to this — and one I wholeheartedly recommend to anyone Cooking Hard Stuff — is to make a list or schedule.

Making an ordered to-do list of prep work allows you to spend less time running around deciding what task to complete next and more time efficiently enjoying each process. If a recipe includes extensive resting, chilling, or baking periods, you can also pencil approximate times you’ll complete each step onto your list. Finally, if a recipe can be broken up over several days (many of the fancy cheesecakes on Willow Bird Baking can be broken up over three days), break down what you’ll be doing on which day so that you can enjoy yourself.

You’re probably going to make fun of me, but since I’m a visual person, I actually draw my schedules out in blocks. Here’s an example. The blocks help me see, relatively, how long each step will take, and when I might have time to walk the dog, jump in the shower, or go get lunch with a friend.

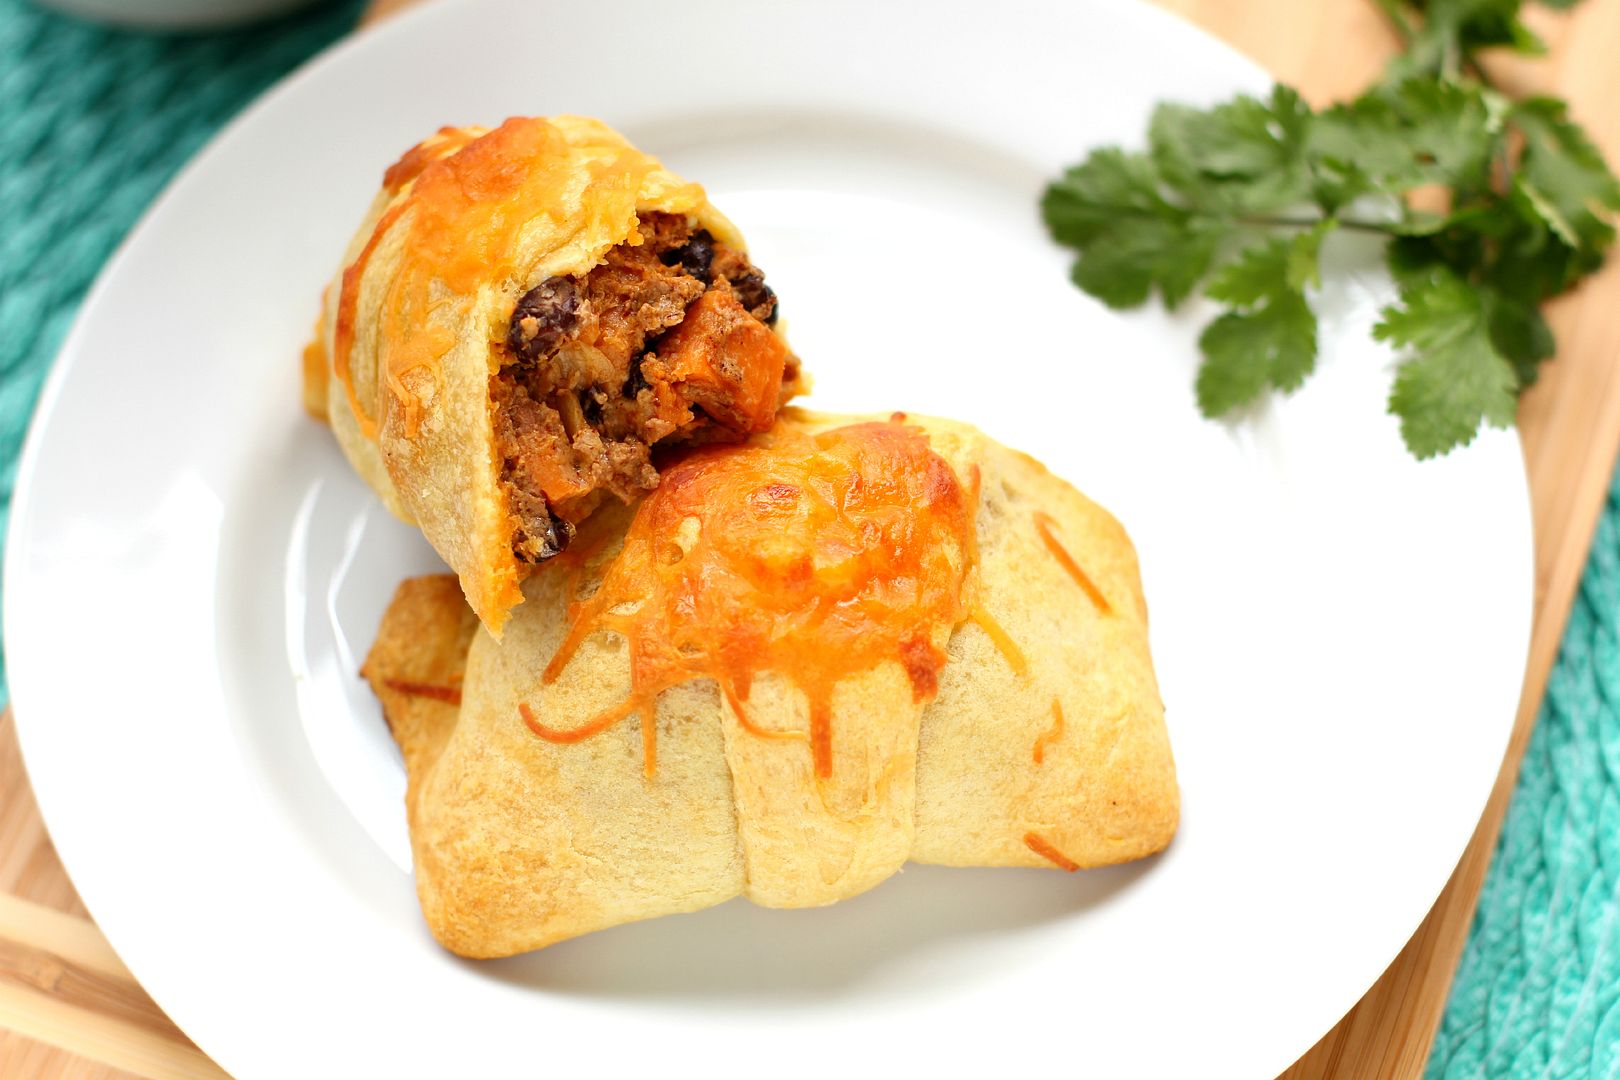
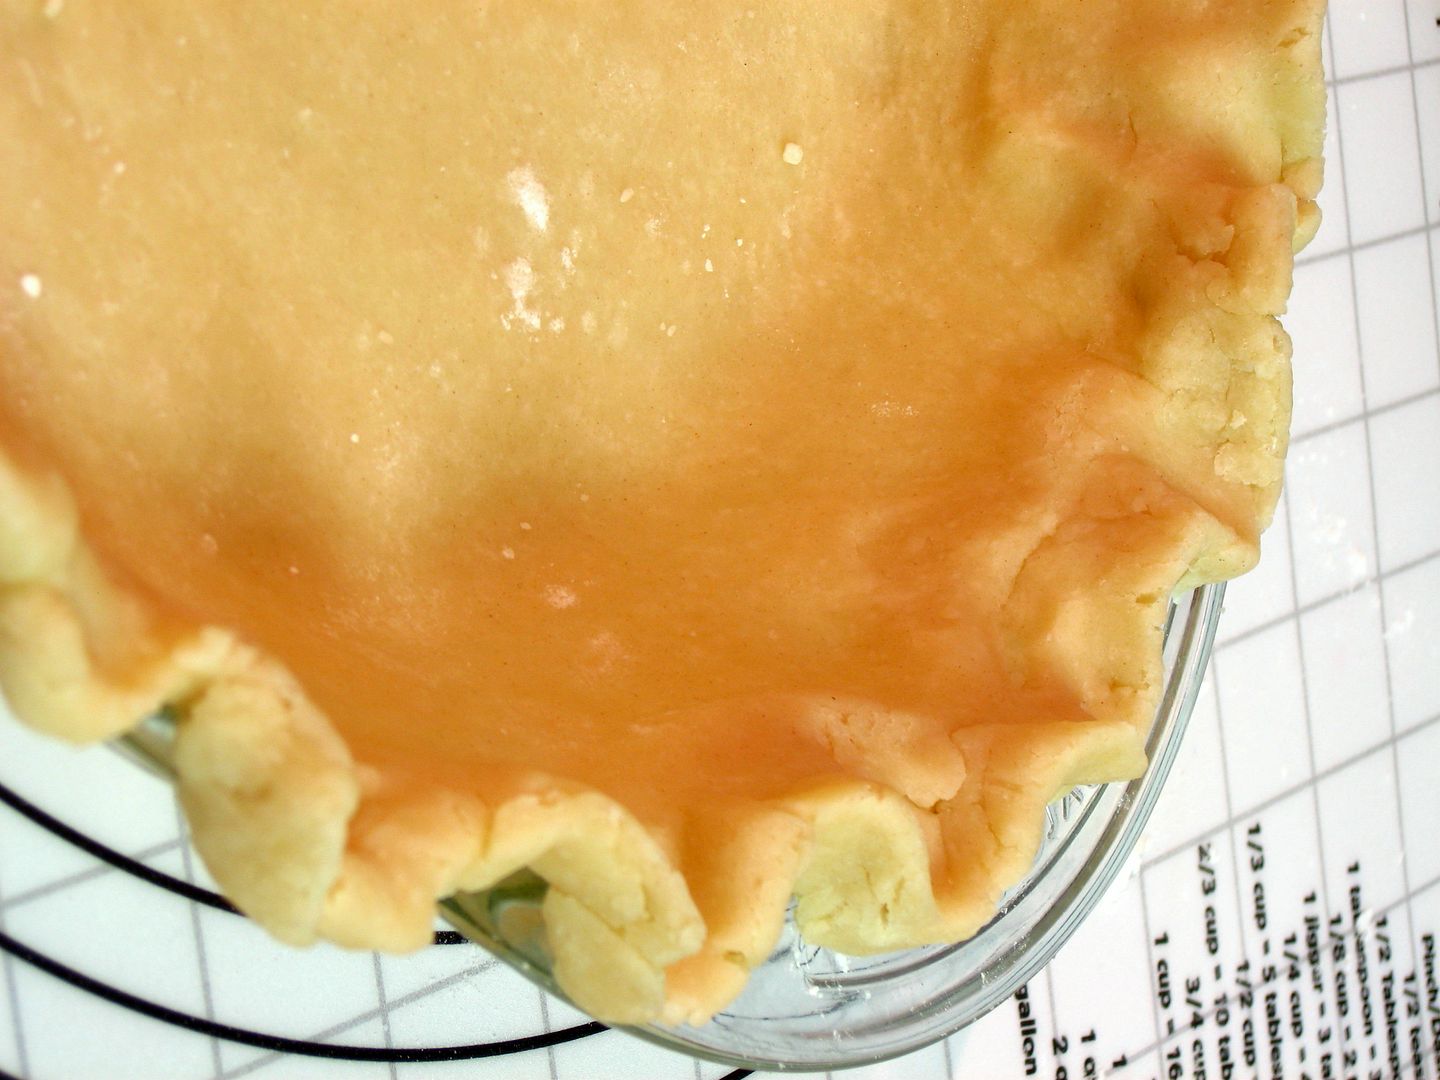
These Sweet Tater & Chorizo Tarts are fortunately simple to make. You could use premade pie dough (or even crescent roll dough for a super easy meal), but it’s also easy to prepare homemade pie dough while roasting your sweet potatoes. You can then mix up the filling while the pie dough chills, cool the filling while you roll the dough out, assemble your tarts, and bake. Draw out a little schedule for yourself (maybe something like this?) and enjoy the process.

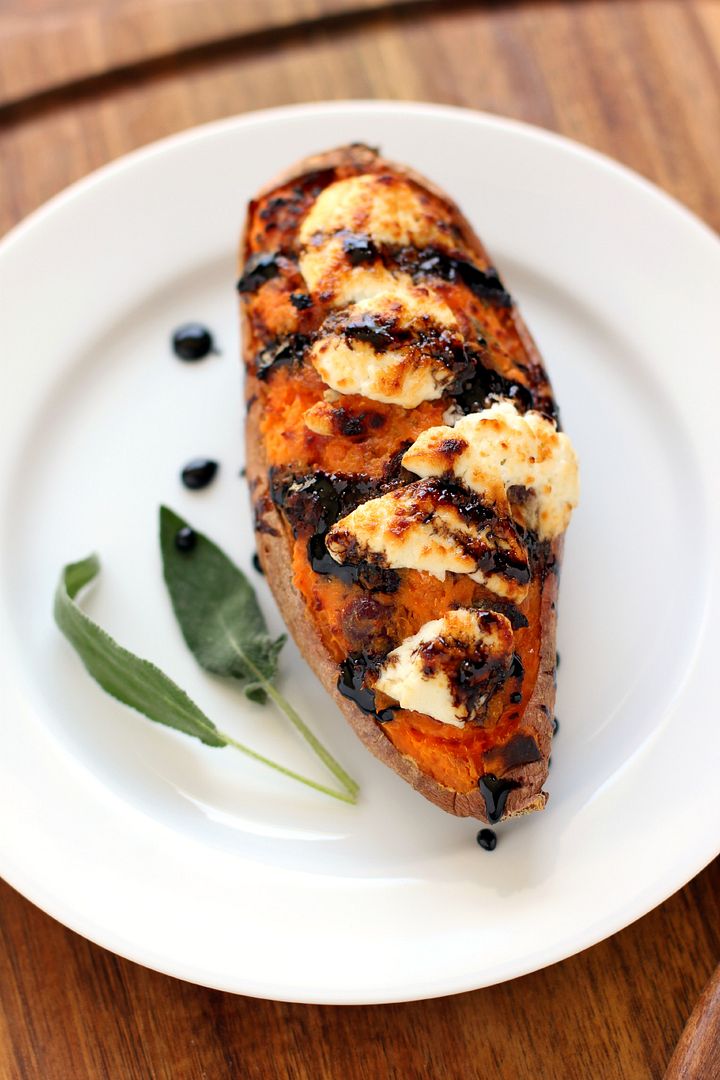
And even more, enjoy the product. The natural sweetness of the sweet taters is fantastic with the spicy chorizo and cumin scented black beans. The flaky pastry crust (or buttery crescent roll) around the filling rounds out the flavor and makes each little tart fun to eat. This is one of Mike’s new favorite dinners!

Do you know your Meyers-Briggs personality type? Are you a planner/scheduler, or more of a free spirit?

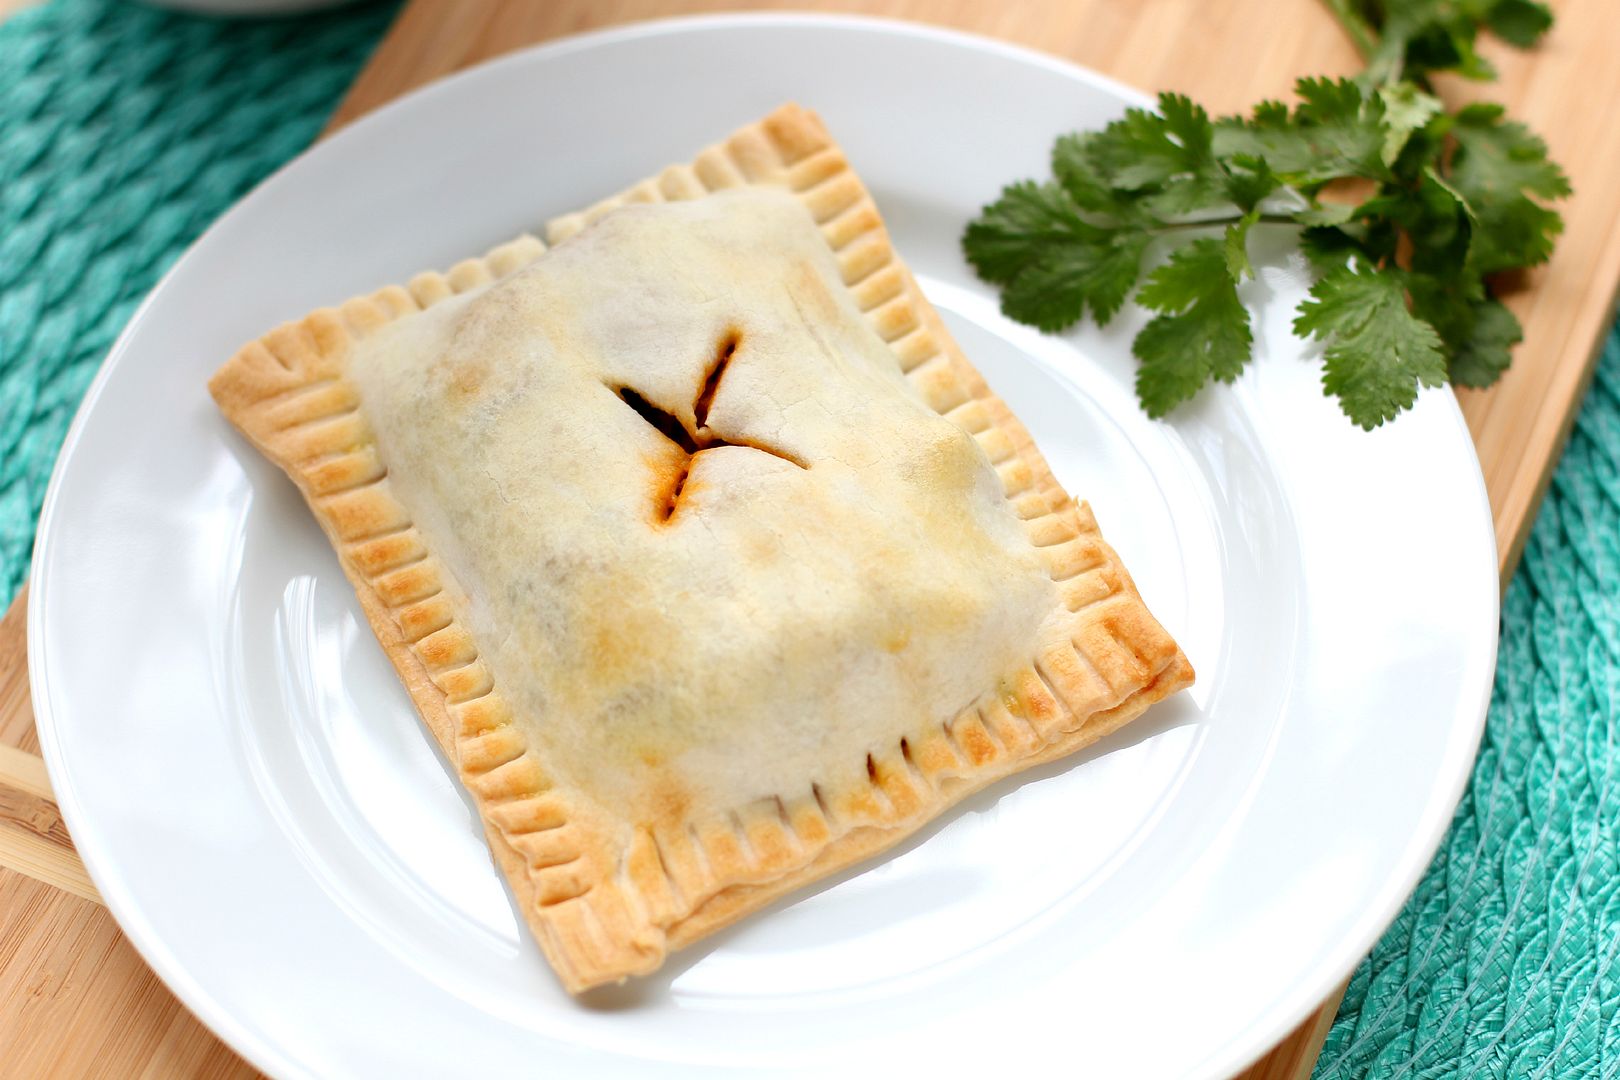
Sweet Potato & Chorizo Hand Tarts


Recipe by: Willow Bird Baking, inspired in part by Joy the Baker‘s tacos
Yield: about 7-10 tarts, or 12 crescents

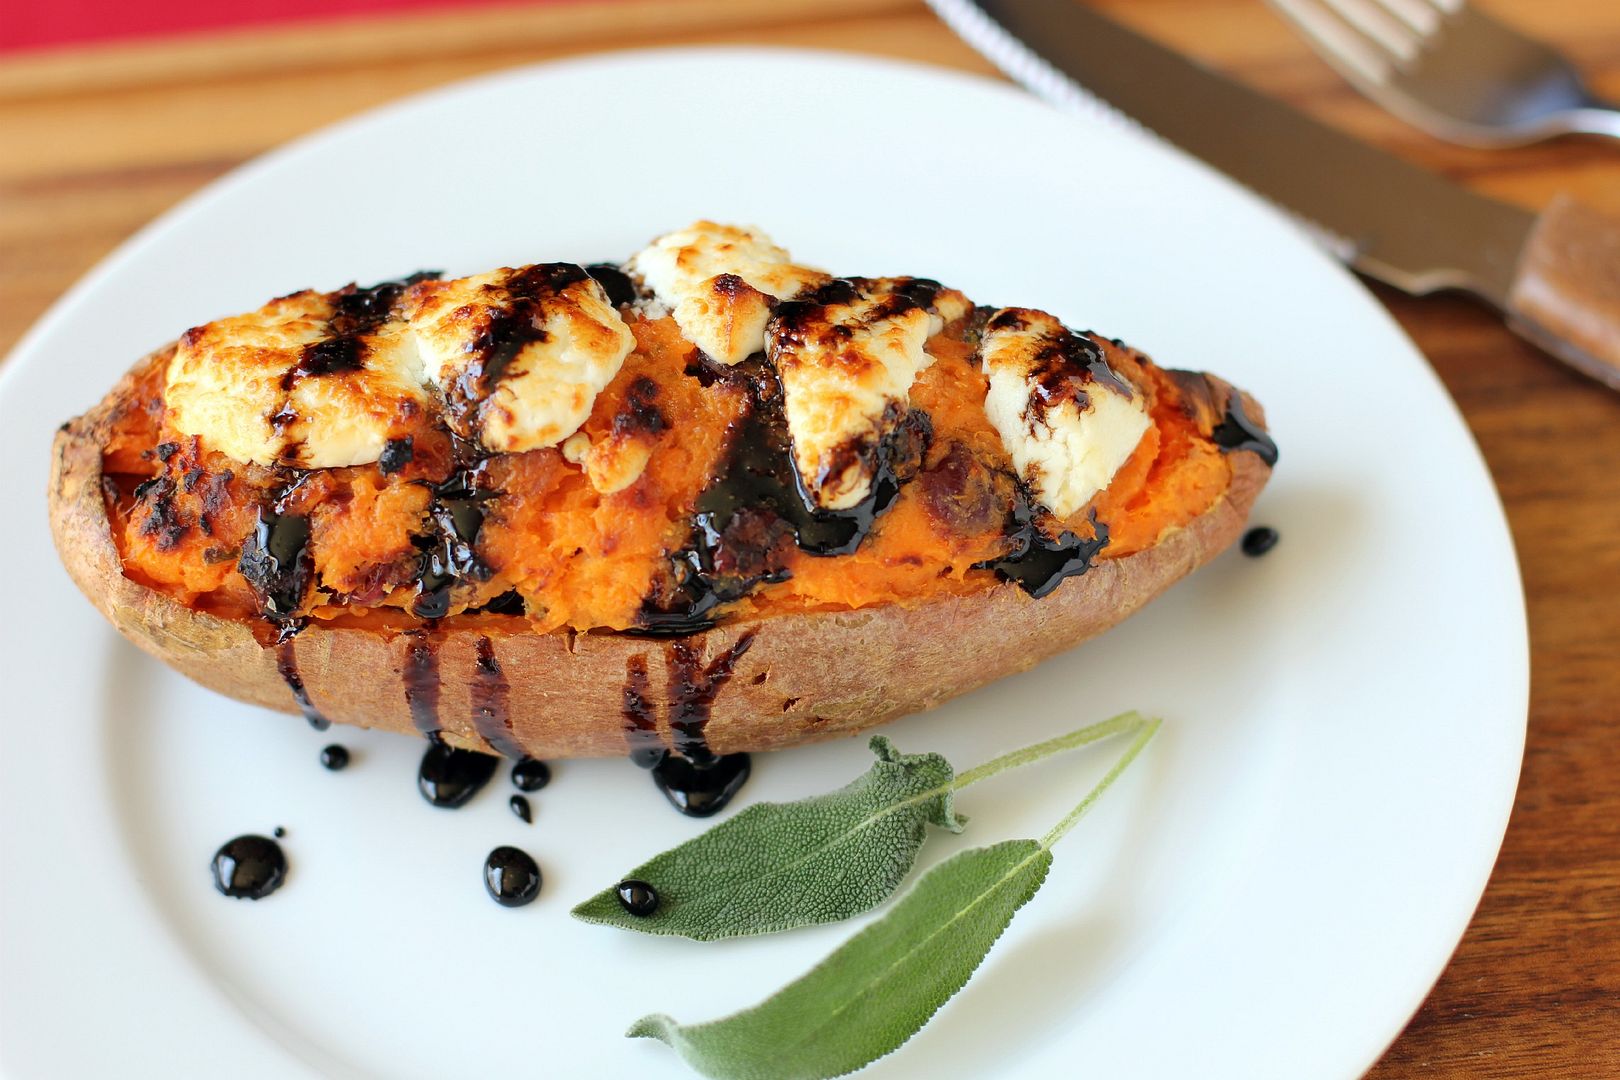
This sweet tater and chorizo filling is so scrumptious, I want to incorporate it into every dinner! In this recipe, I stuffed pie pastry and crescent roll dough with it to make plump, cheesy, Tex-Mexy hand tarts. They’re spicy, creamy, flaky, with a touch of natural sweetness from the roasted sweet potatoes. A plate of these with some sour cream, salsa, and cilantro on the side is more than enough for a hearty dinner.

Ingredients:
2 recipes pie pastry (or 1 package refrigerated pie pastry, or 2 cans giant crescent rolls)
1 sweet potatoes, cut into 1/2 inch chunks
1 tablespoon olive oil
1/2 teaspoon chili powder
kosher salt to taste
1/2 (15-ounce) can black beans, rinsed and drained
1/2 teaspoon cumin
1/2 teaspoon minced garlic
1 heaping tablespoon finely chopped onion
about 5 ounces chorizo
2 ounces cream cheese
spritz lime juice
1/8 cup sharp cheddar cheese, plus more for topping

optional garnishes: lime wedges, cilantro, sour cream, salsa, guacamole

Directions:
Preheat the oven to 400 degrees F. Toss sweet potatoes with 2 teaspoons of olive oil, kosher salt, and chili powder. Spread the potatoes on a foil-lined baking sheet and roast until fork-tender, about 20-25 minutes.

While the potatoes roast, place cream cheese and cheddar cheese in a medium bowl. Brown the chorizo in a skillet over medium-high heat until it’s fully cooked through, and then pour it over the cheese mixture. Let it melt the cheeses for a minute or two before mixing well. Without wiping the skillet out, add 1 teaspoon of olive oil to the skillet. Add the onion, garlic, and cumin and toast for about 30 seconds or until fragrant. Add the beans and cook until they’re fully warmed through. Add the bean mixture over top of the cheese and chorizo and mix gently until it’s well combined. When the sweet potatoes are fully cooked, fold them into the mixture. Add a spritz of lime juice and kosher salt to taste.

Prepare a baking sheet with parchment paper or cooking spray. Roll out the pie pastry to about 1/8 inch thick on a lightly floured surface. Cut it into roughly 4 in. x 3 in. rectangles. Spoon a generous portion of the sweet potato mixture onto every other rectangle and then sprinkle some cheddar cheese onto each one. Top these with the unused rectangles and crimp the sides together with a fork. Cut a steam vent in each pastry and place it on the prepared baking sheet. (If using crescent rolls, just unroll them and spoon a heaping helping of the sweet potato mixture into each one before rolling it up. Sprinkle some cheese on top.) Bake the tarts for 12-14 minutes or until golden brown (or bake crescents according to package instructions). Serve warm with lime wedges, cilantro, sour cream, salsa, and/or guacamole.

P.S. This dish will be entered in the North Carolina Sweet Potato Commission‘s No More ‘Mallows Recipe Contest. I love me some sweet tater and marshmallow casserole, but I also love that sweet potatoes pack a lot of savory potential.

See all the Cooking Hard Stuff Tips:
The Cooking Hard Stuff Challenge
Tip #1: Read and visualize the recipe.
Tip #2: Mise en place.
Tip #3: Make a schedule.
Tip #4: Try, try, try again — or share your success

If you liked this post, please:
Subscribe to Willow Bird Baking
Follow Willow Bird Baking on Twitter
Follow Willow Bird Baking on Facebook
Give this post a thumbs up on StumbleUpon
Pin It


Shareother ways to share this post with friends

Chocolatey Red Velvet Pull-Apart Bread with Cream Cheese Glaze

“I changed my mind.”

My mom shifted the car into park and turned off the ignition before looking over at me. “What do you mean? You can’t change your mind now; we’re already here.”

I looked out the window at the hair salon and then turned back to my mom. “Can’t I just get a trim, though? I really don’t want short hair. Please.” My 5-year-old voice teetered on the border between whining and shouting.

My mom shook her head. “We already made the appointment and told her what we wanted done. We aren’t spending all this money for just a trim. It’s just hair; it’ll grow back. Come on.”

Before I knew it, I was seated in a pleathery chair in front of a giant mirror, looking at my long blonde locks. Jessica, our hair stylist, sensed my unease. “Let’s just get it over with all at once, okay?” she asked as she tugged it into a ponytail. I could barely nod. A few snips later, my ponytail dropped to the floor with a whisp of finality, and the newly free remnants of my hair fell around my face. They barely reached my ears.

Silent tears began rolling down my cheeks as I calculated how long I’d have to wait to have long hair again.

My hair was really only one facet of my style troubles. In addition to bowl cuts, my mom had a penchant for “hammer pants.” She made many of my outfits by hand, including a hammer-panted onesie (I couldn’t make this up) with candy-pink stripes and gigantic, ceramic ice cream cone buttons. I think it might’ve also had a big lace collar. I posed in it with my bowl cut and a reluctant smile for many a photograph.

Then there was the red-and-denim hammer-panted contraption with the ceramic cow buttons. God bless my mother for sewing clothes for me, seriously, but I considered running away.

At least I was loved? Indeed, my childhood style woes remind me of this quote from food writer Angie Mosier about red velvet cake: “It’s the Dolly Parton of cakes: a little bit tacky, but you love her.”

Incidentally, I think I would’ve rather dressed like Dolly Parton than M.C. Hammer, but that’s neither here nor there.

This red velvet pull-apart bread has all the fun, tacky redness of red velvet with some extra chocolatey goodness thrown in. It began life as a chocolate yeast bread recipe that I modified into a pull-apart loaf. It’s sweet, melty, gooey, and with a cream cheese glaze drizzled over the top, reminiscent of your favorite red velvet desserts. As a plus, there are no hammer pants or bowl cuts in sight.

Tell me about your tackiest fashion choices (or the tackiest fashion “choices” imposed upon you by parents).

Chocolatey Red Velvet Pull-Apart Bread with Cream Cheese Glaze


Recipe by: Willow Bird Baking, adapted from Chocolate Bread by Paula Oland of the Balthazar Bakery
Yield: 2 loaves

Pull-apart loaves are downright addictive. Each layer is crisp on the outside and soft on the inside. This loaf is made from yeast dough with a sweet chocolate flavor, hunks of melty chocolate throughout, and a bright red hue! The cream cheese glaze kicks it right over the top. Schedule out the recipe in advance to allow for the rising/resting times and enjoy!

Bread Starter Ingredients:
1/4 teaspoon active dry yeast
1 cup lukewarm water (100-110 degrees F)
1 cup all-purpose flour, plus 3 tablespoons all-purpose flour

Red Velvet Yeast Bread Ingredients:
2 1/2 cups bread flour
1/4 cup cocoa powder
2 tablespoons (1 ounce) red food coloring plus 1 tablespoon water
1/3 cup sugar
2 teaspoons active dry yeast
1 cup minus 3 tablespoons lukewarm water (100-110 degrees F)
1 1/4 teaspoons table salt
2 tablespoons unsalted butter, room temperature
vegetable oil for lightly oiling bowl

Filling Ingredients:
3/8 – 1/2 cup granulated sugar (depending on how sweet you like things)
2 tablespoons semisweet chocolate chips
2 tablespoons bittersweet chocolate chips (I use Ghirardelli’s 60% cacao)
2 tablespoons unsalted butter, melted

Cream Cheese Glaze Ingredients:
2 ounces cream cheese, room temperature
1/2 cup powdered sugar
2 tablespoons unsalted butter, room temperature
1/4 teaspoon vanilla extract
about 3 tablespoons milk as
mini chocolate chips for sprinkling

Directions:
Note: In recipes that call for hunks of rising/resting time like this one, I like to draw out my schedule with different size boxes representing “hands on” and “hands off” prep time to get a visual feel for how long it will take. If you’re a visual person like me, drawing out your schedule is a great technique to try! Otherwise, a good old fashion list of what you’re doing at what time would also be beneficial.

Make bread starter: Dissolve the yeast in the 100-110 degree water for about 10 minutes. Completely mix in the flour. Cover the bowl loosely and leave it at room temperature to proof for around 6 hours.

Make red velvet yeast bread: Mix the cocoa powder, red food coloring, and 1 tablespoon water into a paste in a small bowl. In a medium bowl, mix together the paste, flour, 1/3 cup sugar, yeast, water, and 1/4 cup of your bread starter (save the rest to use for other recipes). Let this mixture rest for 15 minutes.

Knead in the salt and butter and then knead for about 10 minutes by hand or about 4 minutes on a mixer fitted with a dough hook, or until smooth and elastic. Scoop dough out into a lightly oiled bowl and cover it with a dish cloth. Let it rise until doubled in size, about 1 1/2 hours. Leave the dough in the bowl at this point but fold it in thirds like you’d fold a letter. Recover it and let it rest for 30 more minutes.

Shape and bake pull-apart bread: Prepare two 7″x 3″ x2″ loaf pans by greasing them (I use Wilton’s Cake Release, but you could also butter and flour them). Flour a large work surface. Use a dough scraper or sharp knife to help you cut your dough into halves. Turn out half of the dough onto your floured surface, keeping the other half covered.

Roll your dough out to a 15 inch long and 12 inch wide rectangle, lifting corners periodically to make sure it’s not sticking. If it seems to be snapping back, cover it with your damp towel and let it rest for 5 minutes before continuing.

Spread the melted butter over the surface of the dough with a pastry brush and then sprinkle the sugar and chocolate chips over the top, patting them down to ensure they mostly stick. Some will inevitably fall out as you do the following steps — just stuff ’em back in and don’t worry too much about perfection.

With the long edge of the rectangle toward you, cut it into 6 strips (do this by cutting the rectangle in half, then cutting each half into equal thirds. I used a pizza cutter). Stack these strips on top of one another and cut the resulting stack into 6 even portions (again, cut it in half, and then cut the halves into equal thirds). Place these portions one at a time into your greased loaf pan, pressing them up against each other to fit them all in. Cover the pan with your damp cloth and place it in a warm place for 45 minutes to an hour to double in size. Repeat the rolling and cutting process with the second half of dough.

While the dough rises, preheat oven to 350 degrees F (or 325 if you have a glass loaf dish instead of a metal pan). When it’s risen, place the loaf in the center of the oven and bake for 30-35 minutes until dark on top (if you take it out at light brown, it’s liable to be raw in the middle, so let it get good and dark). Cool until just warm on a cooling rack in the loaf pan while you make the glaze.

Make the cream cheese glaze: Beat the cream cheese until fluffy, and then add sugar and vanilla. Add the milk to thin it to drizzling consistency. Drizzle some of the glaze over the slightly warm bread (save the rest for drizzling over individual slices) and sprinkle it with mini chocolate chips. Serve immediately.

If you liked this post, please:
Subscribe to Willow Bird Baking
Follow Willow Bird Baking on Twitter
Follow Willow Bird Baking on Facebook
Give this post a thumbs up on StumbleUpon
Pin It


Shareother ways to share this post with friends

Chocolate & Pretzel Cereal Treats

Dear Mrs. Harolds,

I may have been in 3rd grade with a fledgling worldview and a tiny stature, but if there was one thing I understood, it was justice.

Justice (and, incidentally, righteous indignation) were bred into every last molecule in my stubborn, pint-sized being. Thus, even though children often unwittingly grant adults unbridled authority and unquestioning amnesty, I knew on that gray day in the middle of November that you were being unfair.

There was precedent for said unfairness. I had a nervous habit (and still do, actually) of picking at my lips, which were always dry for some reason. One day you walked by and roughly pushed my arm down while I was standing in line, and I remember the shock of the physical correction. In the confusing moments that followed, I tried to evaluate whether or not that was an appropriate action for a teacher to take. I finally decided that it most certainly was not.

There was also that time when Logan stole my troll doll pencil. He’d been eying it all day while Chris and I used it to produce elaborate troll doll plays. When it went missing, I confronted him and, while he looked decidedly uneasy, he denied any knowledge of its whereabouts. When I informed you of this, fully trusting that you would remedy the situation because that’s what adults are supposed to do, you shrugged. “If he says he doesn’t have it,” you said, “there’s nothing I can do about it.”

My tiny heart burned with indignation. There was sure something I could do about it if you wouldn’t intervene! I marched right over and yanked Logan’s bookbag open before he even had a chance to protest. There, looking happily up at me from on top of a social studies book, was my troll doll pencil. I grabbed it and stalked away as you watched in surprise.

But this was a wholly different situation. This time, you were implicitly criticizing my dad. Perhaps you didn’t know this about me, but that’s one of the last things you want to do in my presence.

It all started with that chocolate rice cereal treat. It was snack time at school, so I pulled the treat from my bookbag and began to tear open the foil wrapper around it. I’d been bringing the cereal treats for my snack ever since my tapioca pudding cups had, without warning, become inexplicably gross to me. But for some reason on this day, my cereal treat was like a magnet for your keen eyes. You strode over to me before I’d even taken a bite.

“You can’t eat that for snack time. Snack time is for healthy snacks.” I looked around at others’ crackers and chips, confused as to why my snack alone warranted this criticism (indeed, if I’d known what I know now, I’d have retorted that crackers are about as worthless for you and a lot less fun).

“Well, this is what my dad bought for me for snack time,” I responded, unsure of how to proceed.

“You can’t eat them. Don’t bring them anymore.” I thought of the box of cereal treats sitting at home designated for my snack time. I thought of my parents’ slim budget. I thought of how hard they both worked to provide for our huge family. You didn’t know it, Mrs. Harolds, but you’d just planted the seed of a lifelong grudge.


I didn’t throw the cereal treat at you or throw a crying fit, although my 3rd grade brain probably considered both of those options. Instead, I mourned about it all day and, with considerable angst, revealed to my parents that night that I couldn’t bring cereal treats anymore. Lest you feel victorious about that fact, however, I’d like to remind you that I’m sitting here 20 years later writing a vindictive description of you for the amusement of the general public. For good measure, I may even tell folks about your nose hairs and the time you threw whiteboard markers at us.

Not only that, but I’m doing all of this in a post that shares a recipe for some indulgent, sugary, chocolatey, salty-and-sweet cereal treats. Some particularly marshmallowy ones, even.

I don’t know, but I’d say I had the last laugh.

Sincerely,
Julie

P.S. Or, I don’t know, maybe the fact that I’m still annoyed at you 20 years later does mean you win. Grr.

And another P.S. to my readers: Have you ever had an unfair teacher? Here’s your space to vent! Unless you’re one of my students, in which case, go do your homework.

Chocolate & Pretzel Cereal Treats


Recipe by: Willow Bird Baking, adapted from Kellogg’s
Yield: about 12 bars

These are cereal treats on steroids! You can mix any kind of cereal you like, but here I’ve chosen to combine chocolate and plain rice cereals. The addition of salty pretzels and gooey chocolate chips make these treats indulgent and delicious. As a bonus, they’re super easy to make!

Ingredients:
1/4 cup butter
4 cups miniature marshmallows or 1 package (10 ounces) large marshmallows
2 cups chocolate rice cereal
2 cups plain rice cereal
2 cups pretzel wheels (broken into pieces, but not pulverized), plus whole pretzels for topping
3/4 cup semisweet or milk chocolate chips

Directions:
Spray a 13 x 9-inch pan with cooking spray and set it aside. Melt the butter in a large saucepan over low heat. Stir in the marshmallows (I use a spatula coated with cooking spray) until they’re completely melted and remove the pan from the heat.

Add the cereal, pretzel pieces, and chocolate chips and stir until they’re thoroughly coated. Pour the mixture out into your prepared pan. Use a sheet of wax paper to press the mixture into an even layer in your pan. Quickly press whole pretzels in rows all along the surface of the bars.

Let the treats cool completely (and maybe even drizzle some melted chocolate over them!) and then cut into squares to serve. The treats can be stored in an airtight container at room temperature for two days, or can be frozen (separated by wax paper) for up to 6 weeks.

If you liked this post, please:
Subscribe to Willow Bird Baking
Follow Willow Bird Baking on Twitter
Follow Willow Bird Baking on Facebook
Give this post a thumbs up on StumbleUpon
Pin It


Shareother ways to share this post with friends

My Favorite Pie Crust Dough

In light of Willow Bird Baking’s Cooking Hard Stuff Challenge, I’ll be sharing some tips for tackling new or challenging recipes throughout the month of March. If you haven’t signed on for the challenge yet, make sure you read about it and join in the fun.

Cooking Hard Stuff Tip #2: Mise en place. (Pronounce that, roughly, “meez ohn plauce.” Apologies to France.)

Mise en place literally means “putting in place,” and it’s an important step in the cooking process that should take place after you read and visualize the steps in your recipe.

If you’ve ever seen a TV chef whisp through a recipe as simply and quickly as a hot knife through butter, you’ve probably witnessed the benefits of this strategy. Every now and again they might measure an ingredient in the middle of the recipe for effect, but in general, all of their ingredients are prepared and sitting next to their workspace, and all of the equipment they need is close at hand. That’s mise en place: measuring ingredients, prepping materials, and setting up your workspace before you begin to cook. Sometimes while I’m visualizing the steps of my recipe, I’ll even sketch out a plan of the mise en place I’ll prepare before I begin.

If you don’t already do a mise en place for your recipes, you might scoff at this advice. I can hear the faint echoes of your criticism across the interwebz: doesn’t that take too much time? Don’t you have to dirty up more dishes to measure everything out beforehand? First off, stop being so negative, Snarky McSnarkerson. Second off, nothing has changed the amount of joy I get out of Cooking Hard Stuff as much as my mise en place. So I’m going to sell you on this.


These photos were taken forever ago with my old camera, so they’re of
a different quality than you’ve hopefully gotten used to lately!

Here’s why you should mise your place:

1. Far from taking more time than measuring as you go, mise en place can save you time (and energy! and happiness!). Measuring out ingredients is probably my least favorite part of baking, but getting it out of the way in one fell swoop at the beginning allows me to enjoy the actual cooking process so much more. It’s streamlined, relaxed, and a lot faster, because everything I need is at my fingertips. Since I’m checking all of my supplies before I begin, I also avoid frustrating and time-consuming mid-recipe trips to the grocery store.

2. Mise en place can be done intelligently so that it doesn’t drastically increase your dish load. For instance, if you know you’ll be combining dry ingredients immediately, instead of measuring them out into separate prep bowls, measure them out altogether into your mixing bowl itself. Look at your recipe to see which ingredients can be measured out into the same bowls. Ingredients that you’ll use soon could even sit in the measuring cups themselves until you’re ready to add them. By the time you’re finished with your mise en place, ingredients will be laid out so logically that your recipe will almost make itself.

3. Prepping your materials and workspace ahead of time frees you up to clean as you go. Cleaning is the anticlimax after finishing a great recipe: all the fun’s over, and you still have a lot of work to do. If you prepare a mise en place, though, the breaks in a recipe (when something’s chilling, mixing, baking, or cooling, for instance) are freed up for cleaning. Instead of preparing for the next steps, you can rinse dishes and stick them in the dishwasher, put leftover ingredients away, and wipe down counters. This makes cooking a nicer experience, but more importantly, it means you’ll have much less cleanup once the cooking is finished.

If you’ve never tried preparing a mise en place before beginning a recipe, give it a shot. Think of it like this: you’re going to have to measure everything out one way or another, so why not do it all at once in an efficient manner instead of having to constantly pop in and out of the pantry, grab the measuring cups, level the flour, and so on and so forth? I think you’ll find that you’ll stress less and enjoy the process more with everything put in place. Still don’t believe me? Here’s an article I enjoyed and some great discussion on the topic.

Do you usually prepare a mise en place before beginning a recipe? If so, how do you do your mise en place?

Pie Crust Dough


Recipe by: Willow Bird Baking
Yield: pie crust for one 9-inch pie

Homemade pie crust is not hard at all, particularly after you make it a couple of times and get a feel for the dough. There are different schools of thought regarding what fat to use in pie crusts, but I’m a firm believer in going halfsies. All butter crusts can lack a tender, flaky texture, while all shortening crusts can lack flavor and create a waxy mouthfeel. This is the best of both worlds: buttery flavor and a flaky texture. I recommend using lard if you can get your hands on it, but shortening also works fine.

Ingredients:
2 cups flour
1 teaspoons salt
3/8 cup (6 tablespoons) cold lard or shortening (I recommend lard)
3/8 cup (6 tablespoons) cold butter, chopped
3-4 tablespoons cold water
1 egg and 1 teaspoon water, lightly beaten together, for egg wash

Directions:
Pulse flour and salt together to combine. Add the lard in hunks and pulse for about 10 seconds (literally stand there and count!) until it’s the texture of coarse sand. Add in the chunks of cold butter and pulse for about 10 pulses (count ’em!) until butter pieces are no larger than small peas. Add 3 tablespoons of ice cold water and turn food processor on low — the dough should form a dough ball in a few seconds. If the dough remains crumbly and doesn’t come together, add another tablespoon of water. Add as little water total as is required for the dough to form a ball. Scoop the dough onto a sheet of plastic wrap, form into a disk, and chill for at least 20-30 minutes.

Preheat oven to 450 degrees F (if you’re blind baking the crust without a filling in it; otherwise, preheat according to your recipe instructions). Roll the disk of dough out between two sheets of lightly floured parchment paper until it’s around 2 inches larger than your (9-inch) pie plate all around. Use the parchment to help you drape the dough over your rolling pin, and then use the rolling pin to gently transfer the dough to your pie plate. Situate it in the plate without stretching the dough (lift the edges and let it fall down into the corners of the dish). Fold the excess dough around the edges and crimp, trimming where necessary.

If you’re filling the crust prior to baking, fill it and bake according to your recipe. If you’re blind baking the crust to fill later, cover the dough with parchment paper and fill this with pie weights or dried beans, pressing to the edges. Bake for around 20 minutes at 450 degrees F. Remove weights and paper, brush the egg wash onto the crust, and bake 5-10 minutes more until golden brown (shield the edges with foil if they begin getting too dark). Let the crust cool completely. Fill according to your recipe.

TIPS:
– When preparing a mise en place for this recipe, chop your butter, measure out your shortening, and fill a jar with ice water first. Stick all of these ingredients into the fridge to get ice cold while you complete the rest of your mise en place.
– Your goal is to keep your fats and your crust dough cold as you prepare it, so don’t handle it too much. The cold hunks of fat in your dough are what will create the flaky layers in your crust as it bakes.
– I roll out my crust dough between two sheets of parchment paper with a little sprinkling of flour on either side. Periodically I’ll stop to lift the paper from the dough to be sure it’s not sticking and flip the dough to check the other side as well. The parchment allows me to use much less messy flour.
-For a double crust pie, double the recipe form into two disks to chill. Roll out each disk separately. Situate the first half of the dough in the pie plate as usual, fill it, and top with the second half. Trim and fold the edges of the top crust under the lip of the bottom crust, crimping the two together. Cut a vent in your pie.

See all the Cooking Hard Stuff Tips:
The Cooking Hard Stuff Challenge
Tip #1: Read and visualize the recipe.
Tip #2: Mise en place.
Tip #3: Make a schedule.
Tip #4: Try, try, try again — or share your success

If you liked this post, please:
Subscribe to Willow Bird Baking
Follow Willow Bird Baking on Twitter
Follow Willow Bird Baking on Facebook
Give this post a thumbs up on StumbleUpon
Pin It


Shareother ways to share this post with friends

Twice Baked Cranberry & Pancetta Sweet Potatoes with Balsamic Glaze

The only time I’ve lived away from my hometown was during my sophomore year in college when I moved to Beaufort, a small town on the coast of North Carolina. I lived there for a few months before traveling for a month down the Eastern seaboard to study marine zoogeography. That semester changed my life, and I’ve continued to process the memories over the years. Periodically I’ll share stories here on Willow Bird Baking from that time.

. . .

I stared willfully at the horizon, waiting for the wave of nausea to subside. As if it were having great fun at my expense, the boat rolled over another giant wave. My stomach followed. I was determined not to succumb to the sensation and end up hanging over the railing like several of my friends, so I squinted even harder at the steady line between sky and land.

We’d woken up at an absurd hour to climb aboard the R/V Susan Hudson that morning. We’d all become accustomed to rolling out of bed, pulling on a pair of salty old sneakers, and plowing through the fog of sleep to begin our adventures. Luxuries like showering and hairstyling and even, say, deodorant had long since been abandoned. There was a high likelihood that on any given day we’d find ourselves traipsing through mud up to our thighs (I’m not exaggerating), swimming to a nearby island, or cuddling with sea cucumbers in the shallows. There was no point in getting pretty.

This was our first deep sea expedition. We were traveling miles out into the ocean to dredge and trawl for invertebrates that we would take back to the lab, observe, and then release. I’d been on the Susan Hudson around Pivers Island, home base for the Duke Marine Lab where we lived, but I soon discovered that this was an entirely different experience: one in which I did not have sea legs. Or a sea stomach.

The briney smell of the critters we poured out onto the ship’s deck didn’t help. We quickly flipped fish back out into the sea and scooped heaps of clams, snails, and squids into buckets of seawater. A cacophony of seagull chatter above us reminded us to toss a bit of our impressively fresh sushi into the air now and then.

On our way back with our spineless loot (the squids’ inky water suggested they were none too happy with their temporary accommodations), we docked near Cape Lookout to explore the seashore for a bit before eating lunch back on the boat. The dining hall had packed us sweet little bag lunches complete with a sandwich, apple, and cookie, but the thought of lunch sent my stomach back into a lurch.

Fortunately, one of the guys in our group had grown up on the water in Charleston. Will had battened down hatches, swabbed the deck, shivered some timbers, and every other nautical cliche I can muster up. He saw my decidedly green gills and said, “Make sure to eat.”

I was skeptical. “Well, I’m feeling really sick — is it a good idea to eat anything? Isn’t that just asking for trouble?”

“Trust me: eat. You’ll feel better.”

I unfolded the wax paper around my sandwich and took a cautious bite. (By the way, if you’ve never wrapped a sandwich in wax paper for your lunch, you should. The sensory experience of unwrapping that crinkly, smooth paper to eat a humble little sandwich is one of my favorite things in the world.) I don’t remember what sort of sandwich it was, but it tasted otherworldly after an entire morning on the boat. My hunger caught up to me and I finished devouring my sandwich with gusto. I headed for the cookie after that, offering my apple to one of my friends (the peel gets caught in my teeth and drives me batty, so I never eat them).

My trust in Will, given tentatively and mostly out of desperation despite his obvious experience, paid off. I felt better almost instantly. So much so that instead of clenching my bench and staring at the now-bright horizon the entire way back to the lab, I was able to get up and survey the surrounding sea, broken by waves and playful dolphins.

. . .

I’ve moved from research boats to potato boats since my time in Beaufort. In fact, I haven’t stepped foot on an actual boat (unless you count a kayak) in years. And I wouldn’t trust these sweet potatoes to be particularly sea-worthy.

They are fantastic, though. I love twice baked potatoes for their soft, creamy filling, and this play on the theme boasts that same lovely texture. In addition to that, it has a phenomenal collection of flavors: sweet potato, cranberry, salty pancetta, sage, goat cheese, and a sweet balsamic glaze. The pretty presentation is just the icing on the cake.

Twice Baked Cranberry & Pancetta Sweet Potatoes with Balsamic Glaze


Recipe by: Willow Bird Baking
Yield: 2 twice baked sweet potatoes

These gorgeous twice baked sweet potatoes are fancy enough for a holiday meal, but simple enough to make any night. You can even prepare them a day in advance so they’re ready to pop in the oven before a big meal. A few tricks (like using a zip top bag to pipe the mixture into their sweet potato boats) speed up the process. The best thing about them, though, is the fantastic combination of flavors: salty pancetta, sweet and tart cranberries, tangy goat cheese, fresh sage, and a sweet balsamic glaze. It’s every sweet potato’s dream.

Ingredients:
2 large sweet potatoes (look for ones that are shaped like a fat oval)
4 ounces cubed pancetta
2 ounces goat cheese, plus more for crumbling on top
2 tablespoons butter
1 heaping teaspoon of loosely packed sage leaves, finely chopped
1/4 cup dried cranberries
1/4 cup half & half
salt to taste
1 1/2 cups balsamic vinegar
3 tablespoons sugar

Directions:
In a small bowl, cover dried cranberries with hot water. Cover the bowl with plastic wrap and let it sit for about 10 minutes to rehydrate the berries. Drain them and set aside. Preheat the oven to 350 degrees F. Poke each sweet potato several times with a fork and bake them on the oven rack (with a baking sheet on the rack below to catch any oozing) for 1 hour or until a knife will slice them easily.

While they bake, sauté the pancetta in a skillet over medium-high heat for a 8-10 minutes or until crisp. Drain it on a plate lined with a paper towel.

Once they’re ready, let the baked sweet potatoes cool for 10 minutes before slicing the top third off of each. Use a spoon to carefully scoop out the flesh (leave about 1/8 inch of flesh in the skin to give it some sturdiness). Mix the sweet potato flesh in a medium bowl with the butter, 2 ounces of goat cheese, and half & half (add this slowly while mixing so you get the consistency you’d like). Once the mixture is smooth, stir in the cranberries, sage, and pancetta. Salt the mixture to taste. Spoon it into a large zip top bag and cut the bottom corner off. Squeeze the mixture into the sweet potato skins. (At this point you can cover the potatoes and refrigerate overnight or bake immediately. If you chill them overnight, just let them come to room temperature before you bake them the next day.) Bake the potatoes for 10-12 minutes before removing them to a cooling rack.

While the potatoes are baking, combine the balsamic vinegar and sugar in a saucepan and boil them over medium-high heat, stirring occasionally, until the mixture is reduced to about 2/3 cup (this can take anywhere from 18-25 minutes). Be careful — vinegar fumes are strong! When the glaze is about ready, preheat the broiler. Top each potato with a generous amount of goat cheese and broil, watching very closely, until goat cheese is toasty brown and bubbly. Remove the potatoes and drizzle on the balsamic glaze. Serve immediately.

P.S. This dish will be entered in the North Carolina Sweet Potato Commission‘s No More ‘Mallows Recipe Contest. I love me some sweet tater and marshmallow casserole, but I also love that sweet potatoes pack a lot of savory potential.

If you liked this post, please:
Subscribe to Willow Bird Baking
Follow Willow Bird Baking on Twitter
Follow Willow Bird Baking on Facebook
Give this post a thumbs up on StumbleUpon
Pin It

1 2