Month: January 2012

Pork Bulgogi Bāozi (Steamed Korean BBQ Buns)

Hands down, my favorite food experience in the universe (so far — who knows, maybe something really awesome is goin’ down on Mars) is going to yum cha, or eating at a dim sum restaurant. Dim sum is a Chinese tea-like meal where a variety of amazing dishes are served as small plates. At a typical dim sum restaurant, carts full of steamed dumplings, fried eggplant, roasted pork buns, custard cakes, Chinese broccoli, sesame balls, and other treats traverse the dining room, replenishing each table.

It sounds pretty heavenly, right? If you haven’t tried it, you really should. That being said, my first dim sum experience was, um, terrifying.

I think the restaurant atmosphere contributed more than a little bit to my anxiety. The interior walls were all painted stark black, and the blinds were mostly drawn. Where sunlight did find a breach, it sliced into the space as bright and sharp as a flashing knife. Grotesque white statues towered in the center of the restaurant and carts crawled down narrow aisles, preventing any retreat. The restaurant owners were apparently going for “horror movie chic.”

My real trepidation, though, came from having no idea how dim sum worked. I saw the carts full of food, but were you supposed to flag them over? Would they just come to you? Were you supposed to write your order on your tab or did the servers write it for you? Was it annoying to ask what each dish was? As the cart rolled towards our table, so did a wave of panic. I didn’t know what I was doing! I turned a frantic face to Mike and literally started plotting an escape: “We’ve already ordered our drinks, but can’t we just pay for them and run out?!”

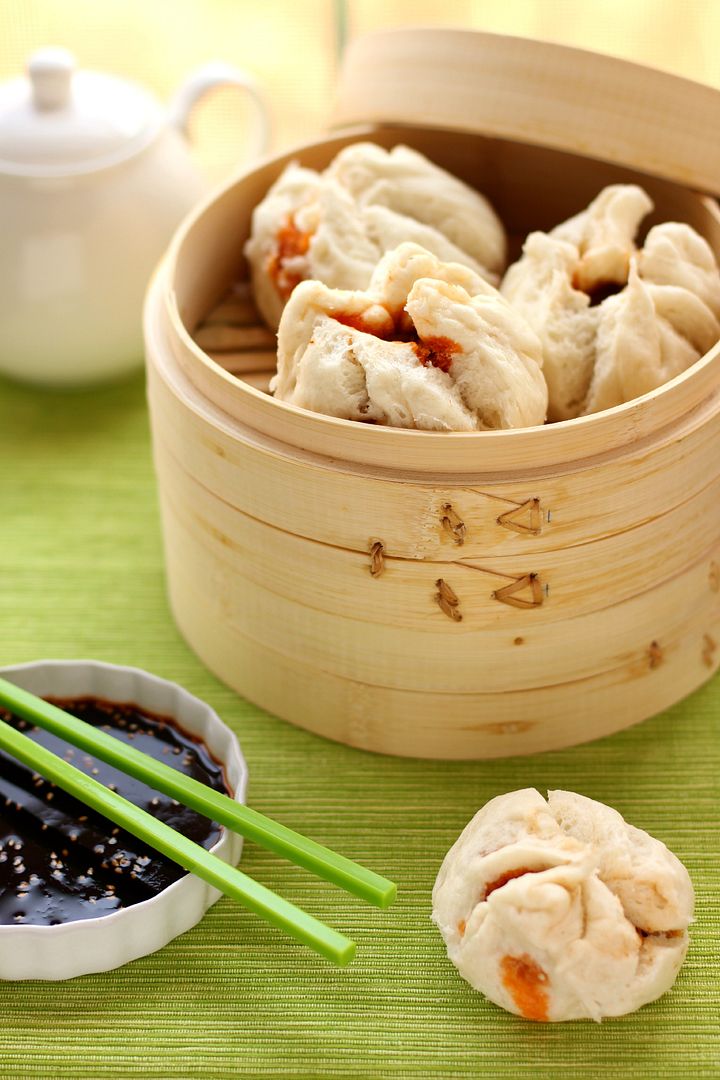
Mike, thankfully, was calm. He talked me down, helping me to temper my fear by focusing on the food. And oh, the food! I stuffed myself silly with every manner of new and delicious Chinese food, but my favorite dish by far was the char siu bao, or steamed pork buns.

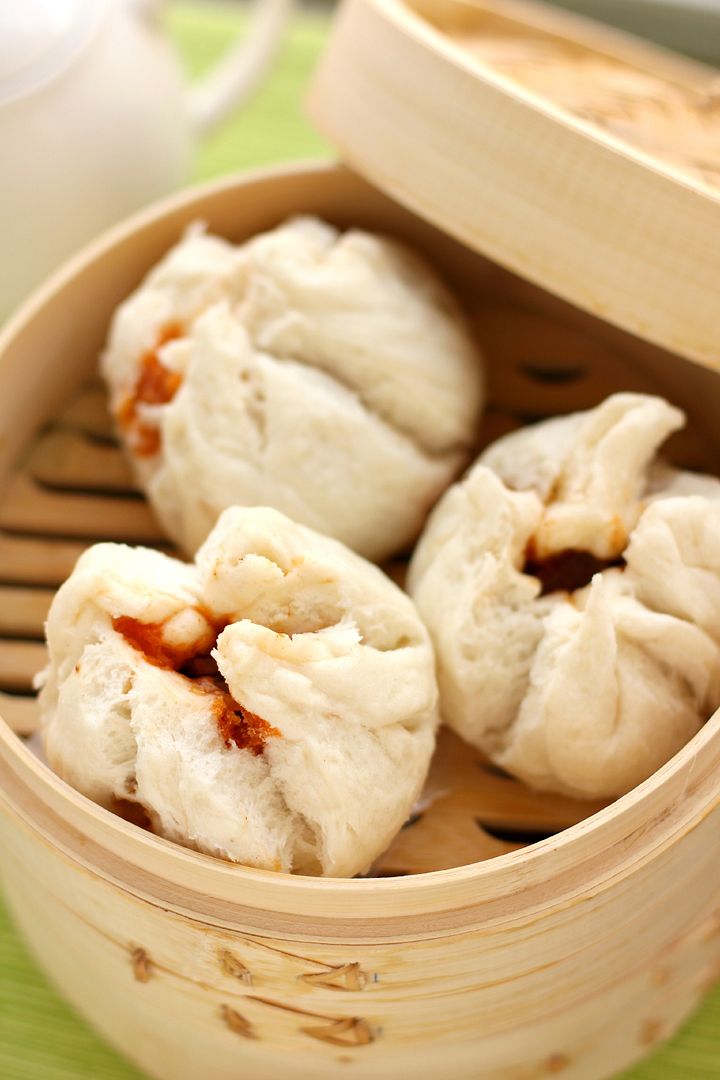
These buns aren’t your average heavy, dense bread. They’re light, cakelike, and inexplicably fluffy. They’re clouds! They’re sheep! They’re cotton! They’re every other fluffy metaphor you’ve ever heard. The sweet pork filling inside the mildly sweet steamed buns was worth every bit of dim sum panic I’d felt. I vowed to make them in my own kitchen someday.

Y’all, that day has come — except, inspired by the McCormick 2012 Flavor Forecast, a report that highlights up-and-coming flavor trends around the world, I decided to mix it up. Two trends the Flavor Forecast describes are Honoring Roots and No Boundaries. These trends — one that showcases regional flavors around the world and another that encourages the blurring of the boundary lines between them — seemed to complement one another in a delicate balance. They were yin and yang, if you will. I chose to encapsulate both by creating a traditional recipe — Chinese steamed pork buns — with an unexpected ingredient. Instead of filling the buns with char siu, the typical Chinese barbecued pork, I opted to fill them with salty, sweet, spicy Korean barbecue, or bulgogi.

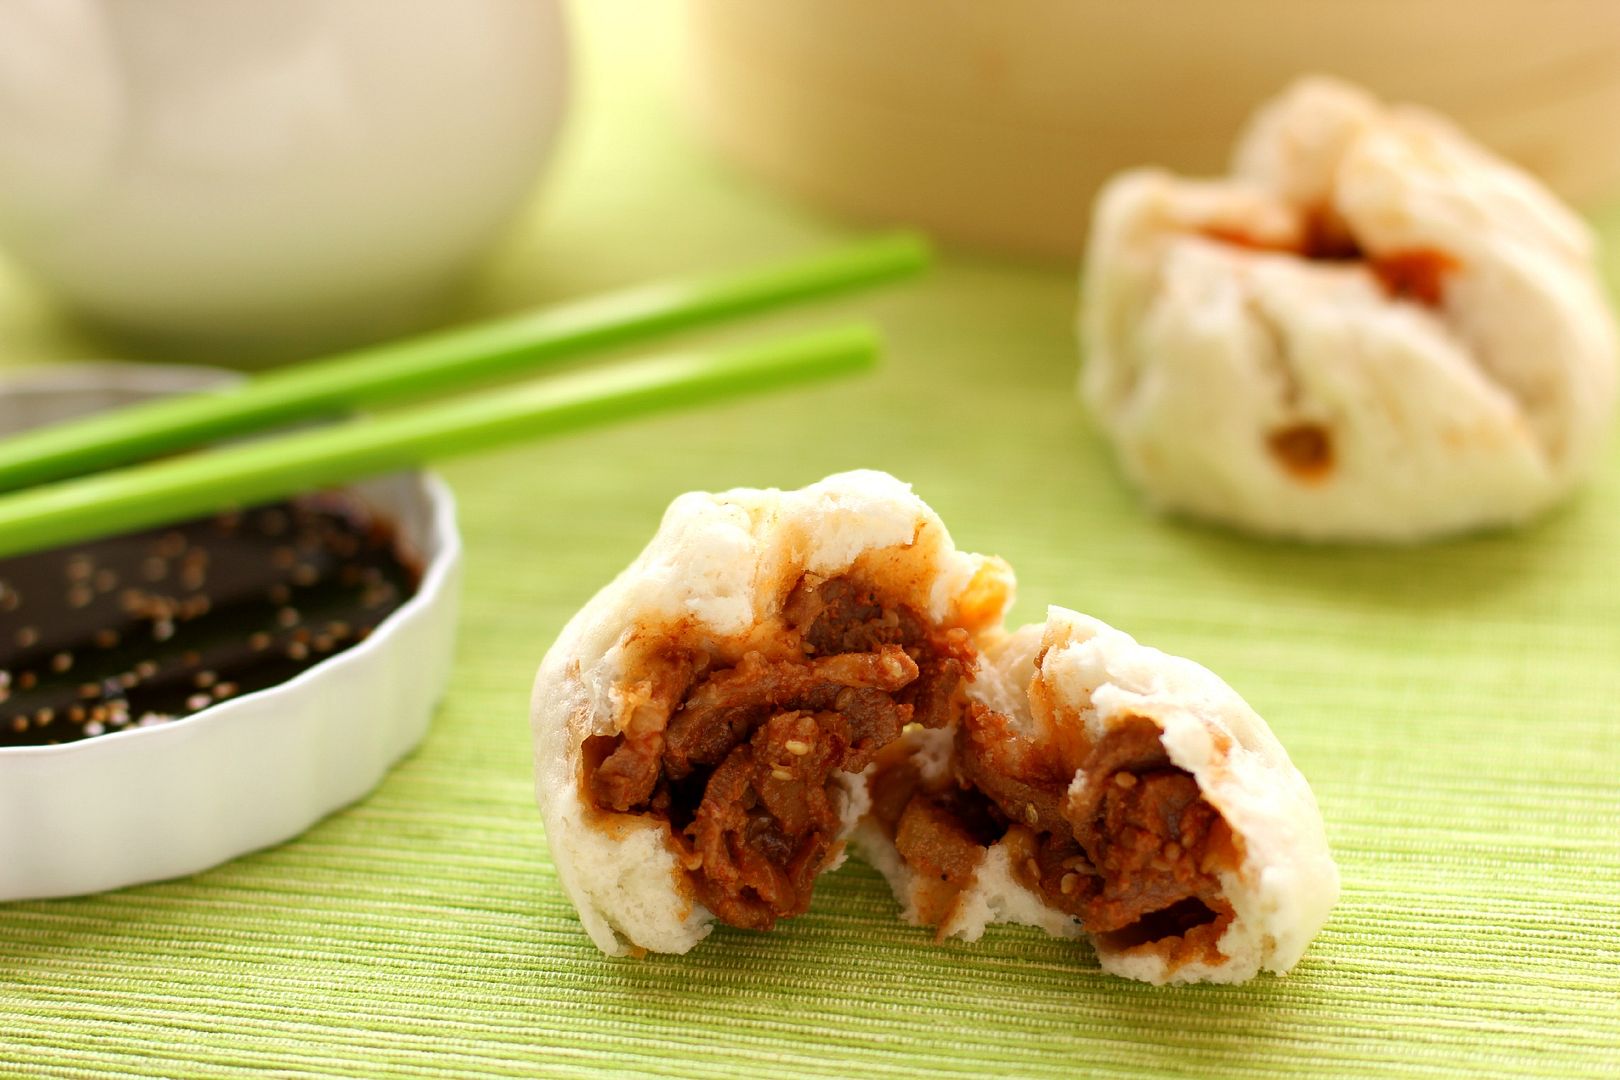
Bulgogi combines the spice of Korean Pepper Paste with sultry sesame, fruity Korean pear, and garlic. It’s delicious over rice, but it really shone when it was coated in this delicious sauce and stuffed into these gorgeous buns (ha ha ha, gorgeous buns!) It took me three tries to make the perfect bāozi, but this version really is the tops. I can honestly say that pulling my Fluffy McFluffypants buns out of my new bamboo steamer was one of my proudest kitchen moments to date. Even better, these buns were one of my most delicious kitchen moments to date!

It may require an initial investment to begin cooking and enjoying Asian food if you aren’t used to doing so (I had to buy soy sauce, rice wine, rice vinegar, Korean pepper paste, sesame oil, sesame seeds, and potato starch to stock my pantry). But these ingredients can be used over and over again, and meals like this are so worth the investment!

In fact, I was so excited about this recipe that I made you a video tutorial on how to shape the bāozi. Sophomoric jokes are included at no extra charge:

Have you ever eaten at a dim sum restaurant or cooked a new-to-you cuisine at home?

Pork Bulgogi Bāozi (Steamed Korean BBQ Buns)


Recipe by: Willow Bird Baking with bun recipe adapted from Rasa Malaysia and bulgogi recipe adapted from Food.com
Yield: 12 pork bulgogi buns

Korean BBQ, or bulgogi, is a delicious combination of salty, sweet, and spicy. It’s amazing served over rice, but even better stuffed inside these slightly sweet, light-as-a-feather steamed buns. I did all the legwork for you in this one, trying multiple bun recipes and tweaking quantities until they were just right. So trust me: invest in the ingredients (you’ll use them over and over again) and make these buns! If you don’t have a steamer, here’s an easy way to make one.

Bun Ingredients:
8 grams active dry yeast
160 milliliters lukewarm water (100-110 degrees F; I use a candy thermometer to do a quick check)
½ teaspoon white vinegar
280 grams low-protein flour (Hong Kong Flour or Cake Flour)
100 grams wheat or potato starch (I used potato)
100 grams icing sugar
30 grams shortening
10 grams baking powder
10 milliliters cold water

Pork Bulgogi Ingredients:
1 pound pork loin (cut into thin, wide slices)
5 tablespoons soy sauce
2 cloves garlic, minced
2 sprigs green onions, chopped
1/2 yellow onion, sliced
2 tablespoons McCormick toasted sesame seeds
black pepper
1 tablespoon and 1 1/2 teaspoons honey
2 1/2 – 4 tablespoons Korean red pepper paste (gochujang)
1 tablespoon McCormick red pepper flakes
1 1/2 teaspoons sesame oil
1 teaspoon vegetable oil for cooking
1/2 cup chopped Korean pear

Sauce Ingredients:
1 tablespoon + 1/4 teaspoon soy sauce
1 1/2 teaspoons honey
1 1/2 teaspoons sweet soy sauce
1 1/4 teaspoons sesame oil
1 teaspoon Korean red pepper paste (gochujang)
3/4 teaspoon rice vinegar
1/4 teaspoon packed brown sugar
1/4 teaspoon McCormick toasted sesame seeds
chopped green onions

Directions:
NOTES: I measured the bun ingredients by weight for accuracy. You can convert them to imperial measures using an online calculator, but I’d use weights if you can.

Some of the ingredients for this recipe (Korean red pepper paste, rice wine, sweet soy) are easiest to find at an Asian supermarket. I bought my steamer there as well, for around $13 — a great investment considering how many times I’ve already used it! Finally, you can usually find pork ready-sliced for bulgogi at an Asian supermarket; if not, freeze the loin for a bit before slicing with a serrated knife, which will make it easier to cut through.


Make pork bulgogi: Whisk together marinade ingredients (soy sauce, garlic, green onions, onion, sesame seeds, sesame oil, pepper, honey, pepper paste, and pepper flakes) and toss pork in marinade. Cover and let the pork marinate overnight in the refrigerator (for at least 8 hours).

Heat a skillet over medium heat and add vegetable oil. When oil is shimmery, add some of the pork mixture (don’t crowd the pan — I cooked about 4 slices at a time) and cook, turning occasionally, for about 5 minutes or until brown and done. Remove this pork to a cutting board. Cut all pork into small bite-sized pieces and place it in a bowl. Toss in chopped Korean pear.

Make sauce: Whisk all sauce ingredients together except green onions. Pour about half of the sauce over your pork bulgogi (you want it lightly coated, not swimming in the sauce) and reserve the other half (with green onions sprinkled in) for dipping.

Make bāozi: Sift together the flour, wheat or potato starch, and powdered sugar into a mixing bowl. Make a well in the center and gently combine the yeast, vinegar, and warm water in the well. Let this sit and proof for around 10 minutes before slowly mixing in the surrounding flour mixture bit by bit, forming a dough. Add in the shortening and then knead (on a KitchenAid mixer at about speed 4-6, knead for about 4 minutes; by hand, knead for about 10 minutes) until the dough is smooth and elastic. It shouldn’t be sticky to the touch.

Transfer the dough to a bowl lightly coated with vegetable oil. Cover it with a damp cloth and place it somewhere warm to rise (I always put mine into an oven that has been warmed for a few minutes and then left open to drop to just above room temperature) for 30 minutes. I never noticed too much rise, so don’t worry if it doesn’t seem like a huge difference.

After 30 minutes, dissolve the baking powder completely in the water and sprinkle this mixture over the bao dough. Knead it in to fully combine it (I used the dough to mop up any of the mixture that was still on the bowl and kneaded it in well — an uneven distribution of baking powder can cause discoloration of your buns). Recover the dough and let it rest for 10 more minutes.

Fill and shape your buns: Turn the dough out onto wax paper and pat it into an even width. Use a dough cutter or sharp knife to divide it into 12 roughly equal sections. Take one section and gently roll it out to about 1/4 inch thick with a rolling pin (I keep the sections I’m not working with covered with a damp cloth so they don’t dry out.) Holding the dough in your non-dominant hand, place the pork bulgogi filling in the center and carefully pleat the edges of the dough together at the top, turning the bun as you work, until it is fully closed (see the video below for a demonstration of to shape the buns — and jokes about the word ‘buns,’ of course). Place each bun on a square of wax or parchment paper.

Steam your buns: Preheat your steamer by boiling water and a teaspoon of vinegar over medium-high heat in a saucepan with your steamer on top (here’s a photo of how your steamer setup should look). Preheating the steamer ensures your buns will fully rise. Once it’s steaming, place buns in each tier (being careful not to crowd them), spray them with a bit of water (this help ensure a smooth surface), and close the steamer. Cook for 12 minutes without opening the lid. Remove the buns to a cooling rack to let them cool. Serve warm with reserved dipping sauce.

You don’t see many product reviews on Willow Bird Baking, because I’m choosy with how I share this space. My choosiness reflects my own ideals for Willow Bird in addition to my respect for the community we have here. When I get the opportunity to work with a company I genuinely love and use in my own kitchen, though, I’m always thrilled to share. McCormick is just such a company, and I’m excited to share their forecast of upcoming flavor trends.

Disclosure: McCormick sent me a Flavor Forecast Immersion Kit of ingredients, and compensated me for other ingredients and for my time and creative energy. I value my readers such that all opinions expressed on Willow Bird are always my own.

If you liked this post, please:
Subscribe to Willow Bird Baking
Follow Willow Bird Baking on Twitter
Follow Willow Bird Baking on Facebook
Give this post a thumbs up on StumbleUpon
Pin It


Shareother ways to share this post with friends

Clementine Mousse Cheesecake

When I was still in high school, Mike moved into an apartment with one of his friends. Until then, we hadn’t had a place to hang out together alone (there was no metro in Charlotte, alas).

We had loafed about at our parents’ houses, sat in my driveway, and driven a billion miles all around Charlotte, but this was different. This was a living room, a television, a kitchen — an entire domestic space that could be (okay, with the exception of that roommate thing) ours.

High school was a hard time for me. I was both a feisty perfectionist and a social oddball. I didn’t fit in to anyone’s circle (now I realize this might’ve had more to do with my own choices than with anyone actually excluding me). I wrote poetry in my notebook, read novels no one else cared about, and walked the halls alone or with one close friend at lunch. I wore pajamas to school because I couldn’t be bothered getting dressed for that mess. I rebelled in tiny ways — writing the school board indignant letters, painting red x’s on my nails, scrawling lots of angsty notes — because in all of the ways that mattered, I had to be picture perfect.

Every day I’d walk around for 7 hours, surrounded by people but completely alone. I didn’t play an instrument so I didn’t hang out with the marching band. I was in a couple of plays but didn’t totally mesh with the drama crowd. I went to a couple of debate tournaments but never really made a connection. I excelled in everything I tried, but formed real relationships with no one. This is heavy stuff, I guess, but the reason I mention it is just to say that Mike’s apartment became a refuge.

(And also, as a side note, now would be a good time to ask why in the world I’m involved in planning my upcoming 10-year high school reunion.)

I’d spend all day long pushing myself, participating in class and working with classmates. Then the last bell would ring and I’d finally lug my 50 gajillion pound bookbag out to my blue Pontiac Sunbird. I’d drive way too fast (the speeding ticket I got the other day suggests that my driving habits haven’t changed) to Mike’s apartment. I’d knock on his window and a few seconds later, the door would open and I would fall into a hug, finally “home.”

And we did play house. I helped him with laundry. I went grocery shopping with him. I carefully prepared boxes of Hamburger Helper and proudly presented him with heaping plates of it. We’d snuggle on the couch and watch Star Trek: The Next Generation.

When I had to climb back into my car each evening (my limited provisional license imposed a curfew of 9 p.m.), I felt like I was leaving home instead of driving towards it.

Ah. Well. Time alone together isn’t a novel thing anymore. Mike and I often hang out at my apartment or at his place in Raleigh. We also still watch Star Trek, but we’ve moved on to Deep Space Nine. And I still cook him meals, though they usually don’t begin with a box.

Some things have changed; some things have stayed the same. But we talk about those Star-Trek-and-Hamburger-Helper days like my parents talk about their Sliding-Down-the-Hall-in-Socks days. They’re part of our mythology now, something we’ll give our children someday, a story they might not understand until they make a home in someone else. Maybe someday they’ll find themselves preparing a box meal in a sweet little kitchen, or sliding down the hallway in the middle of the night. Or maybe their story will be a different one altogether.

. . .

This cheesecake is certainly not a box meal, but it is something special I made for Mike recently. He loves clementines (or ‘tines, as we call them), and I was going to take him a bushel last time I went to Raleigh, but I opted to make a big cheesecake with them instead. The top layer is a sweet clementine mousse made with clementine curd, and the bottom layer is a traditional creamy cheesecake. I candied some clementine slices to decorate the top and served each piece of cake with a heap of freshly whipped cream. I can’t be sure, but I don’t think Mike missed the Hamburger Helper.

Tell me a story from your love mythology. What memories do you have from early on in your relationship (or from relationships past)?

Clementine Mousse Cheesecake


Recipe by: Willow Bird Baking
Yield: 10 pieces

Clementine Mousse Cheesecake is a creamsicle lover’s dream. Bright, airy clementine mousse sits atop a smooth, creamy traditional cheesecake in a cookie crust. I decorated mine with pretty candied clementines and served it with freshly whipped cream. In addition to being delicious, this recipe is also easy to break down over multiple days so there’s never too much to do at once.

Cheesecake Ingredients:
3 (8 ounce) packages cream cheese, at room temperature
1 cup granulated sugar
1½ tablespoons all-purpose flour
2 teaspoons vanilla extract
3 large eggs
34 Golden Oreos, processed to fine crumbs*
6 tablespoons butter
*Golden Oreos give off some grease while cooking, so you may want to place a baking sheet under your springform to catch this — you can also substitute graham cracker crumbs if you’d rather, but the oreos are delicious!

Clementine Mousse Ingredients:
1 1/4 cups clementine curd
2 1/2 tablespoons cold water
1 envelope (2 1/4 teaspoons) unflavored gelatin
1 cup chilled heavy whipping cream

Candied Clementine Ingredients:
3 clementines with firm (not loose) skin, well washed and dried
4 cups water
2 cup sugar

Directions:
Notes: Cheesecakes are simple and super customizable. New to cheesecake making? Watch my 6 minute Cheesecake Video Tutorial for visual assistance! This recipe can be divided up over several days — you can make the clementine curd and candied clementines in advance. Make the cheesecake the day before you want to assemble the dessert. Then make the mousse and assemble the cake with enough time to chill before serving.

Make candied clementine slices: (If you make these in advance, keep them in their syrup and store in the fridge. When ready, gently heat them again, remove the slices, and proceed with the drying procedure.) Cut each clementine into 6 horizontal slices. Remove any seeds carefully. Preheat the oven to 200 degrees and place a cooling rack over a baking sheet on the center rack. Prepare a plate of sugar and set it aside.

Heat the sugar and water in a saucepan (wide enough for the slices to sit in a single layer) over medium heat, stirring until the sugar dissolves. Place the slices in in a single layer and gently simmer them for 40-50 minutes, turning them once. The white bits should begin to get transparent. Pull them out of the syrup with tongs and place them on the cooling rack to dry for around 1 hour to 1 hour 15 minutes, or until they’re no longer sticky to the touch. Gently dredge them through the plate of sugar, shaking off excess, to coat any sticky portions. Cool completely.

Make the cheesecake: Preheat the oven to 350 degrees F. Lightly grease a springform cheesecake pan. Combine the cookie crumbs and melted butter in a small bowl. Toss with a fork to moisten all of the crumbs. Using a flat-sided glass, press into an even layer covering the bottom and sides of your cheesecake pan (you want it to be tall — try to get to about 2.5-3 inches high — and a little thicker than for your usual cheesecake; maybe 1/4 inch thick so it won’t crumble). Bake the crust for about 6 minutes and let it cool as you make your cheesecake filling.

In a large bowl, beat the cream cheese and sugar on medium-high speed until well blended. Beat in the flour. Add in the vanilla and beat until well incorporated, scraping down the sides of the bowl as needed. Beat in the eggs one at a time, scraping down the bowl between each addition. Pour the filling into your crust.

Bake until the top is lightly browned, puffed and cracked at the edges, and the center moves only very slightly when the pan is lightly shaken (about 40 minutes). Check while baking periodically and put a pie shield (or strips of foil) around the top of your pan to protect the crust edges if they’re getting too dark. Just don’t let the shield/foil touch the crust — it’s delicate and might crumble. When you pull the cheesecake out, you can use a sharp knife to score a circle around the top of the cheesecake about an inch inside the crust so that as it cools and chills/sinks, it won’t pull the crust in too much. Don’t worry if it’s pretty, because you won’t be able to see it in the finished product! Let cheesecake cool completely on a wire rack before chilling it in the fridge for at least 3 hours.

To make the mousse: Pour 2 1/2 tablespoons water into small saucepan. Sprinkle the gelatin evenly over the water and let it stand to soften for about 15 minutes. Meanwhile, place 7/8 cups of the clementine curd in large bowl. Stir the remaining 3/8 cup curd in another small saucepan over medium-low heat until very warm.

Stir the gelatin mixture over medium-low heat until the gelatin is dissolved and the liquid is clear (do not boil, or the gelatin may not set up your mousse anymore). Whisk the warm gelatin mixture into the 3/8 cup of warm curd. Then gradually whisk this gelatin-curd mixture into the curd in the large bowl. Let this cool slightly while you make your whipped cream.

Using an electric mixer, beat the heavy cream to stiff peaks (it helps to use a chilled bowl and whisk). Fold around 1/3 of this cream into the curd to lighten it, and then fold the rest in gently. Pour the mousse over the cheesecake and chill it to set. Top the cake with candied clementines and serve with fresh whipped cream (I whip up about a cup of cream with about 2-3 tablespoons of powdered sugar to make mine — it’s a good use for leftover cake and is lovely with the cheesecake!)

If you liked this post, please:
Subscribe to Willow Bird Baking
Follow Willow Bird Baking on Twitter
Follow Willow Bird Baking on Facebook
Give this post a thumbs up on StumbleUpon
Pin It


Shareother ways to share this post with friends

Clementine Curd

I noticed early on in my teaching career that 6th graders do this thing. A discussion with them about a novel might go something like this:

Me: “What was the main character’s opinion on the government?”
Student: (unsure of the answer) “Hm. Uh.” (stares off into space for a few moments) “Ummm.” (gives up) “Well, I don’t know.”

All the while, the novel itself sits like an ironic little nugget in front of them, untouched. I look at it pointedly. The student looks at me blankly.

At this point, I usually get a little heavy-handed. I give my head an exaggerated scratch and give a shrug of cartoon proportions. “Is there any way we could possibly find out? Is there anywhere in the universe we might be able to get a hint about the answer?” Typically after this bit of melodrama on my part, the students catch my drift, grin, and grab their books.

It’s not a personal failing that they don’t immediately use available resources to form their ideas. Instead, it’s part of natural child development — every 6th grader who enters my class needs to build this skill. I’m here to construct a staircase toward resourcefulness and independence.

In keeping with that, I tell my 6th graders all year long that we’re going to work on finding evidence.

We hunted through the novel Crispin to find for evidence to support our opinions about feudalism. We hunted through a biography about St. Giles to find evidence for why the author included him in the story. We read Greek myths to find evidence to build a definition of what a hero quest is. We found evidence in The Giver that Lois Lowry’s “utopia” wasn’t really all that perfect.

Evidence isn’t just for language arts, either. In the after school Cookie Camp I’m leading right now, the following exchange is a common one:

Me: “What’s the next thing we have to do?”
Camper 1: “Maybe add the egg?”
Camper 2: “Oh, or maybe add the flour!”
Camper 3: “Do we have to add the vanilla next?”
Me: (requisite melodrama) “How in the world are we going to decide?! We don’t want to mess up our cookies, but how do we know what to do?!”
Campers: “Oh, the recipe!”

Oh. The recipe, y’all.

Maybe as you accumulate practice and skill, you can begin to deviate from the recipe, combine recipes, or even create recipes. But in those beginning stages when you’re just learning to bake (or form opinions, or understand new subject matter), you have to learn to go back to the source.

6th grade was a long time ago for me, but I still need this reminder sometimes. I’ll find myself fretting about a decision or wondering why events are unfolding like they are. My cloud of anxiety can narrow my perspective. I need to return to the source during those times. I need to increase my time reading the Bible, return to the basics, and remind myself through the words inspired by God Himself who He is and what He’s done. I need to let go of the other ways I try to find my answers — worrying, busying myself with my to-do list, trying on different reactions to the situations I encounter.

That being said, this post isn’t so much a polished prescription (“just go back to the source, duh — problem solved!”) as it is a revelation of where I am in my thought process right now. I’m reading through Job, the most difficult book of scripture for me (and I don’t mean in terms of comprehension), for the second time in a year. I’m finding some answers, but also more questions. And always, always, I’m asking God to take me back to the recipe, to give me evidence — building blocks of information about what I can do (or what I can release) to glorify Him.

There’s a song I love that says, “[A Father’s] whisper’s like a bridge; it’s a river spanned.” It’s true — every whisper of truth He gives me spans a river of need. So I’ll keep collecting His whispers and weaving them into a path, an answer that won’t be complete in this lifetime.

. . .

In the meantime, in the spirit of going back to the basics, here’s a simple, foundational recipe. A lovely fruit curd can play so many versatile roles in the kitchen: a spread for buttered toast, a dip for shortbread cookies, a base for mousse, a filling for cakes and cupcakes, a quick snack on a spoon. I’ve been in love with Fine Cooking’s foolproof lemon curd recipe since I first found it, and I use it as a base for all other curds I create, such as this clementine curd.

While it takes quite a bit of stirring and only lasts a week in the fridge, curd can be frozen for up to about two months. It’s worth the investment of time and your arm muscles.

How do you go “back to basics” in your life?

Clementine Curd


Recipe by: Adapted from Fine Cooking’s foolproof lemon curd recipe
Yield: about 1 1/2 cups of curd

Bright, sweet, tangy clementine curd is lovely spread on toast, stuffed into cupcakes or cakes, or used as a base for mousse. I make a big batch and freeze it, using it in many different recipes over the course of a few weeks. This curd recipe is adapted from one dubbed “foolproof” by Fine Cooking, and it’s perfect for those who have never made curd before and worry about accidentally cooking their eggs or curdling their mixture.

Ingredients:
6 tablespoons unsalted butter, at room temperature
1 cup sugar
2 large eggs
2 large egg yolks
2/3 cup fresh clementine juice
1 teaspoon grated clementine zest

Directions:
Cream butter and sugar together in a large bowl for about 2 minutes or until light, pale, and fluffy. While mixing, slowly add eggs and yolks. Beat the mixture for 1 minute before mixing in the clementine juice. Don’t worry if the mixture looks curdled, because it’ll get smooth as it cooks and the butter melts.

Cook the mixture in a heavy saucepan over medium heat, stirring constantly, for about 20-25 minutes (lemon curd only takes 15, but I’ve found the clementine curd takes me longer), or until it’s thickening and it registers at least 170 degrees on a candy thermometer (I usually end up around 175 before I get it to the thickness I want). Just don’t let the mixture boil. Also, remember it’ll continue thickening as it cools and then chills, so don’t feel like you have to get it to its final thickness on the stove. When it’s done, it should leave a clean path on the back of a wooden spoon when you run your finger down it.

Remove the clementine curd from the heat and stir in the clementine zest. Transfer the mixture to a wide bowl and place a layer of plastic wrap directly on the surface of the curd to prevent a film from developing. Place the curd in the refrigerate to chill it. Cover it tightly and keep if you about a week in the fridge or for about 2 months in the freezer.

If you liked this post, please:
Subscribe to Willow Bird Baking
Follow Willow Bird Baking on Twitter
Follow Willow Bird Baking on Facebook
Give this post a thumbs up on StumbleUpon
Pin It


Shareother ways to share this post with friends

Caramelized Banana Upside-Down Coconut Cake & Coconut Whipped Cream

I don’t remember the first spice I ever purchased with my own money, but I’m betting it was a packet of McCormick® chili seasoning. And I’m betting it was during my senior year of college. I lived in a cozy apartment above my professor’s garage. It was furnished with a blue couch from Goodwill that was missing its back legs, a twin bed, a sturdy desk, a dresser, and a couple of plants I was doing my best to keep alive.

There wasn’t a kitchen, but there was a fridge downstairs in the garage and a microwave in my room. Mike assembled an electric skillet for me (he likes to say, “remember that skillet I built you?”) as well. My makeshift “kitchen” wasn’t much, but since I’d left the comfort (and cost) of a meal plan behind the previous year, it would have to do.

Many of my meals were hot dogs and quesadillas, usually devoured with lots of salsa while watching The Cosby Show, or People’s Court. But I did call my mom and ask her to send over her chili recipe — the one we ate with peanut butter maple syrup sandwiches when I was little.

Heading to the grocery store to buy the chili ingredients was the beginning of a new adventure for me. In those days, the aisles and ingredients were unfamiliar, and I ambled to and fro searching for each item. Each line of the recipe flooded my head with new questions: Where are the canned tomatoes? Do I buy dry beans or canned? Where is the spice aisle? How lean do I want my ground beef? Wait, do I own a spoon?

I do remember my mom specifying that she used McCormick’s chili seasoning though. And I remember sprinkling the packet on my ground beef just as she’d instructed. And finally, I remember the utter satisfaction of sitting down with a bowl full of cheesy, sour creamy, spicy chili (and watching A Different World, no doubt) that I’d made myself.

McCormick is definitely a part of my earliest cooking memories, and it claims a huge chunk of my spice rack (or really, spice shoe organizer) today. Far from being stuck in the past, though, the company released the McCormick Flavor Forecast 2012 on Tuesday.

This report, compiled by chefs, sensory scientists, trend trackers, marketing experts, and food technologists, highlights up-and-coming flavor trends around the world. It’s used both to guide the company’s product development as well as to inspire home cooks with new flavor combinations.

While McCormick has been producing a Flavor Forecast since 2000, this year’s report is the first to be global in scope. It’s organized into six trends: Honoring Roots, Quest for the Ultimate, Veggies in Vogue, Simplicity Shines, Flavorful Swaps, and No Boundaries. Each trend includes two innovative spice and ingredient combinations to spark your culinary creativity.

One of the flavor combinations that sounded particularly tempting to me was ginger and coconut. I decided to use this simple pair to create an indulgent Caramelized Banana Upside-Down Coconut Cake. Upside-down cakes are both simple to create and delicious. You’ll love this comforting, nostalgic dessert even more with a few modern twists: the bold zing of ginger in the caramelized banana topping, a moist coconut cake in the place of a regular yellow cake, and a big dollop of coconut whipped cream on top. I added a generous sprinkle of toasted coconut for extra texture and flavor. In short, it was insane. I can’t wait for you to taste this thing!

In the meantime, I’d love for you to join in the conversation: which of McCormick’s flavor combinations could you see yourself using? What are some ideas for recipes you want to create? Get inspired!

Caramelized Banana Upside-Down Coconut Cake With Coconut Whipped Cream


Recipe by: Willow Bird Baking, with coconut whipped cream adapted from Nutty Kitchen
Yield: 10 pieces

This thing is downright celestial. Upside-down cakes are easy to create, but come out so beautiful and delicious. This one uses a sweet, tender coconut cake in the place of a yellow cake, and adds the bold zing of ginger to the caramelized banana topping. Enjoy it with a cloud of cool coconut whipped cream (one of my new favorite things!) and some crunchy toasted coconut.

Topping Ingredients:
3/4 stick unsalted butter
3/4 cup packed light brown sugar
4 large just-ripe bananas, cut on a diagonal into 1/2-inch slices (you might want to have an extra banana or two on hand just in case your bananas are skinnier or something weird)
1 teaspoon McCormick ginger
1 teaspoon finely chopped McCormick crystallized ginger
pinch salt

Cake Ingredients:
1 cup all-purpose flour
3/4 cup sugar
1 1/2 teaspoons baking powder
1/2 teaspoon salt
1/4 cup vegetable oil
1/2 cup Thai Kitchen coconut milk
1 teaspoon McCormick vanilla
1 egg

Coconut Whipped Cream Ingredients:
2 cans Thai Kitchen coconut milk (refrigerated overnight)
3 tablespoons powdered sugar
1/2 teaspoon McCormick vanilla
flaked coconut for toasting and topping

Directions:
NOTE: This recipe is designed for a 10-inch cast iron skillet, but it can also be made in a 10-inch cake pan or a 12-inch cast iron skillet. To make it in a cake pan, prepare the topping in a separate saucepan first, add it to your cake pan, and then continue with the recipe as usual. If you make it in a 12-inch skillet, it’ll produce a thinner cake, may require an extra banana or two, and may take about 5 minutes less to bake. Because cast iron can vary, no matter what size you use, be sure to check the cake’s doneness early and often, starting around 20 minutes, with a toothpick inserted into various spots.

Toast coconut flakes: Preheat oven to 350 degrees F. Spread flakes out on baking sheet. Bake for a few minutes, stirring every minute or so, until the coconut is lightly browned (watch it like a hawk). Transfer to a plate to let cool.

Make cake: In a 10-inch skillet (see note above about using different pan sizes), melt the butter over medium-high heat. Stir in the brown sugar, ground ginger, crystallized ginger, and salt and simmer for 4 minutes (or until the mixture is bubbly and caramelized), whisking constantly. Be careful — hot sugar is no joke! After 4 minutes, remove the mixture from heat and add the bananas as close together as possible, fitting as many in as you can.

In a separate bowl, whisk together the flour, sugar, baking powder, and salt. Add the oil and coconut milk and whisk like a crazy person for 1 minute. Add the egg and vanilla and whisk it in well. Pour the batter over the banana mixture, evening it out with a spatula.

Bake 25-30 minutes or until it’s lightly brown on top and a toothpick inserted in various parts of the cake comes out with just a few moist crumbs. Let cool in the pan for exactly 5 minutes (any more and it will harden in the pan, and less and it might fall apart) before running a knife around the edge of it and carefully (use oven mitts! hold both sides of the skillet, holding the plate on with the heels of your hands! enlist a spotter! did I mention that hot sugar is no joke?) invert it onto a large serving platter.

Make coconut whipped cream: Using a spoon, remove the cold coconut solids from each can of coconut milk (save the coconut water for other uses). Place it in a chilled bowl with vanilla and powdered sugar. Whisk like the dickens with a chilled beater until it has a whipped cream-like consistency (this probably took over 10 minutes with my electric mixer, but it’s worth it). Serve cake warm with a big dollop of cold coconut whipped cream and a sprinkle of toasted coconut.

You don’t see many product reviews on Willow Bird Baking, because I’m choosy with how I share this space. My choosiness reflects my own ideals for Willow Bird in addition to my respect for the community we have here. When I get the opportunity to work with a company I genuinely love and use in my own kitchen, though, I’m always thrilled to share. McCormick is just such a company, and I’m excited to share their forecast of upcoming flavor trends.

Disclosure: McCormick sent me a Flavor Forecast Immersion Kit of ingredients, and compensated me for other ingredients and for my time and creative energy. I value my readers such that all opinions expressed on Willow Bird are always my own.

If you liked this post, please:
Subscribe to Willow Bird Baking
Follow Willow Bird Baking on Twitter
Follow Willow Bird Baking on Facebook
Give this post a thumbs up on StumbleUpon
Pin It


Shareother ways to share this post with friends

Milnot Cheesecake Cheesecake

The world lost a firecracker just a few days before Christmas. My Great Grandma Thelma passed away at 99 years old, but her spirit can’t be extinguished.

Grandma was as comfortable with a gun and a dog as she was in a dress and pearls. As if to match her personality, her hair remained a shocking shade of red right up until the last few years of her life, when soft white took over. The lines on her face deepened and multiplied over time, no doubt spurred on by belly laughs and smiles.

She was a home to those who needed a home, a laugh to those who needed a laugh, and a light to all of us.


Grandma Thelma through the years.

My mom, who was very close to her grandma and lived with her for awhile growing up, got to travel to Missouri to attend her funeral. Person after person stood up and reflected how Grandma had touched their lives. Mom says she couldn’t hold it together enough to talk about her Grandma then, but when she returned home, she sat down with my dad and began the task of capturing Nettie Thelma Logsden in words.

I can’t think of a better way to introduce you to this wonderful woman than to share Mom’s list with you. So without further ado, here are Life Lessons from Grandma Thelma. Some of them are funny, some of them are profound, some of them are downright suspect. But they’re all thoroughly Thelma.

1. Work hard. People are counting on you.

2. Turtles will always return to one spot. Best to paint your initials on their shells (hot pink paint will work) to identify them later.

3. Outhouses also look great painted hot pink!

4. Bacon grease, duck eggs, and bread soaked in grease make healthy dog food.

5. Spoons, Yahtzee, Rummy, and Skip Bo are great fun!

6. Cold beer and peanuts taste exceptionally good after mowing the lawn.

7. A bite of peanut butter will take the beer smell away (in case someone drives up)!

8. Empty your own “potty.”

9. A straw hat pulled way down will keep your hair from blowing in the wind while driving.

10. Empty bottles and doll heads are keepers!

11. Everything is a keeper!

12. Enjoy the silly things in life: Furbies, Billy Bass, Rockin’ Santas, et cetera.

13. Flour with weevils is fine; just sift them out and it’ll be good as new!

14. If the dog was good enough to tree something (even at 3 a.m.), it’s our duty to go shoot it!

15. If you are old enough to reach the pedal, you are old enough to drive.

16. If something is on sale, buy 10. Even if it’s bubble bath and you don’t have a bathroom. You’ll use it someday.

17. Under the bed is a great place to store all the Cokes you bought on sale.

18. Rock hunting is fun (especially hunting for shiny ones. Or round ones. Or flat ones. Or arrow heads. Well, pretty much ANY rock!)

19. Don’t do anything until the supper dishes are done. You’ll hate coming back to do them later.

20. Fishing, hunting, camping are all fun when done with family.

21. Annie Over is a wonderful game, but it’s hard to find a place to play!

22. Guitar, banjo, harmonica, and piano are all fun to play, and you can teach yourself!

23. Staying up late (even all night) is okay.

24. You can tie a string around a lizard’s tail and pin it to your shirt and it will wiggle. Beetles with strings tied to their leg are great fun, too. (Julie’s note: WHAT?! Really, Grandma?! Do not try this at home, y’all.)

25. You can drive better and faster if you hunch over the steering wheel. (Don’t forget the straw hat!)

26. The fish in Peggy’s lake like to eat chicken fat.

27. When you stir your gravy, put your whole body into it.

28. You don’t really ever need lunch.

29. Take people in if they need a place to stay.

30. Aunt Jaquie’s house is a great place to wash your hair, do laundry, or just hang out.

31. Certain plant leaves are good for making “frog tongues.”

32. Sleeping is better with a small pillow between your knees, a fan on, and a big swig of mineral “oral” before bed. (A True Confessions magazine helps, too.)

33. An electric skillet makes great fried chicken. (Or pork steaks!)

34. Waffles are great with white corn syrup and real butter.

35. Never talk bad about anyone. (Never THINK bad about anyone.)

36. Store-bought frozen cream pies are great!

37. Churn your own butter and drink the buttermilk.

38. Writing on the “tunnel” walls is fun.

39. A whole lot of kids can fit into one car on “$1.00 night” at Pine Hill Drive-In.

40. Grandkids are special!

41. Great grandkids are special!

42. Great, great, grandkids are special!

43. Milnot Cheesecake is very easy and tasty.

I may not agree with Grandma Thelma on every detail (I throw away my doll heads, personally. And OH MY GOSH, no live animals are pinned to clothing on my watch), but she’s struck plenty of truth here. She lived a bright, full, strong life, and treated every person who walked into that life with love and respect. I’m glad the world had her for 99 years.

One thing she was certainly right about is Milnot Cheesecake. It’s an old no-bake recipe named after Milnot, an evaporated milk substitute. The Milnot or evaporated milk whips into a whipped cream consistency. When combined with cream cheese and a package of lemon Jell-O gelatin, it creates a light, lemony cloud of mousse. Grandma Thelma used to wake up on occasion and declare, “I think I’ll make a Milnot cheesecake.”

But the title of this essay isn’t a mistake. The dessert pictured here isn’t a Milnot Cheesecake. It’s a Milnot Cheesecake Cheesecake.

Never content to leave well enough alone, I decided to stack a layer of Milnot Cheesecake on top of a layer of creamy, thick regular cheesecake. This double-layered dessert has a mixture of textures and a light, airy flavor that would make Grandma Thelma proud. The recipe might look a little fiddly — and true, it isn’t a dessert you can whip up in a few minutes — but it can be broken up over a few days into very manageable pieces.

In honor of Grandma Thelma, have a slice! (Then go finish your supper dishes. You aren’t going to want to come back to those later.)

Milnot Cheesecake Cheesecake


Recipe by: Willow Bird Baking, using an age-old recipe for Milnot Cheesecake found on Recipes for Laughter
Yield: serves 8-10

This recipe is a twist on the classic, no-bake Milnot Cheesecake. A layer of fluffy, delicious Milnot cheesecake sits like a delicate lemon cloud over a rich layer of traditional cheesecake. A cinnamon graham cracker crust encircles the whole shebang. See the note on scheduling below to break this recipe into a few manageable parts.

Cheesecake Ingredients:
3 (8 ounce) packages cream cheese, at room temperature
1 cup granulated sugar
1 1/2 tablespoons all-purpose flour
2 teaspoons vanilla extract
3 large eggs
2 heaping cups graham cracker crumbs (I use the cinnamon kind)
6 tablespoons butter

Milnot Cheesecake Topping Ingredients:
1/2 small package of lemon Jell-o gelatin mix (this will be 3 tablespoons and 1/4 teaspoon of the powder)
1/2 cup boiling water
8 ounces (1 package) of cream cheese, at room temperature
2 tablespoons and 2 teaspoons sugar
1/2 teaspoon vanilla
a few drops yellow food coloring, optional
1/2 of a 12-ounce can Milnot or evaporated milk, chilled (this will be about 3/4 cup)
crumbled graham cracker crumbs for decorationg

Directions:
Notes: Cheesecakes are simple and super customizable. New to cheesecake making? Watch my 6 minute Cheesecake Video Tutorial for visual assistance! This recipe can be divided up over several days. You can make the cheesecake one day and chill it overnight, make and add the Milnot cheesecake topping the next day, and serve on day 3!

Make the cheesecake: Preheat the oven to 350 degrees F. Lightly grease a springform cheesecake pan. Combine the cookie crumbs and melted butter in a small bowl. Toss with a fork to moisten all of the crumbs. Using a flat-sided glass, press into an even layer covering the bottom and sides of your cheesecake pan (you want it to be tall — try to get to about 2.5-3 inches high — and a little thicker than for your usual cheesecake; maybe 1/4 inch thick so it won’t crumble). Bake the crust for about 6 minutes and let it cool as you make your cheesecake filling.

In a large bowl, beat the cream cheese and sugar on medium-high speed until well blended. Beat in the flour. Add in the vanilla and beat until well incorporated, scraping down the sides of the bowl as needed. Beat in the eggs one at a time, scraping down the bowl between each addition. Pour the filling into your crust.

Bake until the top is lightly browned, puffed and cracked at the edges, and the center moves only very slightly when the pan is lightly shaken (about 40 minutes). Check while baking periodically and put a pie shield (or strips of foil) around the top of your pan to protect the crust edges if they’re getting too dark. Just don’t let the shield/foil touch the crust — it’s delicate and might crumble.

When you pull the cheesecake out, you can use a sharp knife to score a circle around the top of the cheesecake about an inch inside the crust so that as it cools and chills/sinks, it won’t pull the crust in too much. Don’t worry if the circle you cut isn’t pretty, because you won’t be able to see it in the finished product! Let cheesecake cool completely on a wire rack before chilling it in the fridge for at least 3 hours.

Make Milnot Cheesecake Topping: Dissolve Jell-o in boiling water and chill in the refrigerator until slightly thickened, about 25 minutes. Meanwhile, cream the cream cheese, sugar, food coloring, and vanilla in a large bowl. Beat the chilled Jell-o into the cream cheese mixture until completely combined and smooth.

In a large chilled bowl, whip the chilled Milnot with a chilled beater until it forms stiff peaks. Stir about 1/3 of the Milnot mixture into the cream cheese mixture to lighten it up. Then gently fold the rest of the whipped Milnot in until the mixture is uniform in color and completely combined. Pour Milnot filling evenly onto your cheesecake (you will use most of it but not quite all — pour the remainder into a separate dish and cover with graham cracker crumbs. Chill it to make a separate “individual” cheesecake dessert!). Garnish your cheesecake with graham cracker crumbs. Chill the cake for 8 hours. Keep refrigerated and serve chilled.

If you liked this post, please:
Subscribe to Willow Bird Baking
Follow Willow Bird Baking on Twitter
Follow Willow Bird Baking on Facebook
Give this post a thumbs up on StumbleUpon
Pin It


Shareother ways to share this post with friends

1 2