Month: November 2011

Bright Pepper Jelly (and Welcome to the new Willow Bird Baking)

Last week I did around 8 billion google searches for recipes, and a solid million of those (give or take a few) were for pepper jelly.

I’d recently been inundated with it at restaurants — pepper jelly on fried pimiento cheese balls, pepper jelly on grilled chile cornbread, pepper jelly on fried green tomatoes — and had developed a bit of an obsession with the stuff.

My recipe search yielded tons of pepper jellies, but none were satisfactory. I was willing to experiment with the hot-sweet balance and the tang of my jelly, but I had one non-negotiable: I didn’t want the recipe to involve canning.

I’d never canned before. I didn’t know how to can. I didn’t want to learn a whole new thing in the middle of a busy week. I wasn’t sure if I had all the materials I needed. There were lots of reasons for my stubbornness. But much to my annoyance, recipe after recipe began, “Sterilize six half-pint mason jars . . . .”

Finally, still skeptical, I broke down and read about the process of preserving food. If you’ve ever done any canning yourself, you probably know what I found out:

It’s easy.

Like, super easy. You sterilize some jars (which can be as simple as running them through the dishwasher), pour a simple hot jelly mixture into them, close the lids, and then boil them to create a seal. The “equipment” you needed was limited to jars, a pair of tongs with some rubber bands on the end for gripping, and a big stock pot. Really? This was what I was afraid of?

Running smack into a wall of my own self-doubt forced me to realize that it was comprised of shoddy materials — insecurity, laziness, haste — and needed to be torn down. It also reminded me of Willow Bird Baking’s reason for being: to share life lessons and build kitchen confidence in other home cooks just like me. If I shy away from a new technique, how can I encourage my friends to charge ahead and tackle unfamiliar things?

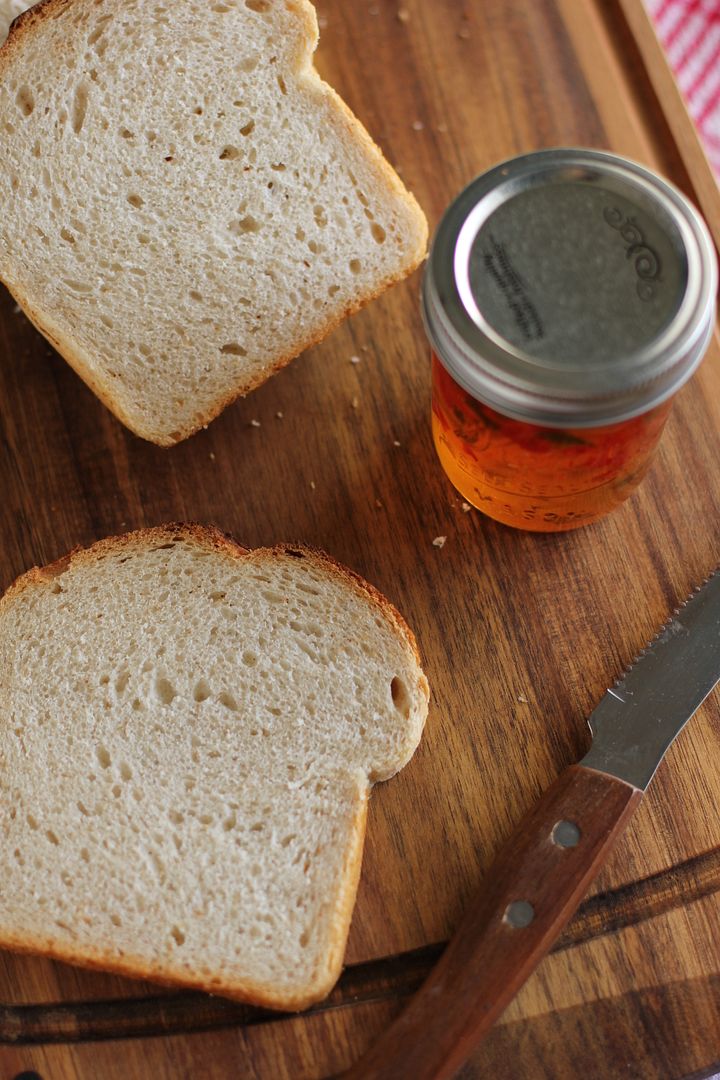
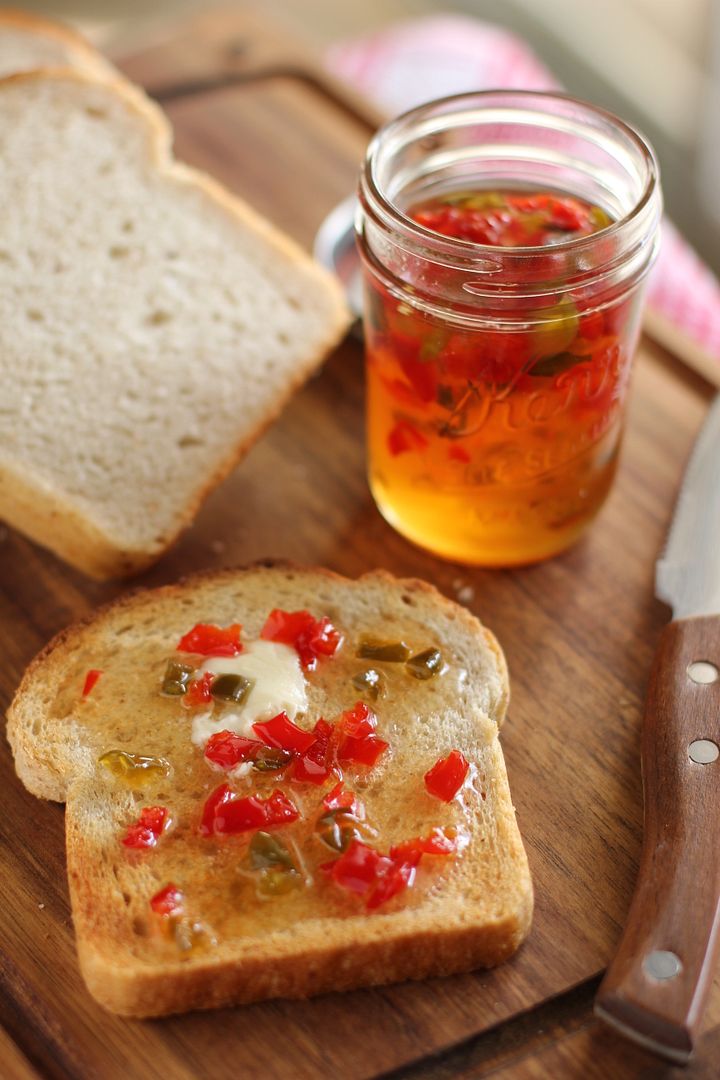
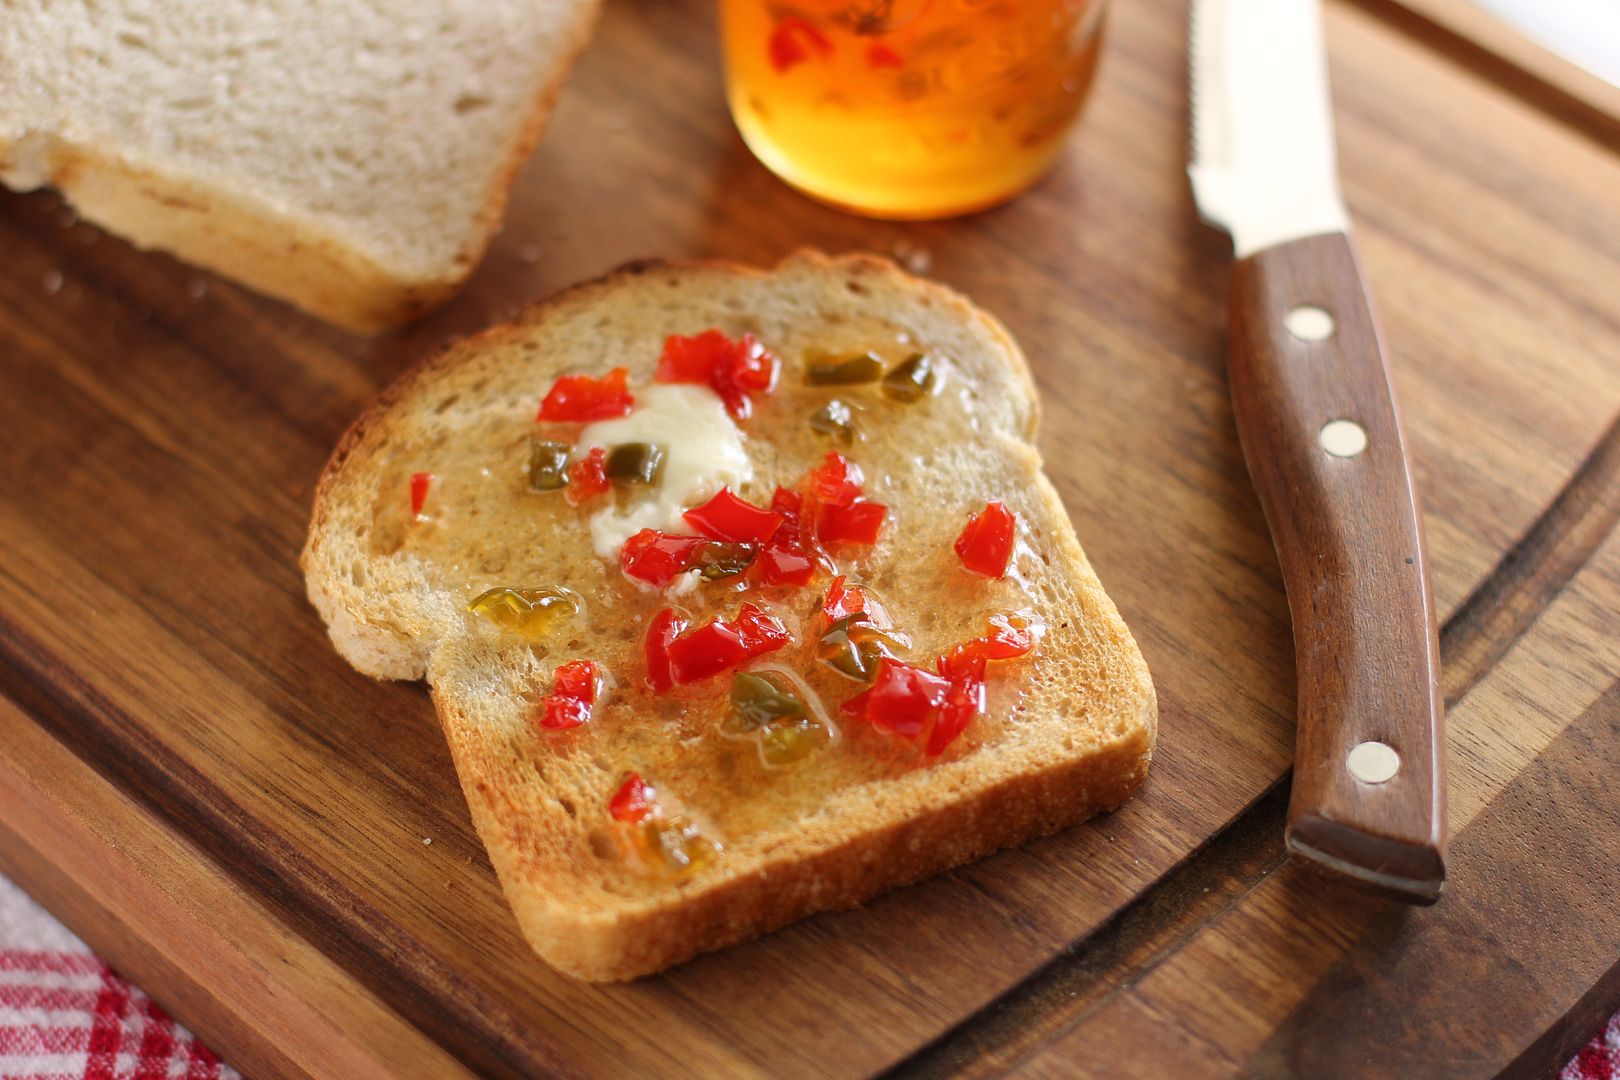
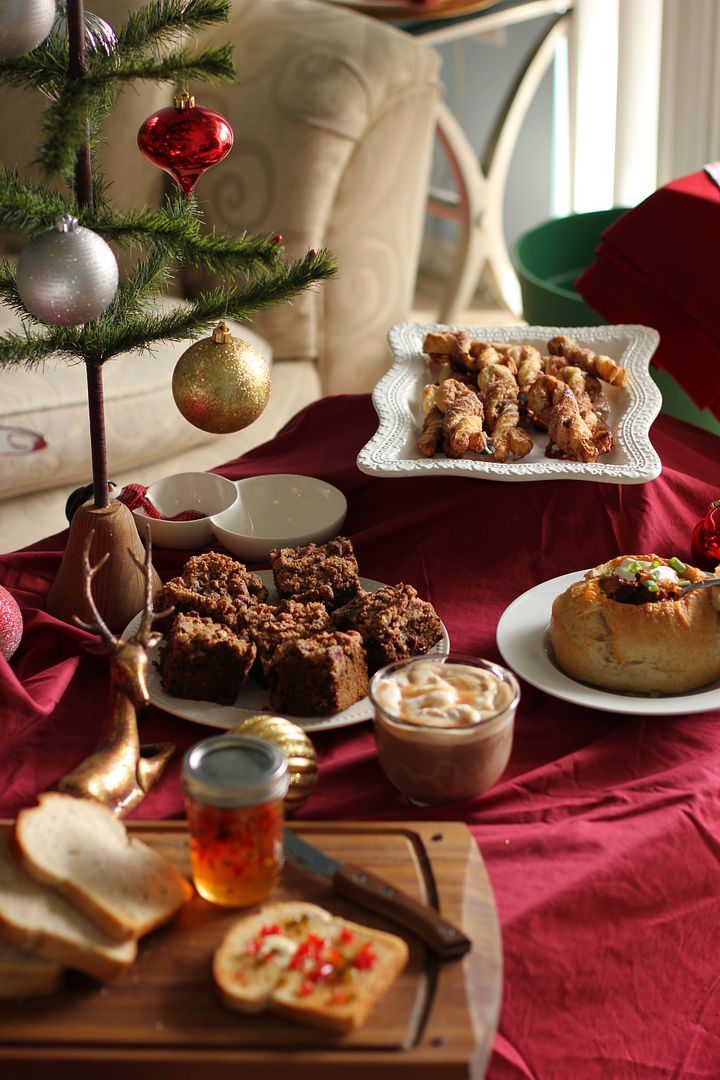
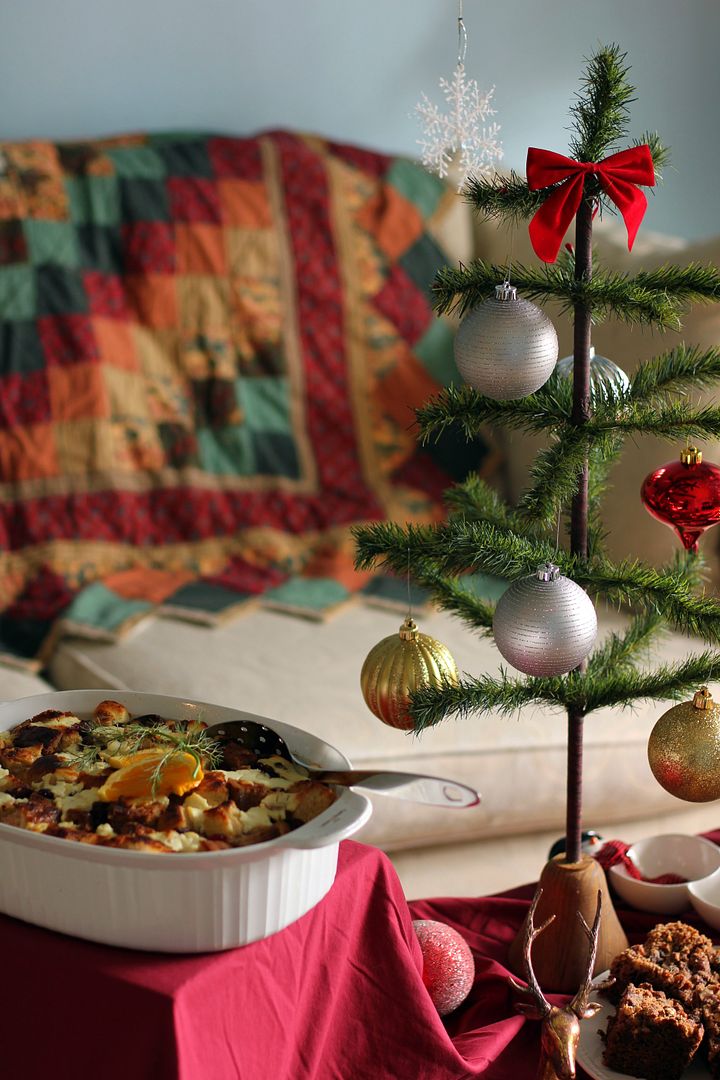
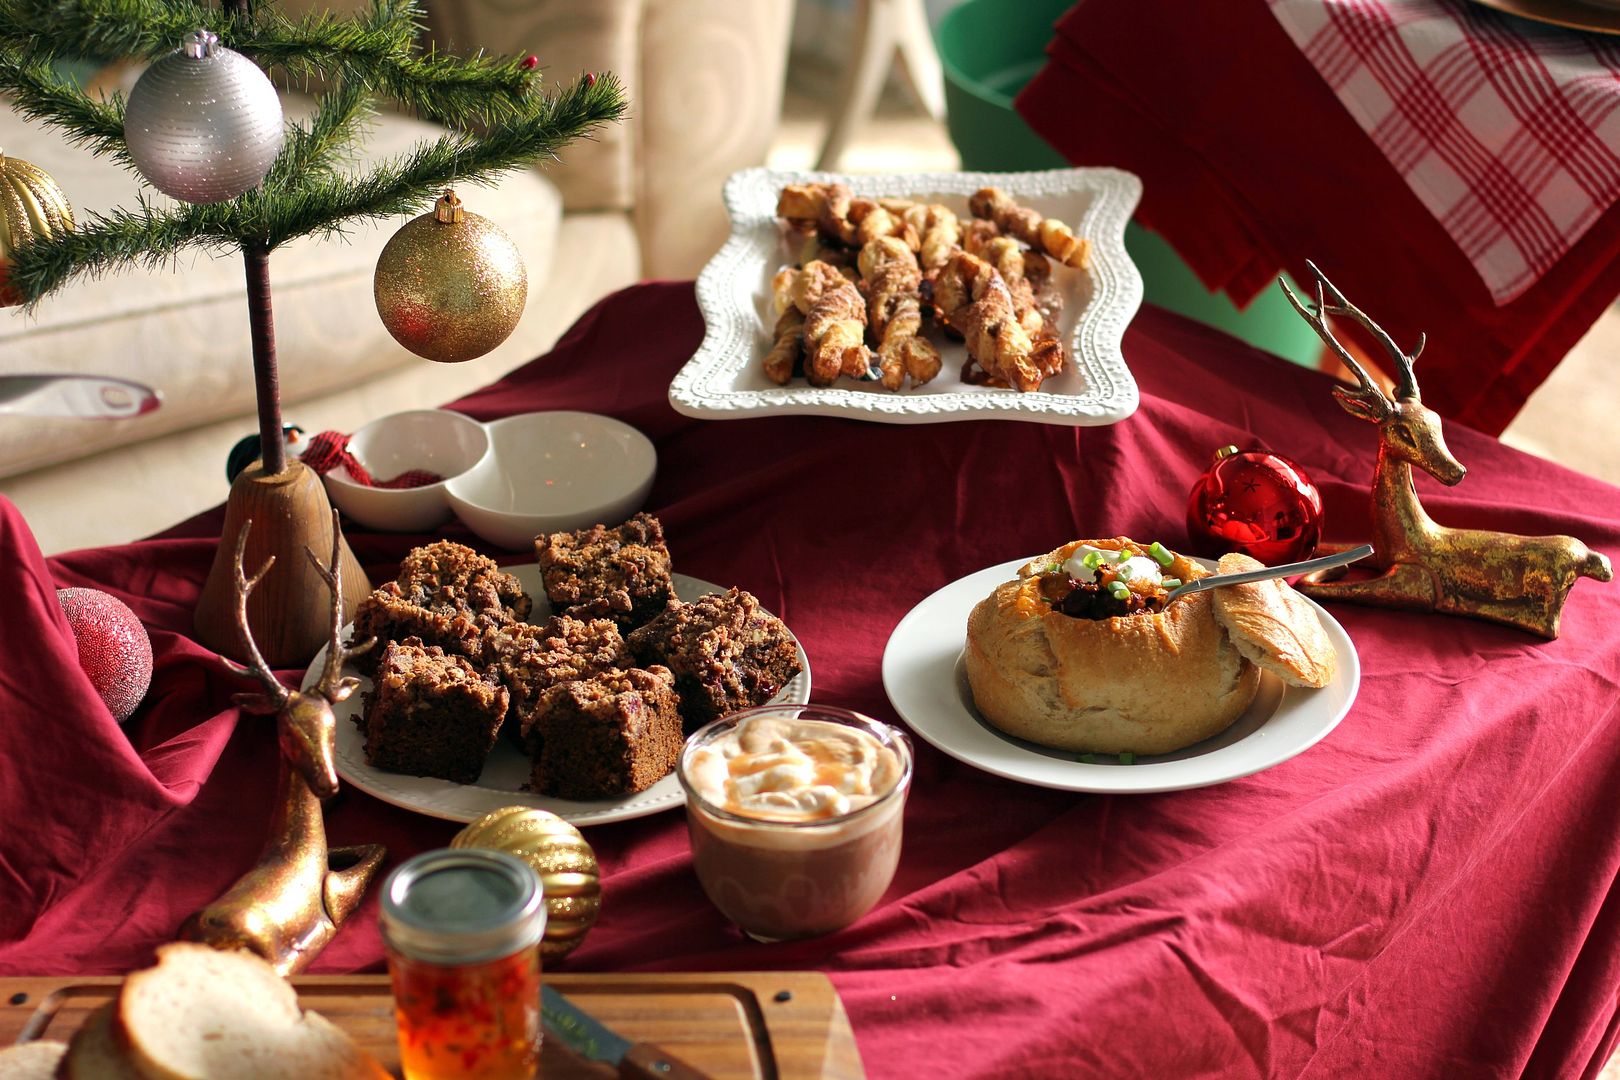
Feeling admonished by my own website’s mission, I prepared my materials and successfully canned seven lovely jars of bright pepper jelly. Mike and I glopped it onto buttered sourdough toast by the spoonfuls at our Make-Ahead Holiday Breakfast Party on Saturday morning.

My pride in having tackled a new challenge renewed — as it always does — my dedication to the community here at Willow Bird Baking. Every comment or anecdote we share with one another encourages me when my pie crust turns to pie dust, my cake is falling over, or my brownies are lying in the floor. We’re all in this together, and the result is more than just great food. The result is great friendships.

. . . and pepper jelly.

Speaking of the bonds we’ve forged over pepper jelly and other such culinary challenges, I’ve got something to show you. I’ve waited for weeks to reveal what I’ve been working on behind the scenes: Welcome to the new Willow Bird Baking!

We have a brand new home on the web (at willowbirdbaking.com) and a clean, warm new design. Willow Bird Baking is also sporting a new, exhaustive recipe index where you can browse recipes by type, season, meal — and even by color!

This news means more to me than just a makeover. Willow Bird’s appearance finally reflects the comforting, loving, simple environment we’ve created here. The blog become a forum to share everything from family memories to laughter over our mistakes. Really, the fact that I can reveal this new chapter in Willow Bird’s life to you means the world to me. Thank you for reading.
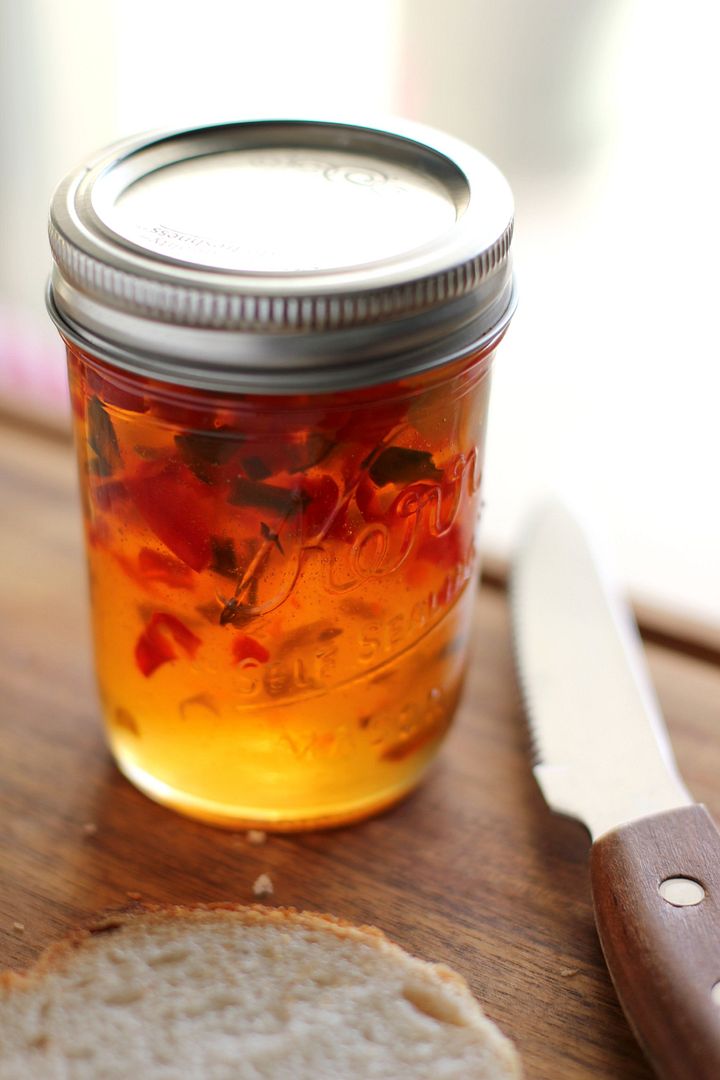
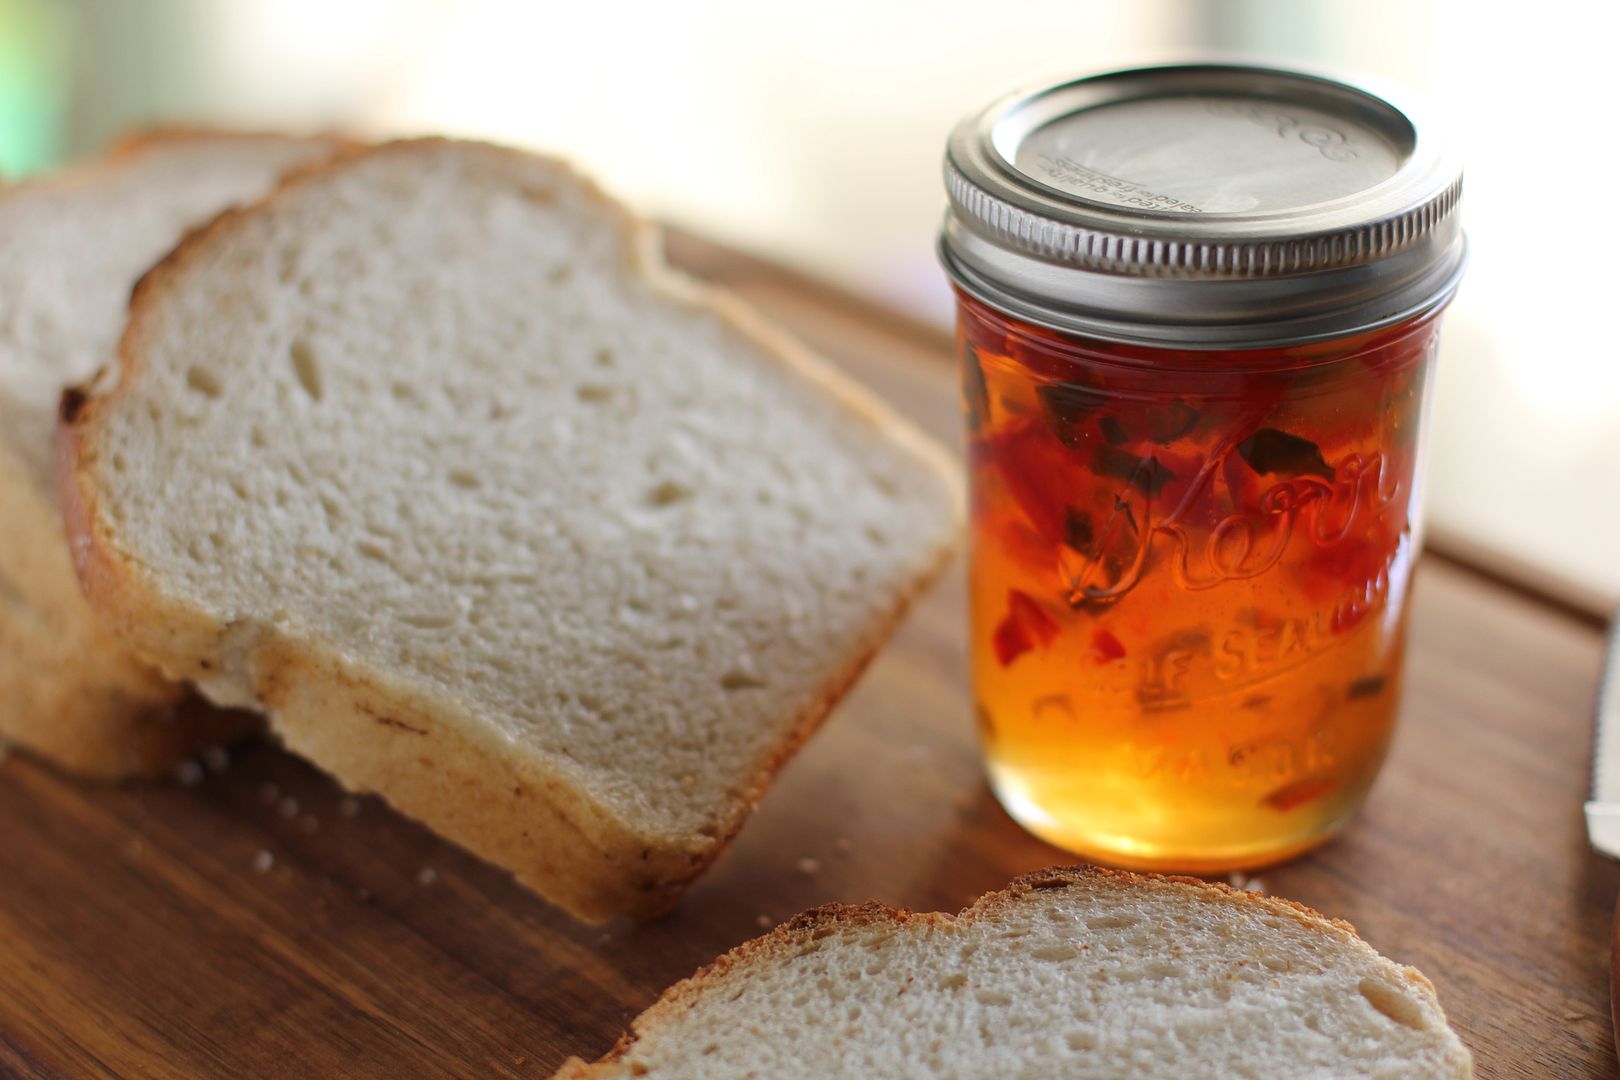
Bright Pepper Jelly


Recipe by: Adapted from (thanks, Erin for this recipe!)
Yield: 7 half-pint jars of jelly

This pepper jelly is bright, tangy, and has the perfect balance of hot and sweet. Feel free to adjust the ratio of peppers to your taste, though, so long as the overall quantity is 4 cups. The consistency is that of a thin jelly — if you like a thicker, spreadable jelly, I hear you can double the amount of pectin in the recipe. Serve this pepper jelly spooned over crackers with cream cheese or slathered on buttered toast. Oh, and don’t worry if you’ve never canned anything before; the recipe below will walk you through the process step by step.

Ingredients:
2 1/4 cups finely chopped red bell peppers
1 1/4 cups finely chopped green bell peppers
1/2 cup finely chopped jalapeno peppers
1 cup apple cider vinegar
1 (1.75 ounce each) package powdered pectin (or 2 if you want a thicker jelly)
5 cups white sugar

Equipment needed:
6 or 7 (8-ounce or half-pint) canning jars
tongs (preferably with rubber bands around the ends to improve grip)
a large stockpot or canner (with room for your jars to be fully submerged with 2 inches of water above the top of the jars)
a dish towel or rack to keep the jars off the bottom of the pot

Directions:
Note: Do not adjust the amount of sugar and vinegar in canning recipes. Always use gloves when chopping jalapenos or other hot peppers and avoid touching your eyes or face. Wash your hands and surfaces immediately when finished.

Prepare ingredients: Chop the peppers by hand and then drain them in cheesecloth to remove excess moisture. Set them aside while you sterilize your jars. You can also measure out sugar and vinegar so that you’re prepared.

Sterilize your tongs and 7 (8-ounce) canning jars: Place rubber bands on the end of the tongs, which will make it easier to grip your jars. Boil the ends of the tongs for 5 minutes to sterilize them. Sterilize your jars, lids, and rings by running them through a short cycle on the dishwasher or using the oven method or boiling water method (see below). No matter which method you choose, time them to be finished when your jelly is ready (preparing the jelly takes about 15 minutes) so that you can put the hot preserves into hot jars.

Oven method: Preheat the oven to 175 degrees F. Wash the lids and jars with hot, soapy water and rinse them. Line the lids and jars up on a baking sheet (open sides up) and bake them for 25 minutes.

Stovetop method: Wash the lids and jars with hot, soapy water and rinse them. Boil the jars and lids covered with water for 15 minutes.

While jars sterilize, make jelly: Place all of the peppers into a large saucepan over high heat. Add the vinegar and fruit pectin and bring the mixture up to a full rolling boil, stirring constantly. Stir in the sugar and return the mixture to a full boil. Boil exactly 2 minutes, continuing to stir constantly. Remove the mixture from the heat and skim off any foam before carefully and quickly ladling the jelly into hot, sterile jars. Fill each jar to within 1/4 inch of its top. Cover each jar with a flat lid and screw on its ring.

Process your jars: Slowly lower the jars with tongs into a large stock pot or canner with a rack or a folded towel inside so the jars do not touch the bottom. Cover the jars with hot water that isn’t boiling (the water depth should be about 2 inches above the top of the jars — and make sure your pot is large enough that it won’t boil over when the water boils). Bring the water to a full boil and process the jars for 5 minutes before removing them with tongs and cooling completely. Hearing the jars pop while they cool is normal — this is the sound they make while they’re sealing!

Store in a cool dark place until you’re ready to serve over crackers with cream cheese, or on hot buttered toast. For best quality, use within a year. Refrigerate jars after opening for up to 1 month.

If you liked this post, please:
Subscribe to Willow Bird Baking
Follow Willow Bird Baking on Twitter
Follow Willow Bird Baking on Facebook
Give this post a thumbs up on StumbleUpon
Pin It

Foodbuzz 24×24: The Make-Ahead Holiday Breakfast Party (Recipe: Salted Caramel Mocha Hot Chocolate)

I remember that Christmas morning with all the clarity of the glass icicles adorning our Christmas tree — at least one of which was shattered each year, an inadvertent Christmas tradition. Mom was sitting on the couch in her dramatic floral robe. The scent of coffee — which I loved, despite being averse to the bitter taste — filled the house. The rest of the family was milling about the living room, preparing to distribute the presents.

Suddenly, with a pine needley, jingle-jangly harrrrrumph!, the Christmas tree outright fell on my mother.

I mean, one minute that thing was standing tall, looking regal and festive, and the next it was on her head. She let out a startled cry and flailed from between its branches, sending ornaments and pine needles flying around the room.

Mom will disagree — and okay, my little brother’s First Christmas ornament broke, and that was sad — but this was quite possibly the most hilarious and lively Ruble Christmas morning to date.

Other Christmas mornings were notable too. There was the one where I found, after opening all my gifts, that I hadn’t received the one thing I wanted most: a pedal go-kart. I pasted on a happy face, but I was disappointed. I did have one present left, but it was a card and didn’t look promising.

The card turned out to be from Santa. I scanned it halfheartedly, and realized that it was a set of instructions. I was supposed to head upstairs to my sister’s room. Suddenly, my heart filled with hope. I charged up the stairs eagerly and shot through the door. There, in all its bright yellow glory, was my go-kart!

Other years brought a dose of holiday reality. When I was around 6, I opened my parents’ closet a few days before Christmas to put some clothes away. To my great surprise, I found myself staring at a gigantic dollhouse. I was so stunned that it took me a few moments to realize that this must be a poorly hidden Christmas present.

My tiny heart filled with glee as I briefly surveyed the three-story mansion, complete with furniture, a balcony, and landscaping. I’d always been enamored with miniatures, and now my parents had apparently decided to indulge my dollhouse obsession. I closed the door, thrilled at my discovery and determined to act surprised when I received my gift.

On Christmas morning, I ran downstairs and sure enough, the dollhouse was standing in the living room like a beacon of childhood happiness, boasting a big bow. I squealed joyfully and ran over to it, only to hear my parents call out, “That’s for your sister!

Those four words — so tiny! so brief! — cut me down faster than a fir tree on a Christmas farm.


family photo!

Then there was the Christmas morning I woke up and accidentally stabbed myself in the nose while trying to brush my hair out of my face. My entire family, probably confused but not surprised by the fact that I’d managed to injure myself immediately upon waking, waited patiently while I tried to stop the bleeding.

I couldn’t make this stuff up.


salted caramel.

It’s true; Christmas morning has varied wildly over the years — exciting, disappointing, joyous, dangerous, absurd. One constant that we’ve all come to cherish, though, is Christmas morning breakfast. Every single year, without fail, my mother wakes up early, bakes an egg casserole, and rolls out dough to make fresh cinnamon rolls. While we’re all still counting sugar plums in our jammies, she’s hard at work in the kitchen.

This year, in her honor, I decided to design some recipes specifically for a holiday breakfast — dishes that in addition to being fancy and indulgent, could be prepared almost entirely in advance. To test my menu — that’s my excuse, and I’m stickin’ to it — I threw a Make-Ahead Holiday Breakfast Party, where I decked my halls and created a make-believe Christmas morning.

The party turned out to be special even beyond the menu. See, Mike and I have never spent a Christmas morning together, despite being in a relationship for most of the past 12 years.

I’m not complaining. So many families are separated on Christmas morning because of deployment, distance, and even death. Our situation is downright joyful by comparison. We’re separated each year because both of our families have Christmas morning traditions. We spend time with our own parents in the morning before meeting later to enjoy Christmas afternoon together. This year, though, my Make-Ahead Holiday Breakfast Party was the perfect way to create a “Christmas morning” for just us.

So yesterday morning, we donned our PJs and slippers in true Christmas morning fashion. I lit my first ever fire, put the finishing touches on all of the make-ahead dishes I’d prepared earlier in the week, and we sat down together to eat. Little Byrd sat between us eating her Christmas kibble. Our plates, however, were loaded down with Gingerbread Coffee Cake, Cinnamon Stix with Eggnog Glaze, Savory Bread Pudding with Cranberries and Fennel, Winter Breakfast Chili in Sourdough Bowls, and Buttered Toast with Bright Pepper Jam.

Between bites, we sipped this Salted Caramel Mocha Hot Chocolate. I’m not one for hot breakfast drinks, usually, but I’d make an exception for this thing any day. You coat the mug with hot, buttery salted caramel before pouring in the steaming mocha hot chocolate (where coffee plays a supporting role than the lead). The whole thing is topped with a mess of caramel whipped cream and a caramel drizzle.

I’ll be sharing the other make-ahead breakfast recipes with you throughout the coming weeks as you prepare for the holidays. In the meantime, share your favorite Christmas morning memories. Anyone have any harrowing experience with falling Christmas trees?

Salted Caramel Mocha Hot Chocolate


Recipe by: Willow Bird Baking, inspired by Savory Sweet Life, adapted from Martha Stewart (caramel and cream) and TLC
Yield: 2 big mugs of hot chocolate

I can’t really quantify how buttery, caramelly, chocolatey, and delicious this Salted Caramel Mocha Hot Chocolate is, so let me just say: mmmmmm. I don’t like coffee, but in this recipe it’s there to add richness and balance, and isn’t the dominant flavor. The recipe is designed to be completed mostly in advance, making it lovely for a holiday morning breakfast — or anytime you’re in a festive mood. Also, don’t be afraid of caramel. This recipe includes temperatures, and as long as you use a candy thermometer, you’ll be great!

Mocha Hot Chocolate Ingredients:
1 1/2 cups milk
1/2 cup brewed coffee
2 tablespoons semi-sweet chocolate chips
2 tablespoons bittersweet chocolate chips (I love Ghirardelli 60% cacao)
2 tablespoons sugar

Caramel Sauce and Cream Ingredients:
3/4 cup sugar
1/8 cup water
3/4 cup heavy cream
1/8 cup creme fraiche or sour cream
1/4 teaspoon pure vanilla extract
Pinch of coarse salt

Directions:
1 to 3 days in advance: Make the hot chocolate and the caramel. First, heat the milk, coffee, chocolate, and sugar in a saucepan over medium heat, whisking constantly until it comes to a boil. Remove it from the heat and whisk it to ensure it’s fully combined. Pour it into a bowl and let it cool, stirring periodically, before covering it and refrigerating it.

Make caramel sauce: Prepare an ice-water bath and set a heavy bowl in it. Heat the sugar and water in a medium saucepan over medium-high heat until mixture boils and sugar dissolves (don’t stir at all, or crystals will form and make your caramel grainy). Use a pastry brush to wash down sides of pan often to prevent crystals from forming. When the sugar starts to turn amber, you can swirl a couple of times to ensure it’s caramelizing evenly.

Cook until the sugar turns a dark amber (definitely use a candy thermometer here! You’re looking for it to read about 345 degrees), 5 to 7 minutes more. Immediately remove from heat, and slowly whisk in 1/2 cup cream (reserve the rest of the cream in the fridge). It will bubble up when you do this, so be careful. Return the caramel to medium heat, whisking and heating until the sugar melts completely and the mixture boils.

Remove the pan from the heat and pour the caramel into a bowl set in an ice-water bath. Let the caramel cool, stirring often, for 10 minutes. Whisk in creme fraiche or sour cream, vanilla, and salt. Cover and refrigerate this.

The morning of: Reheat the chocolate mixture in a saucepan over medium heat on the stove (or for a couple of minutes in the microwave), stirring often. In the meantime, whip your remaining 1/4 cup cream in a cold bowl to stiff peaks.

Coat the sides of two mugs with caramel sauce, reserving a little over half of it. Gently fold most of the rest of the caramel sauce into your whipped cream (reserving a little to drizzle on top). Fill caramel coated mugs with mocha hot chocolate. Top with caramel cream and drizzled caramel. Serve immediately.

Note: I received a stipend from Foodbuzz for creating this meal.

If you liked this post, please:
Subscribe to Willow Bird Baking
Follow Willow Bird Baking on Twitter
Follow Willow Bird Baking on Facebook
Give this post a thumbs up on StumbleUpon
Pin It


ShareOther ways to share this post with friends!

Salted Caramel Chocolate Trifle

The first face to poke through the door of my classroom was that of an older woman. She was followed by one of my 7th grade students, who was followed by a white haired man. “Come in! Find a seat anywhere!” I called as I made last minute adjustments to the position of the projector.

Soon people were pouring into my room. They had arrived for Grandfriends Day, where Woodlawn students invited their grandparents (or grandpeople they’d “adopted”) to eat lunch with them and participate in their classes.

I’m going to go ahead and publicly admit that I was terrified of Grandfriends Day. What activity could I plan that both a 60-year-old and a 12-year-old might enjoy? We usually read novels or tackle projects that take weeks to complete. What concept could I introduce and cover in a meaningful way in 30 minutes?

Thankfully, I learned a trick at the beginning of my teaching career that always serves me well in these types of circumstances: when you’re scared of a new thing, get enthusiastic and give it an honest, earnest try. (This also works with baking, writing, and life in general.) So as the students and their grandfriends filtered into my room, I pasted on a smile.

Once they were all somewhat assembled, I took a deep breath and did something a little ridiculous. I turned on the projector and pressed play on this video (no, really, go watch it). Confusion turned into giggles as Maru the cat repeatedly attempted to gain access to a huge cardboard box. Young and old alike cheered when he finally sprang into its depths. I surveyed the classroom as they watched, concluding that funny YouTube clips were, indeed, a language that spanned the generations.

When the video ended, I posed a question: “What was Maru’s goal?”

“To get in the box!” the class cried in unison.

“Did he accomplish his goal the first time he tried?”

“No!”

“How about the second?”

“No!”

“Did he eventually get in the box?”

“Yes!”

Their enthusiasm was cute. They were still riding the wave of cheer that Maru’s antics had created. I distributed sheets of notebook paper as I issued their assignment: “Write about a time when you, like Maru, had a goal you couldn’t accomplish right away.”

Some dove at their paper with ardor while others thoughtfully drummed fingers or pencils on the desk. A short ten minutes later, though, everyone sat staring at their finished anecdote. I asked for volunteers to share, wholly unsure about the quality of work I was about to receive. I needn’t have been concerned, though. I have great students and, it turns out, they have amazing grandfriends.

One man told of learning to drive a car with a manual transmission and repeatedly killing the engine before finally getting the hang of it. Another told of being determined to get his garden planted despite the rain that threatened to prevent it. A third detailed how he and his construction crew had created a machine that could drive 16 nails a second to accomplish their goals more efficiently.

Two women discussed taking a pottery class and working for months before they produced the bowl or vase they’d envisioned. My students relayed sports goals they’d attempted to accomplish: a back set in volleyball, a backflip in gymnastics. Finally, one of my students raised his hand and asked to read his grandfather’s composition.

His grandfather had worked with a veterinarian as a young man and decided to enter into that profession himself. His application to NC State’s veterinary program, however, was denied. Undeterred, he entered the college for agriculture instead, and — my student articulated the following with great pride — became the first person in his family to graduate from college.

We were all quiet for a minute before one clap — and then another, and then another — began a round of applause for this man’s accomplishment. It was one of those moments (you teachers out there will know just what I mean) when I thought, “Oh, this is why I teach.”

Some folks that day had reached their goal by pushing through the obstacles. Others had used trial and error, learning from their mistakes and adjusting their actions. Still others had created a tool to help them accomplish their objective. That man, though, had courage and flexibility I sometimes lack. Instead of getting discouraged, he changed his goal. He created a path for himself that wasn’t what he’d originally envisioned. The pride his whole family felt at his accomplishment was a testimony to his success.

I wish I’d had that much grace this week when making this Salted Caramel Chocolate Cake. Yes, I said cake, because that’s what this dessert was supposed to be.

My goal was to create a towering chocolate cake drenched in gooey salted caramel and frosted with a smooth, fudgy icing. I saw that goal crumble before my eyes, however, when I opened my refrigerator and found all 6 layers sliiiiiiding down like they were preparing to do the limbo. The skewers I’d added for support were leaning right along with the cake.

I could pretend I handled it well, because this is the internet. For all you know I’m a supermodel who, apart from saving puppies and keeping a perfect house, never loses her temper. In the spirit of honesty, however, let’s just say that there was a solid 30 minutes of angst in my kitchen Wednesday night.

Then somehow I flipped a switch. I stopped trying to restack the layers, grabbed a spoon and my trifle dish (thanks for my trifle dish, Joyce!), and started building this bucket o’ cake. As I worked, my mood improved drastically.

Not only was my trifle pretty, less fuss to frost, and easier to transport, but it was also going to taste every bit as delicious as the cake I’d envisioned. The satisfied faces of my family around the Thanksgiving table the next day confirmed that it was a success.

Your turn: tell me about a time when you had a goal you couldn’t accomplish right away.

Salted Caramel Chocolate Trifle


Recipe by: Adapted from Martha Stewart
Yield: About a billion servings. Or at least 10-15.

This is actually a recipe for a 6-layer salted caramel chocolate cake. Feel free to attempt the cake and keep the trifle as a backup plan in case it doesn’t work — or just make the trifle from the beginning! Either way, the dessert you end up with will be rich, moist, and covered in the most delicious salted caramel and fudgy frosting. By the way, if you’re scared of making caramel, don’t be — just make sure you use a candy thermometer, which takes the guesswork out of the process.

Cake Ingredients:
3 cups all-purpose flour, plus more for pans
3 cups granulated sugar
1 1/2 cups unsweetened Dutch-process cocoa powder
1 tablespoon baking soda
1 1/2 teaspoons baking powder
1 1/2 teaspoons coarse salt
4 large eggs
1 1/2 cups low-fat buttermilk
1/2 cup plus 2 tablespoons safflower oil
1 1/2 cups warm water
2 teaspoons pure vanilla extract

Caramel Ingredients:
4 cups granulated sugar
1/4 cup light corn syrup
1/4 cup water
2 cups heavy cream
1 teaspoon coarse salt
2 sticks cold unsalted butter

Frosting Ingredients:
1/4 cup plus 2 tablespoons Dutch-process cocoa powder
1/4 cup plus 2 tablespoons warm water
2 sticks unsalted butter, room temperature
1/2 cup confectioners’ sugar
Coarse salt
1 pound semisweet chocolate chips, melted and cooled
flaked sea salt, such as Maldon

Directions:
Note on scheduling: You can make the cake layers a few days in advance. Just wrap them and refrigerate them, and take them out and freeze them the day you’ll be cutting and assembling them (which will make them easier to work with). You can make the caramel up to three days in advance and keep it in the fridge — just let it come to room temperature for a couple of hours before using it. The entire cake can be assembled a day in advance and refrigerated, allowing its flavors to meld.

Make the cake: Cut 3 circles of parchment paper and use cooking spray as “glue” to adhere them to 3 9-inch round cake pans. Then grease the pans and the paper (I use Wilton’s Cake Release, but you could also use butter and flour). Preheat the oven to 350 degrees F.

Sift the flour, sugar, cocoa, baking soda, baking powder, and coarse salt together in a mixing bowl. Beat the dry ingredients on low until combined before increasing the speed to medium and adding eggs, buttermilk, warm water, oil, and vanilla. Beat about 3 minutes until the mixture is smooth. Divide it among the three pans.

Place the pans in the oven and bake until a toothpick inserted in the middle comes out with just a few moist crumbs, about 30-35 minutes. Rotate the pans about halfway through so they’ll bake evenly. Let them cool on a wire rack for about 10 minutes before turning them out onto sheets of wax paper and leaving them to cool completely. Stick them in the freezer if you’re going to make a cake; if you’re going for a trifle, just leave them out.

Make the caramel: Slice your butter into tablespoon chunks and set it back in the fridge for later. In a large saucepan, gently combine the sugar, corn syrup, and water. Once you put it on the heat, you won’t stir it anymore to ensure that the sugar will not crystallize and give you grainy caramel. Put a candy thermometer on the pan and heat it over high heat (no stirring!). Once the mixture starts turning amber around 320 degrees, you can gently swirl it every now and then (not stirring!) to ensure the sugar caramelizes evenly. Heat it until the mixture is dark amber (350 degrees on your thermometer), about 14 minutes. Remove it from the heat.

VERY CAREFULLY and slowly, pour in the cream. The mixture will bubble up and spatter so just be prepared and stand back — flaming sugar is no joke! Once you add the cream, whisk the mixture until it’s smooth before returning it to the heat and cooking until it reaches exactly 238 degrees (I know it sounds weird, but apparently this is crucial for the texture), about 2 minutes. Pour the caramel into a medium bowl and add the salt. Let it cool for about 15 minutes before whisking in the butter 1 tablespoon at a time (you’re definitely going to want to enlist another set of hands here; otherwise your arm will fall off).

Make the frosting: In a small bowl, whisk together the cocoa and warm water. In a separate bowl, beat together butter, confectioners’ sugar, and a generous pinch of coarse salt until pale and fluffy. Gradually beat in the melted chocolate and the cocoa mixture. Let this sit for about 30 minutes before you use it.

Assemble the cake (or trifle): If you’re making a trifle, simply tear up the cake and alternate layers of cake and 3/4 cup of caramel in your bowl, using a spoon or offset spatula sprayed with cooking spray to help spread the caramel. Do a layer of frosting in the middle of the dish and another layer on top before drizzling with caramel and sprinkling with sea salt.

Alternatively, if you want to try the cake, freeze your cake layers until they’re firmer (this makes them much easier to work with). Use a long serrated knife to level their tops and cut each layer in half. Place one layer on a serving platter and spoon 3/4 cup of caramel on top, using a spoon or offset spatula sprayed with cooking spray to help spread the caramel. Place another cake layer on top and repeat the process, alternating layers of cake and caramel, leaving the top cake layer uncovered. For goodness’ sake, place dowels through your cake (I’d say at least 4), mark them at the height of the cake, remove them, and cut them down to size. Then replace them in the cake. I’d also wrap the entire cake tightly in plastic wrap before chilling it to prevent sliding. Refrigerate it until it’s set (about an hour) before frosting the top and sides of the cake and sprinkling with sea salt.

Serve the trifle or cake: I think this dessert is delicious no matter what, but it’s absolutely out-of-this-world if you heat a serving of it for about 30 seconds before spooning a big hunk o’ vanilla ice cream on top. I didn’t try this with a cake slice, so I don’t know that it’d hold together — another benefit of a messy trifle.

If you liked this post, please:
Subscribe to Willow Bird Baking
Follow Willow Bird Baking on Twitter
Follow Willow Bird Baking on Facebook
Give this post a thumbs up on StumbleUpon
Pin It


ShareOther ways to share this post with friends!

A Dozen Pumpkin Recipes from Willow Bird Baking

My pumpkin craze is far from over, y’all. Just a fair warning.

The pumpkin shortage over the past two seasons must have really scarred me, because it seems like every time I pass a display I pick up a couple more cans. I don’t mind; my pumpkin stash has come in handy plenty o’ times. Here are a few of my favorite pumpkin recipes, hand-picked to be perfect for your Thanksgiving meal. Enjoy!

1. Jack O’ Lantern Whoopie Pies
2. Pumpkin Spice Pull Apart Bread with Butter Rum Glaze
3. One-Skillet Gooey Pumpkin Cookie Cake

4. Mini Pumpkin Pies
5. Pumpkin Cheesecake Stuffed Snickerdoodles
6. Pumpkin Streusel Swirled Cream Cheese Pound Cake

7. Pumpkin Cheesecake Bread Pudding
8. Vegan Pumpkin Nut Bread
9. Easy Sopapilla Pumpkin Cheesecake Bars

10. Chocolate Pumpkin Truffles
11. Pumpkin Pecan Streusel Breakfast Braid
12. Browned Butter Pumpkin Croquemcake with White Chocolate Chai Mousse

…and you guys know there’s more where that came from. Pumpkin and I are BFFs.

If you liked this post, please:
Subscribe to Willow Bird Baking
Follow Willow Bird Baking on Twitter
Follow Willow Bird Baking on Facebook
Give this post a thumbs up on StumbleUpon
Pin It


ShareOther ways to share this post with friends!

Pumpkin Streusel Swirled Cream Cheese Pound Cake

I recently attended the Foodbuzz Blogger Festival in San Francisco, California, 2,700 miles away from my home. Traveling alone is always a meaningful, reflective experience for me, and over the next couple of weeks, I’ll be sharing vignettes that I hope are meaningful to you, as well.

. . .

I’ve started to write this story countless times. Sometimes you get so tangled up in words that they suddenly seem more like a net than a lubricant, more like a shroud than a lamp.

It’s when the ideas are most important that the words get the stickiest. Personally, I find that I have to scrap those sticky words entirely — sometimes repeatedly — to set myself free and finally get the tale told. So. Here’s another try…

“Proposition?”

It was the first word the man next to me on the bus (the correct bus, thankfully) had uttered, and I didn’t understand what he meant. I looked at him quizzically. He repeated himself, pronouncing the word slightly wrong: “Proposition?”

I noticed he was pointing to something and looked down at the book in his lap. His finger was settled on — what else? — the word “proposition.” I finally put the pieces together. “Oh! Yes, that’s ‘proposition,'” I answered, pronouncing the word correctly. He thanked me and went back to his book with a satisfied nod.

I forget how the conversation started up again, but eventually we were chatting. He introduced himself as Vincent. I told him I was a food blogger and teacher from Charlotte. He revealed that he had family in Winston-Salem but had lived in California for years. Finally, the pleasant conversation ambled back to his book. “What are you reading?” I asked. It seemed like a totally innocent question.

Rather than answering aloud, he turned his book over so I could see the cover. It was 12 Steps and 12 Traditions, an Alcoholics Anonymous book.  I immediately stuck my foot in my mouth wondering if I’d embarrassed him, but he seemed unfazed by the interaction.  I was touched — both that he was diligently reading this book on the bus and that he was willing to share it with me.

But I was also a little self-conscious. How should I respond to the information he’d just shared with his simple gesture? Wouldn’t anything I had to say sound patronizing? After all, while he seemed to have had plenty of hard knocks, I was giving off the air of an easy life. I was wearing a blue Parisian scarf and a camel trench coat, holding a huge camera case, and I’d just flown across the country for a vacation of sorts.

He couldn’t know that the scarf was a gift, the coat a hand-me-down, and the plane ticket a contest prize. Nor did it really matter. I just looked floofy. Floofy in that wealthy lapdog sort of way. And compared to the sort of obstacles he was facing, my life was pretty floofy.

Floofy or not, I decided there was nothing to do except respond sincerely. Quietly, I said, “That’s awesome, Vincent. I really admire that you’re doing that.” He flashed a big smile and I inwardly sighed with relief.

Up until now our chat had been lighthearted, but we’d just turned a corner into SeriousLand (a little known suburb of San Francisco, apparently). Before long we were talking about his recovery (he was on his way to see his sponsor at that moment), his life in San Francisco, and about Jesus. You know, the usual.

I was nervous about missing my stop, but Vincent was getting off at the corner of Lombard too. “The view of the bay is beautiful here,” he said as we alighted from the bus. “You should try to walk around if you get a chance.” He took a moment to direct me toward my next bus stop before shaking my hand and rounding the corner toward his sponsor.

I met a lot of people over the course of my San Francisco trip — even some pretty fancy bloggers! — and I enjoyed them all for different reasons. I did some schmoozing, some eating, some shopping (Dear H&M, please come to Charlotte. Thanks.) But as I sit here in Charlotte with little Byrd snarfling into her supper bowl beside me, Vincent is the one who comes to mind. In a weekend full of people with their game faces on — me included — Vincent was the one who was sacrificially genuine. With a stranger, at that.

I gave him a Willow Bird Baking card. I hope he gets a chance to happen by sometime, and I hope he recognizes himself through the pseudonym I’ve given him. Vincent, if you ever read this: Thank you for a conversation I’ll have tucked in my heart for the rest of my days. Godspeed.

. . .

In honor of a special guy, here’s a special pound cake.

But listen, THIS AIN’T YOUR GRANDMAMA’S POUND CAKE.

Okay, it kind of is, actually. It’s Southern Living’s Cream Cheese Pound Cake and it’s been a staple in many family recipe boxes for decades. But first off, GRANDMAMA DON’T PLAY. She knows exactly what she’s doing in the kitchen, thankyouverymuch.

Second off, this pound cake has a new twist; namely, pumpkin-cinnamon-pecan-streusel-awesomeness swirled throughout the cake. Add the maple brown sugar glaze and some toasted nuts on top and you have the perfect autumn dessert. It’s a handsome one, at that, so consider this recipe for your holiday table.

Have you one of these unexpected, significant conversations?

Pumpkin Streusel Swirled Cream Cheese Pound Cake


Recipe by: Willow Bird Baking, inspired by Southern Living
Yield: 12 servings

This dessert was made for autumn! A ribbon of pumpkin custard and cinnamon pecan streusel winds through this luxurious, rich cream cheese pound cake. It’s topped with maple brown sugar glaze, toasted pecans, and a dusting of cinnamon. The finished product is pretty as can be — and so delicious!

Cream Cheese Pound Cake Ingredients:
1 1/2 cups butter, softened
8 ounces cream cheese, softened
3 cups sugar
6 large eggs
1 1/2 teaspoon vanilla
3 cups flour
1/8 teaspoon salt

Pumpkin Pie Filling Ingredients:*
6 ounces cream cheese, softened
1/8 cup sugar
1/2 cup pumpkin puree
1/4 teaspoon vanilla extract
1 egg
1 teaspoon cinnamon
1/4 teaspoon nutmeg
1/4 teaspoon ginger
1/8 teaspoon allspice
*This makes a little more filling than you need, but I used most of it and baked the small amount I had leftover in a greased ramekin for 15-20 minutes — instant pumpkin custard!)

Pecan Streusel Ingredients:
1/4 cup firmly packed light brown sugar
1/4 cup all-purpose flour
1 teaspoon cinnamon
2 tablespoon cold butter
1 cup chopped pecans
1/2 cup cinnamon chips (optional — you can find these seasonally at some grocery stores or online from King Arthur’s Flour)

Maple Brown Sugar Glaze Ingredients:
2 tablespoon butter
4 tablespoons milk
1/2 cup brown sugar
2 tablespoons real maple syrup
pinch salt
1 1/2 – 2 cup powdered sugar (I ended up using just 1 1/2)
cinnamon for sprinkling

Directions:
Toast pecans: Preheat the oven to 350 degrees F. Spread pecans out on a baking sheet, and bake for 4-6 minutes or until fragrant, stirring and flipping nuts once in the middle. Spread the nuts out on a plate to cool. Leave the oven on for the cake.

Make the creamy pumpkin pie filling: In your electric mixer, or with a hand mixer, beat the cream cheese until smooth. Add the sugar and beat until fluffy and smooth. Add the pumpkin, egg, and vanilla extract, cinnamon, nutmeg, ginger, and allspice and mix until combined. Set in fridge while you make your cake.

Make the streusel: Combine the flour and brown sugar in a medium bowl and using two knives or a pastry cutter, cut in the butter until you have crumbly streusel. Mix in the cinnamon chips (if you’re using them) and 1/2 cup of the cooled toasted pecans (if they haven’t completely cooled, stick ’em in the fridge for a bit first — you don’t want to mix warm nuts into this and melt your butter, since it should stay cold). Save the rest of your nuts for decorating the finished cake. Set the streusel aside.

Make the pound cake: Beat the butter and cream cheese on medium speed for about 2 minutes or until it’s creamy. Gradually add sugar and beat 5-7 minutes until light and fluffy. Add the eggs one at a time, beating only until yellow disappears after each one. Stir in the vanilla.

Whisk the flour and salt together in a bowl and add to creamed mixture gradually, beating on low speed after each addition and scraping down the sides of the bowl as needed. Pour/dollop 1/3 of the batter into greased and floured 10-inch tube pan and use a spatula to smooth it right up against the sides of the pan and level it.

Dump your streusel into your pumpkin pie mixture and fold it together a few times to loosely mix — you’re not trying to combine them completely. Dollop big spoonfuls of this pumpkin mixture on the batter in your tube pan and swirl with a wooden skewer or table knife. Top this layer with another third of the batter and add another pumpkin layer (swirling again). Top with the final third of the batter. Fill a 2-cup ovenproof measuring cup with water and place in oven with cake (this keeps it moist!).

Bake the cake at 350 degrees for 1 hour 30 minutes to 1 hour 55 minutes (the original recipe said 1 hour and 10 minutes, but this was way too short for me. Nevertheless, you should start checking early and often just in case. This is a good practice, also, because you may have to cover the top with foil if it’s getting too brown). To test for doneness, insert a wooden skewer in a few different areas of the cake and pull it out. You want it to come out with just a few moist crumbs (no liquid batter, but not completely clean either).

Let the cake cool on wire rack for 10 minutes before running a knife around the edge of the pan. Remove the cake from the pan by topping the pan with a plate and carefully inverting it. Then invert the cake again onto another plate so that it’s right-side up. Let cool completely (at least 1 hour).

Make the Maple Brown Sugar Glaze: Combine the butter and milk in a small saucepan over medium heat. When the butter melts, whisk in the brown sugar, syrup, and salt, whisking until the brown sugar melts. Remove the pan from the heat and whisk in the powdered sugar, starting with 1 cup and adding more to thicken per your preference (taste as you go to ensure you don’t oversweeten). Drizzle the glaze over the top of your cooled cake. Sprinkle the cake with toasted pecans immediately (the glaze sets quickly) and dust with cinnamon. Serve immediately. Refrigerate leftovers in an airtight container and microwave for about 20 seconds to serve.

If you liked this post, please:
Subscribe to Willow Bird Baking
Follow Willow Bird Baking on Twitter
Follow Willow Bird Baking on Facebook
Give this post a thumbs up on StumbleUpon
Pin It


ShareOther ways to share this post with friends!

1 2