Month: August 2011

Gooey S’mores Bars

GUESS WHAT I JUST BOUGHT. Can you guess?! First, let me tell you a story. Maybe I’ll drop some hints here and there . . .

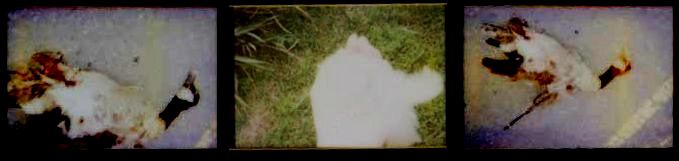
I got my first camera in high school. It was a Polaroid I-Zone, and I had no idea how cool it was. It took grainy, gorgeous photos full of unintentional auras and printed them instantly on adhesive-backed paper. You’ll have to forgive my poetic heart for the example below — a triptych (am I allowed to call it that?) of a goose that had been hit by a car. The middle frame is my hand full of its oversaturated feathers. Morbid, I know, but isn’t it pretty?

My next camera was a little Kodak film camera. I carried it everywhere with me, hoping to capture some gritty reality. I took photos of the outcast crowd at my high school (I wasn’t cool enough to fit in, even with them), of my feet, of neon lights. I filled rolls of film and convinced my parents to get them developed only to find, again and again, that my photos weren’t this or this or this. They were flat snapshots.

I gave up.

Fast forward to food blogging. I’m a baker and I’m a writer, so food blogging suits me nicely. But, I told everyone who asked, I am not a photographer.

Photography was the red-headed stepchild (what’s so bad about one of those, anyway?) of Willow Bird Baking. It was an ill-behaved upstart of a stepchild at that — one that I often had to drag along behind me as it kicked its tiny mismatched-stocking feet.

Since WBB’s inception in June 2009, I’ve used a Canon PowerShot A540 to shoot all of my photos. That faithful little point-and-shoot was powerful, don’t get me wrong, but the fiddling that went in to my hours-long photo shoots was extremely stressful. I shot in manual mode and it went something like this:

Make food for hours. Style food. Wait until the perfect time of day. Go out onto the balcony to freeze and/or sweat. Set up my camera on its tripod. Set all camera settings: manual mode, white balance, macro mode, exposure time, self-timer. Hold up white boards to bounce light in crazy directions. Change all settings repeatedly, taking photos with varying exposures, camera angles, and lighting setups. Run into the apartment to upload the photos every 50 or so snaps to see if I’m on the right track, usually to find that ALL of the photos were out of focus. Hours and hundreds of photos later, drag myself inside and clean up. Go through the hundreds of photos looking for the 6 or 7 acceptable ones. Edit them. Write my post.

Even while I loved my camera (so much so that I decided I’d stick with Canon whenever I upgraded), it’s not hard to see why photography stressed me out. There was a teensy (and sometimes nonexistent) yield for all the sweat I put into it.

When Willow Bird Baking was featured recently in the Davidson Journal, Meg Kimmel was kind enough to mention my “burgeoning skills as a food photographer.” They even printed my photo of my Coffee Cookie Dough Fudge Cheesecake for good measure. But oh, did I have a love-hate relationship with photography.

That is, until now.

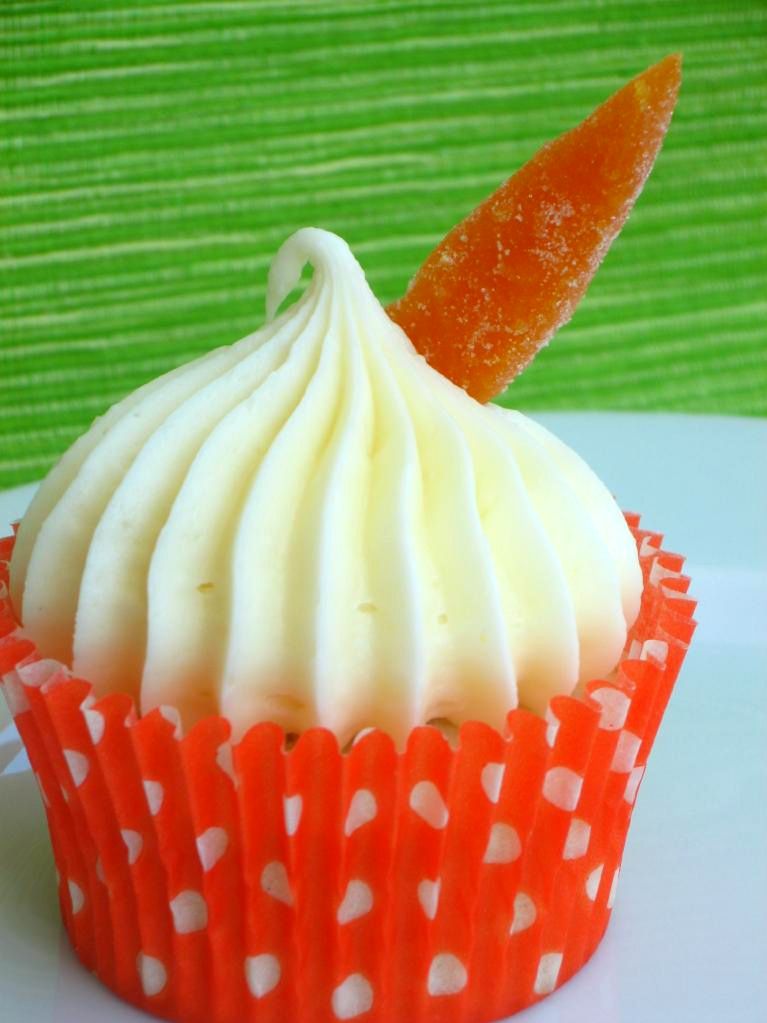
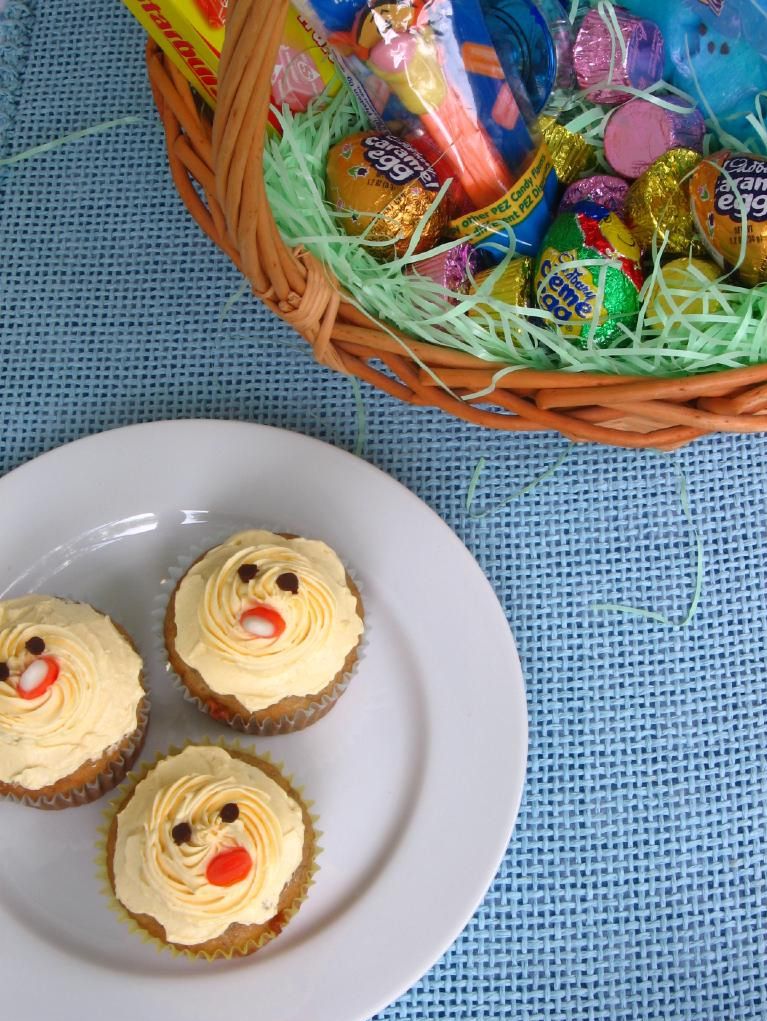
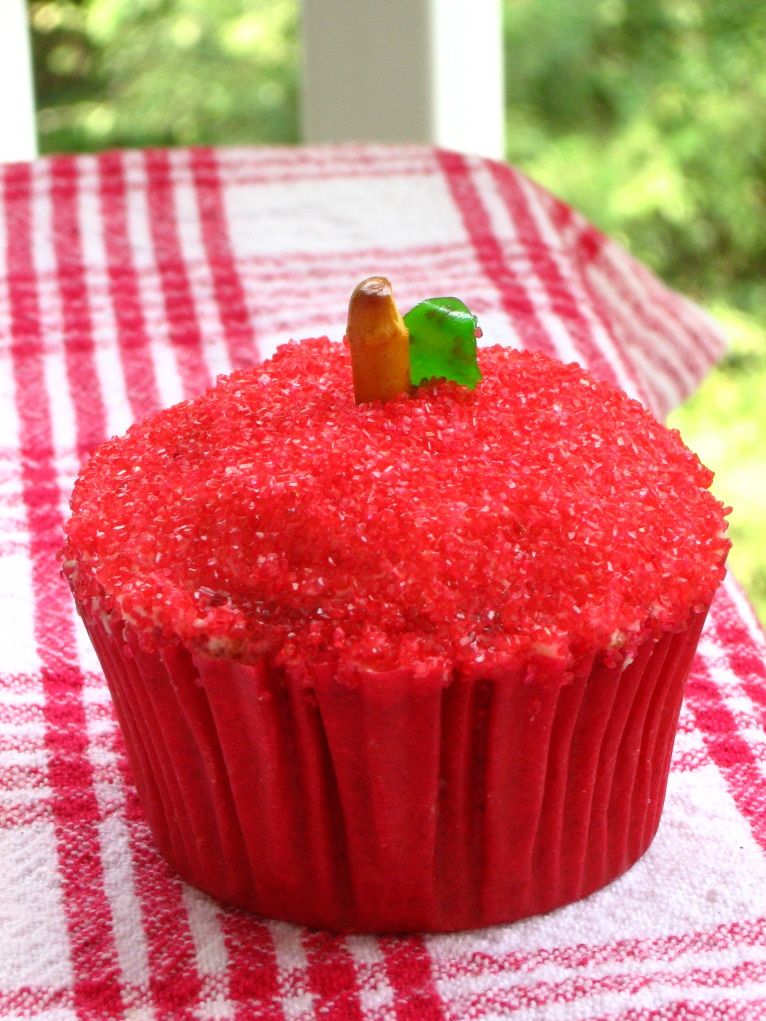
Have you guessed yet? I think I set you up pretty well, and hopefully the photos were helpful hints. I bought a new camera!

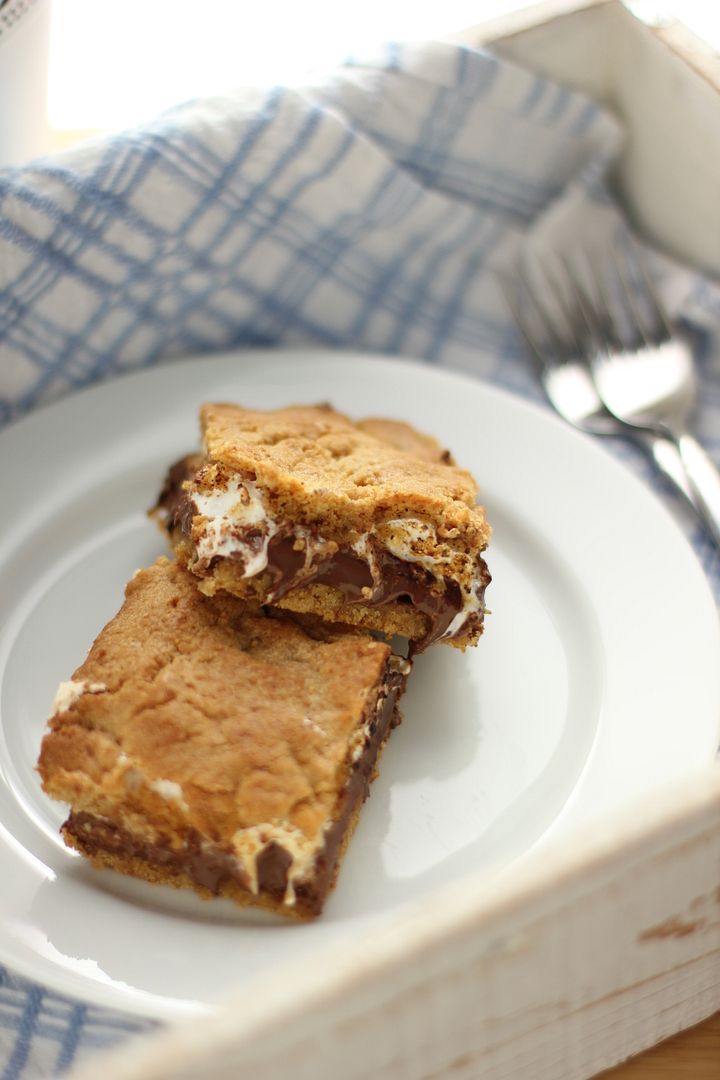
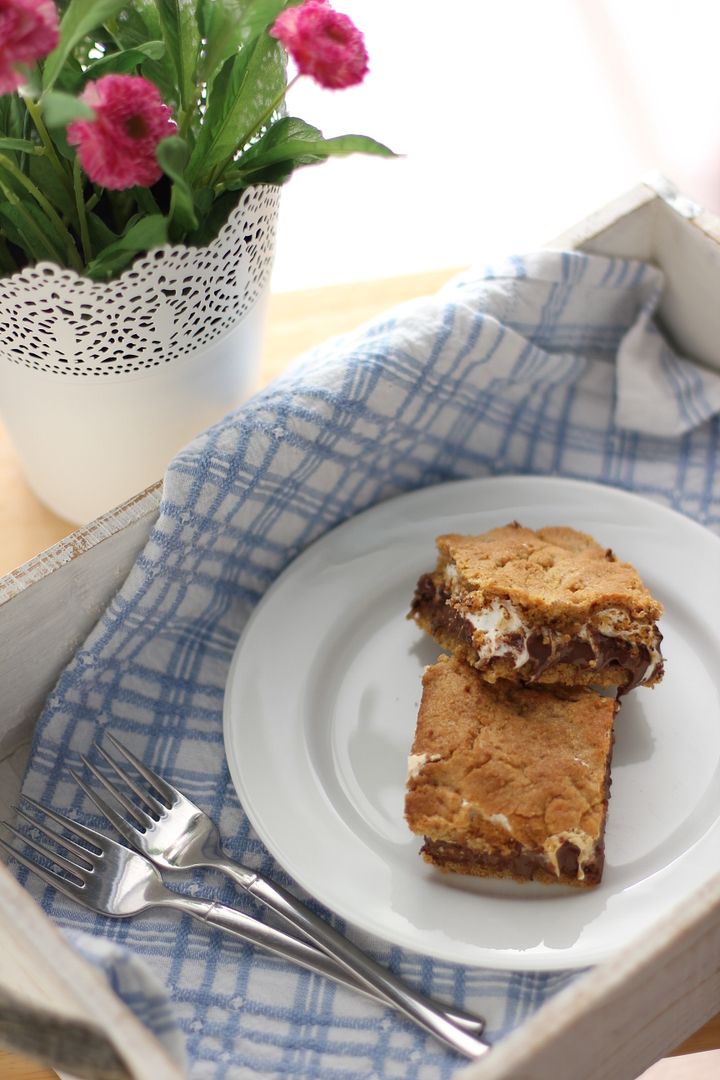
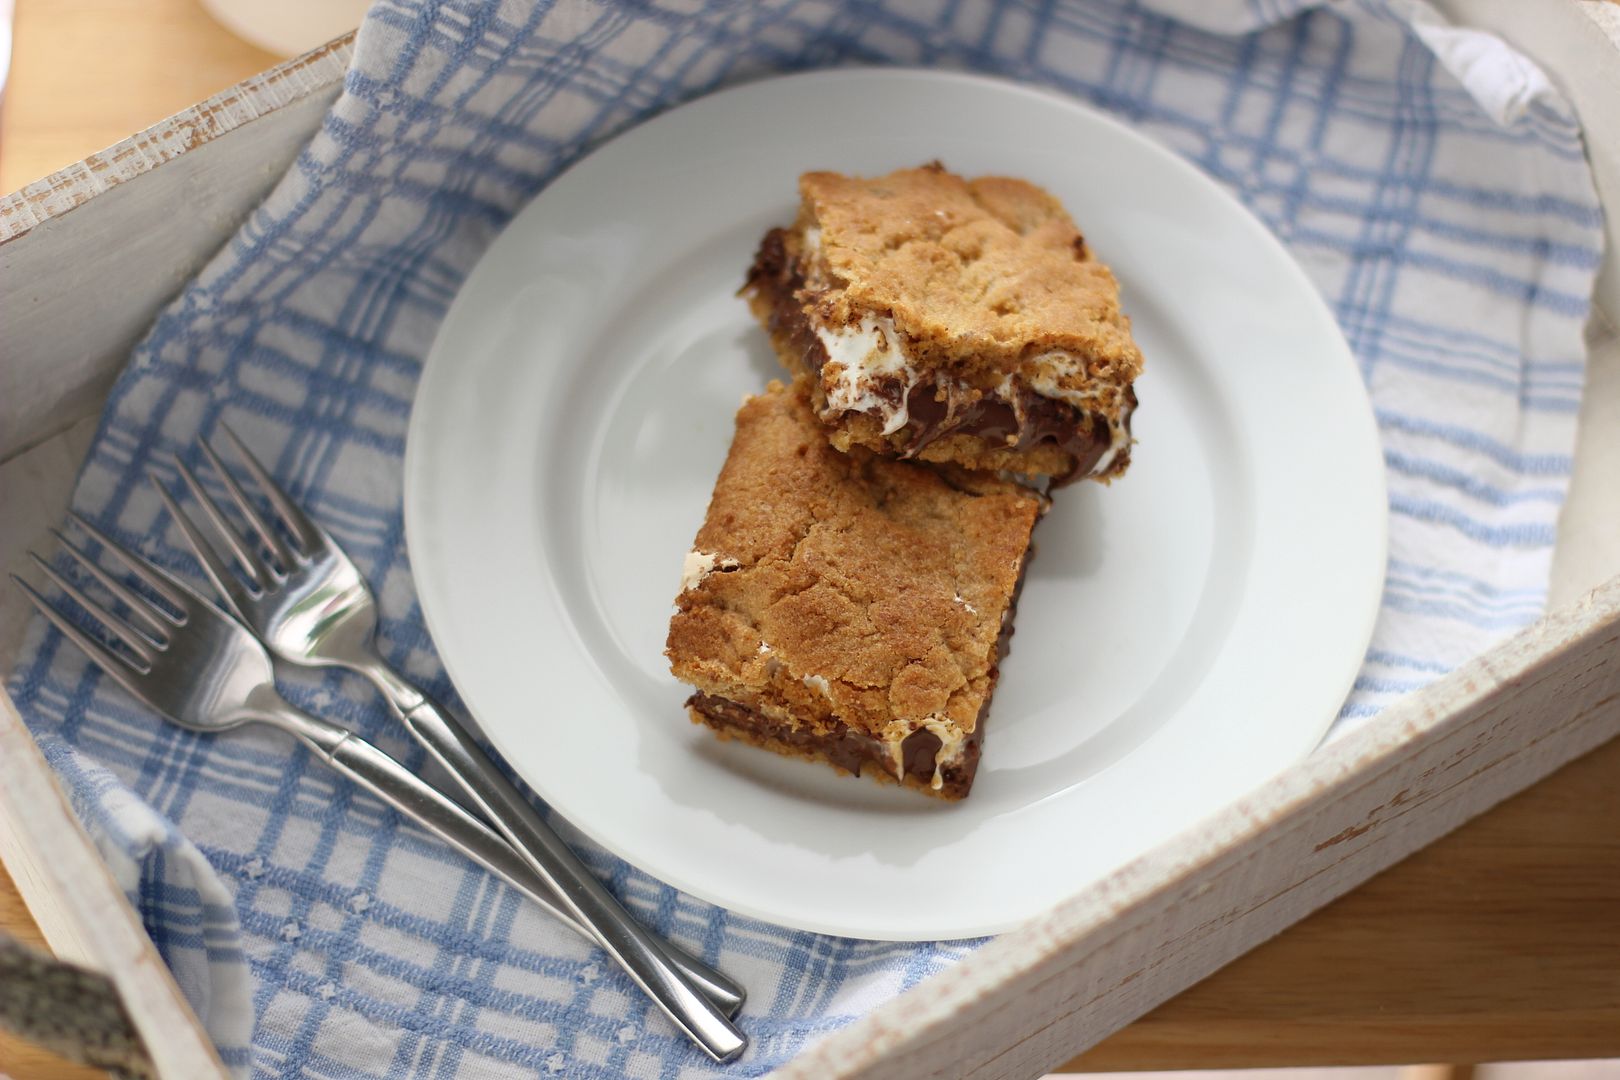
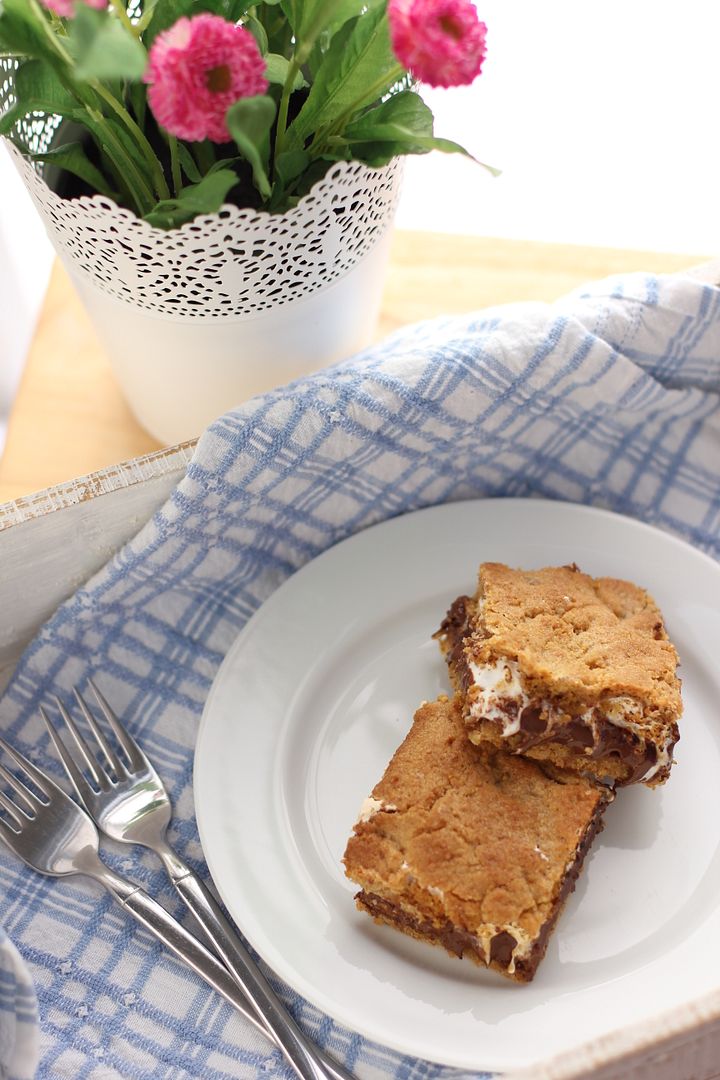
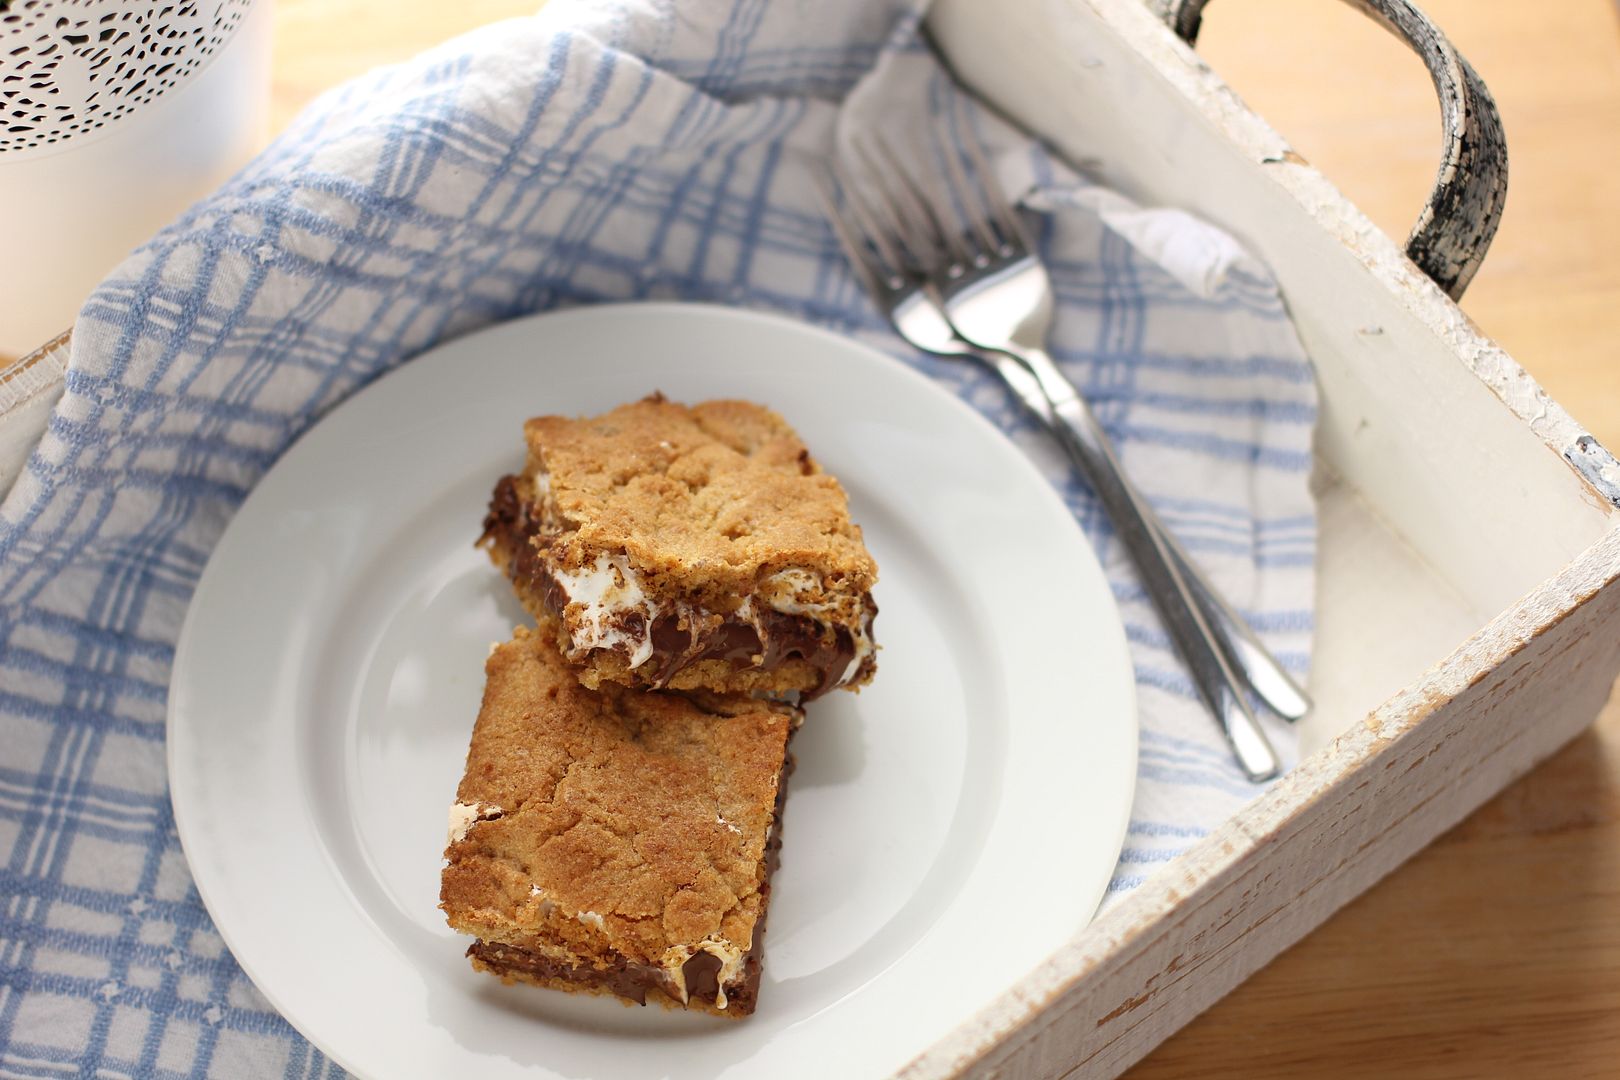
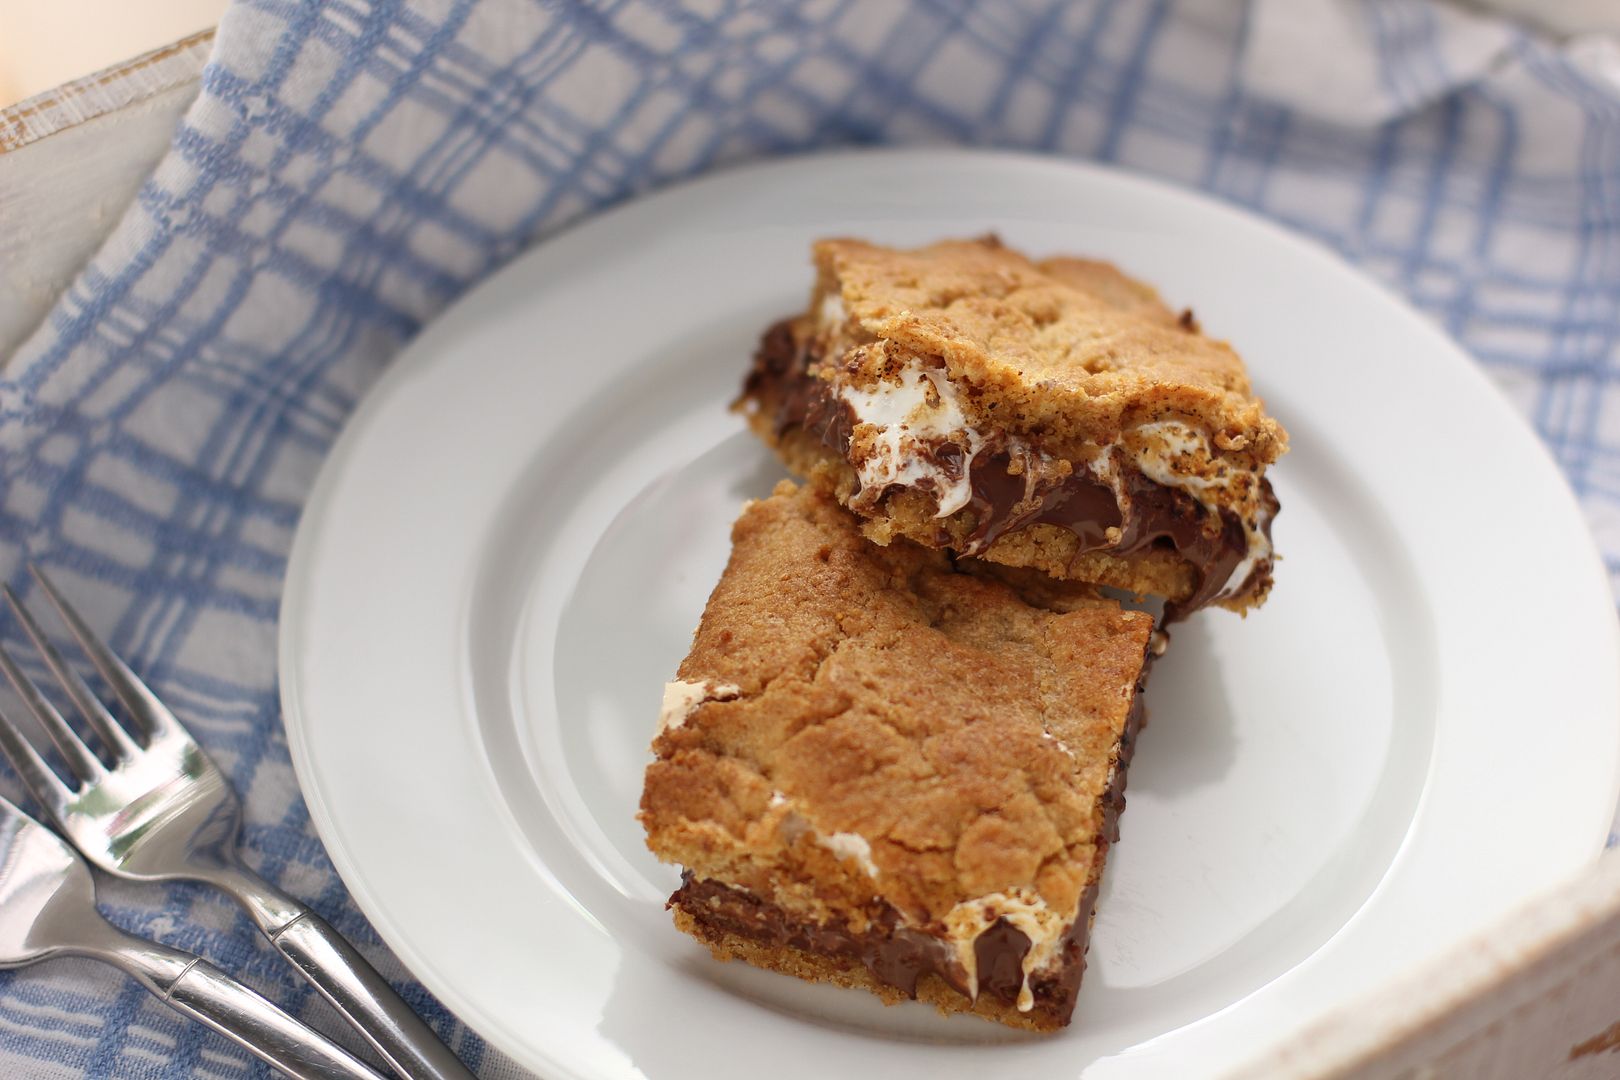
A Canon Rebel T2i with a 50mm f/1.4 lens, to be exact. By no means did the camera make me an instant photographer extraordinaire, but when I styled and photographed these Gooey S’mores Bars (inside! with air conditioning!), I marveled at how fun and exciting and creative it felt!

I wasn’t doing acrobatics to get an acceptable shot in 100 degree heat — the camera was doing more than its fair share of work! I wasn’t forcing the photos — I was making artistic decisions! I wasn’t fretting and uploading a dozen times to check my shots — I was contentedly fiddling with various camera settings and enjoying the results! For the first time in years, I think I’ve almost recaptured the joy of snapping a photo with that old Polaroid I-Zone and sticking it in my poetry notebook surrounded by walls of messy handwriting.

. . . Almost.

P.S. Will you look at the number of exclamation points in that last paragraph? I must be in love.

P.S. 2 There’s just over a week left in the Willow Bird Baking Cupcake Challenge! Bake your creation and email photos to juruble ‘at’ gmail.com by Wednesday, September 7, 2011. I’ll feature your cupcake on WBB! Find more details and some cupcake inspiration here.

Gooey S’mores Bars


Recipe by: Adapted from Lovin’ From the Oven
Yield: 9-12 bars depending on your appetite

These Gooey S’mores Bars were more than worthy of being the first dish snapped by my new camera. They combine a chewy, graham cracker-flavored base with melty marshmallow creme and a hearty dose of chocolate. I heated each bar in the microwave for 25 seconds and then used a kitchen torch to toast the sides before serving, resulting in the perfect s’more flavor. Don’t worry if you don’t have the torch, though — they’d be delicious without.

Ingredients:
1/2 cup butter, room temperature
1/4 cup brown sugar
1/2 cup sugar
1 large egg
1 teaspoon vanilla extract
1 1/3 cups all-purpose flour
3/4 cup graham cracker crumbs
1 teaspoon baking powder
1/4 teaspoon salt
2 king-sized milk chocolate bars (e.g. Hershey’s)
1 1/2 cups marshmallow creme/fluff

Directions:
Preheat the oven to 350°F. Grease an 8-inch square baking pan and create a foil sling: tear off 4, 16-inch long pieces of aluminum foil and fold them in half. Situate two side-by-side in the pan, covering the bottom of the pan to the edge (they will overlap). Situate the other two strips in the same manner, but perpendicular to the first. The overhanging foil of the sling will make it easy to remove the bars from the pan after baking and cooling. Grease the foil as well.

Cream the butter and sugar together in a large bowl until fluffy and pale yellow. Beat in the egg and vanilla. In a small, separate bowl, whisk together the flour, graham cracker crumbs, baking powder and salt. Add the dry ingredients to the butter mixture and mix until just combined. Divide the dough roughly in half.

Press half of the dough (using clean fingers is easiest) into the pan. Place the chocolate bars side by side (if they fit; if not, break them and arrange) over the dough such that you have a full single layer of chocolate (about 1/4 inch thick). Glop on marshmallow creme and use a greased offset spatula to spread it evenly across the chocolate. Place the remaining dough on top (to do so, take a small handful at a time and flatten it into a “shingle,” laying these side by side over the top). Bake for 25 to 30 minutes or until lightly browned. Let cool completely in pan before gently using the overhang of the foil sling to lift the bars out of the pan and place them on a cutting board to slice.

When ready to serve, heat each bar in the microwave for about 25-30 seconds and use a kitchen torch to lightly “toast” the exposed marshmallow (optional). Enjoy!

If you liked this post, please:
Subscribe to Willow Bird Baking
Follow Willow Bird Baking on Twitter
Follow Willow Bird Baking on Facebook
Give this post a thumbs up on StumbleUpon


ShareOther ways to share this post with friends!

Fauxstess Cupcakes

I recently saw a letter written by an experienced teacher to his first-year-teacher self, and it reminded me of all the times I’ve thought, “I wish I’d known this when I started teaching.” Tomorrow is my last teacher workday before the students come back on Monday. What better time than the beginning of a new school year to write my own letter to my past self? So here it goes.

Dear Julie of 2006 (or as you’re about to be known, Ms. Ruble!),

It’s the night before the first day of school. I know you’re scared. I would tell you to get a good night’s rest, but to be honest, you’re not going to sleep much tonight. It doesn’t matter, though. Well-rested or not, you’re about to meet around 150 students who will change your life forever.

You’ll meet D, who you’ll admire for his sense of humor and his dance moves, and who will ask you all year when you’re going to let his beloved mother do your hair. You’ll meet L, who will stand up in class and scream in your face, but who needs you to forgive her and love her about as much as she needs air. You’ll meet H and P, who you will never reach. You’ll meet M, who seems impervious but who will shed surprising tears when you speak to her in anger. You’ll meet D, whose artwork will take your breath away.

You’ll meet K, and Julie . . . K will break your heart. Nothing you do will rescue that little boy from his situation. What can I say? This is going to be a tough year. But you can make it one of the most important years of your life.

You don’t lack fervor. I’m not going to tell you to be fervent. You are meticulous. I’m not going to tell you to perfect your classroom management systems. You are fretting about how students will learn science. I’m not going to advise you on unit plans. I’ve been teaching for 3.5 years now and I’m not an expert, but I’m going to tell you the things I wish you’d known.

1. Teach your students to learn. There are so many standards and concepts that you’ll literally try to pack a new topic in every day this year. I know you can drag the kids along at that pace — you’re good at making things happen — but maybe you shouldn’t. You’re trying to cram little bits of application into a full day of lecturing, and that’s not really how they’re going to learn. Put the importance of teaching them every tiny fact about your subject matter into perspective.

Instead, present new information and then find resources, projects, labs, and other experiences that allow them to apply the information themselves. Let them take ownership in their learning and enjoy the process. Give them more time to read and problem-solve together. Let them come up with creative ways to study. They don’t need to remember every step of the rock cycle for the rest of their lives, but they do need to know how to gather and process information.

I know it will take too long. I know you’ll end up not being able to cover everything. But if they come out of your class with the ability to be a curious, driven learner, that’s more important than all the Earth science facts you could give them.

2. Be humble and open to new ideas. This is a lesson you’ve learned, but that you need to continue to wholeheartedly embrace. We all tend to grow up feeling like we have a good handle on how the world works. In a way, deep down, we believe we know everything and can do everything. Teachers especially can develop a superiority complex when they run their classroom well and start to have great ideas. Rather than being a vessel that accepts and pours out in equal measure, they become a faucet, spewing a thick, opaque blanket of know-it-all over their colleagues.

Apart from alienating the people who can be your greatest allies, you miss out on so much when you think you know everything. Remind yourself constantly that some of your most exciting moments in the classroom have come from trying someone else’s ideas, even when they were outside of your comfort zone. Remind yourself that others are competent professionals, too — indeed, when you move on to a different school after this year, you will be surrounded by some of the most intelligent, innovative people you’ve ever met. Remind yourself that it’s okay to ask for help.

Finally, teach your students that they don’t know everything, either. Model humility, and place them in situations that challenge their worldview.

3. Be an advocate for yourself so that you can be an advocate for your students. You’ve been lectured endlessly on being flexible, rolling with the punches, and sucking up the pain. Those things are important sometimes. But what no one’s told you yet, and what you really need to know to survive this year (and I’m not just being dramatic), is this: you are a valuable professional, and you do not have to let people take advantage of you.

You’re the sweet, young, impressionable, flexible new teacher and this year, others will try to steamroll you to further their own interests. Even if they have their students’ needs in mind, it is not okay for them to hurt you and your class. If someone tells you you have to do something unreasonable, say no. If someone tells you you have to do something that hurts your class, say no. If the administration says they won’t assist you, don’t stop insisting. This isn’t a crusade or a mission for which you have to allow yourself to be victimized. It’s your job — and it’s important for you and your students that you are treated professionally.

4. Let yourself fail, and teach your students that failing doesn’t make you a failure. You are a perfectionist, but masterfully handling dozens of unpredictable, unique children is kind of like orchestrating a synchronized swimming team . . . made up of cats. Some lessons and classroom management plans are going to flop. Someone is going to steal the popcorn you brought in as a reward for the students. Someone is going to cut every one of your students’ bean plants in half. You are going to be unnecessarily harsh to a student and regret it.

Show your students that it’s okay to make a mistake by owning your mistakes. Show them that it’s okay to apologize by apologizing to them. Show them that it’s okay to be disappointed in yourself while still loving yourself — that you can pick yourself up and move on.

There are kids who make a mistake and add it to a list in their brains called, “Reasons I Don’t Deserve to be Loved.” Show them that there’s nothing they can do to make themselves failures as long as they keep moving forward. Tell them to expect “excellence, not perfection,” as one of my coworkers said in a meeting today, and to forgive themselves when they miss the mark.

5. Most importantly, Julie, love your students. I know you think you understand how crucial this is, but you will lose sight of it. You will immerse yourself in creating classroom structure, creating lessons, developing systems. You will prioritize academic achievement without realizing that having a loving, secure environment is the bedrock on which achievement is built.

Your students may not remember the different kinds of earthquake faults, but they’ll remember that they had a 6th grade teacher who loved them. They’ll remember that even when they misbehaved, there was someone in their lives who would not give up on them. They will be changed by the fact that you listened to their ideas and treated them like valuable human beings. Stop and let yourself interact with them in a personal way that lets them know you care about them.

That’s all for now — no words of wisdom on how to organize your files or balance housework and schoolwork, because you’ll figure all of that out. You’re going to be great. And even when you’re not, you’re going to change lives and be changed. Thank God for a job where you can say that!

Love and #2 pencils,
Ms. Ruble of 2011

Fauxstess Cupcakes


Recipe by: Adapted from Annie’s Eats and Hershey’s
Yields: about 15 cupcakes

These “Fauxstess” Cupcakes are homemade knock-offs of the Hostess Cupcakes that might’ve shown up in your lunch boxes during your childhood. They were adorable additions to my elementary school throwback picnic. The tender chocolate cake is filled with a marshmallowy cream and topped with rich ganache. Apart from being cute, these things are seriously easy to make and seriously delicious!

Cupcake Ingredients:
1 cups sugar
7/8 cup all-purpose flour
3/8 cup HERSHEY’S Cocoa
3/4 teaspoon baking powder
3/4 teaspoons baking soda
1/2 teaspoon salt
1 egg
1/2 cup milk
1/4 cup vegetable oil
1 teaspoon vanilla extract
1/2 cup boiling water

Filling Ingredients:
9 tablespoon unsalted butter, softened
2 1/4 cups confectioners’ sugar
1 1/8 cup Marshmallow Fluff
2 tablespoons plus 1 3/4 teaspoon heavy cream

Ganache Ingredients:
3/4 cups heavy cream
5 ounces bittersweet chocolate chips (I love Ghirardelli’s 60% cacao chips)
5 ounces semisweet chocolate chips

Directions:
Make the cupcakes: Preheat oven to 350°F. Line two muffin pans with cupcake liners. In a large bowl, whisk together the sugar, flour, cocoa, baking powder, baking soda and salt in large bowl. Add the eggs, milk, oil, and vanilla. Beat this mixture medium speed for 2 minutes. Stir in boiling water (this will make the batter thin). Fill each well about 2/3 full of batter (be careful to not to overfill them — these cupcakes always bake up a little wonky for me, and if you overfill them, they can overflow the pan). Bake 20 to 25 minutes (I check them early and often, starting around the 15 minute mark) or until a toothpick inserted into the center of a cupcake comes out with just a few moist crumbs. Cool completely.

Make the filling: Beat the butter, confectioners’ sugar, marshmallow fluff and 2 1/4 tablespoons (I eyeballed this measurement) of the heavy cream together until fluffy. Transfer all but 3/4 cup of this mixture into a pastry bag with a narrow tip. Add the remaining 1 1/2 teaspoon of cream to the remaining 3/4 cup of the mixture and beat until smooth. Cover this and save it for decorating the top of the cupcakes later.

Make the ganache: Place the chocolate in a medium bowl. Bring the cream to a simmer in a medium saucepan (or heat it for a couple of minutes in the microwave, keeping a watch that it doesn’t boil. Pour the hot cream over the chocolate and let stand 1-2 minutes. Whisk in small circles until a smooth ganache forms.

Assemble the cupcakes: Insert the tip of the pastry bag full of cream into the bottom of each cupcake and gently squeeze cream out into the cake. It’s hard to tell how much to squeeze and for how long, but I tried to squeeze as much as possible without bursting the cupcake, and to the point where a small bead of the cream poked out of the bottom when I removed the pastry tip (I then scraped off the excess). Dip the top of each cupcake into the ganache (or, if they don’t rise above the cupcake paper, you can gently spoon the ganache on and spread it with the back of a spoon). Grab the reserved filling mixture with the extra cream and use a pastry bag with a small tip (or a plastic zip bag with a small corner cut off) to pipe curls across the top of each cupcake. Refrigerate the cupcakes to set the frosting. Serve immediately or store in an airtight container in the refrigerator.

P.S. Are you thinking up your own filled cupcake for the Willow Bird Baking Cupcake Challenge? Bake your creation and email photos to juruble ‘at’ gmail.com by Wednesday, September 7, 2011. I’ll feature your cupcake on WBB! Find more details and some cupcake inspiration here.

If you liked this post, please:
Subscribe to Willow Bird Baking
Follow Willow Bird Baking on Twitter
Follow Willow Bird Baking on Facebook
Give this post a thumbs up on StumbleUpon


ShareOther ways to share this post with friends!

Peanut Butter Pie for Mikey, and for Dad

I was a little girl, maybe 8 years old. My sisters and I were sitting at the breakfast table, bowls of cereal in front of each of us. My dad sat across from us waiting to brush my hair into a tail and clip one of my bows on it before shepherding us off to school.

I’d slept the whole night enveloped in my pink-and-blue quilt under pink-and-white striped wallpaper with a rose border halfway up, unaware of anything wrong in the world. None of my army of teddy bears and dolls had murmured a warning of danger. I didn’t have a gut feeling worthy of a sappy novel. But at breakfast, Dad surprised us all by saying, “I went to the emergency room last night; I thought I was having a heart attack.”

You would have to know me — like, really, really know me — to understand how I reacted. You’d have to know that I firmly believe that my dad is the best man besides Jesus Himself to have ever lived. You’d have to know that by the time I was 8, I’d already started fretting about his mortality. That I’d already started praying that he’d live forever — and not just in the spiritual sense that I now recognize is more valuable. His soul living forever didn’t amount to enough to my 8-year-old heart.

If you knew all that, you wouldn’t be surprised that I cried tears of shock and asked every question I could think to ask. It turns out that Dad (who has always worked two or three jobs to take care of our family) was actually feeling pains from an ulcer, not from a heart attack. I thanked God.

I also thanked God years later when my dad was safely out of surgery for prostate cancer. I also thanked God when my dad finished the radiation treatments for said cancer. I can’t even tell you how I thanked God when we found that, finally, his cancer was gone completely. And I thank God on my knees every time we get new tests that show that, yes, it’s still gone.

Last week I read Jennie’s post, as so many of us did, and saw that she had suddenly lost her husband of 16 years. Just like that. One morning everything’s as it should be and the next, the world has a surreal, devastating new landscape. My heart was crushed for her and her little girls.

This week, when I thanked God to celebrate my Dad’s 60th year in the world, I knew I wanted to make a peanut butter pie. I wanted to make a virtual hug for Jennie and her family, a memorial pie for Mikey, a token of love for my family, a birthday pie for my dad.

Remember what’s important, y’all.

Almost No-Bake Peanut Butter Pie


Recipe by: Adapted from All-Recipes
Yields: about 8-10 slices

Pie Ingredients:
1 1/4 cups chocolate sandwich cookie crumbs (just grind ’em up, cream and all)
1/4 cup butter, melted
1 (8 ounce) package cream cheese, softened
1 cup creamy peanut butter
3/4 cup white sugar
1 tablespoon unsalted butter, softened
1 teaspoon vanilla extract
1 cup heavy whipping cream

Whipped Cream Ingredients:
2 cups heavy whipping cream
4 tablespoons confectioners’ sugar
peanuts and/or mini peanut butter cups for garnish (optional)

Directions:
Preheat oven to 375 degrees F. Combine the cookie crumbs and melted butter with a fork and press into a 9-inch pie plate. Spend a few minutes working on it to make sure there aren’t gaps and that it’s a thin layer (I had to discard some of my cookie crumbs because 1 1/4 cups turned out to be a bit too much for my pie plate). Bake for 10 minutes. Cool completely.

In a large mixing bowl, beat the cream cheese, peanut butter, sugar, butter, and vanilla until smooth. Whip the cream to soft peaks. Stir 1/3 of the cream into the peanut butter mixture to lighten it up, then gently fold the rest of it in. Gently spoon the filling into your crust and use an offset spatula or the back of a spoon to smooth it out. Chill this for a few hours.

To make whipped cream, whip cream and confectioners’ sugar together until you reach soft peaks. Spoon this over your peanut butter pie and top with peanuts and mini peanut butter cups for garnish, if desired. Serve immediately.

P.S. Are you thinking up your own filled cupcake for the Willow Bird Baking Cupcake Challenge? Bake your creation and email photos to juruble ‘at’ gmail.com by Wednesday, September 7, 2011. I’ll feature your cupcake on WBB! Find more details and some cupcake inspiration here.

If you liked this post, please:
Subscribe to Willow Bird Baking
Follow Willow Bird Baking on Twitter
Follow Willow Bird Baking on Facebook
Give this post a thumbs up on StumbleUpon


ShareOther ways to share this post with friends!

Sweet and Spicy Pickled Grapes with Goat Cheese

First, I just want to take a moment to send love to Jennifer Perillo of In Jennie’s Kitchen who lost her husband Mikey this past week, and Kristen Doyle of Dine & Dish, who lost her brother after his struggle with cancer. I can’t begin to imagine the unthinkable heartbreak each woman is trying to navigate. I hope the huge wave of love their loss has inspired across the internet (have you seen the peanut butter pies? Mine’s coming next week) is just one tangible way God is embracing them during this time.

These tragedies come in the same year that Mara (I Made Dinner) lost her father and father-in-law and Erika (Ivory Hut) lost her home in a fire. This has been a hard year for so many blogger friends. The whole blogging community is grieving with and praying for these ladies, who deserve every ounce of the outpouring they’re receiving — and more. May God bless and keep you during your hard times.

I sat in a coffee shop last night with a friend chatting about submarines (what?) and drinking Pomegranate Hibiscus Ginger Ale. It was unfiltered, and the ginger burned my throat with spice every time I took a sip. The burning reminded me of eating rum cake, each bite of which is literally heartwarming. I love that sensation.

The ginger prickle in my throat also reminded me of pickled grapes. This intriguing recipe boasts a surprising flavor combination. I know the words “pickled grapes” may initially conjure up visions of dilly, sour grapes and the urge to upchuck one’s lunch (can I say that kind of thing on a food blog?), but hear me out.

As Deb said in the original recipe, these are a desserty sort of pickle. The brine itself is spicy with peppercorns, mustard seed, and cinnamon, and the grapes take on a deep, sweet warmth that the vinegar doesn’t overpower.

I served these in a little dish with wells for the grapes, goat cheese hunks, and toothpicks. Friends at my elementary school throwback picnic would grab a toothpick, skewer a grape, skewer a cheese hunk (that sounds like the kind of guy I want to meet — a cheese hunk. ha ha), and devour. Pairing the grapes with creamy goat cheese grounded their tangy flavor and, for me, made them the perfect appetizer.

As you might expect, these meet mixed reviews. I have a friend who tried the recipe with green grapes and didn’t love them. Some folks can’t get past the idea of a pickled fruit. But I really enjoyed the ease of preparation, their convenience as an appetizer, and the taste! If you like trying new things and have an open mind (and palette), give ’em a shot!

What kinds of things do you pickle?

Sweet and Spicy Pickled Grapes with Goat Cheese


Recipe by: Adapted from Smitten Kitchen
Yields: about 3 cups of pickled grapes

Ingredients:
1 pound red or black seedless grapes, washed and with stems removed
1 cup white wine vinegar
1 cup granulated sugar
1 1/2 teaspoons mustard seeds
1 teaspoon whole black peppercorns
1 (2 1/2-inch) cinnamon stick
1/4 teaspoon salt
goat cheese for serving (optional)

Directions:
Cut off the very end of each grape, exposing a bit of the inner flesh (which will help the pickling solution infiltrate the grapes). Place the grapes in a clean mason jar.

Bring the remaining ingredients to a boil in a saucepan over medium heat. Either pour the hot brine over the grapes and let them cool together or let the brine cool and then pour it over the grapes (Deb notes the difference: “The original recipe has you pour the bring mixture over the grapes and let them cool together. I personally prefer a cold brine on certain foods, not wanting to wilt the fresh fruit, so I cool the brine completely before pouring it over. The former will yield a more tender pickle, and it will pick up the brine’s flavor faster. The latter will take a bit longer to souse, but the grapes will stay more firm.”) I chose to mostly cool my brine first.

Once your grapes and brine are cool, chill in the jar for at least 8 hours or overnight. Serve cold with hunks of goat cheese.

P.S. Are you thinking up your own filled cupcake for the Willow Bird Baking Cupcake Challenge? Bake your creation and email photos to juruble ‘at’ gmail.com by Wednesday, September 7, 2011. I’ll feature your cupcake on WBB! Find more details and some cupcake inspiration here.

If you liked this post, please:
Subscribe to Willow Bird Baking
Follow Willow Bird Baking on Twitter
Follow Willow Bird Baking on Facebook
Give this post a thumbs up on StumbleUpon


ShareOther ways to share this post with friends!

Celebrating Cupcakes — and a challenge for you!

Willow Bird Baking’s Cupcake Week has come to an end, but your cupcake fun is just beginning! As a grand finale to a week full of baking, filling, frosting, and eating, I’m handing my middle school cupcake campers’ thinking caps over to you. You’re gonna need ’em. Presenting the Willow Bird Baking Cupcake Challenge!

My goal is to inspire kitchen confidence in home cooks. In my own experience, I’ve gained confidence in two ways. The first is simply trying recipes that stretch my skill level. I’ll find a recipe with a technique I’ve never tried, watch some videos online, read about the technique, and give it a shot! Every success builds my confidence, and every flop provides a funny story. It’s a no-lose situation.

The second way I’ve gained kitchen confidence is by creating my own recipes. Sometimes I do this by combining components of several different recipes, by transforming one dessert into another, or by adding a fun surprise to an existing dessert. No matter how I accomplish it, any time I produce my own unique creation in the kitchen, it’s a huge confidence boost. Giving you that boost is the goal of the cupcake challenge!

Here’s what you do:


-Make your own cupcake! Choose a cake recipe, a filling recipe, and a frosting recipe and put them together to form your own unique creation (see below for lots of helpful inspiration!) Make sure your cupcake has all 3 components!

– Take a photo of your cupcake (we’d love to see a photo of the inside, too!) and email it to me at juruble ‘at’ gmail ‘dot’ com with a few comments about how it went and a link to your blog (if you have one — if you don’t, that’s okay too!).

– Do this before Wednesday, September 7, 2011. In a month, I’ll post all of your cupcake masterpieces here on Willow Bird Baking!

– You can also grab the badge at the bottom of this post if you’d like to let your readers know that you’re participating in the Cupcake Challenge, but it’s optional.

If you’d like to participate, leave me a comment below and let me know! You can use these cupcakes for inspiration!

Willow Bird Baking’s Cupcake Recipes:

1. Blueberry Lemon Cheesecake Cupcakes
2. Strawberry Jam Cupcakes
3. Paula Deen’s Red Velvet Cupcakes with Cream Cheese Frosting
4. Peach Cobbler Cupcakes

5. Peach Lemon Cupcakes
6. Ferrero Rocher Cupcakes 1
7. Ferrero Rocher Cupcakes 2
8. Reese’s Cup Cupcakes

9. Lemon Burst Fairycakes
10. Mango Raspberry Rosecakes
11. Chocolate Cheesecake Stuffed Cupcakes with Ganache
12. Plum and Cream Mini Tortes

13. Clementine Burst Cupcakes
14. Ice Cream Cupcakes
15. Banana Coconut Cream Easter Cupcakes
16. Chocolate Pistachio Cream Cupcakes

17. Banana Split Cupcakes
18. Creamsicle Cupcakes
19. Strawberry & Cream Cupcakes
20. Apple Cinnamon Cream Cupcakes

More Inspiration:

To inspire my students, I gave them this list of cake, filling, and frosting flavors. These are all sweet suggestions, but who says you can’t make a savory cupFAKE? The possibilities probably end somewhere, but I sure don’t know where!

Cake Flavors
chocolate, vanilla, almond, strawberry, orange, lemon, blueberry, peach, carrot cake, hummingbird cake, spice cake, cheesecake, pound cake

Filling Flavors
vanilla mousse, easy pudding mix mousse with any flavor, chocolate mousse, cinnamon mousse, pastry cream, coconut pastry cream, coffee pastry cream, berry/fruit mousse, whipped cream, marshmallow fluff, lemon/citrus curd, jam/jelly, cookie dough, peanut butter, peanut butter mousse, Nutella, other nut butters, frostings, ice cream

Frosting Flavors
chocolate/vanilla/fruit/citrus buttercream, Swiss meringue buttercream, cream cheese frosting, fruit/citrus cream cheese frosting, brown sugar buttercream, whipped cream, 7 minute frosting

Toppings
berries, nuts, sprinkles, sanding sugar, graham cracker crumbs, cookies, cookie crumbs, candy, toasted marshmallows

Finally, here’s a WBB Cupcake Challenge badge if you want to grab it:

If you liked this post, please:
Subscribe to Willow Bird Baking
Follow Willow Bird Baking on Twitter
Follow Willow Bird Baking on Facebook
Give this post a thumbs up on StumbleUpon


ShareOther ways to share this post with friends!

1 2