Month: December 2009

Best of Willow Bird Baking 2009

My Dear Willow Bird Readers,

This past year has been full of exhilarating kitchen challenges. Making puff pastry from scratch; frying up homemade cannoli; tackling a beautiful, historic Dobos Torte; piping everything from buttercream roses to butterflies to snowman arms . . . the list goes on and on! I’m excited and humbled when I think back on all the fun I’ve been able to have and share with you this year. Byrd and I have had a ball in the kitchen baking up treats to post here, and we hope you’ve enjoyed every visual bite!

Are you busy making resolutions? I was inspired by Megan of Delicious Dishings to set a few culinary resolutions for 2010!

1. Make more fresh, homemade bread.
2. Cook a lovely Beef Wellington for Mike.
4. Buy more ethically minded meat, dairy, and eggs.
5. Make homemade pasta.
6. Fashion a lovely Baked Alaska — hopefully with some flambé action.
7. Weather kitchen disasters with grace and humor!

What about you? Thinking ahead to the new year, what do you hope to accomplish in your kitchen life? No matter what your goals, best wishes for health, happiness, and blessings in the new year! Oh, and speaking of all the wonderful times we’ve had together in 2009, here are some of Willow Bird Baking’s absolute best, most delectable dishes from the past year. Enjoy!


Plum and Cream Mini Tortes: Sweet and splushy mini plum cakes with a smooth dollop of ricotta frosting.


Lemon Burst Fairycakes: Lemon cupcakes stuffed with fresh lemon curd and a raspberry “surprise,” and topped with lemon buttercream and royal icing butterflies.


Mango Raspberry Rosecakes: The perfect white cake stuffed with fresh mango curd and topped with raspberry buttercream roses.


Cheddar, Chive, and Bacon Cupfakes with Avocado Frosting: The cupcakes can’t have all the fun! These adorable dinner biscuits combine sultry bacon, fresh chives, and sharp cheddar with the smooth, rich flavor of avocado.


Giant Red Velvet and Oreo Kisses: Cake balls with a twist! Red velvet and oreo truffles get in touch with their inner “kiss” when wrapped with some cheap aluminum foil.


Best Ever Cream Cheese Pound Cake with Easy Caramel Frosting and Spiced Apples: The name says it all! The best ever rich, moist, delicious pound cake.


Peach Crisp Pie: Fresh peaches, oats, brown sugar, and butter meld inside a flaky, butter crust.


Mini Pies: Sour Cream Apple, Pumpkin, and Peach Crisp: These sweet little individual pies can be made with any pie filling you like!


Chocolate Tart and Raspberry Cream Cheese Tart: One of these tarts holds a tangy combination of raspberries and cream cheese, while the other boasts rich chocolate and mounds of luxurious whipped cream.


Green Chile Chicken Enchiladas with Mexican Sausage Rice: The best dinner of 2009! Cheesy, gooey, tangy enchiladas with a side of spicy Mexican sausage rice.


Oreo Truffle Snowmen: These little snowguys are so tasty and so sweet! Golden oreos, cream cheese, chocolate coating, fruit roll ups, and some sprinkles are used to create these winterfolk.

See you next year!


Share Share this post with friends!

Taco Stuffed Crescent Rolls

Can you stand a little product placement? The truth is, Pillsbury isn’t paying me a dime or mailing me a single free biscuit (not that I’d mind a shipment if the doughboy happens to be reading!), but I’m still going to brag on their crescent rolls. If you’ve only been making little bread rollups with these, you’re missing out!

Pillsbury has plenty of creative ideas on their website for how to make better use of the crescent, but I’ve never tried a single one of them. That’s because every time I get a can of crescents (and to be honest, I sometimes buy the generic brand — are you rescinding my biscuit shipment, Pillsbury?), I have to make Taco Stuffed Crescent Rolls.

It’s funny (and a little depressing) that after all the hours I’ve spent in the kitchen making things from scratch — fresh puff pastry? a full traditional lasagna? homemade yeast bread? — these little Tex-Mex treats are some of Mike’s absolute favorites. He loves these things! And for good reason: the flaky, buttery crescents are stuffed with a creamy, gooey, cheesy, spicy, meaty mixture and topped with toasted cheddar. They’re so simple to make, too! Perfect for a busy weeknight or a last-minute supper.

Not a fan of cans? No problem; any leftover yeast roll dough will serve just fine to bake up a batch of these crescents. Serve them with salsa, sour cream, guacamole or fresh avocado slices, and a sprinkle of cilantro. Or just burn the tarnation out of your tongue eating them straight off the baking sheet! By the way, this is just the beginning — think of all the possible sweet and savory crescent stuffings! Pizza crescents, apple pie crescents, Mediterranean crescents, ham and cheese crescents, spinach and feta crescents . . . what would you stuff in your crescent?

Taco Stuffed Crescent Rolls


Recipe By: Willow Bird Baking
Yields: 16 large crescent rolls

Ingredients:
1 lb. ground beef (or a little less)
1 packet McCormick’s cheesy taco seasoning (or taco seasoning of your choice)
6 oz. cream cheese, softened
2-3 heaping tbsp. salsa
1/4 cup shredded cheddar cheese
2 cans giant crescent rolls (I usually use “big and buttery” or “big and flaky” crescents)

Directions:

Preheat oven to 375 degrees (or whatever is listed on crescent roll package). Brown ground beef, drain, and return to pan. Add packet of taco seasoning with a bit of water and cook until combined. In a separate bowl, combine cream cheese, salsa, and cheddar cheese. Add ground beef mixture to the bowl (which will melt the mixture a bit) and stir to combine.

Spoon about 2 tablespoons of ground beef mixture onto each crescent roll (I pressed them out a bit to make them bigger) and roll up like normal, carefully sealing the openings. Sprinkle a bit of cheddar cheese on top of each roll. Bake 11-13 minutes (or whatever is listed on crescent roll package), watching carefully. Rolls should be a golden brown to make sure they’re done inside.

Notes: This recipe actually makes more filling than needed, but it would be delicious in tacos or burritos, on a taco salad, or eaten with a spoon. Seriously!


Gathering all of my ingredients and mixing the taco filling.


Stuffing, rolling, and baking.


Big pile o’ stuffed crescents and one ridiculous serving suggestion: yes, Mike and I actually ate a dinner that consisted of stuffed crescents and oven-baked macaroni and cheese. Carbs, anyone?


Taco Stuffed Crescent Roll love!


Share Share this post with friends!

Oreo Truffle Snowmen

The next few days hold the possibility of many bright, full moments: cutting into my mom’s annual pan of fresh cinnamon rolls, watching my niece and nephews swashbuckling their way through jungles of Christmas wrapping paper with their foam swords, the beautiful Christmas afternoon nap. But there were also some shining moments in the past few days that made this holiday a special one. Moments like this one, for example:

[youtube=http://www.youtube.com/watch?v=JfHijA5PjA8&hl=en_US&fs=1&]

In case you couldn’t tell — what, my shaky hands and shrieking aren’t helping? — that’s Mike graduating from college with a BS in Mathematics. His family and I were sitting about a mile high in the stands, just as proud as fresh-plucked plums. Afterward we got a closer view of his handsome cap and gown.


Mike and a proud, plum-like Julie.

All of these special moments — the holiday celebrating my Savior’s birth, the coming new year, and the culmination of Mike’s undergraduate studies — warranted some special treats. I got a little crafty with some golden oreos, cream cheese, white candy melts, fruit roll ups, melted chocolate, and sprinkles. Okay, I bet you’re confused by now. Why don’t I just show you?

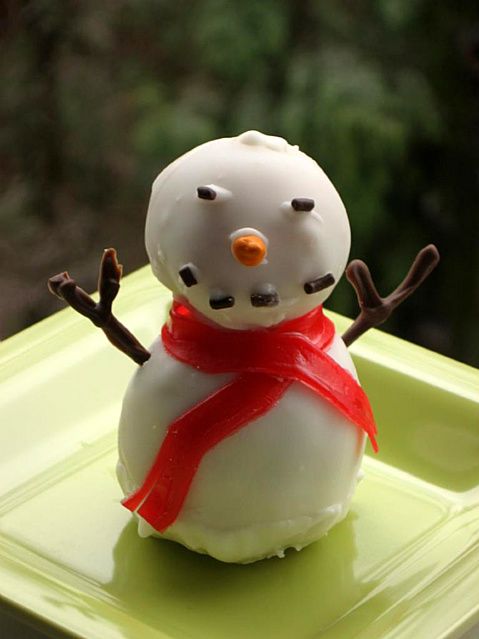
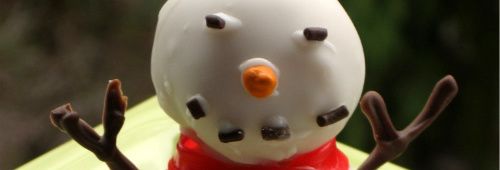
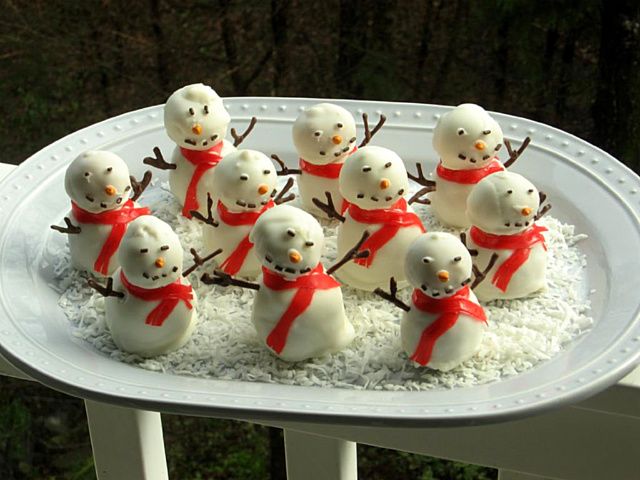
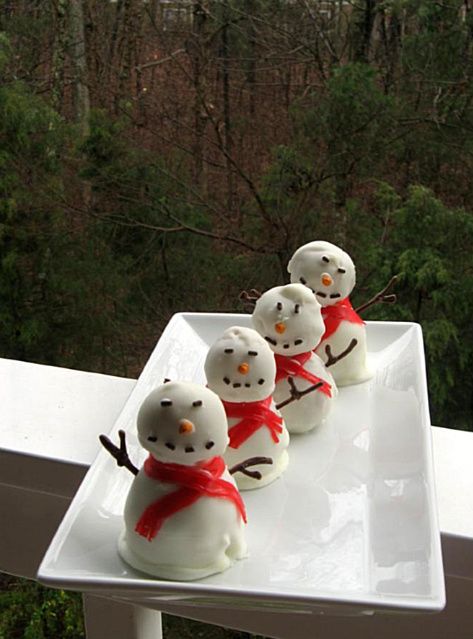
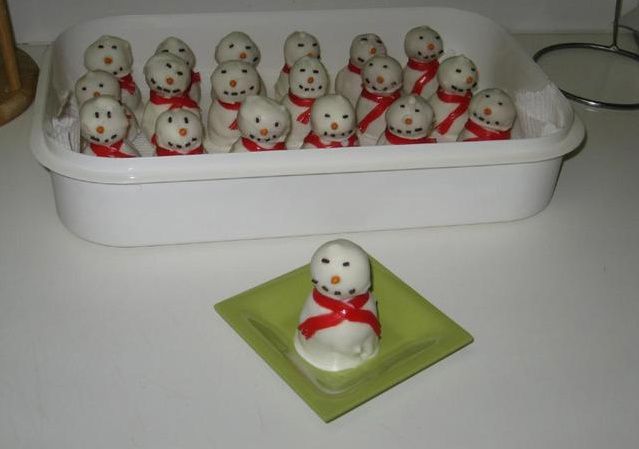
Voilà, oreo truffle snowmen! What do you think — would Bakerella, queen of cuteness, be proud? Personally, I was as tickled as a hungry hyena in a flock o’ flamingoes. Which is why, despite numerous setbacks, I persevered for about 13 hours to make, decorate, and photograph these little snow sweeties. I did take frequent breaks when things were going particularly bad to watch Ballet Shoes (don’t bother with the movie, but the book is cute), drink coke zero, mourn, sing Christmas carols, and dance around with Byrd. She doesn’t mind a bit when we’re up ’til 5 a.m. because of baking shenanigans. More time to play!

Why were these so time consuming? Well, I think the fat/moisture content in the oreo truffles this time around caused my candy melt to crack and ooze repeatedly. I redipped a gazillion times before finally realizing that refrigerating my snowpeople stopped the ooze. If I’d made that revelation sooner, these might have been relatively simple. Well, other than cutting out the little scarves from fruit roll ups, piping little branch arms, and sorting multicolored sprinkles. Okay, so these aren’t the treats for you if you’re in a hurry. But you have to admit, they are somethin’ special!

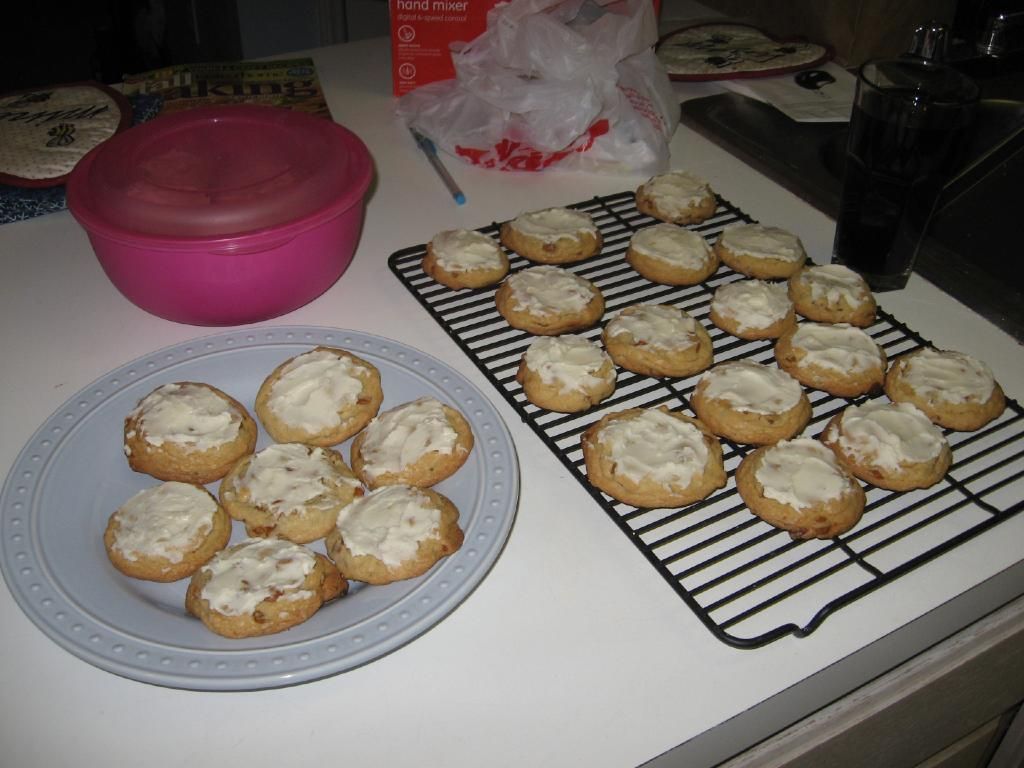
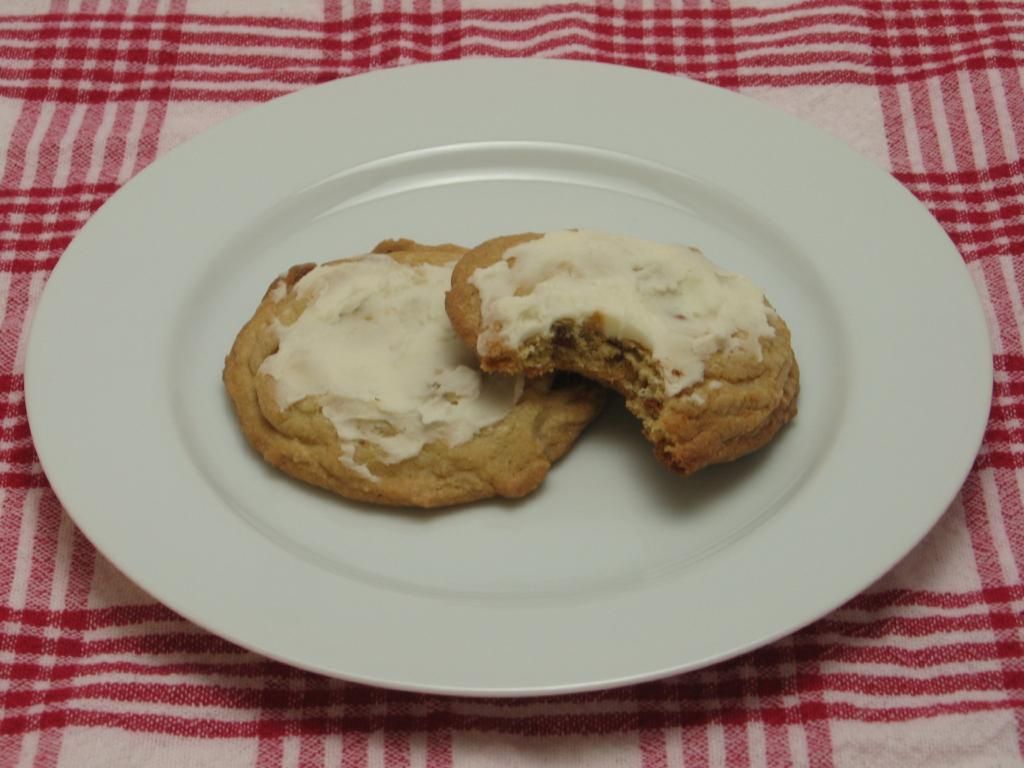
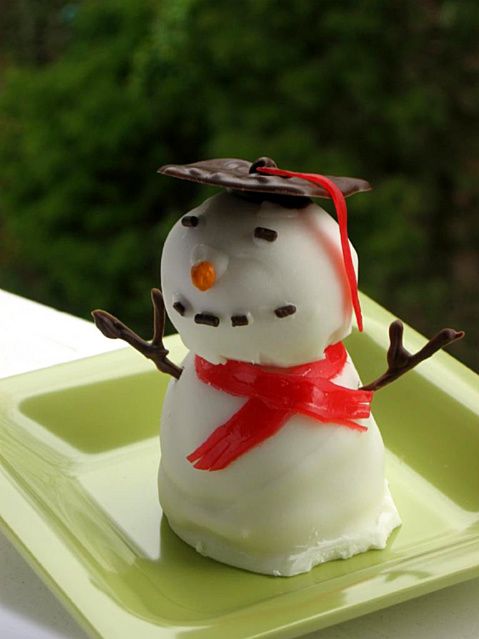
Not just appearance-wise, either. This happens to be a delicious group of snowfolks. I love golden oreo truffles even better than their chocolate cousins, and the vanilla flavored candy melts (I use CandiQuik) with chocolate accents was the perfect flavor addition. Mike said he might even love these more than red velvet cake balls — and that’s saying a lot! Speaking of Mike, of course I had to do a little something special to honor his special day. How about something like this:

Want to make these cuties? The recipe below includes notes I wish I’d known the first time around. Clear yourself an afternoon (and evening), put on some Christmas carols, and enjoy! Happy holidays!

Oreo Truffle Snowmen


Recipe By: Kraft Food & Family Fall 2006 (adapted, with decorating ideas by Willow Bird Baking)
Yields: About 15 large snowmen

Oreo Truffle Ingredients:
2 packages golden oreo cookies (divided; use cookie including the cream center)
2 8-ounce package cream cheese (softened)
white candy coating or candy melts (I use CandiQuik)

Decorations:
multicolored or chocolate sprinkles
candy-coated chocolate kiss sprinkles
strawberry fruit roll ups (or fruit by the foot)
chocolate (for melting)

Directions
1. Finely crush all but 14 cookies in a food processor or place them in a ziploc bag and crush into a fine consistency. Note: As for the extra 14 cookies, just eat them. Or, if you have extra dipping chocolate, make some chocolate covered oreos.
2. Stir in softened cream cheese. Use the back of a large spoon to help mash the two together.
3. Roll the mixture into 2″ balls (for the bodies) and 1″ balls (for the heads) and place on a cookie sheet covered with wax paper. Make sure you have enough heads for your bodies!
5. It helps to put the uncoated balls in the freezer for a few minutes to keep the mixture from starting to fall apart when you drop into the melted chocolate. Note: I refrigerate mine for an hour or two in lieu of the freezer. I’ve heard folks say that if they get too cold, they can crack.
6. Melt candy coating as directed on package and then dip balls one at a time into candy coating. Let excess coating drain off onto wax paper covered cookie sheet to dry. Note: Dipping is often the most difficult part. Find what works for you. Let your kitchen be your playground. Look through your utensils for useful tools, and be creative. I used a grill fork to hold my “bodies” while spooning coating over them, and then redipped the bottoms separately. For the heads, I usually skewered them with a toothpick, dipped them, and then wriggled them off onto the wax paper after draining excess coating.
7. As soon as each body and head is dry (which usually only takes a couple of minutes) transfer it to the refrigerator immediately to prevent cracking/oozing. If it does crack, blot with a paper towel, redip, dry, and then refrigerate.

To decorate:
1. Take a head and body out of the fridge, and “glue” them together using melted candy coating (I used a sharp paring knife here to whittle away some of the excess coating around the bottom of the heads).
2. Use melted coating to “glue” on chocolate sprinkles for eyes, mouth, and buttons if desired. “Glue” on an orange candy-coated chocolate sprinkle (or a regular orange sprinkle) for a carrot nose.
3. Cut a strip of strawberry fruit roll up, and snip “fringe” into each end. Wrap around snowman’s neck and “glue” together with melted candy coating.
4. Melt chocolate and pipe out tree branch arms. Using a bamboo skewer or a toothpick, carve out a hole in each side of the snowman. Gently slide a “branch” into each hole to serve as arms.
4. Refrigerate snowmen in an airtight container.
5. Immediately before serving, you can create a snowy scene with coconut and/or glistening sugar sprinkles. Optional but pretty!


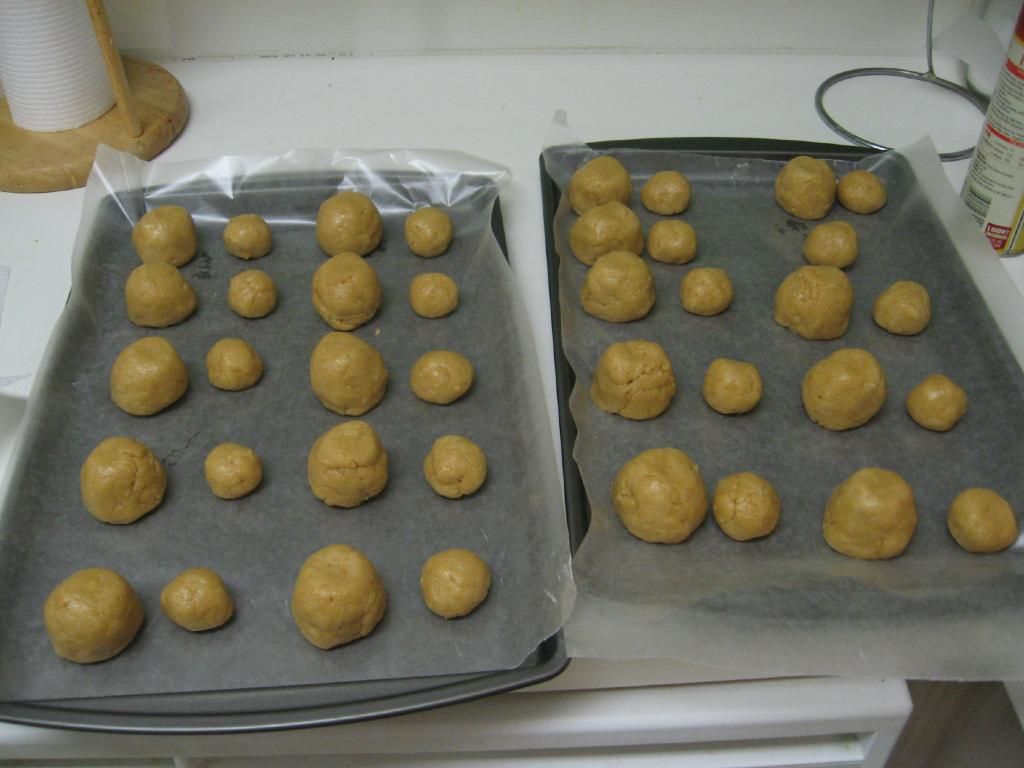
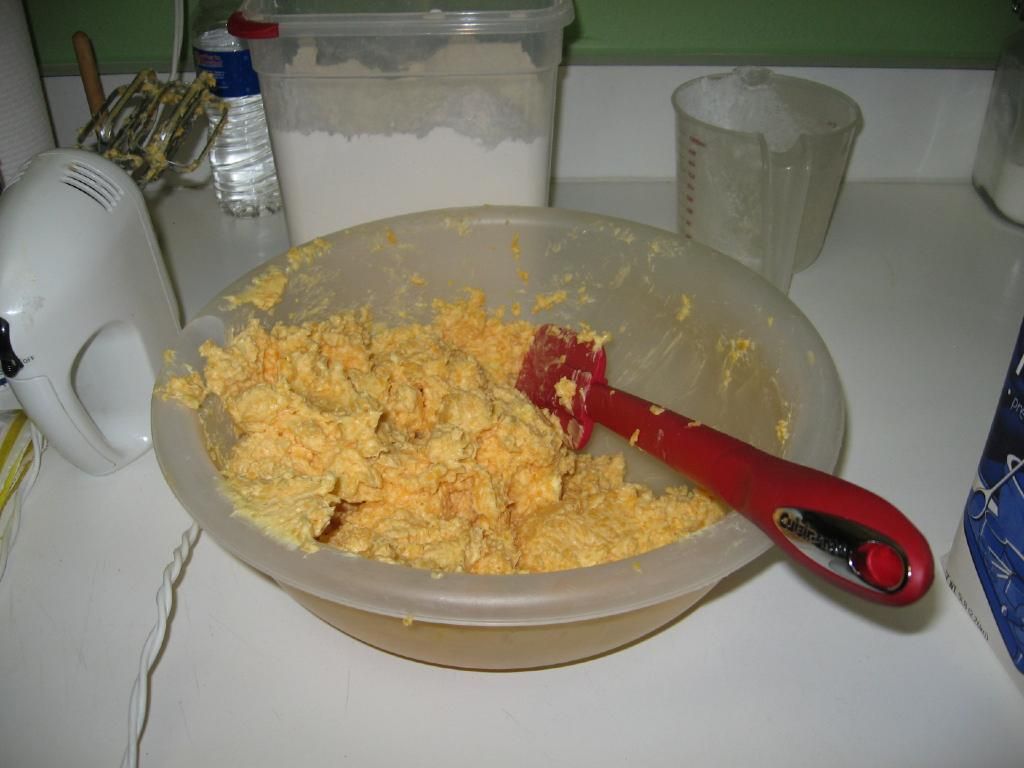
Mixing up the golden oreo truffles and shaping snowman parts.


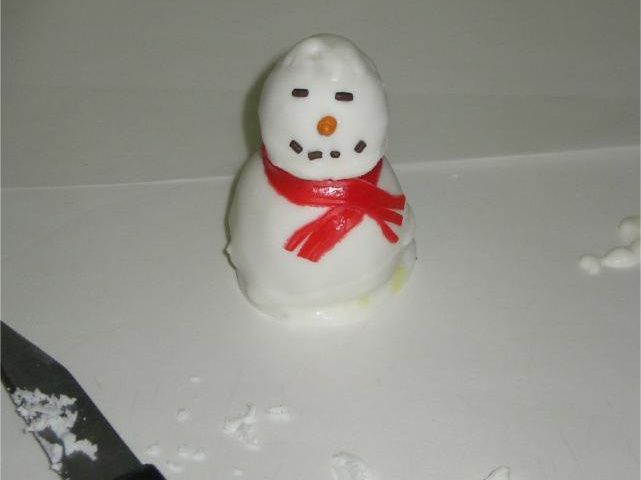
My very first snowman, and then three chilling out in the fridge.


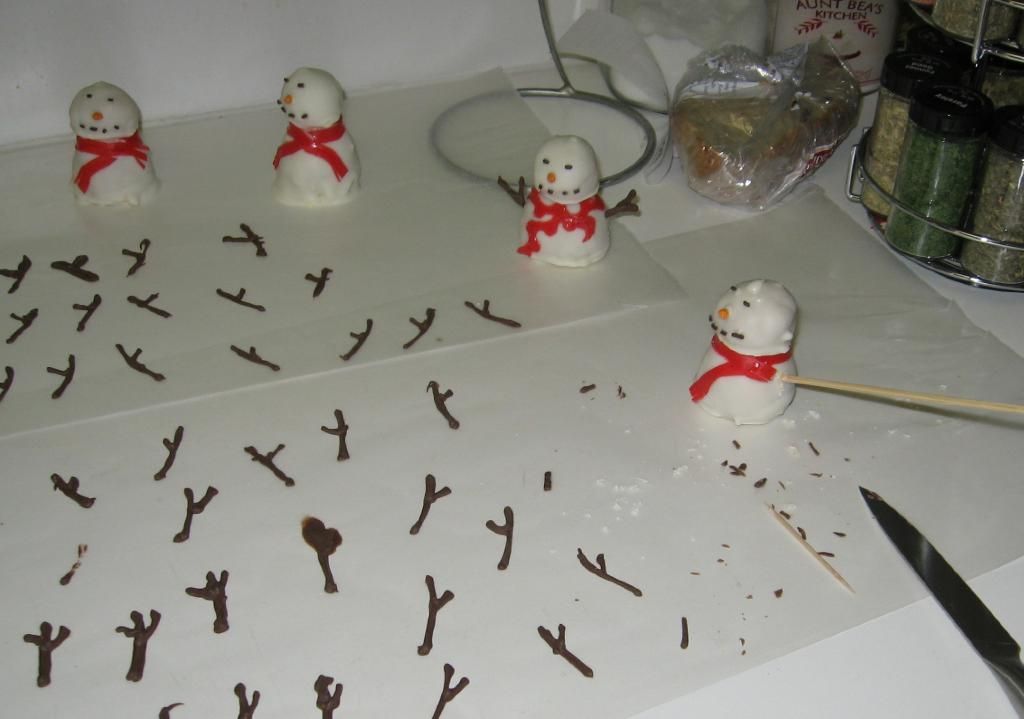
All the snowmen decorated, and then finally receiving arms!


Mike seeing his “surprise” snowman and Byrd giving her daddy graduation kisses.


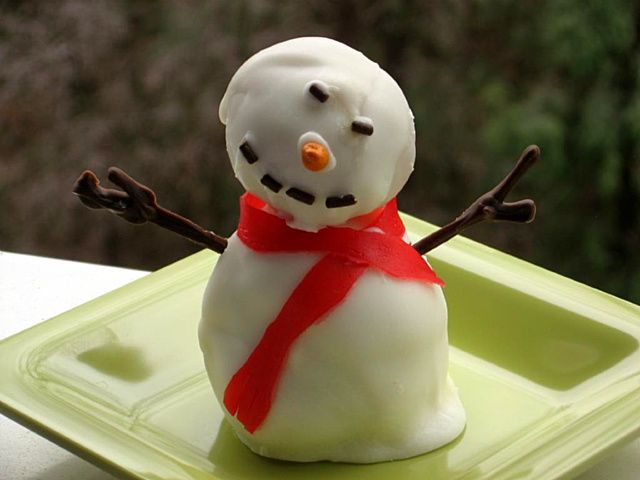
My favorite snowman! Happy as can be!


Share Share this post with friends!

Cinnamon Roll Cookies

My lovely friend Jennifer and I had a date this past Saturday to do some holiday baking. It was a much-needed fun adventure in the midst of the whirlwind holiday season. Do you all feel a bit like a hamster in a wheel, or is it just me? This is the time of year replete with Christmas parties, family gatherings, and various other occasions that call for packing freshly baked goodies into a satchel and carting them all over town. Festive, but exhausting!

I was therefore glad to do some “relaxing baking” with Jennifer. We set out to make cheese straws first, followed by a batch of Cinnamon Roll Cookies. We were sure we’d knock the cheese straws out quicker than a cat knockin’ ornaments outta the Christmas tree. But . . . well, it turns out that, “This recipe looks easy!” are famous last words.


A moment we weren’t sure would ever happen:
pulling the cheese straws out of the oven!

One smoking, dead mixer motor; one spontaneous shopping trip; and one battery-acid-filled cookie press later, we were bemoaning our smug pronouncement. Okay, okay, cheese straws can get a little complicated! They were at least delicious for all the trouble — they were cheesy, dense, and came out of the oven smelling just like macaroni and cheese. I devoured my portion in two days flat. So much for sharing! (Well, Mike did get a few. And somehow escaped with his fingers.)

You can understand why, after being bested by a recipe that only had 5 ingredients, I approached the Cinnamon Roll Cookies with some trepidation. Thankfully, the sweet little cookies we made next are as simple can be. Originally called Iced Cinnamon Chip Cookies, these chewy treats have such a buttery cinnamon flavor and such a lovely white swish of glaze that I couldn’t help changing their name a bit. They remind me of the warm pan of cinnamon rolls my mom makes on Christmas morning, so I’ve dubbed them Cinnamon Roll Cookies.

The warmth of the cinnamon with the sweet edge of icing was the perfect Christmassy treat, particularly since whipping up a batch was so easy. If you’re about to run your little hamster wheel right off its fulcrum, I hope you’ll give this relaxing and rewarding recipe a try.

Cinnamon Roll Cookies


Recipe by: Taste of Home
Yields: about 39 cookies

Cookie Ingredients:
1 cup butter, softened
3/4 cup sugar
3/4 cup packed brown sugar
2 eggs
1 teaspoon vanilla extract
3 cups all-purpose flour
1 teaspoon baking soda
1 teaspoon salt
1 package (10 ounces) cinnamon baking chips

Icing Ingredients:
1/4 cup butter, melted
1/4 cup shortening
1 1/4 cups confectioners’ sugar
1 tablespoon milk
3/4 teaspoon vanilla extract

Directions:
In a large bowl, cream butter and sugars until light and fluffy. Beat in eggs and vanilla. Combine the flour, baking soda and salt; gradually add to creamed mixture and mix well. Fold in cinnamon chips.

Drop by rounded tablespoonfuls 2 in. apart onto ungreased baking sheets. Bake at 350° for 10-12 minutes or until golden brown. Remove to wire racks to cool.

In a small bowl, combine icing ingredients; beat on high speed for 1-2 minutes or until fluffy. Spread over cooled cookies.


The impossibly thick cheese straw batter (with the now departed mixer in the background!), followed by Jennifer piping the finished mixture out to bake.


Cookies just getting started, and then in the oven.


Cookies cooling and then all frosted.


Enjoy!


Share Share this post with friends!

1 2