sweet potato

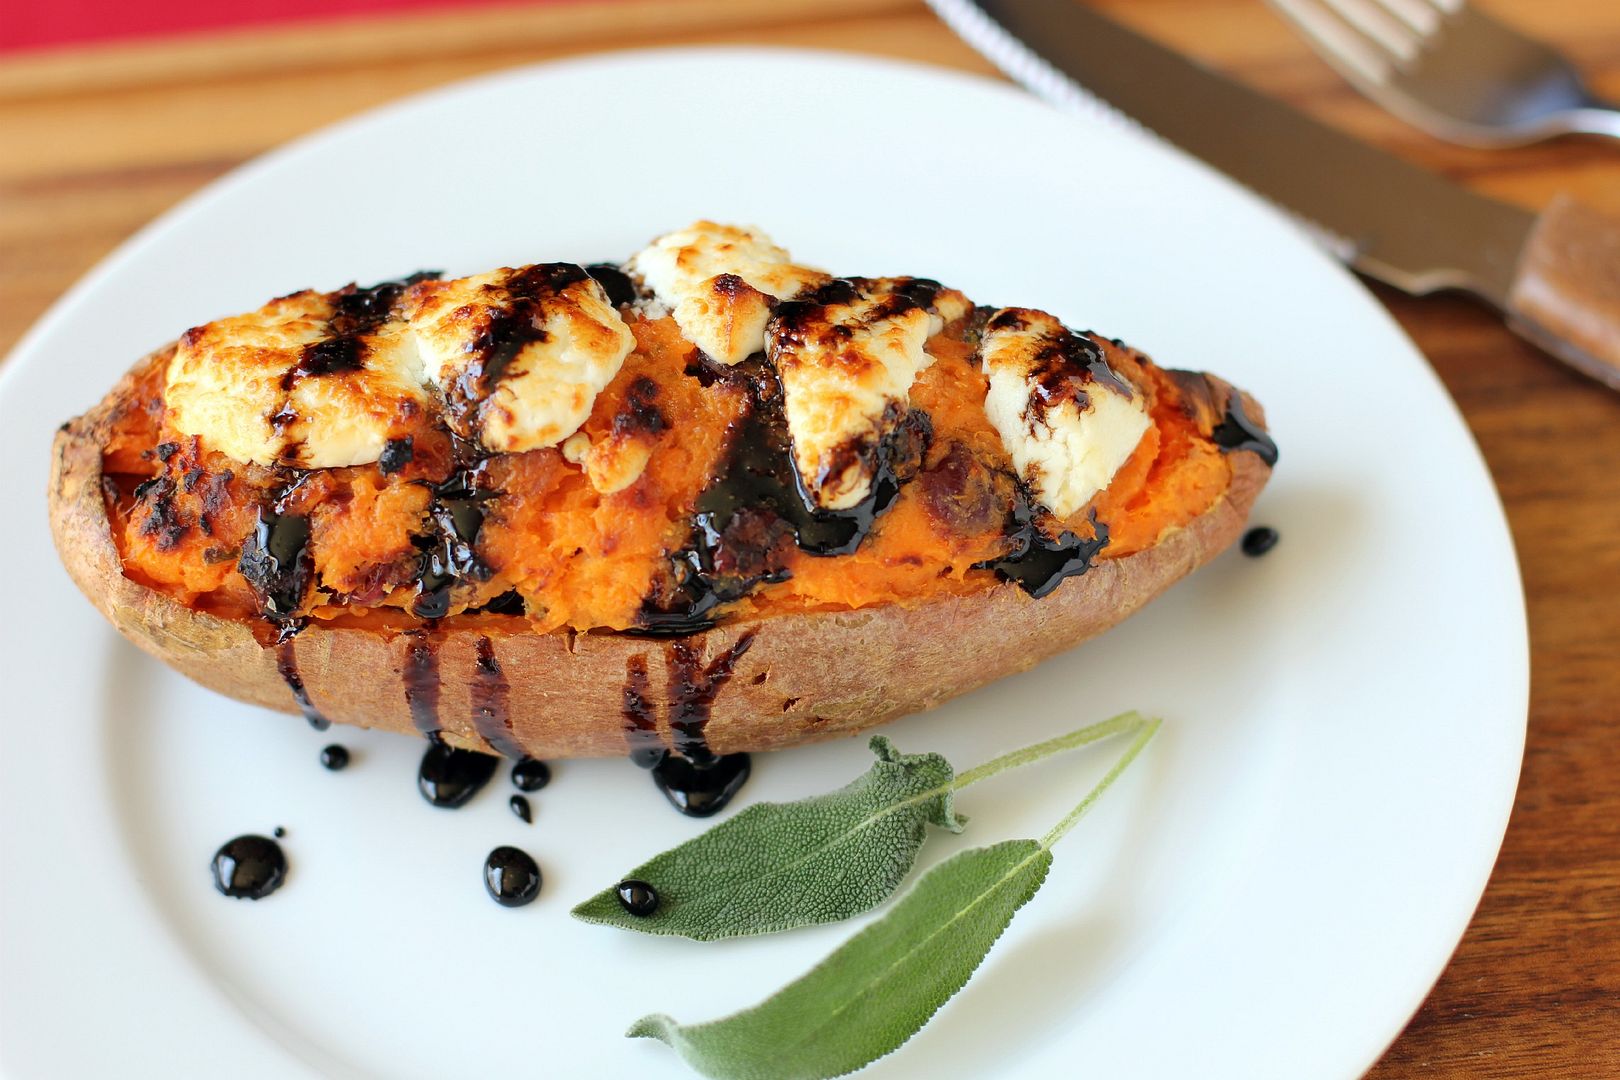
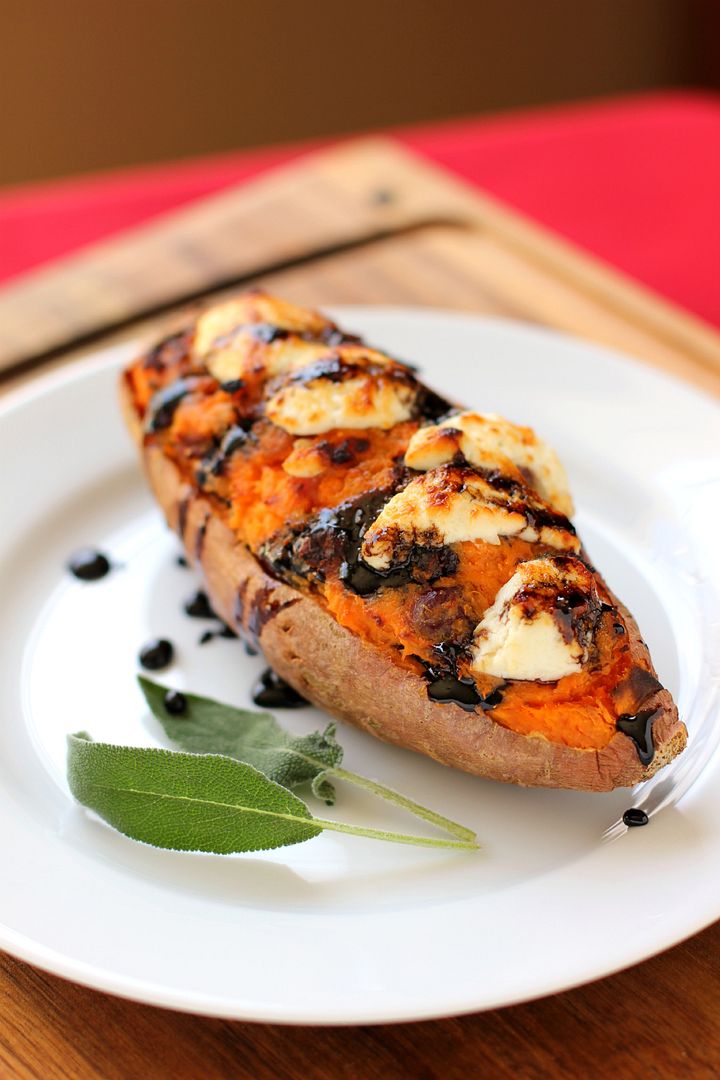
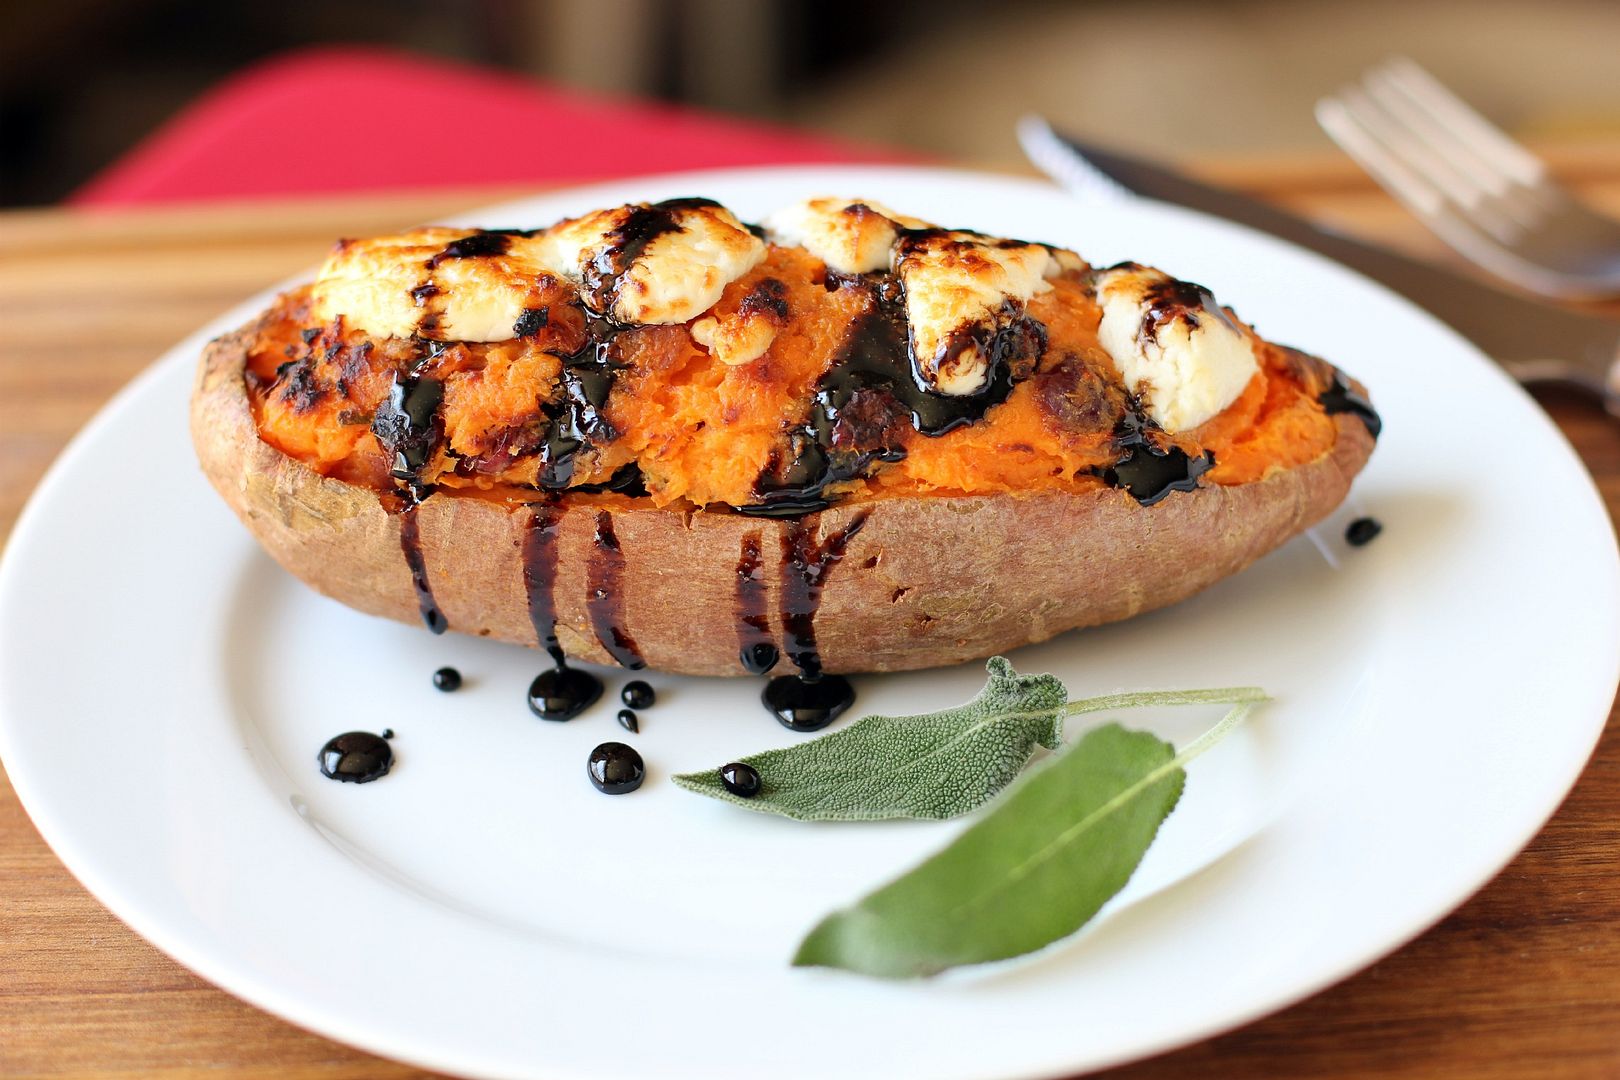
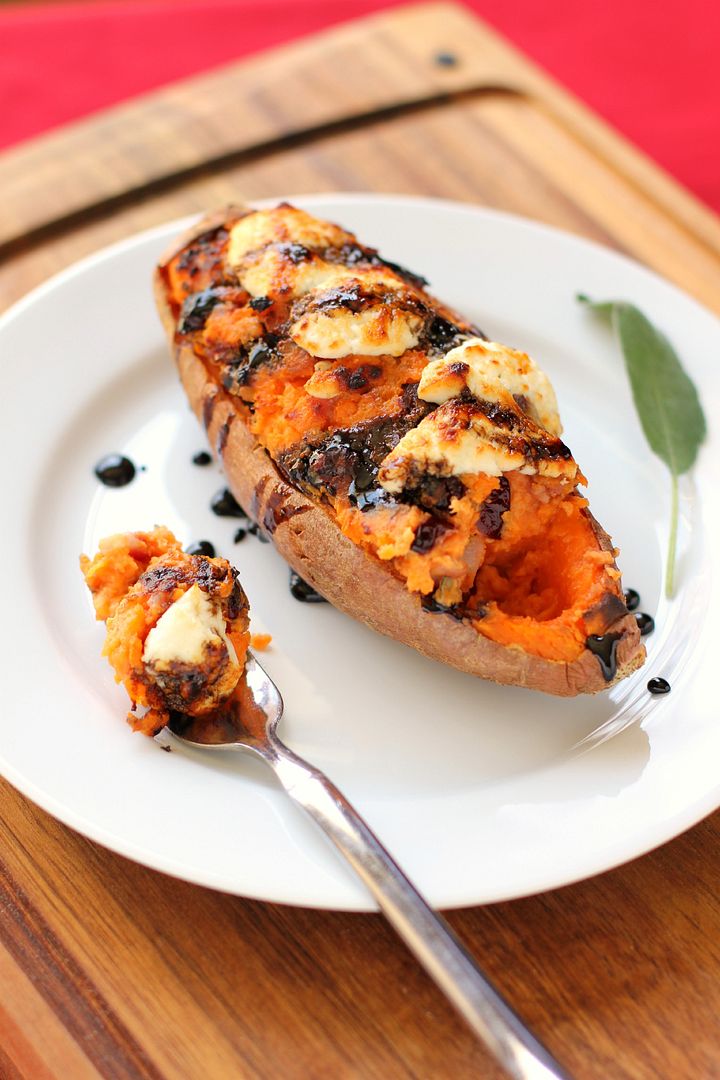
Twice Baked Cranberry & Pancetta Sweet Potatoes with Balsamic Glaze

The only time I’ve lived away from my hometown was during my sophomore year in college when I moved to Beaufort, a small town on the coast of North Carolina. I lived there for a few months before traveling for a month down the Eastern seaboard to study marine zoogeography. That semester changed my life, and I’ve continued to process the memories over the years. Periodically I’ll share stories here on Willow Bird Baking from that time.

. . .

I stared willfully at the horizon, waiting for the wave of nausea to subside. As if it were having great fun at my expense, the boat rolled over another giant wave. My stomach followed. I was determined not to succumb to the sensation and end up hanging over the railing like several of my friends, so I squinted even harder at the steady line between sky and land.
We’d woken up at an absurd hour to climb aboard the R/V Susan Hudson that morning. We’d all become accustomed to rolling out of bed, pulling on a pair of salty old sneakers, and plowing through the fog of sleep to begin our adventures. Luxuries like showering and hairstyling and even, say, deodorant had long since been abandoned. There was a high likelihood that on any given day we’d find ourselves traipsing through mud up to our thighs (I’m not exaggerating), swimming to a nearby island, or cuddling with sea cucumbers in the shallows. There was no point in getting pretty.
This was our first deep sea expedition. We were traveling miles out into the ocean to dredge and trawl for invertebrates that we would take back to the lab, observe, and then release. I’d been on the Susan Hudson around Pivers Island, home base for the Duke Marine Lab where we lived, but I soon discovered that this was an entirely different experience: one in which I did not have sea legs. Or a sea stomach.

The briney smell of the critters we poured out onto the ship’s deck didn’t help. We quickly flipped fish back out into the sea and scooped heaps of clams, snails, and squids into buckets of seawater. A cacophony of seagull chatter above us reminded us to toss a bit of our impressively fresh sushi into the air now and then.

On our way back with our spineless loot (the squids’ inky water suggested they were none too happy with their temporary accommodations), we docked near Cape Lookout to explore the seashore for a bit before eating lunch back on the boat. The dining hall had packed us sweet little bag lunches complete with a sandwich, apple, and cookie, but the thought of lunch sent my stomach back into a lurch.
Fortunately, one of the guys in our group had grown up on the water in Charleston. Will had battened down hatches, swabbed the deck, shivered some timbers, and every other nautical cliche I can muster up. He saw my decidedly green gills and said, “Make sure to eat.”

I was skeptical. “Well, I’m feeling really sick — is it a good idea to eat anything? Isn’t that just asking for trouble?”

“Trust me: eat. You’ll feel better.”

I unfolded the wax paper around my sandwich and took a cautious bite. (By the way, if you’ve never wrapped a sandwich in wax paper for your lunch, you should. The sensory experience of unwrapping that crinkly, smooth paper to eat a humble little sandwich is one of my favorite things in the world.) I don’t remember what sort of sandwich it was, but it tasted otherworldly after an entire morning on the boat. My hunger caught up to me and I finished devouring my sandwich with gusto. I headed for the cookie after that, offering my apple to one of my friends (the peel gets caught in my teeth and drives me batty, so I never eat them).
My trust in Will, given tentatively and mostly out of desperation despite his obvious experience, paid off. I felt better almost instantly. So much so that instead of clenching my bench and staring at the now-bright horizon the entire way back to the lab, I was able to get up and survey the surrounding sea, broken by waves and playful dolphins.

. . .

I’ve moved from research boats to potato boats since my time in Beaufort. In fact, I haven’t stepped foot on an actual boat (unless you count a kayak) in years. And I wouldn’t trust these sweet potatoes to be particularly sea-worthy.

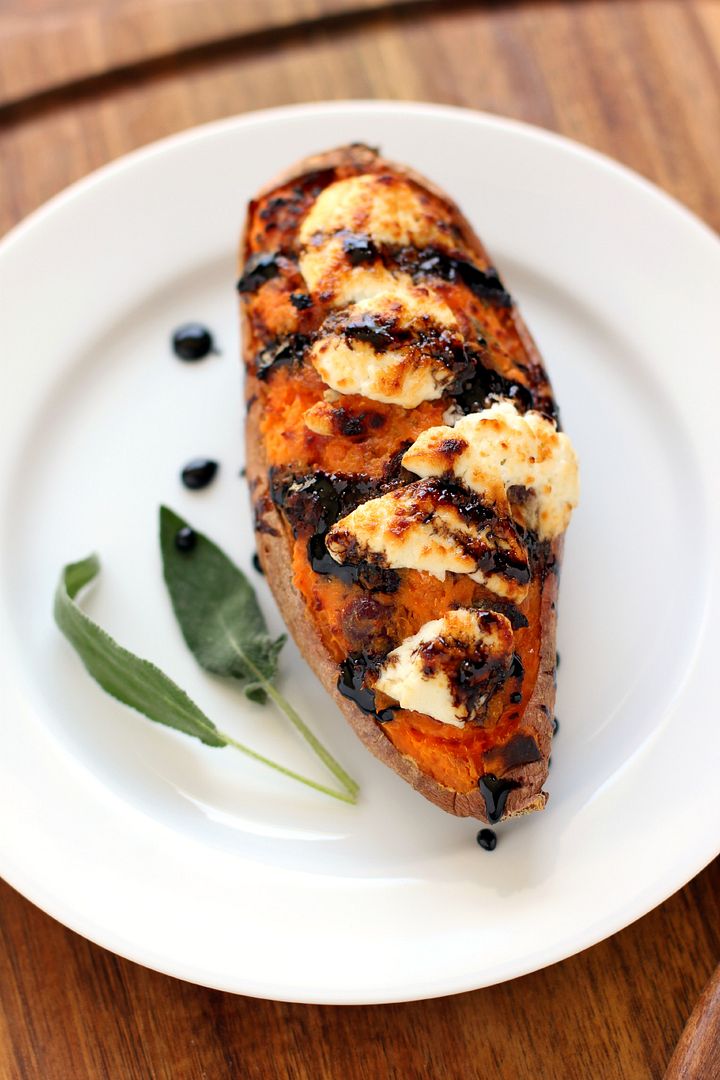
They are fantastic, though. I love twice baked potatoes for their soft, creamy filling, and this play on the theme boasts that same lovely texture. In addition to that, it has a phenomenal collection of flavors: sweet potato, cranberry, salty pancetta, sage, goat cheese, and a sweet balsamic glaze. The pretty presentation is just the icing on the cake.

Twice Baked Cranberry & Pancetta Sweet Potatoes with Balsamic Glaze


Recipe by: Willow Bird Baking
Yield: 2 twice baked sweet potatoes

These gorgeous twice baked sweet potatoes are fancy enough for a holiday meal, but simple enough to make any night. You can even prepare them a day in advance so they’re ready to pop in the oven before a big meal. A few tricks (like using a zip top bag to pipe the mixture into their sweet potato boats) speed up the process. The best thing about them, though, is the fantastic combination of flavors: salty pancetta, sweet and tart cranberries, tangy goat cheese, fresh sage, and a sweet balsamic glaze. It’s every sweet potato’s dream.

Ingredients:
2 large sweet potatoes (look for ones that are shaped like a fat oval)
4 ounces cubed pancetta
2 ounces goat cheese, plus more for crumbling on top
2 tablespoons butter
1 heaping teaspoon of loosely packed sage leaves, finely chopped
1/4 cup dried cranberries
1/4 cup half & half
salt to taste
1 1/2 cups balsamic vinegar
3 tablespoons sugar

Directions:
In a small bowl, cover dried cranberries with hot water. Cover the bowl with plastic wrap and let it sit for about 10 minutes to rehydrate the berries. Drain them and set aside. Preheat the oven to 350 degrees F. Poke each sweet potato several times with a fork and bake them on the oven rack (with a baking sheet on the rack below to catch any oozing) for 1 hour or until a knife will slice them easily.

While they bake, sauté the pancetta in a skillet over medium-high heat for a 8-10 minutes or until crisp. Drain it on a plate lined with a paper towel.

Once they’re ready, let the baked sweet potatoes cool for 10 minutes before slicing the top third off of each. Use a spoon to carefully scoop out the flesh (leave about 1/8 inch of flesh in the skin to give it some sturdiness). Mix the sweet potato flesh in a medium bowl with the butter, 2 ounces of goat cheese, and half & half (add this slowly while mixing so you get the consistency you’d like). Once the mixture is smooth, stir in the cranberries, sage, and pancetta. Salt the mixture to taste. Spoon it into a large zip top bag and cut the bottom corner off. Squeeze the mixture into the sweet potato skins. (At this point you can cover the potatoes and refrigerate overnight or bake immediately. If you chill them overnight, just let them come to room temperature before you bake them the next day.) Bake the potatoes for 10-12 minutes before removing them to a cooling rack.

While the potatoes are baking, combine the balsamic vinegar and sugar in a saucepan and boil them over medium-high heat, stirring occasionally, until the mixture is reduced to about 2/3 cup (this can take anywhere from 18-25 minutes). Be careful — vinegar fumes are strong! When the glaze is about ready, preheat the broiler. Top each potato with a generous amount of goat cheese and broil, watching very closely, until goat cheese is toasty brown and bubbly. Remove the potatoes and drizzle on the balsamic glaze. Serve immediately.

P.S. This dish will be entered in the North Carolina Sweet Potato Commission‘s No More ‘Mallows Recipe Contest. I love me some sweet tater and marshmallow casserole, but I also love that sweet potatoes pack a lot of savory potential.

If you liked this post, please:
Subscribe to Willow Bird Baking
Follow Willow Bird Baking on Twitter
Follow Willow Bird Baking on Facebook
Give this post a thumbs up on StumbleUpon
Pin It

Hasselback Sweet Potatoes with Orange Rosemary Butter & Goat Cheese

In light of Willow Bird Baking’s Cooking Hard Stuff Challenge, I’ll be sharing some tips for tackling new or challenging recipes throughout the month of March. If you haven’t signed on for the challenge yet, make sure you read about it and join in the fun.

My first bit of advice about how to Cook Hard Stuff (or really, how to cook anything at all) is going to seem half obvious and half new agey, but it’s important enough to harp on a bit.

Cooking Hard Stuff Tip #1: Read and visualize the recipe.

Once upon a time, I treated a recipe like a labyrinth. I started at the beginning without any knowledge of what was ahead, putting one foot in front of the other and hoping I eventually reached the other side.

It was exciting, for sure. Suddenly, I’d need a cup of sugar. I’d dig around in the cabinet for a bit, do some measuring, and accomplish that task. Then, bam! I’d need a stick of butter. I’d scrounge around in the fridge to see if I had one. The pitfalls of this technique are pretty obvious: sometimes you’re out of sugar, or your butter needed to be set out to soften hours ago, or the pan you need is soaking in the sink with last night’s baked ziti caked all over it.

It only took a few such missteps to start reading recipes, but even then, I just “read” them. Skimming did the trick most of the time. Finally, a few mid-recipe trips to the grocery store made me realize that a cursory scan of a recipe wasn’t going to cut it either.

When I say you should read through your recipe, I mean you should grab a pencil, sit down with the recipe, and really read it. Make grocery lists based on the ingredients. Make a schedule for your prep work so things like softening butter don’t sneak up on you. Sketch a plan for how to set up your workspace for finicky or time sensitive recipes so you won’t have to stop and rummage through the pantry.

These things take a little time. You might sit with your recipe for 15 or 20 minutes planning. I can say from experience, though, that the time and angst you’ll save as you breeze through your recipe is worth the few minutes of preparation.

Once you’ve given a recipe a thorough reading and made any helpful notes, you need to sit down and visualize the steps of the recipe. Literally, sit there and picture yourself doing each step. Maybe this is starting to sound a little like a yoga class, but mentally walking through a recipe is one of the most important things I do to ensure my success. It’s during this exercise that I realize what order the prep work is best completed in, what techniques I’m unfamiliar with and might need to read more about, and what kitchen tools I should use in order to maximize my efficiency and minimize my workload.

Thinking through the recipe a few times also makes me feel like I’ve practiced the steps I’m about to tackle, which boosts my confidence and leads to better results in the kitchen.

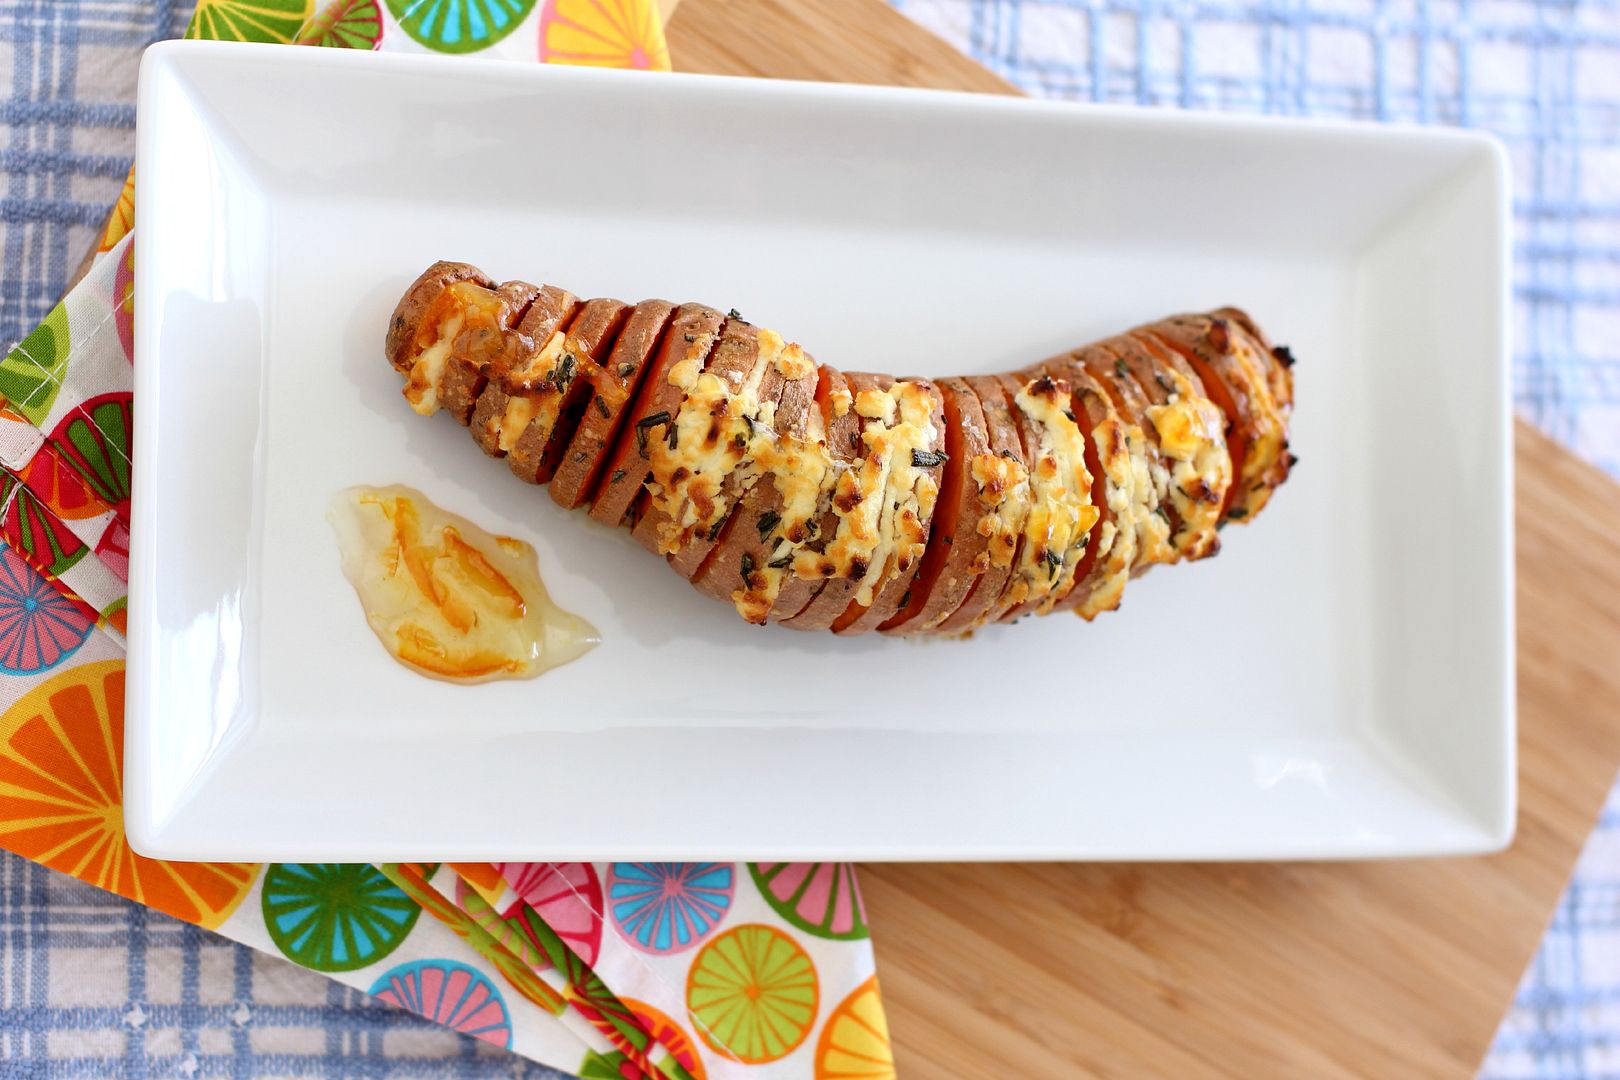
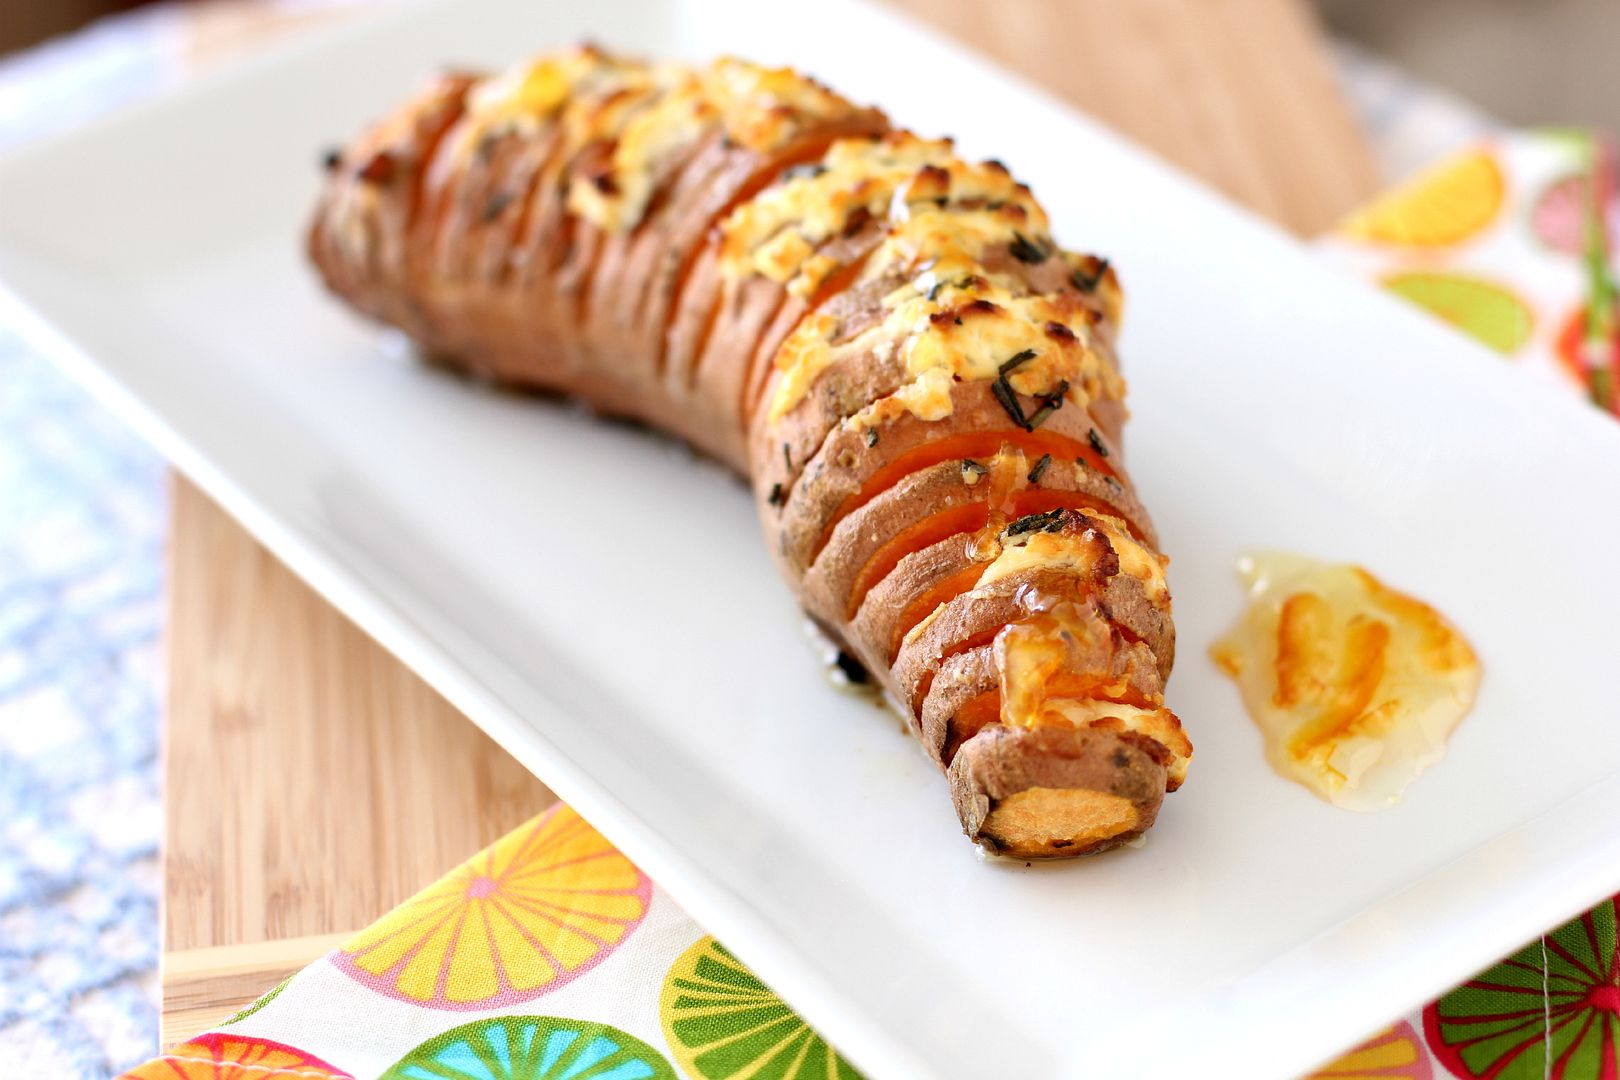
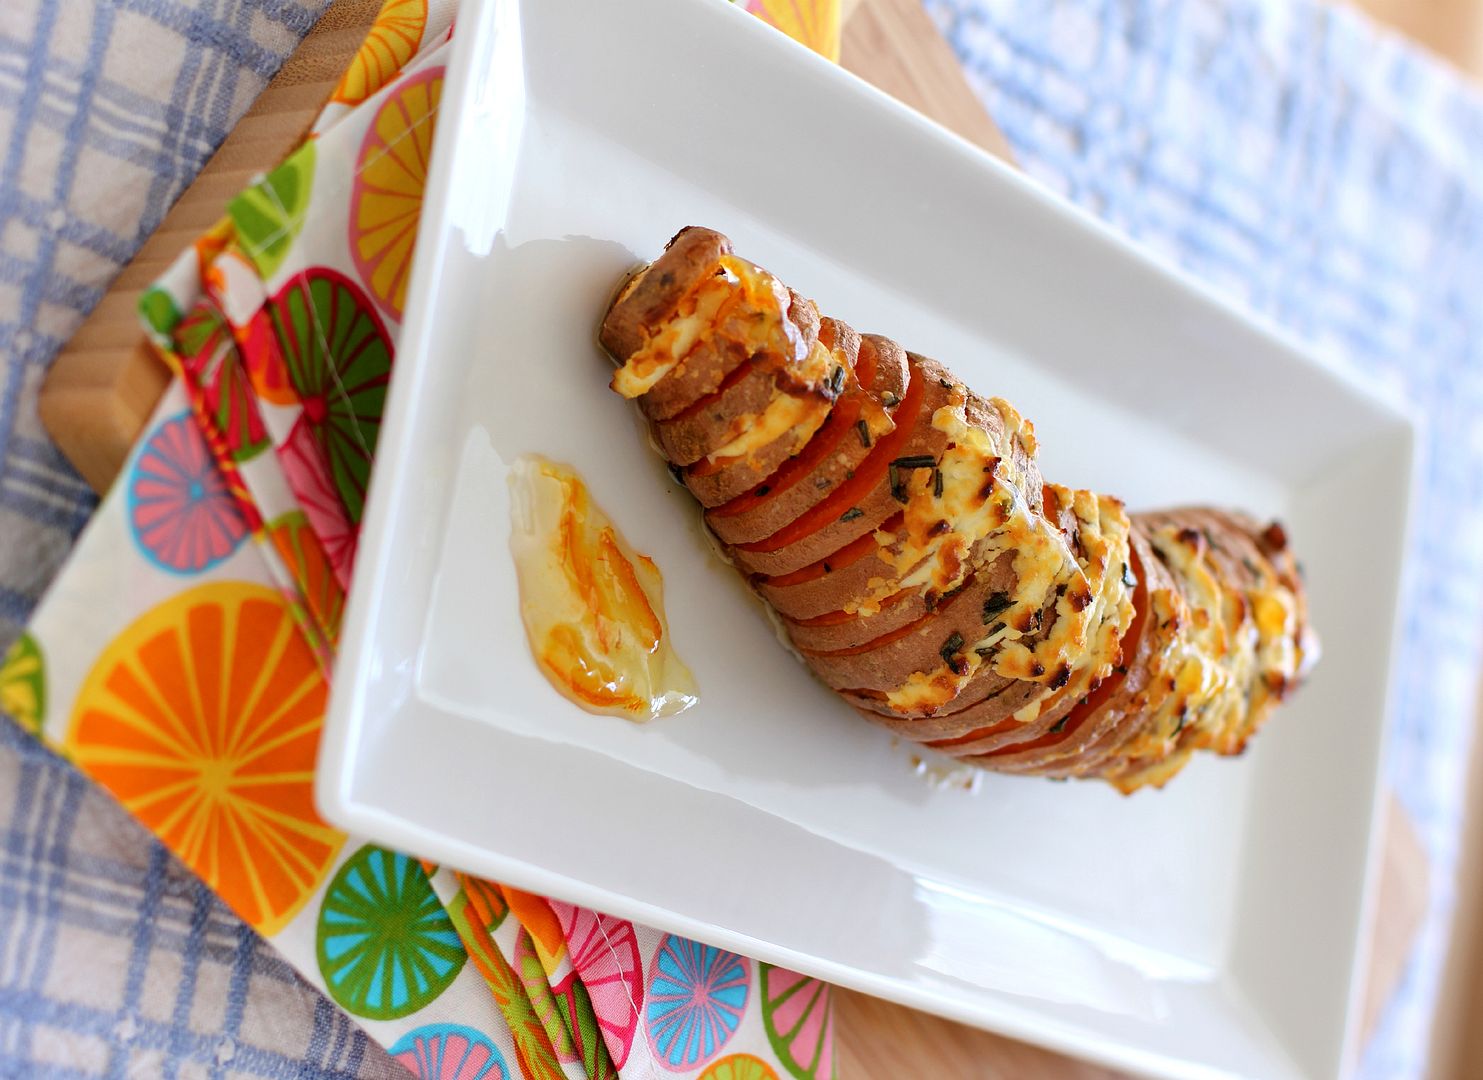
These Hasselback Sweet Potatoes aren’t Hard Stuff; they’re actually pretty simple to prepare and boast a gorgeous flavor profile. But having never made Hasselback potatoes before, you better believe I was reading around online, comparing various recipes, and making a prep list for myself. After this bit of preparation, the dish practically flew together.

As I hoped, the orange rosemary butter, goat cheese, and smidge of warm orange marmalade glaze worked perfectly with the sweet potato to create a bold savory side dish. Do a little reading and a little visualization (and maybe even some yoga?) and then make yourself some sweet taters.

What tips for Cooking Hard Stuff would you offer other readers?

Hasselback Sweet Potatoes with Orange Rosemary Butter & Goat Cheese


Recipe by: Willow Bird Baking, inspired by A Cozy Kitchen’s Hasselback Potatoes
Yield: 2 sweet potatoes, 2-4 servings

These sweet potatoes are stuffed with delicate orange rosemary butter and goat cheese and drizzled with a touch of warm orange marmalade when they’re fresh from the oven. The result is a savory side dish with a hint of sweetness and a ton of bright flavor. Don’t fret if the butter and cheese needs to be smooshed into each slit in the potato and ends up a little messy — the finished product will be gorgeous.

Ingredients:
2 sweet potatoes, scrubbed clean
4 tablespoons butter, softened
1 tablespoon rosemary leaves, finely chopped
1/2 teaspoon orange extract
1/2 teaspoon orange zest (optional)
3/4 teaspoon honey
4 ounces goat cheese
1/4 teaspoons kosher salt (plus more for salting butter to taste)
1 tablespoon olive oil
1 tablespoon orange marmalade

Directions:
Make the Rosemary Orange Butter: Mix softened butter, orange extract, orange zest, finely chopped rosemary, and honey until well combined. Add salt to taste. Spoon butter onto a square of wax paper and gently form into a log. Wrap the log and place it in the freezer to firm up completely.

Prepare potatoes: Preheat the oven to 400 degrees F and cover a baking sheet with foil. Place a wooden spoon handle on either side of your potato and slice thin slices into it, allowing the spoon handles to stop your knife before you cut all the way through. Slice your cold butter into thin slices and stuff a sliver into every other slit in your potato. Stuff goat cheese into the other slits (some goat cheese will smear out onto the top of your potato and form a topping of sorts). Place the potatoes on the prepared baking sheet, drizzle each potato with 1/2 tablespoon of oil, and sprinkle with kosher salt.

Bake the potatoes at 400 degrees F for 45 minutes or until fork tender. Check halfway through and tent with foil if the goat cheese is beginning to brown too much. Remove the potatoes from the oven after baking and heat the orange marmalade in a small, microwave safe prep bowl for about 15 seconds. Drizzle half over each potato and serve immediately.

P.S. This dish will be entered in the North Carolina Sweet Potato Commission‘s No More ‘Mallows Recipe Contest. I love me some sweet tater and marshmallow casserole, but I also love that sweet potatoes pack a lot of savory potential.

See all the Cooking Hard Stuff Tips:
The Cooking Hard Stuff Challenge
Tip #1: Read and visualize the recipe.
Tip #2: Mise en place.
Tip #3: Make a schedule.
Tip #4: Try, try, try again — or share your success

If you liked this post, please:
Subscribe to Willow Bird Baking
Follow Willow Bird Baking on Twitter
Follow Willow Bird Baking on Facebook
Give this post a thumbs up on StumbleUpon
Pin It

Naked Vegan Tacos with Corn Relish and Cilantro-Lime Slaw

Do not make naked vegan tacos while naked.

Yes, I know it’d be clever. I know it’d be a fun story to tell your friends (who would then promptly decline all future dinner invitations). But if one splatter of hot oil goes awry, all amusement you had hoped to gain from the experience will promptly disintegrate (along with patches of your skin, I’m just sayin’).


Make me with clothes on, please.

Also, do not assume Naked Vegan Tacos are made specifically for naked vegans. You may certainly eat these if you are a naked vegan, but clothed vegans are also welcome to partake. Even you omnivorous folks (clothed or otherwise) can enjoy this recipe if you’re so inclined.

This is an equal opportunity blog, y’all.

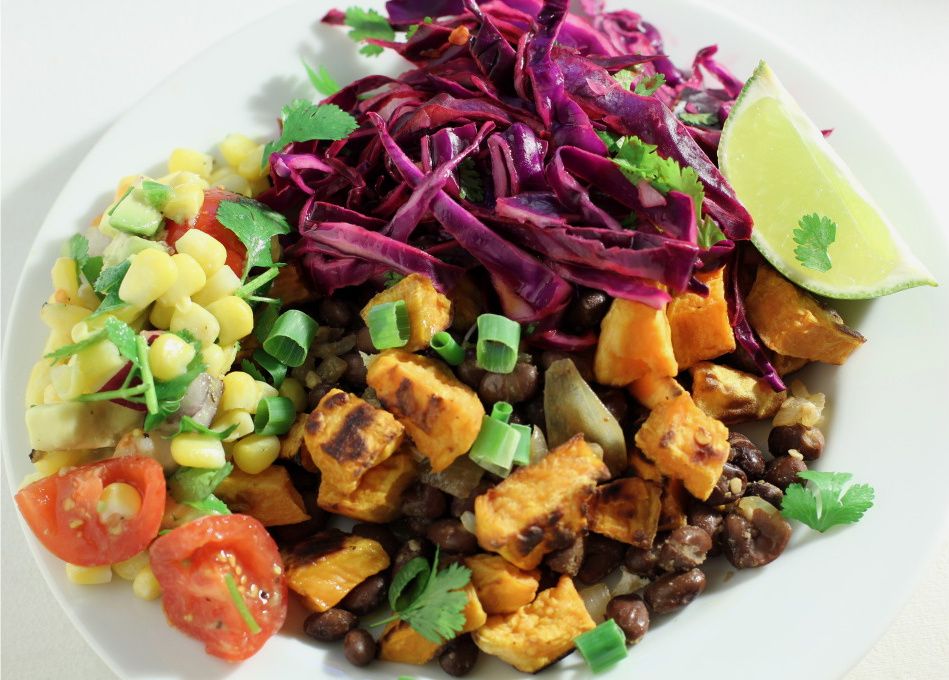
So why are Naked Vegan Tacos called Naked Vegan Tacos? ‘Cause they’re not wearing their taco shells! All the lovely stuffins of a vegan taco are included, but engineered for your fork instead of your hands.


Exposed.

This quick dinner was a take on sweet potato and black bean tacos, a dish I’ve had on my to-make list forever. Just as I expected, the sweetness of the roasted sweet potatoes was fantastic with the heat and cumin in the black beans. The cilantro-lime slaw added acid and crunch. The corn relish — boasting bright corn, tomatoes, and creamy hunks of avocado — cooled things off.

This huge, cheap, flavorful meal was so satisfying; I ate it over the course of 4 days and loved every bite, even though the avocados were oxidizing (i.e. turning all brown and creepy) after the first day.


Not vegan anymore.

Since it’s full of veggies, only 451 calories per serving, and includes components to make up complete proteins, I’m also going to decree that this meal is healthy (though I’m no expert). Serve it atop your favorite grain for an even more filling dinner. Heck, you could even go crazy and serve the tacos in flippin’ taco shells. You know, if you’re that kind of person.

What’s your favorite fresh vegetable?

Naked Vegan Tacos with Corn Relish and Cilantro-Lime Slaw


Recipe by: Adapted from Joy the Baker and Paula Deen
Yields: 4 servings

The focus of this meal is flavor. Roasted sweet potatoes sweeten, black beans with cumin bring the heat, cilantro-lime slaw adds crunch and acid, and a bright corn relish with creamy avocado and juicy tomatoes lends freshness. Filling my plate with all of these lovely bits and pieces and then spending my entire dinner creating various perfect “bites” was so satisfying — especially since it was also healthy.

Sweet Potatoes Ingredients:
2 sweet potatoes, peeled and cut into small cubes
1 tablespoon olive oil
salt and red chili flakes to taste
juice of 1 lime

Cilanto-Lime Slaw Ingredients:
2 heaping cups finely shredded cabbage
1/4 cup finely diced yellow onions
2 heaping tablespoons chopped cilantro
juice of 2 limes
salt and red chili flakes to taste

Black Beans Ingredients:
1 teaspoon olive oil
1/4 cup finely diced yellow onion
1 teaspoon ground cumin
1 (15-ounce) can black beans, drained and rinsed
juice of 1 lime

Corn Relish Ingredients:
2 cups cooked corn, fresh or frozen
1 avocado, cut into 1/2-inch cubes
1 pint cherry tomatoes, halved
1/2 cup finely diced red onion
1 teaspoon finely diced jalapeno (or to taste)
2 tablespoons olive oil
1 tablespoon fresh lime juice
1/4 cup chopped cilantro
1/4 teaspoon salt
1/4 teaspoon pepper

Optional Extras:
Fried or poached egg (obviously this makes it un-vegan)
salsa, fat free sour cream, green onions, fresh cilantro, limes

Directions:
Make sweet potatoes: Preheat oven to 400 degrees F. In a bowl, toss sweet potato cubes with oil, salt, chili flakes, and lime juice. Spread out on a baking sheet. Roast 40-45 minutes (stirring/flipping gently a couple of times during the process) or until tender and brown. Remove the potatoes from the oven and set aside.

Make Cilanto-Lime Slaw: While the potatoes are roasting, place shredded cabbage, onions, cilantro, lime juice, salt, and chili flakes in a bowl. Toss them together and set aside to let the cabbage soften.

Make Black Beans: Heat oil in a saucepan over medium-high heat. When the oil shimmers, add the onions and cook them for a few minutes until they’re soft and translucent. Add the cumin and garlic and toast these for a few seconds until fragrant. Finally, add the beans and lime juice and cook until they’re heated through.

Make the corn relish: Mix the corn, avocado, tomatoes, jalapenos, and onion in a large bowl. Whisk together the oil, lime juice, cilantro, salt, and pepper in a separate bowl. Pour it over the corn mixture and gently toss.

Assemble: Serve your naked tacos by heaping sweet potatoes and black beans on a place and garnishing with a big spoonful of cilantro-lime slaw and corn relish. Accompany your meal with a dollop of sour cream, fresh cilantro, chopped green onions, and salsa. If you fancy some added protein and aren’t vegan, you can top with a poached or over-easy fried egg.

If you liked this post, please:
Subscribe to Willow Bird Baking
Follow Willow Bird Baking on Twitter
Follow Willow Bird Baking on Facebook
Give this post a thumbs up on StumbleUpon


ShareOther ways to share this post with friends!

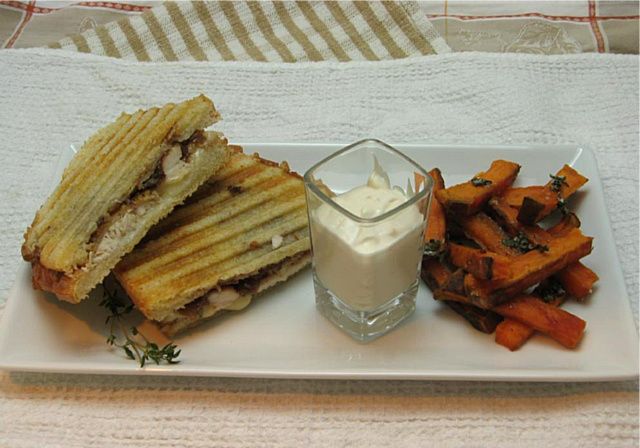
Roast Chicken and Onion Jam Panini with Sweet Potato Fries

There’s been a joyous new addition to my family! She doesn’t even have a name yet, but she’s already brought so much love and happiness into our lives. And quesadillas. She’s brought a lot of those, too.


Meet my new baby!

That’s right! I have a precious new Cuisinart panini press! And I got her for free! Well, sort of. My local grocery store has been running a promotion where you get a point for every $10 you spend on groceries. You can then use points to “purchase” an array of Cuisinart appliances. My little panini press here cost 100 points, or (wince!) $1,000 worth of groceries. Okay, okay, so obtaining her was a bittersweet accomplishment. Nevertheless, I was as excited as a bunny eatin’ a banana! The cashier politely listened to me ramble about all the panini I planned to make as I scooped my new appliance up to bring her home. Since then, there’s been a whole lotta pressin’ going on!

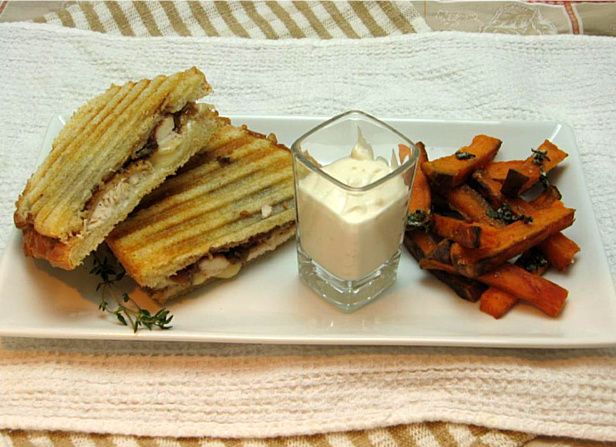
While searching around enthusiastically for panini recipes, I came upon a lovely blog: Panini Happy. A whole blog entirely devoted to using my new favorite kitchen gadget! I got so excited paging through the blog that I planned a whole dinner around panini! On the menu was a succulent Roast Chicken and Onion Jam Panini, a side of Sweet Potato Fries with Basil Salt and Garlic Mayonnaise, and a comforting side of Oven-Baked Macaroni and Cheese.

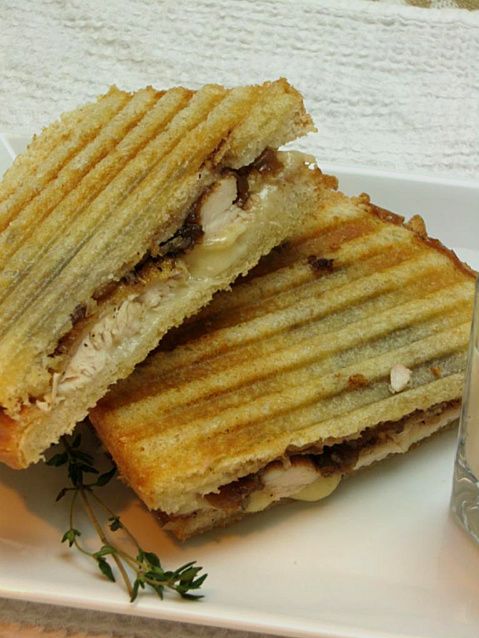
The panini was a synergy of gorgeous materials: sourdough bread, freshly roasted chicken, Gruyère, fresh thyme, garlic mayonnaise, and (drum roll please) ONION JAM. Panini Happy is where I met this Condiment of Condiments. Oh man, y’all, this stuff is good. Sweet caramelized onion, roasted garlic, reduced balsamic vinegar . . . it’s the perfect, hearty, luscious spread to drench your panini in. And drench we did!

Onion Jam


Recipe by: Panini Happy
Yields: ~3/4 cup of onion jam

Ingredients:
3 large sweet onions
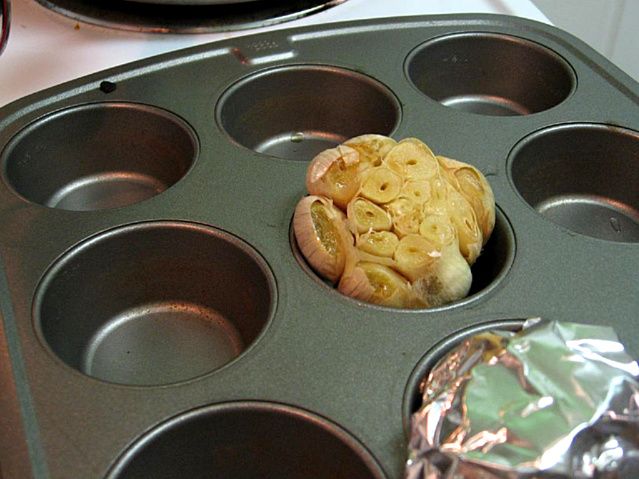
2 heads garlic, roasted*
2 tablespoons sugar
2 tablespoons brown sugar
4 tablespoons balsamic vinegar

Directions:
Squeeze roasted garlic cloves unto a small plate. Set aside. Cut onions in half lengthwise; peel. Cut off ends; cut lengthwise into 1/4-inch thick pieces.

Coat a 13″ skillet with cooking spray, and set over medium heat. Add onions, and cover. Cook, stirring occasionally, until softened and translucent, about 15 minutes.

Add sugars; re-cover. Cook, stirring occasionally, until onions are golden, 20 – 30 minutes.

Add 1/4 cup water and stir. Cover and cook until dark brown, 20 -30 minutes.

Add balsamic vinegar, roasted garlic cloves, and another 1/4 cup water. Continue cooking until liquid has been absorbed, about 10 minutes. Transfer to a bowl to cool. Store in an airtight container in the refrigerator for up to 1 week.
*See Elise’s helpful guide to roasting garlic on Simply Recipes

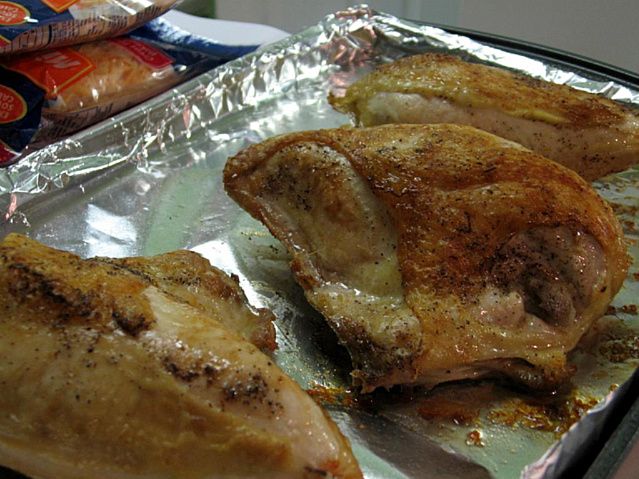
This easy roasted chicken breast was a new recipe for me, which I now adore. It’s simpler than roasting a full bird, but still produces juicy meat with a nice crispy skin. Easy as pie, especially for chicken you’re about to slice up onto a sandwich. Alternatively, you could pick up a rotisserie chicken at the grocer and slice some meat off the already-prepared bird for your panini. But then you don’t get to pull this out of the oven:

All that was left once my onion jam was prepared and my chicken had been roasted was to assemble my panini.

Roast Chicken and Onion Jam Panini


Recipe by: Panini Happy, adapted

Ingredients:
Onion jam (see recipe above)
Roasted chicken (see recipe above), carved
Gruyère cheese, sliced
fresh thyme to taste
garlic mayonnaise (see recipe below, with sweet potato fries)
olive oil

Assembling the Panini:

1. Prepare onion jam (can be completed in advance).
2. Prepare roast chicken (can be completed in advance).
3. Preheat closed panini press to medium.
4. Brush one side of a slice of sourdough with olive oil and placed it on a preheated panini press. Assemble materials on top: slather on garlic mayonnaise, layer slices of cheese, slices of roasted chicken, a sprinkle of thyme, and heaping spoonfuls of onion jam. Place second slice of oiled bread on top, oil side up.
5. Using gentle pressure, press sandwich and hold for about 3 minutes, or until bread is toasted with grill marks and ingredients are heated through. Slice in half and enjoy immediately.

Finding the perfect side items to accompany the perfect panini was quite a task. The comforting, creamy side items I’d been craving throughout the cold, rainy weeks of November didn’t seem to “fit” next to my hip panini, but typical light sandwich fare didn’t appeal to me. So I compromised and made both! I baked a pan of my beloved Oven-Baked Macaroni and Cheese, but also crisped up some delicious (and more appropriate) sweet potato fries. Giada DiLaurentis’s sweet potato fries are my favorite; they’re sprinkled with fresh basil and kosher salt, and dipped in a tangy garlic mayonnaise (the same garlic mayonnaise, by the way, that I slathered on my sandwich). I’ve loved these sweet potato fries since I took my very first bite of them months ago. I cut mine thick, but you can slice them thinner for a crispier fry.

Sweet Potato Fries with Basil Salt and Garlic Mayonnaise


Recipe by: Giada DiLaurentis
Yield: 4 to 6 servings

Ingredients:
5 sweet potatoes, cut into about 1 by 5-inch “fries”*
3 tablespoons olive oil
2 tablespoons chopped fresh basil leaves
2 teaspoons kosher salt
1/2 teaspoon freshly ground black pepper
3/4 cup mayonnaise
1 clove garlic, minced
1 tablespoon lemon juice
*Note: I usually make this recipe in batches of 1-2 potatoes at a time, and it’s perfect for 1-2 people. I keep the garlic mayonnaise recipe the same and have extra throughout the week for a sandwich spread.

Directions:
Preheat the oven to 400 degrees F.

Place the sweet potato “fries” on a foil-lined baking sheet and toss with the olive oil. Bake until golden, about 45 minutes. Meanwhile combine the basil, salt, and pepper in a small bowl. In another small bowl combine the mayonnaise, garlic, and lemon juice, and stir to combine. When the sweet potato fries come out of the oven, sprinkle with the basil salt. Serve with the garlic mayonnaise alongside for dipping.

Even if you don’t have your own panini press, I hope you’ll get out a regular ol’ skillet and grill up some cheesy, onion jammy sandwiches — and don’t forget the delicious sides! Oh, and one last thing . . . what do you think I should name my new gadget?


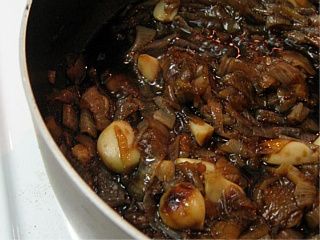
Roasted garlic and delicious finished onion jam.


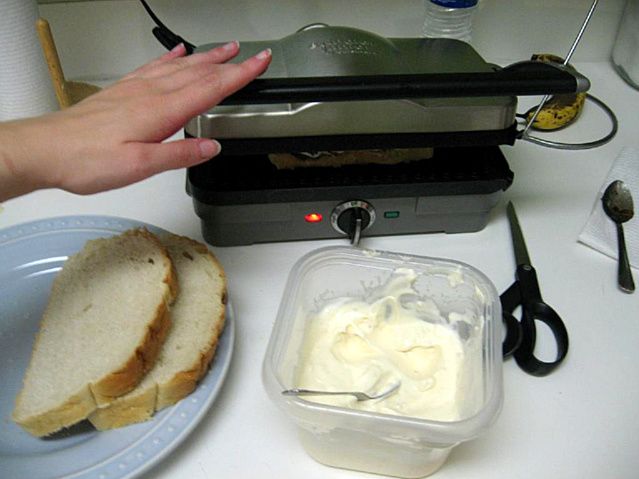
Sweet potato fries cooking and panini grilling!


Enjoy!


Share Share this post with friends!

1 2