spice cake

Honeybun Cake with Caramel Sauce

Willow Bird Baking is a contestant in Project Food Blog, a contest comprised of a series of challenges to find the next food blog star. Today is the last day to vote for me in Round 2! To vote, register for a Foodbuzz account. Once you’re registered, sign in and go here. To vote, click the heart next to the words “Vote for this Entry.” I am so grateful for your support!

Willow Bird Bakers, I have one thing to say to you:

You’re my honeybun, sugarplum,
Pumpy-umpy-umpkin; you’re my sweetie pie.
You’re my cuppycake, gumdrop,
snoogums-boogums; you’re the apple of my eye!
And I love you so and I want you to know
That I’ll always be right here,
And I love to sing sweet songs to you,
Because you are so dear!

Mike thinks this song is annoying, but we’ll ignore him for a moment — because it’s too true to resist. I got an email today from a stranger-turned-fast-friend that reminded me (again!) how special the opportunity to share with you really is.

This now-friend, J, said that she’s been experiencing some hard times, and that something she found here — on a food blog of all things — comforted her on a difficult day.

Little did she know that I was also having a difficult day: Byrd’s tummy has been upset and after all her knee surgery woes, this feels like the proverbial camel’s back-breaking straw. Mike and I are struggling with the distance between us, among other things. A confluence of so many issues has been forming a river of worry in my heart.

Her note letting me know that she had found comfort here was, so fittingly, a huge comfort to me. Apart from just the reminder that the food community is an army of friends and supporters, her email calmed the river of worry and helped me listen to the living waters inside of me. The main points of a sermon I heard just this past Sunday while visiting Mike in Raleigh flooded into my mind: God is in control, He is faithful, and I can rest in Him in my time of need.

Indeed, Jesus said, “Come to Me, all you who labor and are heavy laden, and I will give you rest.”

With how you’ve supported me, no wonder I can’t help but call you my honeybuns — and give you some honeybun cake.

This cake is a simple, fuss-free dessert to make and serve. More importantly, though, it’s dynamite! The buttery cake base with the deep cinnamon swirl reminds me of the best sort of coffee cake, and the buttery caramel drizzle makes it gooey, just like a real honeybun. Each bite is a revelation of different flavors, since the swirl ensures you get a different proportion of cinnamon to butter cake with each forkful. In short: YUM.

Regarding the recipe, it calls for a box cake mix. I’m not a box mix snob — I’m of the camp that says use a box mix if you feel like it, and don’t use one if you don’t feel like it. Frankly, box mixes taste great. The only argument against them that resonates with me is the fact that they contain preservatives and artificial flavorings, but really, y’all, we’re making a honeybun cake — exactly how healthy do you think you could make this thing? (answer: not very.) We eat dessert in moderation anyway (ahem).

That being said, I prefer to make things from scratch. One reason is because I feel like people are too far removed lately from the raw ingredients of their meals, and have decided that baking or cooking from scratch is intimidating. A primary message of my blog is that cooking from scratch isn’t scary — that anyone can do it. Another reason I cook from scratch is just because I like to. Simple!


from-scratch version

For this cake, I tried it two ways. I didn’t set out to try it two ways, mind you, but that’s how it ended up happening! First, I tried baking it with a homemade cake mix. Turns out that recipe’s proportions were off somehow. The cake overflowed a bit, and was gooey in the center while done on the sides. Disappointed and in need of a dish for a school potluck, I grabbed my roommate’s box of butter cake mix and hastily remade the cake.

When my second cake was in the oven, though, I realized that my first cake was actually lookin’ pretty delicious despite being wonky. If anything, the slightly undercooked middle was appealingly moist. Just like that, I had two cakes — and the perfect setup for a box mix versus homemade comparison!


box mix version – note the yellow!

So which did I like better? Honestly, it was a very close call. The box mix has a more pronounced butter flavor that was delicious, but did taste artificial. The homemade cake had a deeper from-scratch flavor, but wasn’t as buttery. In the end, I think I preferred the homemade version, but with such close results, you can feel comfortable going either way. If you do use the homemade cake mix, though, be prepared for the wonky manner in which is bakes — and maybe line your oven with foil to guard against spills.

What about you – do you use box cake mixes? Why or why not?

Honeybun Cake with Caramel Sauce


Recipe by: My friend Lora and Martha Stewart (caramel sauce)
Yield: one 9 x 13 inch cake; serves about 12-15 depending on size of pieces

Cake Ingredients:
1 box butter recipe yellow cake mix (or 1 recipe homemade cake mix, below)
4 eggs
1 cup milk
3/4 cup vegetable oil
1 cup sugar
2 tablespoons cinnamon
1 cup brown sugar

Caramel Sauce Ingredients:*
3/4 cups sugar
1/8 cup water
1/2 cup heavy cream
1/8 cup creme fraiche or sour cream
1/4 teaspoon pure vanilla extract
Pinch of coarse salt

Directions:
Make caramel sauce first. Prepare a bowl set in an ice-water bath. Place sugar and water in a saucepan and heat over medium-high heat until it boils and the sugar is dissolved. Throughout this process, use a wet pastry brush to wash down the sides of your saucepan often to prevent crystal formation. Reduce the heat to medium and cook until the mixture reaches 345 degrees on a candy thermometer (begin swirling gently when you see hints of amber, so the sugar cooks evenly), about 5-7 minutes. Immediately remove from the heat and add cream carefully (the mixture will bubble up) while whisking constantly. Return mixture to medium heat until it boils and sugar melts.

Remove from heat, and pour into the bowl set in your ice-water bath. Let the caramel cool, whisking often, for 10 minutes before whisking in creme fraiche, vanilla, and salt. Cover and refrigerate at least 2 hours before serving over heated honeybun cake. Can store in the refrigerator for up to 5 days.

To make honeybun cake, preheat oven to 200 degrees F. Mix together homemade or store-bought cake mix, eggs, milk, sugar, and oil. Pour this mixture into a greased 9 x 13 inch baking pan. Mix cinnamon and brown sugar together and sprinkle this mixture over the batter. Use a fork to swirl the batter over the entire cake, going to the bottom of the pan, until it is well-swirled. Bake cake at 200 degrees F for 20 minutes before increasing the temperature to 300 degrees F and baking for an additional 30 minutes. Drizzle caramel sauce over hot pieces of cake.

*(Alternate glaze, if you’re not a caramel fan (though that is some phenomenal caramel, y’all, and very easy to make with a candy thermometer! Glaze: mix 1 cup powdered sugar, 2 tablespoons milk, 1 teaspoons vanilla and pour over hot cake.)

Homemade Cake Mix


Recipe by: My Kitchen Cafe
Yield: one box mix worth

NOTE: as mentioned in the post above, this recipe bakes wonkily in a 9 x 13 in. pan. Visit My Kitchen Cafe to read her note about it. I still think it’s worth making, since mine turned out delicious, but do line your oven with foil and watch that the sides of the cake don’t burn while you’re waiting for the middle to finish cooking.

Yellow “Cake Mix” Cake Ingredients:
2 cups granulated sugar
1 1/2 cups all-purpose flour
1 1/2 cups cake flour
1/2 cup nonfat dry milk powder
1 tablespoon baking powder
1 teaspoon salt
16 tablespoons butter (2 sticks), cut into 1/2-inch pieces and chilled
1 tablespoon vanilla extract
2 teaspoons imitation butter flavor

Directions:
Pulse sugar, flours, milk powder, baking powder, and salt in a food processor for 15 seconds to combine. Add butter, vanilla, and butter flavor and pulse until the mixture resembles coarse meal (much finer than, say, a pie crust). Freeze the dry mixture in a zipper-lock bag for up to 2 months or use immediately in recipe above.

If you liked this post, please:
Subscribe to Willow Bird Baking
Follow Willow Bird Baking on Twitter
Follow Willow Bird Baking on Facebook
Give this post a thumbs up on StumbleUpon


ShareOther ways to share this post with friends!

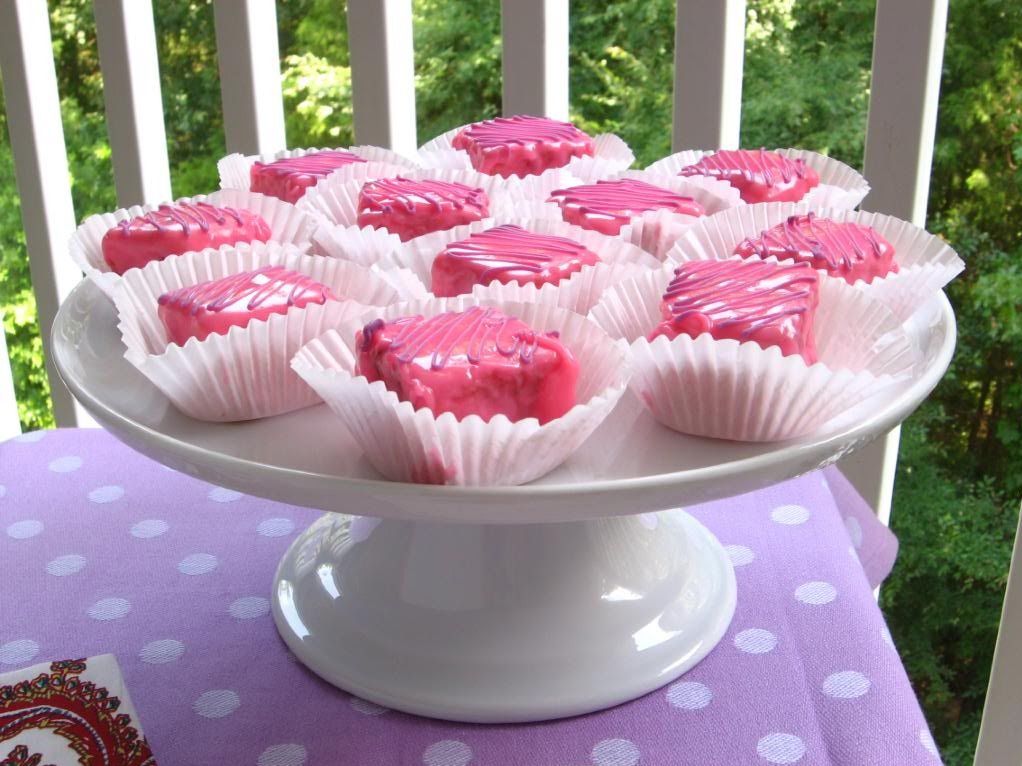
Secret Garden Recipe: Pink Ice Petit Fours

Want to have a tea party?

We’re going to find a garden enclosed in cool, moss-covered stone walls. We’ll lay out delicate china on a wrought-iron table with ivy growing up each leg. Arrayed in sweet sundresses and sandals, we’ll carry in platefuls of hot buttered scones, pitchers of raspberry and strawberry lemonade, and pots of fragrant orange tea. Every sip will be accompanied by a staunch pinky point. Twilight will find us still laughing, unwilling to let the summer daylight slip away.

Oh, and of course there’ll be petit fours. The dainty, sweet little cake squares will be the jewels of the tea table.

What a fantasy. In actuality, I’ve just finished my first week of teacher meetings. The past few days have been filled with book shelving, furniture moving, copy making, curriculum planning, sweet student meeting, and lots of teacher giggling. I’ve left with a headache nearly every day, relieved that headache with a nap nearly every day, and even still . . . gotten a ton of work done nearly every day!

We can still have petit fours, though, right? Petit fours are sweet little tea time desserts that seem to specialize in being adorable. Any number of miniature desserts can be classified as petit fours (literally “small ovens” in French), but for my sister’s surprise garden party earlier this summer, I knew I wanted dense, fruity cake squares. Petit fours are sometimes filled with jams, and then are covered in poured fondant or chocolate.

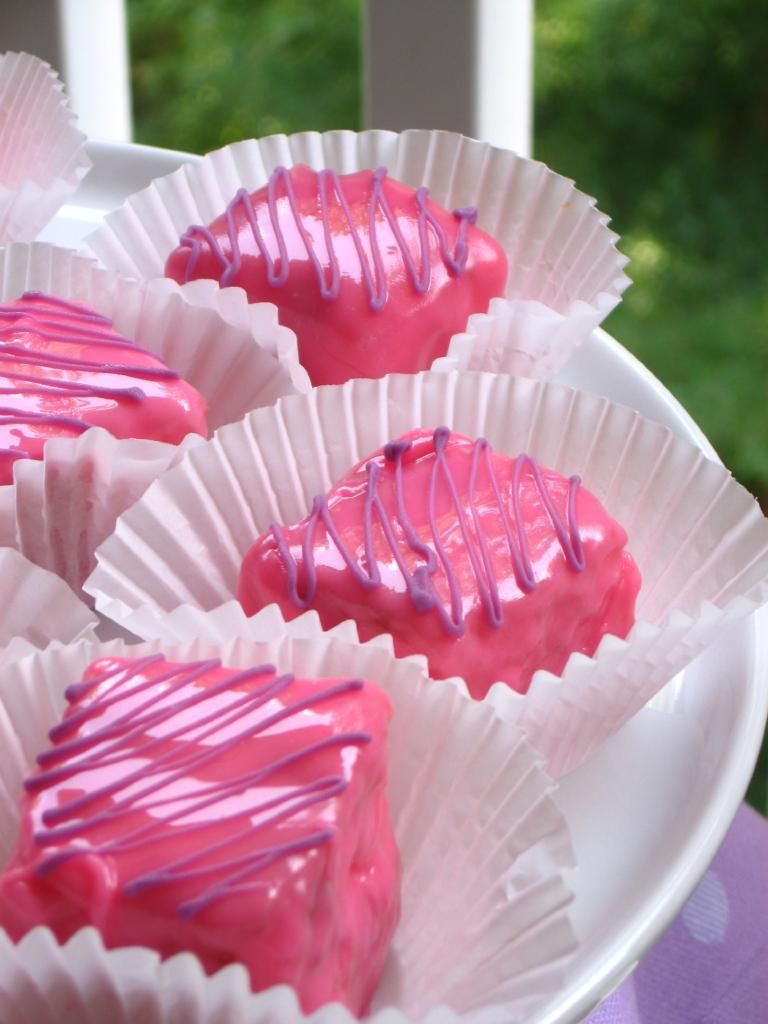
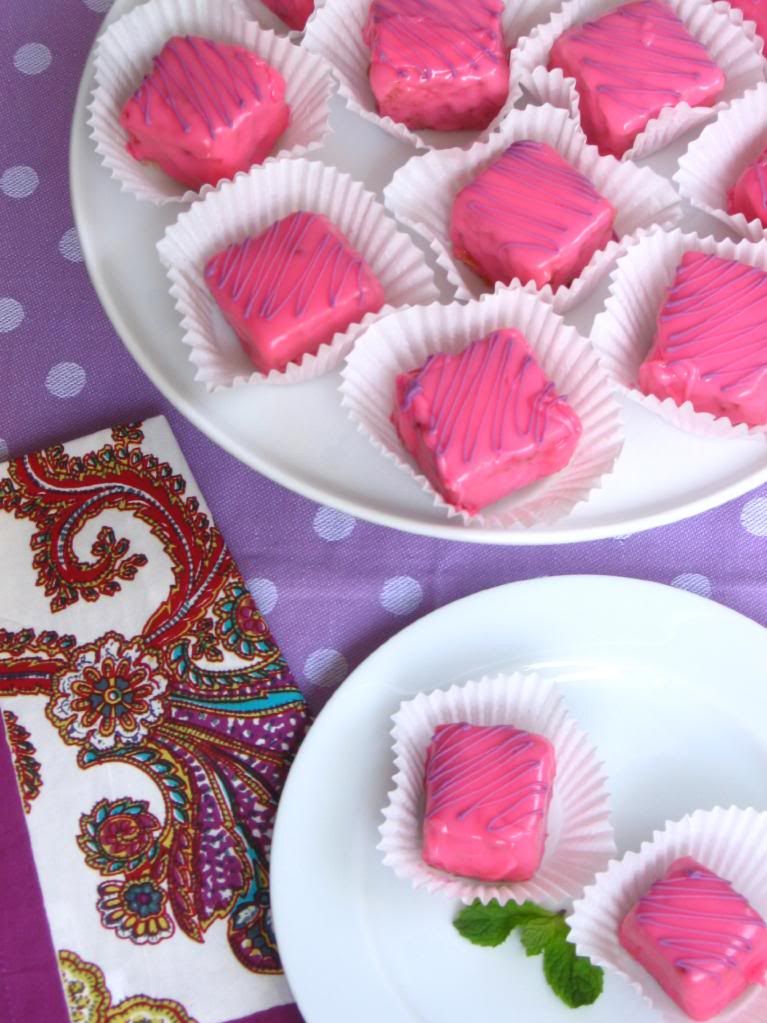
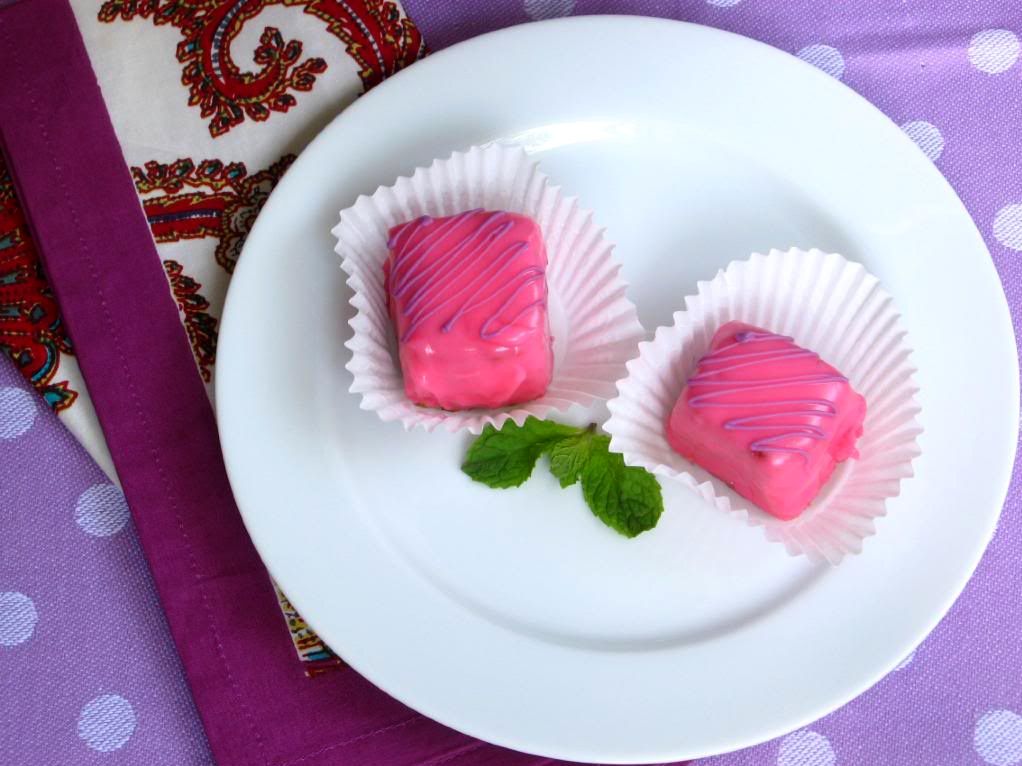
Now, before I gush, these bite-sized cakes were not perfect. More specifically, the poured fondant was not perfect. In fact, instead of “poured,” let’s call it glopped fondant. Shall we?

The thing is, fondant is going to be super sweet. There’s a cavity-inducing amount of confectioner’s sugar in it, not to mention the corn syrup. The only hope of this stuff covering your petit fours and not ending up with a cloying mess is making sure the poured fondant is heated enough to be very thin, so only a thin layer sticks to the outside of the cake square. This proved to be impossible with the recipe I used. It was warmed in a double boiler for gentle heating, but as soon as I started to pour, I was only able to cover a couple of cake squares before it was glop. Even when it was fully heated, it never really got thin enough to cover the squares in a reasonable way. As a result, they were too sweet.

Oh, and that color? That was not the color I was going for. I had a pale, rose petal pink in mind. Um, that’s all I’ll say about that.

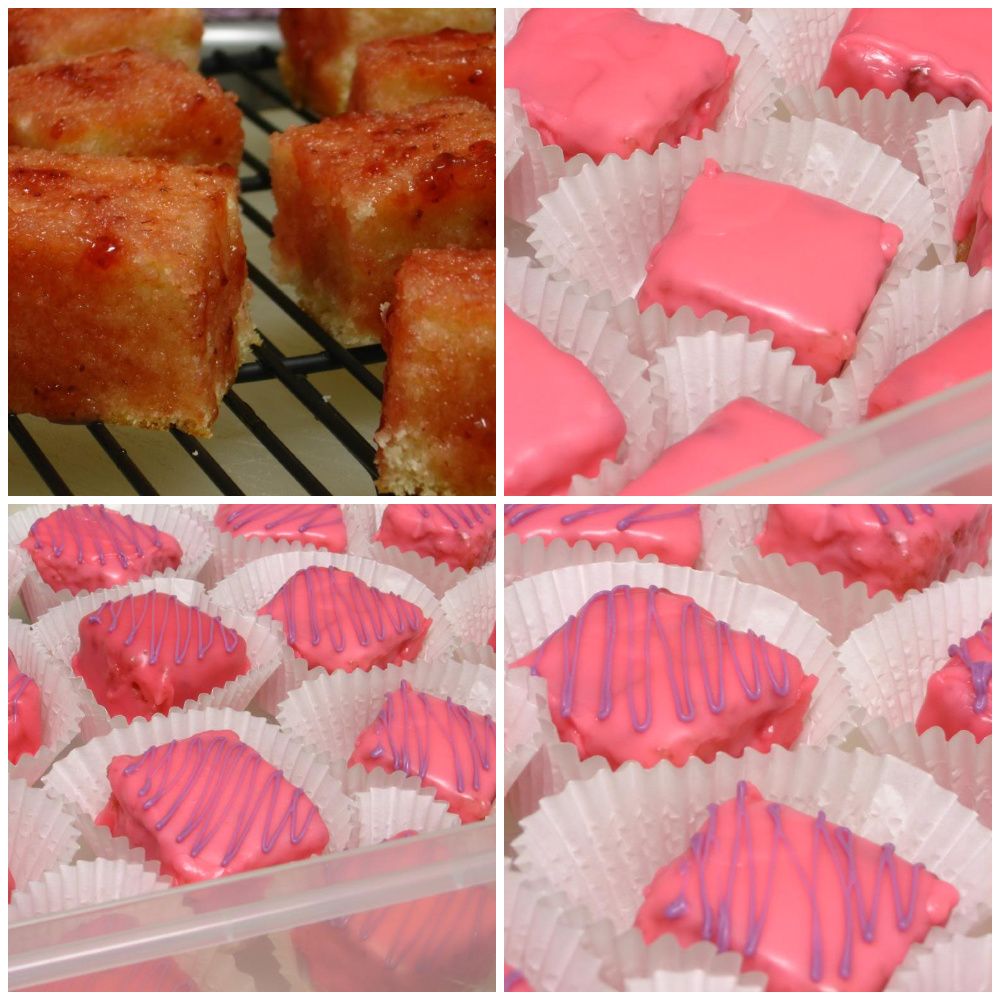
While the petit fours weren’t perfect, the taste itself (beyond the fondant) was so wonderful. The cake was deliciously moist, cool, and dense with a gorgeous buttery almond flavor. The raspberry jam covering was the perfect complement to the almond (one of my favorite flavor combinations!) and was simple to brush on, though it never dried completely. Really, if you use poured white chocolate or a different poured fondant recipe (how about trying this one, which looks great?), these would be fantastic (and they’d probably look a little less “gloppy” as well). Even in their overly sweet state, I ate a ton of them due to their brilliant flavorings.

This is also one of those recipes that ends up looking fancy despite being relatively easy to make — and you know I love those. A few key steps (like freezing the cake before cutting it up and making sure your fruit glaze is very thin) ensure that the process is relatively simple.

Go have a tea party!

Pink Ice Petit fours


Recipe by: Adapted from Diana’s Desserts
Yield: 60 1-inch petit fours, or about 16 2-inch petit fours

NOTE: This recipe does not include the poured fondant recipe or instructions due to the aforementioned difficulties. If you want to try poured fondant, I’d recommend looking at this post on Cakes and Cupboards, which looks promising. Nevertheless, poured fondant might still be too sweet for you. Another option is a poured chocolate. You’ll probably need two coats if you use white chocolate. If you want completely smooth petit fours, I recommend using a thin layer of rolled marzipan under your icing, or the buttercream procedure outlined on Cakes and Cupboards, above.

Cake Ingredients:
1/4 cup butter, melted
1/4 cup shortening
1 cup sugar
1 teaspoon vanilla extract
1 teaspoon almond extract
1-1/3 cups all-purpose flour
2 teaspoons baking powder
1/2 teaspoon salt
2/3 cup milk
3 egg whites

Fruit Glaze:
12 ounces raspberry preserves (or heated jelly)
3 tablespoons water

Directions:
Prepare the cake. Preheat oven to 350 degrees F. Grease and flour a 9-inch baking pan, or use Wilton’s Cake Release.

Cream butter, shortening, and sugar together in a large bowl. Beat in vanilla and almond extracts. In a separate bowl, combine flour, baking powder, and salt. Add dry ingredients to the creamed mixture alternately with the milk. In another bowl, beat egg whites to soft peaks. Gently fold the egg whites into the batter.

Pour the batter into the cake pan and bake for 20-25 minutes, or until a toothpick inserted in the center comes out clean. Remove from oven and let cool in pan for 10 minutes. Turn cake out onto a cooling rack. When cooled, chill cake in refrigerator for a bit before freezing it for at least 1 hour.

Right before removing the cake from the freezer, prepare fruit glaze. In a medium saucepan, heat preserves with the 3 tablespoons water on low heat. If using jelly, judge whether or not you need any of the water to make it a thin consistency.

Remove cake from freezer. Using a long, serrated knife, cut a thin slice off each side of chilled cake. Cut cake into squares of desired size (for me, about 1.5-inch squares). Place squares 1/2 inch apart on a cooling rack over a sheet pan. Use a pastry brush to spread a thin layer of heated preserves over tops and sides of petit fours before icing. Allow excess to drip off. Let dry (I put them in the fridge and let them set up a bit — they never really “dry”). Repeat if necessary to thoroughly coat squares.

Prepare your desired poured fondant or chocolate and pour over the petit fours. Decorate the tops with different frostings, chocolates, sprinkles, candy, sugar flowers, etc. as you wish. Refrigerate until ready to eat — eat within a day or two.

If you liked this post, please:
Subscribe to Willow Bird Baking
Follow Willow Bird Baking on Twitter
Follow Willow Bird Baking on Facebook
Give this post a thumbs up on StumbleUpon

ShareOther ways to share this post with friends!

Carrot Cake Waffles

Wouldn’t it be cool if bakers got to choose flashy names like WWF Wrestlers? You could be the Vanilla Villain, the Meat Tenderizer, the Mighty Masher, the Blender Blade, the Sweaty Spatula.

Ew. Nevermind that last one.

Today, my flashy baking name is the Waffle Wrangler. See, I finally acquired a waffle iron. Or . . . okay, actually I acquired it months ago. You’ll forgive me for not having tried it out yet, right? Especially since I happen to know for a fact your waffle iron is sitting under a coat of dust in a dark cabinet somewhere? It’s okay! No shame! You just need a reason to lug it out, wipe it off, and heat it up. I think I can help.

Despite appearances, I have been anxious to try this baby out. Waffles seem especially apt for one of my favorite culinary tricks: combining two well-known dishes into one. For instance, the recipes for Peach Cobbler Cupcakes, Peach Crisp Pie, and Blueberry Lemon Cheesecake Cupcakes each combine two desserts into a super-dessert.

So of course, I’ve spent the last few weeks pondering what sort of waffles to create. I could’ve taken a cue from this breakfast and made Pecan Maple Bacon Waffles (yum), but I had an urge to try something new. Apple or peach crisp waffles? Chocolate cake waffles? A bacon, egg, and cheese waffle sandwich? Peanut butter and jelly waffles? And then, as if Mike were sending me telepathic messages reminding me about his favorite dessert, it dawned on me . . .

CARROT CAKE WAFFLES! I’ve actually been trying to think of some recipe to add carrot cake flavors to after seeing this amazing Carrot Cake Ice Cream over on Not Quite Nigella. This was my chance!

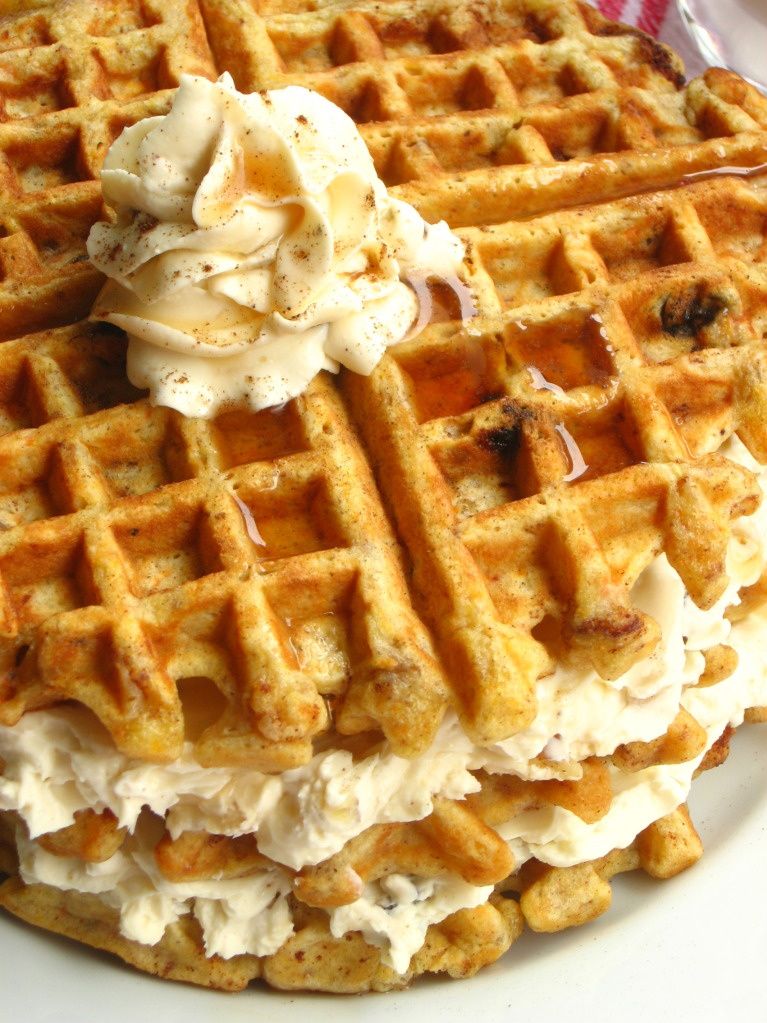
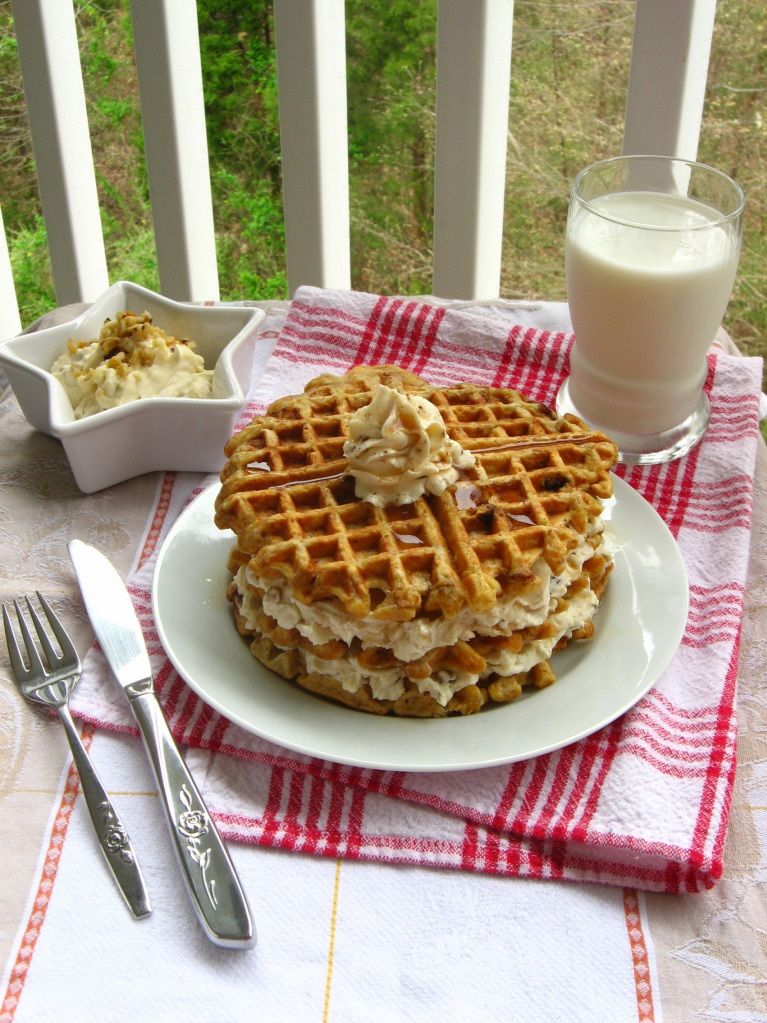
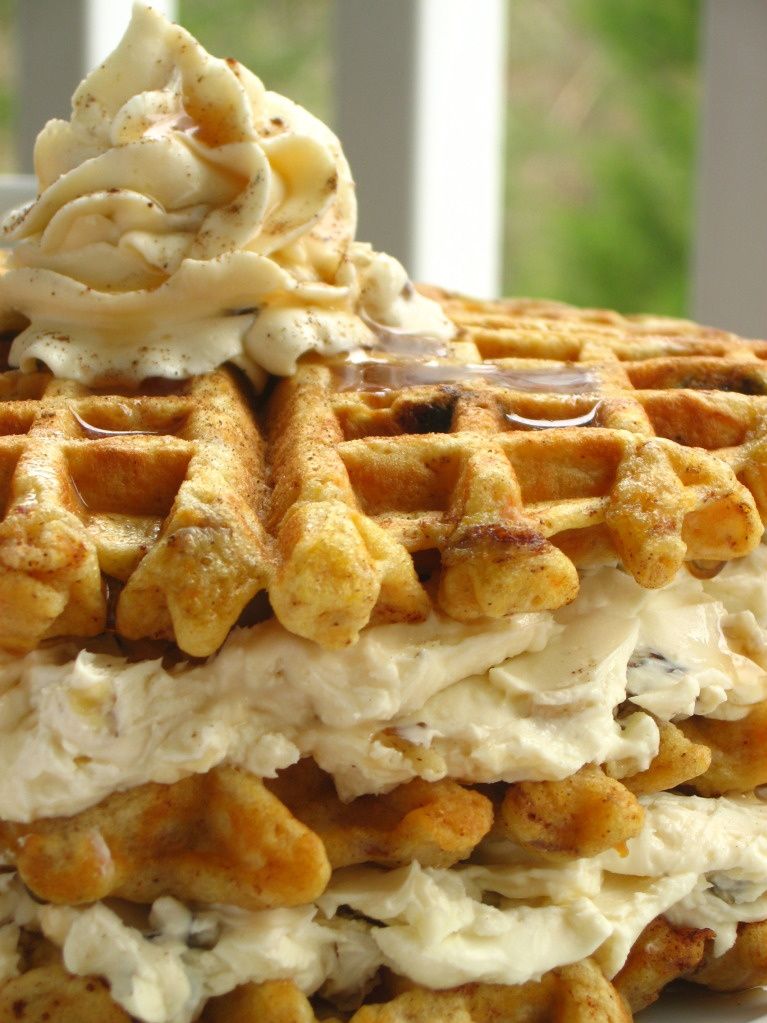
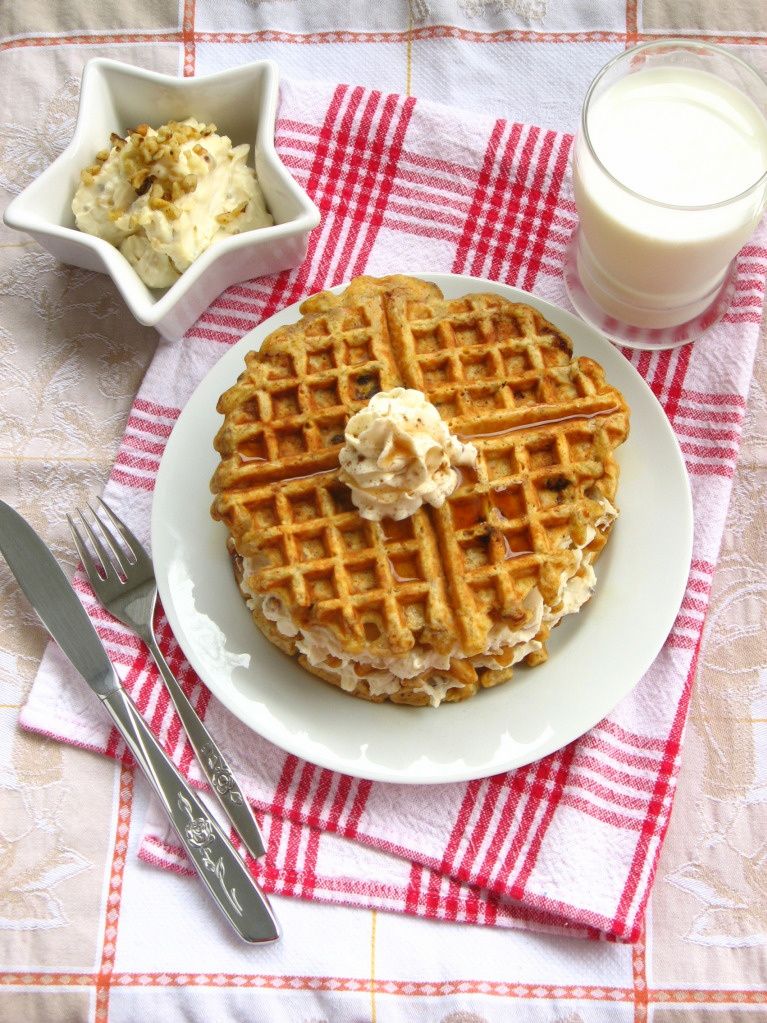
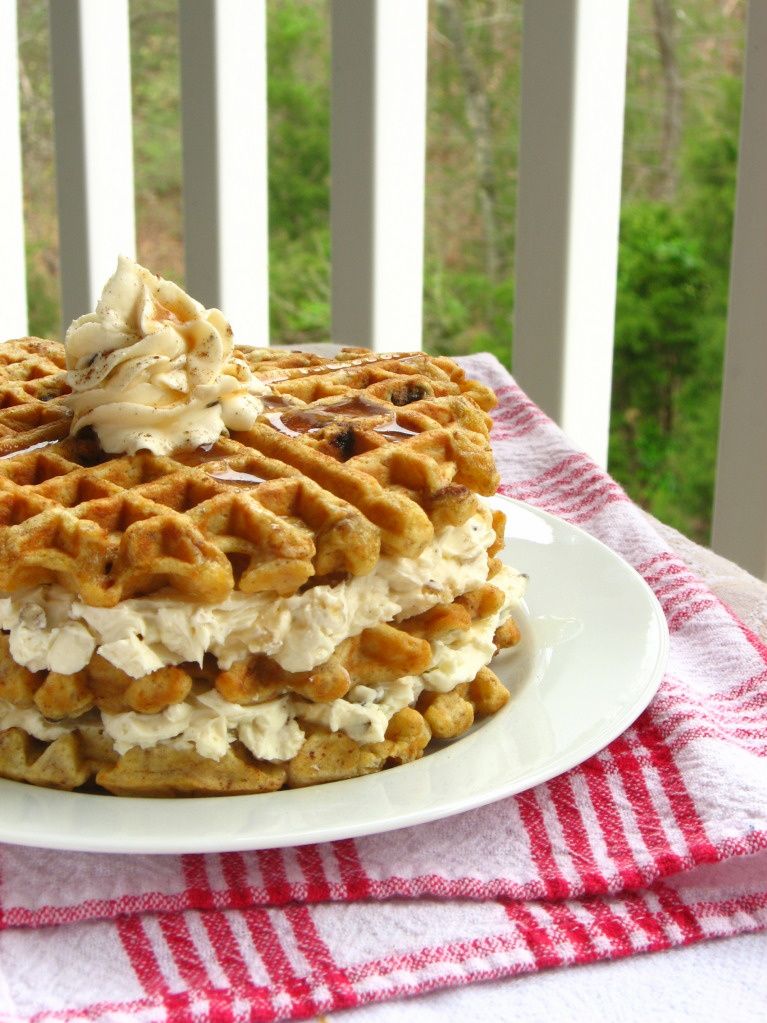
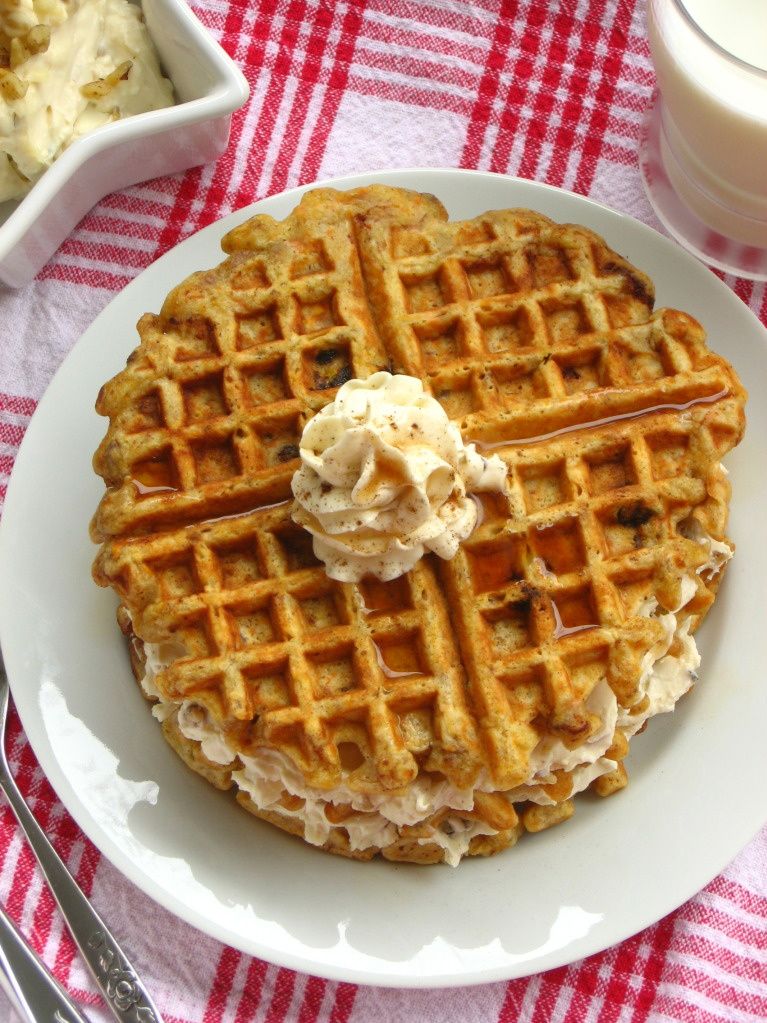
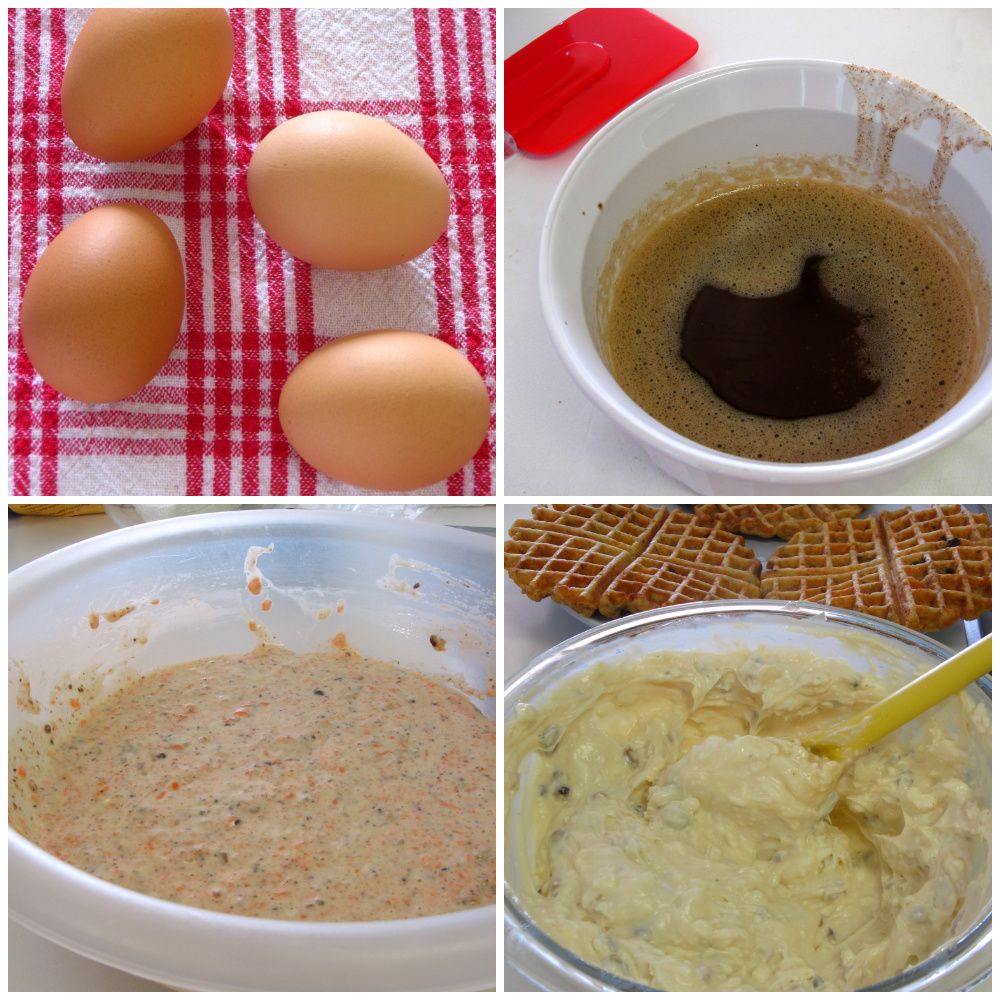
The foundation of the recipe I’ve spliced together is a simple but delicious buttermilk waffle recipe. To it, I’ve added the spice cake flavors of cinnamon, allspice, and nutmeg, bloomed in brown butter according to America’s Test Kitchen’s recommendation. I also added the lovely hunks you’d find in any carrot cake: raisins, chopped walnuts, and grated carrots. Finally, the waffles were topped with a schmear of Maple Nut Cream Cheese spread, which merges the main component of traditional carrot cake frosting with the familiar breakfast flavor of maple.

I was nervous the entire time I was mixing this batter: would it be the right consistency? Would the raisins and carrots burn? But it worked out perfectly! I did a little dance of joy (inwardly — mustn’t alarm the roommate!) with each waffle I successfully wrangled off of my waffle iron.

And how did they taste? Delicious, and exactly like you might expect: like the convergence of a hunky carrot cake and a fluffy waffle! The spices were warm and aromatic, and the nuts, raisins, and carrots made for a hearty texture. And I can’t forget one of the best parts: the Maple Nut Cream Cheese spread.

This Maple Nut Spread is ridiculous! If your cream cheese isn’t already softening to mix some up, you should grab it out of the fridge right now. It’s rich, creamy, and perfectly sweet, with the satisfying crunch of chopped walnuts. I want to spread this stuff on bagels, toast, waffles, you name it. The photos you see here (in which I tried to build a “layer cake” out of the waffles — ha ha, get it? Carrot Cake Waffles?) are only a slight exaggeration of how much Maple Nut Cream Cheese I ate with my breakfast. I’m too embarrassed to tell you how much of it I ate straight from the spoon, so just take my word for it: you’re going to love it.

Okay, you have your reason — now go dust off your waffle irons! Have your cake and eat it for breakfast, too!

5 from 1 reviews
Carrot Cake Waffles
 
Prep time
Cook time
Total time
 
It's like your favorite dessert -- but it's breakfast!!
Ingredients
Waffle Ingredients:
  • 2 cups all-purpose flour
  • 1/2 teaspoon salt
  • 2 tablespoons sugar
  • 1 1/2 teaspoons baking soda
  • 1 teaspoon cinnamon
  • 1 teaspoon nutmeg
  • 1 teaspoon allspice
  • 1 3/4 cups buttermilk
  • 2 eggs, separated
  • 4 tablespoons (1/2 stick) butter
  • 1/2 teaspoon vanilla extract
  • 1 cup raisins
  • 1 cup walnuts, chopped
  • 1 1/2 cup finely grated carrots
  • Cooking spray for waffle iron
Maple Nut Cream Cheese Spread Ingredients:
  • 8 ounces cream cheese, softened
  • 3-4 tablespoons maple syrup
  • 1/8 cup chopped walnuts
Instructions
  1. Bloom the spices in butter: Heat 4 tablespoons butter in skillet over medium heat until melted, 1 to 2 minutes. Continue to cook, swirling pan constantly, until butter is light brown and has faint nutty aroma, 2 to 4 minutes. Add spices and continue to cook, stirring constantly, 15 seconds. Remove from heat and cool to room temperature, about 30 minutes.
  2. Combine the flour, salt, sugar, baking soda.
  3. Mix together the buttermilk (or buttermilk substitute) and the egg yolks. Stir in the spiced butter and vanilla. Spray the waffle iron well and preheat it. Stir the wet into the dry ingredients.
  4. Beat the egg whites in a separate bowl with a whisk or electric mixer (make sure bowl and mixer are spotlessly clean) until they hold soft peaks. Stir them gently into the batter. Add carrots, walnuts, and raisins. Stir gently to combine.
  5. Spread a ladleful or so of batter onto the waffle iron and bake until the waffle is done, usually 3 to 5 minutes, depending on your iron. Spray iron with cooking spray between waffles as needed.
  6. To make Maple Cream Cheese spread, simply combine nuts, syrup, and cream cheese and mix well. Serve waffles immediately with a schmear of Maple Cream Cheese spread (which will get lovely and melty), or keep them warm for a few minutes in a low oven. Waffles also freeze well. You can make a big batch, allow them to cool, and freeze them for a homemade alternative to preservative-laden commercial frozen waffles.


Breakfast for dessert-lovers!

A&P Spanish Bar Cake

In case you were wondering: No, I cannot eat all these desserts by myself. First of all, I’d rather not weigh 400 pounds — I just don’t think that’d be a very fun way to live. Secondly, even if I developed some wonderful condition that kept me trim regardless of how much pie I ate, baking is no fun unless you can share it with people you love. For me, one of the most rewarding parts of being a food blogger is watching people enjoy the things I’ve made (that sounds creepy, like I sit and stare at them as they eat, but I’m sure you know what I mean).

One group of folks I love to bake for is Mike’s family. Each Sunday evening we gather at their house for dinner and I bring whatever dessert I’ve whipped up. His mom is a fantastic cook, so the meal is always devoured enthusiastically. Many times I almost don’t think I have room for dessert! I say almost, because y’all know that there is always room for dessert.

Yay, SPRING!!

One reason I love to bake for Mike’s family is because they’re always encouraging — even if the results of my culinary efforts that week are not perfect! Don’t you love the people in your life who take one look at your runny pie and say, “Nevermind, it tastes delicious!” My own family deserves this praise as well, since they were served Coconut Cream Soup for Thanksgiving and ate it with cheerful smiles and compliments. Yep, those kind of folks are the keepers!

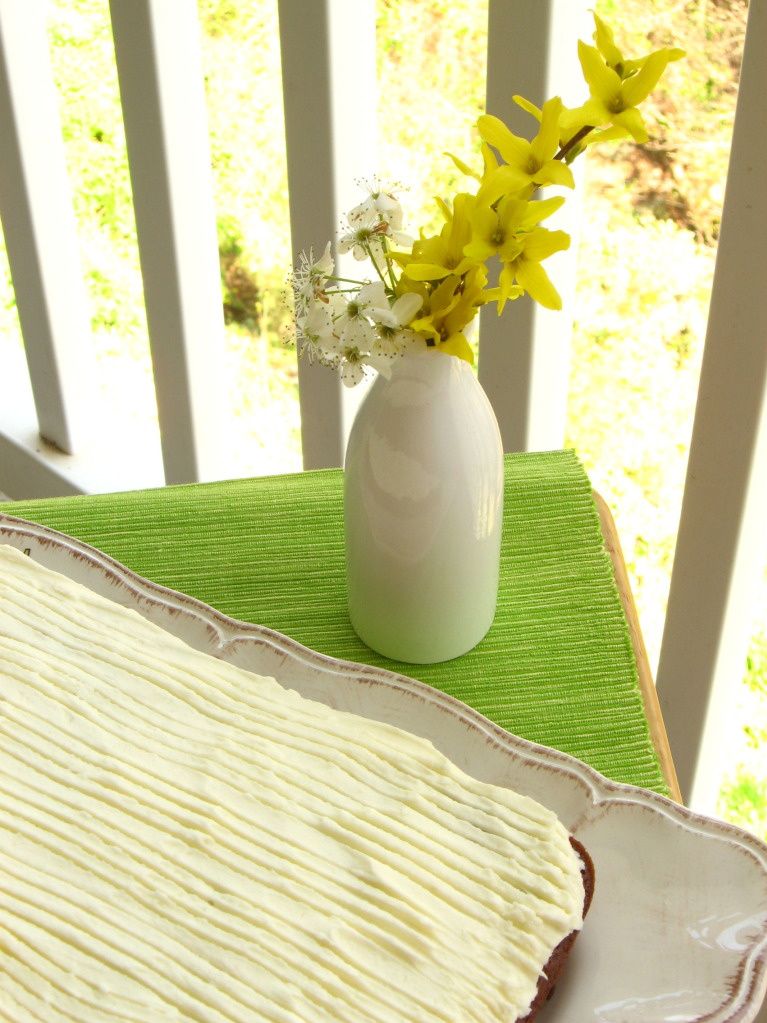
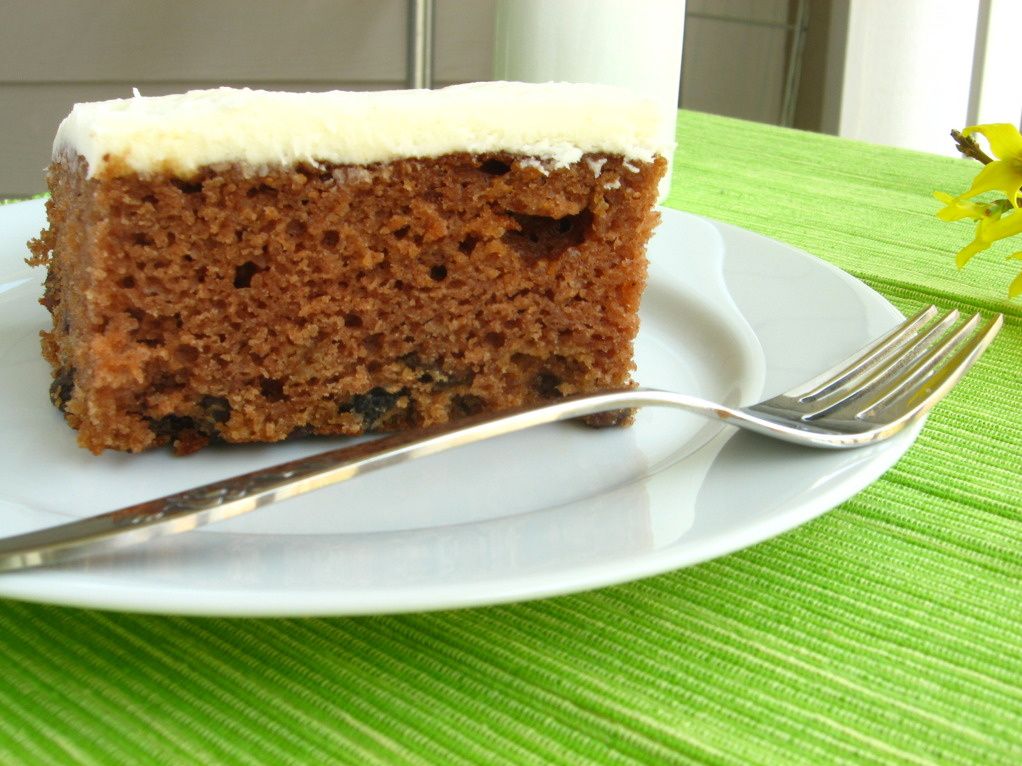
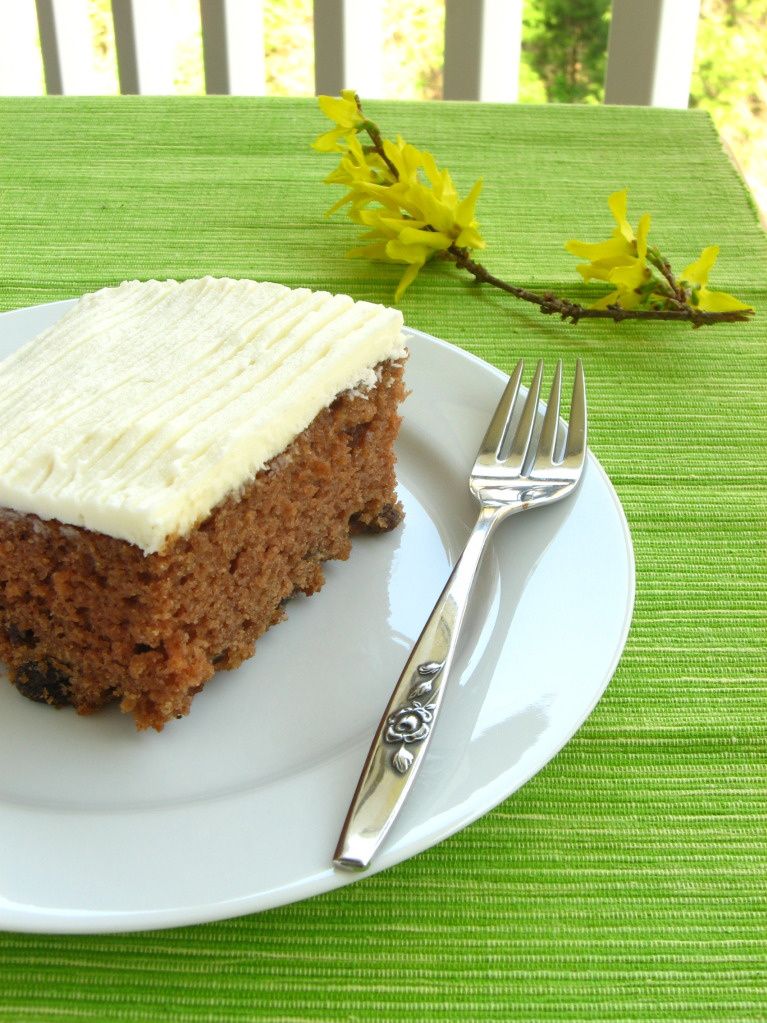
Because Mike’s family has been so supportive of my baking, I jumped at the chance this past weekend to create something a little special for them. A couple Sundays ago, Mike’s dad mentioned a cake his dad used to bring home from the old A&P store. The cake was called Spanish Bar Cake, and he described it as a dark brown cake with raisins and a creamy white frosting. I was so excited to recreate the memory that I started googling around that night.

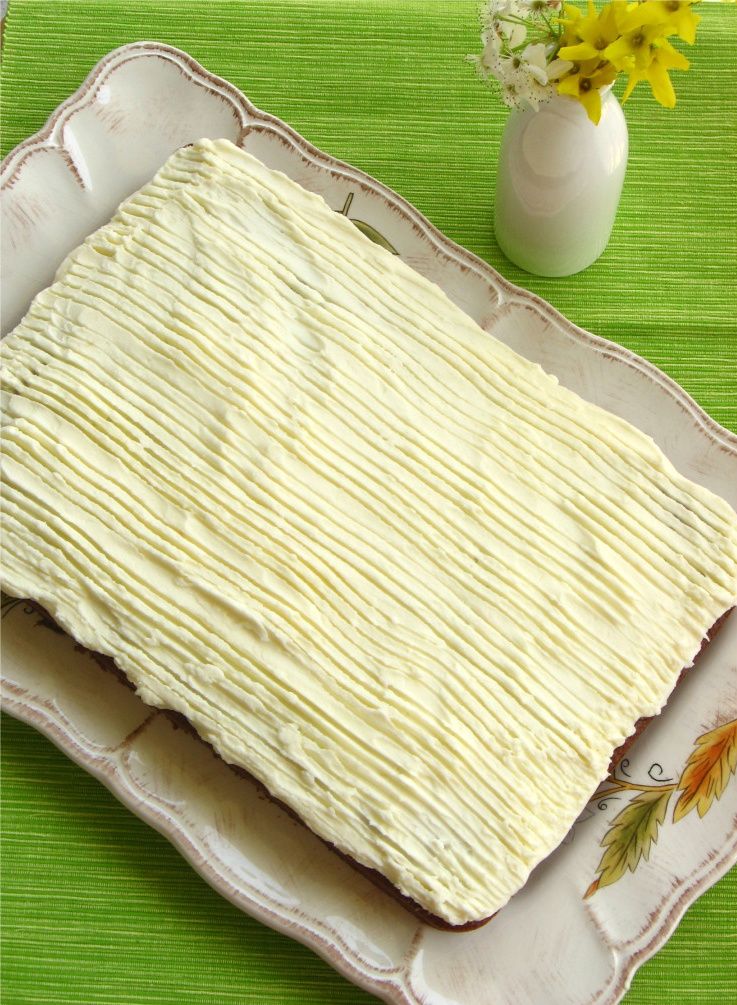
What did I find? Well, first off, Mike’s dad is not the only one by far who wants to recreate the cake! Many online forums had pages of nostalgic posters describing their childhood experiences with the cake. They discussed every facet of their vivid Spanish Bar Cake memories : the color, the texture, the pattern on the frosting, the shape, the packaging . . . ! I also found many copycat recipes that boasted an identical taste and appearance to the original.

Not having tasted Spanish Bar Cake myself, I found it difficult to settle on a recipe! There were a few key disparities I had to evaluate. First, some recipes used cocoa powder, while some were a more traditional spice cake. After asking Mike’s dad to describe the color again, I decided to use the recipe that included the cocoa.

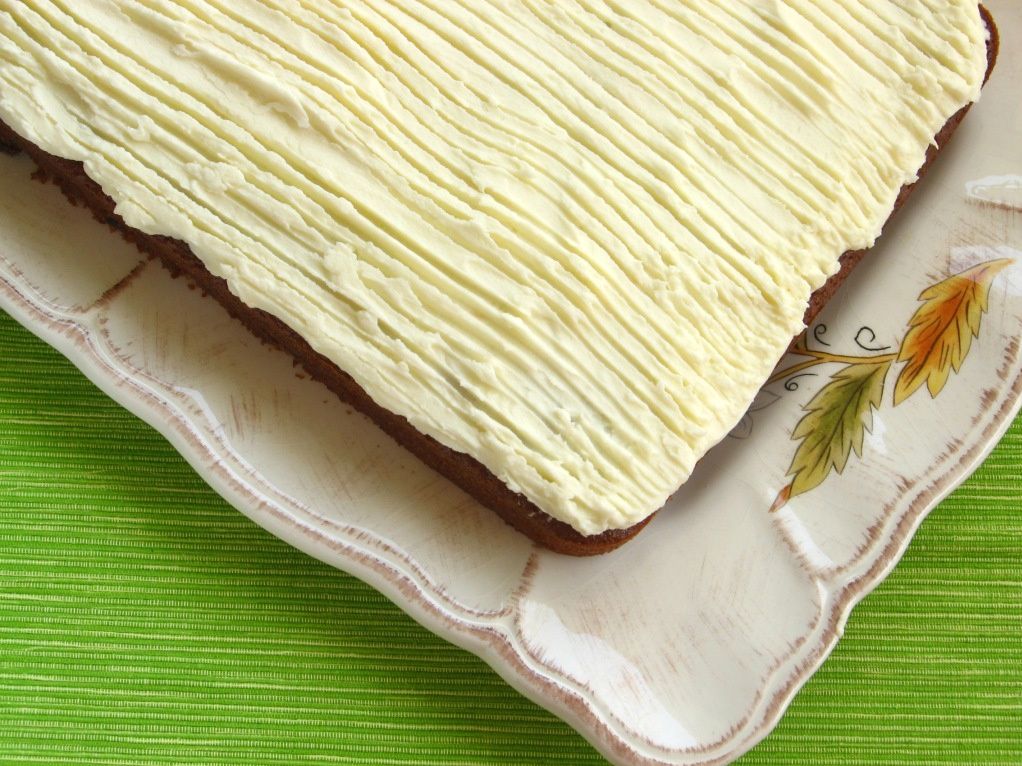
Another difference in the recipes I viewed was the frosting. Some used a standard cream cheese frosting, while others used white buttercream. I chose the latter, though I love cream cheese frosting. I reasoned that if the cakes were not refrigerated and had groove marks in the frosting, chances are the frosting would need to be safe when stored at room temperature and relatively stiff. Hence, buttercream. There were other, smaller decisions to make — things like nuts or no nuts (I chose no nuts), one layer or two (I chose one) — and then I was ready to bake!

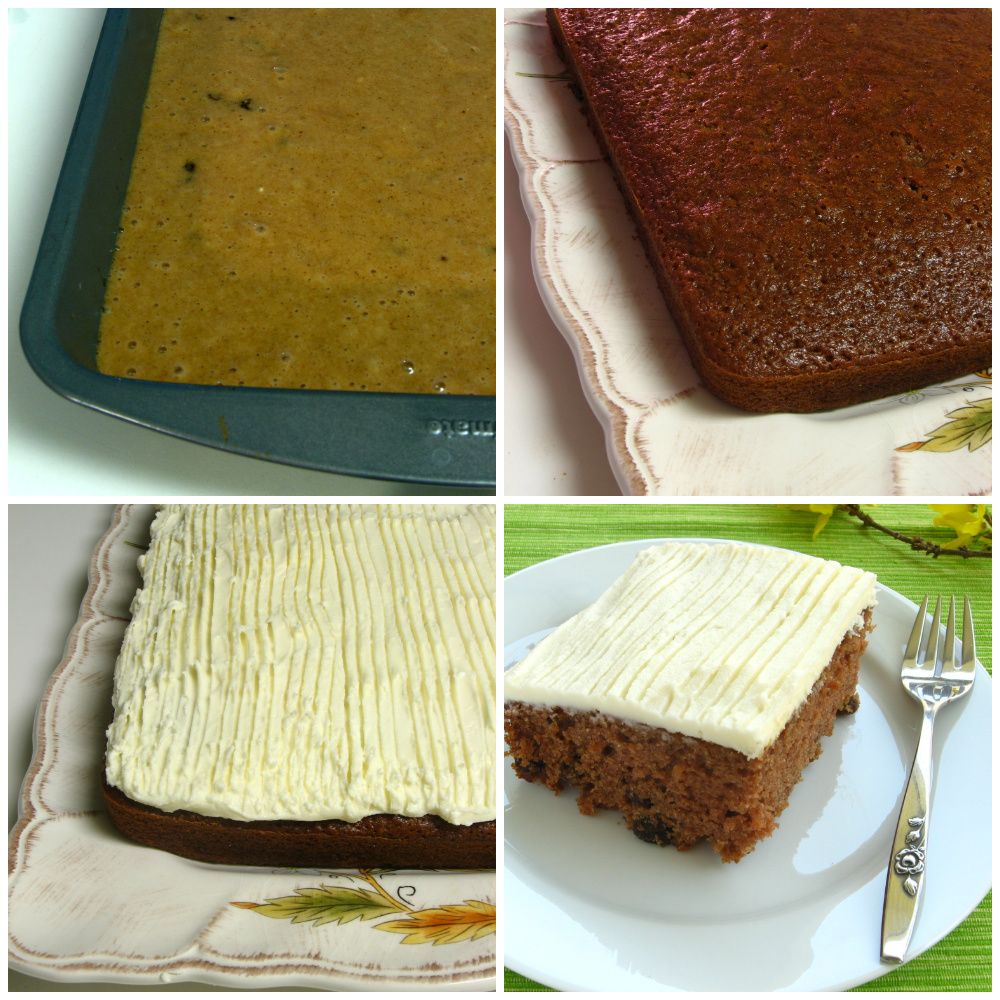
One bonus of this cake is how simple it is to make! I must be on an easy cake kick. It’s a two-bowl process (one for the cake and one for the frosting). In a nutshell, you mix the dry ingredients, add the wet, bake, cool, mix the frosting, frost. No fuss.

If you have fond memories of this old A&P cake, bake one up for yourself and enjoy a blast from the past. I’ll add a note tomorrow to let you know how close to the original this recipe is, based on Mike’s dad’s reaction!

UPDATE: Score! Mike’s dad said as soon as it touched his tongue, the memories came flooding back! Apparently this is it, folks! He even said it seemed a bit moister than the original. Hurray!

Spanish Bar Cake


Recipe by: compiled from various internet sources
Yields: one 9 x 13 in. cake

Cake Ingredients:
2 cups flour
1 1/2 cups sugar
1 1/2 teaspoons baking soda
1 tablespoon cocoa (I used Dutch process)
1 teaspoon cinnamon
1 teaspoon salt
1 teaspoon nutmeg
1 teaspoon allspice
1/2 cup vegetable oil
2 cups applesauce
2 eggs
1 1/2 cups raisins, soaked in warm water until plump and drained

Buttercream Frosting Ingredients:
1 cup white shortening
1 cup butter, softened
8 cups confectioner’s sugar
1 teaspoon pure vanilla extract (can use clear if you want the frosting to be snow white)
4-6 tablespoons milk for thinning to desired consistency

Directions:
Preheat oven to 350 degrees F. Prepare a 9 x 13 in. baking pan with cooking spray (or butter and flour). Plump the raisins in warm water (I do this in a measuring cup that I’ll use for wet ingredients later — one less dish to clean).

In a large bowl, whisk all dry ingredients together. Add oil, applesauce, and eggs. Mix well. Add in raisins and stir to combine. Pour batter into prepared pan, rapping 3-4 times on a counter to release trapped air bubbles. Bake for 30-35 minutes or until a toothpick inserted into the center comes out with only a few moist crumbs. Let cake cool completely before frosting.

To prepare frosting, mix all ingredients until well combined. Add more milk if needed for consistency. Frost completely cool cake. Use a fork to rake grooves into the frosting to resemble A&P’s cake presentation.


Share Share this post with friends!

Thanksgiving Recipe Ideas

The students have all closed their novels and packed up their supplies for Thanksgiving Break, so it’s time for me to take a deep breath and relax — until the baking begins tomorrow, of course! Because I enjoyed reading Jillicious‘s list of things she’s thankful for this year, here are a few of my own:

  1. Jesus, who made the greatest sacrifice for me.
  2. My family — they’re crazy, wonderful, and so supportive.
  3. Mike, who has never disliked anything I’ve ever cooked, whether overseasoned, underseasoned, burnt, or weird.
  4. Cake.
  5. Friends, for joining me in ridiculous escapades.
  6. My students, who make me laugh every day and (usually) make me feel like I’m making a difference through my teaching.
  7. Writing.
  8. Byrd and Squirt, my poodle and red-eared slider. One is fluffy and hyper, the other is scaly and . . . frowny; nevertheless, they’re both the sweetest pets anyone could ask for, and have made my little apartment a home.
  9. My snuggie. Shut up; it’s comfortable!
  10. Food, which is one language through which history, family, culture, and emotion has been communicated to me. I love joining the conversation.

On that note, here are some dishes that have warmed the pages of Willow Bird Baking in the past months that would be lovely on your Thanksgiving dinner table. May you enjoy the sharing of mirth, love, and calories with your family this year!


Mini-Pies: Pumpkin, Peach Crisp, and Sour Cream Apple — Add some variety to your Thanksgiving pie choices! Everyone gets to choose their own flavor. The pumpkin and peach pies are especially scrumptious.


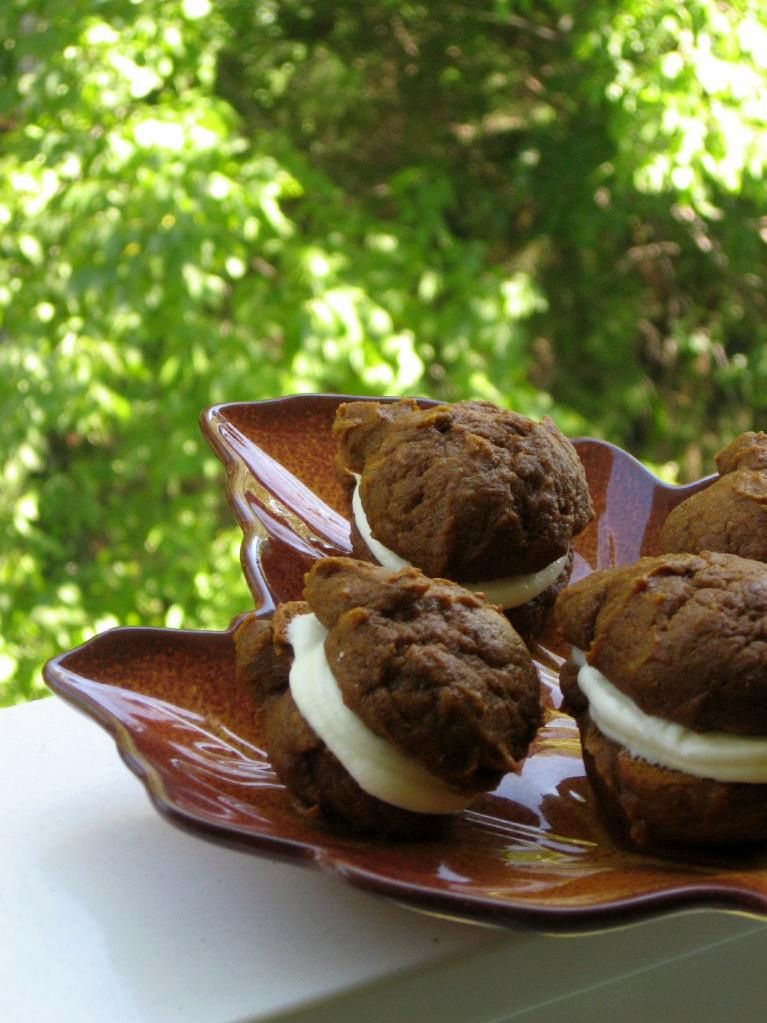
Jack-O’-Lantern Whoopie Pies — These cakey cookies are hearty, moist, spicy, and addictive. Whoopie pies should be part of every family’s Thanksgiving tradition.


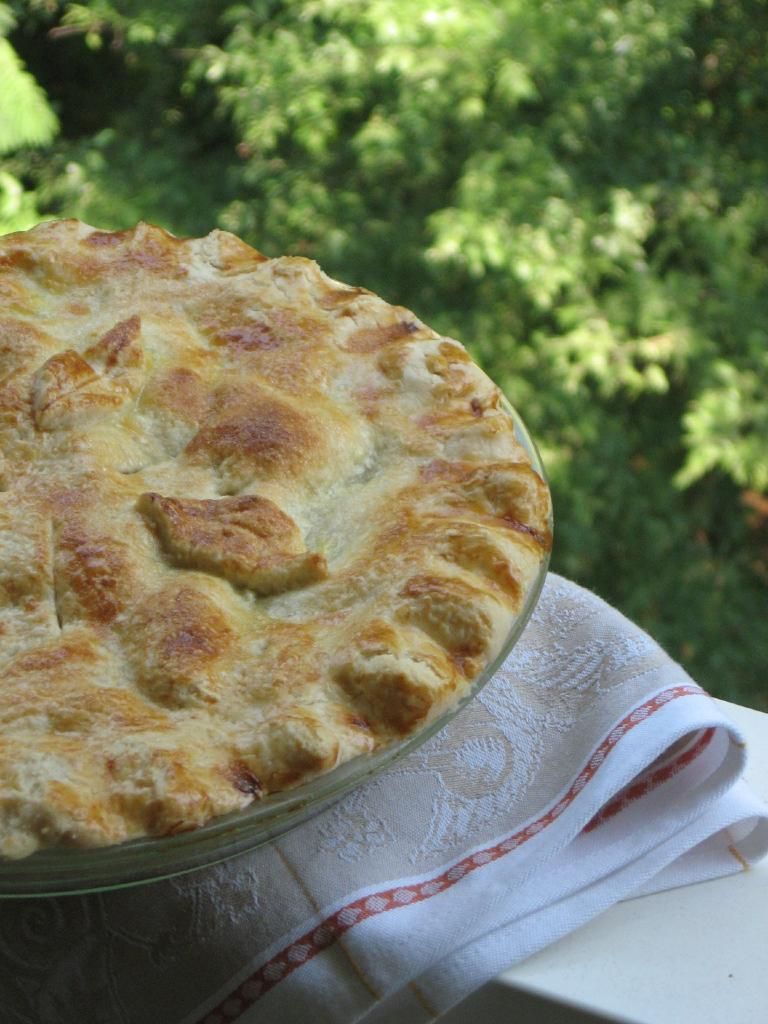
Peach Crisp Pie — Delicious, gooey peaches and crispy oats fill a tender, flaky crust. This is my favorite pie of all time!


Best Ever Cream Cheese Pound Cake with Easy Caramel Frosting and Spiced Apples — This moist, dense, finely-crumbed cake is heavenly with or without some spicy cinnamon apples on the side. “Best Ever” is not an exaggeration!


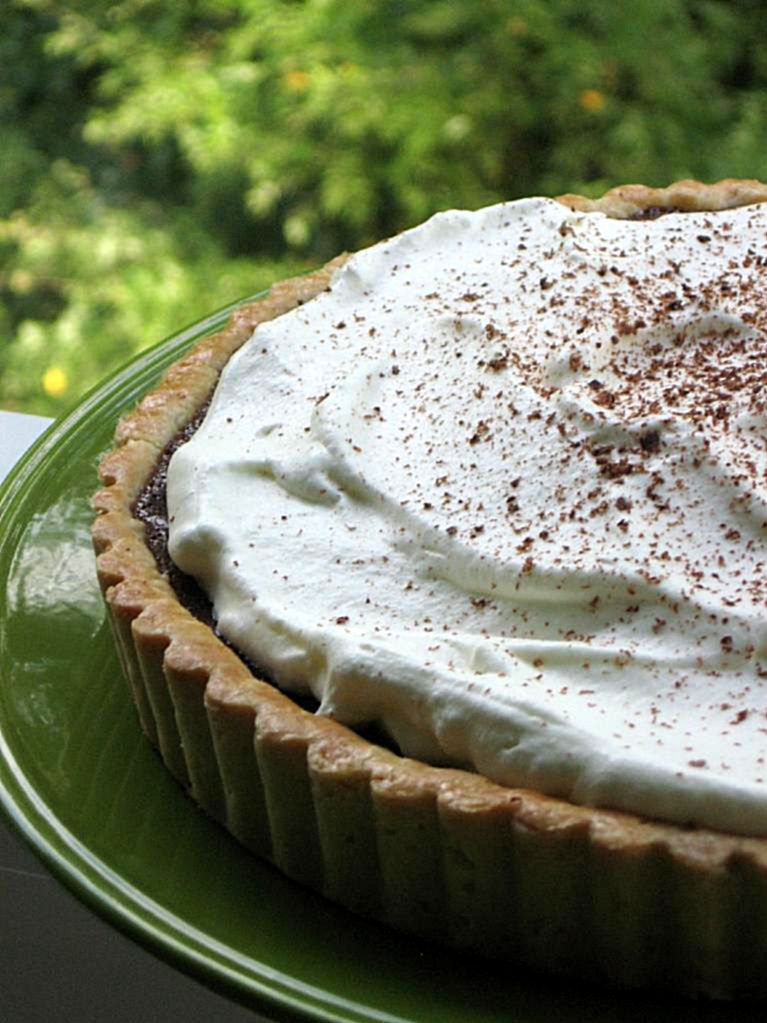
Chocolate Tart — Tired of pumpkin? If you’re a chocolate lover, this tart is a must-eat. Rich, indulgent chocolate fills the buttery tart crust, and a pile of freshly whipped cream accompanies each bite. This post also includes a bright and tangy Raspberry Cream Cheese Tart.


Overnight Yeast Rolls — These fluffy, delicious, buttery yeast rolls are part of my family’s annual Thanksgiving tradition. When I realized I was old enough to make them myself (and at any time of year, too), it was one ecstatic day in the kitchen!


Cardamom Pumpkin Macarons — Having an elegant Thanksgiving? These gluten-free cookies combine cardamom with traditional Thanksgiving pumpkin. Macarons are the perfect bite: crisp on the outside, chewy on the inside.


Barefoot Contessa’s Carrot Pineapple Cake — Looking for a big, beautiful cake to adorn your Thanksgiving table? Barefoot Contessa’s Carrot Pineapple Cake is brimming with hunks of pineapple, carrot, walnut, and raisin. With cream cheese frosting slathered on in a thick layer, it’s an elegant and decadent Thanksgiving dessert.

Green Chile TURKEY Enchiladas — Okay, these don’t quite fit on the Thanksgiving dinner table, but maybe you find yourself wondering what to do with all your juicy turkey leftovers? These Green Chile Chicken Enchiladas can be transformed into turkey-filled treats, and what a great way to spice up leftovers. The recipe is so seductive, yet very simple — it won’t take up all of your Black Friday!


Share Share this post with friends!

1 6 7 8 9