spice cake

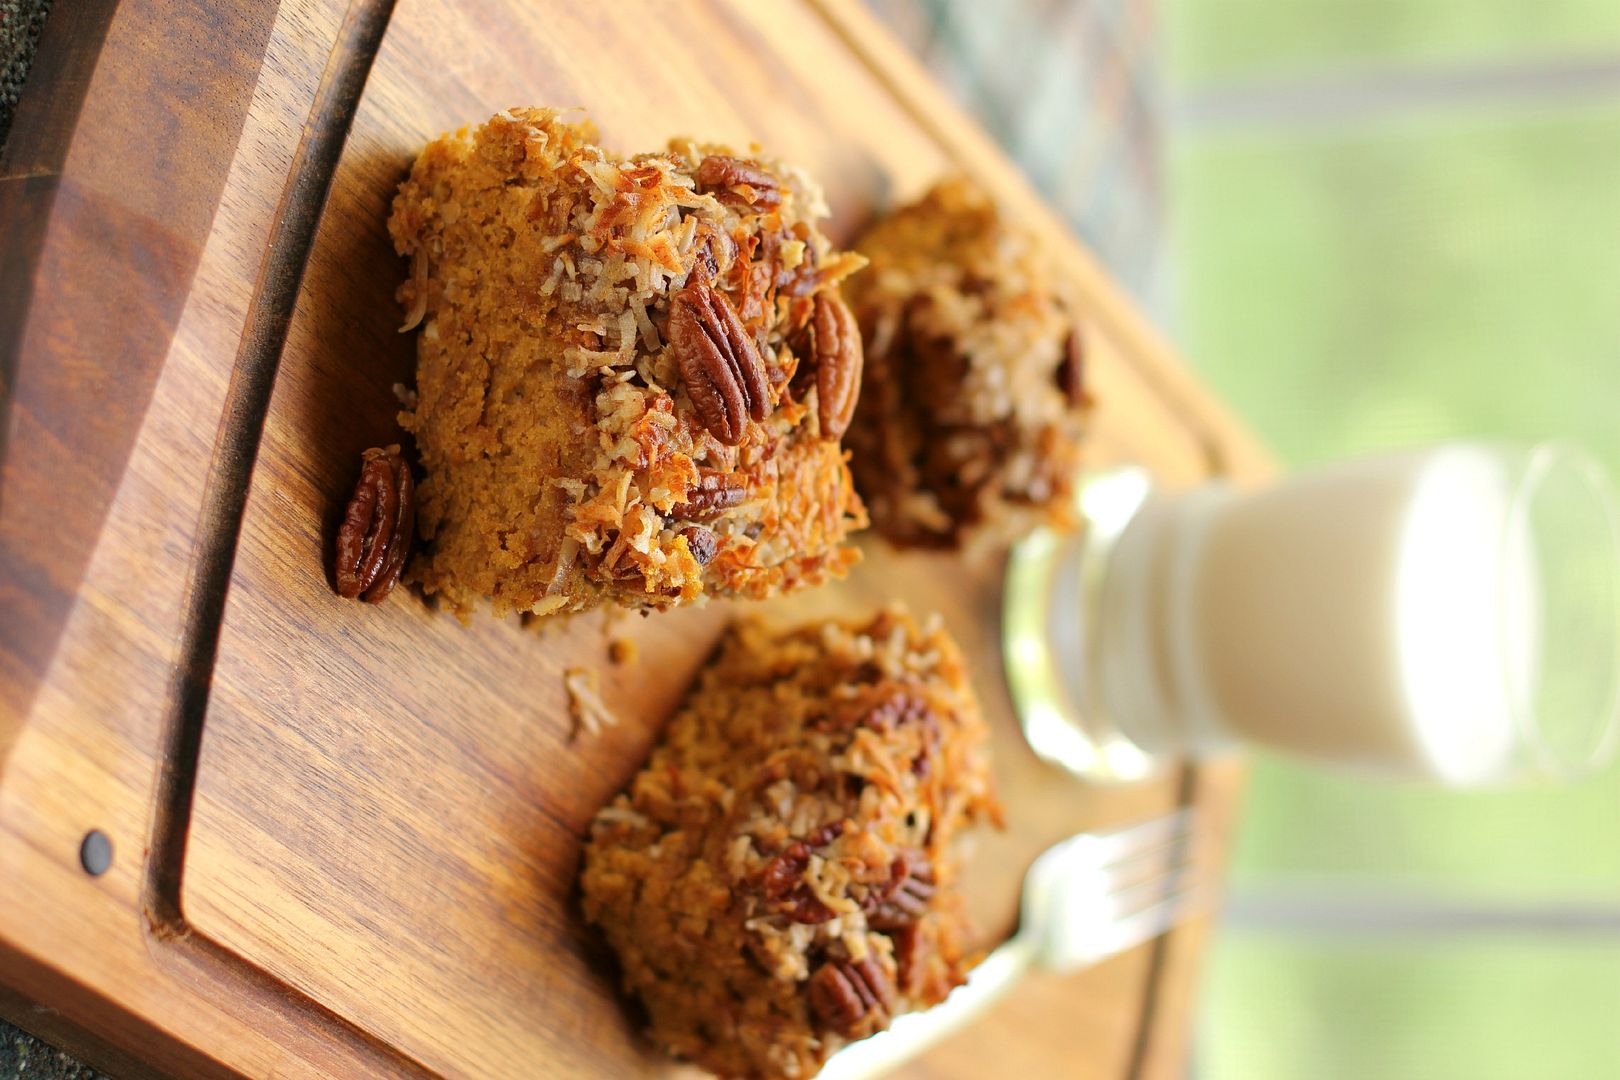
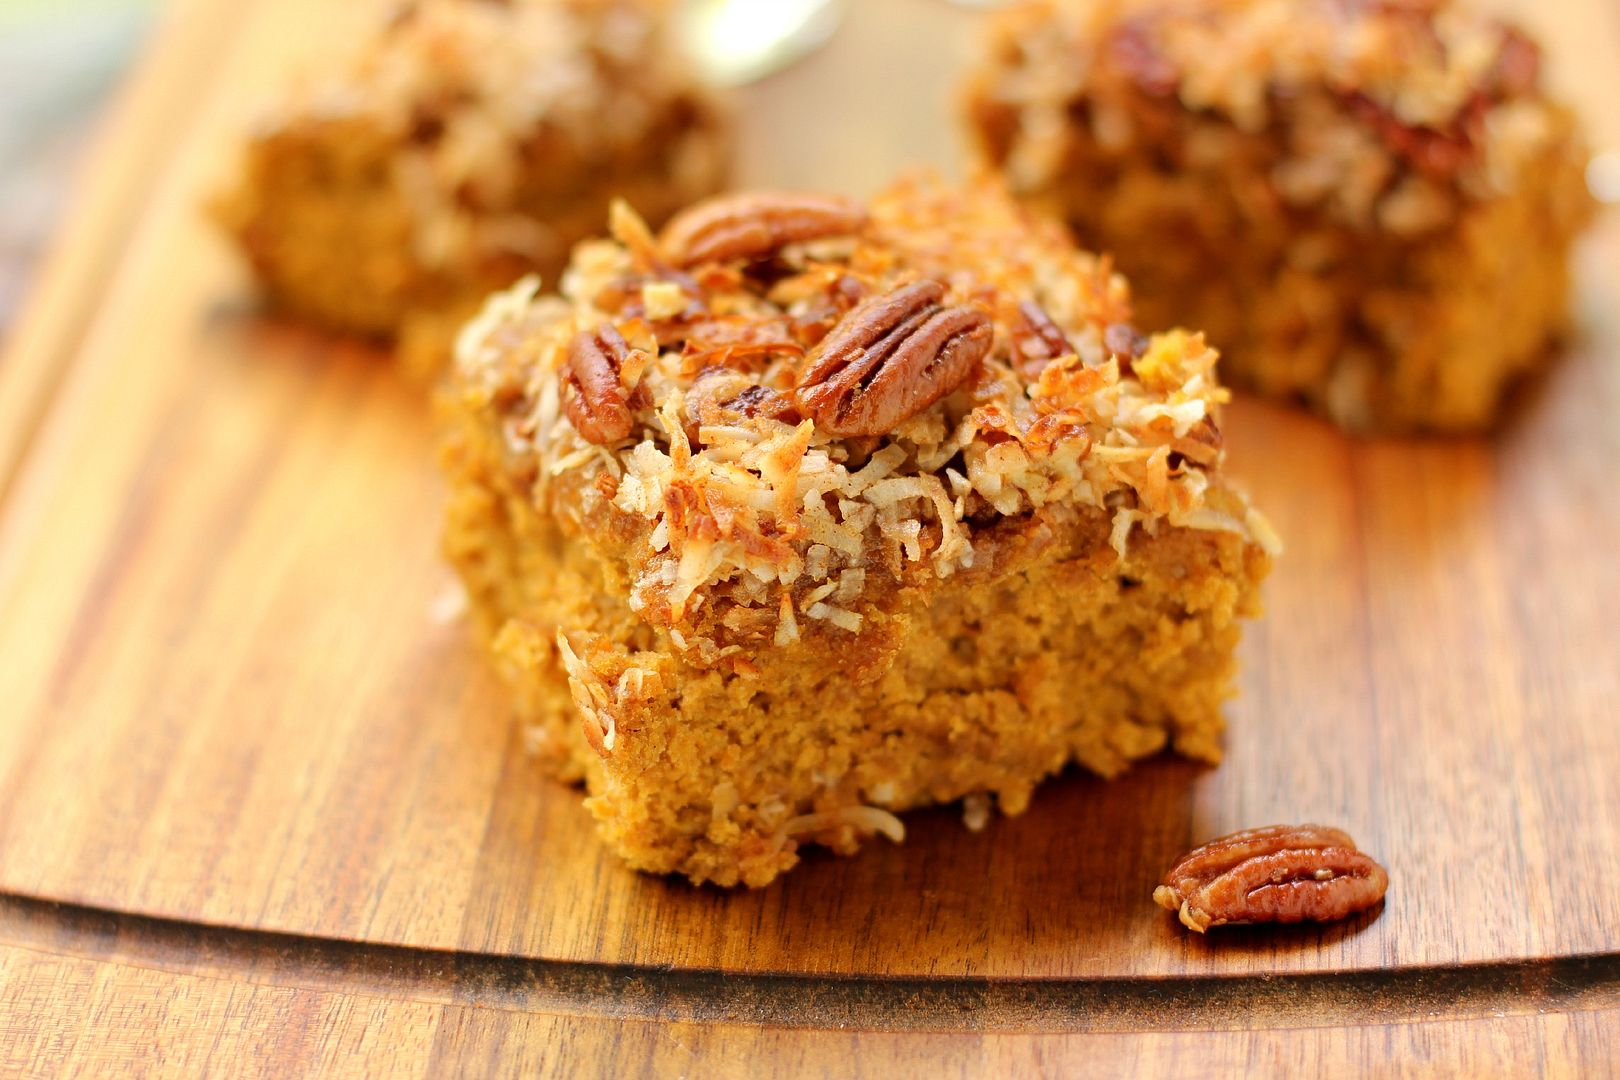
Pumpkin Oat Snack Cake with Broiled Coconut Icing

I was floored to see that Willow Bird Baking is a finalist for SAVEUR Magazine’s Best Baking & Desserts Blog. Thank you so much for making this happen. If you’d like to vote for Willow Bird Baking, you can do so here. You all are truly wonderful.
I could feel his eyes on me from the table to my right. He obviously wanted to strike up a conversation. Being an introvert by nature, I nursed a healthy flurry of paperwork all around me and kept my eyes on my computer screen. My work was a comforting wall between me and his social overtures.

However, I quickly realized as he walked over that he was unfazed by walls. He sat down on the couch next to me in the bustling coffee shop. I slurped my soda noisily as a last-ditch effort to appear busy. He set down his carton of milk and walked over to stand next to my seat. He peered at my computer screen.

“Um, hi,” I said, obviously unable to avoid a conversation any longer.
“Hi. What’s your name?” He replied.

“Julie. What’s yours?”

“Brian.”

“How old are you, Brian?”

He danced a little and held up 4 pudgy fingers. “Almost 4. My birfday’s in a coupla weeks.” I smiled. His cute delivery and guileless demeanor warmed me up to the idea of a conversation. I was starting to feel glad that he’d walked over after all.

I pointed to my computer screen. “See this cake? It’s a pumpkin cake. Do you like pumpkin?” (He does not.) “Are you going to have a pretty cake like this at your birthday?” (He is.) “What else are you going to do for your birthday?”

My own birthday, incidentally, is coming up in just a week, but trust me: compared to the monologue Brian launched into about his upcoming birthday party, my birthday will be tame. Just to give you an idea, he mentioned something about a castle and a road trip with his Me-Me and Paw-Paw for his birthday. I asked Mike for a car wash (with wax, please) for mine.
But really, Brian wasn’t just enthusiastic about a party. Indeed, he went on to tell me about his mom, his dad and Paw-Paw who were both “at deir jobs,” and his own job, by which I finally figured out he meant preschool. He noticed my marker and excitedly related that he loved markers, too! He drained his milk as we talked, and inched over repeatedly to eye this pumpkin cake with great interest. He was enthusiastic about life.

Looking around with my Brian lens on, I realized how wonderful it was to have spent the morning eating a bowl of fresh greens with a big scoop of tuna salad on top. How privileged I was to be sipping a soda and working on my new laptop (I named it Esmerelda — Zelda for short — and I’m ecstatic about it.) How blessed I am that my parents are taking me out for brisket next week (when they ask if I want fatty or lean, I’m saying fatty.) How amazing it is that I am dating the man of my dreams after having been separated from him for way too long. How delicious buttered toast is!

I’m with Brian, man. Life is pretty great!
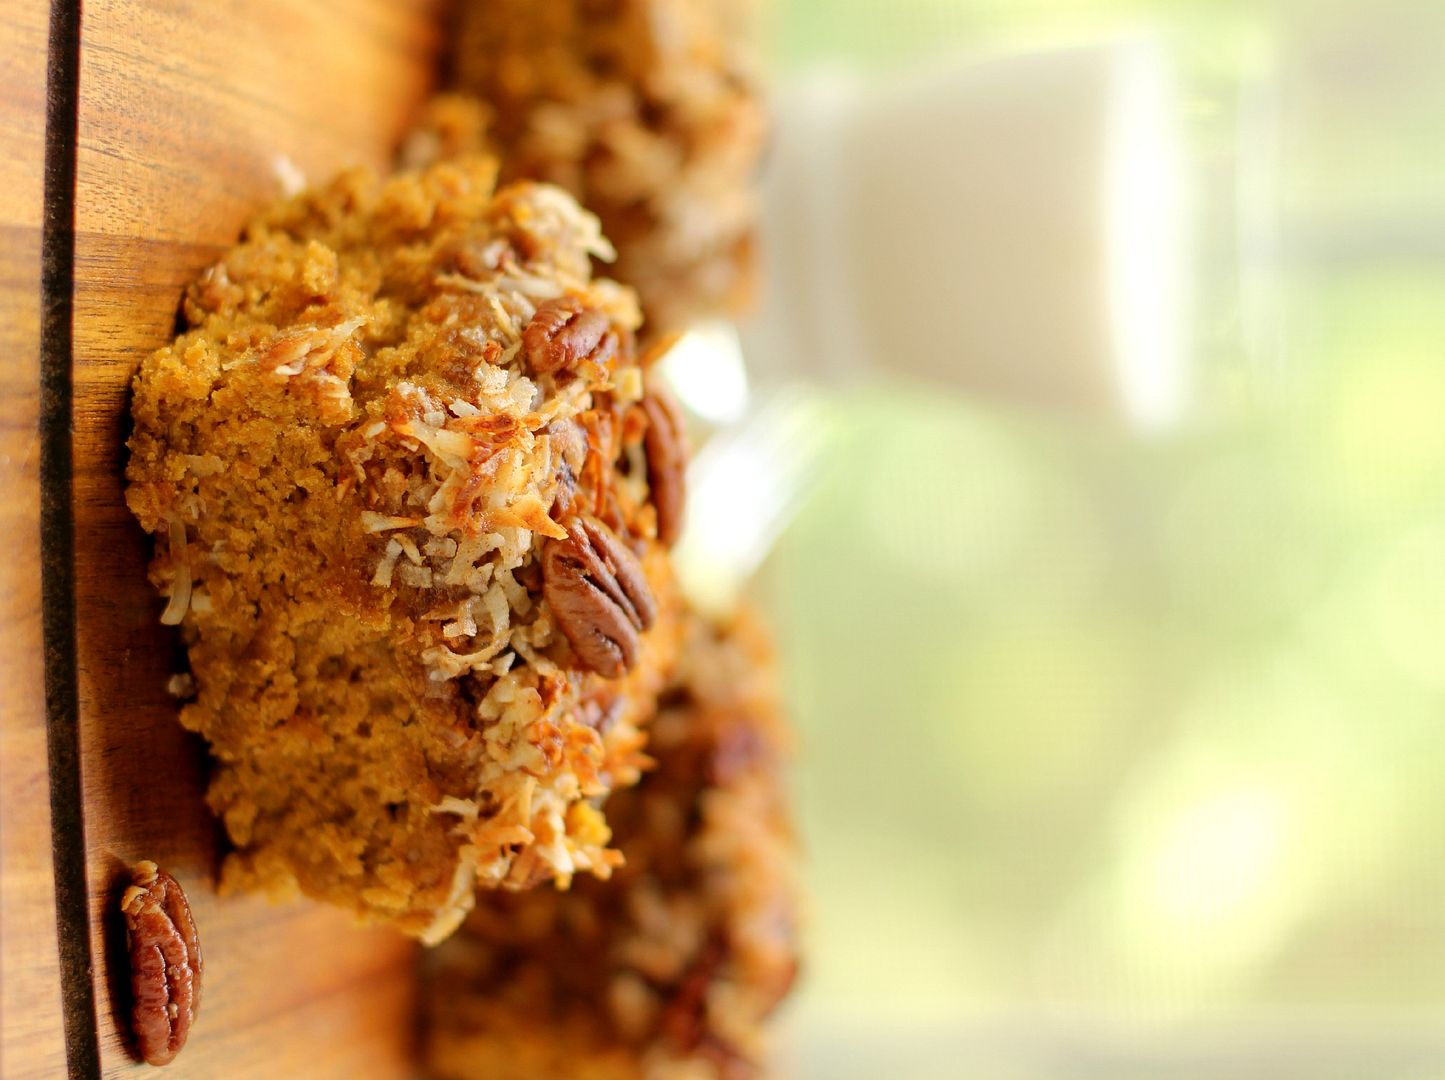
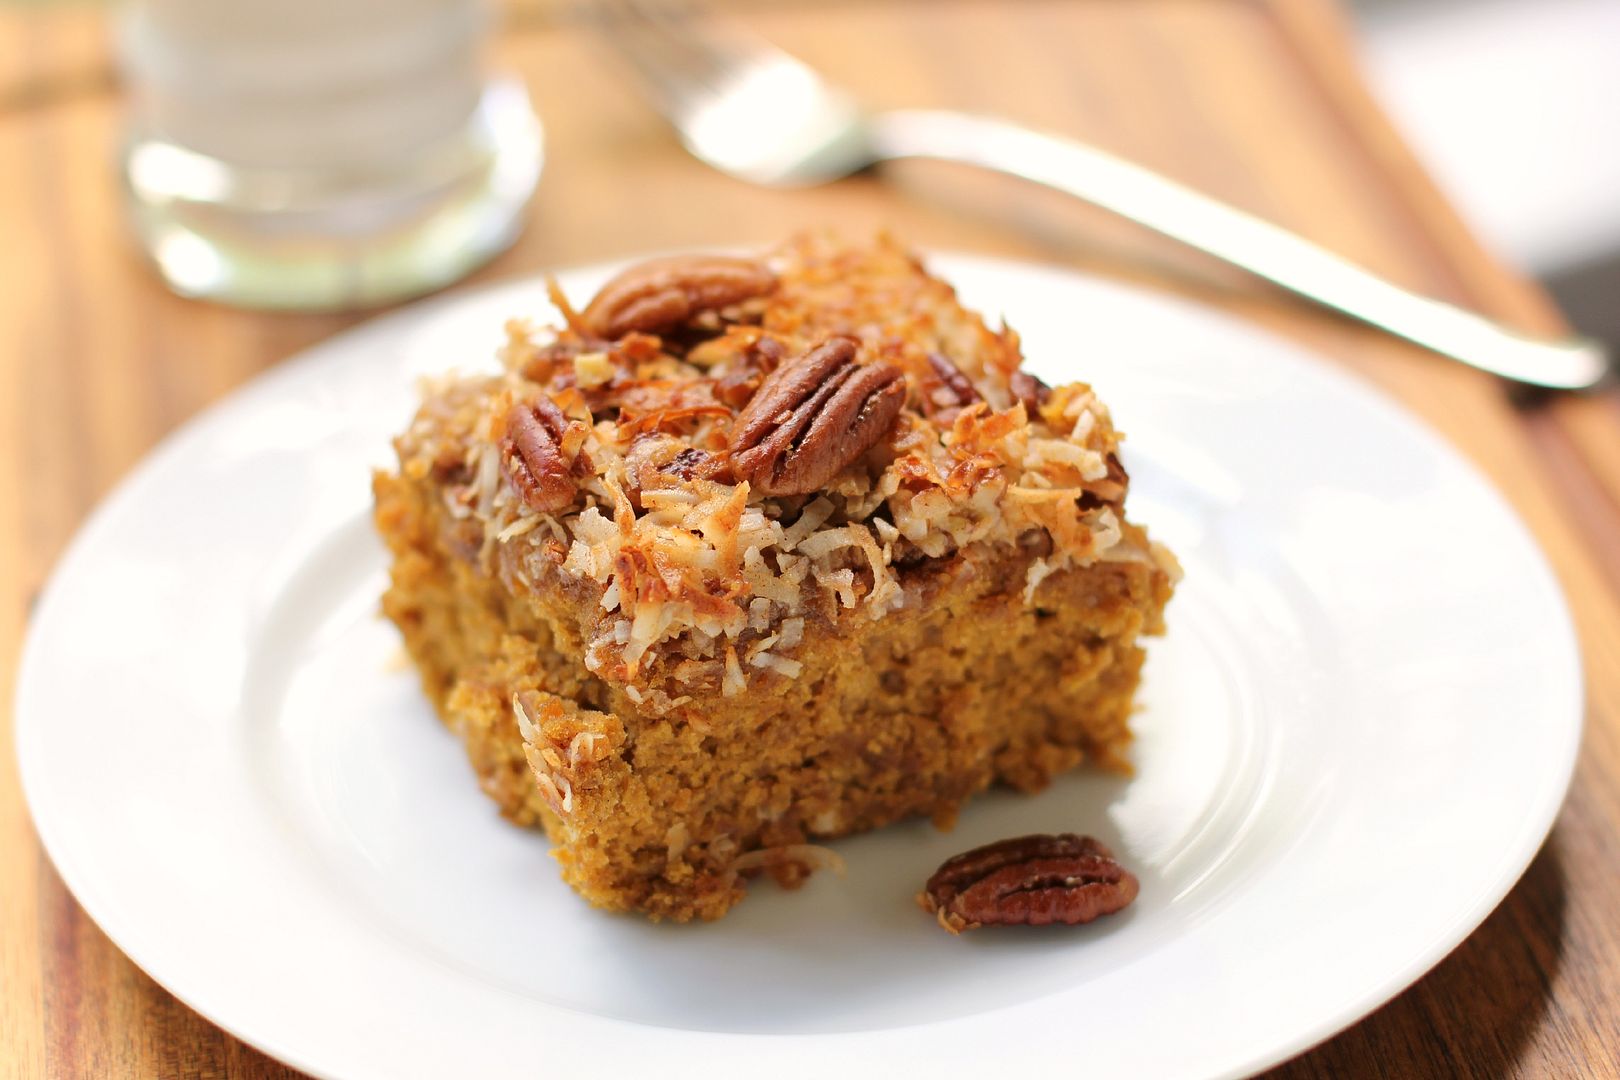
This Pumpkin Oat Snack Cake is just another great thing in an otherwise great life. It’s quick and simple to whip up, just as a snack cake should be, but it’s also birthday-bouncy-house delicious: moist, tender, and sporting a crispy toasted topping. And since we’re calling it a snack cake, you can slice yourself off a piece any old time. Right?

What are some little things in life you’ve been appreciating lately?

Pumpkin Oat Snack Cake with Broiled Coconut Icing


Recipe by: Adapted from America’s Test Kitchen’s Oatmeal Snack Cake with Broiled Icing
Yield: 9 servings

This little snack cake whips up in a jiffy and boasts so much bang for its buck! It’s a delicious pumpkin-oat spice cake with a toasty coconut and pecan broiled topping.

Cake Ingredients:
1 cup (3 ounces) quick-cooking oats*
3/4 cup water, room temperature
3/4 cup (3 3/4 ounces) unbleached all-purpose flour
1/2 teaspoon baking soda
1/2 teaspoon baking powder
1/2 teaspoon salt
1 teaspoon ground cinnamon
1/2 teaspoon ground nutmeg
1/2 cup pumpkin
4 tablespoons (1/2 stick) unsalted butter, softened
1/2 cup (3 1/2 ounces) granulated sugar
1/2 cup packed (3 1/2 ounces) dark brown sugar
1 large egg, room temperature
1/2 teaspoon vanilla extract

Broiled Icing Ingredients:
1/4 cup packed (1 3/4 ounces) dark brown sugar
1/2 teaspoon cinnamon
3 tablespoons unsalted butter, melted and cooled
3 tablespoons milk
3/4 cup sweetened shredded coconut
1/2 cup (2 1/2 ounces) pecans, chopped

Directions:
Make the cake: Preheat oven to 350 degrees. Create a foil sling for an 8-inch square pan: cut two 16-inch lengths of foil and fold them to widths of 5 inches each. Fit foil pieces into baking dish, one overlapping the other, pushing them into corners and up sides of pan; allow excess to overhang pan edges. Cut two more pieces of the same size and arrange them in the same way, except perpendicular to the first two. This creates a sling that will help you remove the cake after baking and cooling. Spray foil lightly with nonstick cooking spray.

Combine the oats, pumpkin puree, and water in medium bowl and let sit until water is absorbed, about 5 minutes. In another medium bowl, whisk the flour, baking soda, baking powder, salt, cinnamon, and nutmeg together.

In a separate large bowl, cream together the butter and sugars for a few minutes until the mixture resembles damp sand (scraping down the bowl as needed). Add the egg and vanilla and mix until combined. Add the flour mixture in 2 batches, mixing until just incorporated after each addition. Add the oat mixture and mix until just combined. Stir the mixture by hand to make sure everything is combined.

Glop the batter into the prepared pan and tap it against the counter a few times to ditch any air bubbles. Smooth the surface with a spatula. Bake the cake, rotating halfway through baking, until a toothpick inserted into center comes out with few moist crumbs attached, about 28 to 32 minutes. Let the cake cool in the pan for about 10 minutes while you mix the icing.

Make the icing: Move the oven rack to around 9 inches away from the broiler heating element and preheat the broiler. In a medium bowl, whisk together the brown sugar, cinnamon, melted butter, and milk. Stir in the coconut and pecans before spreading mixture evenly over the top of the cake. Broil the cake, keeping a close eye on it and rotating as needed, until topping is bubbling and golden, about 3 to 5 minutes. Let the cake cool in pan for 1 hour. Use the sling to pull the cake gently out of the pan. Cut it into squares and transfer to a platter or serving plates; discard the foil.

*ATK’s notes: Do not use old-fashioned or instant oats for this recipe. Be sure to use a metal baking dish; glass pans are not recommended when broiling. A vertical sawing motion with a serrated knife works best for cutting through the crunchy icing and tender crumb.

If you liked this post, please:
Subscribe to Willow Bird Baking
Follow Willow Bird Baking on Twitter
Follow Willow Bird Baking on Facebook
Give this post a thumbs up on StumbleUpon
Pin It


Shareother ways to share this post with friends

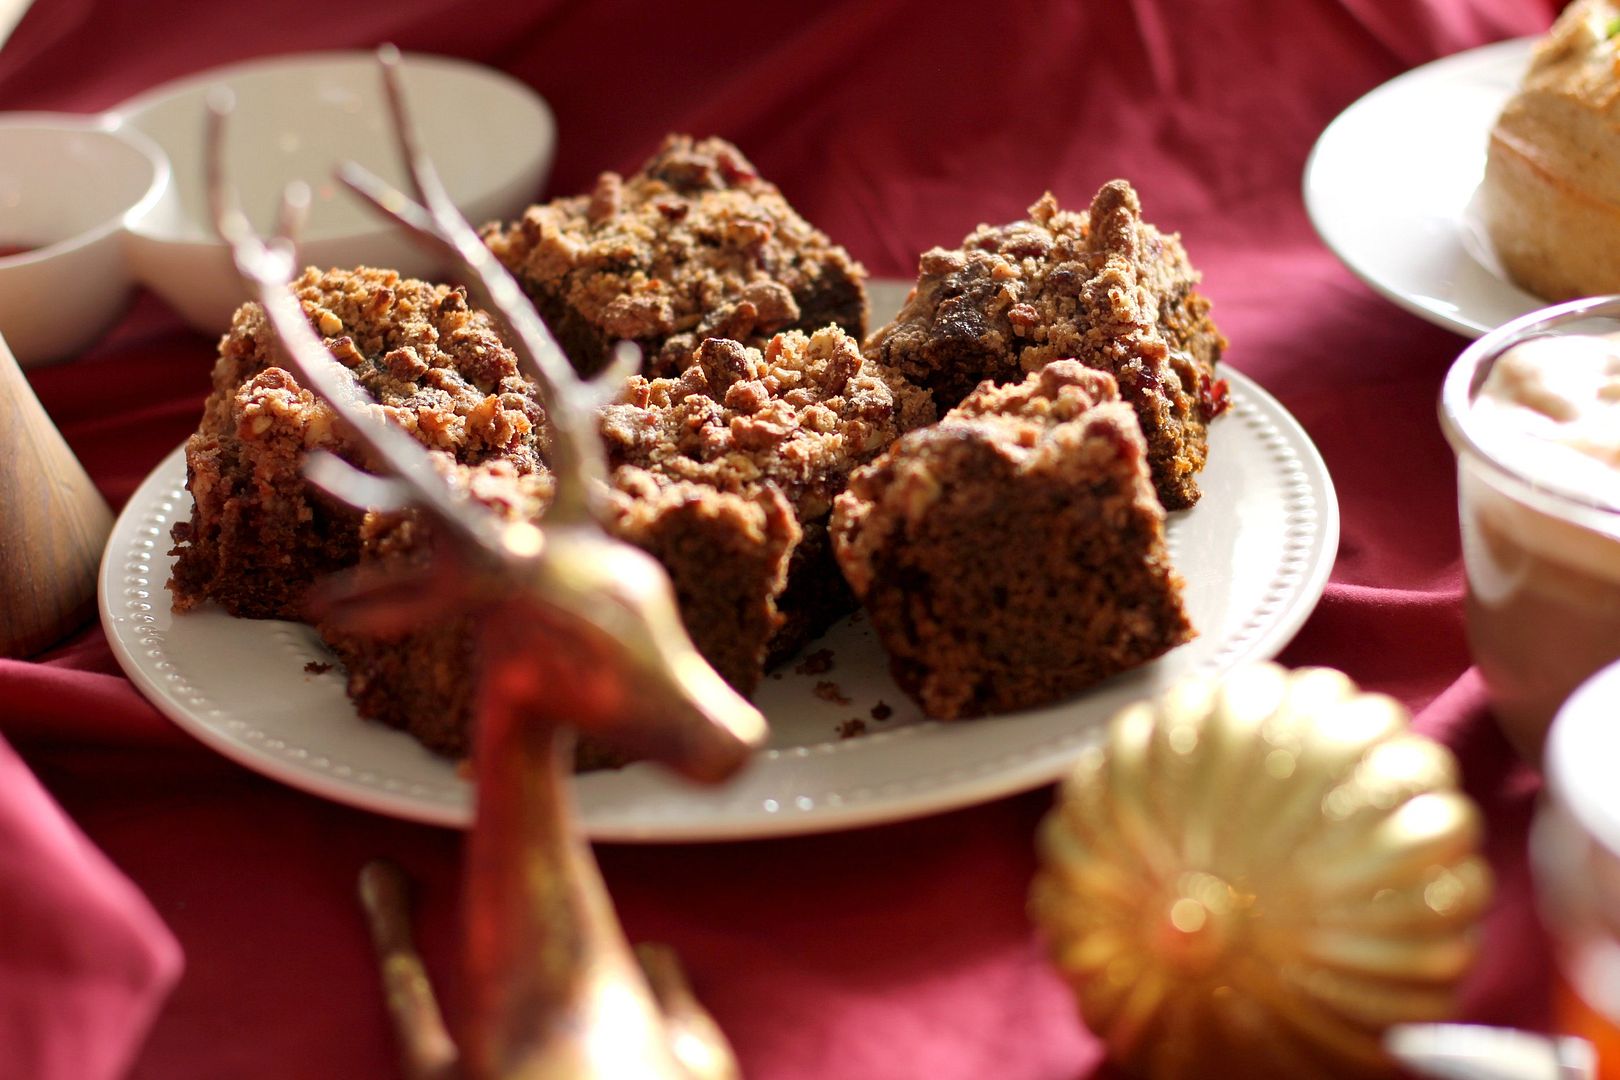
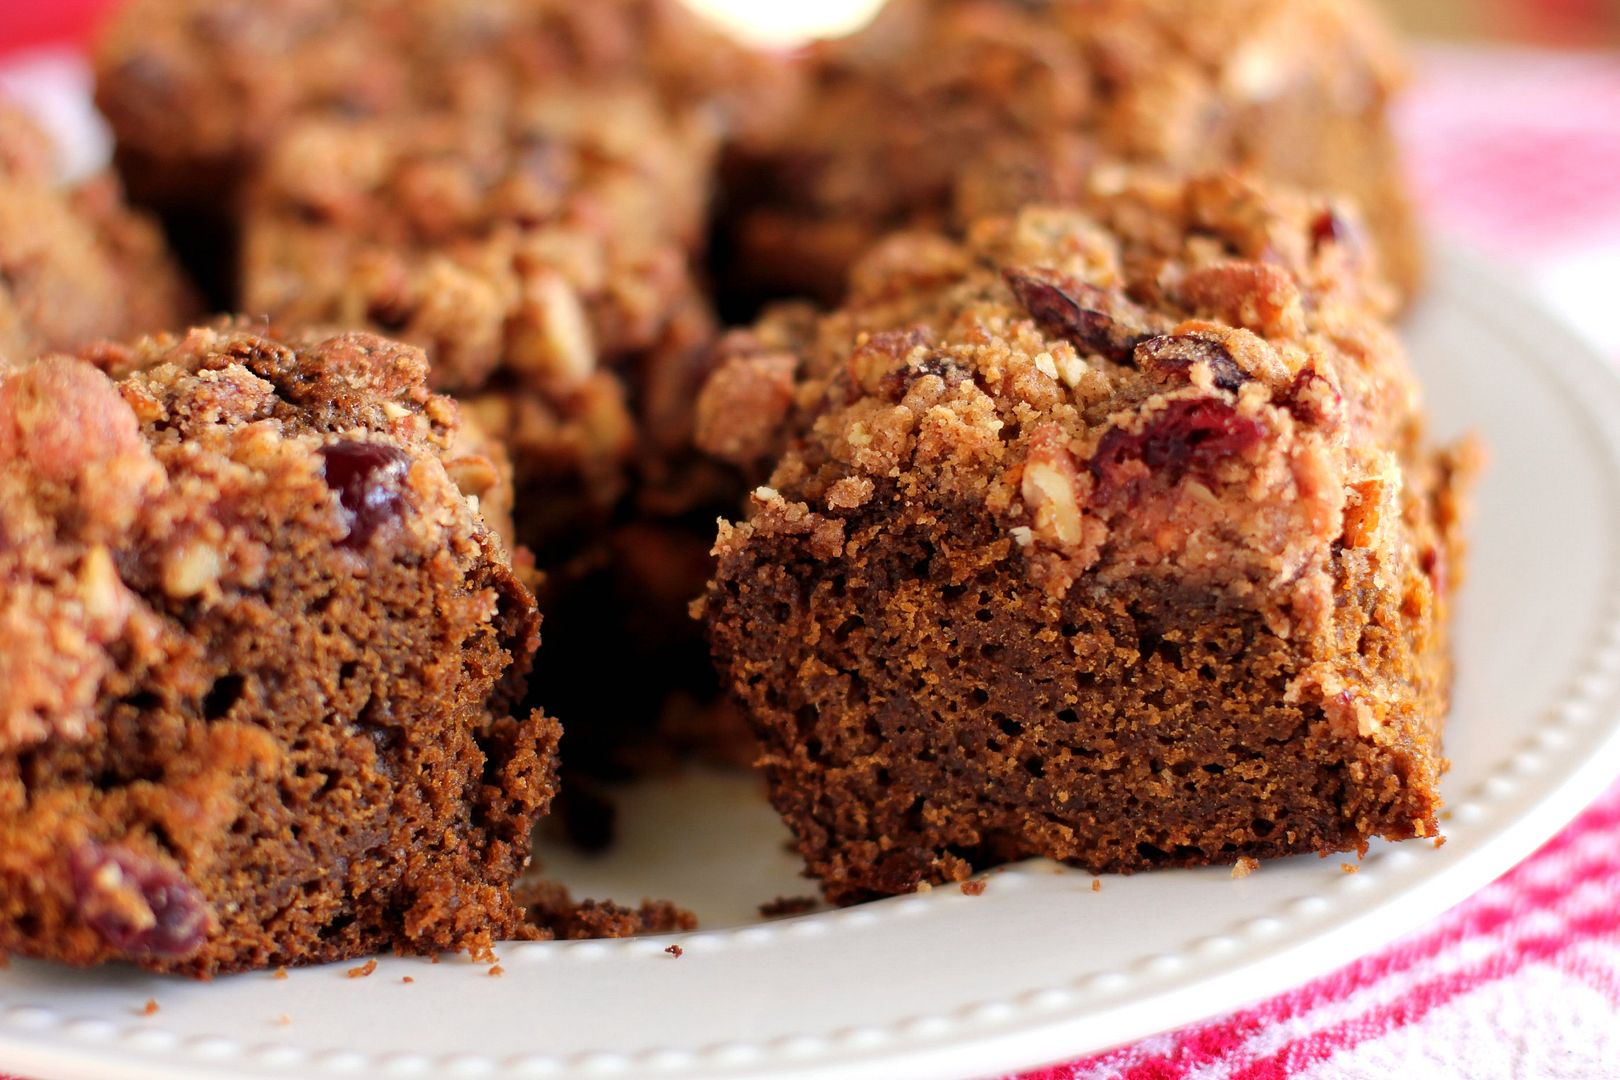
Make-Ahead Gingerbread Coffee Cake with Cranberry Pecan Streusel

“Hey Barb,” I chirped into the phone, hoping I sounded nonchalant. “You know our security deposit? Well. We’re, uh . . . we’re not getting that back.”

It was my first call to my roommate since we’d gotten the keys to our new apartment. I was standing in the living room surveying the debris field. Chaotic stacks of moving boxes littered the floor, as you might expect, but in front of me, the front doorframe lay in splinters on the floor. The door itself hung agape, swaying in the wind: a boat without a moor.

The tone of her voice took on a preparing-for-the-worst quality as she replied. “Uh-oh. What happened?” Do you want to know what happened, dear reader? I’ll tell you what happened.

It all started about an hour earlier, when I’d arrived in the parking lot of my new apartment complex with my dad and my brother, Alex, to begin moving in. We walked up the stairs and I began digging through my gigantic purse in search of my apartment key. I dug past lip gloss, receipts, gift cards, candy, my flashlight, my checkbook, my hippopotamus change purse, tampons, medicine, tissues, letters, my phone, several key rings . . .

I dug through that purse like an paleontologist for what seemed like an hour, uncovering months’ worth of fossilized garbage instead of cool dinosaur bones. And instead of, um, my apartment key.

Suddenly the awful realization dawned on me: I’d left the key at my parents’ house. I admitted this to my dad and we stared unhappily at the moving boxes we’d just hauled across town. We walked downstairs to consider our options.

We needn’t have worried, though, because Alex came down a few minutes later and relayed some “good” news: “The door’s open.”

“Wait, what?” I asked, thinking perhaps the apartment folks had left it unlocked for us. But you know where this is going. Alex didn’t mean that the door was unlocked. No. You know what Alex meant?

Alex meant that on my first day moving into my brand new apartment, he had just broken down my front door.

(Even better is that I don’t think he saw anything strange about this. He had kind of a, “Well, we had to get in, right?” attitude about the whole thing.)

As I stood in the living room relaying to Barbara that our new apartment had just been broken into (by, uh, my kid brother), I felt more than just my bank account plummet. The apartment didn’t feel so new and exciting anymore. My spirits fell. I’d been anxious about moving across town, moving in with a new roommate, and starting a new job; now it seemed my new living situation was already going poorly.

My dad returned the next day and fixed the door frame. A few nails, some spackle, and some paint and it was good as new. As for my morale, it took a little longer to improve. Barb is a magnets-on-the-refrigerator and tchotchkes-on-the-mantle person and I am not. The huge windows, while gorgeous, let in lots of cold air. The faucet in the kitchen was too low to fit a stock pot under.

Really, though, none of this was the issue. The issue was that I was in a new place and it just wasn’t home yet.

It’s been 3 years since I stood in front of my busted up doorway and broke the news to Barbara. I still don’t know if we’ll get our security deposit back. And as I mentioned to Kaitlin recently, I still don’t know that this is truly “home.”

But there have been plenty of moments that felt like “home” in this apartment. There was the time Mike walked in and saw the Valentine’s feast I’d prepared as a surprise for him. There was the time Barbara, Mike and I all decorated her Christmas tree together. There was the time I sat out on the balcony in the middle of a summer night all alone, writing poetry in the company of fireflies.

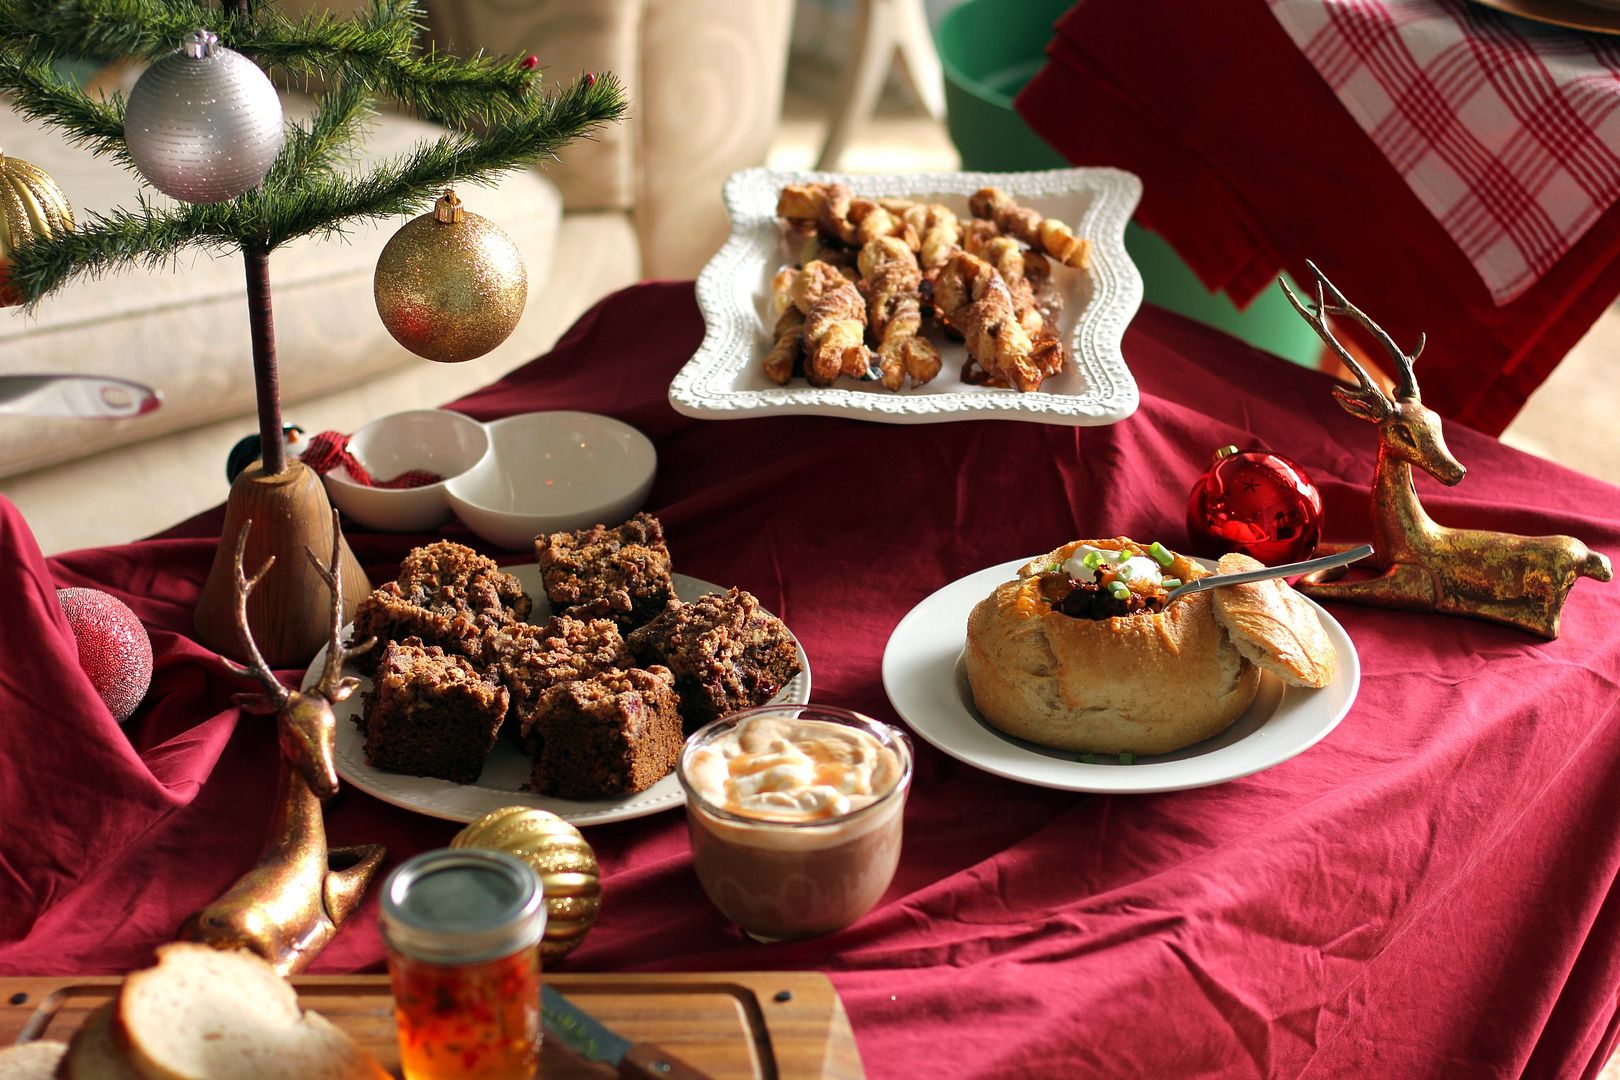
And there was the Make-Ahead Holiday Breakfast Party — Mike and I eating in our PJs by the fire, with little Byrd eating her breakfast between us.

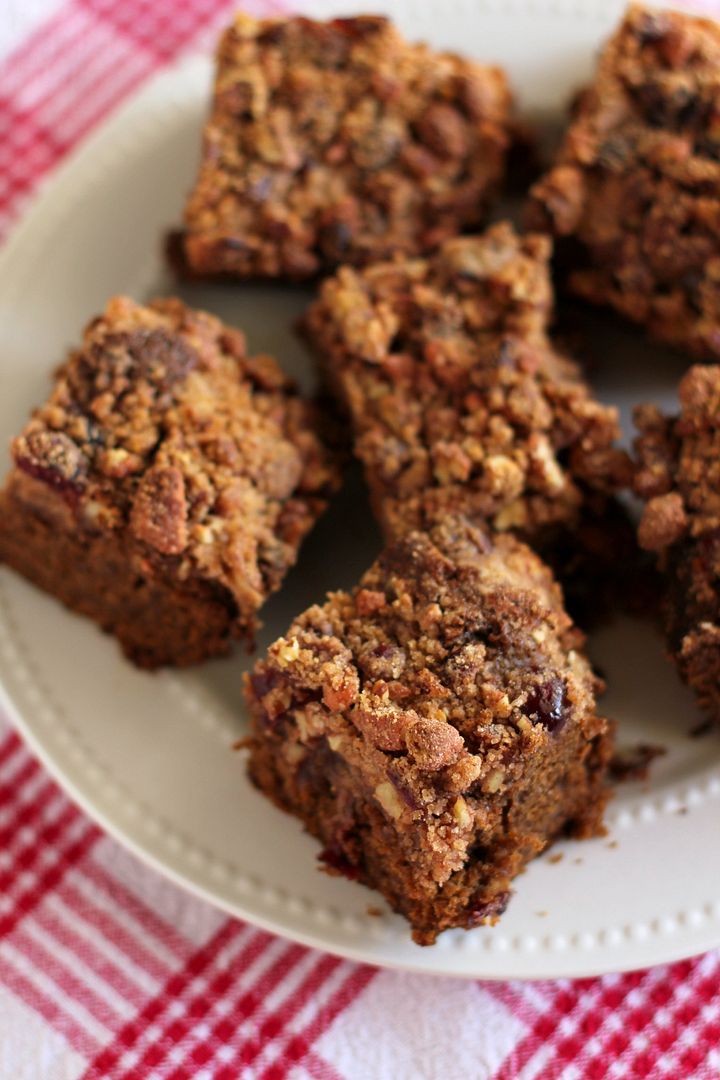
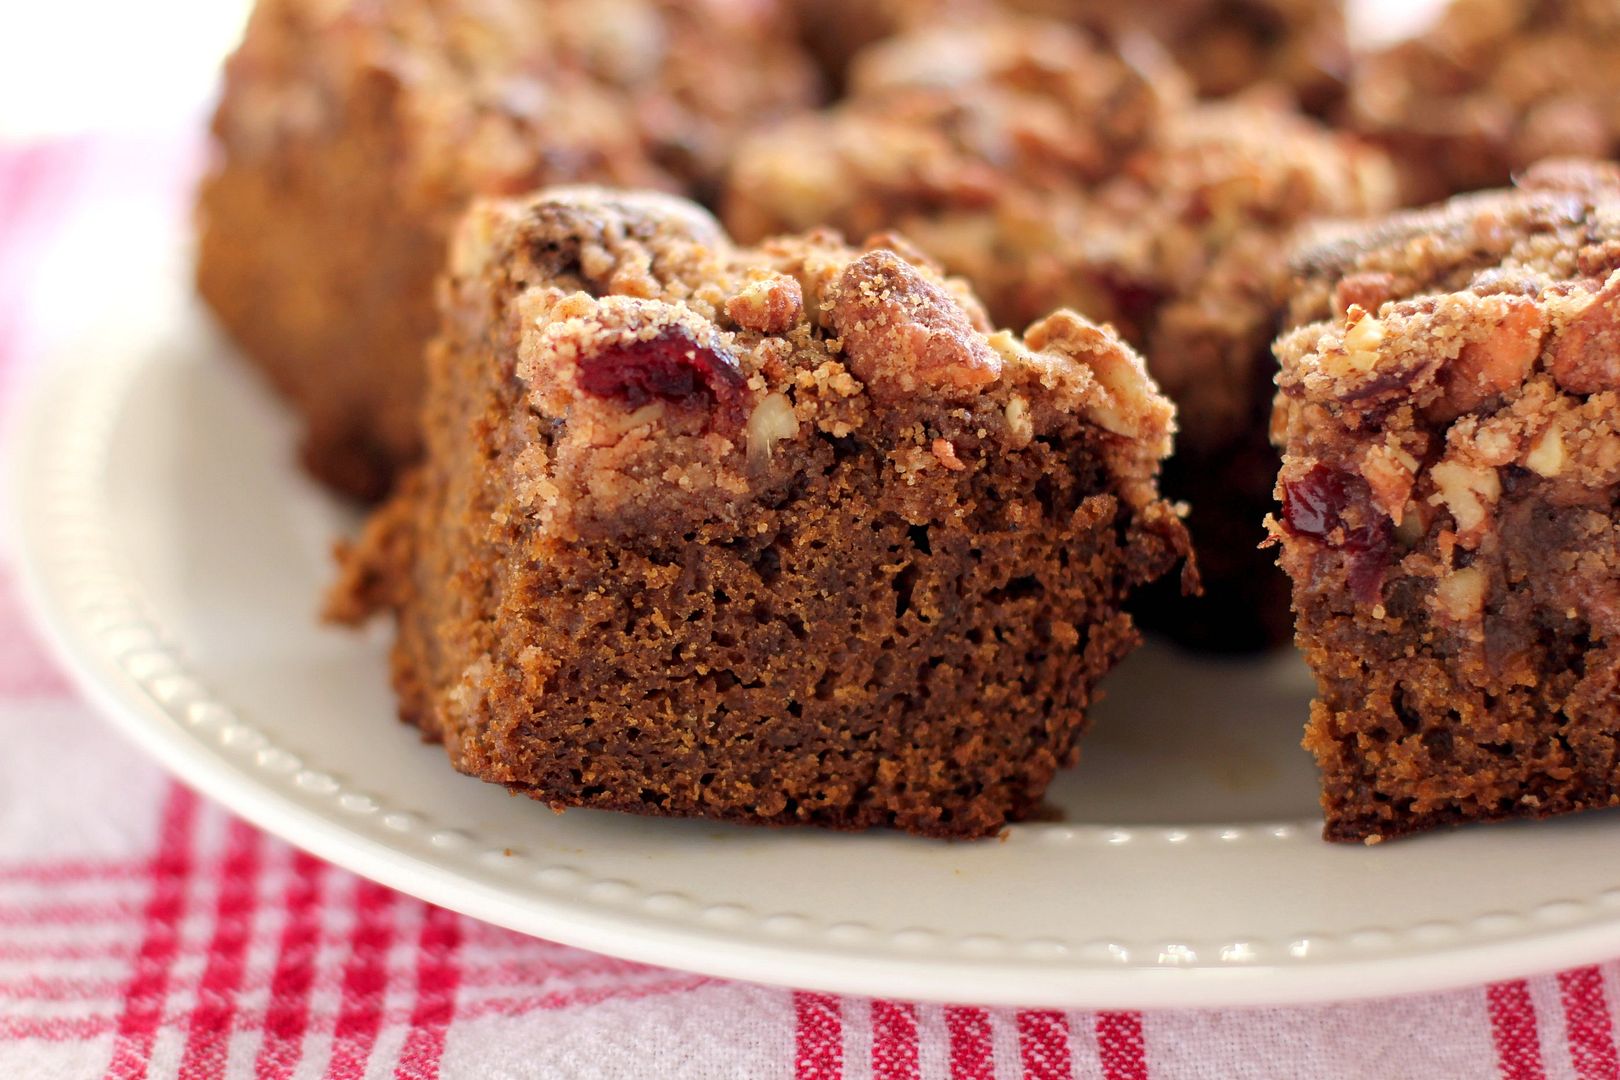
This Gingerbread Coffee Cake was probably the easiest dish to prepare and also Mike’s favorite of the morning. The recipe began life as a regular gingerbread cake, but I revised it to include sour cream, cake flour, and a healthy dose of streusel on top to turn it into a coffee cake. It’s certainly Christmas-worthy! I hope you can find a little bit of “home” in it just like I did.

Gingerbread Coffee Cake with Cranberry Pecan Streusel


Recipe by: Willow Bird Baking, heavily adapted from Joy of Baking
Yields: 9-12 servings

This moist, gorgeous Gingerbread Coffee Cake is the perfect combination of sweet, spiced, crunchy, and comforting. The best part (besides the taste!) is that it can be made in advance and refreshed in the oven for just a few minutes before serving. You can even divide the preparation over a few days to ensure it fits into your holiday schedule. This was Mike’s favorite dish on our holiday breakfast table.

Coffee Cake Ingredients:
1 1/2 cups cake flour
1/2 cup all-purpose flour
1 1/2 teaspoons baking soda
1 1/2 teaspoon ground ginger
1 1/2 teaspoon cinnamon
1/2 teaspoon salt
1/4 teaspoon ground cloves
1/8 teaspoon nutmeg
1/4 cup unsalted butter, room temperature
1/2 cup light brown sugar
2 large eggs, room temperature
1/2 cup unsulphured molasses*
1/2 cup milk
1/2 cup sour cream
*Tip from Joy of Baking: To prevent the molasses from sticking to the measuring cup, first spray the cup with a non-stick vegetable spray.

Cranberry Pecan Streusel Ingredients:
3/4 cup firmly packed light brown sugar
3/4 cup all-purpose flour
1 tablespoon cinnamon
6 tablespoons cold butter
1 cup chopped pecans (Oh Nuts! sent me Cranberry Pecans and they were so awesome for this!)
1/2 cup dried cranberries
1/4 cup apple cider

Directions:
NOTE: If you wanted to make this cake way in advance, you could complete this recipe up to the point of wrapping and refrigerating the cake. Instead, you’d double wrap it and freeze it. Then you could just thaw it overnight in the fridge before warming it through in the oven and serving it.

2 days in advance: Place the cranberries and apple cider for the streusel into a small bowl and cover. Refrigerate to rehydrate the berries.

1 day in advance: Make the streusel. First, drain the cranberries. Combine the flour and brown sugar in a medium bowl and using two knives or a pastry cutter, cut in the cold butter until you have crumbly streusel. Mix in the pecans and drained cranberries. Cover and refrigerate until ready to use.

Make the cake: Preheat the oven to 350 degrees F and make a foil sling for a 9-inch square baking pan: tear off 4, 16-inch long pieces of aluminum foil and fold them in half. Situate two side-by-side in the pan, covering the bottom of the pan to the edge (they will overlap). Situate the other two strips in the same manner, but perpendicular to the first. The overhanging foil of the sling will make it easy to remove the cake from the pan after baking and cooling. Butter and flour the sling.

In a medium bowl, whisk together the flours, baking soda, salt, cinnamon, ginger, cloves, and nutmeg. Set aside. In a separate large bowl, beat the butter and sugar with an electric mixer until pale and fluffy (at least 2-3 minutes). Add the eggs one at a time, beating after each addition. Beat in the molasses, pausing to scrape down the sides of the bowl when you need to. Gently mix the sour cream and milk in a measuring cup. Add the dry ingredients and milk mixture alternately, starting and ending with the dry ingredients. Beat until just combined.

Pour the batter into the buttered and floured baking pan and smooth the top with a spatula. Bake for about 25 minutes before sprinkling the streusel evenly over the top of the cake (and kind of pressing it on). Continue baking for 20-25 minutes, or until a toothpick inserted into the middle of the cake comes out with just a few moist crumbs. Remove the cake from the oven and let it cool completely. Remove it from its pan using the foil sling and wrap it tightly with plastic wrap (I wrap the foil sling and all so I can just pop it back in the pan to refresh later on) and stick it in the fridge.

The morning of: Let the cake sit out and come to room temperature while you preheat the oven to 350 degrees F. Pop it back in its pan and into the oven for a few minutes until warmed through. Let it cool for about 10 minutes.

P.S. Oh Nuts! sent me Cranberry Pecans to try free of charge. My opinions are always my own and always thoughtfully prepared with consideration for my readers — and I loved ’em!

If you liked this post, please:
Subscribe to Willow Bird Baking
Follow Willow Bird Baking on Twitter
Follow Willow Bird Baking on Facebook
Give this post a thumbs up on StumbleUpon
Pin It


ShareOther ways to share this post with friends!

One-Skillet Gooey Pumpkin Cookie Cake

Pale strands of my hair tangled into the mess of dusky flowers in my lap. Mike’s car sliced quietly through the lukewarm air of the countryside until a gravel drive slid into view. We turned into it with a crunch, parked, and began the arduous process of shuttling picnic supplies down a rocky path.

Some time later we sat alone by a still pond, the flowers now perched on a stack of books beside us. We’d just finished eating an elaborate lunch on my childhood patchwork quilt. The ground was hard and uneven — it always seemed so soft in movies — but at one point I lay down, the silk of my slip dress cool in the autumn breeze, and watched the highest leaves fluttering against the sky. Then I looked back to Mike’s ruddy, bespectacled face and smiled.

Sometimes you only realize how special a moment is once it’s passed, but every now and then, you get the gift of realizing in the moment itself. This was one of those times.

I’d never been on a legitimate blanket-on-the-ground picnic before, and living in different cities, Mike and I rarely got to just sit and enjoy each other’s company. Now here we were, grinning at each other, stuffed like turkeys in the middle of the woods and post-lunch euphoria. The streamer of hearts I’d hung from the trees around us whispered in the wind. The whole afternoon spread out before us.

That was last fall. In the dark days that followed, I remembered that picnic as a bright bit of joy to hold onto.

I love those unexpected moments that settle into your heart as significant — the ones that nestle like bookmarks into the very best folds of time. I remember so many of them:

Sitting by a fire in Gatlinburg with Mike, drinking hot chocolate in mugs we’d just bought from a Walgreens around the corner.

Dancing with a stranger on the sidewalk one night in San Francisco.

Pausing with Mike on the stairwell of my apartment building to watch the sunset.

Looking down at the fluffy mop in my lap while driving home from Carolina Poodle Rescue and realizing that Byrd was truly mine.

Embracing my new friend, 7-year-old Zoe, when she ran up to hug me after we’d been baptized together one Sunday morning.

Walking alone across the Georgia Tech campus one summer night in the middle of my teacher training, the golden skyline glowing above me.

Getting the phone call where my dad revealed that after years of dangerous treatments, he was cancer-free.

Running barefoot through the grass in La Jolla one warm night with my sister, Sarah, for no reason at all.

Sitting in traffic on i-85 to Raleigh with the sun illuminating the gorgeous fall leaves and little Byrd poking her nose out the open window.

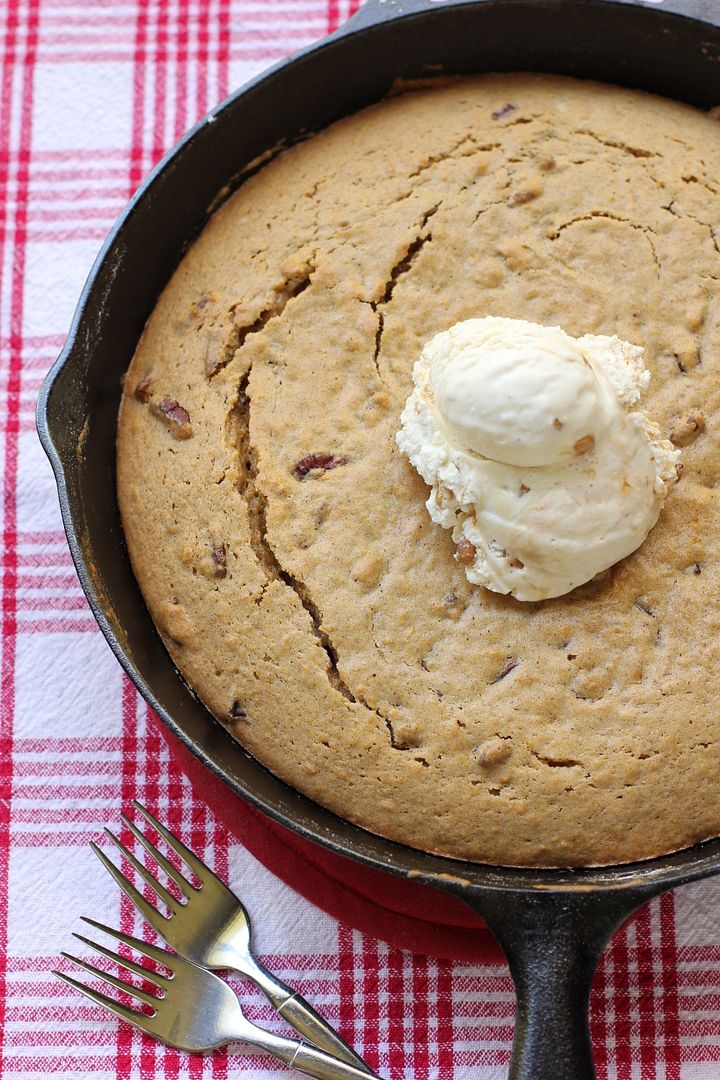
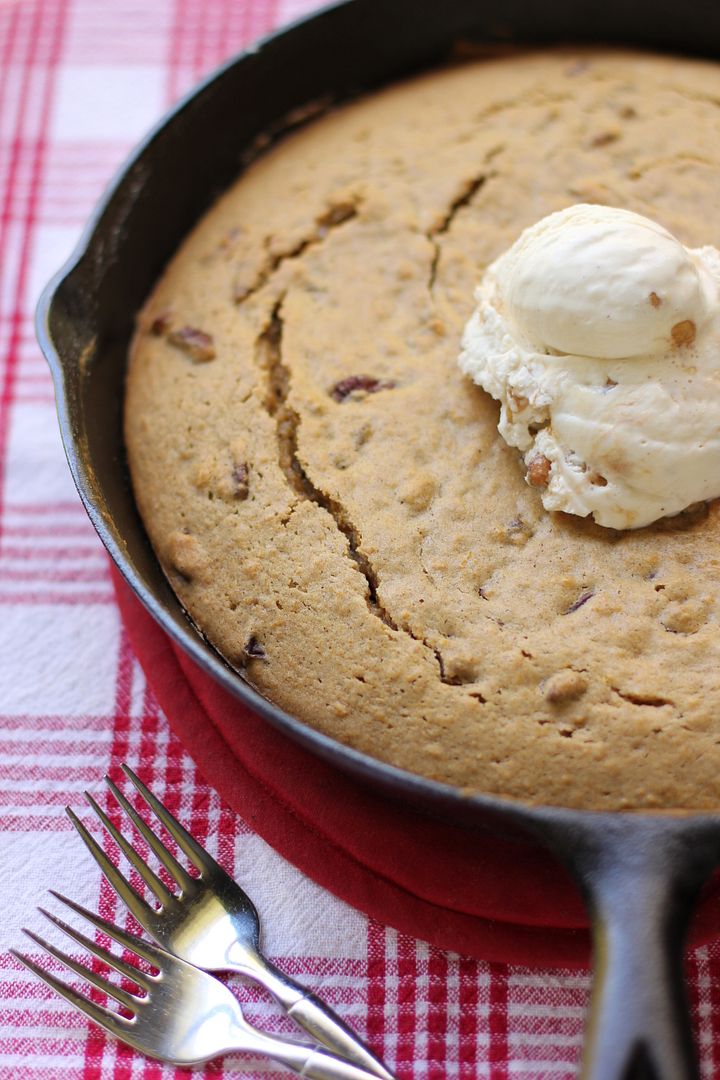
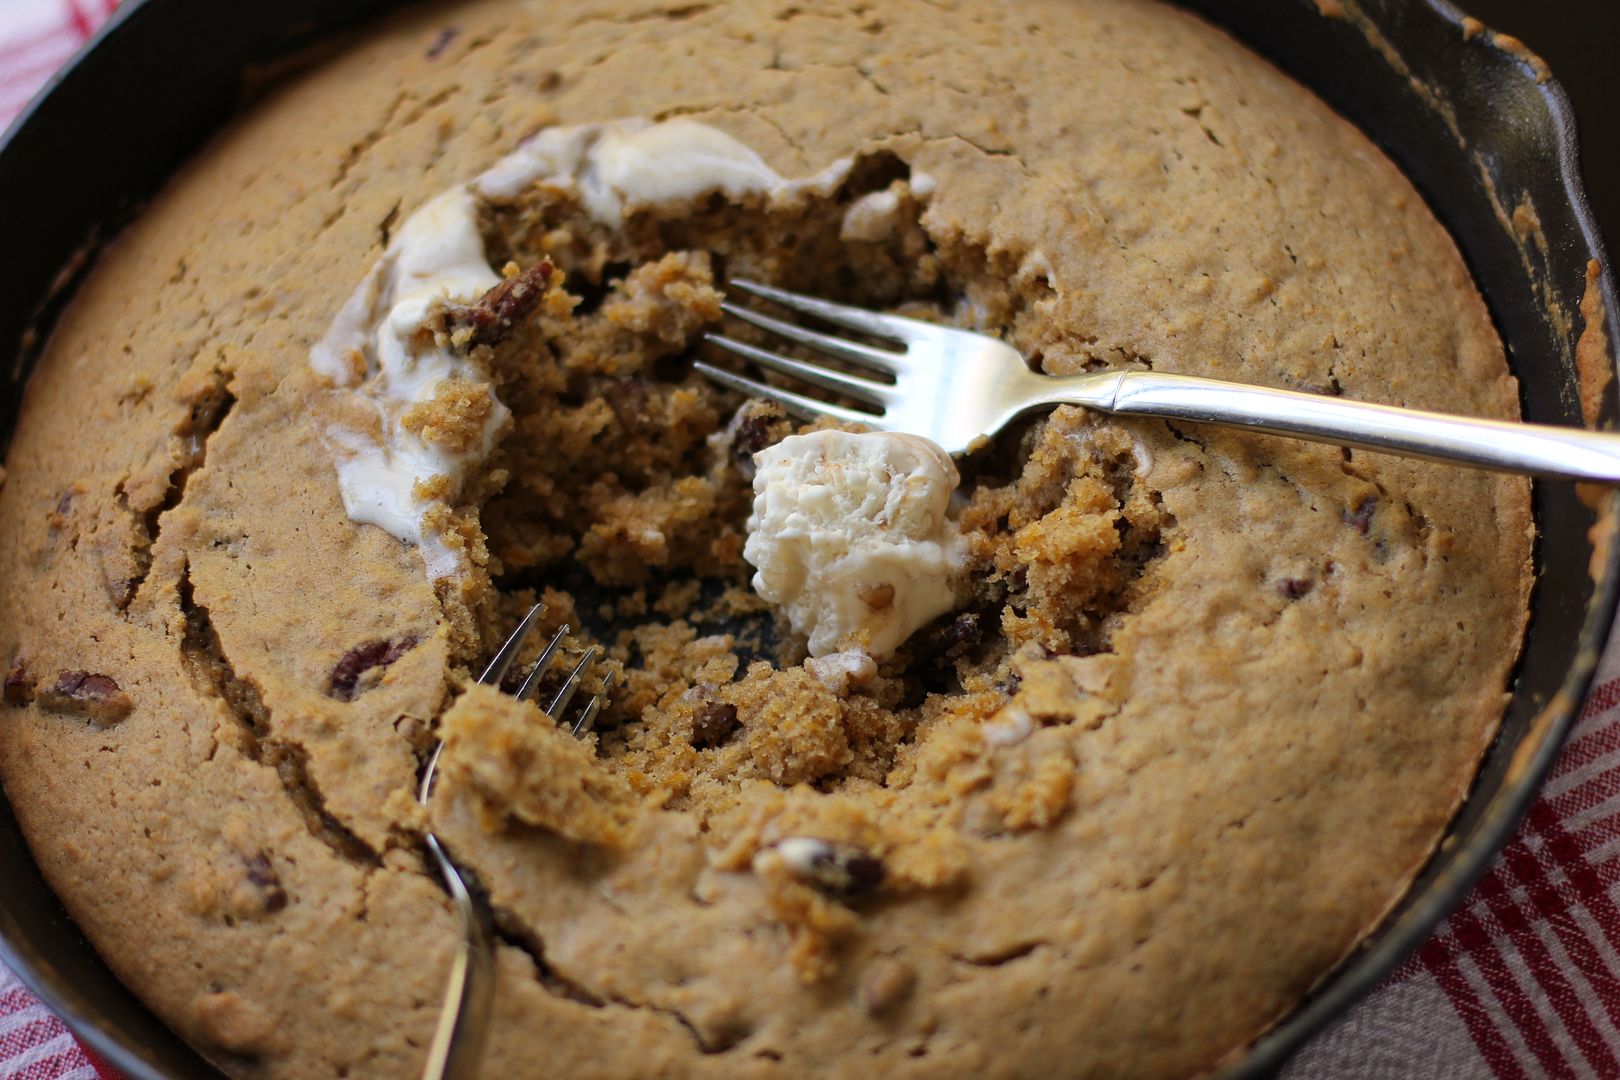
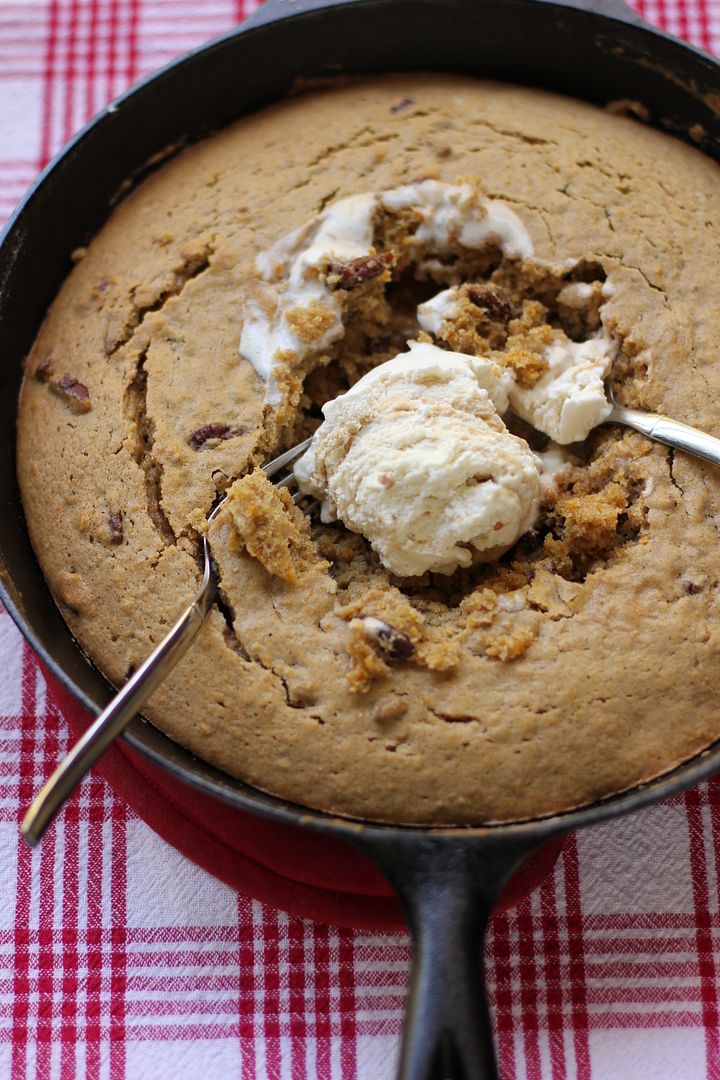
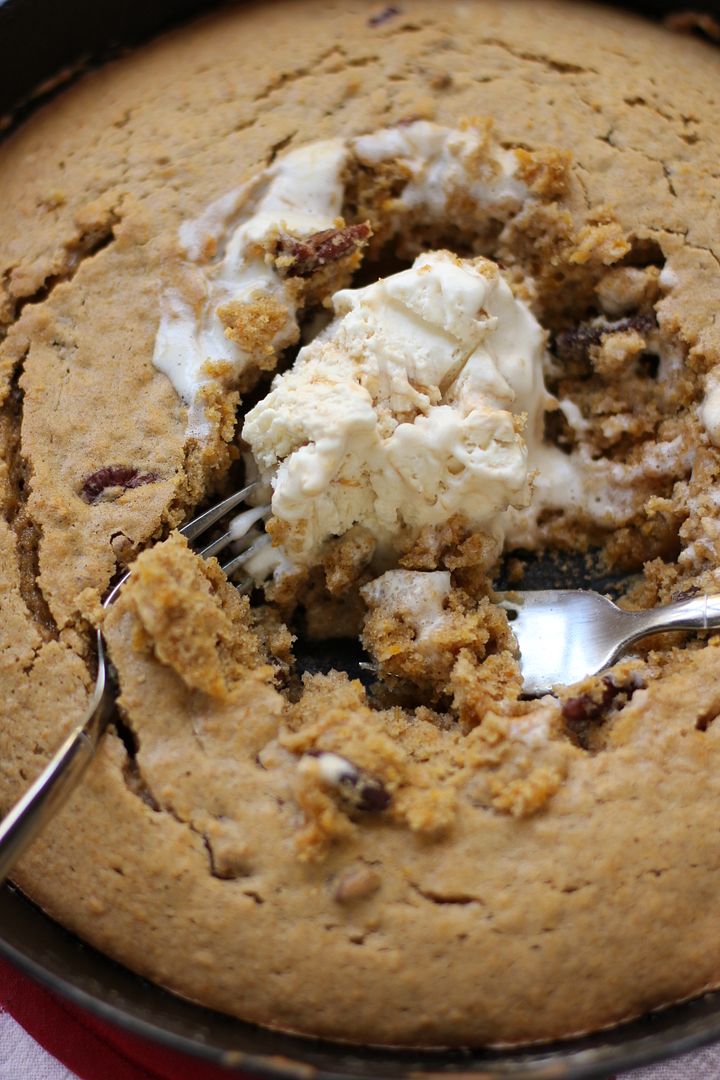
And, most recently, sitting with Mike and eating gooey pumpkin cookie cake straight out of my cast iron skillet. I’d just pulled the cake from the oven and taken dozens of photos, and with my camera still propped up beside me, we dug in. No plates needed — just forks and some ice cream. There’s just nothing like the casual, sweet act of devouring forkfuls of a shared dessert without even an ounce of fuss.

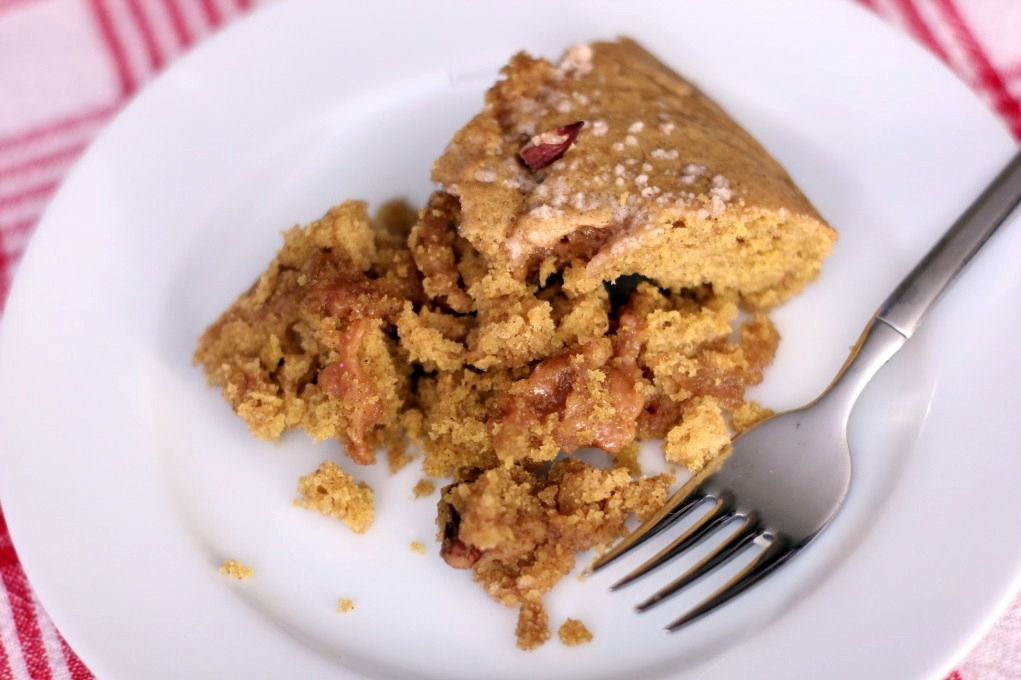
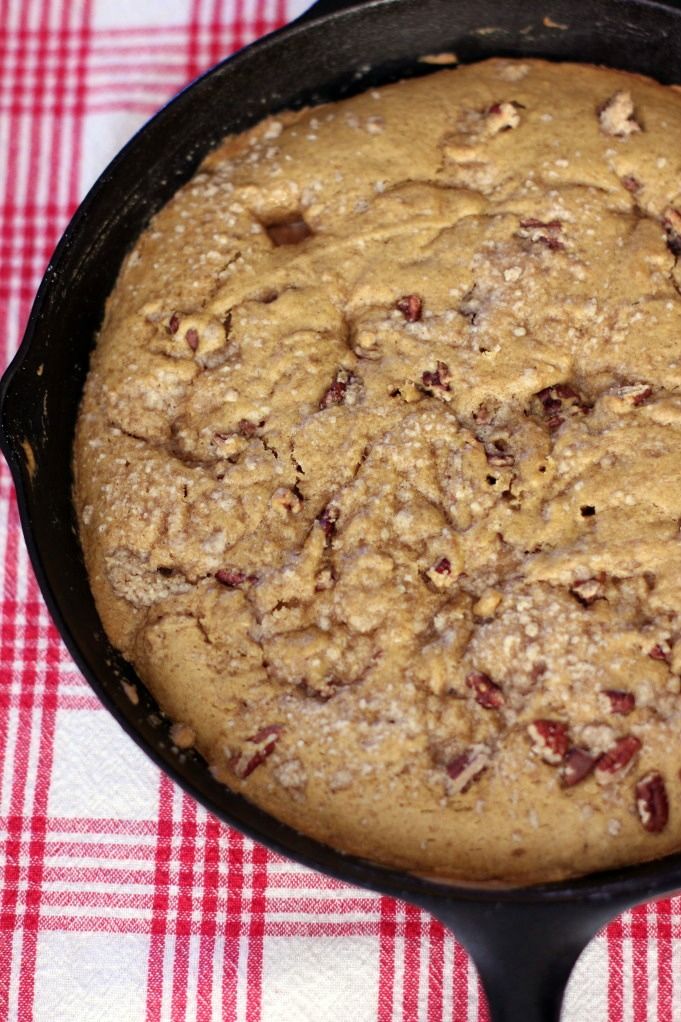
And this cake! I made it twice to fiddle with proportions a bit. The first version (pictured throughout this post) was great, but the second version (see pictures below) was insane: a moist, gooey, comforting cake boasting surprise bites of caramel and toasted pecans.

Not only that, but you can make this cake in about half an hour with one skillet! Even if you choose to toast up some pecans and make some streusel to go with it (which I recommend!), you’ll have minimal dishes to wash. Especially if you skip the plates.


A slice of the final cake.

You have to make this thing as soon as possible. Make it tonight! Throw it together and eat it on the couch with someone sweet. Or take it to your Halloween parties. Or eat the entire thing alone while watching old episodes of Hoarders. No judgments. It’ll be amazing no matter what.

And in the meantime, share a beautiful moment that stands out in your memory.

One-Skillet Gooey Pumpkin Cookie Cake


Recipe by: Willow Bird Baking, inspired by Sophistimom and Food Network
Yield: about 8 servings

This melt-in-your-mouth pumpkin spice cake is warm, moist, and delicious. Gooey caramel and toasted pecans amp up the “mmm” factor. And to say it’s easy is an understatement — you can make it in one skillet in about 35 minutes! This is the perfect recipe to whip up on a whim and eat in your PJs on the couch. Devour it straight from the skillet with a pile of ice cream. (P.S. If you don’t care about the number of pots and pans and want to go a little crazy, cut down the sugar a little and try the cake with this amazing caramel sauce.)

Ingredients:
3/4 cup (1 1/2 sticks) unsalted butter
1/4 cup vegetable oil
3/4 cup granulated sugar
1/4 cup firmly packed light brown sugar
1 cup pureed pumpkin
1 teaspoon vanilla extract
2 eggs
2 1/8 cups all-purpose flour
1 teaspoon baking powder
1/2 teaspoon baking soda
1/2 teaspoon salt
2 teaspoons cinnamon
1/2 teaspoon nutmeg
1/2 teaspoon ginger
1/4 teaspoon allspice
some dulce de leche or 10-15 caramels
1/2 cup toasted pecans (optional, see note in directions)

Directions:
Note: The first time I made this cookie cake, I mixed in 1/2 cup of chopped pecans that I’d toasted (on a sheet pan at 350 degrees F for about 6 minutes or until fragrant, stirring a couple of times). The second time I made it, I mixed in this toasted pecan streusel — heavenly! These extra mix-ins will add a bowl and a sheet pan to your prep, but I highly recommend them.

Preheat the oven to 350 degrees F. In a 10- or 12-inch cast iron skillet over medium heat, melt the butter. Stir in the vegetable oil, sugars, and vanilla and remove from heat. Let this mixture cool until the pan is no longer hot (about 5 minutes) so you won’t scramble your eggs.

Add both eggs to the butter mixture, whisking them well to combine. Whisk in the pumpkin. In a separate bowl, whisk together the flour, salt, baking soda, baking powder, cinnamon, nutmeg, ginger, allspice (Note: it’s kind of lame to use another bowl for this, and according to Sophistimom, you should be able to just dump all your dry ingredients on top and whisk them in well, but I was too chicken to try. So I guess this is technically “One-Skillet, One-Bowl” cake if you do it my way. If you just dump them in, please let me know how it goes!) Whisk the dry ingredients into the wet and pour the batter into your skillet.

Stir in the toasted pecans or streusel if you’re using them. Place dollops of dulce de leche or caramel candies around the surface of the batter. Bake your skillet cookie for 15-25* minutes, or until the edges are getting golden and the center is still soft (a toothpick inserted into the center should come out with some moist crumbs, but no liquid batter). Eat immediately (preferably straight out of the skillet!) with heaps of vanilla ice cream (or a fun caramel flavor).

*Depending on your skillet, this cooking time can really vary. I’d start checking at 15 minutes and then check every couple of minutes after that with toothpicks. Make sure to look for moist crumbs, not a clean toothpick. If you overbake, it might be dry!


Recipe before and after tweaking to warm, gooey perfection.

Need a closer look at the final product?


Gooey, caramelly, streuselly, pumpkiny, amazing.

If you liked this post, please:
Subscribe to Willow Bird Baking
Follow Willow Bird Baking on Twitter
Follow Willow Bird Baking on Facebook
Give this post a thumbs up on StumbleUpon
Pin It


ShareOther ways to share this post with friends!

Apple Cinnamon Cream Cupcakes: NOT Back-to-School Cupcakes!

It’s Cupcake Week on Willow Bird Baking! Cupcake Capers was a 5-day summer camp I conducted last week wherein 5 middle school girls learned to bake, fill, and frost cupcakes. We eschewed pedestrian cupcake flavors in favor of creative combinations that I now get to share with you! Every day this week I’ve been posting fun memories and recipes from Cupcake Camp.


No really, they’re not Back-to-School Cupcakes.

Like all good things, Cupcake Camp had to eventually come to an end. Day 5 arrived and so did the campers, eager to pack in one last day of cake pops and cupcakes. At the end of the day they would finally carry home their aprons, recipe notebooks, and colorful bakery boxes filled with the cupcakes we’d made all week (the ones they hadn’t already devoured, that is) to share with their families.

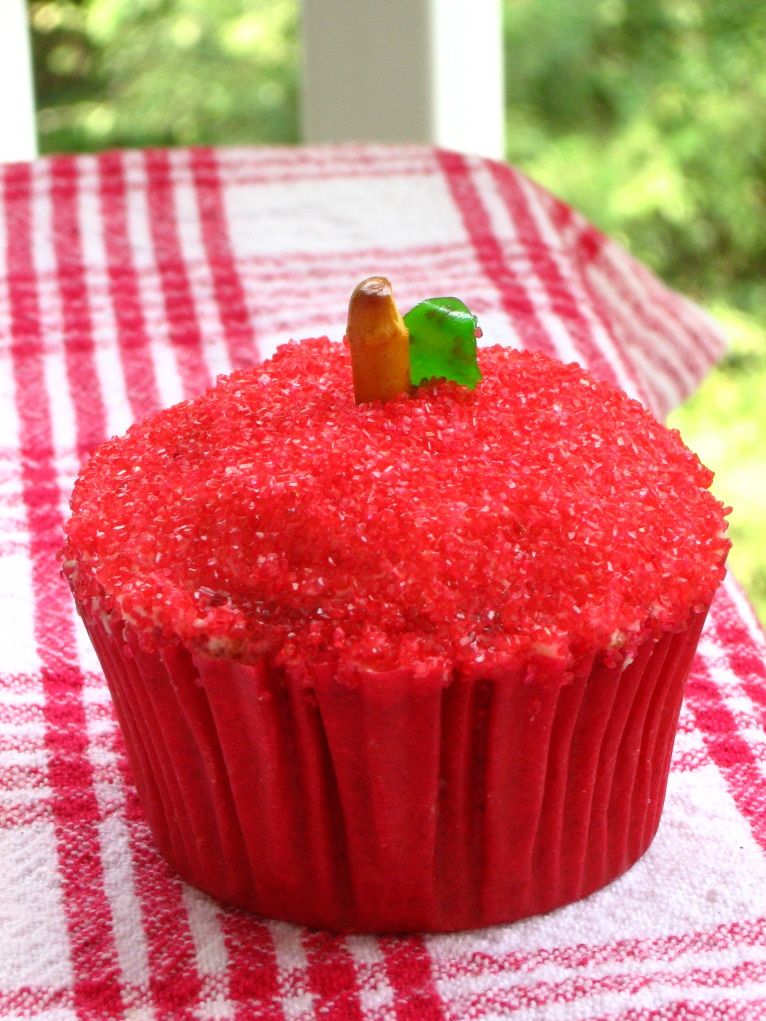
But first, we sat down to complete the cutest decorating job of the week: turning cupcakes into apples! We baked these apple cupcakes in bright red liners to begin creating the effect. Once they were cooled and frosted, we dipped the tops in red sanding sugar, used bits of pretzel for their “stems,” and cut “leaves” from green fruit roll-ups.

These cupcakes weren’t just adorable, though — they were also one of the girls’ favorite recipes all week long. The spice cake, creamy cinnamon mousse, and brown sugar buttercream frosting melded into a delicious preview of fall flavors. Bright smiles broke out all around as the campers first tasted one of their “apples.” Even though they had already ranked their favorite cupcakes, several of them went back and added Apple Cinnamon Cream Cupcakes right at the top of their lists!

After tasting, we sat back and admired our handiwork. Meticulous Mary Rood made the comment that these looked like Back-to-School cupcakes. She’s right, of course. Isn’t it funny how just as soon as August peeks around the corner, stores everywhere roll out the red plaid, apples, mini chalkboards, and school supplies in an array of primary colors? These cupcakes fit right in.

Her comment sunk in for a moment before our summer spirit rebelled. We still have a few weeks of freedom! The temperature still climbs to 100 degrees each day! We still have beach trips, pool trips, and sprints through the sprinkler planned!

I don’t care what the stores might have you believe, it’s still SUMMER! We’ll go back to school when our parents drag us, kicking and screaming, and not one second before!

(Okay, I guess I can’t quite wait until my parents drag me . . . )

So these may look like Back-to-School cupcakes. They may taste like Back-to-School cupcakes. I may have gotten carried away and photographed them surrounded by a bunch of the brightly colored school supplies I just made fun of.

But these are NOT Back-to-School cupcakes. These are IT’S-STILL-SUMMER-AND-I-DON’T-CARE-WHAT-YOU-SAY-LA-LA-LA cupcakes.

Now that we’re clear on that, you should go make them and eat about twenty.

What summer plans do you still have to accomplish before summer ends? Or, for readers on the tail end of winter, what exciting things do you have lined up for the spring?

Apple Cinnamon Cream Cupcakes


Recipe by: adapted from Baked Bree
Yields:about 24-28 cupcakes

Cupcake Ingredients:
2 cups flour
2 teaspoons ground cinnamon
1 teaspoon baking soda
3/4 teaspoon salt
1/2 teaspoon fresh nutmeg
1/8 teaspoon ground cloves
2 sticks butter at room temperature
1 cup sugar
1/2 cups brown sugar
4 large eggs
1 1/2 cups applesauce
1 cup toasted pecans, chopped (optional)

Cinnamon Mousse Ingredients:
1 cup milk
1 cup heavy cream
1 (4 serving) package vanilla Instant Pudding Mix (not Cook & Serve)
1 1/2 teaspoons cinnamon
3/4 teaspoon nutmeg

Brown Sugar Buttercream Frosting Ingredients:
1 stick room temperature butter
1/4 cup shortening
1/3 cup brown sugar
1/2 teaspoon cinnamon
3 cups of powdered sugar (depends on consistency desired)
3 tablespoons of heavy cream (depends on consistency desired)

Directions:
*Note: This recipe makes twice as much mousse as you need for filling the cupcakes. If you want to use half the pudding pack and save the rest for later, just measure it out and do so. Or use the extra mousse for another project (you know, like eating it with a spoon).

Make cupcakes: Line two muffin tins with paper liners. Preheat oven to 350°F. In a medium bowl, whisk together dry ingredients. In a separate, large bowl, cream together butter, sugar, and brown sugar until light and fluffy (several minutes). Add the eggs in one at a time, beating after each addition, and then mix in the applesauce. Finally, mix in the dry ingredients until just combined.

Fill each cupcake liner about 3/4 full of batter. Bake for 15-20 minutes and let cool completely.

Make mousse: To make the cinnamon mousse, combine milk, cream, and pudding mix, and spices in a medium bowl. Beat with a mixer until you reach soft peaks, or a thick whipped cream consistency (this takes a few minutes). Refrigerate mousse until you’re ready to use it.

Make frosting: To make the frosting, beat butter and shortening together until light and fluffy. Add the brown sugar and cinnamon and mix. Gradually add the powdered sugar, 1/2 cup at a time, and alternately add the cream. Adjust these items until desired consistency is reached.

Assemble cupcakes: To fill the cupcakes, use the Cone Method: cut an upside-down cone out of the top of each one. Cut off the tip of the cone (and eat it, if you wish) leaving just the “lid.” Fill the cavity with mousse using a piping bag or zip-top bag with the corner cut off, and then replace the “lid” to give you a relatively smooth surface to frost. Don’t overfill these, or they’ll be hard to frost.

Use the back of a spoon, a knife, or an offset spatula to cover the cupcakes with a layer of frosting. To ensure you don’t accidentally shift your “lid,” use a pretty thick layer of frosting and just gently pull it out toward the sides of the cupcake to achieve full coverage — that way you’re never pulling your spoon/spatula straight up and pulling the lid off. Dip frosted cupcakes into a bowl of red sanding sugar or sprinkles. Add a piece of a pretzel stick for a stem. Add a leaf cut from a green fruit roll up (I made a little indentation in my frosting with the tip of a knife to stick the tip of the leaf into). Enjoy!

All Cupcake Week Recipes:
Day One: Chocolate Pistachio Cream Cupcakes
Day Two: Banana Split Cupcakes and Cake Pops
Day Three: Creamsicle Cupcakes
Day Four: Strawberry & Cream Cupcakes and Cake Pops
Day Five: Apple Cinnamon Cream Cupcakes

If you liked this post, please:
Subscribe to Willow Bird Baking
Follow Willow Bird Baking on Twitter
Follow Willow Bird Baking on Facebook
Give this post a thumbs up on StumbleUpon


ShareOther ways to share this post with friends!

Browned Butter Pumpkin Croquemcake with White Chocolate Chai Mousse (Project Food Blog Round 8!)

Because of YOU, Willow Bird Baking is one of only 24 blogs in Project Food Blog Round 8! I am so beyond grateful for your support and love throughout this process. Challenge #8 was to create a baked good using pumpkin. VOTING IS NOW OPEN! (Thank you for voting! Voting is now closed.) I’d love it if you’d pop over to cast a vote for me by clicking “Vote for this Entry” here. Thank you all!!

I am basically an architect. I know some folks who worked through countless hours of pesky schoolwork to call themselves architects and may disagree with me. But I think I have enough experience to go ahead and claim the title.

See, in 6th grade, my classmates and I were divided into teams and charged with a task of monumental proportions. We were to engineer a bridge out of toothpicks, string, and glue. Each of these “resources” was assigned a cost, and we were given a budget of imaginary money with which to purchase supplies. The team whose bridge could hold the most weight at the end of the competition would win epic bragging rights.


Moist, amazing Browned Butter Pumpkin Cake!

We must have been hyped up on marshmallowy breakfast cereal or something, because as soon as the teachers said GO, it was on.

We were ruthless. We pasted, chopped, measured, quarreled, budgeted, collaborated, and in a move that I’m still not sure was entirely legal, pilfered cast-off supplies from the trash can. Hey, we were just being green, right? Nowadays we’d obtain a high L.E.E.D. certification and get a pat on the back. I’m sure my teachers would’ve seen it that way . . .

I remember waxing intellectual about the structural integrity of domes, lecturing a classmate on how strong the ends of an egg were for this reason. Another peer gave an impromptu diatribe on the virtues of suspension bridges. We ended up with some sort of Frankesteinian hybrid, a bridge held up by suspension and bulky domes underneath. We were still furiously glopping on excess glue in hopes of bolstering the bridge’s integrity when the teachers called time.

We watched breathlessly as the teacher judging the competition picked up a thin book and placed it on our bridge. It held. Another volume was snapped up into her fingers and laid gingerly on our opponents’ bridge. It held.

One by one, she stacked books on top of our lopsided, aesthetically wreck-tastic but apparently strong-as-an-ox toothpick bridge. Every book our bridge held was matched by one on our opponent’s bridge — until the teacher picked up two textbooks. Ours held under the weight. Our opponents’ bridge collapsed — and so did we: we collapsed into cheers and giggles, inebriated with victory. We had done it! We were brilliant engineers! We had won!


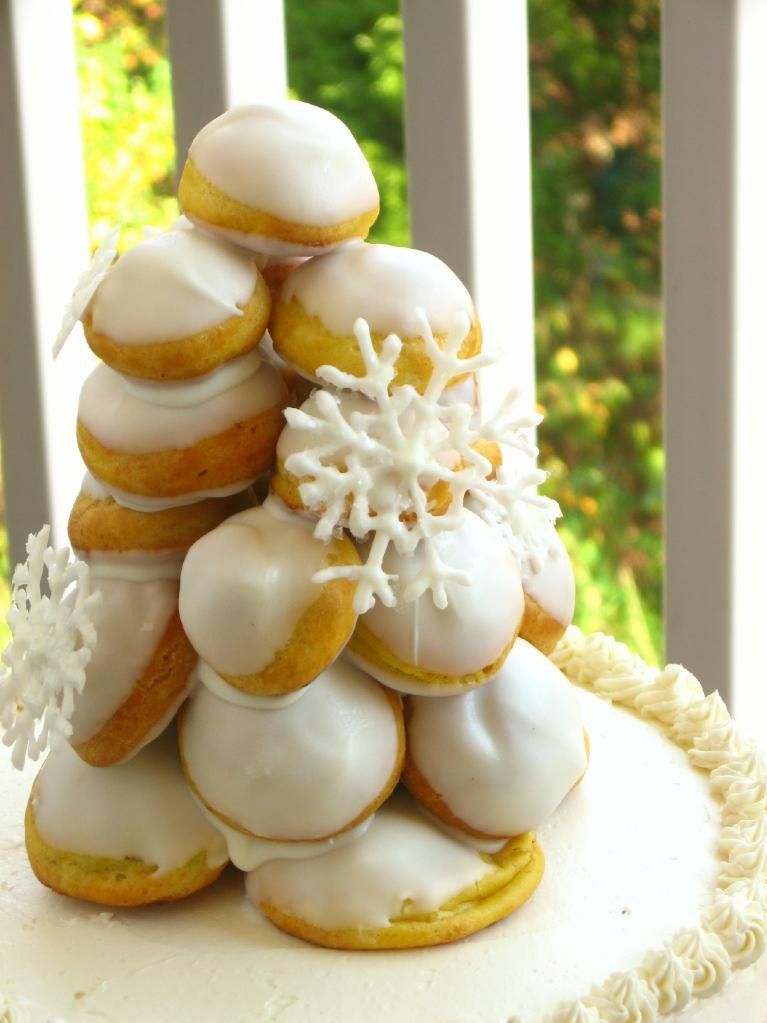
Pumpkin profiteroles — with pumpkin in the choux dough itself — were filled alternately with White Chocolate Chai Mousse and ganache.

As the crowd thinned, we stood around and stared in wonder at our messy little Golden Gate. My friend Ashley was not yet satisfied. Sure, our bridge was stronger than the other team’s, but just how strong? With her hands on teammates’ shoulders for balance, Ashley stepped — first one foot, and then the other — onto the bridge.

It held.

I’ll never forget that moment standing in front of my elementary school, seeing Ashley’s huge grin, relishing the easy pulse of victory through our already-marshmallow-filled veins. So, yeah, I’m basically an architect. Right?

At least, it was this (misguided?) confidence that led me to believe that I could construct what I’ve officially dubbed the croquemcake.

I wanted to pull out all the stops for Project Food Blog Round 8 (do I say that every round? It’s definitely true every round!) The challenge was to create a baked good using pumpkin, and I was torn between building pumpkin profiteroles (made from pâte à choux) into a lovely croquembouche (mounted cream puff tower) or baking a pumpkin chai cake. Suddenly, it hit me. When in doubt, do both.


I may or may not have tweeted my desire to bathe in luxurious Swiss buttercream.

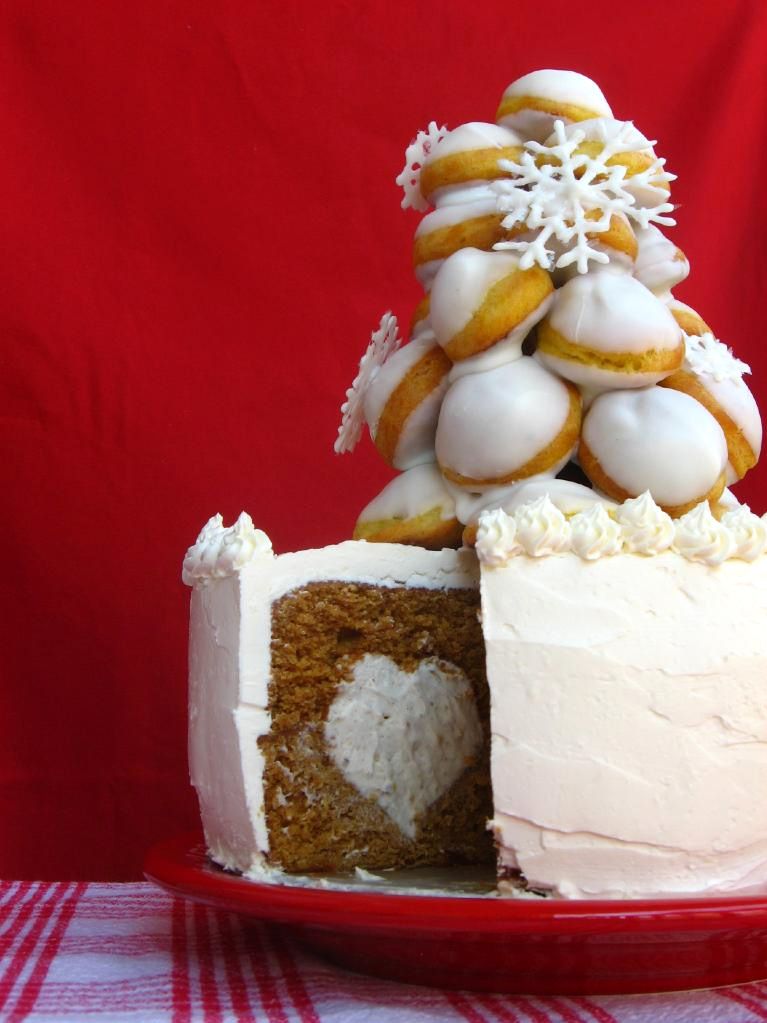
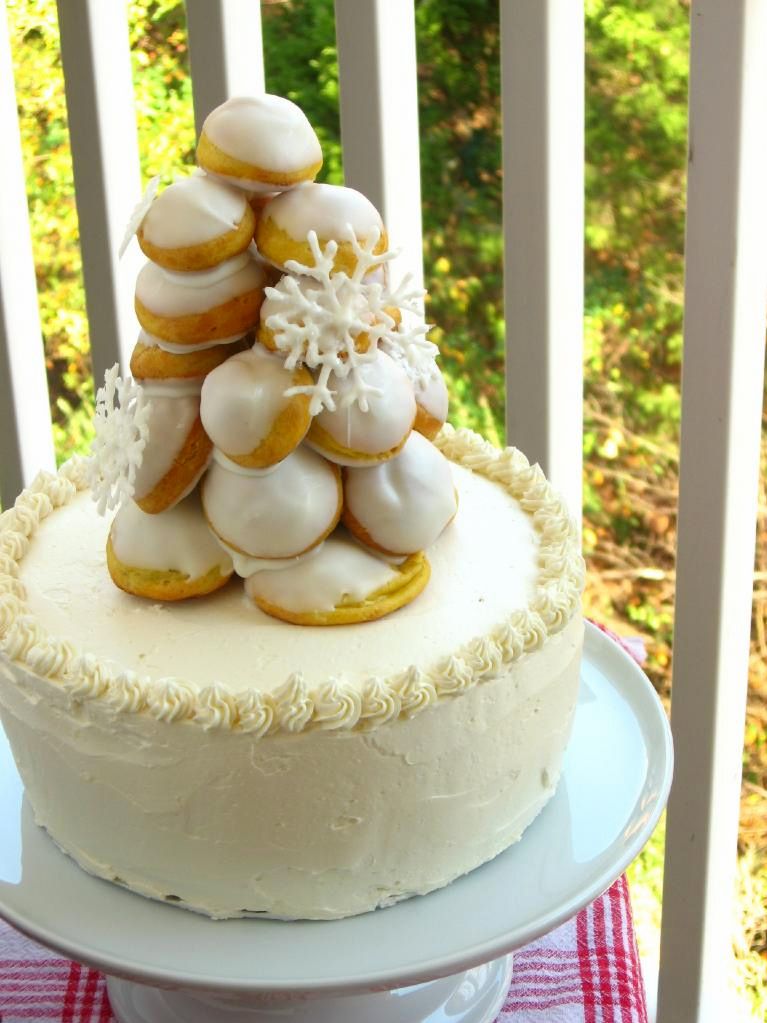
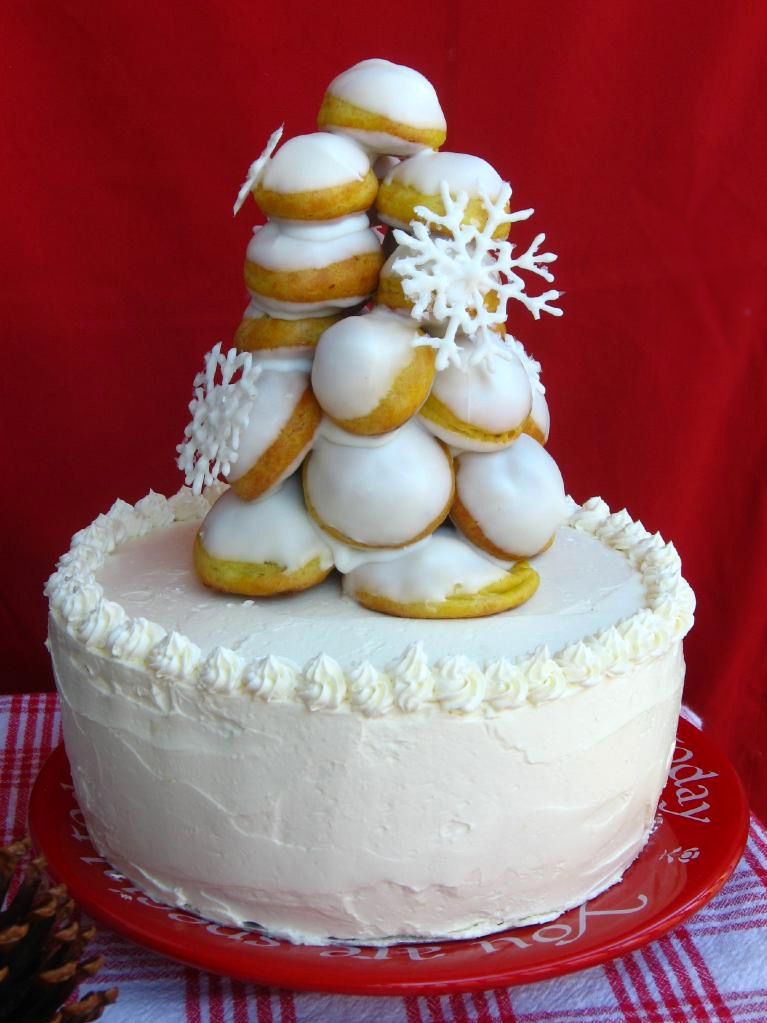
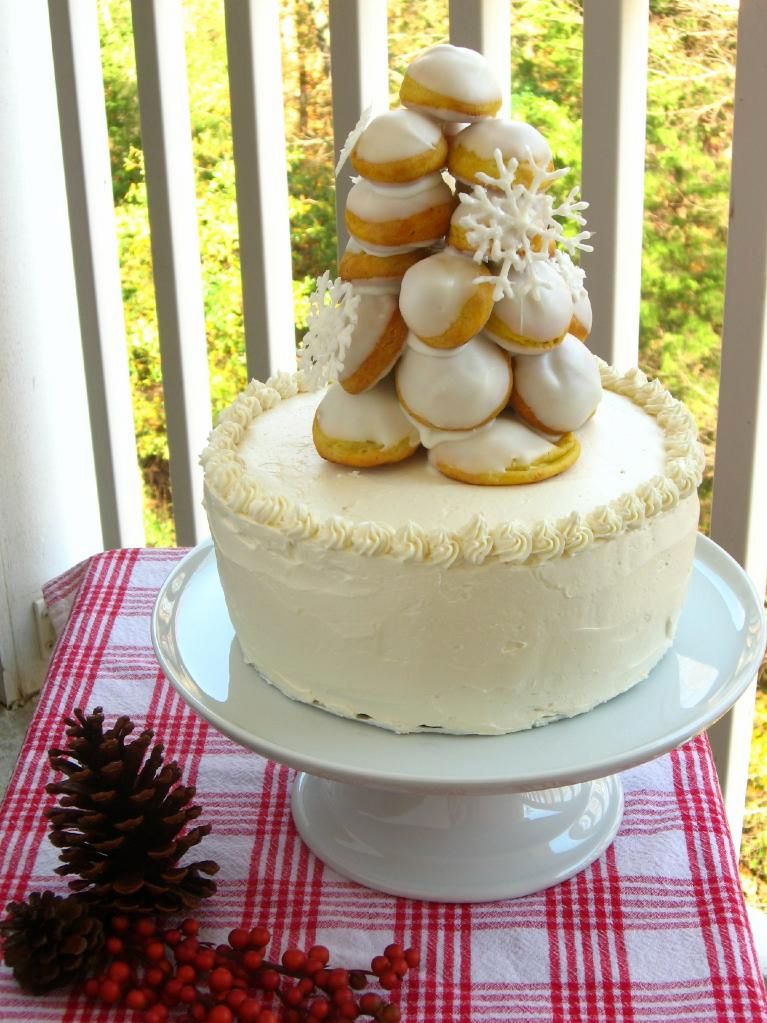
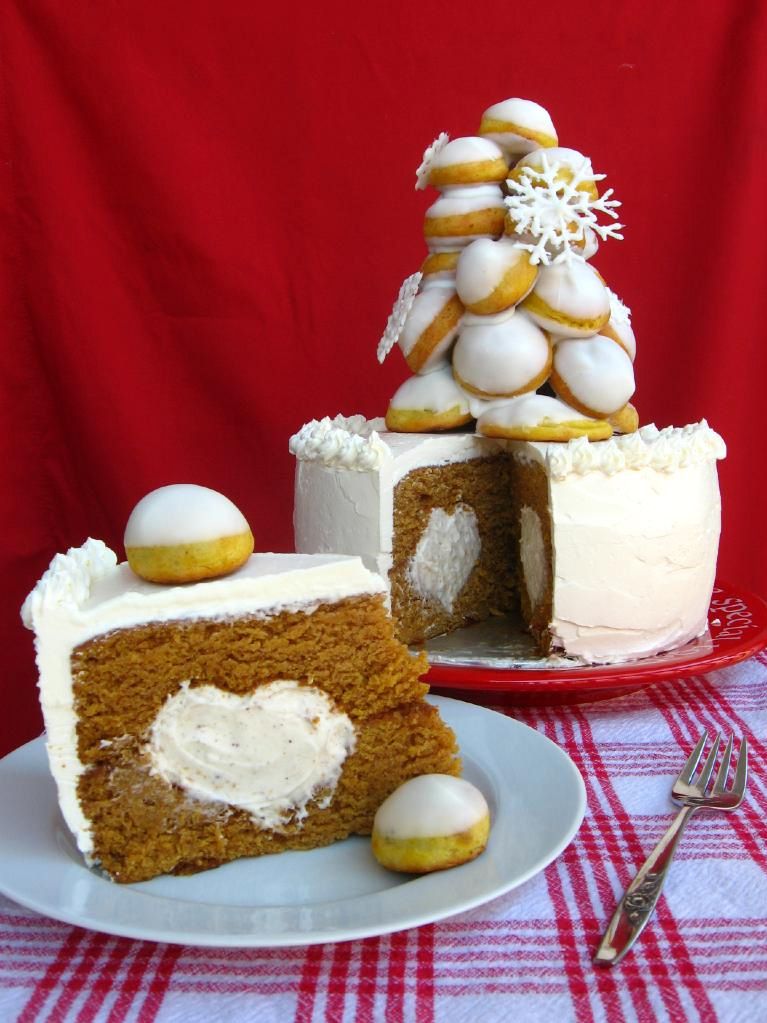
Thus, the croquemcake was born: a browned butter pumpkin cake filled with a comforting white chocolate chai mousse heart, frosted with velveteen Swiss buttercream frosting, and topped with a croquembouche of pumpkin profiteroles filled with chai mousse and ganache. The cake is served in slices accompanied by a few plucked cream puffs, and is essentially the embodiment of all things autumn.

At first I was panicky about trying to stack a tall, leany thing on top of a tall, frosted thing, but it turned out to be super easy, and it produced a ravishing effect.


The White Chocolate Chai Mousse is incredamazing, y’all. Even if you put off making the whole shebang until Christmas, you should make some bowls o’ mousse ASAP!

. . . oh, and it just might be my new favorite dessert ever. Every bite had an insanely satisfying combination of textures and flavors. This beautiful croquemcake would be the rockstar of any holiday table.

Don’t be scared of the length of the recipe. True to Willow Bird Baking’s mission, this dessert is also surprisingly easy to make. Let me qualify that: it takes three days and has tons of steps, but the steps themselves are simple and manageable. Use my note below on timing to space out the recipe steps into manageable chunks. It is so worth the effort.

What’s your favorite childhood memory?

Browned Butter Pumpkin CroquemCAKE with White Chocolate Chai Mousse


Recipe by: Willow Bird Baking, compiled and adapted from sources including Fine Cooking, Annie’s Eats, America’s Test Kitchen, Cookin’ Canuck, Martha Stewart, Gina DePalma, Alone and Unobserved
Yields: 15-20 servings, depending on your size o’ cake slices. You’ll have the topping croquembouche plus about 30 other cream puffs to serve alongside.

Pumpkin Puree Ingredients: (or use canned pumpkin puree)
about 7 pounds worth of sugar pumpkins (or pie pumpkins)
2-3 cups water

Browned Butter Pumpkin Cake Ingredients:
1 1/2 cups of your pumpkin puree
3/4 cup unsalted butter; more for the pans
2 cups unbleached all-purpose flour; more for the pans
1 1/2 teaspoon baking soda
1 1/2 teaspoon ground cinnamon
1 teaspoon ground ginger
3/4 teaspoon table salt
1/4 teaspoon ground cloves
1 1/2 cups granulated sugar
2/3 cup firmly packed light brown sugar
2 large eggs
1/3 cup buttermilk

White Chocolate Chai Mousse Ingredients: (I had a lot of leftover mousse; you could probably get by with 2/3 of this recipe)
2 1/4 teaspoons powdered gelatin
3 tablespoons water
18 ounces white chocolate chips (see note)
4 1/2 cups cold heavy cream
heaping 1/2 teaspoon ground cinnamon
heaping 1/2 teaspoon ground cardamom
1/4 teaspoon ground nutmeg
1/4 teaspoon ground ginger
1/4 teaspoon ground allspice
1/4 teaspoon ground pepper (white or black)
dash cayenne powder

Swiss Buttercream Frosting Ingredients:
1 cup sugar
4 large egg whites , at room temperature
24 tablespoons (3 sticks) unsalted butter, at room temperature
2 teaspoon vanilla extract

Profiterole (Cream Puff) Ingredients:
1 1/8 cups water
9 tablespoons unsalted butter
3/8 teaspoons salt
1.5 tablespoons sugar
1.5 cups all-purpose flour
6 large eggs
3/4 cup pumpkin puree
Egg wash (1 egg yolk and 1/2 cup heavy cream, lightly beaten)

Ganache Ingredients:
10 ounces bittersweet and semisweet chocolate chips
3/4 cup heavy whipping cream


Directions:
Note on timing: This dessert is easy to create, but involves many steps. For this reason, I divided the work over three days. On day 1, I roasted and pureed my pumpkins (you can nix this day if you use canned pumpkin). On day 2, I baked my cake and froze it, baked my profiteroles and froze them, and made my chai mousse. I also piped out white chocolate snowflake decorations to dry overnight. On day 3, I made my frosting, assembled and frosted my cake, made ganache, filled my profiteroles, and constructed my croquembouche.

To make pumpkin puree: Preheat oven to 350 degrees F. Cut the tops off of above 7 pounds worth of sugar pumpkins (also called pie pumpkins). Cut the pumpkins in half and scrape out the seeds and innards. Place the pumpkin halves peel-up, cut-side-down in a baking dish and fill the dish 1/4 inch deep with water (about 2-3 cups). Roast pumpkins for 60-90 minutes, or until flesh is fork tender. Allow them to cool for a bit before scooping all flesh out of the peel and placing it in a food processor. Puree for 2-3 minutes until completely pureed, then drain in a paper towel-lined colander for about an hour. Store your pumpkin puree in the fridge for up to 5 days or freeze it in 1-cup increments for later use. Alternatively, you can use canned pumpkin puree for this recipe.

To make browned butter pumpkin cake: I baked my cake in a pan that allows you to fill your cake with a heart-shaped tunnel of mousse (please comment if you’d like the details). If you don’t have one of these pans, you can still create the tunnel effect! You can use this technique by the fabulous Amanda, or this tunnel technique featured previously on my blog.

Preheat oven to 350 degrees F. Butter and flour two cake pans (either the heart-tunnel pan or regular 9-inch cake pans) very thoroughly. Melt the butter in a saucepan over medium heat and cook it, swirling occasionally, until it’s golden brown with a nutty aroma, around 4 minutes. Remove it from heat and pour it into a bowl to cool for about 15 minutes.
Whisk or sift together flour, baking soda, cinnamon, ginger, salt, and cloves in a small bowl. In a separate, large bowl, whisk together 1 1/2 cups of pumpkin puree, granulated sugar, brown sugar, eggs, and buttermilk until well combined. Use a spatula to stir in the dry ingredients until just combined, and then whisk in the browned butter. Pour batter evenly into prepared cake pans.

Bake the cakes until a toothpick inserted in the center comes out with just a few moist crumbs, around 28 minutes. Let cakes cool in their pans until mostly cool before turning them out onto wax paper to wrap and freeze. Freeze at least 30 minutes or until firm.

To make white chocolate chai mousse: Mix spices (cinnamon, cardamom, nutmeg, allspice, ginger, pepper, cayenne) together in a small bowl. Set aside.
Place 3 tablespoons of water in a small bowl and sprinkle the gelatin over top to dissolve and soften for at least 5 minutes. Place white chocolate in a medium bowl. Combine 1 1/2 cups of cream and spice mixture in a saucepan over medium heat and cook until simmering. Remove from heat, add gelatin, and stir to dissolve. Pour gelatin mixture over white chocolate and whisk in small circles until smooth. Cool completely to room temperature, stirring occasionally, around 5 to 8 minutes.

In a separate bowl, beat remaining cream to soft peaks. Use a whisk to fold about 1/3 of the whipped cream into white chocolate mixture to lighten. Then fold the rest of the whipped cream in until no streaks remain. Refrigerate your mousse until set, then stir slightly to break up before using.

To make profiteroles: Combine water, butter, salt and sugar in a saucepan over medium heat. Bring to a boil and stir occasionally. At boil, remove from heat and sift in the flour, stirring to combine completely.

Return to heat and cook, stirring constantly until the batter dries slightly and begins to pull away from the sides of the pan. Transfer to a bowl and stir with a wooden spoon 1 minute to cool slightly.

Add 1 egg. The batter will appear loose and shiny. As you stir, the batter will become dry-looking like lightly buttered mashed potatoes. It is at this point that you will add in the next egg. Repeat until you have incorporated all the eggs. Stir in pumpkin puree.

Pipe the batter using a pastry bag and a plain tip. Pipe choux about 1 inch-part in the baking sheets. Choux should be about 1 inch high about 1 inch wide. Using a clean finger dipped in hot water, gently press down on any tips that have formed on the top of choux when piping. You want them to retain their ball shape, but be smoothly curved on top. Brush tops with egg wash while trying not to drip the wash down the puffs onto the pan (which could somewhat inhibit rise).

Bake the choux at 425 degrees F until well-puffed and turning lightly golden in color, about 10 minutes. Lower the temperature to 350 degrees F and continue baking until well-colored and dry, about 20 minutes more. Remove to a rack and cool (tip from a pro: poke each puff with a toothpick while cooling to release the steam inside. It shouldn’t cause your cream to leak, but will help the puffs stay crisp). Can be stored in a airtight box overnight, but I recommend, if you aren’t using them right away to create your croquembouche, that you freeze them. When you’re ready to use them, bake them at 350 degrees F for 5-6 minutes to refresh and recrisp them.

To make ganache: Bring the cream to a simmer in a medium saucepan (or just stick it in the microwave for 2 minutes in a microwave-safe bowl). Place the chocolate in a medium bowl. Once the cream reaches a simmer, pour the cream over the chocolate and let stand 1-2 minutes. Whisk in small circles until a smooth ganache has formed. Let ganache stand at room temperature until fully cooled, then whip to frosting-like consistency for piping into cooled profiteroles.

To make Swiss buttercream frosting: Combine sugar and 1/2 cup water in a small saucepan and bring to a boil over medium-high heat, stirring to dissolve sugar. Boil without stirring until syrup reaches 240° on a digital thermometer, about 5 minutes.

Meanwhile, in a stand mixer with whisk attachment, beat egg whites on medium-high speed until soft peaks form. With mixer on medium speed, gradually pour in hot syrup in a thin stream; avoid pouring syrup on whisk. Increase speed to medium-high and beat until stiff peaks form and mixture is cool, about 8 minutes. Reduce speed to medium and add butter 1 tablespoon at a time, beating after each addition. (If at any time buttercream appears curdled, beat on high until smooth, then reduce speed to medium and continue beating in butter.) Once all butter is added, beat on high speed until buttercream is smooth and fluffy, about 1 minute. Beat in vanilla extract.

To assemble your cake: Line up cake layers and trim sides as needed with a long serrated knife. No need to thaw before you do this — it’s actually easier with frozen layers. Spoon white chocolate chai mousse into heart-shaped wells in your cake layers (if applicable — or spoon it into whatever shaped cavity you’re using). Carefully position the top layer on the bottom. Apply a thin coating of frosting all over as a “crumb coat” and refrigerate the cake for a half hour or so. Then frost the cake generously with the remaining frosting.

To assemble your croquembouche: Fill cooled profiteroles with leftover chai mousse and ganache as desired. Melt white chocolate bark and dip tops of each profiterole into the chocolate, lining up on wax paper to dry. Cover a plate with wax paper — this is where you’ll build your croquembouche. Start with bigger, broader profiteroles and use the white chocolate as “glue” to piece together a sturdy base. I refrigerate my croquembouche after the construction of each new layer, to harden the chocolate and avoid any toppling incidents! Continue building a cone, fitting the profiteroles together according to their shape. Use white chocolate to pipe snowflakes on wax paper, and to “glue” them onto your croquembouche once they’re dry. Refrigerate your croquembouche until you’re ready to assemble your final product.

To assemble your final croquemCAKE: Carefully ensure that your croquembouche isn’t sticking to your wax paper. Gently lift it onto the center of your cake. Surround your cake with leftover cream puffs for serving. Enjoy!


Roasting pumpkins! While there’s not a huge taste difference from using this process versus the canned stuff, it’s a fun, satisfying thing to try!

If you liked this post, please:
Subscribe to Willow Bird Baking
Follow Willow Bird Baking on Twitter
Follow Willow Bird Baking on Facebook
Give this post a thumbs up on StumbleUpon


ShareOther ways to share this post with friends!

1 5 6 7 8 9