savory

Winter Breakfast Chili Over Eggs in Sourdough Bowls


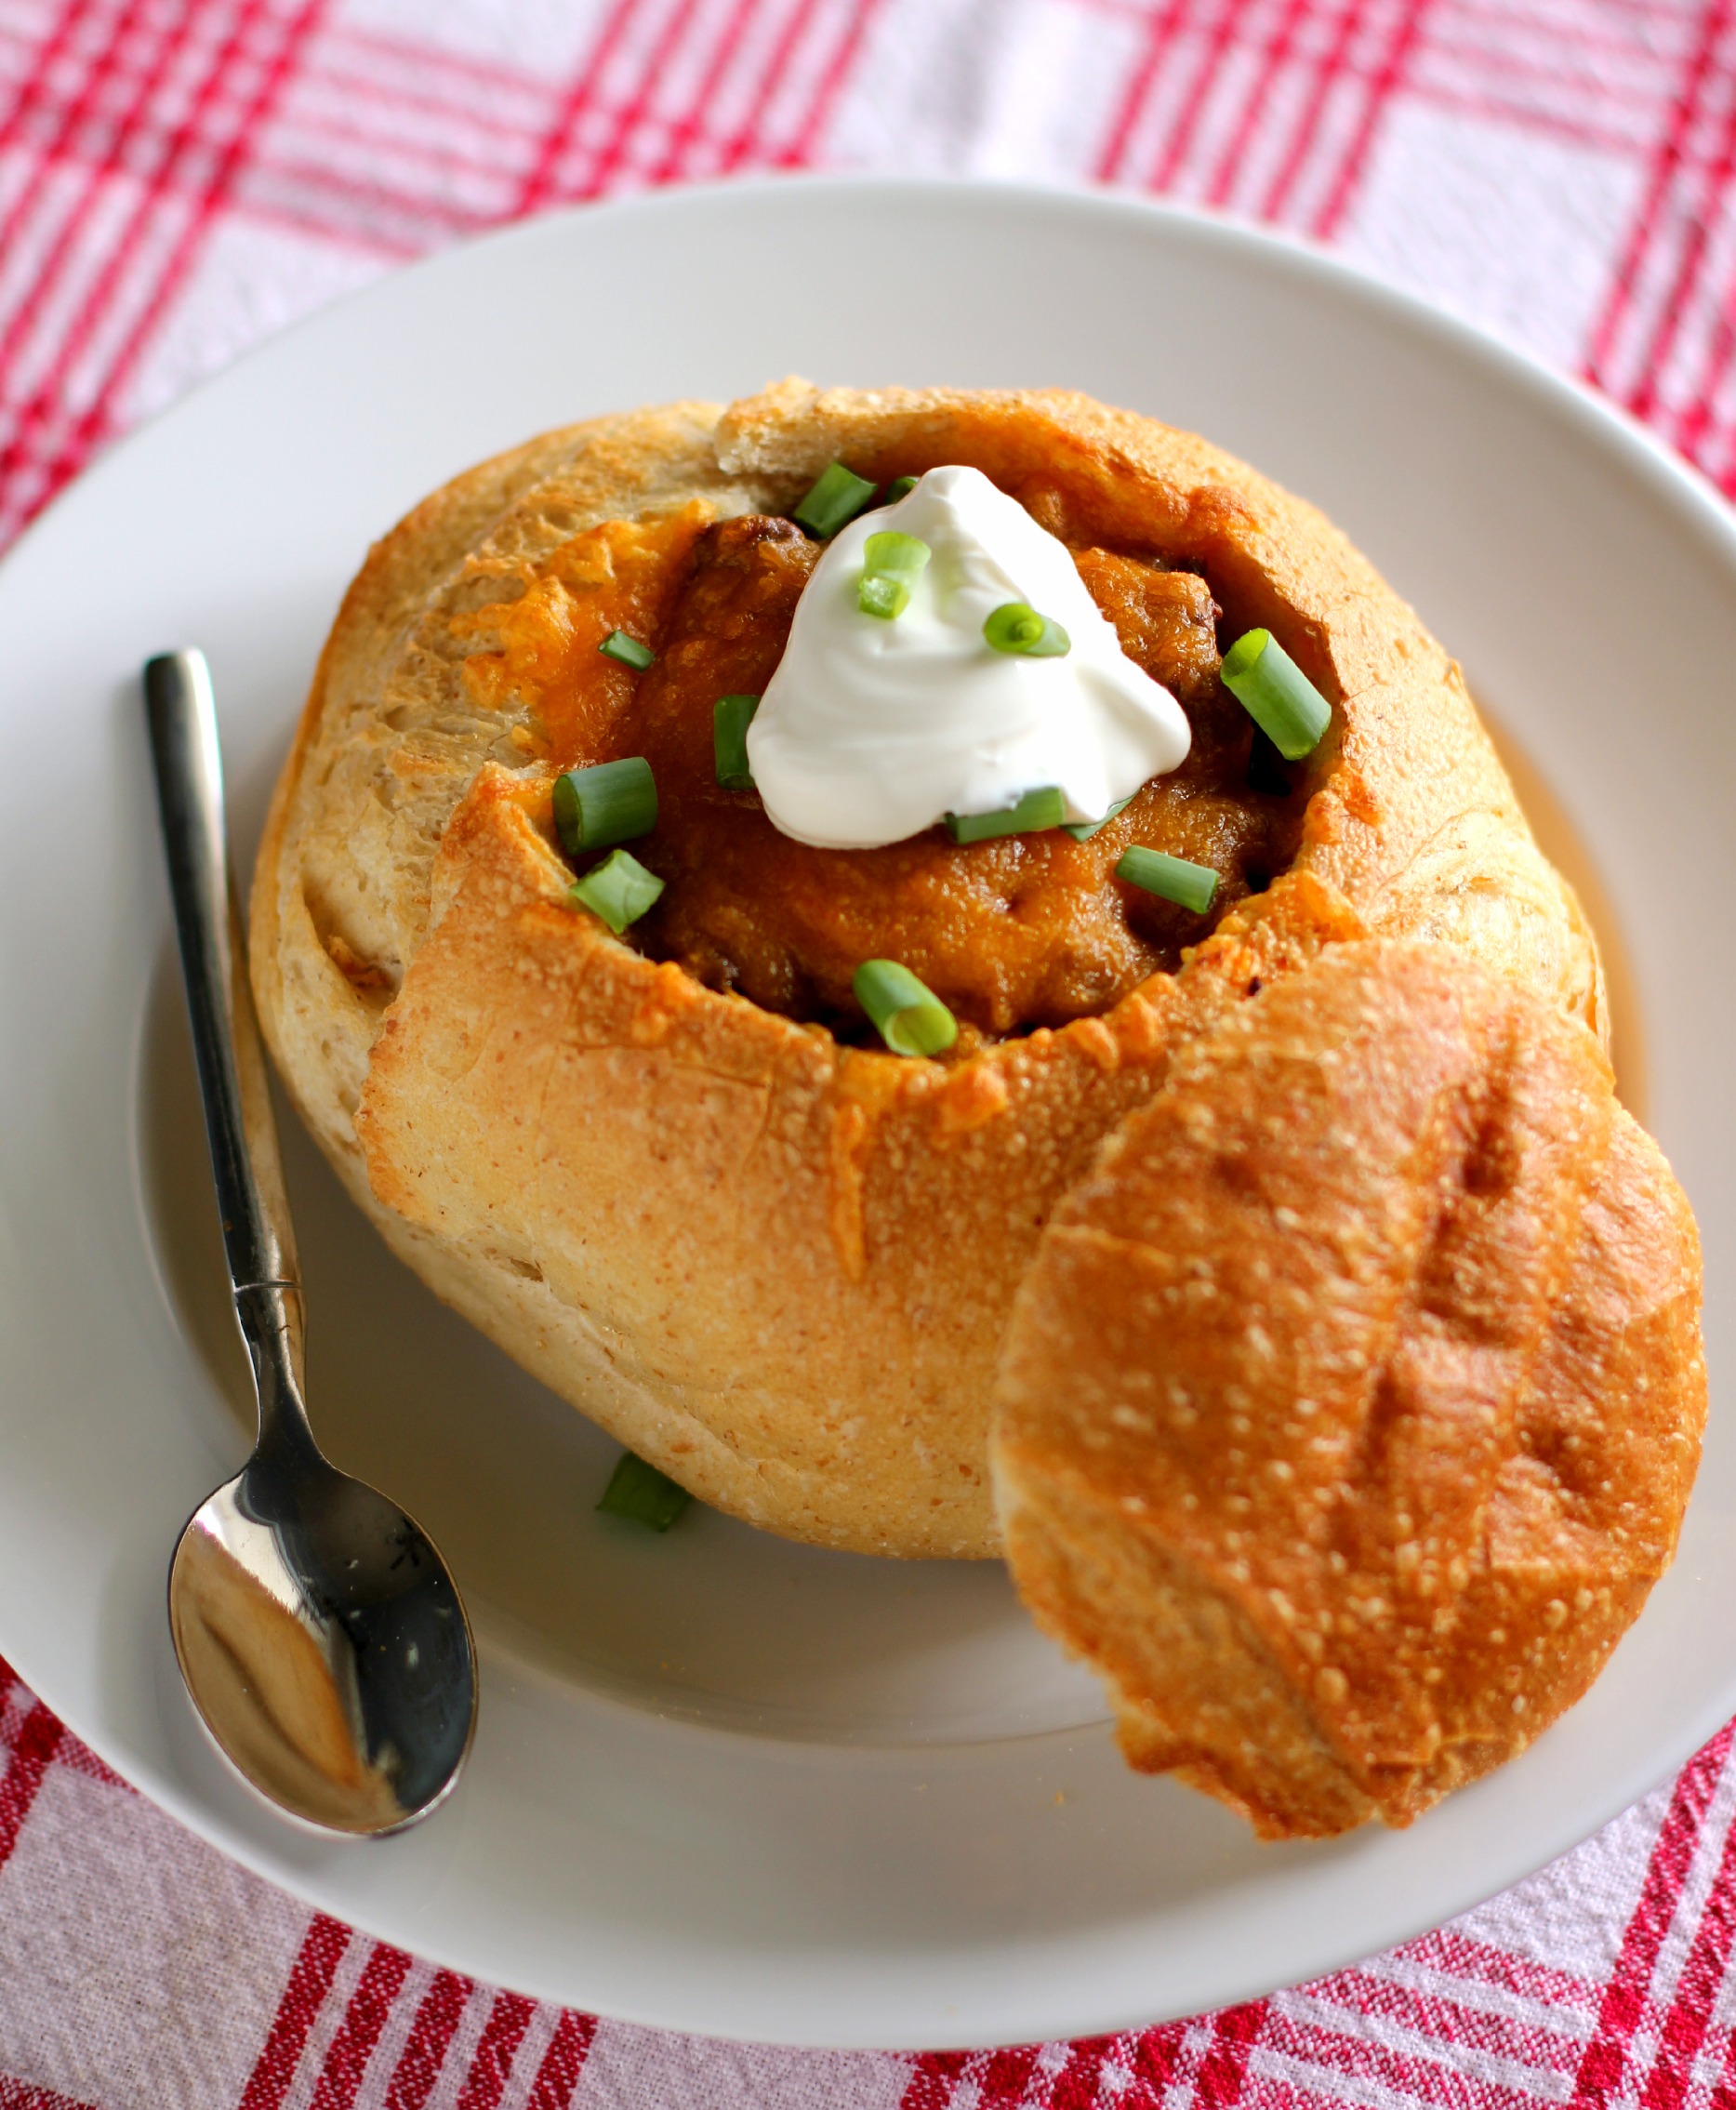
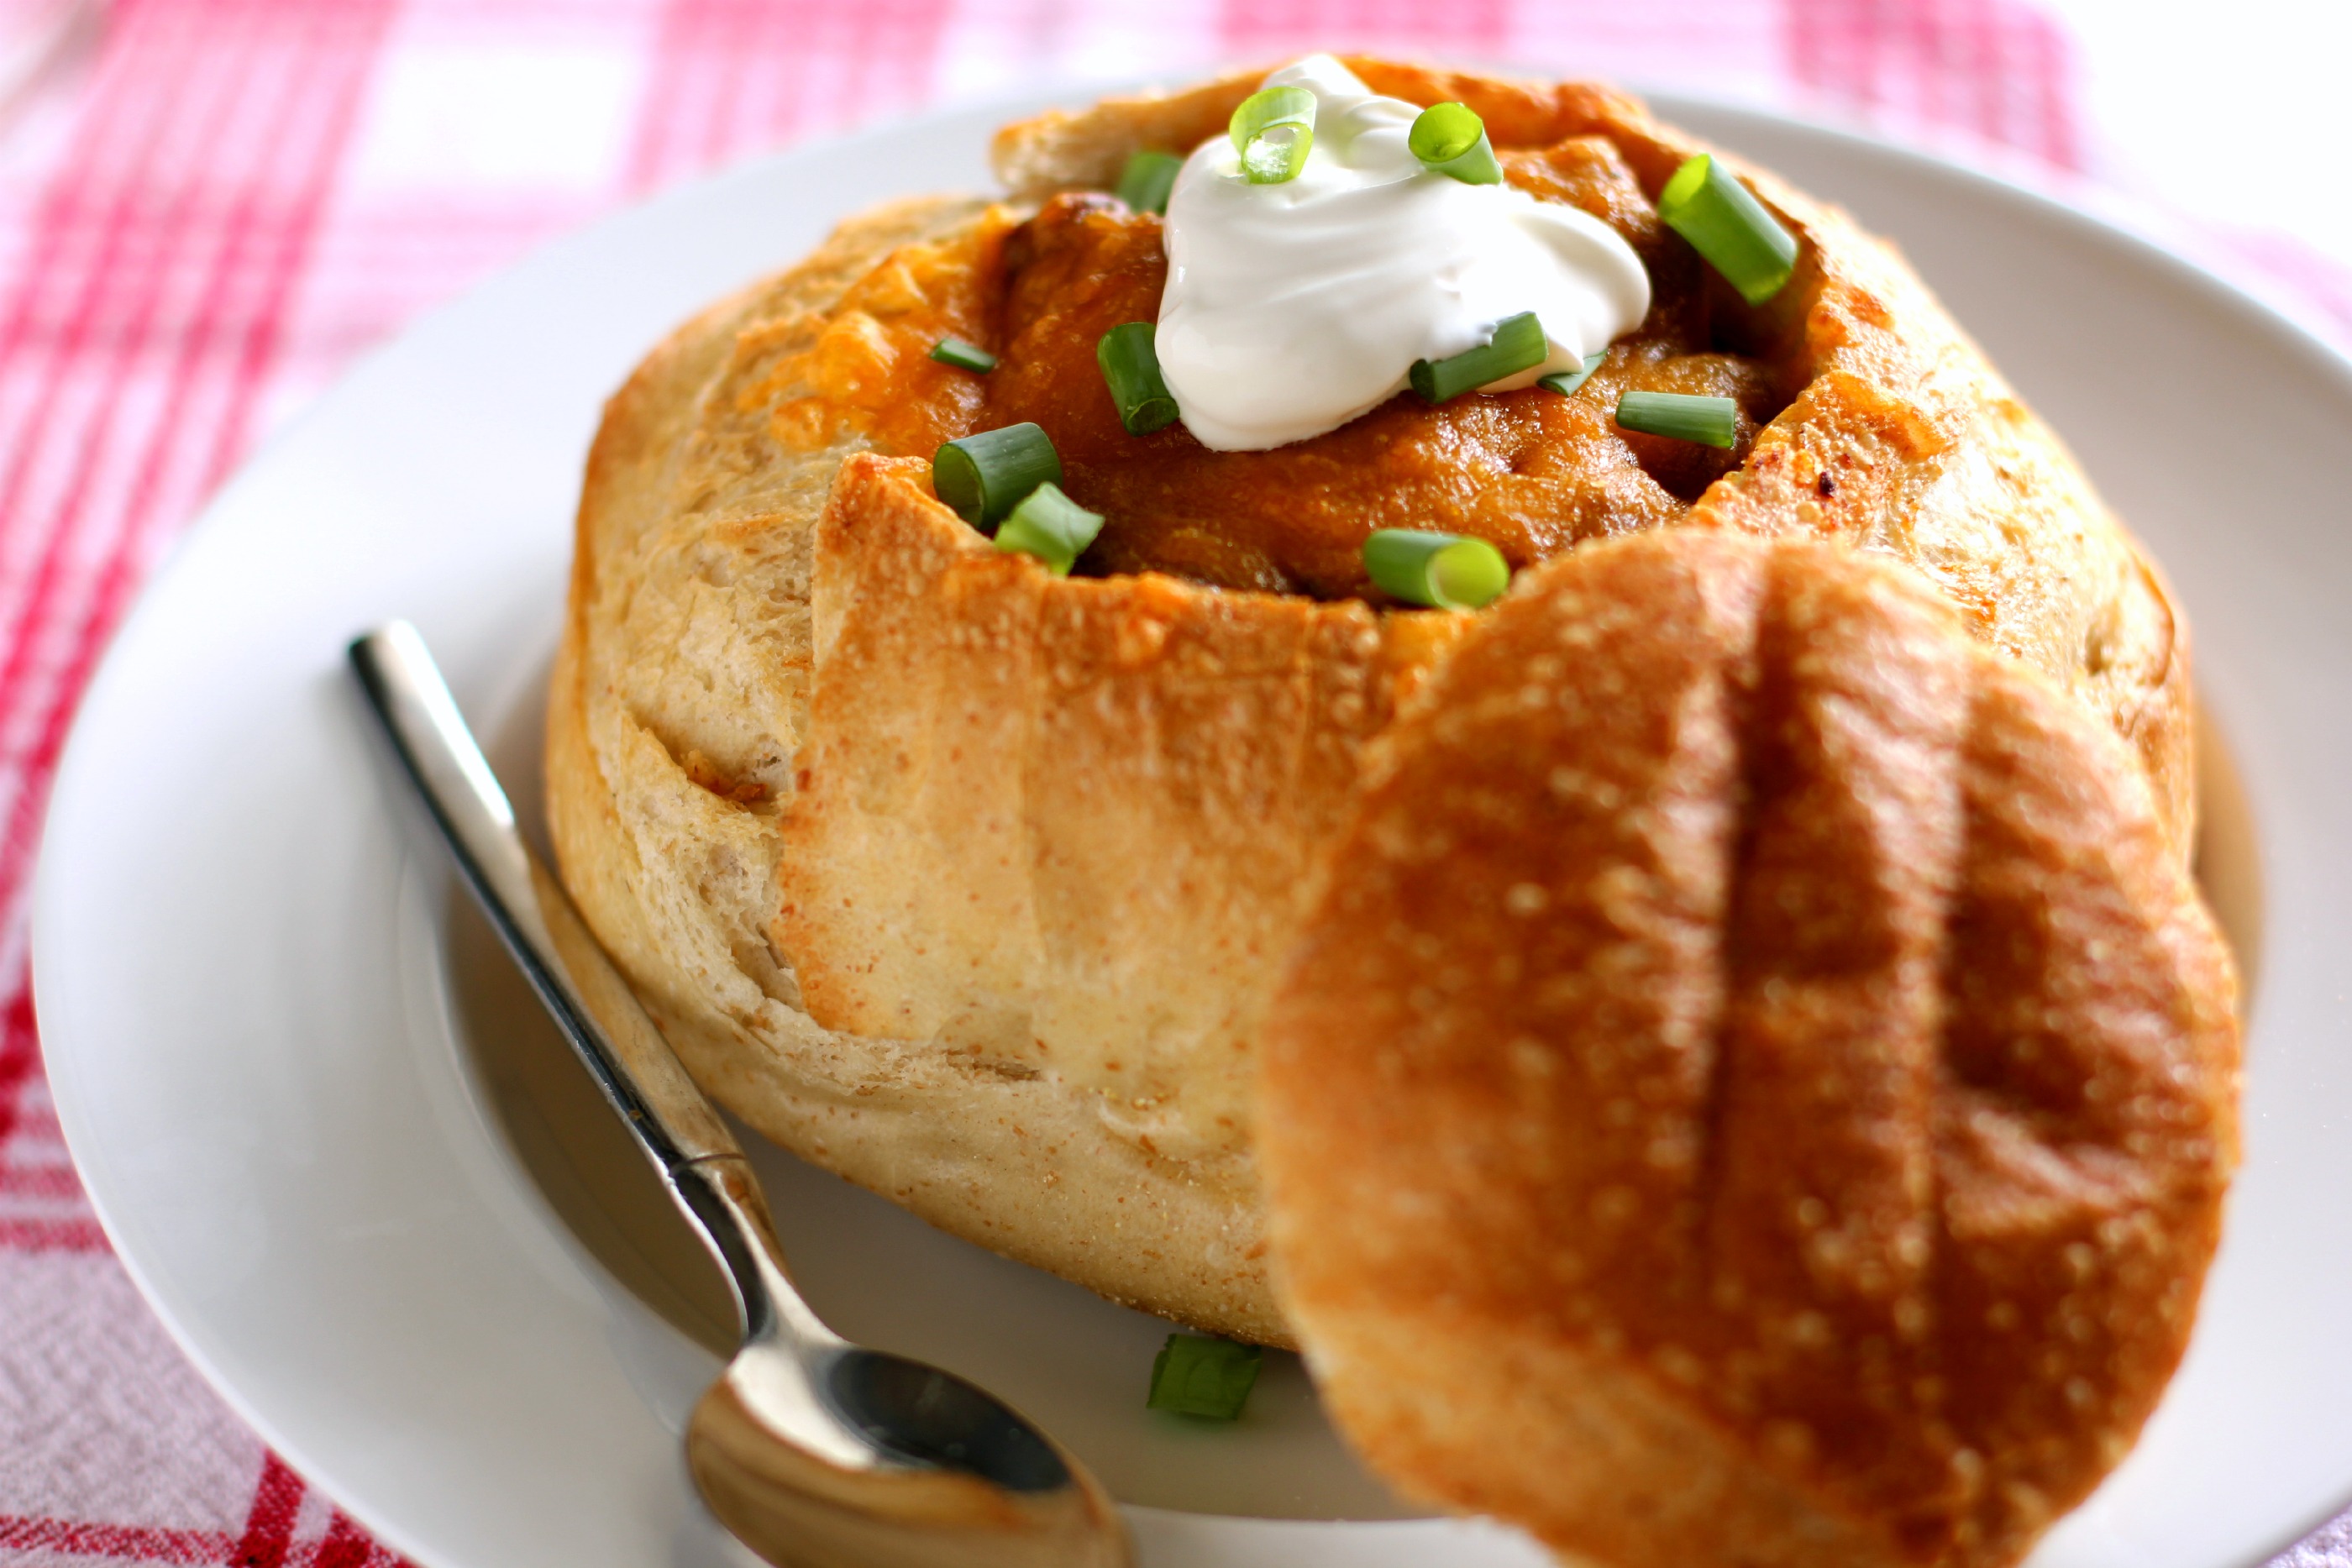
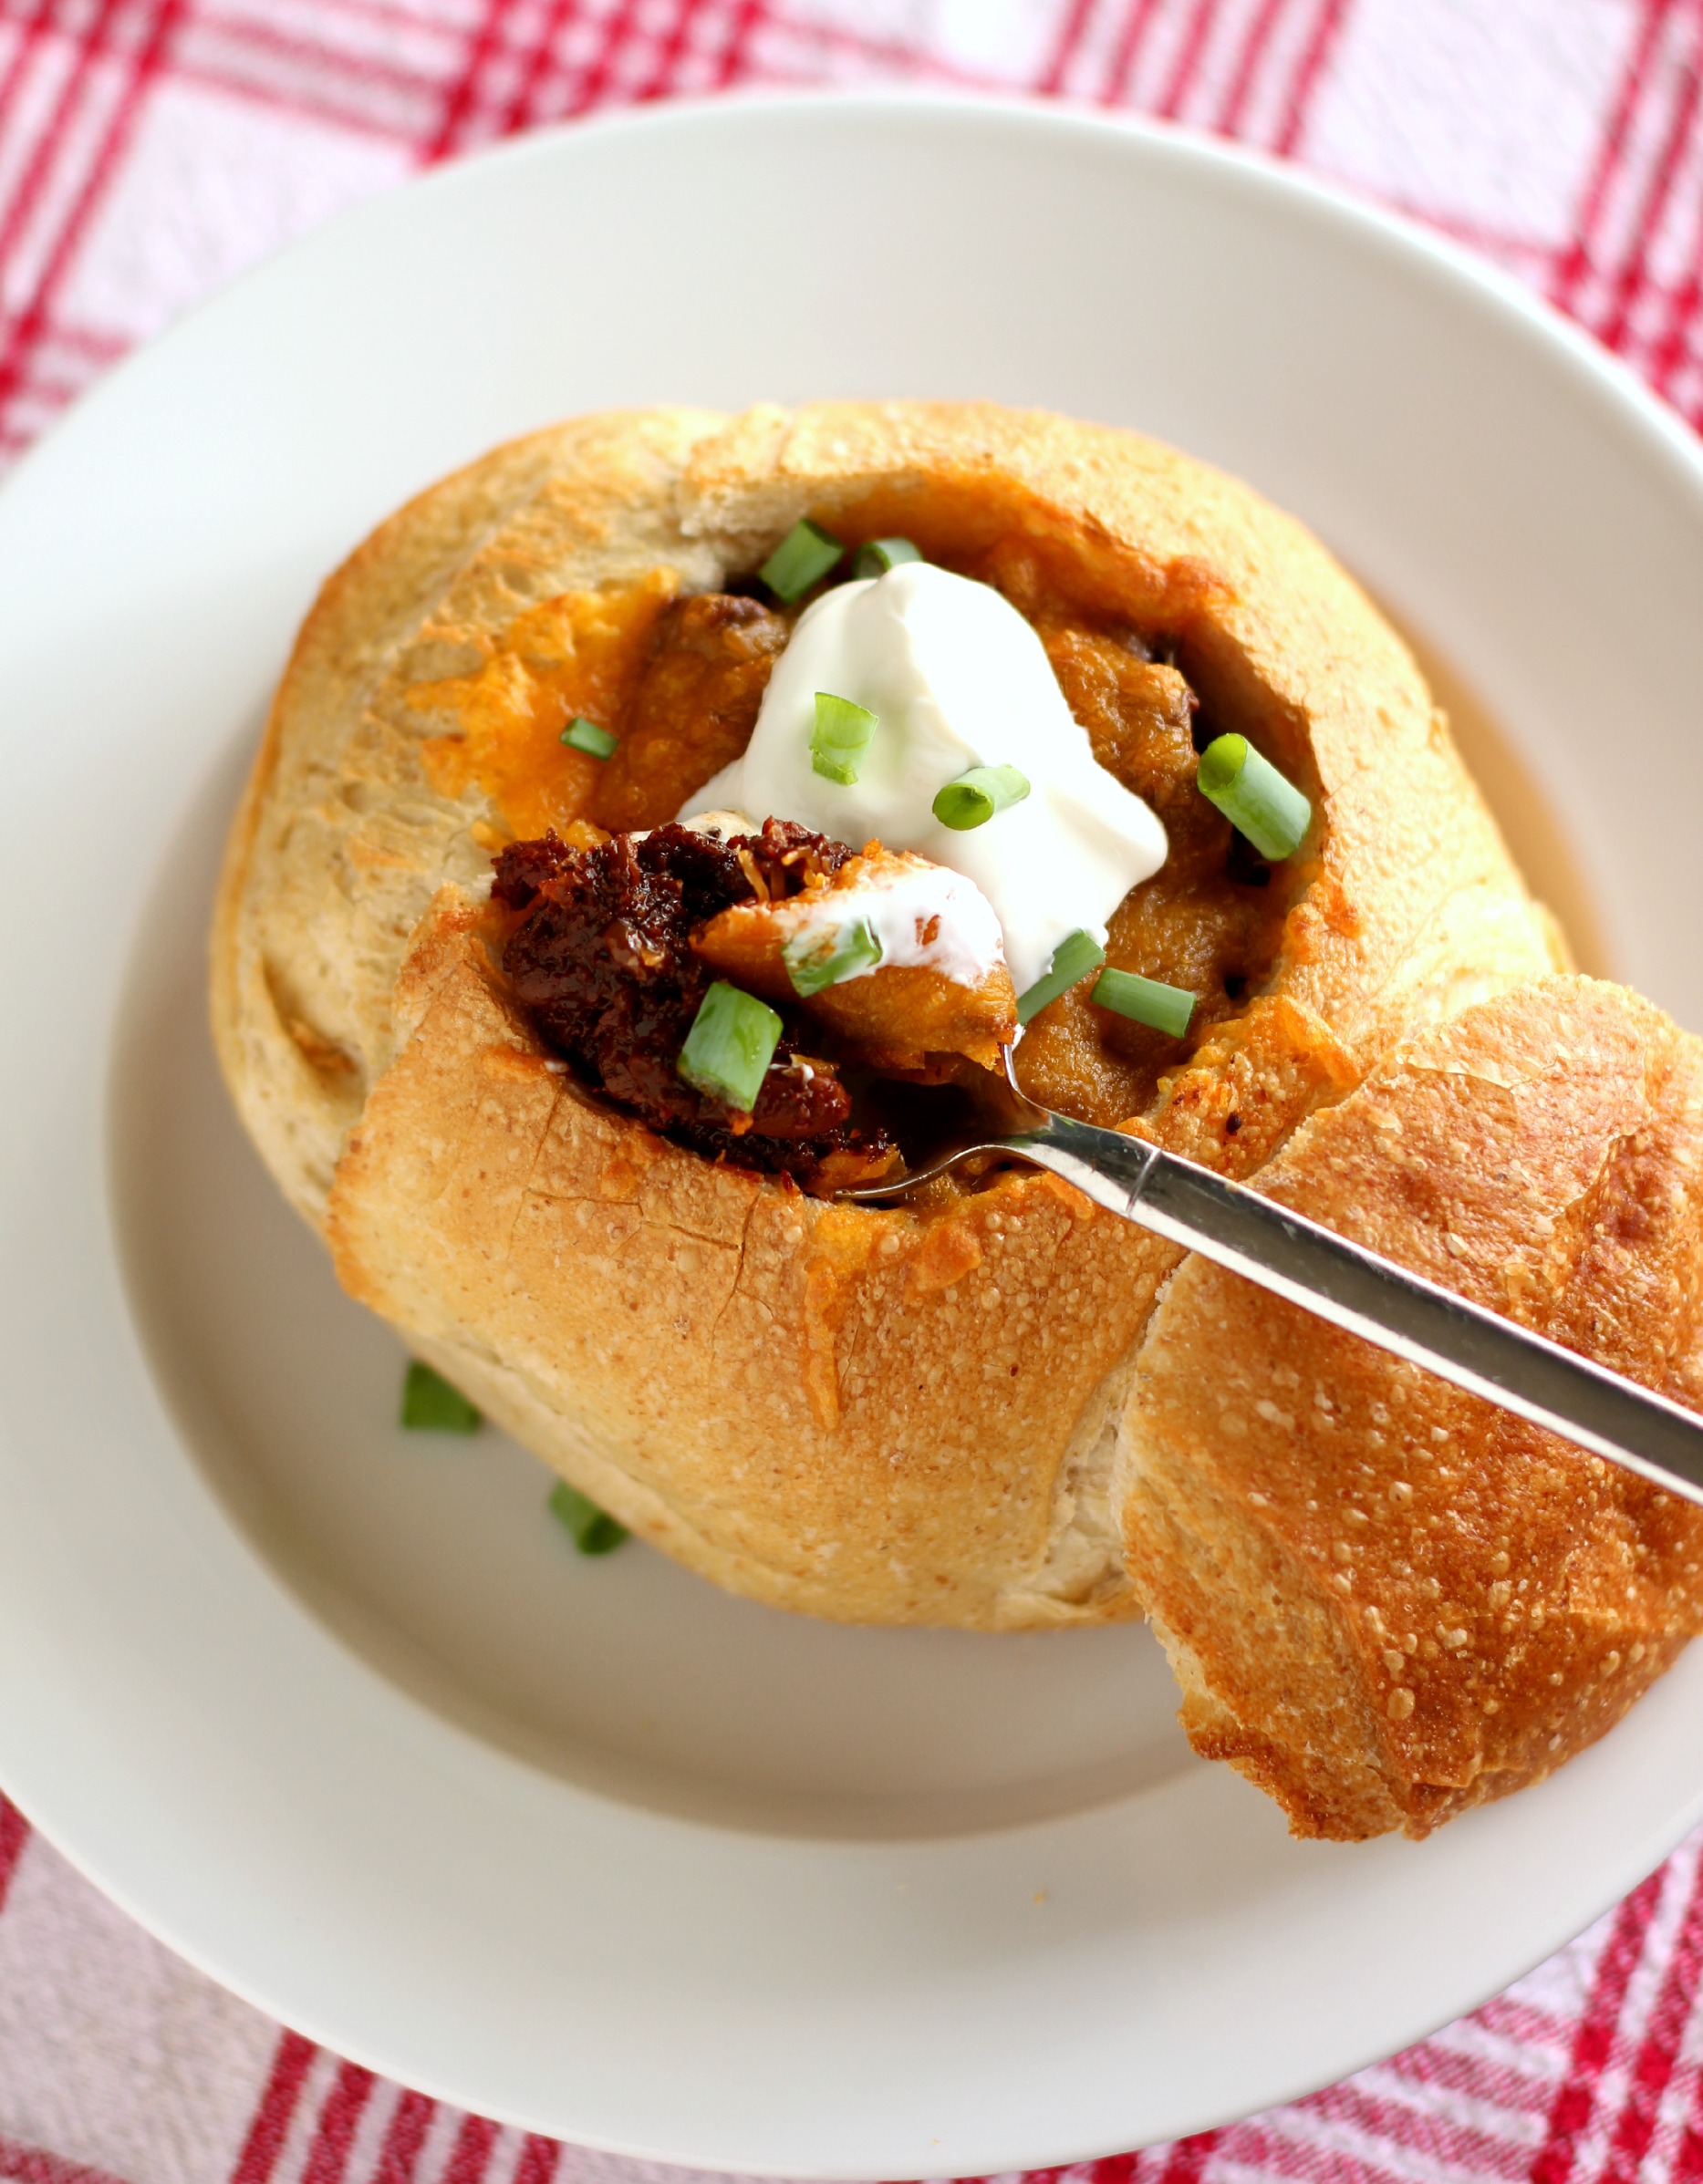
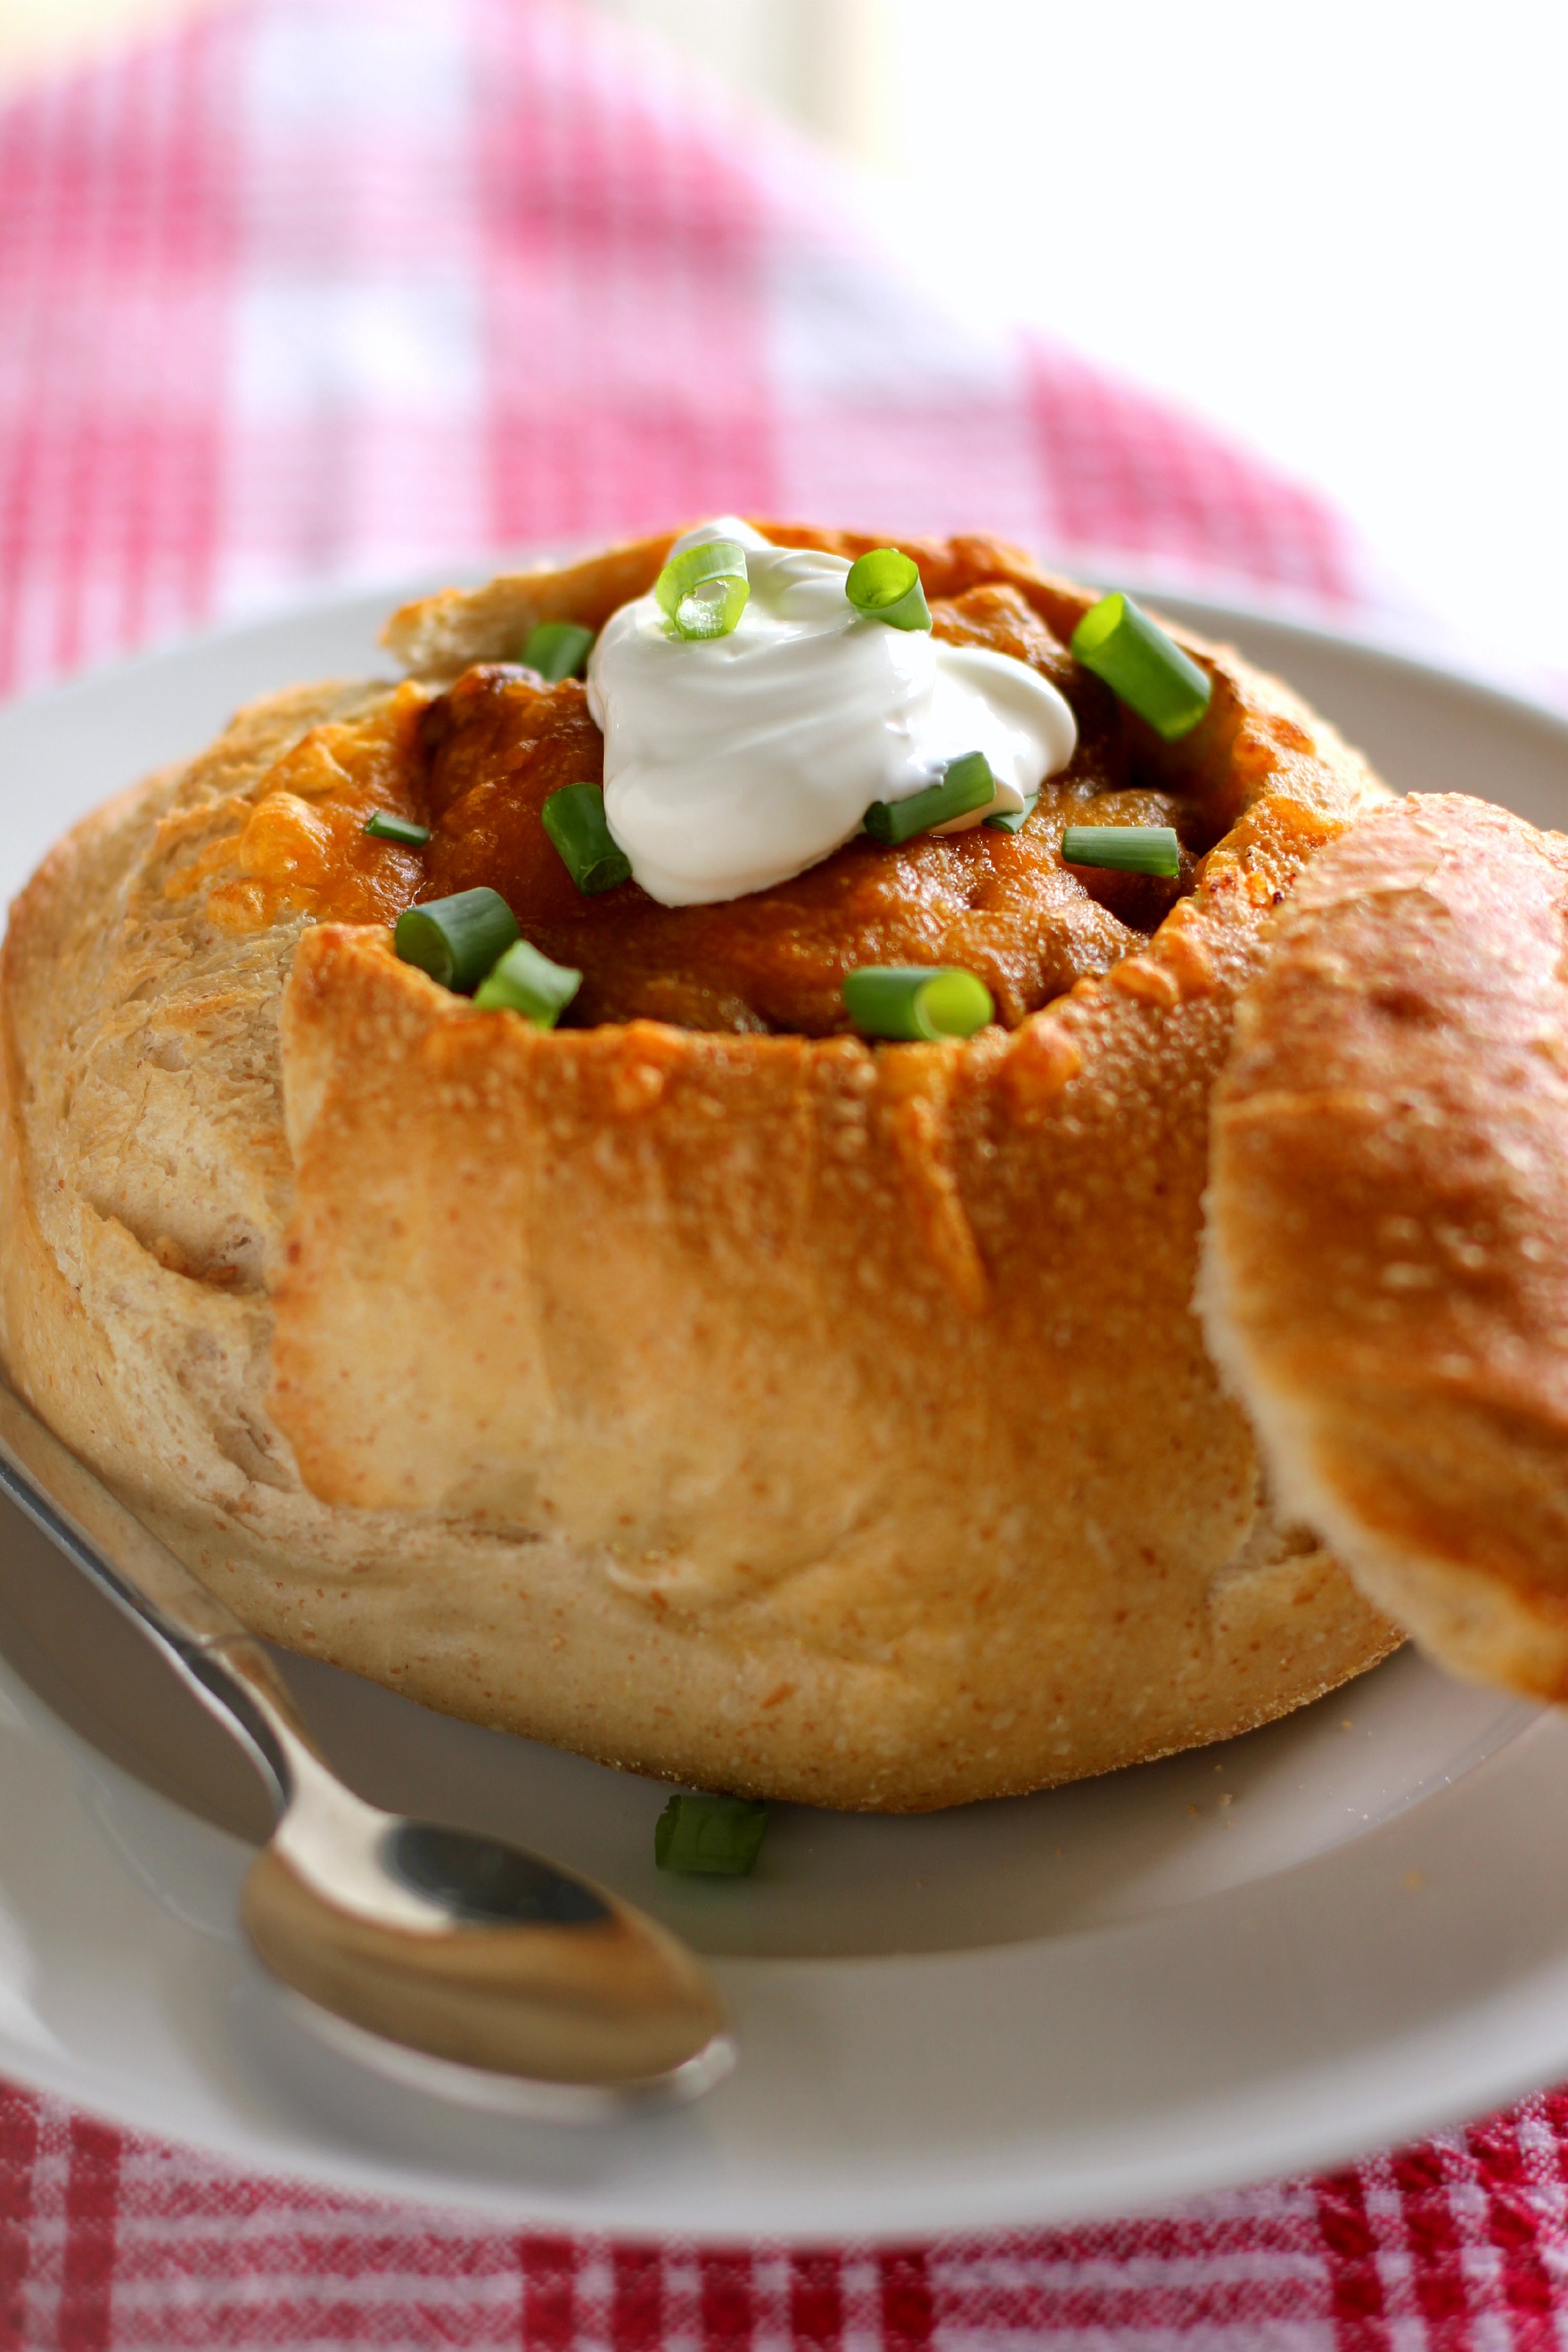
winter breakfast chili: spicy chili served over fluffy scrambled eggs in sourdough bowls

My 6th graders’ faces lit up deviously. It was a cold, gray morning hardly worthy of delight, but they seemed delighted nonetheless.

I was standing at the front of the room sipping the day’s second diet Sunkist while I issued instructions for the assignment they were about to begin. They double-checked: “So we don’t put our name on it anywhere? Can we disguise our handwriting? Can we give you a letter grade?”

The assignment was something I affectionately call Ms. Ruble’s Progress Report.

It was only fair, I had explained to them, for students to give me a grade since I got to give them one. And since I wanted them to feel comfortable honestly evaluating my performance, they could complete the entire progress report anonymously.

The ardor with which they began furiously scribbling comments — some writing in careful cursive or big block caps to hide their identity — made me a tad bit nervous. One after another finished with a flourish and shuffled their paper into the growing stack at the front of the room.

You may think I’m a little nuts. And every trimester when I give a gaggle of 12- and 13-year-olds the power to anonymously evaluate me, I kind of wonder if I’m a little nuts as well. But even though I may get one or two angsty comments, I learn something about how my students are feeling from every insight they offer. And beyond that, every single time I’ve completed this exercise with them, I’ve been overwhelmed not by how snarky they are, but by how kind.

For instance, from my most recent evaluations:

“I like your singing and your happiness.”

“I like having individual chats about my essays or projects.”

“I know you care about me because you always take the time to make class fun and equal for every student.”

“I really liked making haiku and working outside.”

“Ms. Ruble only gets mad when necessary.” (Ha!)

“I like how organized everything is and how we read a lot.” (Lots of them asked for even more reading time!)

“I love the creative projects we do because they really entertain me.”

“Ms. Ruble is always helping me with things I don’t understand.”

“You can tell she has put thought into each lesson and really wants you to enjoy it.”

“I really enjoyed making the paper cranes and doing the anime project. I have learned a lot so far this year about China and Japan.”

“I like that language arts challenges you, makes you want to put forth all of your potential and effort. Awesome teacher.”

“Ms. Ruble is fair because she gives proper instruction for everything we do and constantly includes our opinions about activities.”

“I like that Ms. Ruble is funny and that makes the class fun. I also like that she adds her own touch to the lesson.”

“Class is strict to keep it running smoothly and that’s what I like the most.”

“There is never a day that is boring from just note taking off the board.”

“I know that Ms. Ruble cares about me because she gives us lots of tips and is always trying to make us better at everything.”

“I think Ms. Ruble sees so much potential in every one of us. She thinks we all can succeed.”

. . . Wow, right? I’m getting a little teary compiling these just like I did while reading them.

Honestly, these comments say a lot more about my students than they say about me. I’m no different from any other teacher who works hard and tries to give her class a valuable experience. But my students, given complete freedom, anonymity, and voice — a soapbox to gripe about homework! to call me a witch! to rip apart my policies! to complain about having to write essays! — are the ones who chose words full of kindness.

If you’re surprised that when given the opportunity to say anything, these tweens chose to be sweet, I understand. We hear about the cyberbullying and the “mean girls,” very real issues, but we don’t often hear about kids’ kind hearts. The day after I read these evaluations, I stood in front of class and tried not to get choked up as I thanked them for their suggestions, critiques, and most of all, for their thoughtfulness.

Sometimes folks are skeptical about this claim, but I’ll say it again: middle schoolers are great little people.

. . .


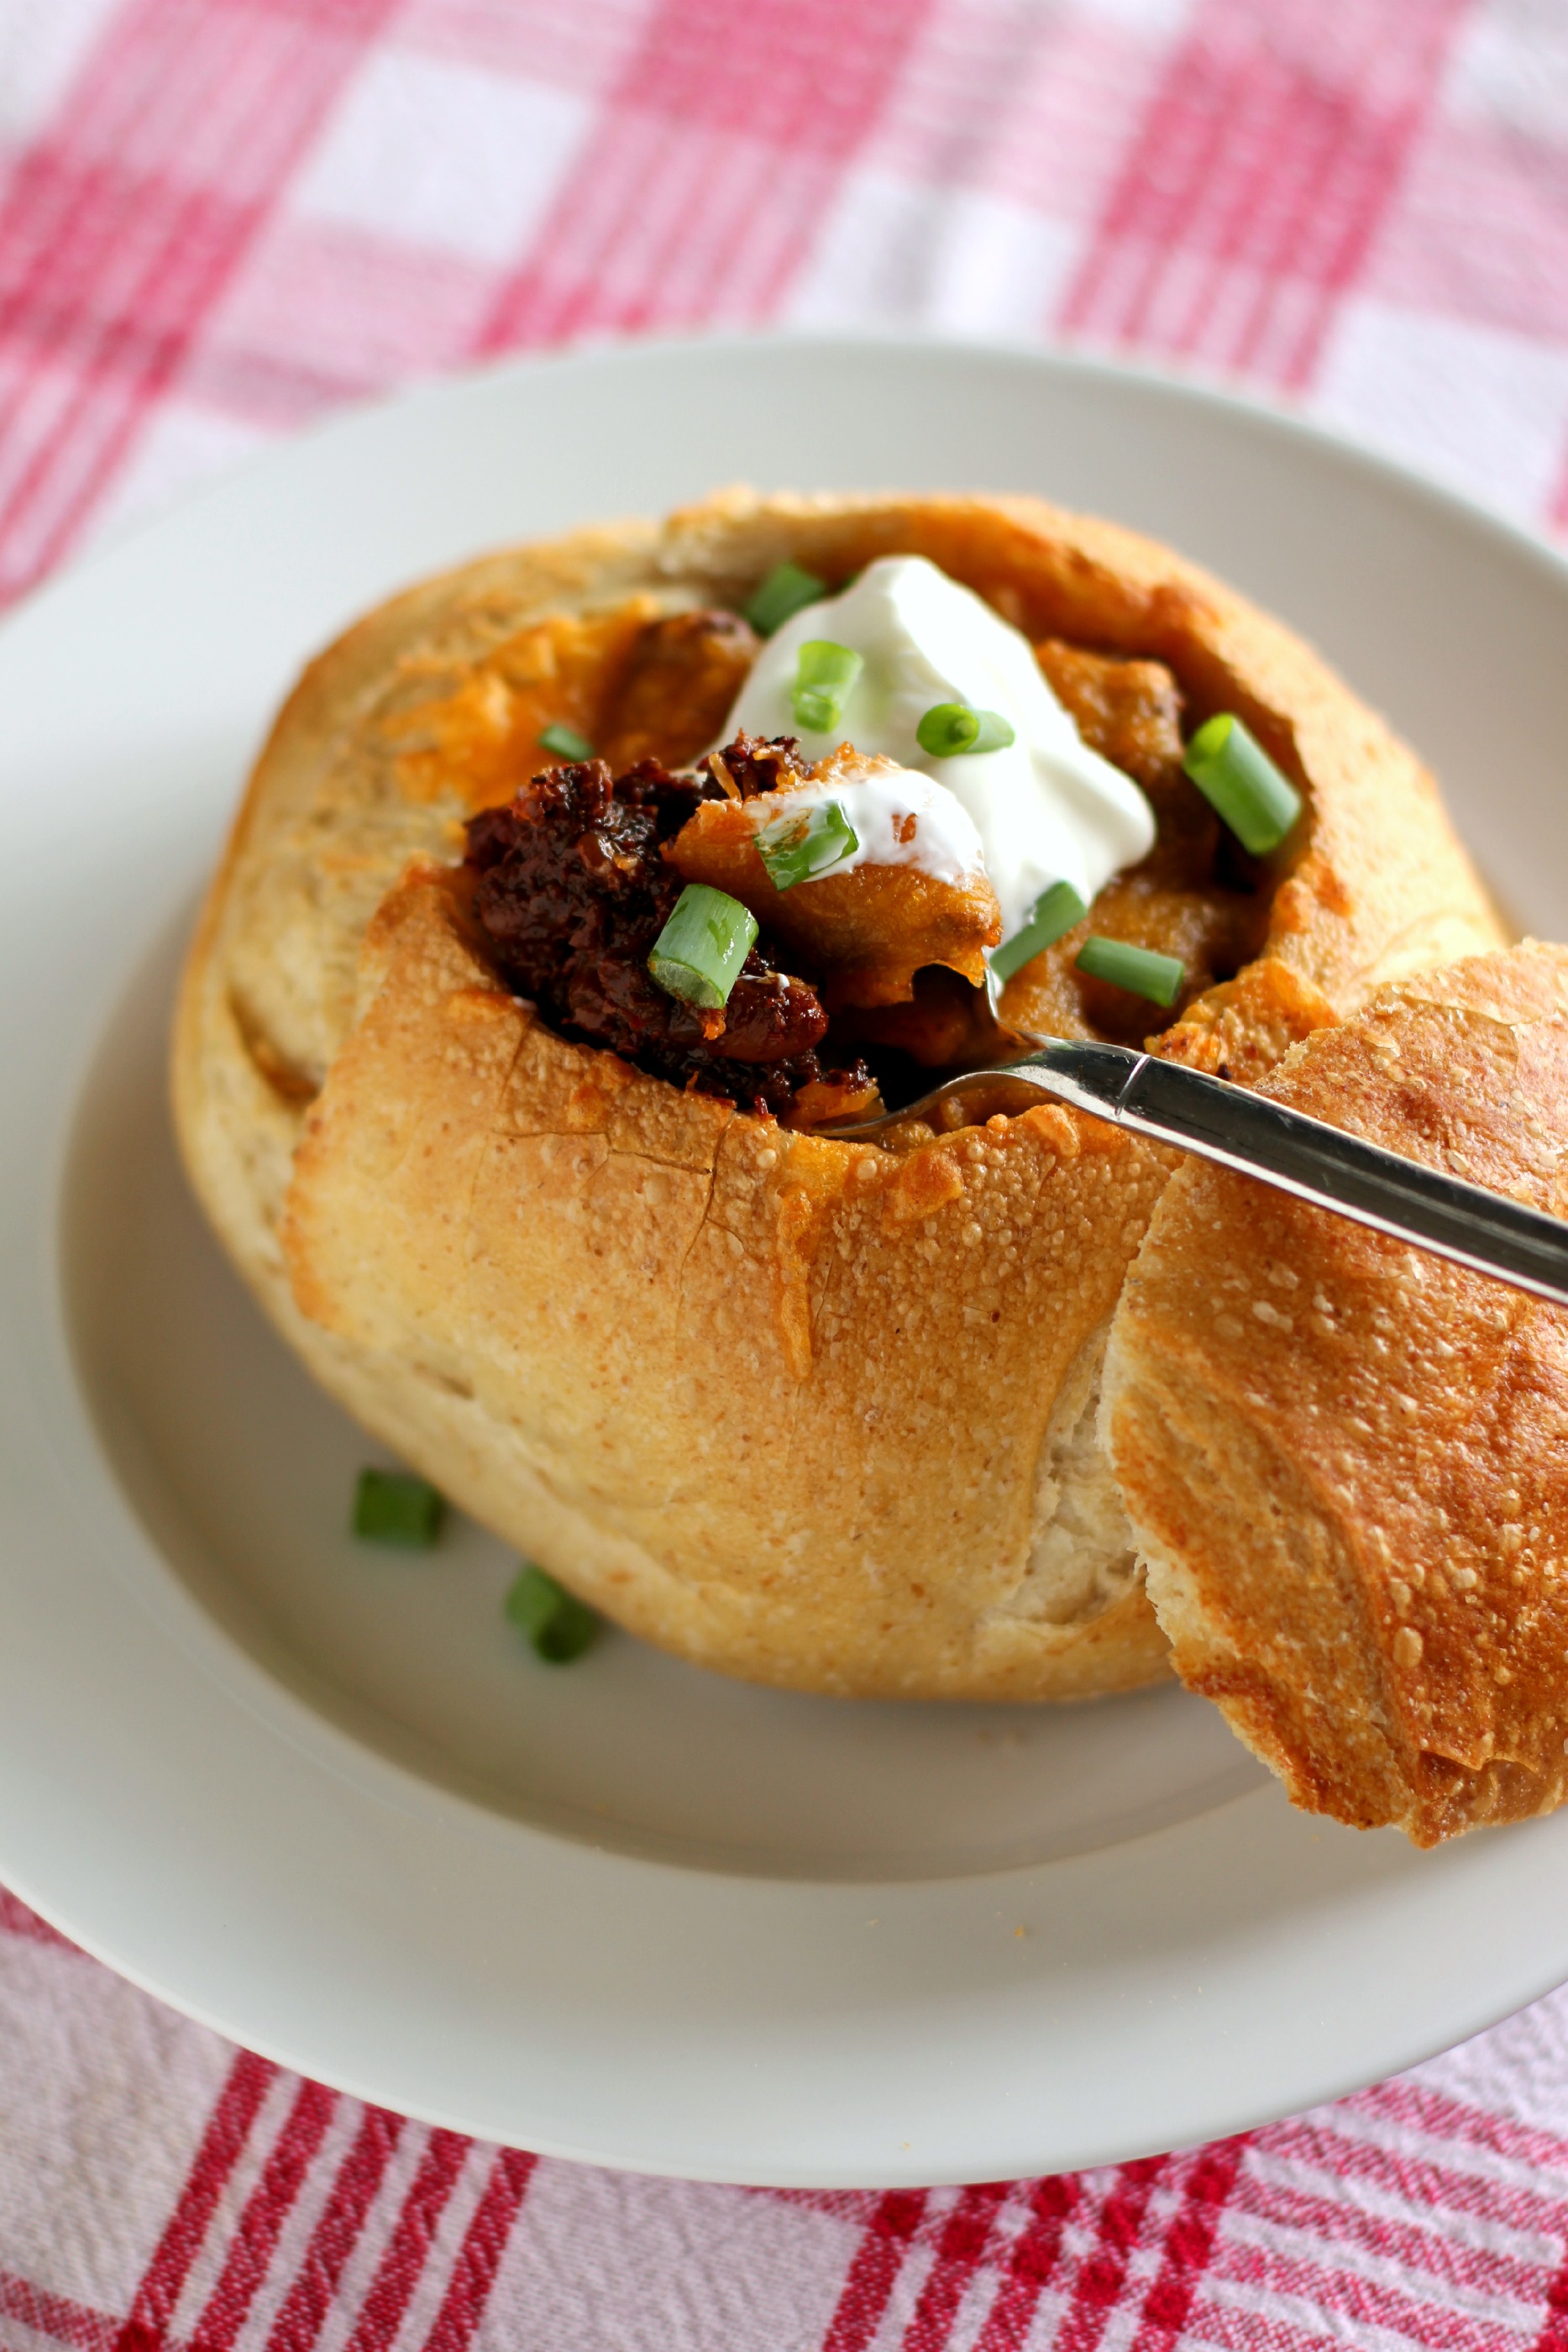
Speaking of things that have warmed my soul lately, this Winter Breakfast Chili was another pleasant surprise. I’d never toasted and ground chiles to make my own chile paste before, but believe me, I’ll never go back. First, it was easy — I found cheap, big bags of the dried chiles I needed right in my local grocery store (in the small Hispanic foods section). Second, this chili is flippin’ awesome — it’s the best I’ve ever tasted hands down.

You may be curious about the concept of a breakfast chili. The idea was borne from my desire to create a winter breakfast that was warm and filling, full of protein and just a bit of heat. This chili includes bacon and chorizo and is served over fluffy scrambled eggs in sourdough bread bowls from my local bakery. It turned out to be a phenomenal breakfast reminiscent of spicy, comforting huevos rancheros. And since the chili can be prepared in advance and refrigerated, it’s also the perfect special breakfast for a busy holiday morning.

What’s warmed your soul lately?

Winter Breakfast Chili Over Eggs in Sourdough Bowls


Recipe by: Recipe adapted from Cooks’ Illustrated, as found on Brown Eyed Baker
Yield: 4 servings

The layers of flavor in this chili come from the toasted dried chiles used to make the chile paste, the savory chorizo and bacon, and the addition of some yeasty beer. It’s a rich, deep, slightly spicy dish that shines on a breakfast or dinner table. For breakfast, serve it over fluffy scrambled eggs in a sourdough bowl with broiled cheese on top. Since the chili can be prepared in advance, it makes the perfect dish for a busy holiday morning.

Chili Paste Ingredients:
3 dried ancho chiles (about 7/8 ounces), stems and seeds removed, and flesh torn into 1-inch pieces
1-2 dried árbol chiles, stems removed, pods split, seeds removed
1 tablespoon plus 1 1/2 teaspoons cornmeal
1 teaspoon dried oregano
1 teaspoon ground cumin
1 teaspoos cocoa powder
1 1/4 cups chicken broth, divided

Chili Ingredients:
1/4 pound dried pinto beans (about 1/2 cup), rinsed and picked over
Table salt
1 medium onions, cut into ¾-inch pieces (about 1 cup)
1 1/2 jalapeño peppers, stems and seeds removed, cut into ½-inch pieces
1 tablespoon plus 1 1/2 teaspoons vegetable oil, divided
2 garlic cloves, minced
1/2 (14.5-ounce) can diced tomatoes
1 teaspoon light molasses
3 ounces chorizo, with casings removed
a few strips of bacon
1/2 (12-ounce) bottle milk lager (I don’t know anything about beer, so I just used Red Stripe and it came out perfectly)*
4 eggs for scrambling
1 tablespoon butter
4 sourdough boules (about 4 inches in diameter)
1 cup sharp cheddar cheese, shredded
sour cream and cilantro for serving
*If you don’t cook drink alcohol (I don’t, either), you should know that according to this chart, only about 5-10% of alcohol will remain in the entire dish by the time you’re done. The beer is very important to the flavor and I don’t recommend skipping it.

Directions:
Note on scheduling: This chili can be fully prepared in advance and stored in the fridge for a few days. You can hollow out fresh bread boules the day before serving and wrap them tightly to keep them soft. When ready to eat, reheat the chili in the microwave for a few minutes, stirring periodically. Scramble your eggs, assemble the dish, broil the cheese on top, and serve.

Other notes: Make sure to wear gloves when working with chiles and avoid touching your eyeballs (or other people’s eyeballs. But why would you be doing that? Weirdo.) You can substitute 1/4 cup chili powder and 1/8 to 1/4 teaspoon cayenne pepper if you don’t want to use the dried chiles, but I highly, highly recommend you give it a try. It’s so easy, and very gratifying.


Soak the beans: In a large stock pot or Dutch oven, bring 8 cups of water, beans, and 1 1/2 teaspoons salt to a boil over high heat. Once boiling, remove the pot from the heat and cover it. Let it stand for 1 hour before draining and rinsing the beans and rinsing out the pot.

Prepare chile paste: Preheat the oven to 300 degrees F. Toast ancho chiles in a skillet over medium-high heat, stirring frequently, until they’re fragrant (4 to 6 minutes). Reduce the heat if they start to smoke. Place the chiles into the bowl of a food processor and let them cool. Leave the skillet unwashed for future use.

Add the árbol chiles, cornmeal, oregano, cumin, cocoa, and 1/4 teaspoon salt to the food processor with the ancho chiles and pulverize for about 2 minutes, or until finely ground. Then, with the food processor still running, slowly add 1/4 cup of chicken broth until a smooth paste forms (about 45 seconds). Use a spatula to scrape the sides of the bowl as needed. Transfer the paste to a bowl and set aside.

Make the chili: Put the onions in the food processor and pulse them until they’re chopped (about 4 pulses). Add the jalapeños and pulse until the mixture reaches the consistency of a chunky salsa, about 4 more pulses, scraping the bowl if needed.

In your stock pot or Dutch oven, heat 1 1/2 teaspoons of vegetable oil over medium-high heat. Add the onion mixture and cook, stirring occasionally, until the veggies are softened and the moisture has cooked off, about 7 to 9 minutes. Then add the garlic and saute until it’s fragrant, just about 1 minute. Add the chili paste, tomatoes, and molasses and stir to combine thoroughly. Add the remaining 1 cup of chicken broth and the drained beans and bring the whole mixture to a boil before reducing the heat to simmer.

Meanwhile, cook the bacon over medium-high heat in your skillet to your desired crispiness. Remove it to drain on a paper towel lined plate. In the same skillet, cook the chorizo until browned through (add 1 1/2 teaspoons of vegetable oil if needed to supplement the bacon grease). Use a slotted spoon to transfer the chorizo to the Dutch oven. Discard any liquid in the skillet (but don’t rub off the stuck-on bits!) and return to the heat. Add 1/2 of the bottle of lager to the skillet, scraping the bottom of the pan with a wooden spoon to loosen any browned bits, and bring it to a simmer. Pour the lager into the Dutch oven. Stir to combine and return the mixture to a simmer.

Cover the pot and transfer it to the oven. Cook until the meat and beans are fully tender, 1½ to 2 hours (I kept test-tasting the beans, since they took the longest — mine actually took longer than 2 hours). While the chili cooks, hollow out 4 sourdough bread boules for serving. If you’re not serving the chili today, wrap these tightly to preserve their freshness for the next day. Otherwise, set them aside.

When the chili is finished, let it stand, uncovered, for about 10 minutes. Stir the chili well and season to taste with salt. (Afterwards, you can store it in a tupperware in the refrigerator if you’re not eating it right away.)

Assemble the dish: When you’re ready to serve your chili, heat 1 tablespoon butter in a skillet over medium heat. Scramble 4 eggs and distribute them evenly between the bread boules. Ladle chili over the eggs in each boule. Top with shredded cheddar and place on a baking sheet covered in foil. Broil on high for a couple of minutes, watching closely, until cheese is melted and bubbly. Serve immediately with cilantro, avocado, chopped onions, and sour cream.

If you liked this post, please:
Subscribe to Willow Bird Baking
Follow Willow Bird Baking on Twitter
Follow Willow Bird Baking on Facebook
Give this post a thumbs up on StumbleUpon
Pin It


Shareother ways to share this post with friends

Bright Pepper Jelly (and Welcome to the new Willow Bird Baking)

Last week I did around 8 billion google searches for recipes, and a solid million of those (give or take a few) were for pepper jelly.

I’d recently been inundated with it at restaurants — pepper jelly on fried pimiento cheese balls, pepper jelly on grilled chile cornbread, pepper jelly on fried green tomatoes — and had developed a bit of an obsession with the stuff.

My recipe search yielded tons of pepper jellies, but none were satisfactory. I was willing to experiment with the hot-sweet balance and the tang of my jelly, but I had one non-negotiable: I didn’t want the recipe to involve canning.

I’d never canned before. I didn’t know how to can. I didn’t want to learn a whole new thing in the middle of a busy week. I wasn’t sure if I had all the materials I needed. There were lots of reasons for my stubbornness. But much to my annoyance, recipe after recipe began, “Sterilize six half-pint mason jars . . . .”

Finally, still skeptical, I broke down and read about the process of preserving food. If you’ve ever done any canning yourself, you probably know what I found out:

It’s easy.

Like, super easy. You sterilize some jars (which can be as simple as running them through the dishwasher), pour a simple hot jelly mixture into them, close the lids, and then boil them to create a seal. The “equipment” you needed was limited to jars, a pair of tongs with some rubber bands on the end for gripping, and a big stock pot. Really? This was what I was afraid of?

Running smack into a wall of my own self-doubt forced me to realize that it was comprised of shoddy materials — insecurity, laziness, haste — and needed to be torn down. It also reminded me of Willow Bird Baking’s reason for being: to share life lessons and build kitchen confidence in other home cooks just like me. If I shy away from a new technique, how can I encourage my friends to charge ahead and tackle unfamiliar things?

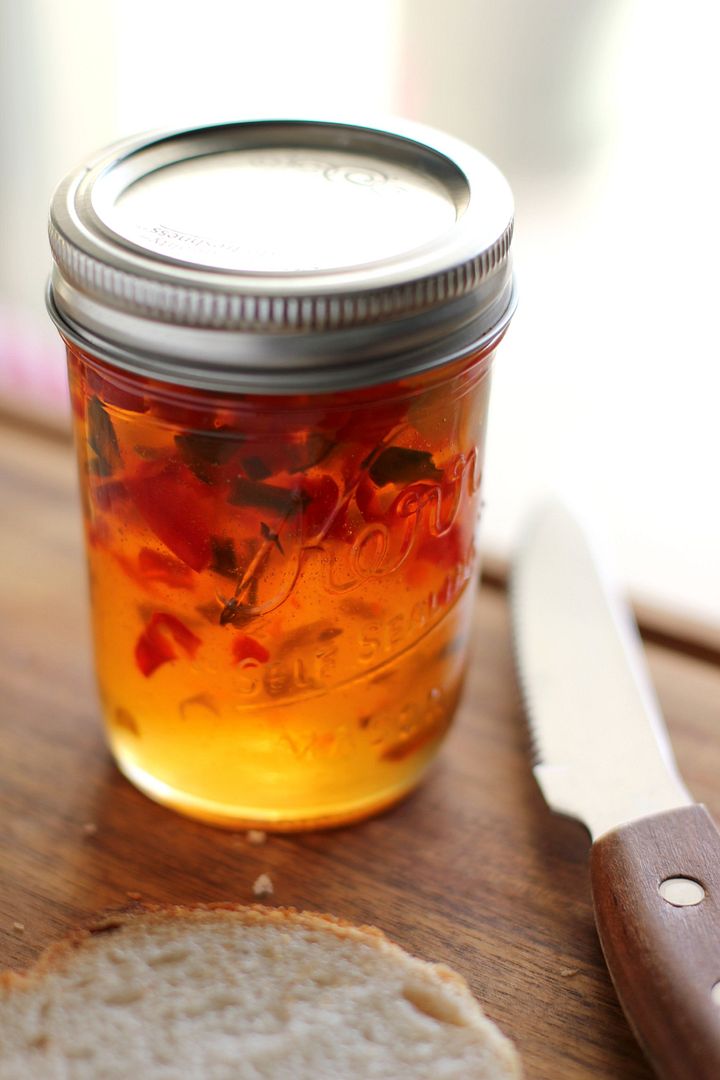
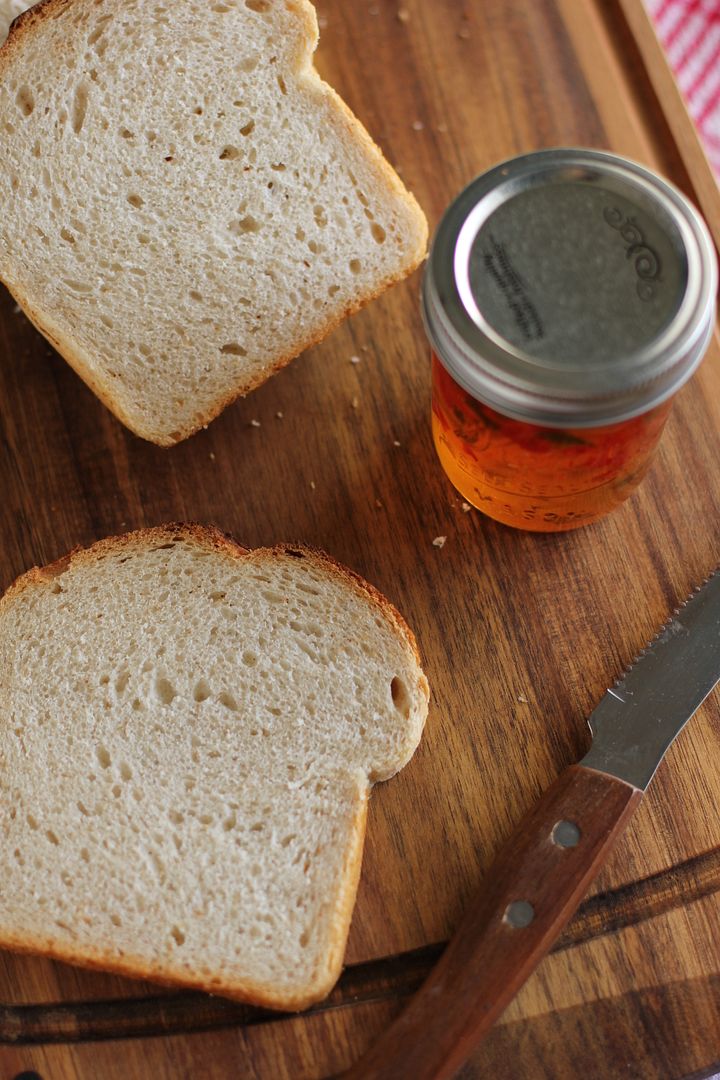
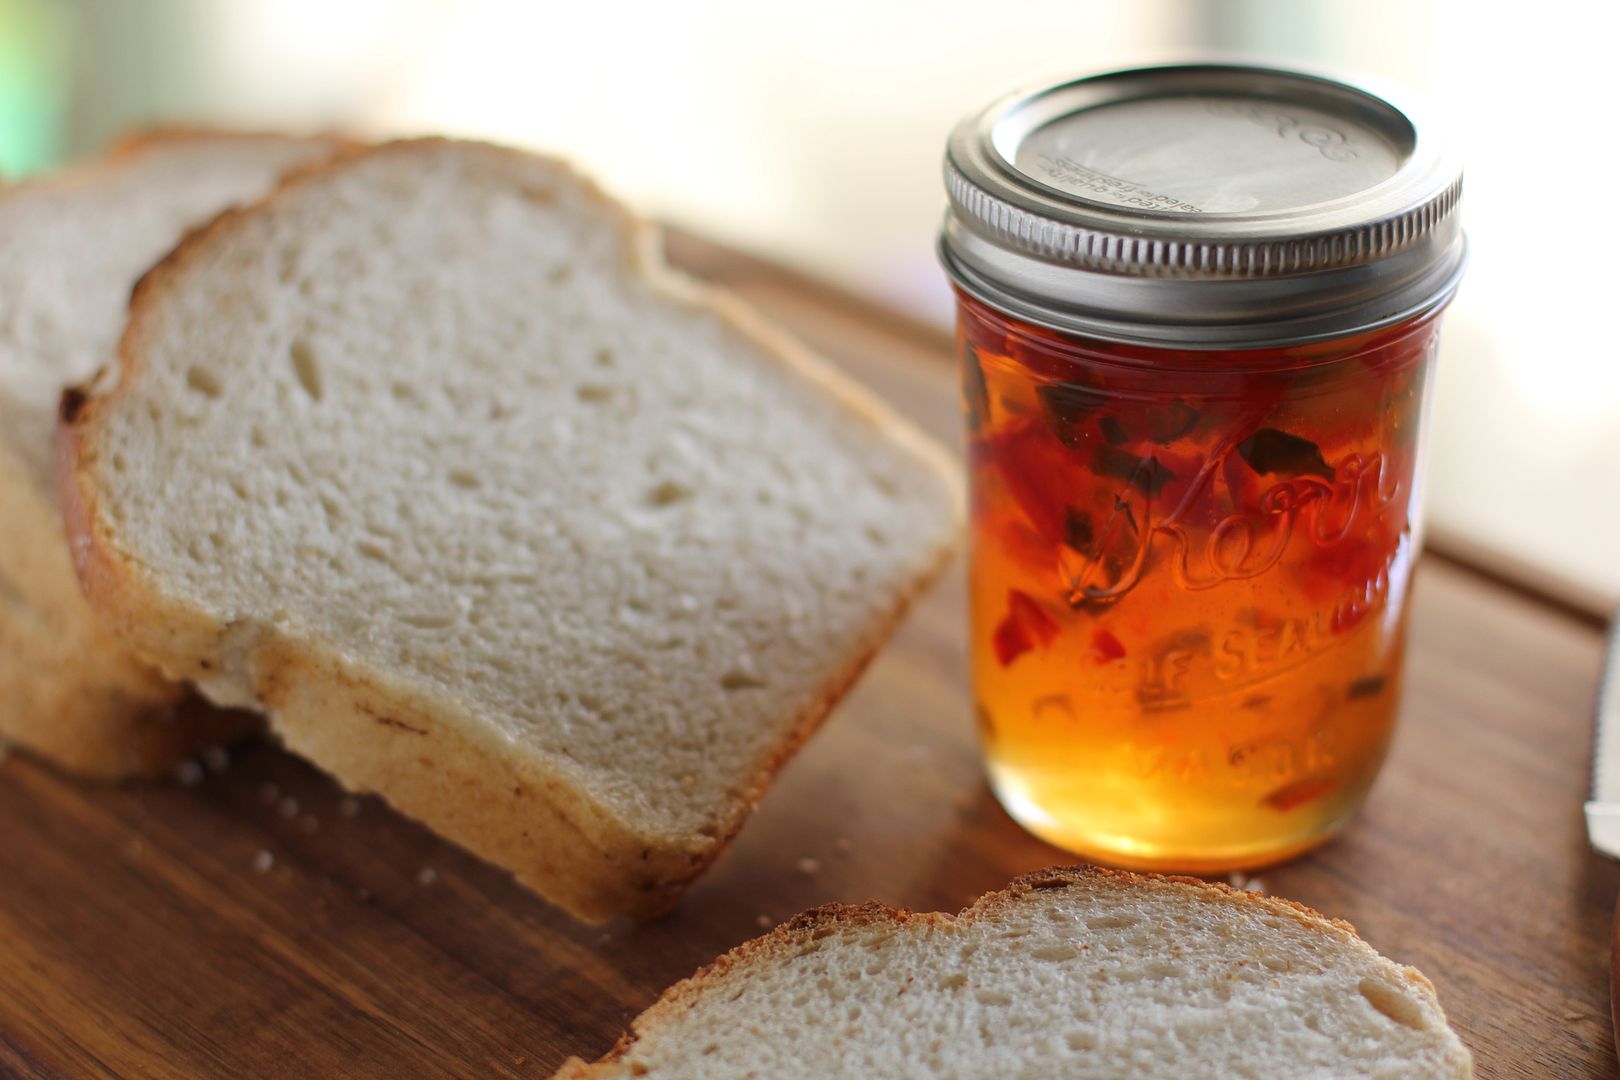
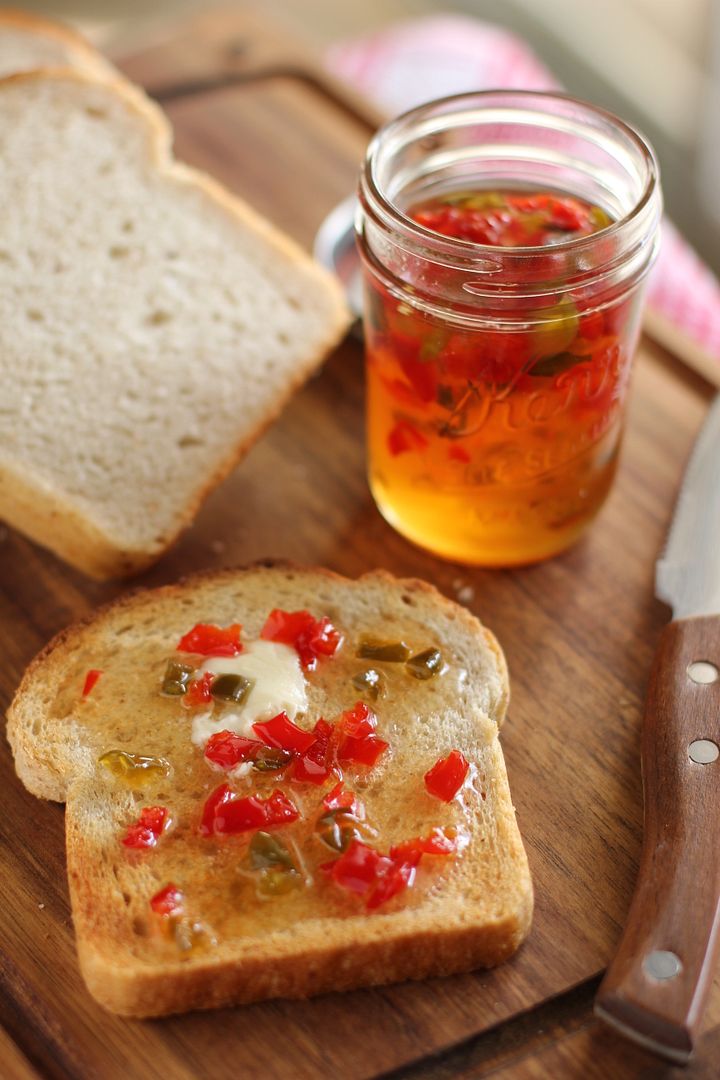
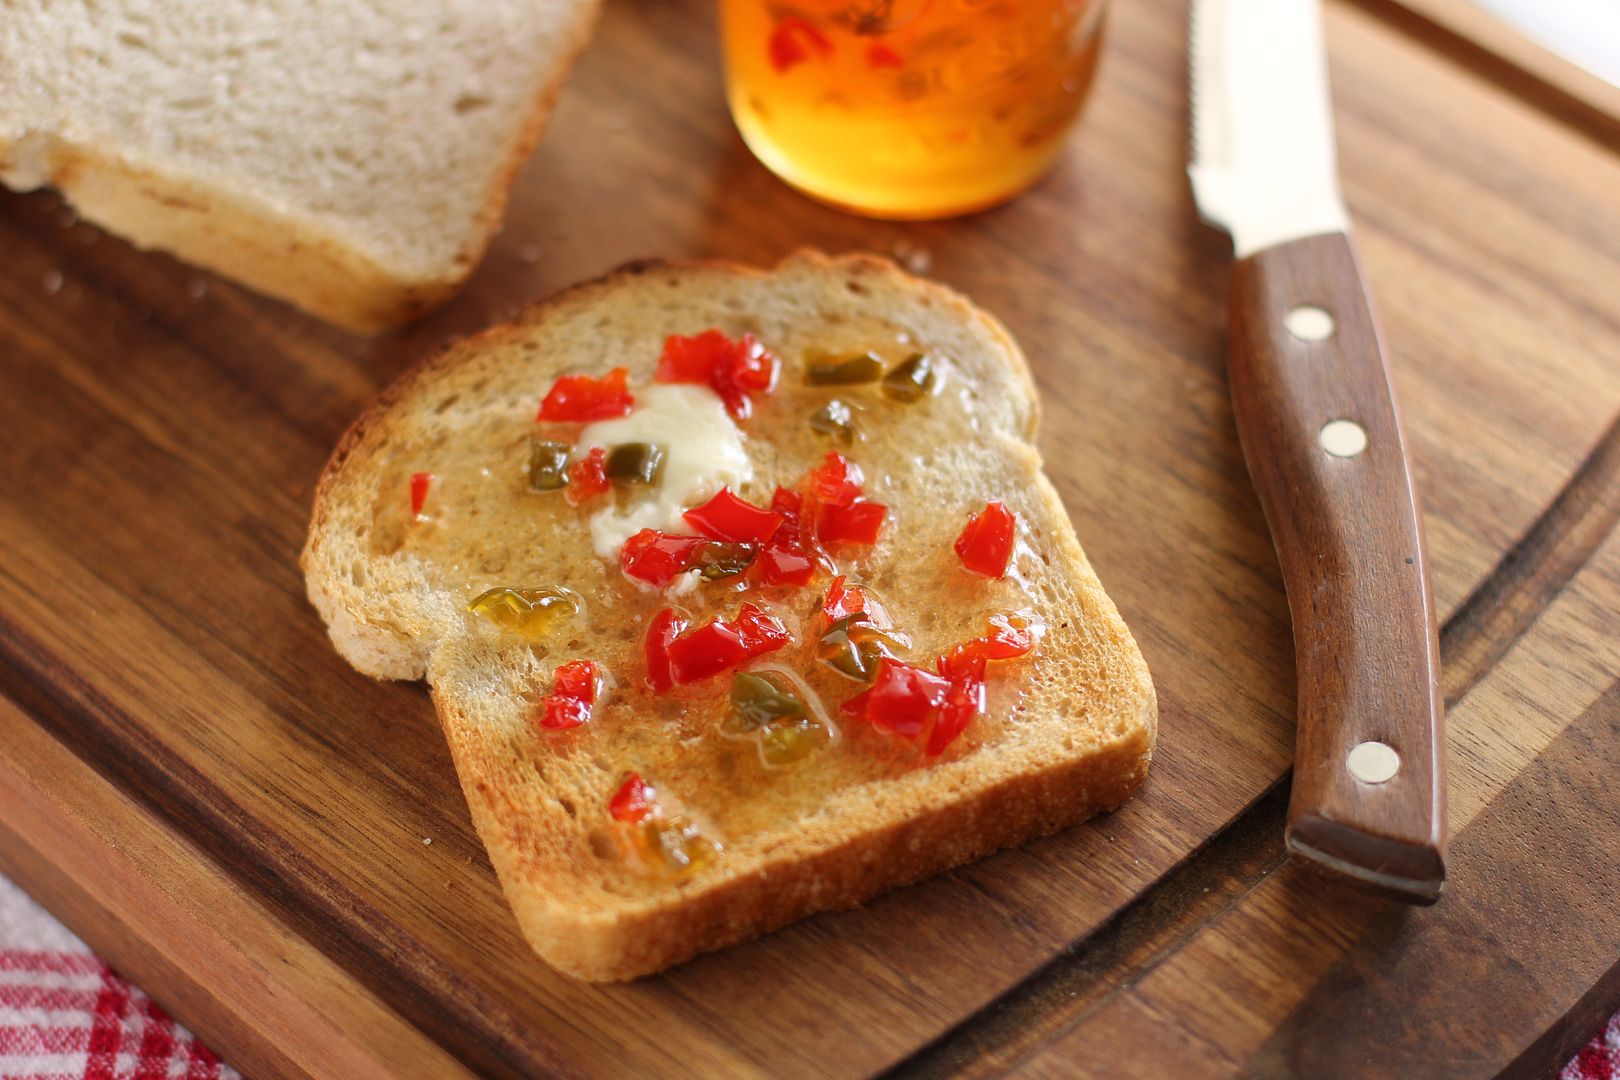
Feeling admonished by my own website’s mission, I prepared my materials and successfully canned seven lovely jars of bright pepper jelly. Mike and I glopped it onto buttered sourdough toast by the spoonfuls at our Make-Ahead Holiday Breakfast Party on Saturday morning.

My pride in having tackled a new challenge renewed — as it always does — my dedication to the community here at Willow Bird Baking. Every comment or anecdote we share with one another encourages me when my pie crust turns to pie dust, my cake is falling over, or my brownies are lying in the floor. We’re all in this together, and the result is more than just great food. The result is great friendships.

. . . and pepper jelly.

Speaking of the bonds we’ve forged over pepper jelly and other such culinary challenges, I’ve got something to show you. I’ve waited for weeks to reveal what I’ve been working on behind the scenes: Welcome to the new Willow Bird Baking!

We have a brand new home on the web (at willowbirdbaking.com) and a clean, warm new design. Willow Bird Baking is also sporting a new, exhaustive recipe index where you can browse recipes by type, season, meal — and even by color!

This news means more to me than just a makeover. Willow Bird’s appearance finally reflects the comforting, loving, simple environment we’ve created here. The blog become a forum to share everything from family memories to laughter over our mistakes. Really, the fact that I can reveal this new chapter in Willow Bird’s life to you means the world to me. Thank you for reading.

Bright Pepper Jelly


Recipe by: Adapted from (thanks, Erin for this recipe!)
Yield: 7 half-pint jars of jelly

This pepper jelly is bright, tangy, and has the perfect balance of hot and sweet. Feel free to adjust the ratio of peppers to your taste, though, so long as the overall quantity is 4 cups. The consistency is that of a thin jelly — if you like a thicker, spreadable jelly, I hear you can double the amount of pectin in the recipe. Serve this pepper jelly spooned over crackers with cream cheese or slathered on buttered toast. Oh, and don’t worry if you’ve never canned anything before; the recipe below will walk you through the process step by step.

Ingredients:
2 1/4 cups finely chopped red bell peppers
1 1/4 cups finely chopped green bell peppers
1/2 cup finely chopped jalapeno peppers
1 cup apple cider vinegar
1 (1.75 ounce each) package powdered pectin (or 2 if you want a thicker jelly)
5 cups white sugar

Equipment needed:
6 or 7 (8-ounce or half-pint) canning jars
tongs (preferably with rubber bands around the ends to improve grip)
a large stockpot or canner (with room for your jars to be fully submerged with 2 inches of water above the top of the jars)
a dish towel or rack to keep the jars off the bottom of the pot

Directions:
Note: Do not adjust the amount of sugar and vinegar in canning recipes. Always use gloves when chopping jalapenos or other hot peppers and avoid touching your eyes or face. Wash your hands and surfaces immediately when finished.

Prepare ingredients: Chop the peppers by hand and then drain them in cheesecloth to remove excess moisture. Set them aside while you sterilize your jars. You can also measure out sugar and vinegar so that you’re prepared.

Sterilize your tongs and 7 (8-ounce) canning jars: Place rubber bands on the end of the tongs, which will make it easier to grip your jars. Boil the ends of the tongs for 5 minutes to sterilize them. Sterilize your jars, lids, and rings by running them through a short cycle on the dishwasher or using the oven method or boiling water method (see below). No matter which method you choose, time them to be finished when your jelly is ready (preparing the jelly takes about 15 minutes) so that you can put the hot preserves into hot jars.

Oven method: Preheat the oven to 175 degrees F. Wash the lids and jars with hot, soapy water and rinse them. Line the lids and jars up on a baking sheet (open sides up) and bake them for 25 minutes.

Stovetop method: Wash the lids and jars with hot, soapy water and rinse them. Boil the jars and lids covered with water for 15 minutes.

While jars sterilize, make jelly: Place all of the peppers into a large saucepan over high heat. Add the vinegar and fruit pectin and bring the mixture up to a full rolling boil, stirring constantly. Stir in the sugar and return the mixture to a full boil. Boil exactly 2 minutes, continuing to stir constantly. Remove the mixture from the heat and skim off any foam before carefully and quickly ladling the jelly into hot, sterile jars. Fill each jar to within 1/4 inch of its top. Cover each jar with a flat lid and screw on its ring.

Process your jars: Slowly lower the jars with tongs into a large stock pot or canner with a rack or a folded towel inside so the jars do not touch the bottom. Cover the jars with hot water that isn’t boiling (the water depth should be about 2 inches above the top of the jars — and make sure your pot is large enough that it won’t boil over when the water boils). Bring the water to a full boil and process the jars for 5 minutes before removing them with tongs and cooling completely. Hearing the jars pop while they cool is normal — this is the sound they make while they’re sealing!

Store in a cool dark place until you’re ready to serve over crackers with cream cheese, or on hot buttered toast. For best quality, use within a year. Refrigerate jars after opening for up to 1 month.

If you liked this post, please:
Subscribe to Willow Bird Baking
Follow Willow Bird Baking on Twitter
Follow Willow Bird Baking on Facebook
Give this post a thumbs up on StumbleUpon
Pin It

Fresh Open-Faced California Sandwich

This past weekend I attended the Foodbuzz Blogger Festival in San Francisco, California, 2,700 miles away from my home. Traveling alone is always a meaningful, reflective experience for me, and over the next couple of weeks, I’ll be sharing vignettes that I hope are meaningful to you, as well.

. . .

“Can you tell we’re tourists?” the gossamer-haired man asked the woman at the BART (Bay Area Rapid Transit) information desk after she guided him through the process of purchasing a ticket. He chuckled toward his smiling wife, and they walked over toward the ticket machine.

I walked up to the information desk, wondering if I was about to annoy the attendant by asking a question she’d already been asked a hundred times this morning. Like everyone else I’d met so far in the Bay City, though, she cheerfully offered detailed advice. With some help from the tourist couple who’d gone before me, I successfully purchased a subway ticket and stepped onto the escalator to descend into the rumbling belly of the city.

After a posing a few more clueless questions to kind San Franciscans, I stepped onto a BART train and settled into my seat with a self-congratulatory sigh. We sped off only to hear a robotic voice a few seconds later announcing the next stop: “Montgomery.”

Oh. Montgomery? I looked at the map on the wall. I was trying to head to the Mission area to visit the gorgeous, iconic Tartine Bakery. Montgomery, however, was in the opposite direction — toward Oakland across the bay. Once again I turned to a stranger. “If I’m trying to get to 16th and Mission–” I began.

“Oh, you’re headed the wrong way,” she said with a smile. “You needed the train on the other side of the tracks.” It suddenly dawned on me that of course the trains, like cars, would go in two different directions. I felt a little sheepish.

“Oh, thanks! I guess it’s a good thing I realized after only one stop,” I said.

“Definitely. You’re fine. You’re not under the water yet!” she replied.

Her reassurance at once comforted me and alerted me to an alarming fact that I hadn’t considered about the trains: they go under the water. Under the San Francisco Bay. Seriously? I could hear my mom’s voice in my head saying, “What if there’s an earthquake while you’re under there?!” I jumped off at the next stop and changed trains, relieved that I didn’t have to go under the water until I visited Oakland later in my trip.

A couple of hours later I stood at a bus stop, blissful after devouring a frangipane croissant, a gruyere and black pepper gougere, and a Mexican Coke at the communal table in Tartine. I hurriedly grabbed $2 out of my pack as the bus pulled up, but I had the good sense to pause on the bus steps and ask, “Do you head toward Lombard?”

I expected the bus driver to wave me onto the bus, impatient with silly tourist questions, but again, I was met with generosity: “Oh, you want the 22 that runs on the other side of the street.” He pointed to the bus stop across the way. A kind man at the bus stop confirmed the bus driver’s words, “Just wait over there and another bus will be along in a moment.” Buses, it seemed — like trains! and cars! and everything else, Julie! — ran in both directions. Since you might be wondering at this point, I promise I’m not dumb.

I walked across the street, once again redirected by the kindness of others.

Are you plowing ahead on your own power lately? Personally, I never grew out of that independent toddler stage of life — the one where you’re constantly insisting, “I’ll do it myself!” There’s nothing quite like being alone in a strange city across the country from your home to break you of that intransigence, though.

I found my way to Tartine and then up to the Golden Gate Bridge on Friday because I was willing to accept the generosity and support of others. (And if I hadn’t found my way to Tartine, what a tragedy that would’ve been!)

Reach out for help when you need to. You don’t have to handle everything alone. And hey, you’re not under the water yet.

. . .

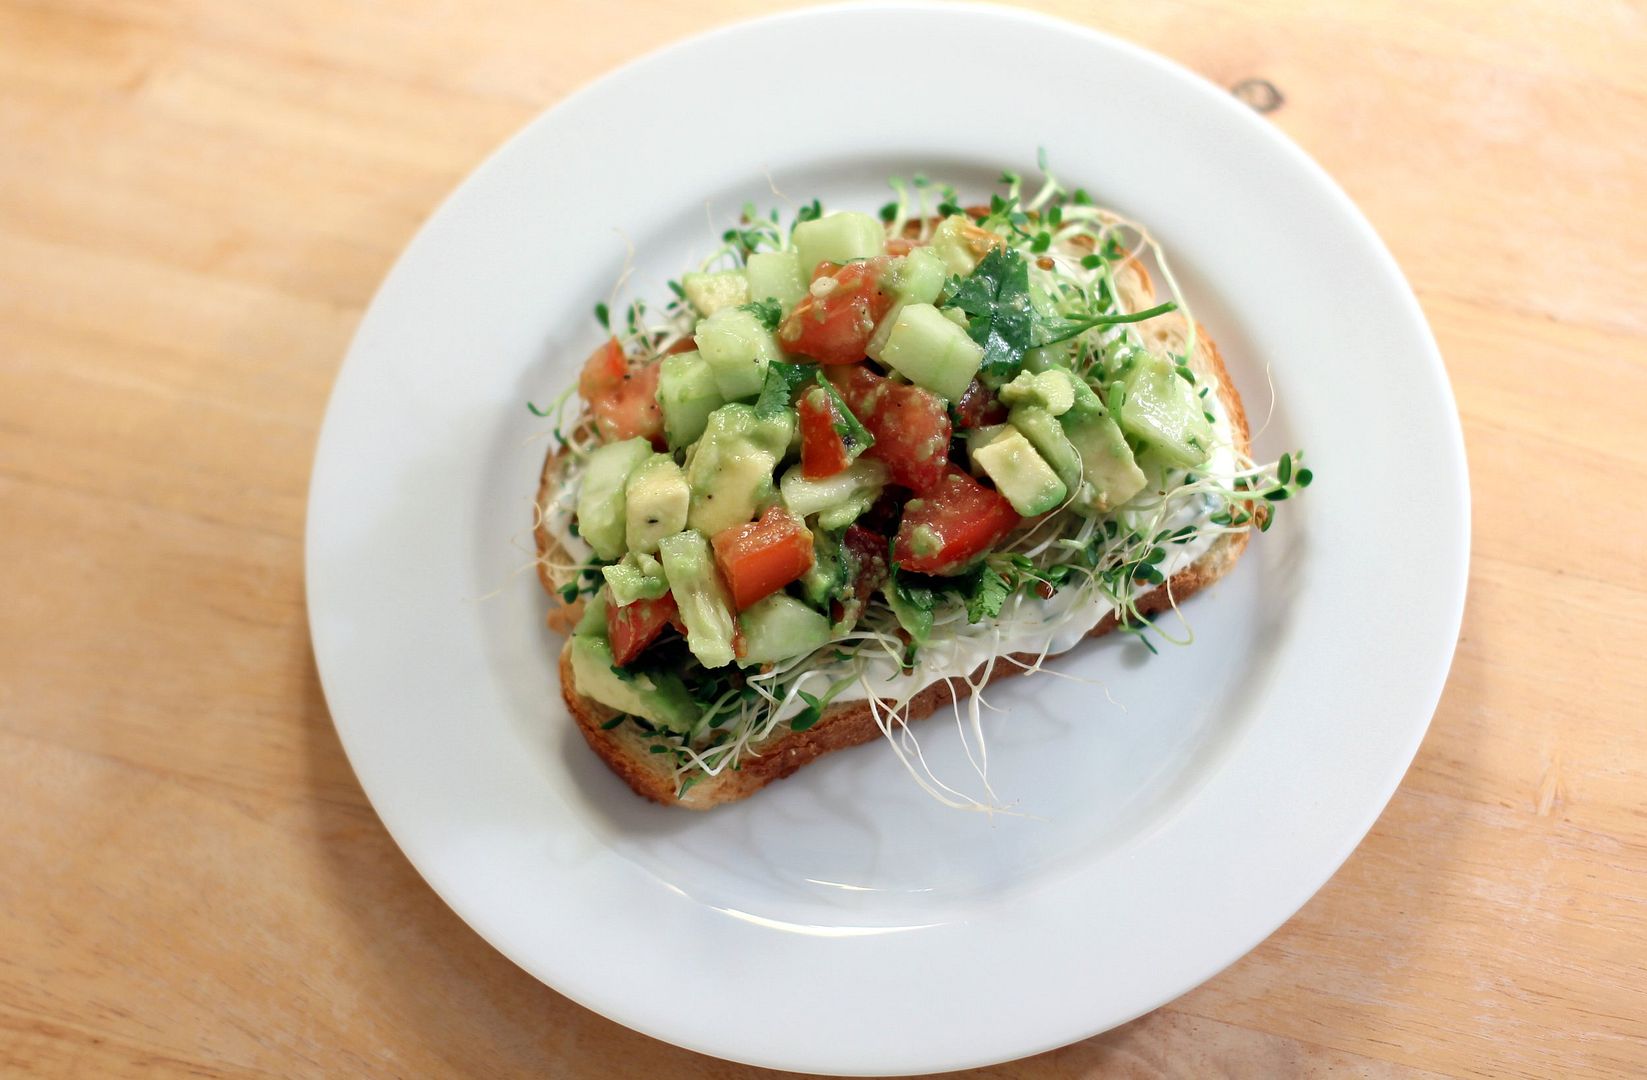
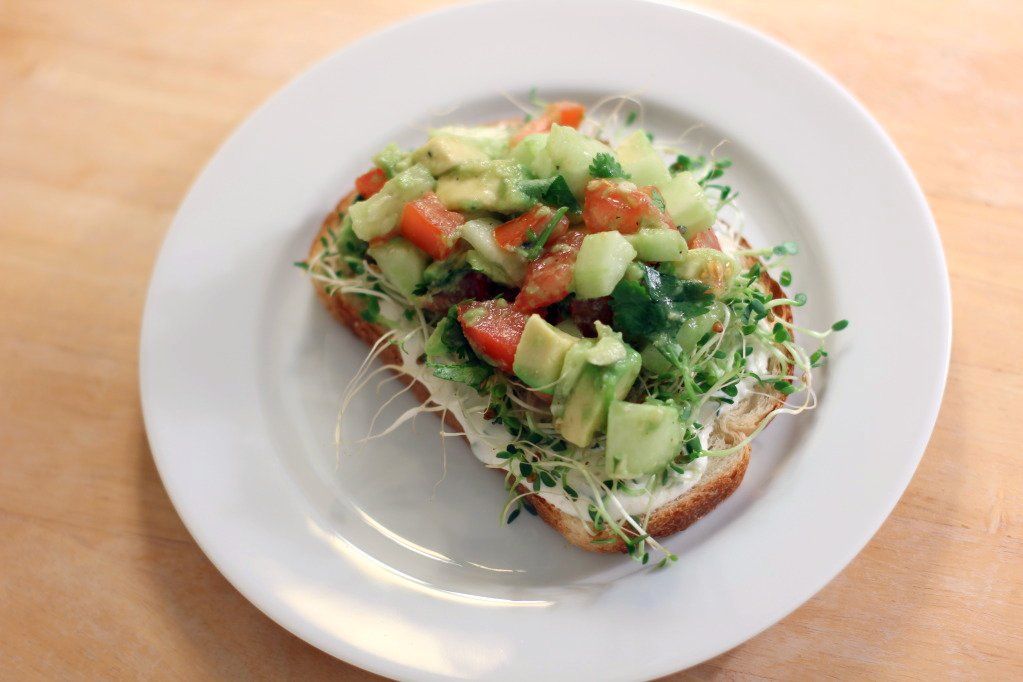
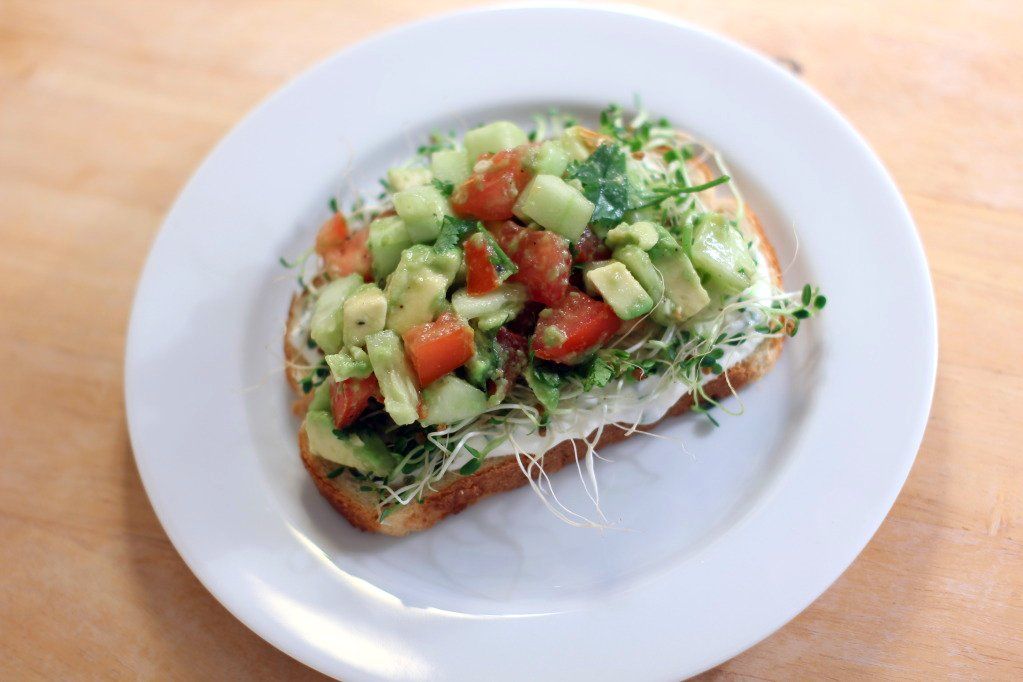
What better way to kick off my California posts than with a gorgeous open-faced California Sandwich? It’s just as healthy as it looks, but don’t worry — it doesn’t lack a thing in the taste department. In fact, it’s one of the best sandwiches I’ve ever made in my kitchen. It’s a fresh, tangy combination of flavors that you just feel good eating. I made it on sourdough bread, which I love — and how appropriate for all this talk of San Francisco.

Was there a time in your life when you’ve had to break down and accept the help and kindness of others?

Fresh Open-faced California Sandwich


Recipe by: Adapted from Ezra Pound Cake
Yield: 2 open-faced sandwiches

This quick sandwich is cool and refreshing. The bright California salad is comprised of tomatoes, cucumbers, cilantro, and avocado bathed in lime juice. It rests on a tangy chive spread and a thick, toasty slice of sourdough bread. I was pleasantly surprised at how delicious the finished product was considering how little effort went into assembly. This sandwich would make the perfect lunch or light dinner.

Chive Spread Ingredients:
2 tablespoons plain yogurt
2 tablespoons mayonnaise
1 tablespoon finely chopped fresh chives
Salt and pepper, to taste

California Salad Ingredients*:
1 avocado, peeled, pitted and diced
1 tomato, cored and chopped
1 cucumber, peeled, seeded and diced
Squeeze of lime juice
2 tablespoons chopped fresh cilantro
Salt and pepper, to taste
*This makes enough salad for 4 sandwiches, if you wanted to put a smaller amount on each, but I really heaped it on. I wanted more salad and less bread per sandwich. Yum!

Other Things You Need:
2 slices of thick sourdough bread
1/2 cup alfalfa sprouts

Directions:
Make the chive spread by mixing the yogurt, mayonnaise, chives, salt, and pepper in a small bowl. Set aside. Toast the 2 slices of bread in toaster or in a buttered skillet over medium heat. Lay these out on a plate.

Make the California salad by tossing avocado, tomato, cucumber, lime juice, cilantro, salt, and pepper together in a bowl. Spread each slice of bread with half of your chive spread and pile on half of the alfalfa sprouts. Then top with half of the California salad, piled high. I ate mine with a knife and fork and considerable enthusiasm.

If you liked this post, please:
Subscribe to Willow Bird Baking
Follow Willow Bird Baking on Twitter
Follow Willow Bird Baking on Facebook
Give this post a thumbs up on StumbleUpon
Pin It


ShareOther ways to share this post with friends!

Quick Dinner: Garlicky Peanut Noodles with Crunchy Vegetables

I was a mess of elbows and ankles today as I ran around school, the grocery store, the bank, and my apartment desperately trying to tug loose ends together.

In the store, I deftly ran over my own foot with a grocery cart just minutes before dropping not one but two 12-packs of diet Sunkist.

People stared. I acted nonchalant: Whatever, don’t act like you’ve never thrown some soda around. Totally under control over here.

I’m now doing laundry, packing Byrd’s things, packing my things, fixing up lesson plans, adjusting my budget, wrestling with Squirt’s stupid filter, and trying to find a moment to shave my legs. Oh, and writing a blog post, naturally.

All of this craziness came about because tomorrow I’m waking up at 3 in the flippin’ morning, collecting my mountain of luggage, and heading to San Francisco (with flowers in my hair! Except not really.) The 3rd annual Foodbuzz Blogger Festival is this weekend, and I can’t wait to eat lots of good food and see some sweet people.

Well, I can totally wait for the airplane part, though. In fact, can we just delete that part altogether? I’m one of those hyperventilating-just-a-little, having-occasional-panic-attacks, making-weird-faces people you hope you don’t have to sit next to on the plane. It’s cool; as long as I take my pills I should be able to limit the panic to some periodic weeping in the window seat.

I kid, I kid. The pills actually knock me straight out. I may snore, but at least I won’t be convulsing?

Anyway, back to the current chaos. Even with all the hubbub tonight, I threw together a homemade dinner. I’ve been eating this quick, 15 minute pasta dish like it’s goin’ out of style since I saw it on Not Without Salt. It checks all of my most important boxes for a weekday meal: it’s low calorie, it’s almost effortless, it’s tasty, and it’s piled sky-high with fun toppings.

The peanut butter and soy sauce together form a hearty, savory sauce that’s saved from straight-up bitterness by a few glugs of white wine and some gorgeous carrot curls. I threw on some green onions, chopped peanuts, lime juice, and tons and tons of bean sprouts before mixing the whole dish together and digging in. I love that gorgeous salty soy sauce flavor in every bite.


crunch.

All right, my loves. On that crunchy, delicious note, I’m off to ‘Frisco (I know, don’t worry. I’ve already read all the blogs about how much locals hate it when tourists call it that) for a food adventure. Stay safe, and stay off airplanes, you crazies! If people were meant to fly, God would’ve given us jet engine biceps. Or helium-filled love handles. Or, like, wings or something.

P.S.: My apartment will be occupied and supervised while I’m gone. Probably by robots that throw themselves into bonfires so they can incinerate you in a fiery embrace. Nice try, thieves of the interwebz!

P.S. 2: AHHHHHHHH AIRPLANES.

Garlicky Peanut Noodles with Crunchy Vegetables


Recipe by: Adapted from Not Without Salt‘s recipe inspired by Nigel Slater
Yields: 4 servings

These noodles are bathed in a salty, garlicky peanut sauce before being topped with an array of crunchy toppings: carrot curls, bean sprouts, green onions, chopped peanuts, sesame seeds. A spritz of lime juice and a good toss finishes the dish in just 15 minutes. I love simple weekday meals.

Ingredients:
3 tablespoons peanut butter (or tahini if you’d rather, but I haven’t tried it)*
1/3 cup soy sauce*
2 tablespoons rice wine (or dry white wine)
1 tablespoon rice wine vinegar
1 1/2 tablespoons Sesame oil
4 cloves garlic, minced
1 tablespoon chopped shallot
4 servings’ worth of spaghetti (or other long noodle)
*You may need to adjust peanut butter and soy sauce to your taste preferences (more peanut butter for sweetness, more soy for saltiness)

Optional Toppings:
carrot curls (just take a vegetable peeler to a peeled carrot to get these)
bean sprouts (boil these for a few minutes and then rinse in cold water for safety)
chopped green onions
chopped peanuts
sesame seeds
squeeze of lime

Directions:
Boil salted water over medium-high heat and cook pasta to al dente according to package instructions. Drain, return to pan, and set aside.

In a food processor, combine the garlic and shallots and process until fine. Scrape down the sides of the processor bowl with a spatula and then add the peanut butter, soy sauce, wine, vinegar, and sesame oil and process until combined. Add this sauce to pasta in pan and toss to coat.

Serve pasta on plate topped with shredded carrots, green onions, chopped peanuts, sesame seeds, bean sprouts, and a slice of lime.

If you liked this post, please:
Subscribe to Willow Bird Baking
Follow Willow Bird Baking on Twitter
Follow Willow Bird Baking on Facebook
Give this post a thumbs up on StumbleUpon
Pin It


ShareOther ways to share this post with friends!

Naked Vegan Tacos with Corn Relish and Cilantro-Lime Slaw

Do not make naked vegan tacos while naked.

Yes, I know it’d be clever. I know it’d be a fun story to tell your friends (who would then promptly decline all future dinner invitations). But if one splatter of hot oil goes awry, all amusement you had hoped to gain from the experience will promptly disintegrate (along with patches of your skin, I’m just sayin’).


Make me with clothes on, please.

Also, do not assume Naked Vegan Tacos are made specifically for naked vegans. You may certainly eat these if you are a naked vegan, but clothed vegans are also welcome to partake. Even you omnivorous folks (clothed or otherwise) can enjoy this recipe if you’re so inclined.

This is an equal opportunity blog, y’all.

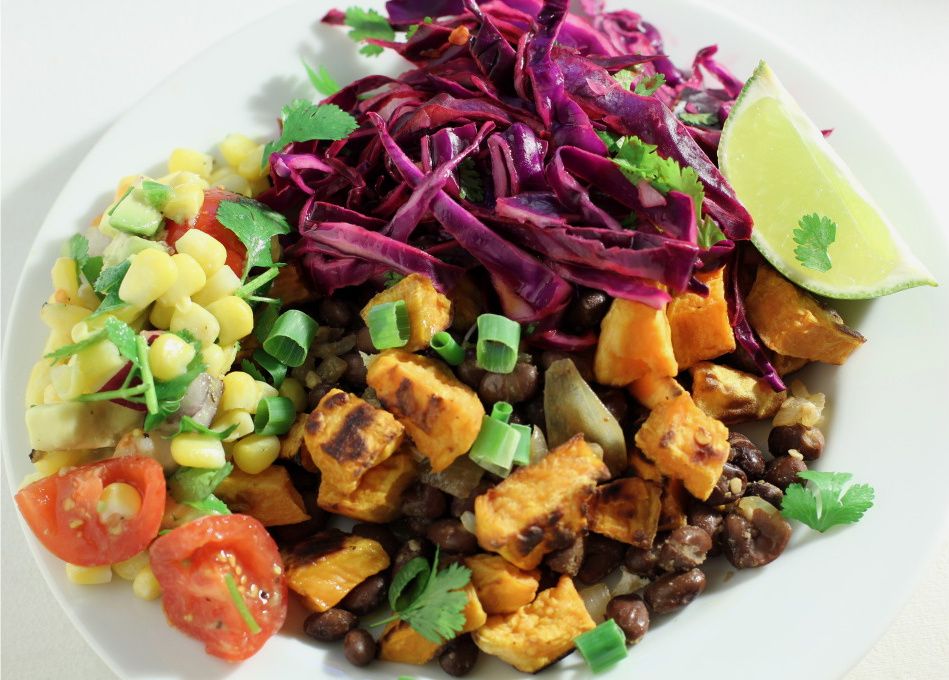
So why are Naked Vegan Tacos called Naked Vegan Tacos? ‘Cause they’re not wearing their taco shells! All the lovely stuffins of a vegan taco are included, but engineered for your fork instead of your hands.


Exposed.

This quick dinner was a take on sweet potato and black bean tacos, a dish I’ve had on my to-make list forever. Just as I expected, the sweetness of the roasted sweet potatoes was fantastic with the heat and cumin in the black beans. The cilantro-lime slaw added acid and crunch. The corn relish — boasting bright corn, tomatoes, and creamy hunks of avocado — cooled things off.

This huge, cheap, flavorful meal was so satisfying; I ate it over the course of 4 days and loved every bite, even though the avocados were oxidizing (i.e. turning all brown and creepy) after the first day.


Not vegan anymore.

Since it’s full of veggies, only 451 calories per serving, and includes components to make up complete proteins, I’m also going to decree that this meal is healthy (though I’m no expert). Serve it atop your favorite grain for an even more filling dinner. Heck, you could even go crazy and serve the tacos in flippin’ taco shells. You know, if you’re that kind of person.

What’s your favorite fresh vegetable?

Naked Vegan Tacos with Corn Relish and Cilantro-Lime Slaw


Recipe by: Adapted from Joy the Baker and Paula Deen
Yields: 4 servings

The focus of this meal is flavor. Roasted sweet potatoes sweeten, black beans with cumin bring the heat, cilantro-lime slaw adds crunch and acid, and a bright corn relish with creamy avocado and juicy tomatoes lends freshness. Filling my plate with all of these lovely bits and pieces and then spending my entire dinner creating various perfect “bites” was so satisfying — especially since it was also healthy.

Sweet Potatoes Ingredients:
2 sweet potatoes, peeled and cut into small cubes
1 tablespoon olive oil
salt and red chili flakes to taste
juice of 1 lime

Cilanto-Lime Slaw Ingredients:
2 heaping cups finely shredded cabbage
1/4 cup finely diced yellow onions
2 heaping tablespoons chopped cilantro
juice of 2 limes
salt and red chili flakes to taste

Black Beans Ingredients:
1 teaspoon olive oil
1/4 cup finely diced yellow onion
1 teaspoon ground cumin
1 (15-ounce) can black beans, drained and rinsed
juice of 1 lime

Corn Relish Ingredients:
2 cups cooked corn, fresh or frozen
1 avocado, cut into 1/2-inch cubes
1 pint cherry tomatoes, halved
1/2 cup finely diced red onion
1 teaspoon finely diced jalapeno (or to taste)
2 tablespoons olive oil
1 tablespoon fresh lime juice
1/4 cup chopped cilantro
1/4 teaspoon salt
1/4 teaspoon pepper

Optional Extras:
Fried or poached egg (obviously this makes it un-vegan)
salsa, fat free sour cream, green onions, fresh cilantro, limes

Directions:
Make sweet potatoes: Preheat oven to 400 degrees F. In a bowl, toss sweet potato cubes with oil, salt, chili flakes, and lime juice. Spread out on a baking sheet. Roast 40-45 minutes (stirring/flipping gently a couple of times during the process) or until tender and brown. Remove the potatoes from the oven and set aside.

Make Cilanto-Lime Slaw: While the potatoes are roasting, place shredded cabbage, onions, cilantro, lime juice, salt, and chili flakes in a bowl. Toss them together and set aside to let the cabbage soften.

Make Black Beans: Heat oil in a saucepan over medium-high heat. When the oil shimmers, add the onions and cook them for a few minutes until they’re soft and translucent. Add the cumin and garlic and toast these for a few seconds until fragrant. Finally, add the beans and lime juice and cook until they’re heated through.

Make the corn relish: Mix the corn, avocado, tomatoes, jalapenos, and onion in a large bowl. Whisk together the oil, lime juice, cilantro, salt, and pepper in a separate bowl. Pour it over the corn mixture and gently toss.

Assemble: Serve your naked tacos by heaping sweet potatoes and black beans on a place and garnishing with a big spoonful of cilantro-lime slaw and corn relish. Accompany your meal with a dollop of sour cream, fresh cilantro, chopped green onions, and salsa. If you fancy some added protein and aren’t vegan, you can top with a poached or over-easy fried egg.

If you liked this post, please:
Subscribe to Willow Bird Baking
Follow Willow Bird Baking on Twitter
Follow Willow Bird Baking on Facebook
Give this post a thumbs up on StumbleUpon


ShareOther ways to share this post with friends!

1 17 18 19 20 21 27