nuts

Carrot Cake Waffles

Wouldn’t it be cool if bakers got to choose flashy names like WWF Wrestlers? You could be the Vanilla Villain, the Meat Tenderizer, the Mighty Masher, the Blender Blade, the Sweaty Spatula.

Ew. Nevermind that last one.
Today, my flashy baking name is the Waffle Wrangler. See, I finally acquired a waffle iron. Or . . . okay, actually I acquired it months ago. You’ll forgive me for not having tried it out yet, right? Especially since I happen to know for a fact your waffle iron is sitting under a coat of dust in a dark cabinet somewhere? It’s okay! No shame! You just need a reason to lug it out, wipe it off, and heat it up. I think I can help.
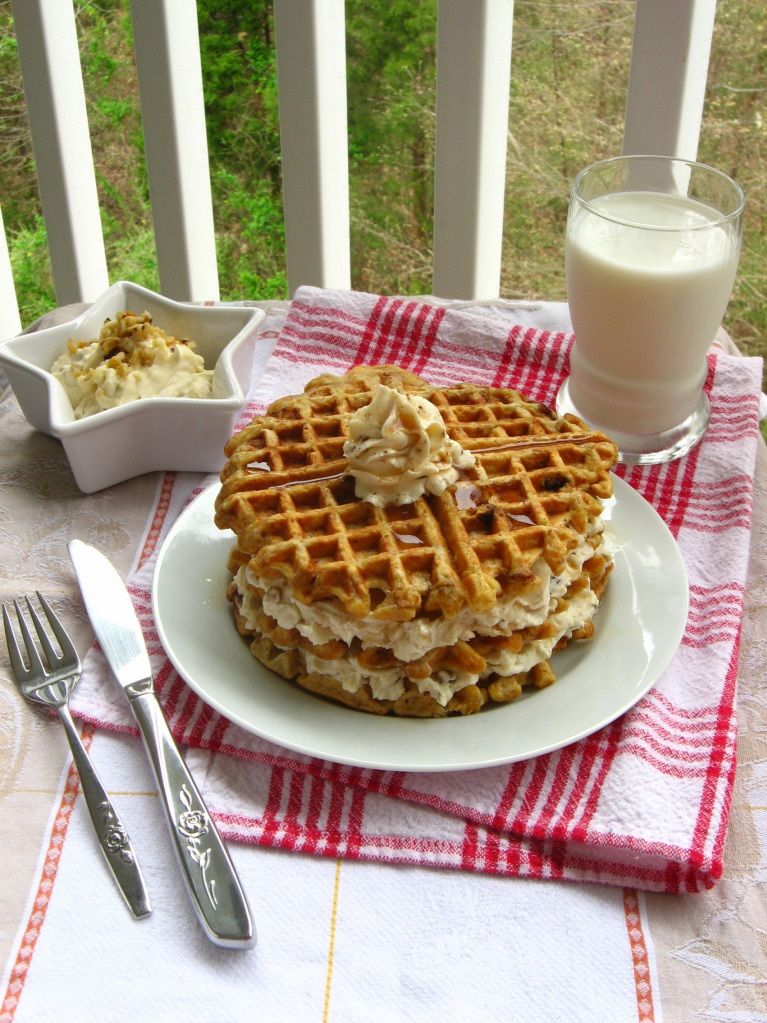
Despite appearances, I have been anxious to try this baby out. Waffles seem especially apt for one of my favorite culinary tricks: combining two well-known dishes into one. For instance, the recipes for Peach Cobbler Cupcakes, Peach Crisp Pie, and Blueberry Lemon Cheesecake Cupcakes each combine two desserts into a super-dessert.
So of course, I’ve spent the last few weeks pondering what sort of waffles to create. I could’ve taken a cue from this breakfast and made Pecan Maple Bacon Waffles (yum), but I had an urge to try something new. Apple or peach crisp waffles? Chocolate cake waffles? A bacon, egg, and cheese waffle sandwich? Peanut butter and jelly waffles? And then, as if Mike were sending me telepathic messages reminding me about his favorite dessert, it dawned on me . . .
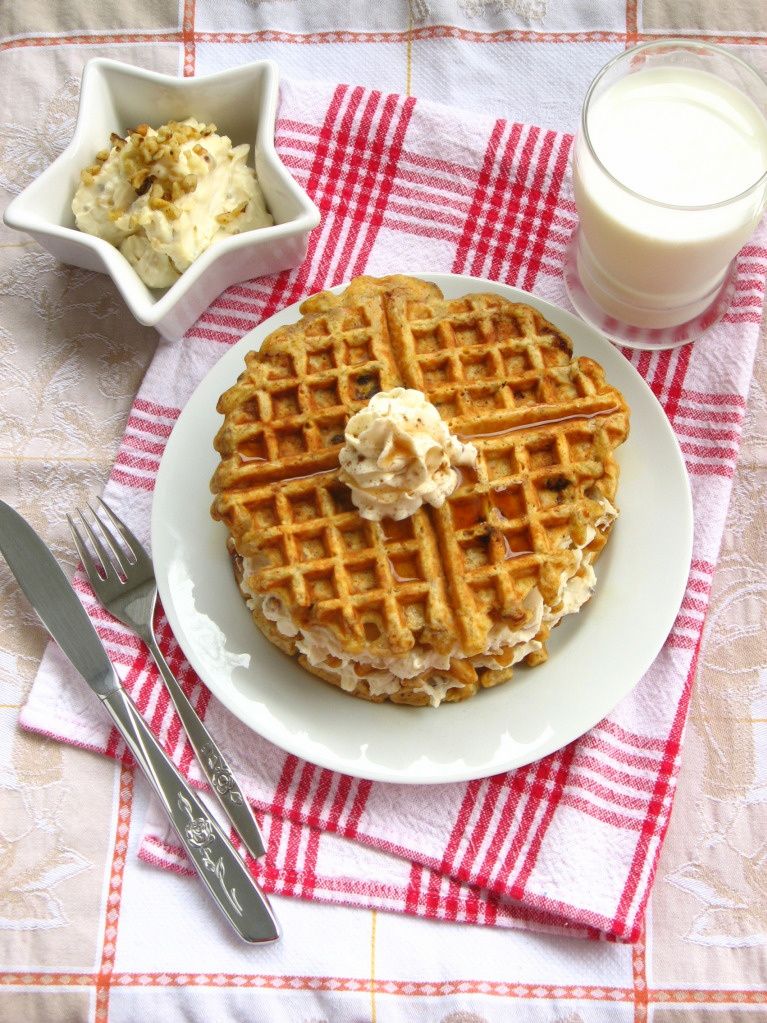
CARROT CAKE WAFFLES! I’ve actually been trying to think of some recipe to add carrot cake flavors to after seeing this amazing Carrot Cake Ice Cream over on Not Quite Nigella. This was my chance!

The foundation of the recipe I’ve spliced together is a simple but delicious buttermilk waffle recipe. To it, I’ve added the spice cake flavors of cinnamon, allspice, and nutmeg, bloomed in brown butter according to America’s Test Kitchen’s recommendation. I also added the lovely hunks you’d find in any carrot cake: raisins, chopped walnuts, and grated carrots. Finally, the waffles were topped with a schmear of Maple Nut Cream Cheese spread, which merges the main component of traditional carrot cake frosting with the familiar breakfast flavor of maple.
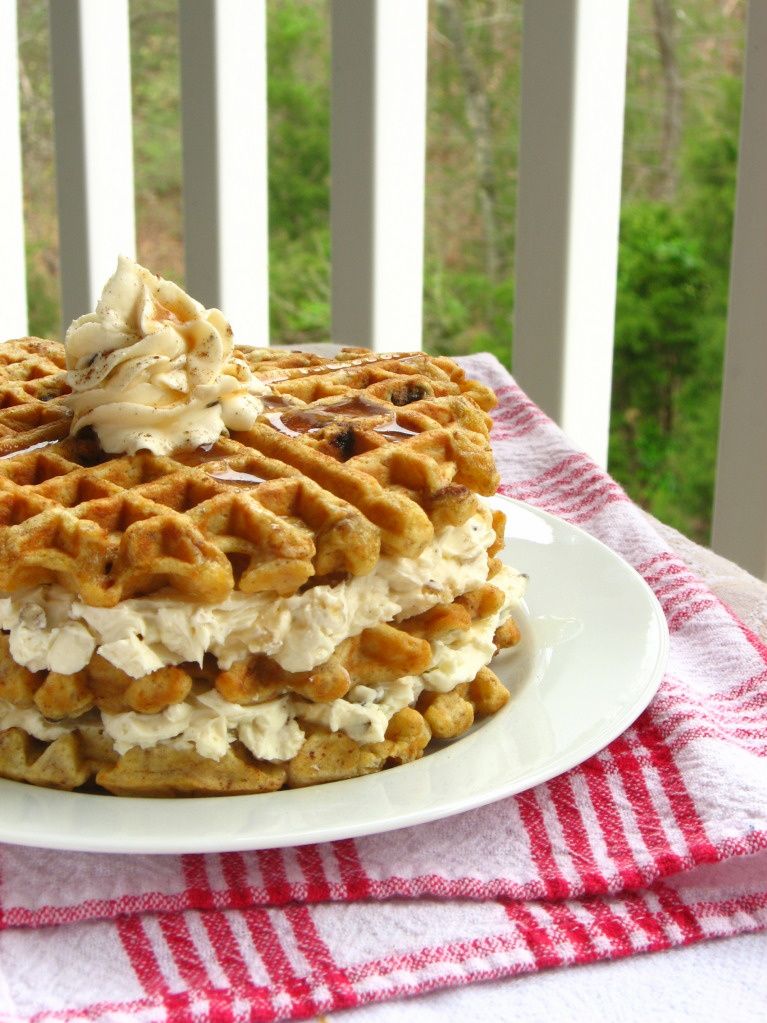
I was nervous the entire time I was mixing this batter: would it be the right consistency? Would the raisins and carrots burn? But it worked out perfectly! I did a little dance of joy (inwardly — mustn’t alarm the roommate!) with each waffle I successfully wrangled off of my waffle iron.

And how did they taste? Delicious, and exactly like you might expect: like the convergence of a hunky carrot cake and a fluffy waffle! The spices were warm and aromatic, and the nuts, raisins, and carrots made for a hearty texture. And I can’t forget one of the best parts: the Maple Nut Cream Cheese spread.
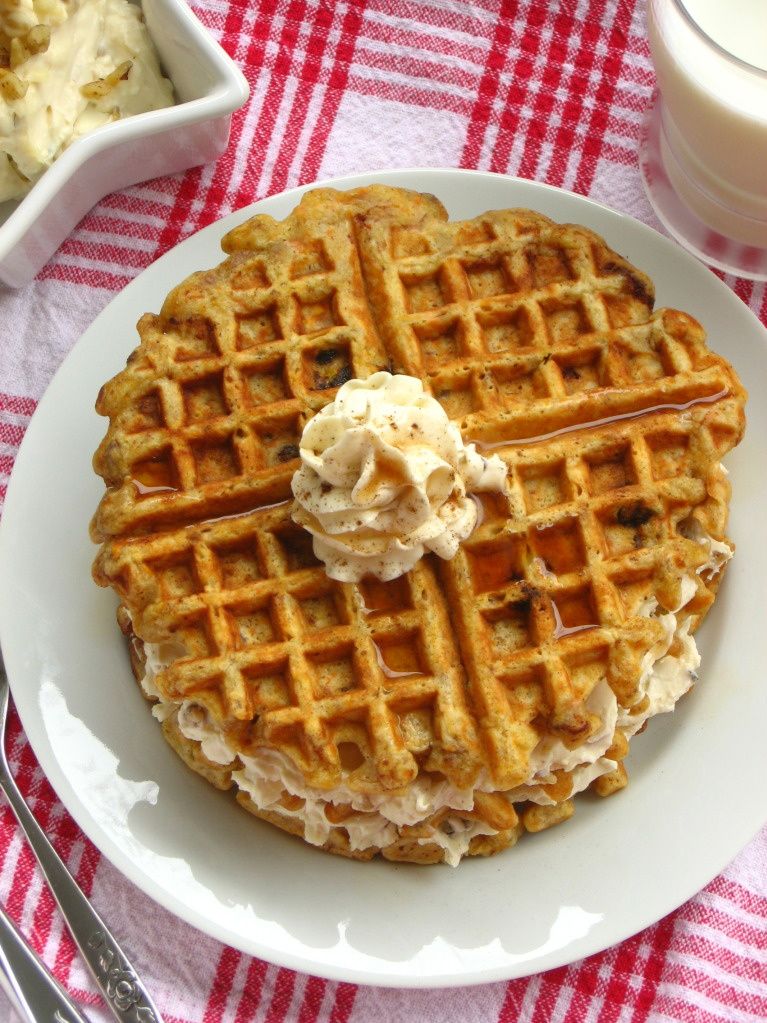
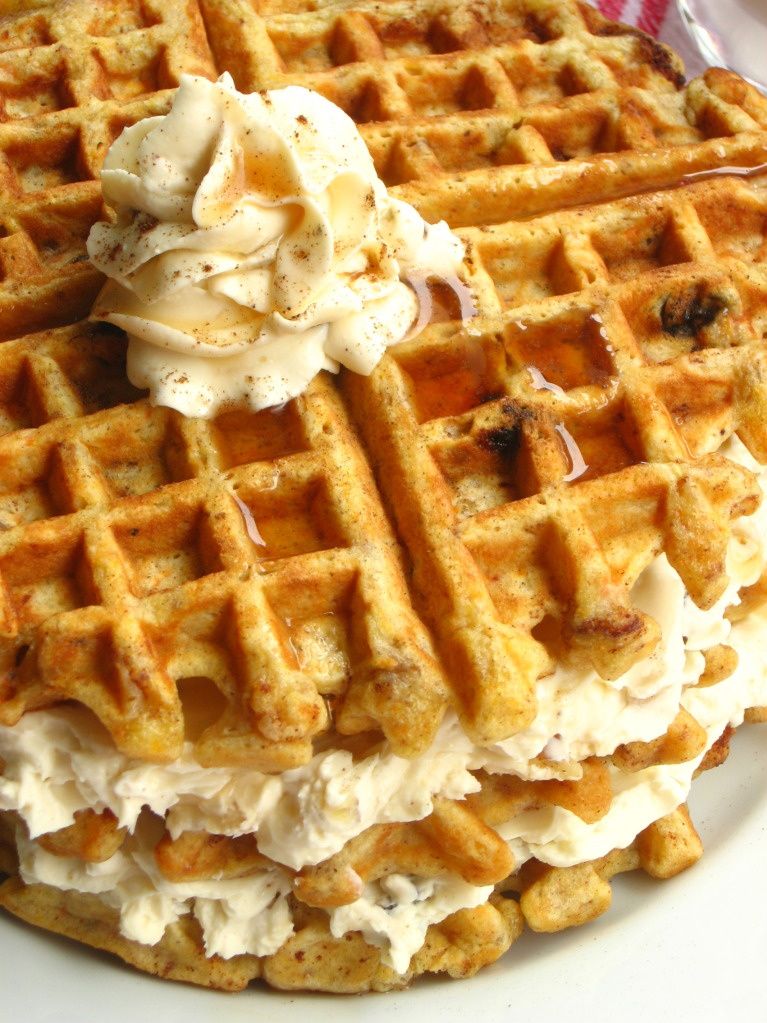
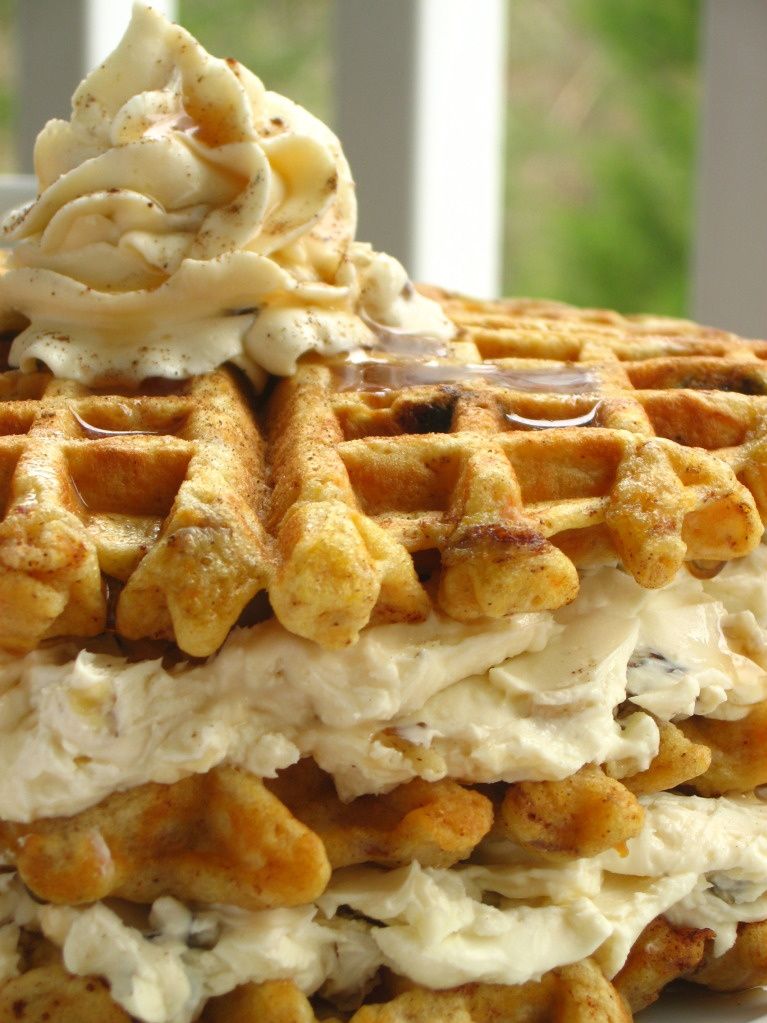
This Maple Nut Spread is ridiculous! If your cream cheese isn’t already softening to mix some up, you should grab it out of the fridge right now. It’s rich, creamy, and perfectly sweet, with the satisfying crunch of chopped walnuts. I want to spread this stuff on bagels, toast, waffles, you name it. The photos you see here (in which I tried to build a “layer cake” out of the waffles — ha ha, get it? Carrot Cake Waffles?) are only a slight exaggeration of how much Maple Nut Cream Cheese I ate with my breakfast. I’m too embarrassed to tell you how much of it I ate straight from the spoon, so just take my word for it: you’re going to love it.

Okay, you have your reason — now go dust off your waffle irons! Have your cake and eat it for breakfast, too!

5 from 1 reviews
Carrot Cake Waffles
 
Prep time
Cook time
Total time
 
It's like your favorite dessert -- but it's breakfast!!
Ingredients
Waffle Ingredients:
  • 2 cups all-purpose flour
  • 1/2 teaspoon salt
  • 2 tablespoons sugar
  • 1 1/2 teaspoons baking soda
  • 1 teaspoon cinnamon
  • 1 teaspoon nutmeg
  • 1 teaspoon allspice
  • 1 3/4 cups buttermilk
  • 2 eggs, separated
  • 4 tablespoons (1/2 stick) butter
  • 1/2 teaspoon vanilla extract
  • 1 cup raisins
  • 1 cup walnuts, chopped
  • 1 1/2 cup finely grated carrots
  • Cooking spray for waffle iron
Maple Nut Cream Cheese Spread Ingredients:
  • 8 ounces cream cheese, softened
  • 3-4 tablespoons maple syrup
  • 1/8 cup chopped walnuts
Instructions
  1. Bloom the spices in butter: Heat 4 tablespoons butter in skillet over medium heat until melted, 1 to 2 minutes. Continue to cook, swirling pan constantly, until butter is light brown and has faint nutty aroma, 2 to 4 minutes. Add spices and continue to cook, stirring constantly, 15 seconds. Remove from heat and cool to room temperature, about 30 minutes.
  2. Combine the flour, salt, sugar, baking soda.
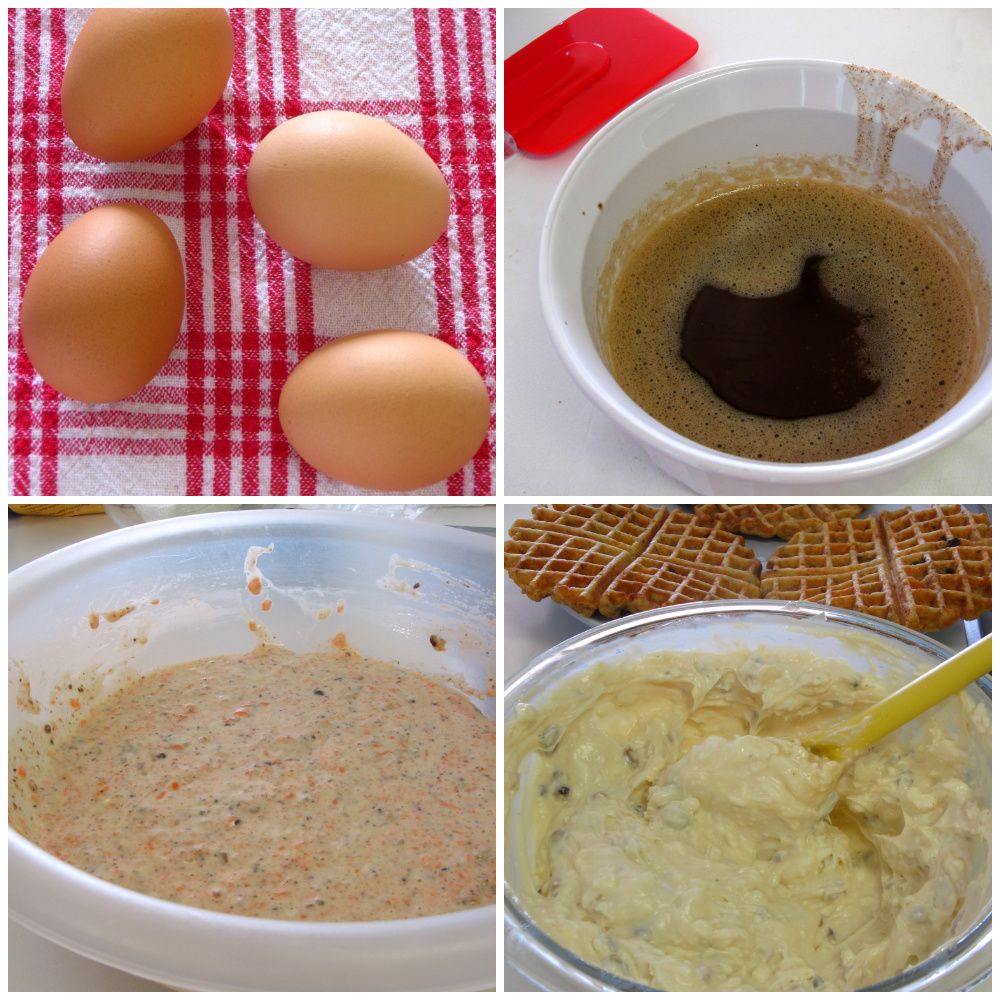
  3. Mix together the buttermilk (or buttermilk substitute) and the egg yolks. Stir in the spiced butter and vanilla. Spray the waffle iron well and preheat it. Stir the wet into the dry ingredients.
  4. Beat the egg whites in a separate bowl with a whisk or electric mixer (make sure bowl and mixer are spotlessly clean) until they hold soft peaks. Stir them gently into the batter. Add carrots, walnuts, and raisins. Stir gently to combine.
  5. Spread a ladleful or so of batter onto the waffle iron and bake until the waffle is done, usually 3 to 5 minutes, depending on your iron. Spray iron with cooking spray between waffles as needed.
  6. To make Maple Cream Cheese spread, simply combine nuts, syrup, and cream cheese and mix well. Serve waffles immediately with a schmear of Maple Cream Cheese spread (which will get lovely and melty), or keep them warm for a few minutes in a low oven. Waffles also freeze well. You can make a big batch, allow them to cool, and freeze them for a homemade alternative to preservative-laden commercial frozen waffles.


Breakfast for dessert-lovers!

A&P Spanish Bar Cake

In case you were wondering: No, I cannot eat all these desserts by myself. First of all, I’d rather not weigh 400 pounds — I just don’t think that’d be a very fun way to live. Secondly, even if I developed some wonderful condition that kept me trim regardless of how much pie I ate, baking is no fun unless you can share it with people you love. For me, one of the most rewarding parts of being a food blogger is watching people enjoy the things I’ve made (that sounds creepy, like I sit and stare at them as they eat, but I’m sure you know what I mean).

One group of folks I love to bake for is Mike’s family. Each Sunday evening we gather at their house for dinner and I bring whatever dessert I’ve whipped up. His mom is a fantastic cook, so the meal is always devoured enthusiastically. Many times I almost don’t think I have room for dessert! I say almost, because y’all know that there is always room for dessert.

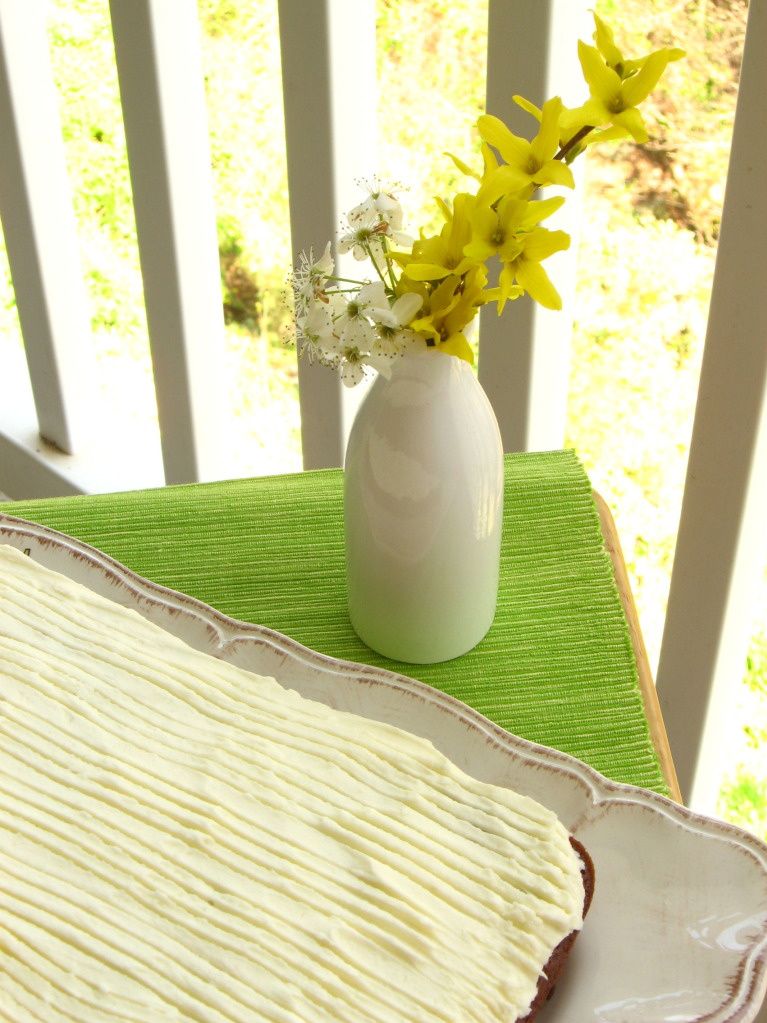
Yay, SPRING!!

One reason I love to bake for Mike’s family is because they’re always encouraging — even if the results of my culinary efforts that week are not perfect! Don’t you love the people in your life who take one look at your runny pie and say, “Nevermind, it tastes delicious!” My own family deserves this praise as well, since they were served Coconut Cream Soup for Thanksgiving and ate it with cheerful smiles and compliments. Yep, those kind of folks are the keepers!

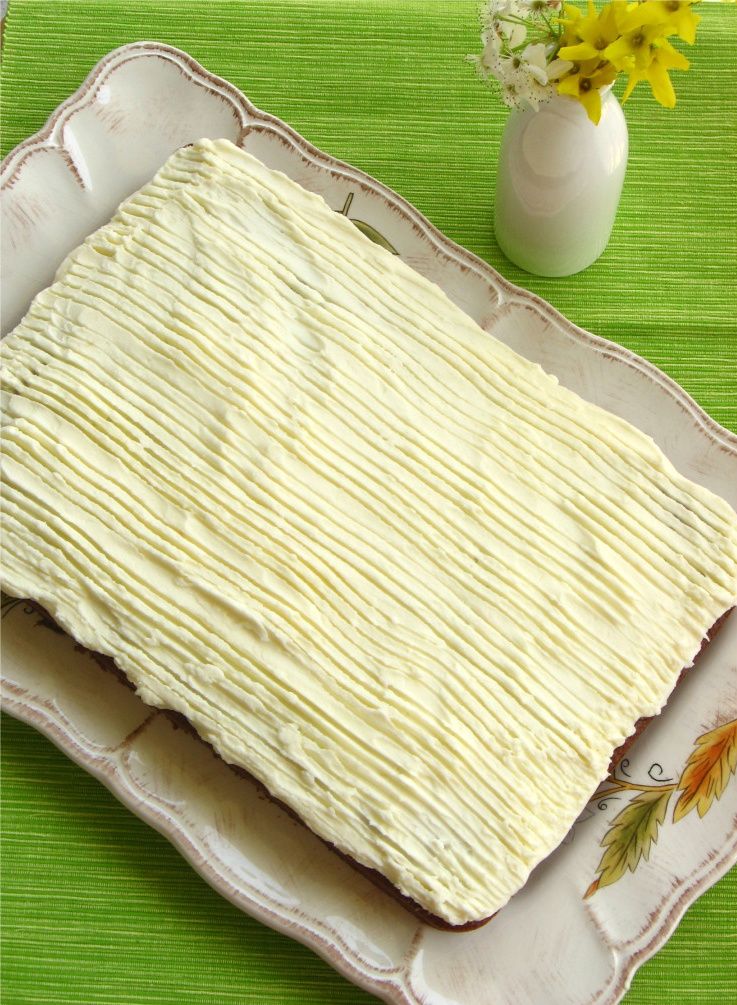
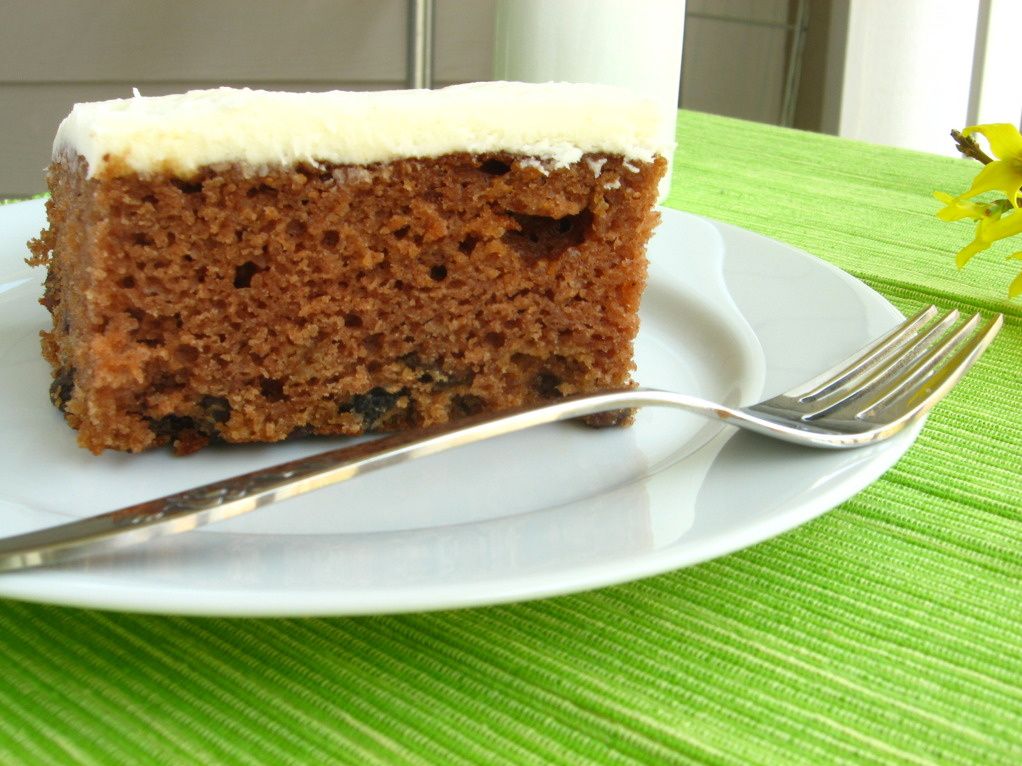
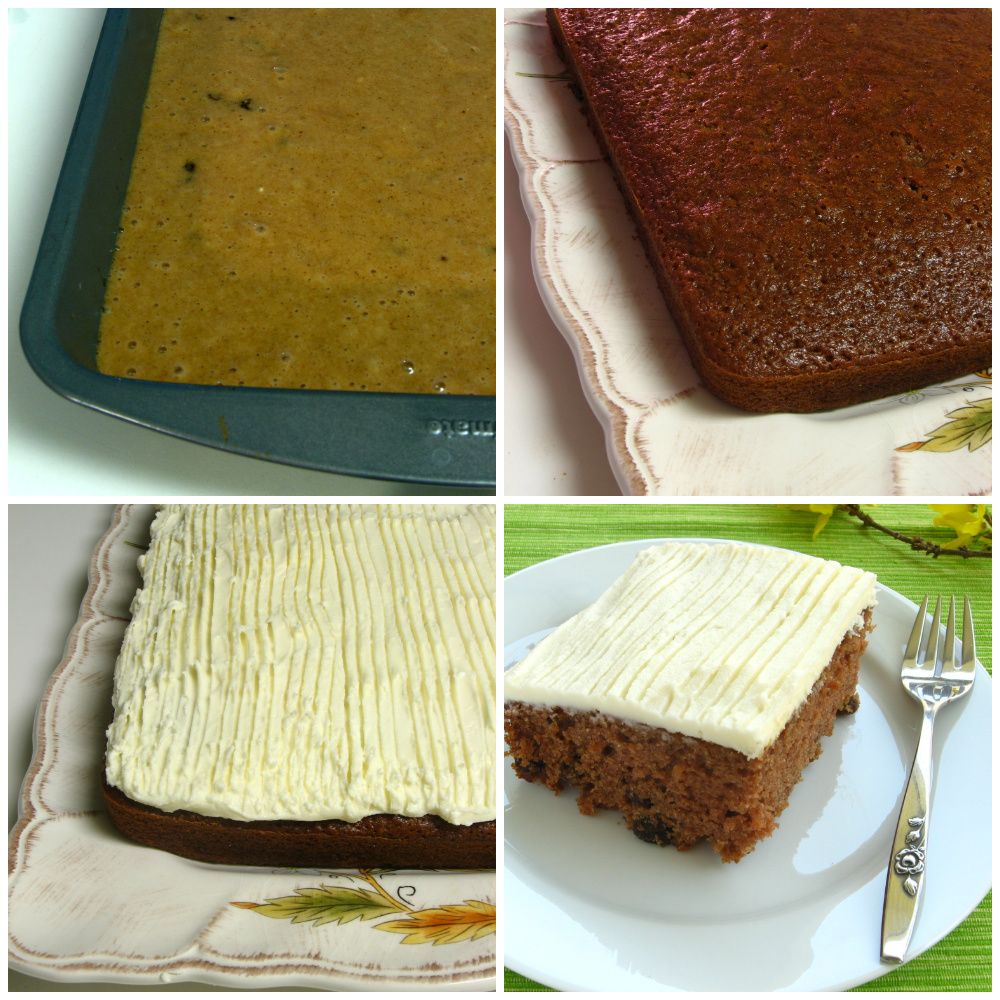
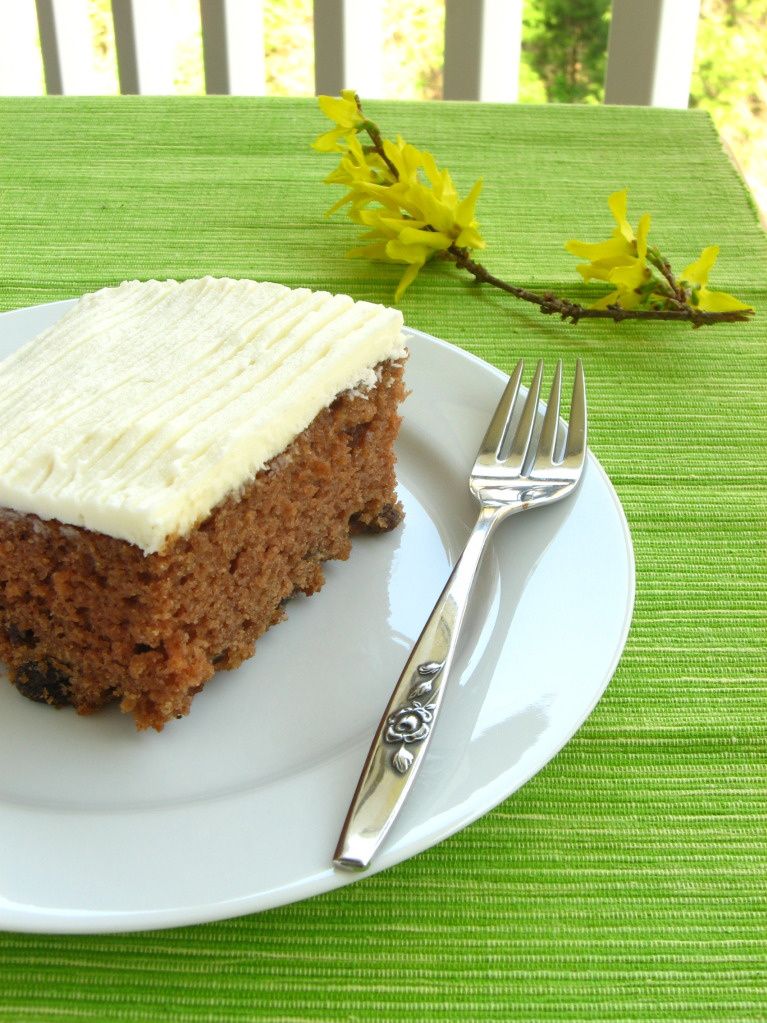
Because Mike’s family has been so supportive of my baking, I jumped at the chance this past weekend to create something a little special for them. A couple Sundays ago, Mike’s dad mentioned a cake his dad used to bring home from the old A&P store. The cake was called Spanish Bar Cake, and he described it as a dark brown cake with raisins and a creamy white frosting. I was so excited to recreate the memory that I started googling around that night.

What did I find? Well, first off, Mike’s dad is not the only one by far who wants to recreate the cake! Many online forums had pages of nostalgic posters describing their childhood experiences with the cake. They discussed every facet of their vivid Spanish Bar Cake memories : the color, the texture, the pattern on the frosting, the shape, the packaging . . . ! I also found many copycat recipes that boasted an identical taste and appearance to the original.

Not having tasted Spanish Bar Cake myself, I found it difficult to settle on a recipe! There were a few key disparities I had to evaluate. First, some recipes used cocoa powder, while some were a more traditional spice cake. After asking Mike’s dad to describe the color again, I decided to use the recipe that included the cocoa.

Another difference in the recipes I viewed was the frosting. Some used a standard cream cheese frosting, while others used white buttercream. I chose the latter, though I love cream cheese frosting. I reasoned that if the cakes were not refrigerated and had groove marks in the frosting, chances are the frosting would need to be safe when stored at room temperature and relatively stiff. Hence, buttercream. There were other, smaller decisions to make — things like nuts or no nuts (I chose no nuts), one layer or two (I chose one) — and then I was ready to bake!

One bonus of this cake is how simple it is to make! I must be on an easy cake kick. It’s a two-bowl process (one for the cake and one for the frosting). In a nutshell, you mix the dry ingredients, add the wet, bake, cool, mix the frosting, frost. No fuss.

If you have fond memories of this old A&P cake, bake one up for yourself and enjoy a blast from the past. I’ll add a note tomorrow to let you know how close to the original this recipe is, based on Mike’s dad’s reaction!

UPDATE: Score! Mike’s dad said as soon as it touched his tongue, the memories came flooding back! Apparently this is it, folks! He even said it seemed a bit moister than the original. Hurray!

Spanish Bar Cake


Recipe by: compiled from various internet sources
Yields: one 9 x 13 in. cake

Cake Ingredients:
2 cups flour
1 1/2 cups sugar
1 1/2 teaspoons baking soda
1 tablespoon cocoa (I used Dutch process)
1 teaspoon cinnamon
1 teaspoon salt
1 teaspoon nutmeg
1 teaspoon allspice
1/2 cup vegetable oil
2 cups applesauce
2 eggs
1 1/2 cups raisins, soaked in warm water until plump and drained

Buttercream Frosting Ingredients:
1 cup white shortening
1 cup butter, softened
8 cups confectioner’s sugar
1 teaspoon pure vanilla extract (can use clear if you want the frosting to be snow white)
4-6 tablespoons milk for thinning to desired consistency

Directions:
Preheat oven to 350 degrees F. Prepare a 9 x 13 in. baking pan with cooking spray (or butter and flour). Plump the raisins in warm water (I do this in a measuring cup that I’ll use for wet ingredients later — one less dish to clean).

In a large bowl, whisk all dry ingredients together. Add oil, applesauce, and eggs. Mix well. Add in raisins and stir to combine. Pour batter into prepared pan, rapping 3-4 times on a counter to release trapped air bubbles. Bake for 30-35 minutes or until a toothpick inserted into the center comes out with only a few moist crumbs. Let cake cool completely before frosting.

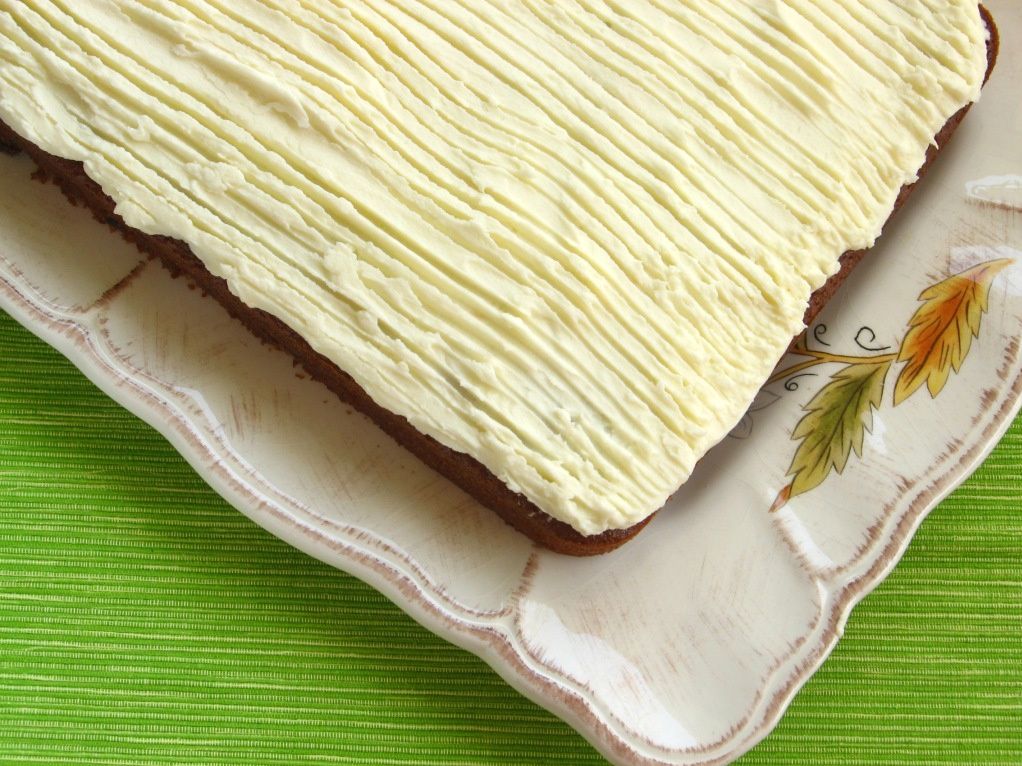
To prepare frosting, mix all ingredients until well combined. Add more milk if needed for consistency. Frost completely cool cake. Use a fork to rake grooves into the frosting to resemble A&P’s cake presentation.


Share Share this post with friends!

Oatmeal Cake with Broiled Icing

It was hard to get my baking accomplished this weekend, but if I could go back and do it all again, I wouldn’t change a thing. I just spent the weekend with 8 of the sweetest 6th graders on the planet. My church holds a youth conference each year called Disciple Now. Students travel to the homes of generous church members to spend two days worshiping God, studying His Word, and having fun. I was a family group leader, responsible for leading the gals through Bible studies and refereeing the occasional pillow fight.

My short time with those bright, silly, beautiful, brilliant young ladies was so rewarding — partly because at first, it didn’t feel like it was going very well. They were exhausted Friday when we arrived home after worship, and were in no state for the Bible study we had planned. Sleepiness, pointed watch-checking, and delirium ensued. I lay in bed that night and reiterated the prayer I’d prayed upon arriving at the event earlier in the afternoon: Lord, I know Your strength is made perfect in my weakness, and right now, I’m feeling very weak! Please come make this work for Your glory.

The next day, I spoke with other group leaders who had experienced that very same moment of brokenness late Friday night. My Bible study leader revealed that she had woken up at 3 am that morning with the urge to pray for us. I’m so thankful for her prayers and the faithfulness of God — because the fantastic time spent with the girls Saturday was not my doing, but His! Apart from wheelbarrow relay races, crabwalking, screaming contests, an obstacle course, and a whole lot of giggling, we had an amazing discussion of what it means to live a “backwards life” for Christ (here is a site where you can download a free copy of the devotional book we worked through on this topic). The girls revealed their hearts — friends they were praying for, their struggles in faith. At one point, we made a list of daring ways to share the gospel (“good news”) of Christ with our loved ones.

I’m adding one to my own personal list — posting the good news on Willow Bird Baking! You are all on my list of “loved ones”! You may not be a believer, but I challenge you to read and consider this message either way, in the spirit of allowing me to share something that’s important to my heart.

The central message of Christianity is this simple truth: we are all sinners, separated from God by our sins. We cannot remedy this by ourselves, but God so loved us that He sent His Son Jesus to live a perfect life and die in our place — paying the price for sin. Jesus was then resurrected to triumph over sin and death. If we confess with our mouth and believe in our heart that Jesus did this for us, we accept His free gift of what Christians call “salvation”: salvation from the price of sin, and an eternal relationship with God, who is a wonderful Father.

If this is the first time you’ve heard or understood what Christ did for you, will you take a moment right now and tell Him you’re accepting His gift? If you’re already a believer, will you take a moment and thank Him again? Lastly, if you’re reading this right now and have questions, please leave me a comment with your email address.

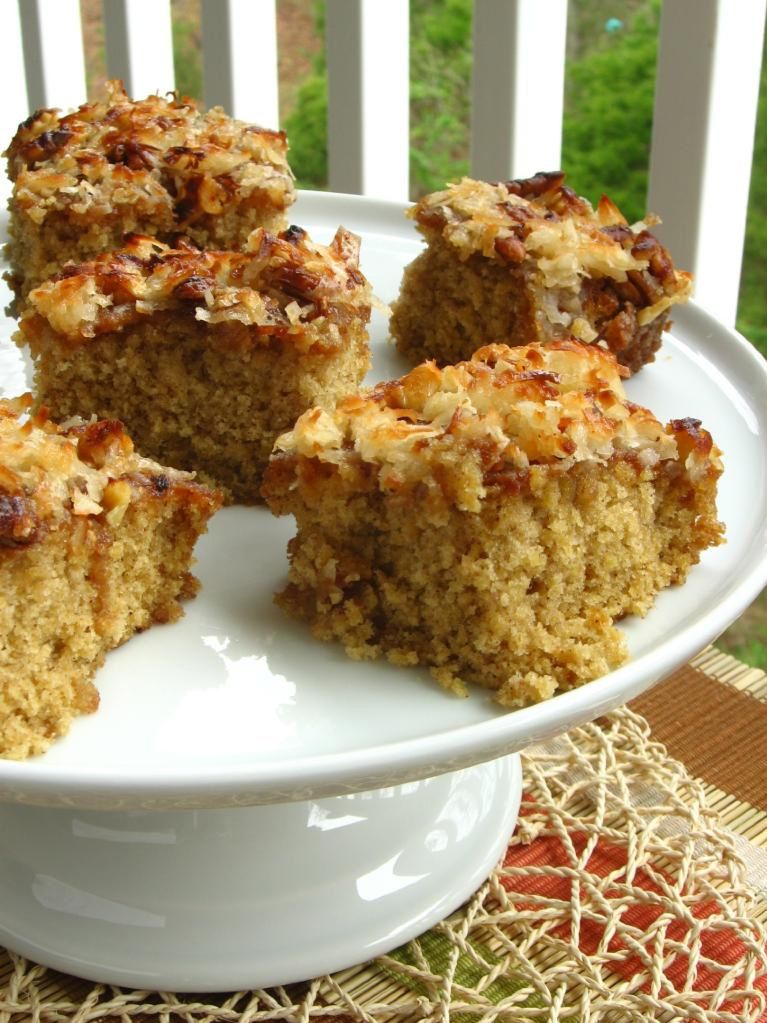
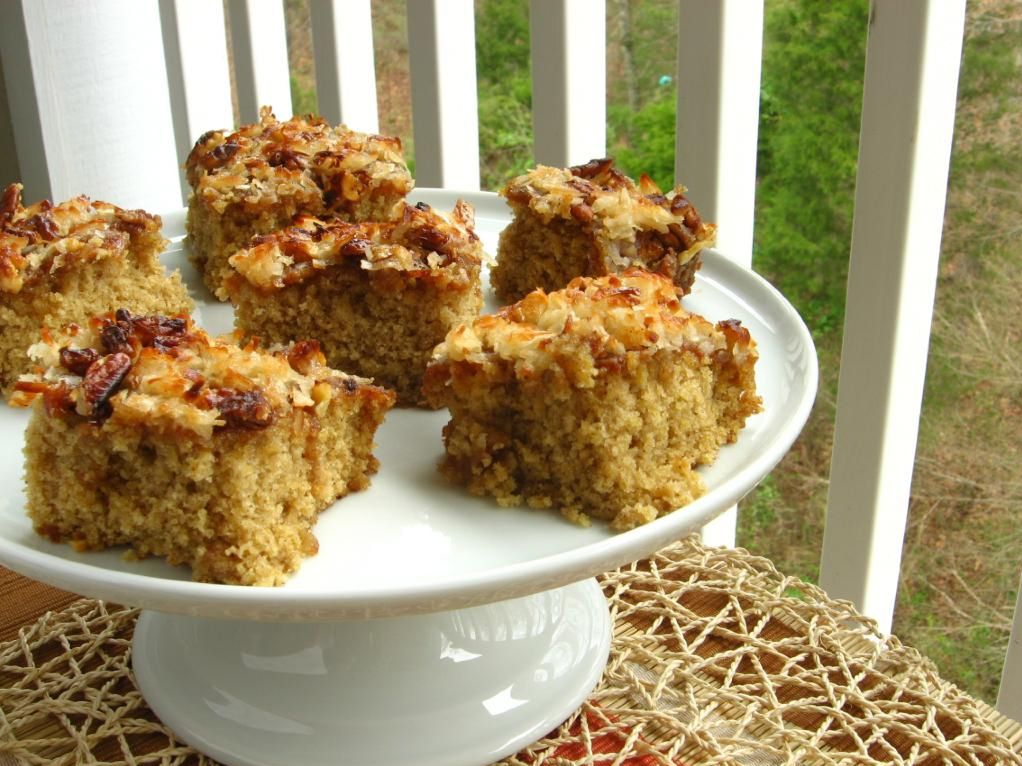
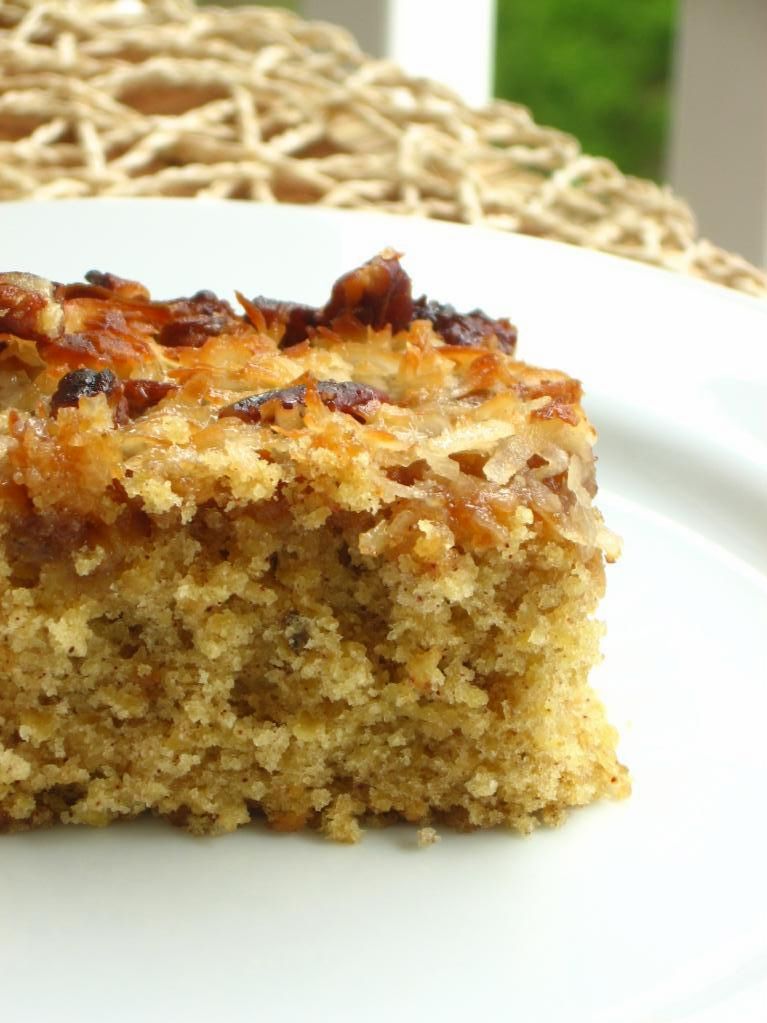
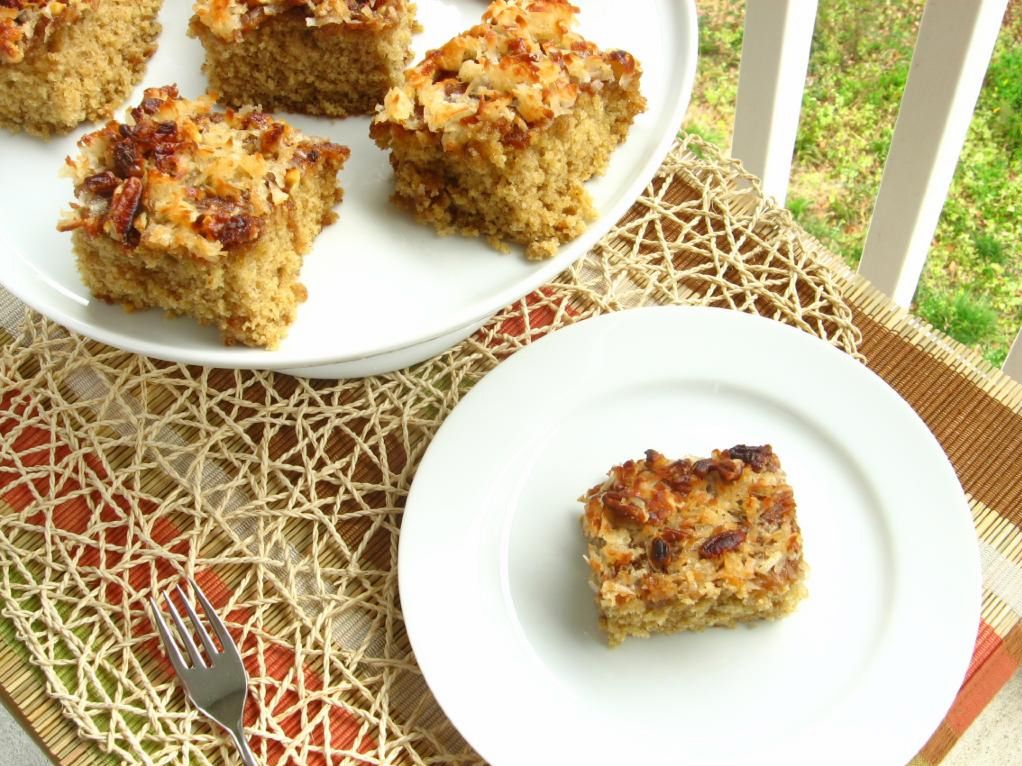
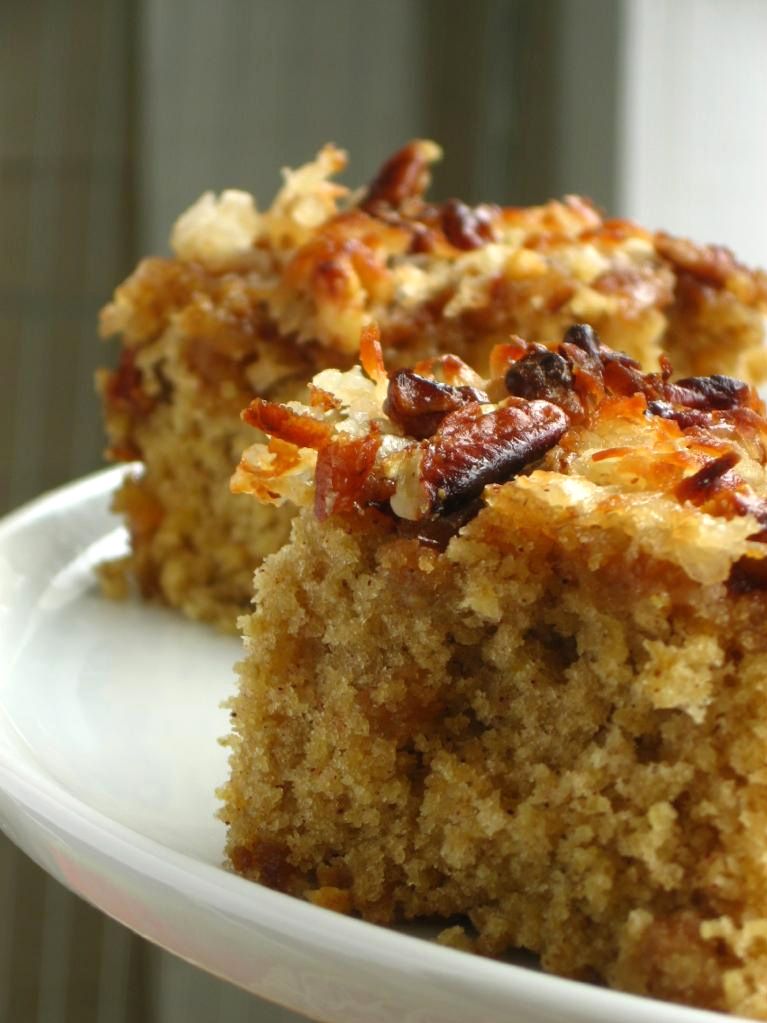
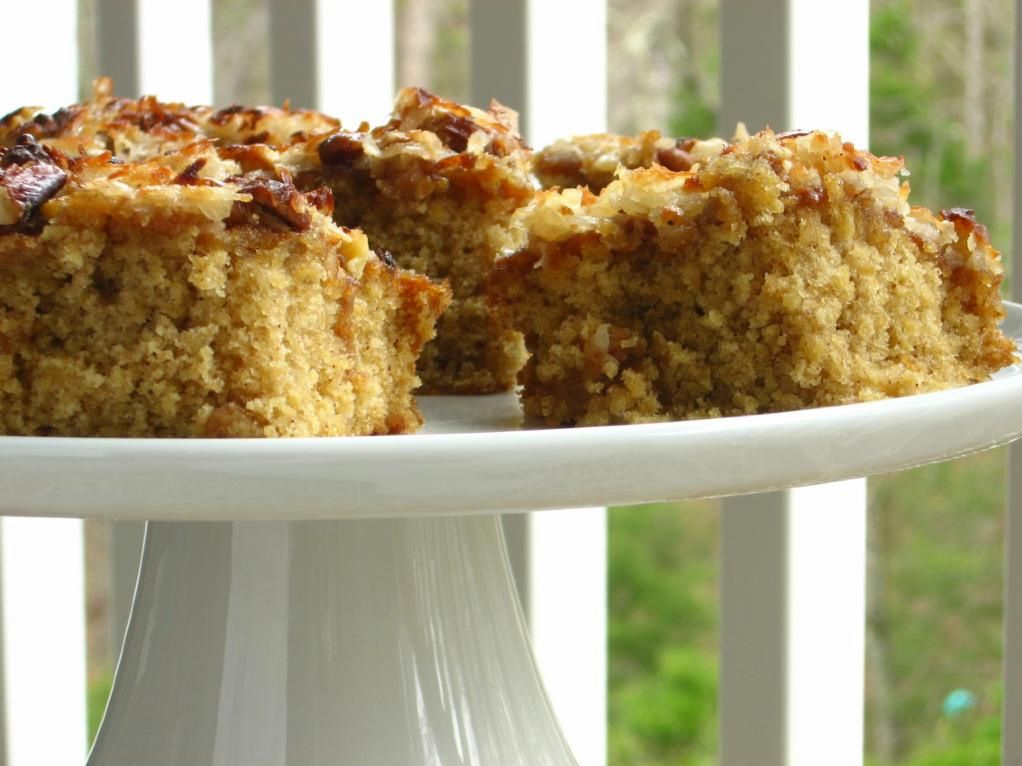
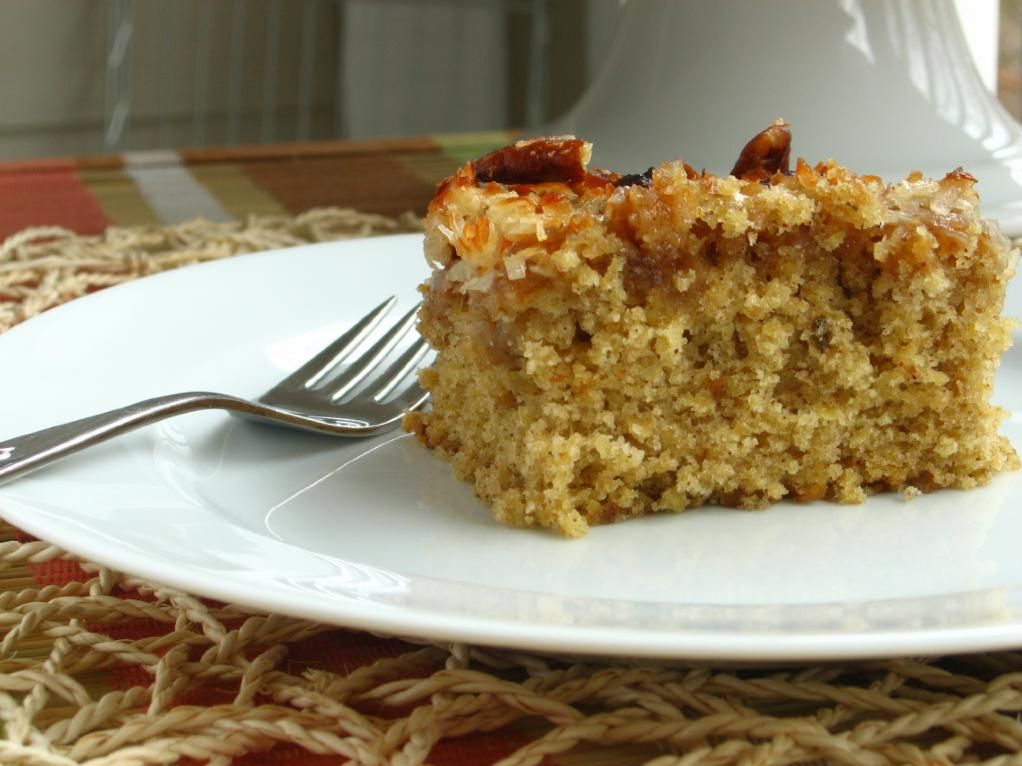
Okay, I know you’re ogling the pictures of the amazing Oatmeal Cake with Broiled Icing and wondering . . . how does Christ relate to Oatmeal Cake? Well, my jam-packed weekend resulted in a rushed baking session on Sunday. I needed a quick and simple recipe that I could make while bleary due to sleep deprivation. I cut calories during the week to splurge on the weekends, so I also wanted a recipe that could be easily devoured before Monday morning. This cake more than fit the bill — especially the easily devoured part!

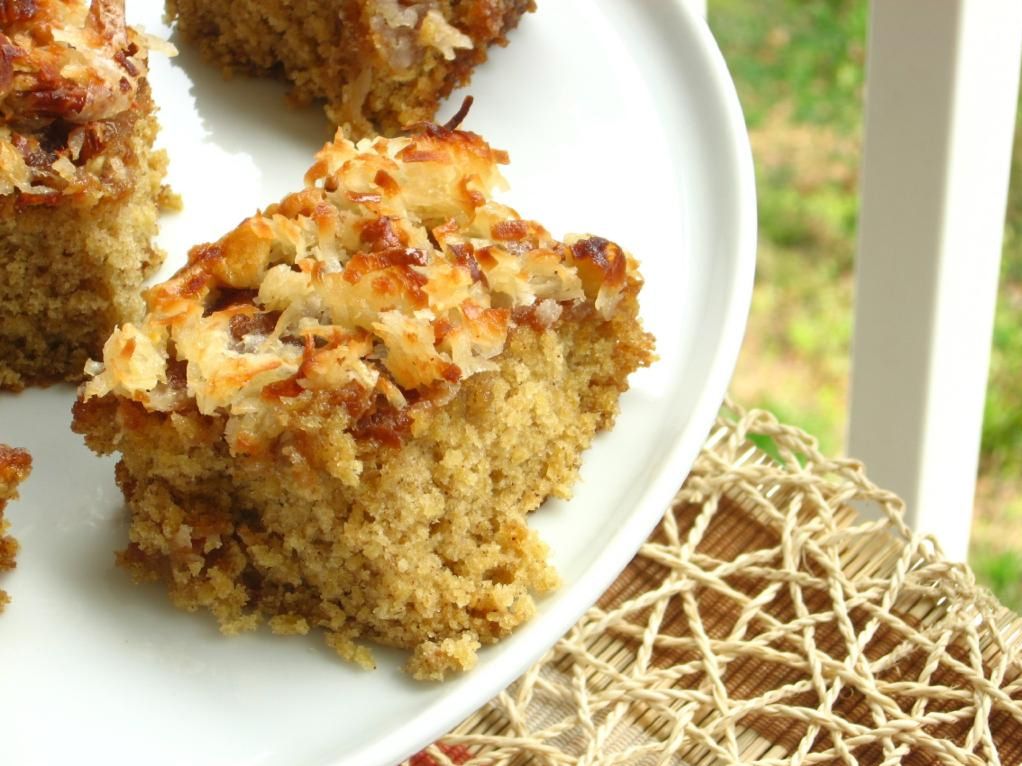
This recipe is heavenly, y’all (pun intended)! The cake is incredibly moist and delicate, with a mesmerizing blend of cinnamon, nutmeg, and oats. The broiled icing is insane: toasted coconut and pecans bound by a gooey almost-caramely mixture created by the broiled butter and brown sugar. On my Recipe Index, small hearts denote Willow Bird Baking favorites — the recipes I’m over the moon about. This hearty, filling cake has more than earned its heart!

One of the best parts is that it truly is a quick and easy recipe as well. The icing is spread on while the cake is warm, meaning that the entire recipe can be easily accomplished within an hour (not including cooling time). If I got through the entire process without a hitch while half-asleep, caffeinated, sore, and frazzled, it should be a breeze for you! Happy eating!

Oatmeal Cake with Broiled Icing


Recipe by: America’s Test Kitchen*
Yields: one 8-inch square cake (about 9 pieces)

Cake Ingredients:
1 cup (3 ounces) quick-cooking oats (see note)
3/4 cup water , room temperature
3/4 cup (3 3/4 ounces) unbleached all-purpose flour
1/2 teaspoon baking soda
1/2 teaspoon baking powder
1/2 teaspoon salt
1/4 teaspoon ground cinnamon
1/8 teaspoon ground nutmeg
4 tablespoons (1/2 stick) unsalted butter, softened
1/2 cup (3 1/2 ounces) granulated sugar
1/2 cup packed (3 1/2 ounces) light brown sugar
1 large egg, room temperature
1/2 teaspoon vanilla extract

Broiled Icing Ingredients:
1/4 cup packed (1 3/4 ounces) light brown sugar
3 tablespoons unsalted butter, melted and cooled
3 tablespoons milk
3/4 cup sweetened shredded coconut
1/2 cup (2 1/2 ounces) pecans, chopped

Directions:
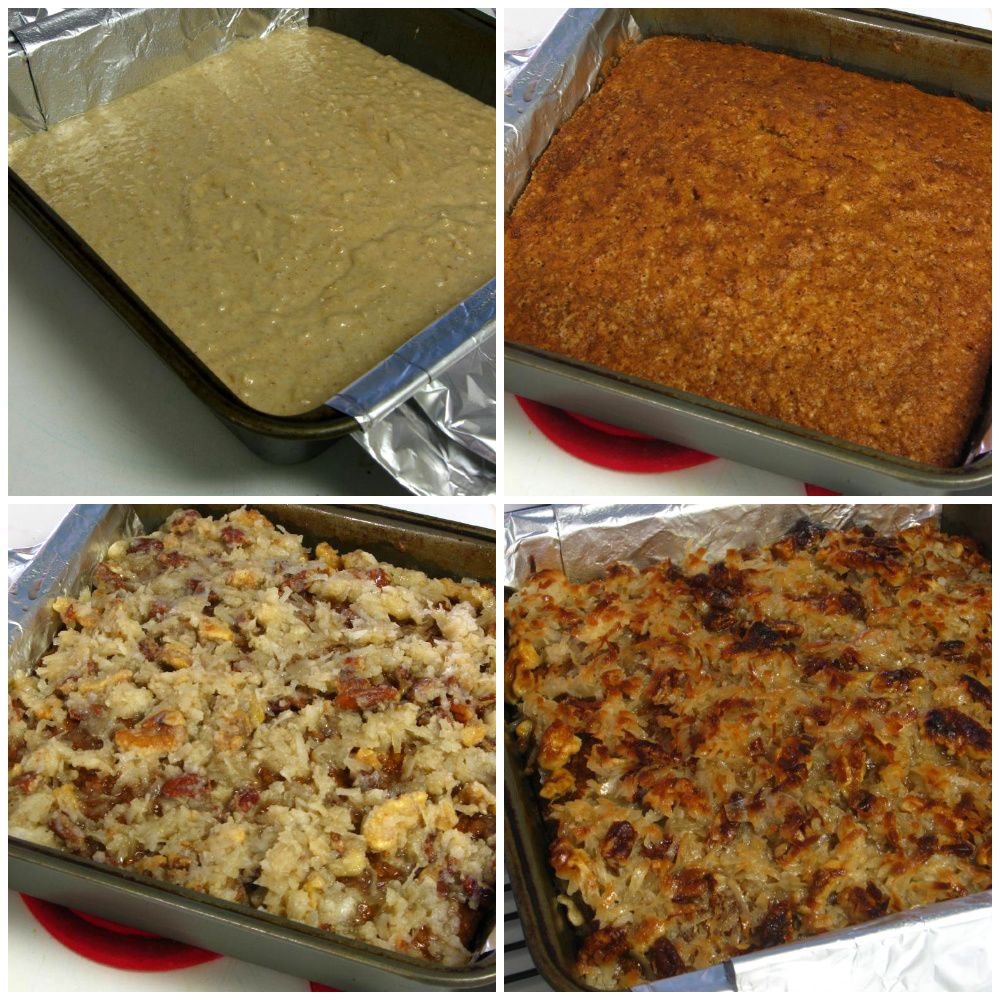
1. FOR THE CAKE: Adjust oven rack to middle position and heat oven to 350 degrees. Cut two 16-inch lengths aluminum foil and fold both lengthwise to 5-inch widths. Spray 8- by 8-inch metal baking dish with nonstick cooking spray. Create a foil sling for the pan: cut two 16-inch lengths of foil and fold them to widths of 5 inches each. Fit foil pieces into baking dish, one overlapping the other, pushing them into corners and up sides of pan; allow excess to overhang pan edges. This creates a sling that will help you remove the cake after baking and cooling. Spray foil lightly with nonstick cooking spray.

2. Combine oats and water in medium bowl and let sit until water is absorbed, about 5 minutes. In another medium bowl, whisk flour, baking soda, baking powder, salt, cinnamon, and nutmeg together.

3. In bowl of standing mixer, beat butter and sugars on medium speed until combined and mixture has consistency of damp sand, 2 to 4 minutes, scraping down bowl with rubber spatula halfway through mixing. Add egg and vanilla; beat until combined, about 30 seconds. Add flour mixture in 2 additions and mix until just incorporated, about 30 seconds. Add soaked oats and mix until combined, about 15 seconds.

4. Give batter final stir with rubber spatula to make sure thoroughly combined. Transfer batter to prepared pan and lightly tap against counter 3 or 4 times to dislodge any large air bubbles; smooth surface with spatula. Bake cake until toothpick inserted into center comes out with few crumbs attached, 30 to 35 minutes (careful: mine only took 28 minutes), rotating pan halfway through baking. Let cake cool slightly in pan, at least 10 minutes.

5. FOR THE BROILED ICING: While cake cools, adjust oven rack about 9 inches from broiler element and heat broiler. In medium bowl, whisk brown sugar, melted butter, and milk together; stir in coconut and pecans. Spread mixture evenly over warm cake. Broil until topping is bubbling and golden, 3 to 5 minutes.

6. Let cake cool in pan 1 hour. Following illustration 2, transfer cake to serving platter, then discard foil. Cut cake into squares and serve.

*ATK’s notes: Do not use old-fashioned or instant oats for this recipe. Be sure to use a metal baking dish; glass pans are not recommended when broiling. If you have a drawer-style broiler (underneath the oven), position the rack as far as possible from the broiler element and monitor the icing carefully as it cooks in step 5. A vertical sawing motion with a serrated knife works best for cutting through the crunchy icing and tender crumb.


Enjoy!

P.S. Reader comment: “Seriously this is the best cake I have ever baked or eaten. […] I cannot thank you enough for posting this. It is seriously amazing!” Hurray! GO MAKE THIS CAKE!


Share Share this post with friends!

Chocolate Sheet Cake

My family and I like to joke that Pioneer Woman stole this recipe from us, since she has such a similar one on her blog. We know it’s not true by any stretch of the imagination, but I think it makes us feel a little smug. We think to ourselves, We had an amazing family recipe that Ree Drummond decided she was going to pilfer! Because it was so awesome, of course! We’ve been robbed by fantastic Pioneer Woman, of all people! Wouldn’t it sound cool to tell people that at dinner parties?

Ahem . . . but, as I mentioned . . . not actually true. In reality, the recipe for this amazing Chocolate Sheet Cake was created by who-knows-who, and was passed around, shared, and adapted to fit into many families’ recipe boxes. Here’s an interesting discussion about the origins of the cake. Several folks on Pioneer Woman’s blog recount where they came across the recipe first: some found it printed in a newspaper decades ago, some grew up eating it in their own kitchens. My family’s recipe was passed on to us by my great aunt, Linda Houts. Bless that woman.

Readers also shared their different names for the cake: Fabulous Sheet Cake, Cowboy Sheet Cake. Beth Moore and some other folks calls their version Texas Sheet Cake — and the flavor is, indeed, big enough for even Texas! As for my family, we always just called ours Chocolate Sheet Cake. But now I’m a little jealous of all those fancy names! I might have to come up with something a little more snappy. What do you think of Majestic Imperial Fantabulous Sheet Cake o’ Love? MIFSCOL for short? Okay, okay, fine . . . we’ll stick with Chocolate Sheet Cake.

But this is one fantabulous cake. It’s simple enough that I made it as a child (repeatedly — as in, any time my mom would hand over the cocoa powder and a spoon). My favorite time- and energy-saving characteristic of this cake is that you don’t have to wait for the cake to cool to pour the rich frosting all over it. So easy and quick!

But it’s not just simple — it’s also delicious enough that I still make it as an adult (wait, what? I’m an adult?!) when I want the absolute best chocolate cake flavor. Don’t you love it when the easiest also happens to be your favorite? The cake is fluffy and extremely moist with a gooey, deep chocolate frosting. I’m telling you . . . something magic happens when you put all these ingredients together, and the product is greater than the sum of its parts!

I’ve devoured this cake in Chocolate Chickie Cake Balls, in the Ice Cream Cupcakes I posted earlier this week, and (of course) all by its lovely lonesome. It’s also the perfect platform for a big ol’ scoop of vanilla bean ice cream. After my discussion of Freezer Tetris last post, I’m sure you’ll believe me when I say that there’s a big ziplock bag of Chocolate Sheet Cake in my freezer right now, just waiting for another fun recipe where I can sneak it in! Once you get a taste, you’ll be looking for any reasons you can find to bake it, too!

Chocolate Sheet Cake


Recipe by: Linda Houts
Yields: one half sheet cake (serves about 12)

Cake Ingredients:
2 cups flour
1 teaspoon baking soda
2 cups sugar
dash salt
1 stick butter
1/2 cup vegetable oil
4 tablespoons cocoa
1 cup water
1/2 cup buttermilk
2 eggs
1 teaspoon vanilla

Frosting Ingredients:
1 stick butter
4 tablespoons cocoa
6-8 tablespoons milk (as needed for consistency)
1 cup walnuts, chopped
1 lb. confectioners’ sugar
1 teaspoon vanilla

Directions:
Preheat oven to 350 degrees F. Whisk flour, baking soda, sugar, and salt together and set aside. Mix butter, vegetable oil, cocoa powder, and water together in a sauce pan and bring to boil. Pour over mixture of dry ingredients. Stir well, then add buttermilk, eggs, and vanilla. Mix to combine. Pour into a half sheet cake pan (12 x 18 in.) sprayed with cooking spray.

Bake at 350 degrees F for about 15 minutes. When a toothpick comes out with just a few moist crumbs, the cake is done. While cake starts to cool, make the frosting. Mix butter, cocoa, and milk and bring to boil. Remove from heat and add confectioner’s sugar, nuts, and vanilla. Stir to combine. Spread over warm cake.


Share Share this post with friends!

Vegan Pumpkin Nut Bread

Babies have an uncanny ability to make you silly. We’ve all experienced the strange, instantaneous transformation: you’re walking along, the picture of respectability, when you spot bright eyes and baby CHEEKS! It’s always the cheeks that really push you over the edge. Suddenly, you’re cooing, peekabooing, vroooooming airplane spoons . . . anything for a smile, or best of all, a baby giggle!

My friend Amelia knows all too well what one will do for a baby. Her little Rowan (now 6 months old) wasn’t tolerating dairy very well, so mama had to give it up! No tall glasses of milk, no cheesy pizzas, no gooey lasagnas — and worst of all, hubby was still able to chow down! I’m going to be honest (with apologies to vegans out there): I would not be a fan of a dairy-free lifestyle. I enjoy meat, but I’d be much quicker to give it up than my beloved cheese, butter, and milk! Amelia’s a champ, though; with nary a complaint, she’s gone almost completely dairy-free for months. She deserves a mommy medal, but perhaps she’d settle for a loaf of vegan pumpkin bread?

I first spotted this beauty on Joy the Baker awhile back, when Joy admitted to sometimes searching for vegan recipes just because she’s out of butter or eggs. I love the honesty, not to mention the resourcefulness. A girl after my own heart. Gotta have sweets and gotta avoid the mid-recipe grocery store run.

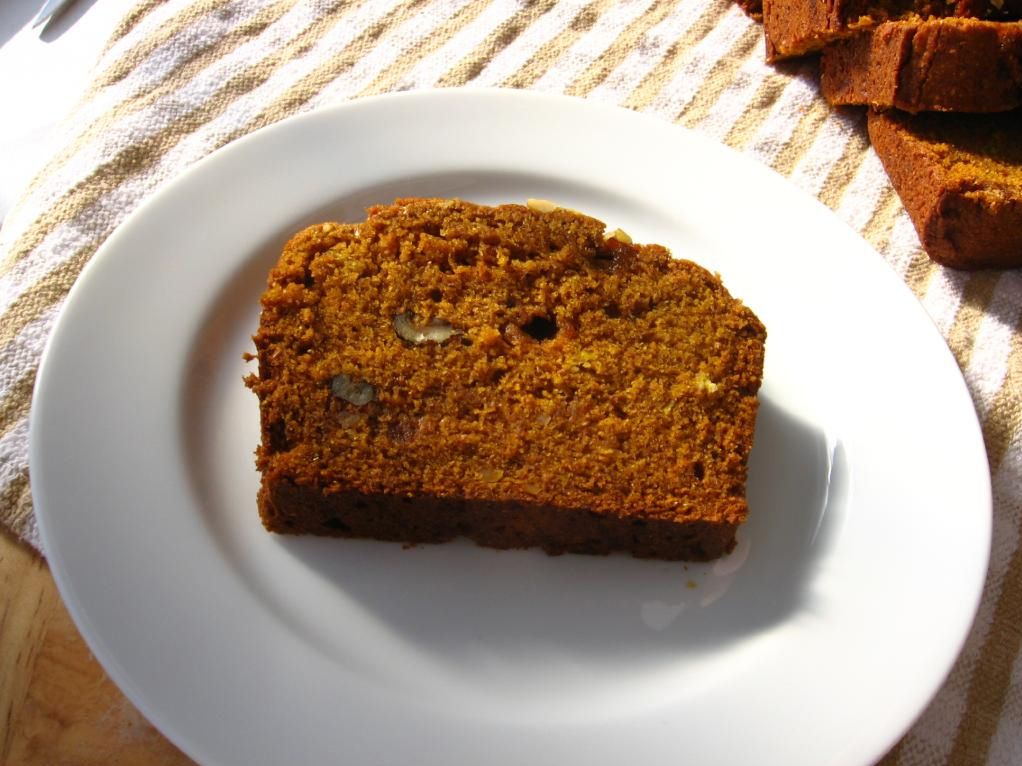
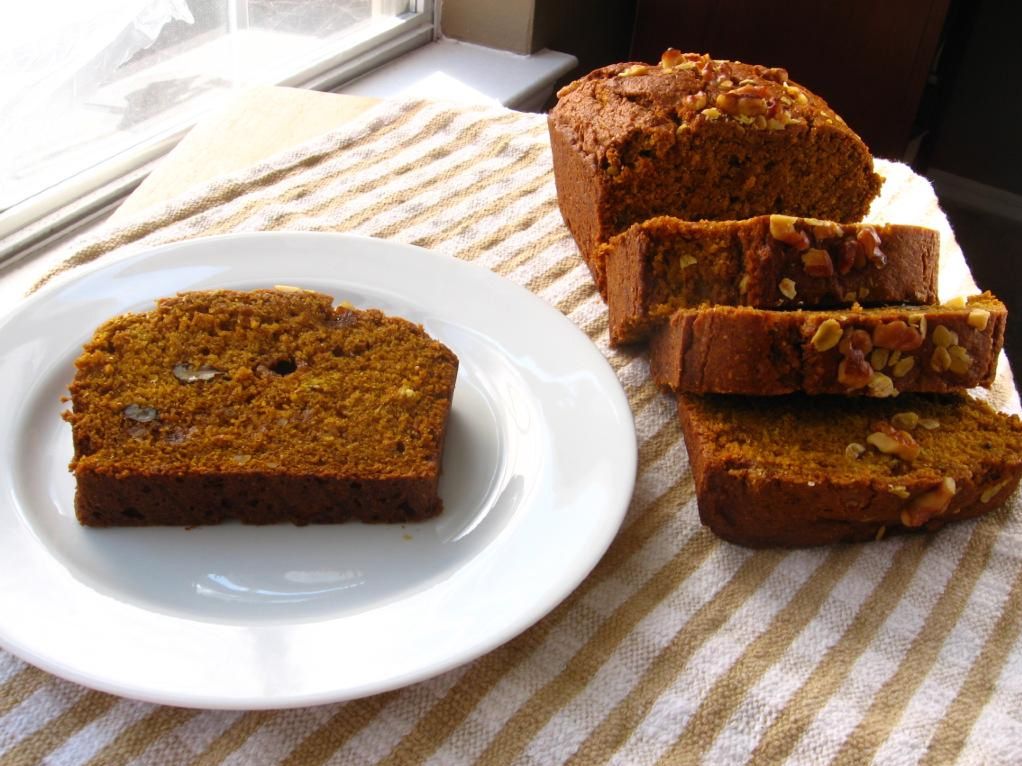
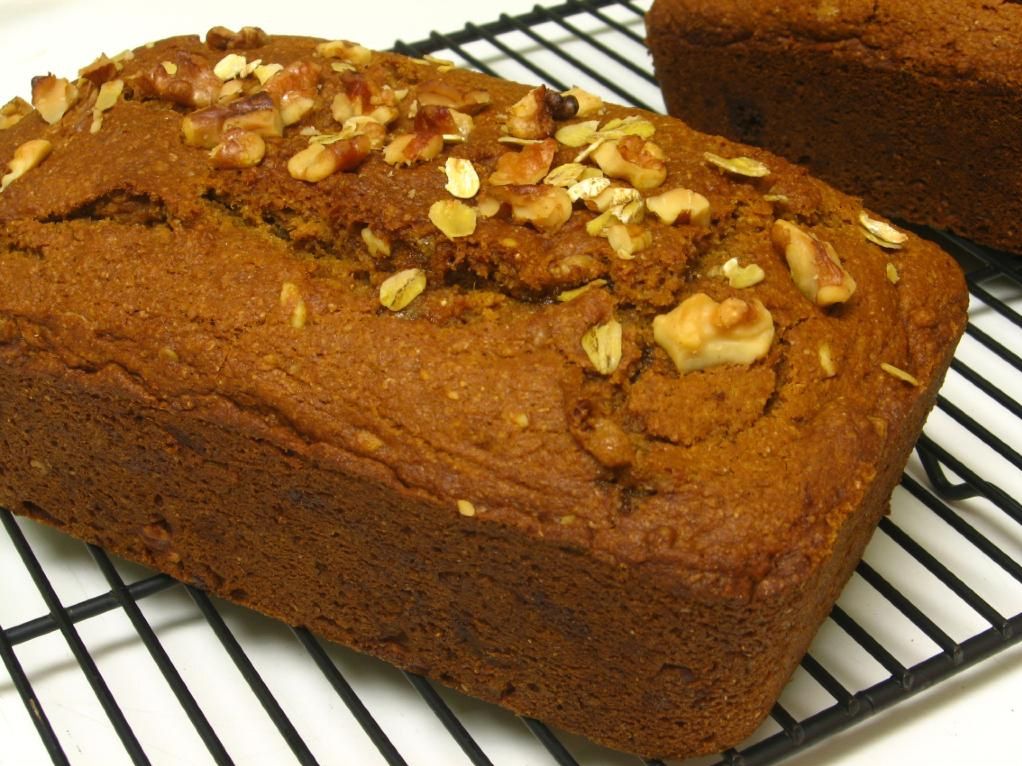
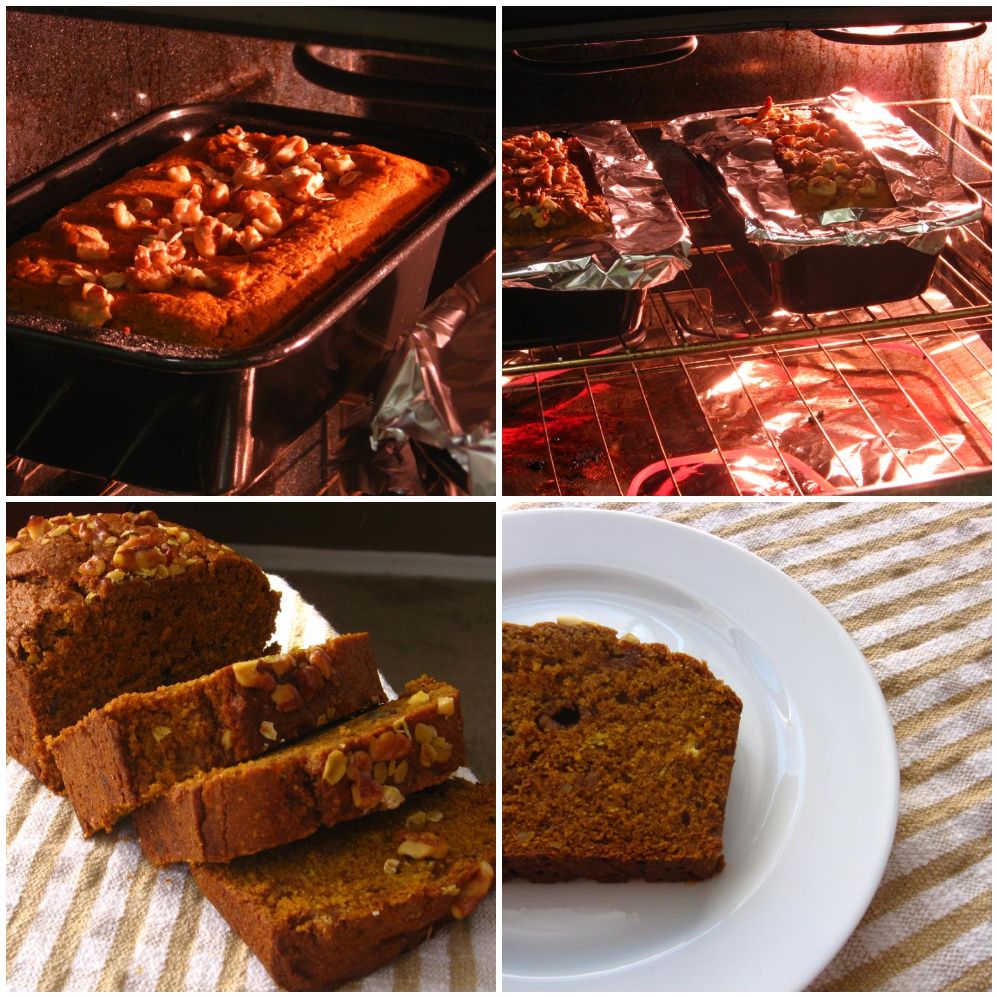
This pumpkin bread was nice and moist, with a deep caramel-esque flavor from the brown sugar and maple. I added oats for more heartiness. One loaf went to Amelia, and Mike and I kept one for breakfasting. We defiled our loaf by slathering it with butter (more apologies to the vegans!), but it’d be delicious spread with cream cheese (oh wait! sorry vegans!), peanut butter, pumpkin, maple syrup, vegan margarine, mud . . . it’s just good! Just spread it with something creamy and suited to your dietary leanings, and consume!

I will say that it wasn’t as grand, in my tastebuds’ opinions, as regular old pumpkin quick bread. I think I prefer a brighter pumpkin spice flavor to the depth of the maple and brown sugar combo in this recipe. Nevertheless, if you’re out of eggs, following a vegan lifestyle, or simply avoiding dairy for a cute little imp of a babe, this is a nice, hearty option. We have the last bit of our loaf sitting in our freezer waiting for Saturday morning breakfast!

Vegan Pumpkin Walnut Bread


Recipe by: Joy the Baker, slightly adapted by Willow Bird Baking
Yields: 2 loaves

Ingredients:
2 cups all-purpose flour
1 1/2 cups white whole wheat flour (or whole wheat flour, or use only all-purpose flour)
2 cups light brown sugar, packed
1/3 cups granulated sugar
2 teaspoons baking soda
1 teaspoon baking powder
1 teaspoon salt
1 teaspoon freshly grated nutmeg
1 teaspoon cinnamon
1 teaspoon allspice
1/2 teaspoon cloves
1 15-ounce can pumpkin puree, or just under two cups
1 cup vegetable oil
1/3 cup maple syrup
1/3 cup water
1 cup chopped walnuts
1/2 cup oats

Directions:
Preheat oven to 350 degrees F. Place a rack in the center of the oven. Grease and flour two loaf pans and set aside.

In a large bowl, whisk together flours, sugars, baking soda, baking powder, salt and spices.

In a medium bowl, carefully whisk together pumpkin puree, oil, maple syrup and water. Add the wet ingredients to the dry ingredients and use a spatula to fold all of the ingredients together. Make sure to scrape the bottom of the bowl well, finding any stray flour bits to mix in. Fold in most of the chopped walnuts and oats, reserving some to sprinkle on top of the batter once in the pan.

Divide the dough between the two greased pans and sprinkle with a few walnut pieces. Bake for 1 hour to 1 hour and 15 minutes, or until a skewer inserted in the center comes out clean. Remove from the oven. Let rest in the pans for 20 minutes, then invert onto a cooling rack.

Serve warm. To freeze, double wrap in plastic wrap and then wrap in foil.


Enjoy!


Share Share this post with friends!

1 16 17 18 19 20 21