holiday

Buttery Coconut & Almond Morning Buns

I was floored to see that Willow Bird Baking is a finalist for SAVEUR Magazine’s Best Baking & Desserts Blog. Thank you so much for making this happen. If you’d like to vote for Willow Bird Baking, you can do so here. You all are truly wonderful.

Batik . . . Issei . . . Caballero . . . Kuchen . . . Coffle . . . Lariat . . . Trepak . . . Twoling . . .

The spelling bee pronouncer carefully enunciated one word after another, round after round. The dwindling pool of contestants seethed: a child was always approaching the microphone timorously, bouncing back to their seats triumphantly, or moping over to their consoling families. I sat in the audience rigid with excitement, scribbling each word on the back of an old envelope I’d found in my cavernous purse.

Watching my student compete in the 72nd annual Winston-Salem Journal Regional Spelling Bee was already an ideal afternoon for a logophile like myself, but making the event even more wonderful was the fact that Mike was at my side. Since the Bee took place about halfway between our two cities, he agreed to meet me for a nerdy date! As I frantically attempted to spell each word before the contestant had a chance, he did math in his composition book. (We’re quite the exciting pair.)

My student did a phenomenal job. She got out (with only 5 contestants left!) on the word ringent. If you’re being honest, you’ll probably admit that you didn’t really know how to spell ringent, either, so that’s not bad at all for a 12-year-old. She was disappointed, but I was thrilled with her performance. She still has two full years of eligibility, and since we were so close this year, I fully expect to travel to D.C. eventually to watch her in the National Bee.

After she left with her family, Mike and I set out to explore Winston-Salem. We scanned every restaurant on the main thoroughfare (to appease me; Mike would’ve been happy just to choose one) before finally settling in for pizza and more nerd talk. Mike taught me about hyperbolic conservation laws. We then ambled down the street looking for dessert (or in my case, two desserts, ’cause that’s how I roll.)


ha ha, get it?

One of our dessert stops was at a little coffee shop and bakery where Mike ordered a coconut roll. The flaky pastry was reminiscent of a cinnamon roll, but stuffed instead with toasted coconut. We both enjoyed it, but as soon as I tasted it I told him, “I can do better. I’m going to make you one of these and it’s gonna be insane.” I tucked the mission down into my heart while he promptly forgot about it.

The afternoon was also filled with other lovely things. After buying me a coffee-flavored frozen custard cone, we ambled until we found ourselves seated on a rickety bench outside of a beautiful Moravian church. About a dozen cherry trees heavy with blossoms surrounded us and swayed in the breeze. The sky was a pretty slate blue that belied the sunshine and hinted at an impending spring shower. I think we talked about Moravian chicken pies and guinea hens (one sauntered by us nonchalantly while we were talking — maybe that’s normal in Winston-Salem?), but more important than the conversation was my hand in his, my head on his shoulder.

It was a perfect date. I’m sure Mike drove away thinking about partial differential equations or something in that vein, but I drove away thinking of coconut rolls (oh, okay, and love and hearts and romance and stuff).

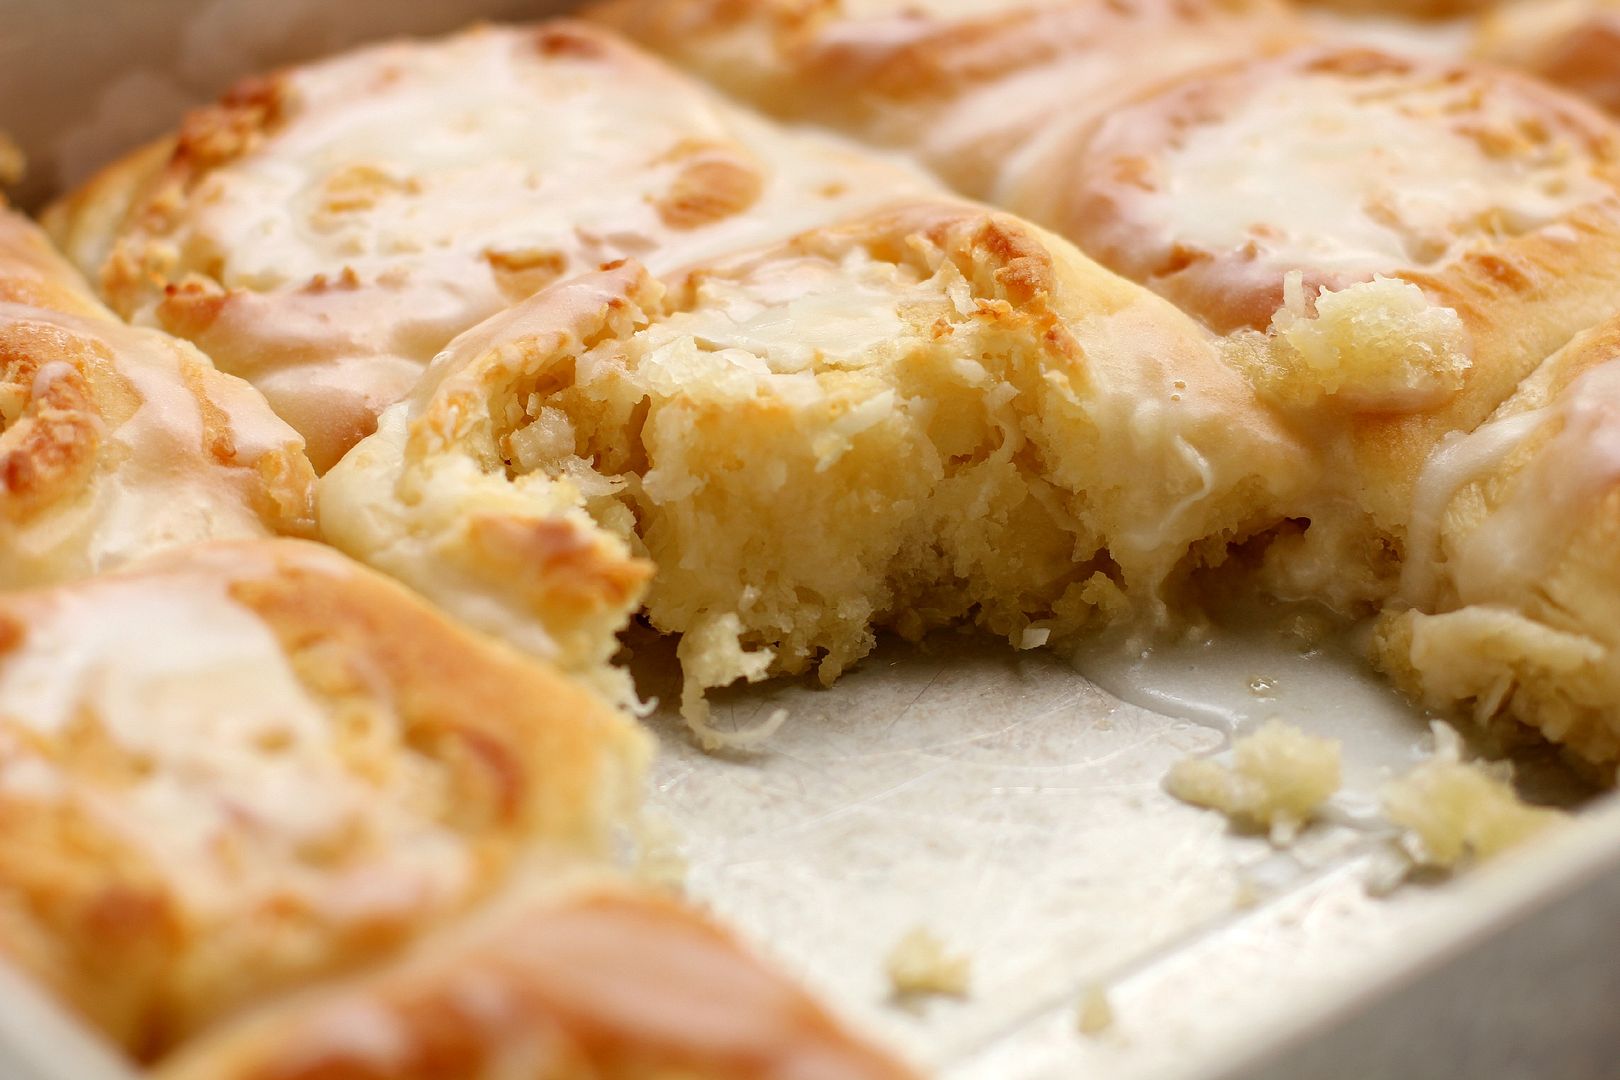
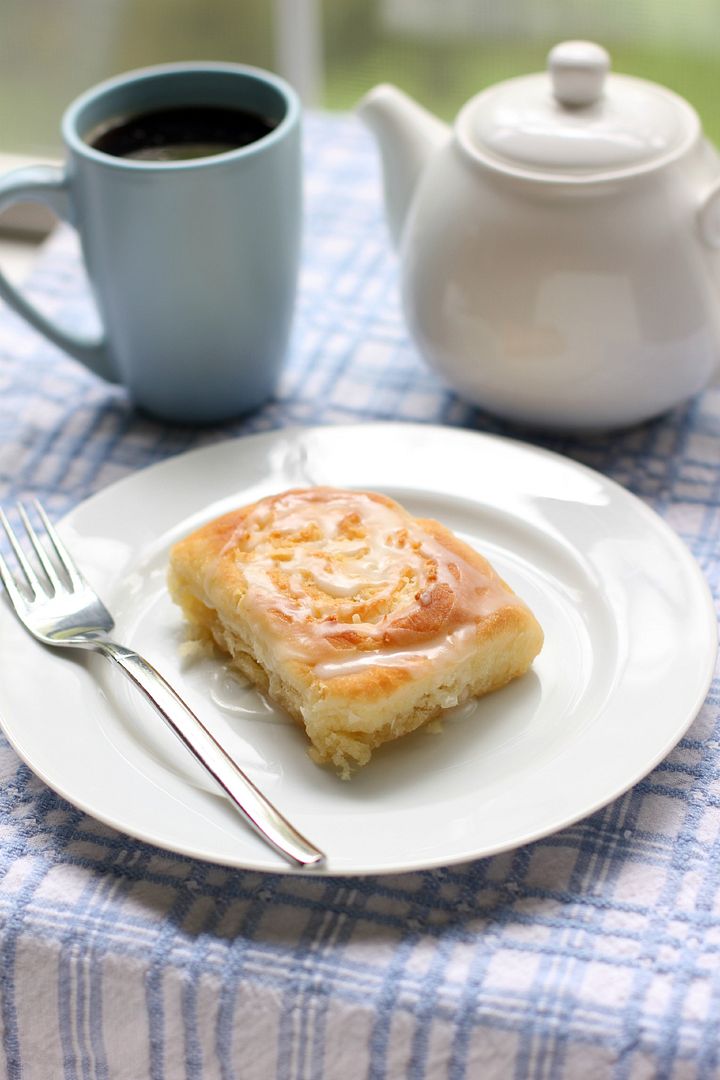
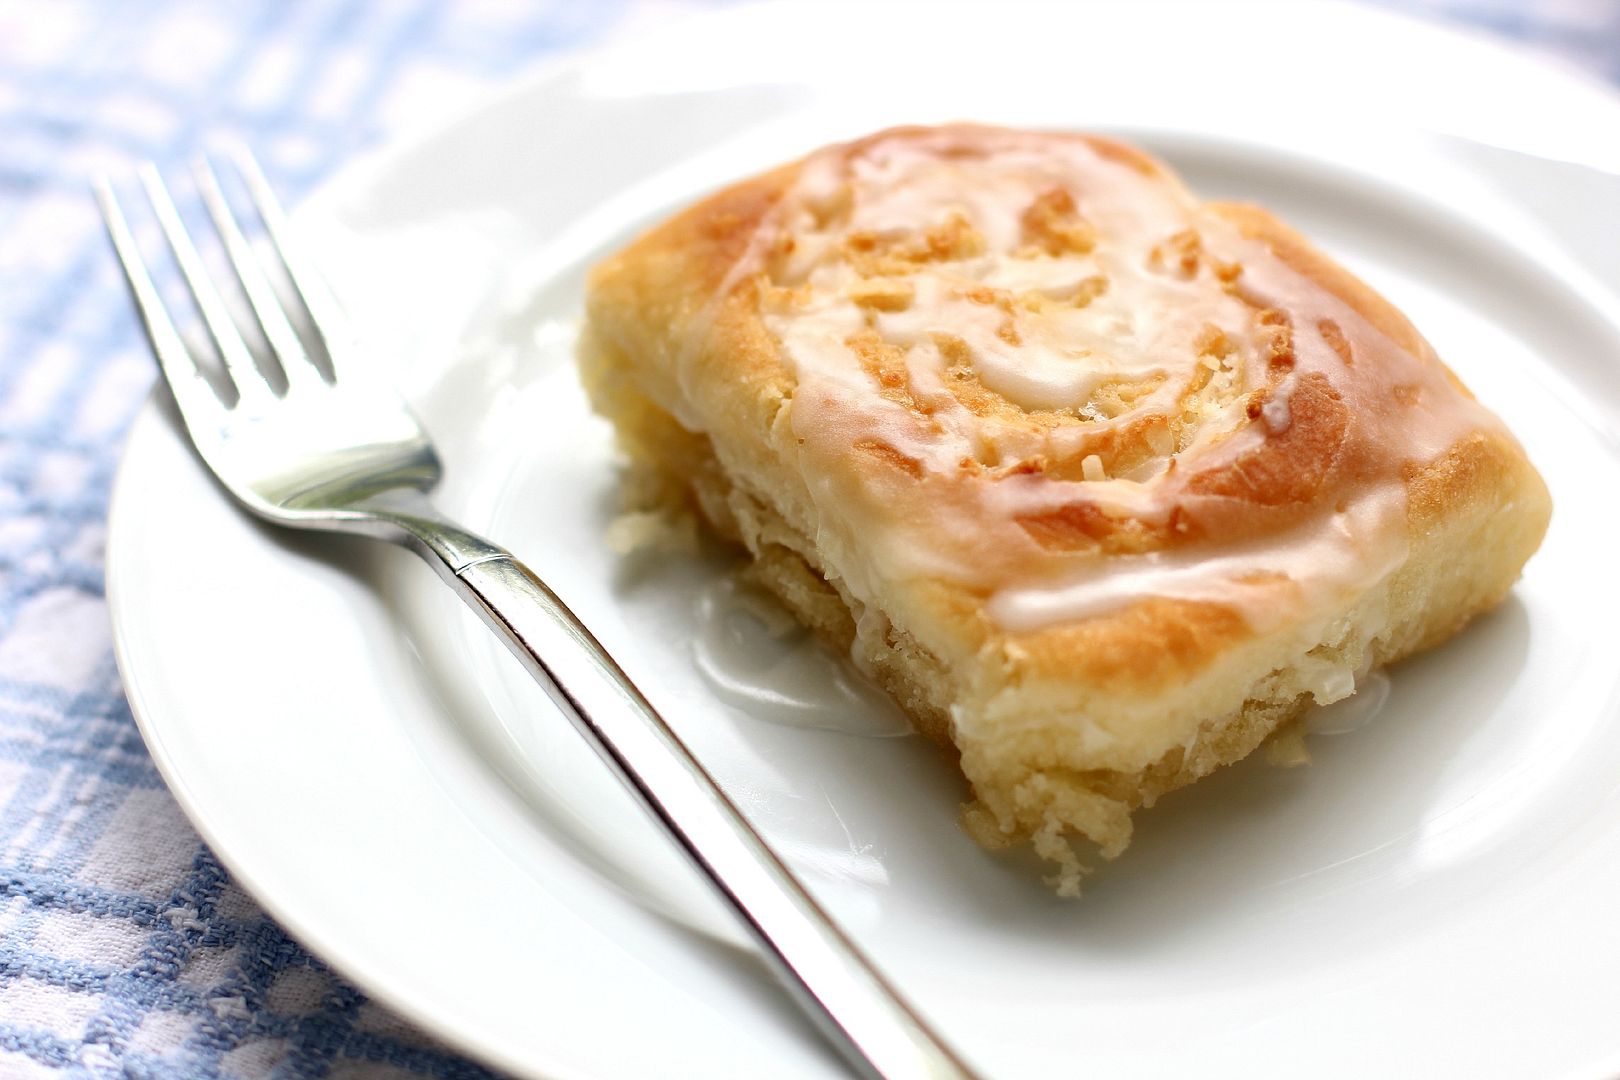
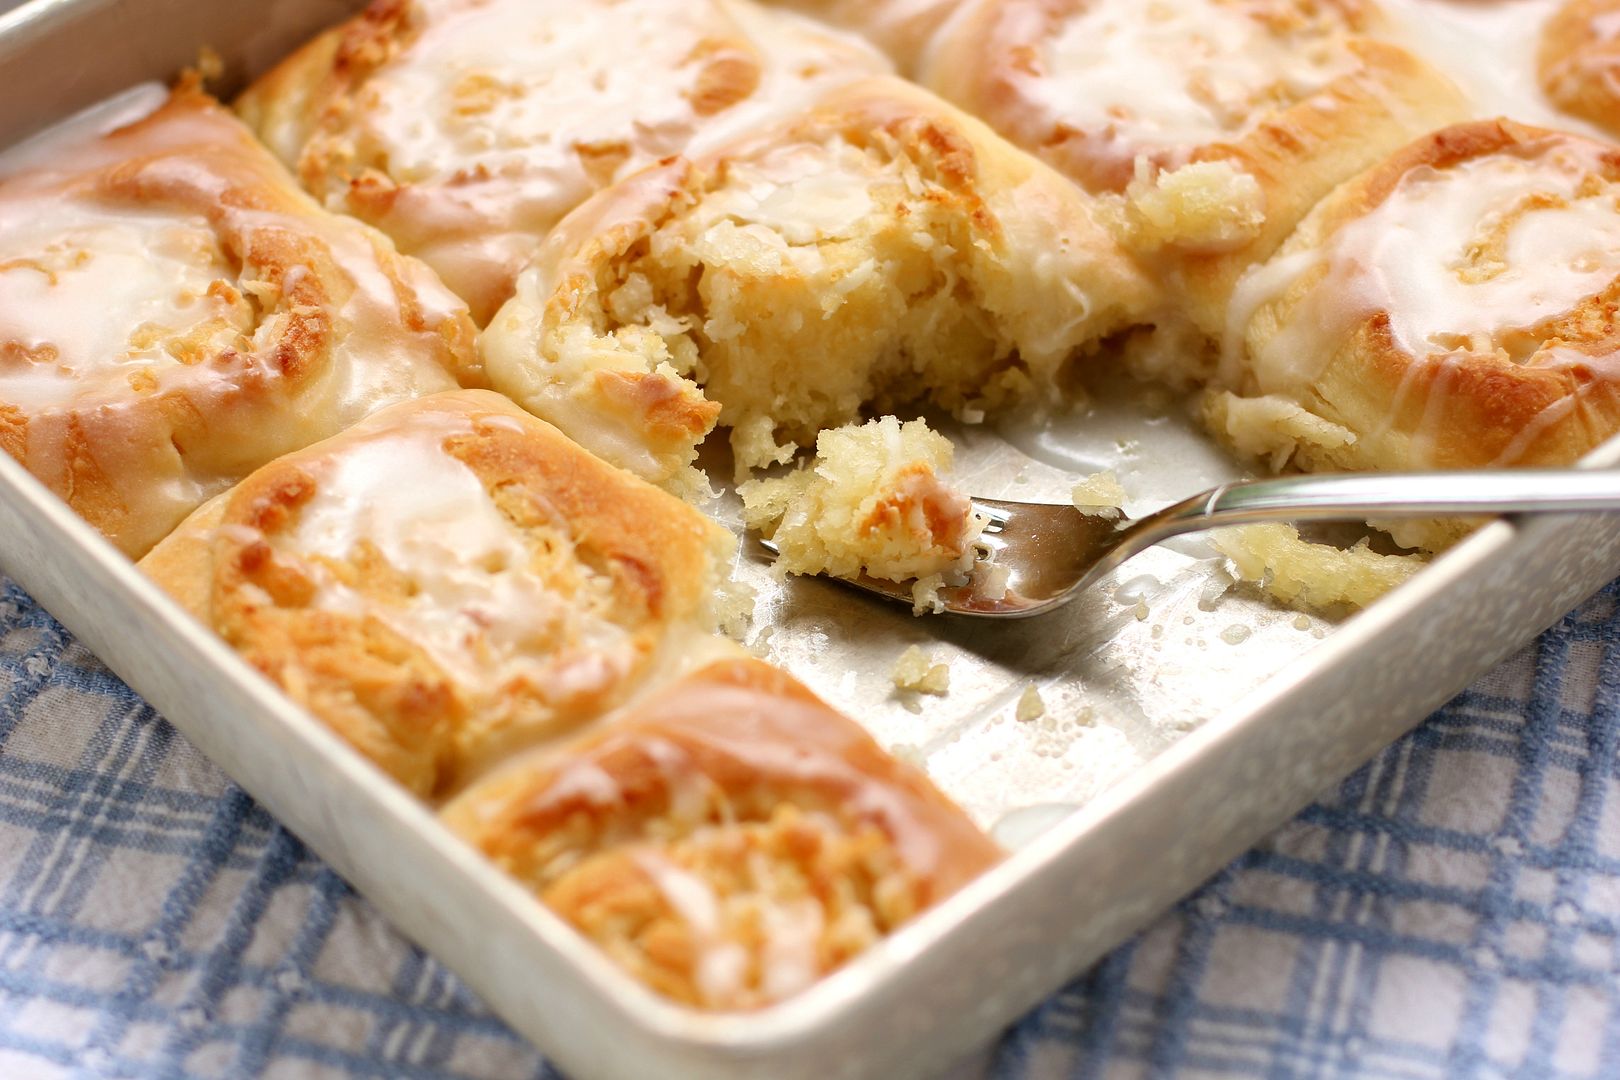
It took me a couple of weeks to get around to experimenting, but when I finally did, these lovely Coconut & Almond Morning Buns were the result. They were even more phenomenal than I’d imagined: buttery, gooey, and delicate, with a gorgeous balance of sweet coconut and subtle almond. I proudly presented them to Mike, who had forgotten all about the Winston-Salem coconut roll but wholeheartedly enjoyed my revamped version nonetheless.

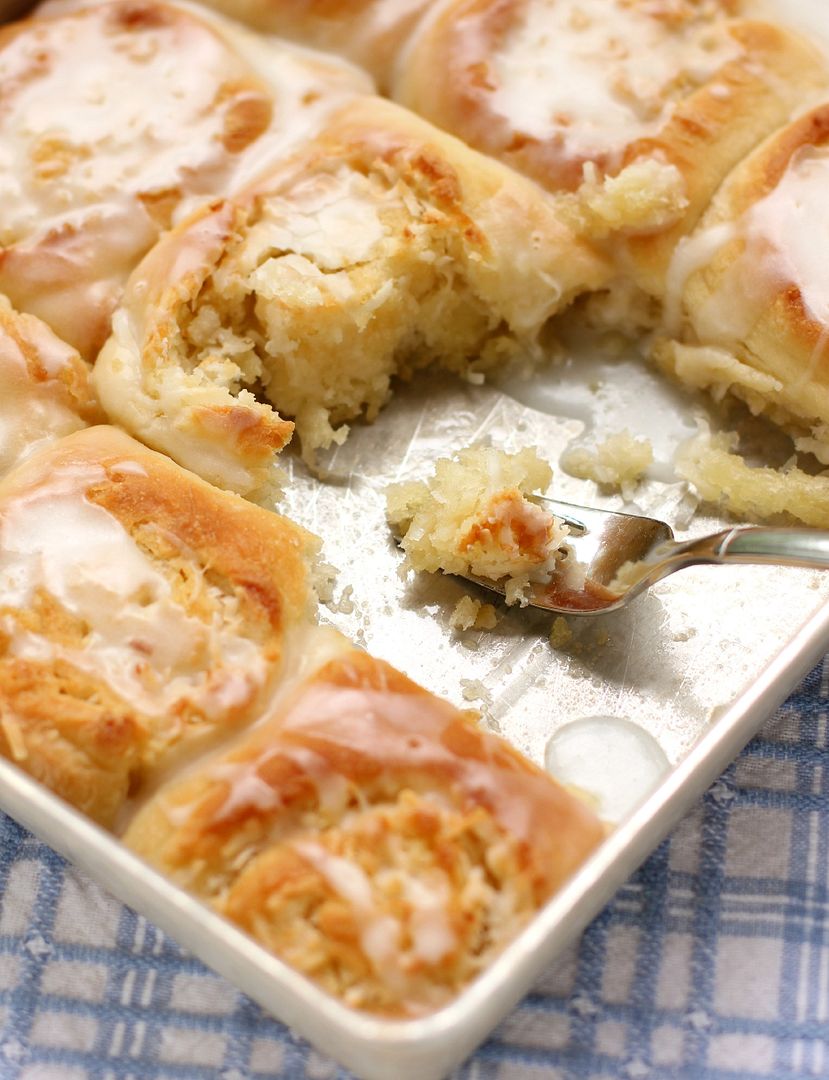
By the way, if you’re wondering: yes, these buns whipped the coffee shop’s coconut rolls right out of the mixing bowl. Not that I’m competitive or anything.

Everyone remembers the word they got out on in their childhood spelling bee. What was yours? (I got out on “eclipse” in 5th grade and “monotonous” in 6th.)

Buttery Coconut & Almond Morning Buns


Recipe by: Willow Bird Baking
Yield: 24 buns

These morning buns could easily double as dessert. They are fluffy, gooey, buttery, and beyond delicious. There’s a lot of butter in this recipe, making it a special occasion treat, but I hope you’ll find a space for these rolls on your Easter brunch table. They definitely belong in the spotlight.

Roll Ingredients:
1 package (2 1/4 teaspoons) active dry yeast
1/4 cup warm water (100-110 degrees F)
2 tablespoons white vinegar
2 cups milk minus 2 tablespoons, room temperature
2/3 cup cold shortening (I use butter flavored Crisco)
3 tablespoons sugar
1 teaspoon salt
1 teaspoon baking soda
1 teaspoon baking powder
5 cups flour
2 tablespoons butter, melted, for after baking

Filling Ingredients:
1 1/2 cup (3 sticks) butter, melted
1/2 teaspoon coconut extract
1/2 cup sugar
2 cups sweetened coconut flakes
7 ounces almond paste, frozen until firm and then grated with hand grater

Glaze Ingredients:
1 1/4 cups confectioners’ sugar
1/4 teaspoon almond extract
1/4 teaspoon coconut extract
2-3 tablespoons milk (to thin to drizzling consistency)

Directions:
Note: I don’t recommend halving yeast recipes; instead, if you don’t want 24 rolls at once, consider freezing some for later. To freeze some of the unbaked rolls, just wrap them well before the second rise and freeze them. Once frozen, pop them out of the pan all together and store in the freezer, wrapped in plastic wrap and in a zip top bag or wrapped in foil. When you want to bake them, stick them back in a greased pan, thaw them in the fridge overnight, proof for the instructed amount of time, and bake like usual.

Mix the warm water and yeast in a medium bowl and let the yeast foam for about 10 minutes. Put 2 tablespoons white vinegar in a measuring cup and then add milk up to the 2 cup line. Set this aside. In a separate large bowl (or the bowl of a mixer fitted with a dough hook), whisk together flour, sugar, salt, baking soda, and baking powder and cut the shortening into the mixture with two knives or a pastry cutter until the shortening looks like small peas. Stir yeast mixture and milk mixture into the dry ingredients and mix well, kneading just a few turns. Transfer the dough to a bowl lightly sprayed with cooking spray, cover tightly with plastic wrap, and store in refrigerator overnight.

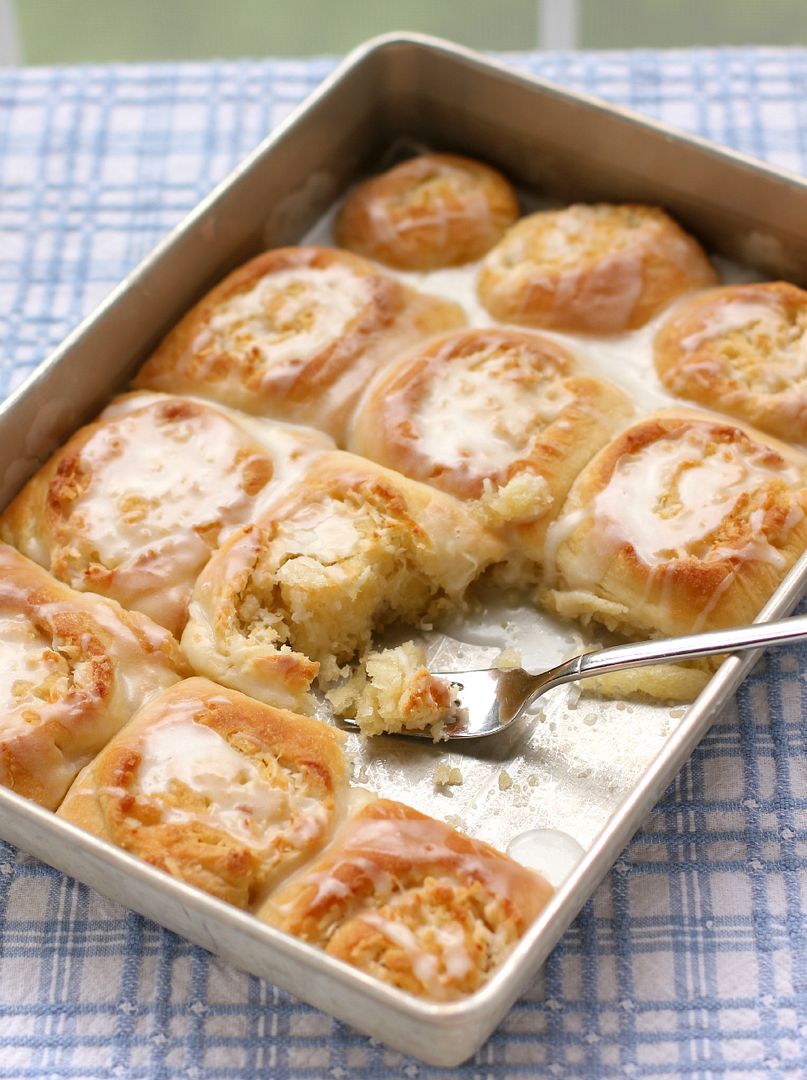
The next morning, preheat the oven to 400 degrees F and lightly spray two 9 x 13-inch baking dishes with cooking spray. Turn the chilled dough out onto a floured surface and roll it into a large rectangle about 1/8-inch thick (I carefully cut the dough in half and worked with half at a time to make it more manageable; if you do this, just spread on half of the filling ingredients for each half you roll). Stir the coconut extract into the melted butter; then spread the melted butter all over the top of the dough. Sprinkle on the sugar, sweetened coconut, and almond paste flakes. Gently roll the dough up into a spiral and cut it into rolls, placing them close together in your prepared baking dishes (at this point, you could wrap and freeze the rolls for later if you wanted).

Cover the rolls with a clean dish cloth and let them rise in a warm spot until they’ve nearly doubled, about 1 1/2 – 2 hours. Bake them for about 15-20 minutes or until browned on top (if you take them out at just lightly golden brown, they may still be doughy in the center). Brush with 2 tablespoons melted butter and return to the oven for 1 more minute. Whisk together the glaze ingredients (adding milk to get it to drizzling consistency) and drizzle the glaze over the warm rolls. Serve immediately.

If you liked this post, please:
Subscribe to Willow Bird Baking
Follow Willow Bird Baking on Twitter
Follow Willow Bird Baking on Facebook
Give this post a thumbs up on StumbleUpon
Pin It

Chocolatey Red Velvet Pull-Apart Bread with Cream Cheese Glaze

“I changed my mind.”

My mom shifted the car into park and turned off the ignition before looking over at me. “What do you mean? You can’t change your mind now; we’re already here.”

I looked out the window at the hair salon and then turned back to my mom. “Can’t I just get a trim, though? I really don’t want short hair. Please.” My 5-year-old voice teetered on the border between whining and shouting.

My mom shook her head. “We already made the appointment and told her what we wanted done. We aren’t spending all this money for just a trim. It’s just hair; it’ll grow back. Come on.”

Before I knew it, I was seated in a pleathery chair in front of a giant mirror, looking at my long blonde locks. Jessica, our hair stylist, sensed my unease. “Let’s just get it over with all at once, okay?” she asked as she tugged it into a ponytail. I could barely nod. A few snips later, my ponytail dropped to the floor with a whisp of finality, and the newly free remnants of my hair fell around my face. They barely reached my ears.

Silent tears began rolling down my cheeks as I calculated how long I’d have to wait to have long hair again.

My hair was really only one facet of my style troubles. In addition to bowl cuts, my mom had a penchant for “hammer pants.” She made many of my outfits by hand, including a hammer-panted onesie (I couldn’t make this up) with candy-pink stripes and gigantic, ceramic ice cream cone buttons. I think it might’ve also had a big lace collar. I posed in it with my bowl cut and a reluctant smile for many a photograph.

Then there was the red-and-denim hammer-panted contraption with the ceramic cow buttons. God bless my mother for sewing clothes for me, seriously, but I considered running away.

At least I was loved? Indeed, my childhood style woes remind me of this quote from food writer Angie Mosier about red velvet cake: “It’s the Dolly Parton of cakes: a little bit tacky, but you love her.”

Incidentally, I think I would’ve rather dressed like Dolly Parton than M.C. Hammer, but that’s neither here nor there.

This red velvet pull-apart bread has all the fun, tacky redness of red velvet with some extra chocolatey goodness thrown in. It began life as a chocolate yeast bread recipe that I modified into a pull-apart loaf. It’s sweet, melty, gooey, and with a cream cheese glaze drizzled over the top, reminiscent of your favorite red velvet desserts. As a plus, there are no hammer pants or bowl cuts in sight.

Tell me about your tackiest fashion choices (or the tackiest fashion “choices” imposed upon you by parents).

Chocolatey Red Velvet Pull-Apart Bread with Cream Cheese Glaze


Recipe by: Willow Bird Baking, adapted from Chocolate Bread by Paula Oland of the Balthazar Bakery
Yield: 2 loaves

Pull-apart loaves are downright addictive. Each layer is crisp on the outside and soft on the inside. This loaf is made from yeast dough with a sweet chocolate flavor, hunks of melty chocolate throughout, and a bright red hue! The cream cheese glaze kicks it right over the top. Schedule out the recipe in advance to allow for the rising/resting times and enjoy!

Bread Starter Ingredients:
1/4 teaspoon active dry yeast
1 cup lukewarm water (100-110 degrees F)
1 cup all-purpose flour, plus 3 tablespoons all-purpose flour

Red Velvet Yeast Bread Ingredients:
2 1/2 cups bread flour
1/4 cup cocoa powder
2 tablespoons (1 ounce) red food coloring plus 1 tablespoon water
1/3 cup sugar
2 teaspoons active dry yeast
1 cup minus 3 tablespoons lukewarm water (100-110 degrees F)
1 1/4 teaspoons table salt
2 tablespoons unsalted butter, room temperature
vegetable oil for lightly oiling bowl

Filling Ingredients:
3/8 – 1/2 cup granulated sugar (depending on how sweet you like things)
2 tablespoons semisweet chocolate chips
2 tablespoons bittersweet chocolate chips (I use Ghirardelli’s 60% cacao)
2 tablespoons unsalted butter, melted

Cream Cheese Glaze Ingredients:
2 ounces cream cheese, room temperature
1/2 cup powdered sugar
2 tablespoons unsalted butter, room temperature
1/4 teaspoon vanilla extract
about 3 tablespoons milk as
mini chocolate chips for sprinkling

Directions:
Note: In recipes that call for hunks of rising/resting time like this one, I like to draw out my schedule with different size boxes representing “hands on” and “hands off” prep time to get a visual feel for how long it will take. If you’re a visual person like me, drawing out your schedule is a great technique to try! Otherwise, a good old fashion list of what you’re doing at what time would also be beneficial.

Make bread starter: Dissolve the yeast in the 100-110 degree water for about 10 minutes. Completely mix in the flour. Cover the bowl loosely and leave it at room temperature to proof for around 6 hours.

Make red velvet yeast bread: Mix the cocoa powder, red food coloring, and 1 tablespoon water into a paste in a small bowl. In a medium bowl, mix together the paste, flour, 1/3 cup sugar, yeast, water, and 1/4 cup of your bread starter (save the rest to use for other recipes). Let this mixture rest for 15 minutes.

Knead in the salt and butter and then knead for about 10 minutes by hand or about 4 minutes on a mixer fitted with a dough hook, or until smooth and elastic. Scoop dough out into a lightly oiled bowl and cover it with a dish cloth. Let it rise until doubled in size, about 1 1/2 hours. Leave the dough in the bowl at this point but fold it in thirds like you’d fold a letter. Recover it and let it rest for 30 more minutes.

Shape and bake pull-apart bread: Prepare two 7″x 3″ x2″ loaf pans by greasing them (I use Wilton’s Cake Release, but you could also butter and flour them). Flour a large work surface. Use a dough scraper or sharp knife to help you cut your dough into halves. Turn out half of the dough onto your floured surface, keeping the other half covered.

Roll your dough out to a 15 inch long and 12 inch wide rectangle, lifting corners periodically to make sure it’s not sticking. If it seems to be snapping back, cover it with your damp towel and let it rest for 5 minutes before continuing.

Spread the melted butter over the surface of the dough with a pastry brush and then sprinkle the sugar and chocolate chips over the top, patting them down to ensure they mostly stick. Some will inevitably fall out as you do the following steps — just stuff ’em back in and don’t worry too much about perfection.

With the long edge of the rectangle toward you, cut it into 6 strips (do this by cutting the rectangle in half, then cutting each half into equal thirds. I used a pizza cutter). Stack these strips on top of one another and cut the resulting stack into 6 even portions (again, cut it in half, and then cut the halves into equal thirds). Place these portions one at a time into your greased loaf pan, pressing them up against each other to fit them all in. Cover the pan with your damp cloth and place it in a warm place for 45 minutes to an hour to double in size. Repeat the rolling and cutting process with the second half of dough.

While the dough rises, preheat oven to 350 degrees F (or 325 if you have a glass loaf dish instead of a metal pan). When it’s risen, place the loaf in the center of the oven and bake for 30-35 minutes until dark on top (if you take it out at light brown, it’s liable to be raw in the middle, so let it get good and dark). Cool until just warm on a cooling rack in the loaf pan while you make the glaze.

Make the cream cheese glaze: Beat the cream cheese until fluffy, and then add sugar and vanilla. Add the milk to thin it to drizzling consistency. Drizzle some of the glaze over the slightly warm bread (save the rest for drizzling over individual slices) and sprinkle it with mini chocolate chips. Serve immediately.

If you liked this post, please:
Subscribe to Willow Bird Baking
Follow Willow Bird Baking on Twitter
Follow Willow Bird Baking on Facebook
Give this post a thumbs up on StumbleUpon
Pin It


Shareother ways to share this post with friends

Twice Baked Cranberry & Pancetta Sweet Potatoes with Balsamic Glaze

The only time I’ve lived away from my hometown was during my sophomore year in college when I moved to Beaufort, a small town on the coast of North Carolina. I lived there for a few months before traveling for a month down the Eastern seaboard to study marine zoogeography. That semester changed my life, and I’ve continued to process the memories over the years. Periodically I’ll share stories here on Willow Bird Baking from that time.

. . .

I stared willfully at the horizon, waiting for the wave of nausea to subside. As if it were having great fun at my expense, the boat rolled over another giant wave. My stomach followed. I was determined not to succumb to the sensation and end up hanging over the railing like several of my friends, so I squinted even harder at the steady line between sky and land.

We’d woken up at an absurd hour to climb aboard the R/V Susan Hudson that morning. We’d all become accustomed to rolling out of bed, pulling on a pair of salty old sneakers, and plowing through the fog of sleep to begin our adventures. Luxuries like showering and hairstyling and even, say, deodorant had long since been abandoned. There was a high likelihood that on any given day we’d find ourselves traipsing through mud up to our thighs (I’m not exaggerating), swimming to a nearby island, or cuddling with sea cucumbers in the shallows. There was no point in getting pretty.

This was our first deep sea expedition. We were traveling miles out into the ocean to dredge and trawl for invertebrates that we would take back to the lab, observe, and then release. I’d been on the Susan Hudson around Pivers Island, home base for the Duke Marine Lab where we lived, but I soon discovered that this was an entirely different experience: one in which I did not have sea legs. Or a sea stomach.

The briney smell of the critters we poured out onto the ship’s deck didn’t help. We quickly flipped fish back out into the sea and scooped heaps of clams, snails, and squids into buckets of seawater. A cacophony of seagull chatter above us reminded us to toss a bit of our impressively fresh sushi into the air now and then.

On our way back with our spineless loot (the squids’ inky water suggested they were none too happy with their temporary accommodations), we docked near Cape Lookout to explore the seashore for a bit before eating lunch back on the boat. The dining hall had packed us sweet little bag lunches complete with a sandwich, apple, and cookie, but the thought of lunch sent my stomach back into a lurch.

Fortunately, one of the guys in our group had grown up on the water in Charleston. Will had battened down hatches, swabbed the deck, shivered some timbers, and every other nautical cliche I can muster up. He saw my decidedly green gills and said, “Make sure to eat.”

I was skeptical. “Well, I’m feeling really sick — is it a good idea to eat anything? Isn’t that just asking for trouble?”

“Trust me: eat. You’ll feel better.”

I unfolded the wax paper around my sandwich and took a cautious bite. (By the way, if you’ve never wrapped a sandwich in wax paper for your lunch, you should. The sensory experience of unwrapping that crinkly, smooth paper to eat a humble little sandwich is one of my favorite things in the world.) I don’t remember what sort of sandwich it was, but it tasted otherworldly after an entire morning on the boat. My hunger caught up to me and I finished devouring my sandwich with gusto. I headed for the cookie after that, offering my apple to one of my friends (the peel gets caught in my teeth and drives me batty, so I never eat them).

My trust in Will, given tentatively and mostly out of desperation despite his obvious experience, paid off. I felt better almost instantly. So much so that instead of clenching my bench and staring at the now-bright horizon the entire way back to the lab, I was able to get up and survey the surrounding sea, broken by waves and playful dolphins.

. . .

I’ve moved from research boats to potato boats since my time in Beaufort. In fact, I haven’t stepped foot on an actual boat (unless you count a kayak) in years. And I wouldn’t trust these sweet potatoes to be particularly sea-worthy.

They are fantastic, though. I love twice baked potatoes for their soft, creamy filling, and this play on the theme boasts that same lovely texture. In addition to that, it has a phenomenal collection of flavors: sweet potato, cranberry, salty pancetta, sage, goat cheese, and a sweet balsamic glaze. The pretty presentation is just the icing on the cake.

Twice Baked Cranberry & Pancetta Sweet Potatoes with Balsamic Glaze


Recipe by: Willow Bird Baking
Yield: 2 twice baked sweet potatoes

These gorgeous twice baked sweet potatoes are fancy enough for a holiday meal, but simple enough to make any night. You can even prepare them a day in advance so they’re ready to pop in the oven before a big meal. A few tricks (like using a zip top bag to pipe the mixture into their sweet potato boats) speed up the process. The best thing about them, though, is the fantastic combination of flavors: salty pancetta, sweet and tart cranberries, tangy goat cheese, fresh sage, and a sweet balsamic glaze. It’s every sweet potato’s dream.

Ingredients:
2 large sweet potatoes (look for ones that are shaped like a fat oval)
4 ounces cubed pancetta
2 ounces goat cheese, plus more for crumbling on top
2 tablespoons butter
1 heaping teaspoon of loosely packed sage leaves, finely chopped
1/4 cup dried cranberries
1/4 cup half & half
salt to taste
1 1/2 cups balsamic vinegar
3 tablespoons sugar

Directions:
In a small bowl, cover dried cranberries with hot water. Cover the bowl with plastic wrap and let it sit for about 10 minutes to rehydrate the berries. Drain them and set aside. Preheat the oven to 350 degrees F. Poke each sweet potato several times with a fork and bake them on the oven rack (with a baking sheet on the rack below to catch any oozing) for 1 hour or until a knife will slice them easily.

While they bake, sauté the pancetta in a skillet over medium-high heat for a 8-10 minutes or until crisp. Drain it on a plate lined with a paper towel.

Once they’re ready, let the baked sweet potatoes cool for 10 minutes before slicing the top third off of each. Use a spoon to carefully scoop out the flesh (leave about 1/8 inch of flesh in the skin to give it some sturdiness). Mix the sweet potato flesh in a medium bowl with the butter, 2 ounces of goat cheese, and half & half (add this slowly while mixing so you get the consistency you’d like). Once the mixture is smooth, stir in the cranberries, sage, and pancetta. Salt the mixture to taste. Spoon it into a large zip top bag and cut the bottom corner off. Squeeze the mixture into the sweet potato skins. (At this point you can cover the potatoes and refrigerate overnight or bake immediately. If you chill them overnight, just let them come to room temperature before you bake them the next day.) Bake the potatoes for 10-12 minutes before removing them to a cooling rack.

While the potatoes are baking, combine the balsamic vinegar and sugar in a saucepan and boil them over medium-high heat, stirring occasionally, until the mixture is reduced to about 2/3 cup (this can take anywhere from 18-25 minutes). Be careful — vinegar fumes are strong! When the glaze is about ready, preheat the broiler. Top each potato with a generous amount of goat cheese and broil, watching very closely, until goat cheese is toasty brown and bubbly. Remove the potatoes and drizzle on the balsamic glaze. Serve immediately.

P.S. This dish will be entered in the North Carolina Sweet Potato Commission‘s No More ‘Mallows Recipe Contest. I love me some sweet tater and marshmallow casserole, but I also love that sweet potatoes pack a lot of savory potential.

If you liked this post, please:
Subscribe to Willow Bird Baking
Follow Willow Bird Baking on Twitter
Follow Willow Bird Baking on Facebook
Give this post a thumbs up on StumbleUpon
Pin It

Thick Chocolate Cake with a Big Red (Velvet!) Heart

Okay, confession: I’m actually starting this post on Thursday, February 8. At this moment, I haven’t taken any photos of this cake yet, because I haven’t even baked this cake yet. I’ve only just drafted the recipe. It could be a total cake flop (or another trifle?) But hopefully, by the time I’m finished with this post in a few days’ time, there’ll be a great big gorgeous cake staring at you from the photographs.


hi.

I also haven’t driven up to Raleigh for my Valentine’s weekend yet, so I may be totally off-base with the following mushiness (I’m a city girl, so I’m unfazed by your aphoristic “counting-unhatched-chickens” nonsense.)

I’m gonna take a stab at predicting the future and tell you (and hopefully confirm for you later): Mike is the best boyfriend ever.

See, Mike is planning (or, by the time you see this, planned — is this getting confusing?) our Valentine’s celebration this year.

I got him a few presents (this novel, and some astronaut ice cream, because who doesn’t want to eat weird space food?)

I also attempted to paint my toenails for the weekend, but if you follow Willow Bird Baking on Facebook, you know that I actually only managed to make my toes look like they’d been gnawed off by a possum. Romantic?

But other than those little details (and, okay, this gigantic cake), it’s all Mike.

Update, Friday, February 9: Mike just emailed me to tell me to bring something nice to wear to dinner, but that’s my only clue so far. I bought him Reese’s hearts to tuck into his present. And Scooby Doo valentines to hide around his apartment, because I am apparently 5 years old.

I finally baked the cake and filled it with red velvet goodness (spiking the cream cheese frosting with amaretto on the fly was a fantastic choice). Hopefully tomorrow morning will find me frosting, photographing, and hitting the road with Byrd (my smaller, fuzzier valentine).

Update, Saturday, February 10: My suspicions were correct — Mike wins at romantic Valentine’s dinners! He took me to fancy schmancy Coquette in Raleigh, where I had gnocci that tasted just like Thanksgiving (how’d they do that?) and he had a mind-blowing cassoulet. The wind chill might’ve been hovering around negative eleventy billion, but the cockles of my heart were as warm as a . . . well, as a cassoulet. Because I ate a bunch of it.

Update, Sunday, February 11: My suspicions were even more correct — Mike wins at awesome Valentine’s surprises! I’ve been wanting to see Hugo since it came out but haven’t gotten a chance. After Mike and I tried but failed to go see it last time he was in Charlotte, I figured I was going to miss it in theaters entirely. But after church today (and some fantastic pizza), Mike drove me to the movies! Hugo was amazing.

Actually, though, the best thing Mike gave me was a card. He knew it was good when I cried for five solid minutes after reading it (and I’ve read it 3 or 4 times since and cried every time.) The best part: “I love you with all my heart. I’m so glad we’re together this Valentine’s.”

If he thinks he’s glad . . . !

I can now happily report that the cake, also, was a smashing success. It turns out if you combine the best chocolate cake you’ve ever tasted, the best red velvet cake you’ve ever tasted, the best (amaretto!) cream cheese frosting you’ve ever tasted, and the best chocolate frosting you’ve ever tasted, the result will be pretty flippin’ awesome.

What are your Valentine’s plans?

Thick Chocolate Cake with a Big Red (Velvet!) Heart


Recipe by: Willow Bird Baking, using chocolate cake and chocolate frosting recipes adapted from Martha Stewart
Yield: 10-12 slices

This is a capital-D Delicious show-stopper of a fancy schmancy special occasion cake. It’s a labor of love; however, even though it’s a lot of steps, they’re all pretty easy to accomplish! To make this cake (and so many others — it’s been a great investment for me), I used a Wilton Heart Tasti-Fill Pan. You can find this pan online or at Hobby Lobby, Michael’s, and probably AC Moore, if you’re looking for one. Or you can also use this tutorial by Amanda at i am baker to create a heart inside your cake without the pan!

Chocolate Cake Ingredients:
2 1/4 cups all-purpose flour, plus more for pans
2 1/4 cups granulated sugar
1 1/8 cups unsweetened Dutch-process cocoa powder
2 1/4 teaspoons baking soda
1 1/8 teaspoons baking powder
1 1/8 teaspoons coarse salt
3 large eggs, room temperature
1 1/8 cups low-fat buttermilk
1/4 cup plus 3 1/2 tablespoons safflower oil
1 1/8 cups warm water
1 1/2 teaspoons pure vanilla extract

Red Velvet Cake Filling Ingredients:
1/4 cup vegetable shortening
1 egg
1 tablespoon cocoa
1/4 teaspoon salt
3/4 cups sugar
1/2 teaspoon vanilla extract
1/2 cup buttermilk
1 1/4 cups flour
1/2 teaspoon baking soda
1 1/2 teaspoons white vinegar
1 ounce (about 2 tablespoons) red food coloring

Amaretto Cream Cheese Frosting Ingredients:
2 ounces cream cheese, at room temperature
2 tablespoons unsalted butter, at room temperature
1 3/4 cups powdered sugar
1/2 teaspoon vanilla extract
1 tablespoon amaretto or almond liqueur (optional)

Chocolate Frosting Ingredients:
1/4 cup plus 2 tablespoons Dutch-process cocoa powder
1/4 cup plus 2 tablespoons warm water
2 sticks unsalted butter, room temperature
1/2 cup confectioners’ sugar
Coarse salt
1 pound semisweet chocolate chips, melted and cooled
sprinkles

Directions:
NOTE: This cake has a lot of steps, but it’s easy to split up over several days. The cake layers can all be made days in advance (freeze the chocolate ones to make them easier to work with — no need to thaw before you assemble your cake — and stick the red velvet one in an airtight container in the fridge until you’re ready to use it). You can also assemble the cake and refrigerate it the night before you want to frost it (just cover it in the fridge).

Bake red velvet cake: Preheat oven to 350 degrees F and grease a 9-inch square baking pan. Cream together shortening, sugar, and eggs. Mix the cocoa and food coloring to form a paste and add this to the shortening mixture. Add the salt and vanilla extract. Add the buttermilk alternately with the flour, beginning and ending with flour. Mix the vinegar and soda together in a small bowl and immediately fold it into the cake batter. Pour the batter into your prepared pan and bake at 350 degrees for 25-30 minutes, or until a toothpick inserted into the center comes out with just a few moist crumbs. Cool completely. Keep the oven preheated for your chocolate cake.

Make the chocolate cake: Grease the Wilton Heart Tasti-Fill Pan well (You can find this pan at Hobby Lobby or Michael’s, if you’re looking for one, or you can also use this tutorial by Amanda at i am baker to create a heart inside your cake without the pan!). I use Wilton’s Cake Release to grease my pans, but you could also use butter and flour.

Sift the flour, sugar, cocoa, baking soda, baking powder, and coarse salt together in a mixing bowl. Beat the dry ingredients on low until combined before increasing the speed to medium and adding eggs, buttermilk, warm water, oil, and vanilla. Beat about 3 minutes until the mixture is smooth. Divide it among your prepared pans.

Place the pans in the oven and bake until a toothpick inserted in the middle comes out with just a few moist crumbs, about 30-35 minutes. Rotate the pans about halfway through so they’ll bake evenly. Let them cool on a wire rack for about 10 minutes before turning them out onto sheets of wax paper and leaving them to cool completely. Stick them in the freezer so they’ll be easier to work with.

Make the cream cheese frosting: Whip cream cheese and butter until fluffy. Mix in all other frosting ingredients and mix on medium-high speed until combined. When cake is cooled and crumbled, mix the cream cheese frosting in until the mixture has a dough-like consistency.

Make your chocolate frosting: In a small bowl, whisk together the cocoa and warm water. In a separate bowl, beat together butter, confectioners’ sugar, and a generous pinch of coarse salt until pale and fluffy. Gradually beat in the melted chocolate and the cocoa mixture. Let this sit for about 30 minutes before you use it to frost the outside of your cake. (You can assemble the cake while you wait.)

Assemble the cake: Take out your firm-from-the-freezer cake layers and stack them to see if you need to trim the sides with a serrated knife at all. Level them if they need it. Then place them cavity-side up on the counter. Knead your red velvet mixture a bit to make it soft and pliable and pack the cavities of both layers with it, making sure it gets down into the shape of the heart. I smoothed the red velvet mixture level with the back of a spoon.

Spread a touch of chocolate frosting on the middle and outside of the cake layer (not on the red velvet heart) as “glue” and then place the cake layers together (filled sides together, of course). Carefully align your heart. Smooth a very skimpy layer of chocolate frosting (the crumb coat) all over the outside of the cake, brushing away any crumbs, and place the cake in the fridge to harden the frosting and secure the crumbs. After chilling for about 20 minutes, remove the cake and frost completely. Decorate with fantastic sprinkles and lots of love. Serve immediately with ice cream or store, covered, in the fridge. If you store it, zap each slice for 20-30 seconds or let it sit out for 20 minutes or so to let the chocolate frosting soften.

If you liked this post, please:
Subscribe to Willow Bird Baking
Follow Willow Bird Baking on Twitter
Follow Willow Bird Baking on Facebook
Give this post a thumbs up on StumbleUpon
Pin It

Red Velvet Cheesecake-Stuffed Cake Balls

What’s your favorite color?

Alex‘s answer is pink. He’s the son of fellow Charlotte food blogger Julie of Mommie Cooks, and he just celebrated his 6th birthday in style with a gorgeous rainbow cake. Things haven’t all been rainbows lately, though, because Alex was recently informed by some kids at school that boys aren’t supposed to wear pink.

Julie’s post beautifully captures the struggle of a mom trying to empower her kid to hold tight to his unique personality when the world is trying to tuck him into a bright blue mold. It’s hard to explain to a 6-year-old that pink wasn’t always considered “girly.” Or that part of the reason pink is a “girl color” now is so businesses can make more money. Maybe Riley can help explain?

I shared Julie’s post with my 7th grade students, who wrote a reflection on it before we discussed their thoughts. Middle school is a particularly difficult time for finding your own way, so we talk a lot about bullying and how to be ourselves and love others. Given this (and the fact that they’re sweethearts), I wasn’t surprised at all that they were touched by Alex’s story.

Their indignant and protective voices cried, “He can like whatever color he wants to like!” and “He’s just a little boy! Why does it matter what color he wears?” Then someone — I think it was Matt — raised their hand with an idea. “We should all wear pink tomorrow to support him!”

And just like that, a plan was born: the 7th grade “color swap.”

That’s how it came to pass that the 7th grade boys filed into my room this morning in every shade of pink and red. The 7th grade girls donned blues, grays, greens, and browns, complete with sneakers and baseball caps. One boy snazzed his outfit up with a pink tie. Another topped off his ensemble with a pink fedora. Yet another wore cute socks. Their message was clear: colors don’t belong to a certain gender, and you should always be able to be yourself.


The 7th grade. Be yourself, love others!

This Valentine’s Day, don’t limit yourself to celebrating romantic love. Why not celebrate pink for Alex? Find a way this week to be your unique self, or to show support for someone else’s individual choices. Maybe you can find a day to wear pink for all the Alexes of the world, who shouldn’t ever have to conform to an arbitrary idea of normal.

In the spirit of loving yourself and others, here are some Valentine’s Day Red Velvet Cheesecake-Stuffed Cake Balls. Nothing says I love you like cheesecake, red velvet, and chocolate, am I right? And I definitely got some I love yous from the folks who devoured these.

How can you be yourself and love others?

Red Velvet Cheesecake-Stuffed Cake Balls


Recipe by: Willow Bird Baking
Yield: 30+ cake balls

People will seriously swoon when you show up with these cake balls. SWOON, I tell you. Red velvet cake and cheesecake and chocolate?! They’re also, despite looking really fancy, surprisingly straightforward to make. That being said, cake balls and pops are always fiddly the first time you make them and they require a little trial and error (should I dip with a toothpick or a spoon? Should I dry them at room temperature or in the fridge?), but the great thing about them is that they always taste amazing. The “recipe” below is more of a technique than a recipe. I’ve included lots of hints and even have a video tutorial to help you make these cuties! Also be sure to check out Candiquik’s great post on Common Cake Pop Problems.

Cake Ball Ingredients:
Your favorite red velvet cake recipe*, prepared and cooled
Chocolate candy coating (I love Candiquik or candy melts)
sprinkles

Cheesecake Filling Ingredients:
1 8-ounce package cream cheese, softened
2 tablespoons sugar

Cream Cheese Frosting Ingredients:
2 ounces cream cheese, at room temperature
2 tablespoons unsalted butter, at room temperature
1 3/4 cups powdered sugar
1/2 teaspoon vanilla extract

Directions:
*Note: I used a half recipe for these red velvet whoopie pies for my cake balls. They’re delicious as whoopie pies but were too oily for the cake balls, so mine cracked if I didn’t keep them in the fridge. I’d recommend using the red velvet cake recipe I used for these cake balls, which has always worked well for me. It might be more red velvet than you need, so you could try halving it and baking it in a loaf pan, but I haven’t attempted this. What the heck is too much red velvet, anyway?

Make the cheesecake middles: While the cake you chose is baking and cooling, mix all the cheesecake filling ingredients for 3-4 minutes or until fluffy. Fill a plastic zip bag with the mixture and cut off the corner. Pipe the cheesecake mixture into small swirls on a silicone mat or wax paper. Freeze these until firm (mine only took about 45 minutes).

Make frosting: Whip cream cheese until fluffy. Mix in all other frosting ingredients and mix on medium-high speed until combined. When cake is cooled and crumbled, start mixing frosting in. Start with about 1/2 cup of frosting and mash/stir with your fingers, pressing together to feel the texture. You’re looking to reach a playdough-like consistency. I think I used about 3/4 cup of frosting total, but the amount you use will depend on how much cake you have crumbled in your bowl.

Make cake balls: Once your cake mixture is ready and your cheesecake middles are frozen firm, you’re ready to assemble your cake balls! Take a frozen cheesecake middle and pack some cake around it. Roll it into a ball and place it on a silicone mat or wax paper. Continue until all cake balls are rolled. Chill these in the refrigerator overnight. I don’t freeze mine like some sites suggest, because I find chilling them in the fridge instead reduces cracking after I dip them.

Dip cake balls: After cake balls have chilled overnight, melt your candy melts or candy coating according to the package directions. I keep my bowl of candy melts situated in a bigger bowl of hot water to keep them warm and fluid, but be careful no water gets into the melts or they’ll seize!

To dip cake balls, I insert a toothpick into the center and dip them in the candy coating, using a spoon to help coat them. I then hold my cake ball over the bowl, gently bouncing and turning it to drain the excess coating off (letting them drain a good long while — but not long enough to fall off the toothpick — is how I avoid having a huge chocolate “foot”). When well-drained, I gently wiggle the cake ball off my toothpick onto a sheet of wax paper and add any sprinkles. I noticed my cake balls cracking (because I used an oilier cake), so I stuck them in the fridge as soon as they were dry to prevent this (it always helps for some reason). Serve immediately or store in an airtight container in the refrigerator.

VARIATIONS:
-You can leave the cheesecake middles out of this recipe and roll the cake into a solid ball if you want traditional cake pops.
-You can use any flavor of cake (or even a cake mix) for your cake.
-You can add chopped berries to your no-bake cheesecake mixture or even add in chocolate or other flavoring to produce different flavors of cheesecake in the center.
-You can use lollipop sticks or pretzel sticks to make these into cake pops.
-You can decorate with chocolate drizzle instead of (or in addition to) sprinkles.

Alex, this is for you. Be yourself! We think you’re awesome just the way you are.


Rainbows for Alex

If you liked this post, please:
Subscribe to Willow Bird Baking
Follow Willow Bird Baking on Twitter
Follow Willow Bird Baking on Facebook
Give this post a thumbs up on StumbleUpon
Pin It


Shareother ways to share this post with friends

1 11 12 13 14 15 16