glaze

Ina Garten’s Lemon Loaf Cake and Raffaldini Vineyards

So what have you been up to this summer? As you know, up until this past weekend, I had not fulfilled my summer quota of fun sunshiney activities — no beach, no pool, no picnic. With school looming ahead of me (teacher meetings start tomorrow), something had to be done. Quickly.

My friend Vada saved the day (er, the season?). We Jazzercise together and she invited me to join her and a group of her fun friends for a road trip. It was her friend Lori’s birthday and they were headed to Raffaldini Vineyards in Ronda, NC.

When she first suggested it, I wasn’t sure. I don’t drink, so what would I do at a vineyard? Would I end up counting grapes in the corner as everyone else played wine pong (that’s what they do at vineyards, right)? As it turns out, though, Vada doesn’t drink either, and she was certain it would still be fun. I’m up for fun! I told her to count me in.

Vada and Luca

I’m so glad I went, because it was fun. Turns out, vineyards are beautiful — or at least Raffaldini Vineyards certainly were! We drove about an hour out of Charlotte and suddenly it felt like we were in Italy. Vada’s friend Luca, our resident Italian, agreed that it reminded him of home — a nice stamp of authenticity. As promised, fun ensued.
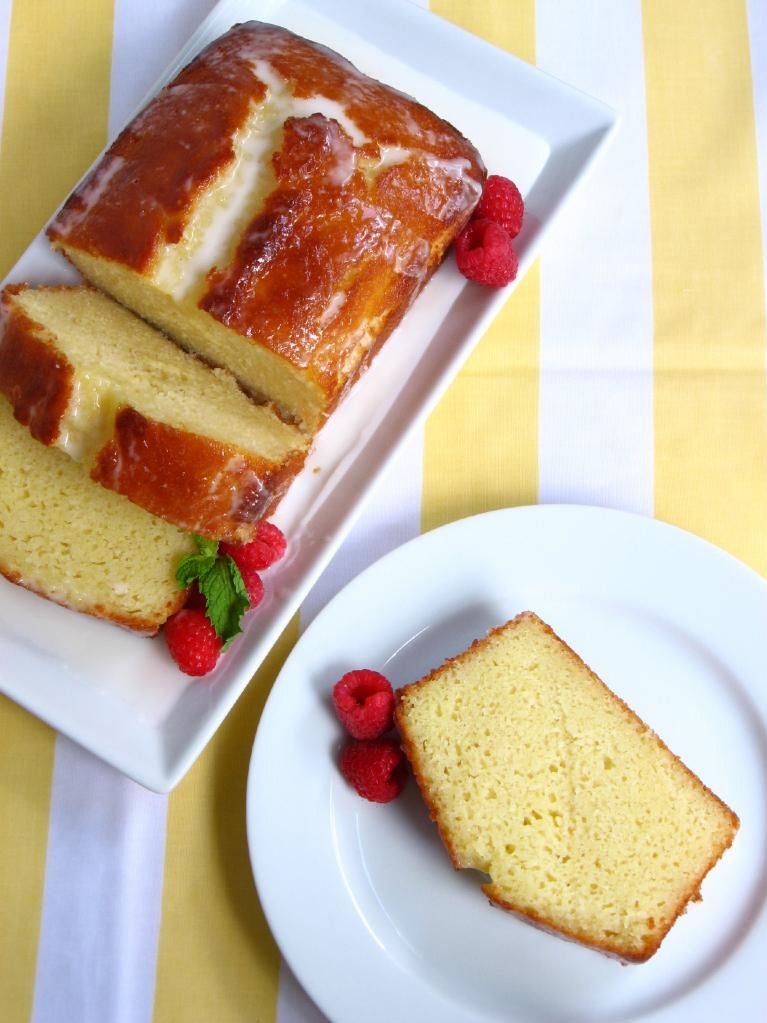
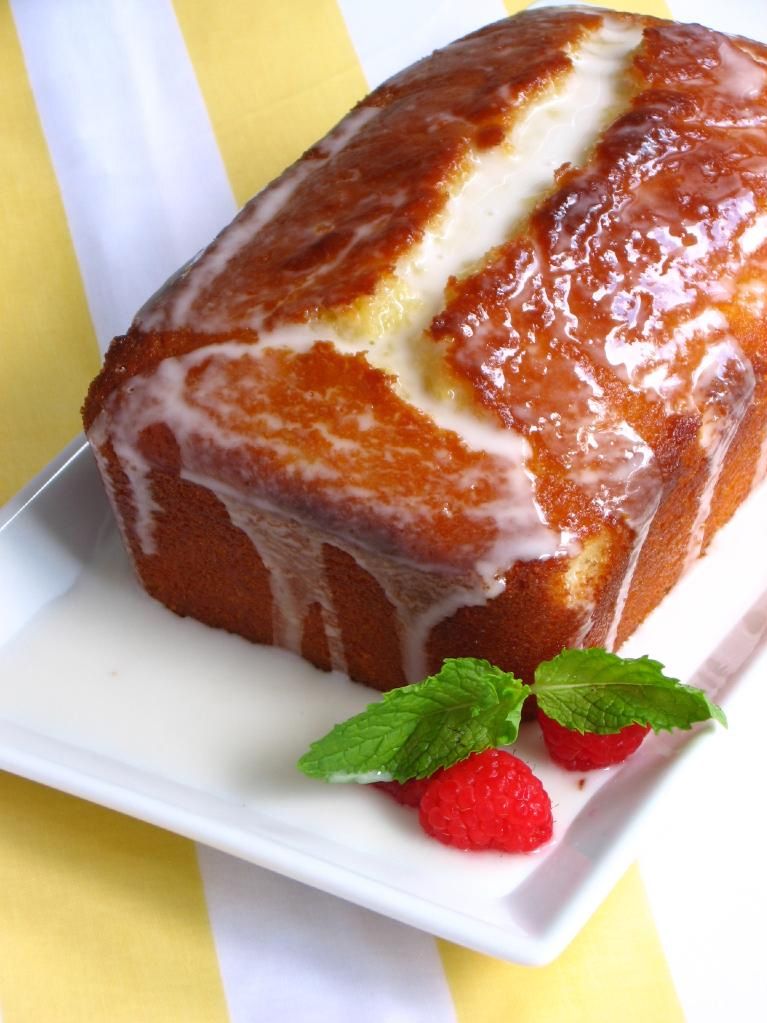
First, we ate a lovely picnic on an outdoor patio overlooking the vineyards and mountains in the distance. The vineyards offered a whole menu of food you could purchase on-site, but I brought a little packed lunch to save money. I also brought this bright, summery Lemon Loaf Cake, which was moist and traveled so well. Vada, who is an absolutely extraordinary cake decorator, brought cupcakes along. We had quite a feast!

After our picnic, we took a brief tour of the vineyard, learning about the soil, growing practices, and types of grapes grown. While others enjoyed a wine tasting, Vada and I took a walk around the grounds and had a photo shoot. Finally, we took a tour of the winery and learned how the wines were made. It was so informative — not being a drinker, I tend to think of grapes as the basis of jelly and “tannin” as something you do at the beach. I learned a lot! The best part? The entire day only cost me $8 — and that included buying a bottled water on-site.
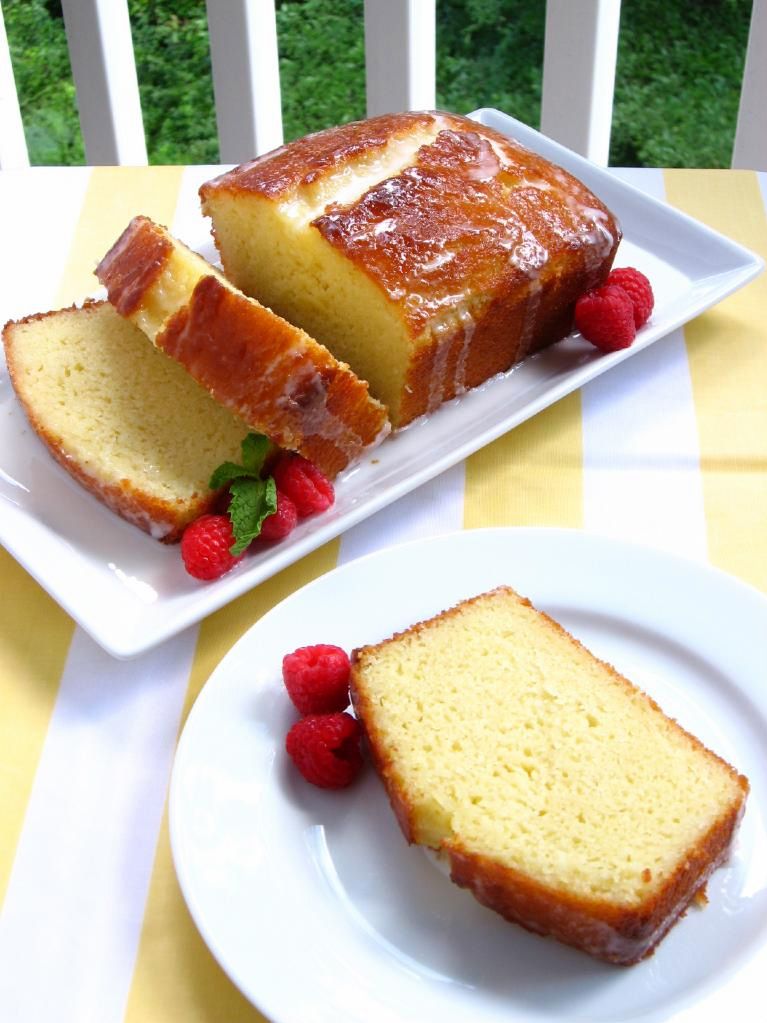

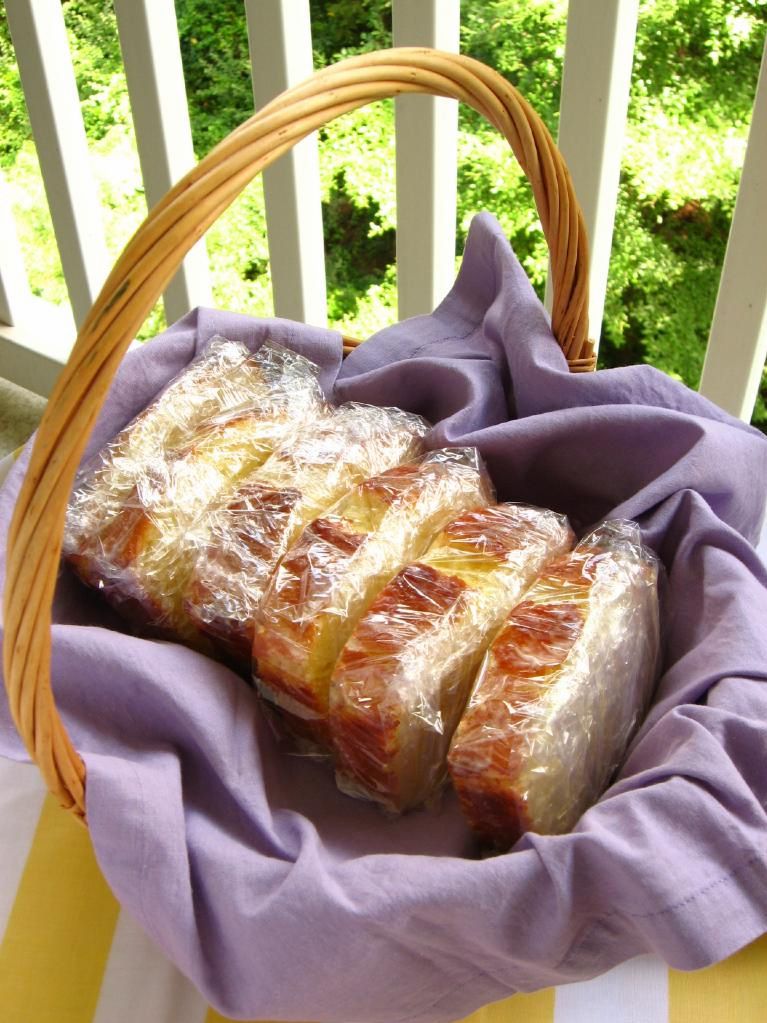
Vada’s gorgeous cupcakes and the quick Lemon Loaf Cake packed for traveling!

This one little day trip kind of made my summer! It was filled with sweet people, good food, beautiful surroundings. How about you? Does one event or activity this summer stand out as your favorite?

You can relive part of my end of summer fun by making this quick, simple loaf cake for yourself. It has a tangy, drenched lemon flavor that will help you kiss the summer days farewell.

5 from 1 reviews
Ina Garten's Lemon Loaf Cake
 
Prep time
Cook time
Total time
 
A delicious, tangy, easy lemon loaf cake. Be careful not to overbake!
Author:
Serves: 6
Ingredients
Cake Ingredients:
  • 1 1/2 cups all-purpose flour
  • 2 teaspoons baking powder
  • 1/2 teaspoons kosher salt
  • 1 cup plain whole-milk yogurt or sour cream
  • 1 1/3 cups sugar, divided
  • 3 eggs
  • 2 teaspoons grated lemon zest or 2 teaspoons lemon extract
  • 1/2 teaspoons pure vanilla extract
  • 1/2 cup vegetable oil
  • 1/3 cup freshly squeezed lemon juice
Glaze Ingredients:
  • 1 cup powdered sugar
  • 2 tablespoons freshly squeezed lemon juice
Instructions
  1. Preheat the oven to 350 degrees F. Grease an 8 1/2 x 4 1/4 x 2 1/2-inch loaf pan (I use Wilton’s Cake Release). Line the bottom with parchment paper and butter and flour the entire pan.
  2. Sift the flour, baking powder, and salt together into a medium bowl. In a large bowl, whisk together yogurt, 1 cup of the sugar, eggs, lemon zest or extract, and vanilla. Slowly add the dry ingredients into the wet, whisking to combine (I did this in 2-3 additions). Use a rubber spatula to fold the vegetable oil into the batter until it’s fully incorporated. Pour into the prepared pan and bake for about 50 minutes, or until a cake tester stuck in the center of the loaf comes out clean.
  3. While the cake is baking, combine the 1/3 cup lemon juice and remaining 1/3 cup sugar in a small saucepan over medium heat and cook until the sugar dissolves and the mixture is clear. Set aside.
  4. When the cake is done, allow it to cool in the pan for 10 minutes before removing it and placing it on a baking rack over a sheet pan. Use a cake tester, wooden skewer, or toothpick to carefully pierce holes throughout the cake (I used a toothpick so the holes wouldn’t be too obvious, but a skewer might have made deeper holes in the cake, allowing more syrup to get through). While the cake is still warm, pour the lemon-sugar mixture over the cake and allow it to soak in. Cool completely.
  5. In a small bowl, combine the powdered sugar and lemon juice, whisking to form a smooth glaze. Pour over the cake. Slice and serve with fresh berries, whipped cream, or ice cream.


Raspberry Almond Braid

20 things I love about SPRING BREAK:

1. Wearing sundresses and new dollar store flip-flops.

2. Playing with a dollar store Frisbee in the parking lot with Mike (and realizing that we are truly terrible at Frisbee).

3. Mike’s family’s Easter egg hunt. I ended up with polleny toes and a scraped up arm — but it was worth it. I found 6 eggs! Who says this stuff is just for kids?

4. Playing fetch with Byrd, who has been following me around with her pink rubber bone in her mouth.

5. Running through soft grass barefoot.

6. Witnessing an all-out wasp vs. bees war on my balcony. The gigantic humble bees are bouncing around the new nest the wasps are building, causing an uproar. All of this goes on overhead while I try to focus on photographing my food!

7. Reading books with wet hair after an evening shower.

8. Watching marathons of Undercover Boss online and bawling the entire time. I can’t help it! I’m a softie. Thanks Heidi and Shannon for recommending the show to me!

9. Reminiscing about April Fool’s Day. My 6th grade students received a fake test that they diligently tried to complete with sad looks on their little faces until I finally revealed my trickery (sample question: “What happened on page 148 of the novel?”). The 7th graders were redirected from room to room via signs before finally arriving and being “chewed out” for being late — I’m a good actor when I need to be! They got me pretty good, too: a fake cup of hot chocolate “spilled” all over my desk.

10. Photographing food outside in WARM, SUNNY weather. Such a difference from shivering on my balcony, fiddling with my tripod with numb fingers!

11. Leaving my hair down and letting it swing around my shoulders. Or tying my hair up in pigtails and feeling only a little silly.

12. Eating delicious Indian food before coming home and devouring cheesecake squares.

13. Getting the BEST parking spot outside my apartment building, because everyone else is at work! Mwahaha!

14. Sitting at my desk with the windows thrown open beside me, birds singing, squirrels nesting in the trees, and the occasional lawnmower revving in the distance.

15. Waking up, eating breakfast . . . and then taking a nap.

16. Planning Mike’s BIRTHDAY DINNER and DESSERT for this upcoming weekend! And actually having the time and energy to make it fancy!

17. The spring part.

18. The break part.

19. Everything . . .

20. . . . including this Raspberry Almond Braid.

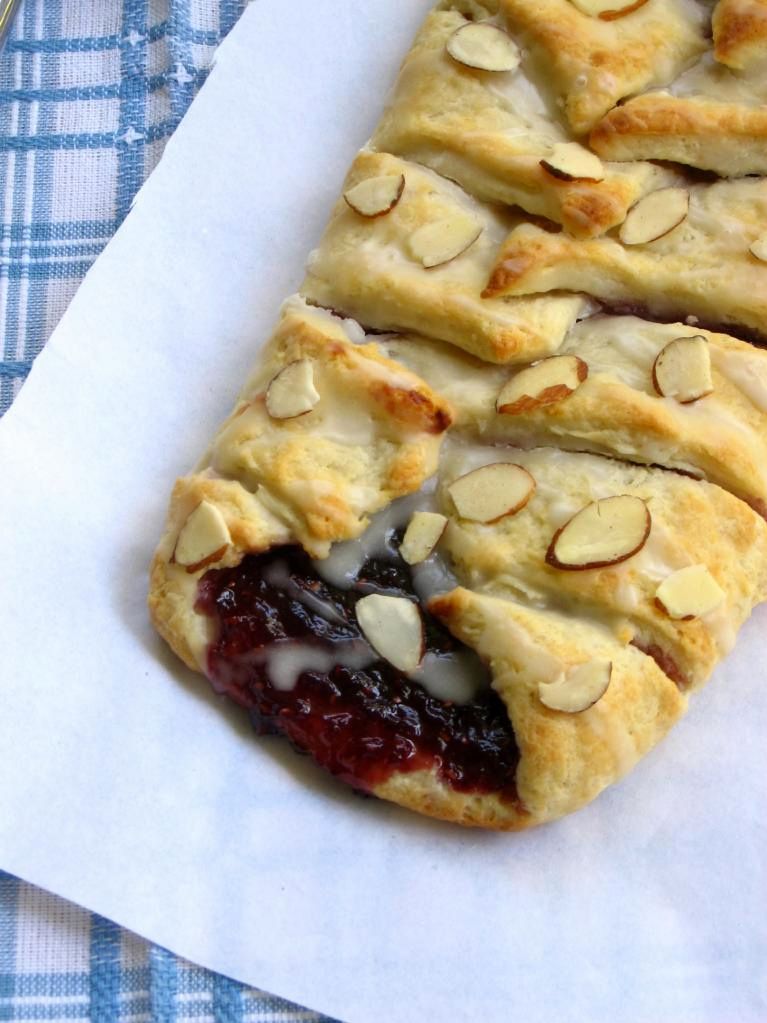
This Raspberry Almond Braid is a tender, flaky, almond-flavored pastry enveloping rich raspberry preserves and topped with a sweet glaze. I was hunting for something simple and comforting to take to the ladies in my Bible study and decided a raspberry cream cheese coffee cake would be perfect . . . only I couldn’t settle on any of the recipes I found. Some were too heavy and cakey; some involved yeasted dough, which felt too finicky for me today. So when I found this braid — made with a quick cream cheese dough — I was sold.

The cream cheese dough was lovely to work with in that it didn’t stick to my rolling pin or the sheets of wax paper I rolled it out between. It actually felt a lot like the crescent roll dough you can buy in stores, so I’m sure you could whip this braid up with one of those cans — but this tasted a ton better! It was almondy and had an almost creamy flavor. The entire dessert was subtly sweet, rich, satisfying, and created in less than an hour.

And you know what I love the most about this braid? In addition to being easy, fast, and delicious, it’s so pretty! Don’t you love simple recipes that look fancy? Make this Raspberry Almond Braid for a quick breakfast one morning this spring, or for a light dessert. I’ll definitely be rounding up my favorite flavors of preserves to make this again!

Raspberry Almond Braid


Recipe by: Adapted from Luna Cafe
Yields: 10-12 1-in. slivers of braid, or about 4 servings

Dough and Filling Ingredients:
2 cups all-purpose flour, sifted
1 teaspoon baking powder
1/2 teaspoon salt
1/2 cup unsalted butter
3 ounces best quality cream cheese
1/2 cup milk, minus 1/2 teaspoon
1/2 teaspoon almond extract
1/2 cup raspberry preserves (or your favorite preserves)

Icing Ingrdients:
1/2 cup powdered sugar
1 tablespoon milk
1/8 teaspoon vanilla
1/8 teaspoon almond extract
2 tablespoons toasted sliced almonds (optional)

Directions:
NOTE: To prepare this braid in advance, complete all steps and assemble the braid but do not bake. Cover the braid on its parchment lined baking sheet with plastic wrap and refrigerate overnight. Set out in the morning as you preheat the oven and then bake as usual.

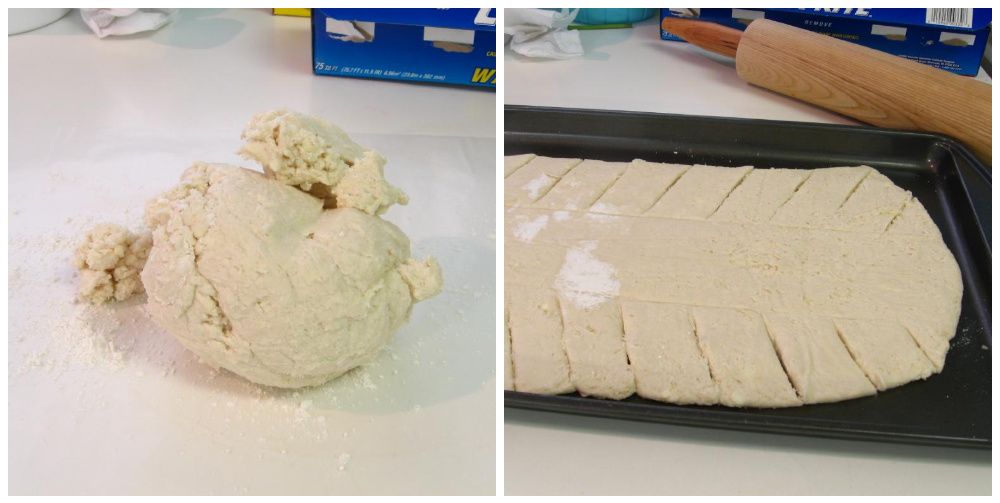
Preheat oven to 425 degrees F. In the bowl of a food processor, mix the flour, baking powder, and salt. Add the cream cheese and butter into the flour mixture and pulse to cut the fat into the flour (about 6 pulses). Add the milk and almond extract and blend into a loose dough.

Turn the dough onto a floured surface and knead VERY LIGHTLY for 4-5 strokes. (NOTE: This is the step at which you can ruin the braid. If you overwork the dough, the pastry will be tough. Just gather the dough together and don’t worry about making it smooth. It will still look a little rough. That’s perfect.)

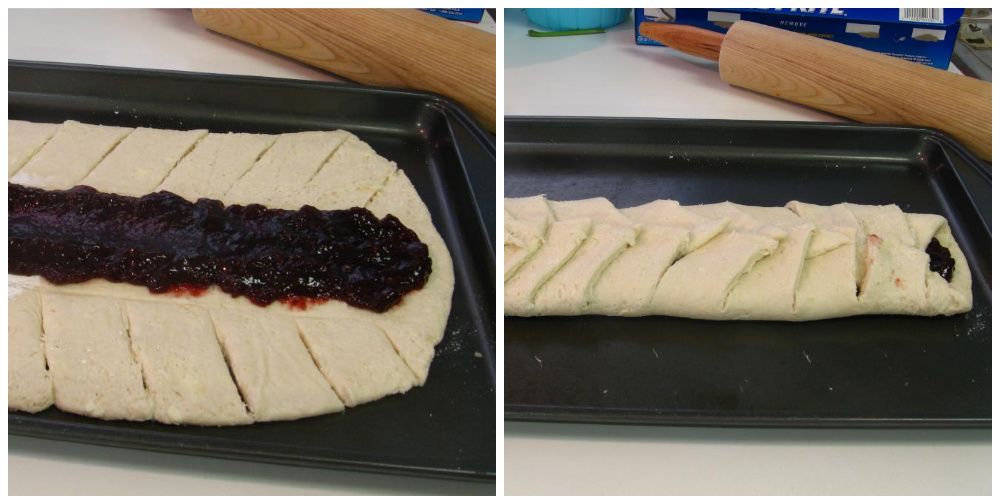
Between two sheets of waxed paper, roll the dough to an 8- by 12-inch rectangle. Turn dough out onto a lightly greased baking sheet and remove the waxed paper. Measure and mark the dough lengthwise into thirds. Spread preserves down the middle third of the dough, keeping it about ½ inch from the mark on both sides.

Make 2¾-inch slight diagonal cuts at 1-inch intervals on each the long sides. Do not cut into the center jam-filled area. Fold strips, first one from one side and then one from the other side in a rotating fashion, over the filling. It will now resemble a braid. Bake in a 425° oven for 12-15 minutes, until the dough is cooked through and the top is lightly browned.

In a small glass measuring cup with a pouring spout, combine the sugar, milk, vanilla, and almond extract. Drizzle over the top of the braid. If desired, sprinkle on the toasted sliced almonds while the icing is still wet. Serve warm.


Enjoy!


Share Share this post with friends!

Clementine Cake

I’m getting really good at u-turns. You can’t make a left turn out of my apartment complex, so a few times a week I’ll find myself sitting at a traffic light, tapping my steering wheel in a bored rhythm, waiting to make my u-turn. If the turn lane light turns red just as I get there, I’m crafty enough to stay in the straight lane for a bit and make a u-turn just up the street. If I time it right, it’s a tad bit faster than waiting for another green arrow. Because that 30 seconds really matters, y’all.

I’m also apparently the queen of the culinary u-turns lately. You remember last week’s shenanigans, right? I wasn’t overwhelmed enough with my two-day Valentine’s dessert recipe, and needed to add, oh, handmade pasta to the mix. Ridiculous.

This week there was another switch, although thankfully not as intense: I was shuffling along, planning to make some personal ice cream cakes when a post showed up in my Google Reader that I could not ignore. Whaaat — a gorgeous citrus cake appears JUST when I’m about to toss out my leftover clementines, which are getting a little squishy? Just like that, my weekend plans slammed on their brakes, put on their turn signal (because unlike the drivers around here, my plans always use their turn signal), and changed direction entirely! Clementine Cake was born!

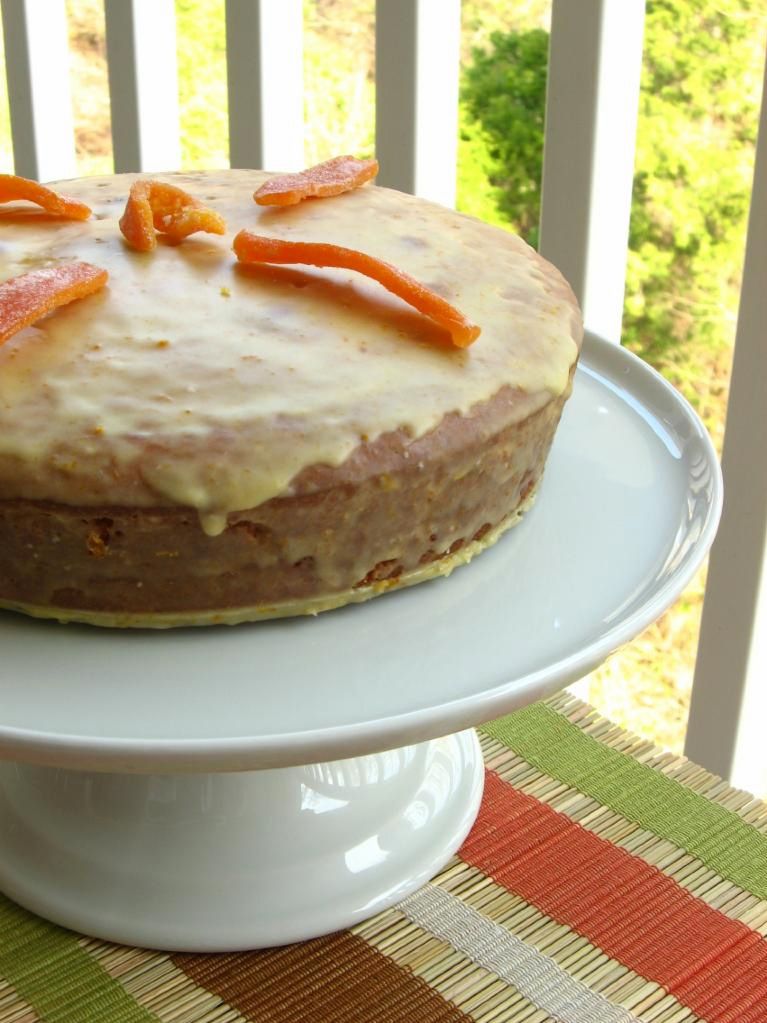
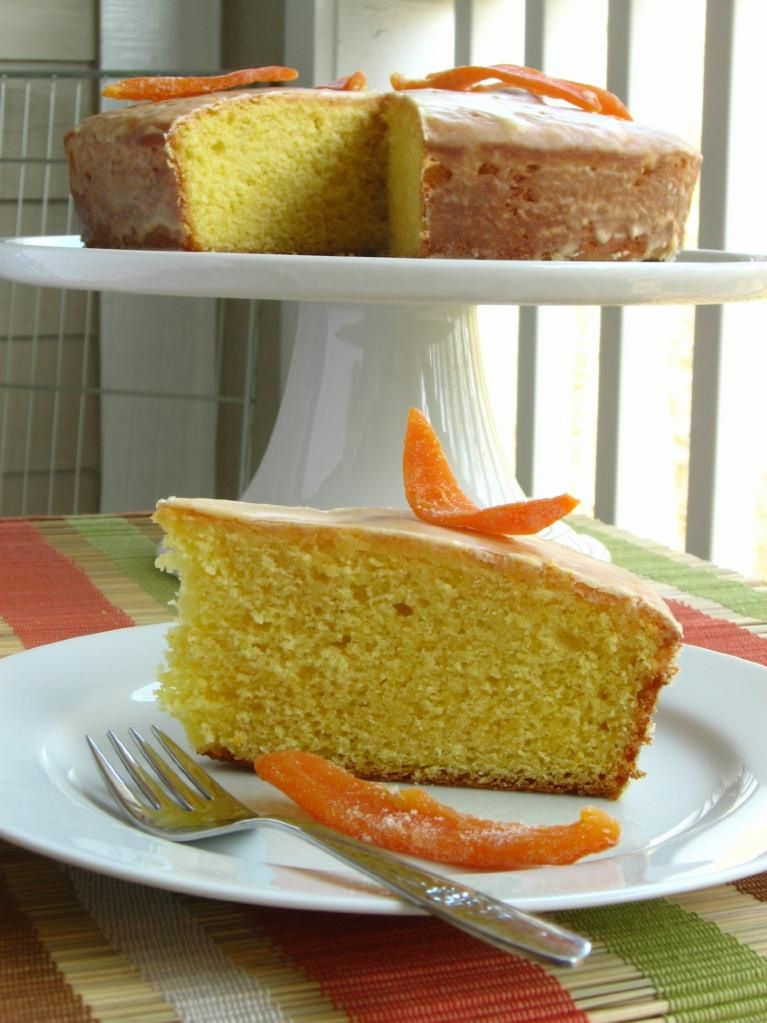
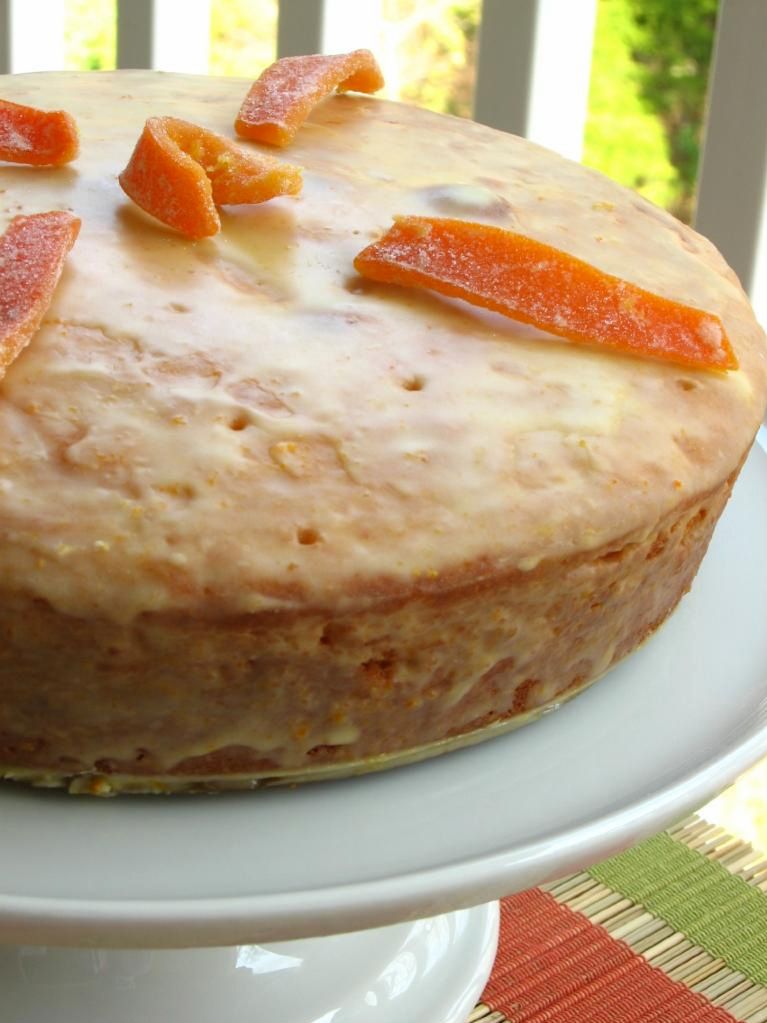
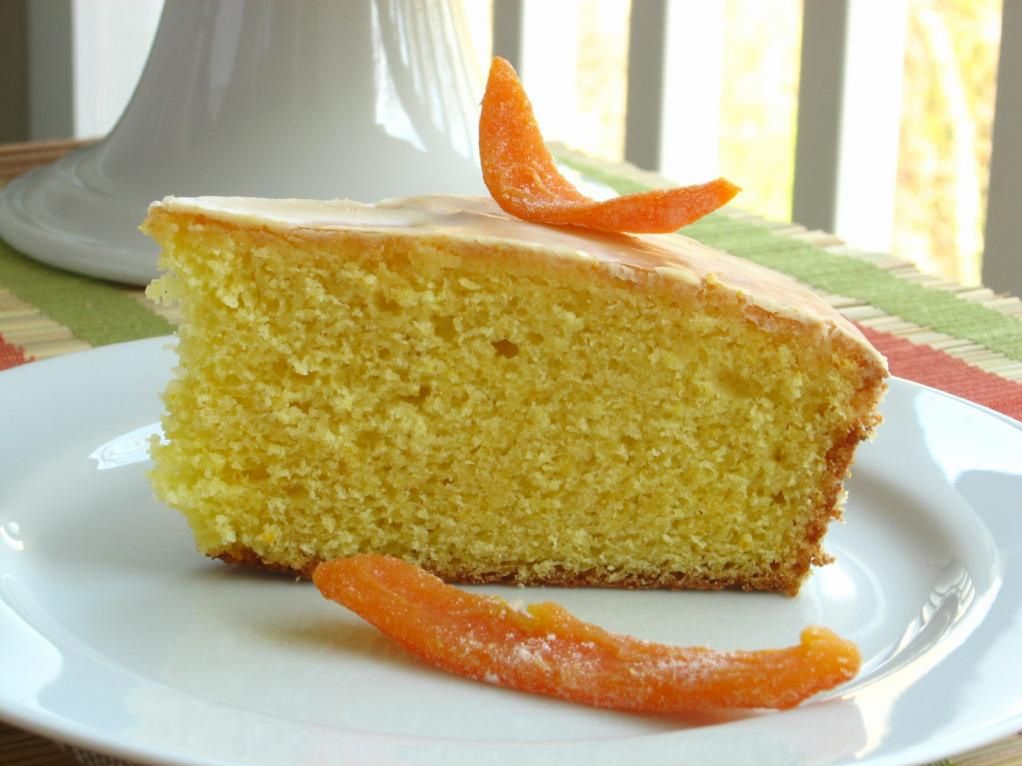
Mike liked this sweet dessert — but I loved it. It was a beautifully simple, dense, bright citrus cake with that lovely crackling glaze to break your fork into. No fussy frosting, so I found myself cutting slabs of it here and there to eat with my fingers!

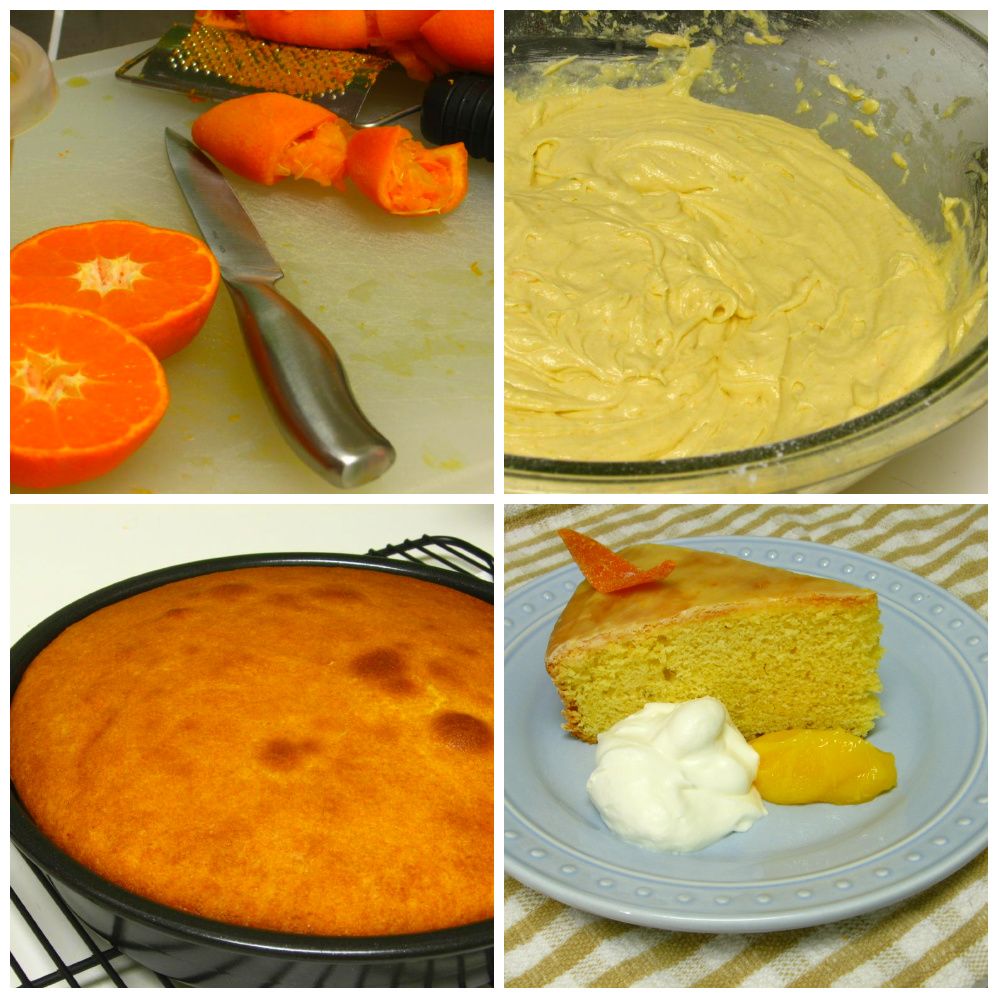
I will say the cake itself was a bit dry (I overbaked, which could be the issue), but I had a few tricks up my sleeve to fix that. I poked holes in the cake as it cooled so the glaze would seep into the it when poured. We also served hunks of the cake with a smear of gorgeous clementine curd and a pluff of barely sweetened fresh whipped cream. I can’t recommend this serving suggestion enough — in fact, I’m going to make it a serving command (can I do that?), because the cake and fixins tasted just like a homey creamsicle!

My poor dad has been on a diet for weeks now and this is his “break” weekend. He’s not technically supposed to have cake, but I fixed him up a small slice (I promise I’m not a diet saboteur). He and my little brother both enjoyed it, so I left them a hunk for later. I may also have hidden away a bit in my own fridge! Something about refrigerating fruity baked goods always enhances the flavor, and this cake was no exception.

Clementine Cake


Recipe by: Adapted by Willow Bird Baking, Lick the Bowl Good, and Technicolor Kitchen from Jill Dupleix
Yields: one 9-inch cake

Cake Ingredients:
1 cup (2 sticks) unsalted butter, room temperature
1 cup granulated sugar
4 eggs, room temperature
1 1/2 teaspoon grated clementine zest
2 cups all purpose flour
1 tablespoon baking powder
1 teaspoon salt
7 tablespoons fresh squeezed clementine juice (I needed about 7 clementines total to make the cake and glaze)

Glaze Ingredients:
1 1/2 – 2 cups powdered sugar
4 tablespoons fresh squeezed orange juice
grated clementine zest

Fresh Whipped Cream Ingredients:
2 cups heavy whipping cream
2 tablespoons icing sugar

Directions:
Heat the oven to 350 degrees F. Butter a 9-inch cake pan and line the bottom with parchment paper. Butter the paper and set aside (I use Wilton’s Cake Release).

Cream the butter and sugar well for several minutes, until it is very pale and thick.

Add the eggs one by one, beating well after each addition, then add the zest. Add the flour, baking powder and salt all at once, and beat well, then slowly add the clementine juice until it is incorporated.

Pour the batter into the prepared cake tin, and bake for 35-40 minutes – or until an inserted skewer comes out clean (If it starts to brown too much on the top, cover loosely with a sheet of foil.) I baked mine for 40 or 45 minutes, which proved to be too long.

Allow cake to cool in pan for 15-20 minutes on a wire rack. Then invert onto a plate, remove the parchment paper and allow to cool completely before glazing.

To make the icing, stir the clementine juice into the icing sugar until you have the right spreading consistency. Using a skewer, dowel, or toothpick, poke holes through entire cake to allow glaze to seep down into it. Pour the icing onto the cake and spread with a spatula or butter knife, allowing the icing to drip down the sides of the cake.

To make fresh whipped cream, whip cream and icing sugar together until the mixture forms soft peaks. Store in an airtight container in the refrigerator.

Leave the icing to set before cutting the cake into wedges or storing in an airtight container. Serve with a smear of clementine curd, and a dollop of fresh whipped cream (and optional candied clementine peel).


Enjoy your citrus squeezin’!


Share Share this post with friends!

Lemon Blueberry Cake

I’m clinging tenaciously to summer’s hem right now, about to topple off into fall. I do have a quiet excitement growing about the upcoming season — crisp air, pumpkins, spice cakes, pies, stews and chilis — but I’m just not ready yet. I need a few more months of summer dresses, fruity cupcakes, and flip flops (although, let’s be honest, I will continue wearing those well into winter).

Along with the end of summer, I’m facing the beginning of another school year teaching middle school English. Our teacher workdays start this coming week. Don’t get me wrong: my school is an absolute Utopia, and I’m excited to spend time with my students in our little classroom together. They’re experts at creating special moments: sometimes insightful, sweet, hilarious, and even absurd. I’ll listen them complain about (and sometimes start to care about) Shakespeare and Hemingway. We’ll laugh over Sei Shonagon’s scandalous Pillow Book. We’ll fold over a thousand paper cranes after reading Sadako’s story. I know it’ll be fun (I just have to convince them of that).

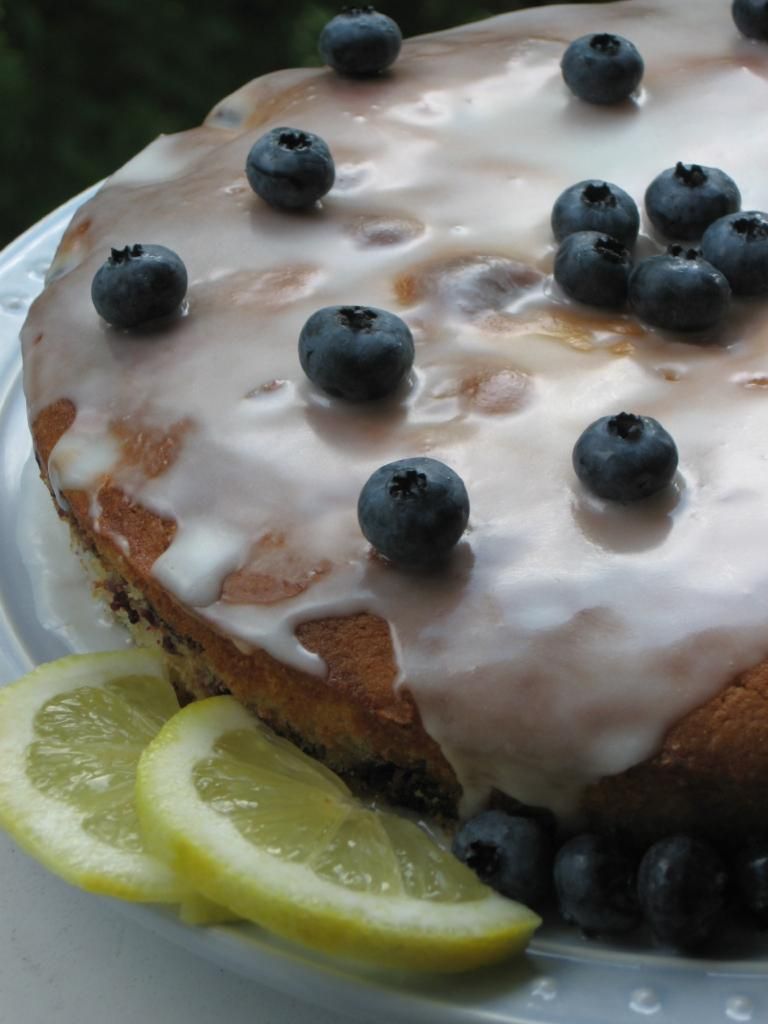
But right now, though the first day of school is still a week away, I’m overwhelmed. Mike and I have been squabbling while trying to make my chaotic mess of a classroom into a decent learning space. I have to make a thousand copies. I have to create a seating chart. I have to plan the first week of school. It’s no wonder that this week, rather than any particular food, I craved simplicity. When I saw the recipe for this Lemon Blueberry Cake, I knew it fit the bill. It’s an ode to summer with plump blueberries and tart lemon, and a simple recipe at that: mix, bake, glaze, eat!

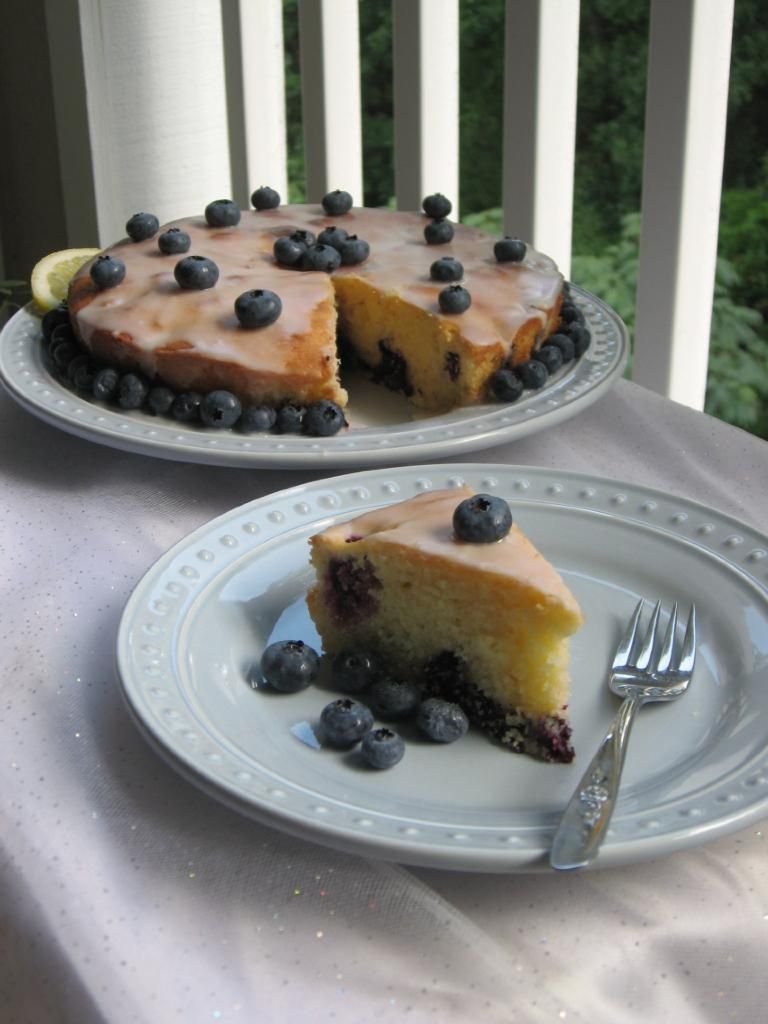
The cake is buttery and moist, and the flavors are a great combination — I adore blueberries and lemons together, as you may already know. While it wasn’t the absolute best cake I’ve ever had, it was a nice dessert for the end to a crazy week. How satisfying, to crack the tart glaze with my fork and shovel a bite of dense, sweet cake into my mouth — and after only having baked for an hour or so! So while I’m not utterly astounded, I am pleased.

This cake would be perfect at a brunch, tea, or garden party, what with its fresh flavors. I’m not going to pretend I have brunches, teas, or garden parties, though; Mike and I will almost certainly devour it while watching Star Trek or something similar. I give you permission to do something more sophisticated with your lemon blueberry cake.

Lemon Blueberry Cake


Recipe by: Joy of Baking and Silent Auror (adapted by me)
Yields: about 8-10 pieces of cake

Ingredients:
1 cup (226 grams) butter, room temperature
1 cup (200 grams) granulated white sugar
4 large eggs
1 teaspoon pure vanilla extract
Zest of 1 large lemon
2 cups (280 grams) all purpose flour
2 teaspoons baking powder
1/4 teaspoon salt
1/4 cup (60 ml) fresh lemon juice
1-1.5 cup blueberries

Icing:
1 cup (115 grams) confectioners’ (powdered or icing) sugar, sifted
2 tablespoons fresh lemon juice

Directions:

Preheat oven to 350 degrees F (180 degrees C). Grease a 9″ springform pan or a 8″ round cake pan. Note: I used a 9″ round cake pan, because I’m a rebel.

Cream the butter and sugar until light and fluffy. Add the eggs, one at a time, mixing well after each addition. Beat in the vanilla extract and lemon zest.

Sift together the flour, baking powder and salt and then add to the batter along with the lemon juice. Mix only until incorporated, adding the blueberries at the very end.

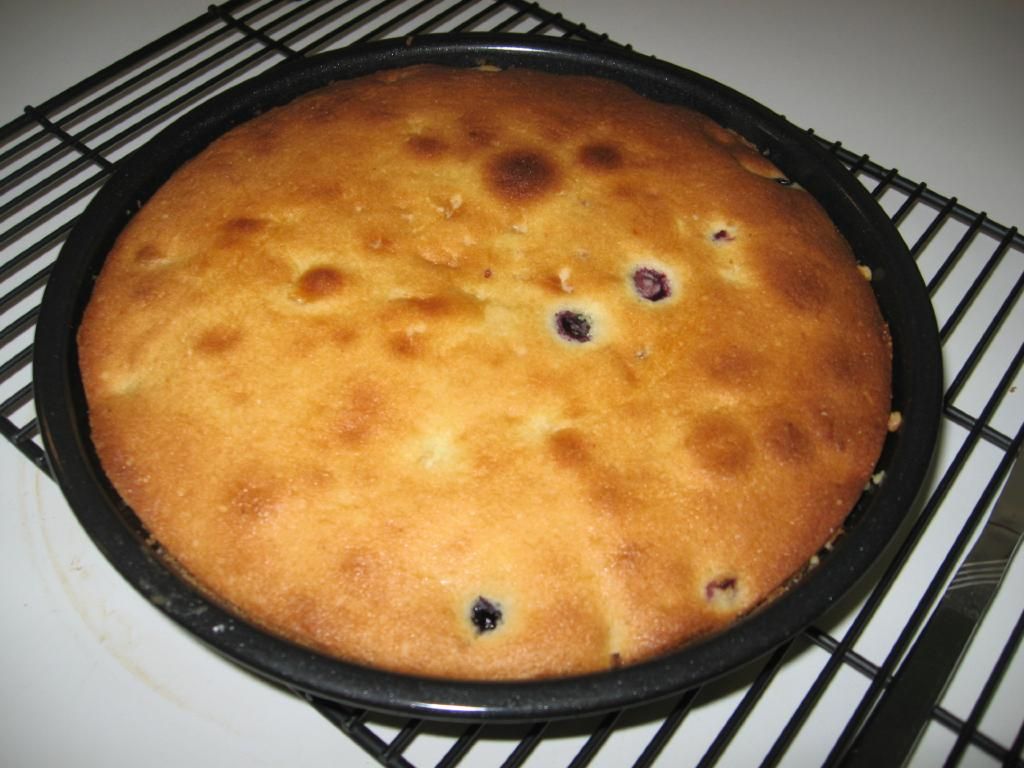
Pour the batter into the prepared pan and bake about 45 minutes, or until a toothpick inserted in the center comes out clean. Note: If you notice the cake is done on top but not in the middle, shield it with aluminum foil for the rest of the baking time. This happened around 35 minutes for me. Place on a wire rack to cool, then gently remove the cake from the pan. Wait until the cake is completely cool before icing.

For the icing, combine the sifted confectioners’ sugar with the 2 tablespoons lemon juice. (You want the icing to be thicker than a glaze but still thin enough that it will just run over the sides of the cake. If not the right consistency add more lemon juice or powdered sugar, accordingly.) Frost the top of the cake, allowing the icing to drip down the sides. Place blueberries over the top as you like.

Note: This cake is another of the many baked goods that tastes better after being refrigerated in an airtight container (such as a cake dome) overnight. The lemon and blueberry get a chance to mingle and chill.


In the oven, and then fresh out of the oven. My cake got a little darker than I wanted on top; keep an eye on it!


Enjoy!

As a side note, I’m “on the spot” this week at The Daring Kitchen — go and take a look!

1 3 4 5