fruit

Heart-Shaped Palmiers and a Pesto Giveaway

What does it say about me that I have more fun at middle school dances as a grown-up than I ever did as a middle schooler?

Woodlawn’s 7th graders hosted a February dance last night. The theme was BRIGHT COLORS to avoid any romantic drama involving Valentine’s Day, so everyone dressed in their rainbow best.

I waltzed in fashionably late in a magenta and turquoise get-up, danced with a gaggle of my 6th grade students to “Fly Like a G6” (though we sing, “now I’m feelin’ so fly / like a fruitbat,” which we feel more accurately characterizes us), and filmed all the hair-whipping that occurred when “Whip My Hair” came on.

We stopped mid-dance to run outside and play freeze tag. I ditched my heels and joined the math teacher, also named Julie, as “it.” Once our feet and hands were frozen, we all filed back in for more dancing. Julie and I sang a duet of “Ice Ice Baby” at one point, showing our age.

Every now and then I’d have a chaperonely duty to perform: directing cleanup, vetoing a song or two, telling the 6th graders to stop screaming. But in general, the dance was exactly what a middle school dance should be: fun and happy. Why didn’t I have this much fun when I was actually in middle school?

I vividly recall my 7th grade Valentine’s dance. My teachers were apparently not as sensitive to the delicate hormonal phase we were in, so they thought it’d be a great idea to make the dance as sappy as possible. Everything was covered in red and pink, with hearts papering the walls. It looked like cupid had thrown up love and romance on every available surface of the multipurpose room where the dance was held. Not only that, but a table was set up outside the bathrooms where the PTA was selling roses and candy for the suave middle school boys who had come to the dance unprepared for their dates.

Someone had asked me to this particular dance. We’ll call him Jeb, and he was not my type. I told him I would go with him as a friend because I wanted to be nice, but once I arrived at the dance, the middle school social pressure overwhelmed me. I didn’t want to be seen with Jeb, much less have to, like, dance with him and stuff.

Just after walking in, I caught sight of him at the aforementioned table buying a rose for me and I booked it to the girls’ bathroom, where I hid for the majority of the night. Every now and then I’d poke my head out and watch him wandering around quizzically, looking for me in the crowd, and then I’d duck back in to hide some more. Part of me felt guilty, but the part that felt mortified won out.

Jeb moved away shortly thereafter, and I felt so bad for having ditched him at the dance. Thankfully, he returned in high school and I got the opportunity to apologize. I chalk the whole experience up to middle schoolitis, the inflammation of your social nerve. For some reason when you’re a middle schooler, it matters so much what others are thinking about you. You don’t want to dance, because what if people think you dance funny? You don’t want to hang out with certain people, because what if people think you’re like them? You don’t want to wear certain clothes, because what if they send the message that you’re uncool?

Phew, I’m so glad that’s over. And so glad that I, unlike a lot of grown-ups, have a second chance at the middle school dance! Call it one of the perks of being a teacher.

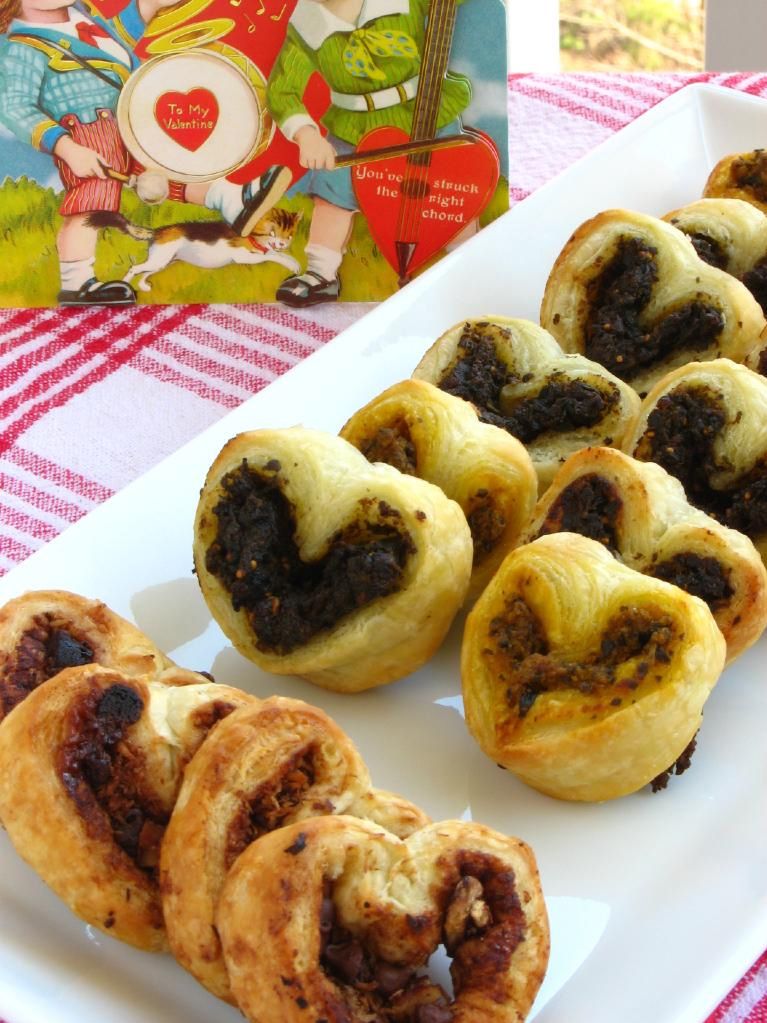
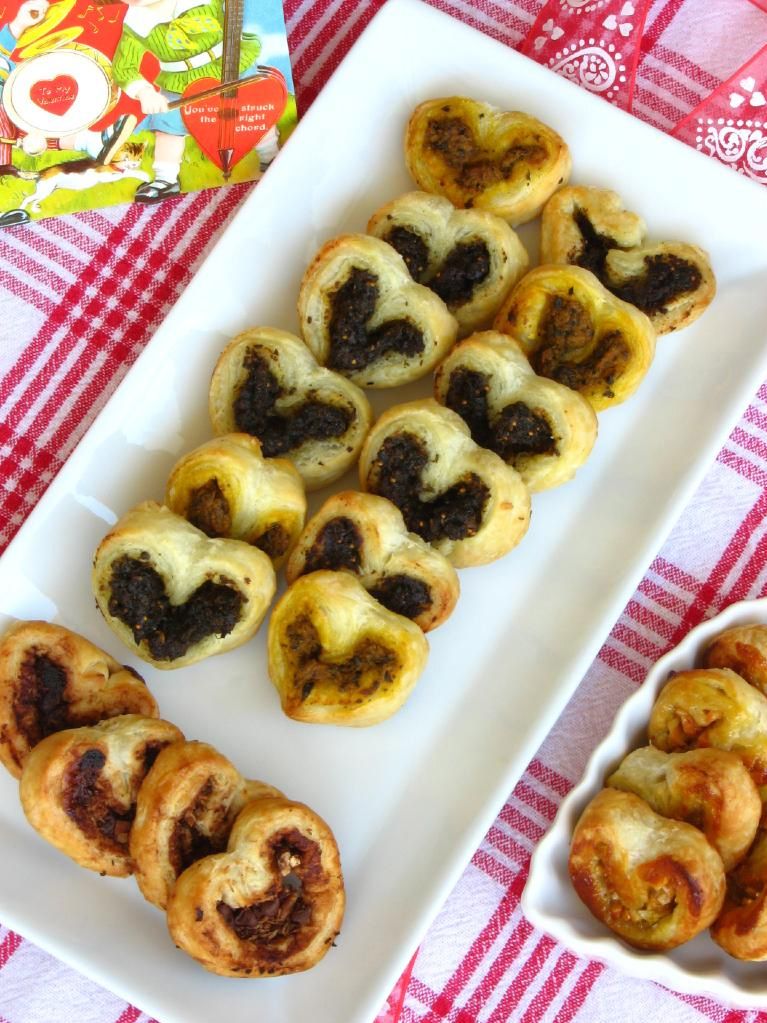
Anyway, after all that fun last night, I didn’t have much time for baking. I knew I wanted to make something sweet and Valentinesy, but it also needed to be quick. Voila: easy heart-shaped palmiers that can be sweet or savory depending on what you spread in them.

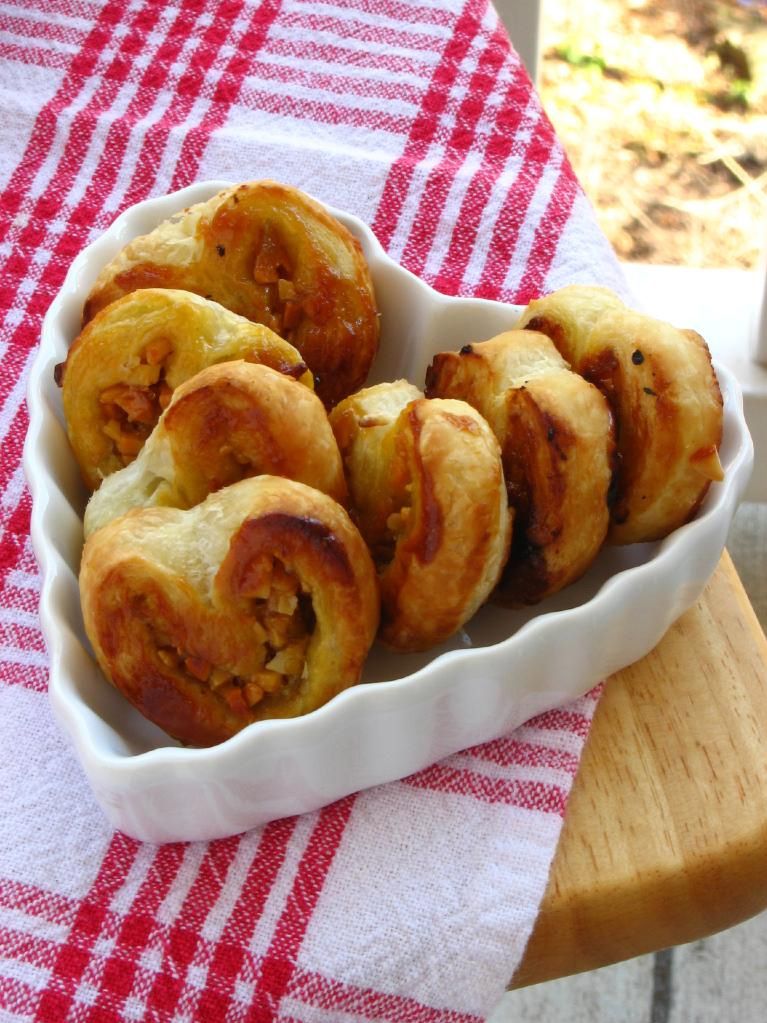
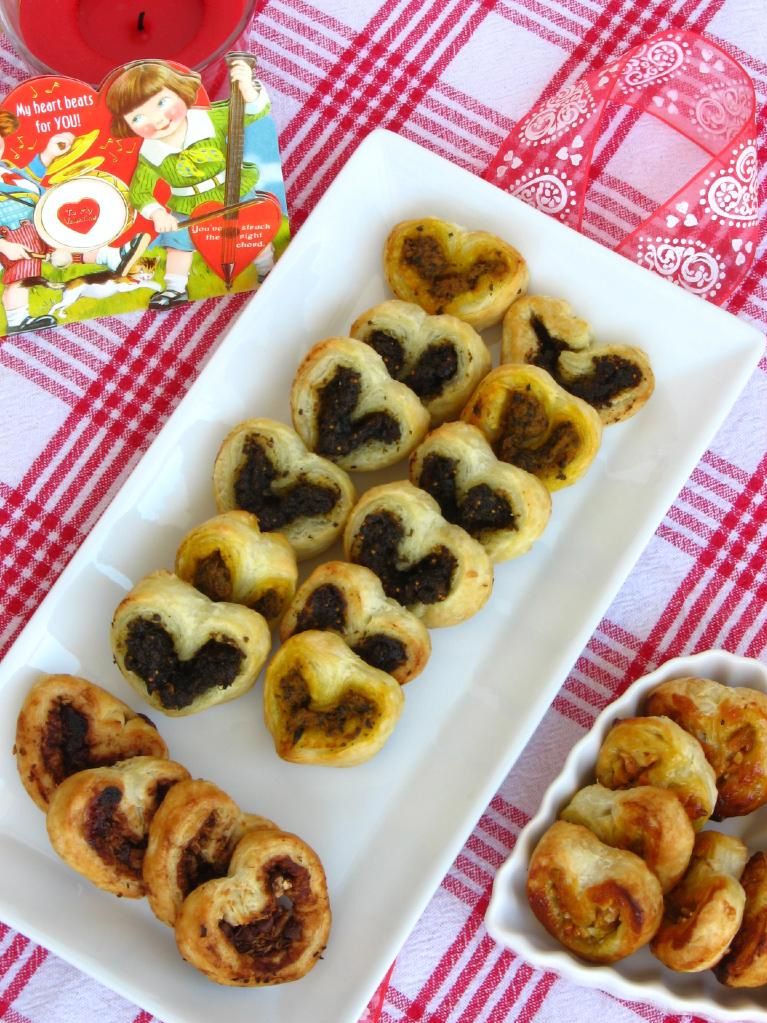
Pestos With Panache by Lauren sent me two pesto flavors to review, Fig & Gorgonzola and Pumpkin Chipotle, so I decided to make two varieties of pesto palmiers. To satisfy my sweet tooth (who’m I kidding? it’s insatiable), I also made Fig Jam & Almond Palmiers and Chocolate, Pecan, & Coconut Palmiers. I love that palmiers are so customizable that you can create a variety of them at once (the method below will inspire you to get creative!), but what I love even more is that you can whip up a batch of these cuties in 20 minutes. Perfect for a last-minute addition to your Valentine’s meal!


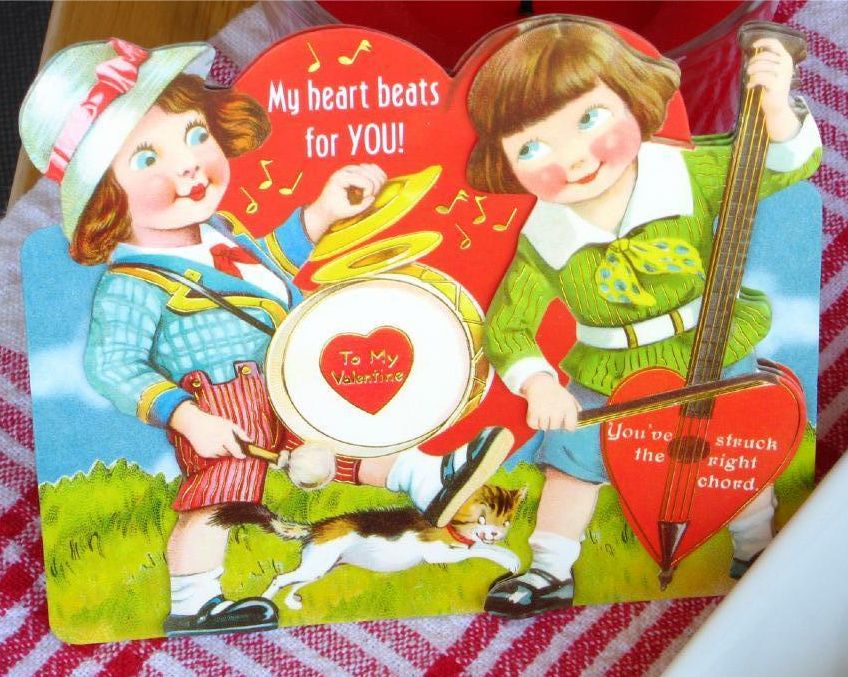
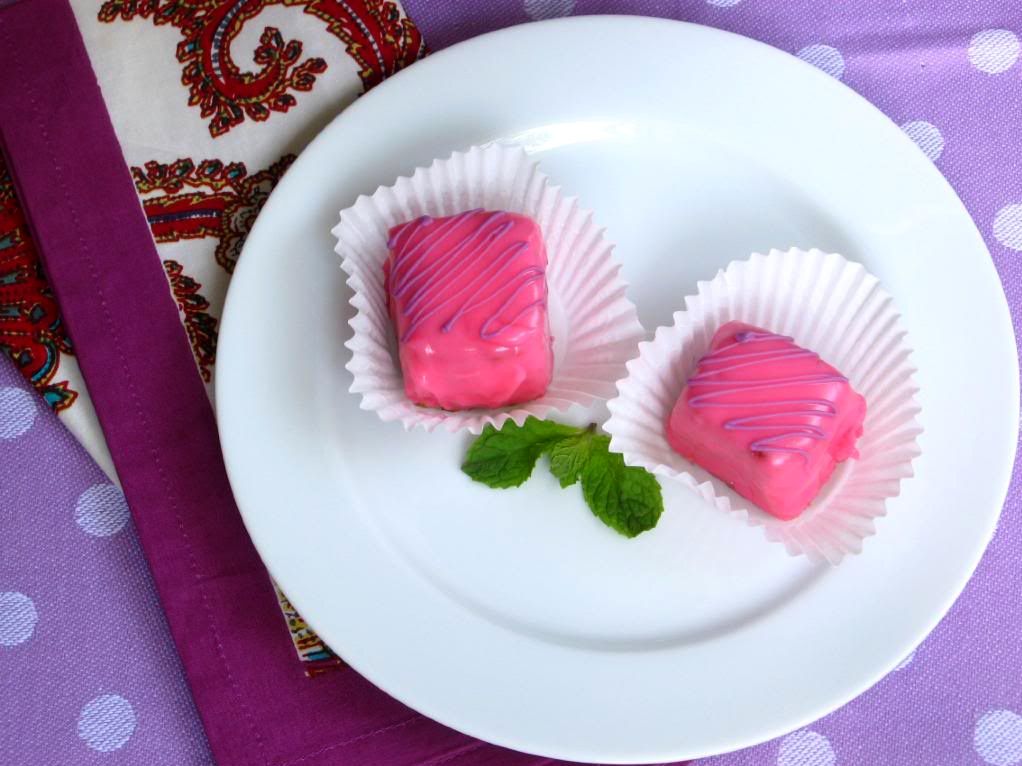
Speaking of Valentines — the Valentine’s Fairy heard my lamentations about not getting any valentines as an adult, so I got this in the mail from my Sunday school teacher, Joyce. Too sweet!

Regarding the pesto, Pestos With Panache by Lauren has all-natural, preservative free products. The pestos keep well in the freezer for up to two years, and the company boasts a number of zany, creative flavors.

I wasn’t wild about the Pumpkin Chipotle Pesto; it combined mild pumpkin with some heat, and it seemed like it would work better in a recipe with bolder flavors to complement it. The Fig & Gorgonzola Pesto, though, was deep and delicious, and I can’t wait to try some of the other fruity flavors. I can imagine lots of creative uses for them, including (of course) palmiers!

Would you like to win two of the fun pesto flavors from Pestos With Panache? They’d love to send one lucky commenter a sample. To enter:

1. Required Main Entry (your other entries won’t count unless you do this one!): Visit Pestos With Panache by Lauren and tell me what 2 pesto flavors you’d love to try.

To get up to five extra entries, do each of the following items (one entry per item). Please be sure to leave a separate comment for each item you complete, or you will not receive the entry for that item. If you already do these things, it still counts (just leave me a comment and tell me so).
2. “Like” Pestos With Panache on Facebook.
3. “Like” Willow Bird Baking on Facebook.
4. Follow Pestos With Panache on Twitter.
5. Follow Willow Bird Baking on Twitter.
6. Tweet the following message: “Just entered to win 2 pesto flavors from @PestosWPanache on Willow Bird Baking! http://su.pr/2diNLK #giveaway @julieruble”

The contest will close at 12 noon (EST) on February 19, 2011, and the winner will be chosen via random.org. In the meantime, make some palmiers!

Heart-Shaped Palmiers


Recipe by: Willow Bird Baking
Yields: 25-28 palmiers

Ingredients:
1 frozen puff pastry sheet, thawed (or use homemade puff pastry!)
sprinkle of flour
moist spread*
toppings**

*you can use pestos, jellies, Nutella, thicker sauces, etc.
**such as cheeses, toasted nuts, chocolate chips, etc.

Directions:
Preheat oven to 425 degrees F. Line two baking sheets with parchment paper. Roll out the puff pastry sheet on a lightly floured surface so that it’s just slightly longer, and then cut it in half horizontally with a pizza cutter. You now have two rectangles of puff pastry.

Spread your pesto, jelly, or other moist spread onto the puff pastry sheets leaving about 1/4-inch border around the edges. Sprinkle toppings on lightly, taking care not to overstuff and make your palmiers difficult to roll. Apart from my two pesto palmiers, I made palmiers spread with fig jam and sprinkled with toasted almonds, and palmiers sprinkled with sugar, cocoa powder, toasted pecans, mini chocolate chips, and toasted coconut. The sky’s the limit in terms of the combinations you can create.

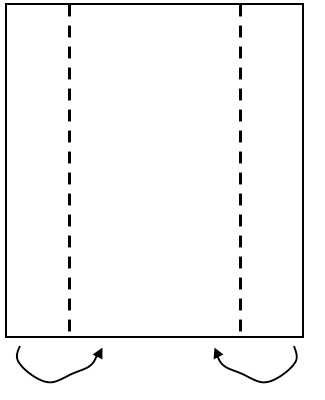
Once you’ve spread and topped your pastry rectangle, grab the long edge and fold it in toward the middle. Repeat with the other long edge, such that they meet in the middle:

Now fold one side of the dough onto the other:

At this point, stick the dough in the freezer on wax paper for about 10 minutes so that it’s easier to cut. Using a sharp knife, cut the log into 1/2-inch slices:

Set each slice on one of the prepared baking sheets with one of the cut sides up. If the knife smooshed them a little, prod them back into shape. Bake at 425 degrees F for 8 minutes before turning the temperature down to 400 degrees F and gently flipping each palmier. Bake for 4-5 minutes extra. Remove the palmiers from the oven and transfer them to a cooling rack. Serve slightly warm.

Note: Pestos With Panache by Lauren provided me with 2 pesto flavors to review at no cost to me and offered to sponsor this giveaway. I’m committed to giving you my honest opinion about any product mentioned on Willow Bird Baking.

If you liked this post, please:
Subscribe to Willow Bird Baking
Follow Willow Bird Baking on Twitter
Follow Willow Bird Baking on Facebook
Give this post a thumbs up on StumbleUpon


ShareOther ways to share this post with friends!

Lemon Berry Crumble Breakup Bars

This is a hard story to write — hard enough that it’s taken me almost two months to even attempt it. I still feel raw about it, and I still don’t know how to address the situation head-on. So I’ll just muddle through it the best way I can.

On November 28, Mike and I broke up. It was a cold day, and I dropped him off at the train station so he could head back to Raleigh. Watching him close the door and walk into the station was like watching a movie, except that it wasn’t fiction. I knew we were about to travel a rocky road, but there was no way to switch off the television, no credits to roll — just the aftermath to clean up as best we could.

4,237 days (or 11 years, 7 months, and 5 days) earlier, I had just turned 15 years old. I was sitting in my room, looking out the window, and talking to Mike on the phone. He had something to ask me, but was obviously nervous: “If I were to ask you . . . something . . . what would you say?”

I helped him get to the point. Yes, I want to be your girlfriend. I couldn’t have imagined at that moment where the next 12 years would take us. Who knows when they’re 15 that they’re embarking on something monumental?

Over the years, our relationship brought us trials, for sure.

It also brought me through high school. Sometimes I’d leave school and drive straight to his apartment to watch Star Trek and eat Hamburger Helper (my early attempts at “cooking for him”).

It took me to college, coming home to see him every weekend. It took me off to the coast to study marine zoogeography for a semester — I remember the strain of distance, calling every night on my newly acquired cell phone, and his visit out to Atlantic Beach to see me.

Our relationship saw me through my first teaching job, a tumultuous experience for me. In the first hopeful, idealistic days before I began, he came and painted every single one of my lab tables a deep green to cover the graffiti. Later in the year, when my administration decided to switch my classroom and everything went wrong, my clean tables were mixed in with others and his hard work was lost. He was still there, though, helping me pack up boxes and carry them down the hallway to my new room.

The relationship also saw me through my year as a research technician and, finally, to my position at Woodlawn, the wonderful school where I now teach.

It saw Mike through college at UNCC. He rocketed through in 3 years with nearly perfect grades. It also saw him move his life three hours north to a new city this past fall to begin graduate school at NC State. It saw us through celebrations, new beginnings, and difficult endings. I wouldn’t trade a single day.

These Berry Crumble Bars were actually made at the very tail end of summer and are one of the only dishes I ever photographed at Mike’s apartment in Raleigh. I brought them up to share with him and my little brother, who is an undergraduate at NC State. The bars are buttery, crumbly, slightly lemony, and bright — almost cobbleresque, and perfect with a scoop of vanilla bean ice cream.

The original recipe used only blueberries, but throwing in other berries or even combining berries is an easy way to create multiple varieties of crumble bars; I settled on blueberry and raspberry. Mike and I probably ate a billion of them over the course of my visit. I had a way of encouraging him to have dessert after every meal. I’m sure you’re not surprised.

So what do you say at the end of a story about a breakup? I think in this case, thank you. Thank you, Mike, for being who you are, and for 12 wonderful years. Thank you, God, for the promise that all things are working together for good for me (Romans 8:28). Thank you, friends and family and lovely readers, for your support during a rough time. Here’s to weathering loss and embracing the future — and to dessert!

Lemon Berry Crumble Breakup Bars


Recipe by: Adapted from My Baking Addiction
Yields: 9 raspberry bars and 9 blueberry bars

Ingredients:
1 cup white sugar
1 teaspoon baking powder
3 cups all-purpose flour
1 cup unsalted butter
1 egg
1 teaspoon pure vanilla extract
1/2 teaspoon kosher salt
2 teaspoons lemon juice
2 cups fresh or frozen blueberries
2 cups fresh or frozen raspberries
1/2 cup white sugar
3 teaspoons cornstarch

Directions:
Preheat the oven to 375 degrees F (190 degrees C). Line a 9×13 inch pan with parchment paper and spray with nonstick cooking spray. Stir together 1 cup sugar, 3 cups flour, salt, and baking powder in a medium bowl. In a separate, small bowl, beat together the egg, lemon juice, and vanilla. Using a pastry cutter or food processor, cut the butter and egg mixture into the flour to form a crumbly dough. Press half of dough evenly into prepared pan.

In two additional bowls, mix together 1/4 cup sugar and 1 1/2 teaspoons cornstarch. Gently mix blueberries into one bowl and raspberries into the other. Sprinkle berries evenly over pressed dough — I did half the pan with blueberries and half with raspberries, but you could alternate or even mix the berries if you’d rather. Crumble the rest of the dough over top of the berries. Bake in preheated oven for 45 minutes or until slightly brown. Cool completely (and even chilling a little helps to ensure they’ll hold together) before cutting into squares. These bars are fun because you can have two different flavors (blueberry and raspberry) or cut your bars such that you have a combination of both berries.

If you liked this post, please:
Subscribe to Willow Bird Baking
Follow Willow Bird Baking on Twitter
Follow Willow Bird Baking on Facebook
Give this post a thumbs up on StumbleUpon


ShareOther ways to share this post with friends!

Easy Apple Puff Pastry Tarts with Almond Whipped Cream (Voting Now Open in Project Food Blog!)

Willow Bird Baking is a contestant in Project Food Blog, a contest comprised of a series of 10 challenges to find the next food blog star. Voting for Challenge #7 is now open! I would be SO grateful if you’d consider voting for me in this round! Just sign in to your Foodbuzz account (or register if you don’t already have one). Then go to my cheesecake video entry here and vote by clicking the heart next to the words “Vote for this Entry.” I appreciate your support so much!

I just arrived in Orlando after 9 hours in a car (thankfully, I was accompanied by a fun coworker, Kyle). I’m in town to give a presentation at the National Council of Teachers of English convention, but after that road trip, I’m not even sure I can still speak English, much less teach others how to teach it.

I kind of expect the next few days to be a blur. Wayyy too much Coke Zero, wayyy too much work done this week, and wayyy too much bustling around this morning means that I’m currently feeling crumpled and headachy.

Kyle and I spent the last 45 minutes of the trip searching for food in a starvation-induced trance. We’d already ruled out Steak ‘n Shake, but every exit had one (and almost nothing else), as if taunting us. Lots of hotels, lots of outlet malls, lots of big-neon-lit-Orlandoy places — but no normal, honest-to-goodness FOOD. Lulled by hunger delirium and the soporific British accent of Kyle’s GPS, I had almost lost touch with reality when we finally spotted a Chick-fil-a. We definitely needed one of those easy buttons you see on TV. Easy dinner for people with currently confuzzled brains, please!

Well, an easy dinner didn’t happen, but here’s an “easy button” for dessert, at least. These apple puff pastry tarts are truly painless in addition to being warm and comforting. I served these treats at my parents’ anniversary dinner. Before beginning dinner prep, I made sure my puff pastry was thawed, cut into squares, and ready to go. After dinner, the family retired to the living room to relax while I mixed my apples and spices and baked up the tarts. Just before serving, we topped each tart with almond whipped cream, which turned out to be my favorite component.

The entire dessert was fancy-looking enough for company, but easy enough for any busy weeknight (easier, obviously, than my food quest with Kyle).

Okay, enough bleary-eyed blogging. Before I say anything too silly, I’m signing off and heading to bed (in the condo bedroom that’s decorated entirely in Disney characters — no confusion about what city I’m in!)

Make some tarts, y’all!

Easy Apple Puff Pastry Tarts with Almond Whipped Cream


Recipe by: Pioneer Woman
Yields: about 6 individual tarts

Tart Ingredients:
homemade or store-bought puff pastry sheets, thawed and cut into rectangles
4 apples, cored and sliced but not peeled
1 cup brown sugar
1/4 teaspoon salt
optional spices to taste: cinnamon, nutmeg, etc.

Almond Whipped Cream Ingredients:
2 cups heavy whipping cream
5-6 tablespoons confectioners’ sugar (to taste)
1 teaspoon almond extract

Directions:
Preheat your oven to 415 degrees. Put the puff pastry rectangles on a greased baking pan (with edges, so the juices don’t run down and caramelize on your oven, or on your mom’s freshly cleaned oven . . . not that I’m speaking from experience, or anything. Combine apple slices, sugar, salt, and any spices you’re using in a bowl and allow them to sit for a few minutes. Then arrange the apple slices on the puff pastry in a straight line, overlapping.

Bake 18 – 20 minutes, or until pastry is puffy and golden brown. While pastry is baking, whip together cream, sugar, and almond extract in a medium bowl to soft peaks. Place this in the fridge until you’re ready to use it.

Remove pastries from the oven and immediately serve with a dollop of cold almond whipped cream (allow diners to place this on their own tarts to ensure it doesn’t melt before it gets to them!)

If you liked this post, please:
Subscribe to Willow Bird Baking
Follow Willow Bird Baking on Twitter
Follow Willow Bird Baking on Facebook
Give this post a thumbs up on StumbleUpon


ShareOther ways to share this post with friends!

Individual Cranberry & Pecan Croissant Bread Puddings

You know those “wreck the dress” photography sessions? A newlywed who probably spent her entire wedding day vigilantly guarding every last inch of white floof on her dress dons her bridal whites again. Only this time, she goes nutso and jumps in a lake or climbs a tree or runs through the rain while a photographer snaps away. Whatever she loses in wedding dress cleanliness, the bride usually gains in some amazing, fun photos.

It’s an exercise in letting go, prioritizing things that really matter, allowing yourself to enjoy something temporary — all of those good things. I still don’t know if I’d be able to do it. I did take baby steps last weekend, though, with a “wreck the croissant” session.

Here’s the thing. When I make homemade croissants, I do not make them just to turn around and use them in other recipes. I do not make them to be shredded (perish the thought), toasted, or drenched with other ingredients. Imagining these things happening to my beautiful, pristine homemade croissants kind of makes me feel like hyperventilating a little.

I make them to EAT. To take pure, unadulterated bites of bliss — maybe with a smidge of butter and honey or jam if I’m feeling adventurous. But this weekend, something happened that changed all that.

Project Food Blog has pushed me out of my comfort zone on several occasions. I’ve been making dishes I’ve never made, hosting fancy dinner parties, and doing wacky phototutorials. I’ve been really pleased with how the competition has enriched Willow Bird Baking rather than detracting from its content — something I had vowed to monitor closely.

This is another one of those times. As much as I’d have loved to put my croissants under a bell jar in my living room to adore (until they disintegrated or got moldy, ew), I wanted to go the extra mile for the competition and show you a few croissant applications. So, with a heavy heart, I set about toasting croissants for Apple, Brie, and Toasted Pecan Panini and (eeek) soaking torn croissant pieces in custard for this bread pudding. I almost got teary. I think you can guess from the panini post, though (and these sweet individual bread puddings are no exception) — it was so worth the pain.

In fact, I would take my freshly baked croissants, shred ’em, and soak ’em again any day for this bread pudding. Each little bowl held a steaming, comforting combination of buttery, rich, creamy, hearty, nutty goodness. The cranberries added a festive flavor. In short, this was the perfect autumn dessert. I ate my whole bowl!

The original recipe was a little too sweet, so I’ve edited the version below to have the perfect amount of sweetness. One thing I particularly love about this “wreck the croissant” recipe is the fact that it makes two perfect-sized servings. You can always double it, but I was happy to make the exact amount I needed.

Happy wrecking!

Individual Cranberry & Pecan Croissant Bread Puddings


Recipe by: Adapted from Jessica Strand’s Cooking for Two: Perfect Meals for Pairs
Yields: 2 4-inch bowls of bread pudding

Ingredients:
1/4 cup dried cranberries
1/4 cup pecans, chopped
2 cups heavy cream
1 vanilla bean (or about 2-3 teaspoons vanilla extract)
4 large egg yolks
3/4 cup sugar
1/4 teaspoon salt
3 large day-old croissants (preferably homemade! You can use fresh instead of stale if you don’t have time)

Directions:
Preheat the oven to 350° F. Grease two ovenproof bowls (with 4-inch diameters) with canola oil or cooking spray.

Put the cranberries in a bowl and fill it with hot water. Let them sit for 20 minutes before draining. Toast the pecans: Place nuts in a dry skillet over medium-high heat and stir constantly. Once they begin to toast (when you start to smell them), shake pan to ensure all sides of the nuts are toasted evenly and none of them burn. Pour them out onto a plate and set aside.

Add the heavy cream to a medium saucepan and heat over low heat to a simmer. Add the vanilla bean: slice the bean in half lengthwise and scrape the seeds into the liquid; then add the pod (or just add extract). Simmer over low heat for 8 to 10 minutes before removing the vanilla bean pod.

Combine egg yolks, sugar, and salt in a medium bowl and whisk together. Slowly pour in the cream mixture while whisking quickly.

Tear the croissants into 6 pieces each and place in a medium bowl. Cover with the cream and egg mixture and allow the croissants to soak it up for about 10 minutes. Add the cranberries and mix gently. Separate the mixture evenly into prepared bowls and sprinkle toasted pecans over the top of each bowl. Place them on a baking sheet in the oven for 25 minutes or until set. Serve warm with whipped cream or ice cream, or with nothing at all!

If you liked this post, please:
Subscribe to Willow Bird Baking
Follow Willow Bird Baking on Twitter
Follow Willow Bird Baking on Facebook
Give this post a thumbs up on StumbleUpon


ShareOther ways to share this post with friends!

Secret Garden Recipe: Pink Ice Petit Fours

Want to have a tea party?

We’re going to find a garden enclosed in cool, moss-covered stone walls. We’ll lay out delicate china on a wrought-iron table with ivy growing up each leg. Arrayed in sweet sundresses and sandals, we’ll carry in platefuls of hot buttered scones, pitchers of raspberry and strawberry lemonade, and pots of fragrant orange tea. Every sip will be accompanied by a staunch pinky point. Twilight will find us still laughing, unwilling to let the summer daylight slip away.

Oh, and of course there’ll be petit fours. The dainty, sweet little cake squares will be the jewels of the tea table.

What a fantasy. In actuality, I’ve just finished my first week of teacher meetings. The past few days have been filled with book shelving, furniture moving, copy making, curriculum planning, sweet student meeting, and lots of teacher giggling. I’ve left with a headache nearly every day, relieved that headache with a nap nearly every day, and even still . . . gotten a ton of work done nearly every day!

We can still have petit fours, though, right? Petit fours are sweet little tea time desserts that seem to specialize in being adorable. Any number of miniature desserts can be classified as petit fours (literally “small ovens” in French), but for my sister’s surprise garden party earlier this summer, I knew I wanted dense, fruity cake squares. Petit fours are sometimes filled with jams, and then are covered in poured fondant or chocolate.

Now, before I gush, these bite-sized cakes were not perfect. More specifically, the poured fondant was not perfect. In fact, instead of “poured,” let’s call it glopped fondant. Shall we?

The thing is, fondant is going to be super sweet. There’s a cavity-inducing amount of confectioner’s sugar in it, not to mention the corn syrup. The only hope of this stuff covering your petit fours and not ending up with a cloying mess is making sure the poured fondant is heated enough to be very thin, so only a thin layer sticks to the outside of the cake square. This proved to be impossible with the recipe I used. It was warmed in a double boiler for gentle heating, but as soon as I started to pour, I was only able to cover a couple of cake squares before it was glop. Even when it was fully heated, it never really got thin enough to cover the squares in a reasonable way. As a result, they were too sweet.

Oh, and that color? That was not the color I was going for. I had a pale, rose petal pink in mind. Um, that’s all I’ll say about that.

While the petit fours weren’t perfect, the taste itself (beyond the fondant) was so wonderful. The cake was deliciously moist, cool, and dense with a gorgeous buttery almond flavor. The raspberry jam covering was the perfect complement to the almond (one of my favorite flavor combinations!) and was simple to brush on, though it never dried completely. Really, if you use poured white chocolate or a different poured fondant recipe (how about trying this one, which looks great?), these would be fantastic (and they’d probably look a little less “gloppy” as well). Even in their overly sweet state, I ate a ton of them due to their brilliant flavorings.

This is also one of those recipes that ends up looking fancy despite being relatively easy to make — and you know I love those. A few key steps (like freezing the cake before cutting it up and making sure your fruit glaze is very thin) ensure that the process is relatively simple.

Go have a tea party!

Pink Ice Petit fours


Recipe by: Adapted from Diana’s Desserts
Yield: 60 1-inch petit fours, or about 16 2-inch petit fours

NOTE: This recipe does not include the poured fondant recipe or instructions due to the aforementioned difficulties. If you want to try poured fondant, I’d recommend looking at this post on Cakes and Cupboards, which looks promising. Nevertheless, poured fondant might still be too sweet for you. Another option is a poured chocolate. You’ll probably need two coats if you use white chocolate. If you want completely smooth petit fours, I recommend using a thin layer of rolled marzipan under your icing, or the buttercream procedure outlined on Cakes and Cupboards, above.

Cake Ingredients:
1/4 cup butter, melted
1/4 cup shortening
1 cup sugar
1 teaspoon vanilla extract
1 teaspoon almond extract
1-1/3 cups all-purpose flour
2 teaspoons baking powder
1/2 teaspoon salt
2/3 cup milk
3 egg whites

Fruit Glaze:
12 ounces raspberry preserves (or heated jelly)
3 tablespoons water

Directions:
Prepare the cake. Preheat oven to 350 degrees F. Grease and flour a 9-inch baking pan, or use Wilton’s Cake Release.

Cream butter, shortening, and sugar together in a large bowl. Beat in vanilla and almond extracts. In a separate bowl, combine flour, baking powder, and salt. Add dry ingredients to the creamed mixture alternately with the milk. In another bowl, beat egg whites to soft peaks. Gently fold the egg whites into the batter.

Pour the batter into the cake pan and bake for 20-25 minutes, or until a toothpick inserted in the center comes out clean. Remove from oven and let cool in pan for 10 minutes. Turn cake out onto a cooling rack. When cooled, chill cake in refrigerator for a bit before freezing it for at least 1 hour.

Right before removing the cake from the freezer, prepare fruit glaze. In a medium saucepan, heat preserves with the 3 tablespoons water on low heat. If using jelly, judge whether or not you need any of the water to make it a thin consistency.

Remove cake from freezer. Using a long, serrated knife, cut a thin slice off each side of chilled cake. Cut cake into squares of desired size (for me, about 1.5-inch squares). Place squares 1/2 inch apart on a cooling rack over a sheet pan. Use a pastry brush to spread a thin layer of heated preserves over tops and sides of petit fours before icing. Allow excess to drip off. Let dry (I put them in the fridge and let them set up a bit — they never really “dry”). Repeat if necessary to thoroughly coat squares.

Prepare your desired poured fondant or chocolate and pour over the petit fours. Decorate the tops with different frostings, chocolates, sprinkles, candy, sugar flowers, etc. as you wish. Refrigerate until ready to eat — eat within a day or two.

If you liked this post, please:
Subscribe to Willow Bird Baking
Follow Willow Bird Baking on Twitter
Follow Willow Bird Baking on Facebook
Give this post a thumbs up on StumbleUpon


ShareOther ways to share this post with friends!

1 28 29 30 31 32 35