fruit

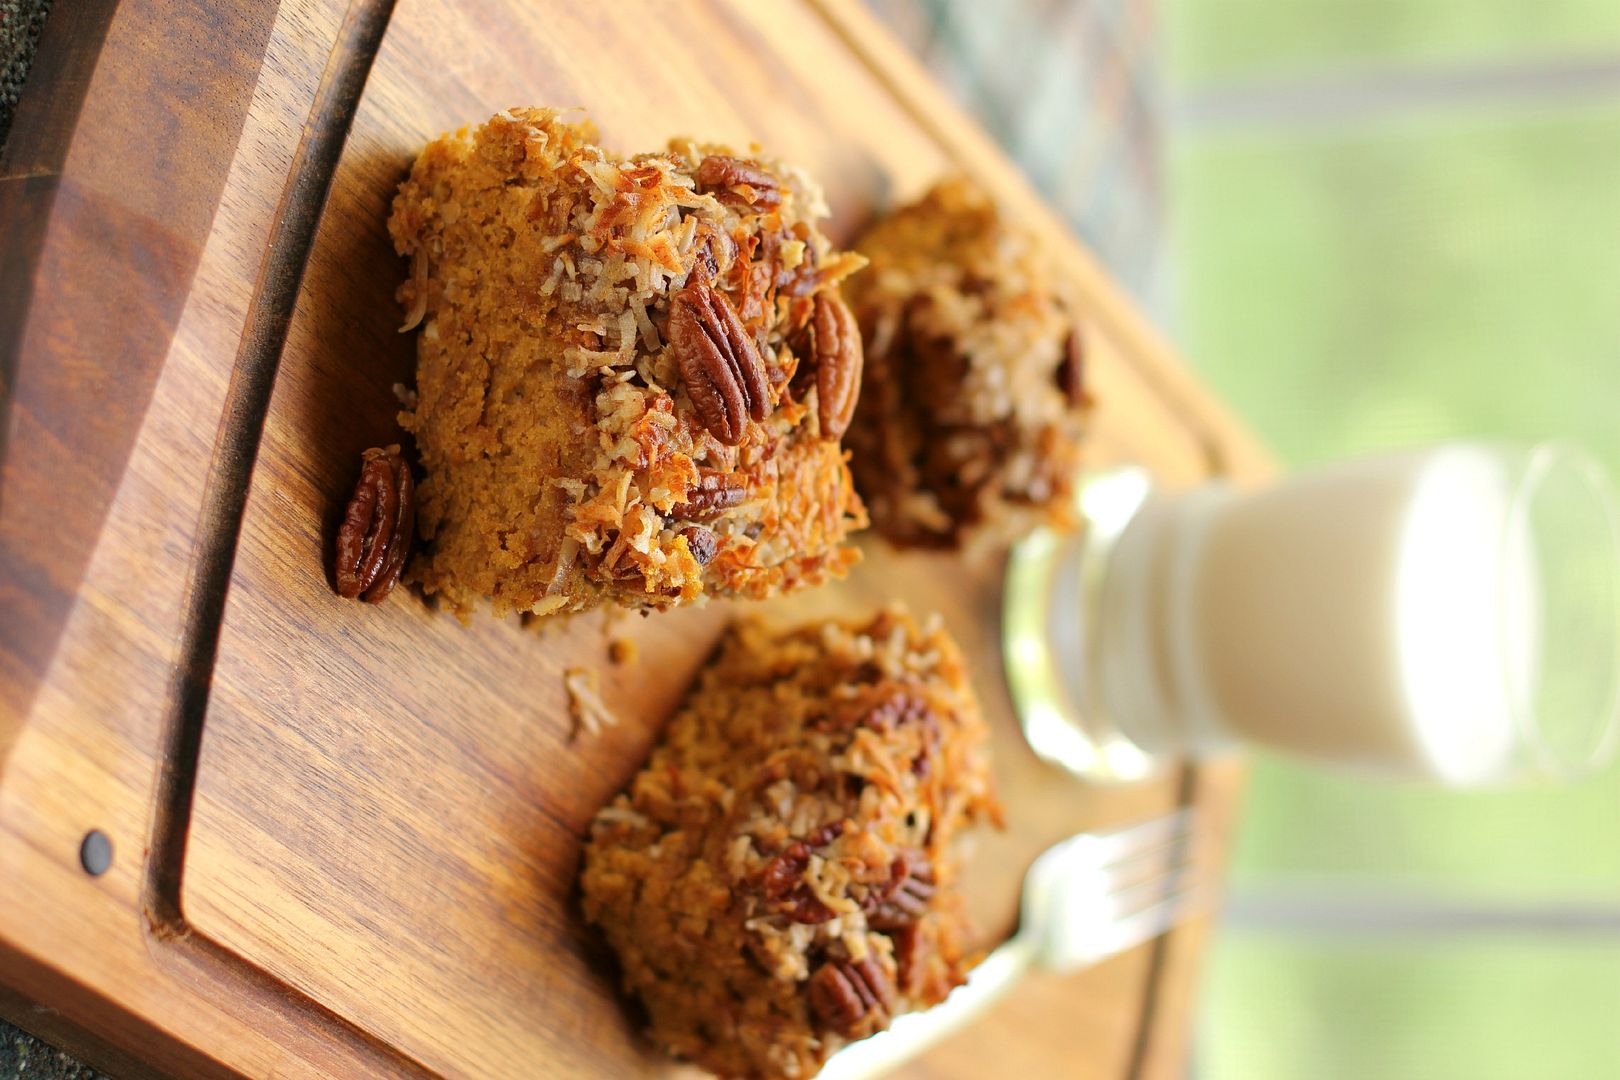
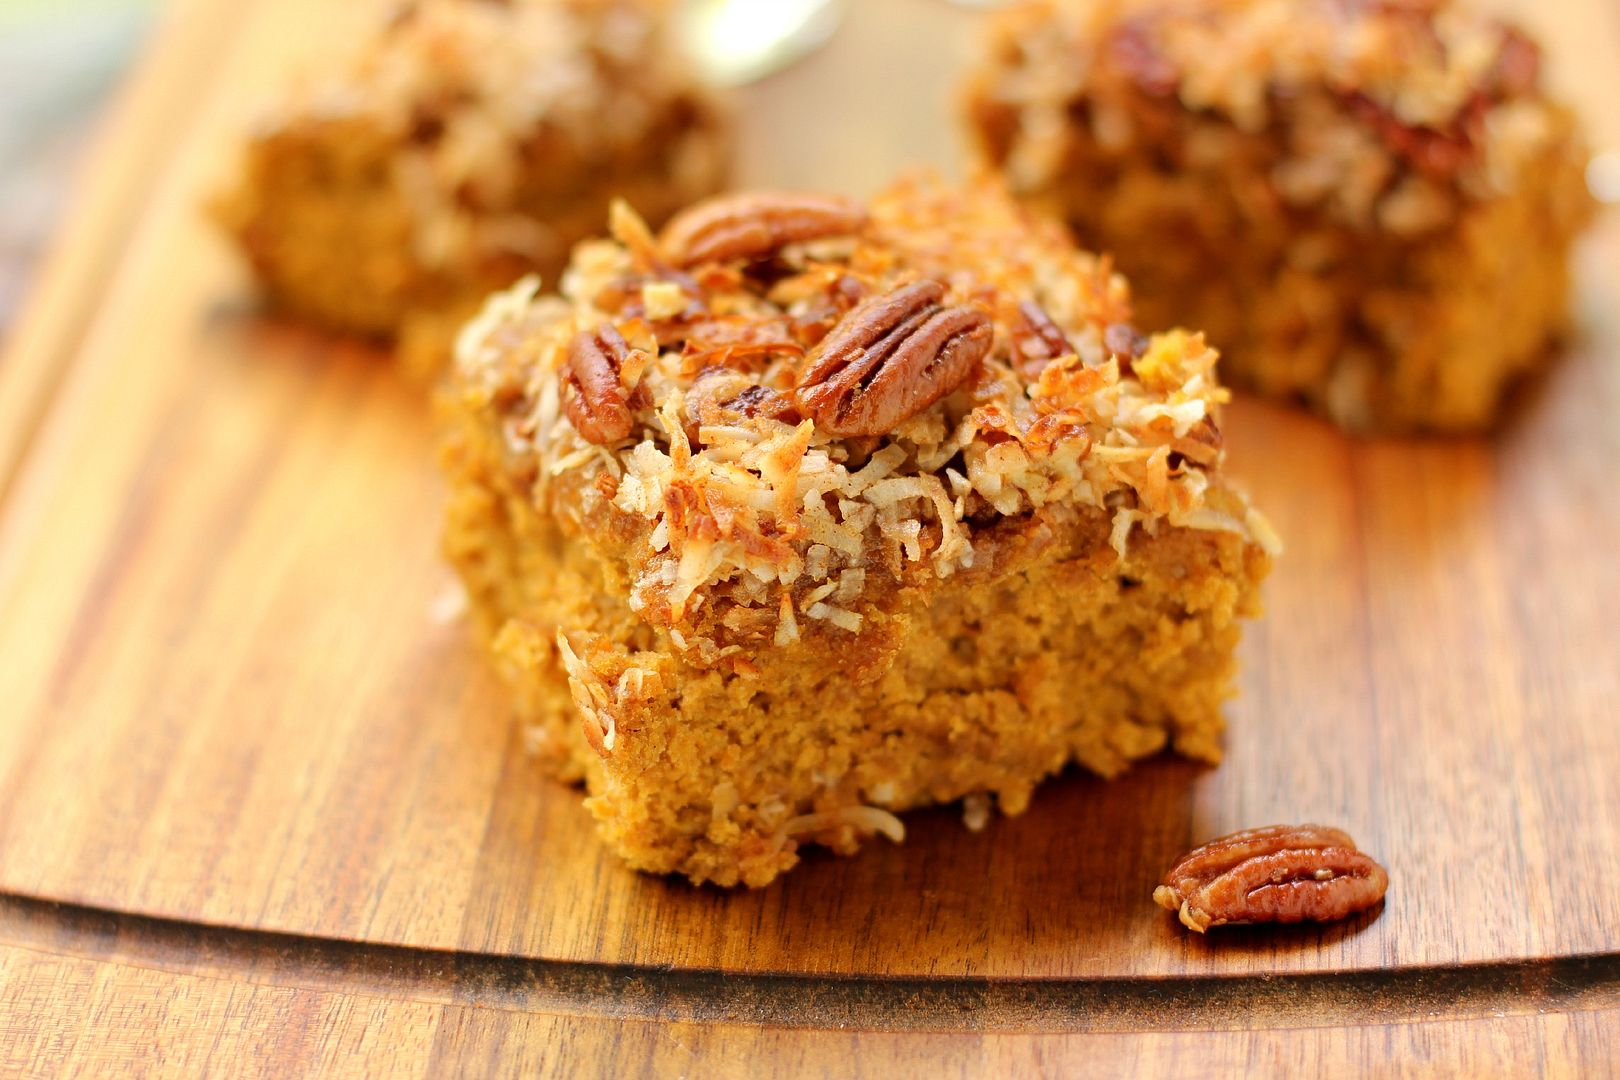
Pumpkin Oat Snack Cake with Broiled Coconut Icing

I was floored to see that Willow Bird Baking is a finalist for SAVEUR Magazine’s Best Baking & Desserts Blog. Thank you so much for making this happen. If you’d like to vote for Willow Bird Baking, you can do so here. You all are truly wonderful.
I could feel his eyes on me from the table to my right. He obviously wanted to strike up a conversation. Being an introvert by nature, I nursed a healthy flurry of paperwork all around me and kept my eyes on my computer screen. My work was a comforting wall between me and his social overtures.

However, I quickly realized as he walked over that he was unfazed by walls. He sat down on the couch next to me in the bustling coffee shop. I slurped my soda noisily as a last-ditch effort to appear busy. He set down his carton of milk and walked over to stand next to my seat. He peered at my computer screen.

“Um, hi,” I said, obviously unable to avoid a conversation any longer.
“Hi. What’s your name?” He replied.

“Julie. What’s yours?”

“Brian.”

“How old are you, Brian?”

He danced a little and held up 4 pudgy fingers. “Almost 4. My birfday’s in a coupla weeks.” I smiled. His cute delivery and guileless demeanor warmed me up to the idea of a conversation. I was starting to feel glad that he’d walked over after all.

I pointed to my computer screen. “See this cake? It’s a pumpkin cake. Do you like pumpkin?” (He does not.) “Are you going to have a pretty cake like this at your birthday?” (He is.) “What else are you going to do for your birthday?”

My own birthday, incidentally, is coming up in just a week, but trust me: compared to the monologue Brian launched into about his upcoming birthday party, my birthday will be tame. Just to give you an idea, he mentioned something about a castle and a road trip with his Me-Me and Paw-Paw for his birthday. I asked Mike for a car wash (with wax, please) for mine.
But really, Brian wasn’t just enthusiastic about a party. Indeed, he went on to tell me about his mom, his dad and Paw-Paw who were both “at deir jobs,” and his own job, by which I finally figured out he meant preschool. He noticed my marker and excitedly related that he loved markers, too! He drained his milk as we talked, and inched over repeatedly to eye this pumpkin cake with great interest. He was enthusiastic about life.

Looking around with my Brian lens on, I realized how wonderful it was to have spent the morning eating a bowl of fresh greens with a big scoop of tuna salad on top. How privileged I was to be sipping a soda and working on my new laptop (I named it Esmerelda — Zelda for short — and I’m ecstatic about it.) How blessed I am that my parents are taking me out for brisket next week (when they ask if I want fatty or lean, I’m saying fatty.) How amazing it is that I am dating the man of my dreams after having been separated from him for way too long. How delicious buttered toast is!

I’m with Brian, man. Life is pretty great!
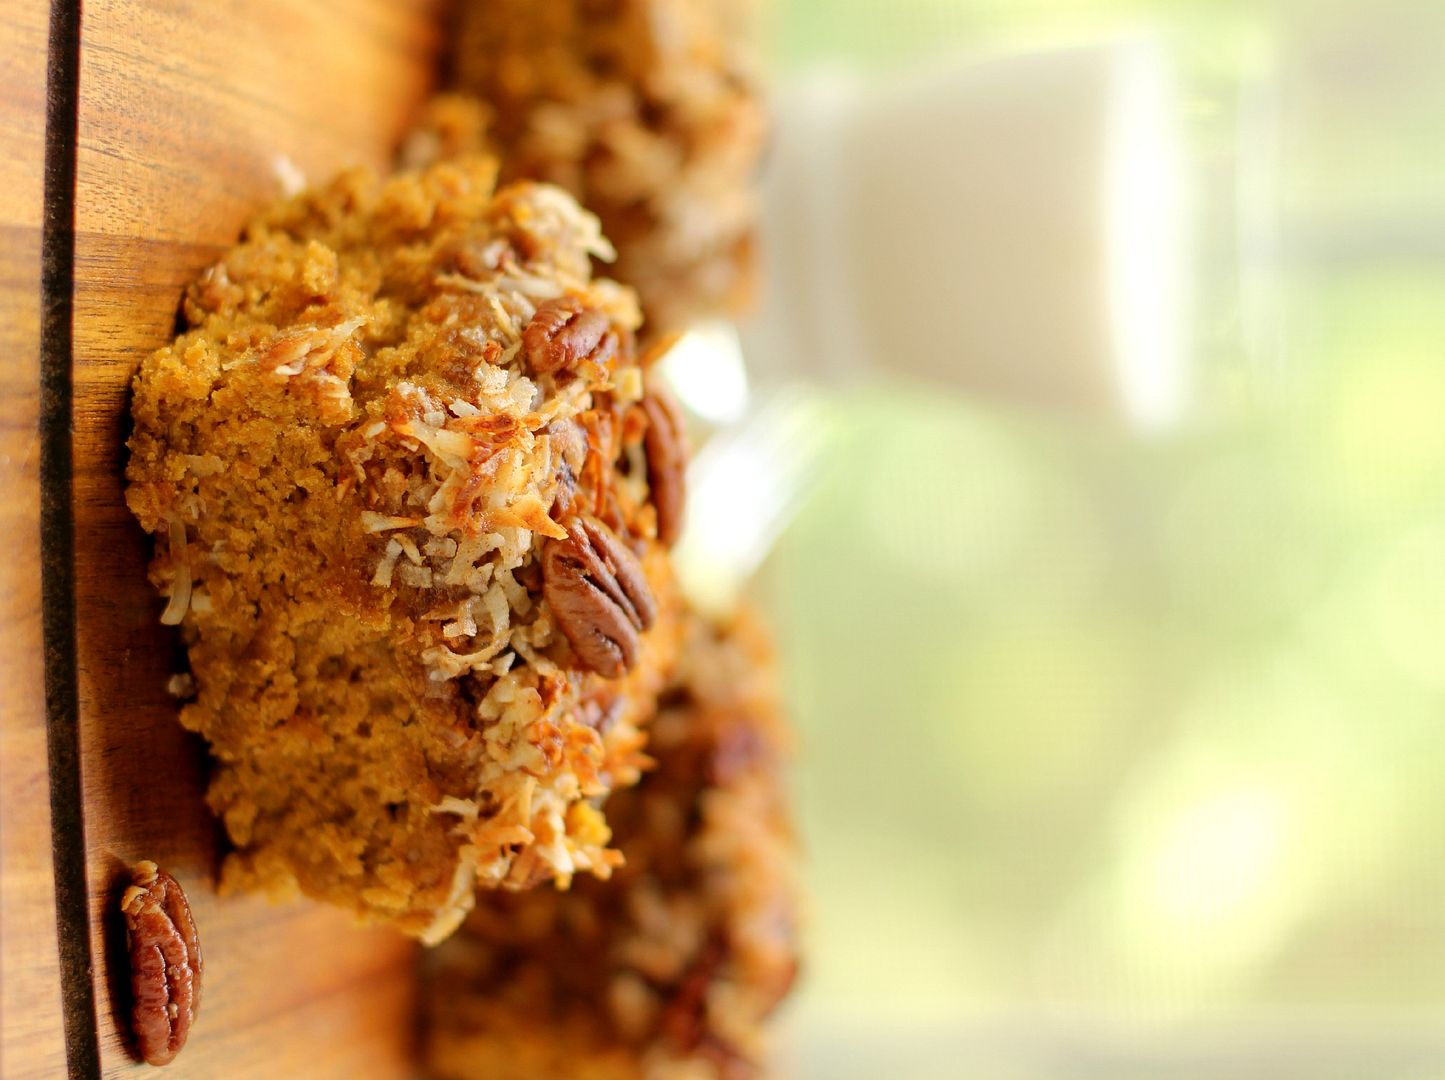
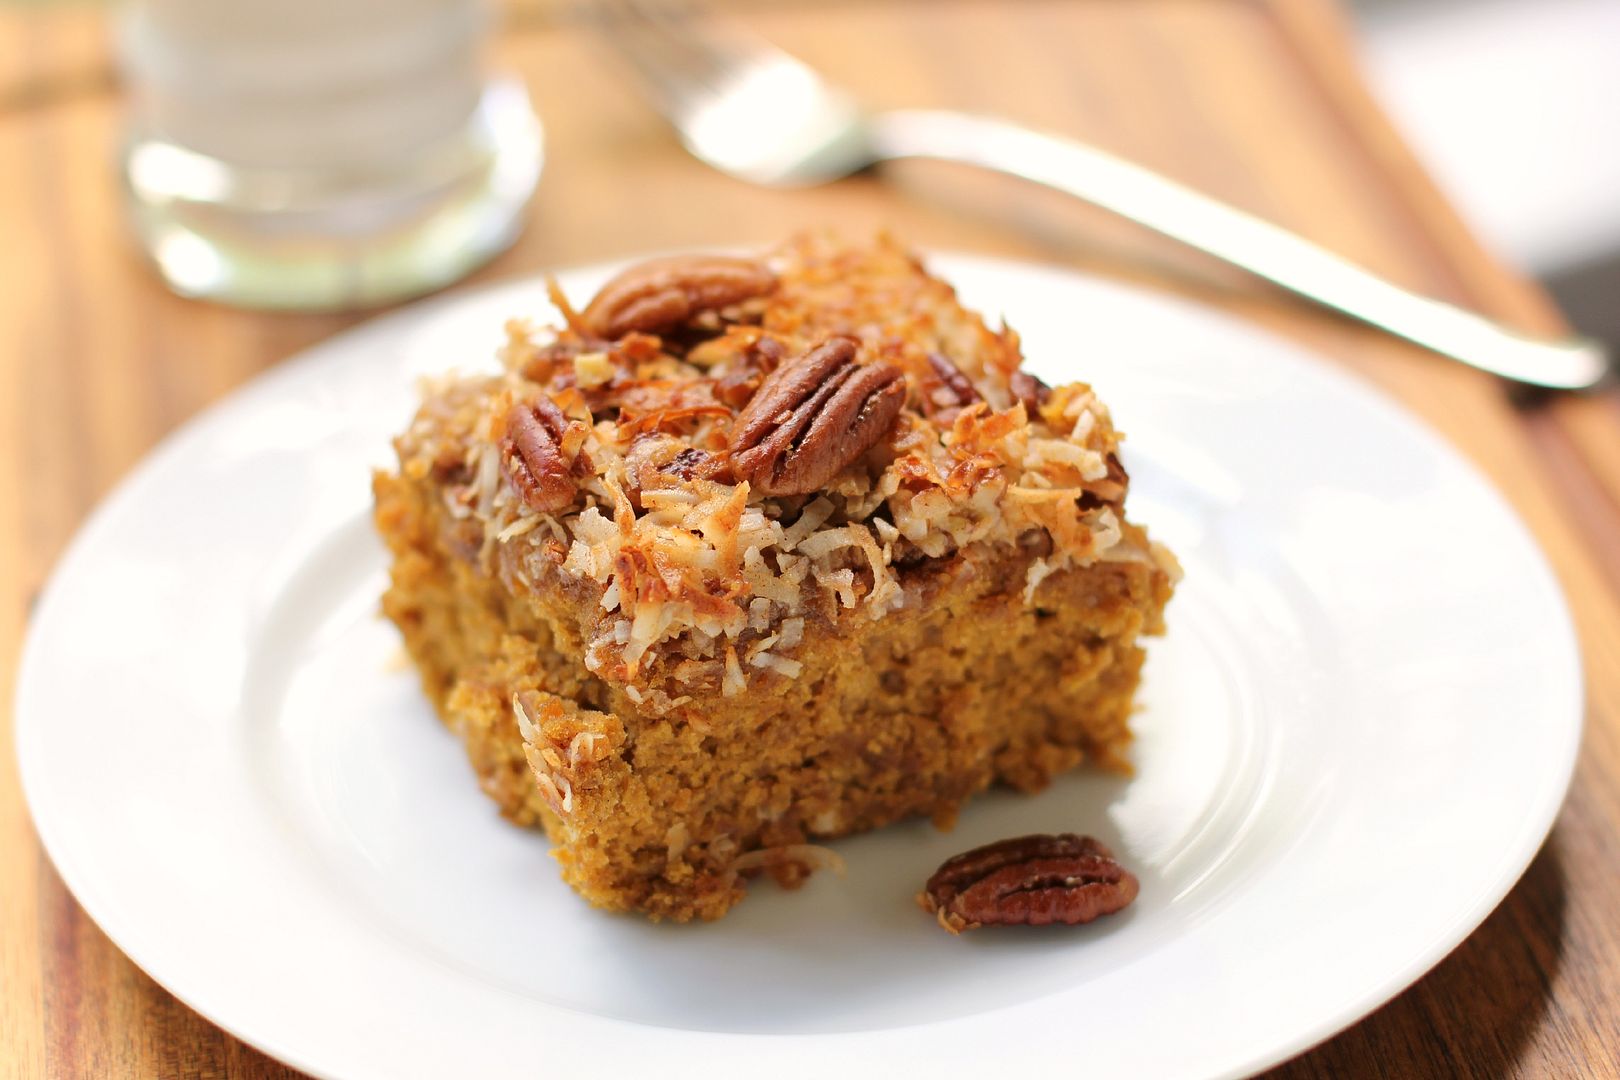
This Pumpkin Oat Snack Cake is just another great thing in an otherwise great life. It’s quick and simple to whip up, just as a snack cake should be, but it’s also birthday-bouncy-house delicious: moist, tender, and sporting a crispy toasted topping. And since we’re calling it a snack cake, you can slice yourself off a piece any old time. Right?

What are some little things in life you’ve been appreciating lately?

Pumpkin Oat Snack Cake with Broiled Coconut Icing


Recipe by: Adapted from America’s Test Kitchen’s Oatmeal Snack Cake with Broiled Icing
Yield: 9 servings

This little snack cake whips up in a jiffy and boasts so much bang for its buck! It’s a delicious pumpkin-oat spice cake with a toasty coconut and pecan broiled topping.

Cake Ingredients:
1 cup (3 ounces) quick-cooking oats*
3/4 cup water, room temperature
3/4 cup (3 3/4 ounces) unbleached all-purpose flour
1/2 teaspoon baking soda
1/2 teaspoon baking powder
1/2 teaspoon salt
1 teaspoon ground cinnamon
1/2 teaspoon ground nutmeg
1/2 cup pumpkin
4 tablespoons (1/2 stick) unsalted butter, softened
1/2 cup (3 1/2 ounces) granulated sugar
1/2 cup packed (3 1/2 ounces) dark brown sugar
1 large egg, room temperature
1/2 teaspoon vanilla extract

Broiled Icing Ingredients:
1/4 cup packed (1 3/4 ounces) dark brown sugar
1/2 teaspoon cinnamon
3 tablespoons unsalted butter, melted and cooled
3 tablespoons milk
3/4 cup sweetened shredded coconut
1/2 cup (2 1/2 ounces) pecans, chopped

Directions:
Make the cake: Preheat oven to 350 degrees. Create a foil sling for an 8-inch square pan: cut two 16-inch lengths of foil and fold them to widths of 5 inches each. Fit foil pieces into baking dish, one overlapping the other, pushing them into corners and up sides of pan; allow excess to overhang pan edges. Cut two more pieces of the same size and arrange them in the same way, except perpendicular to the first two. This creates a sling that will help you remove the cake after baking and cooling. Spray foil lightly with nonstick cooking spray.

Combine the oats, pumpkin puree, and water in medium bowl and let sit until water is absorbed, about 5 minutes. In another medium bowl, whisk the flour, baking soda, baking powder, salt, cinnamon, and nutmeg together.

In a separate large bowl, cream together the butter and sugars for a few minutes until the mixture resembles damp sand (scraping down the bowl as needed). Add the egg and vanilla and mix until combined. Add the flour mixture in 2 batches, mixing until just incorporated after each addition. Add the oat mixture and mix until just combined. Stir the mixture by hand to make sure everything is combined.

Glop the batter into the prepared pan and tap it against the counter a few times to ditch any air bubbles. Smooth the surface with a spatula. Bake the cake, rotating halfway through baking, until a toothpick inserted into center comes out with few moist crumbs attached, about 28 to 32 minutes. Let the cake cool in the pan for about 10 minutes while you mix the icing.

Make the icing: Move the oven rack to around 9 inches away from the broiler heating element and preheat the broiler. In a medium bowl, whisk together the brown sugar, cinnamon, melted butter, and milk. Stir in the coconut and pecans before spreading mixture evenly over the top of the cake. Broil the cake, keeping a close eye on it and rotating as needed, until topping is bubbling and golden, about 3 to 5 minutes. Let the cake cool in pan for 1 hour. Use the sling to pull the cake gently out of the pan. Cut it into squares and transfer to a platter or serving plates; discard the foil.

*ATK’s notes: Do not use old-fashioned or instant oats for this recipe. Be sure to use a metal baking dish; glass pans are not recommended when broiling. A vertical sawing motion with a serrated knife works best for cutting through the crunchy icing and tender crumb.

If you liked this post, please:
Subscribe to Willow Bird Baking
Follow Willow Bird Baking on Twitter
Follow Willow Bird Baking on Facebook
Give this post a thumbs up on StumbleUpon
Pin It


Shareother ways to share this post with friends

Buttery Coconut & Almond Morning Buns

I was floored to see that Willow Bird Baking is a finalist for SAVEUR Magazine’s Best Baking & Desserts Blog. Thank you so much for making this happen. If you’d like to vote for Willow Bird Baking, you can do so here. You all are truly wonderful.

Batik . . . Issei . . . Caballero . . . Kuchen . . . Coffle . . . Lariat . . . Trepak . . . Twoling . . .

The spelling bee pronouncer carefully enunciated one word after another, round after round. The dwindling pool of contestants seethed: a child was always approaching the microphone timorously, bouncing back to their seats triumphantly, or moping over to their consoling families. I sat in the audience rigid with excitement, scribbling each word on the back of an old envelope I’d found in my cavernous purse.

Watching my student compete in the 72nd annual Winston-Salem Journal Regional Spelling Bee was already an ideal afternoon for a logophile like myself, but making the event even more wonderful was the fact that Mike was at my side. Since the Bee took place about halfway between our two cities, he agreed to meet me for a nerdy date! As I frantically attempted to spell each word before the contestant had a chance, he did math in his composition book. (We’re quite the exciting pair.)

My student did a phenomenal job. She got out (with only 5 contestants left!) on the word ringent. If you’re being honest, you’ll probably admit that you didn’t really know how to spell ringent, either, so that’s not bad at all for a 12-year-old. She was disappointed, but I was thrilled with her performance. She still has two full years of eligibility, and since we were so close this year, I fully expect to travel to D.C. eventually to watch her in the National Bee.

After she left with her family, Mike and I set out to explore Winston-Salem. We scanned every restaurant on the main thoroughfare (to appease me; Mike would’ve been happy just to choose one) before finally settling in for pizza and more nerd talk. Mike taught me about hyperbolic conservation laws. We then ambled down the street looking for dessert (or in my case, two desserts, ’cause that’s how I roll.)


ha ha, get it?

One of our dessert stops was at a little coffee shop and bakery where Mike ordered a coconut roll. The flaky pastry was reminiscent of a cinnamon roll, but stuffed instead with toasted coconut. We both enjoyed it, but as soon as I tasted it I told him, “I can do better. I’m going to make you one of these and it’s gonna be insane.” I tucked the mission down into my heart while he promptly forgot about it.

The afternoon was also filled with other lovely things. After buying me a coffee-flavored frozen custard cone, we ambled until we found ourselves seated on a rickety bench outside of a beautiful Moravian church. About a dozen cherry trees heavy with blossoms surrounded us and swayed in the breeze. The sky was a pretty slate blue that belied the sunshine and hinted at an impending spring shower. I think we talked about Moravian chicken pies and guinea hens (one sauntered by us nonchalantly while we were talking — maybe that’s normal in Winston-Salem?), but more important than the conversation was my hand in his, my head on his shoulder.

It was a perfect date. I’m sure Mike drove away thinking about partial differential equations or something in that vein, but I drove away thinking of coconut rolls (oh, okay, and love and hearts and romance and stuff).

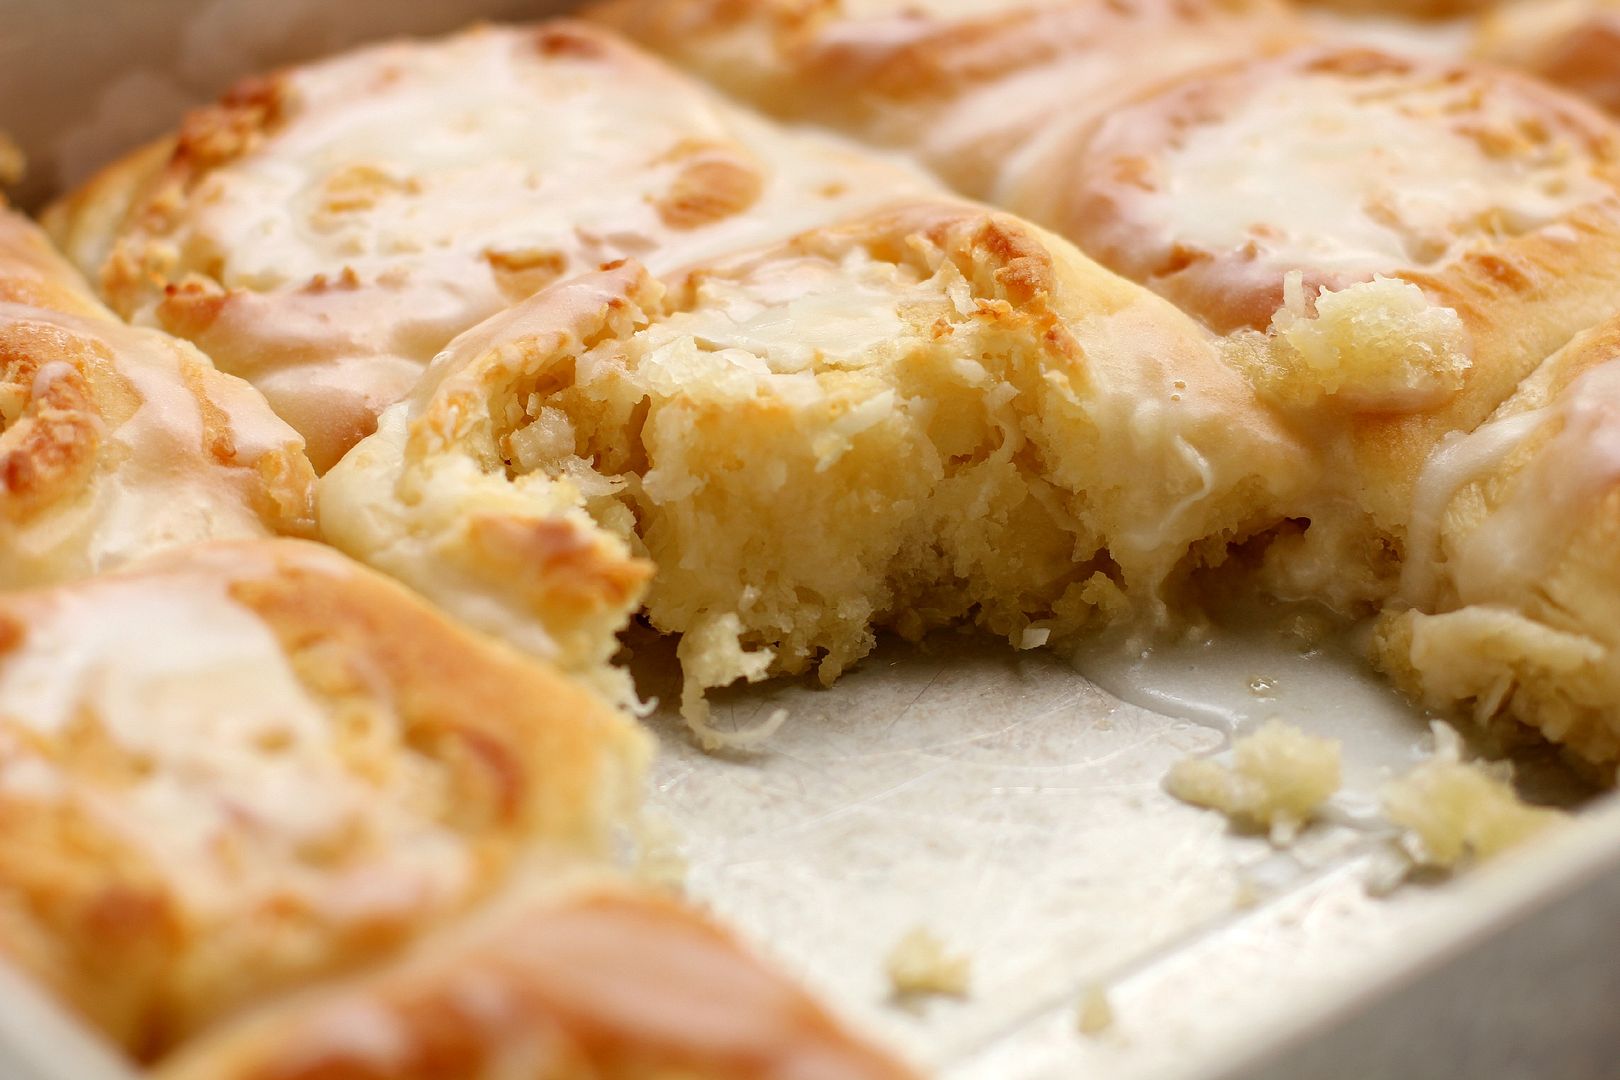
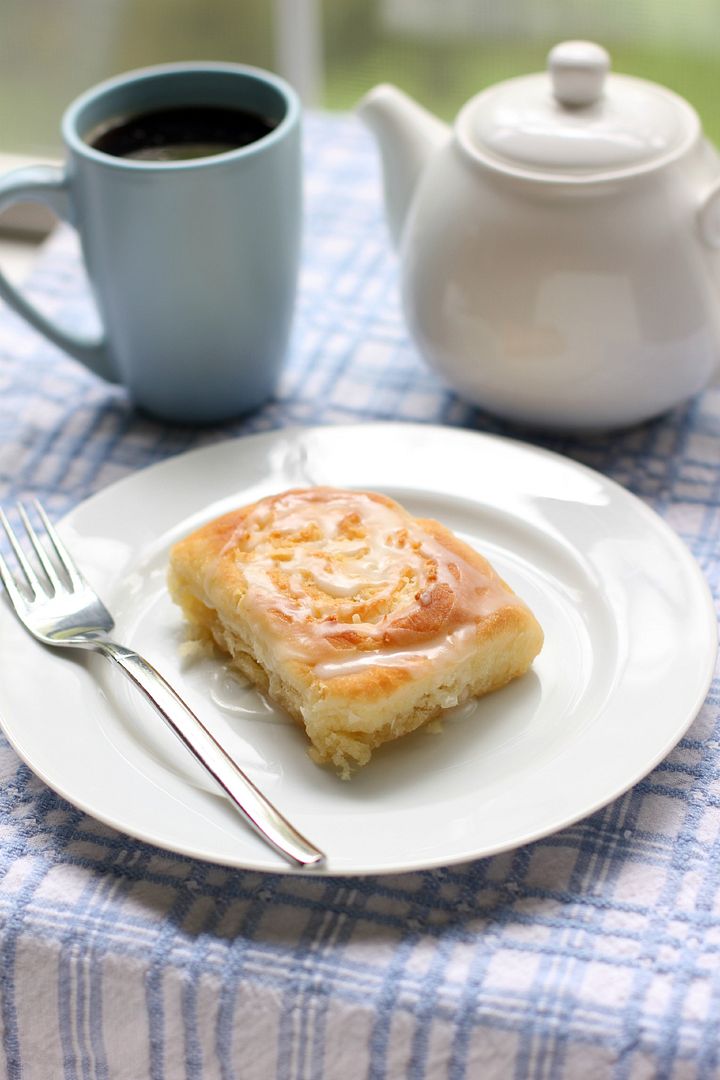
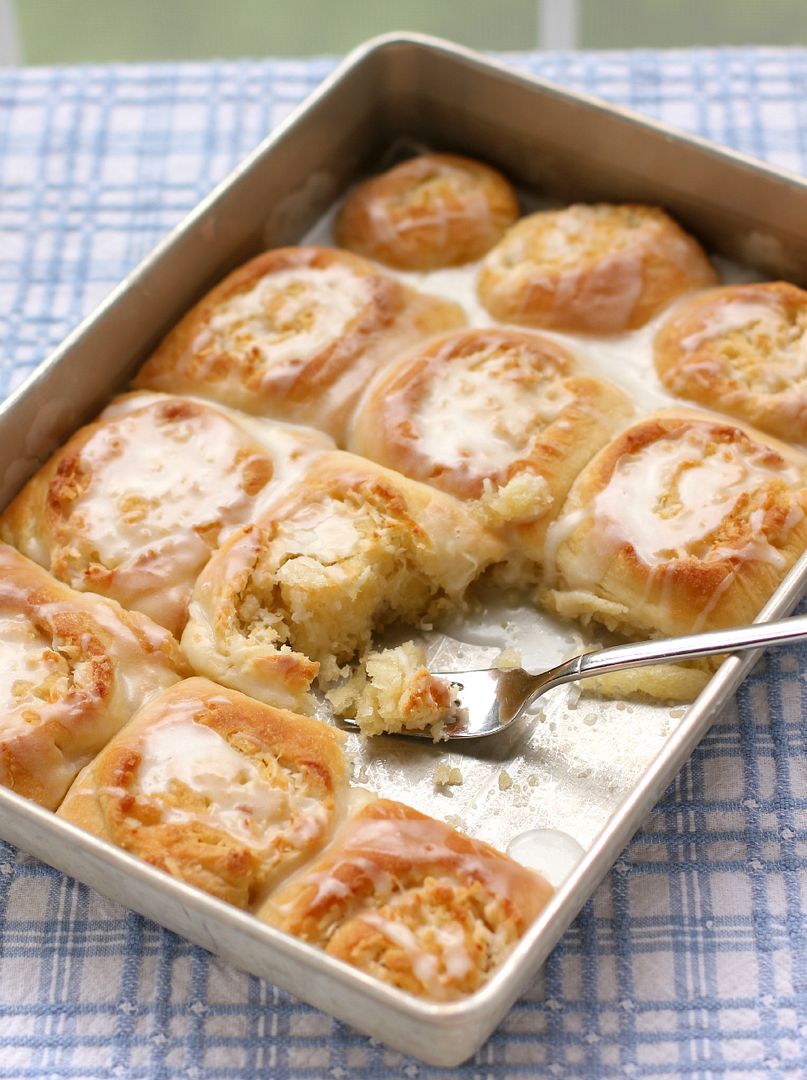
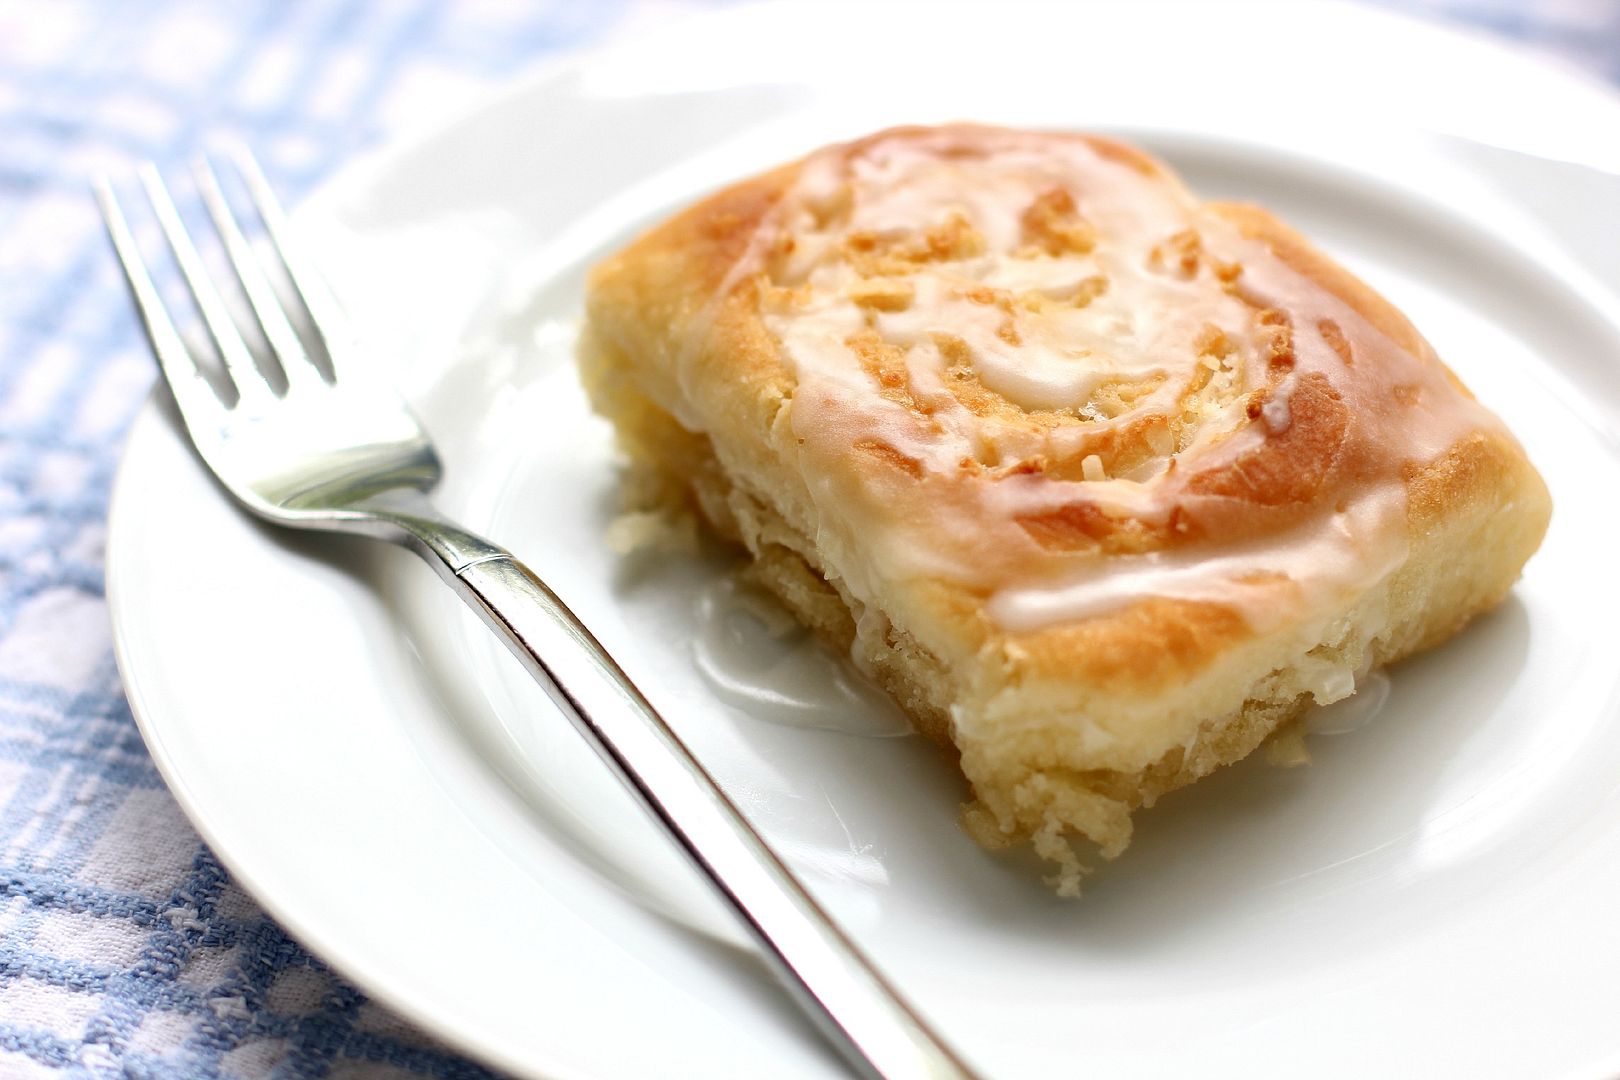
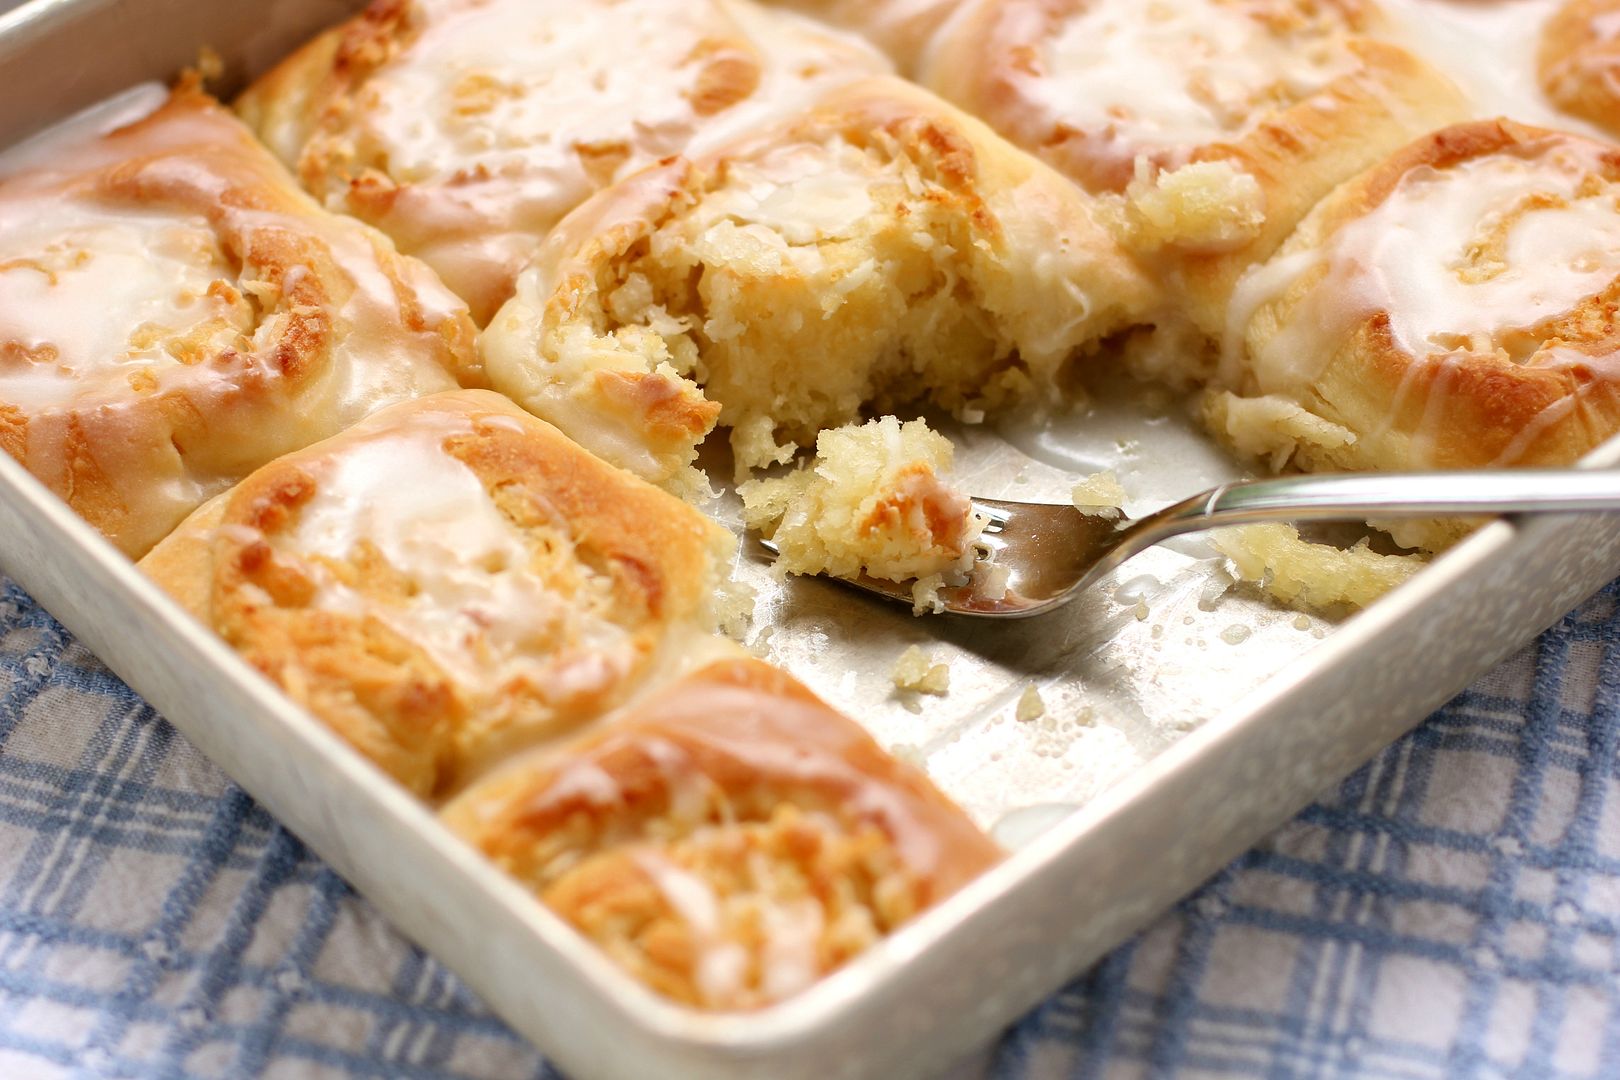
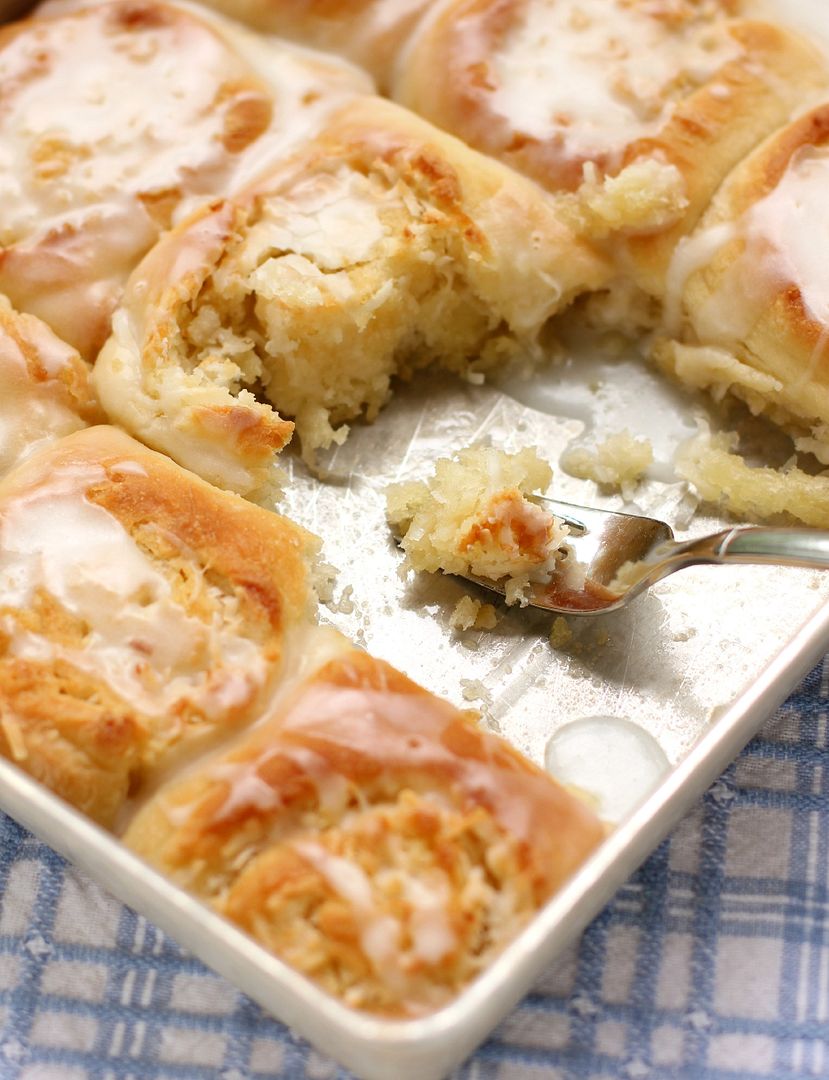
It took me a couple of weeks to get around to experimenting, but when I finally did, these lovely Coconut & Almond Morning Buns were the result. They were even more phenomenal than I’d imagined: buttery, gooey, and delicate, with a gorgeous balance of sweet coconut and subtle almond. I proudly presented them to Mike, who had forgotten all about the Winston-Salem coconut roll but wholeheartedly enjoyed my revamped version nonetheless.

By the way, if you’re wondering: yes, these buns whipped the coffee shop’s coconut rolls right out of the mixing bowl. Not that I’m competitive or anything.

Everyone remembers the word they got out on in their childhood spelling bee. What was yours? (I got out on “eclipse” in 5th grade and “monotonous” in 6th.)

Buttery Coconut & Almond Morning Buns


Recipe by: Willow Bird Baking
Yield: 24 buns

These morning buns could easily double as dessert. They are fluffy, gooey, buttery, and beyond delicious. There’s a lot of butter in this recipe, making it a special occasion treat, but I hope you’ll find a space for these rolls on your Easter brunch table. They definitely belong in the spotlight.

Roll Ingredients:
1 package (2 1/4 teaspoons) active dry yeast
1/4 cup warm water (100-110 degrees F)
2 tablespoons white vinegar
2 cups milk minus 2 tablespoons, room temperature
2/3 cup cold shortening (I use butter flavored Crisco)
3 tablespoons sugar
1 teaspoon salt
1 teaspoon baking soda
1 teaspoon baking powder
5 cups flour
2 tablespoons butter, melted, for after baking

Filling Ingredients:
1 1/2 cup (3 sticks) butter, melted
1/2 teaspoon coconut extract
1/2 cup sugar
2 cups sweetened coconut flakes
7 ounces almond paste, frozen until firm and then grated with hand grater

Glaze Ingredients:
1 1/4 cups confectioners’ sugar
1/4 teaspoon almond extract
1/4 teaspoon coconut extract
2-3 tablespoons milk (to thin to drizzling consistency)

Directions:
Note: I don’t recommend halving yeast recipes; instead, if you don’t want 24 rolls at once, consider freezing some for later. To freeze some of the unbaked rolls, just wrap them well before the second rise and freeze them. Once frozen, pop them out of the pan all together and store in the freezer, wrapped in plastic wrap and in a zip top bag or wrapped in foil. When you want to bake them, stick them back in a greased pan, thaw them in the fridge overnight, proof for the instructed amount of time, and bake like usual.

Mix the warm water and yeast in a medium bowl and let the yeast foam for about 10 minutes. Put 2 tablespoons white vinegar in a measuring cup and then add milk up to the 2 cup line. Set this aside. In a separate large bowl (or the bowl of a mixer fitted with a dough hook), whisk together flour, sugar, salt, baking soda, and baking powder and cut the shortening into the mixture with two knives or a pastry cutter until the shortening looks like small peas. Stir yeast mixture and milk mixture into the dry ingredients and mix well, kneading just a few turns. Transfer the dough to a bowl lightly sprayed with cooking spray, cover tightly with plastic wrap, and store in refrigerator overnight.

The next morning, preheat the oven to 400 degrees F and lightly spray two 9 x 13-inch baking dishes with cooking spray. Turn the chilled dough out onto a floured surface and roll it into a large rectangle about 1/8-inch thick (I carefully cut the dough in half and worked with half at a time to make it more manageable; if you do this, just spread on half of the filling ingredients for each half you roll). Stir the coconut extract into the melted butter; then spread the melted butter all over the top of the dough. Sprinkle on the sugar, sweetened coconut, and almond paste flakes. Gently roll the dough up into a spiral and cut it into rolls, placing them close together in your prepared baking dishes (at this point, you could wrap and freeze the rolls for later if you wanted).

Cover the rolls with a clean dish cloth and let them rise in a warm spot until they’ve nearly doubled, about 1 1/2 – 2 hours. Bake them for about 15-20 minutes or until browned on top (if you take them out at just lightly golden brown, they may still be doughy in the center). Brush with 2 tablespoons melted butter and return to the oven for 1 more minute. Whisk together the glaze ingredients (adding milk to get it to drizzling consistency) and drizzle the glaze over the warm rolls. Serve immediately.

If you liked this post, please:
Subscribe to Willow Bird Baking
Follow Willow Bird Baking on Twitter
Follow Willow Bird Baking on Facebook
Give this post a thumbs up on StumbleUpon
Pin It

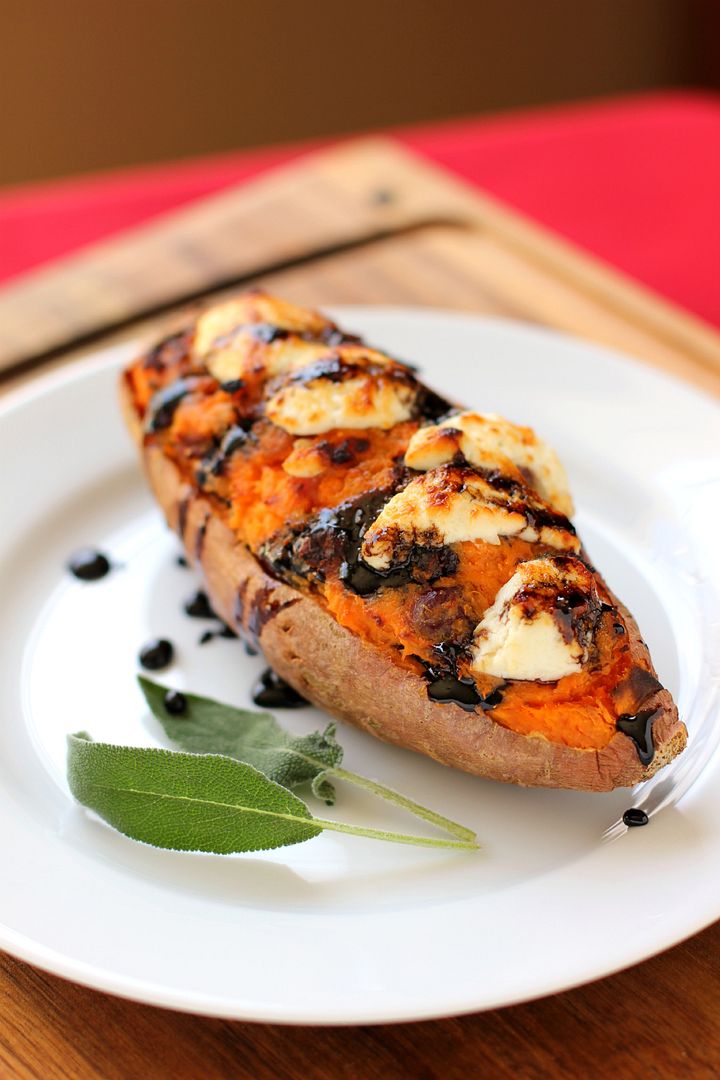
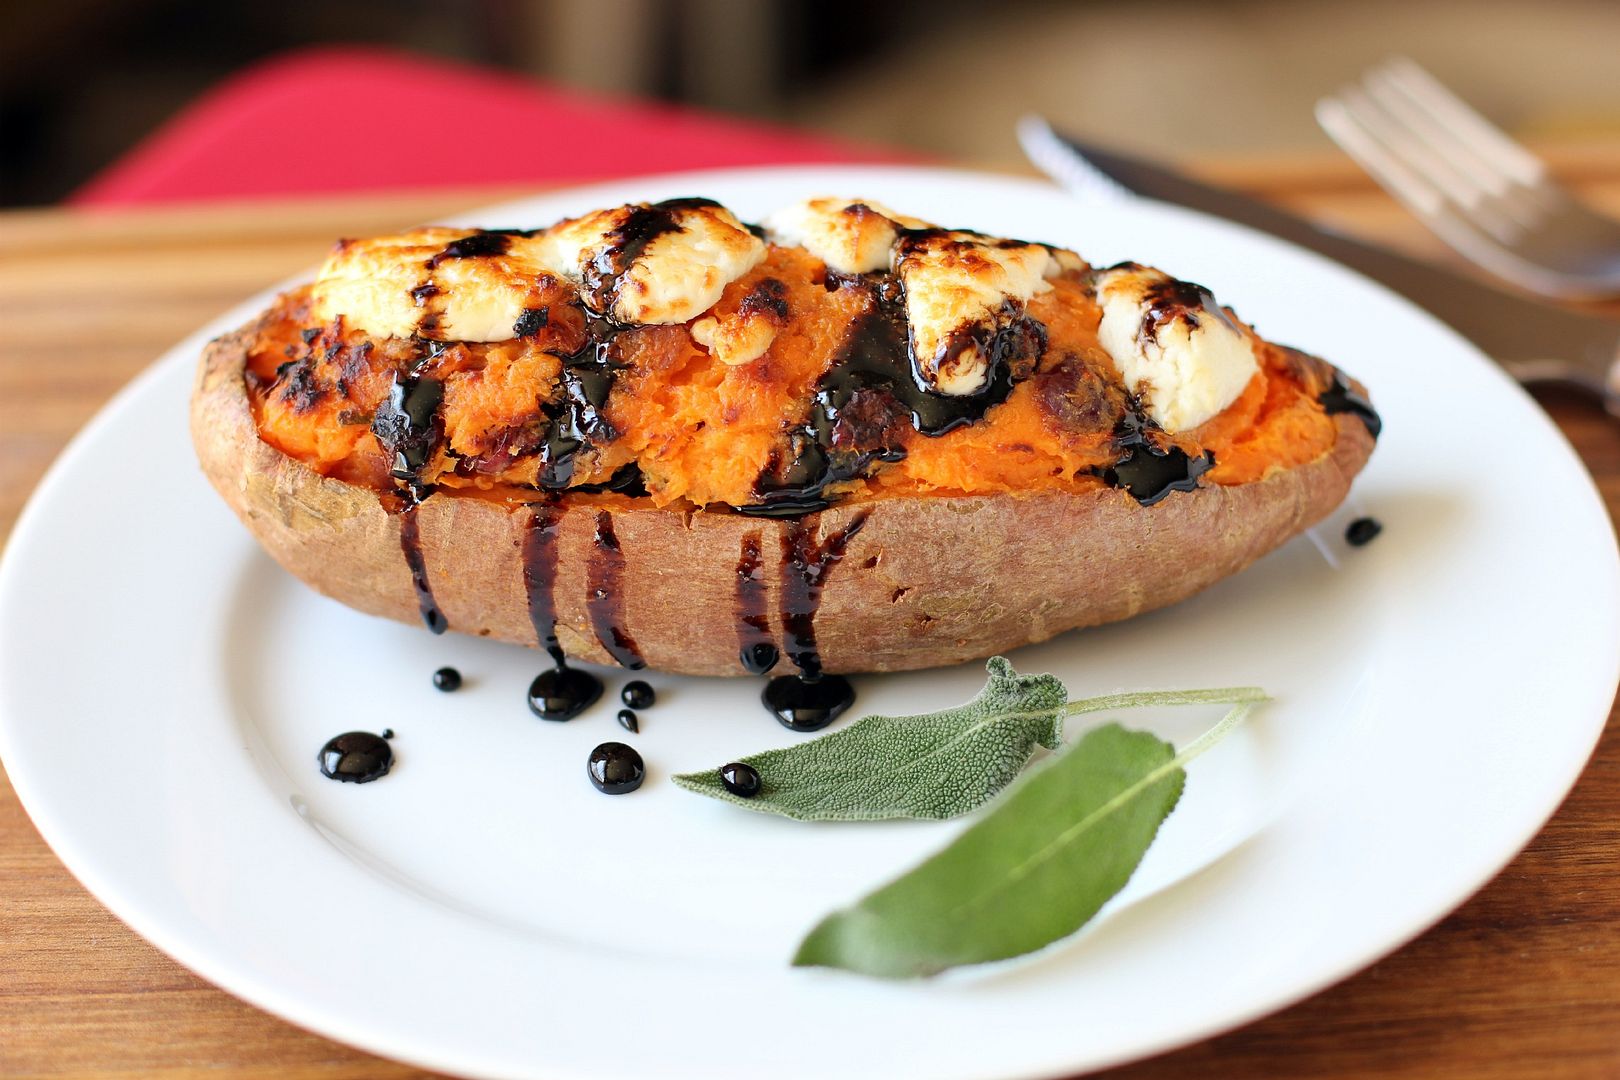
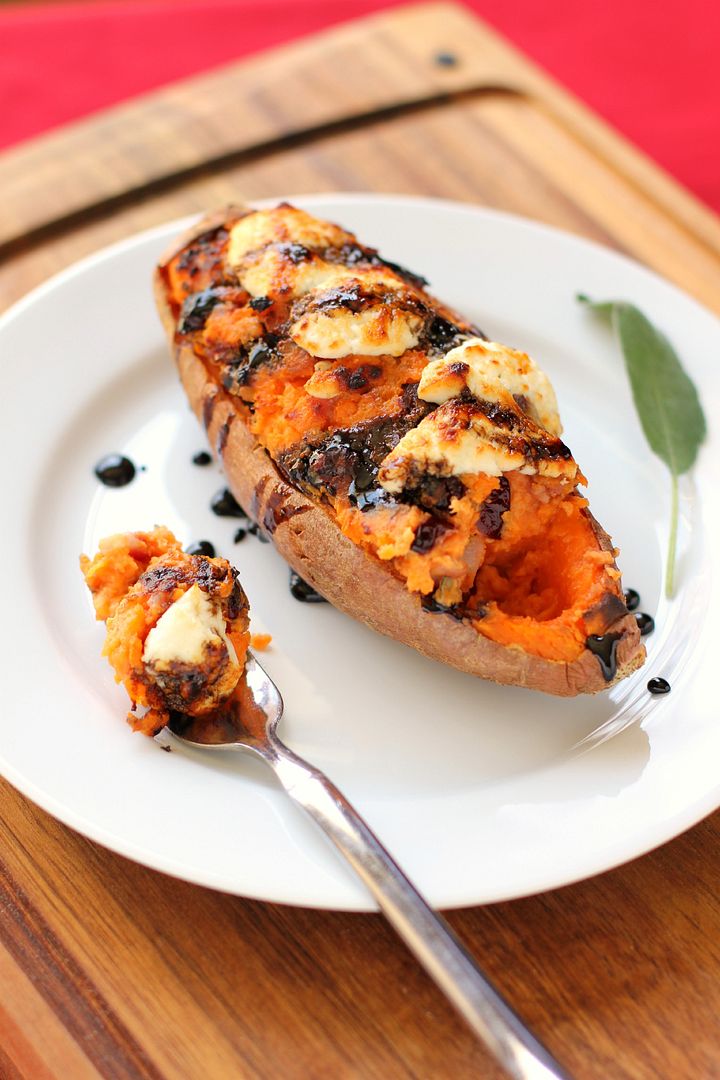
Twice Baked Cranberry & Pancetta Sweet Potatoes with Balsamic Glaze

The only time I’ve lived away from my hometown was during my sophomore year in college when I moved to Beaufort, a small town on the coast of North Carolina. I lived there for a few months before traveling for a month down the Eastern seaboard to study marine zoogeography. That semester changed my life, and I’ve continued to process the memories over the years. Periodically I’ll share stories here on Willow Bird Baking from that time.

. . .

I stared willfully at the horizon, waiting for the wave of nausea to subside. As if it were having great fun at my expense, the boat rolled over another giant wave. My stomach followed. I was determined not to succumb to the sensation and end up hanging over the railing like several of my friends, so I squinted even harder at the steady line between sky and land.

We’d woken up at an absurd hour to climb aboard the R/V Susan Hudson that morning. We’d all become accustomed to rolling out of bed, pulling on a pair of salty old sneakers, and plowing through the fog of sleep to begin our adventures. Luxuries like showering and hairstyling and even, say, deodorant had long since been abandoned. There was a high likelihood that on any given day we’d find ourselves traipsing through mud up to our thighs (I’m not exaggerating), swimming to a nearby island, or cuddling with sea cucumbers in the shallows. There was no point in getting pretty.

This was our first deep sea expedition. We were traveling miles out into the ocean to dredge and trawl for invertebrates that we would take back to the lab, observe, and then release. I’d been on the Susan Hudson around Pivers Island, home base for the Duke Marine Lab where we lived, but I soon discovered that this was an entirely different experience: one in which I did not have sea legs. Or a sea stomach.

The briney smell of the critters we poured out onto the ship’s deck didn’t help. We quickly flipped fish back out into the sea and scooped heaps of clams, snails, and squids into buckets of seawater. A cacophony of seagull chatter above us reminded us to toss a bit of our impressively fresh sushi into the air now and then.

On our way back with our spineless loot (the squids’ inky water suggested they were none too happy with their temporary accommodations), we docked near Cape Lookout to explore the seashore for a bit before eating lunch back on the boat. The dining hall had packed us sweet little bag lunches complete with a sandwich, apple, and cookie, but the thought of lunch sent my stomach back into a lurch.

Fortunately, one of the guys in our group had grown up on the water in Charleston. Will had battened down hatches, swabbed the deck, shivered some timbers, and every other nautical cliche I can muster up. He saw my decidedly green gills and said, “Make sure to eat.”

I was skeptical. “Well, I’m feeling really sick — is it a good idea to eat anything? Isn’t that just asking for trouble?”

“Trust me: eat. You’ll feel better.”

I unfolded the wax paper around my sandwich and took a cautious bite. (By the way, if you’ve never wrapped a sandwich in wax paper for your lunch, you should. The sensory experience of unwrapping that crinkly, smooth paper to eat a humble little sandwich is one of my favorite things in the world.) I don’t remember what sort of sandwich it was, but it tasted otherworldly after an entire morning on the boat. My hunger caught up to me and I finished devouring my sandwich with gusto. I headed for the cookie after that, offering my apple to one of my friends (the peel gets caught in my teeth and drives me batty, so I never eat them).

My trust in Will, given tentatively and mostly out of desperation despite his obvious experience, paid off. I felt better almost instantly. So much so that instead of clenching my bench and staring at the now-bright horizon the entire way back to the lab, I was able to get up and survey the surrounding sea, broken by waves and playful dolphins.

. . .

I’ve moved from research boats to potato boats since my time in Beaufort. In fact, I haven’t stepped foot on an actual boat (unless you count a kayak) in years. And I wouldn’t trust these sweet potatoes to be particularly sea-worthy.

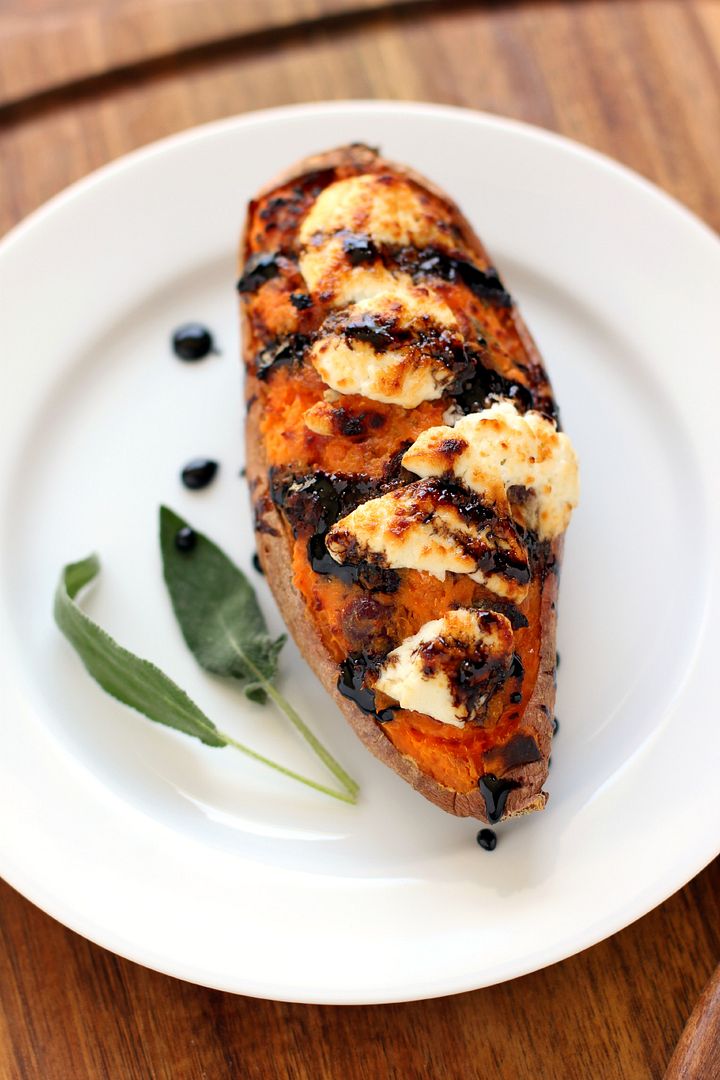
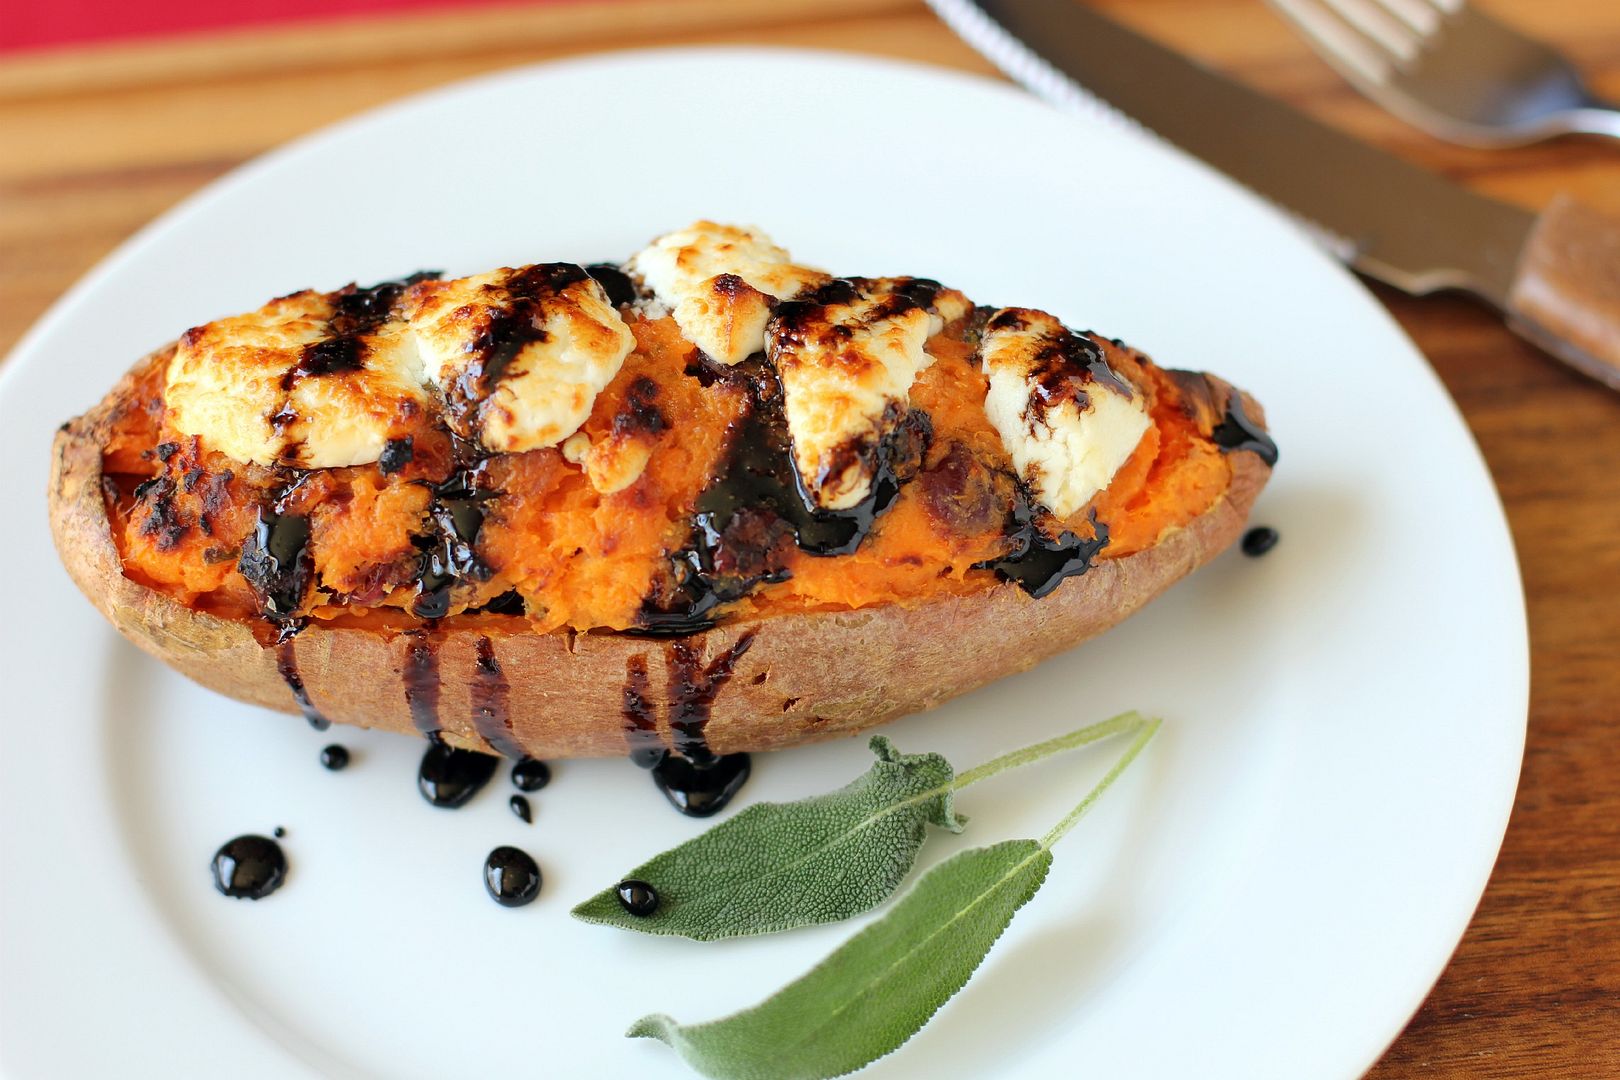
They are fantastic, though. I love twice baked potatoes for their soft, creamy filling, and this play on the theme boasts that same lovely texture. In addition to that, it has a phenomenal collection of flavors: sweet potato, cranberry, salty pancetta, sage, goat cheese, and a sweet balsamic glaze. The pretty presentation is just the icing on the cake.

Twice Baked Cranberry & Pancetta Sweet Potatoes with Balsamic Glaze


Recipe by: Willow Bird Baking
Yield: 2 twice baked sweet potatoes

These gorgeous twice baked sweet potatoes are fancy enough for a holiday meal, but simple enough to make any night. You can even prepare them a day in advance so they’re ready to pop in the oven before a big meal. A few tricks (like using a zip top bag to pipe the mixture into their sweet potato boats) speed up the process. The best thing about them, though, is the fantastic combination of flavors: salty pancetta, sweet and tart cranberries, tangy goat cheese, fresh sage, and a sweet balsamic glaze. It’s every sweet potato’s dream.

Ingredients:
2 large sweet potatoes (look for ones that are shaped like a fat oval)
4 ounces cubed pancetta
2 ounces goat cheese, plus more for crumbling on top
2 tablespoons butter
1 heaping teaspoon of loosely packed sage leaves, finely chopped
1/4 cup dried cranberries
1/4 cup half & half
salt to taste
1 1/2 cups balsamic vinegar
3 tablespoons sugar

Directions:
In a small bowl, cover dried cranberries with hot water. Cover the bowl with plastic wrap and let it sit for about 10 minutes to rehydrate the berries. Drain them and set aside. Preheat the oven to 350 degrees F. Poke each sweet potato several times with a fork and bake them on the oven rack (with a baking sheet on the rack below to catch any oozing) for 1 hour or until a knife will slice them easily.

While they bake, sauté the pancetta in a skillet over medium-high heat for a 8-10 minutes or until crisp. Drain it on a plate lined with a paper towel.

Once they’re ready, let the baked sweet potatoes cool for 10 minutes before slicing the top third off of each. Use a spoon to carefully scoop out the flesh (leave about 1/8 inch of flesh in the skin to give it some sturdiness). Mix the sweet potato flesh in a medium bowl with the butter, 2 ounces of goat cheese, and half & half (add this slowly while mixing so you get the consistency you’d like). Once the mixture is smooth, stir in the cranberries, sage, and pancetta. Salt the mixture to taste. Spoon it into a large zip top bag and cut the bottom corner off. Squeeze the mixture into the sweet potato skins. (At this point you can cover the potatoes and refrigerate overnight or bake immediately. If you chill them overnight, just let them come to room temperature before you bake them the next day.) Bake the potatoes for 10-12 minutes before removing them to a cooling rack.

While the potatoes are baking, combine the balsamic vinegar and sugar in a saucepan and boil them over medium-high heat, stirring occasionally, until the mixture is reduced to about 2/3 cup (this can take anywhere from 18-25 minutes). Be careful — vinegar fumes are strong! When the glaze is about ready, preheat the broiler. Top each potato with a generous amount of goat cheese and broil, watching very closely, until goat cheese is toasty brown and bubbly. Remove the potatoes and drizzle on the balsamic glaze. Serve immediately.

P.S. This dish will be entered in the North Carolina Sweet Potato Commission‘s No More ‘Mallows Recipe Contest. I love me some sweet tater and marshmallow casserole, but I also love that sweet potatoes pack a lot of savory potential.

If you liked this post, please:
Subscribe to Willow Bird Baking
Follow Willow Bird Baking on Twitter
Follow Willow Bird Baking on Facebook
Give this post a thumbs up on StumbleUpon
Pin It

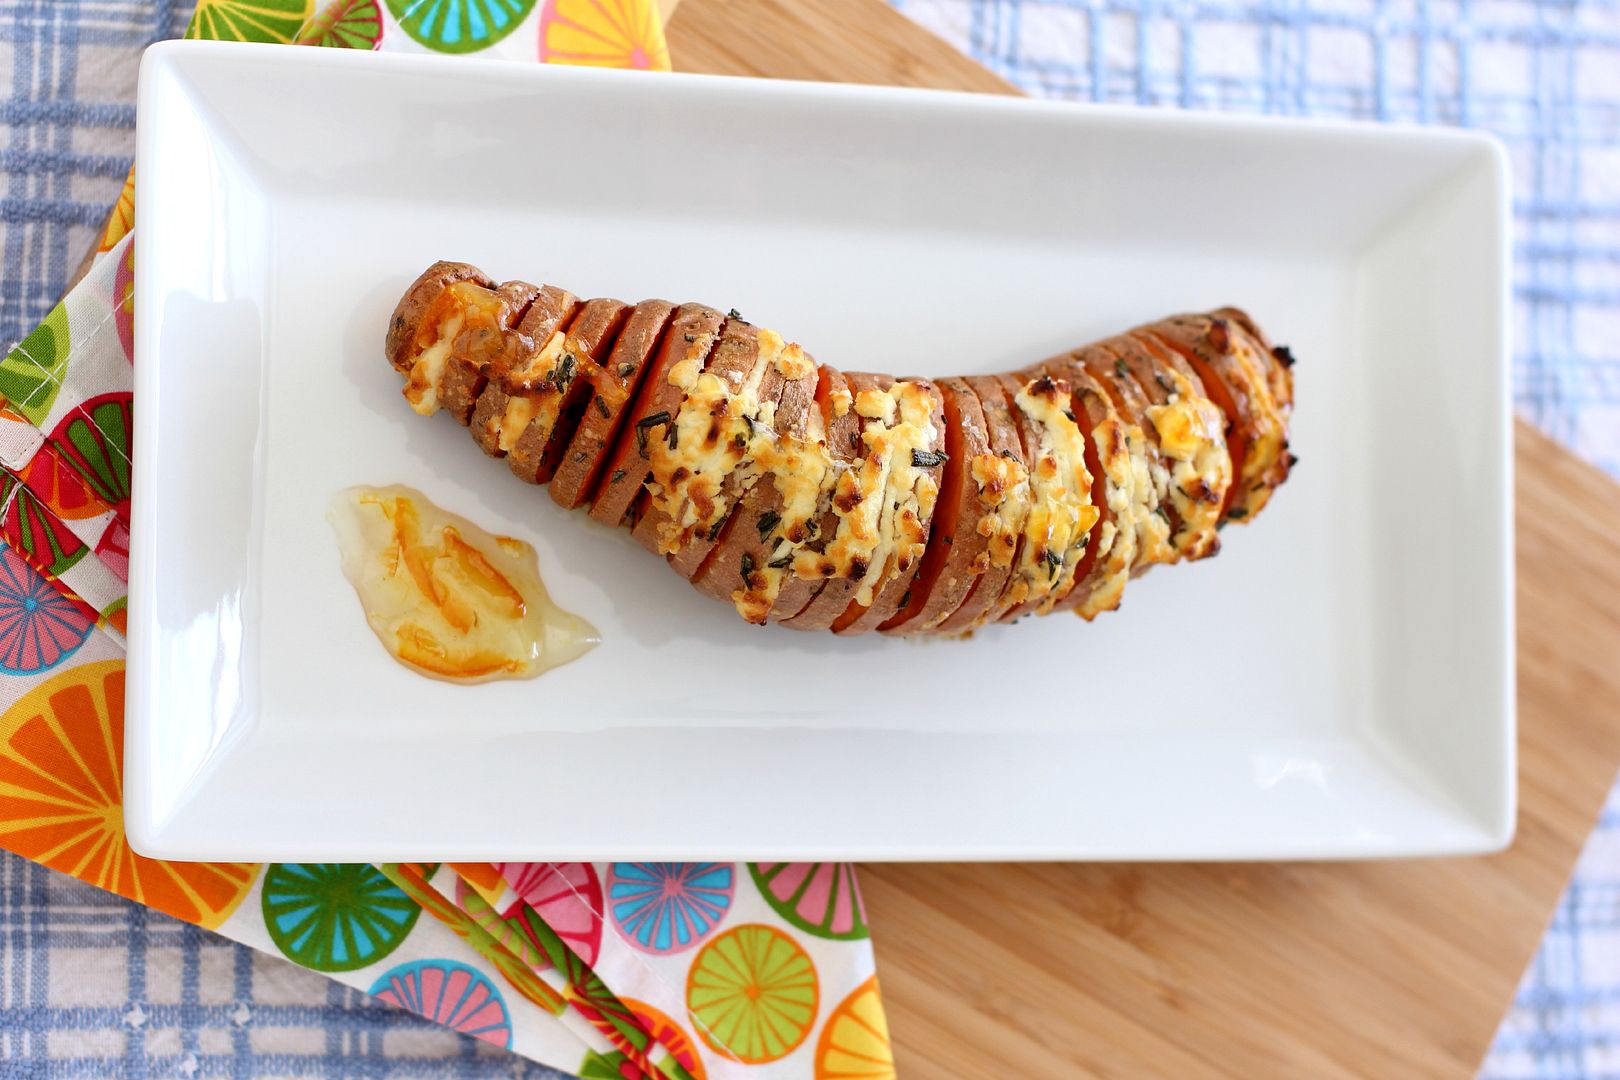
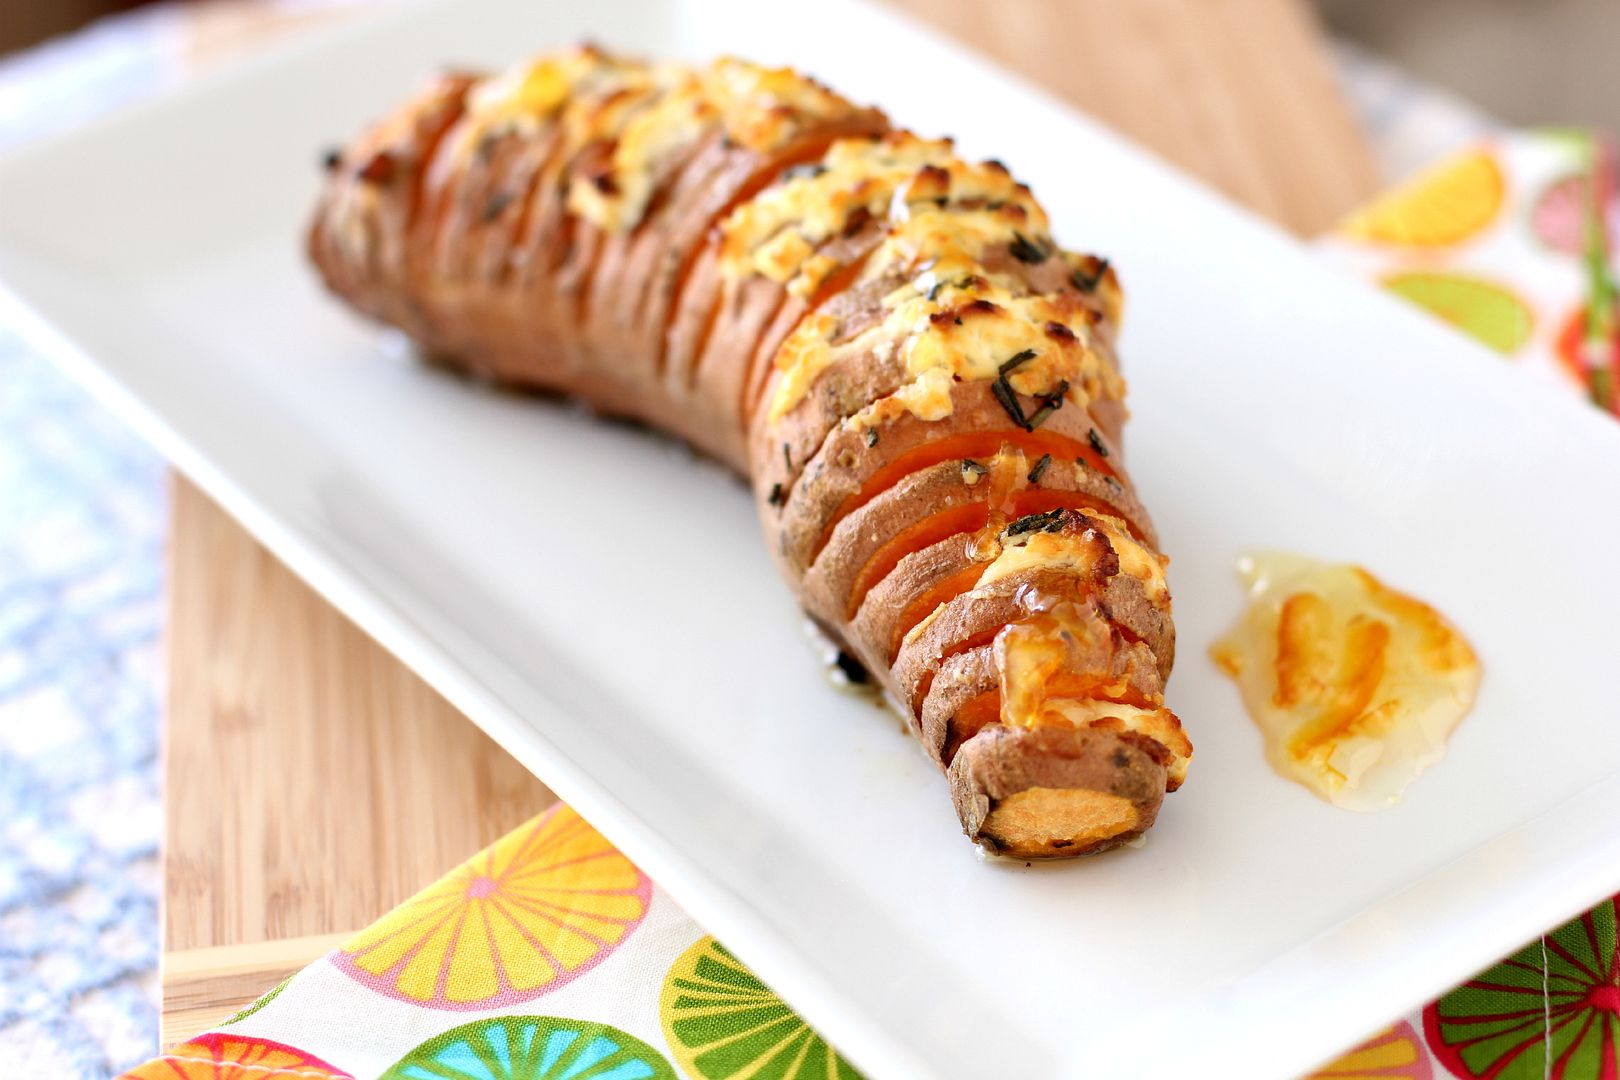
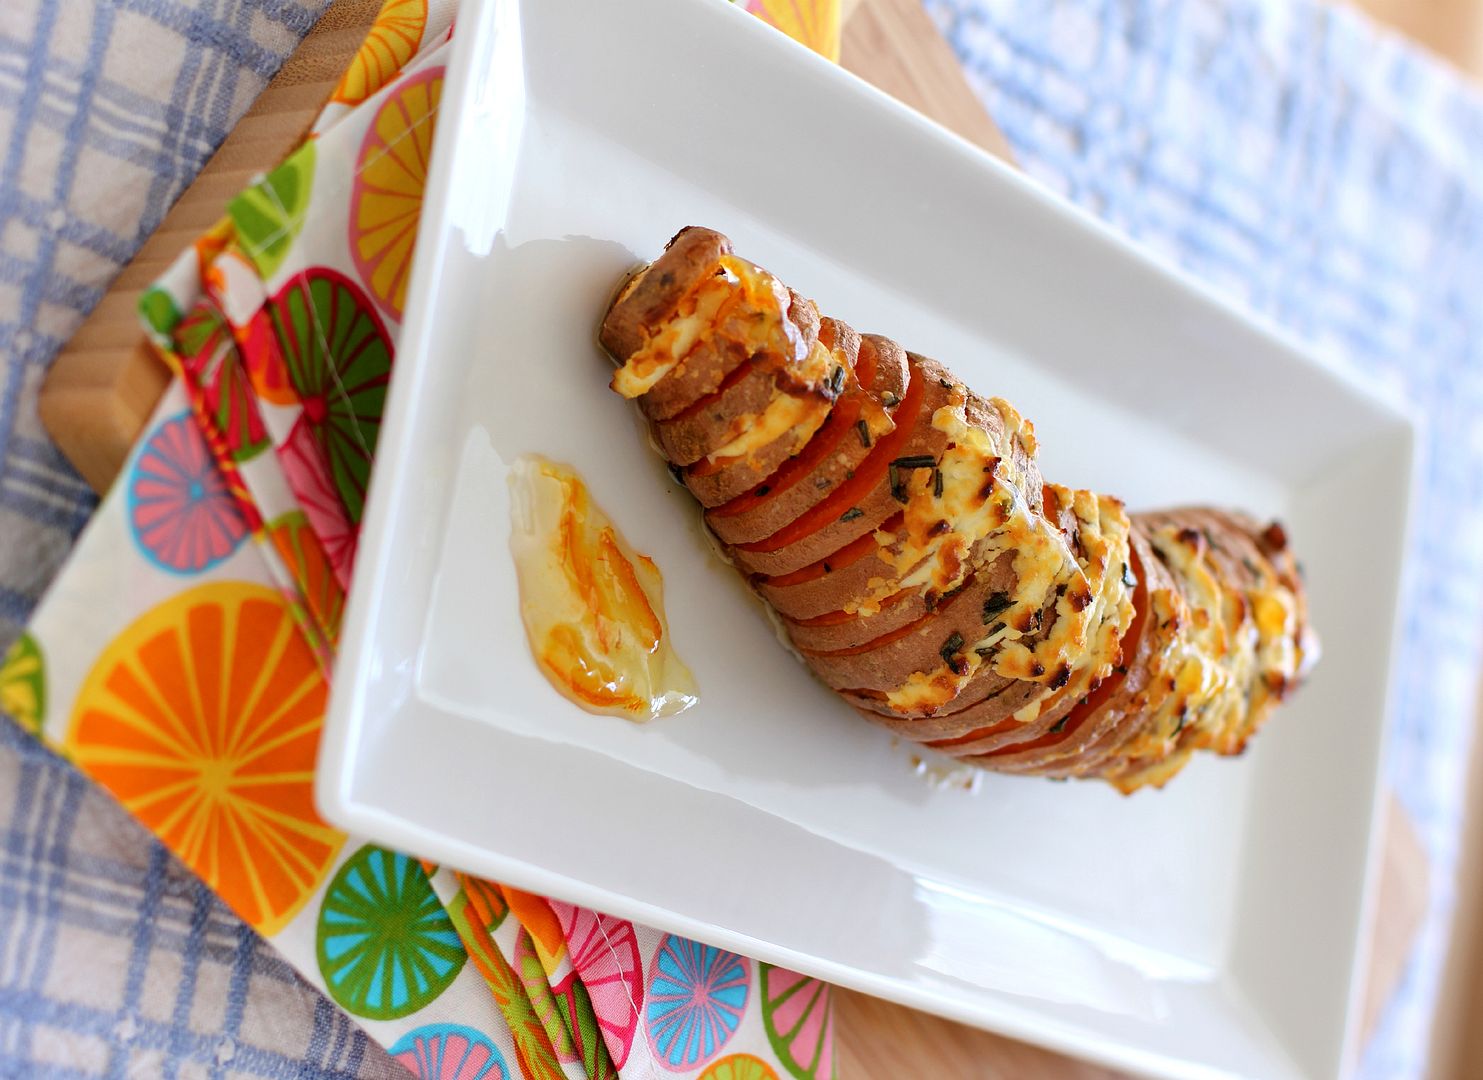
Hasselback Sweet Potatoes with Orange Rosemary Butter & Goat Cheese

In light of Willow Bird Baking’s Cooking Hard Stuff Challenge, I’ll be sharing some tips for tackling new or challenging recipes throughout the month of March. If you haven’t signed on for the challenge yet, make sure you read about it and join in the fun.

My first bit of advice about how to Cook Hard Stuff (or really, how to cook anything at all) is going to seem half obvious and half new agey, but it’s important enough to harp on a bit.

Cooking Hard Stuff Tip #1: Read and visualize the recipe.

Once upon a time, I treated a recipe like a labyrinth. I started at the beginning without any knowledge of what was ahead, putting one foot in front of the other and hoping I eventually reached the other side.

It was exciting, for sure. Suddenly, I’d need a cup of sugar. I’d dig around in the cabinet for a bit, do some measuring, and accomplish that task. Then, bam! I’d need a stick of butter. I’d scrounge around in the fridge to see if I had one. The pitfalls of this technique are pretty obvious: sometimes you’re out of sugar, or your butter needed to be set out to soften hours ago, or the pan you need is soaking in the sink with last night’s baked ziti caked all over it.

It only took a few such missteps to start reading recipes, but even then, I just “read” them. Skimming did the trick most of the time. Finally, a few mid-recipe trips to the grocery store made me realize that a cursory scan of a recipe wasn’t going to cut it either.

When I say you should read through your recipe, I mean you should grab a pencil, sit down with the recipe, and really read it. Make grocery lists based on the ingredients. Make a schedule for your prep work so things like softening butter don’t sneak up on you. Sketch a plan for how to set up your workspace for finicky or time sensitive recipes so you won’t have to stop and rummage through the pantry.

These things take a little time. You might sit with your recipe for 15 or 20 minutes planning. I can say from experience, though, that the time and angst you’ll save as you breeze through your recipe is worth the few minutes of preparation.

Once you’ve given a recipe a thorough reading and made any helpful notes, you need to sit down and visualize the steps of the recipe. Literally, sit there and picture yourself doing each step. Maybe this is starting to sound a little like a yoga class, but mentally walking through a recipe is one of the most important things I do to ensure my success. It’s during this exercise that I realize what order the prep work is best completed in, what techniques I’m unfamiliar with and might need to read more about, and what kitchen tools I should use in order to maximize my efficiency and minimize my workload.

Thinking through the recipe a few times also makes me feel like I’ve practiced the steps I’m about to tackle, which boosts my confidence and leads to better results in the kitchen.

These Hasselback Sweet Potatoes aren’t Hard Stuff; they’re actually pretty simple to prepare and boast a gorgeous flavor profile. But having never made Hasselback potatoes before, you better believe I was reading around online, comparing various recipes, and making a prep list for myself. After this bit of preparation, the dish practically flew together.

As I hoped, the orange rosemary butter, goat cheese, and smidge of warm orange marmalade glaze worked perfectly with the sweet potato to create a bold savory side dish. Do a little reading and a little visualization (and maybe even some yoga?) and then make yourself some sweet taters.

What tips for Cooking Hard Stuff would you offer other readers?

Hasselback Sweet Potatoes with Orange Rosemary Butter & Goat Cheese


Recipe by: Willow Bird Baking, inspired by A Cozy Kitchen’s Hasselback Potatoes
Yield: 2 sweet potatoes, 2-4 servings

These sweet potatoes are stuffed with delicate orange rosemary butter and goat cheese and drizzled with a touch of warm orange marmalade when they’re fresh from the oven. The result is a savory side dish with a hint of sweetness and a ton of bright flavor. Don’t fret if the butter and cheese needs to be smooshed into each slit in the potato and ends up a little messy — the finished product will be gorgeous.

Ingredients:
2 sweet potatoes, scrubbed clean
4 tablespoons butter, softened
1 tablespoon rosemary leaves, finely chopped
1/2 teaspoon orange extract
1/2 teaspoon orange zest (optional)
3/4 teaspoon honey
4 ounces goat cheese
1/4 teaspoons kosher salt (plus more for salting butter to taste)
1 tablespoon olive oil
1 tablespoon orange marmalade

Directions:
Make the Rosemary Orange Butter: Mix softened butter, orange extract, orange zest, finely chopped rosemary, and honey until well combined. Add salt to taste. Spoon butter onto a square of wax paper and gently form into a log. Wrap the log and place it in the freezer to firm up completely.

Prepare potatoes: Preheat the oven to 400 degrees F and cover a baking sheet with foil. Place a wooden spoon handle on either side of your potato and slice thin slices into it, allowing the spoon handles to stop your knife before you cut all the way through. Slice your cold butter into thin slices and stuff a sliver into every other slit in your potato. Stuff goat cheese into the other slits (some goat cheese will smear out onto the top of your potato and form a topping of sorts). Place the potatoes on the prepared baking sheet, drizzle each potato with 1/2 tablespoon of oil, and sprinkle with kosher salt.

Bake the potatoes at 400 degrees F for 45 minutes or until fork tender. Check halfway through and tent with foil if the goat cheese is beginning to brown too much. Remove the potatoes from the oven after baking and heat the orange marmalade in a small, microwave safe prep bowl for about 15 seconds. Drizzle half over each potato and serve immediately.

P.S. This dish will be entered in the North Carolina Sweet Potato Commission‘s No More ‘Mallows Recipe Contest. I love me some sweet tater and marshmallow casserole, but I also love that sweet potatoes pack a lot of savory potential.

See all the Cooking Hard Stuff Tips:
The Cooking Hard Stuff Challenge
Tip #1: Read and visualize the recipe.
Tip #2: Mise en place.
Tip #3: Make a schedule.
Tip #4: Try, try, try again — or share your success

If you liked this post, please:
Subscribe to Willow Bird Baking
Follow Willow Bird Baking on Twitter
Follow Willow Bird Baking on Facebook
Give this post a thumbs up on StumbleUpon
Pin It

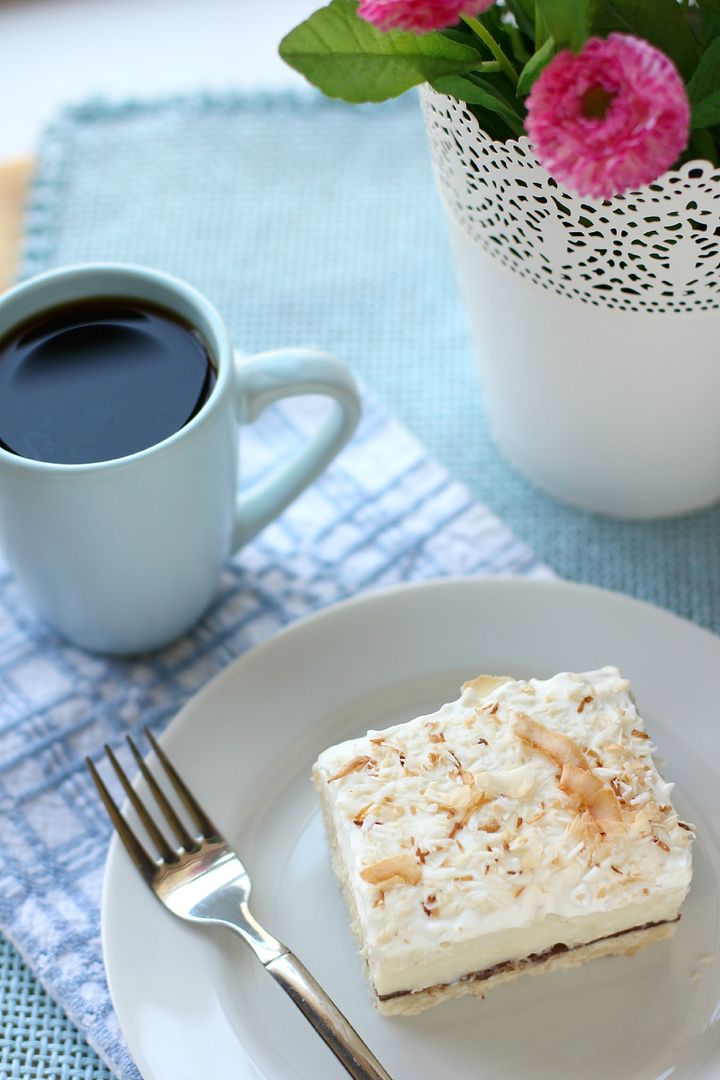
Chocolate & Coconut Cream Pie Bars

Several months ago, I attended the Foodbuzz Blogger Festival in San Francisco, California, 2,700 miles away from my home. Traveling alone is always a meaningful, reflective experience for me. To process my trip, I periodically share vignettes that I hope are meaningful to you, as well.

. . .

Normally, I would have said no.

On-the-spot requests for money make me nervous, and I made a rule years ago to always say no. I give food or supplies freely, as I’m able, to anyone who asks me for them. But I only give money if I have a space to sit, read about the organization, and make a thoughtful choice. That’s my rule, anyway.

But I wasn’t standing at a check-out counter being asked to donate a dollar to a charity, or walking down the street being asked for change. I was sitting on the BART, the Bay Area’s system of trains, and the little boy in front of me was adorably nervous. I waited politely as he took a deep breath and began a clearly well-rehearsed speech. It came out as one halting sentence.

“Hi-I-am-part-of-the-Boys-&-Girls-Club-and-we-are-raising-money-to-go-to-our-basketball-tournament-in-Reno-I-have-already-collected-all-but-$55-can-you-help-by-donating-today?” He took another big breath, obviously relieved to have finished his spiel.

I saw his friend delivering a similar pitch across the car and briefly considered that this might be an elaborate scheme to get more video game or snack money. My innate cynicism comes from personal experience, since I may or may not have canvassed my neighborhood when I was a tiny entrepreneur telling folks that I was an orphan soliciting donations for cancer treatments. Not one of my prouder moments. Thankfully, I don’t think anyone was fooled. A few people tried to tame their amusement as they slipped me some change, which, in hindsight, was unnecessarily generous.

Regardless of my own childhood scheming, I instinctively felt the child in front of me on the train was being honest, and what’s more, I decided I didn’t care. He had mustered up plenty of pluck to come ask me for a few dollars, and I was going to give them to him. I opened up my envelope of cash (such a tourist) and pulled out a few bills for him. His relief turned into joy. “Thank you!” he cried as he walked across the car.

I heard him deliver his pitch to another woman with a satisfied emphasis on his new balance: “…and all I need is $48 now!” She grinned at me as she handed him a couple of bills as well.

A few minutes later, I saw another passenger on the train say no. The boy, clearly coached to deal with this politely, veiled his disappointment as best he could and gave a resigned little nod. I glanced over at the woman and noticed she’d been watching the exchange as well. When she looked over at me, her face had the same sympathetic smile I was sure my own face was wearing. I didn’t blame the other passenger — after all, any other day and any other mood and I might have decided to follow my own rule — but I did resolve to pray for all the boys to get to go to their basketball tournament.

(And you know what? If he’s playing video games or eating some cheesy poofs with my money at this very moment, by golly, I hope he’s enjoying them.)

. . .

It’s funny how sometimes things — like a brief exchange on a train — build a little nook in your heart. Some moments are like that. Some people are like that.

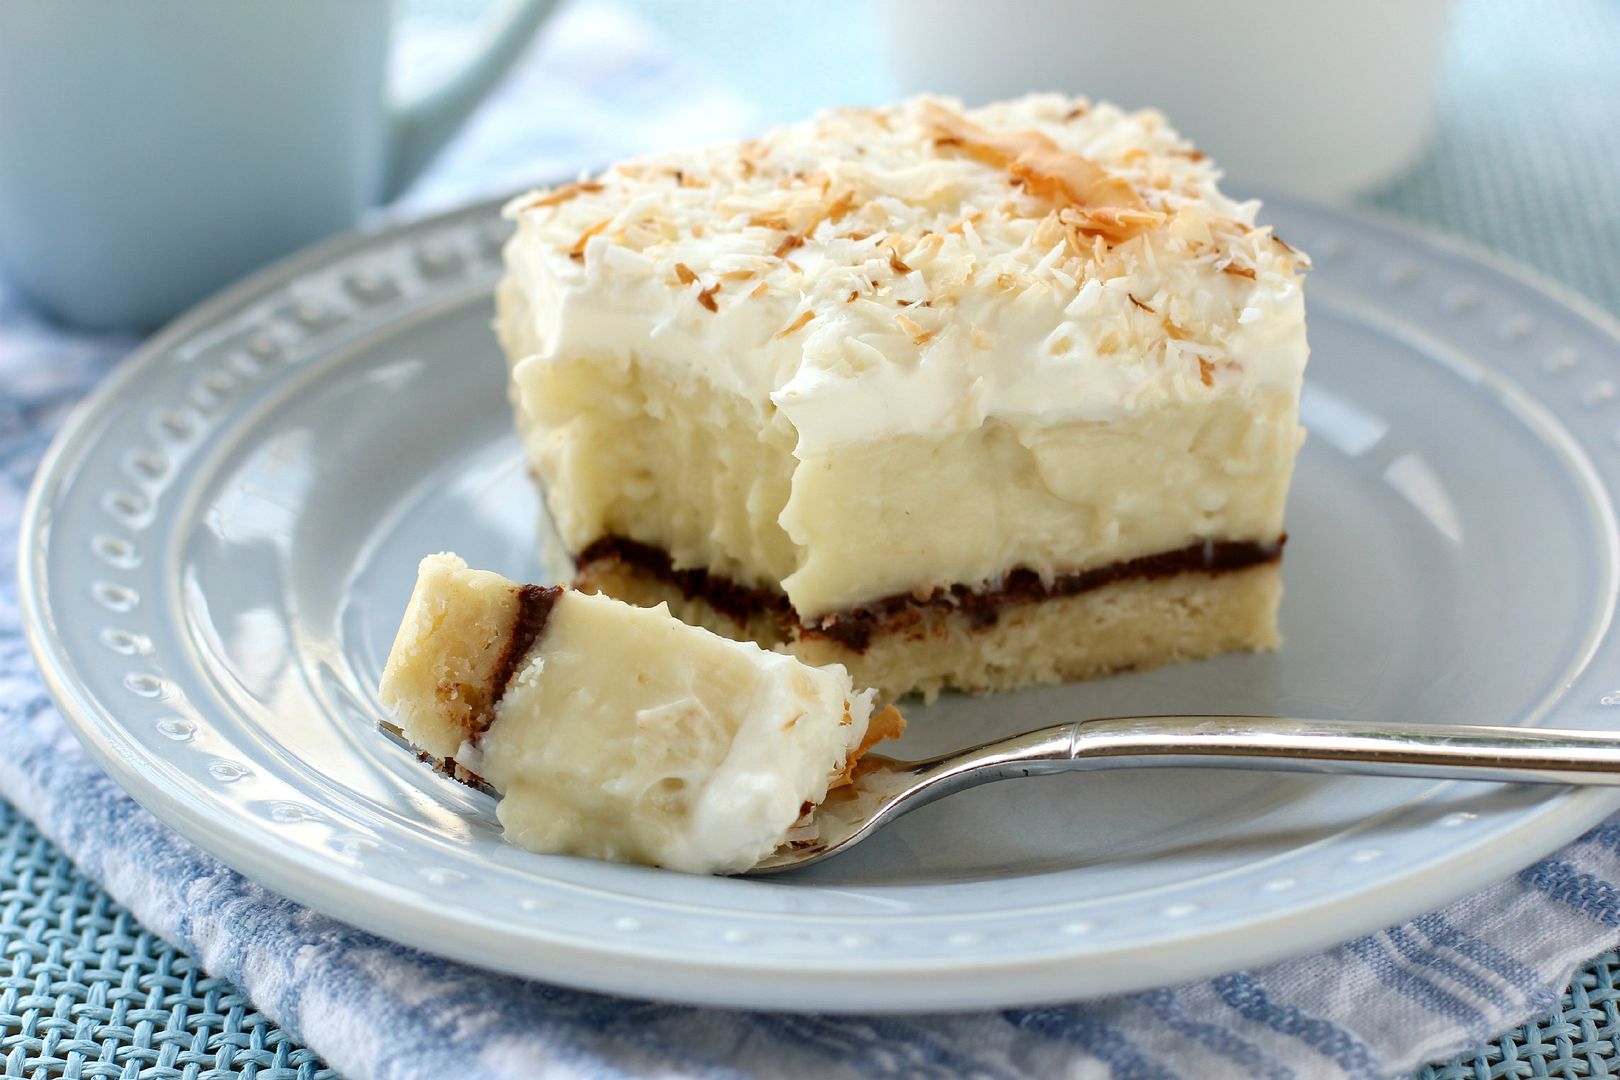
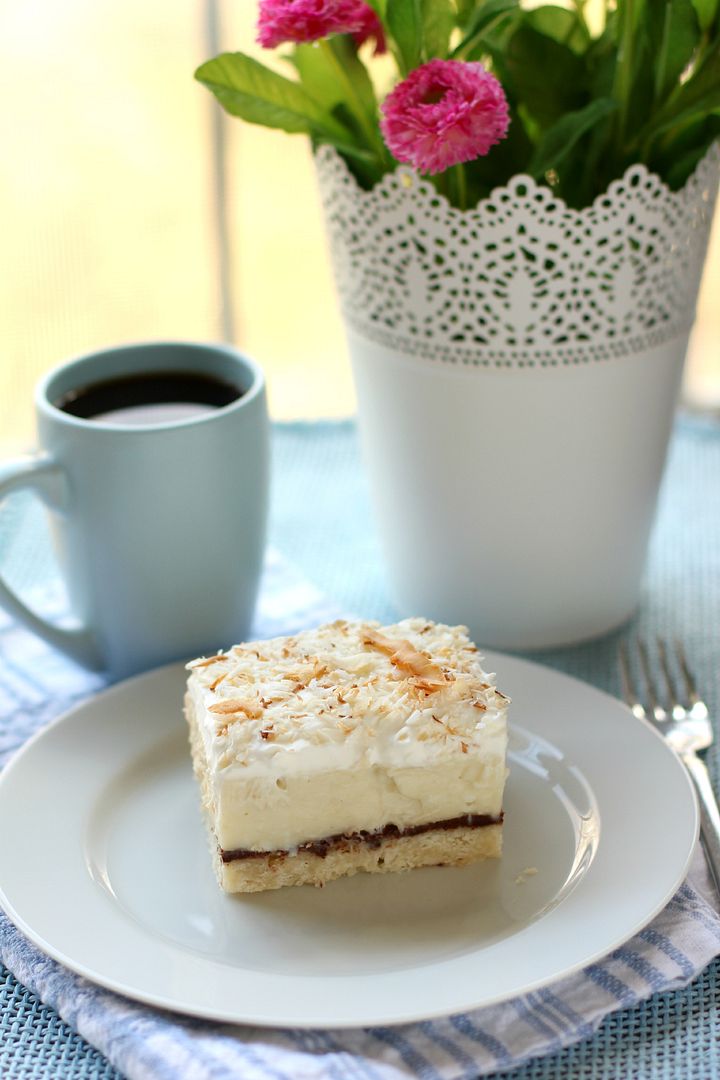
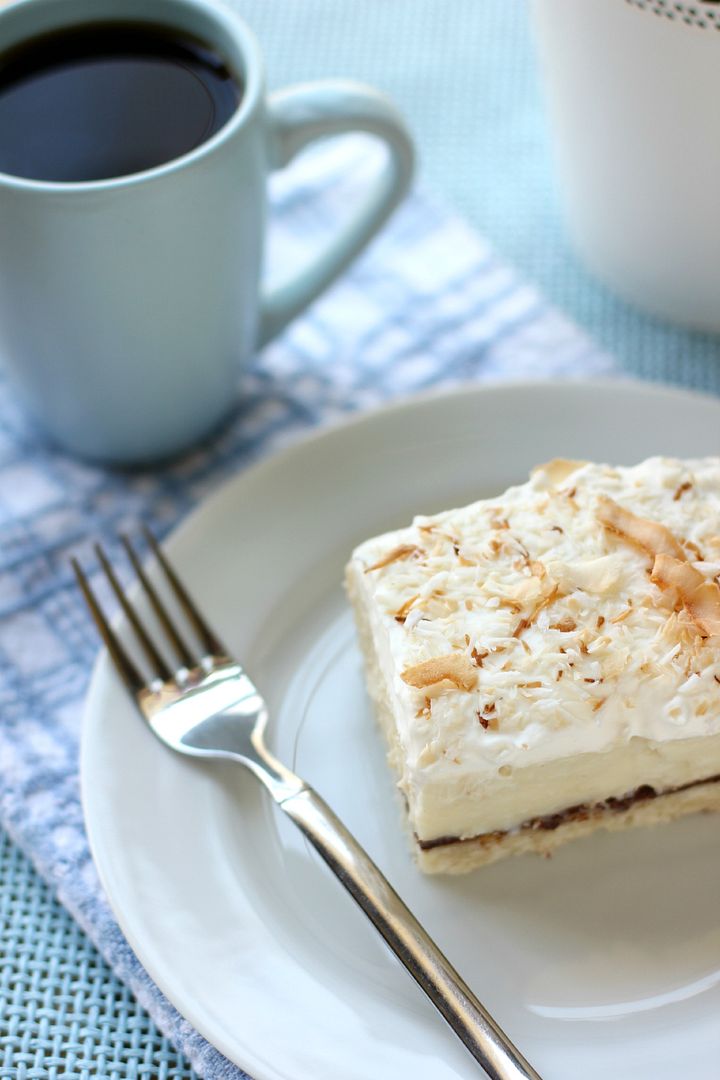
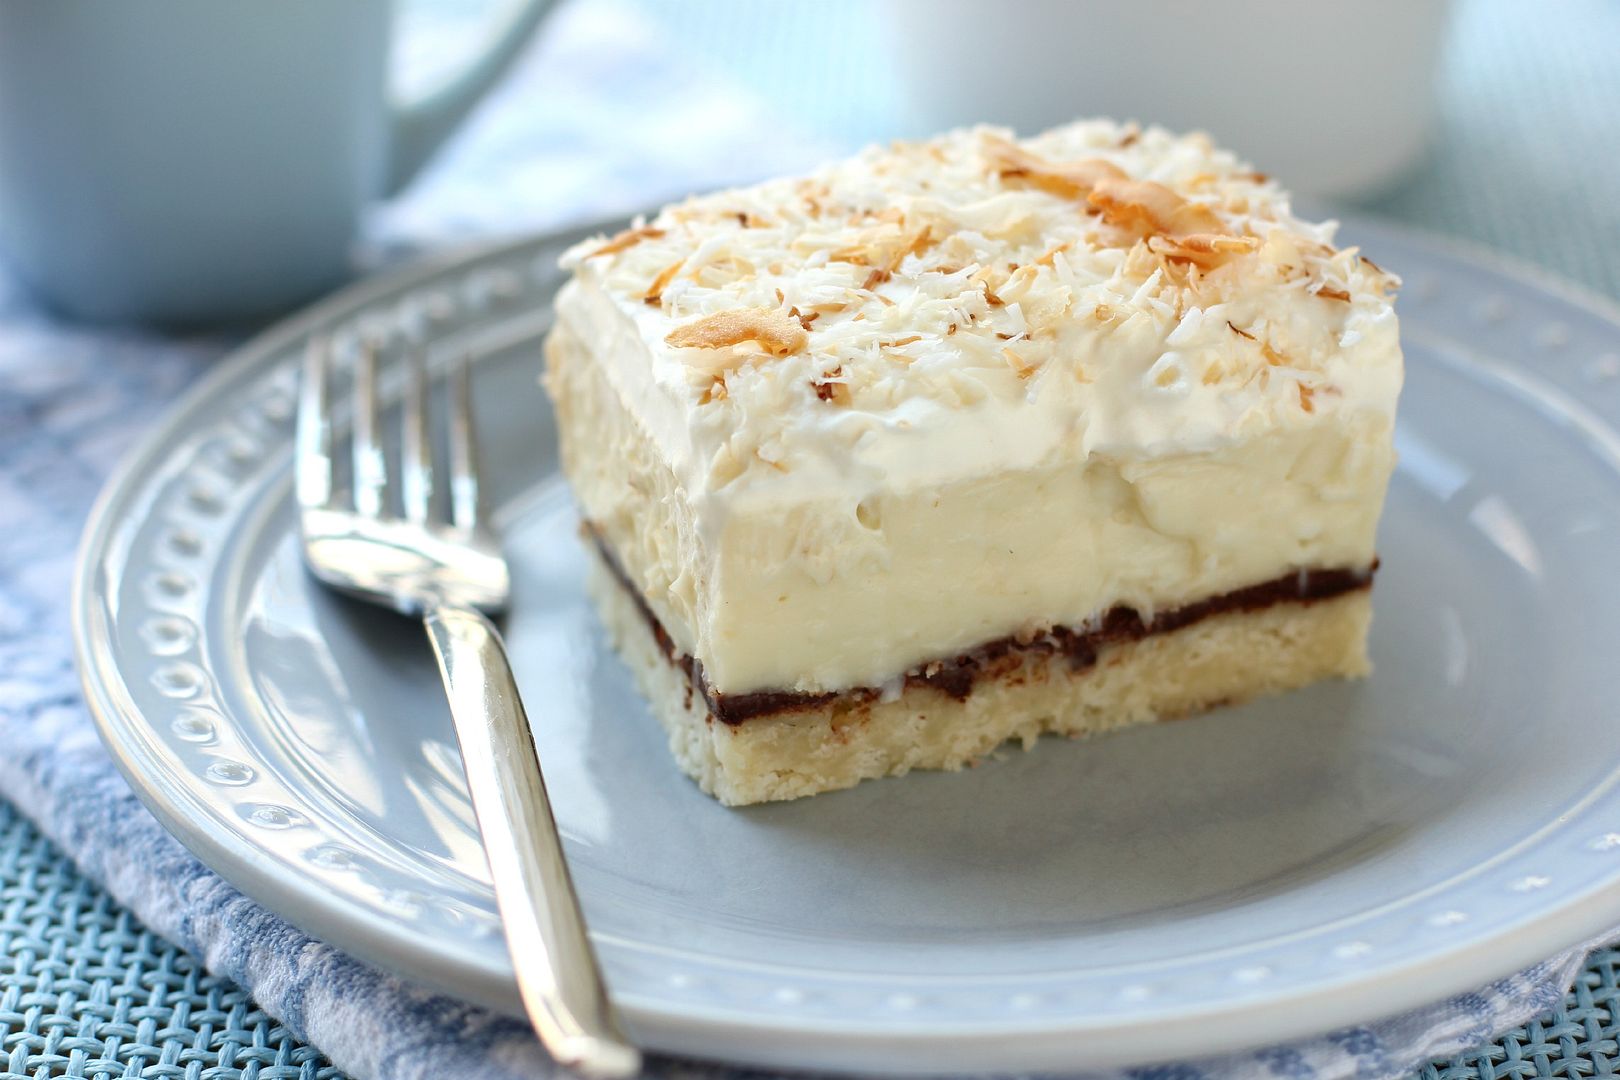
I made these Chocolate & Coconut Cream Pie Bars for a special person who occupies her own shelf in my heart. Martha is Mike’s great-aunt, for all intents and purposes, and she’s truly a crackerjack of a woman. She deserves all sorts of sweet things — video games and cheesy poofs, even! — but I decided on these bars for her birthday because I know she enjoys coconut. The chocolate layer was a whim, but what a great one — the bittersweet ganache is just enough to add a rich background flavor while still allowing the coconut cream to shine.

These bars take a little time and a little arm muscle, but they’re easy to assemble and more than worth the time spent by the stove. If you love a good coconut cream pie, you’ll love them.

Tell me about a moment when you broke one of your own rules.

Chocolate & Coconut Cream Pie Bars


Recipe by: Willow Bird Baking with filling adapted from All Recipes
Yield: 12-16 bars, depending on size

Okay, 30 minutes of stirring sounds like a lot. But now that I know how incredible these bars are, I would stir for an hour if I had to — maybe even two! They combine all the goodness of an old-fashioned coconut cream pie with the perfect amount of rich ganache. In short, these things are amazing. I used stabilized whipped cream on top of my bars, but if you’re serving them immediately and don’t anticipate keeping them long, feel free to just use plain whipped cream.

Crust Ingredients:
1 cup (2 sticks) butter
2 cups all-purpose flour
1/2 cup icing sugar

Ganache Ingredients:
3/8 cups heavy cream
about 3 ounces bittersweet chocolate chips (I love Ghirardelli’s 60% cacao chips)
about 3 ounces semisweet chocolate chips

Coconut Cream Filling Ingredients:
3 cups half-and-half
3 cups coconut milk
4 eggs
1 1/2 cups white sugar
2/3 cup cornstarch
1/2 teaspoon salt
1 1/2 cup flaked coconut
1/2 teaspoon coconut extract
1/2 teaspoon vanilla extract

Whipped Cream Topping Ingredients:
2 cups heavy whipping cream
1 tablespoon cold water (for stabilizing)
1 teaspoon gelatin (for stabilizing)
3-4 tablespoons icing sugar
1/2 cup coconut, toasted

Directions:
Make shortbread crust: Preheat your oven to 350°F. Prepare a 9 x 13 in. baking dish with a parchment paper sling (I use one long sheet across the length of my dish, and two overlapping short sheets across the width of my dish — just arrange it so that it has some overlap and overhang to help you pull the bars out after they’re finished). Cut the butter into the flour and icing sugar and press into the baking dish (I used a food processor to cut the fat into the flour — about 6 pulses — and then the bottom of a glass to press the mixture into the pan). Bake 18-20 minutes or until light brown. Set on a wire rack. Keep oven preheated for coconut toasting.

Make ganache: While the shortbread is baking, place the chocolate in a medium bowl. Bring the cream to a simmer in a medium saucepan (or microwave it for a couple of minutes). Once the cream reaches a simmer, pour the cream over the chocolate and let stand 1-2 minutes. Whisk in small circles until a smooth ganache has formed. Set it aside until your crust is finished and has cooled for a few minutes, and then pour it over the crust (it’s okay if it’s not cooled all the way). Place the chocolate covered crust in the fridge to chill until the ganache is set into a firm layer.

Toast coconut for the topping: Spread about 1/2 cup of the coconut flakes out on a baking sheet and toast for a few minutes, stirring every minute or so, until the coconut is golden brown. Spread it out on a plate to cool completely.

Make coconut cream filling: Combine the half-and-half, coconut milk, eggs, sugar, cornstarch, and salt in a large saucepan and bring it to a boil over medium-low heat, whisking constantly (this can take anywhere from 30-38 minutes. Some folks on All Recipes said you could zap it in the microwave for a minute at a time, stirring after every minute, until it was thickened. It was only supposed to take around 5-10 minutes, but I was too chicken to try. Let me know if you do.) Add coconut and vanilla extracts and the 1 1/2 cups of untoasted coconut and stir. Pour this filling over your chilled ganache and stick the whole thing in the fridge to chill until firm, about 2 to 4 hours.

Make whipped cream topping: Put 1 tablespoon cold water in a small bowl and sprinkle the gelatin evenly over the top. Let it soften for 2 minutes before microwaving it for 30 seconds and whisking to dissolve the gelatin. Using a chilled bowl and beater, whisk the 2 cups of heavy cream and icing sugar together until the cream forms stiff peaks, stopping to add gelatin mixture about halfway through. Dollop the cream over your bars and gently spread it around. Sprinkle on toasted coconut. Chill until ready to serve to let the whipped cream set up. Use the sling to pull the bars out of the dish, slice with a sharp knife, and enjoy!

If you liked this post, please:
Subscribe to Willow Bird Baking
Follow Willow Bird Baking on Twitter
Follow Willow Bird Baking on Facebook
Give this post a thumbs up on StumbleUpon
Pin It


Shareother ways to share this post with friends

1 22 23 24 25 26 35