crust

Red Berry Pie — Version 1.0

Author’s Note: I’ve updated and perfected this recipe! After reading the post below, please see Red Berry Pie — Version 2.0!

Last week I was basking on pluffy cloud nine after baking my first pie. I guess I needed a reality check, because the very next day I decided to give pie-making another go with considerably less amazing results. I wish I could share what I baked this weekend with you instead! It was the Daring Bakers challenge, and I’m giddy with the recipe and results. Unfortunately, I must save that until the 27th of the month, so for now, I present . . . failpie.

Well, that’s a little harsh. This is only a failure of texture/appearance, not taste. I was pleased as punch with the crust, and the strawberry and raspberry combination was perfectly tangy and sweet. With a dollop of homemade whipped cream on the whole concoction, it was actually a satisfying dessert. Mike and his dad even preferred it to the peach pie! When it comes down to it, the only problem with this pie was the texture of the filling. Sadly, the words “mushy” and “runny” are apt here. But even that, as it turns out, may have a relatively simple solution.


Ugly but tasty!

There are a few main reasons fruit pies can be runny (I did some research using the list of pie tips on DianasDesserts, as well as several other sites). The filling may not be cooked long enough. The fruit may have required more of a thickening agent (cornstarch, tapioca, and flour are common). But in my case, I don’t think the recipe was the culprit (it was from the cornstarch folks, for goodness’ sake). No, I’m guessing it was something even simpler; that is, the cooling time. Fruit pies need to be completely cool before being cut, and that can require up to four hours. Did I let my pie cool for four hours? Of course not. I didn’t plan four whole hours into my busy Sunday schedule! In fact, my pie barely sat for half an hour before I had to pack it up and head to dinner at Mike’s sister’s beautiful new home. What did I expect?!


Maybe we’ll just call it a cobbler? How’s that?

I do think you should make this pie, but with a couple of changes. First, some people recommend cooking your fruit with the thickening agent on the stove before filling your pie, thus ensuring the proper thickness. That sounds like a better idea than piling it all in the crust and hoping for the best, now doesn’t it? Second, you should use more berries than I did. I wanted my pie to be stuffed, but I was a little low on fruit this time around. Finally, of course, let your pie cool! Plan ahead and don’t be hasty.

I’m posting the recipe below as I used it, but feel free to tinker with the above aspects. I think this is going to be a real winner with a little work. I’ll have to let you know when I give it another shot.

Red Berry Pie, version 1


Recipe By:

Hodgson Mills (pie filling, adapted by me)
-Ina Garten (whipped cream)
-Me (crust)

Yields: One 9-inch, double-crust pie

Crust Ingredients:
4 cups flour
2 teaspoons salt
3/4 cup cold lard (non-hydrogenated if available)*
3/4 cup cold butter, chopped
6-8 tablespoons cold water
sugar (to sprinkle on before baking)
*you can substitute vegetable shortening here if you wish, but I highly recommend the lard!

Filling Ingredients:
1 pints of fresh or frozen raspberries
1 pound fresh strawberries
1 1/4 cup sugar
tiny pinch of salt
4 tablespoon cornstarch
1/2 teaspoon raspberry extract
1 tablespoon unsalted butter

Egg Wash Ingredients:
1 egg yolk
1 tablespoon heavy cream

Whipped Cream Ingredients:
1 cup heavy whipping cream
3 tablespoons granulated sugar
1/2 teaspoon vanilla (or flavoring of your choice)


Directions:

Pulse flour and salt together to combine. Add scoops of lard and pulse into the mixture has the texture of coarse sand, about 10 seconds. Add in chunks of butter and pulse until butter pieces are no larger than small peas, about 10 pulses. Add minimum amount of water and pulse on low. If dough remains crumbly and doesn’t come together, add another 2 tablespoons of water. Add as little as is required to enable the dough to be rolled into a ball. Form the dough into 2 disks, wrap in plastic, and refrigerate for 20-30 minutes.

Preheat oven to 450 degrees F. Roll one disk of dough out to around 2 inches larger than your pie plate and transfer it, situating it in the plate. Trim the excess flush with the edge of the pie plate.

Mix filling: In a large bowl, gently toss raspberries and strawberries together with sugar. Add cornstarch, raspberry extract and orange juice. Spoon into prepared pie shell bottom. Dot with butter.

Roll the other dough disk out to about 1 inch larger than your pie plate. Situate it over the filling, tucking the edges of the top dough behind the edge of the bottom dough and crimping the edges. Use excess dough to add dough cutouts to top of pie if desired (I made a heart).

In a small bowl, beat cream and egg yolk together for egg wash. Using a pastry brush, brush the surface of the top pie crust (can sprinkle lightly with sugar if you desire). Cut vents in the top crust. Shield crimped edges of pie (and any dough cutouts) with foil. Place on parchment paper lined cookie sheet and place on lower third of oven. Bake 15 minutes, reduce heat to 375 degrees F and bake until juices are bubbling through vents and pastry is browned, another 25-30 minutes. For the last 15 minutes, remove foil shielding. Allow pie to cool completely (around 4 hours minimum).

Serve with vanilla ice cream or homemade whipped cream. To make homemade whipped cream, mix all ingredients together until soft peaks are obtained.


The pie all foil-shielded and baking its heart out.


I can almost hear the tiny pie voice imploring, “Let me cool!” Alas.

Peach Crisp Pie

I have two options here. Option 1: I could throw up a picture of the gooey, hearty peach pie I just made and nonchalantly describe the process. I could pretend that making the flaky crust was a cinch, my kitchen stayed miraculously spotless throughout the effortless endeavor, and oh, by the way, my apron matches the bow in my carefully coiffed hair. Or option 2: I could tell the truth.

I’m an honest woman. The truth is, today was a disaster. A disaster that did end in the aforementioned gooey, hearty peach pie (thank God), but a disaster nonetheless. First of all, I was not planning on making a pie, but pie pockets.

It all started when Heidi over at Heidi Bakes posted these scrumptious looking Apple Hand Pies. Those little pie pockets caused all the trouble! They were so beautiful! And so PERSONAL — if I were talking to my 6th graders, who are practicing analogies, I’d say that cupcakes are to cakes what pie pockets are to pies. I had to make them! All of a sudden, I went a liiiittle bit insane (no really, ask Mike about my late night pie pocket instant messages) about the possibilities.

Here’s just a BRIEF list of all the possible pie pockets that ran through my head:

  • broccoli, cheese, and ham pie pockets
  • raspberry pie pockets
  • apple cranberry pie pockets
  • cherry pie pockets
  • strawberry cherry pie pockets
  • banana, oat, and nut pie pockets with gooey brown sugar, butter, streusel
  • blueberry pie pockets
  • NUTELLA pie pockets
  • pizza pie pockets
  • tomato, mozzarella, and basil pesto pie pockets
  • barbecue and apple pie pockets
  • peach and blueberry pie pockets
  • peach cobbler pockets
  • Philly cheesesteak pie pockets
  • beef burgundy pie pockets
  • coconut cream pie pockets

So what’s the problem? All of that sounds great (in fact, I’m getting excited all over again, which is pretty incredible considering the day I’ve had). Well, the problem is my chronic do-too-muchitis. I can’t just make some cookies; I have to make three types of cookies, decorate them according to each recipient’s favorite color, and tie them up in individualized bows. I can’t just bake a cake; I have to turn it into cupcakes, add three different types of filling, and oh yeah, try one batch with cake flour as an experiment. Get the idea? Alas, my do-too-muchitis struck again. No hyperbole this time around: I couldn’t pick ONE flavor of pie pockets to bake today. I had to pick FOUR flavors (two savory, two sweet) of pie pockets to bake, knowing full well that I’d never made a pie crust before in my life (Oh, I didn’t mention that part yet? That’s right. Never.)

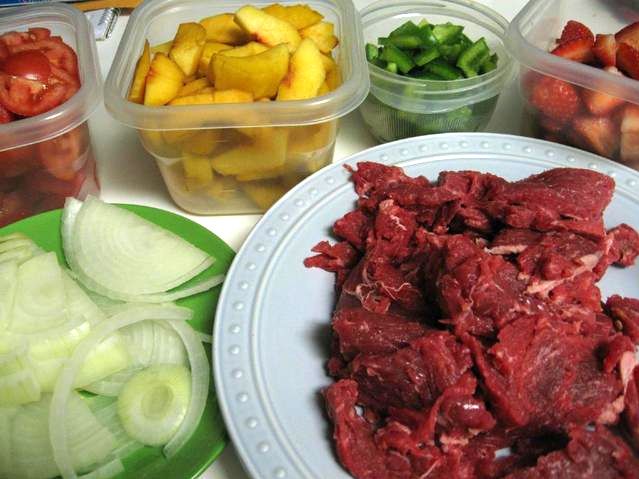
I had done my homework. I’ve been reading about crusts for weeks. For months. I bought my myriad ingredients and dedicated last night to my mise-en-place. Look how pretty!


Pie Pocket Mise-en-Place

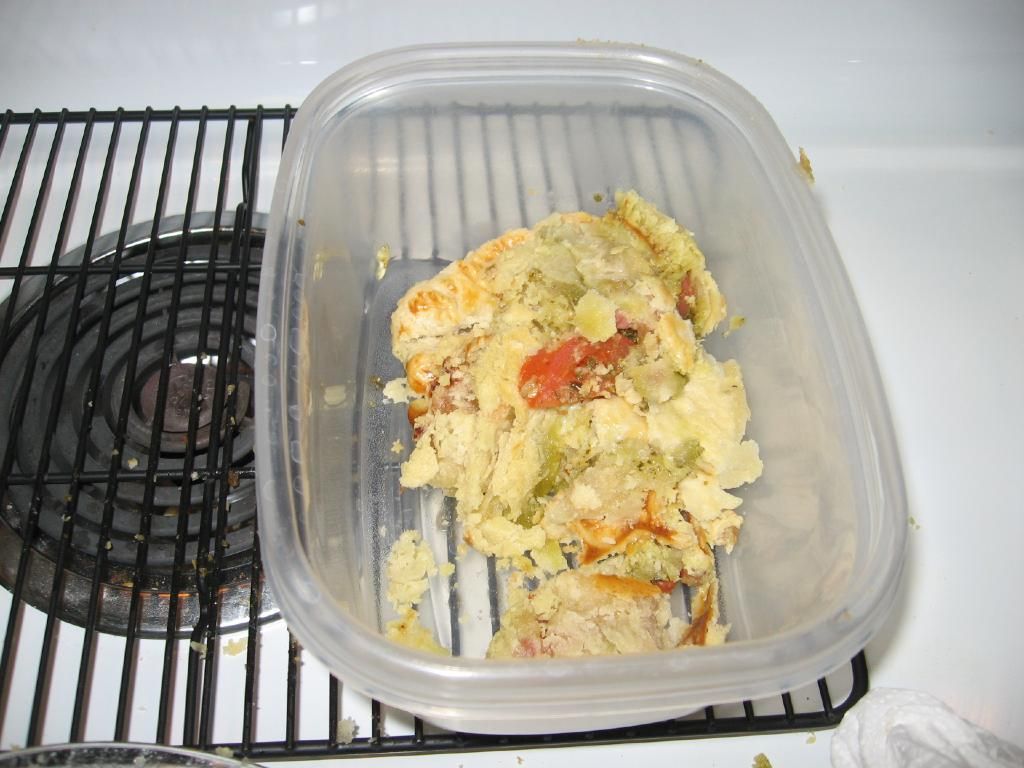
And I made my crust. Pretty simple, I thought, though perhaps a bit crumbly. Oh well. Into some plastic wrap and then into the refrigerator it went. This morning, I woke up early to do a quick assembly of each pie pocket before baking — easy as pie, right? — only to find that a bit crumbly was actually falling apart crumbly. Those that didn’t crumble to pieces before baking certainly did so after.


The picture no respectable food blogger would show: failpies!

All of you professional pie crusters know what I did wrong: I was stingy with my water. But since Julie Powell’s meltdowns in the movie Julie & Julia hit a little too close to home for me, I’ve been trying to take my mother’s advice. She told me once before a major baking project, “You just have to have a sense of humor about things that go wrong.” I also took Beth Moore’s advice and yielded to the right passion — delighting in the Lord instead of giving way to anger. In short, I channeled every known resource for avoiding a kitchen meltdown, and changed gears.

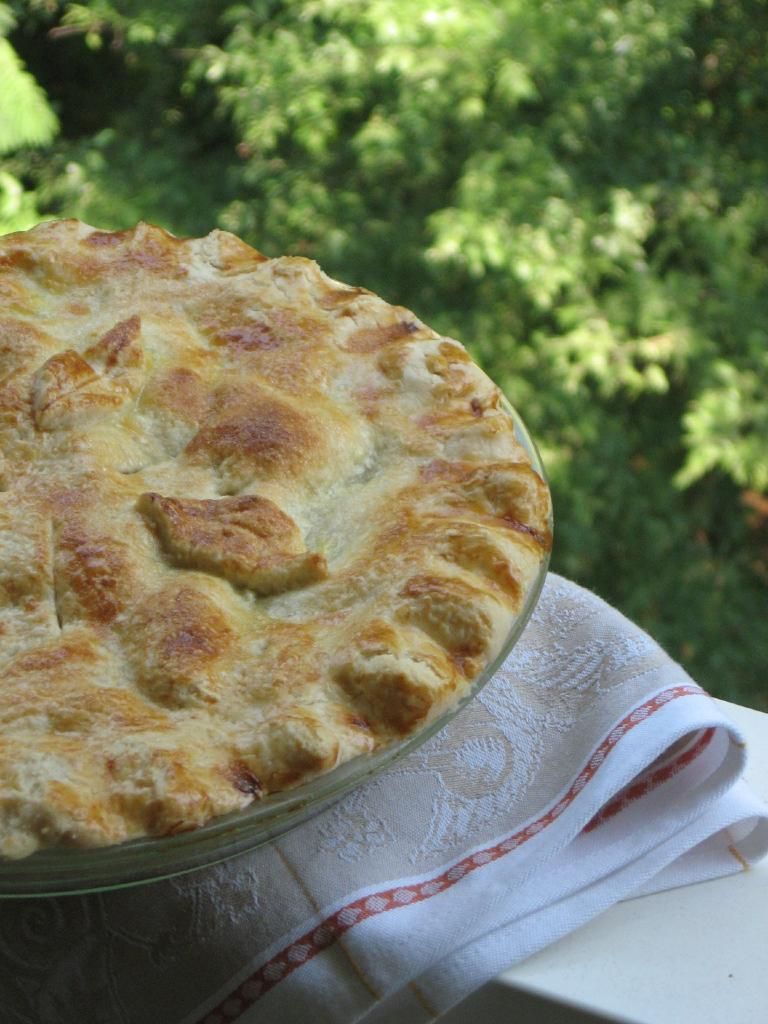
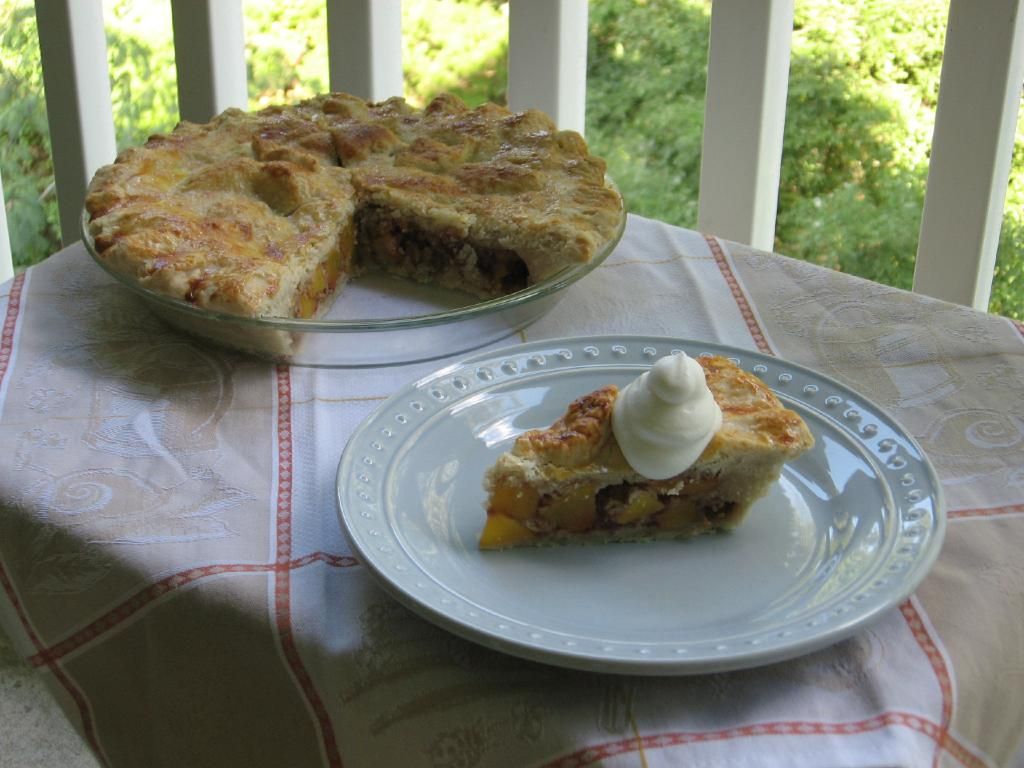
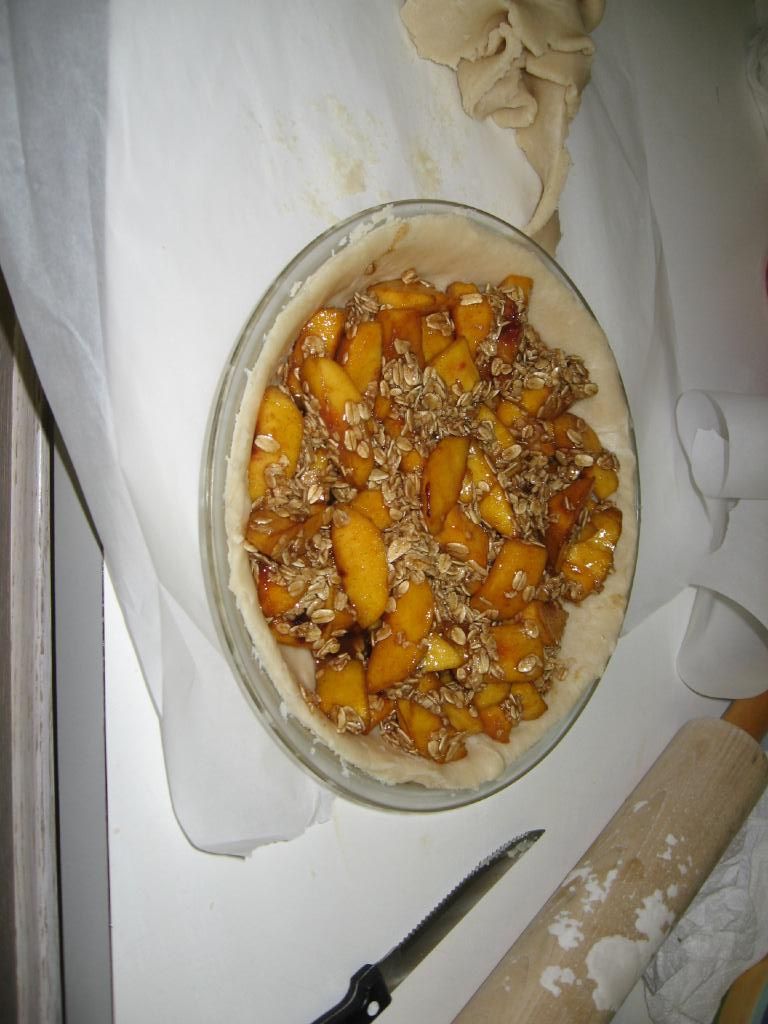
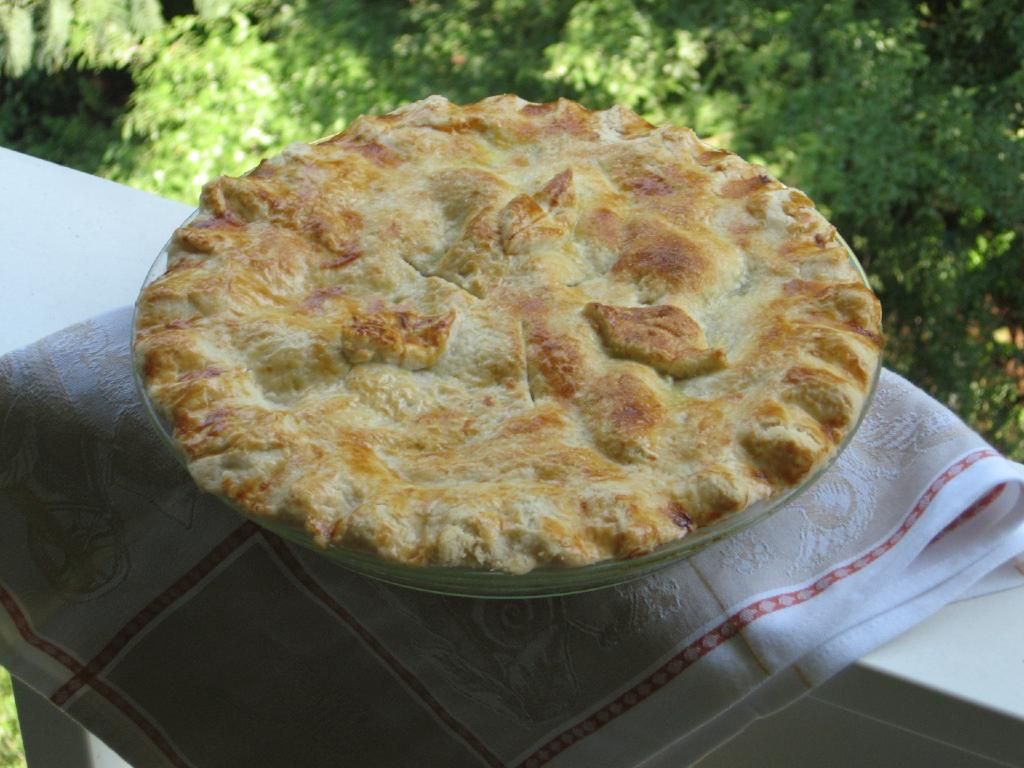
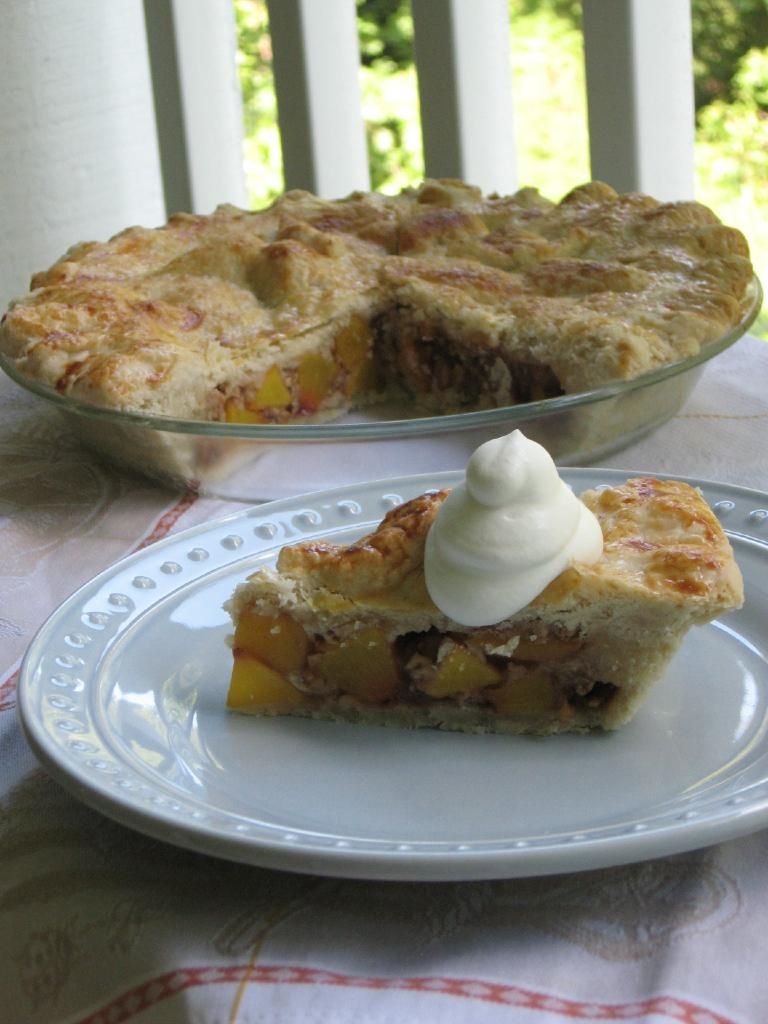
I would conquer the pie crust! And I would not waste one of my most exciting pie pocket fillings: peaches covered in gooey brown sugar and oats. So I dusted myself off (quite literally) and made another batch of pie dough. Shoving my do-too-muchitis aside, I made ONE LOVELY PIE, and boy, was that enough! I was still fighting my sullen mood until I took the first magical bite, and suddenly, all the baking was worth it. The crust? Perfect, tender, flaky, buttery. The filling? An indulgent cinnamon-and-spice herald of the coming fall. When topped with a mound of homemade whipped cream, I feel comfortable saying this is the best pie I’ve ever eaten. So after a long day of dough crises, recipe detours, and outrageous piles of dirty dishes, I’m proud to have ended up with a Peach Crisp Pie.

Oh, and to soothe my wounds a bit, I used the pie dough trimmings to make one last attempt at a pie pocket and was finally successful! Now that I’ve learned my dough lesson, count on seeing a pie pocket post in the future. Until then, I hope you’ll sit back, watch the leaves change, and eat some pie.

Peach Crisp Pie


Recipe by: Willow Bird Baking (crust adapted from Crisco; help from here)
Yields: One 9-inch, two crust pie


Crust Ingredients:
4 cups flour
2 teaspoons salt
3/4 cup cold lard (non-hydrogenated if available)*
3/4 cup cold butter, chopped
6-8 tablespoons cold water
*you can substitute vegetable shortening here if you wish, but I highly recommend the lard!

Filling Ingredients:
5-6 peaches, peeled and quartered
1/2-3/4 cup packed brown sugar
1-2 tablespoons granulated sugar (to taste)
1 teaspoon ground cinnamon
3/4 cup oats
pinch salt

Egg Wash Ingredients:
1 egg yolk
1 tablespoon heavy cream

Whipped Cream Ingredients:
2 cups heavy whipping cream
1/4 cup powdered sugar
1/2 teaspoon vanilla (or flavoring of your choice)


Directions:
Pulse flour and salt together to combine. Add scoops of lard and pulse into the mixture has the texture of coarse sand, about 10 seconds. Add in chunks of butter and pulse until butter pieces are no larger than small peas, about 10 pulses. Add minimum amount of water and pulse on low. If dough remains crumbly and doesn’t come together, add another 2 tablespoons of water. Add as little as is required to enable the dough to be rolled into a ball. Form the dough into 2 disks, wrap in plastic, and refrigerate for 20-30 minutes while preparing your filling.

For filling, mix all ingredients together in a medium bowl.

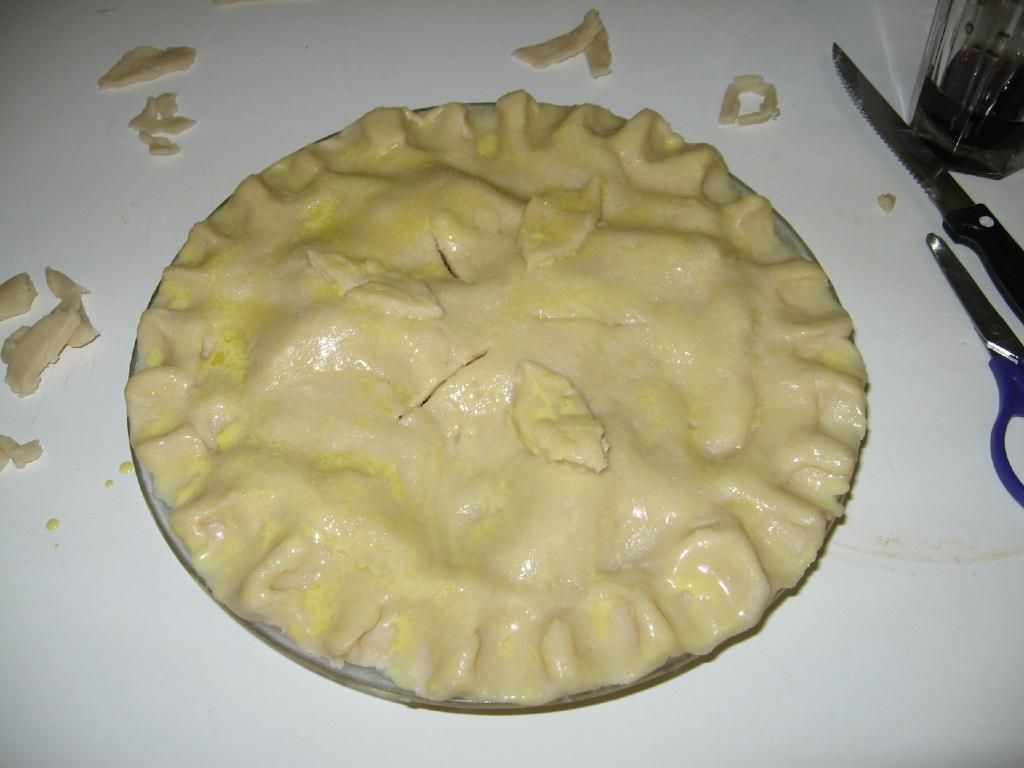
Preheat oven to 450 degrees F. Roll one disk of dough out to around 2 inches larger than your pie plate and transfer it, situating it in the plate. Trim the excess flush with the edge of the pie plate. Fill the pastry covered plate with filling. Roll the other disk out to about 1 inch larger than your pie plate. Situate it over the filling, tucking the edges of the top dough behind the edge of the bottom dough and crimping the edges. Use excess dough to add dough cutouts to top of pie if desired (I made some fall leaves).

In a small bowl, beat cream and egg yolk together for egg wash. Using a pastry brush, brush the surface of the top pie crust (can sprinkle lightly with sugar if you desire). Cut vents in the top crust. Shield crimped edges of pie with foil. Bake in preheated oven for 10 minutes before turning the heat down to 350 degrees F and baking 30-35 minutes longer. For the last 15 minutes, remove foil shielding. Allow pie to cool completely. Serve with vanilla ice cream or homemade whipped cream. To make homemade whipped cream, mix all ingredients together until soft peaks are obtained.


1 10 11 12