coconut

Buttery Coconut & Almond Morning Buns

I was floored to see that Willow Bird Baking is a finalist for SAVEUR Magazine’s Best Baking & Desserts Blog. Thank you so much for making this happen. If you’d like to vote for Willow Bird Baking, you can do so here. You all are truly wonderful.
Batik . . . Issei . . . Caballero . . . Kuchen . . . Coffle . . . Lariat . . . Trepak . . . Twoling . . .

The spelling bee pronouncer carefully enunciated one word after another, round after round. The dwindling pool of contestants seethed: a child was always approaching the microphone timorously, bouncing back to their seats triumphantly, or moping over to their consoling families. I sat in the audience rigid with excitement, scribbling each word on the back of an old envelope I’d found in my cavernous purse.
Watching my student compete in the 72nd annual Winston-Salem Journal Regional Spelling Bee was already an ideal afternoon for a logophile like myself, but making the event even more wonderful was the fact that Mike was at my side. Since the Bee took place about halfway between our two cities, he agreed to meet me for a nerdy date! As I frantically attempted to spell each word before the contestant had a chance, he did math in his composition book. (We’re quite the exciting pair.)
My student did a phenomenal job. She got out (with only 5 contestants left!) on the word ringent. If you’re being honest, you’ll probably admit that you didn’t really know how to spell ringent, either, so that’s not bad at all for a 12-year-old. She was disappointed, but I was thrilled with her performance. She still has two full years of eligibility, and since we were so close this year, I fully expect to travel to D.C. eventually to watch her in the National Bee.

After she left with her family, Mike and I set out to explore Winston-Salem. We scanned every restaurant on the main thoroughfare (to appease me; Mike would’ve been happy just to choose one) before finally settling in for pizza and more nerd talk. Mike taught me about hyperbolic conservation laws. We then ambled down the street looking for dessert (or in my case, two desserts, ’cause that’s how I roll.)

ha ha, get it?

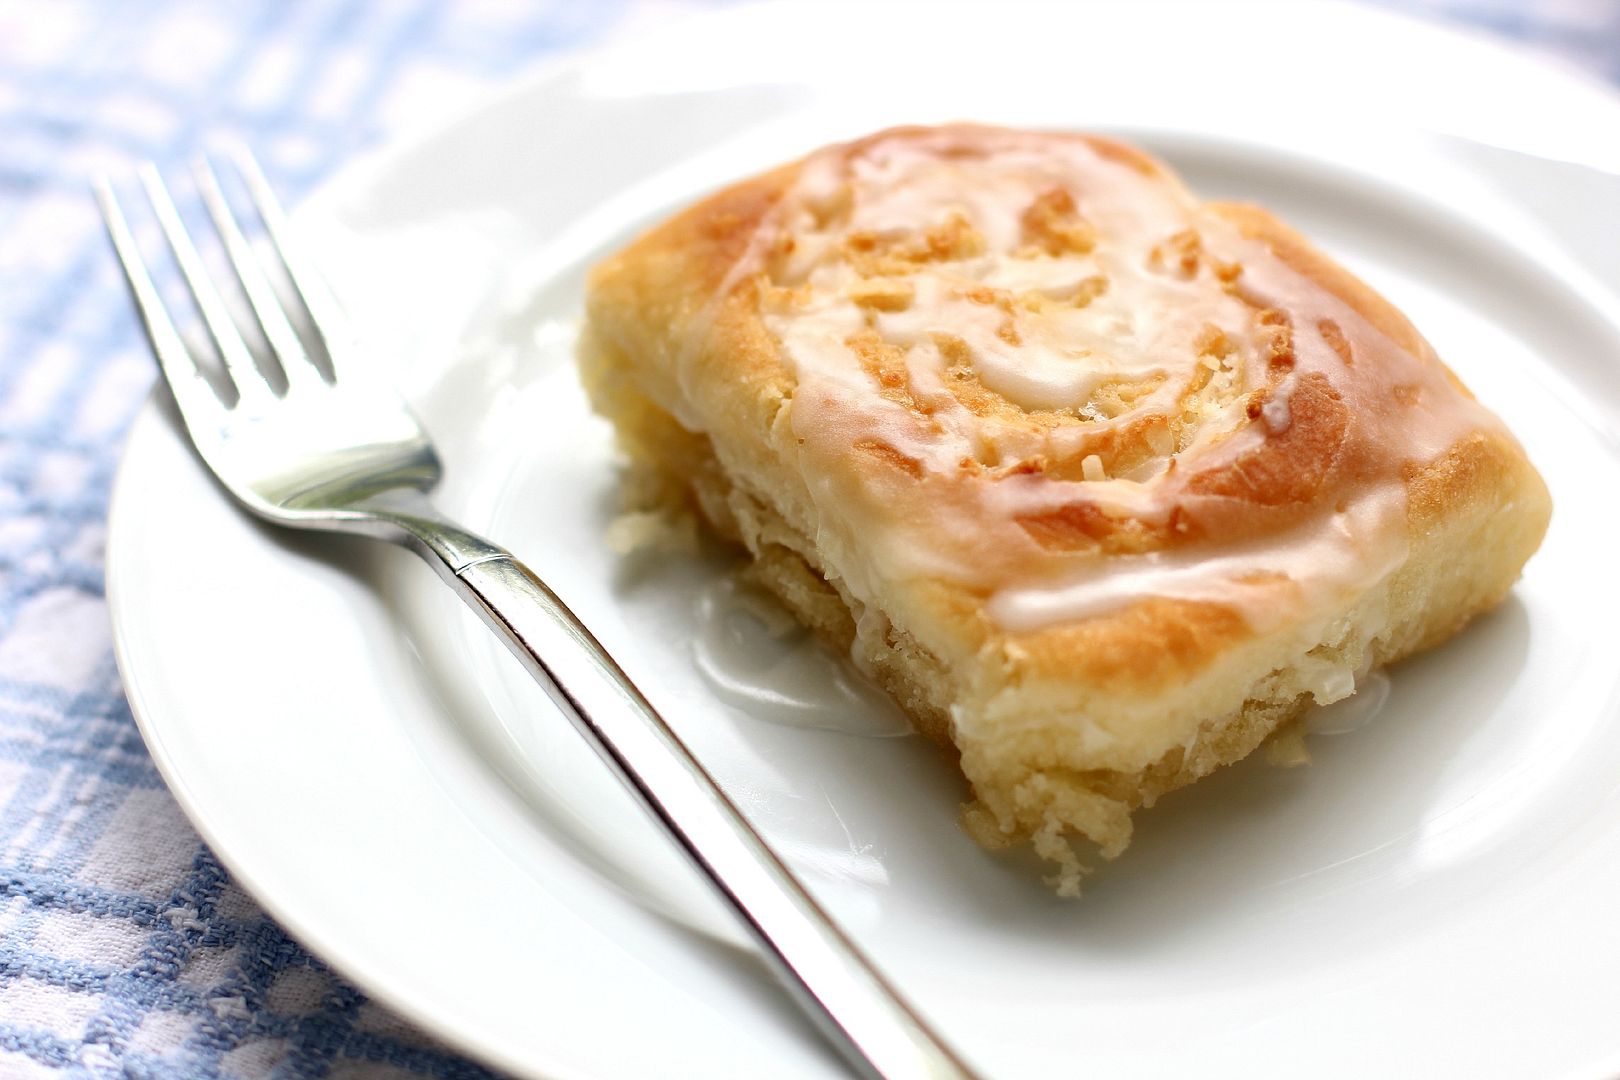
One of our dessert stops was at a little coffee shop and bakery where Mike ordered a coconut roll. The flaky pastry was reminiscent of a cinnamon roll, but stuffed instead with toasted coconut. We both enjoyed it, but as soon as I tasted it I told him, “I can do better. I’m going to make you one of these and it’s gonna be insane.” I tucked the mission down into my heart while he promptly forgot about it.

The afternoon was also filled with other lovely things. After buying me a coffee-flavored frozen custard cone, we ambled until we found ourselves seated on a rickety bench outside of a beautiful Moravian church. About a dozen cherry trees heavy with blossoms surrounded us and swayed in the breeze. The sky was a pretty slate blue that belied the sunshine and hinted at an impending spring shower. I think we talked about Moravian chicken pies and guinea hens (one sauntered by us nonchalantly while we were talking — maybe that’s normal in Winston-Salem?), but more important than the conversation was my hand in his, my head on his shoulder.
It was a perfect date. I’m sure Mike drove away thinking about partial differential equations or something in that vein, but I drove away thinking of coconut rolls (oh, okay, and love and hearts and romance and stuff).

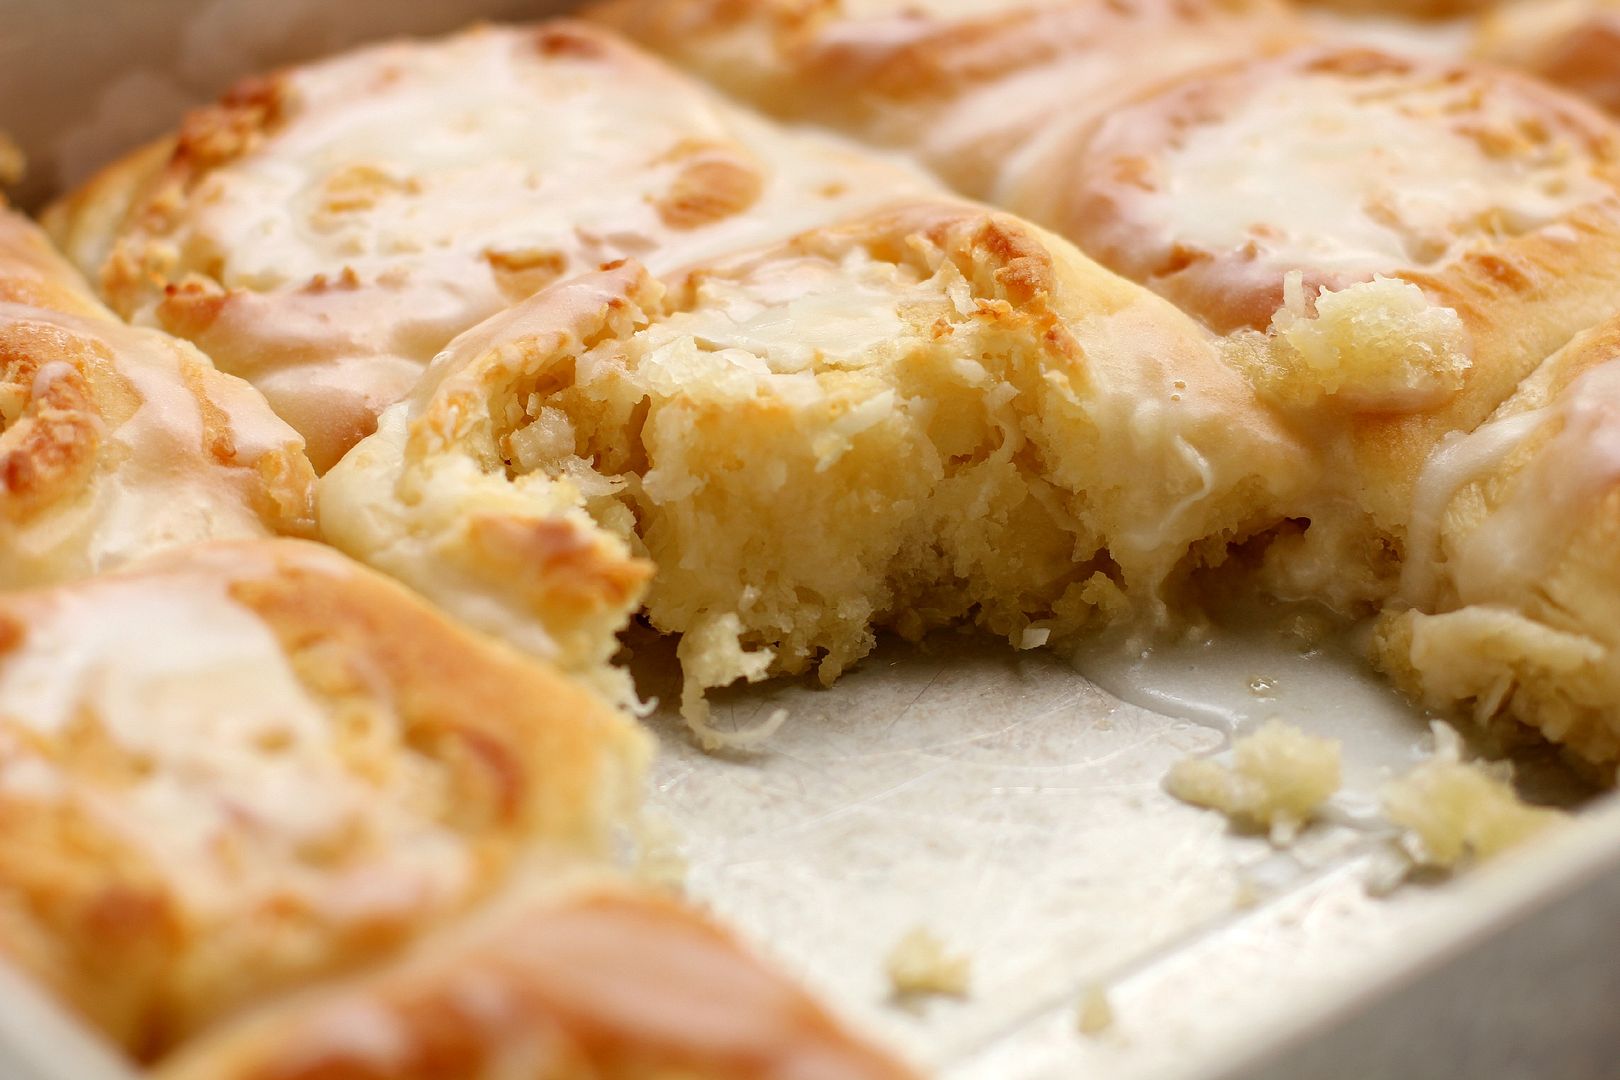
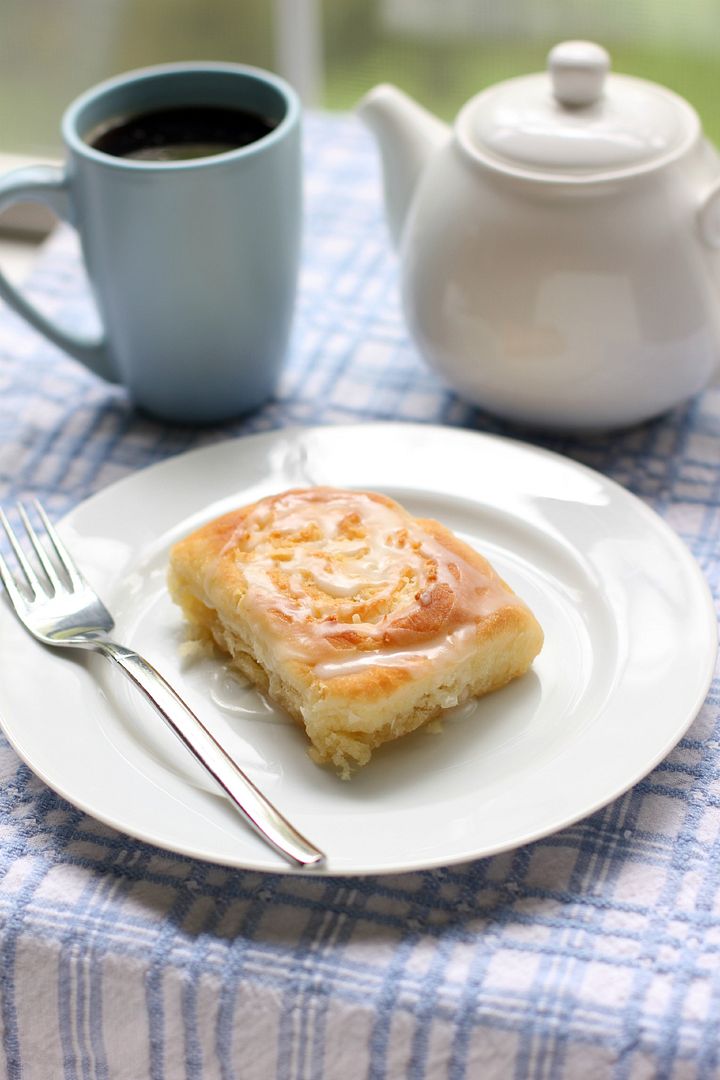
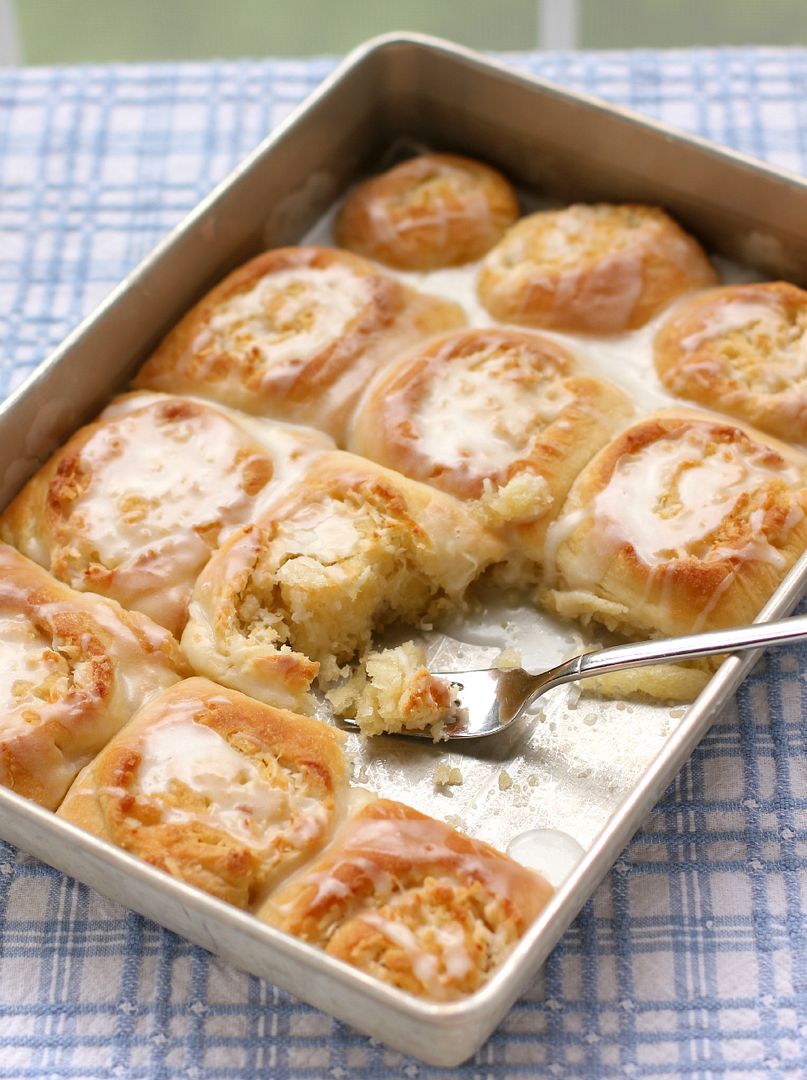
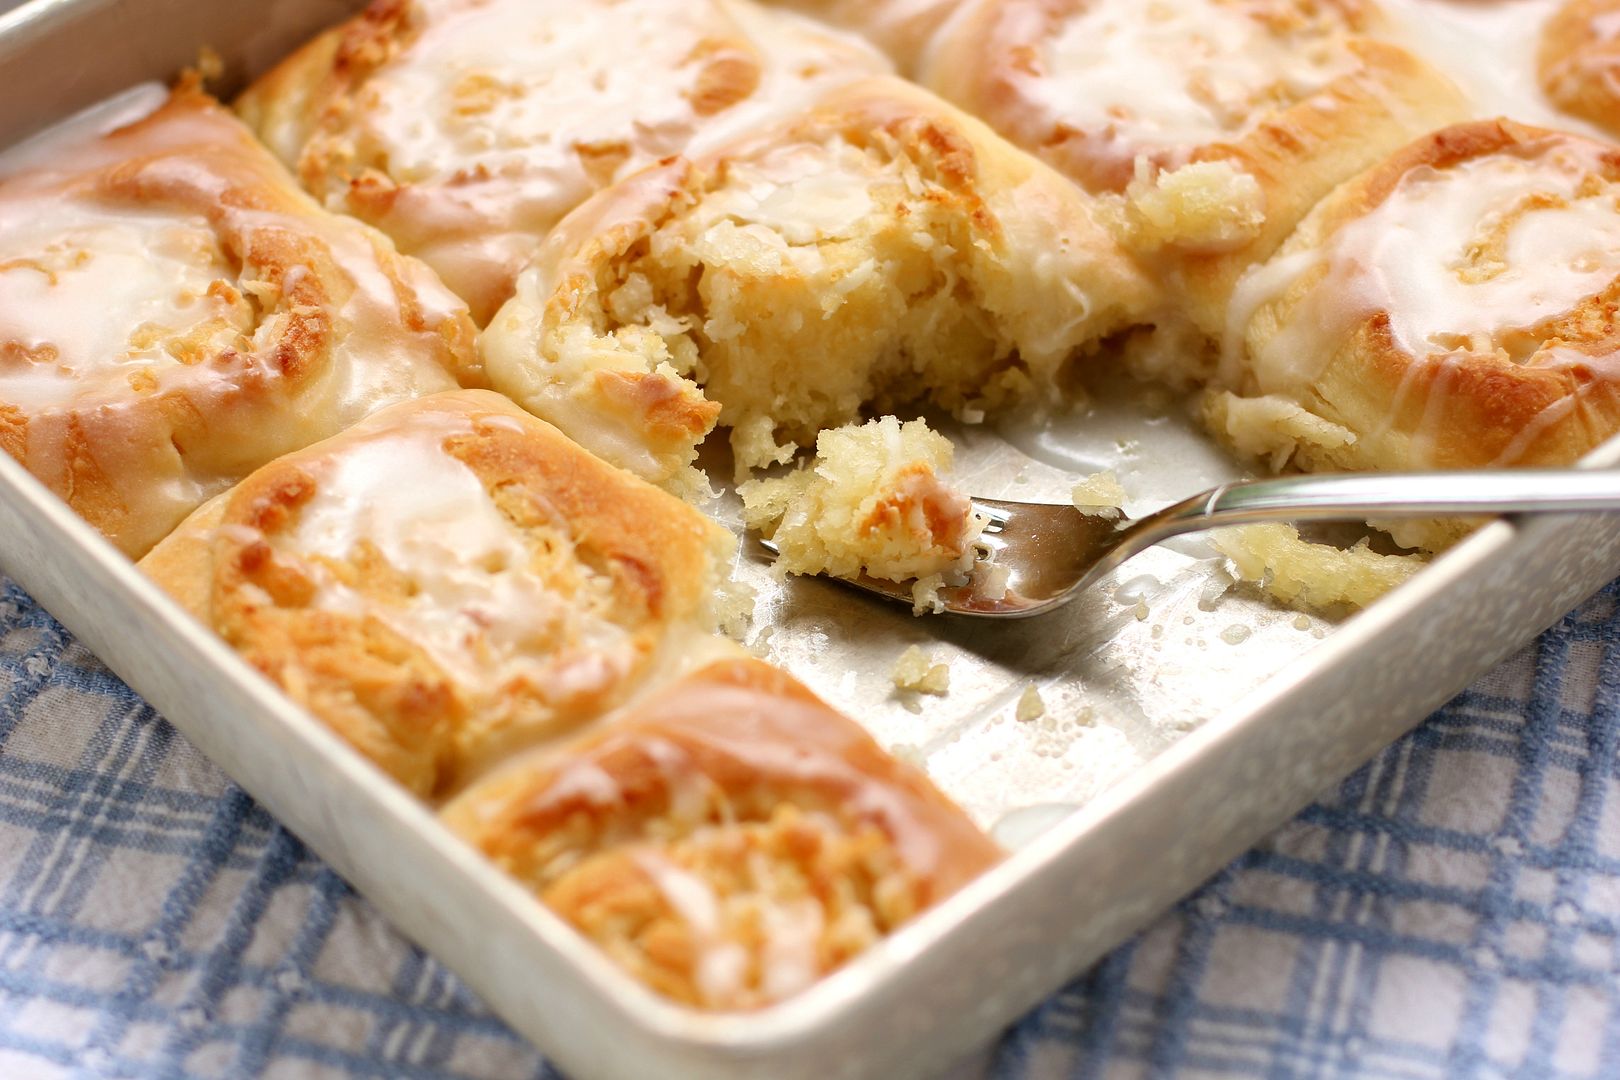
It took me a couple of weeks to get around to experimenting, but when I finally did, these lovely Coconut & Almond Morning Buns were the result. They were even more phenomenal than I’d imagined: buttery, gooey, and delicate, with a gorgeous balance of sweet coconut and subtle almond. I proudly presented them to Mike, who had forgotten all about the Winston-Salem coconut roll but wholeheartedly enjoyed my revamped version nonetheless.
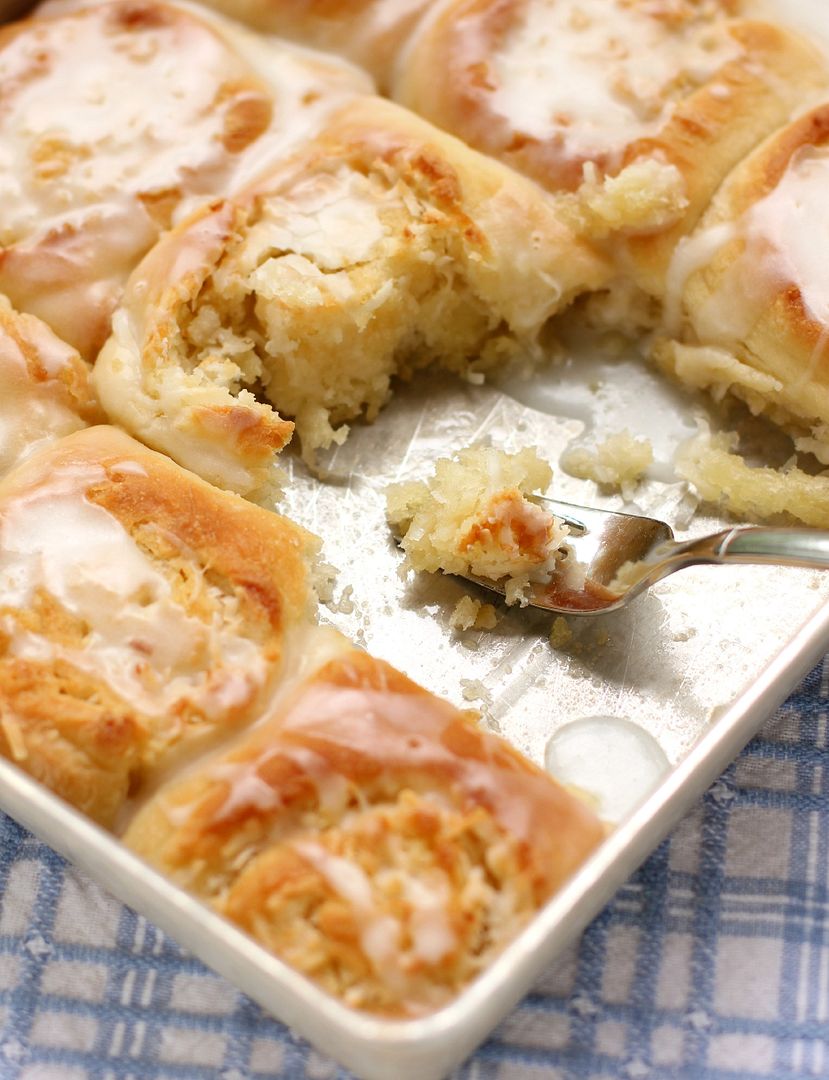
By the way, if you’re wondering: yes, these buns whipped the coffee shop’s coconut rolls right out of the mixing bowl. Not that I’m competitive or anything.

Everyone remembers the word they got out on in their childhood spelling bee. What was yours? (I got out on “eclipse” in 5th grade and “monotonous” in 6th.)

Buttery Coconut & Almond Morning Buns


Recipe by: Willow Bird Baking
Yield: 24 buns

These morning buns could easily double as dessert. They are fluffy, gooey, buttery, and beyond delicious. There’s a lot of butter in this recipe, making it a special occasion treat, but I hope you’ll find a space for these rolls on your Easter brunch table. They definitely belong in the spotlight.

Roll Ingredients:
1 package (2 1/4 teaspoons) active dry yeast
1/4 cup warm water (100-110 degrees F)
2 tablespoons white vinegar
2 cups milk minus 2 tablespoons, room temperature
2/3 cup cold shortening (I use butter flavored Crisco)
3 tablespoons sugar
1 teaspoon salt
1 teaspoon baking soda
1 teaspoon baking powder
5 cups flour
2 tablespoons butter, melted, for after baking

Filling Ingredients:
1 1/2 cup (3 sticks) butter, melted
1/2 teaspoon coconut extract
1/2 cup sugar
2 cups sweetened coconut flakes
7 ounces almond paste, frozen until firm and then grated with hand grater

Glaze Ingredients:
1 1/4 cups confectioners’ sugar
1/4 teaspoon almond extract
1/4 teaspoon coconut extract
2-3 tablespoons milk (to thin to drizzling consistency)

Directions:
Note: I don’t recommend halving yeast recipes; instead, if you don’t want 24 rolls at once, consider freezing some for later. To freeze some of the unbaked rolls, just wrap them well before the second rise and freeze them. Once frozen, pop them out of the pan all together and store in the freezer, wrapped in plastic wrap and in a zip top bag or wrapped in foil. When you want to bake them, stick them back in a greased pan, thaw them in the fridge overnight, proof for the instructed amount of time, and bake like usual.

Mix the warm water and yeast in a medium bowl and let the yeast foam for about 10 minutes. Put 2 tablespoons white vinegar in a measuring cup and then add milk up to the 2 cup line. Set this aside. In a separate large bowl (or the bowl of a mixer fitted with a dough hook), whisk together flour, sugar, salt, baking soda, and baking powder and cut the shortening into the mixture with two knives or a pastry cutter until the shortening looks like small peas. Stir yeast mixture and milk mixture into the dry ingredients and mix well, kneading just a few turns. Transfer the dough to a bowl lightly sprayed with cooking spray, cover tightly with plastic wrap, and store in refrigerator overnight.

The next morning, preheat the oven to 400 degrees F and lightly spray two 9 x 13-inch baking dishes with cooking spray. Turn the chilled dough out onto a floured surface and roll it into a large rectangle about 1/8-inch thick (I carefully cut the dough in half and worked with half at a time to make it more manageable; if you do this, just spread on half of the filling ingredients for each half you roll). Stir the coconut extract into the melted butter; then spread the melted butter all over the top of the dough. Sprinkle on the sugar, sweetened coconut, and almond paste flakes. Gently roll the dough up into a spiral and cut it into rolls, placing them close together in your prepared baking dishes (at this point, you could wrap and freeze the rolls for later if you wanted).

Cover the rolls with a clean dish cloth and let them rise in a warm spot until they’ve nearly doubled, about 1 1/2 – 2 hours. Bake them for about 15-20 minutes or until browned on top (if you take them out at just lightly golden brown, they may still be doughy in the center). Brush with 2 tablespoons melted butter and return to the oven for 1 more minute. Whisk together the glaze ingredients (adding milk to get it to drizzling consistency) and drizzle the glaze over the warm rolls. Serve immediately.

If you liked this post, please:
Subscribe to Willow Bird Baking
Follow Willow Bird Baking on Twitter
Follow Willow Bird Baking on Facebook
Give this post a thumbs up on StumbleUpon
Pin It

Chocolate & Coconut Cream Pie Bars

Several months ago, I attended the Foodbuzz Blogger Festival in San Francisco, California, 2,700 miles away from my home. Traveling alone is always a meaningful, reflective experience for me. To process my trip, I periodically share vignettes that I hope are meaningful to you, as well.

. . .

Normally, I would have said no.

On-the-spot requests for money make me nervous, and I made a rule years ago to always say no. I give food or supplies freely, as I’m able, to anyone who asks me for them. But I only give money if I have a space to sit, read about the organization, and make a thoughtful choice. That’s my rule, anyway.

But I wasn’t standing at a check-out counter being asked to donate a dollar to a charity, or walking down the street being asked for change. I was sitting on the BART, the Bay Area’s system of trains, and the little boy in front of me was adorably nervous. I waited politely as he took a deep breath and began a clearly well-rehearsed speech. It came out as one halting sentence.

“Hi-I-am-part-of-the-Boys-&-Girls-Club-and-we-are-raising-money-to-go-to-our-basketball-tournament-in-Reno-I-have-already-collected-all-but-$55-can-you-help-by-donating-today?” He took another big breath, obviously relieved to have finished his spiel.

I saw his friend delivering a similar pitch across the car and briefly considered that this might be an elaborate scheme to get more video game or snack money. My innate cynicism comes from personal experience, since I may or may not have canvassed my neighborhood when I was a tiny entrepreneur telling folks that I was an orphan soliciting donations for cancer treatments. Not one of my prouder moments. Thankfully, I don’t think anyone was fooled. A few people tried to tame their amusement as they slipped me some change, which, in hindsight, was unnecessarily generous.

Regardless of my own childhood scheming, I instinctively felt the child in front of me on the train was being honest, and what’s more, I decided I didn’t care. He had mustered up plenty of pluck to come ask me for a few dollars, and I was going to give them to him. I opened up my envelope of cash (such a tourist) and pulled out a few bills for him. His relief turned into joy. “Thank you!” he cried as he walked across the car.

I heard him deliver his pitch to another woman with a satisfied emphasis on his new balance: “…and all I need is $48 now!” She grinned at me as she handed him a couple of bills as well.

A few minutes later, I saw another passenger on the train say no. The boy, clearly coached to deal with this politely, veiled his disappointment as best he could and gave a resigned little nod. I glanced over at the woman and noticed she’d been watching the exchange as well. When she looked over at me, her face had the same sympathetic smile I was sure my own face was wearing. I didn’t blame the other passenger — after all, any other day and any other mood and I might have decided to follow my own rule — but I did resolve to pray for all the boys to get to go to their basketball tournament.

(And you know what? If he’s playing video games or eating some cheesy poofs with my money at this very moment, by golly, I hope he’s enjoying them.)

. . .

It’s funny how sometimes things — like a brief exchange on a train — build a little nook in your heart. Some moments are like that. Some people are like that.

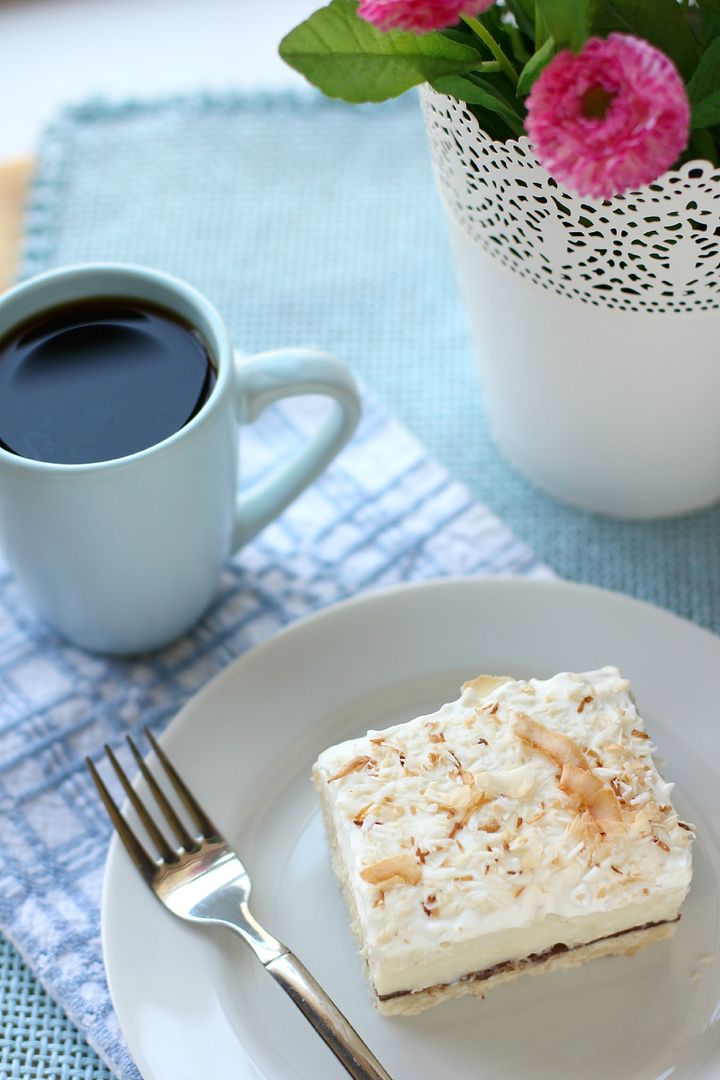
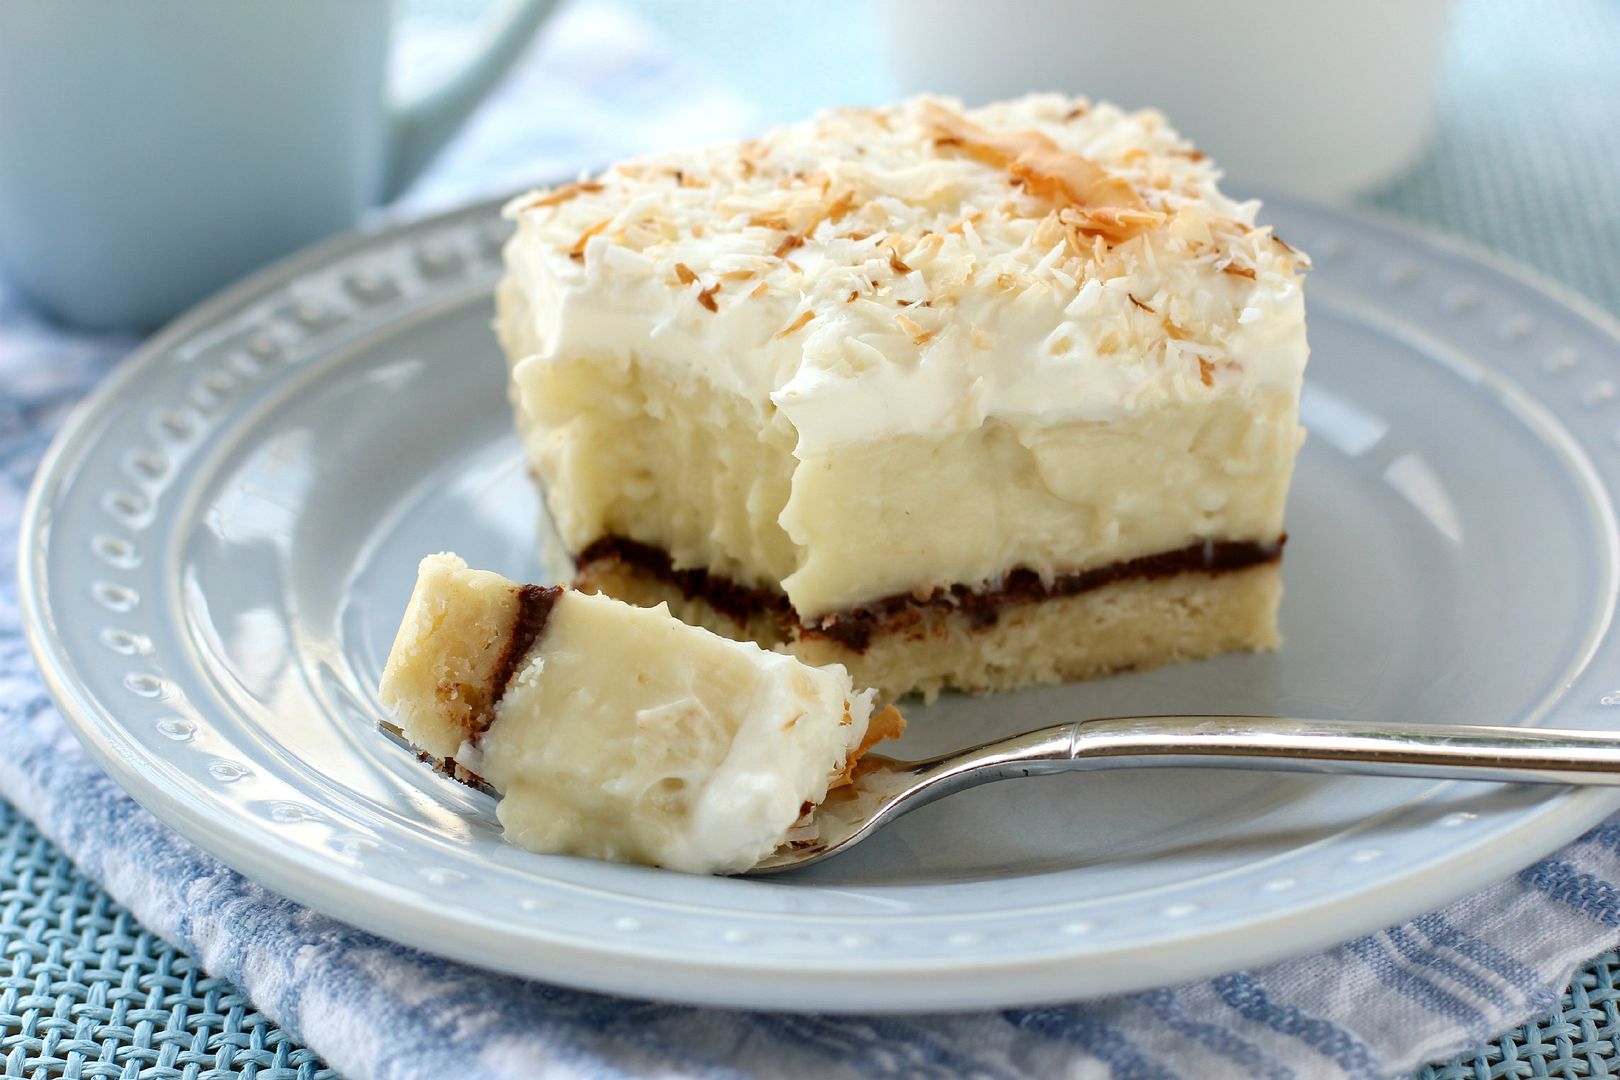
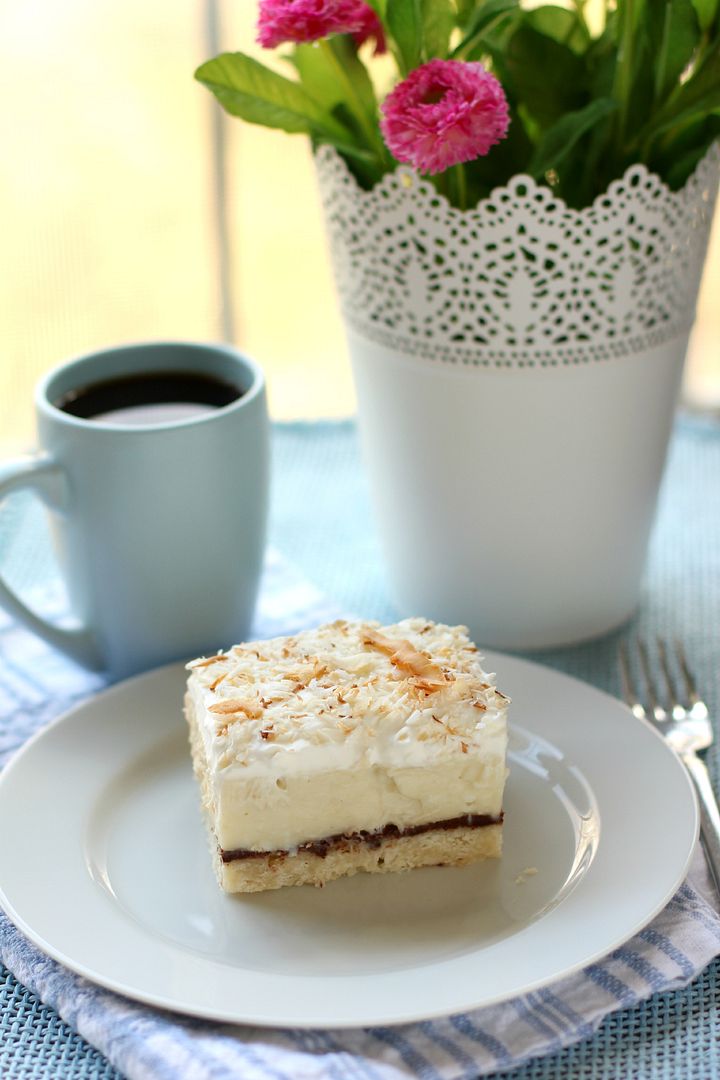
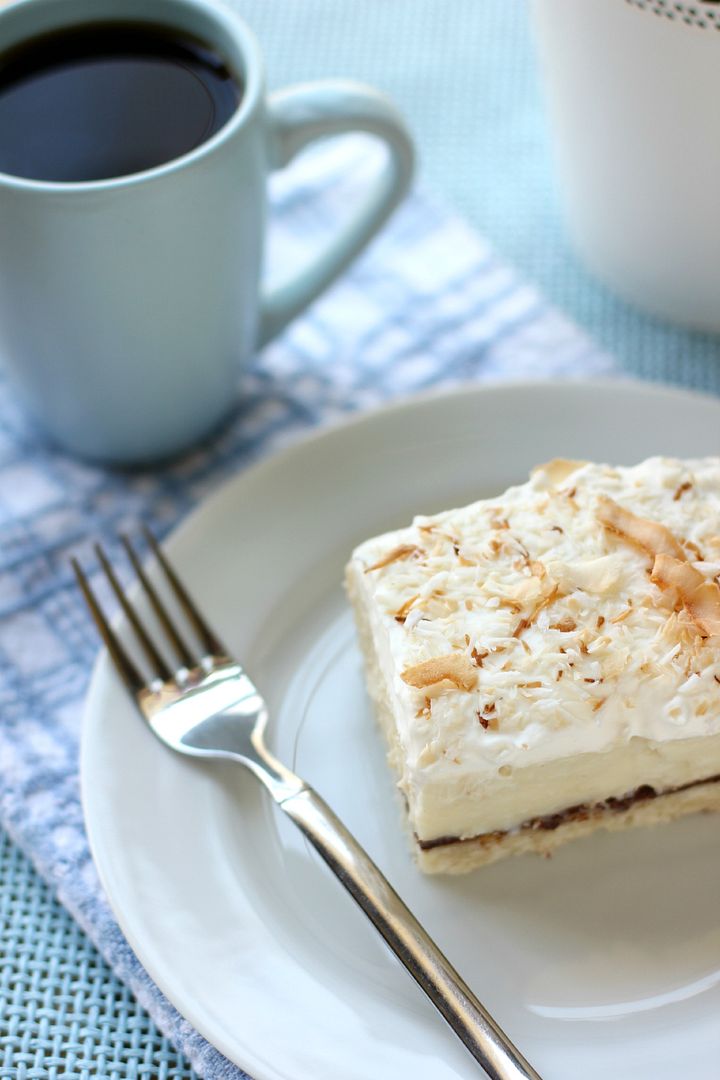
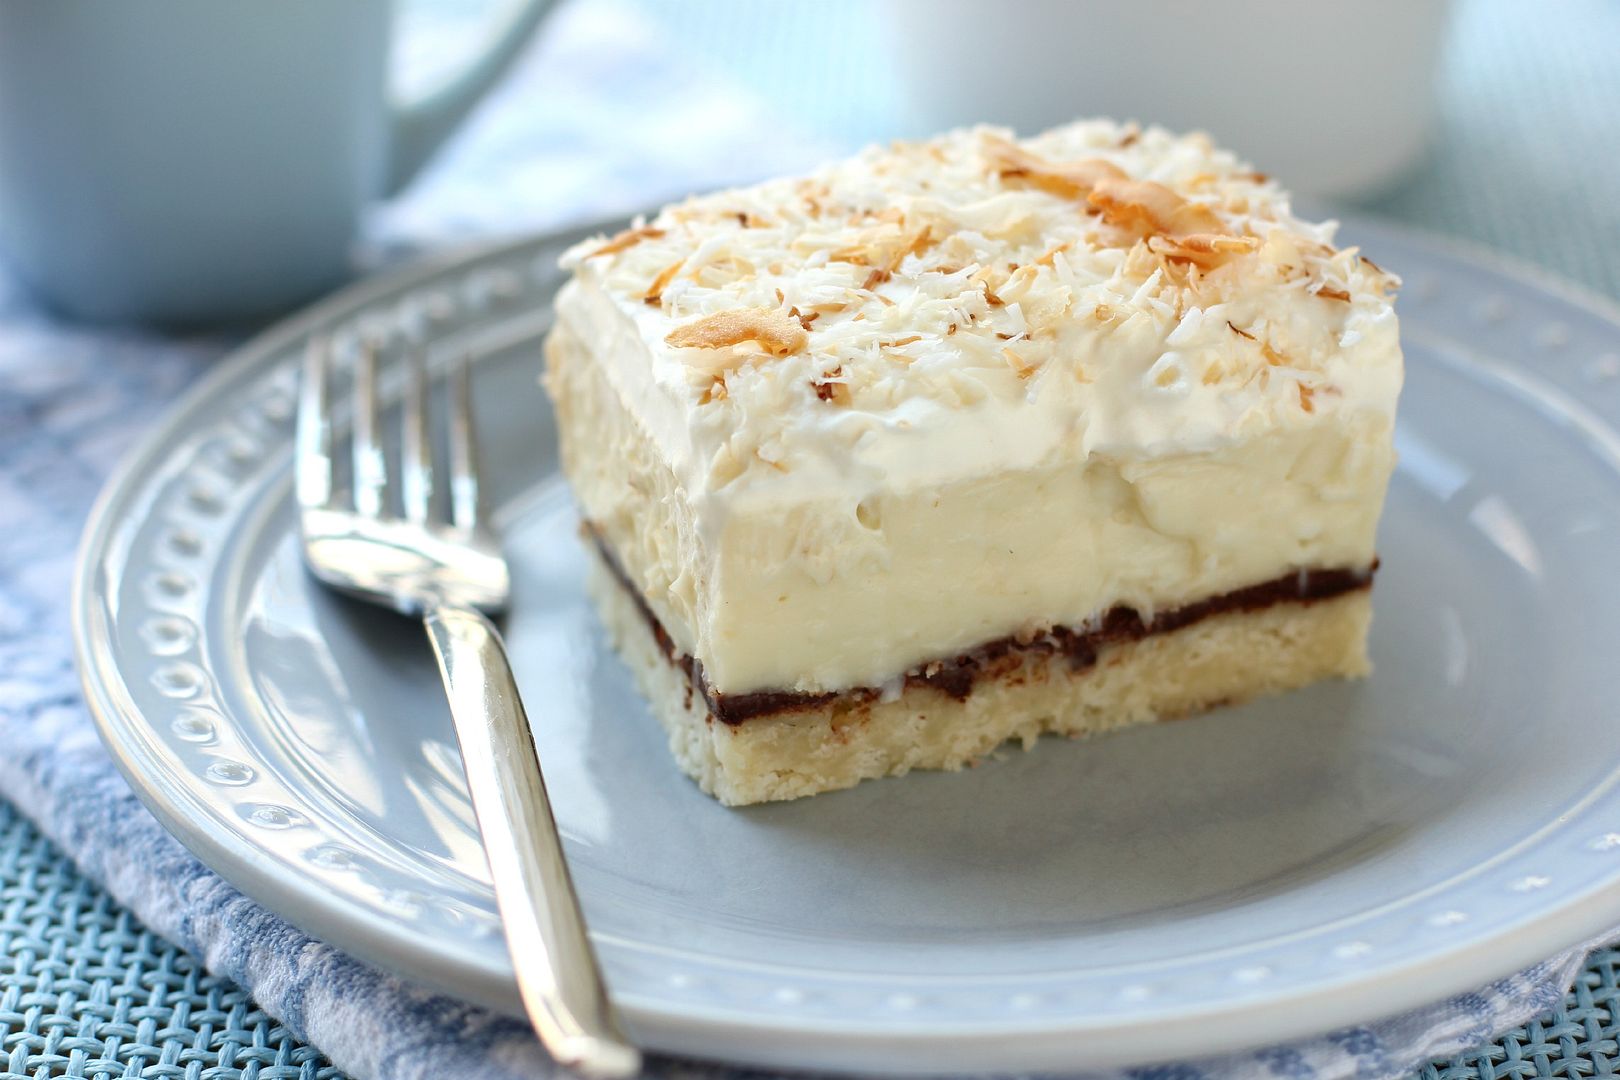
I made these Chocolate & Coconut Cream Pie Bars for a special person who occupies her own shelf in my heart. Martha is Mike’s great-aunt, for all intents and purposes, and she’s truly a crackerjack of a woman. She deserves all sorts of sweet things — video games and cheesy poofs, even! — but I decided on these bars for her birthday because I know she enjoys coconut. The chocolate layer was a whim, but what a great one — the bittersweet ganache is just enough to add a rich background flavor while still allowing the coconut cream to shine.

These bars take a little time and a little arm muscle, but they’re easy to assemble and more than worth the time spent by the stove. If you love a good coconut cream pie, you’ll love them.

Tell me about a moment when you broke one of your own rules.

Chocolate & Coconut Cream Pie Bars


Recipe by: Willow Bird Baking with filling adapted from All Recipes
Yield: 12-16 bars, depending on size

Okay, 30 minutes of stirring sounds like a lot. But now that I know how incredible these bars are, I would stir for an hour if I had to — maybe even two! They combine all the goodness of an old-fashioned coconut cream pie with the perfect amount of rich ganache. In short, these things are amazing. I used stabilized whipped cream on top of my bars, but if you’re serving them immediately and don’t anticipate keeping them long, feel free to just use plain whipped cream.

Crust Ingredients:
1 cup (2 sticks) butter
2 cups all-purpose flour
1/2 cup icing sugar

Ganache Ingredients:
3/8 cups heavy cream
about 3 ounces bittersweet chocolate chips (I love Ghirardelli’s 60% cacao chips)
about 3 ounces semisweet chocolate chips

Coconut Cream Filling Ingredients:
3 cups half-and-half
3 cups coconut milk
4 eggs
1 1/2 cups white sugar
2/3 cup cornstarch
1/2 teaspoon salt
1 1/2 cup flaked coconut
1/2 teaspoon coconut extract
1/2 teaspoon vanilla extract

Whipped Cream Topping Ingredients:
2 cups heavy whipping cream
1 tablespoon cold water (for stabilizing)
1 teaspoon gelatin (for stabilizing)
3-4 tablespoons icing sugar
1/2 cup coconut, toasted

Directions:
Make shortbread crust: Preheat your oven to 350°F. Prepare a 9 x 13 in. baking dish with a parchment paper sling (I use one long sheet across the length of my dish, and two overlapping short sheets across the width of my dish — just arrange it so that it has some overlap and overhang to help you pull the bars out after they’re finished). Cut the butter into the flour and icing sugar and press into the baking dish (I used a food processor to cut the fat into the flour — about 6 pulses — and then the bottom of a glass to press the mixture into the pan). Bake 18-20 minutes or until light brown. Set on a wire rack. Keep oven preheated for coconut toasting.

Make ganache: While the shortbread is baking, place the chocolate in a medium bowl. Bring the cream to a simmer in a medium saucepan (or microwave it for a couple of minutes). Once the cream reaches a simmer, pour the cream over the chocolate and let stand 1-2 minutes. Whisk in small circles until a smooth ganache has formed. Set it aside until your crust is finished and has cooled for a few minutes, and then pour it over the crust (it’s okay if it’s not cooled all the way). Place the chocolate covered crust in the fridge to chill until the ganache is set into a firm layer.

Toast coconut for the topping: Spread about 1/2 cup of the coconut flakes out on a baking sheet and toast for a few minutes, stirring every minute or so, until the coconut is golden brown. Spread it out on a plate to cool completely.

Make coconut cream filling: Combine the half-and-half, coconut milk, eggs, sugar, cornstarch, and salt in a large saucepan and bring it to a boil over medium-low heat, whisking constantly (this can take anywhere from 30-38 minutes. Some folks on All Recipes said you could zap it in the microwave for a minute at a time, stirring after every minute, until it was thickened. It was only supposed to take around 5-10 minutes, but I was too chicken to try. Let me know if you do.) Add coconut and vanilla extracts and the 1 1/2 cups of untoasted coconut and stir. Pour this filling over your chilled ganache and stick the whole thing in the fridge to chill until firm, about 2 to 4 hours.

Make whipped cream topping: Put 1 tablespoon cold water in a small bowl and sprinkle the gelatin evenly over the top. Let it soften for 2 minutes before microwaving it for 30 seconds and whisking to dissolve the gelatin. Using a chilled bowl and beater, whisk the 2 cups of heavy cream and icing sugar together until the cream forms stiff peaks, stopping to add gelatin mixture about halfway through. Dollop the cream over your bars and gently spread it around. Sprinkle on toasted coconut. Chill until ready to serve to let the whipped cream set up. Use the sling to pull the bars out of the dish, slice with a sharp knife, and enjoy!

If you liked this post, please:
Subscribe to Willow Bird Baking
Follow Willow Bird Baking on Twitter
Follow Willow Bird Baking on Facebook
Give this post a thumbs up on StumbleUpon
Pin It


Shareother ways to share this post with friends

Caramelized Banana Upside-Down Coconut Cake & Coconut Whipped Cream

I don’t remember the first spice I ever purchased with my own money, but I’m betting it was a packet of McCormick® chili seasoning. And I’m betting it was during my senior year of college. I lived in a cozy apartment above my professor’s garage. It was furnished with a blue couch from Goodwill that was missing its back legs, a twin bed, a sturdy desk, a dresser, and a couple of plants I was doing my best to keep alive.

There wasn’t a kitchen, but there was a fridge downstairs in the garage and a microwave in my room. Mike assembled an electric skillet for me (he likes to say, “remember that skillet I built you?”) as well. My makeshift “kitchen” wasn’t much, but since I’d left the comfort (and cost) of a meal plan behind the previous year, it would have to do.

Many of my meals were hot dogs and quesadillas, usually devoured with lots of salsa while watching The Cosby Show, or People’s Court. But I did call my mom and ask her to send over her chili recipe — the one we ate with peanut butter maple syrup sandwiches when I was little.

Heading to the grocery store to buy the chili ingredients was the beginning of a new adventure for me. In those days, the aisles and ingredients were unfamiliar, and I ambled to and fro searching for each item. Each line of the recipe flooded my head with new questions: Where are the canned tomatoes? Do I buy dry beans or canned? Where is the spice aisle? How lean do I want my ground beef? Wait, do I own a spoon?

I do remember my mom specifying that she used McCormick’s chili seasoning though. And I remember sprinkling the packet on my ground beef just as she’d instructed. And finally, I remember the utter satisfaction of sitting down with a bowl full of cheesy, sour creamy, spicy chili (and watching A Different World, no doubt) that I’d made myself.

McCormick is definitely a part of my earliest cooking memories, and it claims a huge chunk of my spice rack (or really, spice shoe organizer) today. Far from being stuck in the past, though, the company released the McCormick Flavor Forecast 2012 on Tuesday.

This report, compiled by chefs, sensory scientists, trend trackers, marketing experts, and food technologists, highlights up-and-coming flavor trends around the world. It’s used both to guide the company’s product development as well as to inspire home cooks with new flavor combinations.

While McCormick has been producing a Flavor Forecast since 2000, this year’s report is the first to be global in scope. It’s organized into six trends: Honoring Roots, Quest for the Ultimate, Veggies in Vogue, Simplicity Shines, Flavorful Swaps, and No Boundaries. Each trend includes two innovative spice and ingredient combinations to spark your culinary creativity.

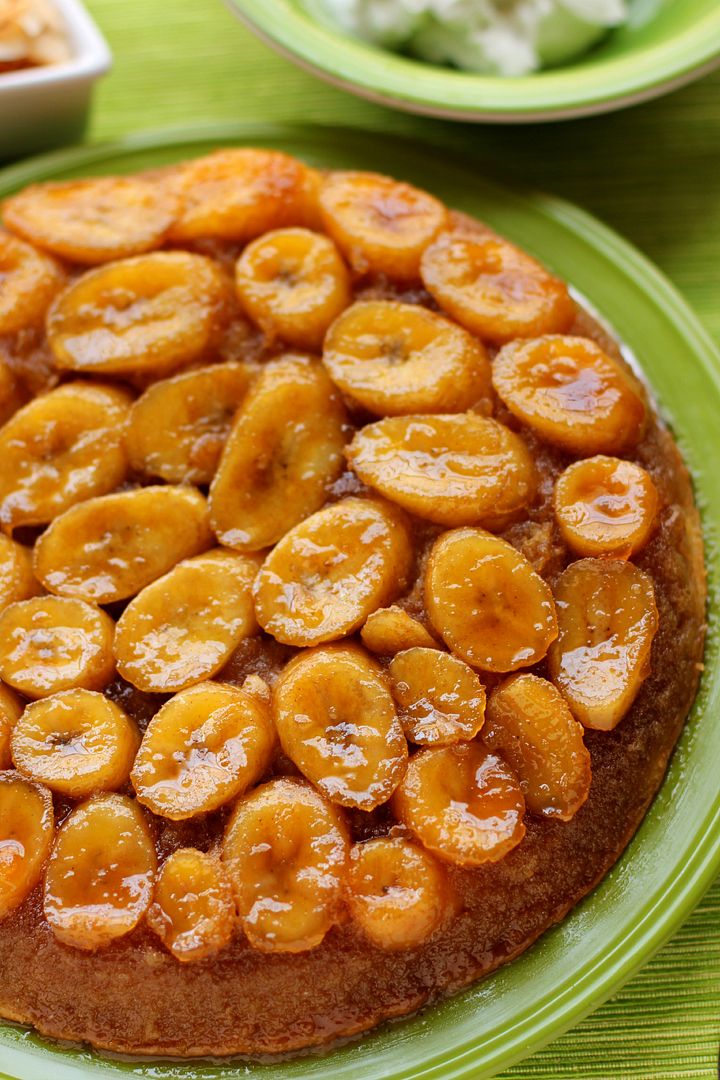
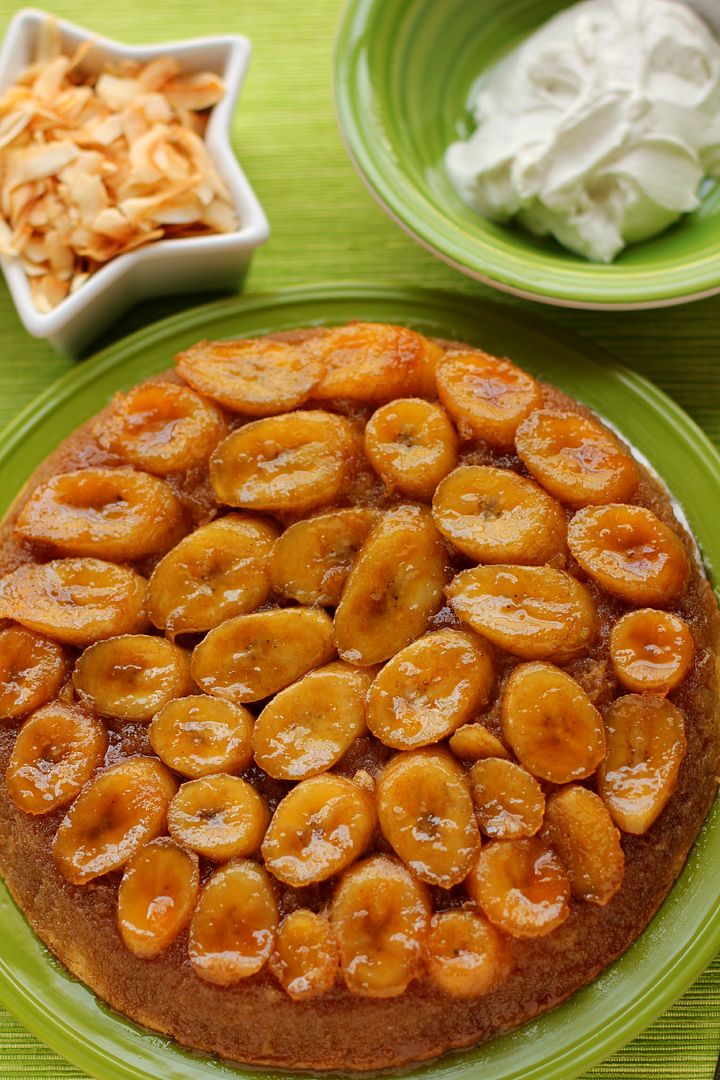
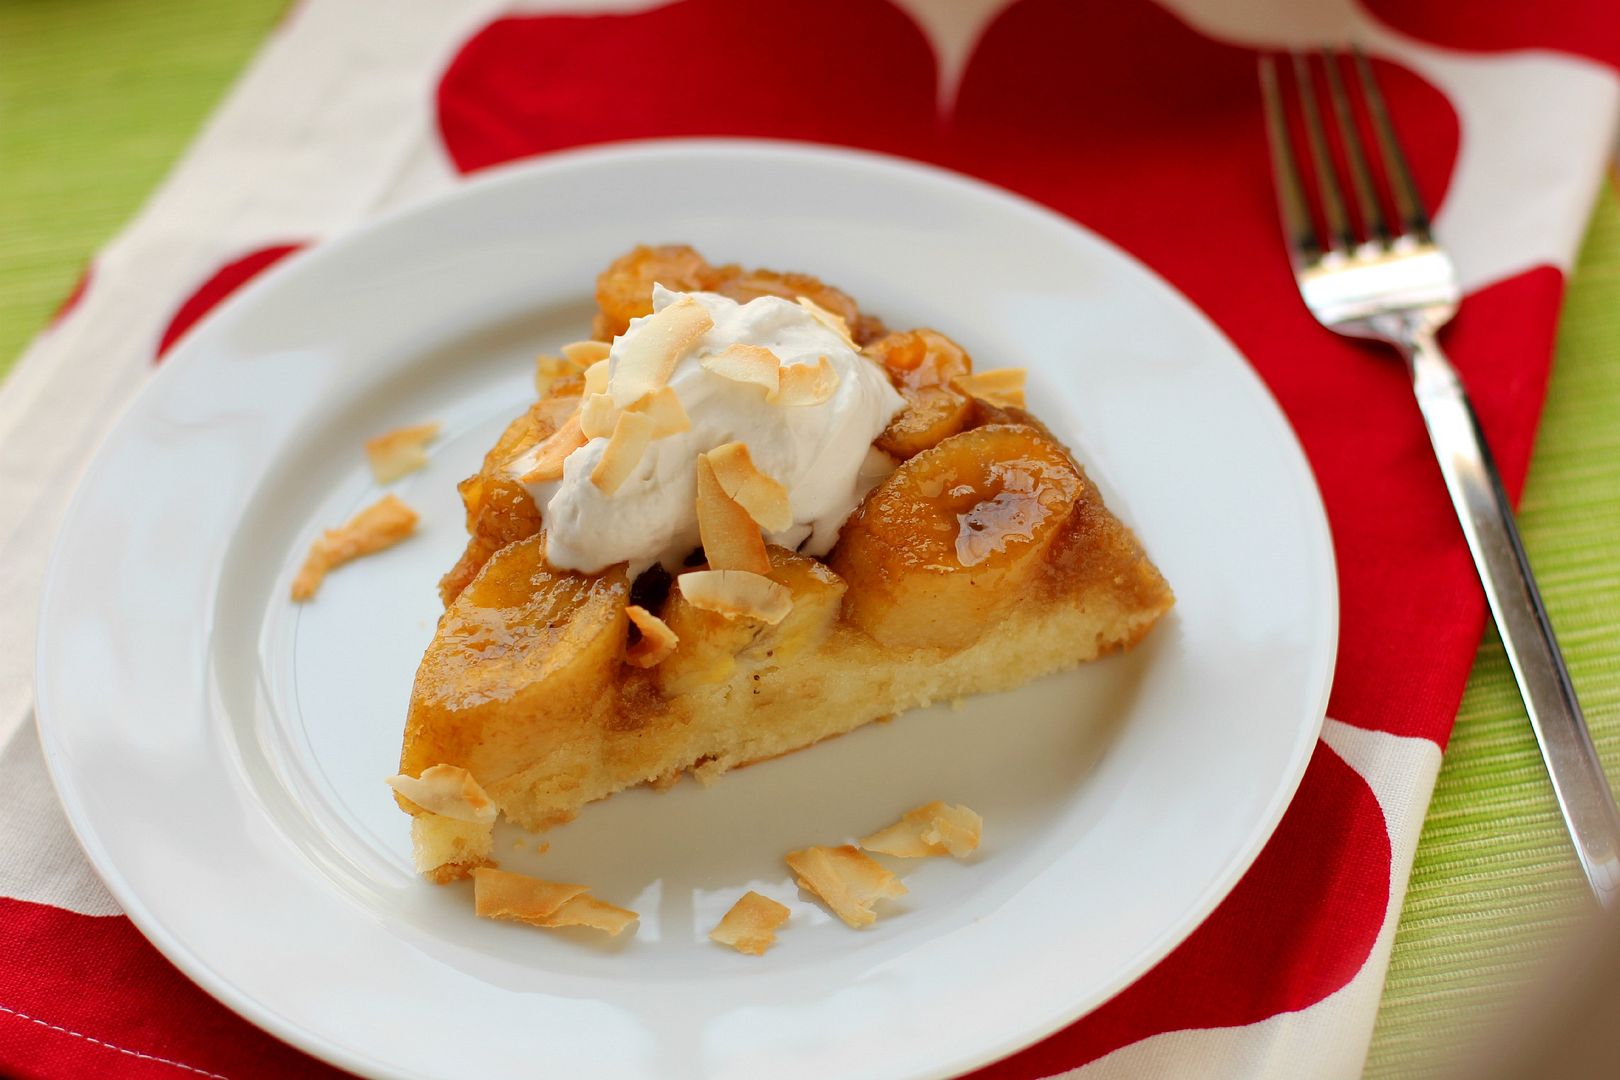
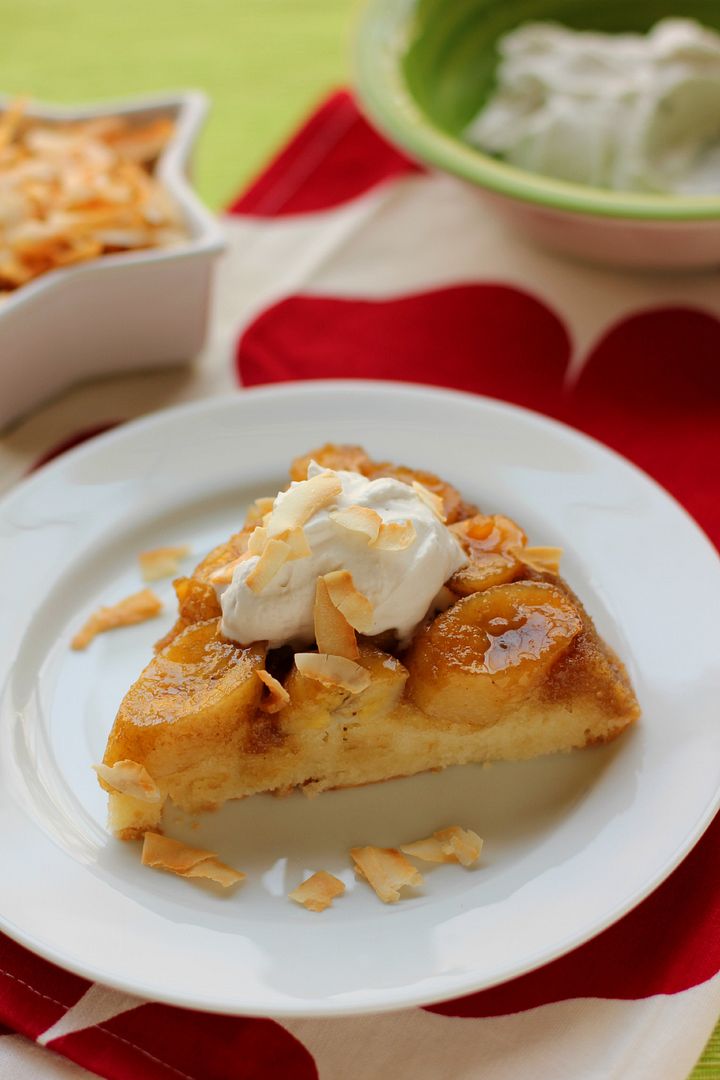
One of the flavor combinations that sounded particularly tempting to me was ginger and coconut. I decided to use this simple pair to create an indulgent Caramelized Banana Upside-Down Coconut Cake. Upside-down cakes are both simple to create and delicious. You’ll love this comforting, nostalgic dessert even more with a few modern twists: the bold zing of ginger in the caramelized banana topping, a moist coconut cake in the place of a regular yellow cake, and a big dollop of coconut whipped cream on top. I added a generous sprinkle of toasted coconut for extra texture and flavor. In short, it was insane. I can’t wait for you to taste this thing!

In the meantime, I’d love for you to join in the conversation: which of McCormick’s flavor combinations could you see yourself using? What are some ideas for recipes you want to create? Get inspired!

Caramelized Banana Upside-Down Coconut Cake With Coconut Whipped Cream


Recipe by: Willow Bird Baking, with coconut whipped cream adapted from Nutty Kitchen
Yield: 10 pieces

This thing is downright celestial. Upside-down cakes are easy to create, but come out so beautiful and delicious. This one uses a sweet, tender coconut cake in the place of a yellow cake, and adds the bold zing of ginger to the caramelized banana topping. Enjoy it with a cloud of cool coconut whipped cream (one of my new favorite things!) and some crunchy toasted coconut.

Topping Ingredients:
3/4 stick unsalted butter
3/4 cup packed light brown sugar
4 large just-ripe bananas, cut on a diagonal into 1/2-inch slices (you might want to have an extra banana or two on hand just in case your bananas are skinnier or something weird)
1 teaspoon McCormick ginger
1 teaspoon finely chopped McCormick crystallized ginger
pinch salt

Cake Ingredients:
1 cup all-purpose flour
3/4 cup sugar
1 1/2 teaspoons baking powder
1/2 teaspoon salt
1/4 cup vegetable oil
1/2 cup Thai Kitchen coconut milk
1 teaspoon McCormick vanilla
1 egg

Coconut Whipped Cream Ingredients:
2 cans Thai Kitchen coconut milk (refrigerated overnight)
3 tablespoons powdered sugar
1/2 teaspoon McCormick vanilla
flaked coconut for toasting and topping

Directions:
NOTE: This recipe is designed for a 10-inch cast iron skillet, but it can also be made in a 10-inch cake pan or a 12-inch cast iron skillet. To make it in a cake pan, prepare the topping in a separate saucepan first, add it to your cake pan, and then continue with the recipe as usual. If you make it in a 12-inch skillet, it’ll produce a thinner cake, may require an extra banana or two, and may take about 5 minutes less to bake. Because cast iron can vary, no matter what size you use, be sure to check the cake’s doneness early and often, starting around 20 minutes, with a toothpick inserted into various spots.

Toast coconut flakes: Preheat oven to 350 degrees F. Spread flakes out on baking sheet. Bake for a few minutes, stirring every minute or so, until the coconut is lightly browned (watch it like a hawk). Transfer to a plate to let cool.

Make cake: In a 10-inch skillet (see note above about using different pan sizes), melt the butter over medium-high heat. Stir in the brown sugar, ground ginger, crystallized ginger, and salt and simmer for 4 minutes (or until the mixture is bubbly and caramelized), whisking constantly. Be careful — hot sugar is no joke! After 4 minutes, remove the mixture from heat and add the bananas as close together as possible, fitting as many in as you can.

In a separate bowl, whisk together the flour, sugar, baking powder, and salt. Add the oil and coconut milk and whisk like a crazy person for 1 minute. Add the egg and vanilla and whisk it in well. Pour the batter over the banana mixture, evening it out with a spatula.

Bake 25-30 minutes or until it’s lightly brown on top and a toothpick inserted in various parts of the cake comes out with just a few moist crumbs. Let cool in the pan for exactly 5 minutes (any more and it will harden in the pan, and less and it might fall apart) before running a knife around the edge of it and carefully (use oven mitts! hold both sides of the skillet, holding the plate on with the heels of your hands! enlist a spotter! did I mention that hot sugar is no joke?) invert it onto a large serving platter.

Make coconut whipped cream: Using a spoon, remove the cold coconut solids from each can of coconut milk (save the coconut water for other uses). Place it in a chilled bowl with vanilla and powdered sugar. Whisk like the dickens with a chilled beater until it has a whipped cream-like consistency (this probably took over 10 minutes with my electric mixer, but it’s worth it). Serve cake warm with a big dollop of cold coconut whipped cream and a sprinkle of toasted coconut.

You don’t see many product reviews on Willow Bird Baking, because I’m choosy with how I share this space. My choosiness reflects my own ideals for Willow Bird in addition to my respect for the community we have here. When I get the opportunity to work with a company I genuinely love and use in my own kitchen, though, I’m always thrilled to share. McCormick is just such a company, and I’m excited to share their forecast of upcoming flavor trends.

Disclosure: McCormick sent me a Flavor Forecast Immersion Kit of ingredients, and compensated me for other ingredients and for my time and creative energy. I value my readers such that all opinions expressed on Willow Bird are always my own.

If you liked this post, please:
Subscribe to Willow Bird Baking
Follow Willow Bird Baking on Twitter
Follow Willow Bird Baking on Facebook
Give this post a thumbs up on StumbleUpon
Pin It


Shareother ways to share this post with friends

Banana Coconut Cream Easter Cupcakes

Easter and I have a checkered past.

When I was a little girl, there were Easter baskets involved, and that seemed pretty awesome. An entire basket of treats and toys surround by that annoying-but-simultaneously-endearing Easter grass? A chocolate bunny bigger than my head that I’d eat about a quarter of before giving up? Plastic Easter eggs my mom had painstakingly filled with candy? Count me in.

Other Easters, though, were fraught with peril. Well, okay, peril might be a little dramatic. Perhaps fraught with inconvenience.

One Easter, for instance, I woke up and immediately realized that I was sick. I was nauseous, feverish, and definitely not interested in holiday cheer. My big plans of jumping out of bed and searching out the nearest stash of candy were dashed.

It was awful; birds were chirping joyfully in the freshly-bloomed Bradford pear trees outside while inside, little Julie was lying, miserable and a tad melodramatic, in the floor.

My parents brought my big Easter basket in and set it in front of me. They apparently thought the effect of this action would be to motivate me towards wellness. However, the piles of candy that should’ve been appetizing to me actually made me want to puke. I languished for hours before I so much as unwrapped a creme egg.

Maybe that Easter wasn’t the easiest one for me to celebrate, and nowadays I don’t even get an Easter basket, but the holiday is actually my favorite time of the year.

Easter is when Christians celebrate the miraculous resurrection of Jesus Christ. He died in our place, taking the punishment for our sins, and the fact that He then rose from the dead is an unspeakable victory that I will try my best to speak: a triumph over the power of death and the power of sin.

I walk around feeling bound a lot of the time. Bound by sadness, bound by financial worry, or bound by indecision; the truth is, what I have in Christ is the ultimate freedom. This holiday reminds me to rejoice, and to give away my worries — to recommit to living a free life for Him.

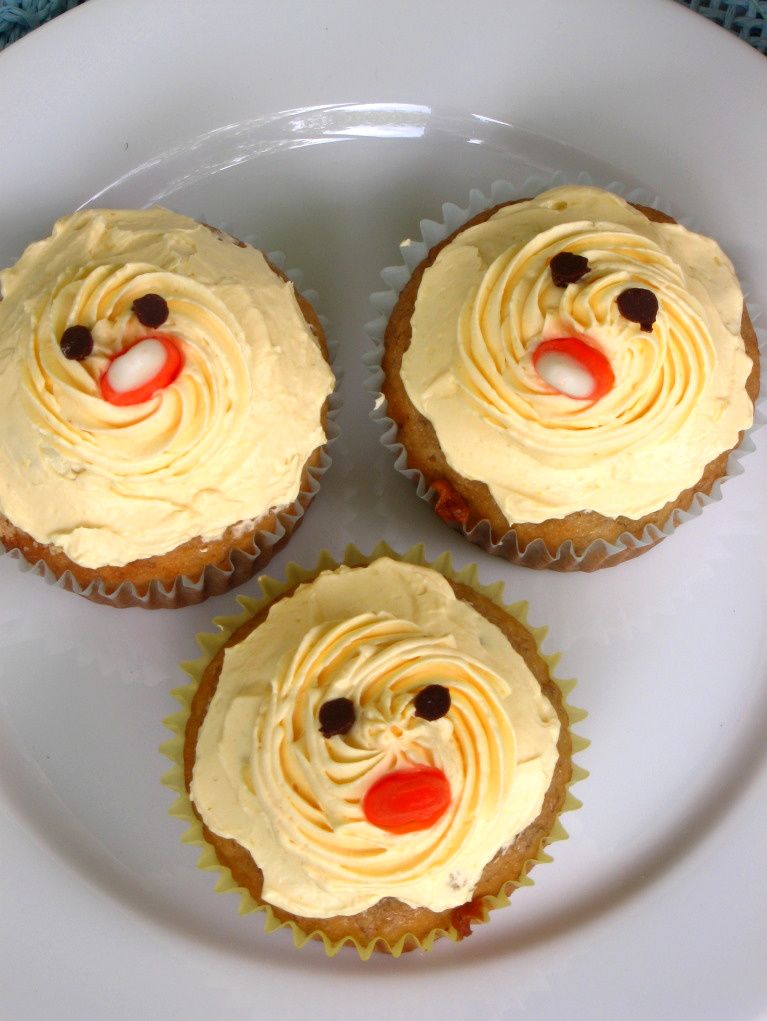
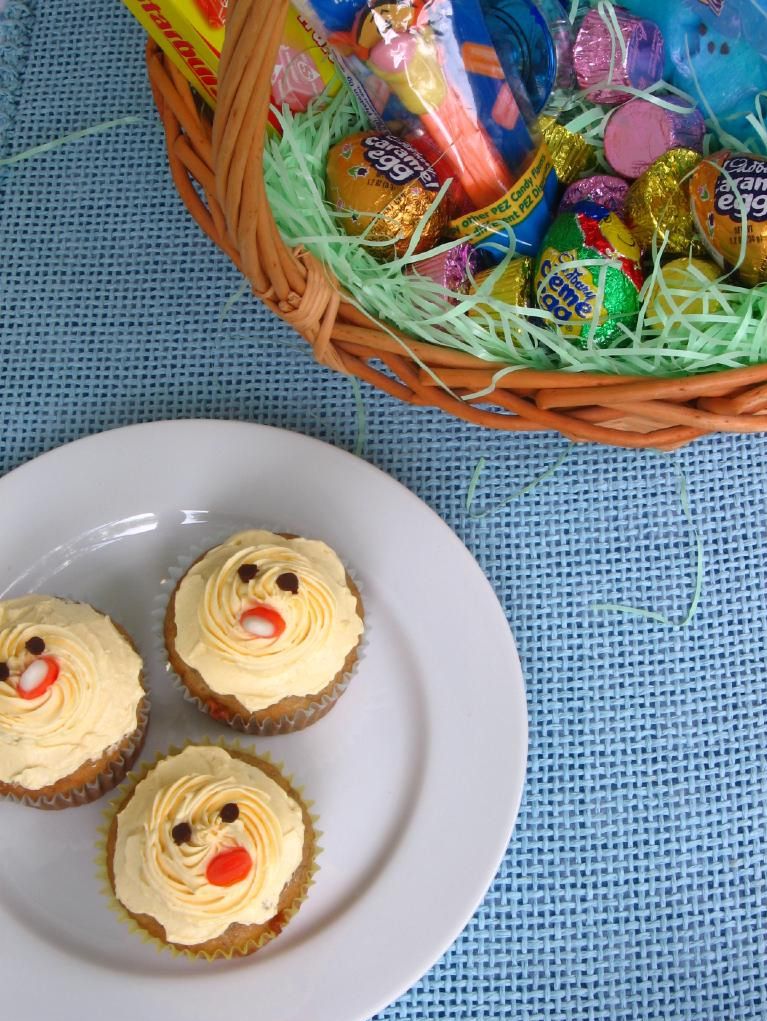
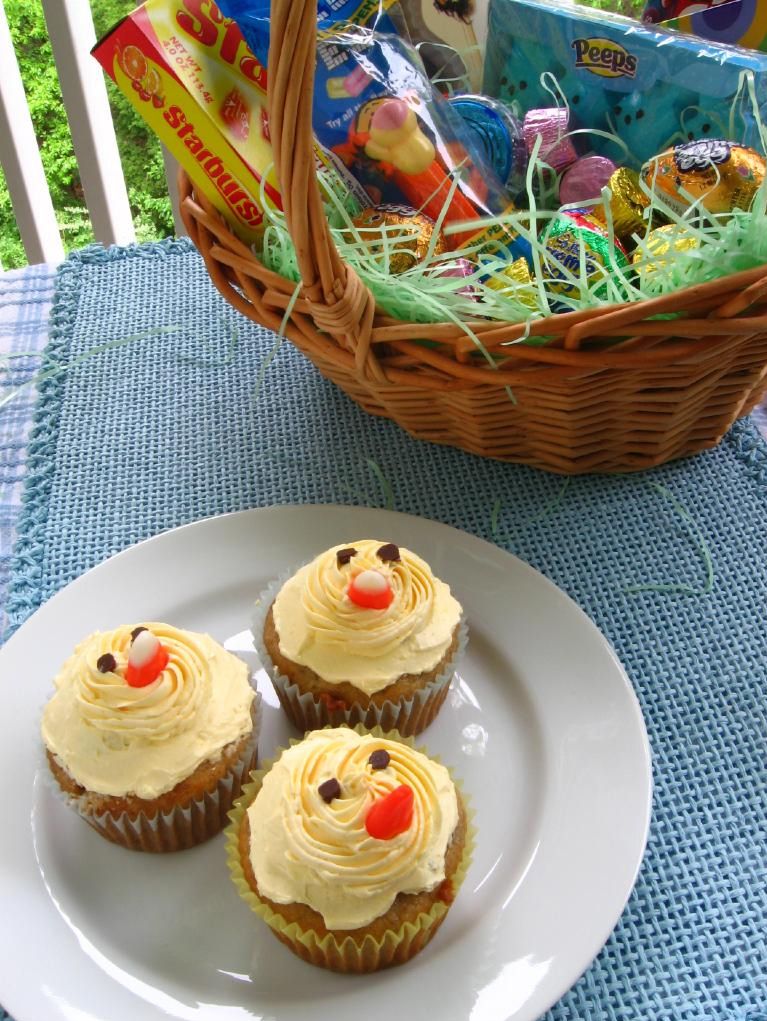
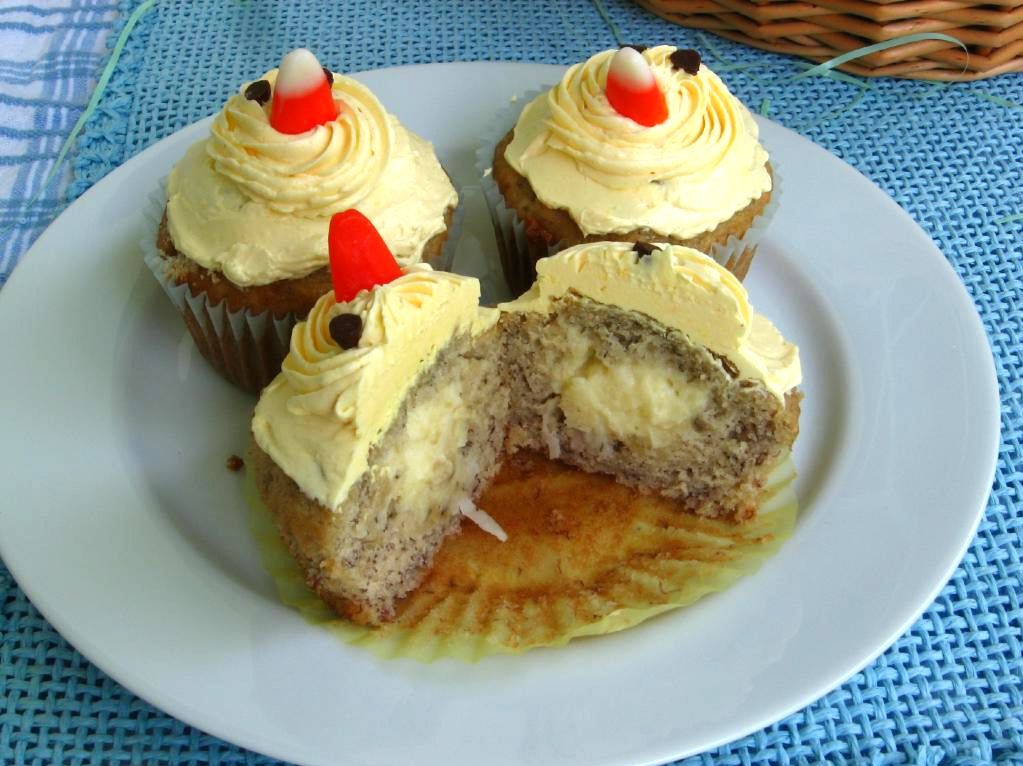
To celebrate this year, I made these moist banana cupcakes stuffed with my favorite edible substance in the universe, coconut pastry cream, and topped with my other favorite edible substance in the universe, Swiss meringue buttercream. They’re heavenly, dense little bites of Easter JOY.

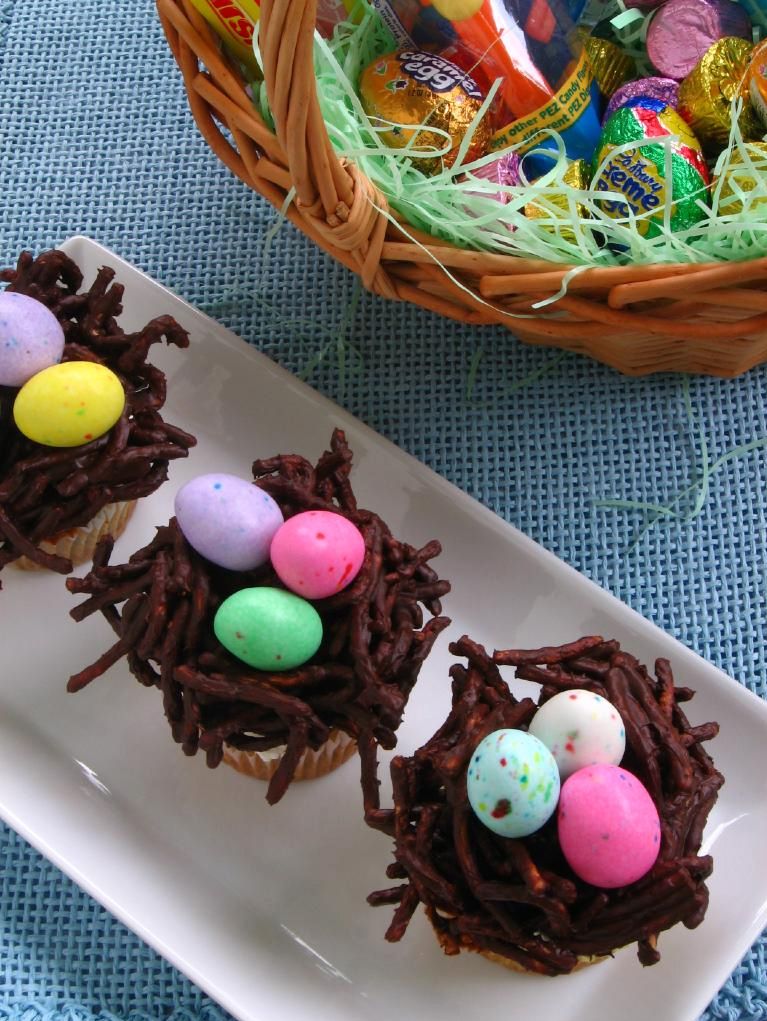
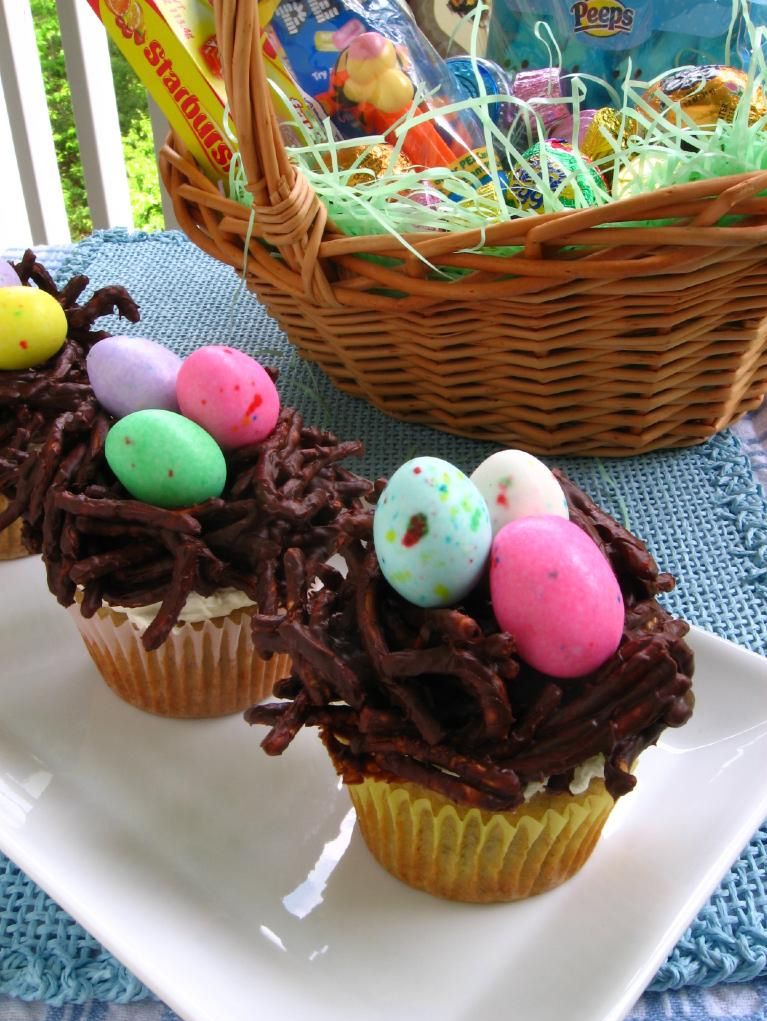
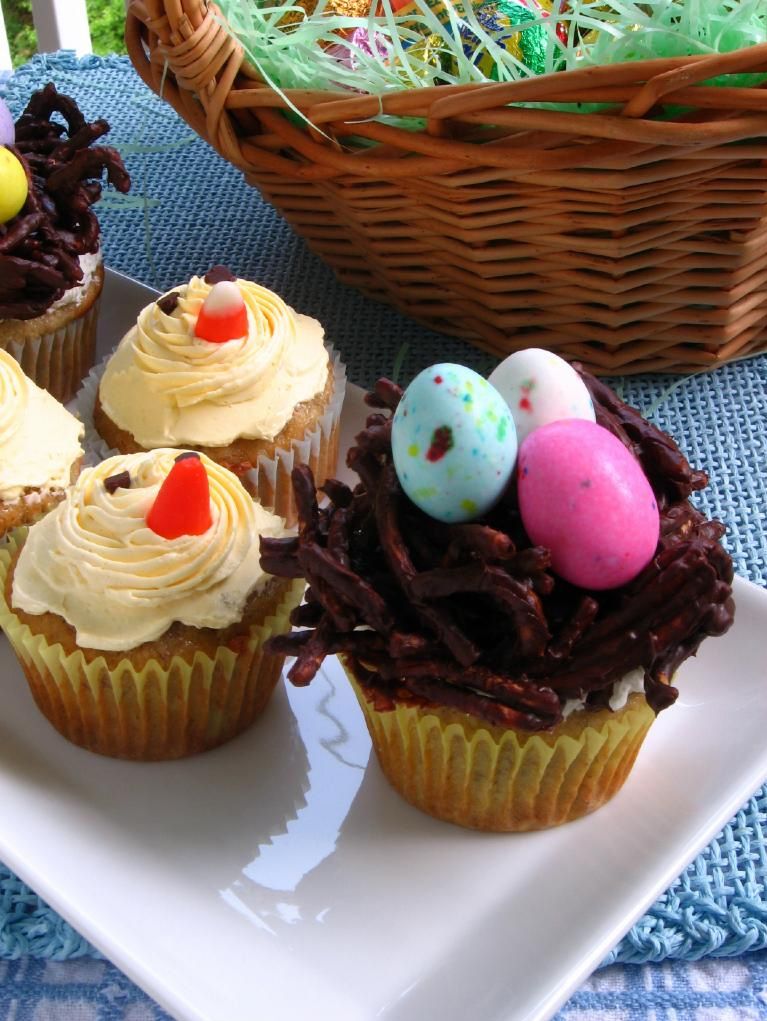
I decorated the cupcakes with tiny chickie faces and some ginormous, delicious birds’ nests. The recipe below will tell you how to create the former, and keep an eye on Maranda’s blog in the coming days for instructions on how to create the cute nests!

If you want to know more about Christianity, what Jesus did, and what it means for us, please leave me a comment below and let me know that you’d like me to email you.

Banana Coconut Cream Easter Cupcakes


Recipe by: Willow Bird Baking, adapted from multiple sources including Piggly-Wiggly, Gina DePalma, and Zoë Bakes
Yields: about 32 cupcakes

Cupcake Ingredients:
3 cups all-purpose flour
2 tsp baking soda
1/2 tsp salt
2 sticks (8 ounces) unsalted butter at room temp
2 cups sugar
2 tsp pure vanilla extract
2 large eggs, preferably at room temp
~4 very ripe bananas, mashed (about 1.5-1.75 cups)
1 cup sour cream or plain yogurt

Coconut Pastry Cream Ingredients:*
1 can (14 fluid ounces) unsweetened coconut milk
3/4 cup sugar
1 vanilla bean
pinch kosher salt
3 large egg yolks
2 tablespoons corn starch
2 tablespoons unsalted butter
1 cup sweetened coconut flakes
1/2 cup whipping cream

Swiss Meringue Buttercream Ingredients:
1 cup sugar
4 large egg whites , at room temperature
24 tablespoons (3 sticks) unsalted butter, at room temperature
2 teaspoon vanilla extract
yellow food coloring (I used lots. Just add it slowly until you reach desired color)
mini chocolate chips (optional, for decorating chicks)
candy corn (optional, for decorating chicks)

Directions:
Make the Cupcakes: Preheat the oven to 350. Generously butter a mini-bundt cake pan or cupcake pan.

In a medium bowl, whisk the flour, baking soda and salt together. In a separate, large bowl, beat the butter until creamy. Add the sugar and beat at medium speed until pale and fluffy. Beat in the vanilla, then add the eggs, one at a time, beating for about 1 minute after each egg goes in. Reduce the mixer speed to low and mix in the bananas.

Mix in half the dry ingredients (the mixture may look curdled — just keep mixing), followed by all the sour cream and finally, the rest of the flour mixture. Fill each well of your prepared pan about 1/2 to 2/3 of the way full and rap the pan on the counter to remove bubbles from the batter and smooth the top.

Bake for 25 to 30 minutes, or until a toothpick inserted deep into the center of the cakes comes out clean. Transfer the pan to a rack and cool for 10 minutes before unmolding on the rack. Let cool to room temperature before adding cream filling and glaze.

Make the Coconut Pastry Cream: While cakes are baking and cooling, make coconut pastry cream. Heat the coconut milk, sugar, salt and vanilla bean in a medium saucepan over medium heat. In a bowl, whisk together the egg yolks and corn starch. Once the cream is hot, remove the vanilla bean, scraping out any remaining seeds and returning them to the cream. Add 1/2 cup of the hot cream slowly to the yolks, whisking as you add. Then pour the yolk mixture into the pot of hot cream and whisk. Continue to whisk with heat on medium-high for 3 more minutes. The mixture will turn thick and bubble. You need to continue to whisk for the full 3 minutes or the pastry cream will separate once it is cool. After the 3 minutes, whisk in the butter. Add the coconut flakes. Pour into a shallow dish to cool.

Cover with plastic wrap pressed right against the pastry cream. This will prevent a thick skin from forming on the surface. Refrigerate for at least an hour or freeze for 30 minutes. Once it is cold, stir the pastry cream to loosen. Whip the 1/2 cup cream to medium peaks. Stir in 1/3 to the pastry cream to lighten. Fold in the remaining cream until the pastry cream is nice and light.

To make Swiss buttercream icing: Combine sugar and 1/2 cup water in a small saucepan and bring to a boil over medium-high heat, stirring to dissolve sugar. Boil without stirring until syrup reaches 240° on a digital thermometer, about 5 minutes.

Meanwhile, in a stand mixer with whisk attachment, beat egg whites on medium-high speed until soft peaks form. With mixer on medium speed, gradually pour in hot syrup in a thin stream; avoid pouring syrup on whisk. Increase speed to medium-high and beat until stiff peaks form and mixture is cool, about 8 minutes. Reduce speed to medium and add butter 1 tablespoon at a time, beating after each addition. (If at any time buttercream appears curdled, beat on high until smooth, then reduce speed to medium and continue beating in butter.) Once all butter is added, beat on high speed until buttercream is smooth and fluffy, about 1 minute. Beat in vanilla and food coloring.

To assemble the cakes: When cakes are cool, hollow out the center of each mini-bundt cake (use the cone method). Pipe in as much of the coconut pastry cream as will fit and replace the top of the “cone.”

Use an offset spatula or the back of a spoon to smooth a layer of frosting over the top of the cupcake. Use a star tip to pipe a small circle of frosting in the middle of the cupcake (covering any imperfections). Give it two mini chocolate chip eyes and a candy corn beak (note: the color of these will start to run after a few days in the fridge, so if you aren’t serving these right away, you may want to wait to add them. You’ll have to remove the cupcakes from the fridge for a bit to let the frosting soften and then stick them on). Voila!

*NOTE: This recipe actually makes twice as much coconut pastry cream as you need to fill the cakes. I split my pastry cream and made these with half, and filled donuts with the other half. You can also just double the number of banana cakes you make to fill, or find some other creative use for the excess cream. I suppose you could also try halving the coconut pastry cream recipe, but I didn’t want to fiddle with halving three yolks and a can o’ coconut milk.

If you liked this post, please:
Subscribe to Willow Bird Baking
Follow Willow Bird Baking on Twitter
Follow Willow Bird Baking on Facebook
Give this post a thumbs up on StumbleUpon


ShareOther ways to share this post with friends!

Heart-Shaped Palmiers and a Pesto Giveaway

What does it say about me that I have more fun at middle school dances as a grown-up than I ever did as a middle schooler?

Woodlawn’s 7th graders hosted a February dance last night. The theme was BRIGHT COLORS to avoid any romantic drama involving Valentine’s Day, so everyone dressed in their rainbow best.

I waltzed in fashionably late in a magenta and turquoise get-up, danced with a gaggle of my 6th grade students to “Fly Like a G6” (though we sing, “now I’m feelin’ so fly / like a fruitbat,” which we feel more accurately characterizes us), and filmed all the hair-whipping that occurred when “Whip My Hair” came on.

We stopped mid-dance to run outside and play freeze tag. I ditched my heels and joined the math teacher, also named Julie, as “it.” Once our feet and hands were frozen, we all filed back in for more dancing. Julie and I sang a duet of “Ice Ice Baby” at one point, showing our age.

Every now and then I’d have a chaperonely duty to perform: directing cleanup, vetoing a song or two, telling the 6th graders to stop screaming. But in general, the dance was exactly what a middle school dance should be: fun and happy. Why didn’t I have this much fun when I was actually in middle school?

I vividly recall my 7th grade Valentine’s dance. My teachers were apparently not as sensitive to the delicate hormonal phase we were in, so they thought it’d be a great idea to make the dance as sappy as possible. Everything was covered in red and pink, with hearts papering the walls. It looked like cupid had thrown up love and romance on every available surface of the multipurpose room where the dance was held. Not only that, but a table was set up outside the bathrooms where the PTA was selling roses and candy for the suave middle school boys who had come to the dance unprepared for their dates.

Someone had asked me to this particular dance. We’ll call him Jeb, and he was not my type. I told him I would go with him as a friend because I wanted to be nice, but once I arrived at the dance, the middle school social pressure overwhelmed me. I didn’t want to be seen with Jeb, much less have to, like, dance with him and stuff.

Just after walking in, I caught sight of him at the aforementioned table buying a rose for me and I booked it to the girls’ bathroom, where I hid for the majority of the night. Every now and then I’d poke my head out and watch him wandering around quizzically, looking for me in the crowd, and then I’d duck back in to hide some more. Part of me felt guilty, but the part that felt mortified won out.

Jeb moved away shortly thereafter, and I felt so bad for having ditched him at the dance. Thankfully, he returned in high school and I got the opportunity to apologize. I chalk the whole experience up to middle schoolitis, the inflammation of your social nerve. For some reason when you’re a middle schooler, it matters so much what others are thinking about you. You don’t want to dance, because what if people think you dance funny? You don’t want to hang out with certain people, because what if people think you’re like them? You don’t want to wear certain clothes, because what if they send the message that you’re uncool?

Phew, I’m so glad that’s over. And so glad that I, unlike a lot of grown-ups, have a second chance at the middle school dance! Call it one of the perks of being a teacher.

Anyway, after all that fun last night, I didn’t have much time for baking. I knew I wanted to make something sweet and Valentinesy, but it also needed to be quick. Voila: easy heart-shaped palmiers that can be sweet or savory depending on what you spread in them.

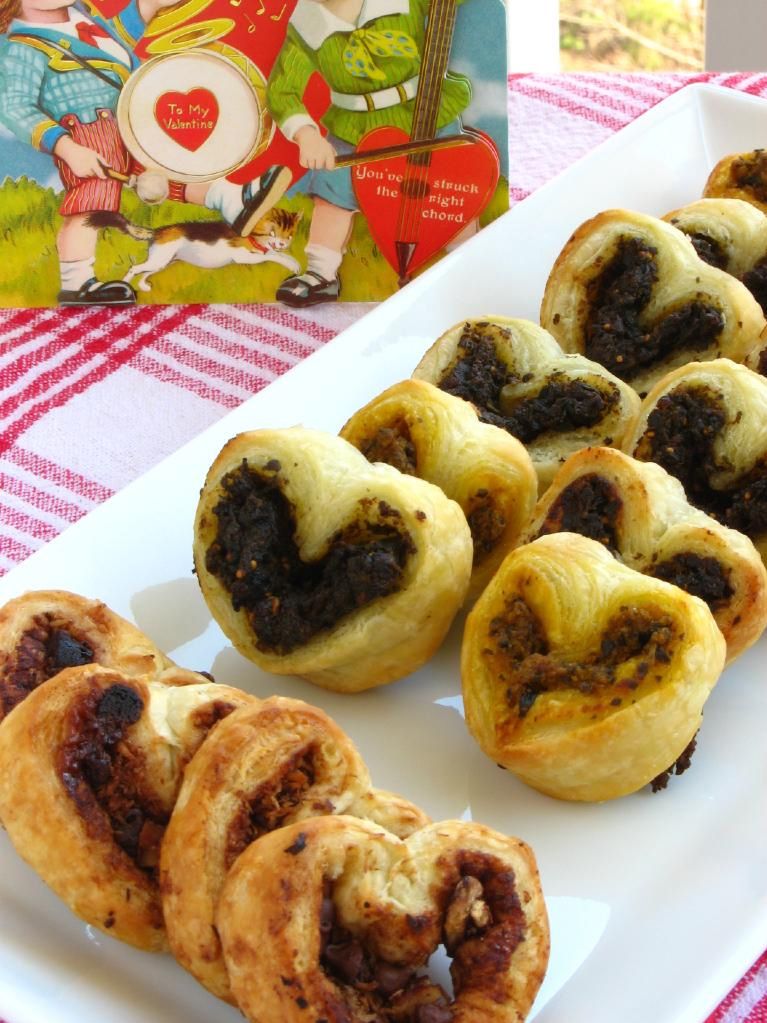
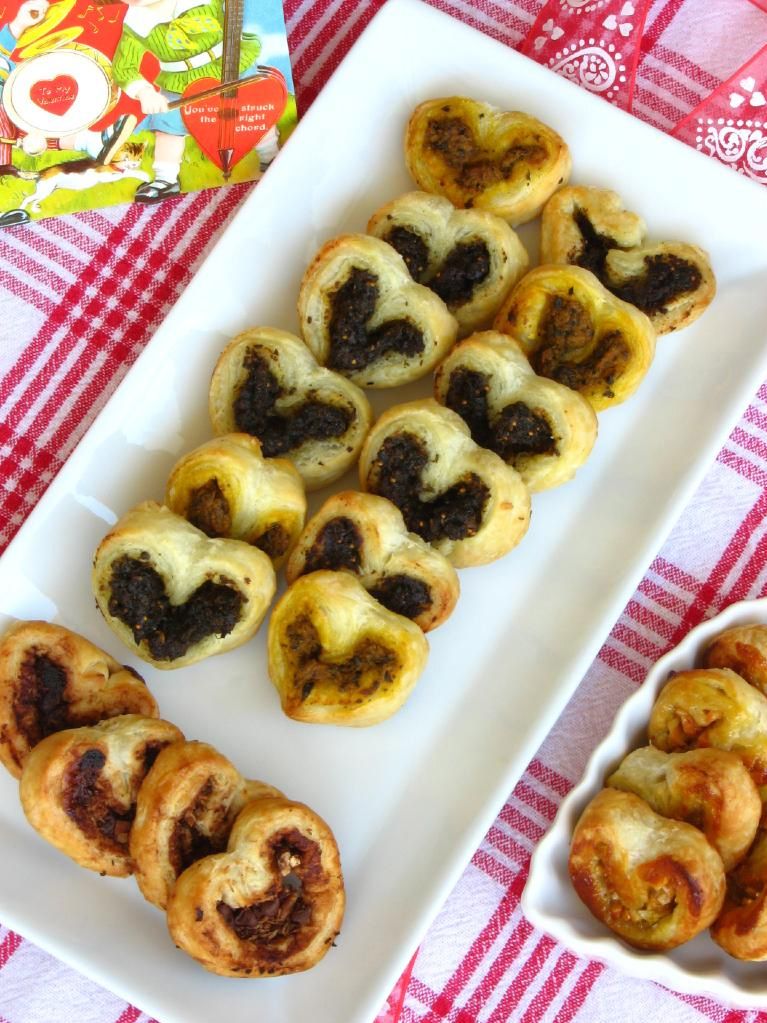
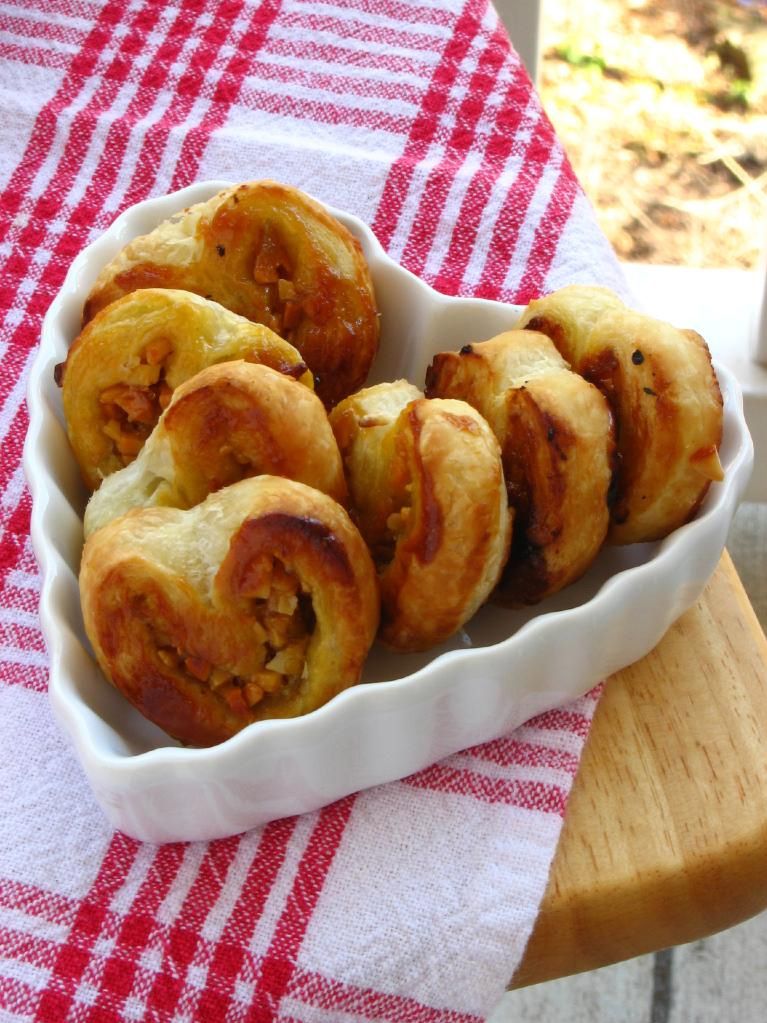
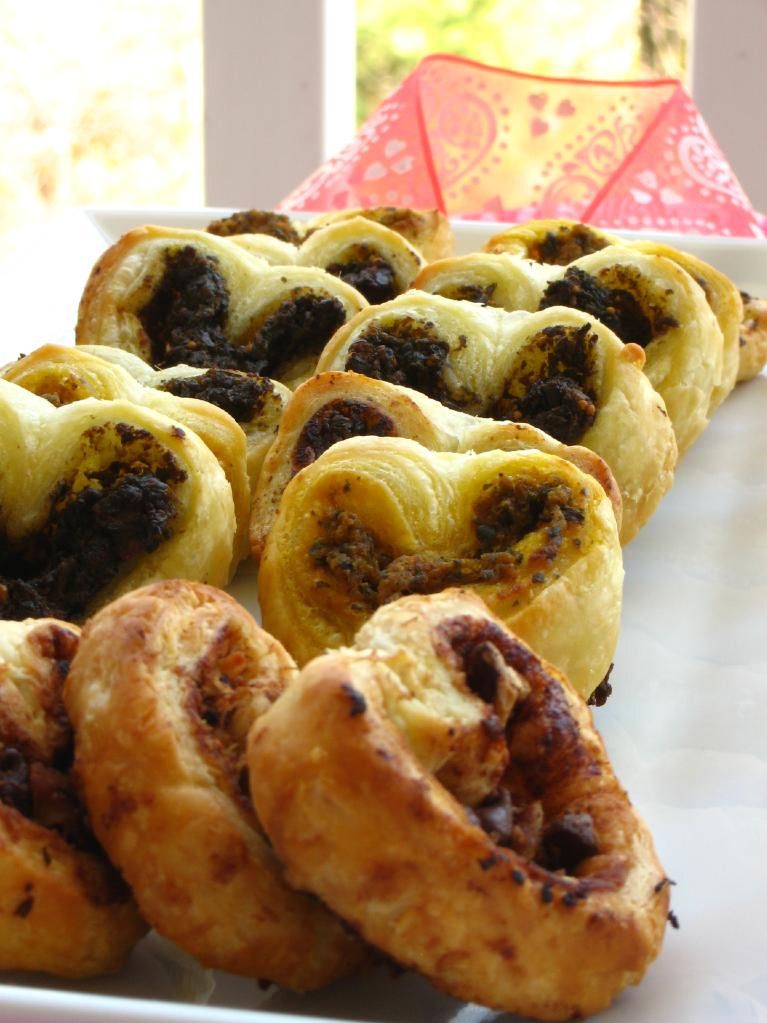
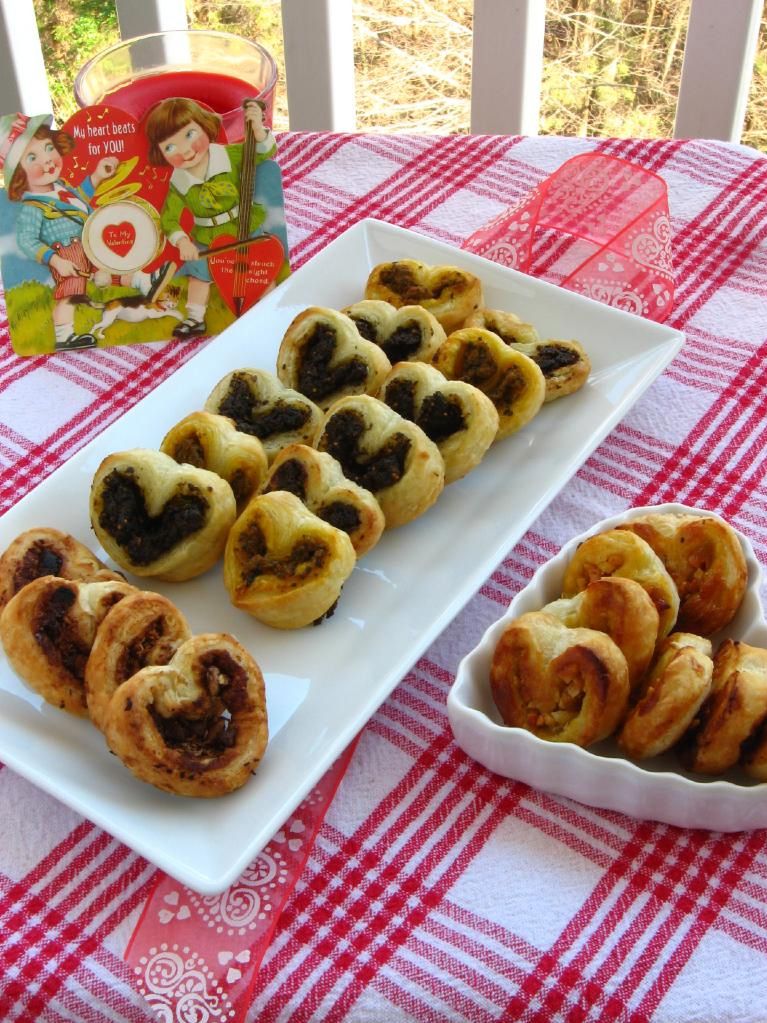
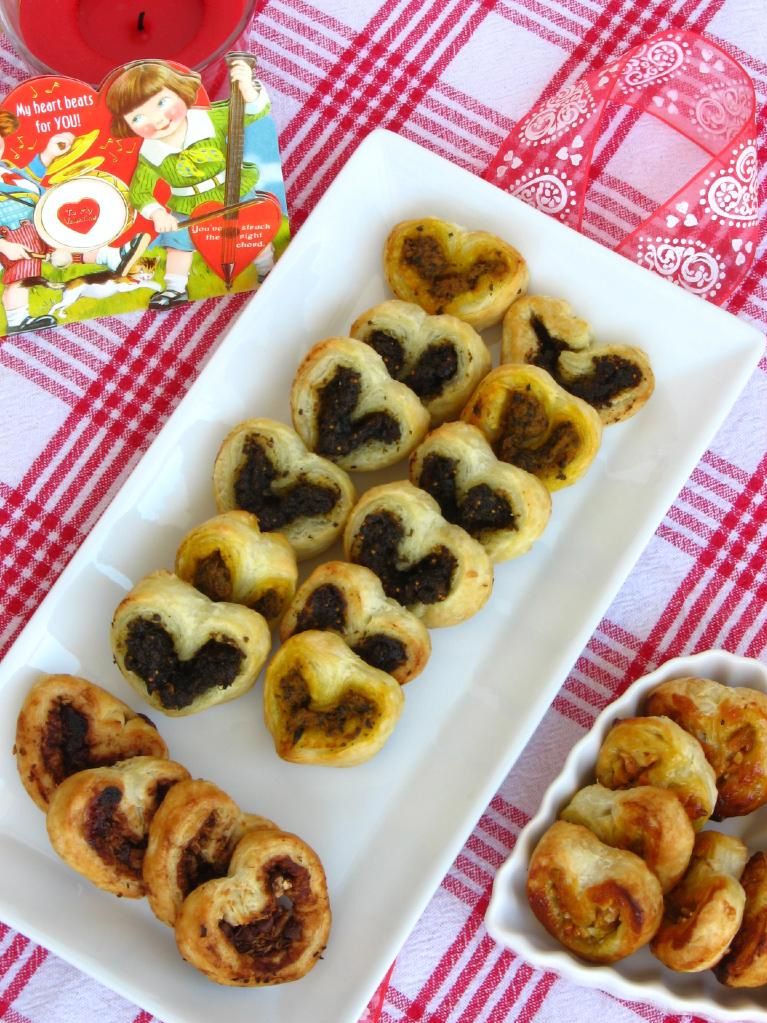
Pestos With Panache by Lauren sent me two pesto flavors to review, Fig & Gorgonzola and Pumpkin Chipotle, so I decided to make two varieties of pesto palmiers. To satisfy my sweet tooth (who’m I kidding? it’s insatiable), I also made Fig Jam & Almond Palmiers and Chocolate, Pecan, & Coconut Palmiers. I love that palmiers are so customizable that you can create a variety of them at once (the method below will inspire you to get creative!), but what I love even more is that you can whip up a batch of these cuties in 20 minutes. Perfect for a last-minute addition to your Valentine’s meal!


Speaking of Valentines — the Valentine’s Fairy heard my lamentations about not getting any valentines as an adult, so I got this in the mail from my Sunday school teacher, Joyce. Too sweet!

Regarding the pesto, Pestos With Panache by Lauren has all-natural, preservative free products. The pestos keep well in the freezer for up to two years, and the company boasts a number of zany, creative flavors.

I wasn’t wild about the Pumpkin Chipotle Pesto; it combined mild pumpkin with some heat, and it seemed like it would work better in a recipe with bolder flavors to complement it. The Fig & Gorgonzola Pesto, though, was deep and delicious, and I can’t wait to try some of the other fruity flavors. I can imagine lots of creative uses for them, including (of course) palmiers!

Would you like to win two of the fun pesto flavors from Pestos With Panache? They’d love to send one lucky commenter a sample. To enter:

1. Required Main Entry (your other entries won’t count unless you do this one!): Visit Pestos With Panache by Lauren and tell me what 2 pesto flavors you’d love to try.

To get up to five extra entries, do each of the following items (one entry per item). Please be sure to leave a separate comment for each item you complete, or you will not receive the entry for that item. If you already do these things, it still counts (just leave me a comment and tell me so).
2. “Like” Pestos With Panache on Facebook.
3. “Like” Willow Bird Baking on Facebook.
4. Follow Pestos With Panache on Twitter.
5. Follow Willow Bird Baking on Twitter.
6. Tweet the following message: “Just entered to win 2 pesto flavors from @PestosWPanache on Willow Bird Baking! http://su.pr/2diNLK #giveaway @julieruble”

The contest will close at 12 noon (EST) on February 19, 2011, and the winner will be chosen via random.org. In the meantime, make some palmiers!

Heart-Shaped Palmiers


Recipe by: Willow Bird Baking
Yields: 25-28 palmiers

Ingredients:
1 frozen puff pastry sheet, thawed (or use homemade puff pastry!)
sprinkle of flour
moist spread*
toppings**

*you can use pestos, jellies, Nutella, thicker sauces, etc.
**such as cheeses, toasted nuts, chocolate chips, etc.

Directions:
Preheat oven to 425 degrees F. Line two baking sheets with parchment paper. Roll out the puff pastry sheet on a lightly floured surface so that it’s just slightly longer, and then cut it in half horizontally with a pizza cutter. You now have two rectangles of puff pastry.

Spread your pesto, jelly, or other moist spread onto the puff pastry sheets leaving about 1/4-inch border around the edges. Sprinkle toppings on lightly, taking care not to overstuff and make your palmiers difficult to roll. Apart from my two pesto palmiers, I made palmiers spread with fig jam and sprinkled with toasted almonds, and palmiers sprinkled with sugar, cocoa powder, toasted pecans, mini chocolate chips, and toasted coconut. The sky’s the limit in terms of the combinations you can create.

Once you’ve spread and topped your pastry rectangle, grab the long edge and fold it in toward the middle. Repeat with the other long edge, such that they meet in the middle:

Now fold one side of the dough onto the other:

At this point, stick the dough in the freezer on wax paper for about 10 minutes so that it’s easier to cut. Using a sharp knife, cut the log into 1/2-inch slices:

Set each slice on one of the prepared baking sheets with one of the cut sides up. If the knife smooshed them a little, prod them back into shape. Bake at 425 degrees F for 8 minutes before turning the temperature down to 400 degrees F and gently flipping each palmier. Bake for 4-5 minutes extra. Remove the palmiers from the oven and transfer them to a cooling rack. Serve slightly warm.

Note: Pestos With Panache by Lauren provided me with 2 pesto flavors to review at no cost to me and offered to sponsor this giveaway. I’m committed to giving you my honest opinion about any product mentioned on Willow Bird Baking.

If you liked this post, please:
Subscribe to Willow Bird Baking
Follow Willow Bird Baking on Twitter
Follow Willow Bird Baking on Facebook
Give this post a thumbs up on StumbleUpon


ShareOther ways to share this post with friends!

1 8 9 10 11 12