casserole

Pioneer Woman’s Macaroni and Cheese

Permit me a few moments of fangirldom: Pioneer Woman is coming to Charlotte in May! Willow Bird Baking reader Jennifer M. told me about it a few days ago and my family’s been all abuzz since then. I was bummed that she didn’t swing by this-a-way on her last book tour, so I’m pleased as a plum that she’ll be here this time around. My mom, dad, and I are already planning to make some t-shirts, grab some dinner, and make a night out of going to see her. Mike has politely declined, citing the possibility of standing in line for hours. His loss!

In the meantime, I’ll make some macaroni from the PW blog. I was not actually in the market for a new macaroni and cheese recipe (except I would like to get the one Mike’s mom makes . . . mmm!). I have an old family favorite that I could eat every day. It’s more custardy than creamy, though, and Mike’s a creamy guy. So I thought I’d give the P-Dub’s recipe a whirl. (Can I call her that?? To her face? What do you SAY to Pioneer Woman, anyway?? Probably something gushy punctuated with a nervous laugh. We’ll see!)

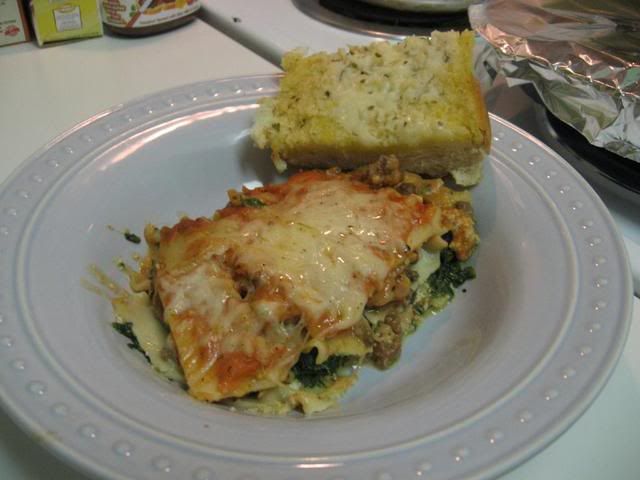
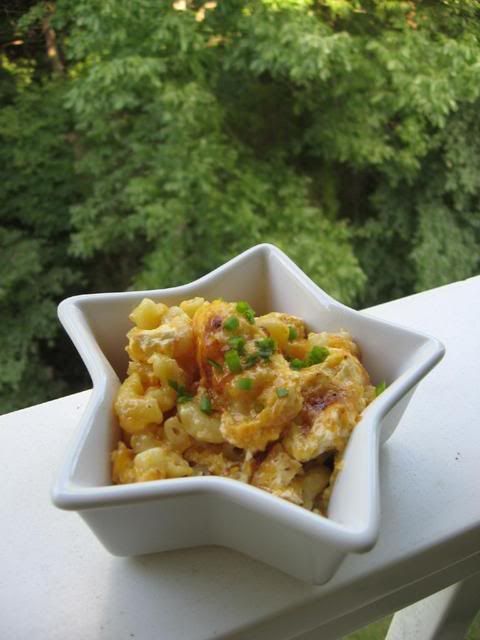
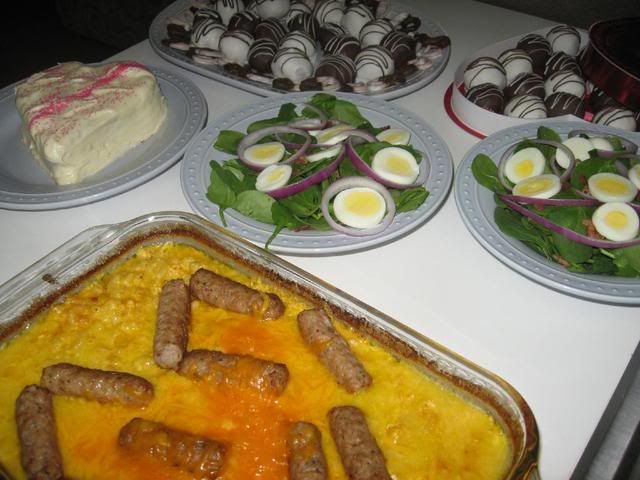
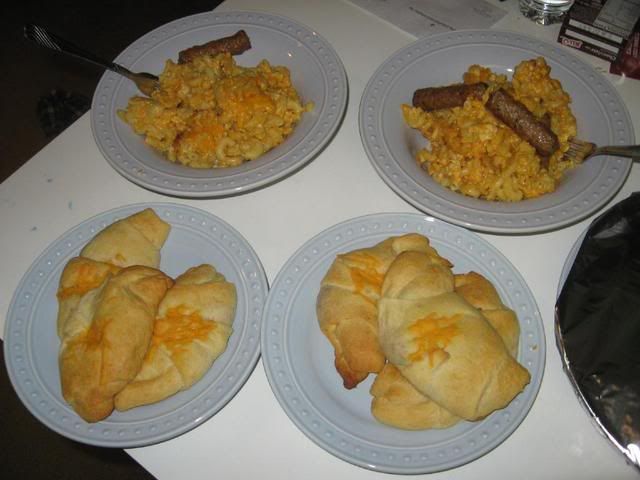
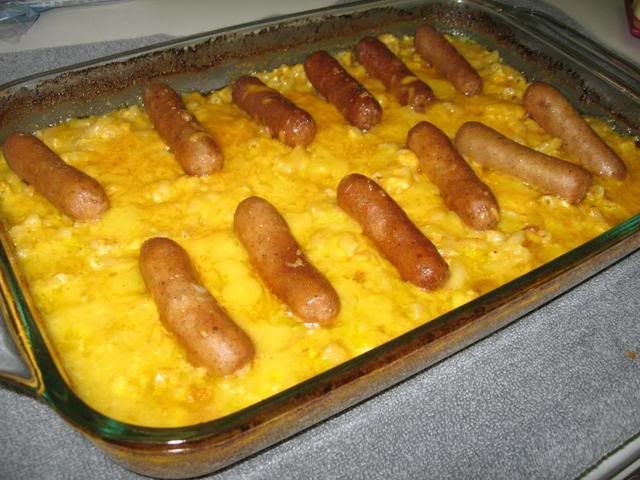
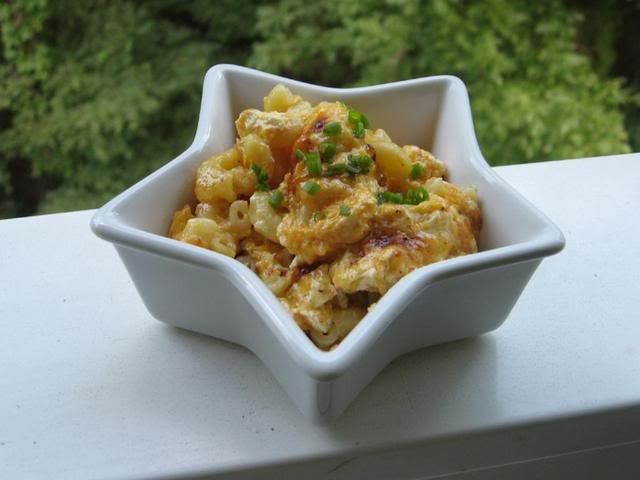
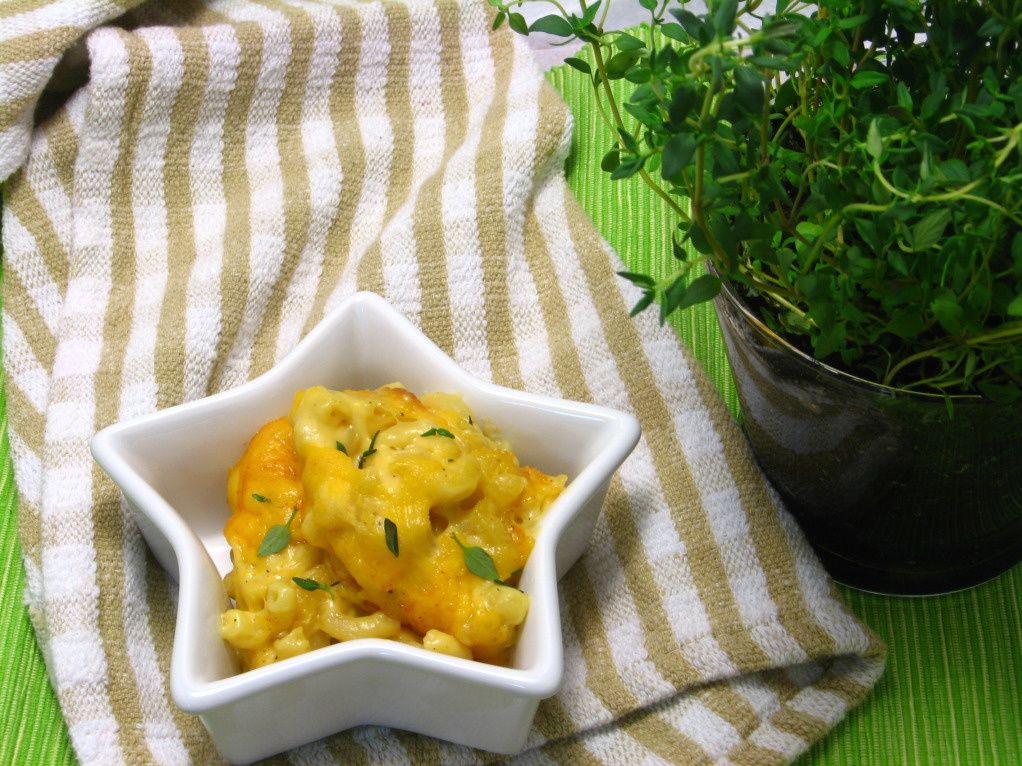
Mmm, and is this mac and cheese creamy! It starts with a roux (cooked flour and butter), but actually isn’t that fussy. You add in some milk, dry mustard, and spices of your choice, cook until thickened, add your cheese, and voila: a rich, thick, creamy cheese sauce in which to dunk those little noodles up to their elbows (get it?). The creamy macaroni then goes into a baking dish, is topped with cheese, and bakes for 20-25 minutes. Pretty simple, very luxurious.

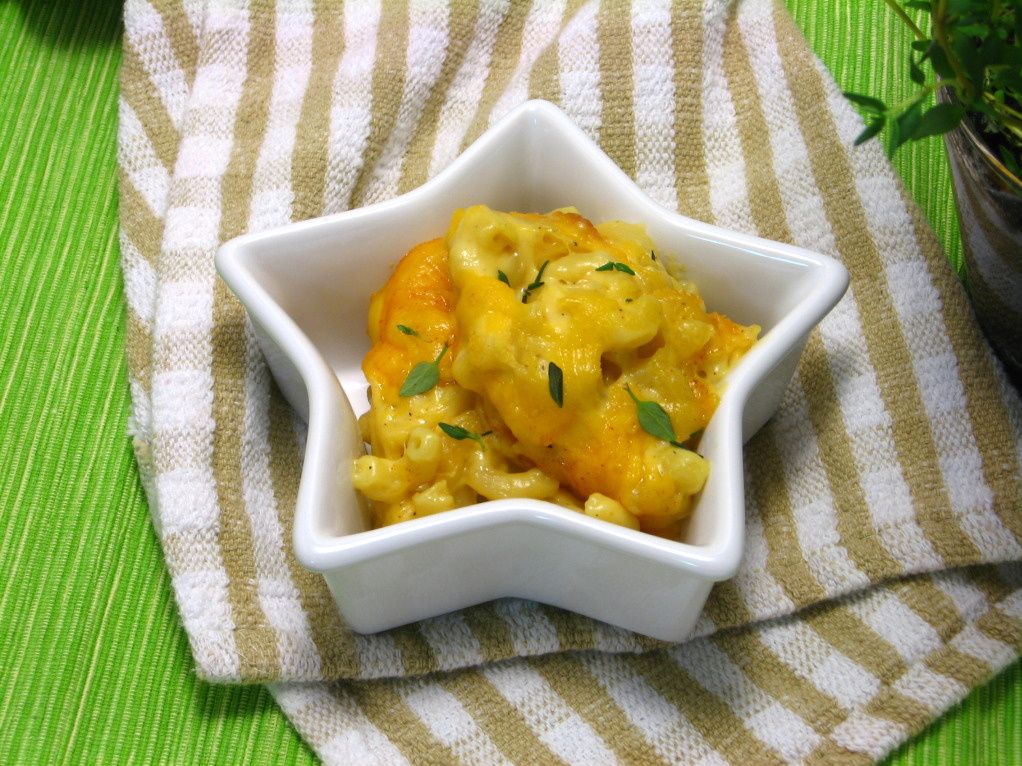
If you’re a creamy macaroni and cheese fan, this recipe’s for you. Just don’t undersalt! Pioneer Woman charges you with this command at least three times in her post, but I still undersalted mine. Go for it with that salt shaker! You don’t want to feel like you just took in a gulp of ocean or anything, but you do want to enhance the great flavors of the dish.

Pioneer Woman’s Macaroni and Cheese


Recipe by: Adapted from Pioneer Woman
Yields: 9 x 13 in. pan of baked macaroni (4 to 8 servings)

Ingredients:
4 cups dried macaroni
¼ cups (1/2 stick or 4 tablespoons) butter
¼ cups all-purpose flour
2-½ cups whole milk
2 teaspoons (heaping) dry mustard, more if desired
1 whole egg, beaten
1 pound cheese, grated
½ teaspoons salt, more to taste
½ teaspoons seasoned salt, more to taste
½ teaspoons ground black pepper
Optional spices: cayenne pepper, paprika, thyme

Directions:
Preheat oven to 350 degrees F. Cook macaroni until very firm. Macaroni should be too firm to eat right out of the pot (about 5 minutes). Drain.

In a small bowl, beat egg.

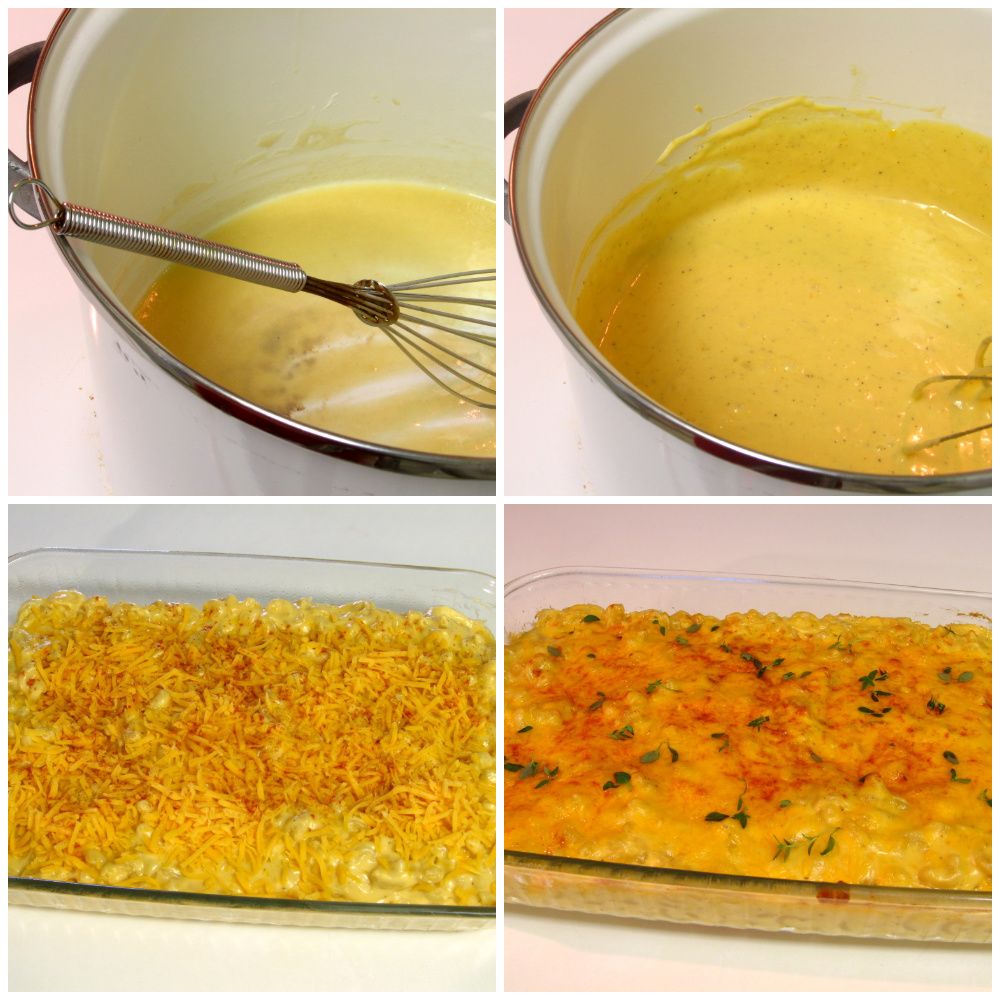
In a large pot, melt butter and sprinkle in flour. Whisk together over medium-low heat. Cook mixture for five minutes, whisking constantly. Don’t let it burn.

Pour in milk, add mustard, whisk until smooth, and turn heat up to medium-high. Cook for five minutes until very thick. Reduce heat to low.

Temper eggs: Take 1/4 cup of the sauce and slowly pour it into beaten egg, whisking constantly to avoid cooking eggs. Whisk together till smooth. Pour egg mixture into sauce, whisking constantly. Stir until smooth.

Add in cheese and stir to melt.

Add salts and pepper. Taste sauce and add more salt and seasoned salt as needed! DO NOT UNDERSALT (Would you believe I still undersalted mine, even with this warning? Don’t undersalt the macaroni and cheese, y’all!)

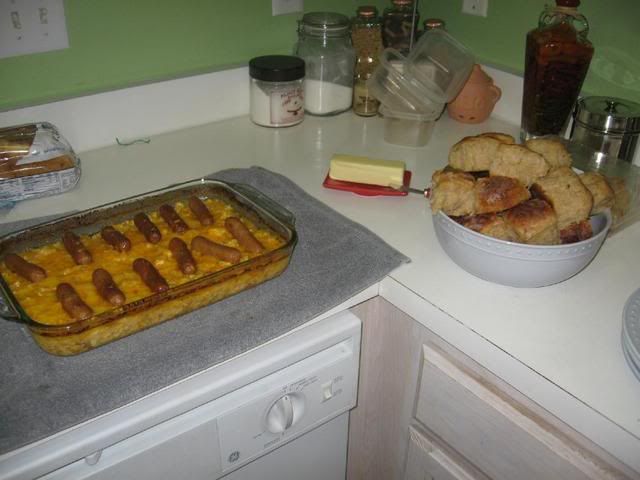
Pour in drained, cooked macaroni and stir to combine. Serve immediately (very creamy) or pour into a buttered baking dish, top with extra cheese and a sprinkle of paprika, and bake for 20 to 25 minutes or until bubbly and golden on top.


Enjoy!

P.S. Looking for something adorable for Easter? How about Chocolate Chickie Cake Balls or Lemon Burst Fairycakes?


Share Share this post with friends!

Baking to Freeze: Introduction!

New babies are such a joyous occasion, but the stress of getting used to a new, totally dependent little person in your life is sure to be a bit overwhelming. I’m so excited for my friend, A., who is expecting her new little one any day now (I’m sure it’s a girl, though we don’t actually know yet). She’s already so organized and has been nesting for months, but I wanted to do something to help her through the first busy days. What better than to do something I love (baking!) to support her as she adds to her family? I decided to make and freeze some dinners (and dessert, of course) for her to pop in the oven after Baby comes.

I’ve always loved the idea of giving friends gifts of food. Beyond merely supplying a need, personal, handmade gifts of food also supply warmth and affection. Sitting down to a hot meal is always satisfying and pleasant, and even moreso when it also represents the bond of friendship. It’s an intimate way to share a tiny piece of the load your friends are carrying. It’s lovely to be able to do something to help, and I hope the food turned out lovely for her.

The first step of creating A.’s meals was scouring the internet for which dishes would freeze well, thawing and baking instructions, and packaging tips. After all that searching around, I thought it might be nice to create a “one-stop” post on Willow Bird Baking about creating frozen meals. Hopefully this will be helpful for those of you with expectant friends, new neighbors, or even friends going through times of grief. Using this post, you ought to be able to bake one (or both) of two freezer-friendly casseroles and a batch of frozen cookie dough, print labels/thawing instructions, and get tips on preparing products for the freezer.

Now, onto the food! I chose two lasagnas for my freezing escapade. One is a Mexican Lasagna, which folks joke is neither Mexican, nor a lasagna! It’s very easy to throw together. The other is a Classic Italian Lasagna, which is Italian and is lasagna, and is much more time consuming. It’s a labor of love. Which casserole you choose really depends on your goal: if you want a quick and easy recipe, choose the former, but if you enjoy making more complex recipes, choose the latter (or both). I personally hadn’t made a “real lasagna” before, so I wanted to give it a shot! Finally, I chose to make some cookie dough for a dessert, since it freezes very well. Martha Stewart’s Chunky Peanut, Chocolate, and Cinnamon Cookies sounded hearty and delicious. Because of the large quantities of food, I decided to keep half and give half. That way the baking does double duty, and A.’s freezer doesn’t get overbooked!


LOTS of food!

Click on the recipe below that you’re interested in baking (or baking to freeze!) to find the recipe, printable labels, and thawing instructions:

Recipe #1: Mexican Lasagna

Recipe #2: Classic Italian Lasagna

Recipe #3: Chunky Peanut Chocolate Cinnamon Cookies

Finally, here are some great tips for freezing casseroles, to which I would add the following:

  • Consider packaging: disposable baking dishes are a kindness, since they won’t need to be returned. Make sure all of the dishes you’re preparing will fit in the freezer when packaged and wrapped!
  • Label your meals: In addition to the name of the dish, include instructions on thawing/baking, a “date packaged” and “good until” date, and the recipes (this will allow friends to calculate nutrition information, peruse ingredients, and even make the dish again, if they wish). I’ve included PDF labels for each of the dishes below, so feel free to download and print them. The labels can be cut out and glued on 4×6 index cards to make them sturdier.
  • Wrap food better than you think you need to. Double layers of plastic wrap, pack things in ziplock bags, etc.

Baking to Freeze: Classic Italian Lasagna

Classic Italian Lasagna is the second recipe in my “baking to freeze” series (see the introduction post here, if you missed it!)

This recipe could quite literally take you all day to make, but if you’re like me and you love a culinary challenge, go for it! If you’d rather cut out a bit of the labor, you can substitute a jarred spaghetti sauce of your choice for the tomato sauce.

Pay special attention that you season each part of the lasagna well (the pasta, the sauce, the meat, the ricotta mixture).


Cooling off in the fridge before freezing! My first real lasagna!


Baking to Freeze Recipe #2: Classic Lasagna


Recipe by: Adapted from Giada DiLaurentis, with tomato sauce by Tina
Yields: About 6-8 servings

Ingredients:

Quick Tomato Sauce:
olive oil
1 onion, diced
3-4 cloves garlic, minced
1 heaping teaspoon diced shallots
1 large can tomato puree
1-2 teaspoons sugar (to taste)
1-2 teaspoons basil (to taste)
Pinch of oregano
Pinch of thyme
Salt and pepper

Béchamel Sauce:
5 tablespoons unsalted butter, plus 2 tablespoons for the lasagna
1/2 cup all-purpose flour
4 cups whole milk at room temperature
Pinch freshly grated nutmeg
1 1/2 cups tomato sauce, recipe follows (I would add more for a bolder tomato flavor)
Salt and white pepper

1/4 cup extra-virgin olive oil
1 pound ground chuck beef
Salt and pepper
1 1/2 pounds ricotta cheese
3 large eggs
1 pound lasagna sheets, cooked al dente
2 packages (10 ounces each) frozen chopped spinach, thawed and squeezed dry
3 cups shredded mozzarella
1/4 cup freshly grated Parmesan

Directions:
Make quick tomato sauce: Sautee onion, garlic, and shallots in olive oil for 5-10 minutes. Add a large can of tomato puree and all spices and herbs. Let sauce simmer for at least 20 minutes.

Make béchamel sauce: In a 2-quart pot, melt 5 tablespoons of butter over medium heat. When butter has completely melted, add the flour and whisk until smooth, about 2 minutes. Gradually add the milk, whisking constantly to prevent any lumps from forming. Continue to simmer and whisk over medium heat until the sauce is thick, smooth and creamy, about 10 minutes. The sauce should be thick enough to coat the back of wooden spoon. Remove from heat and add the nutmeg and tomato sauce. Stir until well combined and check for seasoning. Set aside and allow to cool completely.

In a saute pan, heat extra-virgin olive oil. When almost smoking, add the ground beef and season with salt and pepper. Brown meat, breaking any large lumps, until it is no longer pink. Remove from heat and drain any excess fat. Set aside and allow to cool completely.

In a medium sized bowl, thoroughly mix the ricotta and eggs. Season with salt and pepper. Set aside.

Into the bottom of a 13 by 9-inch baking dish (disposable oven-proof baking dishes are wonderful for freezing in), spread 1/3 of the béchamel sauce (NOTE: if you’re freezing the lasagna but don’t have a disposable baking dish, line a glass baking dish with foil and leave the ends hanging over the dish. Assemble your lasagna in the dish and bake. Then, after you’ve cooled, you can freeze the casserole, pull it out using the ends of the foil, and store it in a large ziplock bag. When you’re ready to thaw and bake, you can use the original dish). Arrange the pasta sheets side by side, covering the bottom of the baking dish. Evenly spread a layer of all the ricotta mixture and then a layer of all the spinach. Arrange another layer of pasta sheets and spread all the ground beef on top. Sprinkle 1/2 the mozzarella cheese on top of the beef. Spread another 1/3 of the béchamel sauce. Arrange the final layer of pasta sheets and top with remaining béchamel, mozzarella and Parmesan cheeses. Cut the remaining 2 tablespoons of butter into 1/4-inch cubes and top lasagna.

Line a large baking sheet with aluminum foil. Place lasagna dish on top, cover and put on the middle rack of the oven and bake until top is bubbling, about 30 minutes. Remove cover and continue to bake for about 15 minutes. (If freezing, bake for 30 minutes covered, remove cover and bake for 5 more minutes. Cool to room temperature and wrap well — double up layers of plastic wrap. Store in freezer for up to 3 months).

Thawing Instructions: Thaw overnight in refrigerator. Preheat oven to 375 degrees. Cook 20-30 minutes or until lasagna is heated through and bubbly.

Pictures of the process:


Béchamel sauce with tomato sauce mixed in.


Lasagna assembling about to begin.


Lasagnas ready for the oven (and an interested Byrd in the background).


Yeah . . . that’s my usually tidy kitchen after a full day of lasagnaing (during which I think I used almost every dish and utensil I own — and most of my roommate’s as well). And I’m a clean-as-you-go person, too, but what can I say?


All packaged and ready!


A nice plate of lasagna and cheesy garlic bread after reheating!

Click here to download thawing/baking instruction labels and recipe card to include with this dish.

Preview:

Baking to Freeze: Mexican Lasagna

Mexican Lasagna is the first recipe in my “baking to freeze” series (see the introduction post here, if you missed it!)


Two dishes of Mexican Lasagna with thawing/baking instructions and green onions on the side

Baking to Freeze Recipe #1: Mexican Lasagna


Recipe by: Adapted from Rachael Ray
Yields: About 6-8 servings

2 pounds ground beef
1 packet taco seasoning, such as McCormick’s
Cheesy Taco Seasoning
1 tablespoon chili powder
1 teaspoon ground cumin
1/2 red onion, chopped
1 15-ounce can black beans, drained
1 14-oz can fire roasted tomatoes
1 cup frozen corn kernels
Salt
8 8-inch flour tortillas
2 1/2 cups shredded cheddar
2 scallions, chopped

Directions:
Preheat the oven to 425 degrees F. Preheat a large skillet over medium high heat. Brown ground beef and drain the fat. Return beef to pan and add taco seasoning (and water, if the seasoning packet calls for such) chili powder, cumin, and red onion. Mix and cook for 2-3 minutes. Add fire roasted tomatoes, black beans, and corn. Heat the mixture through, 2 to 3 minutes, then season with salt to your taste.

Spray a shallow baking dish (disposable oven-proof baking dishes are wonderful for freezing in) with nonstick spray. Cut the tortillas in half or quarters to make them easy to layer with. Build lasagna in layers of meat and beans, then tortillas, then cheese. Repeat: meat, tortilla, cheese again. If freezing, wrap tightly and freeze, keeping bag of scallions and side of salsa in the fridge ready to serve on the side. Lasagna will keep for up to 3 months. If not freezing, simply bake lasagna 12 to 15 minutes until cheese is brown and bubbly. Top with the scallions and serve.

NOTE: if you’re freezing the lasagna but don’t have a disposable baking dish, you can also line a glass baking dish with foil and leave the ends hanging over the dish. Assemble your lasagna in the dish and bake only about 10 minutes. Then, after it’s cooled, you can freeze the casserole, pull it out using the ends of the foil, and store it in a large ziplock bag. When you’re ready to thaw and bake, you can use the original dish.

Thawing Instructions: Thaw overnight in refrigerator. Preheat oven to 425 degrees. Cook 30 minutes or until casserole is heated through and cheese is brown and bubbly. Top with scallions (to taste) and serve.


Mexican Lasagna filling: browned ground beef, red onions, taco seasoning, extra chili powder and cumin, corn, black beans, and fire-roasted tomatoes.

Click here to download thawing/baking instruction labels and recipe card to include with this dish.

Preview:

Oven Baked Macaroni and Cheese

After reliving the lovely memories associated with fresh yeast rolls, I want to share another special family recipe with you: Oven Baked Macaroni and Cheese. My love of macaroni and cheese runs deep. After all of the amazing things I’ve eaten, I still feel like I can say it’s my favorite food.

In fact, I can remember many of the macaroni and cheeses I’ve enjoyed throughout the years. Apart from raiding the macaroni on the buffet at Quincy’s, I remember getting double helpings when my family visited K&W, a cafeteria style restaurant. I also fondly remember when I finally endeavored to make the blue box macaroni on my own as a child, and proceeded to eat most of it on my own as well. The delicious soul food macaroni and cheese at Charlotte’s historic restaurant, the Coffee Cup. The gourmet lobster macaroni and cheese at a restaurant in south Charlotte. The decadent, bready macaroni and cheese Mike’s mom makes. Perhaps I should write a poem on the subject: my life in macaroni.

Over the years, one recipe tops the list as my favorite macaroni and cheese. I guess you’d expect it to be a labor intensive recipe with numerous cheeses and a mile-long list of ingredients. But you know what’s funny? Sometimes the simplest things really are the best. This Oven Baked Macaroni and Cheese (with optional sausages) takes all of 5 minutes to throw together, bakes for 45 minutes, and is truly outstanding. I’ve had people ask if I put ricotta in it because it’s so creamy, and I’ve had people request that I bring two pans of it to a party instead of just one. You’re going to love this recipe, just like my family has for years.


Oven Baked Macaroni and Cheese

I often serve this as a main course with the optional breakfast sausages on top. You can serve it with big spinach salads. In one particularly fabulous meal, I just made a big pan of this macaroni and a big pan of homemade yeast rolls and Mike and I loaded up on carbs! It also goes wonderfully as a side dish, of course. Here are my serving suggestions in photograph form (can you tell we eat this a lot?):


One serving suggestion: big spinach salads with Oven Baked Macaroni and Cheese (and some goodies in the background as a teaser — that post is coming soon!)


Another delicious way to eat Oven Baked Macaroni: with a big bowl of yeast rolls!


Last but not least, another carb indulgence: Oven Baked Macaroni and Cheese acting as a side dish to our Taco Stuffed Crescent Rolls (another great and easy recipe I’ll have to post soon!)


Oven Baked Macaroni and Cheese


Recipe By: unknown
Yields: a large casserole dish; serves about 4.

Ingredients:
3 tablespoons butter
2 cups dry macaroni
4 cups milk
1 block sharp cheddar cheese, grated (or about 4 cups)
1 package breakfast sausage links or bulk sausage, cooked (optional)
salt and pepper
a sprinkle of fresh chopped chives (optional)

Directions:

Preheat oven to 400 degrees. Spray large, rectangular pyrex dish with nonstick cooking spray. Put butter into dish and set it in the oven as it preheats. When butter is melted, take the dish out and add macaroni. Stir until macaroni is coated. Add milk, cheese, salt, and pepper. Stir and make sure ingredients are evenly distributed. Bake at 400 for 45 minutes, stirring twice during baking. Place cooked breakfast sausages on top (and sprinkle a little extra cheese if desired) and heat in oven until hot. Sprinkle on fresh chopped chives if desired.


Ready for the oven!


Ready to eat!


As a bonus, will you just LOOK at my adorable cooking buddy’s sleeping position as I type this? I had to capture it with my grainy Photobooth since my camera is nowhere in sight. Isn’t she the cutest?!


Sleepy little Byrd helping Mom post recipes and dreaming of belly rubs!