caramel

Foodbuzz 24×24: The Make-Ahead Holiday Breakfast Party (Recipe: Salted Caramel Mocha Hot Chocolate)

I remember that Christmas morning with all the clarity of the glass icicles adorning our Christmas tree — at least one of which was shattered each year, an inadvertent Christmas tradition. Mom was sitting on the couch in her dramatic floral robe. The scent of coffee — which I loved, despite being averse to the bitter taste — filled the house. The rest of the family was milling about the living room, preparing to distribute the presents.

Suddenly, with a pine needley, jingle-jangly harrrrrumph!, the Christmas tree outright fell on my mother.

I mean, one minute that thing was standing tall, looking regal and festive, and the next it was on her head. She let out a startled cry and flailed from between its branches, sending ornaments and pine needles flying around the room.

Mom will disagree — and okay, my little brother’s First Christmas ornament broke, and that was sad — but this was quite possibly the most hilarious and lively Ruble Christmas morning to date.

Other Christmas mornings were notable too. There was the one where I found, after opening all my gifts, that I hadn’t received the one thing I wanted most: a pedal go-kart. I pasted on a happy face, but I was disappointed. I did have one present left, but it was a card and didn’t look promising.

The card turned out to be from Santa. I scanned it halfheartedly, and realized that it was a set of instructions. I was supposed to head upstairs to my sister’s room. Suddenly, my heart filled with hope. I charged up the stairs eagerly and shot through the door. There, in all its bright yellow glory, was my go-kart!

Other years brought a dose of holiday reality. When I was around 6, I opened my parents’ closet a few days before Christmas to put some clothes away. To my great surprise, I found myself staring at a gigantic dollhouse. I was so stunned that it took me a few moments to realize that this must be a poorly hidden Christmas present.

My tiny heart filled with glee as I briefly surveyed the three-story mansion, complete with furniture, a balcony, and landscaping. I’d always been enamored with miniatures, and now my parents had apparently decided to indulge my dollhouse obsession. I closed the door, thrilled at my discovery and determined to act surprised when I received my gift.

On Christmas morning, I ran downstairs and sure enough, the dollhouse was standing in the living room like a beacon of childhood happiness, boasting a big bow. I squealed joyfully and ran over to it, only to hear my parents call out, “That’s for your sister!

Those four words — so tiny! so brief! — cut me down faster than a fir tree on a Christmas farm.


family photo!

Then there was the Christmas morning I woke up and accidentally stabbed myself in the nose while trying to brush my hair out of my face. My entire family, probably confused but not surprised by the fact that I’d managed to injure myself immediately upon waking, waited patiently while I tried to stop the bleeding.

I couldn’t make this stuff up.
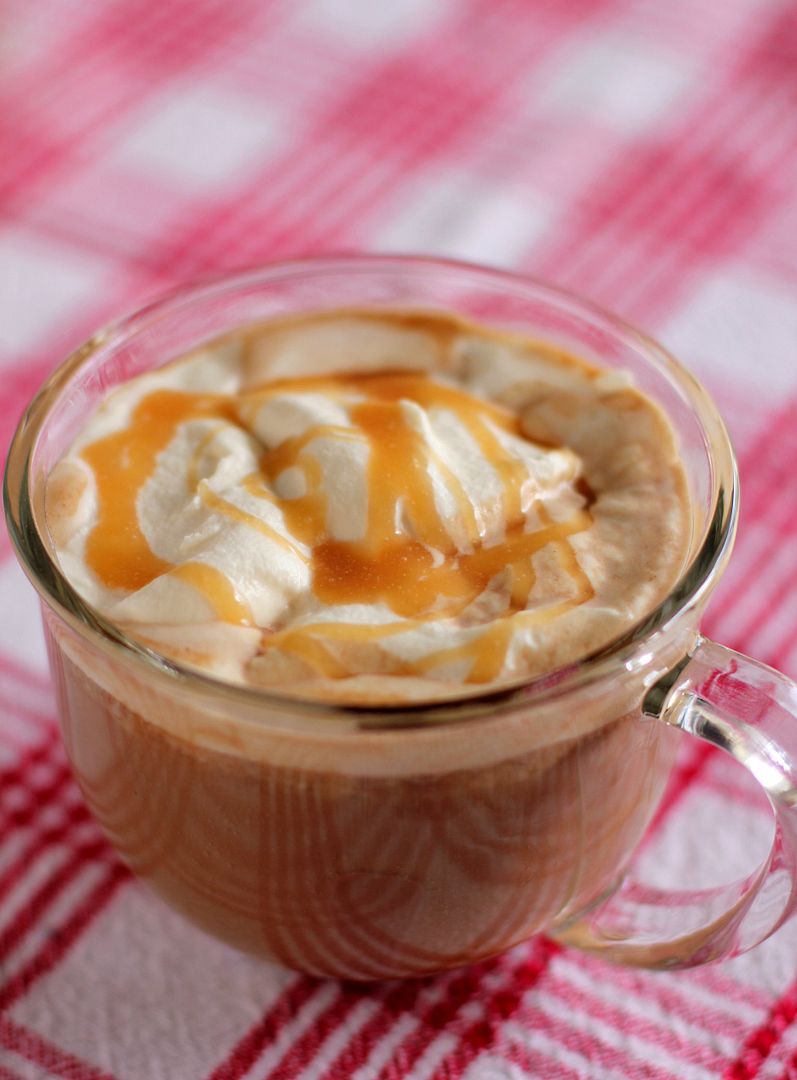

salted caramel.

It’s true; Christmas morning has varied wildly over the years — exciting, disappointing, joyous, dangerous, absurd. One constant that we’ve all come to cherish, though, is Christmas morning breakfast. Every single year, without fail, my mother wakes up early, bakes an egg casserole, and rolls out dough to make fresh cinnamon rolls. While we’re all still counting sugar plums in our jammies, she’s hard at work in the kitchen.

This year, in her honor, I decided to design some recipes specifically for a holiday breakfast — dishes that in addition to being fancy and indulgent, could be prepared almost entirely in advance. To test my menu — that’s my excuse, and I’m stickin’ to it — I threw a Make-Ahead Holiday Breakfast Party, where I decked my halls and created a make-believe Christmas morning.

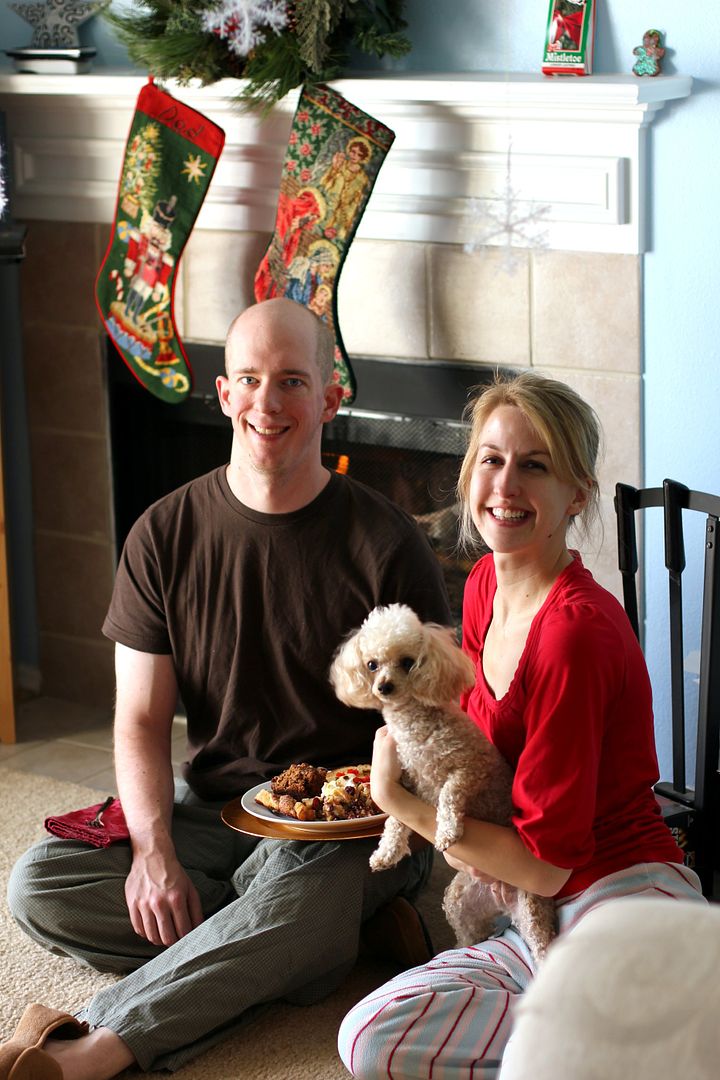
The party turned out to be special even beyond the menu. See, Mike and I have never spent a Christmas morning together, despite being in a relationship for most of the past 12 years.

I’m not complaining. So many families are separated on Christmas morning because of deployment, distance, and even death. Our situation is downright joyful by comparison. We’re separated each year because both of our families have Christmas morning traditions. We spend time with our own parents in the morning before meeting later to enjoy Christmas afternoon together. This year, though, my Make-Ahead Holiday Breakfast Party was the perfect way to create a “Christmas morning” for just us.

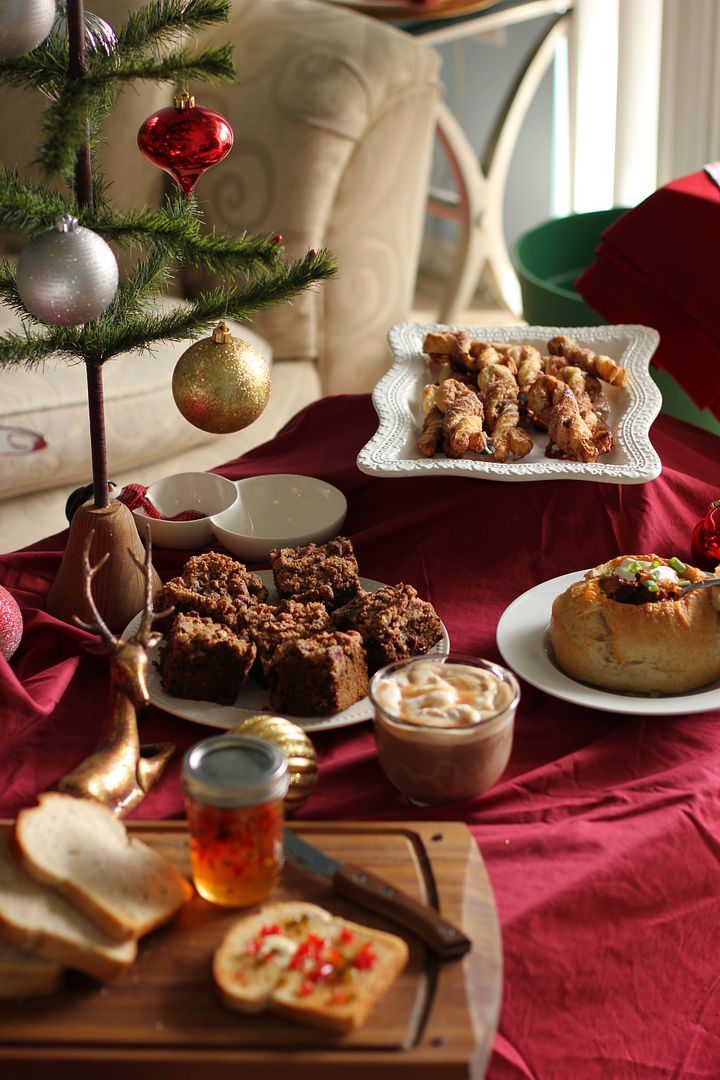
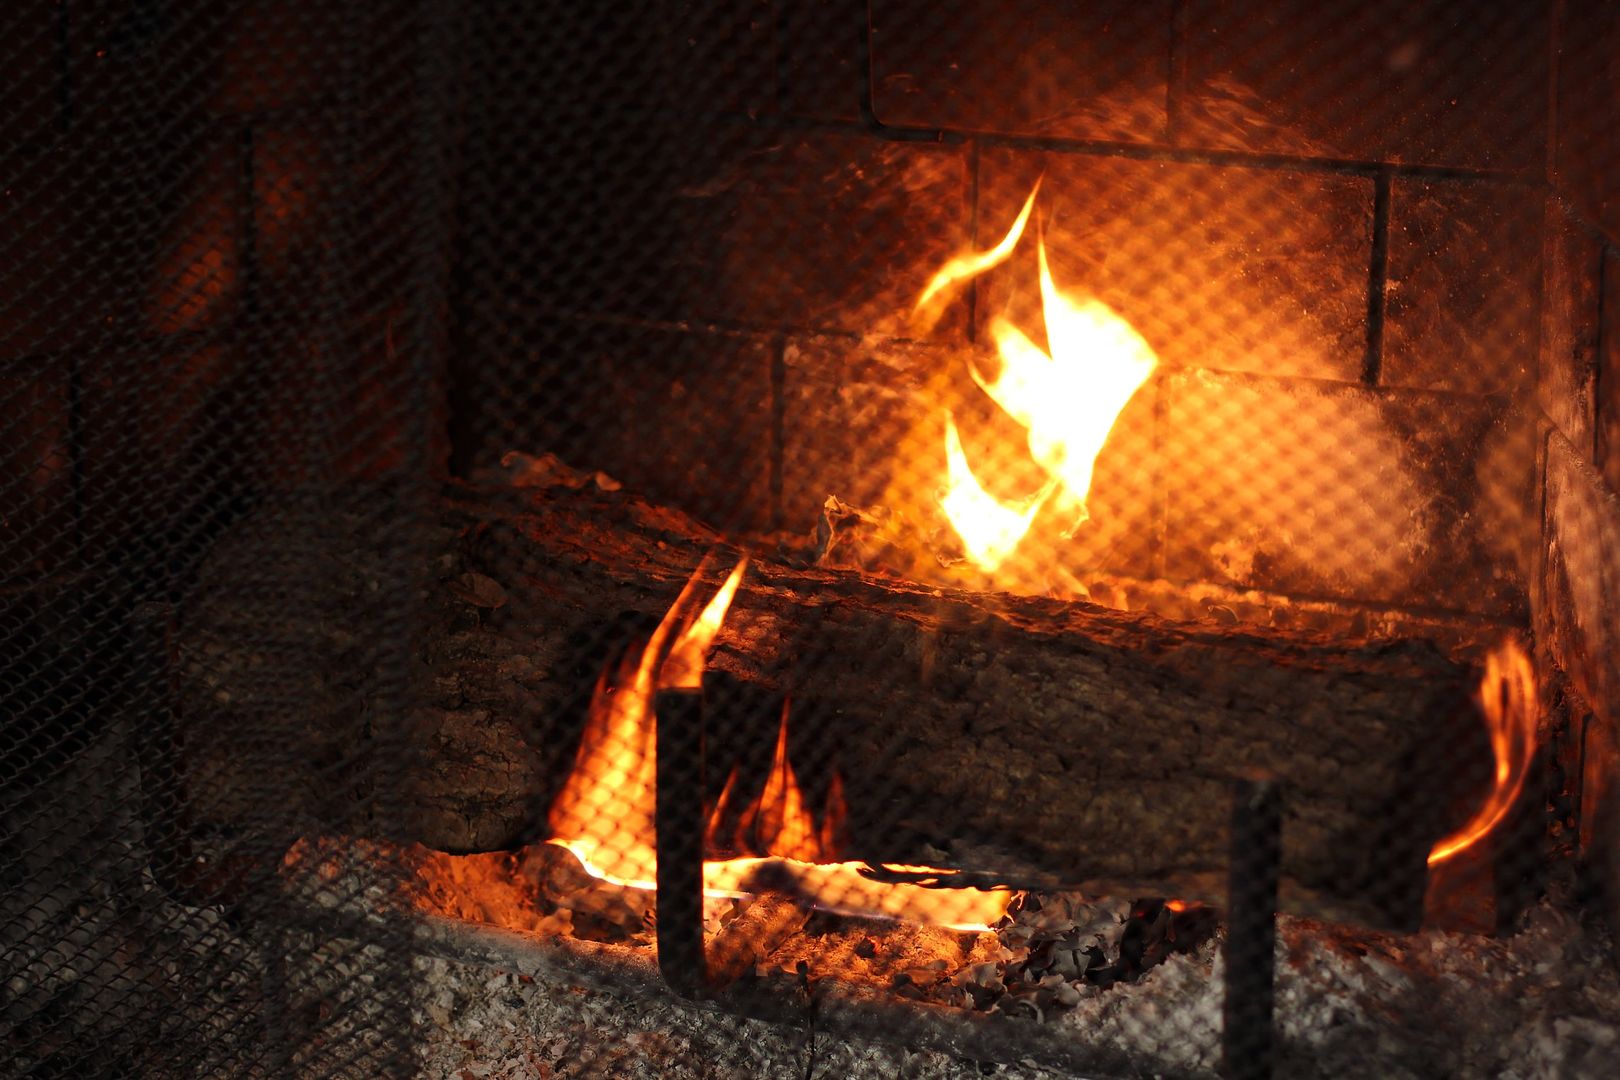
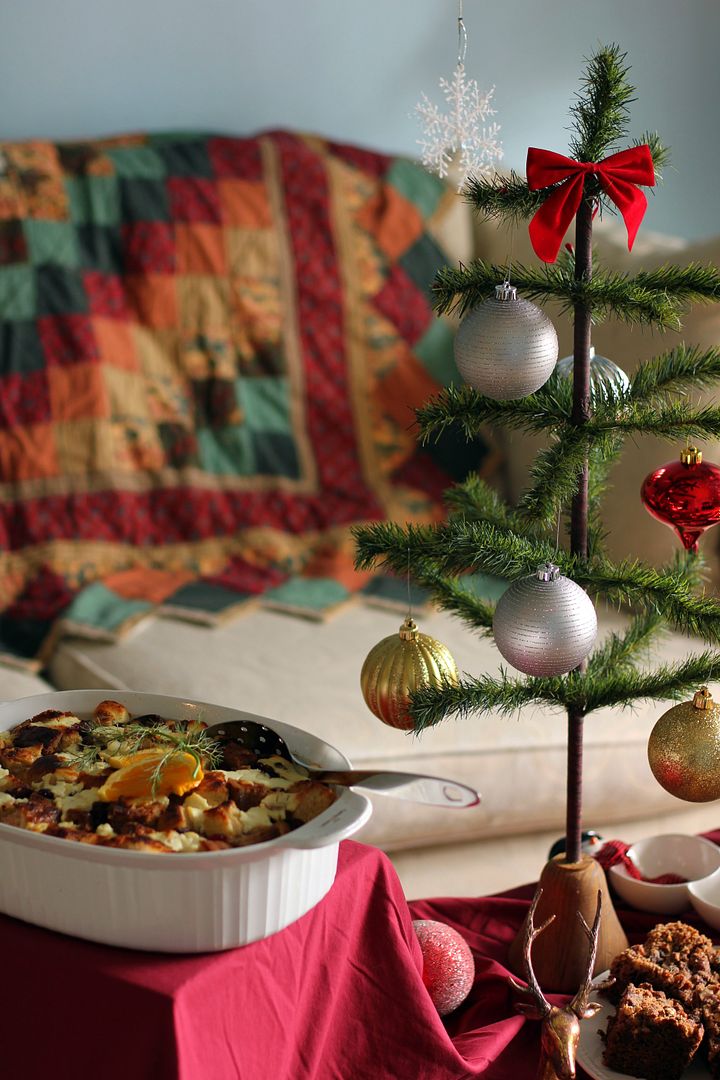
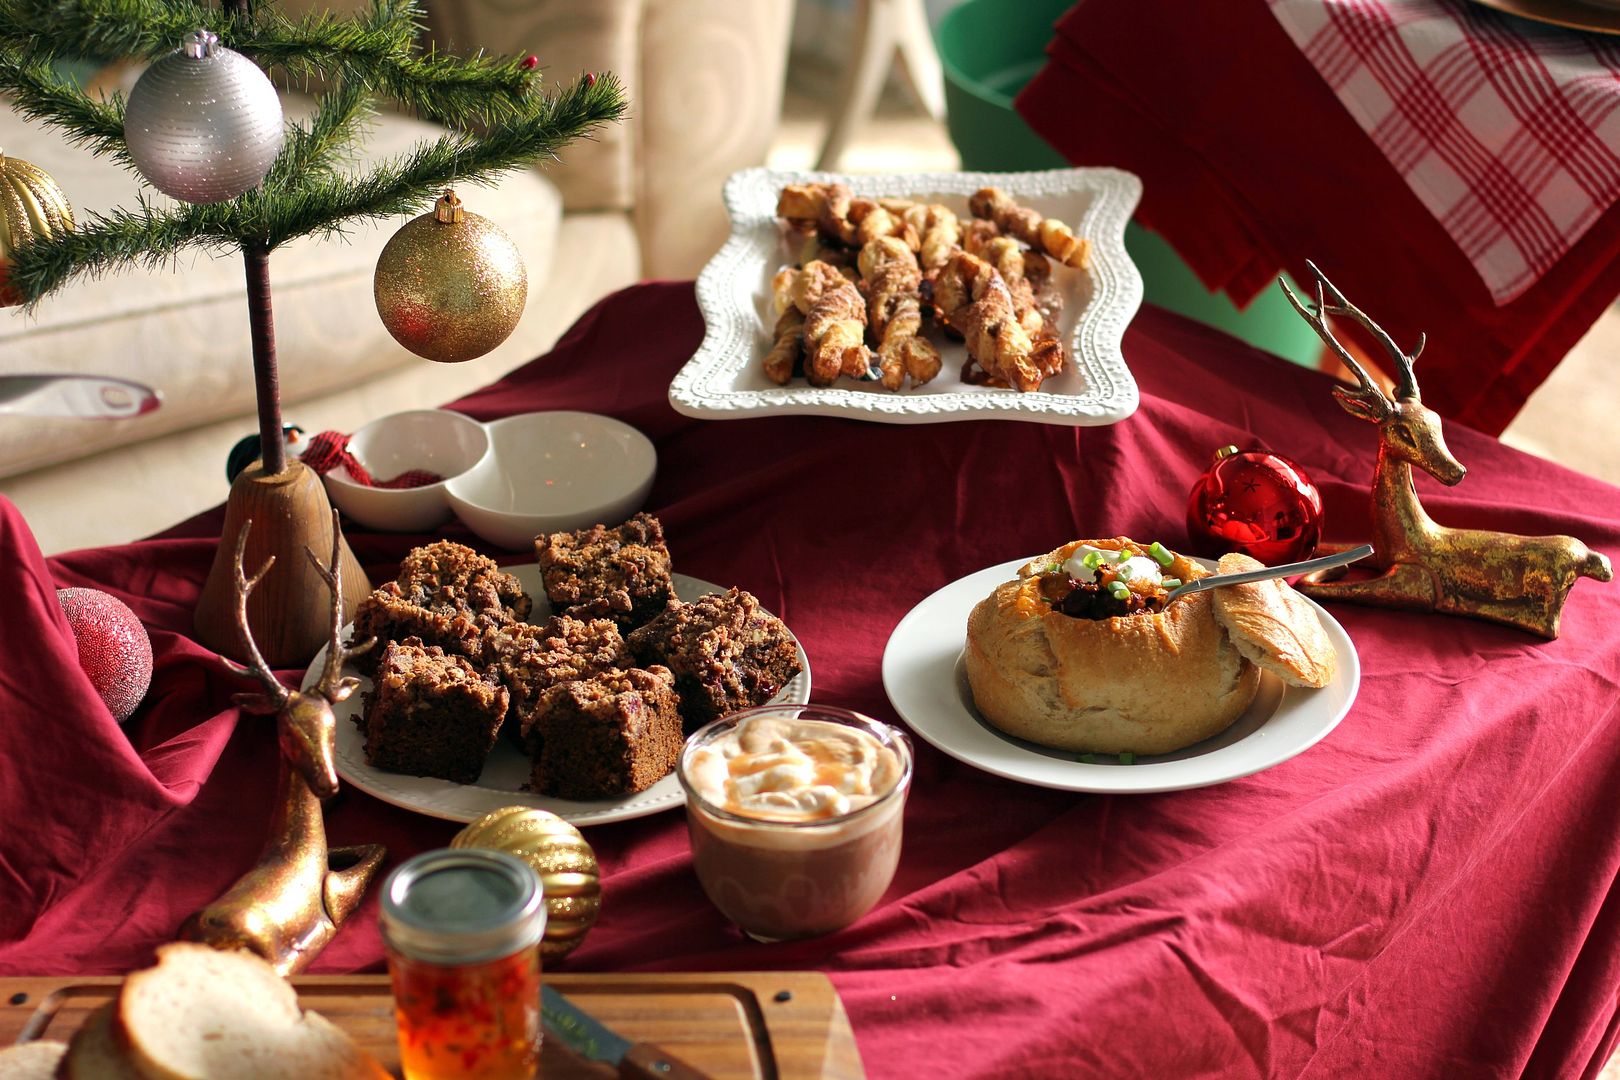
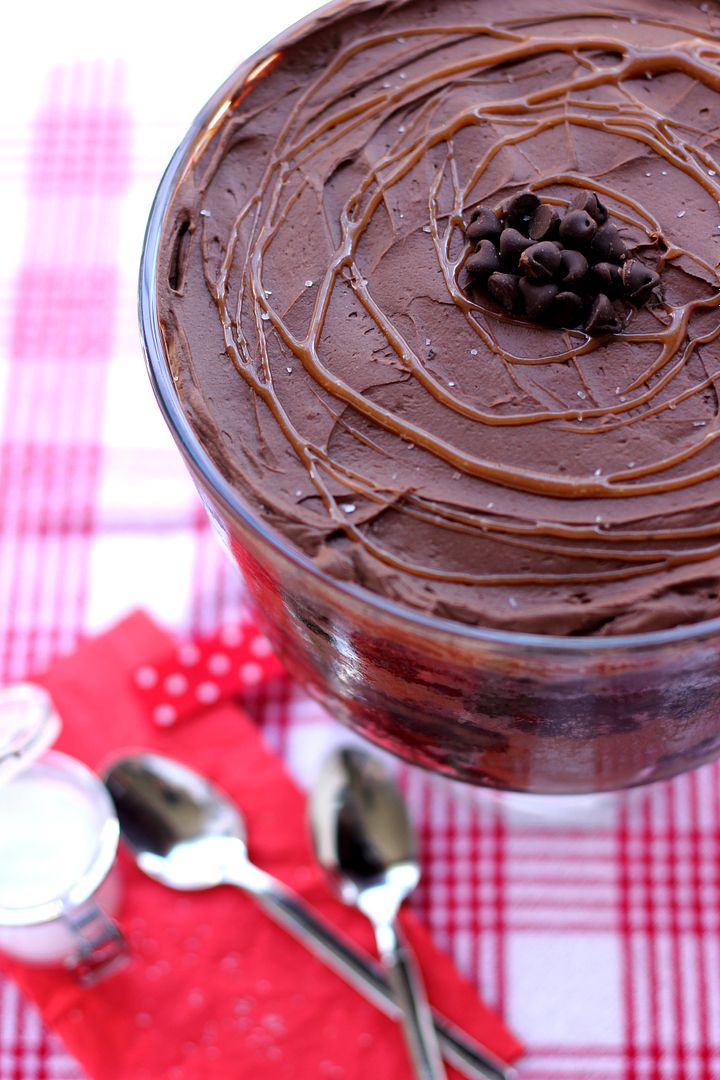
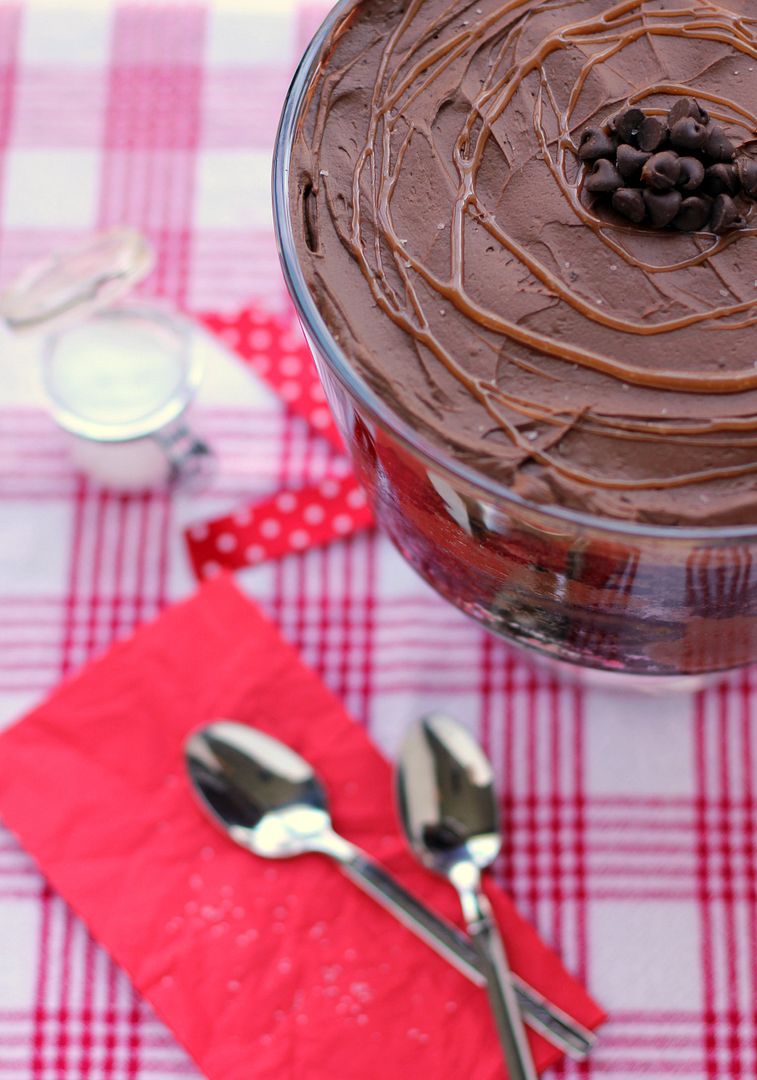
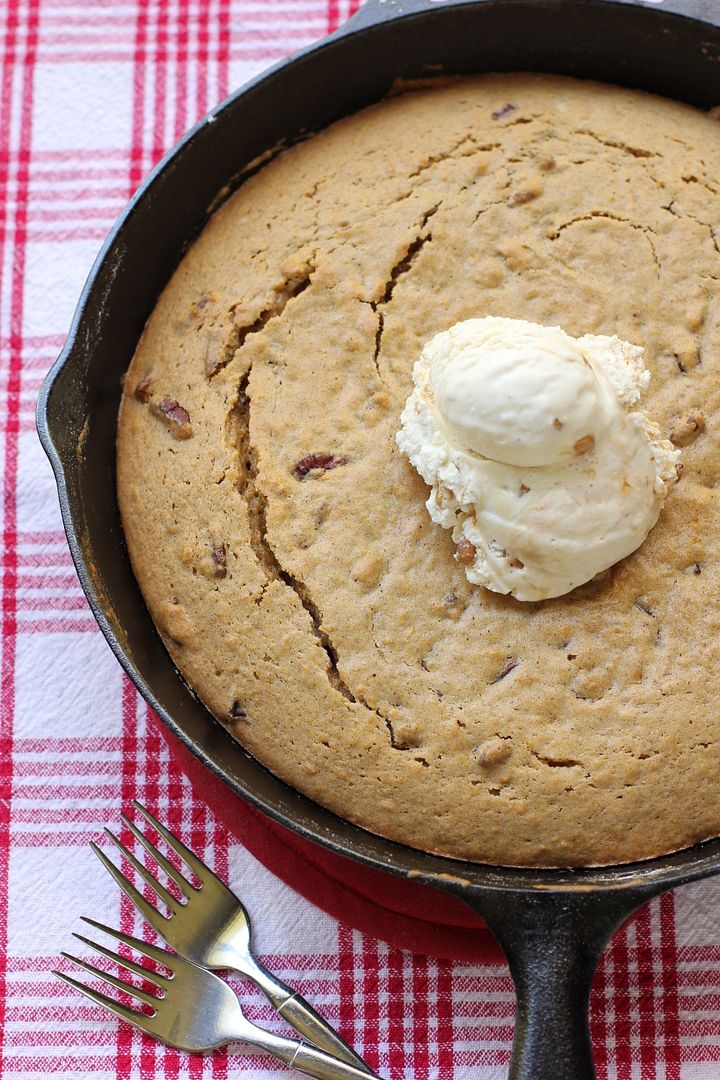
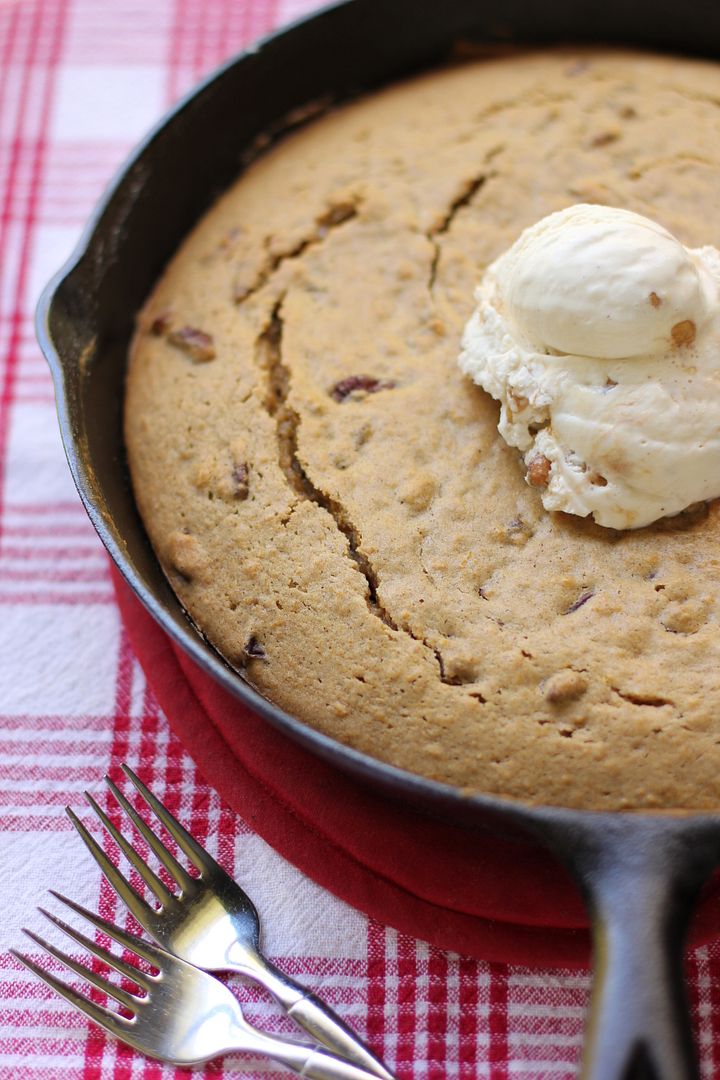
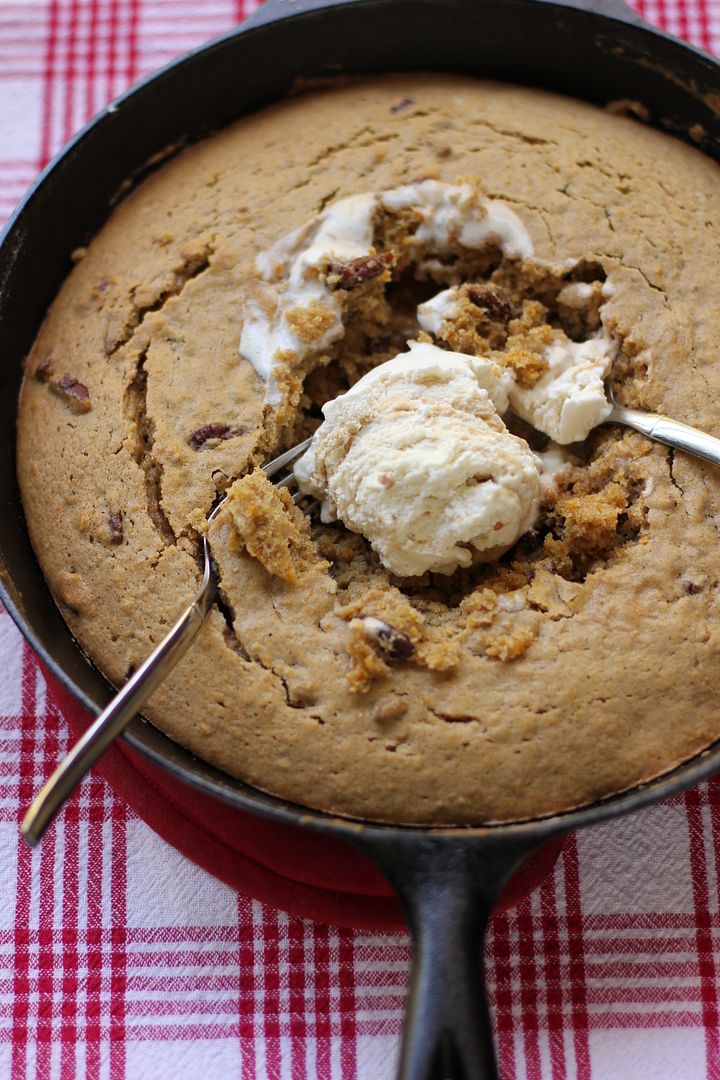
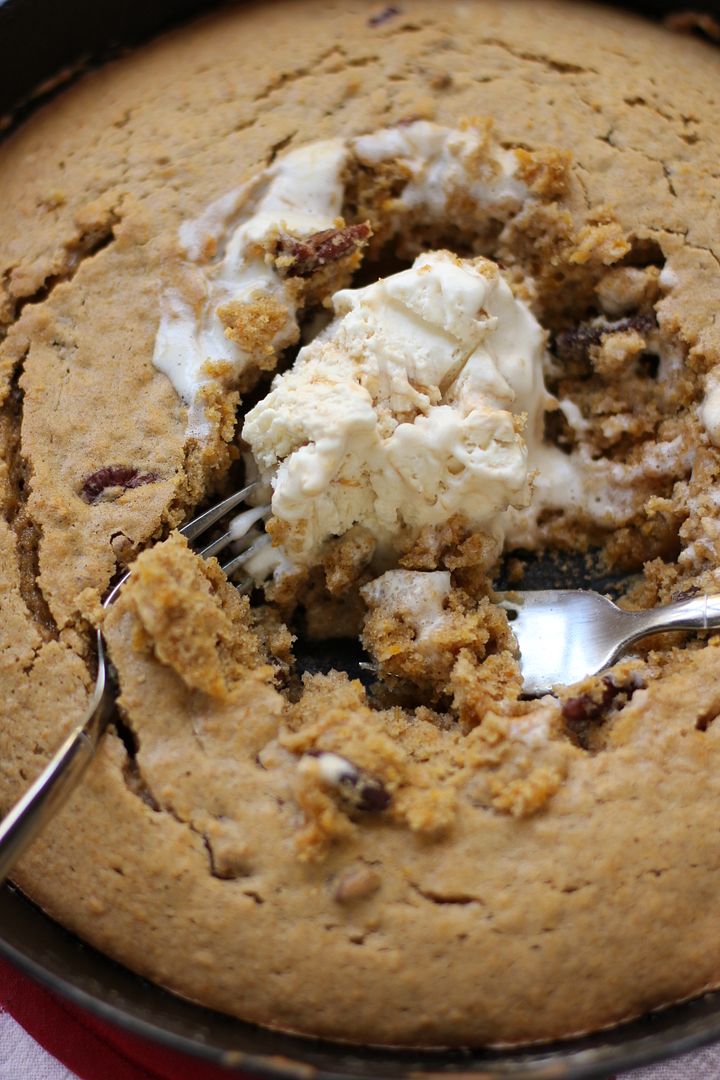
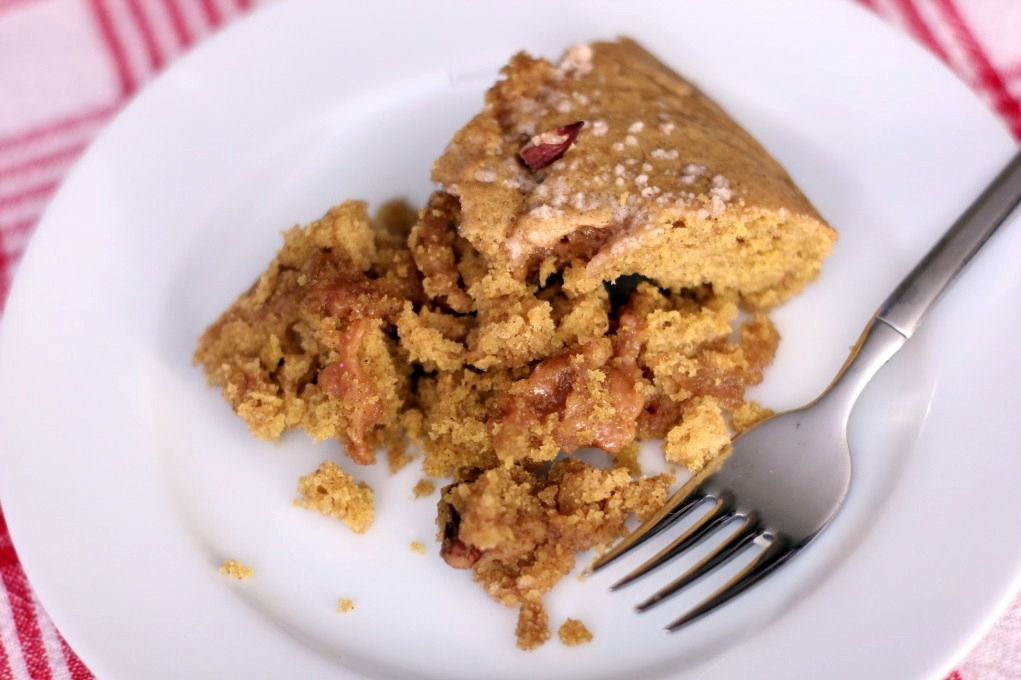
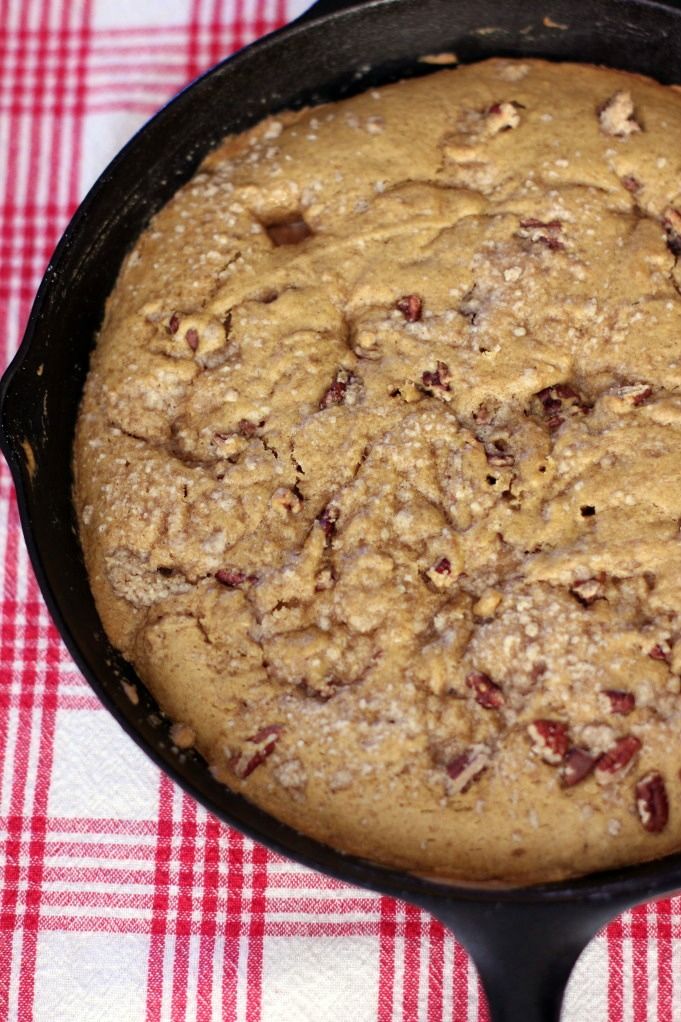
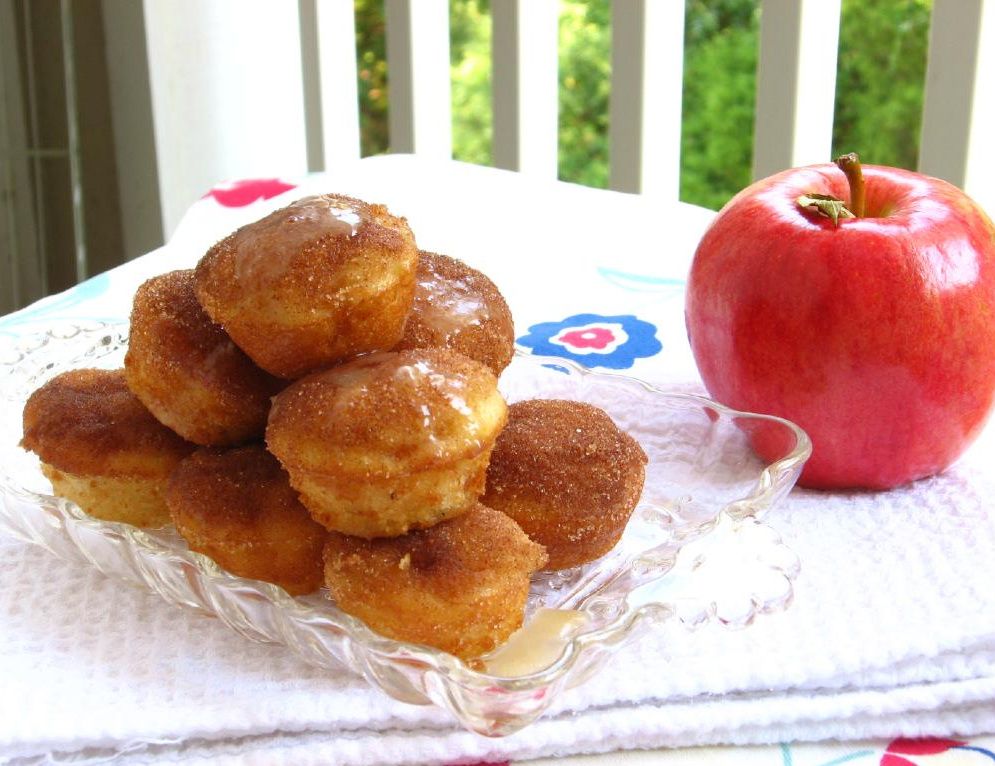
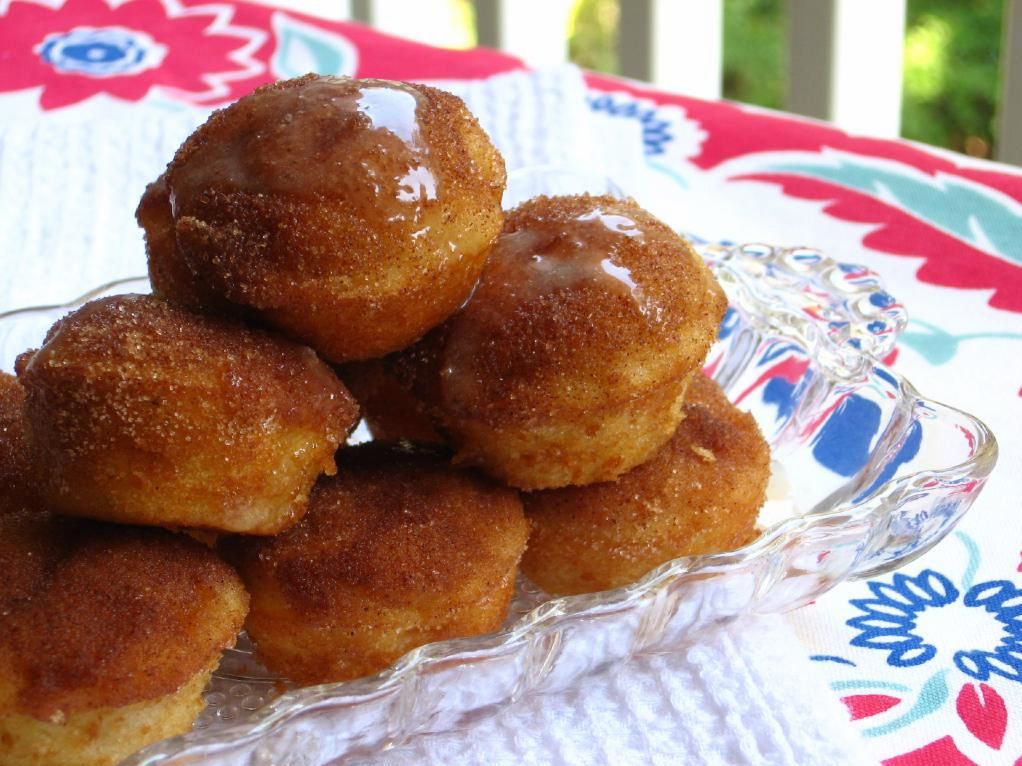
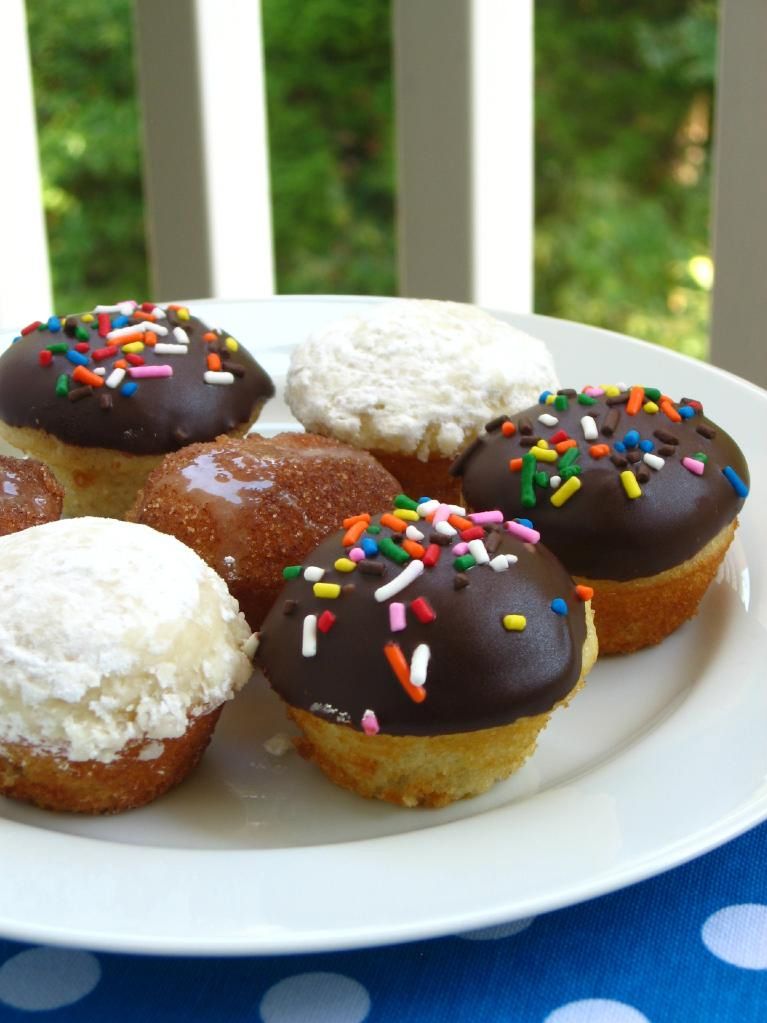
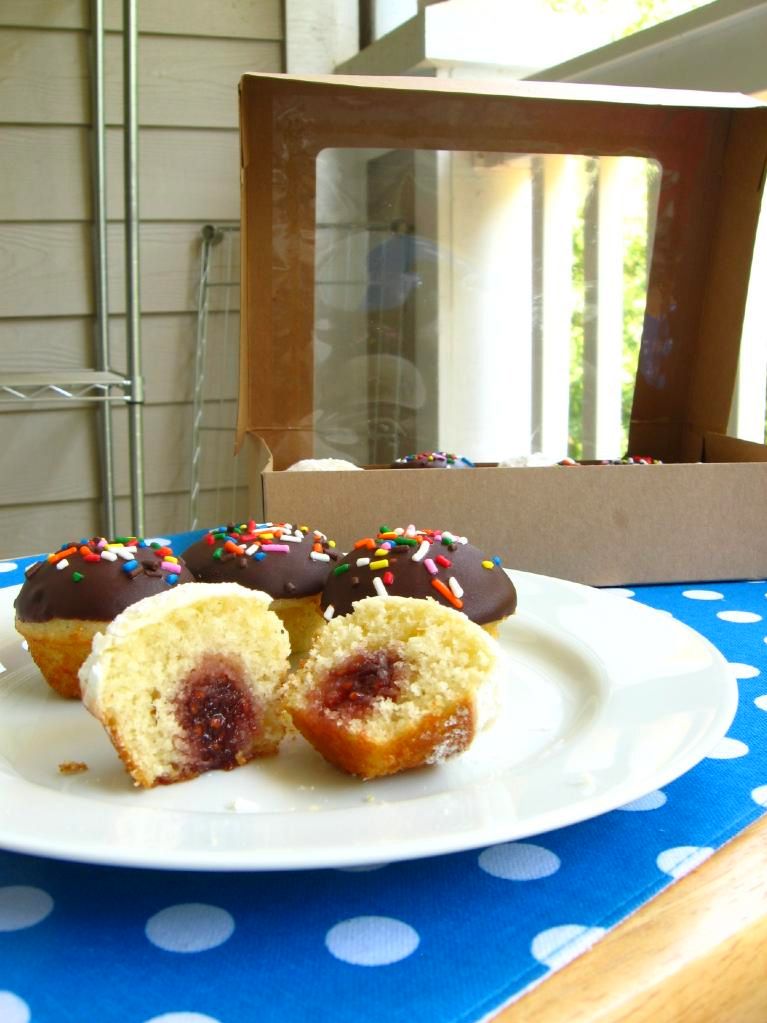
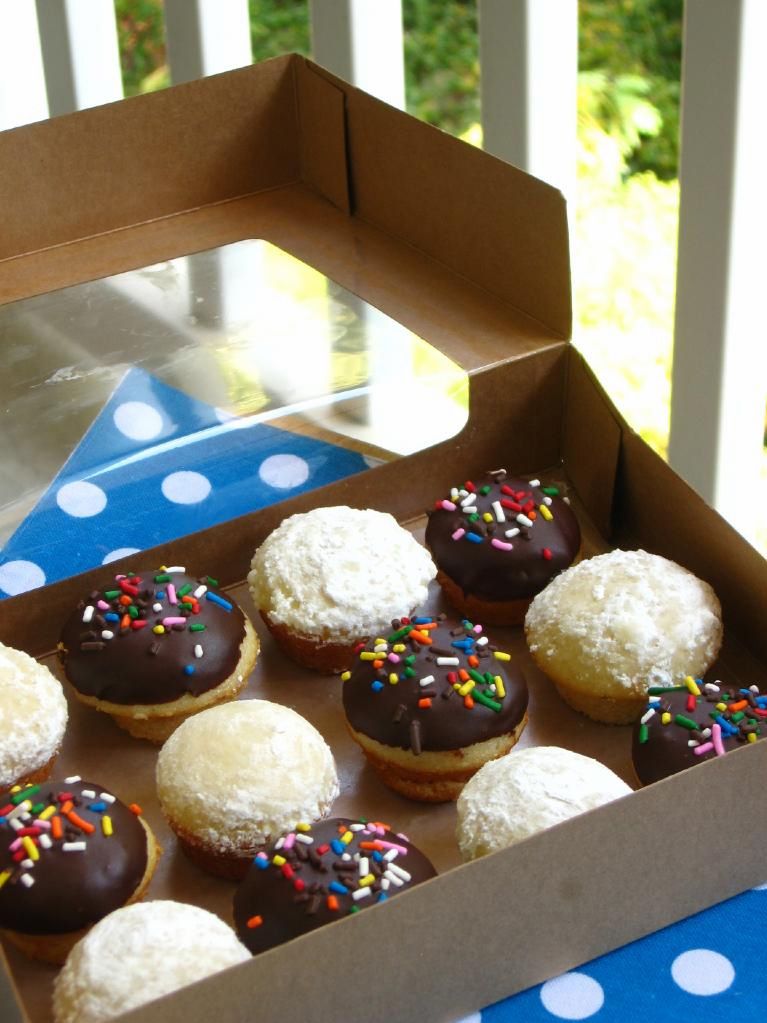
So yesterday morning, we donned our PJs and slippers in true Christmas morning fashion. I lit my first ever fire, put the finishing touches on all of the make-ahead dishes I’d prepared earlier in the week, and we sat down together to eat. Little Byrd sat between us eating her Christmas kibble. Our plates, however, were loaded down with Gingerbread Coffee Cake, Cinnamon Stix with Eggnog Glaze, Savory Bread Pudding with Cranberries and Fennel, Winter Breakfast Chili in Sourdough Bowls, and Buttered Toast with Bright Pepper Jam.

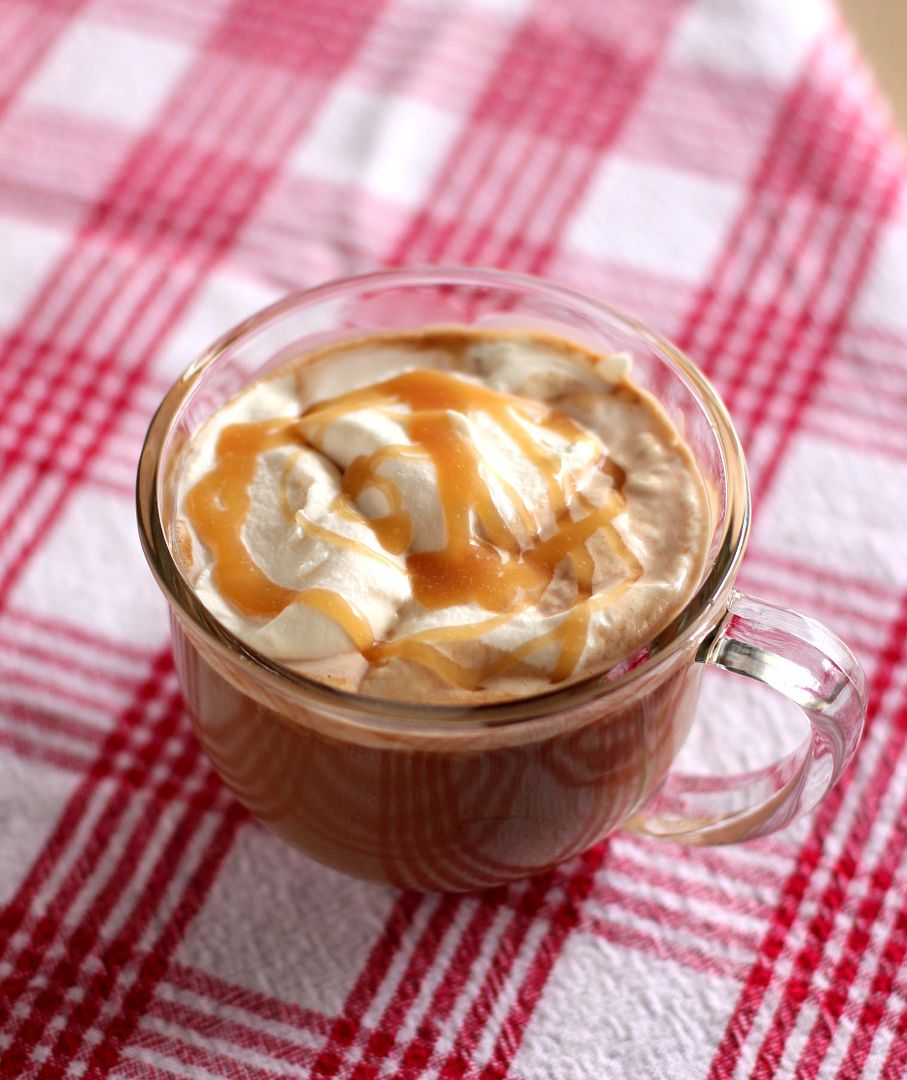
Between bites, we sipped this Salted Caramel Mocha Hot Chocolate. I’m not one for hot breakfast drinks, usually, but I’d make an exception for this thing any day. You coat the mug with hot, buttery salted caramel before pouring in the steaming mocha hot chocolate (where coffee plays a supporting role than the lead). The whole thing is topped with a mess of caramel whipped cream and a caramel drizzle.

I’ll be sharing the other make-ahead breakfast recipes with you throughout the coming weeks as you prepare for the holidays. In the meantime, share your favorite Christmas morning memories. Anyone have any harrowing experience with falling Christmas trees?

Salted Caramel Mocha Hot Chocolate


Recipe by: Willow Bird Baking, inspired by Savory Sweet Life, adapted from Martha Stewart (caramel and cream) and TLC
Yield: 2 big mugs of hot chocolate

I can’t really quantify how buttery, caramelly, chocolatey, and delicious this Salted Caramel Mocha Hot Chocolate is, so let me just say: mmmmmm. I don’t like coffee, but in this recipe it’s there to add richness and balance, and isn’t the dominant flavor. The recipe is designed to be completed mostly in advance, making it lovely for a holiday morning breakfast — or anytime you’re in a festive mood. Also, don’t be afraid of caramel. This recipe includes temperatures, and as long as you use a candy thermometer, you’ll be great!

Mocha Hot Chocolate Ingredients:
1 1/2 cups milk
1/2 cup brewed coffee
2 tablespoons semi-sweet chocolate chips
2 tablespoons bittersweet chocolate chips (I love Ghirardelli 60% cacao)
2 tablespoons sugar

Caramel Sauce and Cream Ingredients:
3/4 cup sugar
1/8 cup water
3/4 cup heavy cream
1/8 cup creme fraiche or sour cream
1/4 teaspoon pure vanilla extract
Pinch of coarse salt

Directions:
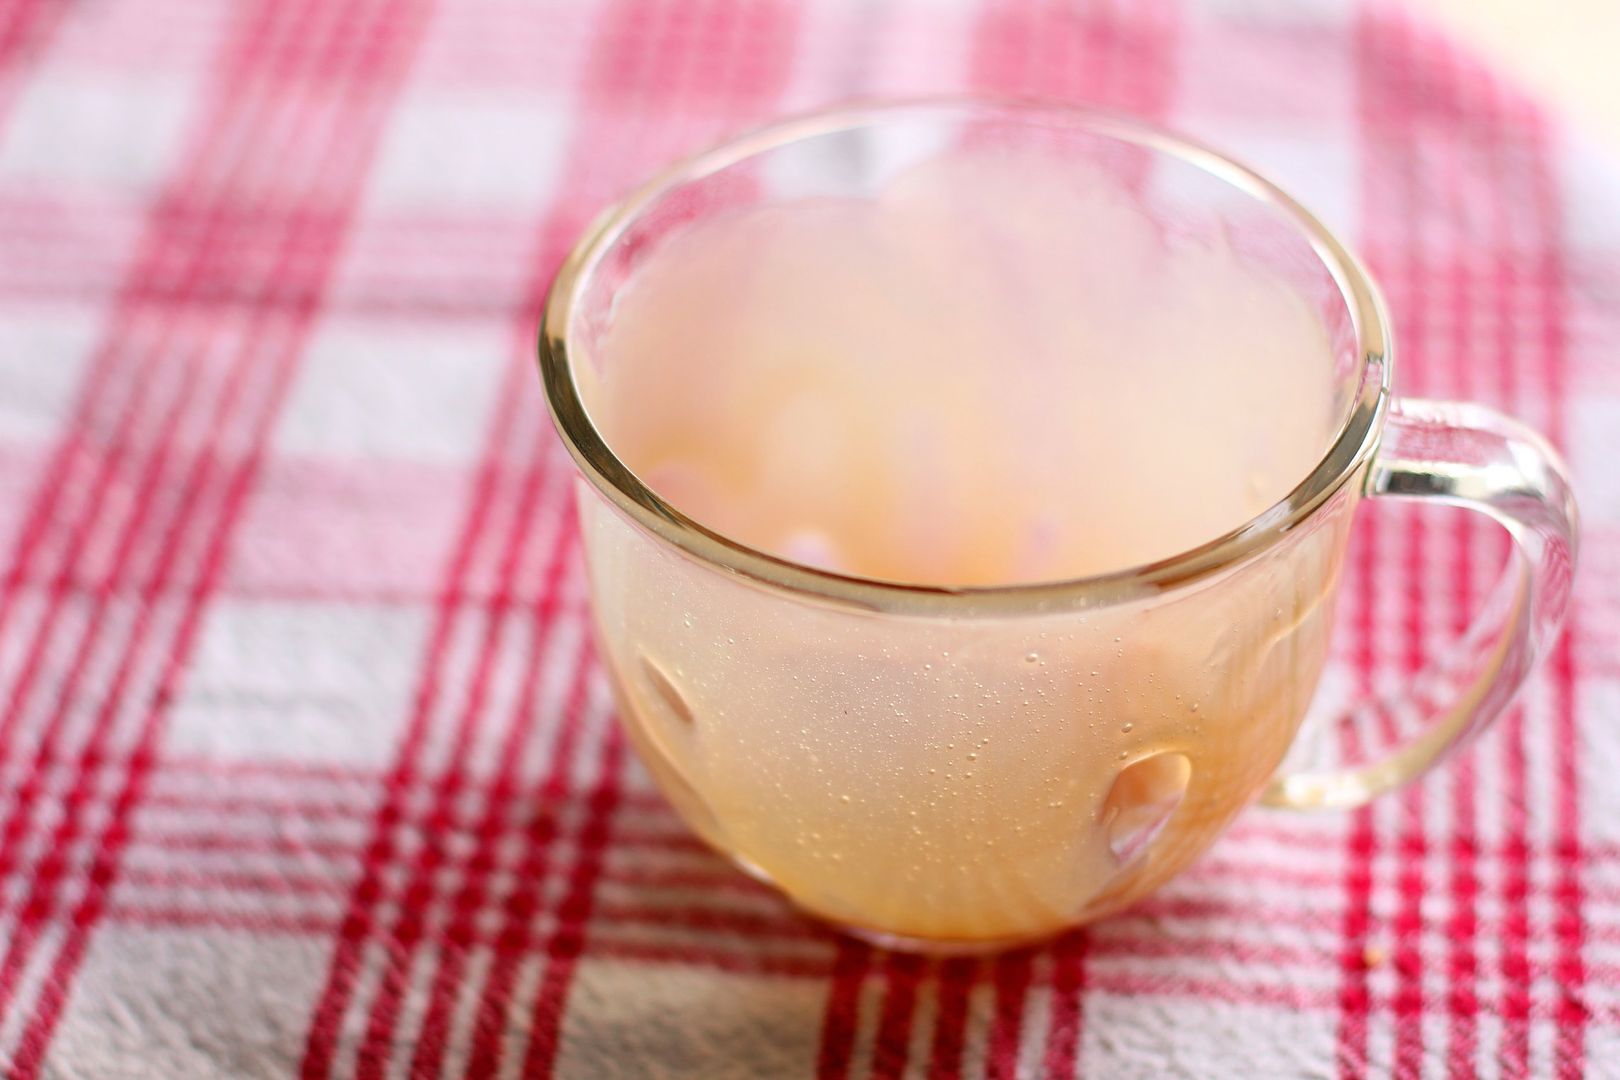
1 to 3 days in advance: Make the hot chocolate and the caramel. First, heat the milk, coffee, chocolate, and sugar in a saucepan over medium heat, whisking constantly until it comes to a boil. Remove it from the heat and whisk it to ensure it’s fully combined. Pour it into a bowl and let it cool, stirring periodically, before covering it and refrigerating it.

Make caramel sauce: Prepare an ice-water bath and set a heavy bowl in it. Heat the sugar and water in a medium saucepan over medium-high heat until mixture boils and sugar dissolves (don’t stir at all, or crystals will form and make your caramel grainy). Use a pastry brush to wash down sides of pan often to prevent crystals from forming. When the sugar starts to turn amber, you can swirl a couple of times to ensure it’s caramelizing evenly.

Cook until the sugar turns a dark amber (definitely use a candy thermometer here! You’re looking for it to read about 345 degrees), 5 to 7 minutes more. Immediately remove from heat, and slowly whisk in 1/2 cup cream (reserve the rest of the cream in the fridge). It will bubble up when you do this, so be careful. Return the caramel to medium heat, whisking and heating until the sugar melts completely and the mixture boils.

Remove the pan from the heat and pour the caramel into a bowl set in an ice-water bath. Let the caramel cool, stirring often, for 10 minutes. Whisk in creme fraiche or sour cream, vanilla, and salt. Cover and refrigerate this.

The morning of: Reheat the chocolate mixture in a saucepan over medium heat on the stove (or for a couple of minutes in the microwave), stirring often. In the meantime, whip your remaining 1/4 cup cream in a cold bowl to stiff peaks.

Coat the sides of two mugs with caramel sauce, reserving a little over half of it. Gently fold most of the rest of the caramel sauce into your whipped cream (reserving a little to drizzle on top). Fill caramel coated mugs with mocha hot chocolate. Top with caramel cream and drizzled caramel. Serve immediately.

Note: I received a stipend from Foodbuzz for creating this meal.

If you liked this post, please:
Subscribe to Willow Bird Baking
Follow Willow Bird Baking on Twitter
Follow Willow Bird Baking on Facebook
Give this post a thumbs up on StumbleUpon
Pin It


ShareOther ways to share this post with friends!

Salted Caramel Chocolate Trifle

The first face to poke through the door of my classroom was that of an older woman. She was followed by one of my 7th grade students, who was followed by a white haired man. “Come in! Find a seat anywhere!” I called as I made last minute adjustments to the position of the projector.

Soon people were pouring into my room. They had arrived for Grandfriends Day, where Woodlawn students invited their grandparents (or grandpeople they’d “adopted”) to eat lunch with them and participate in their classes.

I’m going to go ahead and publicly admit that I was terrified of Grandfriends Day. What activity could I plan that both a 60-year-old and a 12-year-old might enjoy? We usually read novels or tackle projects that take weeks to complete. What concept could I introduce and cover in a meaningful way in 30 minutes?

Thankfully, I learned a trick at the beginning of my teaching career that always serves me well in these types of circumstances: when you’re scared of a new thing, get enthusiastic and give it an honest, earnest try. (This also works with baking, writing, and life in general.) So as the students and their grandfriends filtered into my room, I pasted on a smile.

Once they were all somewhat assembled, I took a deep breath and did something a little ridiculous. I turned on the projector and pressed play on this video (no, really, go watch it). Confusion turned into giggles as Maru the cat repeatedly attempted to gain access to a huge cardboard box. Young and old alike cheered when he finally sprang into its depths. I surveyed the classroom as they watched, concluding that funny YouTube clips were, indeed, a language that spanned the generations.

When the video ended, I posed a question: “What was Maru’s goal?”

“To get in the box!” the class cried in unison.

“Did he accomplish his goal the first time he tried?”

“No!”

“How about the second?”

“No!”

“Did he eventually get in the box?”

“Yes!”

Their enthusiasm was cute. They were still riding the wave of cheer that Maru’s antics had created. I distributed sheets of notebook paper as I issued their assignment: “Write about a time when you, like Maru, had a goal you couldn’t accomplish right away.”

Some dove at their paper with ardor while others thoughtfully drummed fingers or pencils on the desk. A short ten minutes later, though, everyone sat staring at their finished anecdote. I asked for volunteers to share, wholly unsure about the quality of work I was about to receive. I needn’t have been concerned, though. I have great students and, it turns out, they have amazing grandfriends.

One man told of learning to drive a car with a manual transmission and repeatedly killing the engine before finally getting the hang of it. Another told of being determined to get his garden planted despite the rain that threatened to prevent it. A third detailed how he and his construction crew had created a machine that could drive 16 nails a second to accomplish their goals more efficiently.

Two women discussed taking a pottery class and working for months before they produced the bowl or vase they’d envisioned. My students relayed sports goals they’d attempted to accomplish: a back set in volleyball, a backflip in gymnastics. Finally, one of my students raised his hand and asked to read his grandfather’s composition.

His grandfather had worked with a veterinarian as a young man and decided to enter into that profession himself. His application to NC State’s veterinary program, however, was denied. Undeterred, he entered the college for agriculture instead, and — my student articulated the following with great pride — became the first person in his family to graduate from college.

We were all quiet for a minute before one clap — and then another, and then another — began a round of applause for this man’s accomplishment. It was one of those moments (you teachers out there will know just what I mean) when I thought, “Oh, this is why I teach.”

Some folks that day had reached their goal by pushing through the obstacles. Others had used trial and error, learning from their mistakes and adjusting their actions. Still others had created a tool to help them accomplish their objective. That man, though, had courage and flexibility I sometimes lack. Instead of getting discouraged, he changed his goal. He created a path for himself that wasn’t what he’d originally envisioned. The pride his whole family felt at his accomplishment was a testimony to his success.

I wish I’d had that much grace this week when making this Salted Caramel Chocolate Cake. Yes, I said cake, because that’s what this dessert was supposed to be.

My goal was to create a towering chocolate cake drenched in gooey salted caramel and frosted with a smooth, fudgy icing. I saw that goal crumble before my eyes, however, when I opened my refrigerator and found all 6 layers sliiiiiiding down like they were preparing to do the limbo. The skewers I’d added for support were leaning right along with the cake.

I could pretend I handled it well, because this is the internet. For all you know I’m a supermodel who, apart from saving puppies and keeping a perfect house, never loses her temper. In the spirit of honesty, however, let’s just say that there was a solid 30 minutes of angst in my kitchen Wednesday night.

Then somehow I flipped a switch. I stopped trying to restack the layers, grabbed a spoon and my trifle dish (thanks for my trifle dish, Joyce!), and started building this bucket o’ cake. As I worked, my mood improved drastically.

Not only was my trifle pretty, less fuss to frost, and easier to transport, but it was also going to taste every bit as delicious as the cake I’d envisioned. The satisfied faces of my family around the Thanksgiving table the next day confirmed that it was a success.

Your turn: tell me about a time when you had a goal you couldn’t accomplish right away.

Salted Caramel Chocolate Trifle


Recipe by: Adapted from Martha Stewart
Yield: About a billion servings. Or at least 10-15.

This is actually a recipe for a 6-layer salted caramel chocolate cake. Feel free to attempt the cake and keep the trifle as a backup plan in case it doesn’t work — or just make the trifle from the beginning! Either way, the dessert you end up with will be rich, moist, and covered in the most delicious salted caramel and fudgy frosting. By the way, if you’re scared of making caramel, don’t be — just make sure you use a candy thermometer, which takes the guesswork out of the process.

Cake Ingredients:
3 cups all-purpose flour, plus more for pans
3 cups granulated sugar
1 1/2 cups unsweetened Dutch-process cocoa powder
1 tablespoon baking soda
1 1/2 teaspoons baking powder
1 1/2 teaspoons coarse salt
4 large eggs
1 1/2 cups low-fat buttermilk
1/2 cup plus 2 tablespoons safflower oil
1 1/2 cups warm water
2 teaspoons pure vanilla extract

Caramel Ingredients:
4 cups granulated sugar
1/4 cup light corn syrup
1/4 cup water
2 cups heavy cream
1 teaspoon coarse salt
2 sticks cold unsalted butter

Frosting Ingredients:
1/4 cup plus 2 tablespoons Dutch-process cocoa powder
1/4 cup plus 2 tablespoons warm water
2 sticks unsalted butter, room temperature
1/2 cup confectioners’ sugar
Coarse salt
1 pound semisweet chocolate chips, melted and cooled
flaked sea salt, such as Maldon

Directions:
Note on scheduling: You can make the cake layers a few days in advance. Just wrap them and refrigerate them, and take them out and freeze them the day you’ll be cutting and assembling them (which will make them easier to work with). You can make the caramel up to three days in advance and keep it in the fridge — just let it come to room temperature for a couple of hours before using it. The entire cake can be assembled a day in advance and refrigerated, allowing its flavors to meld.

Make the cake: Cut 3 circles of parchment paper and use cooking spray as “glue” to adhere them to 3 9-inch round cake pans. Then grease the pans and the paper (I use Wilton’s Cake Release, but you could also use butter and flour). Preheat the oven to 350 degrees F.

Sift the flour, sugar, cocoa, baking soda, baking powder, and coarse salt together in a mixing bowl. Beat the dry ingredients on low until combined before increasing the speed to medium and adding eggs, buttermilk, warm water, oil, and vanilla. Beat about 3 minutes until the mixture is smooth. Divide it among the three pans.

Place the pans in the oven and bake until a toothpick inserted in the middle comes out with just a few moist crumbs, about 30-35 minutes. Rotate the pans about halfway through so they’ll bake evenly. Let them cool on a wire rack for about 10 minutes before turning them out onto sheets of wax paper and leaving them to cool completely. Stick them in the freezer if you’re going to make a cake; if you’re going for a trifle, just leave them out.

Make the caramel: Slice your butter into tablespoon chunks and set it back in the fridge for later. In a large saucepan, gently combine the sugar, corn syrup, and water. Once you put it on the heat, you won’t stir it anymore to ensure that the sugar will not crystallize and give you grainy caramel. Put a candy thermometer on the pan and heat it over high heat (no stirring!). Once the mixture starts turning amber around 320 degrees, you can gently swirl it every now and then (not stirring!) to ensure the sugar caramelizes evenly. Heat it until the mixture is dark amber (350 degrees on your thermometer), about 14 minutes. Remove it from the heat.

VERY CAREFULLY and slowly, pour in the cream. The mixture will bubble up and spatter so just be prepared and stand back — flaming sugar is no joke! Once you add the cream, whisk the mixture until it’s smooth before returning it to the heat and cooking until it reaches exactly 238 degrees (I know it sounds weird, but apparently this is crucial for the texture), about 2 minutes. Pour the caramel into a medium bowl and add the salt. Let it cool for about 15 minutes before whisking in the butter 1 tablespoon at a time (you’re definitely going to want to enlist another set of hands here; otherwise your arm will fall off).

Make the frosting: In a small bowl, whisk together the cocoa and warm water. In a separate bowl, beat together butter, confectioners’ sugar, and a generous pinch of coarse salt until pale and fluffy. Gradually beat in the melted chocolate and the cocoa mixture. Let this sit for about 30 minutes before you use it.

Assemble the cake (or trifle): If you’re making a trifle, simply tear up the cake and alternate layers of cake and 3/4 cup of caramel in your bowl, using a spoon or offset spatula sprayed with cooking spray to help spread the caramel. Do a layer of frosting in the middle of the dish and another layer on top before drizzling with caramel and sprinkling with sea salt.

Alternatively, if you want to try the cake, freeze your cake layers until they’re firmer (this makes them much easier to work with). Use a long serrated knife to level their tops and cut each layer in half. Place one layer on a serving platter and spoon 3/4 cup of caramel on top, using a spoon or offset spatula sprayed with cooking spray to help spread the caramel. Place another cake layer on top and repeat the process, alternating layers of cake and caramel, leaving the top cake layer uncovered. For goodness’ sake, place dowels through your cake (I’d say at least 4), mark them at the height of the cake, remove them, and cut them down to size. Then replace them in the cake. I’d also wrap the entire cake tightly in plastic wrap before chilling it to prevent sliding. Refrigerate it until it’s set (about an hour) before frosting the top and sides of the cake and sprinkling with sea salt.

Serve the trifle or cake: I think this dessert is delicious no matter what, but it’s absolutely out-of-this-world if you heat a serving of it for about 30 seconds before spooning a big hunk o’ vanilla ice cream on top. I didn’t try this with a cake slice, so I don’t know that it’d hold together — another benefit of a messy trifle.

If you liked this post, please:
Subscribe to Willow Bird Baking
Follow Willow Bird Baking on Twitter
Follow Willow Bird Baking on Facebook
Give this post a thumbs up on StumbleUpon
Pin It


ShareOther ways to share this post with friends!

One-Skillet Gooey Pumpkin Cookie Cake

Pale strands of my hair tangled into the mess of dusky flowers in my lap. Mike’s car sliced quietly through the lukewarm air of the countryside until a gravel drive slid into view. We turned into it with a crunch, parked, and began the arduous process of shuttling picnic supplies down a rocky path.

Some time later we sat alone by a still pond, the flowers now perched on a stack of books beside us. We’d just finished eating an elaborate lunch on my childhood patchwork quilt. The ground was hard and uneven — it always seemed so soft in movies — but at one point I lay down, the silk of my slip dress cool in the autumn breeze, and watched the highest leaves fluttering against the sky. Then I looked back to Mike’s ruddy, bespectacled face and smiled.

Sometimes you only realize how special a moment is once it’s passed, but every now and then, you get the gift of realizing in the moment itself. This was one of those times.

I’d never been on a legitimate blanket-on-the-ground picnic before, and living in different cities, Mike and I rarely got to just sit and enjoy each other’s company. Now here we were, grinning at each other, stuffed like turkeys in the middle of the woods and post-lunch euphoria. The streamer of hearts I’d hung from the trees around us whispered in the wind. The whole afternoon spread out before us.

That was last fall. In the dark days that followed, I remembered that picnic as a bright bit of joy to hold onto.

I love those unexpected moments that settle into your heart as significant — the ones that nestle like bookmarks into the very best folds of time. I remember so many of them:

Sitting by a fire in Gatlinburg with Mike, drinking hot chocolate in mugs we’d just bought from a Walgreens around the corner.

Dancing with a stranger on the sidewalk one night in San Francisco.

Pausing with Mike on the stairwell of my apartment building to watch the sunset.

Looking down at the fluffy mop in my lap while driving home from Carolina Poodle Rescue and realizing that Byrd was truly mine.

Embracing my new friend, 7-year-old Zoe, when she ran up to hug me after we’d been baptized together one Sunday morning.

Walking alone across the Georgia Tech campus one summer night in the middle of my teacher training, the golden skyline glowing above me.

Getting the phone call where my dad revealed that after years of dangerous treatments, he was cancer-free.

Running barefoot through the grass in La Jolla one warm night with my sister, Sarah, for no reason at all.

Sitting in traffic on i-85 to Raleigh with the sun illuminating the gorgeous fall leaves and little Byrd poking her nose out the open window.

And, most recently, sitting with Mike and eating gooey pumpkin cookie cake straight out of my cast iron skillet. I’d just pulled the cake from the oven and taken dozens of photos, and with my camera still propped up beside me, we dug in. No plates needed — just forks and some ice cream. There’s just nothing like the casual, sweet act of devouring forkfuls of a shared dessert without even an ounce of fuss.

And this cake! I made it twice to fiddle with proportions a bit. The first version (pictured throughout this post) was great, but the second version (see pictures below) was insane: a moist, gooey, comforting cake boasting surprise bites of caramel and toasted pecans.

Not only that, but you can make this cake in about half an hour with one skillet! Even if you choose to toast up some pecans and make some streusel to go with it (which I recommend!), you’ll have minimal dishes to wash. Especially if you skip the plates.


A slice of the final cake.

You have to make this thing as soon as possible. Make it tonight! Throw it together and eat it on the couch with someone sweet. Or take it to your Halloween parties. Or eat the entire thing alone while watching old episodes of Hoarders. No judgments. It’ll be amazing no matter what.

And in the meantime, share a beautiful moment that stands out in your memory.

One-Skillet Gooey Pumpkin Cookie Cake


Recipe by: Willow Bird Baking, inspired by Sophistimom and Food Network
Yield: about 8 servings

This melt-in-your-mouth pumpkin spice cake is warm, moist, and delicious. Gooey caramel and toasted pecans amp up the “mmm” factor. And to say it’s easy is an understatement — you can make it in one skillet in about 35 minutes! This is the perfect recipe to whip up on a whim and eat in your PJs on the couch. Devour it straight from the skillet with a pile of ice cream. (P.S. If you don’t care about the number of pots and pans and want to go a little crazy, cut down the sugar a little and try the cake with this amazing caramel sauce.)

Ingredients:
3/4 cup (1 1/2 sticks) unsalted butter
1/4 cup vegetable oil
3/4 cup granulated sugar
1/4 cup firmly packed light brown sugar
1 cup pureed pumpkin
1 teaspoon vanilla extract
2 eggs
2 1/8 cups all-purpose flour
1 teaspoon baking powder
1/2 teaspoon baking soda
1/2 teaspoon salt
2 teaspoons cinnamon
1/2 teaspoon nutmeg
1/2 teaspoon ginger
1/4 teaspoon allspice
some dulce de leche or 10-15 caramels
1/2 cup toasted pecans (optional, see note in directions)

Directions:
Note: The first time I made this cookie cake, I mixed in 1/2 cup of chopped pecans that I’d toasted (on a sheet pan at 350 degrees F for about 6 minutes or until fragrant, stirring a couple of times). The second time I made it, I mixed in this toasted pecan streusel — heavenly! These extra mix-ins will add a bowl and a sheet pan to your prep, but I highly recommend them.

Preheat the oven to 350 degrees F. In a 10- or 12-inch cast iron skillet over medium heat, melt the butter. Stir in the vegetable oil, sugars, and vanilla and remove from heat. Let this mixture cool until the pan is no longer hot (about 5 minutes) so you won’t scramble your eggs.

Add both eggs to the butter mixture, whisking them well to combine. Whisk in the pumpkin. In a separate bowl, whisk together the flour, salt, baking soda, baking powder, cinnamon, nutmeg, ginger, allspice (Note: it’s kind of lame to use another bowl for this, and according to Sophistimom, you should be able to just dump all your dry ingredients on top and whisk them in well, but I was too chicken to try. So I guess this is technically “One-Skillet, One-Bowl” cake if you do it my way. If you just dump them in, please let me know how it goes!) Whisk the dry ingredients into the wet and pour the batter into your skillet.

Stir in the toasted pecans or streusel if you’re using them. Place dollops of dulce de leche or caramel candies around the surface of the batter. Bake your skillet cookie for 15-25* minutes, or until the edges are getting golden and the center is still soft (a toothpick inserted into the center should come out with some moist crumbs, but no liquid batter). Eat immediately (preferably straight out of the skillet!) with heaps of vanilla ice cream (or a fun caramel flavor).

*Depending on your skillet, this cooking time can really vary. I’d start checking at 15 minutes and then check every couple of minutes after that with toothpicks. Make sure to look for moist crumbs, not a clean toothpick. If you overbake, it might be dry!


Recipe before and after tweaking to warm, gooey perfection.

Need a closer look at the final product?


Gooey, caramelly, streuselly, pumpkiny, amazing.

If you liked this post, please:
Subscribe to Willow Bird Baking
Follow Willow Bird Baking on Twitter
Follow Willow Bird Baking on Facebook
Give this post a thumbs up on StumbleUpon
Pin It


ShareOther ways to share this post with friends!

Honeybun Cake with Caramel Sauce

Willow Bird Baking is a contestant in Project Food Blog, a contest comprised of a series of challenges to find the next food blog star. Today is the last day to vote for me in Round 2! To vote, register for a Foodbuzz account. Once you’re registered, sign in and go here. To vote, click the heart next to the words “Vote for this Entry.” I am so grateful for your support!

Willow Bird Bakers, I have one thing to say to you:

You’re my honeybun, sugarplum,
Pumpy-umpy-umpkin; you’re my sweetie pie.
You’re my cuppycake, gumdrop,
snoogums-boogums; you’re the apple of my eye!
And I love you so and I want you to know
That I’ll always be right here,
And I love to sing sweet songs to you,
Because you are so dear!

Mike thinks this song is annoying, but we’ll ignore him for a moment — because it’s too true to resist. I got an email today from a stranger-turned-fast-friend that reminded me (again!) how special the opportunity to share with you really is.

This now-friend, J, said that she’s been experiencing some hard times, and that something she found here — on a food blog of all things — comforted her on a difficult day.

Little did she know that I was also having a difficult day: Byrd’s tummy has been upset and after all her knee surgery woes, this feels like the proverbial camel’s back-breaking straw. Mike and I are struggling with the distance between us, among other things. A confluence of so many issues has been forming a river of worry in my heart.

Her note letting me know that she had found comfort here was, so fittingly, a huge comfort to me. Apart from just the reminder that the food community is an army of friends and supporters, her email calmed the river of worry and helped me listen to the living waters inside of me. The main points of a sermon I heard just this past Sunday while visiting Mike in Raleigh flooded into my mind: God is in control, He is faithful, and I can rest in Him in my time of need.

Indeed, Jesus said, “Come to Me, all you who labor and are heavy laden, and I will give you rest.”

With how you’ve supported me, no wonder I can’t help but call you my honeybuns — and give you some honeybun cake.

This cake is a simple, fuss-free dessert to make and serve. More importantly, though, it’s dynamite! The buttery cake base with the deep cinnamon swirl reminds me of the best sort of coffee cake, and the buttery caramel drizzle makes it gooey, just like a real honeybun. Each bite is a revelation of different flavors, since the swirl ensures you get a different proportion of cinnamon to butter cake with each forkful. In short: YUM.

Regarding the recipe, it calls for a box cake mix. I’m not a box mix snob — I’m of the camp that says use a box mix if you feel like it, and don’t use one if you don’t feel like it. Frankly, box mixes taste great. The only argument against them that resonates with me is the fact that they contain preservatives and artificial flavorings, but really, y’all, we’re making a honeybun cake — exactly how healthy do you think you could make this thing? (answer: not very.) We eat dessert in moderation anyway (ahem).

That being said, I prefer to make things from scratch. One reason is because I feel like people are too far removed lately from the raw ingredients of their meals, and have decided that baking or cooking from scratch is intimidating. A primary message of my blog is that cooking from scratch isn’t scary — that anyone can do it. Another reason I cook from scratch is just because I like to. Simple!


from-scratch version

For this cake, I tried it two ways. I didn’t set out to try it two ways, mind you, but that’s how it ended up happening! First, I tried baking it with a homemade cake mix. Turns out that recipe’s proportions were off somehow. The cake overflowed a bit, and was gooey in the center while done on the sides. Disappointed and in need of a dish for a school potluck, I grabbed my roommate’s box of butter cake mix and hastily remade the cake.

When my second cake was in the oven, though, I realized that my first cake was actually lookin’ pretty delicious despite being wonky. If anything, the slightly undercooked middle was appealingly moist. Just like that, I had two cakes — and the perfect setup for a box mix versus homemade comparison!


box mix version – note the yellow!

So which did I like better? Honestly, it was a very close call. The box mix has a more pronounced butter flavor that was delicious, but did taste artificial. The homemade cake had a deeper from-scratch flavor, but wasn’t as buttery. In the end, I think I preferred the homemade version, but with such close results, you can feel comfortable going either way. If you do use the homemade cake mix, though, be prepared for the wonky manner in which is bakes — and maybe line your oven with foil to guard against spills.

What about you – do you use box cake mixes? Why or why not?

Honeybun Cake with Caramel Sauce


Recipe by: My friend Lora and Martha Stewart (caramel sauce)
Yield: one 9 x 13 inch cake; serves about 12-15 depending on size of pieces

Cake Ingredients:
1 box butter recipe yellow cake mix (or 1 recipe homemade cake mix, below)
4 eggs
1 cup milk
3/4 cup vegetable oil
1 cup sugar
2 tablespoons cinnamon
1 cup brown sugar

Caramel Sauce Ingredients:*
3/4 cups sugar
1/8 cup water
1/2 cup heavy cream
1/8 cup creme fraiche or sour cream
1/4 teaspoon pure vanilla extract
Pinch of coarse salt

Directions:
Make caramel sauce first. Prepare a bowl set in an ice-water bath. Place sugar and water in a saucepan and heat over medium-high heat until it boils and the sugar is dissolved. Throughout this process, use a wet pastry brush to wash down the sides of your saucepan often to prevent crystal formation. Reduce the heat to medium and cook until the mixture reaches 345 degrees on a candy thermometer (begin swirling gently when you see hints of amber, so the sugar cooks evenly), about 5-7 minutes. Immediately remove from the heat and add cream carefully (the mixture will bubble up) while whisking constantly. Return mixture to medium heat until it boils and sugar melts.

Remove from heat, and pour into the bowl set in your ice-water bath. Let the caramel cool, whisking often, for 10 minutes before whisking in creme fraiche, vanilla, and salt. Cover and refrigerate at least 2 hours before serving over heated honeybun cake. Can store in the refrigerator for up to 5 days.

To make honeybun cake, preheat oven to 200 degrees F. Mix together homemade or store-bought cake mix, eggs, milk, sugar, and oil. Pour this mixture into a greased 9 x 13 inch baking pan. Mix cinnamon and brown sugar together and sprinkle this mixture over the batter. Use a fork to swirl the batter over the entire cake, going to the bottom of the pan, until it is well-swirled. Bake cake at 200 degrees F for 20 minutes before increasing the temperature to 300 degrees F and baking for an additional 30 minutes. Drizzle caramel sauce over hot pieces of cake.

*(Alternate glaze, if you’re not a caramel fan (though that is some phenomenal caramel, y’all, and very easy to make with a candy thermometer! Glaze: mix 1 cup powdered sugar, 2 tablespoons milk, 1 teaspoons vanilla and pour over hot cake.)

Homemade Cake Mix


Recipe by: My Kitchen Cafe
Yield: one box mix worth

NOTE: as mentioned in the post above, this recipe bakes wonkily in a 9 x 13 in. pan. Visit My Kitchen Cafe to read her note about it. I still think it’s worth making, since mine turned out delicious, but do line your oven with foil and watch that the sides of the cake don’t burn while you’re waiting for the middle to finish cooking.

Yellow “Cake Mix” Cake Ingredients:
2 cups granulated sugar
1 1/2 cups all-purpose flour
1 1/2 cups cake flour
1/2 cup nonfat dry milk powder
1 tablespoon baking powder
1 teaspoon salt
16 tablespoons butter (2 sticks), cut into 1/2-inch pieces and chilled
1 tablespoon vanilla extract
2 teaspoons imitation butter flavor

Directions:
Pulse sugar, flours, milk powder, baking powder, and salt in a food processor for 15 seconds to combine. Add butter, vanilla, and butter flavor and pulse until the mixture resembles coarse meal (much finer than, say, a pie crust). Freeze the dry mixture in a zipper-lock bag for up to 2 months or use immediately in recipe above.

If you liked this post, please:
Subscribe to Willow Bird Baking
Follow Willow Bird Baking on Twitter
Follow Willow Bird Baking on Facebook
Give this post a thumbs up on StumbleUpon


ShareOther ways to share this post with friends!

Assorted Donut Muffins and Project Food Blog: Vote Now!

Willow Bird Baking is a contestant in Project Food Blog, a contest comprised of a series of challenges to find the next food blog star. If you missed it, my first challenge post explains why I blog, and what makes WBB special. Voting for Challenge #1 is now open! To vote, register for a Foodbuzz account. Once you’re registered, sign in and go here. To vote, click the heart next to the words “Vote for this Entry.” I am so grateful for your support!


At this point, just about all of us have either made Donut Muffins, eaten Donut Muffins from a generous friend, bookmarked a recipe for Donut Muffins, drooled over photos of Donut Muffins, or cursed the day Donut Muffins were invented as we kicked our scales across the bathroom.

I was in the “bookmarked the recipe” category for way too long. Every time I’d see another Donut Muffin post pop up in my Google Reader, I’d admonish myself for not having made them yet. They’re billed as warm, pluffy cake-donut-like muffins that have soaked up butter before being coated in cinnamon and sugar. It’s basically criminal that I hadn’t made them until this past weekend. But don’t worry — I made up for lost time.

What’s the fun of donuts? The taste, definitely — but also the puff of powdered sugar, the jam centers, the colorful sprinkles, the melty chocolate, the sticky glaze. A major component of what makes donuts so fun is the assortment. Even though I have a favorite donut, I always buy a few kinds so that I can pick through the box excitedly, tasting different combinations and flavors. So why make just one sort of Donut Muffin? Especially when it’s so easy to make a few kinds?

In my Donut Muffin assortment: Caramel Apple Donut Muffins, Jam-Filled Powdered Sugar Donut Muffins, and of course, Chocolate Sprinkle Donut Muffins.

You start out by making the batter like normal, but then separate a third of it to add diced apples to. After baking all the muffins up, the apple donut muffins get coated in cinnamon, sugar, and a caramel glaze. Another 1/3 of the batch gets coated with powdered sugar and filled with raspberry jam. The final 1/3 gets a bath in melted chocolate and some sprinkles. I bought a box of bakery cookies just to have a cute little “donut box” to put them in (no clue what I’m going to do with those cookies)!

The Chocolate Sprinkle Donut Muffins were good — but next time I’ll fill them with whipped cream or pastry cream for more donuttiness (that is a Merriam-Webster-certified real word, y’all. Okay, it’s not. Not even close). The Jam-Filled Powdered Sugar Donut Muffins were delicious little jammy bites. But the Caramel Apple Donut Muffins . . . they were OUT OF THIS WORLD. Like, OUT OF THIS GALAXY. Like, OH MY GOODNESS. My roommate had to sit down when she took her first bite, and she insists they’re the best thing I’ve ever made. Are you dicing apples yet? Good.

When they’re warmed up slightly, full of apply, buttery, cinnamon-sugary goodness, and coated with the buttery caramel glaze, these fluffy Caramel Apple Donut Muffins are analogous to the donuts you’d drive across town for. Sure, you want the assortment — and I ate plenty of the other two tasty flavors — but these are the ones you’d keep coming back for.

By the way, are you afraid of caramel? That’s probably because you’ve been using recipes with directions that say things like “look for an amber color,” or, even better, a “dark amber color.” I don’t know about you, but I think “amber” is pretty subjective. What gives? We stopped using terms like “low oven” and “slow oven” in recipes long ago in favor of fancy little things called oven temperatures. It’s time we switched over our sugar recipes to include temperatures as well. Caramel is nowhere near as frightening with a candy thermometer, y’all. You’ll be glad to see I’ve provided temperatures for your caramel sauce below, since I’m not feeling prehistoric.

What’s your favorite kind of donut? I think mine changed with my first bite o’ Donut Muffins! The recipe below shows you how to make all 3 kinds at once, but feel free to make just one sort if you’re feeling decisive.

Assorted Donut Muffins


Recipe by: Willow Bird Baking, adapted from the base recipe by Buns In My Oven. Caramel sauce by Martha Stewart.
Yield: 36 mini-muffins or 18 regular muffins

Batter Ingredients:
3/4 cup sugar
1 large egg
1 1/2 cups all purpose flour
2 tsp baking power
1/4 tsp salt
1/4 tsp ground nutmeg
1/4 cup vegetable oil
3/4 cup milk (low fat is fine)
1 tsp vanilla extract

Extras for Chocolate Sprinkle Donut Muffins:
melted chocolate
sprinkles
whipped cream (if desired, for filling)

Extras for Caramel Apple Donut Muffins:
2 tablespoons melted butter, for dipping
1/4 cup sugar mixed with 1 1/2 teaspoons cinnamon
1/4 apple, peeled and diced (I used a Gala apple)
caramel sauce (recipe below)

Extras for Jam-Filled Powdered Sugar Donut Muffins:
raspberry jam (or flavor of your choice)
about 3/4 cup powdered sugar, sifted
melted butter leftover from Caramel Apple Donut Muffins

Directions:
Prepare two mini-muffin pans by spraying with cooking spray. Preheat the oven to 350 degrees F. Beat sugar and egg together in a large bowl until fluffy. In a smaller bowl, whisk together flour, baking powder, salt, and nutmeg. Pour dry ingredients into wet ingredients and stir until combined. Add vegetable oil, milk, and vanilla extract and mix. Separate 1/3 of mixture into separate bowl and fold in diced apples (these will be the Caramel Apple Donut Muffins). Pour all batter into prepared muffin tins, filling each about 3/4 full. Bake for 13-15 minutes until tester comes out clean.

Let cool in the pan for a few minutes before removing onto a cooling rack (if muffins are extremely delicate and difficult to remove, you may need to bake them a minute longer — mine weren’t quite done enough. On the cooling rack, separate the donut muffins into 3 batches: the apple muffins, 1/2 of the plain muffins, and the other half of the plain muffins. These will be your three types of donuts.

For the Caramel Apple Donut Muffins: Melt the butter in the microwave and mix the cinnamon and sugar in a separate bowl. When the muffins are cool enough to handle, dunk the tops into the melted butter and then into the cinnamon-sugar mixture. Let dry/cool on cooling rack as you prepare caramel sauce (as directed in recipe below). Store caramel in fridge and drizzle on heated Apple Muffins right before serving.

For the Chocolate Donut muffins: When the muffins are cool enough to handle, dunk the tops into the melted chocolate. Add colorful sprinkles. You could fill these with pastry cream or whipped cream using a narrow pastry tip inserted into the bottom of the muffin if you wanted a cream-filled donut muffin.

For the Jam-Filled Powdered Sugar Donut Muffins: When the muffins are cool enough to handle, dunk the tops into the leftover melted butter and then into sifted powdered sugar. When donuts are cool, fill them with raspberry jam using a small pastry tip jabbed into the bottom of the muffin. Be careful not to overfill and burst your muffin (that should definitely be a more popular idiom than ‘burst your bubble,’ don’t you agree?) You may have to re-powder tops before serving if you keep these overnight, since some of the powdered sugar dissolves.

NOTE: Store all your muffins in an airtight container in the fridge.

Caramel Sauce Ingredients:
3/4 cups sugar
1/8 cup water
1/2 cup heavy cream
1/8 cup creme fraiche or sour cream
1/4 teaspoon pure vanilla extract
Pinch of coarse salt

Directions:
NOTE: This makes more caramel than you need, but I don’t reduce the recipe because it would make it difficult to use a candy thermometer, a tool that I believe is absolutely crucial in preparing caramel. I know you can find something else to spoon caramel sauce over — and this is truly delectable caramel.

Prepare a bowl set in an ice-water bath. Place sugar and water in a saucepan and heat over medium-high heat until it boils and the sugar is dissolved. Throughout this process, use a wet pastry brush to wash down the sides of your saucepan often to prevent crystal formation. Reduce the heat to medium and cook until the mixture reaches 345 degrees on a candy thermometer (begin swirling gently when you see hints of amber, so the sugar cooks evenly), about 5-7 minutes. Immediately remove from the heat and add cream carefully (the mixture will bubble up) while whisking constantly. Return mixture to medium heat until it boils and sugar melts.

Remove from heat, and pour into the bowl set in your ice-water bath. Let the caramel cool, whisking often, for 10 minutes before whisking in creme fraiche, vanilla, and salt. Cover and refrigerate at least 2 hours before serving over Caramel Apple Donut Muffins. Can store in the refrigerator for up to 5 days.

If you liked this post, please:
Subscribe to Willow Bird Baking
Follow Willow Bird Baking on Twitter
Follow Willow Bird Baking on Facebook
Give this post a thumbs up on StumbleUpon


ShareOther ways to share this post with friends!

1 2 3 4 5