caramel

Caramel Fudge Brownie Cheesecake

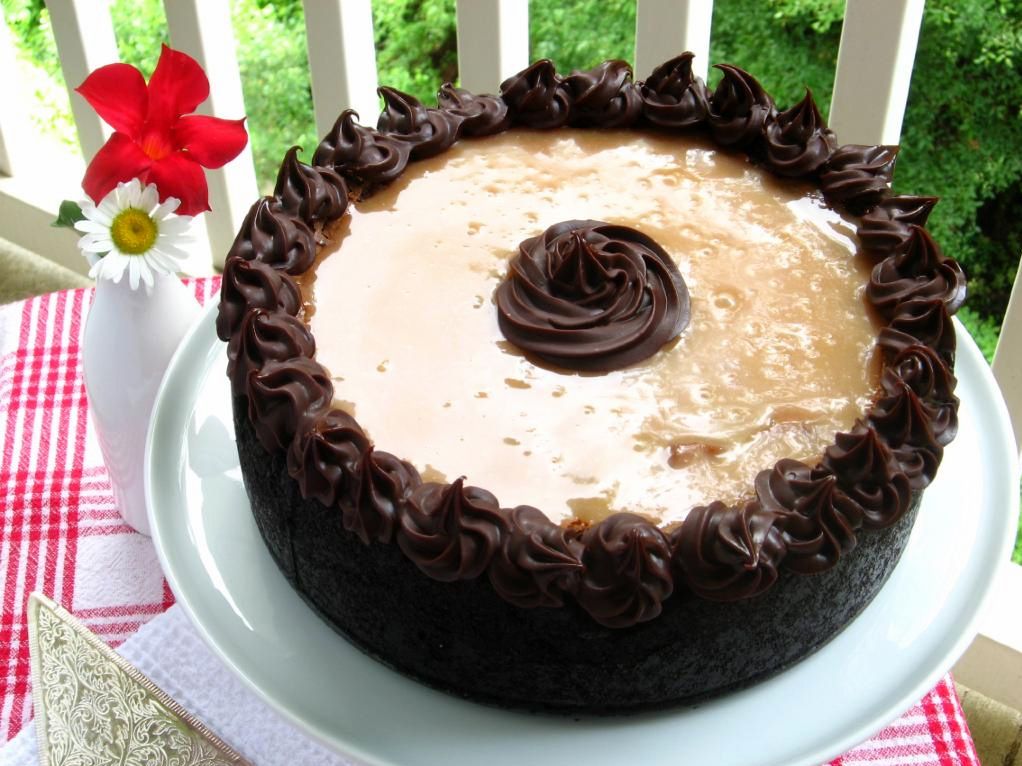
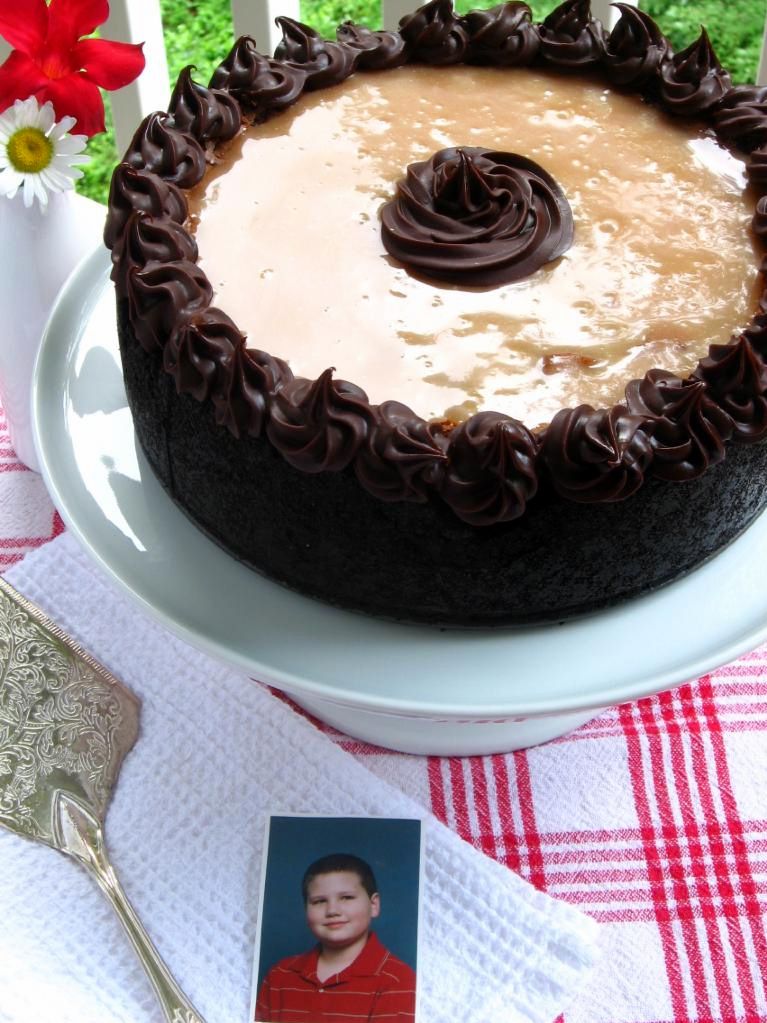
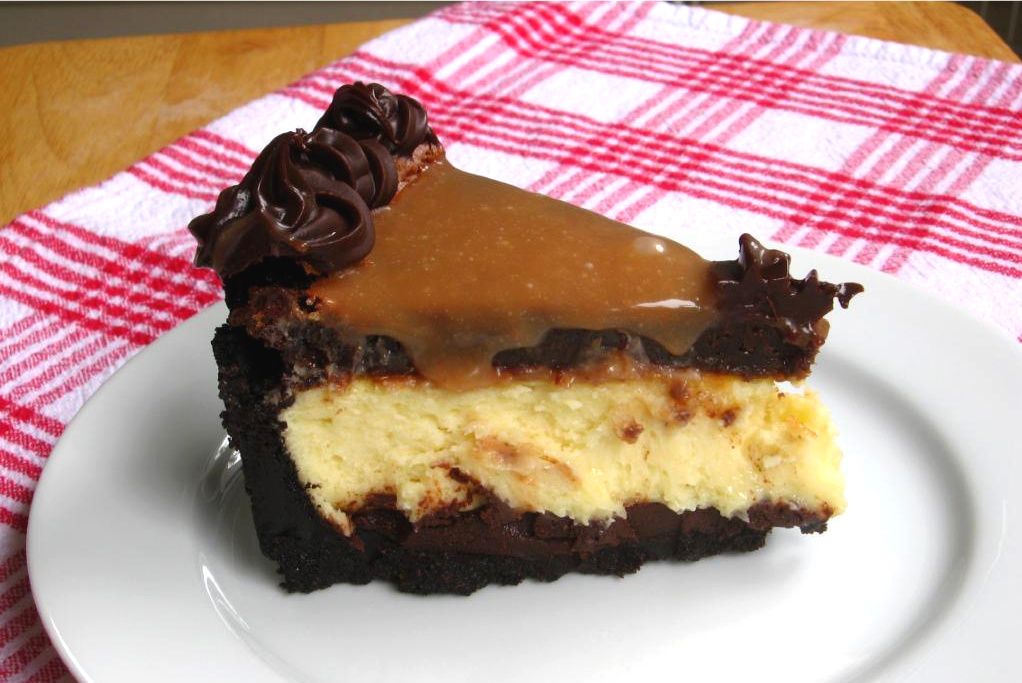
I’ve got to tell you about a special guy. He was shorter than me for most of his life, but suddenly, a couple of years ago, I came home to visit and he was looking down at me. He’s got bright blue eyes and a head full of curls, a dry wit, and really fat rabbit he calls Pilfer. I am not brave enough to wear skinny jeans, but he is. He is my little brother, Joel-called-Alex, and that little chubby cheeked guy you see in the photo next to my Caramel Fudge Brownie Cheesecake . . . that would be him about a decade ago. (Speaking of Caramel Fudge Brownie Cheesecake, it may be the best thing I’ve ever eaten — which is probably not surprising considering it’s a Caramel Fudge Brownie Cheesecake).
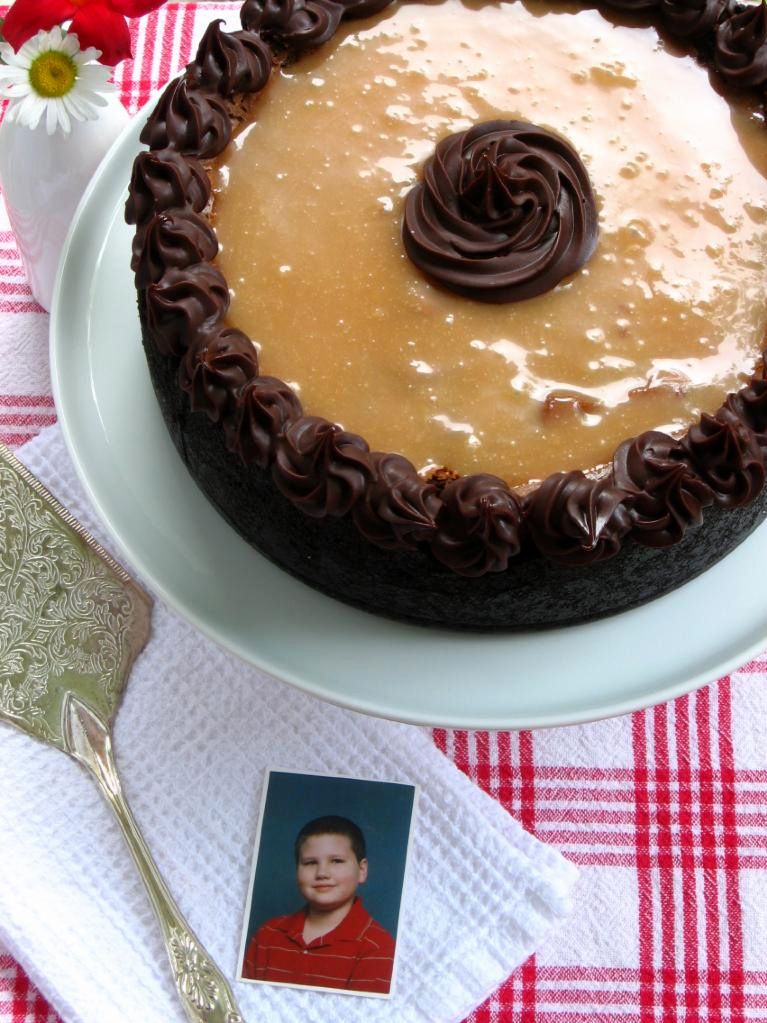
It’s hard to decide which is cuter . . . ganache rosettes or little boy smiles. Look below for a closer view to help you decide. Cakes are nice, but I think he wins!
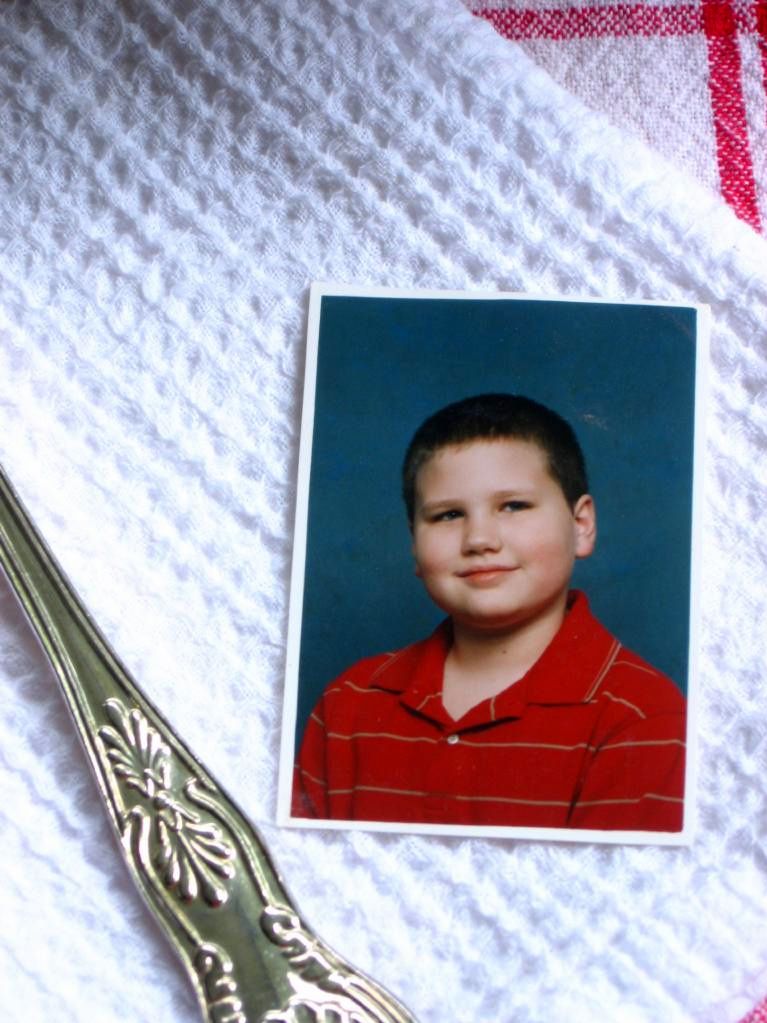

Alex at 8 years old and now!

Something pretty exciting happened in his life on Thursday night: he graduated high school as part of the Hickory Grove Christian School Class of 2010. My family gathered for the occasion, although honestly, I don’t think I really believed that my little brother was actually graduating until this moment:

[youtube=http://www.youtube.com/watch?v=uGLvtJkwDtw&hl=en_US&fs=1&]

And just like that, little Alex — who I remember driving around in his red PowerWheels jeep and running through sprinklers with me as a kid — was a graduate. In the fall, he’ll begin his undergraduate education at N.C. State, the same school Mike is attending for grad school — now I have two reasons to be a Wolfpack fan! I can already tell you that plenty of school nights will find them playing video games together and acting like goofballs.

To fully express my feelings about this momentous occasion, I wrote the following letter and gave it to Alex this week. I thought you might like to read it, too.

DEAR ALEX,

What is this I hear about you graduating high school? I could have sworn that someone told me you were a senior in high school and were graduating this week. But that’s silly. There must be some mistake.
See, you are just a baby. You love your swing, Ernie from Sesame Street, and your older sister, Julie (duh). Soon you will develop a few motor skills and begin arranging your toys: gummy bears and matchbox cars sorted by color (your favorite being “lellow”). You will start using words like “definitely” way before you’re old enough to know four-syllable words. I will be proud to be the sister of such a smart kid. You’re still just a baby!
Or maybe you are still 6 years old. You’re a stout, silly little guy with bright blond curls. Just last week I dressed you up in high heels, a green nightie, a poofy hair bow, and took pictures for future blackmail. You love Barney and Friends, and will soon start watching the Power Rangers movie more times than any human being really ought to.
Or, okay, maybe you’re a little older than that. Maybe you’re a tween. You are obsessed with Pokemon – movies, drawings, you name it. Yu-Gi-Oh is all right too. In a little while, you’ll be admitted into Hickory Grove Christian School for high school. You’ll start staying up late on the internet, playing lots of video games, and hanging out with friends. You’ll become an amazing writer, an excited reader, and an all-around brilliant guy. You’ll be a 9th grader. Suddenly a 10th grader. Maybe even an 11th grader. Maybe you’ll even go to your senior prom.

But graduating? You cannot be graduating. Except . . . you are. In just two days time, you’ll walk across the stage and get your high school diploma. I never thought this day would come (and no, not because I thought you’d flunk out of high school).

Nevertheless, since this day is undeniably upon us, there are a couple of things I want to say. First off, I’m so proud of what a smart kid you are; I hope you’ll continue being an amazing writer and reader. Second, and more importantly, you’re a compassionate kid. Third, you have an amazing personality and amazing character. I expect you to do incredible things at N.C. State next year (GO WOLFPACK!) and beyond. Fourth, and most importantly, I love you and always will.

Oh, and fifth, sorry about that poofy hair bow.

Love, your big sister,
Julie
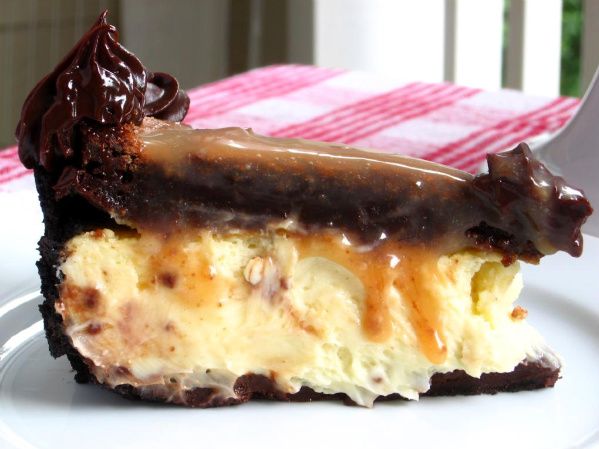
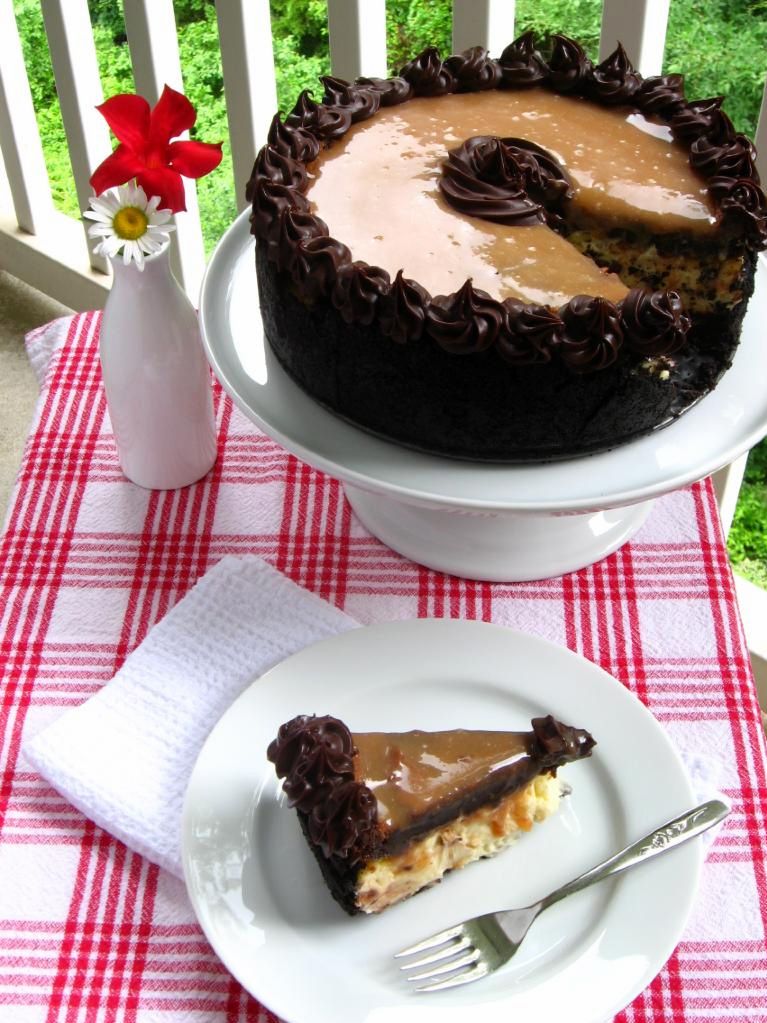
In addition to a boring ol’ letter, Alex will get a nice slab of this Caramel Fudge Brownie Cheesecake on Sunday. This was inspired by my Coffee Cookie Dough Cheesecake, and I love it just as much! While making this cheesecake certainly does require time and energy, it’s a relatively straightforward recipe and is perfect for a special occasion. The multistep procedure produces a thick layer of rich brownie drowning in gooey, buttery-tasting caramel sauce, all on top of creamy cheesecake. It also boasts an oreo crust and decadent ganache.

I think Alex will approve.

Tell me about your graduates! Anyone have a loved one in the Class of 2010?

Caramel Fudge Brownie Cheesecake


Recipe by: Willow Bird Baking, using cheesecake adapted from Bon Appétit, caramel adapted from Martha Stewart, and brownies adapted from a post on Simply Recipes
Yields: one 9-inch cheesecake

Crust Ingredients:
32 chocolate sandwich cookies, finely processed into crumbs
5 1/3 tablespoons unsalted butter, melted and cooled
Small pinch of salt

Ganache Ingredients*:
1½ cups heavy cream
20 oz. bittersweet or semisweet chocolate, finely chopped (I used 3/4 semisweet and 1/4 bittersweet)

Filling Ingredients:
3 (8 oz.) packages cream cheese, at room temperature
1 cup sugar
1½ tablespoons all-purpose flour
2 teaspoons vanilla extract
3 large eggs

Caramel Ingredients:
3/4 cup sugar
1/8 cup water
1/2 cup heavy cream
1/8 cup creme fraiche or sour cream
1/4 teaspoon pure vanilla extract
Pinch of coarse salt

Brownie Ingredients:
10 tablespoons (1 1/4 sticks) unsalted butter
1 1/4 cups sugar
3/4 cup plus 2 tablespoons unsweetened cocoa powder (natural or Dutch-process)
½ teaspoon coffee granules (I added this small amount to impart a richness without a pronounced coffee flavor)
1/4 teaspoon salt
2 teaspoons vanilla extract
2 cold large eggs
1/2 cup all-purpose flour

Directions:
Make the caramel: Prepare an ice-water bath. Heat sugar and water in a medium saucepan over medium-high heat until mixture boils and sugar dissolves, washing down sides of pan often with a wet pastry brush to prevent crystals from forming. Reduce heat to medium, and cook until sugar turns dark amber (about 345 degrees on a candy thermometer), 5 to 7 minutes more. Immediately remove from heat, and carefully whisk in 1/2 cup cream. Return to medium heat, and cook until sugar melts completely and mixture boils. Remove from heat, and pour into a bowl set in ice-water bath. Let caramel cool, stirring often, for 10 minutes. Stir in creme fraiche, vanilla, and salt. Cover and refrigerate at least 2 hours or up to 5 days.

Make the brownie layer: Preheat oven to 325°F with rack positioned in the lower third of the oven. Line the bottom and the sides of an 9-inch round cake pan with parchment paper, leaving an overhang on two opposite sides to make it easier to lift the brownies out of the pan when they are done.

Combine the butter, cocoa, sugar, coffee granules, and salt in a medium heatproof bowl. Set the bowl in a wide skillet of barely simmering water. Stir the butter cocoa mixture from time to time until the butter is melted and the mixture is smooth and hot enough that you want to remove your finger quickly after dipping it in to test. Remove the bowl from the skillet and set aside briefly until the mixture is only warm, not hot.

Using a wooden spoon, stir in the vanilla extract. Add the eggs one at a time, stirring quickly after each one. When the batter looks shiny, thick, and well mixed, add the flour and stir until you cannot see it any longer, then beat for 40 strokes with the wooden spoon. Spread the batter evenly in the lined pan (I used most of the batter, but poured a bit in a separate dish to bake, since I wanted to make my brownie layer a certain thickness – just use your judgment).

Bake until a tester inserted into the center comes out just slightly moist with batter, about 25 minutes. Let the brownies cool completely on a rack and then freeze. When ready to use, lift up the ends of the foil or parchment paper liner, and peel foil away.

Make the cheesecake: To make the crust, preheat the oven to 350˚ F. Position a rack in the middle of the oven. Butter a 9-inch springform pan and place it on a baking sheet. Combine the chocolate cookie crumbs, melted butter and salt in a small bowl. Toss with a fork to moisten all of the crumbs. Press into a thin layer covering the bottom and sides of the springform pan (at least 3 inches up the sides).

Bring the cream to a simmer in a medium saucepan. Place the chocolate in a medium bowl. Once the cream reaches a simmer, pour the cream over the chocolate and let stand 1-2 minutes. Whisk in small circles until a smooth ganache has formed. Pour 1 – 1.5 cups of the ganache over the bottom of the crust. Freeze until the ganache layer is firm, about 30 minutes. Reserve the remaining ganache; cover and let stand at room temperature for later decorating.

In the bowl of an electric mixer fitted with the paddle attachment, beat the cream cheese and sugar on medium-high speed until well blended. Beat in the flour. Add in the vanilla and beat until well incorporated, scraping down the sides of the bowl as needed. Beat in the eggs one at a time, scraping down the bowl between each addition.

Pour the filling over the cold ganache in the crust. Place the springform pan on a rimmed baking sheet. Bake until the top is lightly browned, puffed and cracked at the edges, and the center moves only very slightly when the pan is lightly shaken, about 1 hour. Transfer to a wire cooling rack. Cool at room temperature for at least 30 minutes. Transfer to the refrigerator and let cool at least 3 hours, until completely chilled and set.

Assemble the cheesecake: Wrap a warm towel around the outside of the springform pan to help loosen the crust from the sides. Carefully remove the springform. Transfer the cake to a serving platter. Spread a thin layer of caramel over cheesecake to adhere the brownie layer. Place brownie layer on top of cheesecake (right side up). My brownie layer was almost cup-shaped since the middle didn’t rise as much as the sides, so I poured the rest of my caramel into the concave area and spread it gently (to avoid disturbing the delicate top of the brownies). Place the reserved ganache in a pastry bag fitted with a decorative tip and use to garnish the top of the cake as desired. Chill until the ganache is completely firm, at least 6 hours.

*NOTE: This recipe makes extra ganache. I usually just make it and save the rest for truffles, but feel free to make about 3/4 of this recipe if you’d rather not have leftovers.
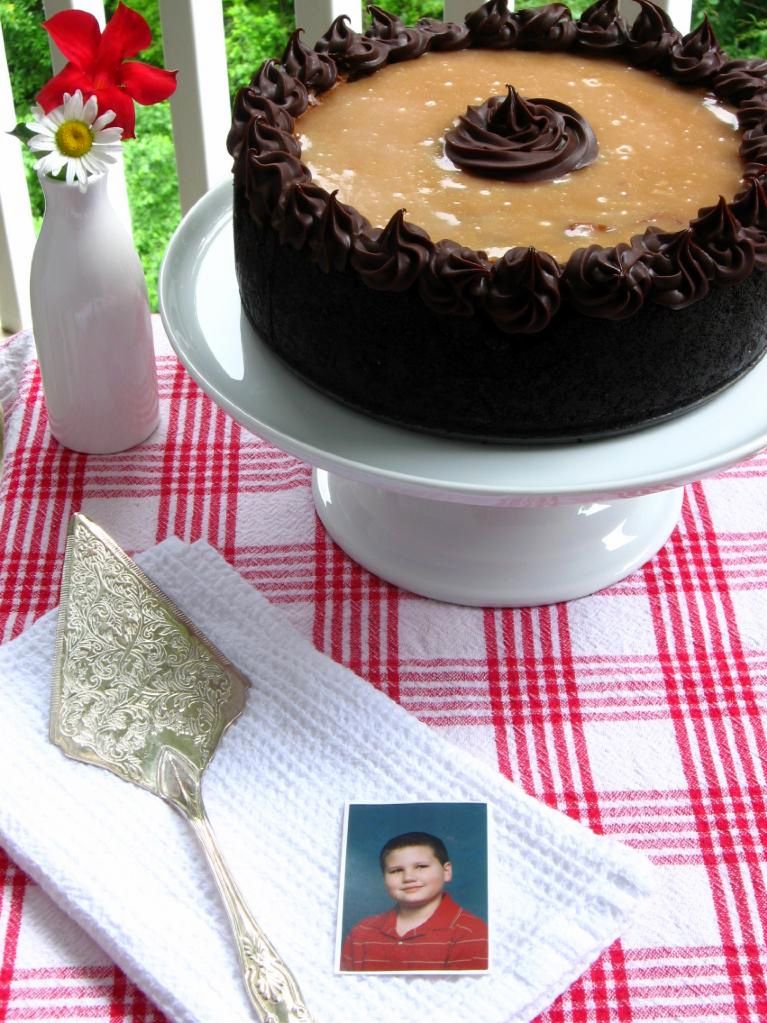
P.S. — Sorry for picking your flowers, Mom, but aren’t they pretty?

P.S. 2 — A serving suggestion for those that want to make this dessert extra-ridiculous: instead of serving with regular whipped cream, whip up some caramel cream.

P.S. 3 — (Am I starting to sound like the evolution of a gaming console?) My talented sister, Laura, wrote a song for Alex’s graduation. It’s called “Alarm of the Freshman,” it’s sung to the tune of “Eye of the Tiger,” and the video I shot of her singing it would be perfect blackmail material, if she had any shame. Love you, Laura! Enjoy, y’all:

[youtube=http://www.youtube.com/watch?v=9tXOCUFGjGo&hl=en_US&fs=1&]


Share Share this post with friends!

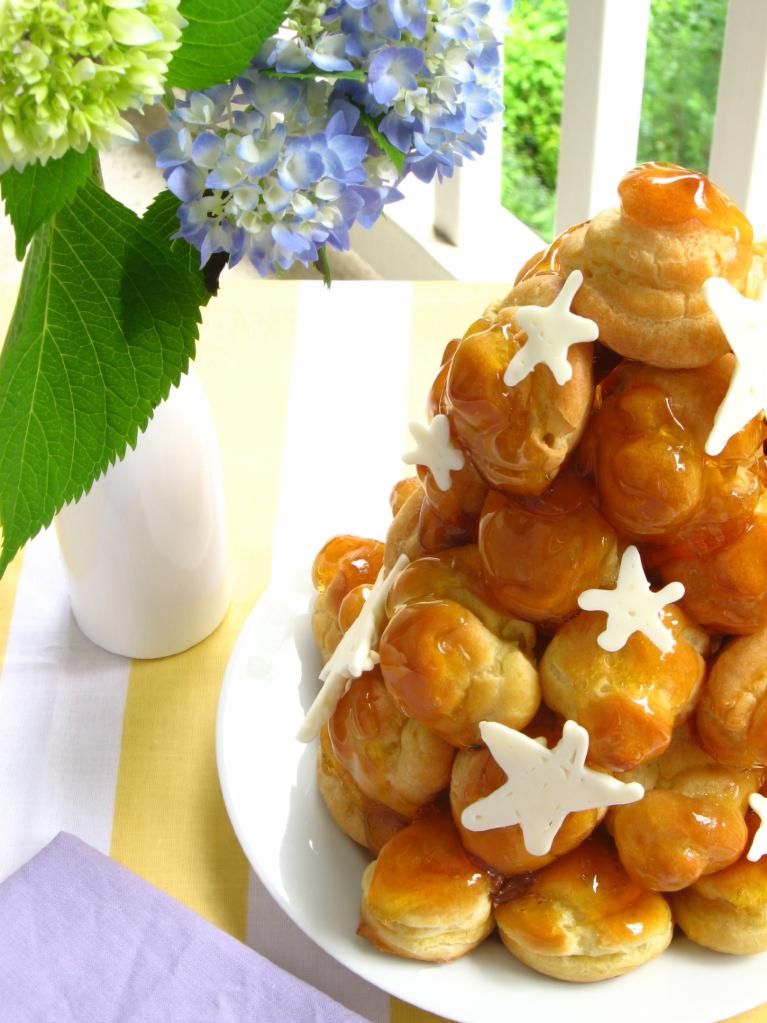
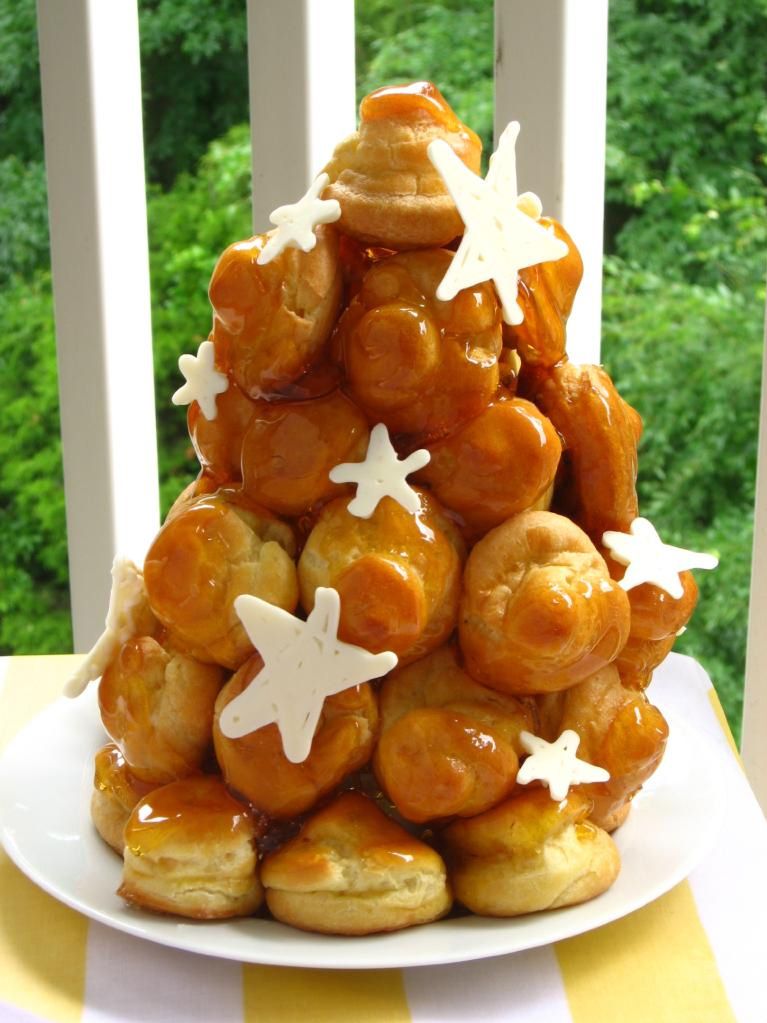
Caramel Cream Croquembouche

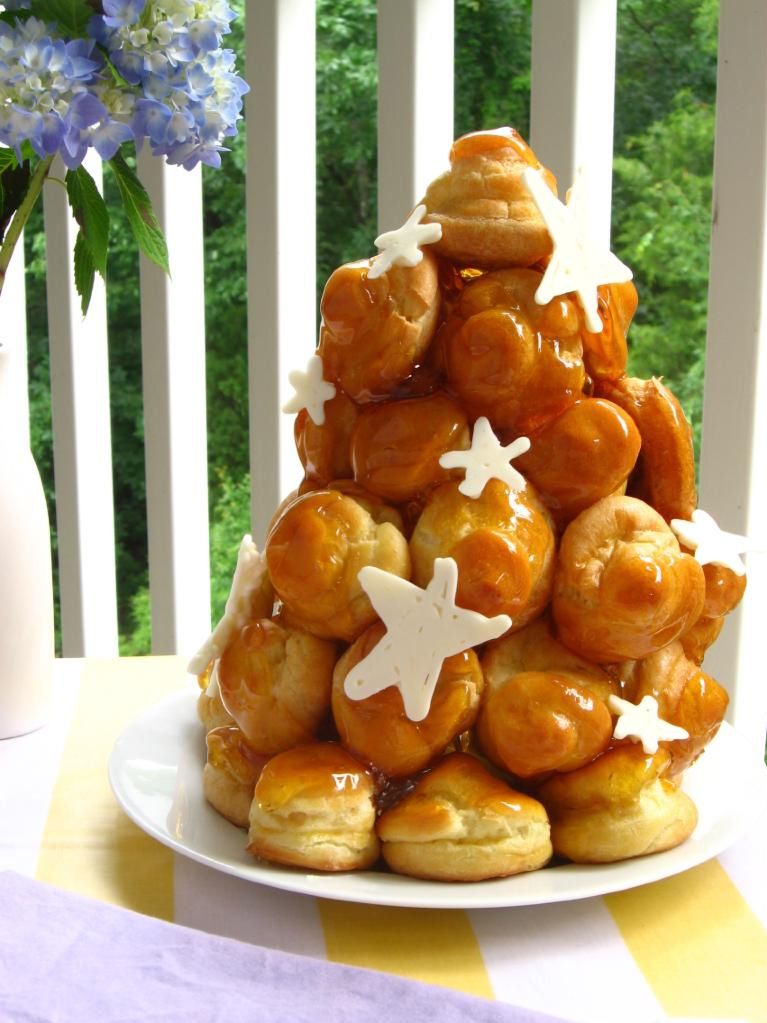
This month’s Daring Bakers challenge was spectacular, at least in part because I felt like a cross between Indiana Jones and MacGyver at various points in the process. Minus the archaeological skillz and/or mullet.

Picture this: a flaming-hot, caramel-dipped cream puff goes flying out of my hands. I instinctively reach up to stop its trajectory across my kitchen, only to be reminded angrily by my neurons that burning sugar is HOOOOTTTTTT (imagine this being screamed in the highest-pitched neuronal voice you can conjure up). I bat the cream puff into the sink (with some panache, I like to think) and plunge my fingers into the nearby bowl of ice water, saving my skin by mere milliseconds. Adrenaline-pumpin’ music plays in the background as I do a double backflip out of the kitchen for a bandaid. Okay, I made that whole last part up. I’m a pretty horrid gymnast.

There were several flyin’ flamin’ cream puffs, though. Which would make a good band name, if you’re in the market for one. Seriously, hot sugar, architecture, and time sensitivity put the “daring” in this Daring Bakers challenge, thus providing me with a comeback for Facebook friends who scoff at my daring baking status updates:

Okay, that last part might not help my case.

Anyway, I bet you’re dying to know . . . what exactly is this scary beast of an edible sculpture? The May 2010 Daring Bakers’ challenge was hosted by Cat of Little Miss Cupcake. Cat challenged everyone to make a piece montée, or croquembouche, based on recipes from Peter Kump’s Baking School in Manhattan and Nick Malgieri.

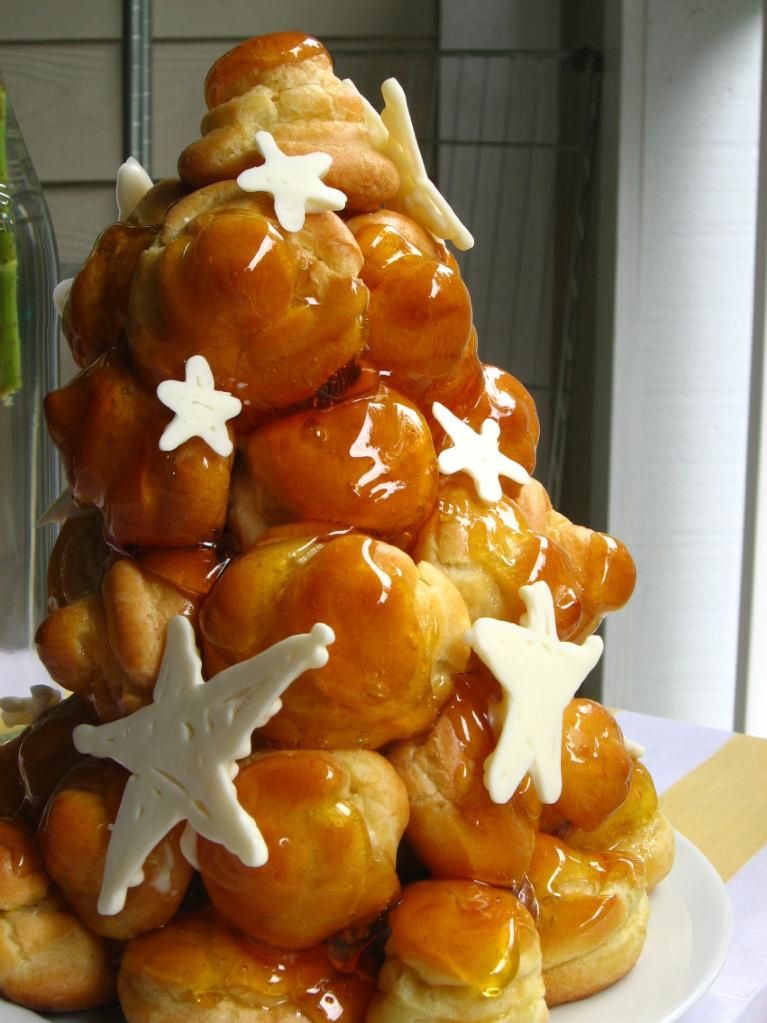
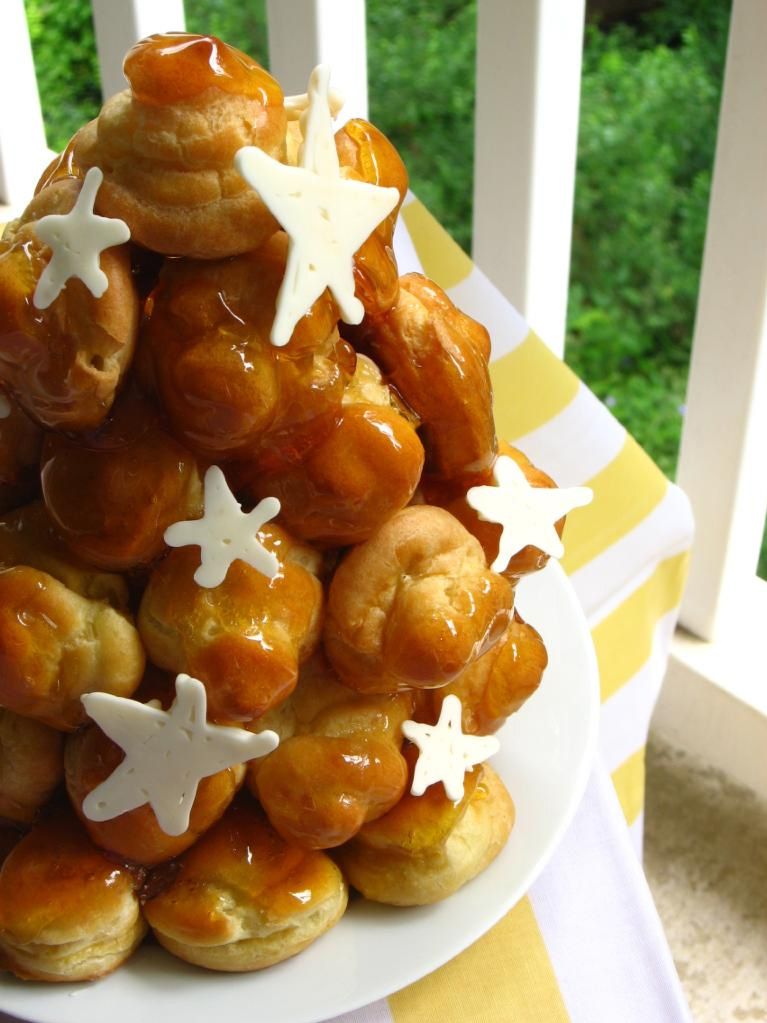
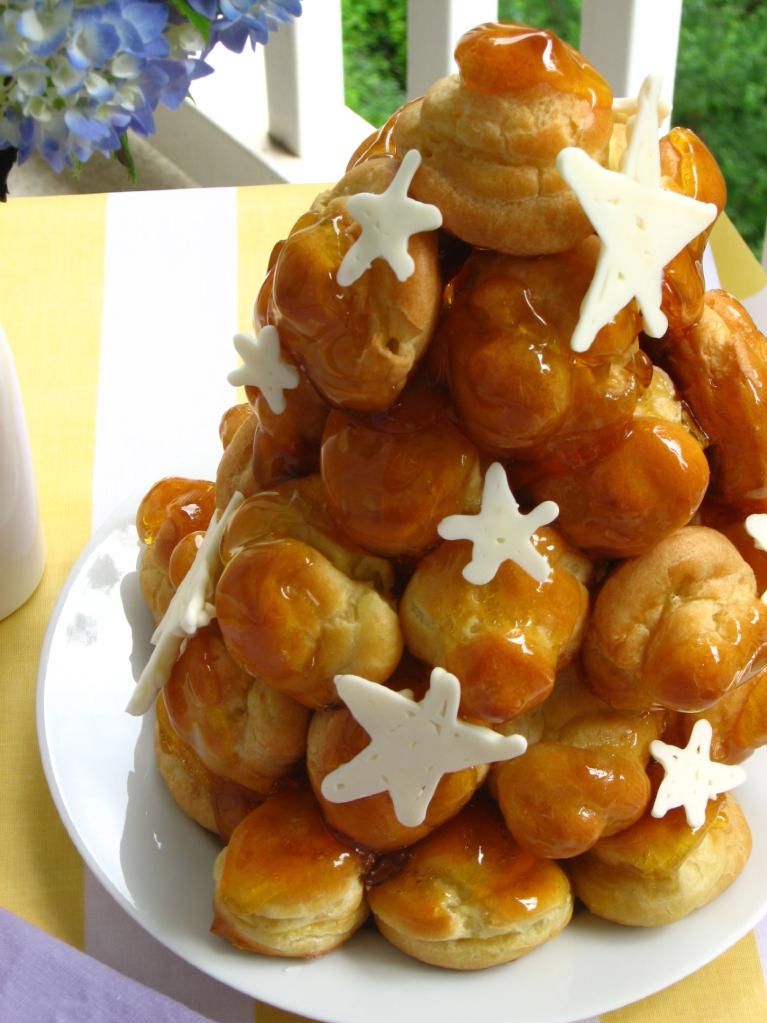
Croquembouche is literally translated, “crunch in mouth,” and incidentally, is a fun word to sing in various overly-dramatic ways while you cook. Besides being a pretty cool word, it’s a pretty cool party trick. You bake up some buttery, light, delectable puff shells that are naturally hollow (so convenient). You resist eating too many of these straight from the oven, let them cool, and stuff them plumb full of light, blissful caramel cream. You then use a hard caramel glaze as mortar to build them into a lovely cone, from which your guests can gingerly pluck their dessert.

This particular combination — the caramel cream and caramel glaze — was heavenly, especially the cream. I’m having fits wanting to stuff the caramel cream into all sorts of confections — cupcakes, tarts, other pastries, my mouth with a spoon. It has a buttery, silky caramel flavor.

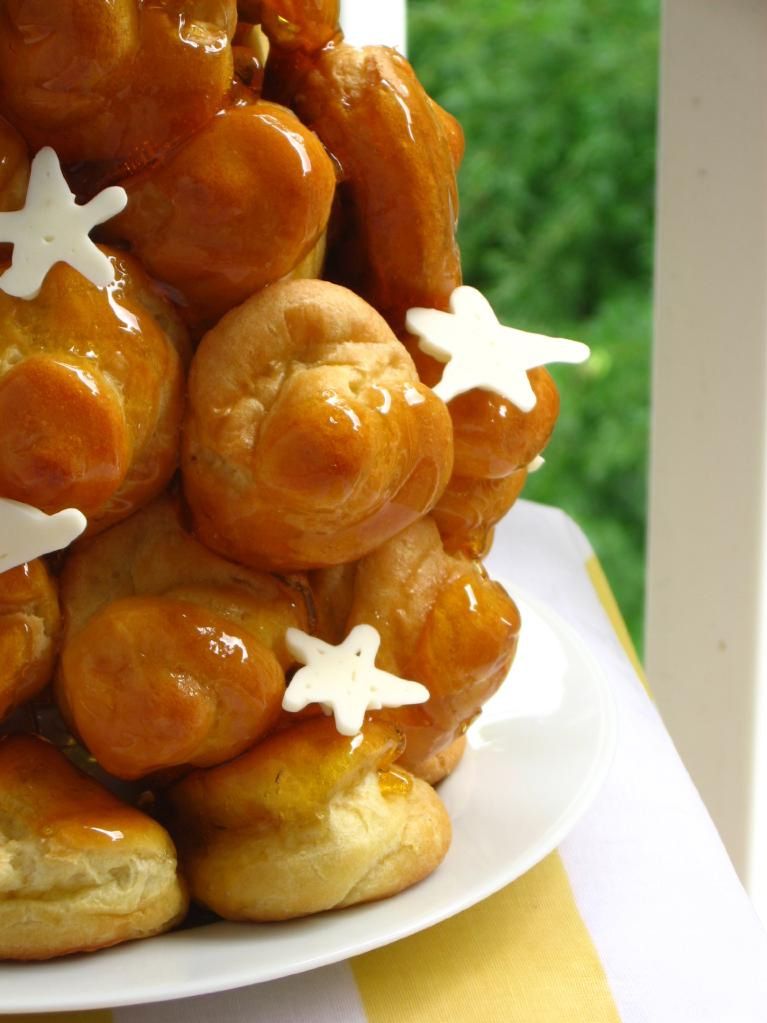
As for the caramel glaze, I’m downright torn as to whether to recommend it to you or not. On one hand, it became very brittle and, as it cooled, left a thicker and thicker layer on the puffs I was dipping. This was fine, except that when it hardened, it was sometimes sharp to bite into.

On the other hand, as I ate over half of this croquembouche all by my lonesome (did I just admit that?), I fell in love with the incredible deliciousness of it. And though you can use melted chocolate to assemble your ‘bouche, I have a feeling this caramel was a much better mortar. It hardened in mere seconds and kept the puffs nearly immobile, creating a sound structure. So, I’m tempted to say . . . just make it and chew carefully? Is that weird? Feel free to substitute if you’re a cautious eater.

The cream puffs with a thin coating of caramel did have a pleasant crunch instead of sharp shards, so another tip is to dip puffs very quickly while your caramel is fluid and the excess can drain off. Then, instead of reheating the caramel if it gets thick (which wasn’t that effective for me), I might make a new batch. You could work in half-batches of caramel to reduce waste.

Don’t be nervous because this recipe seems fussy. The actual cream puffs and tower were surprisingly simple to create, and if you have trouble with caramel, the addition of sugar temperatures in the recipe below should help. Activate your inner-architect/daredevil, impress your friends, and enjoy your scrumptious structure!

Caramel Cream Croquembouche


Recipe by: Adapted from Peter Kump, Nick Malgieri (puffs), and Martha Stewart (caramel cream and glaze)
Yields: a tower of about 51 puffs

Pâte à Choux (Puffs) Ingredients:
1 1/8 cups water
9 tablespoons unsalted butter
3/8 teaspoons salt
1.5 tablespoons sugar
1.5 cups all-purpose flour
6 large eggs
Egg wash (1 egg yolk and 1/2 cup heavy cream, lightly beaten)

Caramel Cream Filling Ingredients:
3/4 cup sugar
1/8 cup water
1 cup heavy cream
1/8 cup creme fraiche or sour cream
1/4 teaspoon pure vanilla extract
Pinch of coarse salt

Caramel Glaze Ingredients:*
2 cups sugar
4 tablespoons water
2 teaspoons fresh lemon juice
white chocolate bark for decorating (optional)

Directions: Make the caramel cream at least a few hours ahead of time to give it a chance to chill before its final step (I made mine 3 days in advance). Prepare an ice-water bath. Heat sugar and water in a medium saucepan over medium-high heat until mixture boils and sugar dissolves, washing down sides of pan often with a wet pastry brush to prevent crystals from forming. Reduce heat to medium, and cook until sugar turns dark amber (about 345 degrees on a candy thermometer), 5 to 7 minutes more. Immediately remove from heat, and carefully whisk in 1/2 cup cream. Return to medium heat, and cook until sugar melts completely and mixture boils.

Remove from heat, and pour into a bowl set in ice-water bath. Let caramel cool, stirring often, for 10 minutes. Stir in creme fraiche, vanilla, and salt. Cover and refrigerate at least 2 hours or up to 5 days.

Just before you are ready to fill the cream puffs, beat remaining 1/2 cup cream until stiff peaks form. Gently fold into caramel sauce, using a rubber spatula, until incorporated. Whisk to thicken, about 1 minute.

Make the pâte à choux. Combine water, butter, salt and sugar in a saucepan over medium heat. Bring to a boil and stir occasionally. At boil, remove from heat and sift in the flour, stirring to combine completely.

Return to heat and cook, stirring constantly until the batter dries slightly and begins to pull away from the sides of the pan. Transfer to a bowl and stir with a wooden spoon 1 minute to cool slightly.

Add 1 egg. The batter will appear loose and shiny. As you stir, the batter will become dry-looking like lightly buttered mashed potatoes. It is at this point that you will add in the next egg. Repeat until you have incorporated all the eggs.

Pipe the batter using a pastry bag and a plain tip. Pipe choux about 1 inch-part in the baking sheets. Choux should be about 1 inch high about 1 inch wide. Using a clean finger dipped in hot water, gently press down on any tips that have formed on the top of choux when piping. You want them to retain their ball shape, but be smoothly curved on top. Brush tops with egg wash while trying not to drip the wash down the puffs onto the pan (which could somewhat inhibit rise).

Bake the choux at 425 degrees F until well-puffed and turning lightly golden in color, about 10 minutes. Lower the temperature to 350 degrees F and continue baking until well-colored and dry, about 20 minutes more. Remove to a rack and cool (tip from a pro: poke each puff with a toothpick while cooling to release the steam inside. It shouldn’t cause your cream to leak, but will help the puffs stay crisp). Can be stored in a airtight box overnight, but I recommend, if you aren’t using them right away to create your croquembouche, that you freeze them. When you’re ready to use them, bake them at 350 degrees F for 5-6 minutes to refresh and recrisp them. When puffs are cool, use a thin, plain tip to fill them generously with caramel cream.

Prepare the plate your croquembouche will be assembled on with wax paper around the edges to catch excess caramel. Set up your work area: two baking sheets covered in parchment for the caramel-covered puffs to dry on, an ice-water bath to stop the caramel from cooking and for any burnt fingers. Once you’re set up, you’re ready to begin assembly.

Make the caramel glaze: Prepare an ice-water bath. Bring all ingredients to a boil in a small saucepan over medium heat, washing down sides of pan often with a wet pastry brush to prevent crystals from forming. Cook, without stirring, until sugar dissolves, 5 to 6 minutes. Raise heat to high, and cook, swirling pan to color evenly, until syrup is amber (about 325 on a candy thermometer), about 5 minutes. Remove caramel from heat, and set bottom of pan in ice-water bath for a few seconds to stop the cooking. Use immediately, working as quickly as possible.*

Assembly: Dip top half of each filled puff into caramel (be careful not to burn your fingers), letting excess drip back into pan. Transfer to a parchment-lined baking sheet. Let stand until caramel is set.

Carefully dip bottom half of 1 puff into caramel, letting excess drip into pan. Transfer puff, hot caramel side down, to a serving platter. Repeat with more puffs, forming a connected ring as you work. Repeat with more puffs, layering rings to form a pyramid, using 45 or 50 puffs total. (If the caramel begins to harden, reheat briefly over low heat.)*

*Note: Reheating the caramel did not work so well for me, and even qorking quickly wasn’t quickly enough — and as mentioned above, when the caramel cools, it settles thickly on the puff and can become a brittle hazard. Thus, you may want to make a half batch of the caramel at a time, starting over if your caramel gets cool/thick, so that you can ensure a thin coating on each puff.


Enjoy!

P.S. Don’t forget to go see the stupendous structures of other Daring Bakers!


Share Share this post with friends!

Best Ever Cream Cheese Pound Cake with Easy Caramel Frosting and Spiced Apples

Last Saturday served as a perfect example of why I dread the coming winter. It was a frigid day filled with misty rain and capped by a gloomy, gray sky. The slick streets were inundated with horrible Charlotte traffic. Depressed by the lack of sunlight for taking photos, I was nevertheless trekking to the store and to my parents’ house to gather materials for a cake. If you’d caught a glimpse of me, you might’ve mistaken me for a little black raincloud; in fact, all I needed was to take Winnie’s cue and strap a balloon around myself for the illusion to be complete. I scowled about the drivers who neglected to use their turn signals, griped to myself about the parking situation at the store, stepped in a billion ice-cold puddles, and bought a plate for my cake only to find it was “not for food use.” Humpf harrumpf humpflumpf! Finally, I grumpily turned into my parents’ neighborhood to borrow a tube pan from my mom.

[youtube=http://www.youtube.com/watch?v=XP1vPfSCYQs&hl=en&fs=1&]

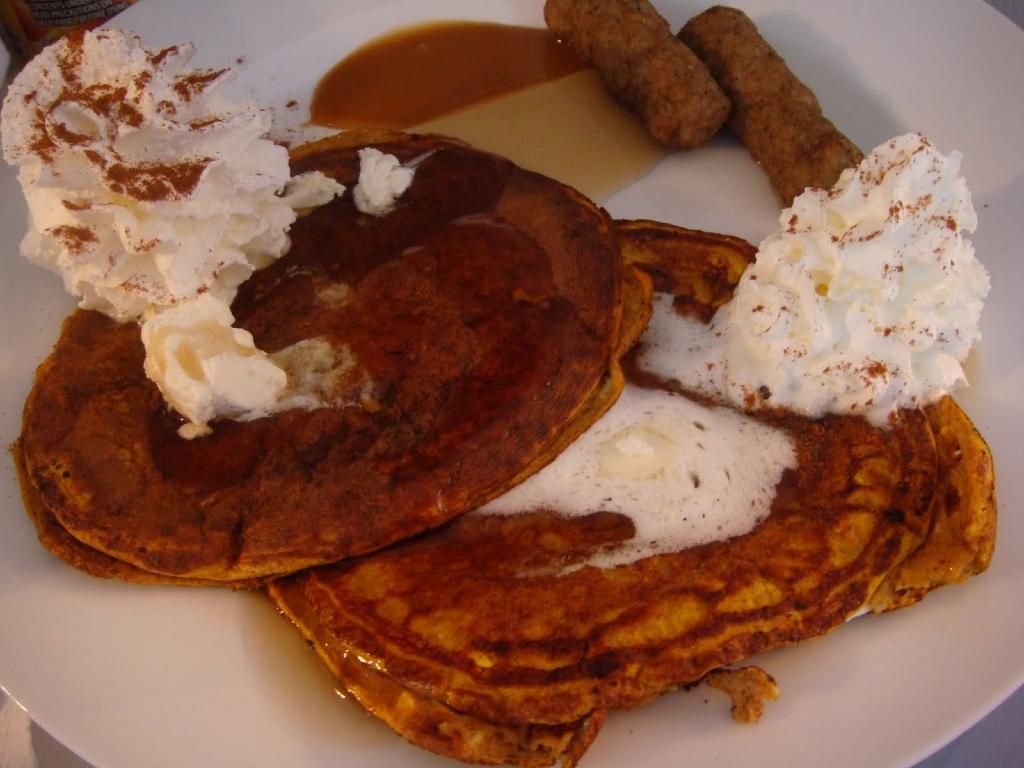
When I finally arrived at my parents’ house, I was thrilled to see the warm, orange glow of the kitchen cut through the side windows into the gray morning light. Finally, some relief and refuge from the weather and from my mood. Indeed, I walked in the door and what should greet me but the smell of freshly made pumpkin pancakes oozing with butter, syrup, sugar-free caramel sauce, and whipped cream. And don’t forget the sizzle of turkey sausages on the side! My mom was standing there channeling June Cleaver (who am I kidding? June has nothing on her) flipping delicious Low-Carb Pumpkin Pancakes while my dad read the paper and anticipated his plateful. Shame on me for wallowing in my mood! My faithful God had arranged such a sweet homecoming for me despite my scowl.


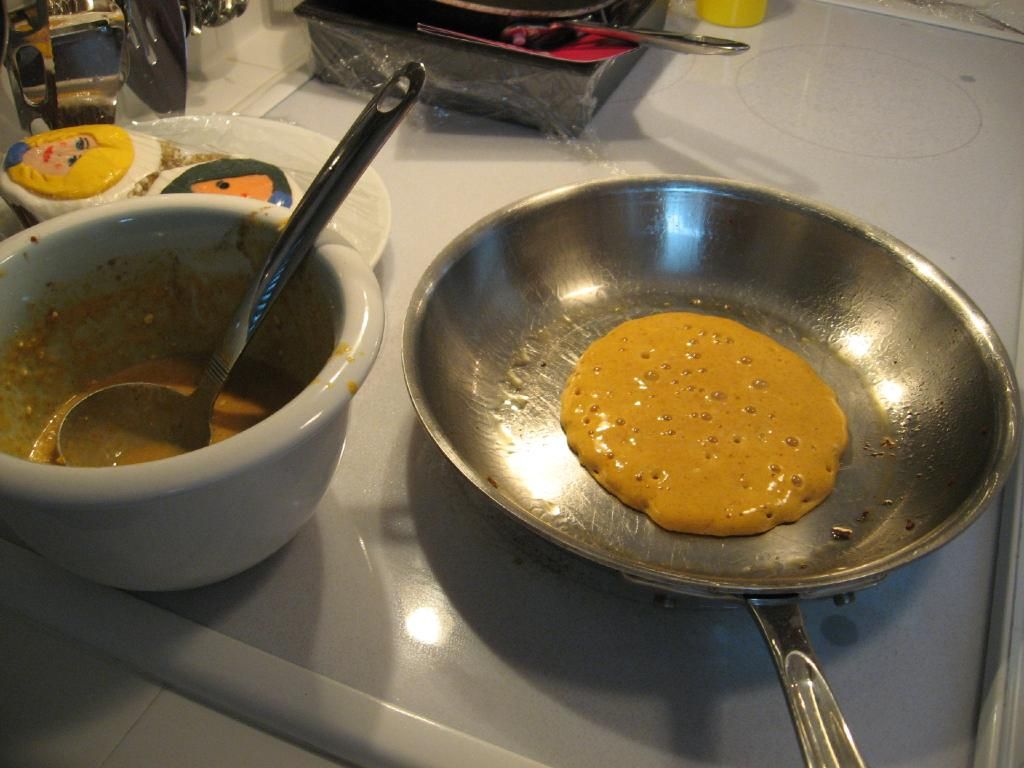
Flipping some delicious Low-Carb Pumpkin Pancakes. If you look closely, you can see my mom’s Mii Cupcakes in the background!


Low-Carb Pumpkin Pancakes served with butter, syrup, sugar-free caramel, and sugar-free whipped cream. Side of turkey sausage.


Dad enjoying his breakfast.

Food plays such a prominent role in my family, and certain dishes in my mind are associated with comforting or joyful memories. The smorgasbord of silly appetizers at our New Year’s Eve game night, the cinnamon rolls and egg casserole on Christmas morning, Dad’s amazing pork butt and slaw, the chicken and dumplings we always clamored for, monkey bread! Milk toast! Sausages, peppers and onions! I could go on and on. It’s no wonder that walking into a comforting kitchen filled with delicious scents and a welcoming plate of breakfast truly felt like coming home — not just coming to borrow a tube pan. My spirits were lifted, and as I drove home, I was prepared for a day of baking another lovely family memory: the richest, most dense and moist pound cake you’ve ever tasted. It’s iced with a simple caramel frosting and served alongside some Southern fried apples.


The best pound cake ever in the history of the universe, hands down. I’m not even worried about overselling it.

Let me see if I can explain how amazing this cake is. The cream cheese imparts a richness to the already buttery batter, and results in a very dense, smooth cake. Cutting into the cake is like slicing into butter, and it’s lovely served slightly chilled. My usual complaint with pound cakes is that they’re dry even with a glaze, but this one stays perfectly moist throughout its entire baking time. The frosting has a sultry caramel flavor without the fuss of normal caramel making, and is the perfect complement to the buttery cake. As for the apples, those were my addition! What with the nice fall days we’ve been having (well, except for the miserable weather from last week), warm Southern spiced apples sounded like a delicious accompaniment to a cool cake. And maybe there was a scoop of vanilla bean ice cream in there somewhere too!

This is absolutely one of those must-bake recipes. One bite and you’ll be daydreaming all day about slicing yourself off another piece! And what a lovely dessert to share with family. I drove back to my parents’ house on Sunday to drop some off for them, and my dad sent me an email from work the next day saying he was enjoying a slice. I hope once you taste your first forkful, this cake will become part of your family’s own food memories.

Cream Cheese Pound Cake with Easy Caramel Frosting


Recipe By: Southern Living
Yields: 12

Cream Cheese Pound Cake Ingredients:
1 1/2 cups butter, softened
8 ounces cream cheese, softened
3 cups sugar
6 large eggs
1 1/2 tsp vanilla
3 cups flour
1/8 teaspoon salt

Caramel Frosting Ingredients:
1/4 cup whipping cream
1 cup firmly packed brown sugar
1 teaspoon vanilla
2 1/2 cups powdered sugar
1/2 cup butter

Directions:
Make the pound cake: beat butter and cream cheese at medium speed of an electric mixer 2 minutes or until creamy. Gradually add sugar and beat 5-7 minutes until light and fluffy. Add eggs, one at a time and beat only until yellow disappears. Stir in vanilla.

Combine flour and salt and add to creamed mixture beating on low speed of electric mixture just until blended after each addition. Pour into greased and floured 10-inch tube pan. Fill a 2-cup ovenproof measuring cup with water and place in oven with cake (keeps it moist!). Bake at 300 degrees for 1 hour and 45 minutes or until a wooden toothpick comes out clean (check in several areas of the cake to be sure it’s completely done). Let cool on wire rack for 10 minutes then remove from pan (invert onto a plate and then invert onto another so that it’s upright) and let cool completely. When cool, spread caramel frosting over the sides.

Make the caramel frosting: melt butter in a heavy saucepan. Add brown sugar; cook over low heat, stirring constantly, 1 1/2 to 2 minutes or until sugar dissolves (do not boil). Remove from heat.

Stir in whipping cream. Add powdered sugar and vanilla. Beat at high speed of an electric mixture until spreading consistency (do not overbeat, or your frosting will develop a play-doughy, “crunchy” consistency. It’ll still taste good, but won’t look very nice or be easy to spread). Spread immediately on top and sides of cake.


Care for some Southern Fried Apples with your cake?

Southern Fried Apples


Recipe by: Diana Rattray (slightly adapted and halved)
Yields: about 4 cups of fried apples

Ingredients:
4 medium Granny Smith apples, cored, peeled, chopped
1/8 cup butter
1/4 – 1/2 cup brown sugar (to taste)
1/4 teaspoon cinnamon
pinch nutmeg (about half of 1/8 teaspoon)

Preparation:
Melt butter in a heavy skillet over medium-low heat. Add apples, brown sugar, cinnamon and nutmeg. Sauté 15 to 20 minutes, or until apples are tender.

Julie’s Note: I made double this and had way too many apples. Three or four tender spiced apple slices are perfect to accompany a single slice of cake, so you don’t need many. You can keep these refrigerated in an airtight container and just warm them up in the microwave before serving with cold cake (and ice cream or whipped cream, if desired). Finally, plenty of websites told me not to bother peeling my apples, so I didn’t, but I wished I had. Even though the peel got tender, it was still a different texture than the apple flesh and wasn’t “a-peel-ing.” Ha ha!


Enjoy!


Share Share this post with friends!

Dobos Torte

Mike’s a history buff in addition to being a math superhero. Every now and then he’ll be looking at photos of something like a spoon from Pompeii or a statue from Greece and geeking out over how neat it is. It’s thrilling to think of people centuries and millennia ago actually using the objects and living in the homes we now have as artifacts of their existence. Last summer he finally went on a trip to some of the places he’s always loved to read about: Rome, Greece, and Turkey. Looking through his pictures when he returned, it was so sweet to see him living one of his dreams.


I understand Mike’s excitement about the cultures of the past, and sometimes I feel it too, but it doesn’t come naturally to me. I usually have to sort of ponder artifacts and give my imagination a shove to really appreciate how neat they are. With this past Daring Bakers challenge, however, I finally got a taste of how Mike must feel. After reading through the recipe and researching the challenge, I realized that I was about to bake a piece of history: the Dobos Torte.

The August 2009 Daring Bakers’ challenge was hosted by Angela of A Spoonful of Sugar and Lorraine of Not Quite Nigella. They chose the spectacular Dobos Torte based on a recipe from Rick Rodgers’ cookbook Kaffeehaus: Exquisite Desserts from the Classic Caffés of Vienna, Budapest, and Prague.

Reading about the Dobos Torte gave me goosebumps. The torte is the namesake of József C. Dobos, its Hungarian creator. It was created with the intent of making a cake with a longer shelf life, and was debuted in 1885 at the National General Exhibition of Budapest. What really excited me was learning that Franz Joseph I and his wife, the Empress Elisabeth (also called Sisi), were among the first to taste the dessert! For those of you who don’t teach your 6th graders about the Russian Revolution like I do, I’ll fill you in. Franz Joseph I was the uncle of Archduke Franz Ferdinand, who was assassinated by Serbian terrorists in 1914. This act effectively started World War I and contributed to the Russian Revolution. I won’t give you a full history lesson, but isn’t that amazing? This torte has such a rich history, and here I am baking it in my own kitchen!

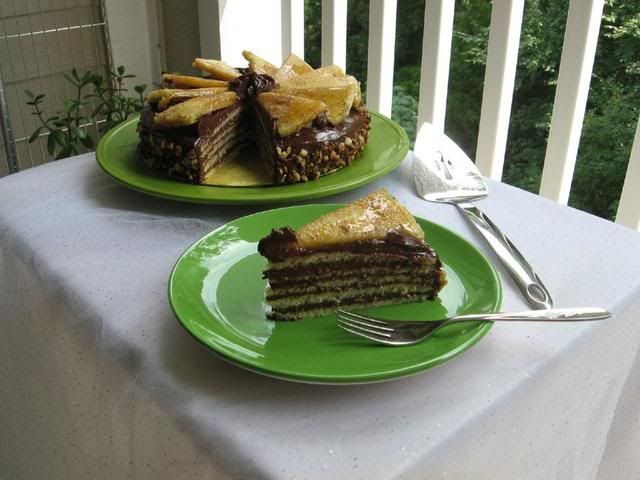
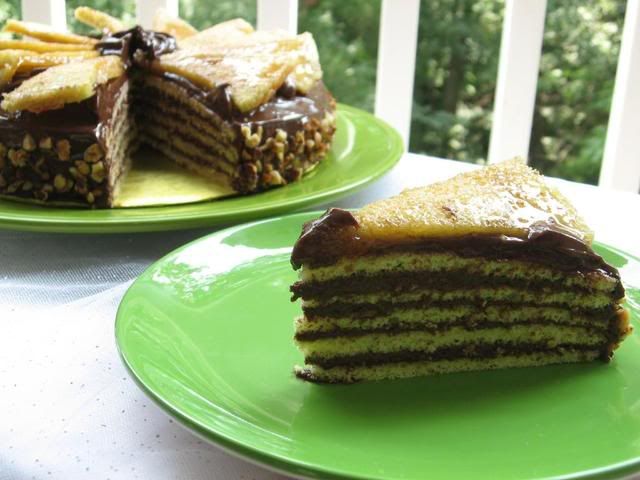
Dobos kept the recipe for his torte a secret until his retirement in 1906, and since then, the popular dessert has been made around the world. The torte is comprised of multiple layers (anywhere from 6-12 is typical) of thin sponge cake, a thick American buttercream, and a slightly lemony caramel coating on the top layer. The recipe was quite intimidating at first, but I enjoyed the process and felt nudged out of my cupcake comfort zone, as all Daring Bakers should!

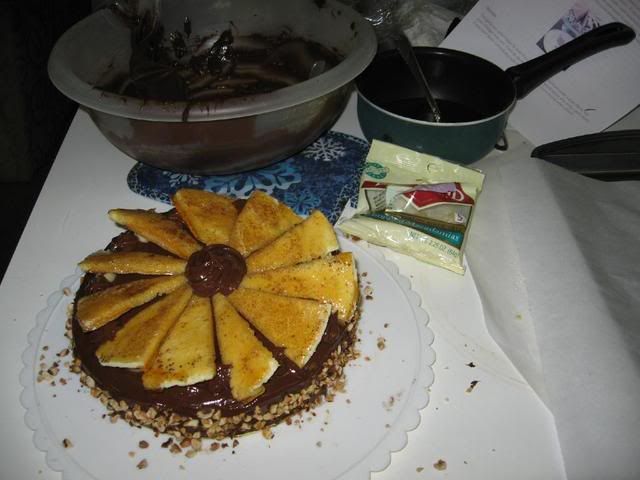
I chose to make my torte the classic size and shape, but did change a few things. I brushed each sponge layer with a simple syrup when assembling the torte to ensure that they’d stay moist. I also used macadamia nuts to prop up my caramel wedges instead of hazelnuts, but that wasn’t an artistic decision — I couldn’t find any whole hazelnuts at my grocery store.

If I could change a few things about the recipe, I’d add flavoring to my simple syrup and apply more of it to the sponge layers. I found my layers a bit dry (good thing they were smooshed between so much buttercream). I’d also nix the lemon from the caramel — it tasted a little odd — and use cream instead. Finally, I can attest that creating the perfect caramel texture is the hardest part of this cake. I took my sugar mixture off of the stove too soon and ended up with a sticky caramel that made my sponge cake layer a bit soggy. Using a candy thermometer might be a better idea than relying on your instincts (especially if you tend to be jumpy/hasty/caffeinated about your baking). For caramel, you’ll want the temperature of your sugar mixture between 320 to 350 degrees based on this handy chart.

One thing I’m glad I didn’t change was the frosting. I used unsweetened Belgian chocolate, and the result spread like a dream and tasted rich and indulgent. I can’t wait to make this chocolate buttercream again and slather it on — you guessed it — some cupcakes!

There are lots of opportunities for creative alterations with this torte. You can bake all the batter in sheet pans and cut it into as many rectangular layers as you’d like, or even use a cookie cutter to create some adventurously shaped layers. You could also use different nuts to decorate the cake (almonds, hazelnuts, cashews), different flavors of syrup on the sponge cake, and different flavors of buttercream to frost. One particularly daring baker brushed each sponge layer with a hazelnut liqueur and used Ferrero Rocher to prop up her caramel wedges! You know I love Ferrero Rocher, so I’m a fan of that idea!

I hope you’ll take the plunge and try making a Dobos Torte on your own. The recipe is a mile long, yes, but that’s partially because of the clear, thorough instructions. Angela has thoughtfully created a printable version of this recipe to make the process a bit easier! It was such a lovely achievement when all the work was finished, and I relished each bite thinking of the legacy I was eating!


Dobos Torte


Recipe by: Kaffeehaus: Exquisite Desserts from the Classic Cafés of Vienna, Budapest, and Prague, by Rick Rodgers
Yield: about 11-12 pieces of torte

Equipment
2 baking sheets
9” (23cm) springform tin and 8” cake tin, for templates
mixing bowls (1 medium, 1 large)
a sieve
a double boiler (a large saucepan plus a large heat-proof mixing bowl which fits snugly over the top of the pan)
a small saucepan
a whisk (you could use a balloon whisk for the entire cake, but an electric hand whisk or stand mixer will make life much easier)
metal offset spatula
sharp knife
a 7 1/2” cardboard cake round (or just build cake on the base of a sprinfrom tin)
12 whole hazelnuts, peeled and toasted (I used macadamia nuts)
½ cup (50g) peeled and finely chopped hazelnuts
piping bag and tip, optional

Prep times
Sponge layers 20 mins prep, 40 mins cooking total if baking each layer individually.
Buttercream: 20 mins cooking. Cooling time for buttercream: about 1 hour plus 10 minutes after this to beat and divide.
Caramel layer: 10-15 minutes.
Assembly of whole cake: 20 minutes

Sponge Cake Ingredients
6 large eggs, separated, at room temperature
1 1/3 cups (162g) confectioner’s (icing) sugar, divided
1 teaspoon (5ml) vanilla extract
1 cup plus 2 tablespoons (112g) sifted cake flour
pinch of salt

Chocolate Buttercream Ingredients
4 large eggs, at room temperature
1 cup (200g) caster (ultrafine or superfine white) sugar
4oz (110g) bakers chocolate or your favourite dark chocolate, finely chopped (I used Belgian chocolate)
2 sticks plus 2 tablespoons (250g) unsalted butter, at room temperature.

Caramel Topping Ingredients
1 cup (200g) caster (superfine or ultrafine white) sugar
12 tablespoons (180 ml) water
8 teaspoons (40 ml) lemon juice
1 tablespoon neutral oil (e.g. grapeseed, rice bran, sunflower)

Directions for the sponge layers:
NB. The sponge layers can be prepared in advance and stored interleaved with parchment and well-wrapped in the fridge overnight.

1. Position the racks in the top and centre thirds of the oven and heat to 400F (200C).
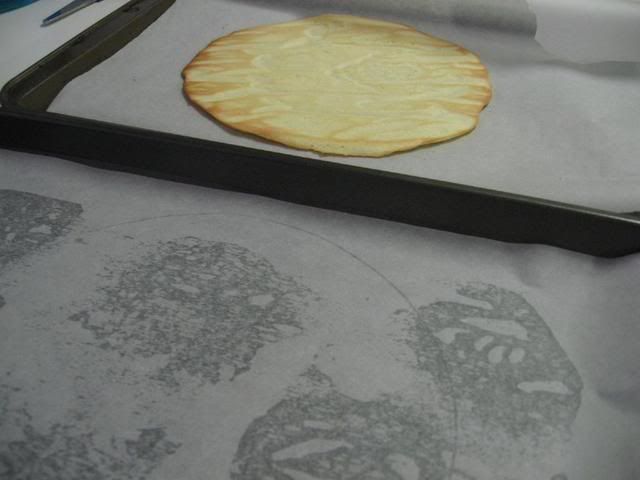
2. Cut six pieces of parchment paper to fit the baking sheets. Using the bottom of a 9″ (23cm) springform tin as a template and a dark pencil or a pen, trace a circle on each of the papers, and turn them over (the circle should be visible from the other side, so that the graphite or ink doesn’t touch the cake batter.)
3. Beat the egg yolks, 2/3 cup (81g) of the confectioner’s (icing) sugar, and the vanilla in a medium bowl with a mixer on high speed until the mixture is thick, pale yellow and forms a thick ribbon when the beaters are lifted a few inches above the batter, about 3 minutes. (You can do this step with a balloon whisk if you don’t have a mixer.) Note: I leveled each sponge layer after baking per a great suggestion from other Daring Bakers. I did this by covering the layer with an oiled, cocoa powder dusted sheet of parchment paper and then pressing another sheet pan down on the layer to even it out.
4. In another bowl, using clean beaters, beat the egg whites until soft peaks form. Gradually beat in the remaining 2/3 cup (81g) of confectioner’s (icing)sugar until the whites form stiff, shiny peaks. Using a large rubber spatula, stir about 1/4 of the beaten whites into the egg yolk mixture, then fold in the remainder, leaving a few wisps of white visible. Combine the flour and salt. Sift half the flour over the eggs, and fold in; repeat with the remaining flour.
5. Line one of the baking sheets with a circle-marked paper. Using a small offset spatula, spread about 3/4cup of the batter in an even layer, filling in the traced circle on one baking sheet. Bake on the top rack for 5 minutes, until the cake springs back when pressed gently in the centre and the edges are lightly browned. While this cake bakes, repeat the process on the other baking sheet, placing it on the centre rack. When the first cake is done, move the second cake to the top rack. Invert the first cake onto a flat surface and carefully peel off the paper. Slide the cake layer back onto the paper and let stand until cool. Rinse the baking sheet under cold running water to cool, and dry it before lining with another parchment. Continue with the remaining papers and batter to make a total of six layers. Completely cool the layers. Using an 8″ springform pan bottom or plate as a template, trim each cake layer into a neat round. (A small serrated knife is best for this task.)


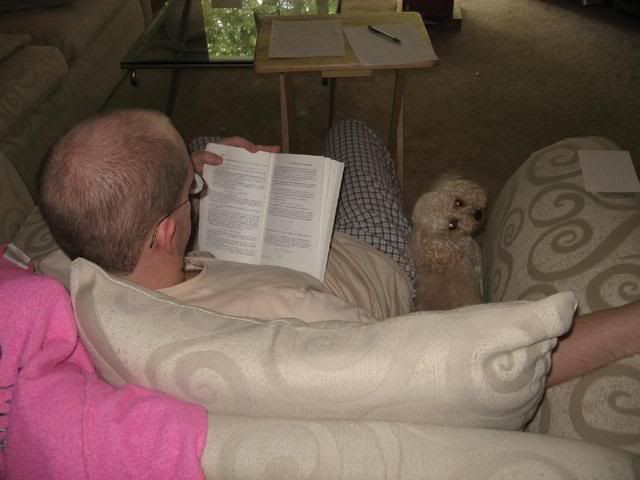
I love when I have two cookin’ buddies! Mike and Byrd cheer me on from the couch.

  
Drawing my circles, spreading my batter, and baking my layers. What sort of recipe requires artwork?

Directions for the chocolate buttercream:
NB. This can be prepared in advance and kept chilled until required.

1. Prepare a double-boiler: quarter-fill a large saucepan with water and bring it to a boil.
2. Meanwhile, whisk the eggs with the sugar until pale and thickened, about five minutes. You can use a balloon whisk or electric hand mixer for this.
3. Fit bowl over the boiling water in the saucepan (water should not touch bowl) and lower the heat to a brisk simmer. Cook the egg mixture, whisking constantly, for 2-3 minutes until you see it starting to thicken a bit. Whisk in the finely chopped chocolate and cook, stirring, for a further 2-3 minutes.
4. Scrape the chocolate mixture into a medium bowl and leave to cool to room temperature. It should be quite thick and sticky in consistency.
5. When cool, beat in the soft butter, a small piece (about 2 tablespoons/30g) at a time. An electric hand mixer is great here, but it is possible to beat the butter in with a spatula if it is soft enough. You should end up with a thick, velvety chocolate buttercream. Chill while you make the caramel topping.

Lorraine’s note: If you’re in Winter just now your butter might not soften enough at room temperature, which leads to lumps forming in the buttercream. Male sure the butter is of a very soft texture I.e. running a knife through it will provide little resistance, before you try to beat it into the chocolate mixture. Also, if you beat the butter in while the chocolate mixture is hot you’ll end up with more of a ganache than a buttercream!


Frosting and decorating the torte.

Directions for the caramel topping:
1. Choose the best-looking cake layer for the caramel top. To make the caramel topping: Line a jellyroll pan with parchment paper and butter the paper. Place the reserved cake layer on the paper. Score the cake into 12 equal wedges. Lightly oil a thin, sharp knife and an offset metal spatula.
2. Stir the sugar, water and lemon juice in a small saucepan. Bring to a boil over a medium heat, stirring often to dissolve the sugar. Once dissolved into a smooth syrup, turn the heat up to high and boil without stirring, swirling the pan by the handle occasionally and washing down any sugar crystals on the sides of the pan with a wet brush until the syrup has turned into an amber-coloured caramel.
3. The top layer is perhaps the hardest part of the whole cake so make sure you have a oiled, hot offset spatula ready. I also find it helps if the cake layer hasn’t just been taken out of the refrigerator. I made mine ahead of time and the cake layer was cold and the toffee set very, very quickly—too quickly for me to spread it. Immediately pour all of the hot caramel over the cake layer. You will have some leftover most probably but more is better than less and you can always make nice toffee pattern using the extra to decorate. Using the offset spatula, quickly spread the caramel evenly to the edge of the cake layer. Let cool until beginning to set, about 30 seconds. Using the tip of the hot oiled knife (keep re-oiling this with a pastry brush between cutting), cut through the scored marks to divide the caramel layer into 12 equal wedges. Cool another minute or so, then use the edge of the knife to completely cut and separate the wedges using one firm slice movement (rather than rocking back and forth which may produce toffee strands). Cool completely.

Angela’s note: I recommend cutting, rather than scoring, the cake layer into wedges before covering in caramel (reform them into a round). If you have an 8” silicon round form, then I highly recommend placing the wedges in that for easy removal later and it also ensures that the caramel stays on the cake layer. Once set, use a very sharp knife to separate the wedges.

Assembling the Dobos:
1. Divide the buttercream into six equal parts.
2. Place a dab of chocolate buttercream on the middle of a 7 1/2” cardboard round and top with one cake layer. Spread the layer with one part of the chocolate icing. Repeat with 4 more cake layers. Spread the remaining icing on the sides of the cake.
3. Optional: press the finely chopped hazelnuts onto the sides of the cake.
4. Propping a hazelnut under each wedge so that it sits at an angle, arrange the wedges on top of the cake in a spoke pattern. If you have any leftover buttercream, you can pipe rosettes under each hazelnut or a large rosette in the centre of the cake. Refrigerate the cake under a cake dome until the icing is set, about 2 hours. Let slices come to room temperature for the best possible flavour.


Don’t forget to visit other Daring Bakers and see the imaginative combinations and configurations of the Dobos Torte they created!

1 3 4 5