cake

Salted Caramel Chocolate Trifle

The first face to poke through the door of my classroom was that of an older woman. She was followed by one of my 7th grade students, who was followed by a white haired man. “Come in! Find a seat anywhere!” I called as I made last minute adjustments to the position of the projector.

Soon people were pouring into my room. They had arrived for Grandfriends Day, where Woodlawn students invited their grandparents (or grandpeople they’d “adopted”) to eat lunch with them and participate in their classes.

I’m going to go ahead and publicly admit that I was terrified of Grandfriends Day. What activity could I plan that both a 60-year-old and a 12-year-old might enjoy? We usually read novels or tackle projects that take weeks to complete. What concept could I introduce and cover in a meaningful way in 30 minutes?

Thankfully, I learned a trick at the beginning of my teaching career that always serves me well in these types of circumstances: when you’re scared of a new thing, get enthusiastic and give it an honest, earnest try. (This also works with baking, writing, and life in general.) So as the students and their grandfriends filtered into my room, I pasted on a smile.

Once they were all somewhat assembled, I took a deep breath and did something a little ridiculous. I turned on the projector and pressed play on this video (no, really, go watch it). Confusion turned into giggles as Maru the cat repeatedly attempted to gain access to a huge cardboard box. Young and old alike cheered when he finally sprang into its depths. I surveyed the classroom as they watched, concluding that funny YouTube clips were, indeed, a language that spanned the generations.

When the video ended, I posed a question: “What was Maru’s goal?”

“To get in the box!” the class cried in unison.

“Did he accomplish his goal the first time he tried?”

“No!”

“How about the second?”

“No!”

“Did he eventually get in the box?”

“Yes!”

Their enthusiasm was cute. They were still riding the wave of cheer that Maru’s antics had created. I distributed sheets of notebook paper as I issued their assignment: “Write about a time when you, like Maru, had a goal you couldn’t accomplish right away.”

Some dove at their paper with ardor while others thoughtfully drummed fingers or pencils on the desk. A short ten minutes later, though, everyone sat staring at their finished anecdote. I asked for volunteers to share, wholly unsure about the quality of work I was about to receive. I needn’t have been concerned, though. I have great students and, it turns out, they have amazing grandfriends.

One man told of learning to drive a car with a manual transmission and repeatedly killing the engine before finally getting the hang of it. Another told of being determined to get his garden planted despite the rain that threatened to prevent it. A third detailed how he and his construction crew had created a machine that could drive 16 nails a second to accomplish their goals more efficiently.

Two women discussed taking a pottery class and working for months before they produced the bowl or vase they’d envisioned. My students relayed sports goals they’d attempted to accomplish: a back set in volleyball, a backflip in gymnastics. Finally, one of my students raised his hand and asked to read his grandfather’s composition.

His grandfather had worked with a veterinarian as a young man and decided to enter into that profession himself. His application to NC State’s veterinary program, however, was denied. Undeterred, he entered the college for agriculture instead, and — my student articulated the following with great pride — became the first person in his family to graduate from college.

We were all quiet for a minute before one clap — and then another, and then another — began a round of applause for this man’s accomplishment. It was one of those moments (you teachers out there will know just what I mean) when I thought, “Oh, this is why I teach.”

Some folks that day had reached their goal by pushing through the obstacles. Others had used trial and error, learning from their mistakes and adjusting their actions. Still others had created a tool to help them accomplish their objective. That man, though, had courage and flexibility I sometimes lack. Instead of getting discouraged, he changed his goal. He created a path for himself that wasn’t what he’d originally envisioned. The pride his whole family felt at his accomplishment was a testimony to his success.

I wish I’d had that much grace this week when making this Salted Caramel Chocolate Cake. Yes, I said cake, because that’s what this dessert was supposed to be.

My goal was to create a towering chocolate cake drenched in gooey salted caramel and frosted with a smooth, fudgy icing. I saw that goal crumble before my eyes, however, when I opened my refrigerator and found all 6 layers sliiiiiiding down like they were preparing to do the limbo. The skewers I’d added for support were leaning right along with the cake.

I could pretend I handled it well, because this is the internet. For all you know I’m a supermodel who, apart from saving puppies and keeping a perfect house, never loses her temper. In the spirit of honesty, however, let’s just say that there was a solid 30 minutes of angst in my kitchen Wednesday night.

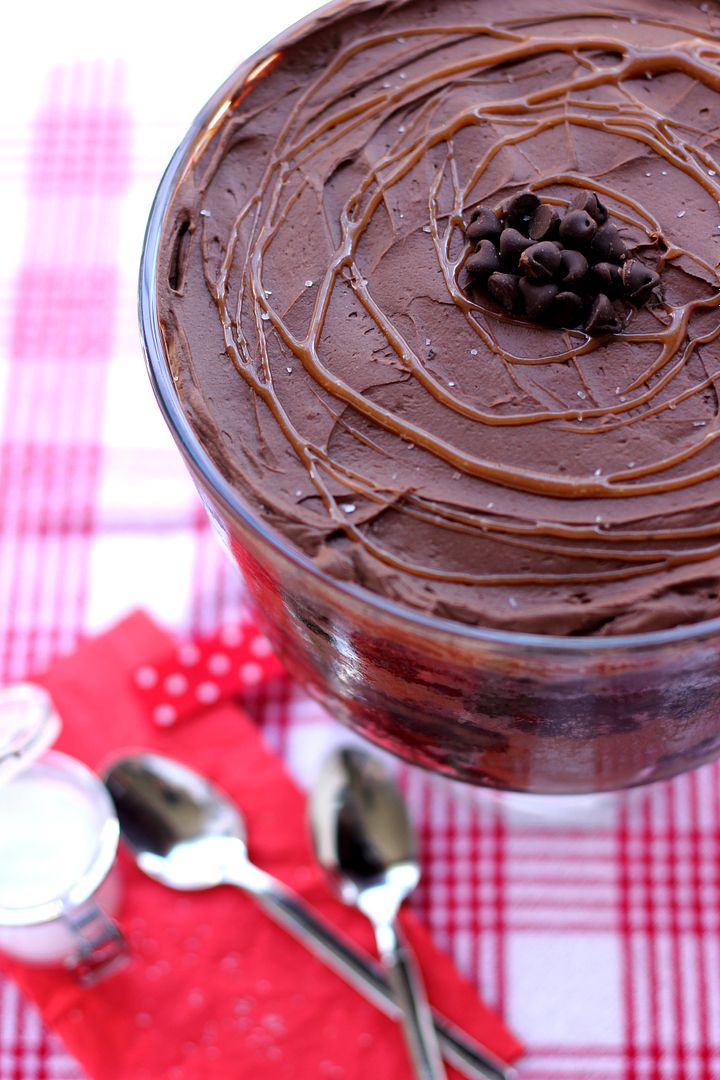
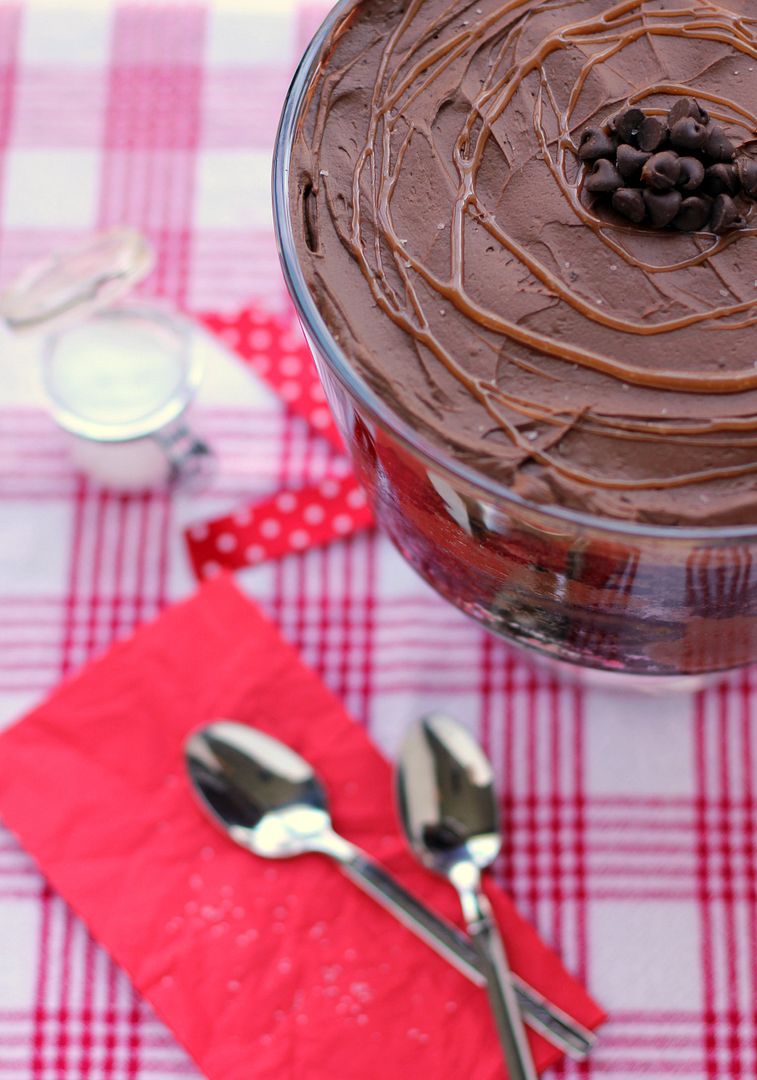
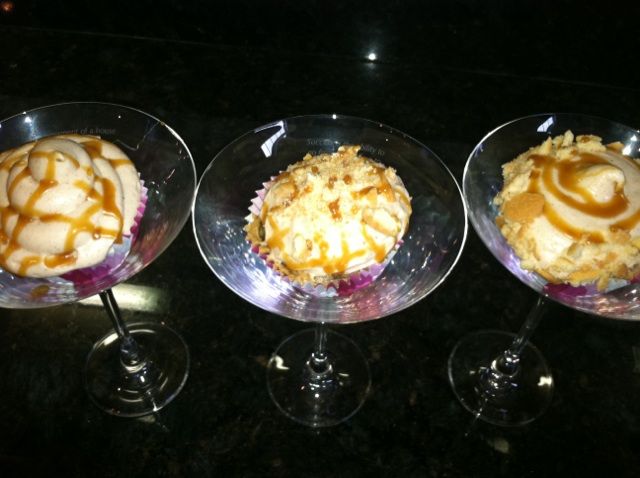
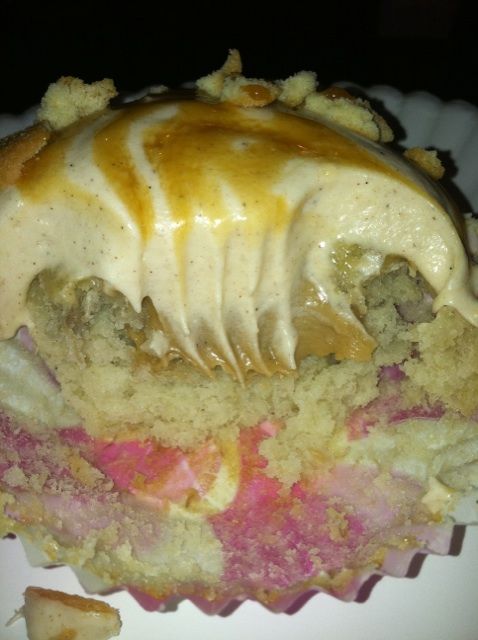
Then somehow I flipped a switch. I stopped trying to restack the layers, grabbed a spoon and my trifle dish (thanks for my trifle dish, Joyce!), and started building this bucket o’ cake. As I worked, my mood improved drastically.

Not only was my trifle pretty, less fuss to frost, and easier to transport, but it was also going to taste every bit as delicious as the cake I’d envisioned. The satisfied faces of my family around the Thanksgiving table the next day confirmed that it was a success.

Your turn: tell me about a time when you had a goal you couldn’t accomplish right away.

Salted Caramel Chocolate Trifle


Recipe by: Adapted from Martha Stewart
Yield: About a billion servings. Or at least 10-15.

This is actually a recipe for a 6-layer salted caramel chocolate cake. Feel free to attempt the cake and keep the trifle as a backup plan in case it doesn’t work — or just make the trifle from the beginning! Either way, the dessert you end up with will be rich, moist, and covered in the most delicious salted caramel and fudgy frosting. By the way, if you’re scared of making caramel, don’t be — just make sure you use a candy thermometer, which takes the guesswork out of the process.

Cake Ingredients:
3 cups all-purpose flour, plus more for pans
3 cups granulated sugar
1 1/2 cups unsweetened Dutch-process cocoa powder
1 tablespoon baking soda
1 1/2 teaspoons baking powder
1 1/2 teaspoons coarse salt
4 large eggs
1 1/2 cups low-fat buttermilk
1/2 cup plus 2 tablespoons safflower oil
1 1/2 cups warm water
2 teaspoons pure vanilla extract

Caramel Ingredients:
4 cups granulated sugar
1/4 cup light corn syrup
1/4 cup water
2 cups heavy cream
1 teaspoon coarse salt
2 sticks cold unsalted butter

Frosting Ingredients:
1/4 cup plus 2 tablespoons Dutch-process cocoa powder
1/4 cup plus 2 tablespoons warm water
2 sticks unsalted butter, room temperature
1/2 cup confectioners’ sugar
Coarse salt
1 pound semisweet chocolate chips, melted and cooled
flaked sea salt, such as Maldon

Directions:
Note on scheduling: You can make the cake layers a few days in advance. Just wrap them and refrigerate them, and take them out and freeze them the day you’ll be cutting and assembling them (which will make them easier to work with). You can make the caramel up to three days in advance and keep it in the fridge — just let it come to room temperature for a couple of hours before using it. The entire cake can be assembled a day in advance and refrigerated, allowing its flavors to meld.

Make the cake: Cut 3 circles of parchment paper and use cooking spray as “glue” to adhere them to 3 9-inch round cake pans. Then grease the pans and the paper (I use Wilton’s Cake Release, but you could also use butter and flour). Preheat the oven to 350 degrees F.

Sift the flour, sugar, cocoa, baking soda, baking powder, and coarse salt together in a mixing bowl. Beat the dry ingredients on low until combined before increasing the speed to medium and adding eggs, buttermilk, warm water, oil, and vanilla. Beat about 3 minutes until the mixture is smooth. Divide it among the three pans.

Place the pans in the oven and bake until a toothpick inserted in the middle comes out with just a few moist crumbs, about 30-35 minutes. Rotate the pans about halfway through so they’ll bake evenly. Let them cool on a wire rack for about 10 minutes before turning them out onto sheets of wax paper and leaving them to cool completely. Stick them in the freezer if you’re going to make a cake; if you’re going for a trifle, just leave them out.

Make the caramel: Slice your butter into tablespoon chunks and set it back in the fridge for later. In a large saucepan, gently combine the sugar, corn syrup, and water. Once you put it on the heat, you won’t stir it anymore to ensure that the sugar will not crystallize and give you grainy caramel. Put a candy thermometer on the pan and heat it over high heat (no stirring!). Once the mixture starts turning amber around 320 degrees, you can gently swirl it every now and then (not stirring!) to ensure the sugar caramelizes evenly. Heat it until the mixture is dark amber (350 degrees on your thermometer), about 14 minutes. Remove it from the heat.

VERY CAREFULLY and slowly, pour in the cream. The mixture will bubble up and spatter so just be prepared and stand back — flaming sugar is no joke! Once you add the cream, whisk the mixture until it’s smooth before returning it to the heat and cooking until it reaches exactly 238 degrees (I know it sounds weird, but apparently this is crucial for the texture), about 2 minutes. Pour the caramel into a medium bowl and add the salt. Let it cool for about 15 minutes before whisking in the butter 1 tablespoon at a time (you’re definitely going to want to enlist another set of hands here; otherwise your arm will fall off).

Make the frosting: In a small bowl, whisk together the cocoa and warm water. In a separate bowl, beat together butter, confectioners’ sugar, and a generous pinch of coarse salt until pale and fluffy. Gradually beat in the melted chocolate and the cocoa mixture. Let this sit for about 30 minutes before you use it.

Assemble the cake (or trifle): If you’re making a trifle, simply tear up the cake and alternate layers of cake and 3/4 cup of caramel in your bowl, using a spoon or offset spatula sprayed with cooking spray to help spread the caramel. Do a layer of frosting in the middle of the dish and another layer on top before drizzling with caramel and sprinkling with sea salt.

Alternatively, if you want to try the cake, freeze your cake layers until they’re firmer (this makes them much easier to work with). Use a long serrated knife to level their tops and cut each layer in half. Place one layer on a serving platter and spoon 3/4 cup of caramel on top, using a spoon or offset spatula sprayed with cooking spray to help spread the caramel. Place another cake layer on top and repeat the process, alternating layers of cake and caramel, leaving the top cake layer uncovered. For goodness’ sake, place dowels through your cake (I’d say at least 4), mark them at the height of the cake, remove them, and cut them down to size. Then replace them in the cake. I’d also wrap the entire cake tightly in plastic wrap before chilling it to prevent sliding. Refrigerate it until it’s set (about an hour) before frosting the top and sides of the cake and sprinkling with sea salt.

Serve the trifle or cake: I think this dessert is delicious no matter what, but it’s absolutely out-of-this-world if you heat a serving of it for about 30 seconds before spooning a big hunk o’ vanilla ice cream on top. I didn’t try this with a cake slice, so I don’t know that it’d hold together — another benefit of a messy trifle.

If you liked this post, please:
Subscribe to Willow Bird Baking
Follow Willow Bird Baking on Twitter
Follow Willow Bird Baking on Facebook
Give this post a thumbs up on StumbleUpon
Pin It


ShareOther ways to share this post with friends!

Presenting . . . Your Amazing Cupcakes!

Well, color me impressed. One month ago I issued a challenge here on Willow Bird Baking. Because I know how inspiring it can be to create your own dish, I asked you to come up with a fun cupcake combination all your own.

Some of these fantastic bakers were mamas baking with their kids (Sarah let her son, Jonathan, help out) while some of them were kids themselves (Erica’s in 7th grade this year). Some of them went the decadent route — chocolate, peanut butter, and beer, oh dear! — while some of them stayed bright and fruity — summery strawberries, blackberries, and citrus. Across the board, though, the one thing you all have in common is kitchen creativity. You came up with plans for a fantastic dessert for your family and friends, and you made it happen! Now it’s time to show off your handiwork!


Faygie the Fantastic

Faygie Made: Chocolate Cupcakes with Guinness-Chocolate Pudding and Caramel Buttercream
Comments:“I had a lot of fun doing this challenge! It took a while to find a combination that was not only unique, but also complemented each other well. The chocolate cupcake recipe is fantastic. The pudding was also very good, […] and I really thought that the caramel buttercream complemented the chocolate and Guinness really well. Because it is a Swiss meringue buttercream, it’s not too sweet (even with the large amount I piped on). I brought these to a friend’s birthday party and they were a huge hit!” (see more on her blog!)


Just look at those mountains of delicious frosting! These sound so rich and decadent.


LeAndra the Lovely

LeAndra Made: Banana and Choco-Banana Cupcakes with Peanut Butter(cream) Filling and Marshmallow Buttercream Frosting
Comments:“Thank you for hosting this cupcake challenge. I’m really looking forward to seeing everyone’s creations. I baked banana cupcakes with peanut butter buttercream filling and marshmallow buttercream icing. The baking itself went well, but I was concerned the banana cake and the peanut butter filling were too similar in coloring. So, I mixed some cocoa powder into the remaining batter for chocolate-banana cupcakes.” (see more of her fun cupcakes on her blog!)


Peanut butter, banana, and marshmallow sound like a match made in fluffernutter heaven. Yum!


Erica the Energetic

Erica Made: Yellow Cupcakes with Lemon Filling and Orange Icing
Comments:Erica is my youngest challenge entrant this time around — she just started 7th grade (in my class)! Aren’t these citrusy cupcakes adorable? Way to go, Erica!


Erica came straight out of my cupcake camp this summer and completed the cupcake challenge! So impressive!


Corisa the Creative

Corisa Made: Tandy Kake Cupcakes
Comments: “I made a ‘Tandy Kake’ cupcake, because Tandy Kake is one of my most loved desserts. I enjoy the combination of peanut butter and chocolate a whole lot! I started with a butter cake and filled it with Ina Garten’s peanut butter frosting. Then I topped it off with a simple chocolate frosting! Thanks so much for this opportunity. I’m so excited to see all the fabulous cupcakes!”


It doesn’t get better than peanut butter and chocolate. I want about 5 of these!


Sophia the Sophisticated

Sophia Made: Butterbeer Cupcakes
Comments: Sophia took two of my cooking classes last year — we had so much fun! She says, “I made the Butterbeer cupcakes. They were awesome! I used some techniques that I learned in your class when I made them, so that was great! They tasted a lot like cream soda and butterscotch (surprise!) I had so much fun! I don’t think I would have been able to make them as well if it hadn’t been for your cooking class…so thanks again.” Aww, what a sweet thing to say. Those kids were naturals in the kitchen, though!


I love butterscotch, and these cute cupcakes make me want to drive my broom straight to Harry Potter world in Florida, licking my fingers all the way.


Diana the Daring

Diana Made: Chocolate-Covered Banana Cupcakes
Comments: “I’m sending you my creation, a Chocolate-Covered Banana Cupcake. I was inspired by our trip to King’s Island (an amusement park in Cincinnati, Ohio) this summer. This was a fun challenge. Thanks for putting it together.”


These are so gorgeous, and I love that they’re a play off such a classic dessert.


Annie the Artistic

Annie Made: Red Velvet Cupcakes with Chocolate Monograms
Comments: “I love reading your blog for inspiration! Here’s a link to my red velvet cupcake with monograms recipe. It was quite a disaster the first two times — the recipe I had didn’t specify to add the vinegar and baking soda together before putting them in the mixture and, as I’m sure you know, red velvet cupcakes are a little tricky! Anyways, it was an overall success and the knitting ladies loved it.” Way to try, try, try again, Annie! (see more on her blog)


The monograms make these red velvet cupcakes unique and special.


Sarah the Sensational

Sarah Made: Champagne Cupcakes with Strawberry Puree Filling and Strawberry Buttercream
Comments: “I modified this Paula Deen recipe because my husband is crazy and doesn’t like peaches. I made a strawberry version.”


I love all things strawberry, and these cupcakes look like heaven. Look at the cute frosting squiggles!


Susan the Sweet

Susan Made: Blackberry Merlot Cupcakes
Comments: “This is my Blackberry Merlot Cupcake!
It’s a dark chocolate cupcake with blackberry preserve filling and a country buttercream made with a fresh blackberry & Merlot reduction. I came up with it when my niece was trying to decide which vice — chocolate, cake, or wine — to partake in. I decided to come up with a way for her to have all three at once!”
(see more on her website)


These sound so decadent and delicious — what a way to “have your cake and eat it too!


Erin the Elegant

Erin Made: Boston Creme Pie Cupcakes
Comments: “I couldn’t help but join in the fun and bake a cupcake! I’m an avid reader of your site and am always inspired to bake after looking at the delicious food you’ve made. Thanks for the opportunity to create something new! I baked a yummy Boston Creme Pie Cupcake with vanilla cake, vanilla cream filling, and dark chocolate ganache topping. To really make the cupcake shine, I added macaroon coconut as a garnish on top of the ganache.” (see more on her blog)


These came out so cute, and I love the addition of coconut! This is the perfect way to eat Boston creme pie — in adorable single portions.


Cathy and Kevin the Courageous

Erin Made: Bananas Foster Cupcakes
Comments: “We made Bananas Foster cupcakes! We used a banana cake recipe, caramel filling, and a cinnamon-madagascar bourbon vanilla bean cream cheese frosting (long enough for you?) topped with vanilla wafer crumbs and butterscotch caramel sauce. These babies were to die for!! (Not for the faint of heart-if you don’t like rich banana-y goodness these are not for you!) Thanks for a great challenge to make us come up with these goodies; we will be making these again.” (see more on their blog)


All I can say is oh my goodness, yum. I need to try these!


As always, I’ve been totally inspired by you — thank you for plunging in and taking the cupcake challenge! If you didn’t get to join in this time around, don’t worry — there are always more WBB challenges coming up to build your kitchen confidence.

If you liked this post, please:
Subscribe to Willow Bird Baking
Follow Willow Bird Baking on Twitter
Follow Willow Bird Baking on Facebook
Give this post a thumbs up on StumbleUpon


ShareOther ways to share this post with friends!

Fauxstess Cupcakes

I recently saw a letter written by an experienced teacher to his first-year-teacher self, and it reminded me of all the times I’ve thought, “I wish I’d known this when I started teaching.” Tomorrow is my last teacher workday before the students come back on Monday. What better time than the beginning of a new school year to write my own letter to my past self? So here it goes.

Dear Julie of 2006 (or as you’re about to be known, Ms. Ruble!),

It’s the night before the first day of school. I know you’re scared. I would tell you to get a good night’s rest, but to be honest, you’re not going to sleep much tonight. It doesn’t matter, though. Well-rested or not, you’re about to meet around 150 students who will change your life forever.

You’ll meet D, who you’ll admire for his sense of humor and his dance moves, and who will ask you all year when you’re going to let his beloved mother do your hair. You’ll meet L, who will stand up in class and scream in your face, but who needs you to forgive her and love her about as much as she needs air. You’ll meet H and P, who you will never reach. You’ll meet M, who seems impervious but who will shed surprising tears when you speak to her in anger. You’ll meet D, whose artwork will take your breath away.

You’ll meet K, and Julie . . . K will break your heart. Nothing you do will rescue that little boy from his situation. What can I say? This is going to be a tough year. But you can make it one of the most important years of your life.

You don’t lack fervor. I’m not going to tell you to be fervent. You are meticulous. I’m not going to tell you to perfect your classroom management systems. You are fretting about how students will learn science. I’m not going to advise you on unit plans. I’ve been teaching for 3.5 years now and I’m not an expert, but I’m going to tell you the things I wish you’d known.

1. Teach your students to learn. There are so many standards and concepts that you’ll literally try to pack a new topic in every day this year. I know you can drag the kids along at that pace — you’re good at making things happen — but maybe you shouldn’t. You’re trying to cram little bits of application into a full day of lecturing, and that’s not really how they’re going to learn. Put the importance of teaching them every tiny fact about your subject matter into perspective.

Instead, present new information and then find resources, projects, labs, and other experiences that allow them to apply the information themselves. Let them take ownership in their learning and enjoy the process. Give them more time to read and problem-solve together. Let them come up with creative ways to study. They don’t need to remember every step of the rock cycle for the rest of their lives, but they do need to know how to gather and process information.

I know it will take too long. I know you’ll end up not being able to cover everything. But if they come out of your class with the ability to be a curious, driven learner, that’s more important than all the Earth science facts you could give them.

2. Be humble and open to new ideas. This is a lesson you’ve learned, but that you need to continue to wholeheartedly embrace. We all tend to grow up feeling like we have a good handle on how the world works. In a way, deep down, we believe we know everything and can do everything. Teachers especially can develop a superiority complex when they run their classroom well and start to have great ideas. Rather than being a vessel that accepts and pours out in equal measure, they become a faucet, spewing a thick, opaque blanket of know-it-all over their colleagues.

Apart from alienating the people who can be your greatest allies, you miss out on so much when you think you know everything. Remind yourself constantly that some of your most exciting moments in the classroom have come from trying someone else’s ideas, even when they were outside of your comfort zone. Remind yourself that others are competent professionals, too — indeed, when you move on to a different school after this year, you will be surrounded by some of the most intelligent, innovative people you’ve ever met. Remind yourself that it’s okay to ask for help.

Finally, teach your students that they don’t know everything, either. Model humility, and place them in situations that challenge their worldview.

3. Be an advocate for yourself so that you can be an advocate for your students. You’ve been lectured endlessly on being flexible, rolling with the punches, and sucking up the pain. Those things are important sometimes. But what no one’s told you yet, and what you really need to know to survive this year (and I’m not just being dramatic), is this: you are a valuable professional, and you do not have to let people take advantage of you.

You’re the sweet, young, impressionable, flexible new teacher and this year, others will try to steamroll you to further their own interests. Even if they have their students’ needs in mind, it is not okay for them to hurt you and your class. If someone tells you you have to do something unreasonable, say no. If someone tells you you have to do something that hurts your class, say no. If the administration says they won’t assist you, don’t stop insisting. This isn’t a crusade or a mission for which you have to allow yourself to be victimized. It’s your job — and it’s important for you and your students that you are treated professionally.

4. Let yourself fail, and teach your students that failing doesn’t make you a failure. You are a perfectionist, but masterfully handling dozens of unpredictable, unique children is kind of like orchestrating a synchronized swimming team . . . made up of cats. Some lessons and classroom management plans are going to flop. Someone is going to steal the popcorn you brought in as a reward for the students. Someone is going to cut every one of your students’ bean plants in half. You are going to be unnecessarily harsh to a student and regret it.

Show your students that it’s okay to make a mistake by owning your mistakes. Show them that it’s okay to apologize by apologizing to them. Show them that it’s okay to be disappointed in yourself while still loving yourself — that you can pick yourself up and move on.

There are kids who make a mistake and add it to a list in their brains called, “Reasons I Don’t Deserve to be Loved.” Show them that there’s nothing they can do to make themselves failures as long as they keep moving forward. Tell them to expect “excellence, not perfection,” as one of my coworkers said in a meeting today, and to forgive themselves when they miss the mark.

5. Most importantly, Julie, love your students. I know you think you understand how crucial this is, but you will lose sight of it. You will immerse yourself in creating classroom structure, creating lessons, developing systems. You will prioritize academic achievement without realizing that having a loving, secure environment is the bedrock on which achievement is built.

Your students may not remember the different kinds of earthquake faults, but they’ll remember that they had a 6th grade teacher who loved them. They’ll remember that even when they misbehaved, there was someone in their lives who would not give up on them. They will be changed by the fact that you listened to their ideas and treated them like valuable human beings. Stop and let yourself interact with them in a personal way that lets them know you care about them.

That’s all for now — no words of wisdom on how to organize your files or balance housework and schoolwork, because you’ll figure all of that out. You’re going to be great. And even when you’re not, you’re going to change lives and be changed. Thank God for a job where you can say that!

Love and #2 pencils,
Ms. Ruble of 2011

Fauxstess Cupcakes


Recipe by: Adapted from Annie’s Eats and Hershey’s
Yields: about 15 cupcakes

These “Fauxstess” Cupcakes are homemade knock-offs of the Hostess Cupcakes that might’ve shown up in your lunch boxes during your childhood. They were adorable additions to my elementary school throwback picnic. The tender chocolate cake is filled with a marshmallowy cream and topped with rich ganache. Apart from being cute, these things are seriously easy to make and seriously delicious!

Cupcake Ingredients:
1 cups sugar
7/8 cup all-purpose flour
3/8 cup HERSHEY’S Cocoa
3/4 teaspoon baking powder
3/4 teaspoons baking soda
1/2 teaspoon salt
1 egg
1/2 cup milk
1/4 cup vegetable oil
1 teaspoon vanilla extract
1/2 cup boiling water

Filling Ingredients:
9 tablespoon unsalted butter, softened
2 1/4 cups confectioners’ sugar
1 1/8 cup Marshmallow Fluff
2 tablespoons plus 1 3/4 teaspoon heavy cream

Ganache Ingredients:
3/4 cups heavy cream
5 ounces bittersweet chocolate chips (I love Ghirardelli’s 60% cacao chips)
5 ounces semisweet chocolate chips

Directions:
Make the cupcakes: Preheat oven to 350°F. Line two muffin pans with cupcake liners. In a large bowl, whisk together the sugar, flour, cocoa, baking powder, baking soda and salt in large bowl. Add the eggs, milk, oil, and vanilla. Beat this mixture medium speed for 2 minutes. Stir in boiling water (this will make the batter thin). Fill each well about 2/3 full of batter (be careful to not to overfill them — these cupcakes always bake up a little wonky for me, and if you overfill them, they can overflow the pan). Bake 20 to 25 minutes (I check them early and often, starting around the 15 minute mark) or until a toothpick inserted into the center of a cupcake comes out with just a few moist crumbs. Cool completely.

Make the filling: Beat the butter, confectioners’ sugar, marshmallow fluff and 2 1/4 tablespoons (I eyeballed this measurement) of the heavy cream together until fluffy. Transfer all but 3/4 cup of this mixture into a pastry bag with a narrow tip. Add the remaining 1 1/2 teaspoon of cream to the remaining 3/4 cup of the mixture and beat until smooth. Cover this and save it for decorating the top of the cupcakes later.

Make the ganache: Place the chocolate in a medium bowl. Bring the cream to a simmer in a medium saucepan (or heat it for a couple of minutes in the microwave, keeping a watch that it doesn’t boil. Pour the hot cream over the chocolate and let stand 1-2 minutes. Whisk in small circles until a smooth ganache forms.

Assemble the cupcakes: Insert the tip of the pastry bag full of cream into the bottom of each cupcake and gently squeeze cream out into the cake. It’s hard to tell how much to squeeze and for how long, but I tried to squeeze as much as possible without bursting the cupcake, and to the point where a small bead of the cream poked out of the bottom when I removed the pastry tip (I then scraped off the excess). Dip the top of each cupcake into the ganache (or, if they don’t rise above the cupcake paper, you can gently spoon the ganache on and spread it with the back of a spoon). Grab the reserved filling mixture with the extra cream and use a pastry bag with a small tip (or a plastic zip bag with a small corner cut off) to pipe curls across the top of each cupcake. Refrigerate the cupcakes to set the frosting. Serve immediately or store in an airtight container in the refrigerator.

P.S. Are you thinking up your own filled cupcake for the Willow Bird Baking Cupcake Challenge? Bake your creation and email photos to juruble ‘at’ gmail.com by Wednesday, September 7, 2011. I’ll feature your cupcake on WBB! Find more details and some cupcake inspiration here.

If you liked this post, please:
Subscribe to Willow Bird Baking
Follow Willow Bird Baking on Twitter
Follow Willow Bird Baking on Facebook
Give this post a thumbs up on StumbleUpon


ShareOther ways to share this post with friends!

Apple Cinnamon Cream Cupcakes: NOT Back-to-School Cupcakes!

It’s Cupcake Week on Willow Bird Baking! Cupcake Capers was a 5-day summer camp I conducted last week wherein 5 middle school girls learned to bake, fill, and frost cupcakes. We eschewed pedestrian cupcake flavors in favor of creative combinations that I now get to share with you! Every day this week I’ve been posting fun memories and recipes from Cupcake Camp.


No really, they’re not Back-to-School Cupcakes.

Like all good things, Cupcake Camp had to eventually come to an end. Day 5 arrived and so did the campers, eager to pack in one last day of cake pops and cupcakes. At the end of the day they would finally carry home their aprons, recipe notebooks, and colorful bakery boxes filled with the cupcakes we’d made all week (the ones they hadn’t already devoured, that is) to share with their families.

But first, we sat down to complete the cutest decorating job of the week: turning cupcakes into apples! We baked these apple cupcakes in bright red liners to begin creating the effect. Once they were cooled and frosted, we dipped the tops in red sanding sugar, used bits of pretzel for their “stems,” and cut “leaves” from green fruit roll-ups.

These cupcakes weren’t just adorable, though — they were also one of the girls’ favorite recipes all week long. The spice cake, creamy cinnamon mousse, and brown sugar buttercream frosting melded into a delicious preview of fall flavors. Bright smiles broke out all around as the campers first tasted one of their “apples.” Even though they had already ranked their favorite cupcakes, several of them went back and added Apple Cinnamon Cream Cupcakes right at the top of their lists!

After tasting, we sat back and admired our handiwork. Meticulous Mary Rood made the comment that these looked like Back-to-School cupcakes. She’s right, of course. Isn’t it funny how just as soon as August peeks around the corner, stores everywhere roll out the red plaid, apples, mini chalkboards, and school supplies in an array of primary colors? These cupcakes fit right in.

Her comment sunk in for a moment before our summer spirit rebelled. We still have a few weeks of freedom! The temperature still climbs to 100 degrees each day! We still have beach trips, pool trips, and sprints through the sprinkler planned!

I don’t care what the stores might have you believe, it’s still SUMMER! We’ll go back to school when our parents drag us, kicking and screaming, and not one second before!

(Okay, I guess I can’t quite wait until my parents drag me . . . )

So these may look like Back-to-School cupcakes. They may taste like Back-to-School cupcakes. I may have gotten carried away and photographed them surrounded by a bunch of the brightly colored school supplies I just made fun of.

But these are NOT Back-to-School cupcakes. These are IT’S-STILL-SUMMER-AND-I-DON’T-CARE-WHAT-YOU-SAY-LA-LA-LA cupcakes.

Now that we’re clear on that, you should go make them and eat about twenty.

What summer plans do you still have to accomplish before summer ends? Or, for readers on the tail end of winter, what exciting things do you have lined up for the spring?

Apple Cinnamon Cream Cupcakes


Recipe by: adapted from Baked Bree
Yields:about 24-28 cupcakes

Cupcake Ingredients:
2 cups flour
2 teaspoons ground cinnamon
1 teaspoon baking soda
3/4 teaspoon salt
1/2 teaspoon fresh nutmeg
1/8 teaspoon ground cloves
2 sticks butter at room temperature
1 cup sugar
1/2 cups brown sugar
4 large eggs
1 1/2 cups applesauce
1 cup toasted pecans, chopped (optional)

Cinnamon Mousse Ingredients:
1 cup milk
1 cup heavy cream
1 (4 serving) package vanilla Instant Pudding Mix (not Cook & Serve)
1 1/2 teaspoons cinnamon
3/4 teaspoon nutmeg

Brown Sugar Buttercream Frosting Ingredients:
1 stick room temperature butter
1/4 cup shortening
1/3 cup brown sugar
1/2 teaspoon cinnamon
3 cups of powdered sugar (depends on consistency desired)
3 tablespoons of heavy cream (depends on consistency desired)

Directions:
*Note: This recipe makes twice as much mousse as you need for filling the cupcakes. If you want to use half the pudding pack and save the rest for later, just measure it out and do so. Or use the extra mousse for another project (you know, like eating it with a spoon).

Make cupcakes: Line two muffin tins with paper liners. Preheat oven to 350°F. In a medium bowl, whisk together dry ingredients. In a separate, large bowl, cream together butter, sugar, and brown sugar until light and fluffy (several minutes). Add the eggs in one at a time, beating after each addition, and then mix in the applesauce. Finally, mix in the dry ingredients until just combined.

Fill each cupcake liner about 3/4 full of batter. Bake for 15-20 minutes and let cool completely.

Make mousse: To make the cinnamon mousse, combine milk, cream, and pudding mix, and spices in a medium bowl. Beat with a mixer until you reach soft peaks, or a thick whipped cream consistency (this takes a few minutes). Refrigerate mousse until you’re ready to use it.

Make frosting: To make the frosting, beat butter and shortening together until light and fluffy. Add the brown sugar and cinnamon and mix. Gradually add the powdered sugar, 1/2 cup at a time, and alternately add the cream. Adjust these items until desired consistency is reached.

Assemble cupcakes: To fill the cupcakes, use the Cone Method: cut an upside-down cone out of the top of each one. Cut off the tip of the cone (and eat it, if you wish) leaving just the “lid.” Fill the cavity with mousse using a piping bag or zip-top bag with the corner cut off, and then replace the “lid” to give you a relatively smooth surface to frost. Don’t overfill these, or they’ll be hard to frost.

Use the back of a spoon, a knife, or an offset spatula to cover the cupcakes with a layer of frosting. To ensure you don’t accidentally shift your “lid,” use a pretty thick layer of frosting and just gently pull it out toward the sides of the cupcake to achieve full coverage — that way you’re never pulling your spoon/spatula straight up and pulling the lid off. Dip frosted cupcakes into a bowl of red sanding sugar or sprinkles. Add a piece of a pretzel stick for a stem. Add a leaf cut from a green fruit roll up (I made a little indentation in my frosting with the tip of a knife to stick the tip of the leaf into). Enjoy!

All Cupcake Week Recipes:
Day One: Chocolate Pistachio Cream Cupcakes
Day Two: Banana Split Cupcakes and Cake Pops
Day Three: Creamsicle Cupcakes
Day Four: Strawberry & Cream Cupcakes and Cake Pops
Day Five: Apple Cinnamon Cream Cupcakes

If you liked this post, please:
Subscribe to Willow Bird Baking
Follow Willow Bird Baking on Twitter
Follow Willow Bird Baking on Facebook
Give this post a thumbs up on StumbleUpon


ShareOther ways to share this post with friends!

Strawberry & Cream Cupcakes and Cake Pops

It’s Cupcake Week on Willow Bird Baking! Cupcake Capers was a 5-day summer camp I conducted last week wherein 5 middle school girls learned to bake, fill, and frost cupcakes. We eschewed pedestrian cupcake flavors in favor of creative combinations that I now get to share with you! Every day this week I’ll be posting fun memories and recipes from Cupcake Camp.

On Day 4 of Cupcake Camp, things got a little silly. I’ve talked before about the moment toward the end of the school year when teachers realize they’ve controlled their classes as long as they can, and that the powder keg of summer frenzy is about to blow. Turns out cupcake camp has that moment, too!

On Day 4, everyone went a little crazy in their own personal ways. Energetic Erica played the Carrot Song until I felt sure I was going to throw a cupcake at someone. Elbow Grease Ella decided she was going to decorate her cupcake with polka dots and then wash every bowl by hand (okay, so her particular method of going crazy happened to be awesome).

Meticulous Mary Rood and I convinced everyone to watch the YouTube video of the sneezing baby panda (no seriously, go watch it). And then there were Pistachio Peyton and Elaborate Elizabeth.

They decided to become architects.

Measuring powdered sugar can get messy. Like, whole-cups-of-powdered-sugar-spilled-on-the-counter messy. Instead of cleaning this up like ordinary children, Pistachio Peyton and Elaborate Elizabeth decided to be extraordinary. They carefully constructed a perfect block of powdered sugar that they then manipulated with a table knife into various shapes and messages. Because, you know, that’s what you do at Cupcake Camp, right?


They may have gotten a little territorial.

I finally convinced the girls to clean off the counters despite their insistence that the powdered sugar sculpture should remain as an eternal (ahem) monument to Cupcake Camp. And believe it or not, in between watching crazy YouTube videos and playing with our food, we actually made some cupcakes!

These Strawberry & Cream Cupcakes were the perfect cool, sweet treat for summer. Tender strawberry cakes were filled with easy vanilla mousse and topped with a creamy, delicious strawberry cream cheese frosting. We had leftover cupcakes, too, so can you guess what we did?

We made cake pops! We crumbled the cupcakes up and mixed them with some of the frosting, rolled them into balls, chilled them overnight, and dipped them in pink candy melts.

If you’ve ever made cake pops, you know that dipping them is the hardest part (see my video tutorial at the bottom of the recipe). I loved watching the girls develop their own dipping techniques as they got the hang of it.

Pistachio Peyton dipped her pops and then rolled them in the spoon to get full coverage. Elbow Grease Ella used the spoon to drizzle candy melts over her cake pop. Elaborate Elizabeth was a pro at turning cake pops into cake balls if they fell off of their pretzel sticks (I love using these instead of lollipop sticks) by draining them on a couple of forks.

Despite a few inevitable cake pop missteps, the campers all successfully rolled, dipped, and ate! The cake pops were a tasty addition to our cupcake picnic.

With Day 4 complete, the girls dropped off their aprons and recipe notebooks and headed home. I’m pretty sure that I went home and collapsed into a cupcake coma (or maybe just a long nap). One more day left of cupcake camp!

What’s your favorite funny YouTube video?

Strawberry & Cream Cupcakes


Recipe by: adapted from Annie’s Eats
Yields: 18-24 cupcakes

Cupcake Ingredients:
2 ½ cups cake flour
1 teaspoon baking soda
¼ teaspoon salt
½ cup unsalted butter
1 ½ cups sugar
2 eggs
1/3 cup buttermilk
¼ cup oil
1 teaspoon vanilla extract
2 cups chopped strawberries

Vanilla Mousse Filling Ingredients:
1 cup milk
1 cup heavy cream
1 (4 serving) package vanilla Instant Pudding Mix (not Cook & Serve)

Strawberry Cream Cheese Frosting Ingredients:
½ cup strawberries
1 (8-ounce) package cream cheese, at room temperature
1 ½ sticks unsalted butter, at room temperature
4-5 cups powdered sugar, sifted
½ teaspoon lemon juice
1 tablespoon vanilla
pink sanding sugar, if desired

Directions:
*Note: This recipe makes twice as much mousse as you need for filling the cupcakes. If you want to use half the pudding pack and save the rest for later, just measure it out and do so. Or use the extra mousse for another project (you know, like eating it with a spoon).

Make cupcakes: Line two muffin tins with paper liners. Preheat oven to 350°F. Onto a sheet of parchment or wax paper, sift flour, salt and baking soda. Set aside. In a large bowl, cream butter and sugar until light, fluffy, and pale yellow (several minutes). Add eggs one at a time, mixing after each. Scrape down the sides of the bowl as needed. Mix in buttermilk, oil and vanilla. Pick up both ends of the parchment/wax paper and use it to add dry ingredients into the bowl and stir until just combined. Fold in the chopped strawberries (you could toss these with a few tablespoons of the dry ingredients first, if you were worried about them sinking to the bottom).

Fill each liner about 3/4 full of batter and bake for 15-20 minutes, or until a toothpick inserted into the center of several cupcakes comes out with just moist crumbs. Let cool completely.

Make mousse: To make the vanilla mousse, combine milk, cream, and pudding mix in a medium bowl. Beat with a mixer until you reach soft peaks, or a thick whipped cream consistency (this takes a few minutes). Refrigerate mousse until you’re ready to use it.

Make frosting: To make the frosting, puree the strawberries in food processor and then strain them through a fine mesh sieve to remove the seeds. In a separate bowl, beat the cream cheese and butter until fluffy and smooth before adding the lemon juice, vanilla, and sugar (start on the low side with the sugar and add more until the frosting reaches your desired consistency). Add the amount of puree needed to achieve your desired consistency and color (I do this before I’ve added all the sugar, so I can adjust both as needed). This is a loose frosting and benefits from sitting in the fridge for awhile after you make it with a damp cloth covering it.

Assemble cupcakes: To fill the cupcakes, use the Cone Method: cut an upside-down cone out of the top of each one. Cut off the tip of the cone (and eat it, if you wish) leaving just the “lid.” Fill the cavity with mousse using a piping bag or zip-top bag with the corner cut off, and then replace the “lid” to give you a relatively smooth surface to frost. Use a piping bag or zip-top bag to pipe on the frosting. Dust with pink sanding sugar if you wish.

Strawberry & Cream Cake Pops


Recipe by: adapted from Annie’s Eats
Yields: probably around 40-50 cake pops

Cupcake Ingredients:
2 ½ cups cake flour
1 teaspoon baking soda
¼ teaspoon salt
½ cup unsalted butter
1 ½ cups sugar
2 eggs
1/3 cup buttermilk
¼ cup oil
1 teaspoon vanilla extract
2 cups chopped strawberries

Strawberry Cream Cheese Frosting Ingredients:
1/4 cup strawberries
4 ounces cream cheese, at room temperature
6 tablespoons unsalted butter, at room temperature
2-2 1/2 cups powdered sugar, sifted
1/4 teaspoon lemon juice
1 1/2 teaspoons vanilla

Other Cake Pop Ingredients:
pretzel sticks
pink candy melts or candy bark
sprinkles or pink sanding sugar, if desired

Directions:
*NOTE: We made our cake pops with leftover cupcakes, so I’m printing instructions for making them with cupcakes here. I’m not sure how this recipe would work if you tried baking this as a cake to save liners, so I don’t want to recommend that, but let me know if you try it.

Make cupcakes: Line two muffin tins with paper liners. Preheat oven to 350°F. Onto a sheet of parchment or wax paper, sift flour, salt and baking soda. Set aside. In a large bowl, cream butter and sugar until light, fluffy, and pale yellow (several minutes). Add eggs one at a time, mixing after each. Scrape down the sides of the bowl as needed. Mix in buttermilk, oil and vanilla. Pick up both ends of the parchment/wax paper and use it to add dry ingredients into the bowl and stir until just combined. Fold in the chopped strawberries (you could toss these with a few tablespoons of the dry ingredients first, if you were worried about them sinking to the bottom).

Fill each liner about 3/4 full of batter and bake for 15-20 minutes, or until a toothpick inserted into the center of several cupcakes comes out with just moist crumbs. Let cool completely, and then crumble your cupcakes into a large bowl. Set aside.

Make frosting: To make the frosting, puree the strawberries in food processor and then strain them through a fine mesh sieve to remove the seeds. In a separate bowl, beat the cream cheese and butter until fluffy and smooth before adding the lemon juice, vanilla, and sugar (start on the low side with the sugar and add more until the frosting reaches your desired consistency). Add the amount of puree needed to achieve your desired consistency and color (I do this before I’ve added all the sugar, so I can adjust both as needed).

Make cake balls: Mix about 3/4 cup of frosting into your crumbled cake, adding more frosting if the mixture is still too crumbly. You want it to reach a sort of stiff play-dough texture so you can shape it into balls. Prepare a sheet pan with a sheet of wax paper on it. Shape your banana mixture into balls and line them on the wax paper. Chill these in the refrigerator overnight. I don’t freeze mine like some sites suggest, because I find chilling them in the fridge instead reduces cracking after I dip them.

Mount and dip cake balls: After cake balls have chilled overnight, melt your candy melts or chocolate bark according to the package directions. I keep my bowl of candy melts situated in a bigger bowl of hot water to keep them warm and fluid, but be careful no water gets into the melts! To mount each cake ball, take a pretzel stick and dip the end in candy melts. Gently but firmly push the end of the pretzel stick into the cake ball. Put these back on their silicone mat or wax paper to chill. Repeat until all cake balls are mounted and chill for about 30 minutes.

After chilling, you’re ready to dip! Dip each cake ball into the candy melts, using a spoon to help coat them. After dipping, hold your cake ball over the bowl and gently bounce to drain the excess off. Turn the pop as you drain. When well-drained, sprinkle some sprinkles on top and gently place the pop in a foam block to continue drying. I placed mine in the fridge to reduce drying time. Once they’re dry, you’re ready to eat them! These keep great in an airtight container in the fridge.

Never made cake pops before? I made this video tutorial to show you some techniques involved.

All Cupcake Week Recipes:
Day One: Chocolate Pistachio Cream Cupcakes
Day Two: Banana Split Cupcakes and Cake Pops
Day Three: Creamsicle Cupcakes
Day Four: Strawberry & Cream Cupcakes and Cake Pops
Day Five: Apple Cinnamon Cream Cupcakes

If you liked this post, please:
Subscribe to Willow Bird Baking
Follow Willow Bird Baking on Twitter
Follow Willow Bird Baking on Facebook
Give this post a thumbs up on StumbleUpon


ShareOther ways to share this post with friends!

1 20 21 22 23 24 29