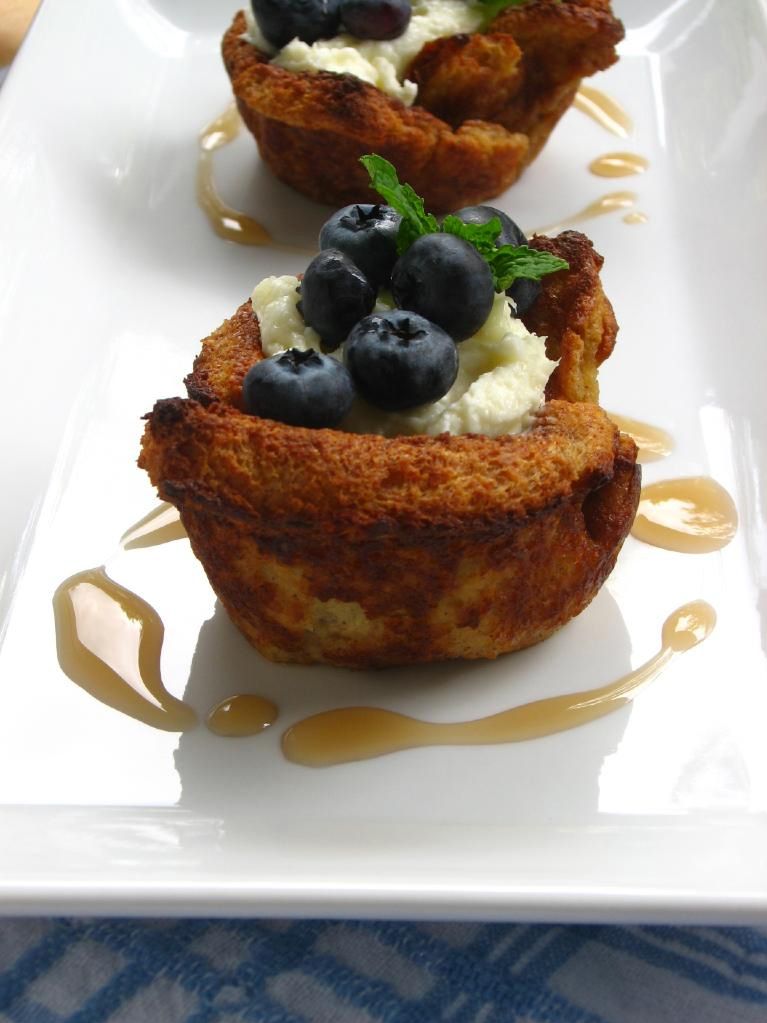
blueberry

Red, White, and FOOD!

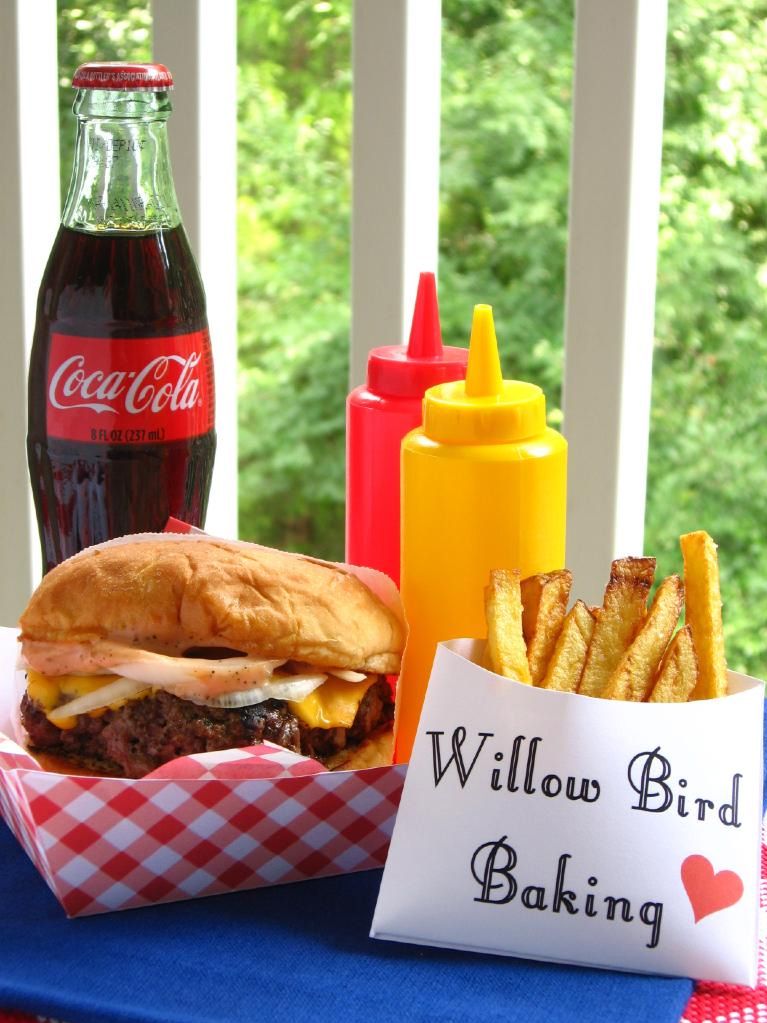
Here are some Willow Bird recipes that are perfect for your 4th of July celebration! If I had to tell you just one thing you have to make in order to fully enjoy all the fireworks and summer heat, it’d be the Old-fashioned Burger Stand Burgers. Everything else is delicious, too, but I’m craving one of those tender, thin, salty, juicy, tangy burgers right this second! And it doesn’t get much cuter than the printable fry pouches and checkered trays.


Old-fashioned Burger Stand Burgers with Easy Fries (and cute pouch/tray printables!)


Strawberry Lemonade Popsicles


Itsy Bitsy Berry Cream Pies


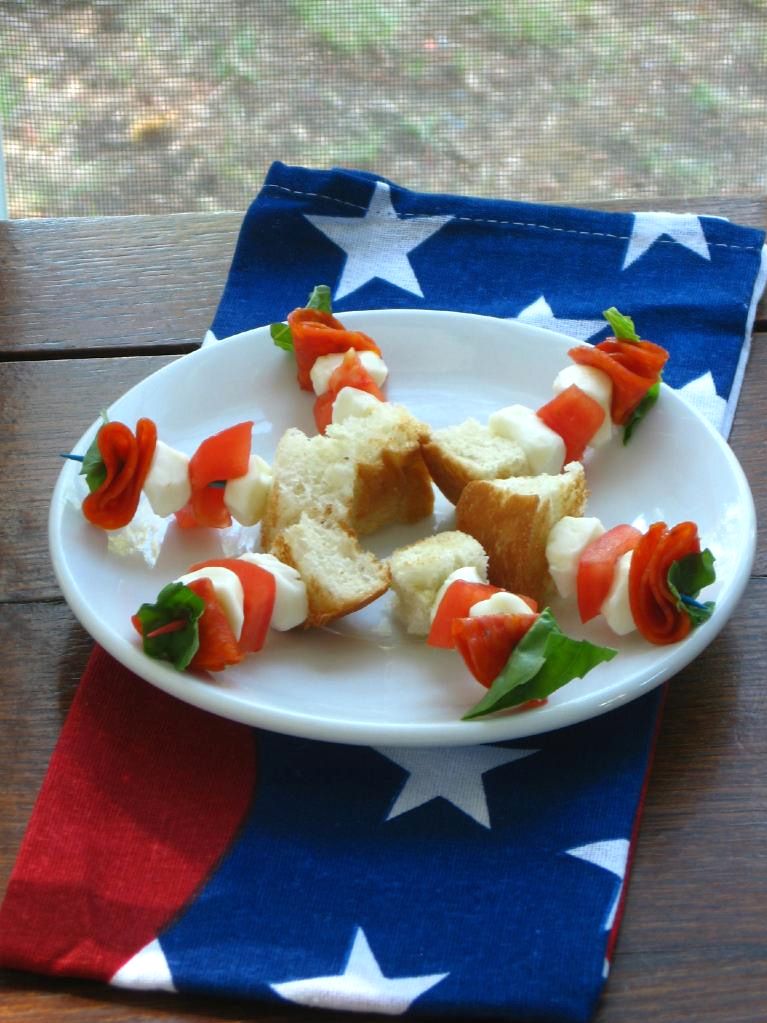
Deconstructed Pizza Bites


Pretzel Dogs


Red Berry Pie


Sparkling Strawberry Lemonade


Sparkling Raspberry Lemonade

Stay tuned later this week for a cute party banner that you can make with minimal effort and about $8. I made the whole thing while watching America’s Got Talent, so it obviously doesn’t take much concentration, either! Happy eating!

If you liked this post, please:
Subscribe to Willow Bird Baking
Follow Willow Bird Baking on Twitter
Follow Willow Bird Baking on Facebook
Give this post a thumbs up on StumbleUpon


ShareOther ways to share this post with friends!

Itsy Bitsy Berry Cream Pies

It happens every year. Early in the springtime, the Sunday comes when I find a neon card tucked inside of my church bulletin, scrounge around in my purse for a pen, and scrawl out some contact information. I drop the card in the jar in the lobby on my way out. I wait for the email telling me where to come for training, inevitably miss training, go to the makeup training. Finally, it’s the first night of Vacation Bible School. I try to find some fun earrings to wear (for some reason, fun earrings have always struck me as a key tool in childcare), and head over to the church.
Last year there was a ranch theme, so every night was spent air-lassoing imaginary animals, tipping our imaginary cowperson hats, conducting chili tastings (I couldn’t make this stuff up), playing with ranch paraphernalia foreign to many of those city kids, and hearing stories about Jesus.

I took great delight in dancing and singing wholeheartedly during worship while all of my third grade charges stared, trying to decide whether I was cool or embarrassing. No comment on their verdict. But we all had a lot of fun.
One of the boys last year (I’ll call him John) stood out to me from the first night. He was subdued, and his freckled face wore the same blank expression no matter what the activity. He seemed guarded, like he had already reached the stage where he wasn’t sure if it was still cool to have fun.
In music class, though, he was different. The music teacher (I’ll call him Mr. Maestro) had a wry sense of humor that John responded to right away. As a result, John would chirrup witty responses to Mr. Maestro’s questions and call out periodically in class. The interruptions were sometimes too frequent, and I could tell by the edge in Mr. Maestro’s voice that he thought John was a bit of a troublemaker. I knew John was actually very sweet, but I wasn’t concerned, since Mr. Maestro was never unfair, just firm.

As an aside, trying not to peg students as “the troublemaker” or “the clown” or “the slacker” is a constant, noble effort of good teachers everywhere. Kids are so dynamic, and most of them truly want to please the adults around them; for this reason, it’s vital to continually give them a fresh slate and the opportunity to remake themselves. That doesn’t mean it’s not a struggle.
On the very last day in music class, Mr. Maestro made a lovely point about helping others. In response, John began enthusiastically, “I sometimes help my mom!” Before he could continue, Mr. Maestro responded, “Oh, do you? That’s nice,” to cut him off at the pass and get on with the lesson. Something turned over in my heart as I watched John disappointedly release the breath with which he had hoped to tell his story.

Before you judge Mr. Maestro too harshly, please think back to a time when you’ve been interrupted repeatedly by a child eager to tell a story. It can be taxing. Some days in my own class, I feel like 75% of my job is shutting down off-topic story telling. Some of those stories were about So-and-so’s sister who ate half a gluestick, but some of them were probably truly charming, edifying additions to our class. We just don’t always have the time. I just don’t always have the energy. We’re all human.

Nevertheless that night, seeing John’s crestfallen face and remembering the emphasis in VBS training on listening to every child, I was determined to do something.
Back downstairs at worship at the end of the night, I was worried John would have long since forgotten his story. I screamed over the din of about a bajillion hyper children and the ecstatic worship music, “John, what was that you were saying about helping your mom?”

The way his face immediately lit up touched my heart; sure enough, this was a special story to him. He explained that his mom was sick and very tired, and so he sometimes swept the floor or did the dishes. With childlike sincerity, he revealed that he was glad he got to serve her.

I could tell he was thankful to share his story, but I was beyond thankful to hear it. It was a moment when God reminded me again (He does so often) that my job is to love Him with all of my heart, mind, and soul, and to love others just as much as I love myself.
Vacation Bible School started up again this week, and while John isn’t in my class this year, I do have more than 20 fourth graders to lead. And you’d better believe I’m doing a ton of listening! So far I’ve heard about video games, making homemade ice cream, a dying grandfather, a new baby sister, and baseball. What serious, funny, sad, crazy, and important things they have to say!

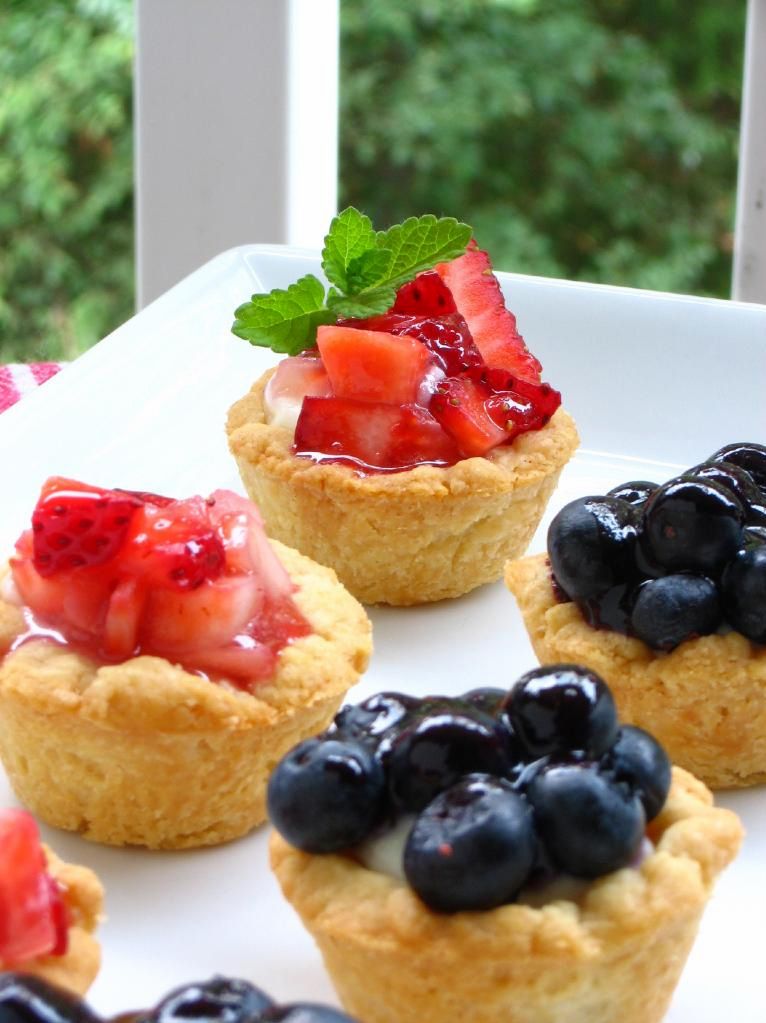
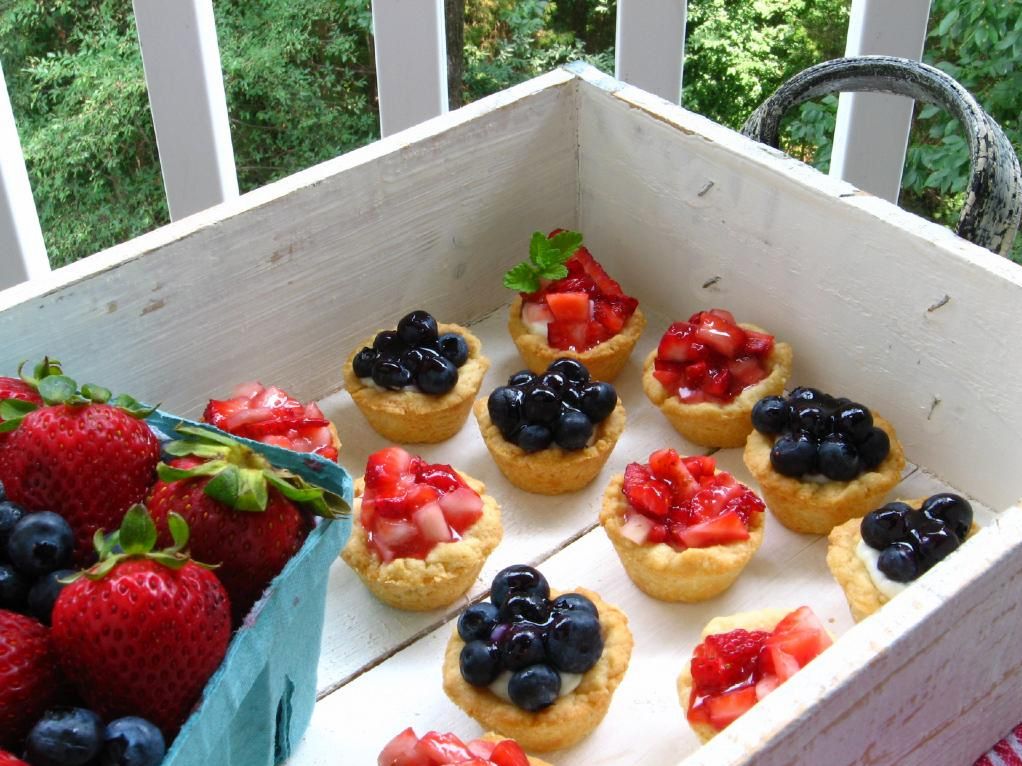
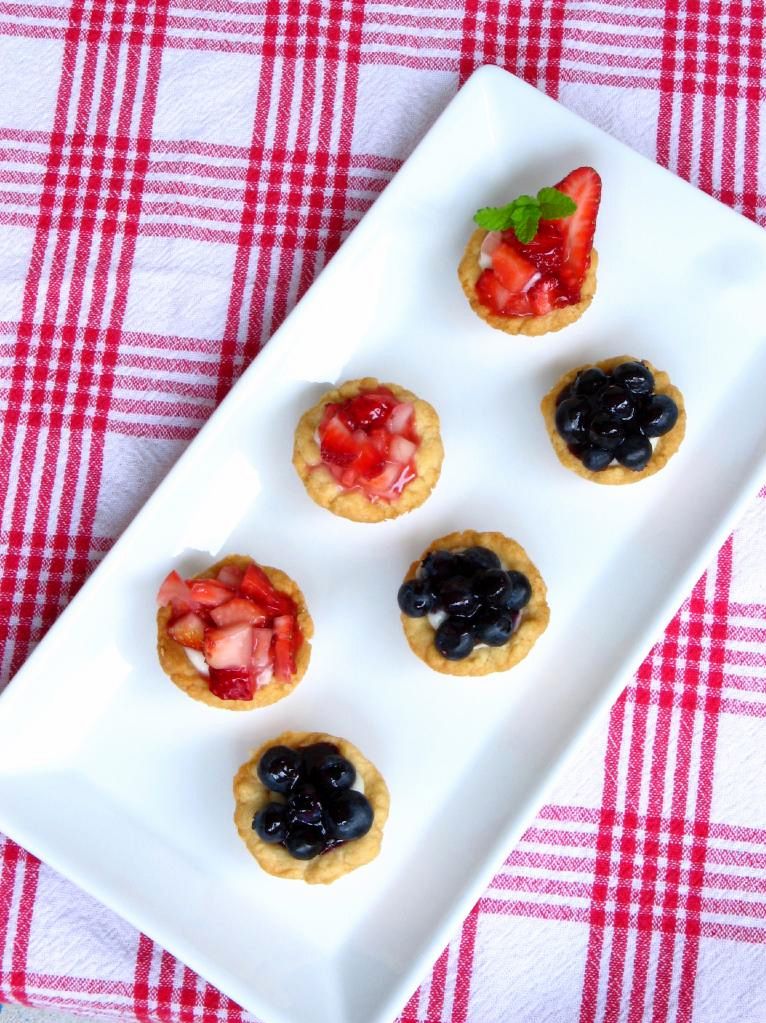
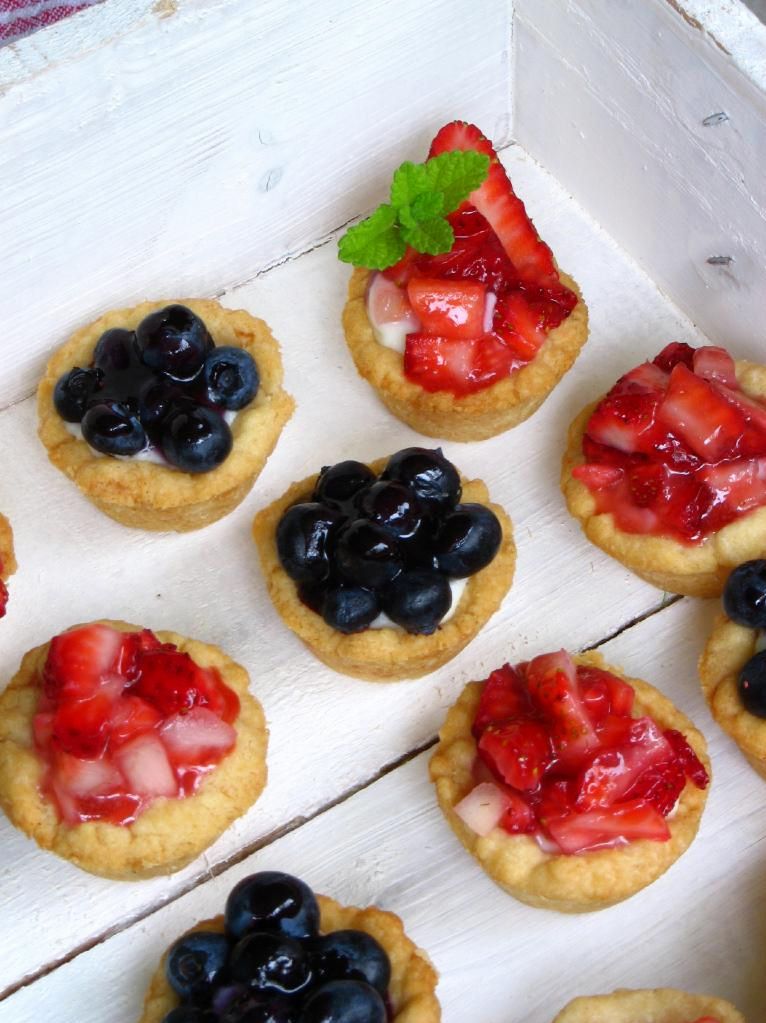
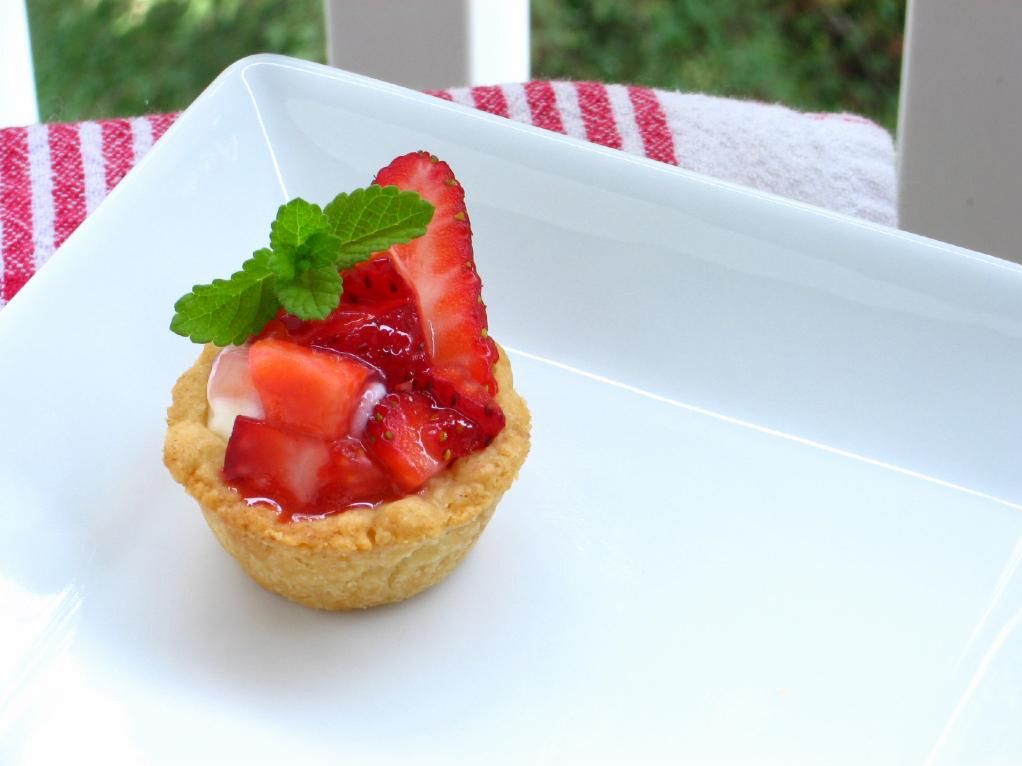
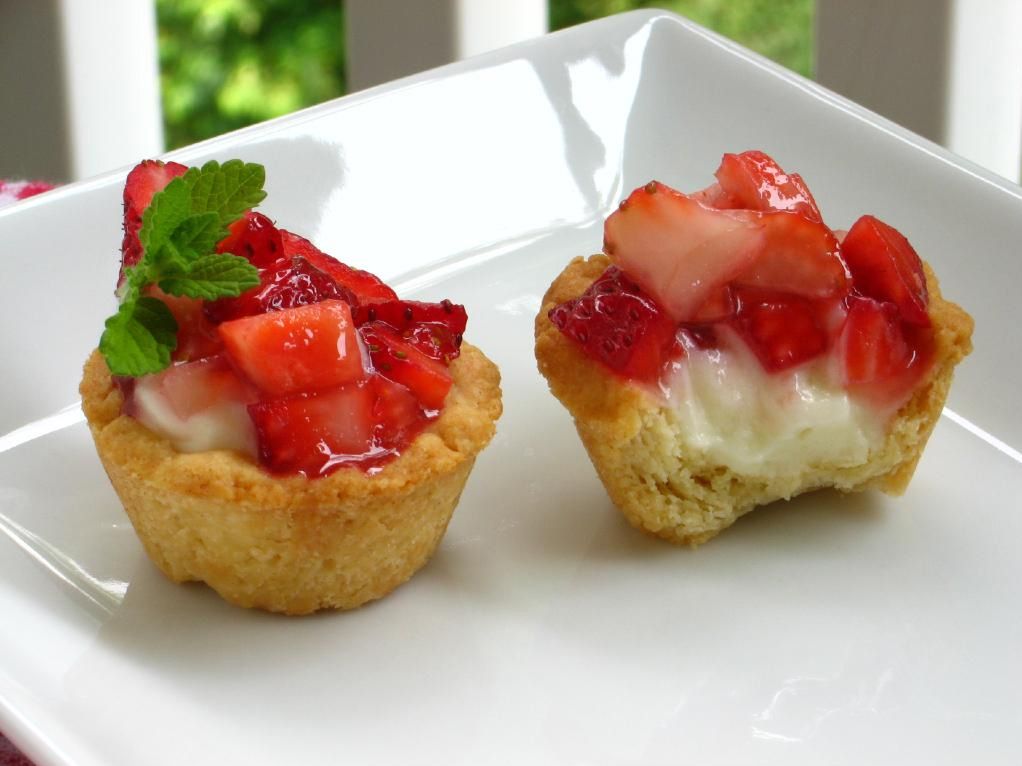
So, in honor of all of those sweet little ones, here are some sweet little pies! I loved my Aunt Pat’s Strawberry Cream Pie so much that I decided to make it in miniature — and in blueberry! These little pies are bright, fresh, and creamy in addition to being adorable finger foods. They’re an especially great first step for a home cook who’s nervous about rolling out a pie crust, since there’s no rolling involved. Happy summer!

Itsy Bitsy Berry Cream Pies


Recipe by: Adapted from my Aunt Pat’s Strawberry Cream Pie recipe
Yields: about 56 mini pies

Crust Ingredients:
4 cups flour
2 teaspoons salt
3/4 cup cold shortening or lard
3/4 cup cold butter, chopped
6-8 tablespoons cold water

Cream Filling Ingredients:
1/2 cup sugar
3 tablespoons cornstarch
3 tablespoons flour
1/2 teaspoon salt
2 cups milk
1 egg, slightly beaten
1/2 cup whipping cream
1 teaspoon vanilla extract
1.5 cups of diced fresh strawberries (or about 1.5 cups blueberries)

Glaze Ingredients:
1 cup fresh strawberries (or blueberries)
1 cup water
1/2 cup sugar
4 teaspoons cornstarch

Directions:
Note on timing: To make the preparation of these mini pies even more manageable, I prepared and baked the pie shells a day in advance. I then made the cream filling, diced the berries, and made my glaze on the day I was planning to serve them. They really benefit from at least a few hours in the fridge before serving.

Make the crust dough: Pulse flour and salt together to combine. Add scoops of lard and pulse into the mixture has the texture of coarse sand, about 10 seconds. Add in chunks of butter and pulse until butter pieces are no larger than small peas, about 10 pulses. Add minimum amount of water and pulse on low. If dough remains crumbly and doesn’t come together, add another 2 tablespoons of water. Add as little as is required to enable the dough to be rolled into a ball. Form the dough into a disk, wrap in plastic, and refrigerate for 20-30 minutes.

After the dough has chilled, preheat the oven to 450 degrees F. Take about 1/4 of the dough out of the fridge at a time. Pinch off walnut-sized balls. Place a ball in each well of an ungreased mini-muffin pan. Using your fingers, work the dough up the sides of each well. Use a fork to “dock” the bottom and sides of the dough –poke holes in it so that it doesn’t puff up too much as it bakes. Bake for 12-15 minutes or until lightly browned. Cool the mini pie shells in the pan for 5 minutes or so before gently removing them (you can use a table knife to help you lever them out) to a cooling rack to cool completely.

Make cream filling: While the crust bakes, prepare your cream filling. Prepare an ice water bath in a bowl big enough to accommodate your saucepan. Mix sugar, cornstarch, flour, and salt in a saucepan over medium-high heat. Stir in the milk and bring to a boil, stirring constantly. Reduce heat and cook until thickened, still stirring constantly. Spoon out about 1/4 cup of your hot mixture and gradually drizzle it into your beaten egg, whisking constantly. This will temper the egg so that when you add it back into the hot mixture, it won’t cook. Add the egg into the hot mixture, continuing to stir constantly. Bring this just to boiling.

Set the saucepan in the ice water bath and stir it periodically as it cools. Once cool enough, chill the mixture in the refrigerator. During this time, whip the cream and vanilla together to stiff peaks. Take the chilled mixture from the fridge and beat it to break it up. Stir in about 1/3 of the cream to lighten it, and then gently fold in the rest of the cream until well combined. Chill until ready to use.

Assemble the pies: Using a piping bag (or a ziplock with the corner cut off), pipe cream into each pie shell. Top with diced strawberries or blueberries. Chill these while you make your glaze.

Make the glaze: Crush 1 cup of strawberries (or blueberries) and cook with water in a saucepan over medium-high heat for two minutes. Strain through a fine mesh sieve and discard the pulp. Add the juice back to the saucepan over medium-high heat and gradually stir in sugar and cornstarch. Cook until thickened. If you want, you can tint this glaze with food coloring to desired hue, but mine was plenty bright enough! Cool the glaze slightly, and then spoon over the top of your mini pies. Chill pies for at least a few hours for best results.

If you liked this post, please:
Subscribe to Willow Bird Baking
Follow Willow Bird Baking on Twitter
Follow Willow Bird Baking on Facebook
Give this post a thumbs up on StumbleUpon


ShareOther ways to share this post with friends!

Blueberry Cream Cheese Almond Braid

So much dust. Shuffling papers, flying markers, scuffling footsteps. The crush of boxes being broken down, the shrill hum of students’ voices. As chairs were stacked and debris was cleared, the classroom started to look foreign. There was an alien quality to the space (cleanness, maybe? emptiness?) that made us all feel like we didn’t quite belong there anymore.

And we didn’t, really. It was the last, abbreviated week of school. The kids had one foot out the door, and the other was probably kicking someone under the table.

The teachers out there will give me an amen when I say that during those last few days, you fight a losing battle for your students’ attention. My middle schoolers and I work until the last minute — reflecting on how their writing has grown over the course of the year, finishing up our last novel — but there’s always a current of near-hysteria that runs through the classroom at the end of the year. I start to feel like I’m trying to hold back a tidal wave with a beach towel. At any given moment, they’re about to lose their little minds entirely and start surfing on the tables.

When I realize we’ve reached this point, the turning of the tide of sanity, I start pining for summer myself. Up until then, everything is a flurry of urgent business: grading projects, writing emails, blogging, creating curriculum. There’s barely a second to let the idea of vacation sink in. But finally, staring into a dozen sets of half-crazed student eyeballs, I see the bright summer sunshine at the end of the tunnel.

This year, I had the presence of mind to make a summer to-do list. It includes all of the mundane tasks I neglected while being a teacher 24/7 during the school year: clean under the bed, clean out the closet, reorganize the bookshelf. It contains resolutions reminiscent of New Year’s: join the Y, start exercising regularly, figure out summer meal plan. It contains techy bloggy things: move to self-hosting, spruce up Willow Bird Baking.

But something’s missing.

Know how I know? I recently re-read my Raspberry Almond Braid post from over a year ago as I was preparing to create this Blueberry Cream Cheese Almond Braid.

When I wrote that post of yesteryear, I was on spring break and gushy about how much I loved the freedom. I listed 20 things I was enjoying, including things like running through the grass, playing fetch with Byrd, and reading. Oh, yeah. Things that are totally absent from what I’ve come to realize is my summer chore list.

Don’t worry, I’m going to fix it.

In fact, it’s only been summer vacation for one day now, but I’ve already read a book: the first of the Hunger Games series my students have been recommending to me. I’ve already done a mini craft project (a card for a friend that turned out wonky but hopefully lovable). I’ve already baked something. I’ve already taken a nap. So far, so good!

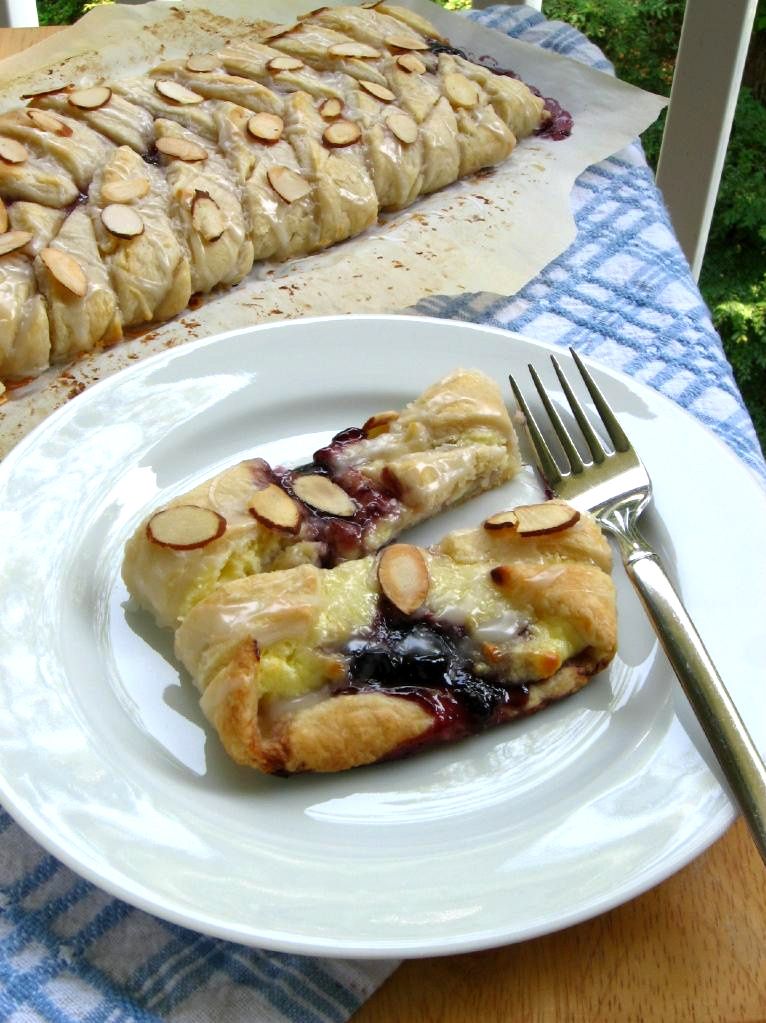
Apart from helping me realize the error of my summer ways, this Blueberry Cream Cheese Almond Braid was also the perfect restful recipe: though the process is as simple as can be, the result looks and tastes phenomenal. The flaky, tender almond pastry surrounds a cream cheese filling in addition to the blueberry preserves, making this one of my new favorite things to eat. It’ll definitely get a heart on the WBB Recipe Index.

You have to make it as soon as you can — and then hopefully you can find the time for a summer nap in a lawn chair somewhere.

What are your family’s summertime plans?

Blueberry Cream Cheese Almond Braid


Recipe by: Adapted from Luna Cafe
Yields: 10-12 1-in. slivers of braid, or about 4 servings

Dough and Filling Ingredients:
2 cups all-purpose flour, sifted
1 teaspoon baking powder
1/2 teaspoon salt
1/2 cup unsalted butter
3 ounces best quality cream cheese
1/2 cup milk, minus 1/2 teaspoon
1/2 teaspoon almond extract
1/2 cup blueberry preserves (or your favorite preserves)

Cream Cheese Filling Ingredients:
8 ounces (227 grams) cream cheese, room temperature
1/4 cup granulated white sugar
1 large egg
1/2 teaspoon pure vanilla extract

Icing Ingrdients:
1/2 cup powdered sugar
1 tablespoon milk
1/8 teaspoon vanilla
1/8 teaspoon almond extract
2 tablespoons toasted sliced almonds (optional)

Directions:
NOTE: To prepare this braid in advance, complete all steps and assemble the braid but do not bake. Cover the braid on its parchment lined baking sheet with plastic wrap and refrigerate overnight. Set out in the morning as you preheat the oven and then bake as usual.

Make the cream cheese filling. In your electric mixer, or with a hand mixer, beat the 8 ounces of room temperature cream cheese until smooth. Add the sugar, egg, and vanilla extract and beat until creamy and smooth. Set aside while you make your braid.

Preheat oven to 425 degrees F. In the bowl of a food processor, mix the flour, baking powder, and salt. Add the cream cheese and butter into the flour mixture and pulse to cut the fat into the flour (about 6 pulses). Add the milk and almond extract and blend into a loose dough.

Turn the dough onto a floured surface and knead VERY LIGHTLY for 4-5 strokes. (NOTE: This is the step at which you can ruin the braid. If you overwork the dough, the pastry will be tough. Just gather the dough together and don’t worry about making it smooth. It will still look a little rough. That’s perfect.)

Between two sheets of waxed paper, roll the dough to an 8- by 12-inch rectangle. Turn dough out onto a lightly greased baking sheet and remove the waxed paper. Measure and mark the dough lengthwise into thirds. Spread preserves down the middle third of the dough and spread a thick line of the cream cheese mixture on either side of the preserves (still remaining in the middle third of the dough — try to keep your filling about ½ inch from the mark on both sides.)

Make 2¾-inch slight diagonal cuts at 1-inch intervals on each the long sides (see photos below). Do not cut into the center jam-filled area. Fold strips, first one from one side and then one from the other side in a rotating fashion, over the filling. It will now resemble a braid. Bake in a 425° oven for 12-15 minutes, until the dough is cooked through and the top is lightly browned.

In a small glass measuring cup with a pouring spout, combine the sugar, milk, vanilla, and almond extract. Drizzle over the top of the braid. If desired, sprinkle on the toasted sliced almonds while the icing is still wet. Serve warm.

If you liked this post, please:
Subscribe to Willow Bird Baking
Follow Willow Bird Baking on Twitter
Follow Willow Bird Baking on Facebook
Give this post a thumbs up on StumbleUpon


ShareOther ways to share this post with friends!
Lemon Berry Crumble Breakup Bars

This is a hard story to write — hard enough that it’s taken me almost two months to even attempt it. I still feel raw about it, and I still don’t know how to address the situation head-on. So I’ll just muddle through it the best way I can.

On November 28, Mike and I broke up. It was a cold day, and I dropped him off at the train station so he could head back to Raleigh. Watching him close the door and walk into the station was like watching a movie, except that it wasn’t fiction. I knew we were about to travel a rocky road, but there was no way to switch off the television, no credits to roll — just the aftermath to clean up as best we could.

4,237 days (or 11 years, 7 months, and 5 days) earlier, I had just turned 15 years old. I was sitting in my room, looking out the window, and talking to Mike on the phone. He had something to ask me, but was obviously nervous: “If I were to ask you . . . something . . . what would you say?”

I helped him get to the point. Yes, I want to be your girlfriend. I couldn’t have imagined at that moment where the next 12 years would take us. Who knows when they’re 15 that they’re embarking on something monumental?

Over the years, our relationship brought us trials, for sure.

It also brought me through high school. Sometimes I’d leave school and drive straight to his apartment to watch Star Trek and eat Hamburger Helper (my early attempts at “cooking for him”).

It took me to college, coming home to see him every weekend. It took me off to the coast to study marine zoogeography for a semester — I remember the strain of distance, calling every night on my newly acquired cell phone, and his visit out to Atlantic Beach to see me.

Our relationship saw me through my first teaching job, a tumultuous experience for me. In the first hopeful, idealistic days before I began, he came and painted every single one of my lab tables a deep green to cover the graffiti. Later in the year, when my administration decided to switch my classroom and everything went wrong, my clean tables were mixed in with others and his hard work was lost. He was still there, though, helping me pack up boxes and carry them down the hallway to my new room.

The relationship also saw me through my year as a research technician and, finally, to my position at Woodlawn, the wonderful school where I now teach.

It saw Mike through college at UNCC. He rocketed through in 3 years with nearly perfect grades. It also saw him move his life three hours north to a new city this past fall to begin graduate school at NC State. It saw us through celebrations, new beginnings, and difficult endings. I wouldn’t trade a single day.

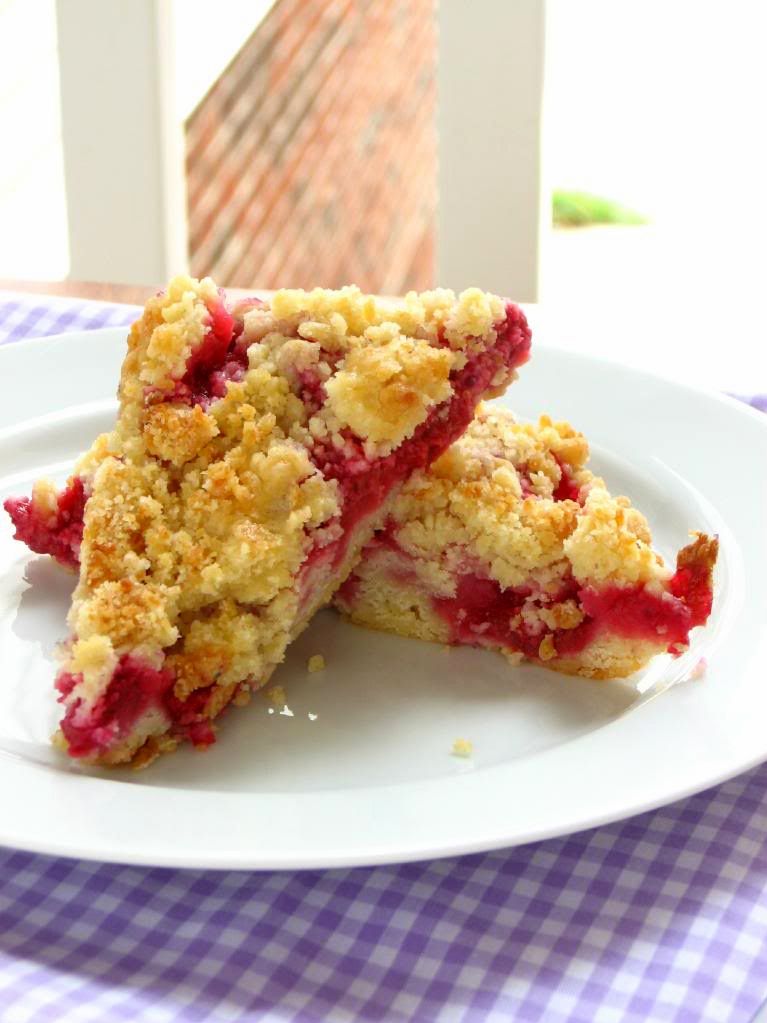
These Berry Crumble Bars were actually made at the very tail end of summer and are one of the only dishes I ever photographed at Mike’s apartment in Raleigh. I brought them up to share with him and my little brother, who is an undergraduate at NC State. The bars are buttery, crumbly, slightly lemony, and bright — almost cobbleresque, and perfect with a scoop of vanilla bean ice cream.

The original recipe used only blueberries, but throwing in other berries or even combining berries is an easy way to create multiple varieties of crumble bars; I settled on blueberry and raspberry. Mike and I probably ate a billion of them over the course of my visit. I had a way of encouraging him to have dessert after every meal. I’m sure you’re not surprised.

So what do you say at the end of a story about a breakup? I think in this case, thank you. Thank you, Mike, for being who you are, and for 12 wonderful years. Thank you, God, for the promise that all things are working together for good for me (Romans 8:28). Thank you, friends and family and lovely readers, for your support during a rough time. Here’s to weathering loss and embracing the future — and to dessert!

Lemon Berry Crumble Breakup Bars


Recipe by: Adapted from My Baking Addiction
Yields: 9 raspberry bars and 9 blueberry bars

Ingredients:
1 cup white sugar
1 teaspoon baking powder
3 cups all-purpose flour
1 cup unsalted butter
1 egg
1 teaspoon pure vanilla extract
1/2 teaspoon kosher salt
2 teaspoons lemon juice
2 cups fresh or frozen blueberries
2 cups fresh or frozen raspberries
1/2 cup white sugar
3 teaspoons cornstarch

Directions:
Preheat the oven to 375 degrees F (190 degrees C). Line a 9×13 inch pan with parchment paper and spray with nonstick cooking spray. Stir together 1 cup sugar, 3 cups flour, salt, and baking powder in a medium bowl. In a separate, small bowl, beat together the egg, lemon juice, and vanilla. Using a pastry cutter or food processor, cut the butter and egg mixture into the flour to form a crumbly dough. Press half of dough evenly into prepared pan.

In two additional bowls, mix together 1/4 cup sugar and 1 1/2 teaspoons cornstarch. Gently mix blueberries into one bowl and raspberries into the other. Sprinkle berries evenly over pressed dough — I did half the pan with blueberries and half with raspberries, but you could alternate or even mix the berries if you’d rather. Crumble the rest of the dough over top of the berries. Bake in preheated oven for 45 minutes or until slightly brown. Cool completely (and even chilling a little helps to ensure they’ll hold together) before cutting into squares. These bars are fun because you can have two different flavors (blueberry and raspberry) or cut your bars such that you have a combination of both berries.

If you liked this post, please:
Subscribe to Willow Bird Baking
Follow Willow Bird Baking on Twitter
Follow Willow Bird Baking on Facebook
Give this post a thumbs up on StumbleUpon


ShareOther ways to share this post with friends!

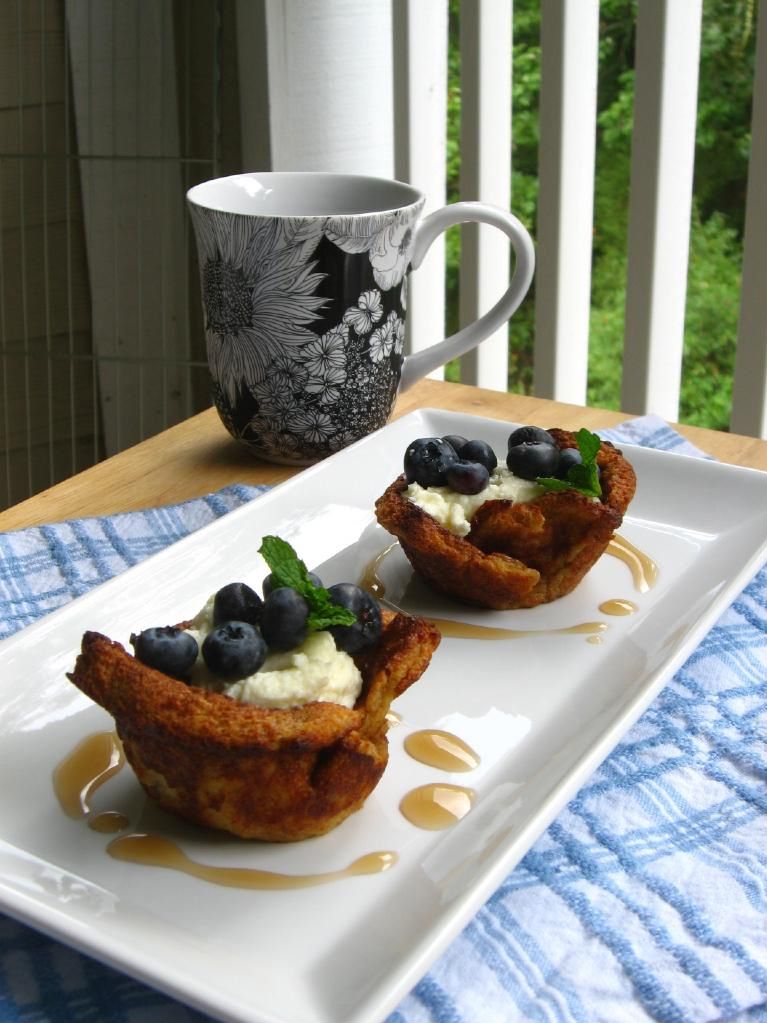
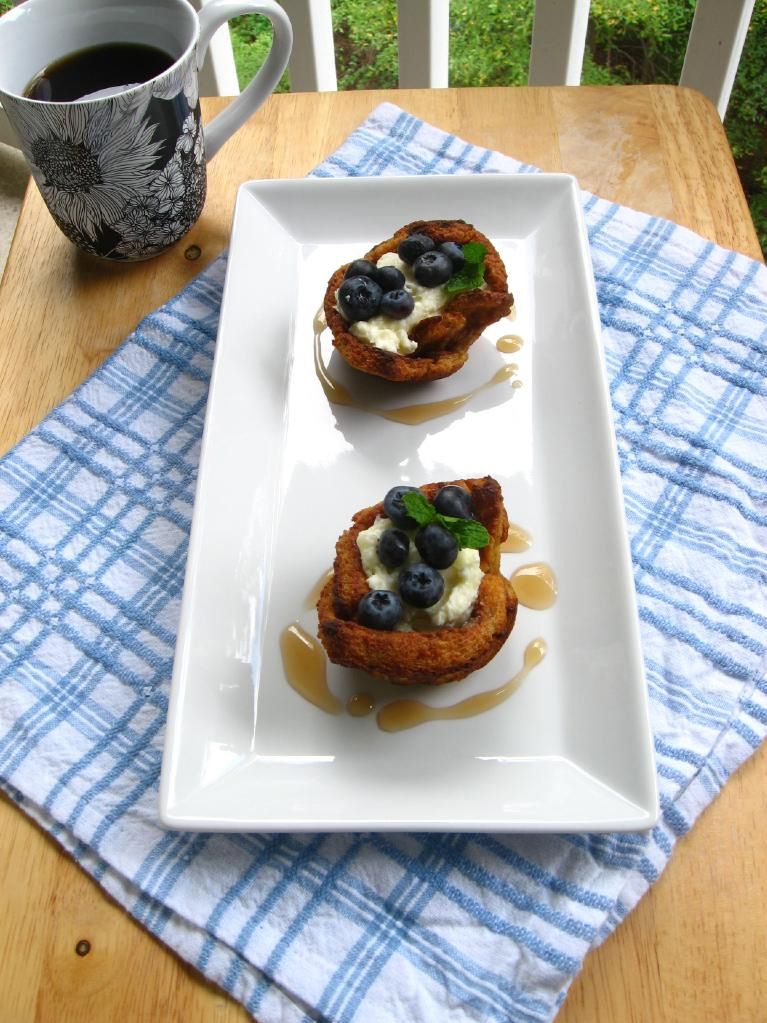
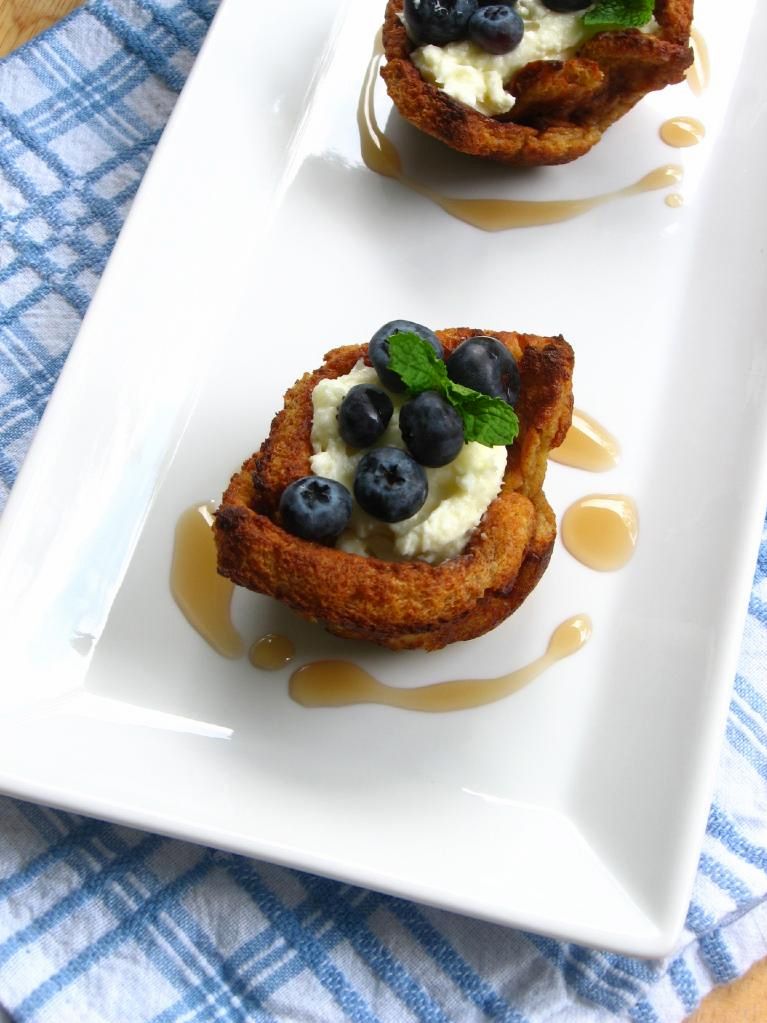
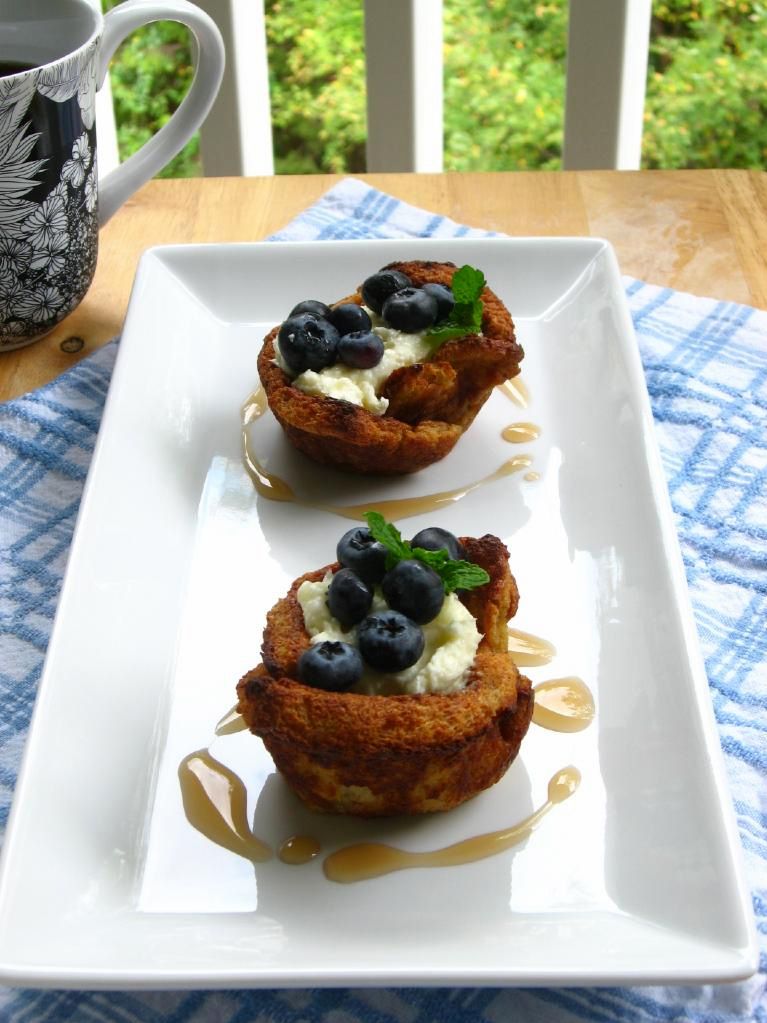
Blueberry Stuffed French Toast Bowls

This is a two-post kind of day, y’all. You don’t mind, do you?

Good. Because this recipe involves some of my favorite things: French toast, blueberries, and cream cheese. Oh my goodness, I love cream cheese.

Nature’s Pride bread is an official sponsor of the Foodbuzz Blogger Festival this year, and as such, they issued a challenge to Featured Publishers to create a recipe using their products. I want to go to San Francisco as much as anyone, so I decided to give it a go. I pondered and brainstormed and debated and considered until, finally, I decided that I couldn’t think of a creative recipe and I gave up.

What? Don’t look at me like that! I was planning a ginormous dinner party, after all; cut me some slack!

It bothered me, though. When I was picking up supplies for the dinner party, I stuck some marshmallow cream and peanut butter in my basket, thinking perhaps I’d make a chocolate-covered fluffernutter. It still didn’t seem original enough, however, and in the shower this morning before church, I had almost convinced myself to give up again — when it hit me.

I’d already thought of and rejected stuffed French toast because sandwich bread is sliced too thin to cut open and stuff. Someone did it last year with two slices of bread, but I wouldn’t want to replicate something that had been that’d already been done.

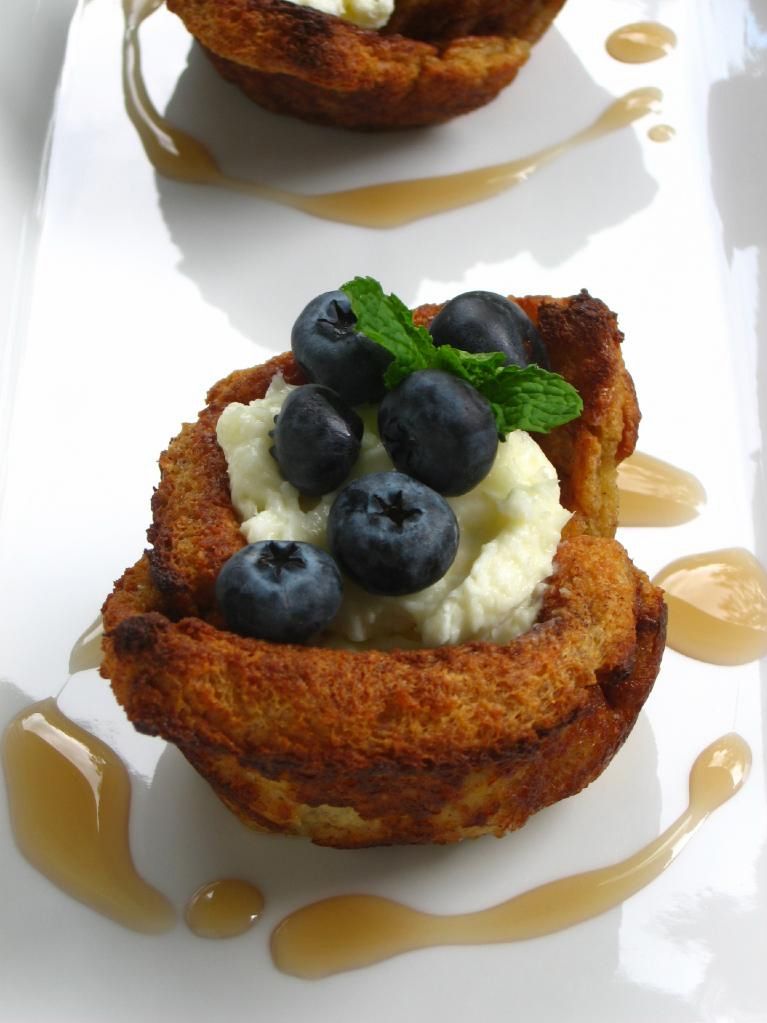
Sometime between shampooing and conditioning, I realized that I could bake French toast into sweet little breakfast cups and fill them instead of stuffing them. They’d be topped with fresh berries with some maple syrup on the side for drizzling or dipping. Suddenly, a breakfast star was born.

There were still some obstacles — like how to create the French toast cups. In my first attempt, I dipped the bread into the custard and placed it uncooked into the muffin tin. I can’t really even describe the outcome, but they were something like soggy, bulbous custard balloons. Not San Francisco-worthy.

But my second attempt? Save me a seat on the trolley, because they were amazing! In this version, I cooked my French toast completely before cooling it and baking it into French toast cups. I then filled it with the sweetened cream cheese filling and berries to finish the dish.

Here’s hoping I win a trip to San Francisco to schmooze with some of my food blog faves, and that YOU make some stuffed French Toast Bowls immediately! Mike just polished off the last one for dessert, and if his reaction is any indication, you won’t regret it.

Blueberry Stuffed French Toast Bowls


Recipe by: Willow Bird Baking, with inspiration from Alton Brown
Yield: 8 bowls, or about 4 servings

Ingredients:
1/2 cup heavy cream
1/2 cup milk
3 large eggs
2 tablespoons honey, microwaved for 20 seconds (but not while still IN THE BEAR, y’all!)
1 teaspoon cinnamon
1/4 teaspoon salt
8 slices day-old or stale sandwich bread (I used Nature’s Pride Honey Wheat Bread)
4 tablespoons butter
2 8-ounce packages cream cheese, room temperature
4 tablespoons sugar
blueberries
maple syrup, for serving

Directions:
Preheat oven to 400 degrees F. In medium bowl, whisk together the milk, cream, eggs, honey, cinnamon, and salt (this step can be done the night before and refrigerated). When you’re ready to cook your French toast, pour this mixture into a cake pan or pie dish.

Prepare your bread: remove crusts and roll with a rolling pin to slightly flatten. Dip the bread into your custard mixture for about 8-10 seconds on each side before carefully removing it with a spatula to a cooling rack over a sheet pan. Allow excess moisture to drain off of the slices for 1-2 minutes.

Melt 1 tablespoon of butter over medium heat in a skillet. Put 2 slides of bread at a time into the pan to toast gently to golden brown (about 2-3 minutes per side). Remove the French toast to a cooling rack to cool completely. Repeat with all slices of bread.

While French toast cools, make your stuffing mixture by combining cream cheese and sugar into a bowl and mixing until fluffy. (When I tasted this at first, it was grainy, but then the sugar seemed to dissolve. I was going to suggest using confectioners’ sugar instead, but since the graininess was completely gone when we ate it, I don’t think there’s a need). Set aside.

Take each piece of cooled French toast and gently tuck into the well of a greased muffin tin, forming a bowl. Bake at 400 degrees F for 10-12 minutes, watching carefully. Pull them out of the oven and allow the bowls to cool in the pan for at least 10 minutes. Remove them to cool on a cooling rack (the first time I did this, they started to fall apart because I pulled them out of the oven too soon, so I baked them a little longer and they were perfect). Once cool, fill them with the cream cheese mixture, top with berries, and serve with maple syrup for dipping.

Note: As part of Foodbuzz’s Tastemaker program, I received a coupon for a free package of Nature’s Pride Bread. But, um, actually I left it in my mailbox, so I bought this loaf with my own money. So I don’t know why I’m telling you this. Except that I may snag the coupon now and use it for another loaf to make hummus sandwiches. Ahem.

If you liked this post, please:
Subscribe to Willow Bird Baking
Follow Willow Bird Baking on Twitter
Follow Willow Bird Baking on Facebook
Give this post a thumbs up on StumbleUpon


ShareOther ways to share this post with friends!

1 2 3 4 5 6