Author’s Note: I’ve updated and perfected this recipe! After reading the post below, please see Red Berry Pie — Version 2.0!
Last week I was basking on pluffy cloud nine after baking my first pie. I guess I needed a reality check, because the very next day I decided to give pie-making another go with considerably less amazing results. I wish I could share what I baked this weekend with you instead! It was the Daring Bakers challenge, and I’m giddy with the recipe and results. Unfortunately, I must save that until the 27th of the month, so for now, I present . . . failpie.

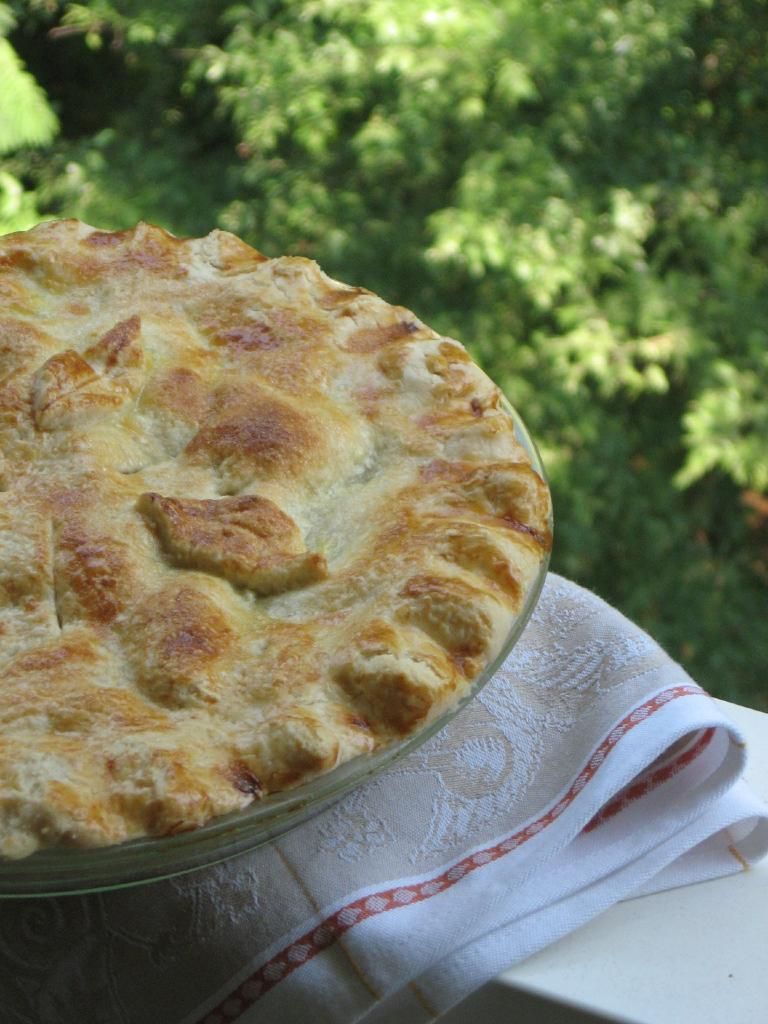
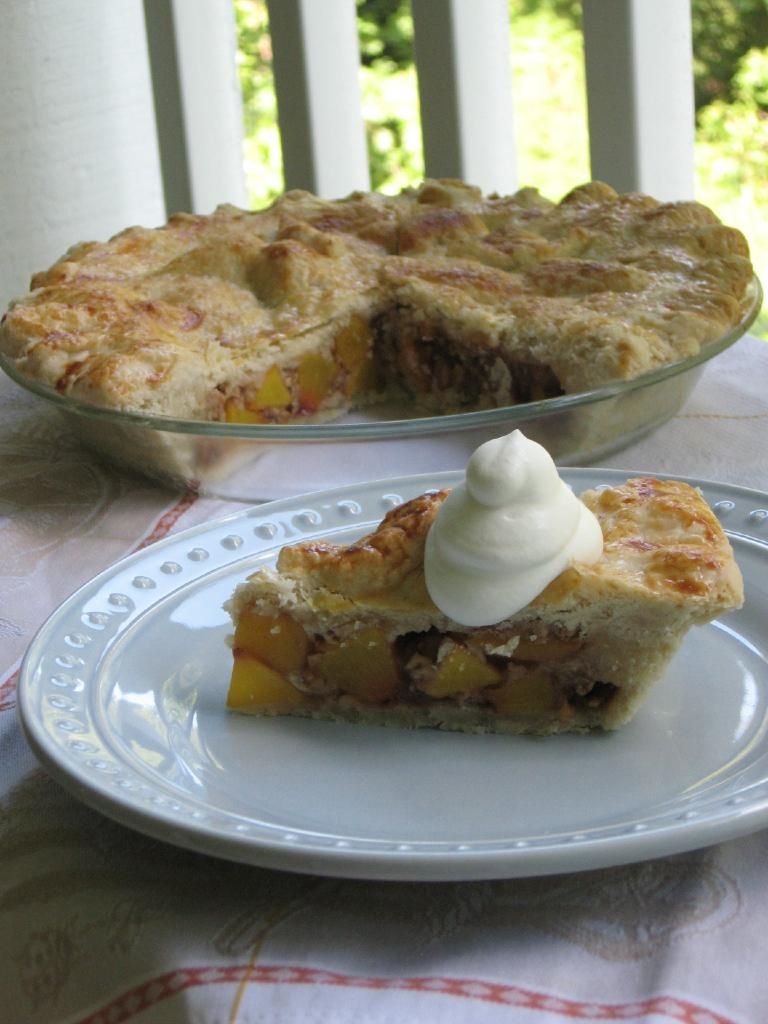
Well, that’s a little harsh. This is only a failure of texture/appearance, not taste. I was pleased as punch with the crust, and the strawberry and raspberry combination was perfectly tangy and sweet. With a dollop of homemade whipped cream on the whole concoction, it was actually a satisfying dessert. Mike and his dad even preferred it to the peach pie! When it comes down to it, the only problem with this pie was the texture of the filling. Sadly, the words “mushy” and “runny” are apt here. But even that, as it turns out, may have a relatively simple solution.

Ugly but tasty!
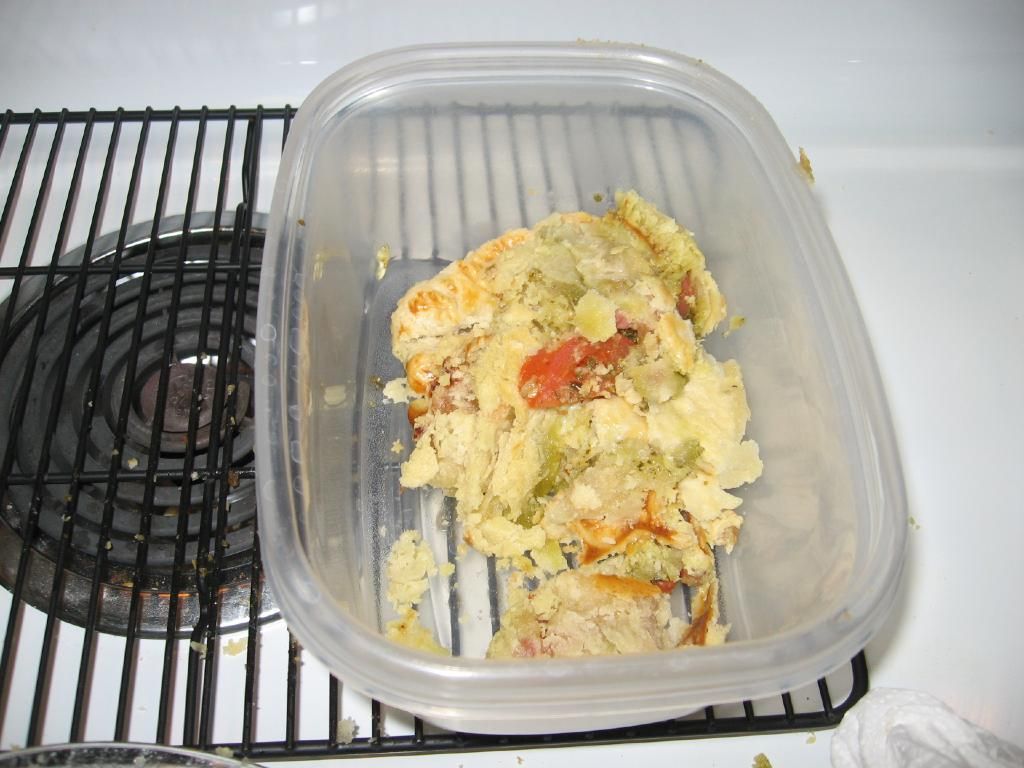
There are a few main reasons fruit pies can be runny (I did some research using the list of pie tips on DianasDesserts, as well as several other sites). The filling may not be cooked long enough. The fruit may have required more of a thickening agent (cornstarch, tapioca, and flour are common). But in my case, I don’t think the recipe was the culprit (it was from the cornstarch folks, for goodness’ sake). No, I’m guessing it was something even simpler; that is, the cooling time. Fruit pies need to be completely cool before being cut, and that can require up to four hours. Did I let my pie cool for four hours? Of course not. I didn’t plan four whole hours into my busy Sunday schedule! In fact, my pie barely sat for half an hour before I had to pack it up and head to dinner at Mike’s sister’s beautiful new home. What did I expect?!

Maybe we’ll just call it a cobbler? How’s that?
I do think you should make this pie, but with a couple of changes. First, some people recommend cooking your fruit with the thickening agent on the stove before filling your pie, thus ensuring the proper thickness. That sounds like a better idea than piling it all in the crust and hoping for the best, now doesn’t it? Second, you should use more berries than I did. I wanted my pie to be stuffed, but I was a little low on fruit this time around. Finally, of course, let your pie cool! Plan ahead and don’t be hasty.
I’m posting the recipe below as I used it, but feel free to tinker with the above aspects. I think this is going to be a real winner with a little work. I’ll have to let you know when I give it another shot.
Red Berry Pie, version 1
Recipe By:–Hodgson Mills (pie filling, adapted by me)
-Ina Garten (whipped cream)
-Me (crust)Yields: One 9-inch, double-crust pie
Crust Ingredients:
4 cups flour
2 teaspoons salt
3/4 cup cold lard (non-hydrogenated if available)*
3/4 cup cold butter, chopped
6-8 tablespoons cold water
sugar (to sprinkle on before baking)
*you can substitute vegetable shortening here if you wish, but I highly recommend the lard!
Filling Ingredients:
1 pints of fresh or frozen raspberries
1 pound fresh strawberries
1 1/4 cup sugar
tiny pinch of salt
4 tablespoon cornstarch
1/2 teaspoon raspberry extract
1 tablespoon unsalted butter
Egg Wash Ingredients:
1 egg yolk
1 tablespoon heavy creamWhipped Cream Ingredients:
1 cup heavy whipping cream
3 tablespoons granulated sugar
1/2 teaspoon vanilla (or flavoring of your choice)
Directions:Pulse flour and salt together to combine. Add scoops of lard and pulse into the mixture has the texture of coarse sand, about 10 seconds. Add in chunks of butter and pulse until butter pieces are no larger than small peas, about 10 pulses. Add minimum amount of water and pulse on low. If dough remains crumbly and doesn’t come together, add another 2 tablespoons of water. Add as little as is required to enable the dough to be rolled into a ball. Form the dough into 2 disks, wrap in plastic, and refrigerate for 20-30 minutes.
Preheat oven to 450 degrees F. Roll one disk of dough out to around 2 inches larger than your pie plate and transfer it, situating it in the plate. Trim the excess flush with the edge of the pie plate.
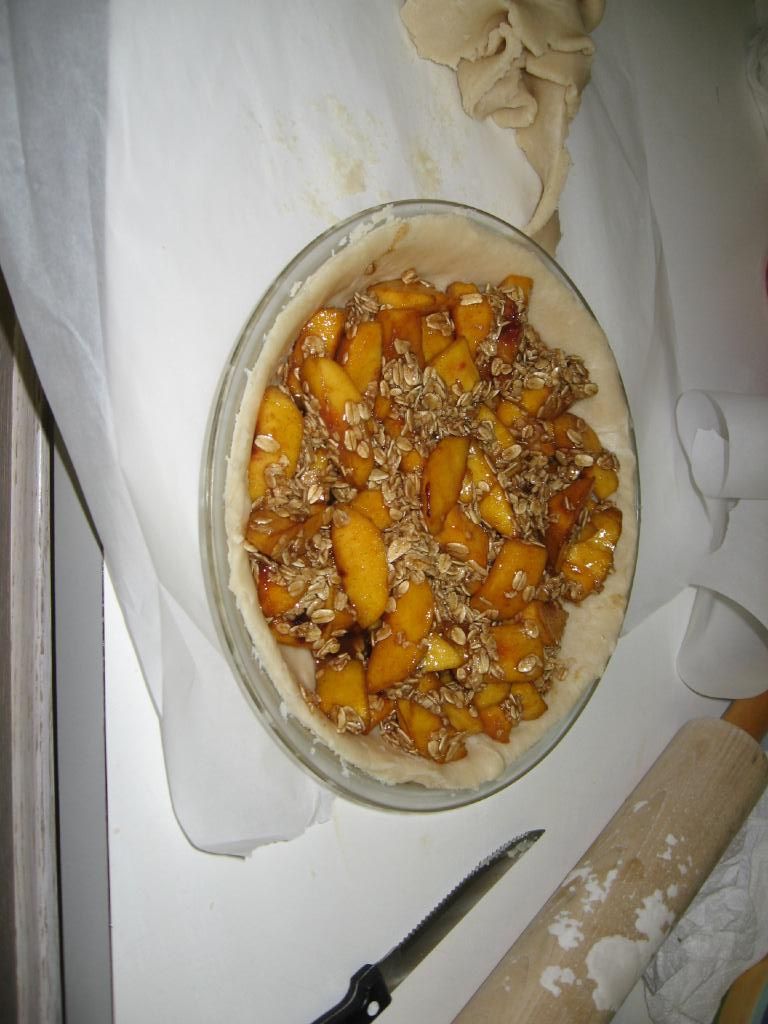
Mix filling: In a large bowl, gently toss raspberries and strawberries together with sugar. Add cornstarch, raspberry extract and orange juice. Spoon into prepared pie shell bottom. Dot with butter.
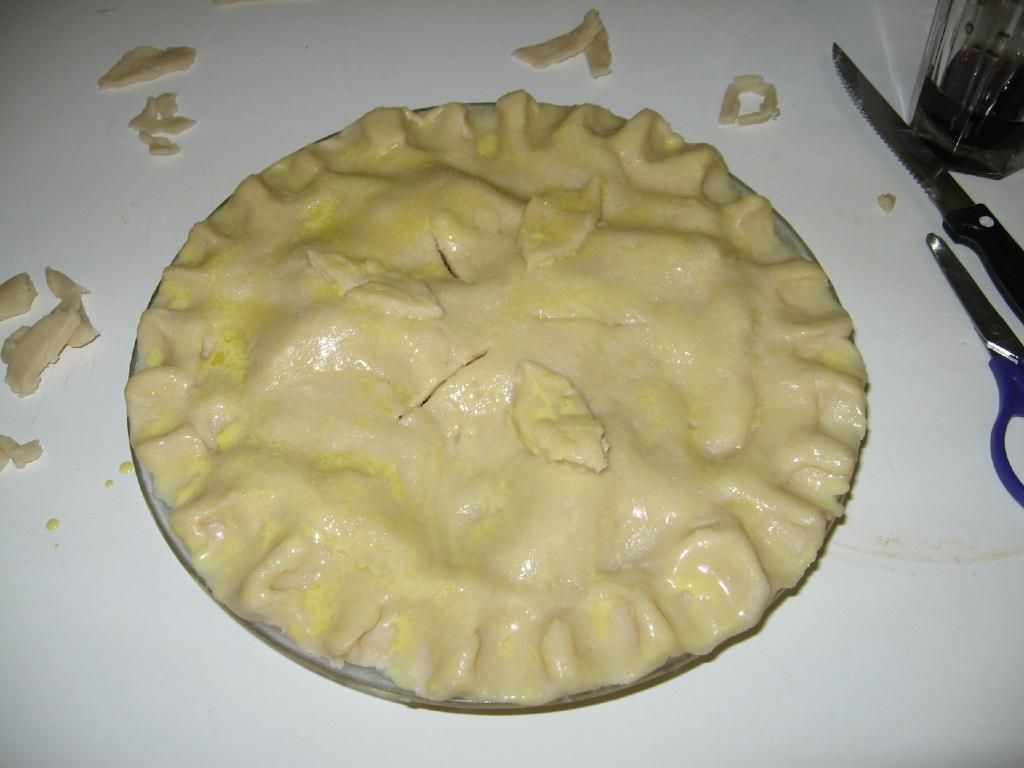
Roll the other dough disk out to about 1 inch larger than your pie plate. Situate it over the filling, tucking the edges of the top dough behind the edge of the bottom dough and crimping the edges. Use excess dough to add dough cutouts to top of pie if desired (I made a heart).
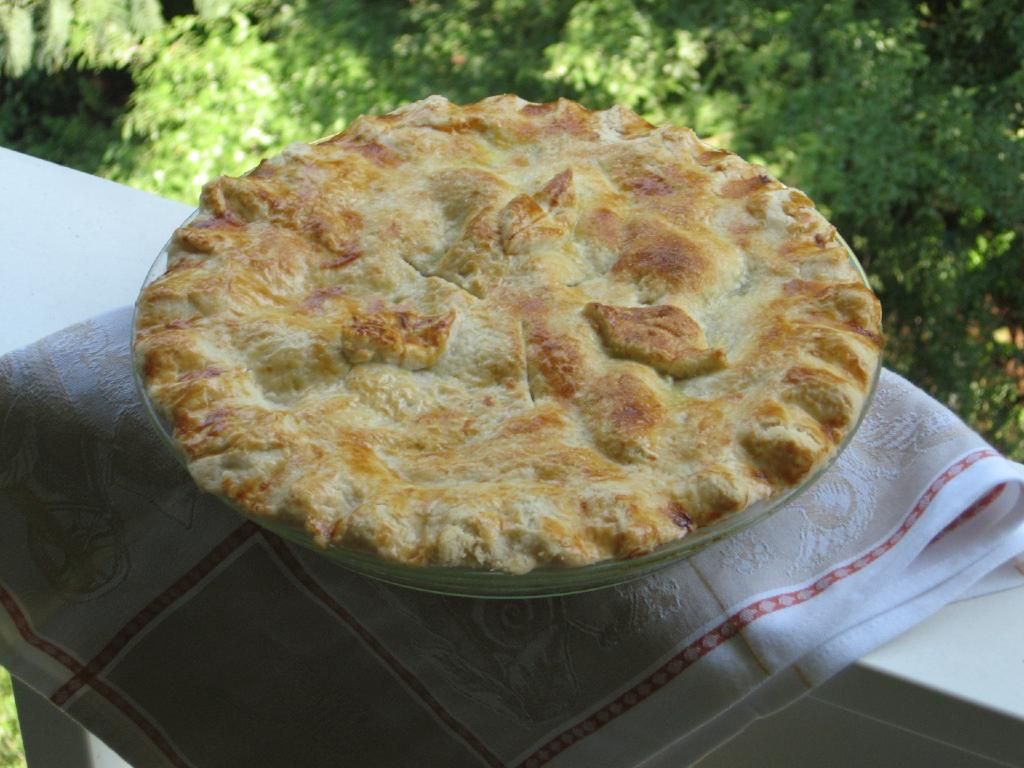
In a small bowl, beat cream and egg yolk together for egg wash. Using a pastry brush, brush the surface of the top pie crust (can sprinkle lightly with sugar if you desire). Cut vents in the top crust. Shield crimped edges of pie (and any dough cutouts) with foil. Place on parchment paper lined cookie sheet and place on lower third of oven. Bake 15 minutes, reduce heat to 375 degrees F and bake until juices are bubbling through vents and pastry is browned, another 25-30 minutes. For the last 15 minutes, remove foil shielding. Allow pie to cool completely (around 4 hours minimum).
Serve with vanilla ice cream or homemade whipped cream. To make homemade whipped cream, mix all ingredients together until soft peaks are obtained.

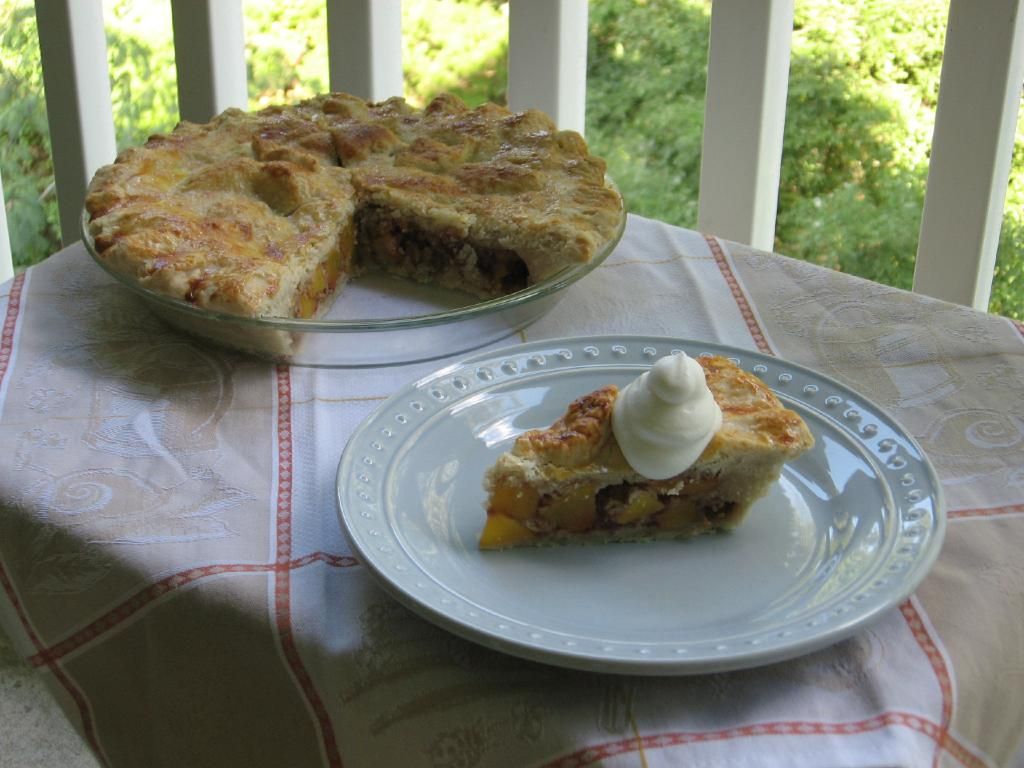
The pie all foil-shielded and baking its heart out.

I can almost hear the tiny pie voice imploring, “Let me cool!” Alas.