other

Secret Garden Craft: Simple Luncheon Napkins

Part of making a celebration special is the thought behind it. I wanted the Secret Secret Garden Party to be particularly special for my sister, so I decided to incorporate some handmade touches — things that showed thoughtfulness in their detail. There was a problem, though.

I am not crafty.

I love the idea behind crafting and think I could be good at scrapbooking, sewing, quilting, knitting, crocheting, jewelry making — if I had 42 hours in a day instead of 24. But I don’t have any extra time, so I don’t have any experience in the crafting world. My mom regularly encourages me to take up sewing, and I regularly reply that I need another hobby like I need a lobotomy (which, in case you’re wondering, is not at all. Yet.)

So, how do you add a handmade touch to a party without many crafting skills? Presenting simple, low-sew luncheon napkins for the crafting impaired.

While these do take a little bit of time, no sewing machine is required, and you can dress them up or down depending on the effort you want to expend. This quick craft is great for adding a handmade touch to a celebration, creating color-coordinating napkins for your table, or dipping your toes into the cold crafting water. I loved that I could sew on little appliques in contrasting fabric to make a sweet, shabby chic product.

Simple Sweet Luncheon Napkins


Help with this craft: DIY Maven
Yields: 9 luncheon napkins

Supplies needed:
2 yards fabric for napkins
1/4 yard fabric for appliques (optional)
Liquid Stitch or similar product
iron
clear nail polish
ruler
scissors
needle
thread (I used embroidery thread for decorative cross-stitching, and regular thread to stitch around the appliques)

Directions:
1. Cut your napkin fabric into 13″ x 13″ squares.

2. On each square, fold over the right side of the napkin 1/4″ and press well with the iron. Fold the right side over another 1/4″ and press well. Repeat these two folds on the left side.

3. Fold each corner down, forming a small triangle, and press these well.

4. Now fold the top down 1/4″ over the triangle and press well. Fold it over another 1/4″, press well, and then pin. Repeat this with the bottom.


5. Use a simple cross stitch to secure the corners. Sometimes I used just one large X, over times I flanked it with smaller cross-stitching on either side. It’s up to you. You can use embroidery thread or regular thread in a contrasting color for this.


6. Use a cotton swab to evenly apply Liquid Stitch under the top, bottom, left, and right edges, pressing firmly to seal. Now your napkin is complete and ready to embellish, if you wish!

7. Cut out shapes of your choice from contrasting fabric. Use clear nail polish to lightly paint the edges so they won’t fray.

8. Attach your applique with a little liquid stitch to the location of your choice.
9. If desired, use a needle and thread to stitch around the applique to give it a sweet handmade feel.
10. Repeat these steps on all napkins. Let napkins dry overnight. If you liquid stitch the applique well and secure the mitered corners carefully, these will probably be fine being machine washed on gentle. I’m using mine more for decorative purposes.

If you liked this post, please:
Subscribe to Willow Bird Baking
Follow Willow Bird Baking on Twitter
Follow Willow Bird Baking on Facebook
Give this post a thumbs up on StumbleUpon


ShareOther ways to share this post with friends!

Secret Garden Recipe: Homemade Buttery Croissants and Pains au Chocolat

I just sat down to write a beautiful post about rain on nighttime windows, the birdcry of feathery sentinels on the dark, and the gentle crunch of a buttery croissant. Moments of transcendence . . .

. . . and then I found a glob of meringue stuck in my hair. Not related to gorgeous French pastries, but I knew you’d want to know.

Back to pastry. Certain achievements in the kitchen really ice the culinary cake for me. These croissants are without a doubt my proudest moment in the kitchen thus far.

I understand the sentiment I’ve heard so often, expressed by so many people: “Why make it, when you can get it from the store or bakery and it’s just as good?” That’s fine. Sometimes you want a sheet of puff pastry as a means to an end. Sometimes you just want a croissant without two days of work. I get it. I’m not a food snob. Even though I think you’d sacrifice some taste in the croissant department, if you want a pre-made croissant every now and then, go for it. But . . .


Beautiful layers.

But I have a goal. My goal is to inspire you, at least once, to make these croissants. When I say “you,” I don’t mean Martha Stewart. I doubt she’s in my readership just yet. I mean you. You who have only made box cakes. Or you who bakes up a storm but feels intimidated by this whole “laminated dough” thing. Or you who thinks you could never accomplish this. I want to make you take a chance. If you’ve never made croissants before, I’m talking to you.

You.

I was nervous, too. There are pages dedicated to croissant comparisons, discussions about how to get the best layering, and hundreds of thousands of mixed recipe reviews to wade through. I saw pictures of failed attempts and read overly detailed and confusing instructions.

In a laminated dough like this, you pound sticks of butter into a thin block and fold them into the dough like a letter in an envelope. The “laminating” process involves rolling out this dough package containing the cold butter layer, folding it, and rolling it out again. Lots of chilling occurs between these folds to ensure the butter stays cold.


Cross-section of a pain au chocolat.

Each fold produces layers of dough-butter-dough-butter, allowing for those gorgeous puffy layers you get when you finally shape and bake the croissants. Having made puff pastry before, I knew that if I could get past the first fold of the dough, I could complete the recipe. The dough becomes so much more manageable at that point, and it’s really just repetition from there until the end. But would I get there with this notoriously sticky dough? And why did the first fold seem so far away when I was standing in my kitchen with gloppy fingers? I was scared.

But you don’t have to be scared. If I did it, you can do it.


Another gratuitous cross-section of a croissant.

You may shudder at two days of kitchen labor, but you get in the swing of the turns after the first one and feel pretty amazing every time you nestle your beautiful rectangle of croissant dough into the fridge again. Even though the recipe looks long, it’s actually extremely straightforward, detailed, and simple to follow. But the real reason you should bake these croissants, though, is to have these croissants. To say the results are worth it is an understatement.

Apart from an incredible self-esteem boost, this recipe yields truly beautiful French pastry. The deep golden brown crust is slightly crisp, and every layer is full of intense buttery flavor. I had envisioned topping these croissants with honey and jam and all sorts of goodness, but couldn’t bring myself to put a thing on them except a bit of butter. They were too perfect all by themselves.

Also making your effort worthwhile is the fact that these are easily frozen after shaping and before proofing — so you can thaw overnight, proof, and bake a few anytime you desire. Baking up French pastry that melts in your mouth with every bite? Having a stash of homemade croissants waiting in your freezer? Knowing that you made those flaky, heavenly layers your family is relishing? It’s worth it, y’all.

Now. Rubber, meet Road. Here’s my challenge to you. I want you to commit in the comments section to make these croissants. If just one person who previously thought, I could never do that, ends up pulling their homemade croissants from the oven because of this post, I will be one happy food blogger.

I’ve included several resources within the recipe to help you with some of the parts you may not be familiar with just yet. I’m also available to answer any question you’ll post in the comments section as best as I can. I want you to feel the same joy I felt at accomplishing this feat, and I want you to taste these delicacies. What do you say?

         Committed to Croissant         

  1. Maranda MARANDA MASTERED CROISSANTS!
  2. Amy AMY MASTERED CROISSANTS!
  3. LizzieBee of A City Girl Gone Country
  4. Blogless Sarah
  5. Blogless Sara
  6. Emily EMILY MASTERED CROISSANTS!
  7. Courtney
  8. Blogless Hannah HANNAH MASTERED CROISSANTS!
  9. Maia
  10. Blogless Eric
  11. Blogless Ellen
  12. Blogless Bryn
  13. Kat KAT MASTERED CROISSANTS!
  14. Blogless Eris
  15. Peggy of My Fiance Likes It, So It Must Be Good
  16. Blogless Kirsten KIRSTEN MASTERED CROISSANTS!
  17. Blogless Nathan
  18. Blogless Amanda AMANDA MASTERED CROISSANTS!
  19. Your Name Here!

If you’ve committed to croissant and don’t see your name on the list, please leave a comment and let me know I’ve missed you! After you make your croissants, please let me know how it went and send pictures (if you can) of you with your masterpiece. I’ll be posting them on Willow Bird Baking to show you off!

Homemade Butter Croissants or Pains au Chocolat


Recipe by: Adapted slightly from Gourmet
Yields: Around 24 small croissants or 36 small pains au chocolat

Ingredients:
1 1/2 cups whole milk, heated to warm (105°F–110°F) (use a candy thermometer to determine)
1/4 cup packed light brown sugar
1 tablespoon plus 1/4 teaspoon active dry yeast (from two 1/4-oz packages)
3 3/4 to 4 1/2 cups unbleached all-purpose flour
1 tablespoon kosher salt
3 sticks (1 1/2 cups) cold unsalted butter (I used Plugra European butter)
1 egg, lightly beaten, for egg wash
1 teaspoon cream or milk for egg wash
chocolate batons or bittersweet chips for pain au chocolat, if desired

Equipment to have on hand:
Stand mixer with dough hook
candy thermometer
kitchen towels
Ruler
Pastry scraper
Pastry brush
Parchment paper or silpat
Spray bottle (although I improvised — see below)

Directions:

Make dough:
Stir together warm milk, brown sugar, and yeast in bowl of standing mixer and let stand until foamy, about 5 minutes. (If it doesn’t foam, discard and start over.) Add 3 3/4 cups flour and salt and mix with dough hook at low speed until dough is smooth and very soft, about 7 minutes.

Transfer dough to a work surface and knead by hand 2 minutes, adding more flour as necessary, a little at a time, to make a soft, slightly sticky dough. Form dough into a roughly 1 1/2-inch-thick rectangle and chill, wrapped in plastic wrap, until cold, about 1 hour.

Prepare and shape butter:
After dough has chilled, arrange sticks of butter horizontally, their sides touching, on a work surface. Pound butter with a rolling pin to soften slightly (butter should be malleable but still cold). Scrape butter into a block and put on a kitchen towel, then cover with other towel (I wrapped them in plastic wrap instead, but it did break at one point). Pound and roll out on both sides until butter forms a uniform 8- by 5-inch rectangle. Chill, wrapped in towels, while rolling out dough.

Roll out dough:
Unwrap dough and roll out on a lightly floured surface, dusting with flour as necessary and lifting and stretching dough (especially in corners), into a 16- by 10-inch rectangle. Arrange dough with a short side nearest you. Put butter in center of dough so that long sides of butter are parallel to short sides of dough. Fold as you would a letter: bottom third of dough over butter, then top third down over dough. Brush off excess flour with pastry brush.

Roll out dough:
Turn dough so a short side is nearest you, then flatten dough slightly by pressing down horizontally with rolling pin across dough at regular intervals, making uniform impressions. Roll out dough into a 15- by 10-inch rectangle, rolling just to but not over ends.

Brush off any excess flour. Fold in thirds like a letter, as above, stretching corners to square off dough, forming a 10- by 5-inch rectangle. (You have completed the first “fold.” Make one impression in the dough with a finger to remind yourself that one fold is finished.) Chill, wrapped in plastic wrap, 1 hour.

Make remaining “folds”:
Make 3 more folds in same manner, chilling dough 1 hour after each fold, for a total of 4 folds. (If any butter oozes out while rolling, sprinkle with flour to prevent sticking.) Wrap dough tightly in plastic wrap and chill at least 8 hours but no more than 18 (after 18 hours, dough may not rise sufficiently when baked). NOTE: This is when you can let the dough hang out in the fridge overnight and get some rest, you croissant-makin’ superstar!

Roll out and cut dough:
Cut dough in half and chill 1 half, wrapped in plastic wrap. Roll out other half on a lightly floured surface, dusting with flour as necessary and stretching corners to maintain shape, into a 16- by 12-inch rectangle. Brush off excess flour with pastry brush and trim edges with a pizza wheel or sharp knife.

Arrange dough with a short side nearest you. Cut in half horizontally and chill 1 half. Cut remaining half vertically into thirds, forming 3 rectangles. Cut each rectangle diagonally in half to make 2 triangles, for a total of 6 triangles. If you’re making pain au chocolat as well, cut some of the dough into smaller rectangles (see my example diagram, below).

For the more visual among you, here’s a diagram I drew of how I ultimately rolled my two halves of dough (note that you need to work with a portion of the dough at a time to keep the rest chilled). This diagram shows you how I cut the dough to make 18 croissants and 9 pains au chocolat (the rectangles):

Shape croissants:
Holding short side (side opposite tip) of 1 triangle in one hand, stretch dough, tugging and sliding with other hand toward tip to elongate by about 50 percent.

Return to work surface with short side of triangle nearest you. Beginning with short side, roll up triangle toward tip. Croissant should overlap 3 times, with tip sticking out from underneath; you may need to stretch dough while rolling.)

Put croissant, tip side down, on a parchment-lined large baking sheet. (Curve ends inward to make a crescent shape if desired, joining their cute little arms. They won’t stay joined during proofing, but this will help ensure that they do maintain their shape. I used a minute drop of water to seal their arms closed if the dough seemed dry.)

Make more croissants with remaining 5 triangles, then with remaining rolled-out dough, arranging them 2 inches apart on baking sheet. Repeat rolling, cutting, and shaping procedures with chilled piece of dough. Note: To make pain au chocolat, simply place a chocolate baton or bittersweet chips on one side of the rectangle (about 1/4-inch from the edge) and roll it up — very simple!)

Freeze croissants, if desired: This is the point at which you may place shaped, unproofed croissants on a baking sheet lined with wax paper in the freezer for an hour or two, until frozen. Then place them in a ziplock bag and freeze. They’re absolutely best when baked within a week. When ready to bake (from frozen), thaw overnight in the refrigerator and proceed to the proofing step as normal. If not freezing, skip this step entirely and proceed to proofing.

Proof your croissants: First, brush croissants with a lightly beaten egg mixed with a teaspoon of milk or cream. Then proof. I use the Pastries from La Brea Bakery method here. Turn the oven on to 100 degrees. After a few minutes, turn the oven off and open the door. When the temperature drops to just slightly warm, place the croissants in the oven and close the door. Let the croissants rise for 2 to 2 1/2 hours or until they are about 1 1/2 times their size, feel marshmallow-y, and leave a slight indent when touched. Make sure to remove the croissants before heating the oven for baking.

Bake croissants:
For best results, bake one pan of croissants at a time (or two pans on the same rack, if they’ll fit). Preheat to 425°F. Place an oven-safe dish full of water on the rack below where the croissants will be baking to produce steam.

Spritz inside oven generously with spray bottle and close door (I used my hands for this — just sprinkled water around). Put croissants in oven, then spritz again before closing door. Reduce temperature to 400°F and bake 8 minutes without opening door.

Switch position of sheets in oven and rotate sheets 180°, then reduce temperature to 375°F and bake until croissants are deep golden, about 8-10 minutes more. Do not take them out at light golden brown, or they’ll be doughy in the middle. They need to get good and golden on the outside.

Croissants are best eaten slightly warm, slathered with butter, and with a lot of “Mmmms” and “Ahhhhs.” Enjoy!

Additional tips and resources:
-To see butter pounding, view this video of Julia Child and Michel Richards making puff pastry. The cold butter is pounded around 3:20 into the video, though I would do it with a sheet of plastic wrap on top as well.
-See below for photos that will clarify the folding instructions.
-The dough needs to be kept cool throughout the entire rolling process. I crank the air down a degree or two in my apartment, chill my rolling pin in the freezer for a few minutes before rolling, and sometimes use frozen veggies I have on hand to ice down my counter (just be sure to dry it) before flouring and rolling. If at any time the butter seems oozy, fold your dough up and chill it well before continuing.
-Don’t overflour the counter, but don’t be afraid of flour. I was so timid about flouring the counter early in my baking life that I usually had a sticky mess on my hands. Once I finally decided to flour however much I needed (albeit lightly each time), things got a lot simpler for me. Check periodically while rolling and if the dough is sticking, flour lightly beneath it. One thing that helped me get the hang of how much to flour the counter and dough was watching youtube videos of people making puff pastry and croissants — and watching how much they floured.
This video gave an excellent tutorial about how to shape the croissants and pains au chocolat. Turn off the recipe annotation in the bottom right corner of the video.


Clockwise: the second, third, and fourth fold and cutting the croissants.


Clockwise: the cute little shaped croissant, my first bake, and my first croissant and pain au chocolat cooling.

If you liked this post, please:
Subscribe to Willow Bird Baking
Follow Willow Bird Baking on Twitter
Follow Willow Bird Baking on Facebook
Give this post a thumbs up on StumbleUpon


ShareOther ways to share this post with friends!

Chocolate Pavlovas with Chocolate Mascarpone Mousse

Don’t laugh.

You’re going to laugh, aren’t you? You’re already laughing, AREN’T YOU?! Okay, clearly I’m a little sensitive about this, but . . . I’ve been going to Jazzercise classes. I know, I know . . . cue the comments about leg warmers, sideways ponytails, and off-shoulder Mickey Mouse t-shirts. Perhaps you’ve conjured up a picture of me in gigantic, neon hoop earrings with poofy bangs dancing around a la Flashdance. It’s okay. I can take it.

Because I love Jazzercise. I LOVE IT. It’s a dance exercise class that includes cardio, small weights, and stretching. I’ve been to two classes, and the pattern seems to be rocking out for 30 minutes (i.e. until I feel like I’m about to die), making the small weights and stretching exercises that last for about 15 minutes a total relief.

Before this, I was a sedentary lump (albeit a lump that did eat healthily throughout the week), so it’s no surprise that I’m the least coordinated person on the planet. Like, less coordinated than your Great Aunt Ida who uses a walker to get around and can’t really see anymore. Like, she would laugh me off the dance floor. So I’m typically the one flailing around in the back of the Jazzercise class two steps behind everyone else and sashaying in the wrong direction. I only wish I were joking!

The good news is, I still love it. I laugh at myself the whole time, sweat a lot, and wonder with slight discomfort if I’m jiggling in an unattractive way. As one of the instructors told me after my first class, “We’re all moving the wrong way at some point!” I just keep jabbing and kicking and pliéing and sashaying and wriggling and whatever else I’m supposed to do until the class is over and I feel like a champ. Albeit a champ with poofy bangs.

Another reason to love my new foray into the exercise world is being able to reflect upon my healthy movement while eating things like rich Chocolate Pavlovas with Chocolate Mascarpone Mousse and Mascarpone Cream. I can now make comments to myself like, “Oh yeah, I totally Jazzercised this off. No problem,” or, “I’m sure we’ll be sashaying these calories off tomorrow.”

With so much Secret Gardening going on, you may have assumed the Daring Bakers challenge fell by the wayside this month. Fortunately, that was not the case! The June 2010 Daring Bakers’ challenge was hosted by Dawn of Doable and Delicious. Dawn challenged the Daring Bakers’ to make Chocolate Pavlovas and Chocolate Mascarpone Mousse. The challenge recipe is based on a recipe from the book Chocolate Epiphany by Francois Payard.

These pavlovas are not the sort with the marshmallowy interior, but are more crisp throughout, like meringue cookies. They’re topped with a decadent, fluffy chocolate mascarpone mousse and a drizzle of mascarpone cream made with heavenly Crème Anglaise. I opted to leave out orange flavorings suggested by the original recipe, because I typically don’t like citrus meddling with my chocolate. The result was perfect. Make your pavlovas small, because these components all together make for an extremely rich, luscious dessert. You’re going to need a glass of milk. And a nap. And some Jazzercise.

But it’s worth it! Mike and I loved this dessert. The combination of crisp and smooth textures was fantastic. It was messy to eat, but simple to make, and a joy to taste! As Daring Bakers challenges go, this challenge had very few, “Uh-oh, this recipe’s about to fail!” moments — a huge plus for me in this busy month. I made my chocolate pavlovas look like little Soda Shop ice cream sundaes for added fun. Scrounge up your best chocolate and enjoy the cool mousse and crisp pavlova on a hot summer evening.

In the meantime, tell me, what’s your favorite exercise routine? Jazzercise? Zumba? Treadmill? Channel surfing?


Gorgeous flowers from a student’s parents’ garden.

Chocolate Pavlovas with Chocolate Mascarpone Mousse


Recipe by: Adapted from Chocolate Epiphany by Francois Payard
Yields: About 8-10 servings depending on the size of your pavlovas

Chocolate Pavlova Ingredients:
3 large egg whites
½ cup plus 1 tbsp (110 grams) white granulated sugar
¼ cup (30 grams) confectioner’s (icing) sugar
1/3 cup (30 grams) cocoa powder

Chocolate Mascarpone Mousse Ingredients:
1 ½ cups (355 mls) heavy cream
9 ounces (255 grams) good chocolate, chopped (I used bittersweet Ghiradeli chocolate chips)
1 2/3 cups (390 mls) mascarpone
pinch of nutmeg

Mascarpone Cream Ingredients:
1 recipe crème anglaise (see below)
1/6 cup (120 mls) mascarpone
1/6 cup (120 mls) heavy cream

Crème Anglaise Ingredients:
1/3 cup whole milk
1/3 cup heavy cream
1/3 vanilla bean, split or 1 teaspoon pure vanilla extract
2 large egg yolks
2 tablespoons sugar

Directions:
Make chocolate pavlovas: Place a rack in the center of the oven and preheat to 200º F (95º C) degrees. Line two baking sheets with silpat or parchment and set aside.

Put the egg whites in a bowl and whip until soft peaks form. Increase speed to high and gradually add granulated sugar about 1 tbsp at a time until stiff peaks form (the whites should be firm but moist.) Sift the confectioner’s sugar and cocoa powder over the egg whites and fold the dry ingredients into the white (this looks like it will not happen. Fold gently and it will eventually come together.)

Fill a pastry bag with the meringue. Pipe the meringue into whatever shapes you desire. Alternatively, you could just free form your shapes and level them a bit with the back of a spoon. Bake for 2-3 hours until the meringues become dry and crisp. Cool completely. You can make these ahead of time and store in an airtight container for up to 3 days.

Make the Crème Anglaise: While the pavlovas are baking (unless you made them ahead of time), whisk together the egg yolks and sugar until the mixture turns pale yellow.

Combine the milk, cream and vanilla in a saucepan over medium high heat, bringing the mixture to a boil. Take off the heat. Pour about ½ cup of the hot liquid into the yolk mixture, whisking constantly to keep from making scrambled eggs. Pour the yolk mixture into the pan with the remaining cream mixture and put the heat back on medium. Stir constantly with a wooden spoon until the mixture thickens enough to lightly coat the back of a wooden spoon. Do not overcook.

Remove the mixture from the heat and strain it through a fine mesh sieve into a bowl. Cover and refrigerate until the mixture is thoroughly chilled, about 2 hours or overnight.

Make the chocolate mascarpone mousse: While the pavlovas are baking or cooling, put ½ cup (120 mls) of the heavy cream in a saucepan over medium high heat. Once warm, add the chocolate and whisk until melted and smooth. Transfer the mixture to a bowl and let sit at room temperature until cool.

Place the mascarpone, the remaining cup of cream and nutmeg in a bowl. Whip on low for a minute until the mascarpone is loose. Do not overbeat, as the mascarpone will break. Mix about ¼ of the mascarpone mixture into the chocolate to lighten. Fold in the remaining mascarpone until well incorporated. Refrigerate until you’re ready to assemble your pavlovas.

Make the mascarpone cream: Slowly whisk the mascarpone into the Crème Anglaise. Put the cream in a bowl and beat with electric mixer until very soft peaks are formed. Fold the cream into the mascarpone mixture.

Assemble your pavlovas: Pipe the mousse onto the pavlovas and drizzle with the mascarpone cream over the top. Dust with confectioner’s sugar and add fresh fruit if desired.

P.S. – Now that I’ve posted my Daring Bakers challenge, check back soon for Secret Garden recipes!

P.S. 2 – Make sure to stop by and see other Daring Bakers’ creations!

If you liked this post, please:
Subscribe to Willow Bird Baking
Follow Willow Bird Baking on Twitter
Follow Willow Bird Baking on Facebook
Give this post a thumbs up on StumbleUpon


ShareOther ways to share this post with friends!

Foodbuzz 24×24: Secret Secret Garden Party

I’ve been keeping a big secret from you.

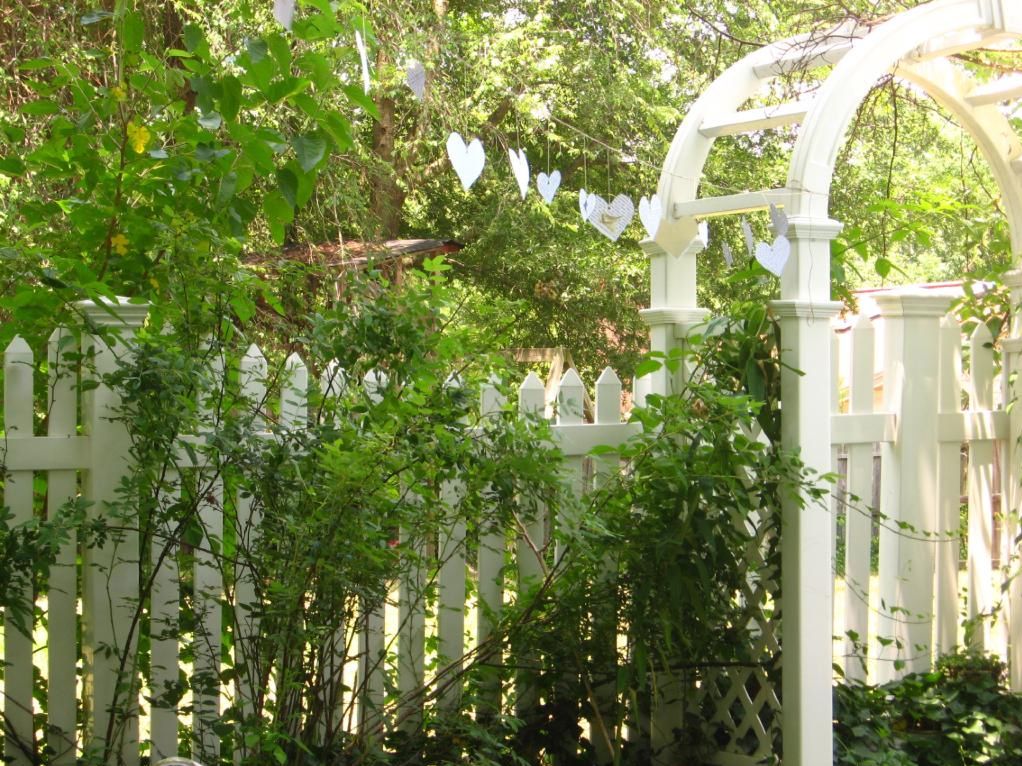
Imagine for a moment, though, that there’s a little redbreasted robin beside you on the fence. He’s a very talkative fellow, and something about his birdish banter gives you the oddest feeling — like maybe he’s trying to get your attention. He seems very interested in one particular flower bed, and upon closer inspection, you notice a key nestled under one of the bushes. Not just any key, but a key that will finally open the mysterious gate situated in an ivy-covered wall — the key to a Secret Garden. Or in this case, to my Secret Secret Garden Party. Won’t you come in?

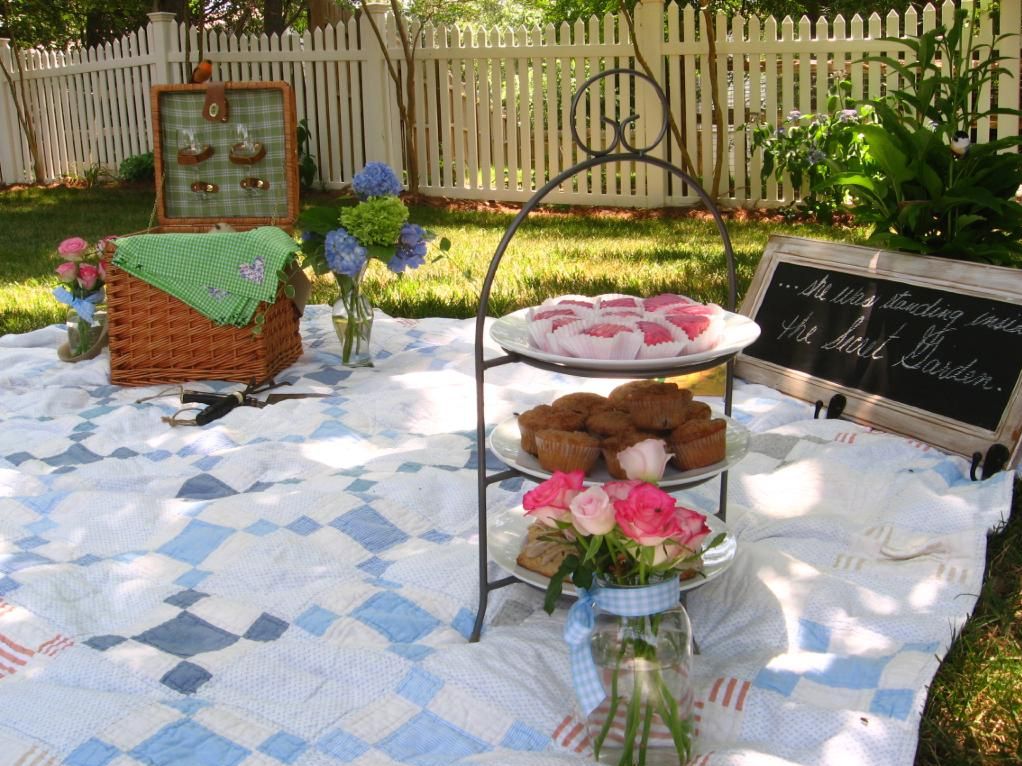
…she held back the swinging curtain of ivy and pushed back the door which opened slowly–slowly. Then she slipped through it, and shut it behind her, and stood with her back against it, looking about her and breathing quite fast with excitement, and wonder, and delight. She was standing inside the secret garden.

My sister, Sarah, is a bibliophile. She loves reading all sorts of books. One day she confided to me that her absolute favorite book of all time was the classic children’s novel, The Secret Garden. This sparked my curiosity since I had passed over that book as a child. Unbeknownst to her, I picked up the book and read it in hopes of understanding its appeal to her. What I read planted an idea in my mind of a way to show Sarah how much we loved her — a Secret Secret Garden Party for her birthday, which at this point was still months away. The idea grew and blossomed and, come June, we were busily buzzing about getting ready to give Sarah the surprise party of a lifetime: a bountiful picnic in my mother’s garden complete with a meal inspired by British tea.

In The Secret Garden, Mary Lennox is the young protagonist who, like Sarah, had to confront issues of identity and find small oases of joy. Mary, a sour and skinny girl, is transported from the dust of India to cool, green England. She finds herself blossoming on the moor as she interacts with nature — a connection with the beauty of living things that Sarah shares. Just as Mary pruned and weeded and planted and nurtured her newfound nest, Sarah has built her own “garden” — a lovely life for herself full of friends, family, her loving boyfriend, a zest for life . . . and, in keeping with the Ruble way, full of food!

When I read the book, one of the things that jumped out to me were the lush feasts the children secreted to the garden and devoured voraciously in the stimulating moor air:

When the white cloth was spread upon the grass, with hot tea and buttered toast and crumpets, a delightfully hungry meal was eaten, and several birds on domestic errands paused to inquire what was going on and were led into investigating crumbs with great activity. Nut and Shell whisked up trees with pieces of cake and Soot took the entire half of a buttered crumpet into a corner and pecked at and examined and turned it over and made hoarse remarks about it until he decided to swallow it all joyfully in one gulp.

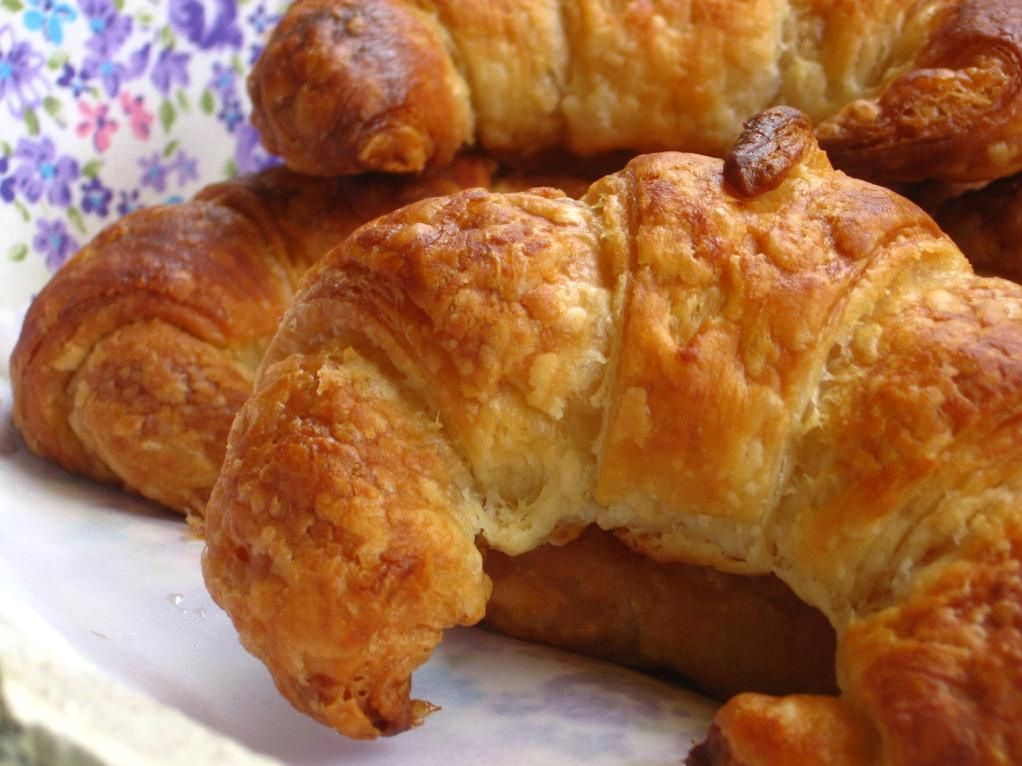
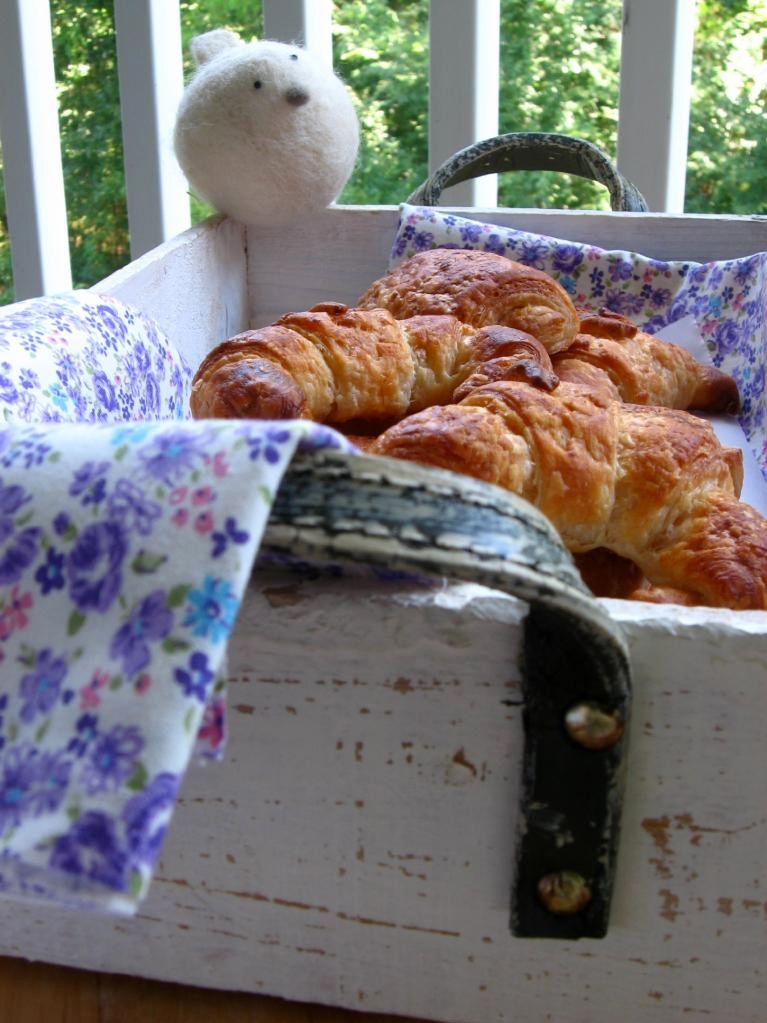
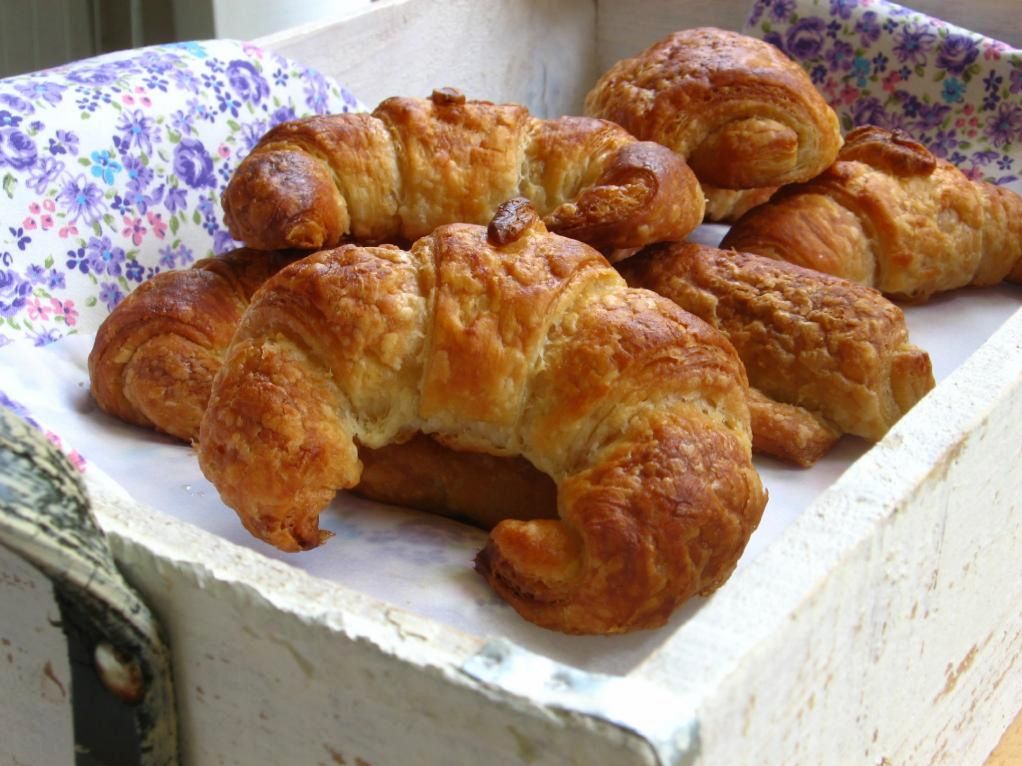
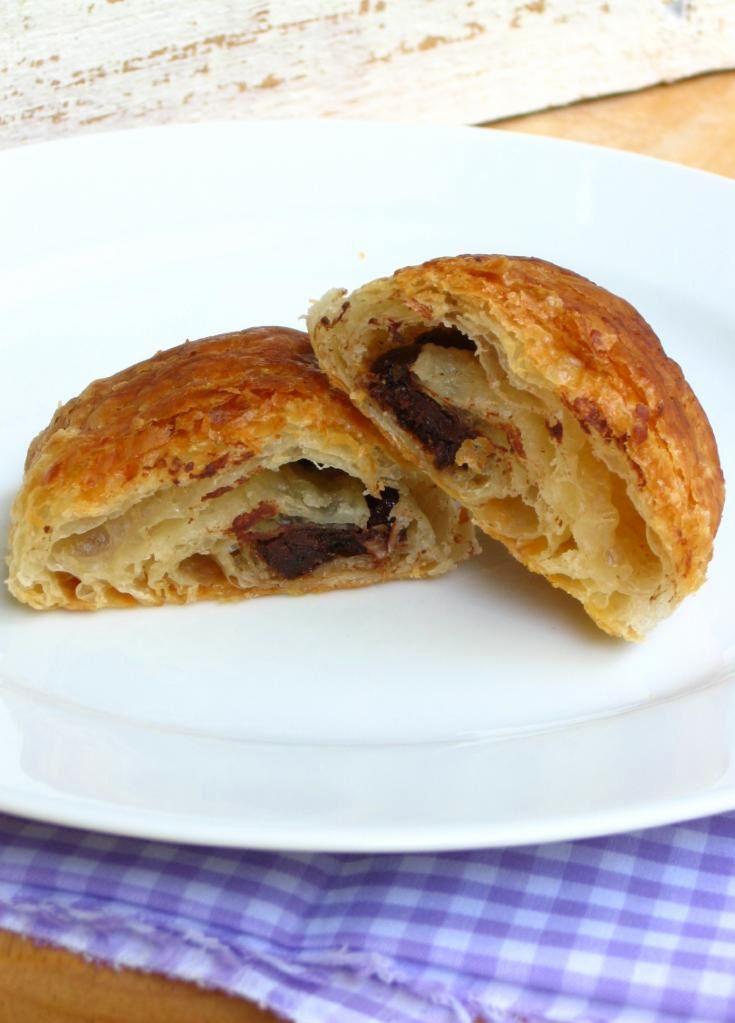
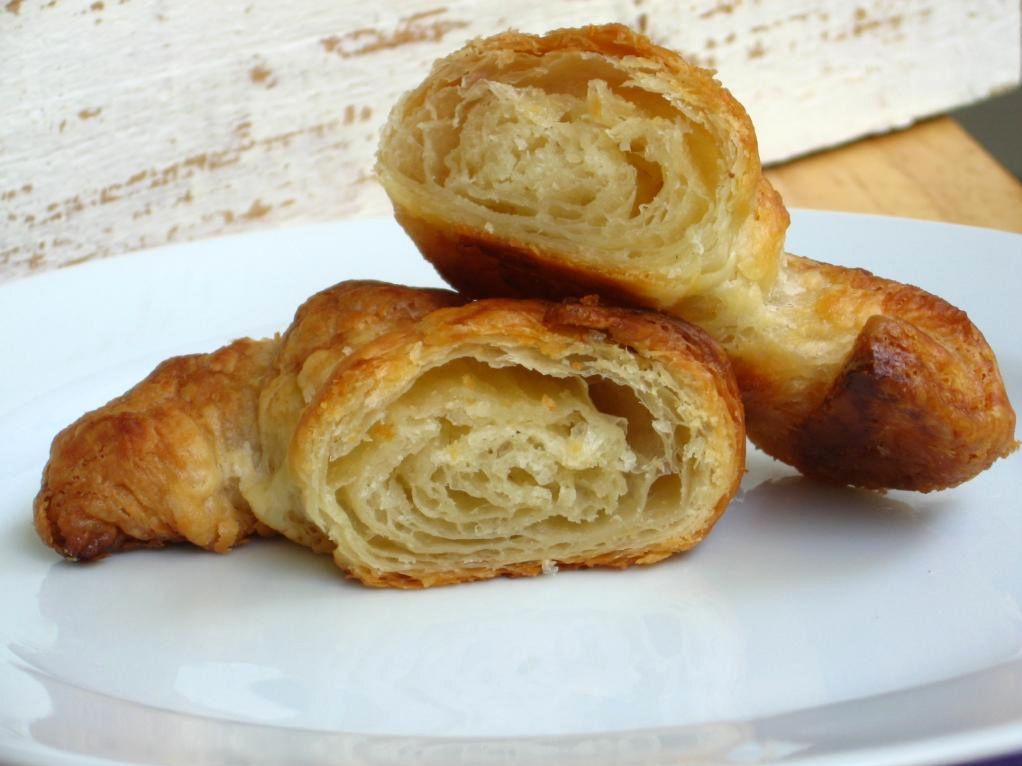
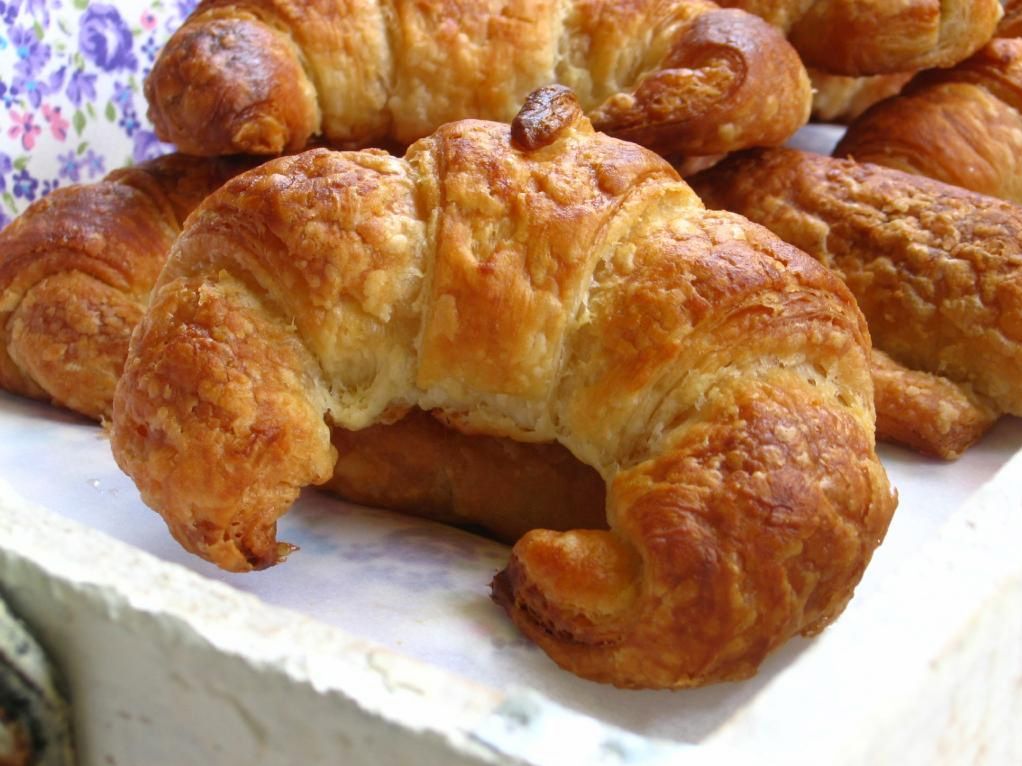
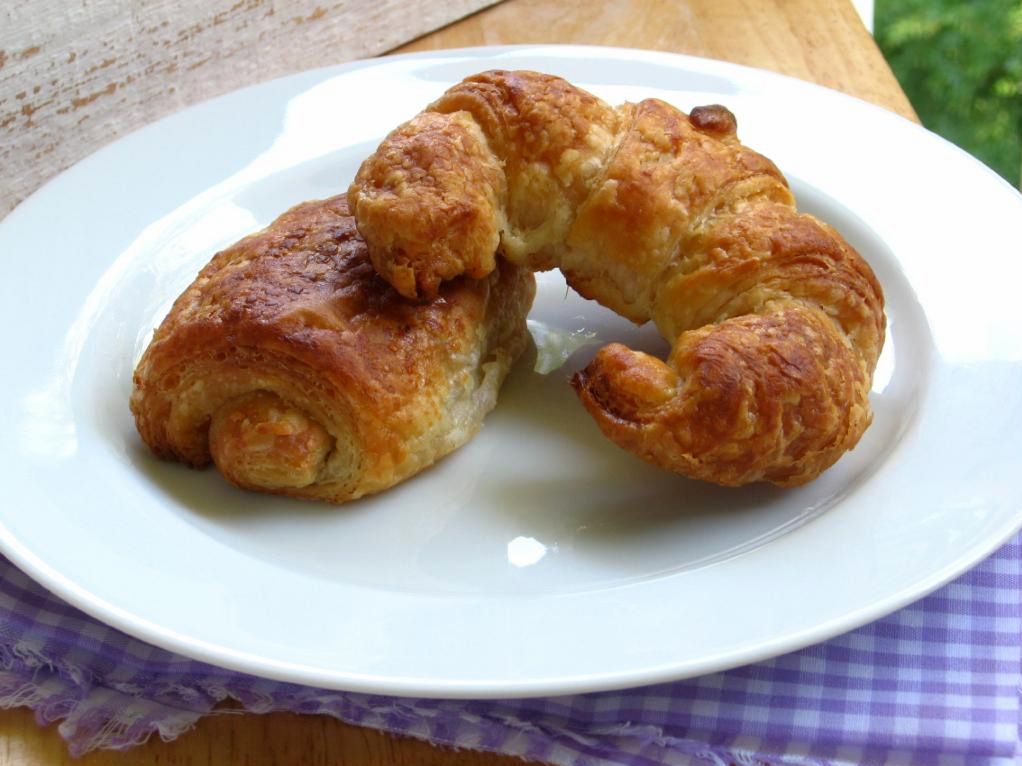
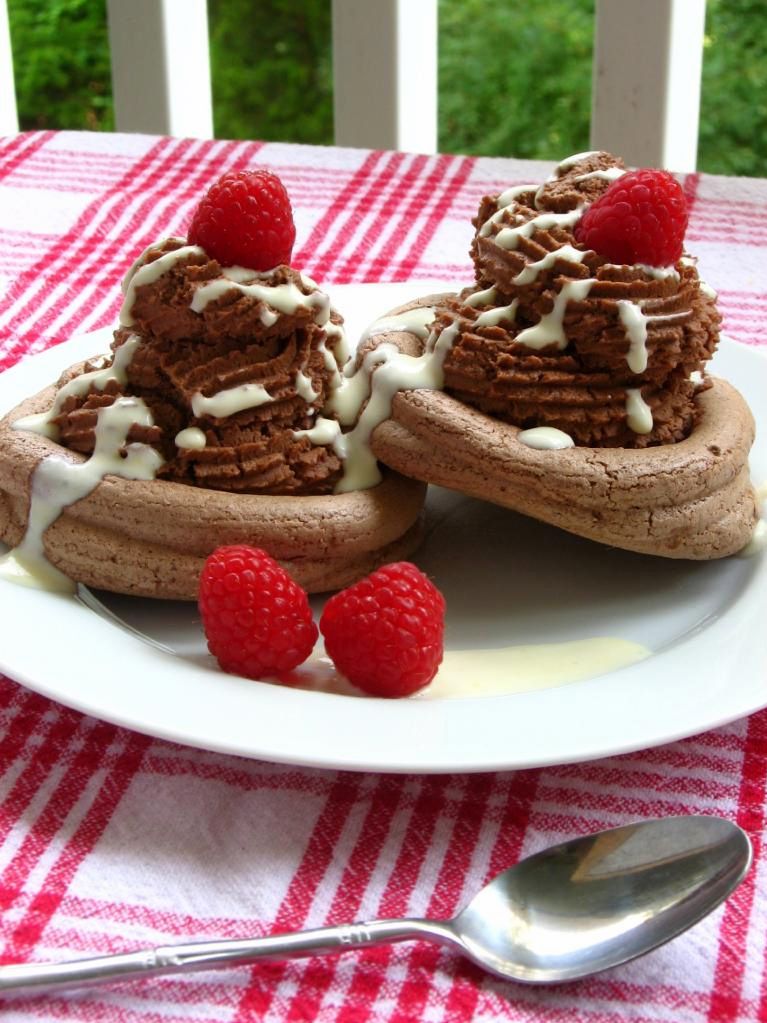
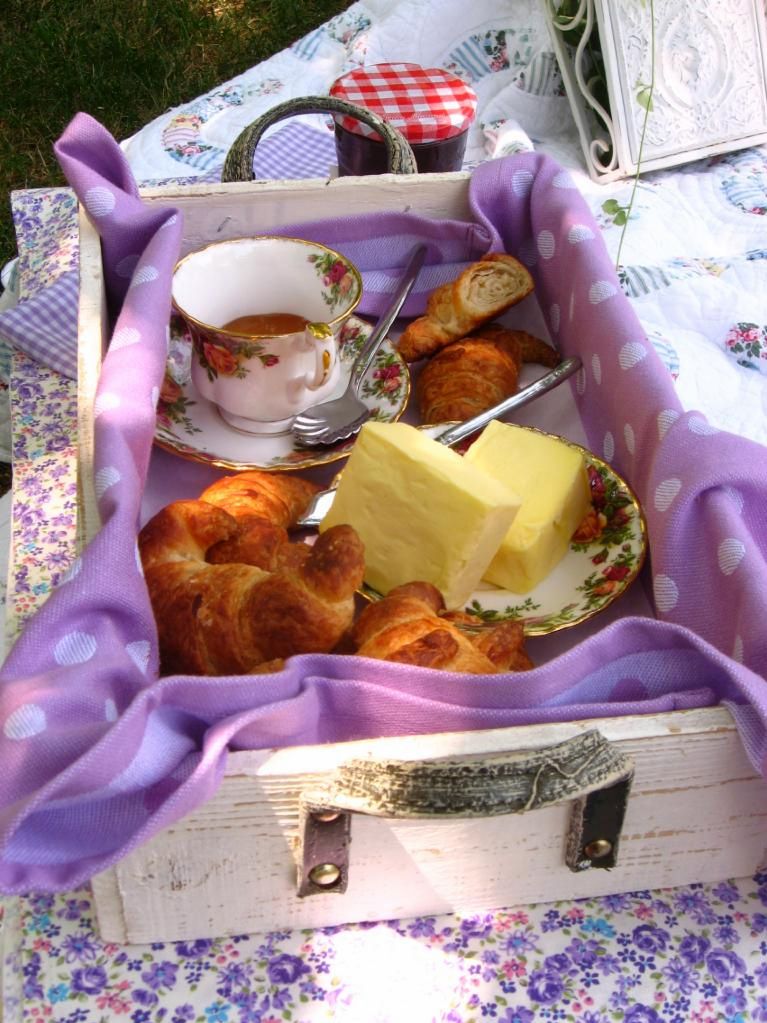
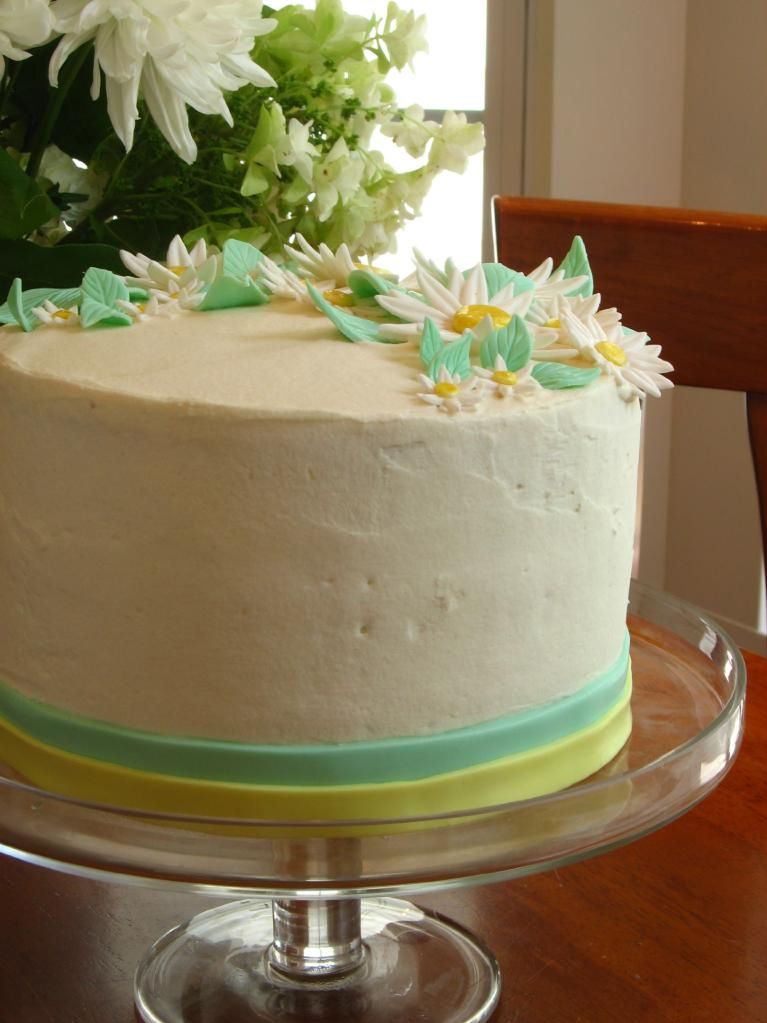
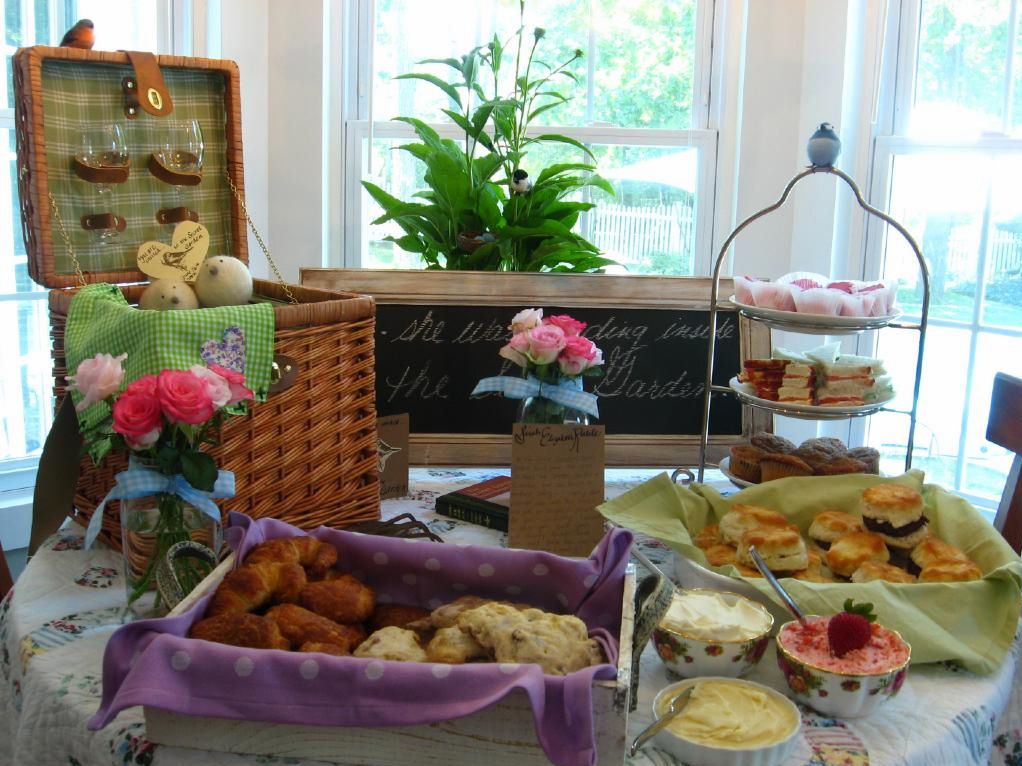
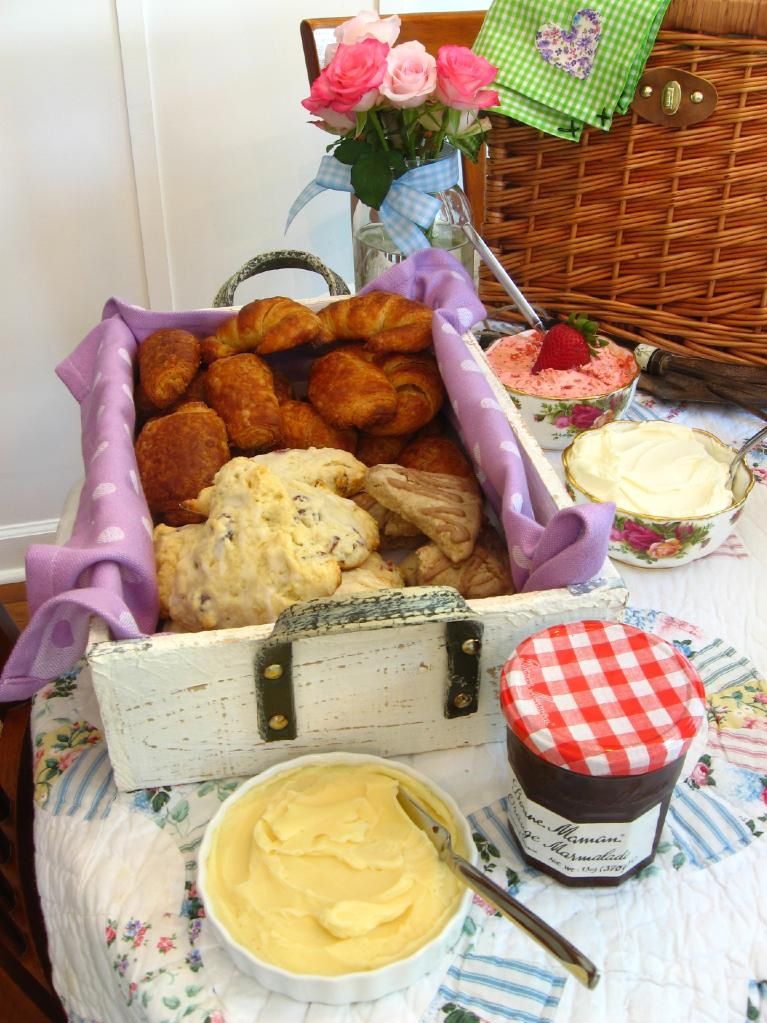
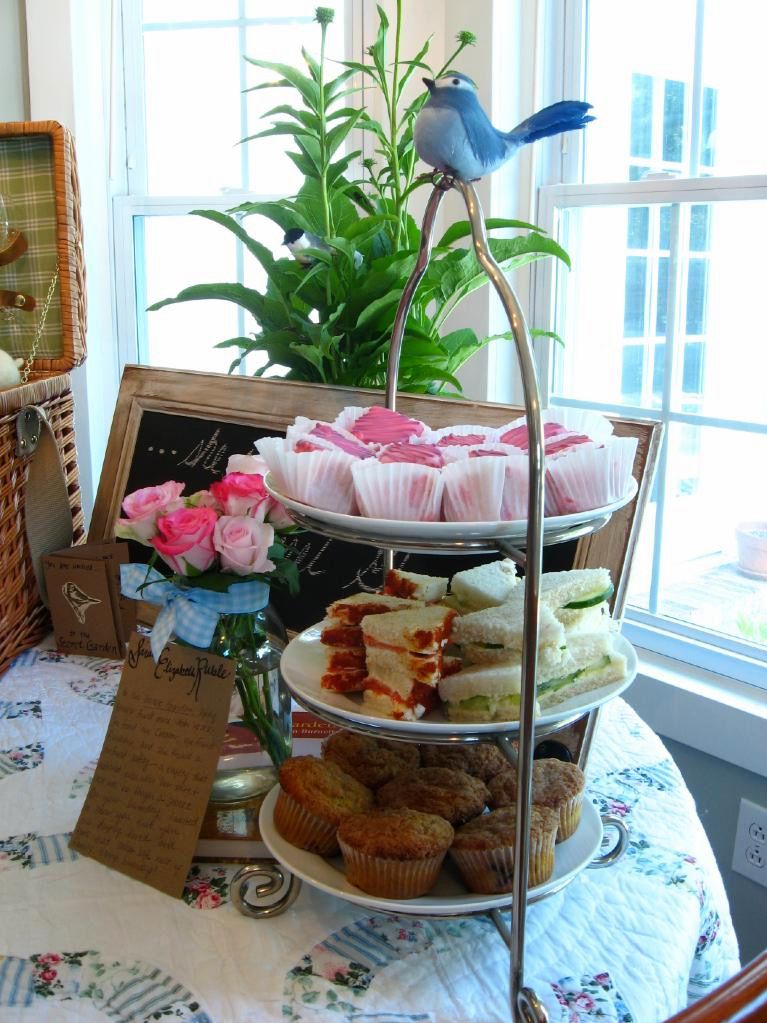
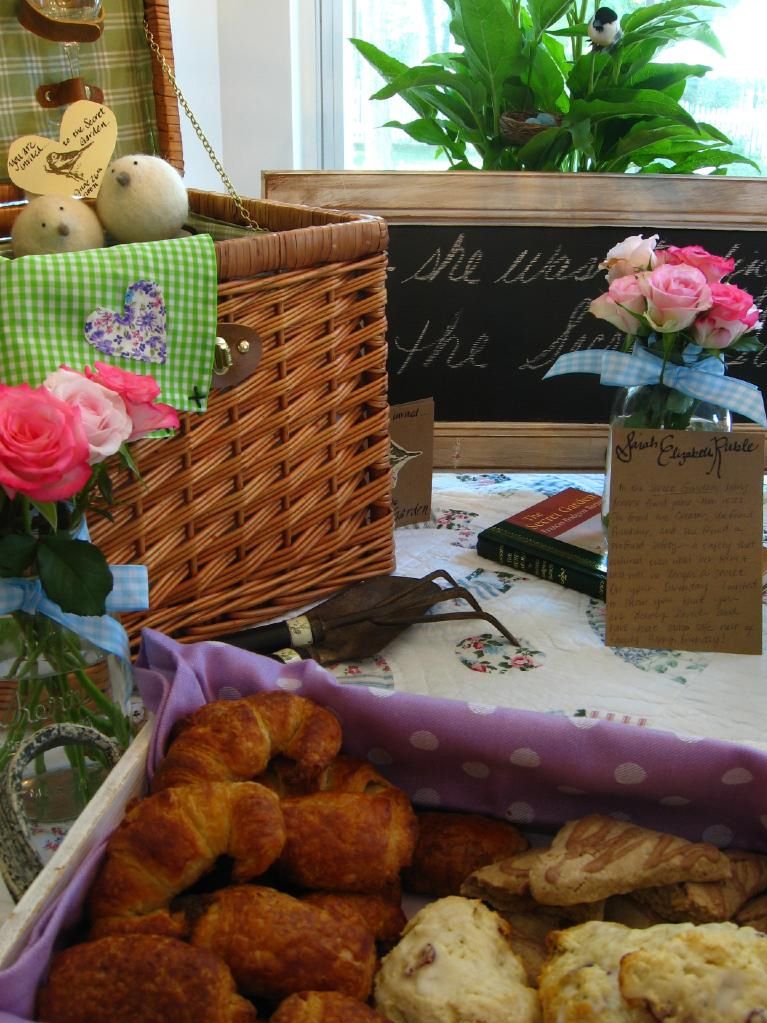
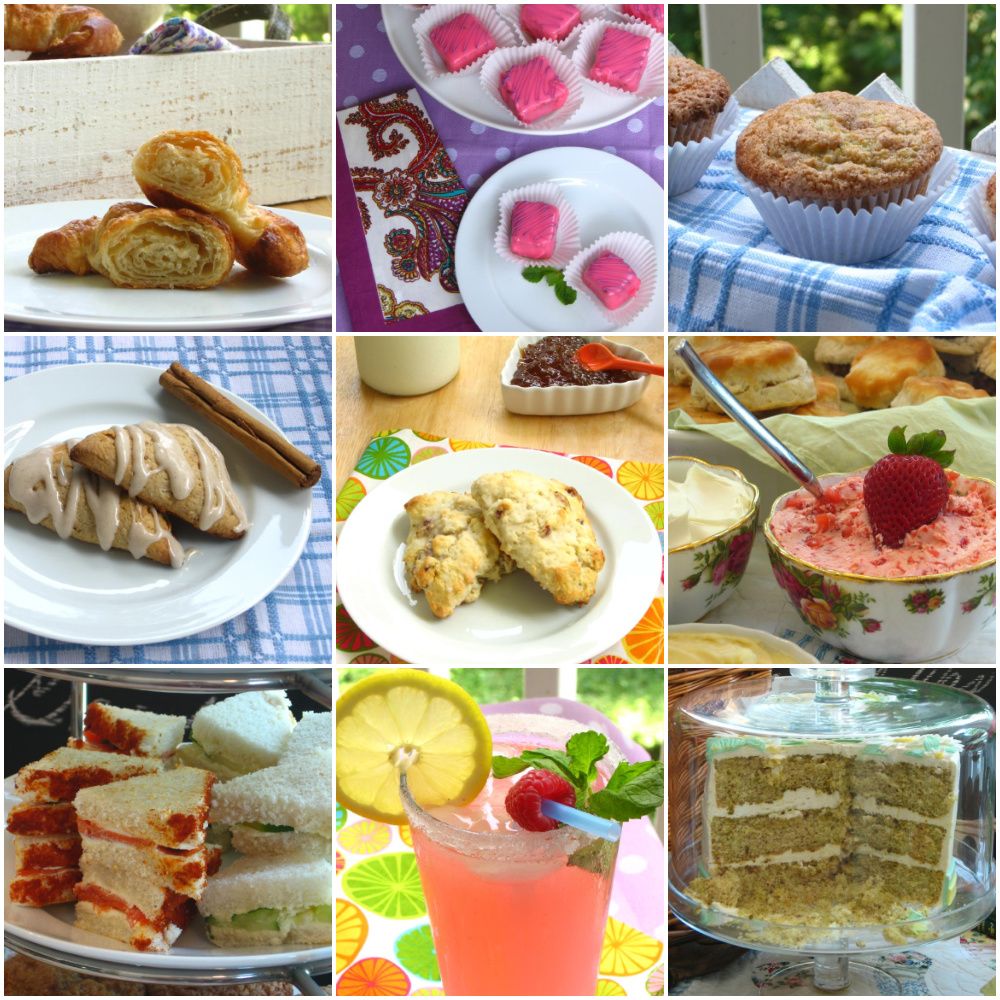
The picnic spread we created for Sarah’s party was inspired by this casual countryside food from the novel: summery tea sandwiches; fresh glazed scones with jam, strawberry butter, and clotted cream; strawberry almond petit fours; homemade croissants with butter; sausage biscuits; berry muffins; and pitchers of plain and raspberry lemonades. The crowning triumph of the birthday feast was a honeyed pistachio birthday cake smothered in buttercream, constructed with love by my mom.

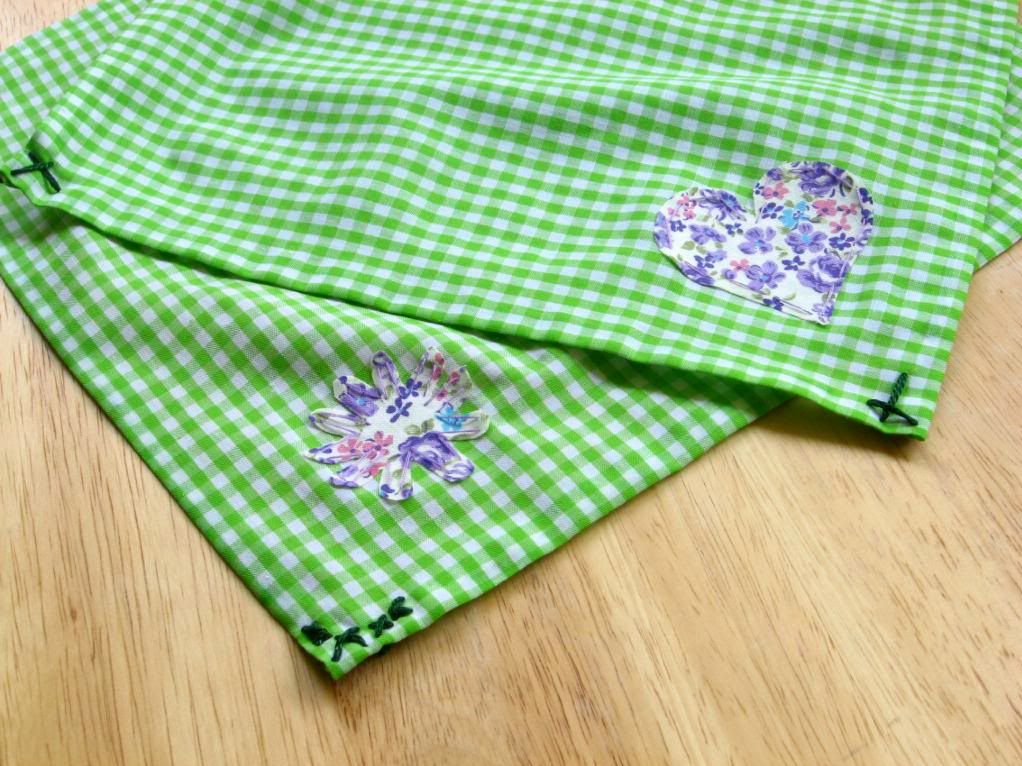
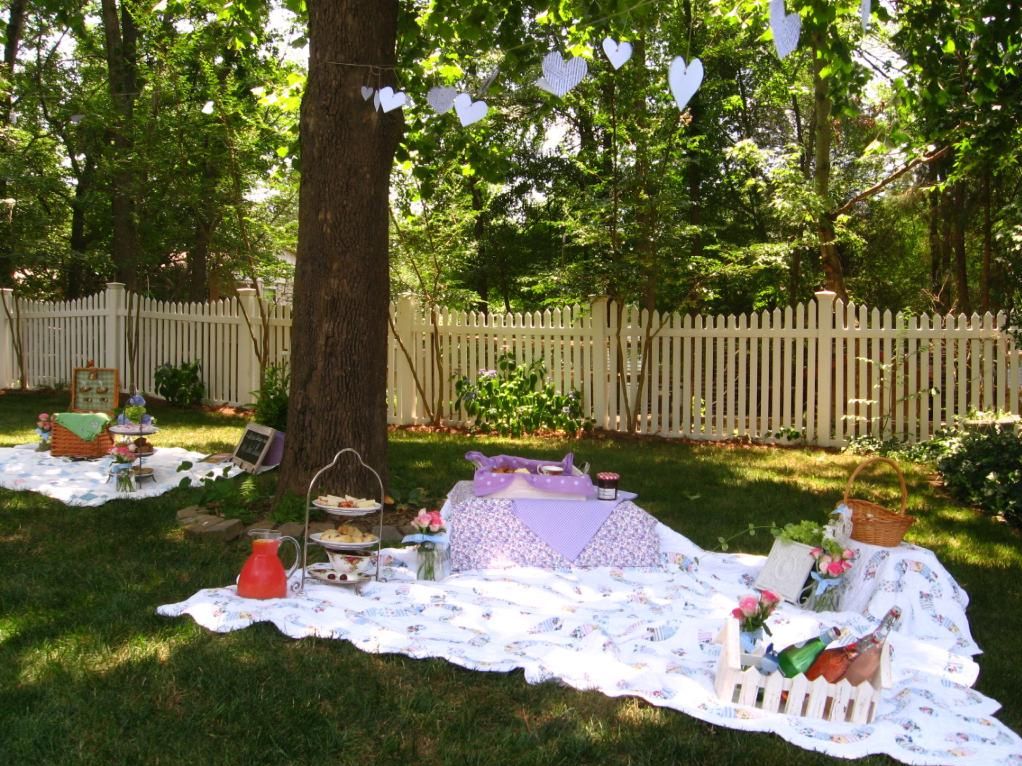
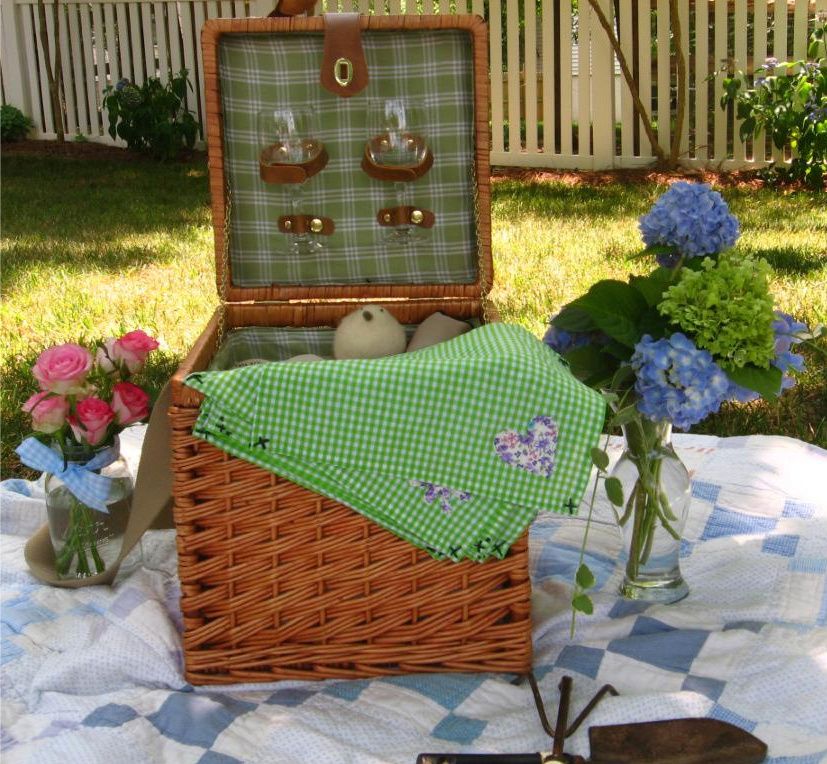
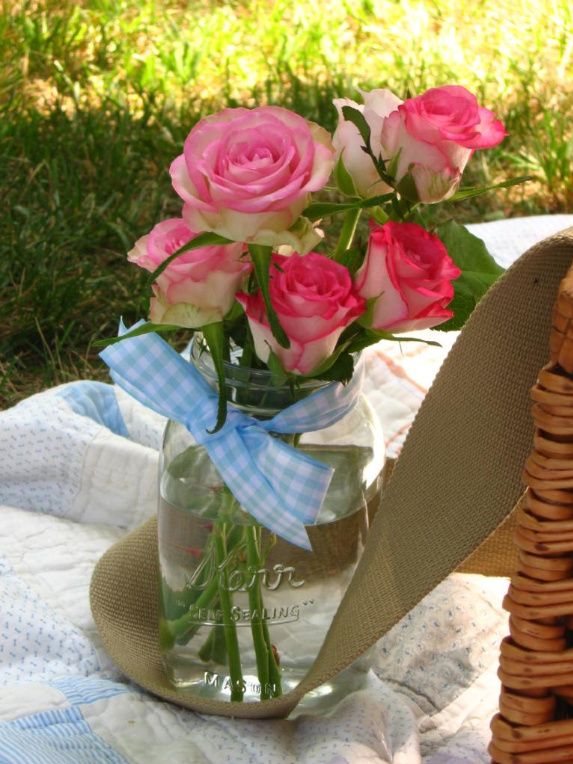
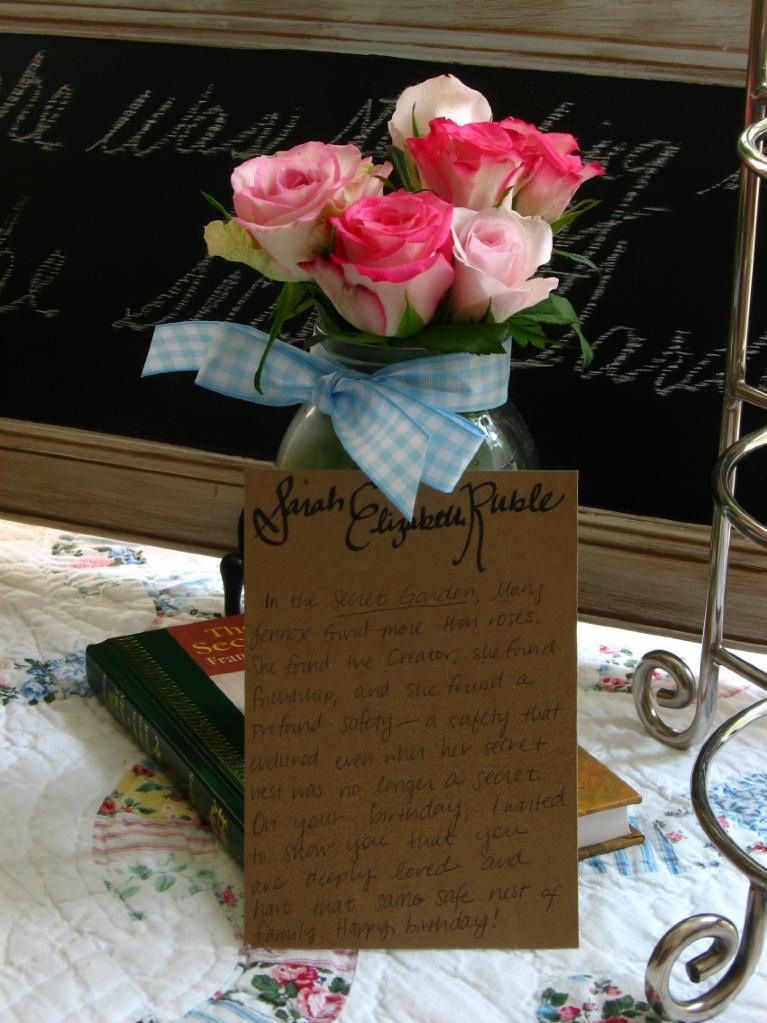
We needed more than piles of luscious food to construct the Secret Garden, though. Determined to create a picnic that seemed to come straight from the pages of the novel, I got crafty. I hand-stitched shabby chic gingham napkins, strung paper hearts from loosely draped hemp string, pasted together handmade invitations, and created mason jars full of fresh roses and accented with gingham ribbon. My mom hunted down faux birds, draped old floral quilts about, rustled up a lovely array of sweet dishes, and snipped heavy hydrangeas from her garden.

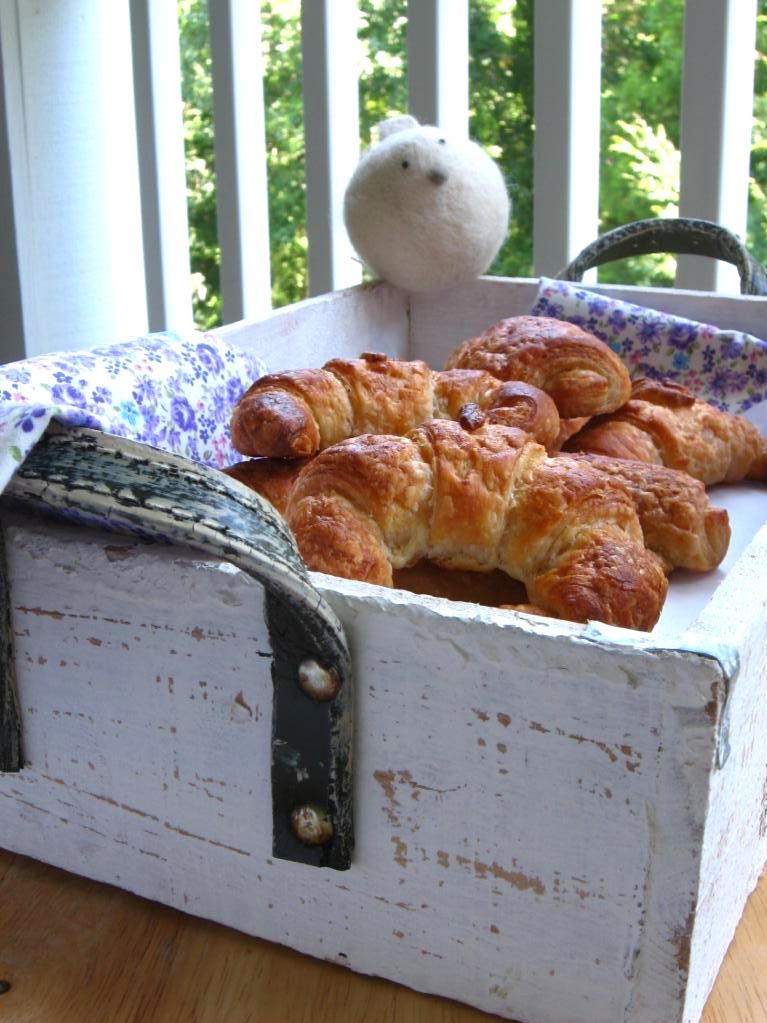
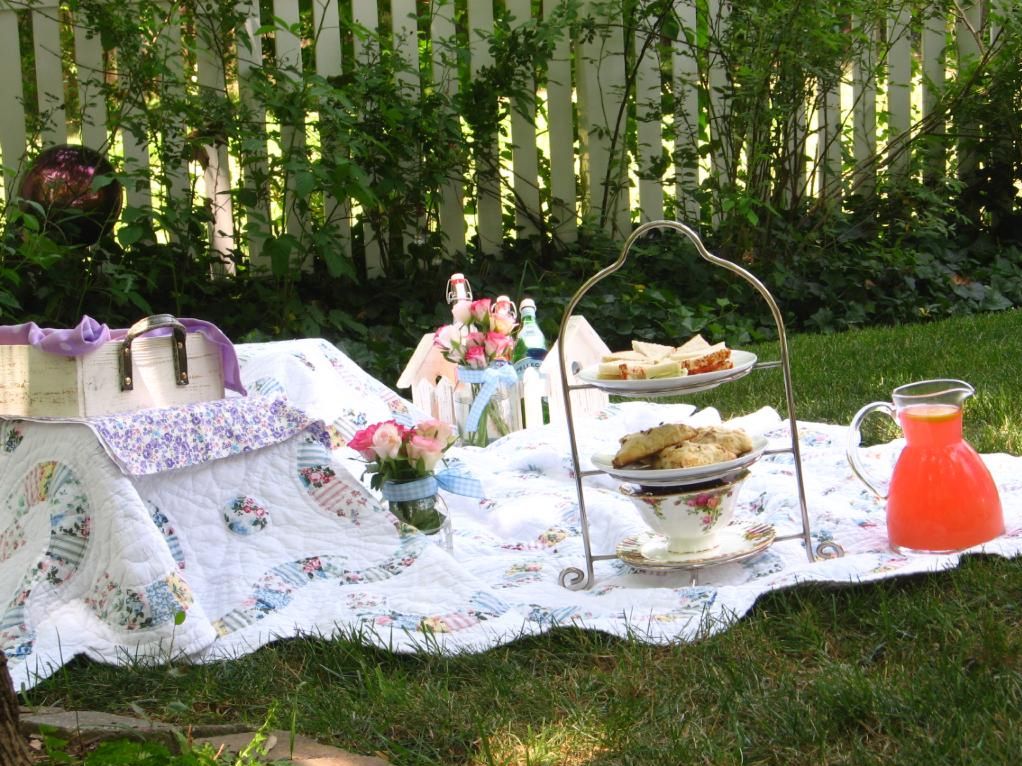
After half a year of dreaming and two weeks of intense planning, baking, shopping, and crafting, my mom and I set the entire picnic up in her lush backyard. We mounted ladders to string the handmade heart streamers from the branches of a huge tree, spread quilts, and arranged the feast onto tiered plates, rustic trays, and in baskets.

The photos you’ve been scrolling through thus far testify to how gorgeous the spread was, but Sarah never got to see that set-up. One of the biggest pieces of advice for picnic planning is have a plan B. A rainstorm, a heat wave, a fish storm — anything can happen to derail your plans. And derailed our plans were.


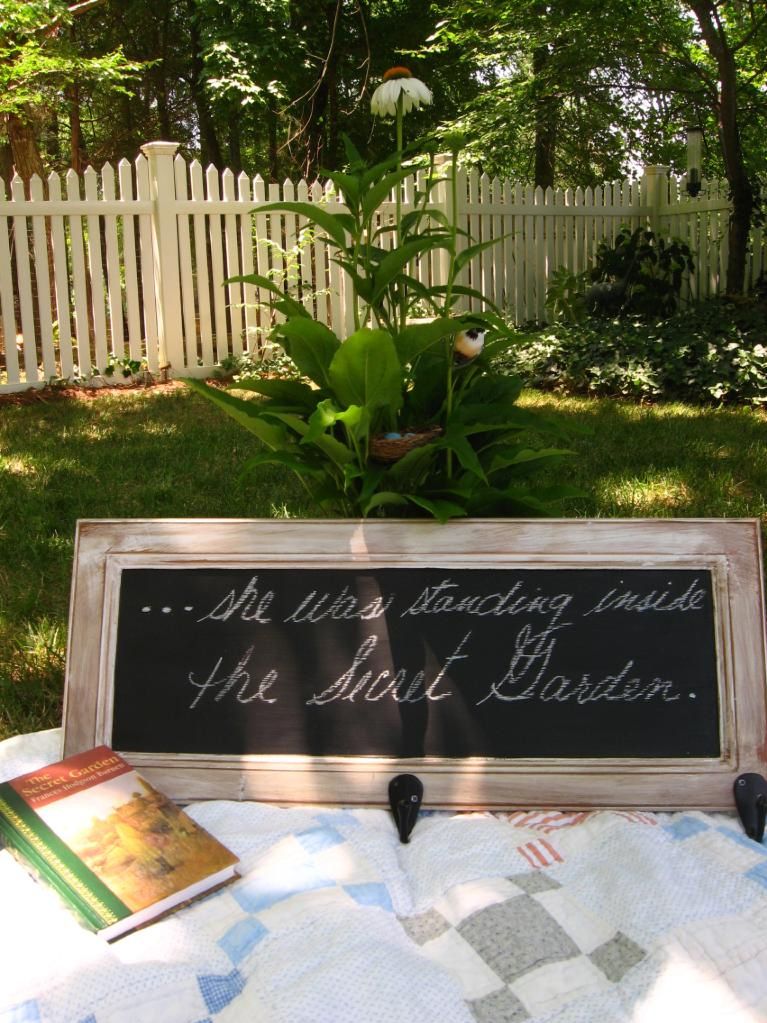
This chalkboard as well as many others can be found in my mom’s Etsy shop, Posh Pilfer.

Our outdoor picnic was attacked by flies during our photo shoot. Not one or two flies. An army of flies. Thankfully, we had only set out part of the food to photograph, and the rest was still safe inside. We threw out the besieged food and moved to plan B — an indoor secret garden. Truthfully, it was just as lush and gorgeous, if not moreso, and we were thankful to be without attendees of the, ah, insect variety. Welcome to the Secret Garden #2:


I think this one is more beautiful, anyway, don’t you?

This was the Secret Garden Sarah actually saw. On Saturday, I picked her up under the pretense of taking her to lunch for her birthday. I casually asked if we could stop by parents’ house to retrieve my present for her, which had been shipped there. She agreed without much thought, and we proceeded to chat in the car about unrelated things. In my brain, I was throwing a celebratory party for myself, having worried for weeks that I would accidentally give away the surprise. She seemed totally unaware! But the self-congratulations came to an abrupt halt when we drove past the grocery store by my parents’ house and she said, “Is that dad in the parking lot?!”

My dad had driven with Sarah’s boyfriend, Alain, and Mike to drop their cars off at the grocery store so they wouldn’t be visible at their house. So when Sarah thought she saw him in the parking lot, I almost had a heart attack! I drove quickly past, but I was privately panicking — what if dad hadn’t gotten them back in time?! What would I say if we walked in to this party I’d been planning for half a year to find only my mom and little brother milling about?! “Um, surprise . . . three of us are here to celebrate your, uh, birthday”?! My heart sank, and it was with great anxiety that I opened the door to my parents’ house when we arrived.

SURPRISE! Not only was everyone there (phew!), Sarah was completely shocked. I was shaking like a leaf as I pulled out her key necklace (shown in the first photo, above, and sold by grigio design) and fastened it around her neck, explaining that this was the key to the Secret Garden. I didn’t want to leave you out, so we filmed her surprised entrance into the picnic. You’ll see how incredibly long it takes me to fasten her necklace with trembling fingers, and hear Byrd’s exciting canine rendition of “Happy Birthday” — okay, maybe she’s just barking. Whichever.

[youtube=http://www.youtube.com/watch?v=rfXUORksbXA&hl=en_US&fs=1&]

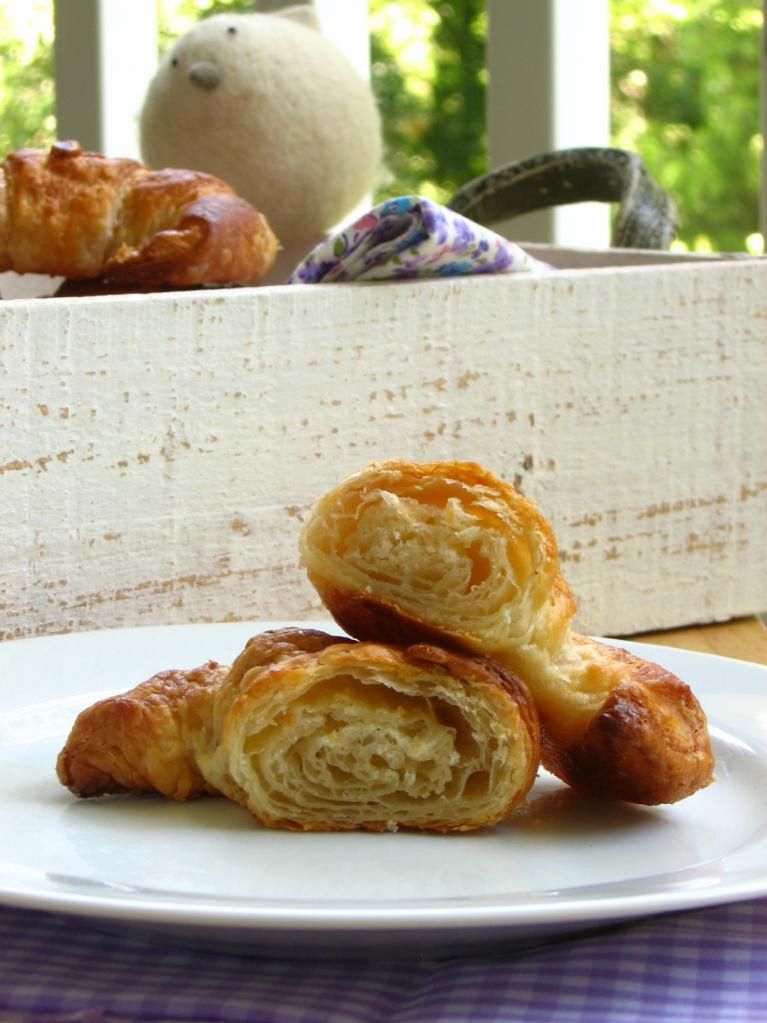
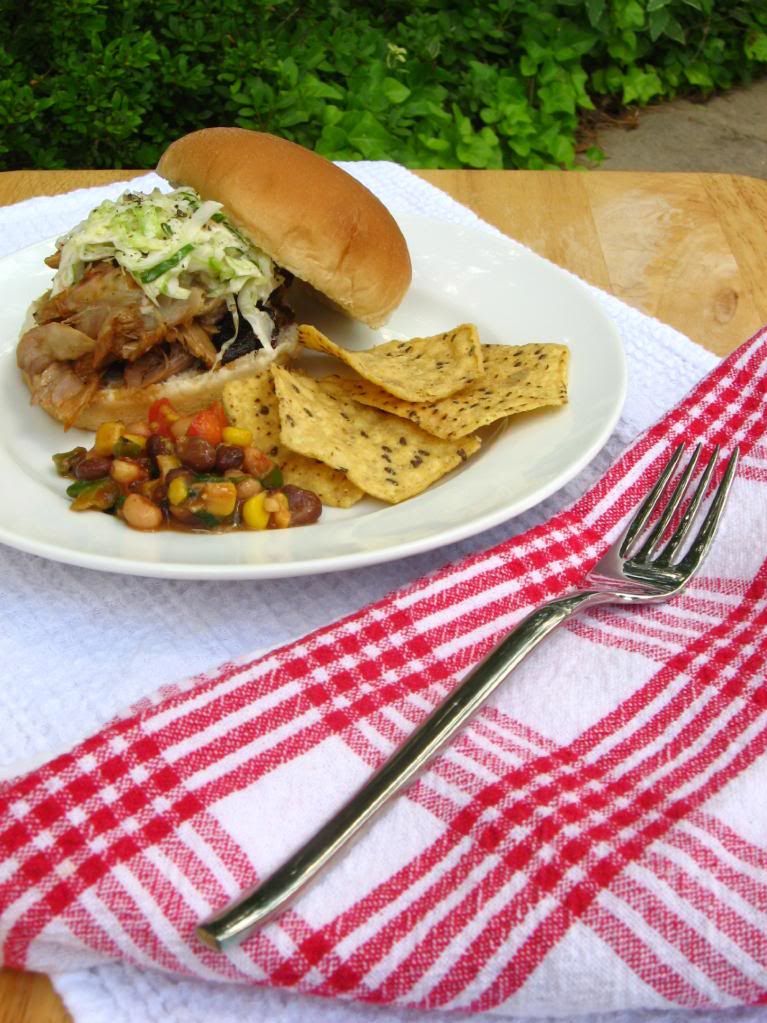
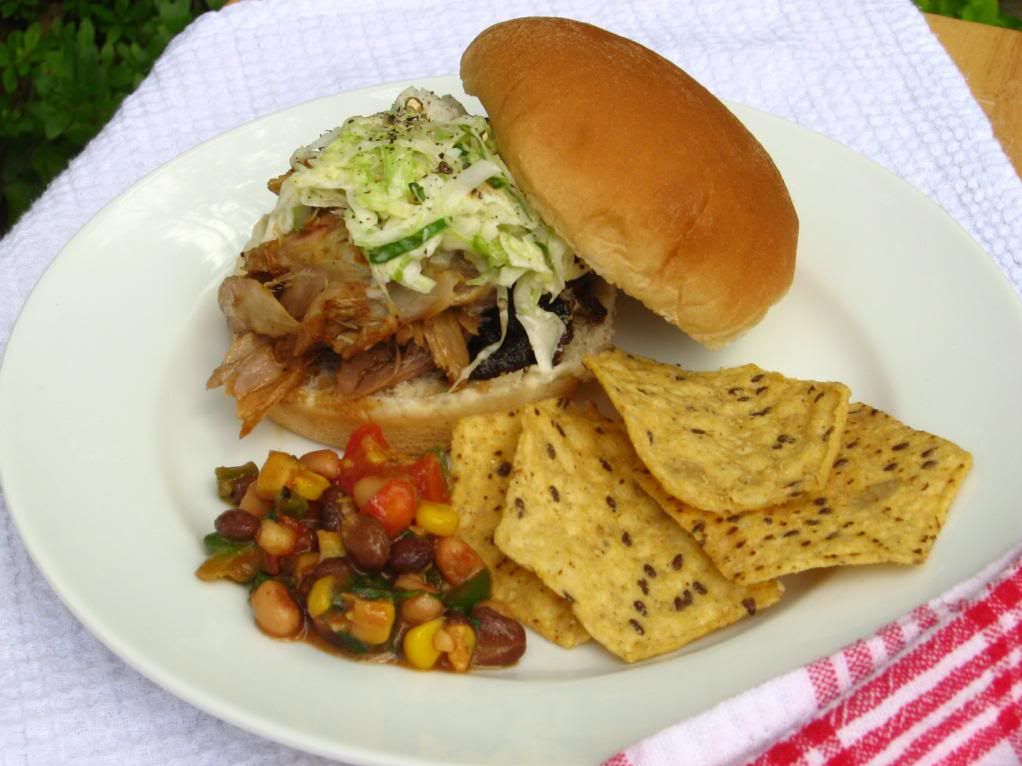
With the joyful surprise behind us, we picnicked! Pastries were devoured, tea sandwiches were daintily nibbled, plain and Lorina French Berry lemonades flowed (we found our Lorina products at World Market). The crisp, buttery pastry; fluffy, cream-slathered Buttermilk Cranberry Lemon Scones; and spicy Smoked Salmon Tea Sandwiches transported us. Huge slices of hearty, triple-layer pistachio cake was the perfect finale to our meal. Mary Lennox would have been proud.

Better than all the food, though, and better even than the lush garden decor, was finding a way to let Sarah know she’s important. The reason families everywhere take the time to construct big, wobbly birthday cakes (even when they’re not bakers) and hang silly streamers (even when they’re not crafty) and light a billion swirly wax candles (even when they’re not, um, pyromaniacs?) is to celebrate a person. What better way to do so than to tailor the celebration to a theme particularly important to that person? When I hugged Sarah goodbye at the end of our Secret Secret Garden Party, she knew she was loved.

Late roses climbed and hung and clustered and the sunshine deepening the hue of the yellowing trees made one feel that one stood in an embowered temple of gold. The newcomer stood silent just as the children had done when they came into [the garden’s] grayness. He looked round and round.

“I thought it would be dead,” he said.

“Mary thought so at first,” said Colin. “But it came alive.”


Sarah and her boyfriend, Alain.


Blowing out her candles.

In the coming weeks, I’ll be sharing with you many of the recipes and crafting ideas that created this party, including the following. As they are posted, they’ll be linked from this page, so bookmark this post to have them all handy. And stay tuned for some Secret Garden outtakes — elaborate party planning makes for some fun blooper photos, as it turns out.

Recipes

Craft Instructions

  1. Homemade Croissants and Pains au Chocolat
  2. Buttermilk Cranberry Lemon Scones
  3. Best Blueberry Streusel Muffins
  4. Buttermilk Brown Sugar Scones
  5. Strawberry Almond Petit Fours
  6. Smoked Salmon Tea Sandwiches
  7. Cucumber Tea Sandwiches
  8. Sparkling Raspberry Lemonade
  9. Fresh Strawberry Butter
  10. Pistachio Cake with Honeyed Buttercream
  1. Paper Heart Streamers
  2. Handmade Robin Invitations
  3. Hand-sewn Luncheon Napkins
  4. Shabby Chic Flower Jars

I’d love your opinion: Which recipes and crafts from the Secret Secret Garden Party are you most excited to see?

If you liked this post, please:
Subscribe to Willow Bird Baking
Follow Willow Bird Baking on Twitter
Follow Willow Bird Baking on Facebook
Give this post a thumbs up on StumbleUpon
Buzz this post up on Foodbuzz’s 24×24 site!


ShareOther ways to share this post with friends!

Pulled Pork Sandwiches, Creamy Coleslaw, and Summer Bean Salsa

Yesterday was a special day on Willow Bird Baking — my one year blogiversary! Considering a given blog post can take upwards of 10 hours to produce including baking, photographing, and writing, this blog now represents over 500 hours of my crazy kitchen capers! I’m humbled by how much WBB has grown, from 450 views in June of 2009 to an average of 65,000+ views per month in April and May of this year. Your readership means so much to me, and I want to sincerely thank you for joining me on this fun, tasty adventure. But as excited as I am about my blogiversary, there is something much, much more important to tell you about today!

My daddy! Tomorrow is Father’s Day and I’ve been holding on to one of my Dad’s special recipes to share with you in honor of the occasion. We’re a family of barbecue lovers. We love it all — from pulled pork sandwiches at Charlotte’s annual Mallard Creek Barbecue to sticky ribs at Gastonia’s Hillbilly’s Barbecue. But my favorite pulled pork sandwich comes right off my dad’s grill!

The grillmaster up there uses a fantastic barbecue rub on a big pork butt, and cooks it all day until it’s fork tender. We shred it onto buns for juicy, fresh pulled pork sandwiches! I top mine with a heaping spoonful of my mom’s creamy coleslaw — it’s got the perfect amount of sweetness to complement the slightly-sweet pork rub, and the whole sandwich just melts in your mouth. When accompanied by a side of fresh, bright bean salsa (sort of like a tangy pico de gallo), this is a fantastic summer meal.

Besides the fact that he can create amazing dinners at the grill, there’s a lot I want to tell you about my dad this Father’s Day! There’s really no way to describe what my dad means to me, but in typical Willow Bird fashion, I’ve decided to give it my best shot with a list. I love my dad because:

1. When I was a little girl, he’d sing songs to me. From “Don’t Worry, Be Happy” to “Julie, Do You Love Me?” he always had a song to make me smile. I always thought he had made the latter song up himself, and was surprised to learn otherwise as an adult! Who would’ve thought there’d be a song ready-made with my name in it?

2. He has always worked so hard for our family. He’s often worked 3 jobs at once to provide for us, without ever complaining about the stress. He currently works 2 jobs.

Best Barbecue Rub


Recipe By: Chris Schlesinger

Ingredients:
2 tablespoons salt
2 tablespoons sugar (or use splenda for low-carb BBQ)
2 tablespoons brown sugar (or use brown sugar substitute for low-carb BBQ)
2 tablespoons cumin
2 tablespoons chili powder
2 tablespoons black pepper
1 tablespoon cayenne pepper
4 tablespoons paprika
2 tablespoons garlic powder

Directions:
Mix together. To use, rub into meat and let sit overnight (or as long as possible) before grilling.

3. His incredible kindness inspires everyone he meets. I once walked into his workplace, where he is a manager. Someone heard me ask for him and took the time to come over and say, “Are you Rick’s daughter? He is a great man” — as if I didn’t already know!

4. He got me ready for school when I was little. Every morning he would blow-dry my hair, comb it into a (sometimes lopsided) ponytail, and place a big bow in it.

5. In addition to getting me ready for school, he took us to school every morning for over a decade. We listened to country music in the car. We didn’t have a ton of extra money, but every day he’d give me my lunch money and 35 cents extra. When school let out, I’d walk across the street and use my 35 cents to buy a cherry coke at the Bi-Lo. I’d sit and drink my soda waiting for him to pick my sisters up and then come to get me.

Creamy Coleslaw


Recipe by: Mom
Yields: about 6 servings

Ingredients:

1 head cabbage, shredded with food processor
1 onion, shredded with food processor
1 carrot, shredded with food processor
6 tablespoons sugar (or splenda)
4 tablespoons white vinegar
2 teaspoons salt
1/2 teaspoon black pepper
dash cayenne pepper
1-2 tablespoons mayonnaise to taste

Directions:

Put cabbage, carrot, and onion through food processor. Mix sugar, vinegar, salt, pepper, and cayenne pepper and coat slaw in it well (slaw will lose volume as it sits, so this will be enough dressing). Refrigerate and add 1-2 tablespoons of Hellman’s mayonnaise when ready to serve, if desired. Can add green pepper or other items to change it up.

6. When my mom went back to college in the ’80s, Dad would periodically pile us in the car and, to my great joy, take us to McDonald’s!

7. Speaking of food, Dad and I share the same food favorites. He introduced me to all sorts of Charlotte culinary wonders: the Chicken Box, Price’s Chicken Coop, Town ‘n Country, the late great Coffee Cup, and the aforementioned Hillbilly’s Barbecue. He’s one of the only people in my family (other than me) who doesn’t wince at the thought of getting a juicy grilled hot dog from a gas station.

8. He has always showered love on us in acts of service. He used to bring me lunch each Friday when I worked across the street from him. He files my taxes for me. He’s always available to listen and assess weird car noises or change my oil.

9. When he worked third shift, I would fall asleep in bed next to my mom. Every night he would pick me up and carry me to my bed. Even when my sleeping quarters moved downstairs, he’d dutifully pick me up and carry me down!

10. He was so courageous throughout his battle with cancer — even though I wanted to support him, he often supported me and the rest of our family and tried to assuage our fear.

Summer Bean Salsa


Recipe By: Jeannie and my mom

Ingredients:

1 15-ounce can black beans, drained and rinsed
1 15-ounce can black eyed peas, drained and rinsed
1 15-ounce can whole kernel corn
1/4 cup cilantro, chopped
1/4 cup green onions, chopped
2 fresh tomatoes, chopped
1/2 cup green pepper, chopped
2 cloves fresh garlic, minced
1 can jalapeño peppers, chopped
Italian salad dressing, to taste

Directions:

Mix all ingredients together, cover, and refrigerate for a day. Serve with tortilla chips.

And most importantly . . .

11. He is a man of God who taught me about Jesus. One day when I was a little girl riding in his old red car, he asked me if I wanted to pray and ask Jesus to be my Savior. I told him I did, and he helped me pray to receive Christ. A decade later, I would come downstairs early in the morning to find him in his big reading glasses reading the Bible with his breakfast.

I truly wish everyone could have a dad like mine. Many people around Father’s Day say that they have the best dad in the world, but of course, I think mine takes the cake (or maybe the pulled pork sandwich). Dad, you mean so much to me. Thank you for all you do and for who you are! I love you!

Readers, tell me about your dads!


Share Share this post with friends!

1 59 60 61 62 63 69