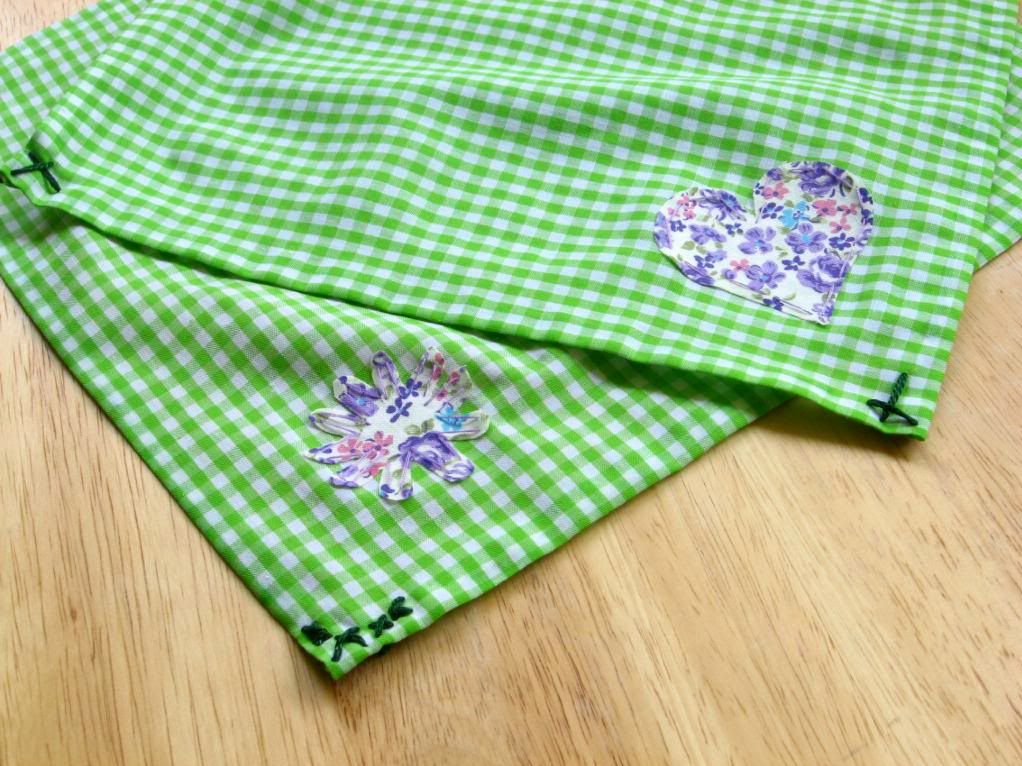
Part of making a celebration special is the thought behind it. I wanted the Secret Secret Garden Party to be particularly special for my sister, so I decided to incorporate some handmade touches — things that showed thoughtfulness in their detail. There was a problem, though.
I am not crafty.
I love the idea behind crafting and think I could be good at scrapbooking, sewing, quilting, knitting, crocheting, jewelry making — if I had 42 hours in a day instead of 24. But I don’t have any extra time, so I don’t have any experience in the crafting world. My mom regularly encourages me to take up sewing, and I regularly reply that I need another hobby like I need a lobotomy (which, in case you’re wondering, is not at all. Yet.)

So, how do you add a handmade touch to a party without many crafting skills? Presenting simple, low-sew luncheon napkins for the crafting impaired.
While these do take a little bit of time, no sewing machine is required, and you can dress them up or down depending on the effort you want to expend. This quick craft is great for adding a handmade touch to a celebration, creating color-coordinating napkins for your table, or dipping your toes into the cold crafting water. I loved that I could sew on little appliques in contrasting fabric to make a sweet, shabby chic product.

Simple Sweet Luncheon Napkins
Help with this craft: DIY Maven
Yields: 9 luncheon napkins
Supplies needed:
2 yards fabric for napkins
1/4 yard fabric for appliques (optional)
Liquid Stitch or similar product
iron
clear nail polish
ruler
scissors
needle
thread (I used embroidery thread for decorative cross-stitching, and regular thread to stitch around the appliques)
Directions:
1. Cut your napkin fabric into 13″ x 13″ squares.
2. On each square, fold over the right side of the napkin 1/4″ and press well with the iron. Fold the right side over another 1/4″ and press well. Repeat these two folds on the left side.
3. Fold each corner down, forming a small triangle, and press these well.
4. Now fold the top down 1/4″ over the triangle and press well. Fold it over another 1/4″, press well, and then pin. Repeat this with the bottom.
5. Use a simple cross stitch to secure the corners. Sometimes I used just one large X, over times I flanked it with smaller cross-stitching on either side. It’s up to you. You can use embroidery thread or regular thread in a contrasting color for this.
6. Use a cotton swab to evenly apply Liquid Stitch under the top, bottom, left, and right edges, pressing firmly to seal. Now your napkin is complete and ready to embellish, if you wish!
7. Cut out shapes of your choice from contrasting fabric. Use clear nail polish to lightly paint the edges so they won’t fray.
8. Attach your applique with a little liquid stitch to the location of your choice.
9. If desired, use a needle and thread to stitch around the applique to give it a sweet handmade feel.
10. Repeat these steps on all napkins. Let napkins dry overnight. If you liquid stitch the applique well and secure the mitered corners carefully, these will probably be fine being machine washed on gentle. I’m using mine more for decorative purposes.

If you liked this post, please:
–Subscribe to Willow Bird Baking
–Follow Willow Bird Baking on Twitter
–Follow Willow Bird Baking on Facebook
–Give this post a thumbs up on StumbleUpon
![]() Other ways to share this post with friends!
Other ways to share this post with friends!
7 Comments on Secret Garden Craft: Simple Luncheon Napkins
1Pingbacks & Trackbacks on Secret Garden Craft: Simple Luncheon Napkins
-
[…] Secret Garden Craft: Simple Luncheon Napkins « Willow Bird Baking July 9, 2010 at 8:46 pm […]


Meggie Wallace
July 9, 2010 at 9:30 pm (15 years ago)These are so darn cute!!!!!!!!! Definitely will have to make them one day :3 No sewing machine, so it’s perfect!
I just love this site so much. I keep up, but only have time to stalk! 🙂 Much love! <3
Julie
July 9, 2010 at 9:36 pm (15 years ago)Aw, thanks Meggie! I’m grateful for your readership!
I’m sewing-machine-less as well. I had originally planned on hand-stitching around all of the sides, and then realized that I was insane. That’s when the Liquid Stitch was thrown into my shopping cart! It turned out perfectly, because it took the tedious part out of the craft and just left the fun, creative bits 🙂
Monica H
July 11, 2010 at 2:09 am (15 years ago)Must get my hands on a bottle of Liquid Stitch!
Jessica
July 13, 2010 at 1:33 am (15 years ago)What an adorable idea! I have a baby shower, that I am hosting, coming up soon…and I love this idea! Thanks!
Julie
July 13, 2010 at 9:14 am (15 years ago)Thanks, Jessica! 🙂
Lorraine @ Not Quite Nigella
July 14, 2010 at 9:16 pm (15 years ago)Aww they’re so sweet Julie! I wish I had crafting skills too but these are totally doable, even for me! 🙂