I just sat down to write a beautiful post about rain on nighttime windows, the birdcry of feathery sentinels on the dark, and the gentle crunch of a buttery croissant. Moments of transcendence . . .

. . . and then I found a glob of meringue stuck in my hair. Not related to gorgeous French pastries, but I knew you’d want to know.
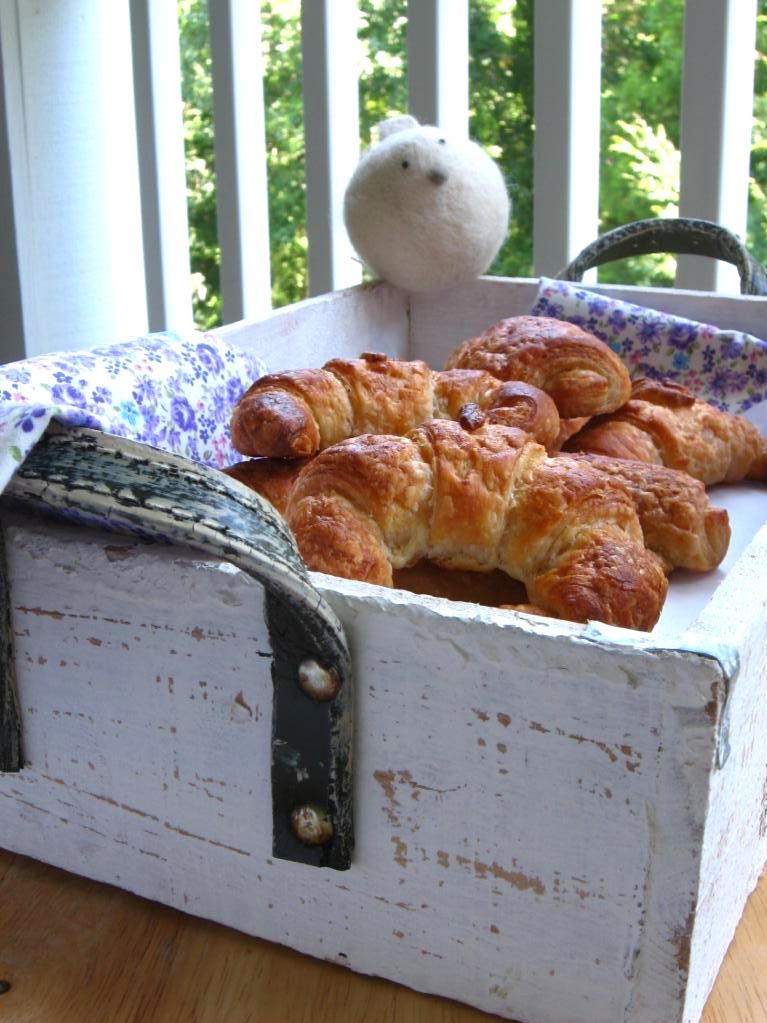
Back to pastry. Certain achievements in the kitchen really ice the culinary cake for me. These croissants are without a doubt my proudest moment in the kitchen thus far.
I understand the sentiment I’ve heard so often, expressed by so many people: “Why make it, when you can get it from the store or bakery and it’s just as good?” That’s fine. Sometimes you want a sheet of puff pastry as a means to an end. Sometimes you just want a croissant without two days of work. I get it. I’m not a food snob. Even though I think you’d sacrifice some taste in the croissant department, if you want a pre-made croissant every now and then, go for it. But . . .

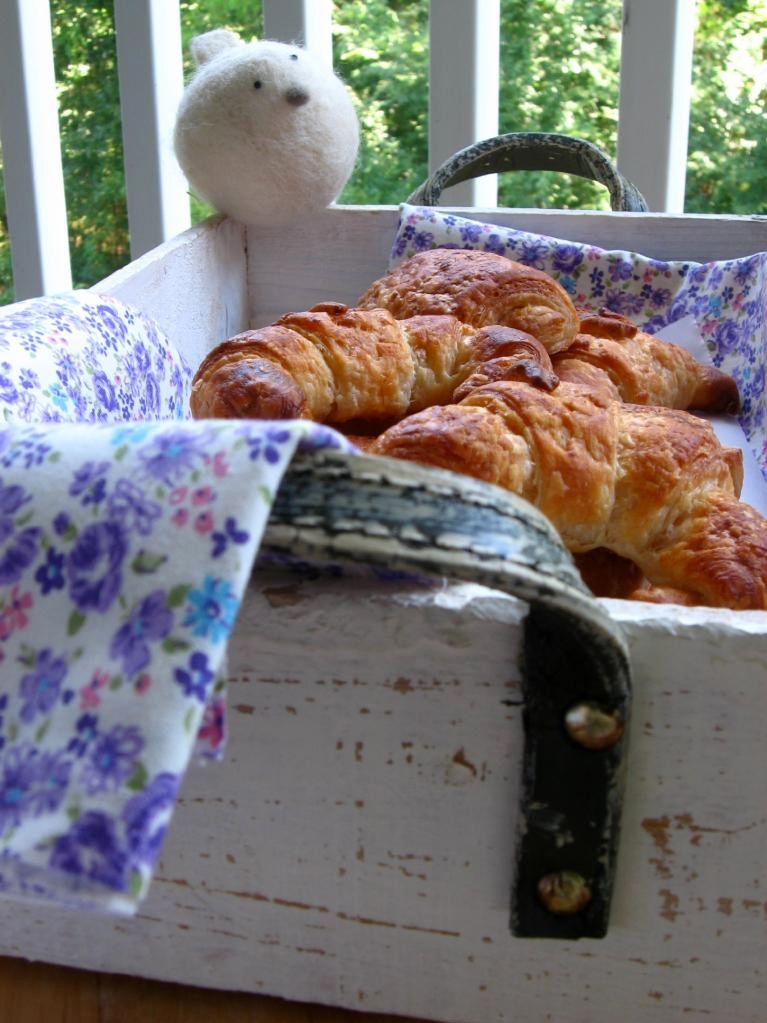
Beautiful layers.
But I have a goal. My goal is to inspire you, at least once, to make these croissants. When I say “you,” I don’t mean Martha Stewart. I doubt she’s in my readership just yet. I mean you. You who have only made box cakes. Or you who bakes up a storm but feels intimidated by this whole “laminated dough” thing. Or you who thinks you could never accomplish this. I want to make you take a chance. If you’ve never made croissants before, I’m talking to you.
You.
I was nervous, too. There are pages dedicated to croissant comparisons, discussions about how to get the best layering, and hundreds of thousands of mixed recipe reviews to wade through. I saw pictures of failed attempts and read overly detailed and confusing instructions.

In a laminated dough like this, you pound sticks of butter into a thin block and fold them into the dough like a letter in an envelope. The “laminating” process involves rolling out this dough package containing the cold butter layer, folding it, and rolling it out again. Lots of chilling occurs between these folds to ensure the butter stays cold.
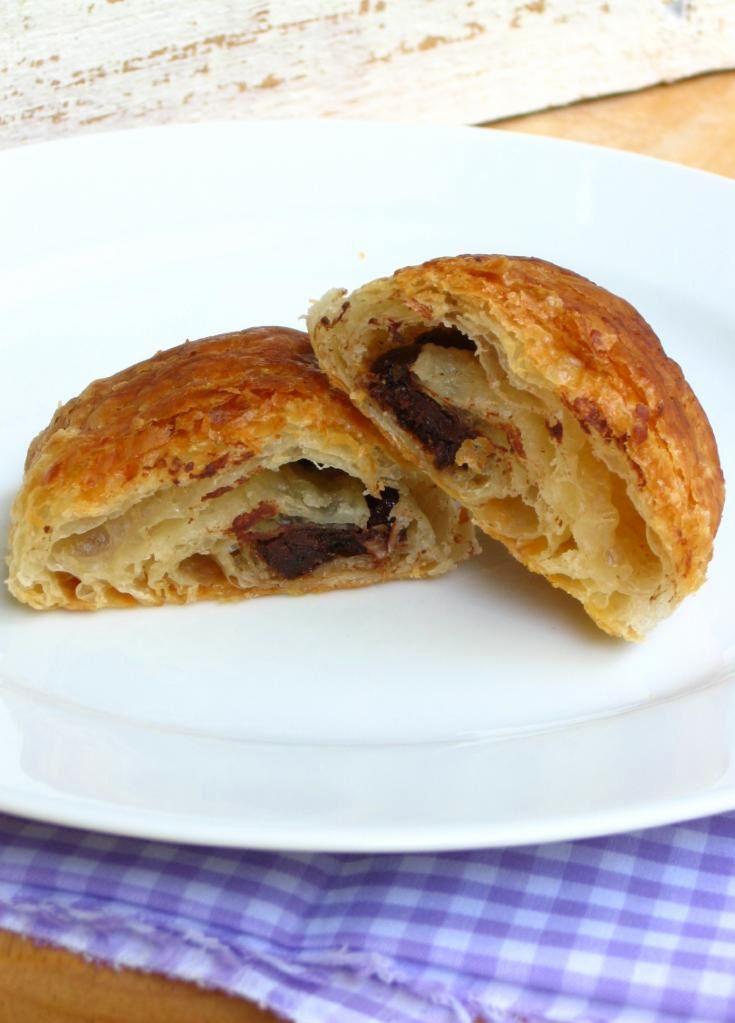
Cross-section of a pain au chocolat.
Each fold produces layers of dough-butter-dough-butter, allowing for those gorgeous puffy layers you get when you finally shape and bake the croissants. Having made puff pastry before, I knew that if I could get past the first fold of the dough, I could complete the recipe. The dough becomes so much more manageable at that point, and it’s really just repetition from there until the end. But would I get there with this notoriously sticky dough? And why did the first fold seem so far away when I was standing in my kitchen with gloppy fingers? I was scared.
But you don’t have to be scared. If I did it, you can do it.

Another gratuitous cross-section of a croissant.
You may shudder at two days of kitchen labor, but you get in the swing of the turns after the first one and feel pretty amazing every time you nestle your beautiful rectangle of croissant dough into the fridge again. Even though the recipe looks long, it’s actually extremely straightforward, detailed, and simple to follow. But the real reason you should bake these croissants, though, is to have these croissants. To say the results are worth it is an understatement.

Apart from an incredible self-esteem boost, this recipe yields truly beautiful French pastry. The deep golden brown crust is slightly crisp, and every layer is full of intense buttery flavor. I had envisioned topping these croissants with honey and jam and all sorts of goodness, but couldn’t bring myself to put a thing on them except a bit of butter. They were too perfect all by themselves.
Also making your effort worthwhile is the fact that these are easily frozen after shaping and before proofing — so you can thaw overnight, proof, and bake a few anytime you desire. Baking up French pastry that melts in your mouth with every bite? Having a stash of homemade croissants waiting in your freezer? Knowing that you made those flaky, heavenly layers your family is relishing? It’s worth it, y’all.

Now. Rubber, meet Road. Here’s my challenge to you. I want you to commit in the comments section to make these croissants. If just one person who previously thought, I could never do that, ends up pulling their homemade croissants from the oven because of this post, I will be one happy food blogger.
I’ve included several resources within the recipe to help you with some of the parts you may not be familiar with just yet. I’m also available to answer any question you’ll post in the comments section as best as I can. I want you to feel the same joy I felt at accomplishing this feat, and I want you to taste these delicacies. What do you say?
|
If you’ve committed to croissant and don’t see your name on the list, please leave a comment and let me know I’ve missed you! After you make your croissants, please let me know how it went and send pictures (if you can) of you with your masterpiece. I’ll be posting them on Willow Bird Baking to show you off!
Homemade Butter Croissants or Pains au Chocolat
Recipe by: Adapted slightly from Gourmet
Yields: Around 24 small croissants or 36 small pains au chocolat
Ingredients:
1 1/2 cups whole milk, heated to warm (105°F–110°F) (use a candy thermometer to determine)
1/4 cup packed light brown sugar
1 tablespoon plus 1/4 teaspoon active dry yeast (from two 1/4-oz packages)
3 3/4 to 4 1/2 cups unbleached all-purpose flour
1 tablespoon kosher salt
3 sticks (1 1/2 cups) cold unsalted butter (I used Plugra European butter)
1 egg, lightly beaten, for egg wash
1 teaspoon cream or milk for egg wash
chocolate batons or bittersweet chips for pain au chocolat, if desired
Equipment to have on hand:
Stand mixer with dough hook
candy thermometer
kitchen towels
Ruler
Pastry scraper
Pastry brush
Parchment paper or silpat
Spray bottle (although I improvised — see below)
Directions:
Make dough:
Stir together warm milk, brown sugar, and yeast in bowl of standing mixer and let stand until foamy, about 5 minutes. (If it doesn’t foam, discard and start over.) Add 3 3/4 cups flour and salt and mix with dough hook at low speed until dough is smooth and very soft, about 7 minutes.
Transfer dough to a work surface and knead by hand 2 minutes, adding more flour as necessary, a little at a time, to make a soft, slightly sticky dough. Form dough into a roughly 1 1/2-inch-thick rectangle and chill, wrapped in plastic wrap, until cold, about 1 hour.
Prepare and shape butter:
After dough has chilled, arrange sticks of butter horizontally, their sides touching, on a work surface. Pound butter with a rolling pin to soften slightly (butter should be malleable but still cold). Scrape butter into a block and put on a kitchen towel, then cover with other towel (I wrapped them in plastic wrap instead, but it did break at one point). Pound and roll out on both sides until butter forms a uniform 8- by 5-inch rectangle. Chill, wrapped in towels, while rolling out dough.
Roll out dough:
Unwrap dough and roll out on a lightly floured surface, dusting with flour as necessary and lifting and stretching dough (especially in corners), into a 16- by 10-inch rectangle. Arrange dough with a short side nearest you. Put butter in center of dough so that long sides of butter are parallel to short sides of dough. Fold as you would a letter: bottom third of dough over butter, then top third down over dough. Brush off excess flour with pastry brush.
Roll out dough:
Turn dough so a short side is nearest you, then flatten dough slightly by pressing down horizontally with rolling pin across dough at regular intervals, making uniform impressions. Roll out dough into a 15- by 10-inch rectangle, rolling just to but not over ends.
Brush off any excess flour. Fold in thirds like a letter, as above, stretching corners to square off dough, forming a 10- by 5-inch rectangle. (You have completed the first “fold.” Make one impression in the dough with a finger to remind yourself that one fold is finished.) Chill, wrapped in plastic wrap, 1 hour.
Make remaining “folds”:
Make 3 more folds in same manner, chilling dough 1 hour after each fold, for a total of 4 folds. (If any butter oozes out while rolling, sprinkle with flour to prevent sticking.) Wrap dough tightly in plastic wrap and chill at least 8 hours but no more than 18 (after 18 hours, dough may not rise sufficiently when baked). NOTE: This is when you can let the dough hang out in the fridge overnight and get some rest, you croissant-makin’ superstar!
Roll out and cut dough:
Cut dough in half and chill 1 half, wrapped in plastic wrap. Roll out other half on a lightly floured surface, dusting with flour as necessary and stretching corners to maintain shape, into a 16- by 12-inch rectangle. Brush off excess flour with pastry brush and trim edges with a pizza wheel or sharp knife.
Arrange dough with a short side nearest you. Cut in half horizontally and chill 1 half. Cut remaining half vertically into thirds, forming 3 rectangles. Cut each rectangle diagonally in half to make 2 triangles, for a total of 6 triangles. If you’re making pain au chocolat as well, cut some of the dough into smaller rectangles (see my example diagram, below).
For the more visual among you, here’s a diagram I drew of how I ultimately rolled my two halves of dough (note that you need to work with a portion of the dough at a time to keep the rest chilled). This diagram shows you how I cut the dough to make 18 croissants and 9 pains au chocolat (the rectangles):
Shape croissants:
Holding short side (side opposite tip) of 1 triangle in one hand, stretch dough, tugging and sliding with other hand toward tip to elongate by about 50 percent.
Return to work surface with short side of triangle nearest you. Beginning with short side, roll up triangle toward tip. Croissant should overlap 3 times, with tip sticking out from underneath; you may need to stretch dough while rolling.)
Put croissant, tip side down, on a parchment-lined large baking sheet. (Curve ends inward to make a crescent shape if desired, joining their cute little arms. They won’t stay joined during proofing, but this will help ensure that they do maintain their shape. I used a minute drop of water to seal their arms closed if the dough seemed dry.)
Make more croissants with remaining 5 triangles, then with remaining rolled-out dough, arranging them 2 inches apart on baking sheet. Repeat rolling, cutting, and shaping procedures with chilled piece of dough. Note: To make pain au chocolat, simply place a chocolate baton or bittersweet chips on one side of the rectangle (about 1/4-inch from the edge) and roll it up — very simple!)
Freeze croissants, if desired: This is the point at which you may place shaped, unproofed croissants on a baking sheet lined with wax paper in the freezer for an hour or two, until frozen. Then place them in a ziplock bag and freeze. They’re absolutely best when baked within a week. When ready to bake (from frozen), thaw overnight in the refrigerator and proceed to the proofing step as normal. If not freezing, skip this step entirely and proceed to proofing.
Proof your croissants: First, brush croissants with a lightly beaten egg mixed with a teaspoon of milk or cream. Then proof. I use the Pastries from La Brea Bakery method here. Turn the oven on to 100 degrees. After a few minutes, turn the oven off and open the door. When the temperature drops to just slightly warm, place the croissants in the oven and close the door. Let the croissants rise for 2 to 2 1/2 hours or until they are about 1 1/2 times their size, feel marshmallow-y, and leave a slight indent when touched. Make sure to remove the croissants before heating the oven for baking.
Bake croissants:
For best results, bake one pan of croissants at a time (or two pans on the same rack, if they’ll fit). Preheat to 425°F. Place an oven-safe dish full of water on the rack below where the croissants will be baking to produce steam.
Spritz inside oven generously with spray bottle and close door (I used my hands for this — just sprinkled water around). Put croissants in oven, then spritz again before closing door. Reduce temperature to 400°F and bake 8 minutes without opening door.
Switch position of sheets in oven and rotate sheets 180°, then reduce temperature to 375°F and bake until croissants are deep golden, about 8-10 minutes more. Do not take them out at light golden brown, or they’ll be doughy in the middle. They need to get good and golden on the outside.
Croissants are best eaten slightly warm, slathered with butter, and with a lot of “Mmmms” and “Ahhhhs.” Enjoy!
Additional tips and resources:
-To see butter pounding, view this video of Julia Child and Michel Richards making puff pastry. The cold butter is pounded around 3:20 into the video, though I would do it with a sheet of plastic wrap on top as well.
-See below for photos that will clarify the folding instructions.
-The dough needs to be kept cool throughout the entire rolling process. I crank the air down a degree or two in my apartment, chill my rolling pin in the freezer for a few minutes before rolling, and sometimes use frozen veggies I have on hand to ice down my counter (just be sure to dry it) before flouring and rolling. If at any time the butter seems oozy, fold your dough up and chill it well before continuing.
-Don’t overflour the counter, but don’t be afraid of flour. I was so timid about flouring the counter early in my baking life that I usually had a sticky mess on my hands. Once I finally decided to flour however much I needed (albeit lightly each time), things got a lot simpler for me. Check periodically while rolling and if the dough is sticking, flour lightly beneath it. One thing that helped me get the hang of how much to flour the counter and dough was watching youtube videos of people making puff pastry and croissants — and watching how much they floured.
–This video gave an excellent tutorial about how to shape the croissants and pains au chocolat. Turn off the recipe annotation in the bottom right corner of the video.
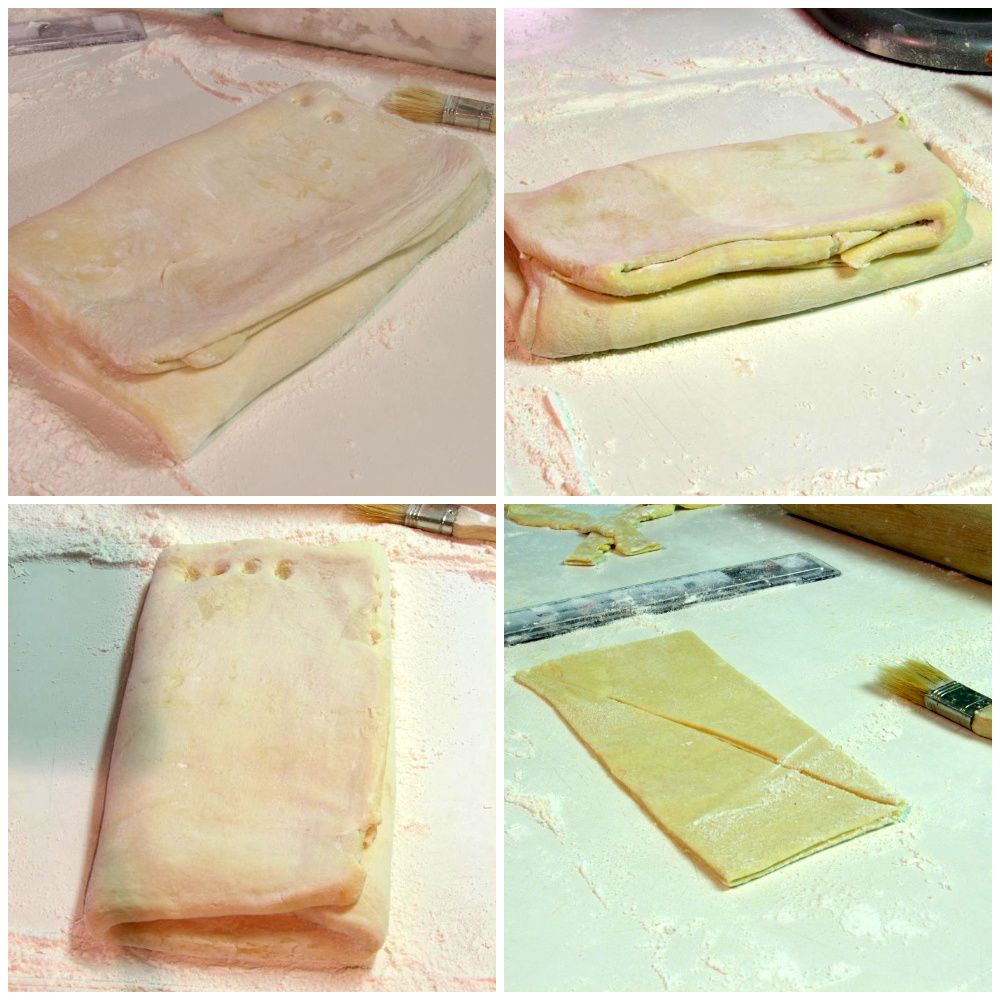
Clockwise: the second, third, and fourth fold and cutting the croissants.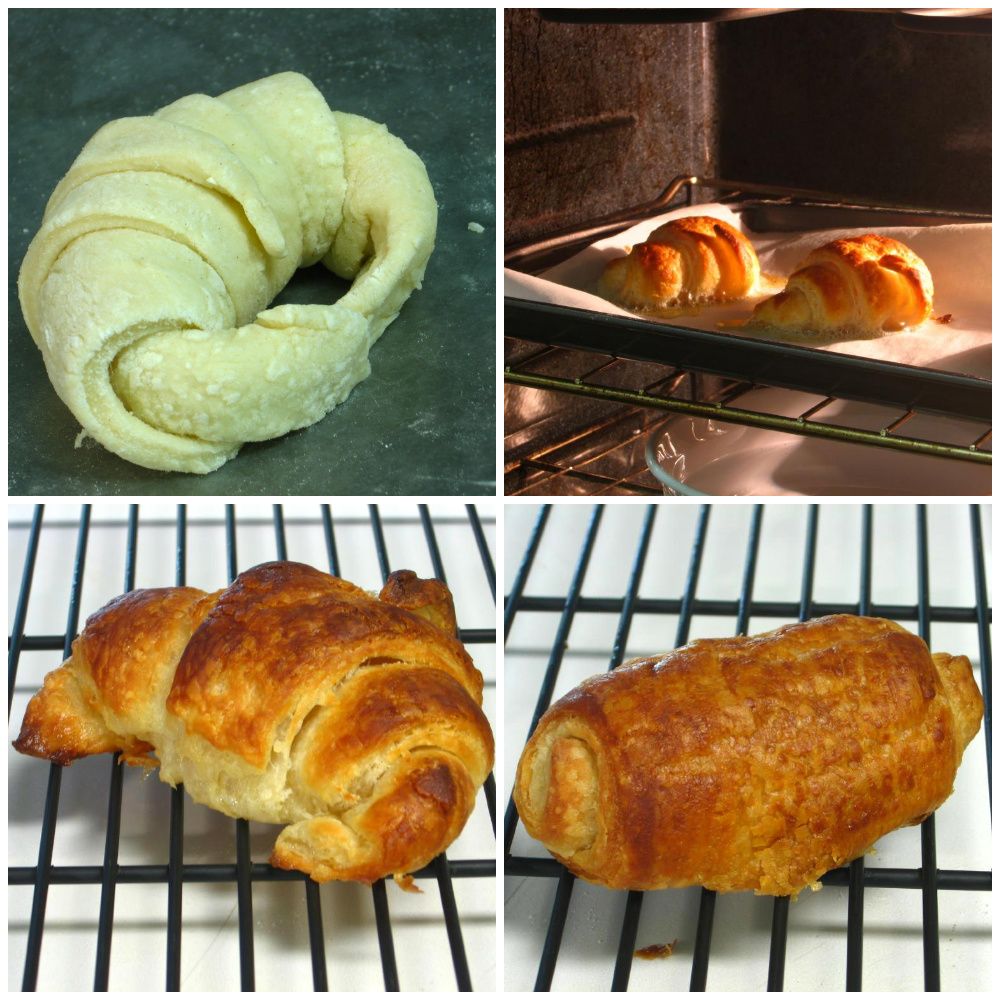
Clockwise: the cute little shaped croissant, my first bake, and my first croissant and pain au chocolat cooling.
If you liked this post, please:
–Subscribe to Willow Bird Baking
–Follow Willow Bird Baking on Twitter
–Follow Willow Bird Baking on Facebook
–Give this post a thumbs up on StumbleUpon
![]() Other ways to share this post with friends!
Other ways to share this post with friends!
107 Comments on Secret Garden Recipe: Homemade Buttery Croissants and Pains au Chocolat
9Pingbacks & Trackbacks on Secret Garden Recipe: Homemade Buttery Croissants and Pains au Chocolat
-
[…] Homemade Croissants and Pains au Chocolat […]
-
[…] always up for a baking challenge so when Julie over at Willow Bird Baking challenged her readers to make croissants, I didn’t hesitate to sign up. I love croissants, but like […]
-
[…] making my own bread — we barely buy any bread at all any more — and I feel like making a good croissant would be a real accomplishment, even if it turns out to be an experience I don’t want to […]
-
[…] folks to make croissants at home for the first time. What an amazing experience it’s been! As I mentioned before, making croissants was one of my proudest kitchen moments. Well, hearing about others making […]
-
[…] Willow Bird Baking readers have taken my Croissant Challenge to heart, and without fail, they’ve been proud of the results they’ve achieved! If […]
-
[…] I planned a Secret Garden surprise party for my sister, for which I made this gorgeous lemonade. I blogged and blogged and blogged. I wrote the syllabus for the new cooking classes I’m teaching this […]
-
[…] cooks just like you, and they’ve all conquered the process. Will you commit to croissant? Go get the recipe for yourself! You can also see the first or second round of Croissant […]
-
[…] these challenges as well, I can give you that sense of pride and accomplishment. For instance, the Croissant Challenge on Willow Bird Baking inspired 17 readers to make homemade croissants in their own kitchens for the […]
-
[…] their kitchen confidence by repeatedly tackling challenging new recipes. In July, I issued the Croissant Challenge where I asked home cooks who had never made homemade croissants before to whip up a batch. Many […]


Maranda
July 3, 2010 at 10:01 pm (15 years ago)Oh man…I’m scared! I’m scared to commit. But…I never back down from a challenge so I’m going to say I’m in. It does seem like a lot of work but I hope the end result is worth it…
Julie
July 3, 2010 at 10:13 pm (15 years ago)YAY, Maranda!! I’m so glad! It is totally worth the effort in the end.
You know, after that first fold the work is all repetition — it’s long but not too hard. Let me know if you come across any questions.
Maranda
August 2, 2010 at 9:37 pm (15 years ago)Woohoo!!! Here’s my post…finally! I hope you don’t mind that I published the recipe over there too. I gave you tons of credit though and did not use your diagram but gave links to it. Let me know if any of this is not okay.
This is where you can find it:
http://mannadonn.blogspot.com/2010/08/buttery-croissants-and-pains-au.html
smalltable
July 3, 2010 at 11:08 pm (15 years ago)I…might do this. I’ll let you know. 🙂 Bookmarked, at any rate!
Julie
July 4, 2010 at 12:01 am (15 years ago)Let me know and I’ll add your name to the list! I hope, I hope! 🙂
Finny
July 3, 2010 at 11:14 pm (15 years ago)I want to do this, badly, but I do not yet have a stand mixer, or the money to get the ingredients. But when I get them, I will be doing this. (Love croissants!)
I am curious, though–what is a pan au chocolat?
Julie
July 4, 2010 at 12:02 am (15 years ago)You COULD try mixing it with a hand mixer and then kneading by hand for the amount of time a dough hook would knead, adding in flour as you go, but I’m not sure the results would be the same.
Pain au chocolat is essentially a croissant with a chocolate baton baked in the center — it gets melty an delicious, especially with the complementary butter flavor of the croissant!
LizzieBee
July 4, 2010 at 6:47 am (15 years ago)I am SO impressed at your effort! And your post is so inspiring. Your garden party that you posted a few days (or so) ago was so lovely. I’m not sure when I’ll be able to get to this endevour, but I am willing to … Commit To Croissant!!!
Julie
July 4, 2010 at 9:37 am (15 years ago)Hurrah!! I’m adding your name, LizzieBee!
Cortney
July 4, 2010 at 10:15 am (15 years ago)Okay, I’m going to be brave an commit! I’ll have to figure out the right time, so it may not be this week, but I’m going to do it! And if this works, puff pastry is next, woo 😉
Julie
July 5, 2010 at 10:54 pm (15 years ago)Yay!! Welcome to the Baker Wagon, Cortney!
Emily
July 4, 2010 at 1:58 pm (15 years ago)These look beautiful! I love a good baking challenge, so I’m definitely going to do this. I’m supposed to be dieting, but it’s my boyfriend’s birthday in a few weeks, so I’ll make them as a special treat!
Julie
July 4, 2010 at 2:21 pm (15 years ago)Yay! Welcome to the croissant challenge, Emily!
Eric
July 4, 2010 at 6:28 pm (15 years ago)Alright. I’ve got housemates who have been haranguing me about making croissants anyways, so here goes nothing, I guess! It’ll probably have to wait until next weekend, but I’m game!
Julie
July 4, 2010 at 8:49 pm (15 years ago)Yay! Welcome aboard, Eric! Adding you to the list.
Eric
November 2, 2010 at 10:46 pm (15 years ago)Wow, and 4 months later, I finally tried the recipe. So worth it!!
Julie @ Willow Bird Baking
November 2, 2010 at 10:49 pm (15 years ago)HURRAY ERIC!! I’d love to see your photos!! You can send them to me at juruble ‘at’ gmail.com. SO glad you enjoyed them! You’re a Croissant Master!
Tifani
July 4, 2010 at 10:09 pm (15 years ago)Croissants are my husband’s cooking nemesis. I’m going to share this blog post with him and see if he will try your recipe and commit to the challenge.
Julie
July 4, 2010 at 10:23 pm (15 years ago)I hope he will, Tifani! This is one of the more straightforward recipes I found, and following it was long, but not too difficult!
Eris
July 4, 2010 at 10:50 pm (15 years ago)I want to!!! when I’m finished with my exams (I’m in the south emisphere, so we still in class xD) and have enough time, I’ll do them!! An I’ll tell you how they tourned out. My mouth waters when I see this photos >.<
Julie
July 4, 2010 at 10:55 pm (15 years ago)Yay! Welcome aboard, Eris! Hope your exams go well — and your croissants do, too, as a reward for a good semester 🙂
Memoria
July 5, 2010 at 3:07 am (15 years ago)Your croissants look fantastic!!! I love making laminated dough.
Julie
July 5, 2010 at 10:54 pm (15 years ago)Thanks, Memoria! Me too! Such an accomplished feeling 🙂
Lorraine @ Not Quite Nigella
July 5, 2010 at 10:53 pm (15 years ago)You are so inspirational Julie! 😀 I get what you mean about shop bought, sometimes you can’t make them but home made is always going to taste wonderful and it’s such an achievement making a puff dough! Bravo!
Julie
July 5, 2010 at 10:54 pm (15 years ago)Thanks, Lorraine! 🙂
Kat
July 5, 2010 at 11:22 pm (15 years ago)I’m in!
Julie
July 5, 2010 at 11:24 pm (15 years ago)Hurray, Kat!! Welcome aboard!
Abbey
July 6, 2010 at 9:14 pm (15 years ago)So, first off, I love your blog – I watch bakebakebake, and invariably, yours is the only blog I ALWAYS go to when you post something.
That said, I totally want to buy a dough hook just to try these. I have truly gotten a bit addicted to baking on my (up til now rare) time off.
Julie
July 6, 2010 at 9:18 pm (15 years ago)Aw, Abbey, thanks so much! I really value your visits to WBB! You know, I think these are worth the cost of a dough hook — they are so, so delicious!
Let me know if you think you’re going to take the plunge and I’ll add you to the list!
Abbey
August 1, 2010 at 5:51 pm (15 years ago)Well, it seems as if we already HAVE a dough hook (who knew?). So that said – I am committed to croissant! And super excited, too. (My mom thinks I’m nuts.)
Julie
August 1, 2010 at 5:54 pm (15 years ago)YAY, ABBEY! I’m so excited! Your mom will think you’re nuts right up until she takes a bite, but never you mind! 🙂 I can’t wait to see your results!
Amy
July 7, 2010 at 12:44 am (15 years ago)Oh I would so do this…..if only I had a stand mixer. For now I will just have to drool over these pictures and save the recipe for when I finally get a mixer.
Julie
July 7, 2010 at 1:43 am (15 years ago)I hear you can also do these by hand, Amy! Just takes a lot of hand kneading in the place of the dough hook’s kneading 🙂
Eris
July 7, 2010 at 11:27 am (15 years ago)I’ll knead by hand! I used to make bread when I was 10!! xD I was in a culinary optative class y school and we made bread like 3 times. Kneading is fun (and a really good excercise for your arms xD) *w* I love making bread, and the smell os yeast… mmm <3
I'll be making the croissants on monday!!!
Julie
July 7, 2010 at 11:30 am (15 years ago)Yay! You go for it, Eris!
Connie
July 7, 2010 at 11:41 am (15 years ago)I don’t think I’ll ever make these, but I sure have a new found respect for those who do. yum!
Julie
July 8, 2010 at 3:23 pm (15 years ago)Thanks, Connie! You never know — maybe one day you’ll get an urge 🙂
Eris
July 8, 2010 at 2:35 pm (15 years ago)I have a question, a stupid question! But my mother language is spanish, not english, so I want to make sure I understand everything right).
When you say chill, it means I have to put the dough in the freezer (the coolest part in the refrigerator, where I put ice cream and freeze veggies)??
Julie
July 8, 2010 at 2:41 pm (15 years ago)Hi Eris! Actually, it means put the dough in the refrigerator (not the coldest part, but the other part — where you keep milk and butter and such).
Eris
July 8, 2010 at 3:00 pm (15 years ago)Thank you =) I thought so… in the freezer seemed a little weird… 8 hours in there would make a rock of the dough… sorry for the idiotic question xD
Julie
July 8, 2010 at 3:23 pm (15 years ago)No, not idiotic at all! Ask anything you need.
Hannah
July 9, 2010 at 2:44 am (15 years ago)Hey!
I’m the Hannah who wanted to try them.
Well I did today and damn they are tasty! I guess they will be a blast at the picnic!
Though mine don’t look nice as yours – it is so hot atm that just a minute after I took the dough out of the fridge it nearly melted in my hands. Try shaping it then..
But expect of their weird shapes your recipe (and tips! Especially the videos) worked nice.
And I’m really proud of myself now, so thanks for the challenge!
Julie
July 9, 2010 at 10:00 am (15 years ago)WAY TO GO, HANNAH! I am so glad to hear they are tasty for your special picnic. Congratulations!!
Kat
July 9, 2010 at 11:37 am (15 years ago)Julie: I want to verify that the egg wash goes on before the final proof? I’ve always put washes on bread just before baking, not just before the final raise…
Hope you see this soon…they’re starting to proof right now!
Julie
July 9, 2010 at 12:04 pm (15 years ago)Hi Kat! There are actually two egg washes in one of the recipes I saw — one before the proof and one just before baking. In attempting to do this, though, I egg washed just before proofing and forgot, both times I baked croissants, to do the final egg wash. My croissants were perfectly browned, so I decided to ditch it on purpose when I baked the croissants a third time.
So, I’d say do the egg wash before proofing, but 2nd egg wash before baking is optional.
Amy
July 9, 2010 at 4:43 pm (15 years ago)I got started on mine this afternoon! Just finished the first fold. It’s actually much easier than I thought it would be (even though I’m doing it all by hand because I don’t have a stand mixer).
Julie
July 9, 2010 at 5:45 pm (15 years ago)That is wonderful to hear, Amy!! I can’t wait to see the finished product!
Amy
July 10, 2010 at 4:55 pm (15 years ago)done!!!!!
And they’re UH-MAY-ZING! (it’s a good thing they take so long to make – anything that includes that much butter should have a mandatory waiting period like that)
http://supervelma.blogspot.com/2010/07/its-official-im-awesome.html
thank you SO much for your amazing recipe and instructions!
Julie
July 10, 2010 at 5:11 pm (15 years ago)They came out SO FANTASTIC, Amy! Congratulations!!
Peggy
July 10, 2010 at 11:04 am (15 years ago)This was such a great resource on croissants! Glad you posted it and I’m definitely in on the challenge!
Julie
July 10, 2010 at 12:05 pm (15 years ago)Yay! Welcome aboard, Peggy!
Monica H
July 11, 2010 at 1:58 am (15 years ago)Your croissants are perfection. I’ve always wanted to make them and someday I will get to it. In due time. Thanks for the tutorial.
Cortney
July 18, 2010 at 12:34 pm (15 years ago)My first batch of croissants are heading into the oven as we speak! So excited, I can’t wait to try my first one 🙂 The dough was a lot easier to work with than I had thought it would be, and thanks to the excellent instructions, I got the hang of the turns pretty quickly. I feel very accomplished already 😉
Julie
July 18, 2010 at 1:57 pm (15 years ago)Yayyyy Cortney!! I can’t wait to see them and hear all about it!
Amanda
July 22, 2010 at 11:19 am (15 years ago)I’ve been looking for a challenge and this certainly fits the bill. Wish me luck!
Julie
July 22, 2010 at 12:56 pm (15 years ago)Yay, good luck Amanda! Let me know when you tackle it; I’d love to post your results!
Amanda
July 24, 2010 at 4:29 pm (15 years ago)Success! They taste amazing!
Julie
July 24, 2010 at 10:17 pm (15 years ago)YAY AMANDA!! Congratulations!! I had a croissant at a local bakery this morning and (don’t mind if I say so myself) homemade were SO SO much better. I’m glad you are loving them! Please feel free to send me a picture/comments about your experience so I can post you in one of the results round-ups!
Cath
July 24, 2010 at 2:44 am (15 years ago)Oh Julie, I am so glad I found this post… croissants are one of those things that I absolutely adore but have never been game enough to try, I just needed that little bit of encouragement! The candy thermometer is what’s holding me back at the moment, once I get my hands on one I’ll be signing up!!
Cath 🙂
Julie
July 24, 2010 at 6:22 am (15 years ago)Hooray! So glad you’re going for it, Cath! Let me know when you do, because I’d love to post your results! Best of luck!!
Enya
July 24, 2010 at 8:08 pm (15 years ago)I was about to take this one tonight but I just realized that I only have white whole wheat flour in the pantry. Definitely doing this tomorrow. I’m inspired!
Julie
July 24, 2010 at 10:17 pm (15 years ago)Hurray! I can’t wait to see your results 🙂
Ruth
July 25, 2010 at 3:43 am (15 years ago)Hi Julie! Thanks so much for this post. I made croissants for the first time the other day and they came out perfectly. I have your recipe to thank for that. 😉
Julie
July 25, 2010 at 8:44 am (15 years ago)GO RUTH! That’s awesome! I’d love to post your results in my next round-up — please send me pictures and/or comments on your process if you get a moment (juruble ‘at’ gmail ‘dot’ com)! 🙂 I’m so glad you enjoyed them!
Cortney
July 29, 2010 at 6:48 pm (15 years ago)Finally got my croissant post up! Thanks again for the awesome challenge, I loved it 🙂
http://cortandmatthall.blogspot.com/2010/07/accomplished-by-definition.html
Julie
July 29, 2010 at 6:54 pm (15 years ago)Yay, Cortney!! They are so lovely!!
Megan
July 31, 2010 at 10:05 pm (15 years ago)I’ve made croissants at work, and I’ve made puff pastry at home, but I’ve never made croissants at home. I do really, really want to make pain au chocolat… sooo I don’t know that I’ll commit, but I’ll commit to thinking about it more!
Diane
August 6, 2010 at 8:17 pm (15 years ago)UH! I committed a few weeks ago to my friend when she posted the link. Waited on my “baker in crime (a.k.a. my mom)” to get back in town to attempt this challenge. We did it today. We feel we did everything right. BUT the yeast did not, we think it was on suicide or something because it did not rise up to the challenge. We carried on any how and everything else turned out great: the layers were flaky, the chocolate melted in all the right places, it was a potential, calorie laden heavenly experience. Except for the yeast death. Oh well, at least the other half of the dough will make a fabulous pie crust!!!
Maybe one day I’ll try it again. Thanks for the challenge and the recipe- it was a thrill to try for my absolute to die for breakfast foods.
Julie
August 10, 2010 at 8:08 pm (15 years ago)Diane, I’m SURE they’re amazing! I’d LOVE to post your results! I’m so glad they tasted great, even if they weren’t up to your standards!
amyloliquefaciens
August 10, 2010 at 8:01 pm (15 years ago)Oohkay, a little late into the game here, but I finally have a new place with a decent kitchen and I’m dying to do some baking! Hoping to attempt these within the next couple days. Thanks for the inspiration!
-Clair
Julie
August 10, 2010 at 8:07 pm (15 years ago)Hurray, Clair! Please send me pictures; I’d love to post your results!! Hope you love the process and product!
amyloliquefaciens
August 15, 2010 at 3:07 pm (15 years ago)They turned out awesome!! Totally worth the effort. I blogged it here: http://claircanadienne.wordpress.com/2010/08/15/like-a-chef-making-donuts-and-pastries/
so there’s a couple pics in that.
Thanks a bunch!
Clair
Amy
August 10, 2010 at 10:08 pm (15 years ago)Ok so I just got a Kitchen Aid stand mixer for my birthday today….dough hook and all soooooooo I am officially in for the challenge. It make take me a bit to get it done but I am ABSOLUTELY gonna do it!!
Julie
August 10, 2010 at 10:11 pm (15 years ago)YAY, Amy!!! So happy to have you aboard! I can’t wait to see your results!!
Nancy
September 21, 2011 at 5:07 am (14 years ago)committing to croissant as soon as I have showered so I can go and buy yeast from the supermarket!
Julie @ Willow Bird Baking
September 21, 2011 at 5:43 am (14 years ago)Hooray, Nancy!! Let me know if you need any help during the process. I’d love to see a photo of your finished result!
Elizabeth
October 1, 2011 at 2:25 pm (14 years ago)I first made these croissants a year ago and they turned out beautifully! This is my go-to recipe for croissants. In fact, I’m making them today, but instead of chocolate, I’m going to make a pumpkin spice cream to fill them. Thank you so much for this awesome, easy-to-follow recipe!
Julie @ Willow Bird Baking
October 1, 2011 at 10:51 pm (14 years ago)Aw, Elizabeth, that is SO good to hear, thank you! I hope you have seen the phototutorial too (http://willowbirdbaking.wordpress.com/2010/10/09/homemade-croissant-phototutorial/) though now it sounds like you’re a total croissant master! PUMPKIN SPICE CROISSANTS sounds amazing! Let me know how they taste!
So glad I could offer a helpful recipe for you!
bub
October 21, 2011 at 11:09 am (14 years ago)Hey, this is bub in India. No fridge but cold enough outside. No hook but 2 motivated hands. This is gonna be something 🙂
Julie @ Willow Bird Baking
October 21, 2011 at 11:25 am (14 years ago)You totally got this! Without a fridge, I’d say it’d be hard, but if it’s truly cold outside, I trust ya! I’m hoping for great success — let me know how it goes!
Allie
February 4, 2012 at 3:06 am (14 years ago)Thank you! Thank you! Thank you! This recipe was so wonderful! I made them for the first time this week and they turn out beautifully! I know this was posted last year but I still wanted to thank you anyway. 🙂
Julie @ Willow Bird Baking
February 4, 2012 at 4:00 am (14 years ago)Hoorayyyy! Allie, my favorite thing is hearing from people who made croissants — they’re such a “fancy” thing to attempt and I LOVE hearing that they came out well for people! Nothin’ makes you feel like a rockstar quite like pulling some croissants out of the oven 😉 I’d love to see a photo if you thought to snap one (no worries if not!) — julie ‘at’ willowbirdbaking.com.
Congratulations!!
Allie
February 4, 2012 at 3:05 pm (14 years ago)I will definitely send you a photo. 🙂 I’ve been cooking and baking for years and tried all kinds of different foods and techniques but croissants really intimidated me for a long time. Never again! And I did feel like a total rock star!
imhaubner
February 20, 2012 at 9:00 pm (14 years ago)Challenge accepted and completed, and it was amazing. I can’t stop eating these things they are so good! http://i.imgur.com/gz3kH.jpg Thank you so much for pushing me to do this!
Julie @ Willow Bird Baking
February 20, 2012 at 9:17 pm (14 years ago)HOORAY!! These are so gorgeous!! CONGRATULATIONS on being a Croissant Master! You did a fantastic job!
Hannah
May 31, 2012 at 5:03 am (14 years ago)hey Julie! thanks for an amazing blog im a big fan!
Im going to make these babies after i finished my exams, just to let the stress out!
I’ll get back to you soon with the results
xx
Julie @ Willow Bird Baking
July 20, 2012 at 1:52 am (13 years ago)I hope you loved them, Hannah!! Would love to hear!!
Su
July 18, 2012 at 7:36 pm (13 years ago)I made these today and they’re AWESOME!!! Thanks so much for the recipe and such detailed instructions. I thought it would be so difficult and it wasn’t at all! I only have one baking tray so instead of using the warm oven technique to help them prove, I left them in a warm room with plastic wrap over them for about 4-5 hours. Also, when I baked them, I put the oven up to 475F and baked the croissants for 13 minutes and the pains au chocolat for 11 minutes as I’d seen someone recommend this on a forum (plus I’m a bit impatient!) and they came out great! Thanks again for posting this, I really feel like I’ve achieved something by baking these as so many people say don’t bother it’s too hard to get right. And for anyone else in the UK who can’t get Kosher salt, just use half the amount of ordinary table salt 🙂 I can’t wait to share these with my friends 🙂 🙂 🙂 Thank you!!! xxxxx
Julie @ Willow Bird Baking
July 20, 2012 at 1:52 am (13 years ago)HOORAY!!! I’m so glad you went for it, Su!!! Don’t you feel like a total rockstar?! Congratulations on a fantastic kitchen achievement!!
Midelaye
November 17, 2012 at 9:31 pm (13 years ago)I’m in the process of making these now but I’m running into problems with my dough. It’s extremely tough (the first batch was practically un-rollable, the second batch is marginally better and in the fridge awaiting rolling right now) and also very crumbly (it’s not holding together very well). I’ve checked and double checked the quantities, kneaded the dough for the suggested time and let my yeast get all bubbly before mixing it in but I can’t get my dough to that soft, slightly sticky stage. Help?
Julie @ Willow Bird Baking
November 17, 2012 at 10:37 pm (13 years ago)Hi Midelaye! When you say the first and second batch, do you mean you threw out the first and started over? Crumbly sounds very wrong — indeed, it’s kind of a wet dough. Have you already put the butter in?
Midelaye
November 18, 2012 at 3:51 pm (13 years ago)Yes, I threw out the first batch and ended up throwing out the second batch as well (which wasn’t so much crumbly as tough). I hadn’t put the butter in yet, and was able to save it for next time.
Unfortunately, I didn’t have much success last night, but will definitely try again in the future. In the mean time, I’m going to whip up a batch of cheesecake brownies to drown my sorrow in delicious sugar and cream cheese.
Any tips for next time I try to make them?
April
March 23, 2013 at 9:06 pm (13 years ago)I’ve been waffling about attempting croissants for months now… I know I’m 2 years late, but I’m committing!! I love your recipes and I love your posts. I’ll be riffling through them for hours 🙂
~April
Mindy
November 3, 2013 at 11:40 pm (12 years ago)I have committed to croissant TWICE now! Although easy, it’s certainly time-consuming… So my fear is that I will now be requested to do croissants at every get-together here on out! Aah! I guess its true no good deed goes unpunished!
Karen
June 15, 2014 at 10:43 am (12 years ago)Committing now. We have the ingredients … we have the stand mixer … we have the time … here we go 🙂
Julie Ruble
June 20, 2014 at 8:03 pm (11 years ago)YAY Karen!! So proud of you!! I need to see photos of how they turned out! I’m sure they are MARVELOUS 🙂
Suzie
June 20, 2014 at 8:00 pm (11 years ago)Hey Julie! My sister and I have been in love with your food for a long time. Whenever I need ideas on what to make, she says, “Look on Willow Bird Baking!” So when I decided I wanted to make croissants, I came here immediately. Mine weren’t nearly as pretty as yours, but they still turned out super delicious. My sister is also making them at the moment, and we’re going to compare them. Thank you so much for putting up this recipe! It was really helpful and the food that came from it was amazing. I’m glad I now know how to make these! 🙂
Julie Ruble
June 20, 2014 at 8:03 pm (11 years ago)Yay Suzie!! Way to go! I’m so proud of you for taking the plunge. I need to see photos of both of your masterpieces 🙂 So glad you had fun with them!