savory

Sassy Sausage and Hash Brown Breakfast Bake

Things I learned from experience this week:

1. If you give in to the urge to take a nap after around 7pm, your body is going to decide it’s sleeping all night (and it won’t bother to consult with your blaring alarm clock). Drink some more caffeine and push through ’til bedtime.

2. Byrd might be certifiably insane. She now brings me pieces of her kibble to throw. She’ll fetch them once or twice before eating them. It’s gotten to the point where she almost won’t eat her food unless she’s played with it first.

I’m not going to lie; I’ve done this test on her. Just in case.

3. I might be certifiably insane. Because I throw that piece of kibble for her every. single. time.

And not only that, but if I’m paranoid she’s not eating enough, I’ll sit in the floor and feed her dinner to her piece by piece like I’m feeding grapes to a flippin’ Roman emperor.

4. Don’t ever say the word “menopause” to 7th graders. You will never get them back. They’re probably still somewhere doubled over in awkward laughter at this very moment.

5. Middle school children will come up with myriad excuses to be violent with each other. The game of “Punch buggy” has apparently expanded: there’s now “Honda Hit,” “Kia Kick,” “Chevy slap,” “Ford flick,” and “Toyota tap.”

6. There’s some sort of principle at work in the universe where, if you’re running late, the passing lane of the highway will be completely blocked by slow drivers. These lovely folks, instead of passing anyone, will be lackadaisically playing a game of “Tap Your Brakes Unnecessarily at Random Intervals.”

Their cars usually sport obnoxious bumper stickers designed to infuriate you while you almost run into them repeatedly. Today, it was a huge Sponge Bob decal that took up the entire rear window. I could not make this stuff up. I almost ran into them on purpose to wipe that oafish starfish grin off of Patrick’s face.

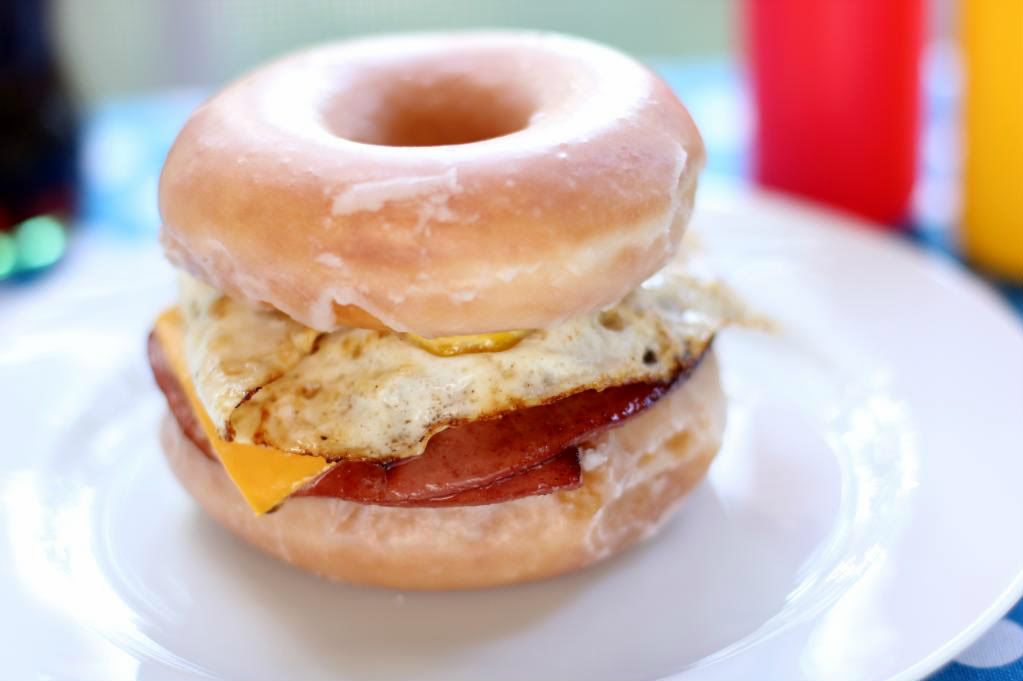
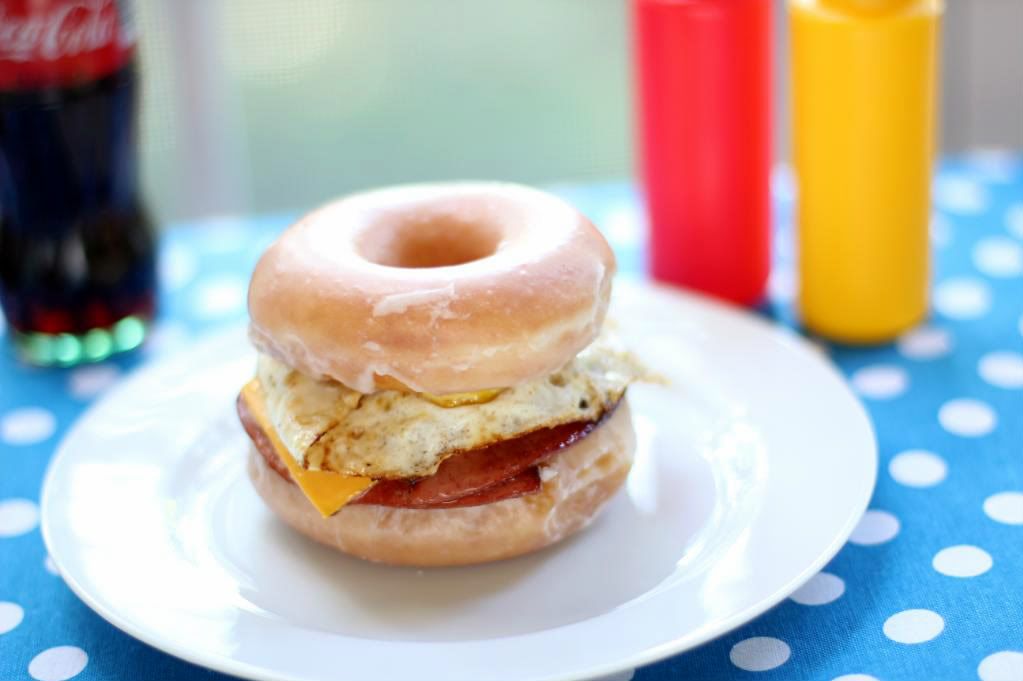
7. Condiments make everything more fun. Please give me dipping sauce, garnishes, toppings, relishes, creams, pastes, flakes, and herbs. I can’t decide if things actually taste better when they’re all dolled up, or if I just love the assembly process.

8. When you’re putting on your fancy dress and high heels, googling librettos, driving downtown, paying for parking, and running full-tilt to make it on time to your very first opera (Carmen, in case you’re wondering), do be sure to check the date on the tickets first. Turns out there was no chance of Mike and I arriving late, considering the opera is next week. We ate Lebanese food in our fancy clothes instead.

9. Always order extra tahini. See #7.

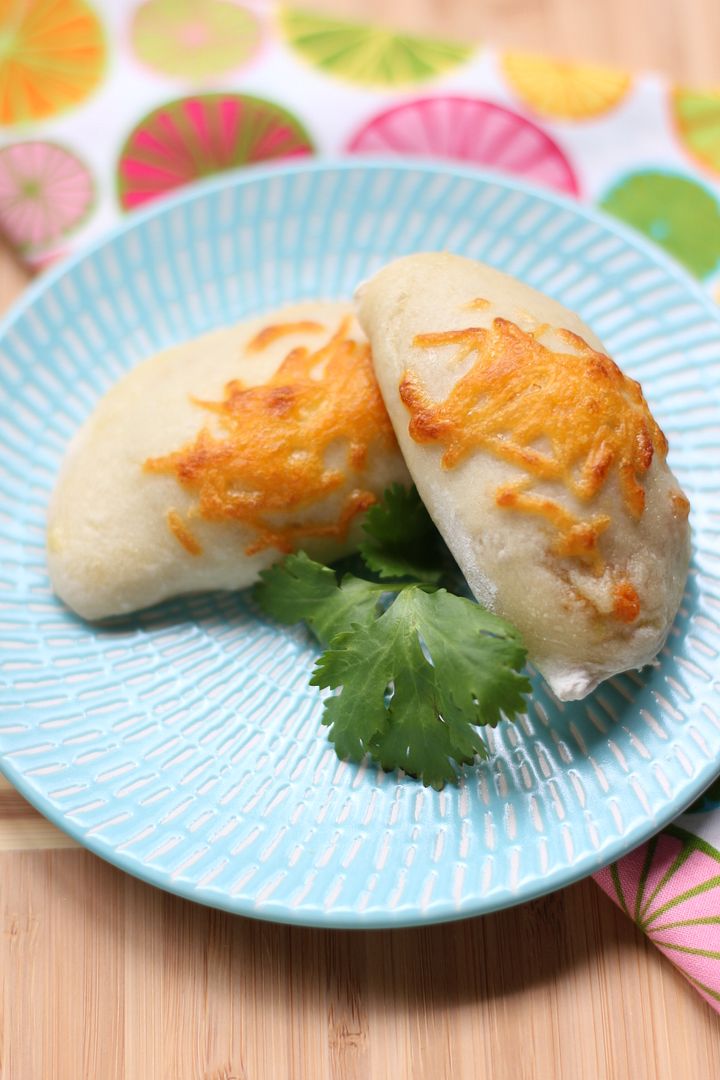
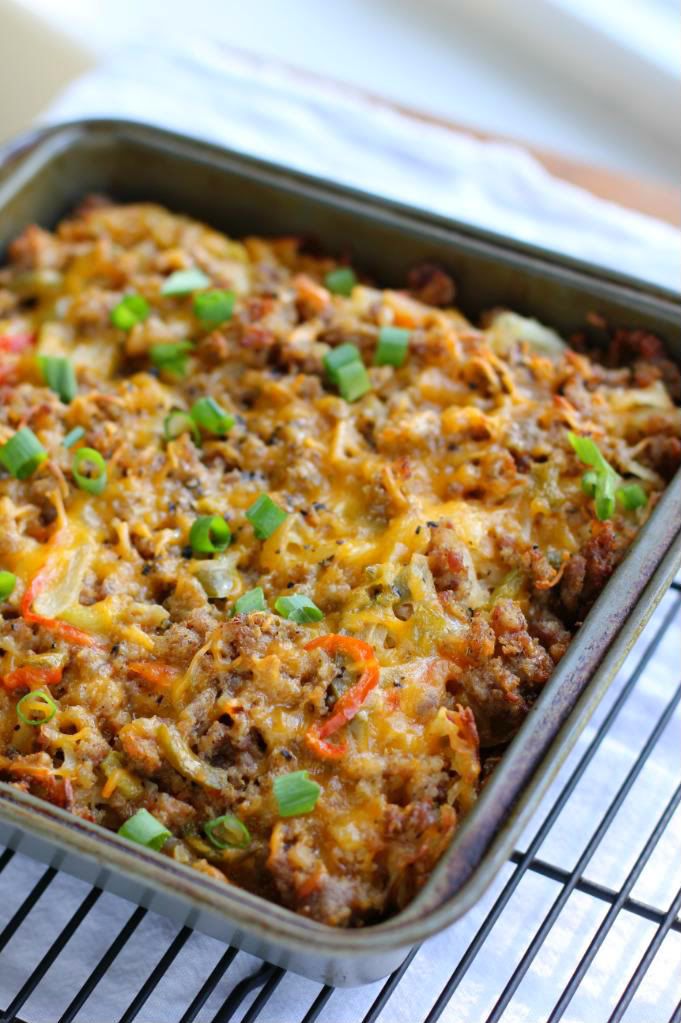
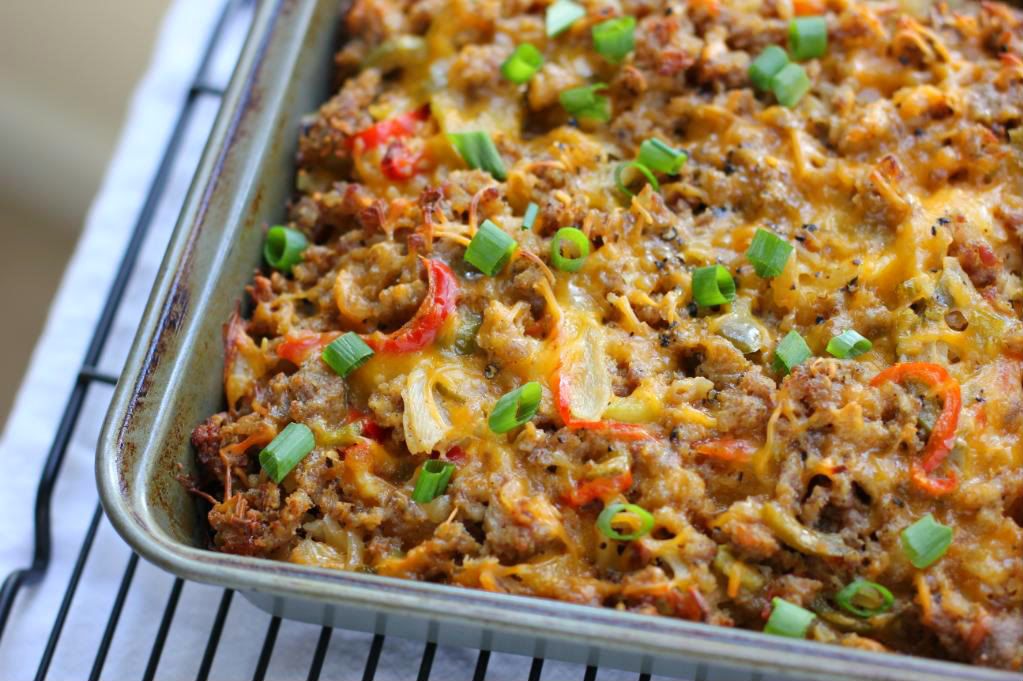
10. Breakfast is one of the best parts of the day. Sometimes I go to sleep early specifically to get to breakfast sooner. And I think you need to go to sleep RIGHT FLIPPIN’ NOW to get to this Sassy Sausage and Hash Brown Breakfast Bake ASAP.

This casserole is super easy, can be prepared in advance, and is one of the best sorts of breakfast to wake up to: hearty, spicy, warm, comforting, and filling. And one you can serve with lots of condiments.

What did you learn from your experiences this week?

Sassy Sausage and Hash Brown Breakfast Bake


Recipe by: Willow Bird Baking
Yields: 9 servings

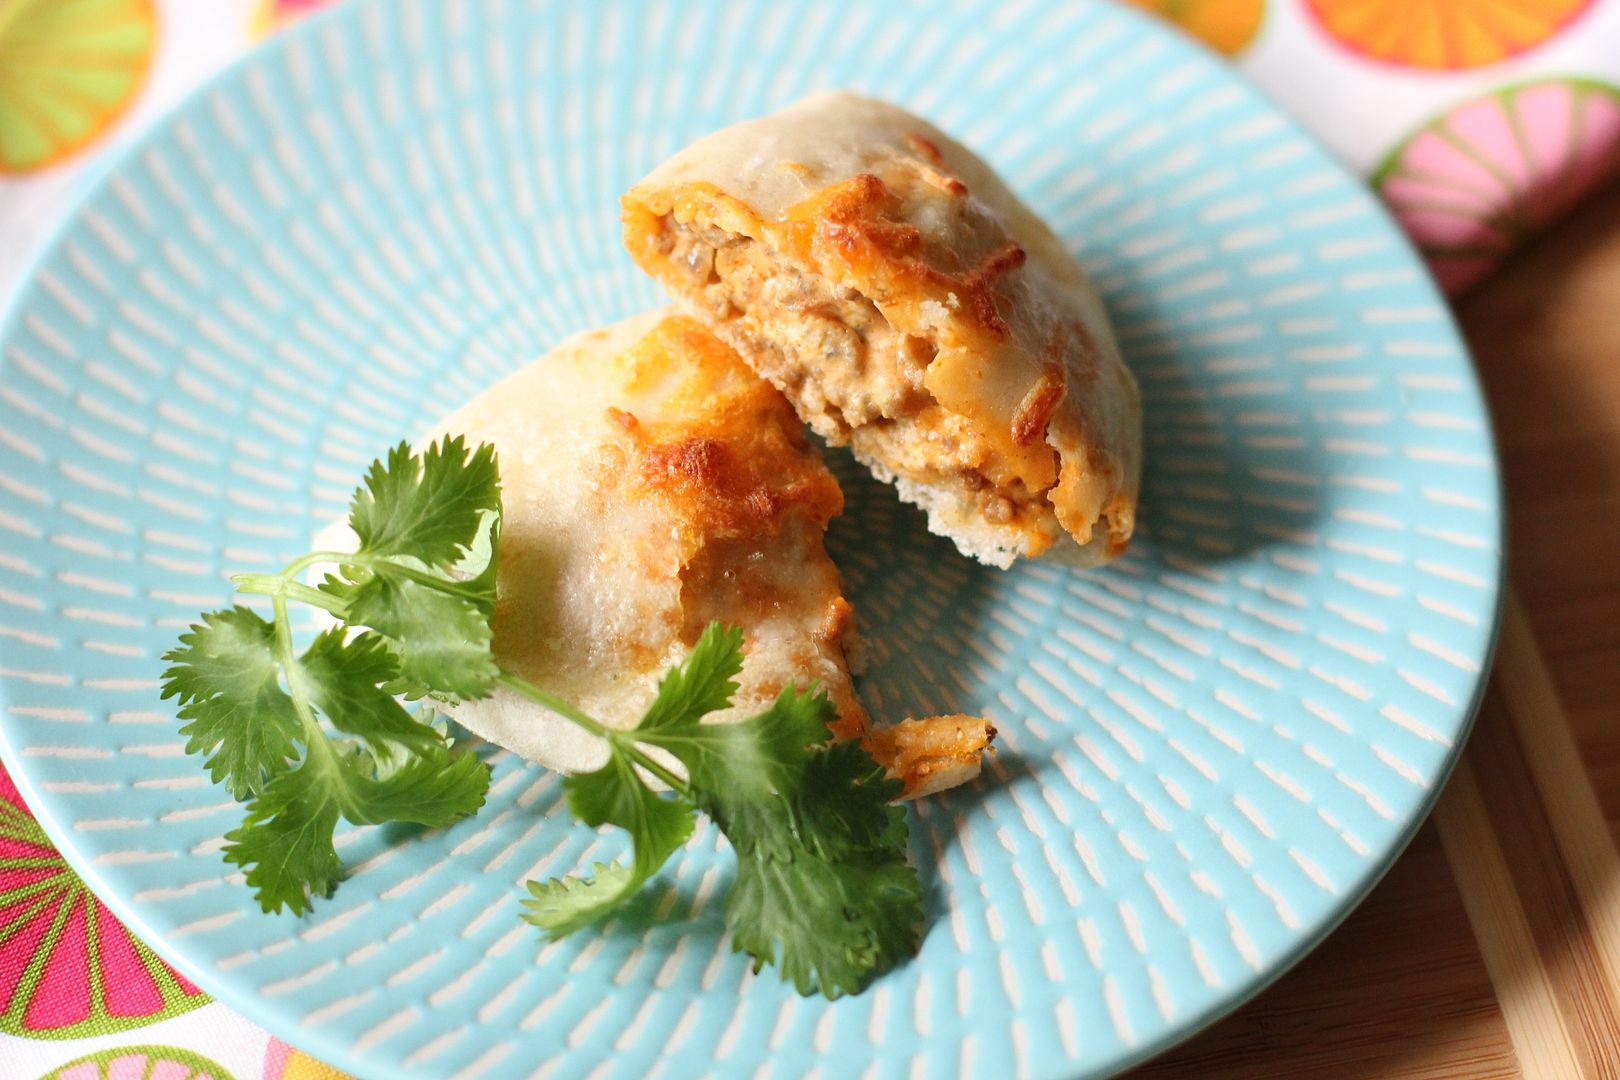
Oh, this breakfast casserole is perfect. The slight heat of the peppers, sausage, and cayenne pepper are the perfect complement to the layers crisp hash browns and cheese. It’ll fill you with warmth and satisfaction on a cold autumn morning. Since it can be prepared days in advance and popped into the oven when you wake up, it’s perfect for brunches or family breakfasts where you’d rather not be trapped in the kitchen for hours!

Ingredients:
4 cups frozen shredded hash brown potatoes
16 ounces hot sausage
1/4 cup finely chopped onion
1/4 cup finely chopped green and red peppers
1/2 clove minced garlic
minced jalapeno to taste (I used about 1/2 teaspoon)
1 cup shredded, sharp cheddar cheese
1 (12-ounce) can evaporated milk
1 egg, lightly beaten
1/2 teaspoon cayenne pepper
1-2 tablespoons olive oil
dash paprika
salt and pepper to taste
Toppings: sour cream, diced jalapenos, hot sauce, salsa, chopped green onions, and some fresh cilantro or parsley

Directions:
Grease an 8-inch square baking pan and preheat the oven to 350 degrees F (if you’re baking the casserole on the same day). In a large skillet over medium-high heat, crumble and cook the sausage until completely browned and cooked through. Remove the sausage to a paper-towel lined plate to drain. Discard all but a couple of teaspoons of its grease.

Place peppers, jalapenos, and onions into the skillet and toss to coat them with the grease. Sauté them for about 5 minutes until they’re soft and the onions are beginning to turn translucent. Add the garlic and cook for about 30 seconds, stirring constantly, until it’s fragrant. Remove this mixture to the paper-towel lined plate with the sausage.

Add a couple of teaspoons of olive oil to the skillet. Brown the hash browns in batches by spreading out about a third of them over the bottom of the skillet in a flat layer. Cover the skillet and let them cook without stirring for around 10 minutes (double check the directions on your hash browns package). When one side is browned, flip the hash browns and brown the other side. Remove these to a separate paper-towel lined place. Continue until all hash browns are browned.

Place half of the hash browns into the baking pan in an even layer. Top with half of the sausage, peppers, and onions mixture and 1/2 cup of cheese. Repeat these layers once more. In a small bowl, whisk together the egg, evaporated milk, cayenne pepper, paprika, salt and pepper. Pour this mixture evenly over the hash brown casserole and cover it with aluminum foil. You can refrigerate the casserole overnight at this point or bake immediately. If you refrigerate it, let it sit out at room temperature while the oven preheats.

Bake the casserole for around 50 minutes before removing the foil and baking an additional 10-15 minutes. Let the casserole cool for 10 minutes before serving it with sour cream, diced jalapenos, hot sauce, salsa, green onions, and some fresh cilantro or parsley.

If you liked this post, please:
Subscribe to Willow Bird Baking
Follow Willow Bird Baking on Twitter
Follow Willow Bird Baking on Facebook
Give this post a thumbs up on StumbleUpon


ShareOther ways to share this post with friends!

The “Just Trust Me” Fried Bologna Breakfast Doughnutwich

When Mike and I went to the North Carolina State Fair last year, I had two goals: pet as many dirty, adorable barnyard animals as possible, and eat as much ridiculous, unhealthy food as possible. High on my list was the Krispy Kreme burger, an admittedly gimmicky new sandwich being marketed (and mocked) across the country. The burger was just like any other burger, except that it was served on two Krispy Kreme doughnuts in the place of a bun. I was sure I was going to absolutely love every bite.


YES.

My first goal was readily accomplished. Mike and I stumbled around until we spotted the closest pettable livestock, whereupon we bought a bag of carrots and subjected our fingers to great peril. We fed goats, sheep, llamas, and even a camel or two. Is it weird that I think there may have been a buffalo in there? I might’ve made that part up.

Anyway, the animals pranced around, joyously accepting our scritches until we ran out of carrots. During this fiasco, I may or may not have illicitly scaled a fence to feed a goat that had been head-butted out of the way by his siblings. Put it this way: I didn’t get caught. Or head-butted.

My second goal turned out to be more complicated. We nibbled around the fair — corn dogs, cheesesteaks — until we finally found the vendor selling the notorious Krispy Kreme Burger. We slipped in line and waited our turn for greatness. When I got up to the booth, the cashier asked me what I’d like on the burger. That was the first sign of trouble.

I hate being asked what I want on my sandwich. Before you decide I’m one of those insufferably picky diners (okay, you might decide that anyway), let me explain. I go to a restaurant to taste a dish someone else has conceived of and prepared. I want the creator of a sandwich to decide what ingredients should be on it to create the right overall flavor. I don’t know what to put on my sandwich to make it taste like the dish they envisioned! And if I wanted to taste my own vision — to create my own sandwich — by golly, I wouldn’t have bothered coming to a restaurant to do it! (Side note: This is why I never go to Subway anymore.) (Side note #2: I think italics make people sound snootier. Don’t you agree?)

So when the cashier asked me to construct my own version of the Krispy Kreme Burger, I was understandably nervous. Would it taste okay with lettuce and tomato? Would mayonnaise be appropriate on it? Mustard? How about cheese? I was stumped and a little miffed, but I ordered the burger with lettuce, tomato, and mayonnaise. Mike and I fought the crowds and found a seat by a kiddie ride to enjoy our culinary adventure.

Mike lasted two bites before he handed me the sandwich. I thought he was just giving me a turn, but it turns out he was down for the count. “I don’t like it,” he declared, wiping doughnut glaze off his fingers with an air of finality.

Really? After hours of waiting and pushing through sweaty throngs of people, you give the sandwich two bites’ worth of a chance? I wasn’t going to be discouraged so easily. I grabbed that sandwich, took a giant bite, and–

It was okay.

The pulsing carnival music from the ride in front of us suddenly seemed a little louder, a little more grating. After hours of waiting and pushing through sweaty throngs of people, the Krispy Kreme Burger was just OKAY?!

I debated in my head: would it have been better without the lettuce and tomato? Was it the mayo that made it so-so? I polished the sandwich off pensively, still disappointed with its mediocrity. Mike and I headed off defeated, in search of better treats (don’t worry, some deep-fried cheesecake later cheered us up).

The other day, though, I had a stroke of inspiration. I was planning on creating a fancy breakfast for Mike and I’d been craving a delicious Southern staple: fried bologna biscuits. Before you start in about how you don’t like bologna: I don’t like bologna either. But fried bologna is an entirely different experience (particularly with little cheese, some yellow mustard, and for breakfast, a fried egg). I knew I didn’t have time to squeeze biscuit making into my schedule, though.

Like a flash of brilliance straight from the heavens, I realized that these flavors — fried bologna with cheese and a gooey fried egg — were the exact sort of flavors that would’ve rocked that Krispy Kreme bun. Instead of the muddy, inexact flavor profile of the State Fair burger, this sandwich would have a bold salty and sweet combination in addition to the gooey, mild saucing of the egg. Far from a gimmicky novelty item you might dare your friends to eat, this sandwich was gonna be delicious.

And it was. In fact, unlike its burger cousin, it was more delicious in real life than it was in my imagination. I’d wait in line behind a thousand other sweaty fair-goers for this baby. Thankfully, though, I don’t have to. It takes about 5 ingredients and maybe 15 minutes to make your own in the comfort of your kitchen.

So listen, JUST TRUST ME! I know it sounds a little weird. I know it packs a caloric-punch. But I promise it’s an incredible breakfast treat. Pick a special weekend, scope out the “Hot Doughnuts Now” sign at your local Krispy Kreme, and try it for yourself.

What’s your favorite weird indulgence?

The “Just Trust Me” Fried Bologna Breakfast Doughnutwich


Recipe by: Willow Bird Baking
Yields: 2 doughnutwiches

This breakfast “doughnutwich” has the absolute perfect balance of salty and sweet. Pillow-light Krispy Kreme glazed doughnuts act as a bun for savory fried bologna, a slice of cheese, and a gooey fried egg. Make this your new special occasion breakfast. It’s a little out of the ordinary, but so incredible!

Ingredients:
2 eggs
4 Krispy Kreme original glazed doughnuts*
2 tablespoons butter
2 slices bologna
2 slices American cheese

Directions:
Lay 2 doughnuts out on a plate. Cut a slit from the middle of each slice of bologna to the edge (so it won’t curl). Heat a skillet over medium-high heat and melt 1 tablespoon of butter in it. Place the slices of bologna in the frying pan. Laugh at how they start to look like little PacMen. Fry them until they’re browning on one side and then flip them. Add a slice of cheese to the top of each piece of bologna and continue frying until bottom is browned. Place the slices briefly onto a paper towel-lined plate to drain off the excess butter, and then place them onto the 2 waiting doughnuts.

Melt the last tablespoon of butter in your skillet. Break one egg at a time into the pan and fry it to your desired doneness (I’d like to make a pitch for over-easy or -medium, since the gooey yolk is delicious in this sandwich!) Place the fried egg briefly on the paper-towel lined plate to drain off the excess butter, and then place one on top of each slice of bologna and cheese. Top each doughnutwich with another doughnut as the “top bun” and serve immediately.

*Note: Feel squeamish about eating 2 doughnuts in one sitting? Carefully split one in half with a serrated knife to use as your bun. I don’t have this issue myself…!

Edited to add: Oh by the way, someone just asked in the comments if Mike liked it. Of course you’d want to know if it was Mike-approved. I’m happy to report that he loved every bite!

Edited to also add: I didn’t receive any compensation or product from Krispy Kreme — I just love ’em.

Foodbuzz 24×24: Cheap and Simple Taco Pockets

i sat watching a flower as it was withering;
i was embarrassed by its honesty.

-bright eyes

This is not a diary. I can’t smudge ugly, unfiltered thoughts into this blog and tuck it deep under a virtual mattress. This is a place for tidy stories that have fully played out in my life — or at least enough to have lost the raw, unfinished edge of uncertainty.

Otherwise, things just get sloppy.

But I’m going to get a little sloppy here for a bit: this has been the hardest year of my life.

I feel embarrassed saying that, because I know some of you are dealing with things that are so much harder, things that make my year look like a fairy tale. There are people right now losing their homes and carefully rationing their cash to afford the week’s groceries. So I hope you’ll forgive me my lesser struggle — that we can have the grace of being in different places and loving each other where we are.

For me, this year has been a mountain to climb — the air is thinning, and I’m not sure I ever wanted to reach the top in the first place.

Last November, as you may remember, I broke up with Mike, my boyfriend of almost 12 years. It took me two months to get up the gumption to write to you about it, but the struggle wasn’t over.

Month after month went by and I found I couldn’t get used to my new world, which had turned inside out and taken on a pallor. Daily life felt like stumbling through a thick wall of cotton. My grief became a dressing room in which I tried on all different Julies, searching for who I was without Mike. Everything I put on was too tight, too abrasive, too loose, too heavy.

Recently, though, a couple of you noticed and commented that I’ve been mentioning Mike here and there. It’s true — we’re slowly, carefully spending time together again. Feeling out the next steps. There’s just not time to waste when you love someone, and it feels like we’ve already wasted so much.

So there it is. This isn’t exactly a great time to tell you what’s up. This is not a diary, like I said, and I’m hesitant to share such a new, uncertain development. But first off, I know I’m among friends. Second off, Foodbuzz issued a 24×24 challenge this month that I knew I wanted to dedicate to Mike.

The 24×24 is usually an opportunity to showcase 24 fun dinner party ideas, but this month, Foodbuzz challenged us to create a meal using only pantry staples. Scraping together something passable from the pantry wouldn’t have been too hard; people do it every day for their families. But as I thought about what I usually have available — some ground meat, cheese, salsa, baking supplies — I realized I wanted to create something truly special.

One of Mike’s favorite dishes during our time together was a silly convenience meal. These Taco-Stuffed Crescent Rolls are delicious, but also based on a can of crescent rolls, for goodness’ sake. Nevertheless, I made them for him throughout our relationship as a quick way of saying, “I love you (and I want some carbs.)”

For the Foodbuzz 24×24, I invited Mike over and recreated this meal — this time with a homemade yeast dough. I wanted to turn my quick I love you into an earnest I love you. The things I took for granted, I can’t take for granted anymore, and I think he feels the same. What we’re working on between us is worth more than a can of crescent rolls. It’s worth adding flour bit by bit. It’s worth waiting the hour for the dough to breathe and rise. It’s worth the messy counter, the sticky shaping, the extra step of egg washing. I would slice avocados for years. I would clean my dough hook a million times over.

The beauty of this meal is that it’s homemade from scratch, but still simple and convenient. The recipe made plenty of dough for taco pockets with enough leftover to dress up as Apple Cinnamon Monkey Bread Sundaes (I’ll share how I did this in an upcoming post). Also, since you can prepare both dishes a day in advance, you have enough time to floof your hair and vacuum the apartment the day your long-lost boyfriend is coming over. Nice.

Oh, by the way, your fear of yeast called and told me to tell you it’s not working out. You’re just going to have to get over him. I’m stocking you up with simple yeast dough recipes so you’ll have a good place to start.

Speaking of good places to start, for me and Mike, this is as good a place as any. I don’t know how things will go, but no one ever does. I’m just going to hitch up my skirts and petticoats and keep on climbing.

I told you my secrets, now tell me yours. What new developments are coming your way these days?


Me and Mike via photobooth, a couple of years ago.

Cheap and Simple Taco Pockets


Recipe by: Willow Bird Baking (yeast dough recipe from Our Best Bites)
Yield: about 26 3-inch long crescent pockets, or 5-6 servings (or you can use half for pockets and half for making monkey bread!)

These Taco Pockets are pillowy yeast rolls filled with a creamy, cheesy, spicy Tex-Mex filling. I like to serve them with an array of accoutrements — sour cream, guacamole, salsa, and fresh cilantro. As a time-saver, you can wrap this cheesy filling in premade crescent rolls and bake per the package instructions, but don’t do it just because you’re afraid of yeast! This is a simple yeast dough that’ll help you conquer your fears. If you’d like, make taco pockets with half the dough and use the rest to make simple Monkey Bread Sundaes for dessert — two dishes for the price of one!

Dough Ingredients:
1 1/2 cups warm water (105-115 degrees – use a candy thermometer to check)
1 tablespoon sugar
1 tablespoon yeast
1/2 teaspoons salt
3-4 1/2 cups flour
1 egg and a splash of water (for egg wash)

Filling Ingredients:
1 pound ground beef
1 packet McCormick’s cheesy taco seasoning (or taco seasoning of your choice)
6 ounces cream cheese, softened
2-3 heaping tablespoons salsa
1/4 cup shredded cheddar cheese
sprinkle of cheddar cheese for the top of pockets

Directions:
Notes on making this in advance: There are two points at which you can stop this recipe and refrigerate it overnight. The first is just before the first proof. Instead of letting the dough proof, cover the bowl with plastic wrap and then a clean, damp cloth. Place it in the refrigerator for 1-5 days, keeping the cloth damp. When ready to roll, let it sit out until it comes to room temperature and doubles (about 2 hours). Another point at which you can leave the recipe overnight is after the pockets are filled and shaped. Instead of allowing them to rise another 30 minutes, cover them and refrigerate them overnight. In the morning, allow them to come to room temperature and rise (about 2 hours) before egg washing and baking.

Make dough: Mix the warm water, sugar, and yeast in a large bowl (such as in the bowl of your stand mixer, if you have one) and let it sit for 5-10 minutes until it foams. Add the salt and 1.5 cups of flour and mix. While kneading on a low speed, gradually add more flour (I added about 1 1/2 more cups) until the dough is pulling away from the sides of the bowl and barely sticks to your finger.

Spray a large bowl with cooking spray and place dough in the bowl for the first proof. Cover and place the dough in a draft-free place (many use the inside of a turned-off oven) to rise for 45 minutes or until doubled in bulk.

Make filling: While dough rises, brown ground beef, drain, and return to pan. Add packet of taco seasoning with a bit of water and cook until combined. In a separate bowl, combine cream cheese, salsa, and cheddar cheese. Add ground beef mixture to the bowl (which will melt the mixture a bit) and stir to combine.

Shape and Bake: Spray a cookie sheet with cooking spray or line it with parchment paper. Remove dough from bowl and place on a lightly-floured surface. I placed a damp, clean cloth over some of the dough while I tore off pieces to work with. Tear off golf ball sized portions (or maybe a little larger) and roll each portion out to about 1/4-inch thick (moving it around as you roll to ensure it’s not sticking, and reflouring your surface as needed). Use a large round cookie cutter (or a knife) to cut out circles about 3 or 4 inches in diameter. Spoon about 1-2 tablespoons of ground beef mixture onto each circle. Fold the circle over on itself, wetting and pressing the edges to seal. Poke each pocket with a knife to give it a steam vent, dust the excess flour off of it with a dry pastry brush, and place it on the prepared baking sheet.

Once all pockets are shaped, cover them with a clean dish towel and let them rise for another 30 minutes. When you have about 20 minutes left, preheat oven to 350 degrees F. Whisk egg and water together and brush over pockets just before baking. Sprinkle each pocket with a bit of shredded cheddar cheese. Bake pockets for 15-20 minutes or until golden. Let cool on sheet pan for a few minutes and serve warm.

Note: I received a stipend from Foodbuzz for creating this meal.

If you liked this post, please:
Subscribe to Willow Bird Baking
Follow Willow Bird Baking on Twitter
Follow Willow Bird Baking on Facebook
Give this post a thumbs up on StumbleUpon


ShareOther ways to share this post with friends!

Pretty Italian Pressed Sandwiches

Pressed —

— the air on East Bay Street was the wing of a pinned insect: dry and crisp, humming with vibrations (sound? wind?) as if still animate. The man approached us on the sidewalk with a swagger a few degrees too severe to be confidence, two hooks for hands, a face that blended into the darkness. Did we want to buy some flowers? My instinct was no-thank-you, but you uncrumpled a few dollar bills and suddenly we had a little bouquet: a peach rose haloed in anonymous blue blooms and holly berries, with the stems wrapped in tin foil.

We were still cynical in the darkness — were the hooks real? a ploy for sympathy? Later I unwrapped the bouquet to put the flowers in a plastic soda bottle filled with water from the hotel sink, and we saw the tears from the hooks in the tinfoil. Eight years later, the flowers are pressed in a bag in the back of my closet somewhere I won’t happen upon them and be injured.

Pressed —

— a late September night when I was five, when summer hadn’t yet given up the ghost. Both my mother and father were both at work. My sisters and I knew that the weather was growing more sinister. What warned us? Was it the lightning? A phone call from my halo-haired mother at the hospital? A screeching report on the news? I don’t remember, but I remember the odd mix of fear and excitement as we realized a hurricane was coming.

I had vague notions about what to do in severe weather — something about getting on your knees in a school hallway, building a fortress for your vital organs with your spine, your little hands crossed over your head. Or something about being in a basement, which we didn’t have, or in a room without windows, or was it mirrors, or was it both? The hall closet in the center of the first floor housed a hot water heater I felt sure would burst and boil us all in the middle of the storm.

My sisters conferred and decided we would take shelter under the daybed in their room, nevermind that it was upstairs and nevermind that my scrawny five-year-old arms could’ve probably lifted it. Suddenly, their clutches were on me and I was being pushed, prodded, pressed under the bed — the first one under, destined to be pinned in by the wall in front of me and both of their bodies behind me.

As I felt myself being entombed by the bed frame, a bag of bricks settled on my lungs and thick claustrophobia blanketed my esophagus — suddenly I was clawing, kicking, screeching. After a few moments of intense struggle, my battered sisters gave me up for lost and climbed under the bed themselves, probably vowing to kill me themselves if the hurricane left me unscathed. I ran into the living room with a rebellious heart, opened the blinds, and stood in front of the window as if it were a movie screen, watching the weather bend the city.

Pressed —

— the crush as I fell off the end of the slide into the dirt, the crunch as the boy behind me brought his heavy shoe down on my nose, the splatter of blood on the hopscotch court and on my pink nylon windbreaker —

Pressed —

— full body weight on bone, a long night of pain, the eventual sling, the osteal memory: an ache along a marrow corridor.

— the pressure of “using the body to eliminate the body,” the weight of no weight, the bottomless glass of chocolate milk that was the road out.

— my hands pressed under the tiny basil plant, ensuring his baby roots made contact with the new soil beneath.

— freshly made ricotta cheese unceremoniously hanged in cheesecloth, mass and gravity pressing the extra water out toward the center of the Earth,

— a new cast-iron skillet placed on top of the wrapped sandwich and then, when the weight still seemed too slight, a cast iron grill pan added as well. The mass of cast-iron compressing the thick, crusty ciabatta down into a rainbow of provolone, salami, roasted peppers. The pesto negotiating a seductive path through the bread’s caverns.

What are your memories of pressure?

Pretty Italian Pressed Sandwiches


Recipe by: adapted from The Cilantropist
Yields: about 5 servings

Ingredients:
1 loaf ciabatta bread
roasted red peppers or tomatoes
sliced hot salamis
sliced provolone cheese
fresh or deli pesto
fresh basil leaves

Directions:
Note: Make this sandwich a day in advance so it has time to press, but don’t leave it for much longer or it will get soggy. When adding each ingredient layer to the sandwich, your goal should be to ensure there’s complete coverage of the previous layer so that when you cut your sandwiches, the colors will be distinct and complete, with no gaps.

Use a long serrated knife to slice the loaf of ciabatta lengthwise. Spread on a thin layer of pesto (don’t saturate the bread) and then lay out a layer of roasted peppers or tomatoes. Next, add about 3 layers of salami (overlapping slices) and a thick layer of cheese on top of that. Top with a layer of fresh basil leaves. Spread more pesto on the top slice of ciabatta and settle it on top of the sandwich. Wrap the sandwich tightly in plastic wrap and refrigerate with a weight on top — I used a cast-iron skillet and a cast-iron grill pan. When ready to serve, use a serrated knife to slice into pretty squares.

P.S. This recipe was part of my elementary school throwback picnic! Visit that post to see more picnicky fun.

If you liked this post, please:
Subscribe to Willow Bird Baking
Follow Willow Bird Baking on Twitter
Follow Willow Bird Baking on Facebook
Give this post a thumbs up on StumbleUpon


ShareOther ways to share this post with friends!

World’s Best Grilled Cheese (Sharp Cheddar & Caramelized Onions on Beer Bread)

You’ve been shipwrecked on a desserted — ahem, I mean deserted — island. Your food options are limited to a sandwich (minus the “wich” part) and a very peevish looking saltwater crocodile who doesn’t seem to want you gnawing on him. After awhile your beard begins to rival that of Tom Hanks’s in Castaway, only there’s no Wilson to keep you company.

You’re hungry. You’re alone.

You’re gonna die.

Okay, sorry; that was an unpleasant beginning for a post, wasn’t it? And there’s that big knife up there underscoring the point.

I promise it gets better. Well, not too much better — you’re still gonna die. But something amazing happens first!

One day you’re wasting away on the beach entertaining fond memories of pizza while chewing on a piece of driftwood. Suddenly, a tiny Tiki Fairy appears. You know this is probably a brief hallucination indicating that an agonizing death is imminent, but you indulge your brain and greet her.

What do you know, she has a surprise for you! Drifters who find themselves starving to death on her island get to choose one last meal. Filet mignon? Truffle burger? Mom’s macaroni and cheese? You name it, you get it.

Ah, the question! It’s been posed to everyone from 50 famous chefs to death row inmates: what would you want your last meal to be?

Photographer Melanie Dunea is the one who had the brilliant idea to email 50 great chefs this question and compile their responses in her book, My Last Supper. Some of the chefs go fancy: caviar and spit-roasted pigs would be in Gary Danko’s final spread. Others prefer simple, comforting food from their childhood: Marcus Samuelsson wants gravlax with a dill mustard sauce in his last hours.

Funnily enough, the death row inmates seem to divide along similar lines. There are cost (and other) limitations to ensure the inmates’ meals don’t become extravagant, but some still think big! One, for instance, asks for two steaks, two burgers, a sliced turkey breast, bacon, two baked potatoes, one chef’s salad, one ear of corn, one pint of ice cream, and four sodas. Others cling to small pleasures; one asks only for cool whip and cherries.

Personally, I’m torn. I want comfort food. I want my mom’s chocolate sheet cake, macaroni and cheese, and yeast rolls for sure. I want a pimiento cheese sandwich on white bread, Dad’s chicken and dumplings, and at least a dozen Coke Zeros.

But I also want luxury! I could go for some fresh lobster tail and fried softshell crab. I want a thick Wagyu rib eye. I want this cheeseburger. I want this ice cream sundae.

Can I also have some Chinese pork buns?

Oh, and one more thing. A grilled cheese sandwich wouldn’t ordinarily make my list, but this isn’t your average grilled cheese — it’s the World’s Best Grilled Cheese.

In fact, Sommer from Mama With Flavor (have you seen her blog? hilarious.) started all of my “last meal” daydreams when she responded to my tweet about this sandwich. She proclaimed it “last meal worthy.” And worthy it is: sharp cheddar cheese and sweet caramelized onions are piled high and toasted between two slabs of buttery, freshly baked beer bread.

Trust me, this sandwich would be a far better companion on your deserted island than any anthropomorphized volleyball. With the very first bite I took, I knew I’d struck genius. Lunch (or dinner, or midnight snack, or breakfast, or even dessert) just doesn’t get much better than this. And with a recipe for fresh bread that consists of only four ingredients, it doesn’t get much simpler than this either.

You know what I have to ask for my parting question — and I can’t wait to read your answers! What would your last meal be?

Sharp Cheddar, Caramelized Onions, and Beer Bread Grilled Cheese


Recipe by: Adapted from Catherine Bienik (beer bread) and Simply Recipes (caramelized onions)
Yields: one loaf of beer bread (up to about 4-5 sandwiches)

Bread Ingredients:
3 cups self-rising flour
scant 1/2 cup sugar
12 ounces beer (I used Guinness)*
3 tablespoons butter, melted

Caramelized Onion Ingredients:
4 onions, sliced thinly
salt to taste
olive oil

Other Sandwich Ingredients:
about two tablespoon of butter per sandwich desired
sharp cheddar cheese

Directions:
Make bread: Preheat oven to 375. Grease a loaf pan or line it with greased parchment paper. Mix flour, sugar, and beer until combined and pour batter into pan. Cook for 40-45 minutes, or until top is well browned and loaf feels firm (you can also stick a toothpick in; if it comes out clean, the loaf is ready). When the loaf is close to done, brush the top thoroughly with melted butter and let the loaf bake for 3 minutes. Remove to a cooling rack to cool for about 20 minutes before removing it from the pan and cooling completely.

While bread is baking and cooling, caramelize onions: Put a few tablespoons of olive oil into a skillet over medium-high heat. Once the oil is translucent and shimmering, add onions and cook for about 10 minutes, stirring every few minutes. Add salt to taste and continue to cook, stirring every few minutes, for 30 minutes to an hour. The goal is to let the onions sit long enough that they start to cook down and caramelize, but not to let them burn. If they seem to be sticking or burning at any time, you can do any of the following: add some more oil to the pan, turn down the heat slightly, or add some water to the pan. Once the onions are a rich brown, remove them to a container to cool slightly before use. Store extra onions in an airtight container in the refrigerator.

Assemble your sandwich: Once the bread has cooled, use a serrated knife to cut it into slices. In a skillet over medium heat, melt one tablespoon of butter. Place a slide of bread into the skillet and pile on sliced cheese and caramelized onions (note: you can brush the underside of the bread all over with melted butter first if you want to ensure even browning). Place another slice of bread on top.

Cook until the bottom slice of bread is well toasted (peek every now and then by lifting a corner) and then gently flip, using your hand to brace the top slice of bread as you do so. You can add more butter if your skillet looks dry, lifting the sandwich to allow the butter to run underneath. When both sides are golden and toasted, remove sandwich to a serving plate and microwave for 30 seconds to insure melty cheese. Repeat these steps to make as many other sandwiches as you want! Serve immediately.

*NOTE: I don’t drink, so I wasn’t sure what sort of beer to use. This recommendation from a friend was outstanding, though! For information about how much of the alcohol cooks out of a given dish, please see this chart. In this particular recipe for beer bread, only about 30% of the alcohol remains in the entire loaf after cooking.

If you liked this post, please:
Subscribe to Willow Bird Baking
Follow Willow Bird Baking on Twitter
Follow Willow Bird Baking on Facebook
Give this post a thumbs up on StumbleUpon


ShareOther ways to share this post with friends!

1 18 19 20 21 22 27