cream cheese

Valentine’s Truffle Heart

Sometimes I ask Mike to carry my dog down three flights of stairs only to have her patently refuse to piddle in the freezing cold. Sometimes I ask Mike if he will please clean the inevitable piddle on the carpet in the corner. Every now and then, I ask Mike if he will help scrub the pile of dirty dishes that have built up while I’ve been barricaded in my room grading. And periodically, I’ll admit, I ask Mike to do the acrobatics necessary to feed my handsome humblebee of a (sharp-clawed) turtle.

Mike’s a good guy. He’s a GREAT guy.

The least I can do is fuss over him a bit, especially on holidays. I love making a big impressive feast for his birthday, our anniversary . . . and Valentine’s Day. Oh, are you one of those Valentine’s Day haters? Eschewing the greeting card industry, scoffing at the idea of commercialized love, decrying the superficiality of a Necco®-hearts-based love-fest? I’m not. True, we don’t have a fancy celebration, but Mike and I do value the day for what it is: an excuse to love on each other through small gifts, thoughtful gestures, and food. That’s right . . . it’s an excuse to EAT. An excuse to eat cake truffles!

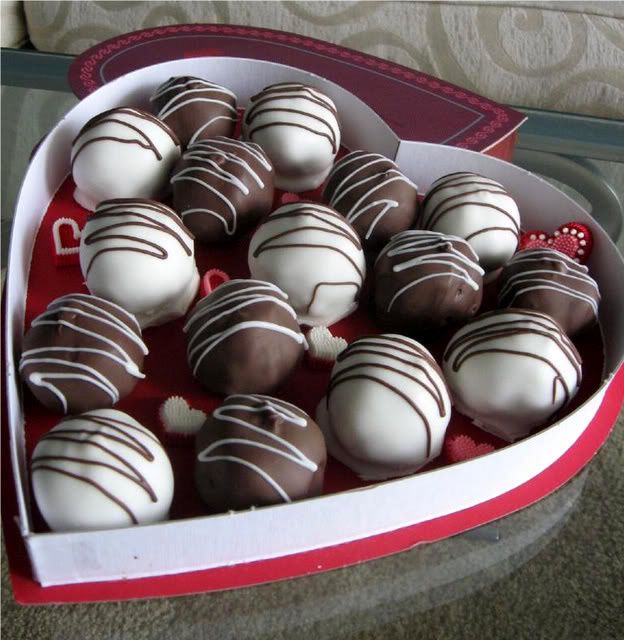
In case you’re hunting for sweet food ideas for your sweetheart, I thought I’d share with you the fun gift I made for Mike last year: a heart-shaped box filled not with candy, but with Red Velvet Cake Truffles and Oreo Truffles. Apart from being indulgent, rich, moist, and delicious, the truffles were a personal, handmade gift — always the best kind! This Valentine’s Day present was a sweet treat for my students, too, since they got to eat the original candy from the heart-shaped box.


Can you find Byrd in the background?

I have a few ideas jangling around for this Valentine’s Day, but they’re top secret for now! What about you? What fun meal or treat are you planning for the people you love?

Red Velvet Cake Truffles / Cake Balls


Recipe by:

Bakerella (truffles)
– Mom (cake)
Paula Deen (frosting)

Yields: about 50 balls.

Cake Truffle Ingredients:
1 9 x 13 in. Red Velvet Cake (see recipe below)
About 1.5 – 2 cups cream cheese frosting (see recipe below)
White chocolate bark / White candy coating (not baker’s chocolate)

Cake Ingredients:
1/2 cup vegetable shortening
2 eggs
2 tablespoons cocoa
1/2 teaspoon salt
1 1/2 cups sugar
1 teaspoon vanilla
1 cup buttermilk
2 1/2 cups flour
1 teaspoon soda
1 tablespoon white vinegar
2 ounces red food coloring

Frosting Ingredients:
1 pound cream cheese, softened
2 sticks butter, softened
1 teaspoon vanilla extract
4 cups sifted confectioners’ sugar

Directions:
For the cake: Preheat oven to 350 degrees F. Cream Crisco, sugar, and eggs. Make a paste of the cocoa and coloring and add to the Crisco mixture. Add salt and vanilla. Add buttermilk alternately with the flour, beginning and ending with flour. Mix vinegar and soda right before using and add to mixture by folding in. Pour batter into a 9 x 13 in. pan and bake at 350 degrees for 25-30 minutes. Cool completely.

For the frosting: In a large mixing bowl, beat the cream cheese, butter and vanilla together until smooth. Add the sugar and on low speed, beat until incorporated. Increase the speed to high and mix until very light and fluffy.

For the cake balls:
1. After cake is cooked and cooled completely, crumble into large bowl.
2. Mix thoroughly with 1 can (or about 1-2 cups if you’re using homemade — add some and mix it, and continue adding a little and mixing it until it reaches a playdough like consistency) cream cheese frosting. (It may be easier to use fingers to mix together, but be warned it will get messy.)
3. Roll mixture into quarter size balls and lay on cookie sheet. (Should make 45-50. You can get even more if you use a mini ice cream scooper, but I like to hand roll them.)
4. Chill for several hours. (You can speed this up by putting in the freezer.)
5. Melt chocolate in microwave per directions on package.
6. Roll balls in chocolate and lay on wax paper until firm. (Use a spoon to dip and roll in chocolate and then tap off extra.)

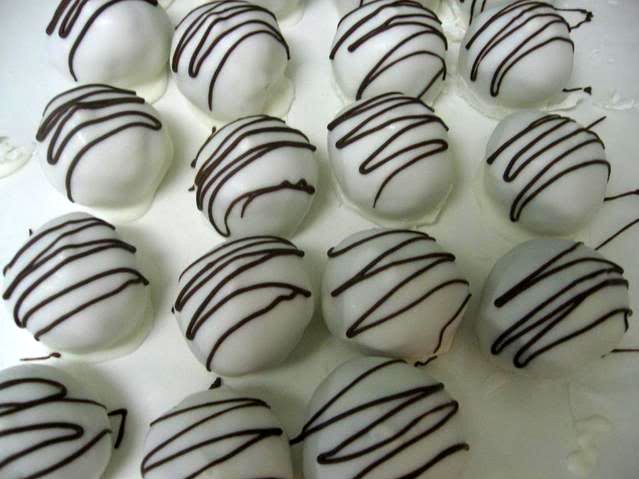
The hardest part of this is definitely the dipping. If you use white candy coating like I did (Candyquik), be prepared to double dip them to get them nice and white. After heating the white coating, I sat its bowl in a larger bowl of hot water to keep it melted. I then held the cake ball on a toothpick and spooned the white coating over it. To prevent the cake ball from having a huge “foot” from puddling coating, you have to let the excess drip off for quite awhile before wiggling it off the toothpick onto the wax paper. You find a groove. Eventually. The chocolate drizzle was applied with a ziplock bag that had the tiniest bit of its bottom corner cut off.

I only used half of my red velvet cake for the cake balls. With the leftovers, I made a little heart-shaped cake. You could also freeze any you didn’t want to use immediately for future cake ball exploits!

Oreo Truffles


Recipe By: Bakerella
Yields: about 36 truffles.

Ingredients:
1 package oreo cookies (divided… use cookie including the cream center)
1 8oz. package cream cheese (softened)
white chocolate bark

Directions:

1. Finely crush 7 cookies in a food processor or place them in a ziploc bag and crush into a fine consistency. Reserve for later (Julie note: I skipped this part)
2. Crush remaining cookies and stir in softened cream cheese. Use the back of a large spoon to help mash the two together.
3. Roll the mixture into 1″ balls and place on wax paper covered cookie sheet.
4. Melt chocolate as directed on the package and then dip balls into chocolate, tap off extra and set aside on wax paper covered cookie sheet to dry. You can sprinkle the tops with the 7 crushed cookies for decoration. (I usually eat mine before they make it to this stage.)
5. Once dry, refrigerate and enjoy!

I used the chocolate candy coating (Candyquik) for this. Once again, the white drizzle was applied with a ziplock bag that had the tiniest bit of its bottom corner cut off.


Mixing and forming red velvet cake truffles.


Red velvet truffles dipped and drying; oreos being crushed (a food processor makes this even easier).


Forming oreo truffles.


The finished (personalized!) present.

Need some other Valentine’s Day ideas? How about Red Velvet and Oreo Kisses? Red Velvet Cupcakes with Cream Cheese Frosting and Chocolate Hearts? Fancy French macarons? A dozen Mango Raspberry Rosecakes? Take a look at the Recipe Index for more ideas.


Share Share this post with friends!

Pumpkin Cheesecake Bread Pudding

For those of you still earnestly hanging on to New Year’s diet resolutions, grappling with temptation like Indiana Jones wrestling a greased wild boar . . . I’m sorry about this! Really! Because I did, indeed, just say pumpkin. And cheesecake. And bread pudding. All in the same dessert, y’all. You’re going to want to step away from the rice cakes and start slicing up some brioche right about now.

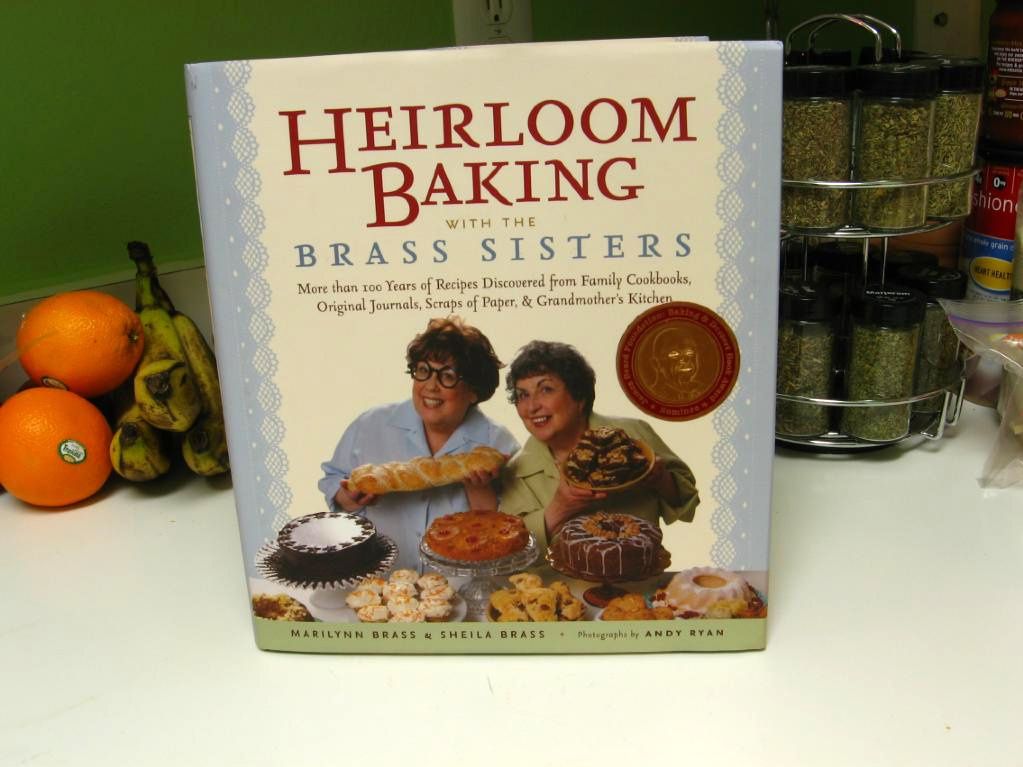
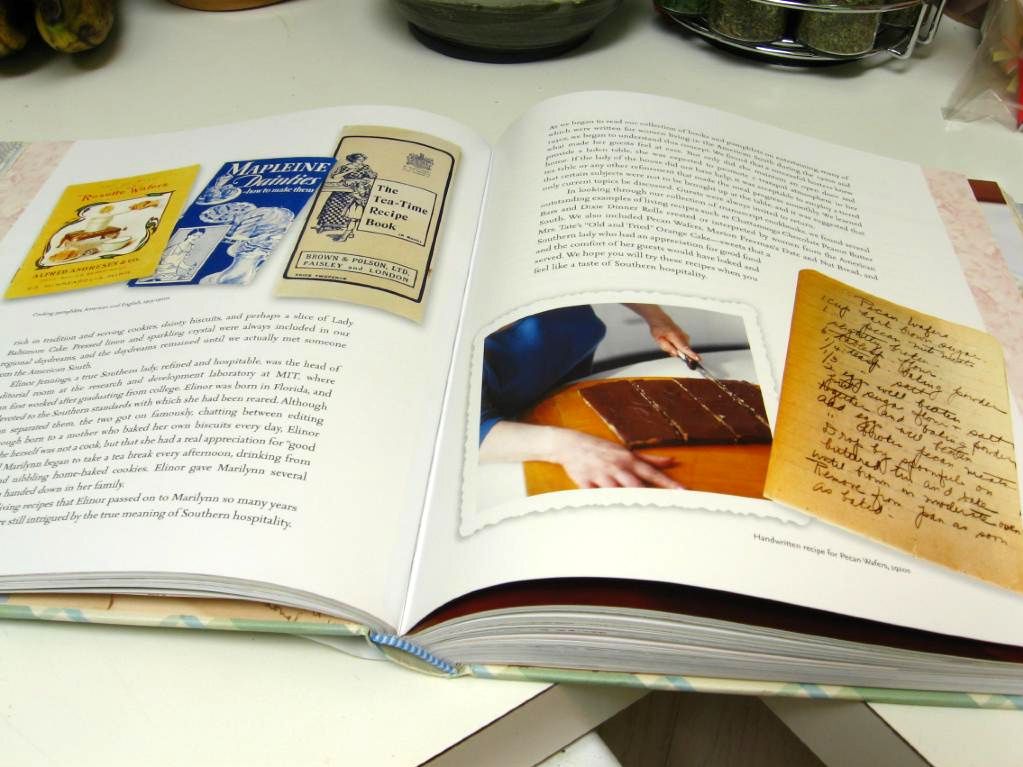
This is how it all began. I have a new cookbook I’ve been carting around with me and fawning over: Heirloom Baking with the Brass Sisters. I actually bought it as a Secret Santa gift for my Sunday school Christmas party, but then couldn’t go at the last minute. So I kept it. And was secretly really glad that I got to keep it. That sounds terrible, doesn’t it? Let me explain!

Heirloom Baking is “more than 100 years of recipes discovered from family cookbooks, original journals, scraps of paper, & grandmother’s kitchen.” You know the box in your kitchen stuffed full of your great aunt Ida’s best dishes, scrawled down in her own lilting handwriting? Or the dusty, well-worn church recipe album from 1982 that includes pictures of every church member — thick-framed glasses, 80s hair and all? Those recipes are some of the best: loved and fiddled with by generations of family cooks, served annually for decades, passed down verbally or jotted on scrap paper. If you’ve ever wished you could round up all of your family recipes and solicit your friends for theirs, you’ll love Heirloom Baking, because that’s exactly what the Brass sisters have done for you.

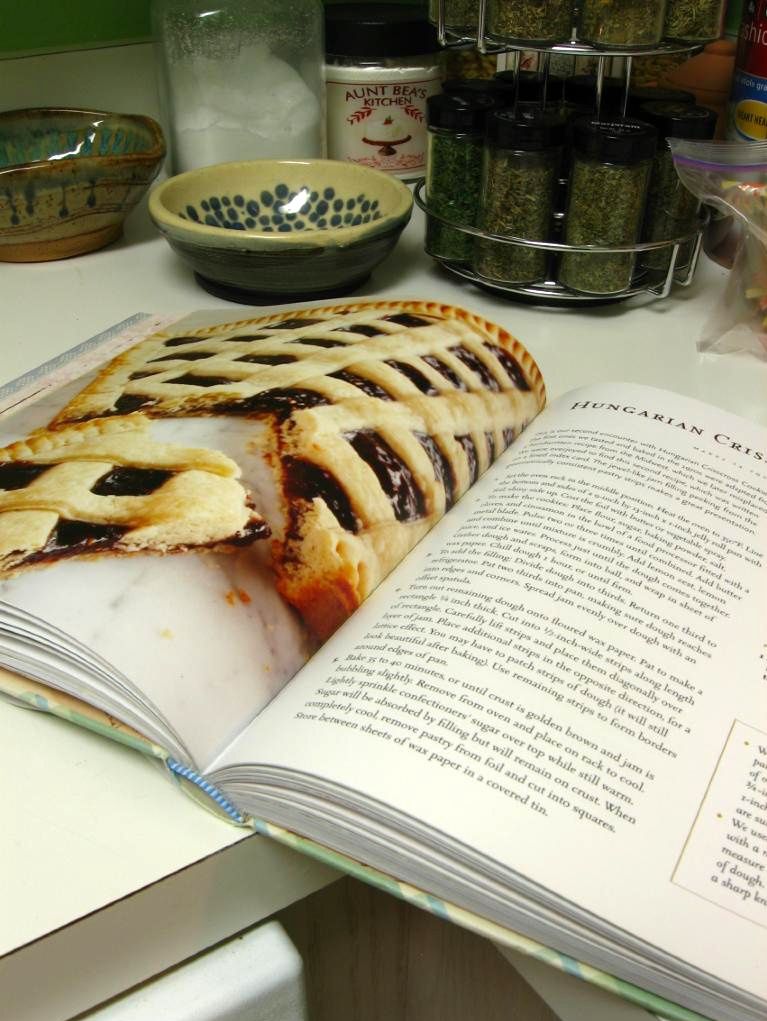
Obviously, I am in love with this charming book. Recipes include Brass family favorites as well as personal recipes from collections the sisters found at flea markets, yard sales, used bookstores, or friends’ houses. Scattered throughout the book are gorgeous images of the original recipes, dated cookbooks, and antique bakeware. Mike and I amused ourselves for an hour flipping through pages, perusing lovely images of handwritten recipes from decades and centuries past, and drooling over the full-page photographs of delicious baked goods. Let me stop being quite such a fangirl and just say, simply, that the book was nominated for a James Beard Foundation Baking and Dessert Book Award for good reason.

Book Stats: 312 pages, $29.95 list price ($19.77 on Amazon), indexed.
Accessibility: Enough information for a beginning baker.
Examples of Recipes: Auntie Dot’s Dutch Apple Cake, Chocolate Bread and Butter Pudding with Plum Jam, Louise Zimmerman’s Cookies Without a Name, Ida’s Cheese Turnovers, and various other assortments of cookies, cakes, puddings, breads, pastries, and pies.
Overall Impression: Fun to read because of such intriguing subject matter and engaging anecdotes. Full of exciting recipes and photos.
Overall Rating: 5 out of 5 stars

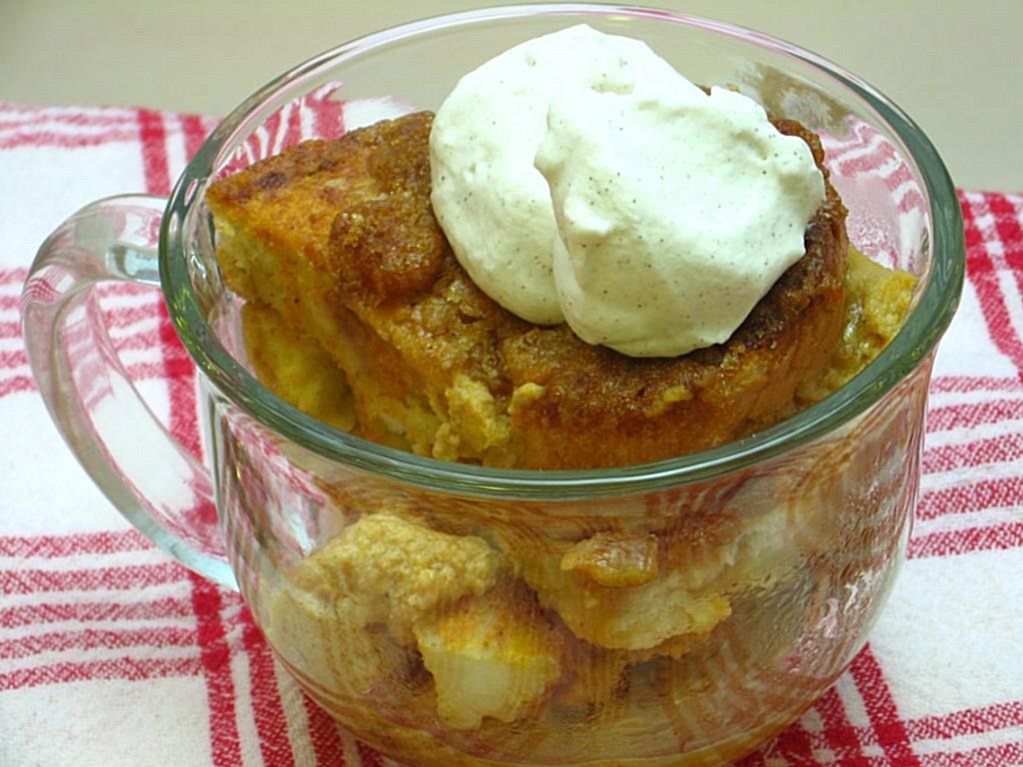
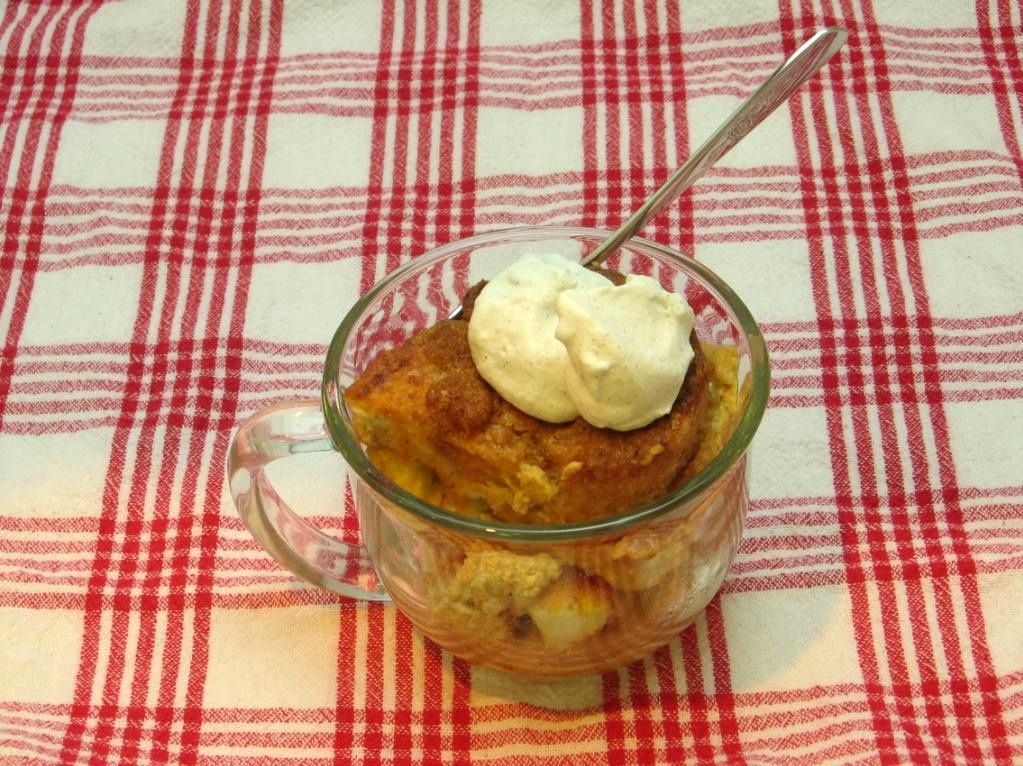
In case you’re wondering how I managed to convince Mike to enjoy a cookbook with me for longer than a millisecond, it has a little something to do with my offer to make him anything he chose from its pages. I’m not above a little strategic bribery! It was a difficult decision, but he settled on this rustic and beautiful Pumpkin Cheesecake Bread Pudding. You already knew he had good taste, right? I hear he’s got a pretty awesome girlfriend. Just something I heard . . .

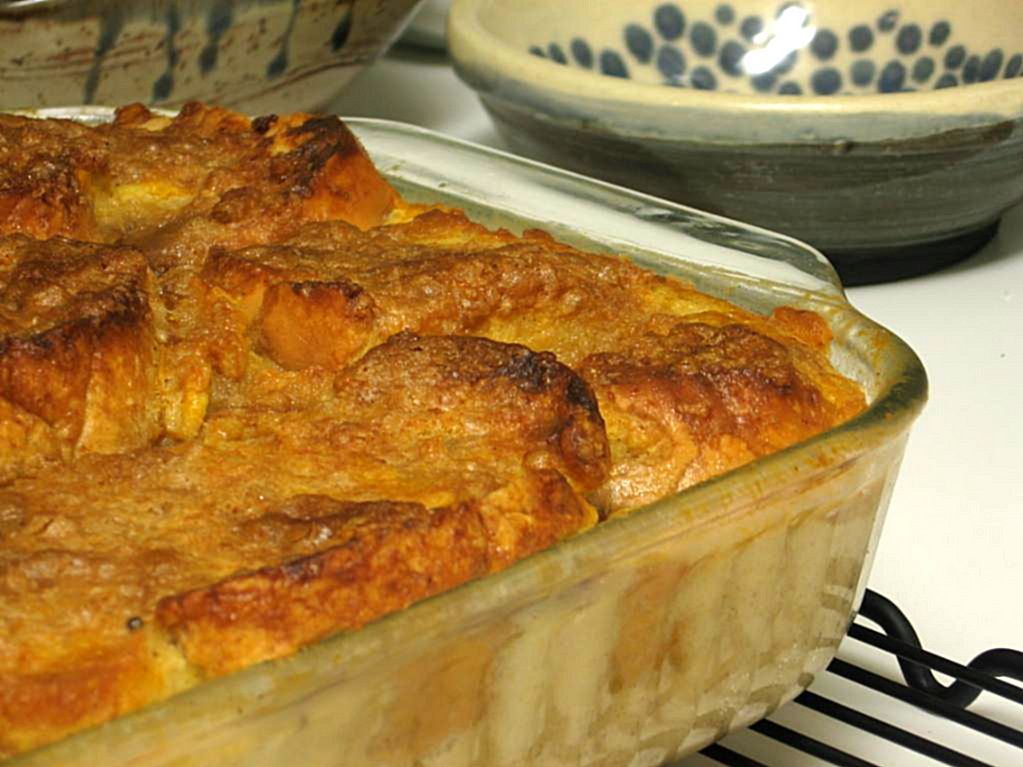
Truth is, this pudding was fantastic. Bread pudding is the soul food of dessert for me: humble, dense, and gorgeous. It’s a peasant dish in its thrift and convenience; it makes use of sometimes stale bread or cake scraps by soaking them and baking them into a filling new dish. It’s also a dish fit for royalty: luxurious, silky, warm, and indulgent. The toasty, custardy texture reminds me of the milk toast my family used to covet for breakfast each morning: buttered toast topped with cinnamon-spiked, buttery hot milk. But this bread pudding takes bread to a whole new level.

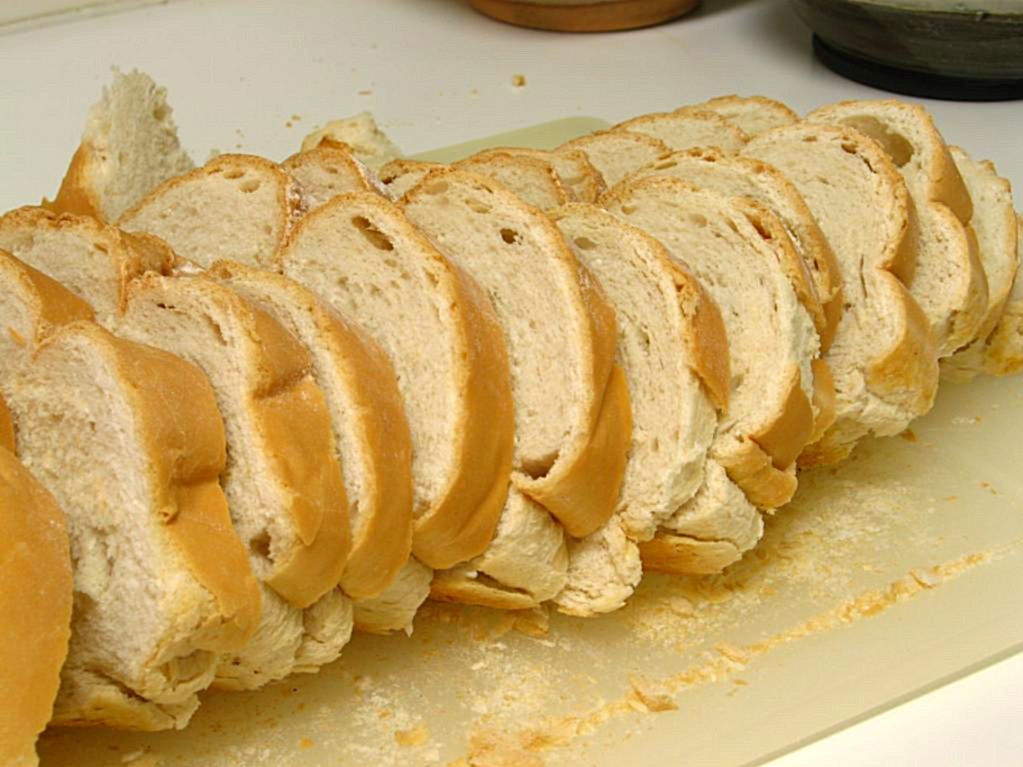
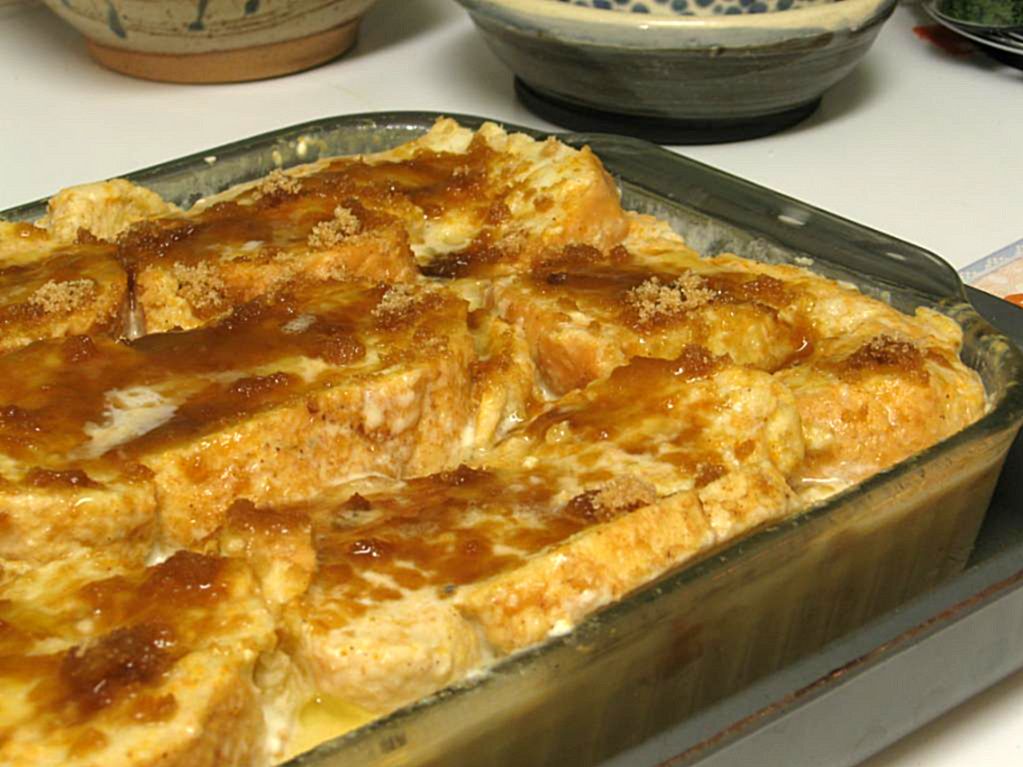
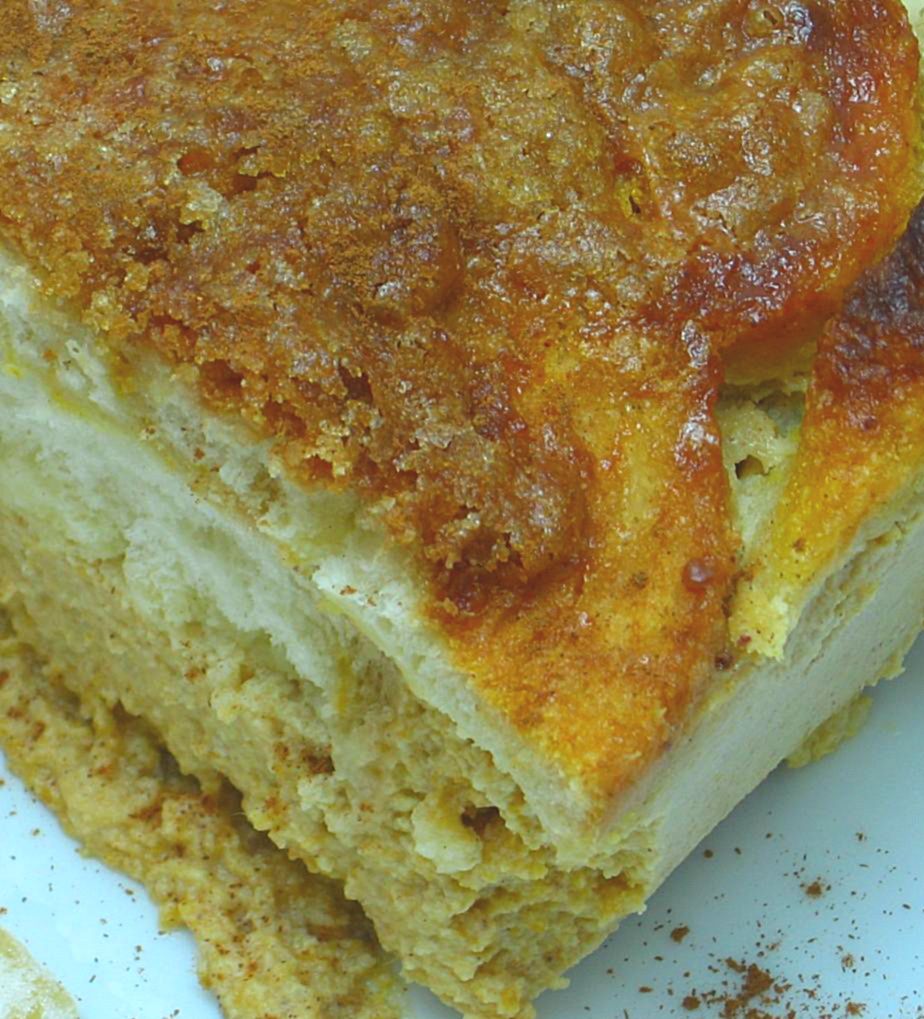
Pumpkin, spice, and cream cheese form the delicious custard base poured over and around sliced brioche (or in my case, a firm loaf of fresh-baked Italian bread from my local grocer). The best part of the pudding, though, is definitely the buttery brown sugar topping that crisps up on the top layer of bread, forming a gorgeous, golden brown layer of cinnamon toast!


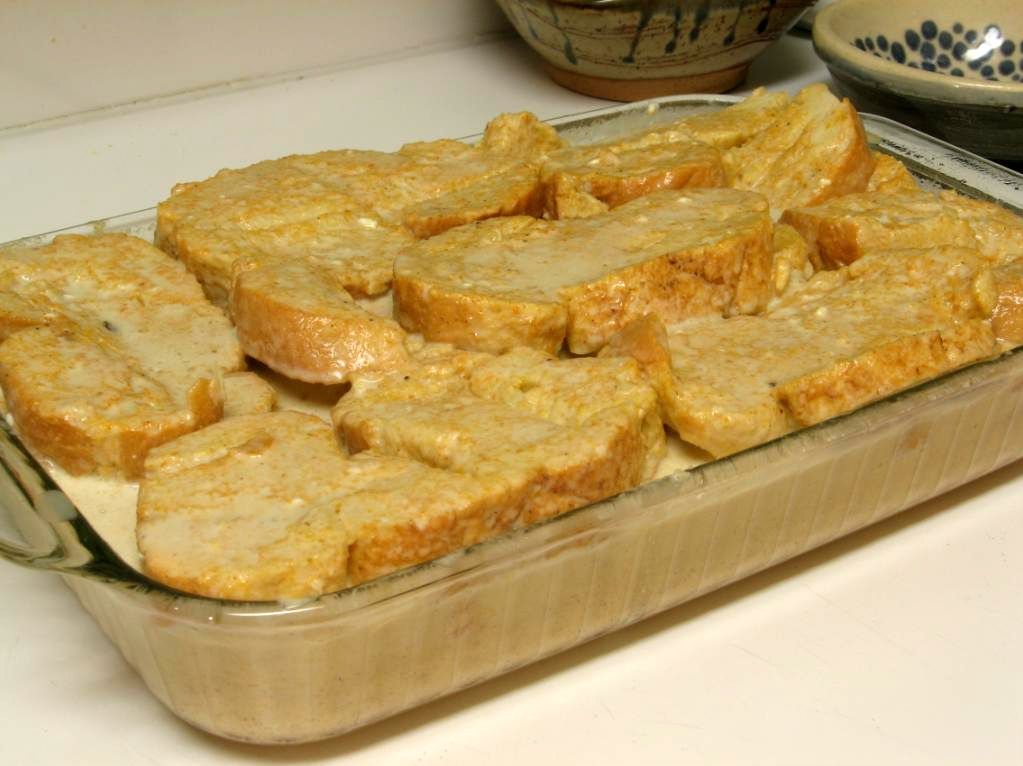
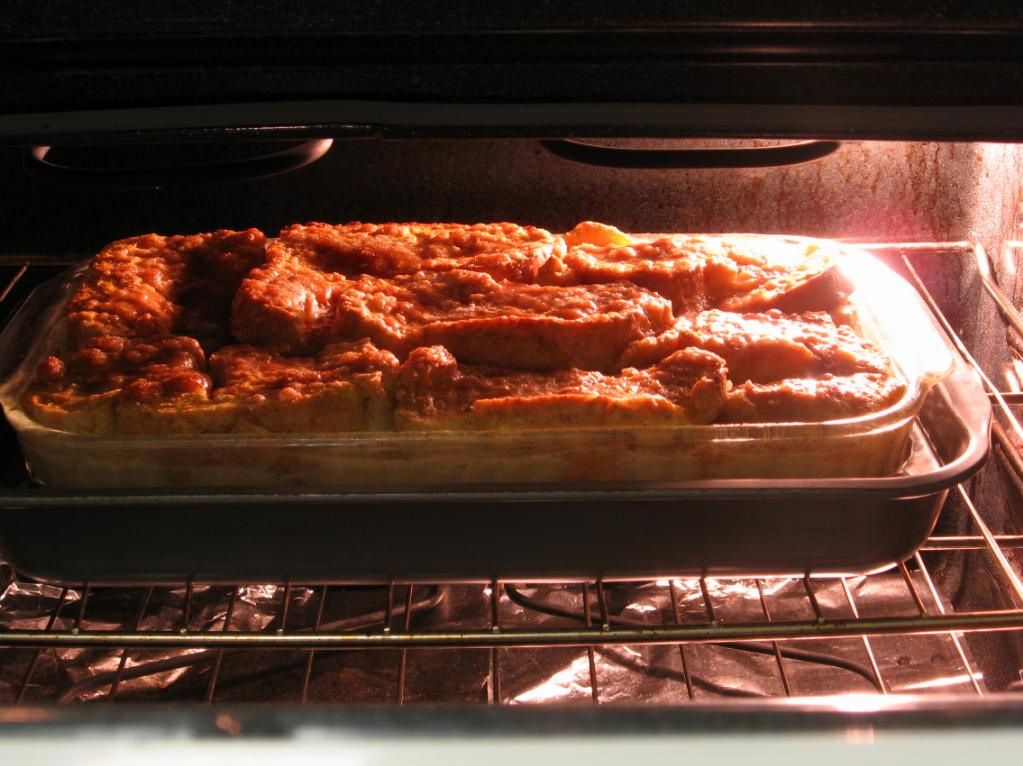
Before and after baking.

The flavor combination couldn’t have been more perfect — the pumpkin was light and balanced by the cream cheese custard. Even Mike’s granddad, who is not enamored with pumpkin, said he loved the pudding. I whipped up some fresh cinnamon whipped cream (2 cups heavy cream, 1 teaspoon cinnamon, icing sugar to taste) to heap on each serving. Ice cream would also be delightful, or just pour a little cold heavy cream over your puddin’ and dig in.

Pumpkin Cheesecake Bread Pudding


Recipe by: Heirloom Baking with the Brass Sisters
Yields: 20 servings

For bread layers:
14 to 16 1/2-inch slices brioche or firm white bread, trimmed of crusts and cut in half
1 1/2 cups butter, melted (I only needed about a cup)

For custard:
2 8-oz. packages cream cheese, at room temperature
1 cup sugar
6 eggs
1 15-oz. can (about 1 3/4 cups) pumpkin
2 cups milk
1 cup heavy cream
1 teaspoon vanilla
1/4 teaspoon salt
1 teaspoon allspice
1 teaspoon ginger
1 teaspoon nutmeg
1 teaspoon cinnamon

For topping:
1/2 cup brown sugar, packed
2 tablespoons butter, melted

Directions:
1. Set the oven rack in the middle position. Preheat the oven to 350 degrees F. Coat a 9-inch by 13-inch ovenproof glass baking dish with vegetable spray. Set aside a larger metal baking pan and rack for the water bath.
2. To prepare the bread: Brush each slice of brioche on both sides with melted butter.
3. To make the custard: Combine cream cheese and sugar in a bowl and mix until smooth.
4. Combine eggs, pumpkin, milk, heavy cream, vanilla, salt, allspice, ginger, nutmeg, and cinnamon in the bowl of a standing mixer fitted with the paddle attachment (Note: I used my hand mixer without difficulty). Beat until smooth. Add cream cheese mixture and combine.
5. Pour 1/2 cup pumpkin custard in bottom of baking dish. Tilt and swirl dish until bottom is completely covered with a thin layer of custard. Layer 6 slices of brioche on top of custard. Pour half of remaining custard over brioche. Add remaining brioche and custard in layers.
6. To add the topping: Use a knife to cut 8 slits through layered pudding. Cover top of pudding with plastic wrap and press down gently with your palm. Let stand 15 minutes. Remove plastic wrap and sprinkle brown sugar over top of pudding. Pour melted butter over sugar.
7. Place baking dish on rack in large metal pan. Pour hot water from a glass measuring cup into the outer pan until water level rises halfway up sides of baking dish. Place carefully in oven. Bake 1 hour to 1 hour and 15 minutes, or until top is nicely browned and custard has rise to top of baking dish (Note: I covered very loosely with foil to prevent top from getting too brown, but did not crimp foil down so as to avoid steaming the crisp topping). Check water bath occasionally and add more water if needed. Do not let the water evaporate form the water bath.
8. Carefully remove baking dish from oven and water bath. Allow pudding to cool on rack 1 hour. Serve slightly warm or cold with whipped cream or vanilla ice cream. Store covered with a paper towel and plastic wrap in the refrigerator.

Reprinted from Heirloom Baking with the Brass Sisters by permission of Black Dog & Leventhal Publishers, Inc. © Copyrigh 2006 Marilynn Brass and Sheila Brass.


Soaking bread, and then the whole pudding in the oven.


Enjoy!


Share Share this post with friends!

Thanksgiving Recipe Ideas

The students have all closed their novels and packed up their supplies for Thanksgiving Break, so it’s time for me to take a deep breath and relax — until the baking begins tomorrow, of course! Because I enjoyed reading Jillicious‘s list of things she’s thankful for this year, here are a few of my own:

  1. Jesus, who made the greatest sacrifice for me.
  2. My family — they’re crazy, wonderful, and so supportive.
  3. Mike, who has never disliked anything I’ve ever cooked, whether overseasoned, underseasoned, burnt, or weird.
  4. Cake.
  5. Friends, for joining me in ridiculous escapades.
  6. My students, who make me laugh every day and (usually) make me feel like I’m making a difference through my teaching.
  7. Writing.
  8. Byrd and Squirt, my poodle and red-eared slider. One is fluffy and hyper, the other is scaly and . . . frowny; nevertheless, they’re both the sweetest pets anyone could ask for, and have made my little apartment a home.
  9. My snuggie. Shut up; it’s comfortable!
  10. Food, which is one language through which history, family, culture, and emotion has been communicated to me. I love joining the conversation.

On that note, here are some dishes that have warmed the pages of Willow Bird Baking in the past months that would be lovely on your Thanksgiving dinner table. May you enjoy the sharing of mirth, love, and calories with your family this year!


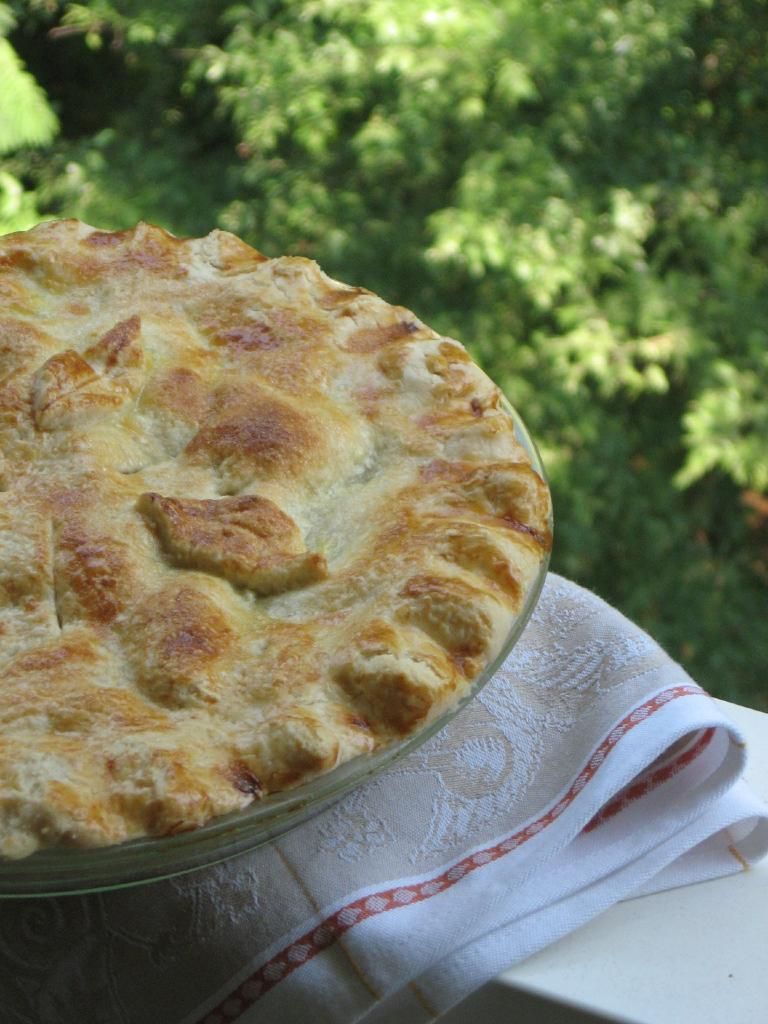
Mini-Pies: Pumpkin, Peach Crisp, and Sour Cream Apple — Add some variety to your Thanksgiving pie choices! Everyone gets to choose their own flavor. The pumpkin and peach pies are especially scrumptious.


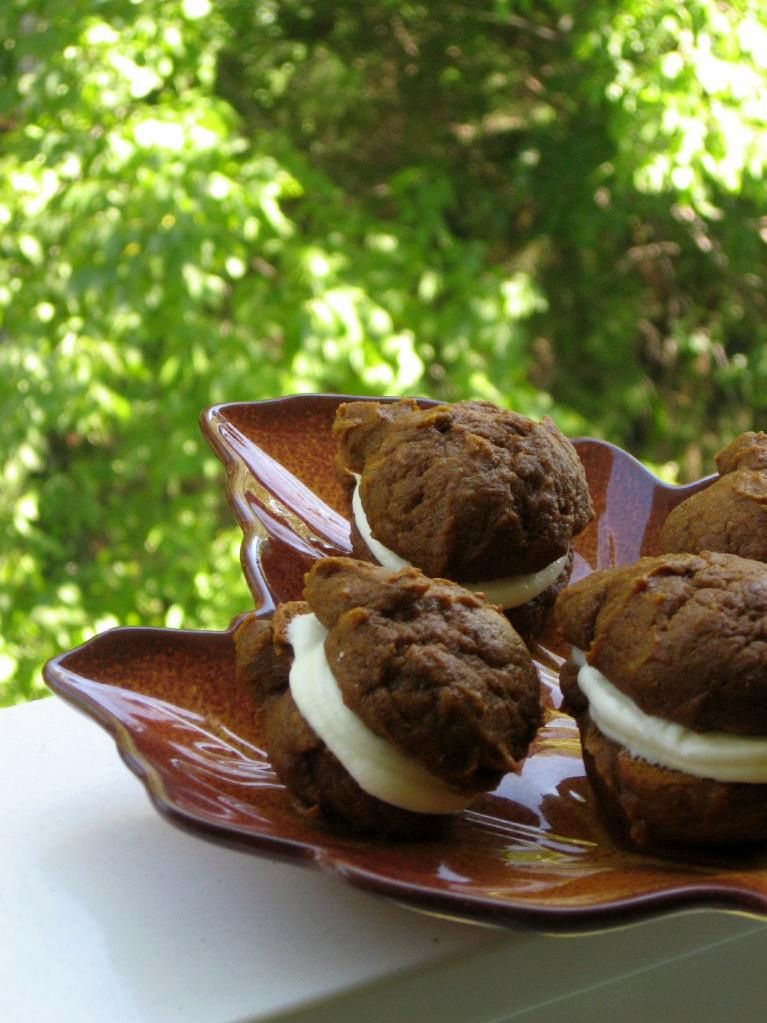
Jack-O’-Lantern Whoopie Pies — These cakey cookies are hearty, moist, spicy, and addictive. Whoopie pies should be part of every family’s Thanksgiving tradition.


Peach Crisp Pie — Delicious, gooey peaches and crispy oats fill a tender, flaky crust. This is my favorite pie of all time!


Best Ever Cream Cheese Pound Cake with Easy Caramel Frosting and Spiced Apples — This moist, dense, finely-crumbed cake is heavenly with or without some spicy cinnamon apples on the side. “Best Ever” is not an exaggeration!


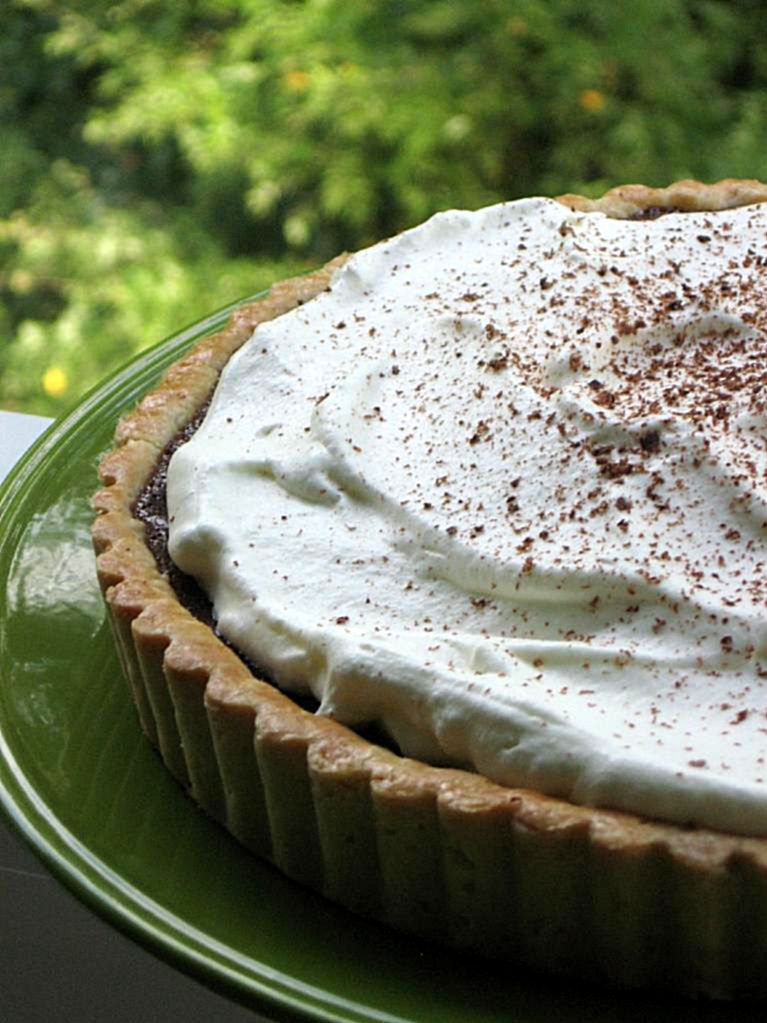
Chocolate Tart — Tired of pumpkin? If you’re a chocolate lover, this tart is a must-eat. Rich, indulgent chocolate fills the buttery tart crust, and a pile of freshly whipped cream accompanies each bite. This post also includes a bright and tangy Raspberry Cream Cheese Tart.


Overnight Yeast Rolls — These fluffy, delicious, buttery yeast rolls are part of my family’s annual Thanksgiving tradition. When I realized I was old enough to make them myself (and at any time of year, too), it was one ecstatic day in the kitchen!


Cardamom Pumpkin Macarons — Having an elegant Thanksgiving? These gluten-free cookies combine cardamom with traditional Thanksgiving pumpkin. Macarons are the perfect bite: crisp on the outside, chewy on the inside.


Barefoot Contessa’s Carrot Pineapple Cake — Looking for a big, beautiful cake to adorn your Thanksgiving table? Barefoot Contessa’s Carrot Pineapple Cake is brimming with hunks of pineapple, carrot, walnut, and raisin. With cream cheese frosting slathered on in a thick layer, it’s an elegant and decadent Thanksgiving dessert.

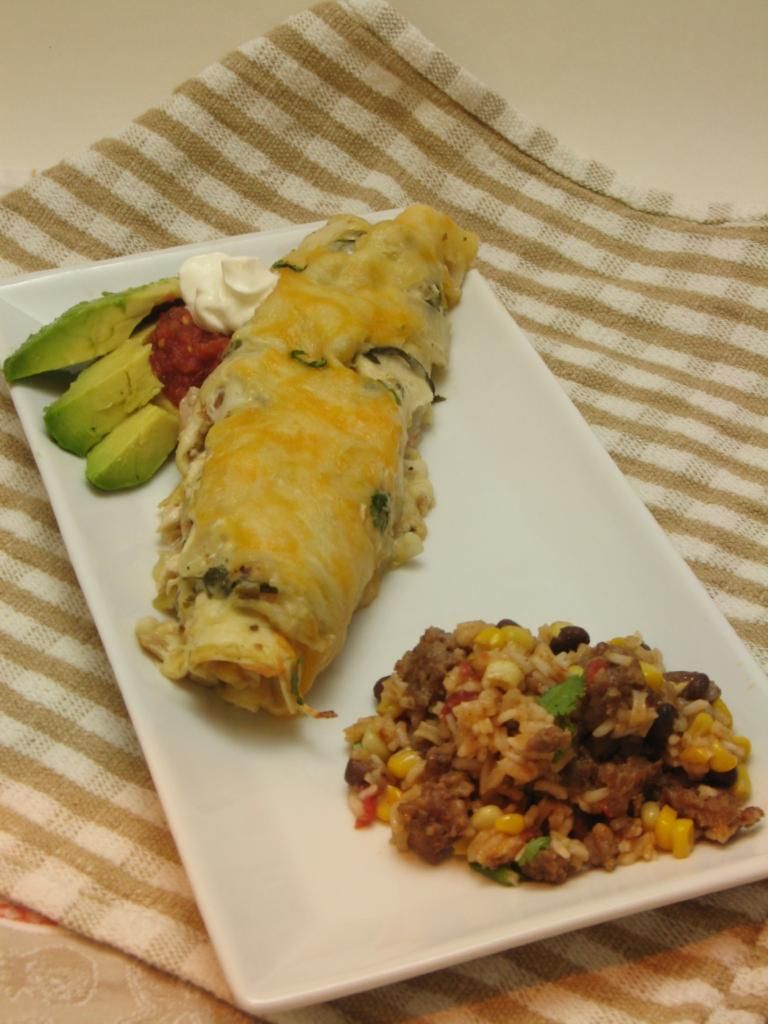
Green Chile TURKEY Enchiladas — Okay, these don’t quite fit on the Thanksgiving dinner table, but maybe you find yourself wondering what to do with all your juicy turkey leftovers? These Green Chile Chicken Enchiladas can be transformed into turkey-filled treats, and what a great way to spice up leftovers. The recipe is so seductive, yet very simple — it won’t take up all of your Black Friday!


Share Share this post with friends!

Barefoot Contessa’s Carrot Pineapple Cake

Yesterday was my church’s annual Fall Festival, complete with rides, games, costumes, boatloads of candy, and funnel cakes. I didn’t actually attend (I know, I know. I can’t believe I passed up a funnel cake, either), but agreed to bake a cake for the cake walk.


Fall falling outside my window.

You remember cake walks, right? There are numbers painted or chalked onto the ground, and you walk on them as music plays. When the music stops a number is called, and the lucky person standing on that number takes home a homemade (one hopes) cake. It’s the simplest game — no skill required! — with the best prize. There is a tad bit of strategy involved, though: you want the Good Cake. You know the one. You see it sitting on the side table waiting for it’s turn to be auctioned off. While other cakes might look small, slouchy, dry, or plain, the Good Cake is gigantic — maybe a sheet or layer cake — with fluffy frosting piled high. The baker’s loving effort is showcased with careful decorations and neat packaging. You time your turn to walk based on when the Good Cake is finally up to be won.

Remembering my own childhood cake walks, I knew I wanted whatever cake I baked to be the Good Cake. I wanted people to all jump in line for the cake walk when it was up on the podium, to shout with glee when they won, or perhaps to brawl a little for it as though it were the last musical chair. Okay, okay, I guess brawling at the church festival is out. Maybe they can just feel a little scrappy. With my Good Cake aspirations in mind, I set out searching for a cake that met these criteria: a moist layer cake that didn’t require refrigeration and had fluffy frosting, decorating potential, and a widely popular flavor. I settled on Ina Garten’s Carrot Pineapple Cake.

Carrot cake is Mike’s absolute favorite, and that’s part of what drew me to this gorgeous cake. On the first birthday I ever baked for him wayyyy back in high school, my mom helped me fashion a little round carrot cake that he adored. For the last decade, though, I haven’t made him another — instead, we only get it when we eat out. Of course I needed to rectify that! I decided I’d make one for us with Ina’s decadent, thick cream cheese frosting while making one for the festival with a sturdier buttercream.


Two cakes and lovely fall foliage.

The cake turned out exceedingly moist, chunky, and dense. It’s an adventure of walnuts, carrots, raisins, cream cheese, and spice cake in every mouthful. The pineapples don’t really come through as a separate flavor, but serve more to moisten the cake. Each slice is a homey, thick, creamy, wonderful experience. Carrot cake isn’t typically my favorite flavor, but if anything could change my mind, it’d be a thick hunk o’ this baby. I’m going for full disclosure here: I definitely just ate piece #3. While I loved the cake, Mike was over the proverbial moon (and maybe even wound around it a few times). I hope the lucky cake walker was as well!

Decorating these cakes was my favorite part; how often do you get to try two presentations at once? For our version, I went with simple elegance: a cream cheese swoosh and some walnuts. For the cake walkers’ version, I wanted to do something a little fancy. I’d seen this incredibly cute autumn tree decoration on a Taste of Home recipe:


Photo by Taste of Home

They created this with melted chocolate, raisins, golden raisins, and dried cranberries. Isn’t it adorable?! But chocolate on a carrot pineapple cake didn’t sound appealing, so I had to be resourceful. I decided to use cinnamon sprinkled over a tree stencil to create my “spice tree.” I broke out my exacto knife and some poster board to cut out a tree stencil. This in itself was quite the feat: on my first try I painstakingly drew and cut out a tree only to realize it was too big for the cake! I had to sit down and start over. Anyone need a large tree stencil?


Attempt #1 at a tree stencil, with my inspiration on the left.


Attempts #1 and #2 for comparison.

I’m glad I took the time to fiddle with the poster board, because the cake decoration certainly turned out sweet. I can’t wait to use this idea again with melted chocolate. I have a feeling it’ll be a bit easier!

I hope you’ll take some time to make a Good Cake sometime soon. This one’s a great candidate — two luxurious layers of fall flavors.

Carrot Pineapple Cake


Recipe by: Barefoot Contessa (adapted by me)
Yields: one two-layer, 8- or 9-inch cake

Cake Ingredients:
2 cups granulated sugar
1 1/3 cups vegetable oil
3 extra-large eggs, at room temperature
1 teaspoon pure vanilla extract
2 1/2 cups plus 1 tablespoon all-purpose flour, divided
2 teaspoons ground cinnamon
2 teaspoons baking soda
1 1/2 teaspoons kosher salt
1 cup raisins
1 cup chopped walnuts
1 pound carrots, grated
1/2 cup diced fresh pineapple

Cream Cheese Frosting Ingredients:
3/4 pound cream cheese, at room temperature
1/2 pound unsalted butter, at room temperature
1 teaspoon pure vanilla extract
1 pound confectioners’ sugar, sifted

Buttercream Frosting (if you prefer):
2/3 cup white shortening
2/3 cup butter
4 cups confectioners’ sugar
1/2 teaspoon vanilla extract
1/2 teaspoon almond extract
1/2 teaspoon imitation butter flavoring

Directions:
Preheat the oven to 350 degrees F. Butter 2 (8-inch) round cake pans. Line with parchment paper, then butter and flour the pans. NOTE: You can also use 9-inch pans, but need to adjust the baking time.

For the cake: Beat the sugar, oil, and eggs together in the bowl of an electric mixer fitted with the paddle attachment until light yellow. Add the vanilla. In another bowl, sift together 2 1/2 cups flour, the cinnamon, baking soda, and salt.

Add the dry ingredients to the wet ingredients. Toss the raisins and walnuts with 1 tablespoon flour. Fold in the carrots and pineapple. Add to the batter and mix well.

Divide the batter equally between the 2 pans. Bake for 55 to 60 minutes, or until a toothpick comes out clean. NOTE: For 9-inch pans, I baked around 40-45 minutes. Allow the cakes to cool completely in the pans set over a wire rack.

For the frosting: Mix the cream cheese, butter and vanilla in the bowl of an electric mixer fitted with the paddle attachment until just combined. Add the sugar and mix until smooth. If you prefer buttercream, simply mix those ingredients together until they reach frosting consistency. NOTE: I’d use cream cheese frosting unless, like me, you needed a cake that did not require refrigeration.

Place 1 layer, flat-side up, on a flat plate or cake pedestal. With a knife or offset spatula, spread the top with frosting. Place the second layer on top, rounded side up, and spread the frosting evenly on the top and sides of the cake. Decorate with diced pineapple, chopped walnuts, or other technique.


Mixing up two cakes.


My cookin’ buddy prepared for (in)action, and then more alert when she sees two cooling cakes!


All frosted and decorated!


Oh, have you seen Byrd’s Halloween costume on the About Willow Bird Baking page? Disregard her pained expression, and please do not call Canine Protective Services! She wore the costume for a total of 10 seconds — just long enough to endure a few photos!


Share Share this post with friends!

Un Petit Trésor: Les Macarons

The time has come. What a lovely night: I’m sitting in my little white desk chair, burning my raspberry scented candle, and weaving together a story I’ve been itching to tell you for ages. Why haven’t I told it sooner? It’s about an endeavor that until this month, I simply haven’t had the nerve to attempt. In keeping with their character and mission, however, the Daring Bakers have once again pushed me out of my comfortable nest. For weeks now I’ve been flapping my wings in a frenzy, uncertain as to whether I’d fly through this challenge like a graceful (albeit nonexistent) Willow Bird, or fall to my (melodramatic) doom. Well, here I am telling you the story I’ve longed to tell you, so it must be good news, right? Let me tell you a tale of magnificence, of magic, of madness, of . . . feet?

Of feet.

Don’t be grossed out, podophobics — these aren’t the sort of feet with heels, arches, and toes. These are the sort of feet that bakers across the world have been dreaming of long before this month’s challenge rolled around. You’ve probably guessed by now that I’m referring to the sweet little feet on a lovely French macaron.

The 2009 October Daring Bakers’ challenge was brought to us by Ami S. She chose macarons from Claudia Fleming’s The Last Course: The Desserts of Gramercy Tavern as the challenge recipe.

Macarons are unique, delicate sandwich cookies with a crisp shell, soft innards, and a variety of different fillings. They’ve been called “the new cupcakes” because of their petite portion sizes, their diverse flavorings, and their meteoric increase in popularity in recent years. While I don’t think they’ll be replacing cupcakes anytime soon, macarons are infinitely versatile. The shells can be flavored with cocoa, powdered fruits, and teas; colored with bright powdered food coloring; and filled with any one of myriad ganaches, frostings, creams, nut butters, or jams.

The recipe for macarons is deceptively short and (forgive my beloved puns) sweet. The plethora of nit-picky addendums to said recipe, however, expose the truth: macarons are difficult to perfect. They’re finicky about ingredient ratios, oven temperatures, folding intensity and duration, your kitchen decor . . . you get the idea. I was nervous but determined as I set my first batch of egg whites out on the counter to age. To be honest, the aforementioned nit-picky how-tos probably added to my anxiety more than they aided my technique. My obsessive compulsive nature was on overdrive trying to compile the 847,948 macaron tips I had read, some of which conflicted and some of which were insanely detailed. I wouldn’t have been at all surprised to find someone prescribing optimal wrist angles for folding batter or proper macaron-making hairstyles.

At some point, you have to stop reading the mountain of macaron manuals and just jump on in. In that spirit, I picked up some cardamom in the bulk spice section of my local grocer and set to work on Cardamom Pumpkin Macarons.

Macaron recipes all typically follow a basic pattern: beat egg whites and sugar to a stiff meringue, process almonds and powdered sugar together until fine, sift to remove lumps, fold dry ingredients into wet ingredients to form the macaronage, pipe out into circles, and bake. I added the cardamom into my macaron shells and whipped up Tartelette’s Pumpkin Cream Cheese Filling to sandwich between them. I sprinkled some roasted, salted pumpkin seeds in the center of some of these macarons for good measure.

When I knelt to peer into my oven window and saw feet on my macarons, I grabbed my phone and my camera. The former was to call Mike and share my elation, while the latter provided a video memento of my victorious achievement. I love knowing that so many fellow bakers (daring or otherwise) have felt the joy of this very moment while sitting in front of their own ovens.

Despite my elation, my first batch of macarons certainly wasn’t perfect. They were delicious, but the shells were a bit flat. After reflecting and reading, I decided the flatness of the shells was probably due to overfolding my macaronage, and that the Daring Bakers recipe was a risk, seeing as it used a different ratio of ingredients than the accomplished Tartelette. Thus I made the following changes: I would count my strokes as I folded in my dry ingredients, ensuring that they were under 50, and I would use Tartelette’s recipe.

Batch #2 was comprised of plain macaron shells with two fillings: Cream Cheese Buttercream with Strawberry Jam, or David Lebovitz’s Chocolate Filling. And finally, using only 45 folding strokes, egg whites aged for 48 hours, and Tartelette’s careful ratio, I achieved a magnificent macaron!

While both fillings were good, we strongly preferred the chocolate filling to the somewhat overly tangy cream cheese buttercream. Y’all know I love cream cheese, but the taste of this recipe struck me as a bit odd (maybe I did something wrong). I do love the idea of cold, fruity jam on top of cream, but next time I’ll use a regular vanilla buttercream.

These gorgeous bites would be perfect with tea or coffee (I have to admit, though, I’m not a coffee drinker. In fact, that’s Coke Zero in the mug up there — go ahead and laugh). Because of their flexible flavoring, macarons are also ideal for any time of day. Eat a light jam macaron on the patio for breakfast, a buttercream macaron for a late morning brunch, or a ganache-filled macaron for a decadent dessert. Don’t be discouraged if your first try doesn’t yield perfection; the eventual success and satisfaction is worth the wait!

Cardamom Pumpkin Macarons


Recipe By:

-Claudia Fleming’s The Last Course: The Desserts of Gramercy Tavern (adapted by me)
Tartelette (pumpkin cream cheese filling)

Yields: around 2 dozen macarons (48 shells)


Macaron Ingredients:
2 ¼ cups (225 g, 8 oz.) icing sugar
2 cups (190 g, 6.7 oz.) almond flour
2 tablespoons (25 g , .88 oz.) granulated sugar
1/2 heaping teaspoon ground cardamom
5 (Have at room temperature) egg whites, at room temperature (I followed the popular recommendation and aged my egg whites for 24-48 hours on a counter top, covered with a paper towel)


Pumpkin Cream Cheese Ingredients:
2 oz (60gr) cream cheese, at room temperature
2 oz (60gr) freshly cooked or canned pumpkin
1/8 tsp ground cloves


Directions:
1. Preheat the oven to 200°F (93°C). Combine the icing sugar and almond flour in a medium bowl. If grinding your own nuts, combine nuts and a cup of confectioners’ sugar in the bowl of a food processor and grind until nuts are very fine and powdery.
2. Beat the egg whites in the clean dry bowl of a stand mixer until they hold soft peaks. Slowly add the granulated sugar and beat until the mixture holds stiff peaks.
3. Sift half of the almond flour mixture into the meringue and fold to combine. Fold quickly at first and then gently. Add cardamom to your batter. Sift in the remaining almond flour and continue to fold, but be gentle! Don’t overfold, but fully incorporate your ingredients. Note: Count your strokes and try to stay under 50. The macaronnage should “flow like magma,” whatever that means, when it’s ready.)
4. Spoon the mixture into a pastry bag fitted with a plain half-inch tip (Ateco #806). You can also use a Ziploc bag with a corner cut off. It’s easiest to fill your bag if you stand it up in a tall glass and fold the top down before spooning in the batter.
5. Pipe one-inch-sized (2.5 cm) mounds of batter onto baking sheets (double up on baking sheets if they aren’t professional grade) lined with nonstick liners (or parchment paper). Note: I piped mine too close together. Be careful.
6. Bake the macaroon for 5 minutes. Remove the pan from the oven and raise the temperature to 375°F (190°C). Once the oven is up to temperature, put the pans back in the oven and bake for an additional 7 to 8 minutes, or lightly colored. Note: Don’t get so excited about their feet that you yank them out too soon; if you do, the feet will collapse into a sad ruffle. Don’t ask me how I know this.
7. Cool on a rack before filling.

For filling: In a medium bowl, mix the cream cheese, pumpkin and cloves until completely incorporated. Fill a pastry bag with this mixture and pipe onto half the shells and top with another shell.

Note: If I had this to do over again, I’d use Tartelette’s recipe (below) with cardamom added for the macarons.

Plain Macarons with Two Fillings: Cream Cheese Buttercream with Strawberry Jam and Chocolate Ganache


Recipe By:

Tartelette (macarons, cream cheese buttercream, adapted by me)
David Lebovitz (chocolate filling)

Yields: around 15-17 macarons (30-34 shells)


Macaron Ingredients:
3 egg whites (about 90 gr)
30 gr granulated sugar
200 gr powdered sugar
110 gr almonds


Cream Cheese Buttercream Filling Ingredients: Note: I would have preferred regular buttercream. This filling had an odd flavor.
1 1/2 sticks (170 gr) butter at room temperature
4 oz (120gr) cream cheese, softened
3 egg whites
1/2 cup (100gr) sugar
2 Tb water
1 tsp vanilla extract or 1/2 vanilla bean split open and seeded.
Strawberry jam (or flavor of your choice)


Chocolate Filling Ingredients:
½ cup (125 ml) heavy cream
2 teaspoons light corn syrup
4 ounces (120 gr) bittersweet or semisweet chocolate, finely chopped
1 tablespoon (15 gr) butter, cut into small pieces


Directions:
For the whites: the day before (24hrs), separate your eggs and store the whites at room temperature in a covered container. If you want to use 48hrs (or more) egg whites, you can store them in the fridge. In a stand mixer fitted with the whisk attachment, whip the egg whites to a foam, gradually add the sugar until you obtain a glossy meringue. Do not overbeat your meringue or it will be too dry and your macarons won’t work. Combine the almonds and powdered sugar in a food processor and give them a good pulse until the nuts are finely ground. Pass through a sieve. Add them to the meringue,with the coloring and give it a quick fold to break some of the air and then fold the mass carefully until you obtain a batter that flows like magma or a thick ribbon. Give quick strokes at first to break the mass and slow down. The whole process should not take more than 50 strokes. Test a small amount on a plate: if the tops flattens on its own you are good to go. If there is a small beak, give the batter a couple of turns. Fill a pastry bag fitted with a plain tip (Ateco #807 or #809) with the batter and pipe small rounds (1.5 inches in diameter) onto parchment paper lined baking sheets (double up on baking sheets if they aren’t professional grade). Preheat the oven to 300F. Let the macarons sit out for 30 minutes to an hour to harden their shells a bit and bake for 8-10 minutes, depending on their size. Note: Don’t get so excited about their feet that you yank them out too soon; if you do, the feet will collapse into a sad ruffle. Don’t ask me how I know this. Let cool. If you have trouble removing the shells, pour a couple of drops of water under the parchment paper while the sheet is still a bit warm and the macarons will lift up more easily do to the moisture. Don’t let them sit there in it too long or they will become soggy. Once baked and if you are not using them right away, store them in an airtight container out of the fridge for a couple of days or in the freezer.

For strawberry cream cheese filling: In the bowl of stand mixer, whip the egg whites until they have soft peaks. In the meantime, combine 2 Tb water with the sugar to a boil in a heavy saucepan and bring the syrup to 250F. Slowly add the sugar syrup to the egg whites. If you use hand beaters, this is even easier and there is less hot syrup splatter on the side of your bowl and in the whisk attachment of the stand mixer. Continue to whip until the meringue is completely cooled. Slowly add the butter, one tablespoon at a time. The mass might curdle but no panic, continue to whip until it all comes together. Add the cream cheese, the same way, a little at a time until everything is smooth. Whisk in the vanilla extract, or paste or bean. Keep it to spreadable consistency for the macarons and refrigerate the leftover for cupcakes or mini toast in the fridge up to 3 days or in the freezer.

To assemble macarons, pipe cream cheese buttercream onto one side topped with a dollop of jam. Sandwich the other shell on top. Refrigerate to set.

For chocolate filling: Heat the cream in a small saucepan with the corn syrup. When the cream just begins to boil at the edges, remove from heat and add the chopped chocolate. Let sit one minute, then stir until smooth. Stir in the pieces of butter. Let cool completely before using. When cool, I whipped the chocolate with a handmixer to achieve a good spreading consistency. I then piped a large dollop in the middle of shells and sandwiched other shells on top. Refrigerate.


Piping batter onto a macaron template and then the cookies fresh out of the oven (and a little wonky).


Blurry proof of feet for batches 1 and 2!


I hope you enjoyed this post! Don’t forget to cruise the Daring Bakers blogroll to see all of the creative French macarons.


Share Share this post with friends!

1 15 16 17 18 19 20