blueberry

48 Homemade Breakfast Cereals

I like variety. Sure, sometimes during the week I can get on a kick and eat the same thing every night for dinner (hellooo, lima beans, I’m lookin’ at you), but I also really appreciate mixing it up every now and then.

That’s why a few months ago when I decided I wanted some breakfast cereal, I went to the store and bought about 8 different boxes of the stuff. Each morning needed to have its own flavor — as long as the nutrition facts were acceptable. What? Don’t look at me like that. Sure, I may be the same girl who posted the Coffee Cookie Dough Fudge Cheesecake, but I do try to eat reasonably during the week!
The store-bought cereal was okay. At least, I thought it was okay at the time. But then something happened — I had one of those thunderous BIG IDEAS.

It all started when I was perusing one of my favorite blogs, Not So Humble Pie, and saw her (you’re not going to believe it) S’mores Candy Bar. I know. Insane.

The premise of her post was that she didn’t understand the excitement over this new company that makes customizable candy bars, since it’s so easy to make them at home. Having been excited about the customizable candy bar company, I felt admonished. And inspired.

Because even more than I had been excited about customizable candy bars, I was excited about customizable cereal. There’s this company on the web (I won’t link to them, since I’m about to tell you it’s silly to pay for their product) that allows you to choose all the ingredients you want in your own personal box of cereal — and even lets you pick a name for your new creation! Too fun!

BUT. I realized when I read Mrs. Humble’s candy bar post that it didn’t make any sense to pay for one kind of customized cereal (that was just like going to the grocery store), or even for eight kinds of customized cereal . . . what would really make sense is to make your own fully customizable cereal buffet — one that would allow you to have a different flavor every day if you wanted to!
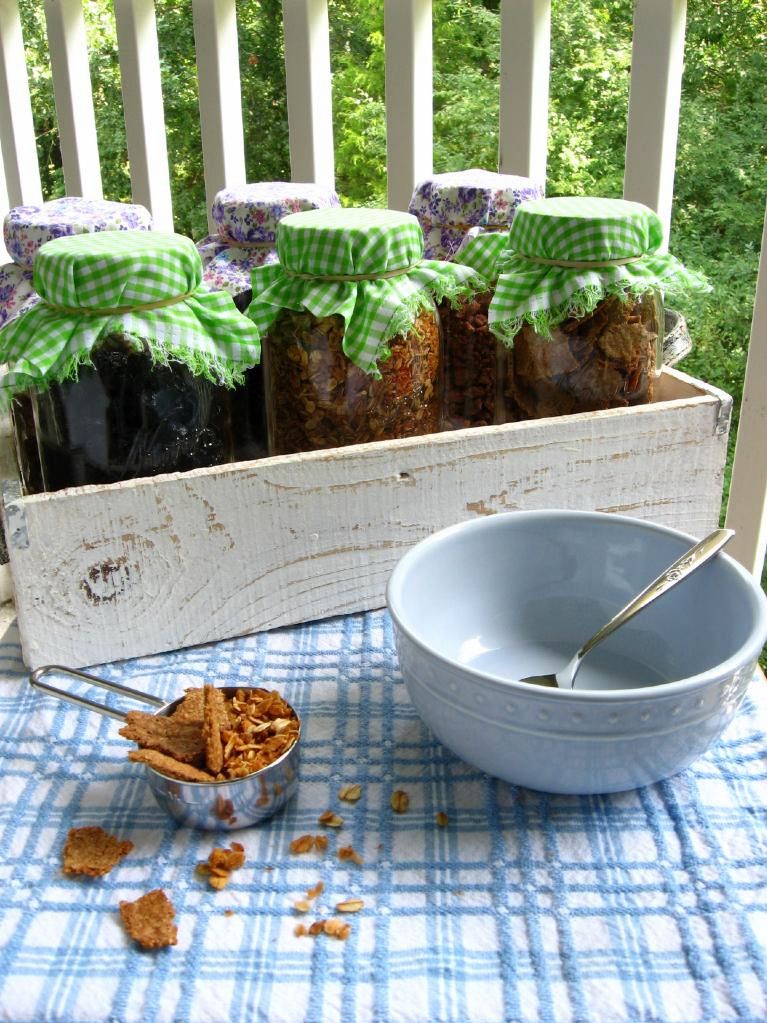
A dream was born. I scrounged up recipes for homemade granola and nutty bran flakes (I’ll gush about these in a minute). And as if to emphasize that making homemade cereal was indeed my destiny, the folks at Oh! Nuts emailed to ask if I’d like to review some of their products. Uh, YES, NUT PEOPLE, YOU READ MY MIND. Pounds of nuts and dried fruits later, I was in the cereal-makin’ biz.

If you’re about to post a comment calling me a hippie for making my own bran flakes, hold it right there. This recipe is super easy, super cool, and super rewarding. You feel like a superhero (who makes their own cereal?! I MAKE MY OWN CEREAL! I AM CEREAL WOMAN!), you know exactly what healthy ingredients went into said cereal, and — this is the best part — you have bran flakes that don’t taste like a cardboard box. Every time I opened the jar they were stored in, I got a whiff of delicious nuttiness. They had texture! They had taste! Yes!
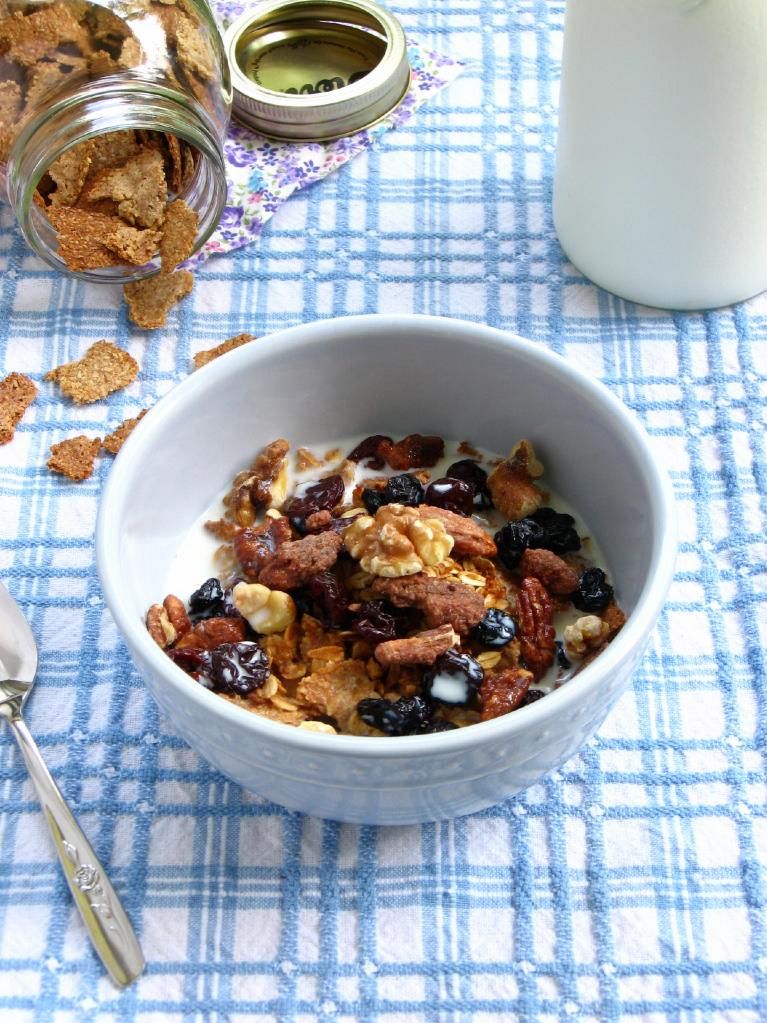
The granola is the flavor that really carries the cereal, though. I chose a Double Coconut Granola from Opera Girl Cooks that I’d heard a ton about. Once it cooled, it lived up to the hype — buttery, slightly sweet, coconutty, with a hint of salt to really amp it up.
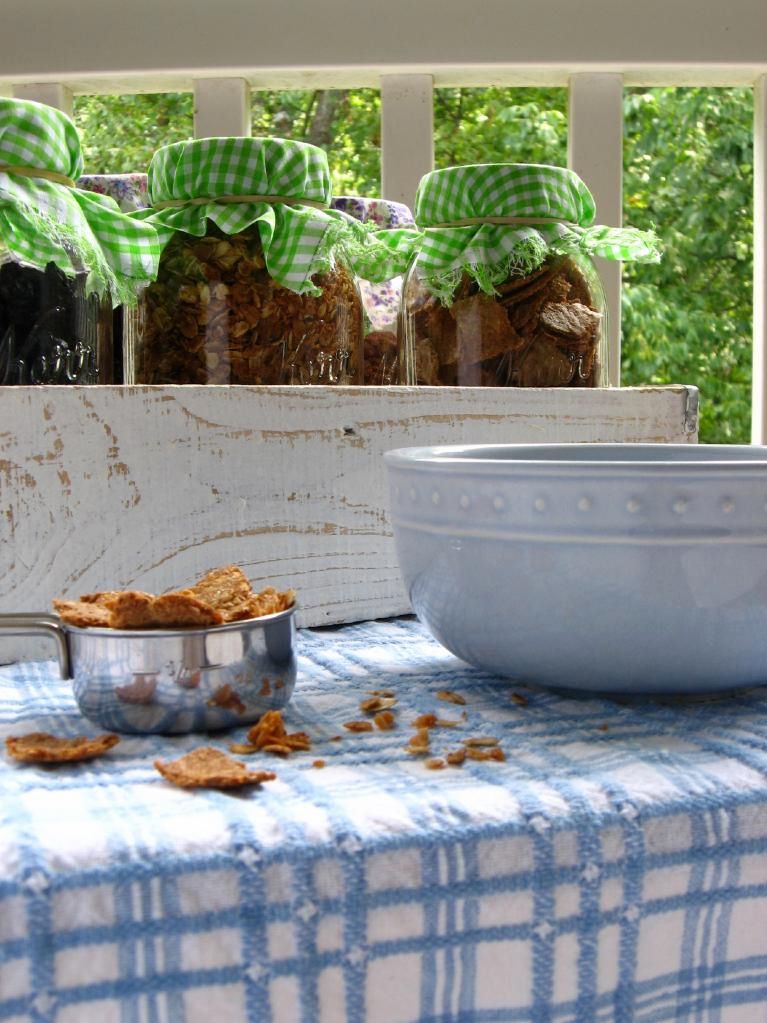
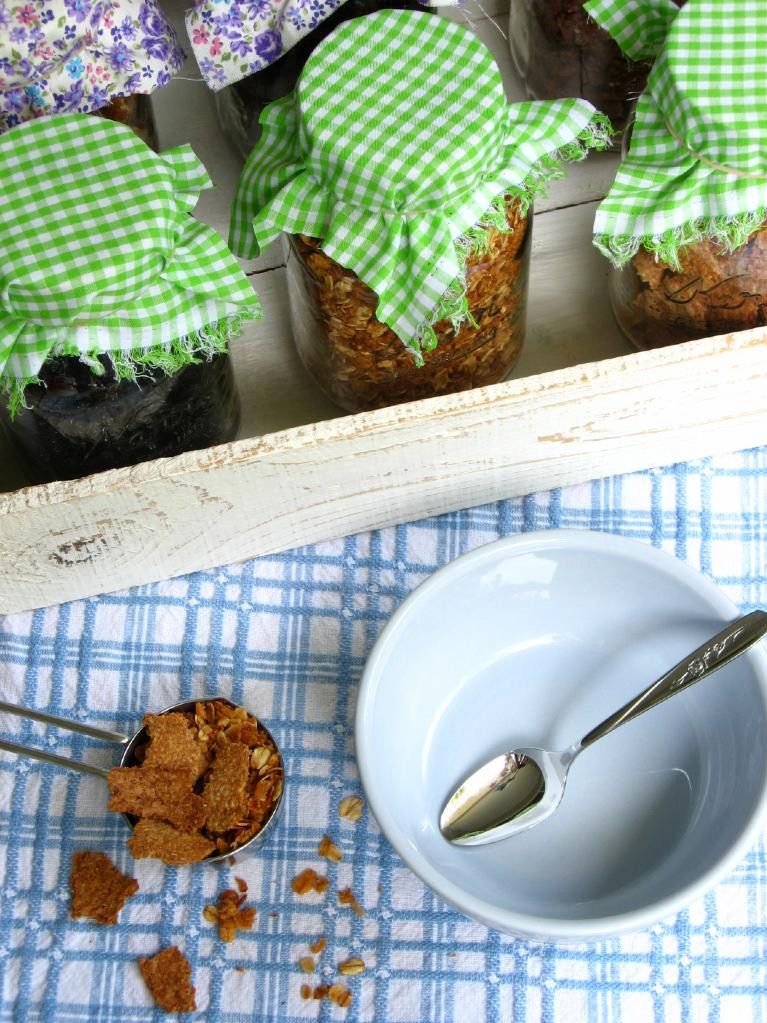
Once you’ve made some flakes and granola, the fun starts. Possible add-ins are endless: dried fruits, fresh fruits, toasted nuts (do make sure to toast them — MUCH more flavor), seeds, chocolate chips, peanut butter or cinnamon chips, candy, marshmallows . . . be creative! Add a little, add a lot.

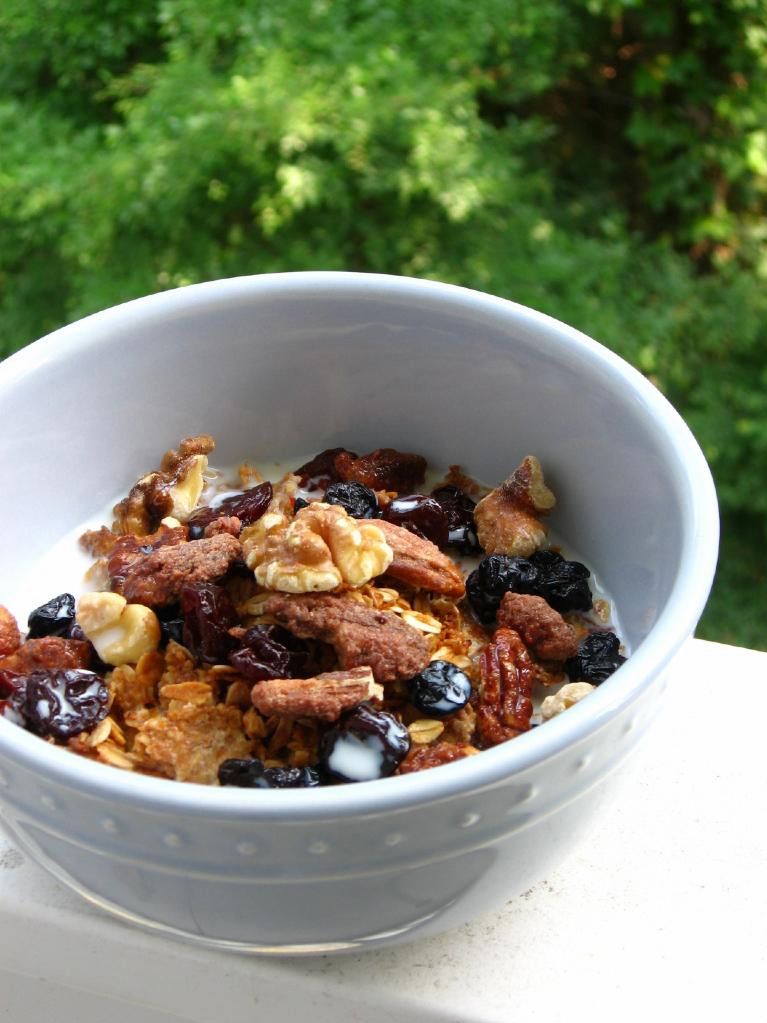
My favorite bowl was a straight-up combination of all my options: bran flakes, double coconut granola, dried cherries, dried blueberries, cinnamon pecans, and toasted walnuts. If you have just 2 dried fruits and two nut options along with your flakes and granola, you’ll have 48 possible breakfast cereal varieties — that’s a lot of options!
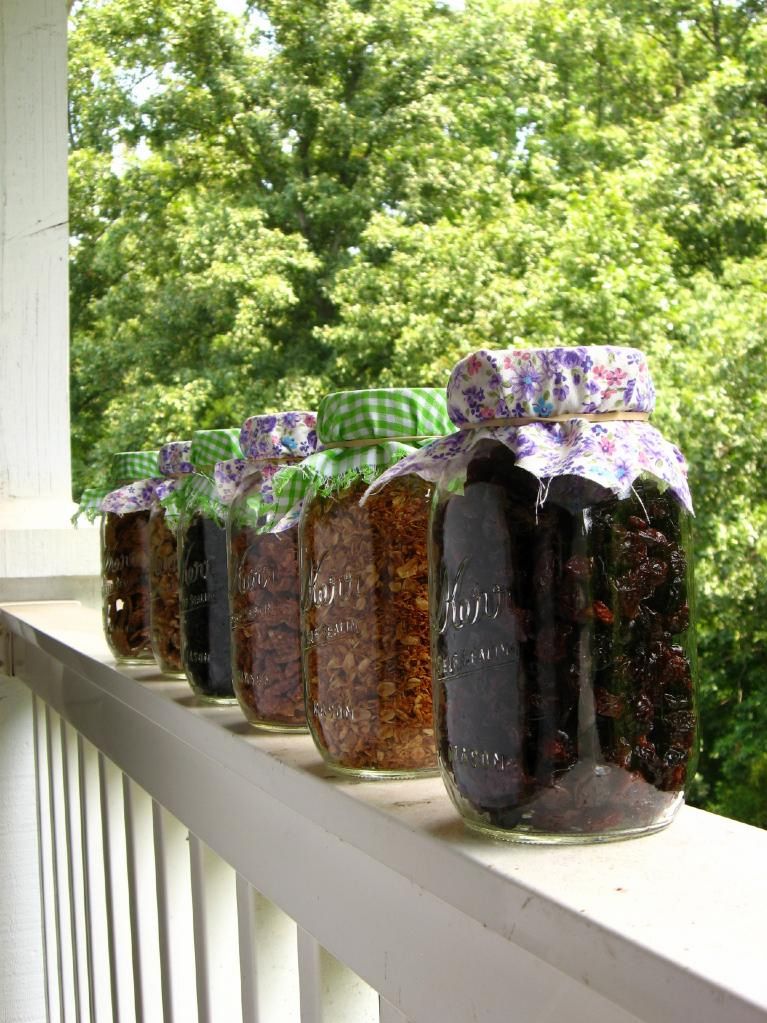
The Oh! Nuts products were a success in terms of taste — the blueberries had a pronounced, wonderful blueberry flavor, and the cinnamon pecans were so addictive that I almost ate my stash before I got my cereal made! The sour cherries did have an odd, slightly fishy flavor (I know, weird), but I still enjoyed eating them. Maybe a flavor compound of the cherries came out that isn’t as pronounced when they’re not dried?

To be honest, including the price of shipping, I probably wouldn’t spend the extra money to buy regular nuts or fruit from Oh! Nuts, but would just head to the grocery store. That being said, for specialty items or rare nuts/fruits/candies, they’re the place to go. The selection is huge, and the products are high quality.

If you, like me, love a big ol’ bowl of hearty, nutty, earthy, crunchy, chewy, flavorful, delicious breakfast cereal — and one that can change with whatever mood you’re in — I hope you’ll make your own personal cereal buffet! Or perhaps fix a cereal buffet in pretty jars as a gift for a friend. Even better, have a breakfast party: set up a cereal buffet for family and friends where each person can make their own cereal combination, perhaps supplemented with juice and muffins on the side. Have fun!

Oh, by the way, I did have to branch out a little in homage to my original inspiration. How about some S’mores Cereal?
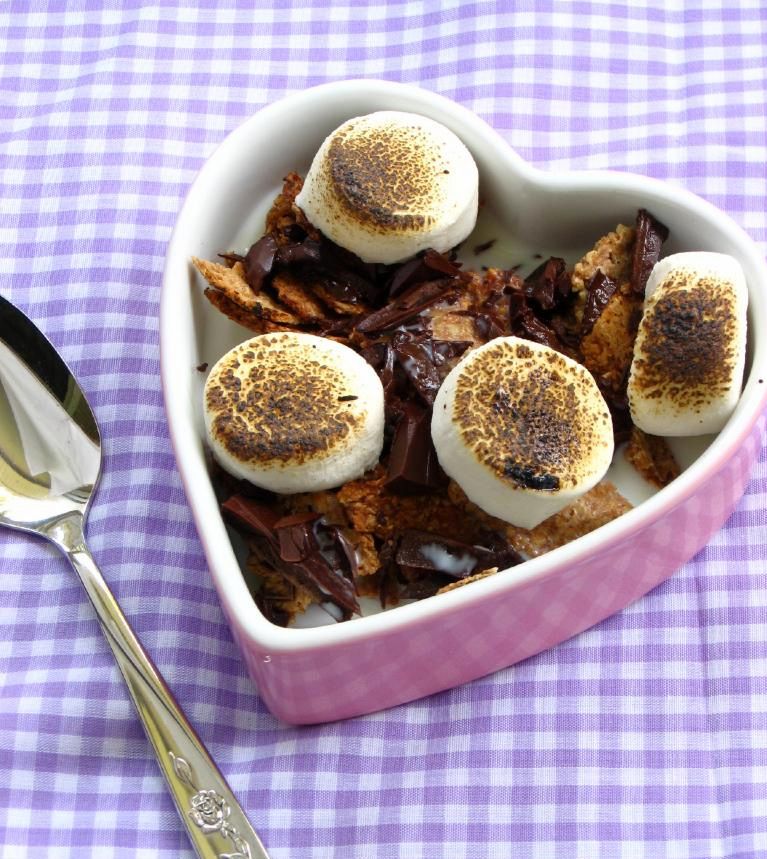
Below you’ll find the recipes for granola and nutty bran flakes. I even included nutritional info so you can make healthy breakfast choices! Round up some of your favorite add-ins and place all the components in separate jars for storage. Enjoy!

5 from 1 reviews
Homemade Nutty Bran Flakes
 
Prep time
Cook time
Total time
 
These flakes are SO MUCH BETTER than the stale boxed kind, you'll be amazed. The only downside is that this recipe uses two full baking sheets and only makes 3-4 bowls of cereal. If you have the stamina for an all-day baking project, I'd grab out all your baking sheets and make a day of it, doubling or tripling the recipe. They really are delicious!
Author:
Serves: 3-4
Ingredients
  • 1/2 cup bran
  • 1/2 cup whole wheat flour
  • 1/3 cup almond flour (or other finely ground nuts)
  • 2 tablespoons sugar
  • 1/4 teaspoon baking powder
  • 1/4 teaspoon salt
  • 1/3 cup milk
  • 1/4 cup water
Instructions
  1. Preheat oven to 350 degrees. Sift all dry ingredients into a large mixing bowl and add milk and water. Stir to mix well. The resulting mixture will be a very wet “dough” (so wet, you can hardly call it a dough). Cut two sheets of parchment paper to fit two baking sheets, and set one sheet of parchment paper on the counter where you’ll be rolling — you won’t be able to transfer it without this!
  2. Glop half of the “dough” out onto the sheet of parchment paper and flatten it by hand. Place a piece of plastic wrap over the dough and “roll” it out (your rolling pin will almost just be smooshing it out into place) EXTREMELY THIN, almost transparent in some places. It will look like a giant bran flake — super fun!
  3. Remove the plastic wrap and transfer the parchment carefully to a baking sheet. Cook for 10 minutes, but check often after just 5, because such a thin dough can easily burn. You’re looking for a thin, leathery cracker that is crunchy at the edges. When it’s done, remove it and allow it to cool completely. While it cools, repeat the process with the other half of the dough.
  4. After both giant bran flakes have finished their first bake, reduce the oven temperature to 275 degrees. Tear the first, cooled bran flake into regular bran flake-sized pieces (about 3/4 of an inch), spreading them out on the parchment-covered baking sheet.
  5. Bake at the reduced temperature for 20 minutes, flipping and stirring the flakes around every 5 minutes. Repeat process with the second cooled, giant bran flake. Then allow all bran flakes to cool completely. Store well in a sealed container for up to two weeks.


Now that I’ve shared my favorites with you, I’m anxious to know: What sort of breakfast cereal would you make for yourself? Piña colada cereal with toasted coconut and dried pineapple? Cherry crumble cereal with dried cherries and cinnamon granola? A luscious combo of dates, coconut, and chocolate chips?

5 from 1 reviews
Double Coconut Granola
 
Prep time
Cook time
Total time
 
An absolutely delicious granola to supplement your bran flakes. Again, don't be shy about doubling this recipe!
Author:
Serves: 6
Ingredients
  • 3 cups rolled oats
  • 1 scant cup unsweetened shredded coconut
  • 1/4 cup clover honey
  • 1/6 cup virgin coconut oil (half of a 1/3 cup measure)
  • 1 tablespoon vanilla extract (I used almond because I was out of vanilla)
  • 1 teaspoon kosher salt
  • optional: I toasted another 1/2 cup of sweetened shredded coconut to add in for sweetness, but that was before I’d tasted the cooled batch. It’s probably unnecessary.
Instructions
  1. Heat oven to 300 degrees F. Combine oats and shredded coconut in a large bowl. In a small saucepan over medium heat, cook honey, coconut oil, vanilla, and salt until just simmering.
  2. Pour honey mixture over the oat mixture, stirring well with a wooden spoon until fully combined. Spread this mixture out over a large sheet pan, place in oven, and bake for 10 minutes before stirring the granola. Repeat 10 minute baking time, followed by stirring, until granola is well-toasted (takes about 4 cycles, or about 40 minutes).
  3. Cool the granola on the baking sheet, stirring occasionally. When cooled, you can store granola in an airtight container in the refrigerator for a few weeks, or at room temperature for two.
 

Other delicious breakfast ideas floating around the internet right now: Beer Waffles with Cinnamon Cardamom Apples, S’mores Oatmeal, Oatmeal Pancakes, Pecan Sticky Buns, and of course, from yours truly, Carrot Cake Waffles.

Note: I received the above mentioned products from Oh! Nuts free of charge to create these recipes.

 

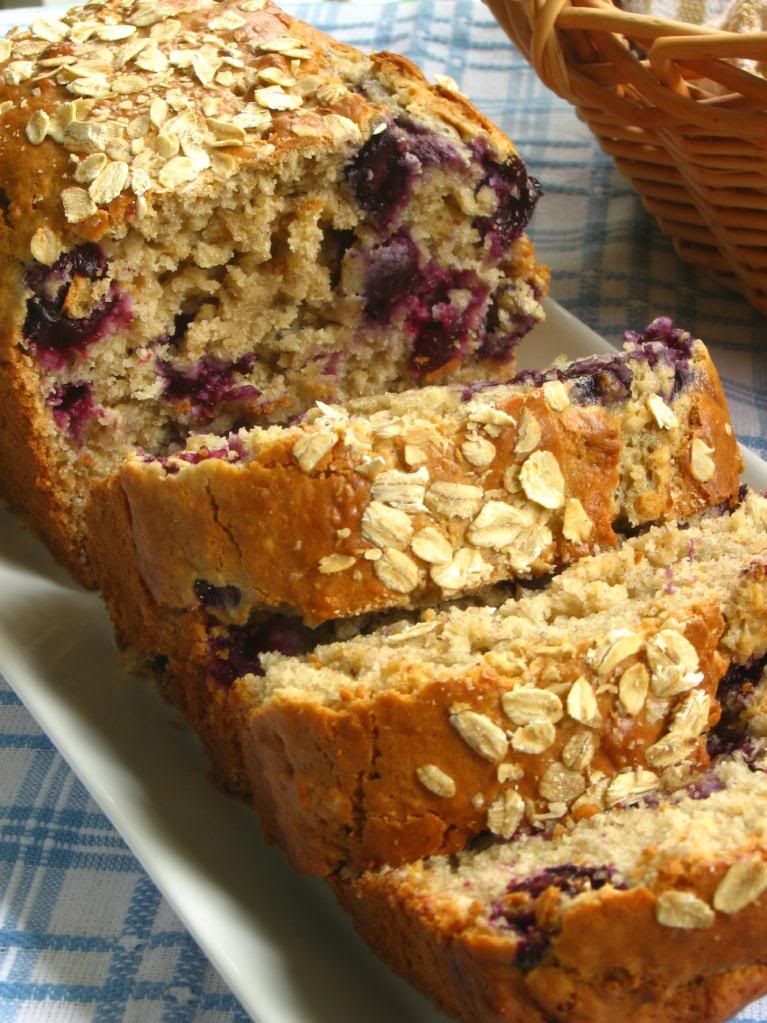
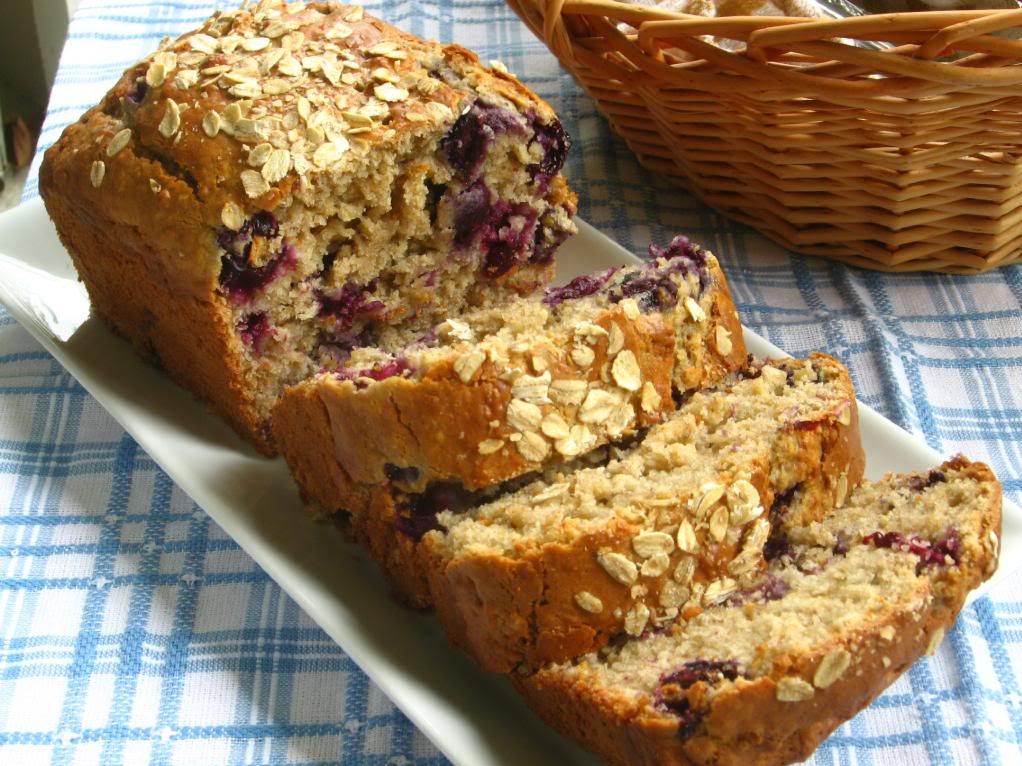
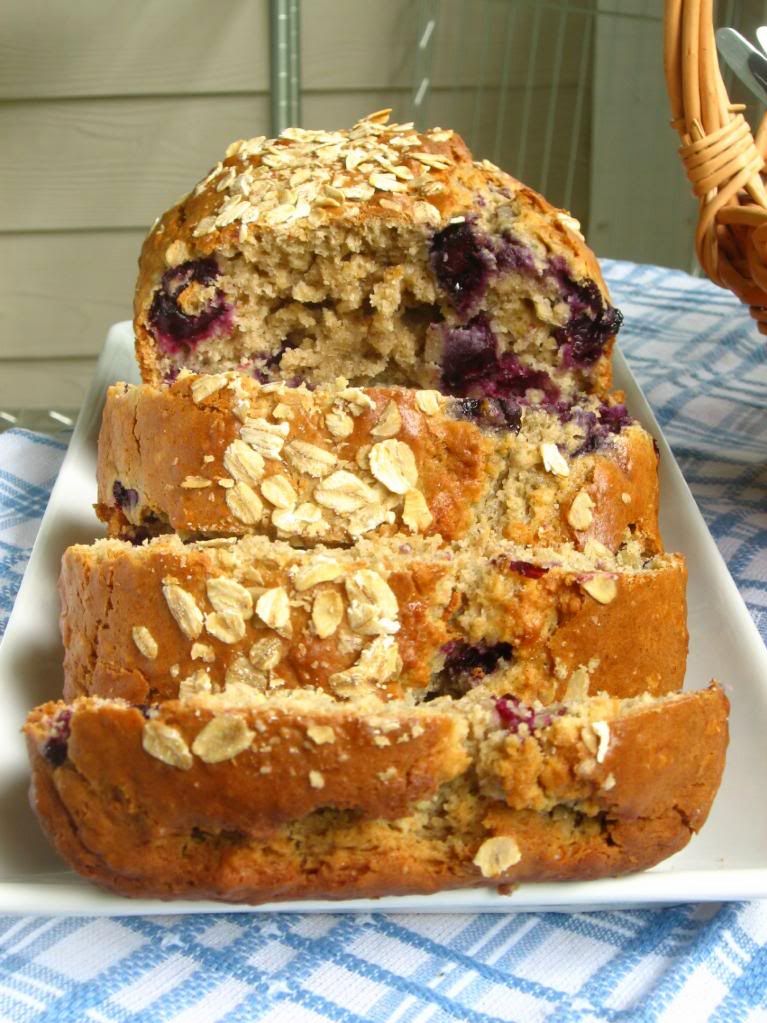
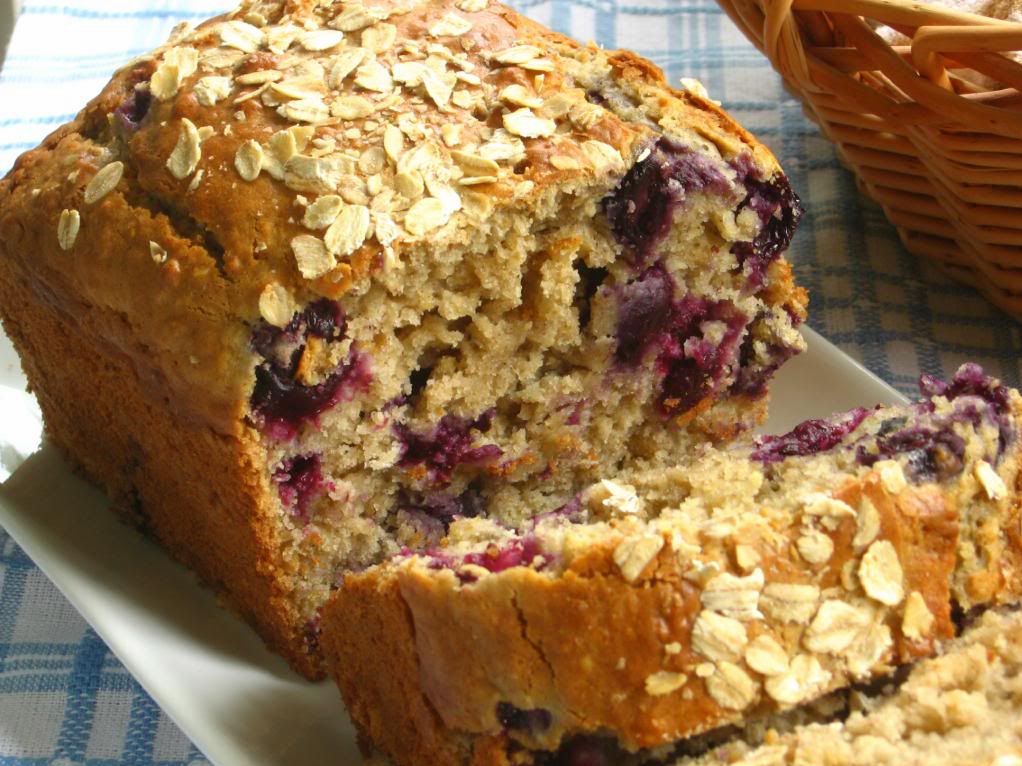
Blueberry Walnut Bread

I’m responsible for little Byrd’s post-knee-surgery physical therapy. For the first week, it involved icing her knees, which she wasn’t thrilled about. But since then it’s involved warm compresses, massages, and gentle exercises. Essentially, my dog is getting the spa treatment. My roommate can’t hold back her laughter when she walks in on me caressing Byrd’s little shaved-bare-bottom.

Today I thought I’d mix it up a little bit. My post-surgery info said that Byrd might enjoy light swimming to exercise her knees. The bath tub looked like the perfect size; she’s only 8 pounds, after all. Maybe she’d love it.

Reality check: Byrd does not love swimming. She is terrified of swimming. The bathtub is not the perfect size. Her thrashing requires at least a lake-sized body of water, and preferably an ocean. After about 10 minutes of trying in vain to convince her that swimming was a jolly pastime that she was bred for, for goodness’ sake, my bathroom, my nightgown, my dog, and my spirits were all soaked.

Both of us ended up on the balcony, soaking wet, shivering, and snuggling for warmth and reassurance. I needed reassurance that I wasn’t the worst mother ever. She needed reassurance that she was, indeed, on dry land and not drowning.

Pups can be wonderful for reassurance, comfort, warmth . . . they love you even when you’ve just tossed them in a bathtub (disclaimer: there was no actual tossing involved, and I held onto her the whole time, despite what her sheer panic might imply). Another amazing summer comfort (and one that I sure wish I still had on hand after that bathtub fiasco) is a hearty fruit-n-nut quickbread. Fruity quickbreads are a favorite of mine when slathered with butter or maybe even torn up over a bowl of fresh oatmeal. Mmm, banana nut bread, delicious pumpkin bread, or in this case . . . blueberry bread!

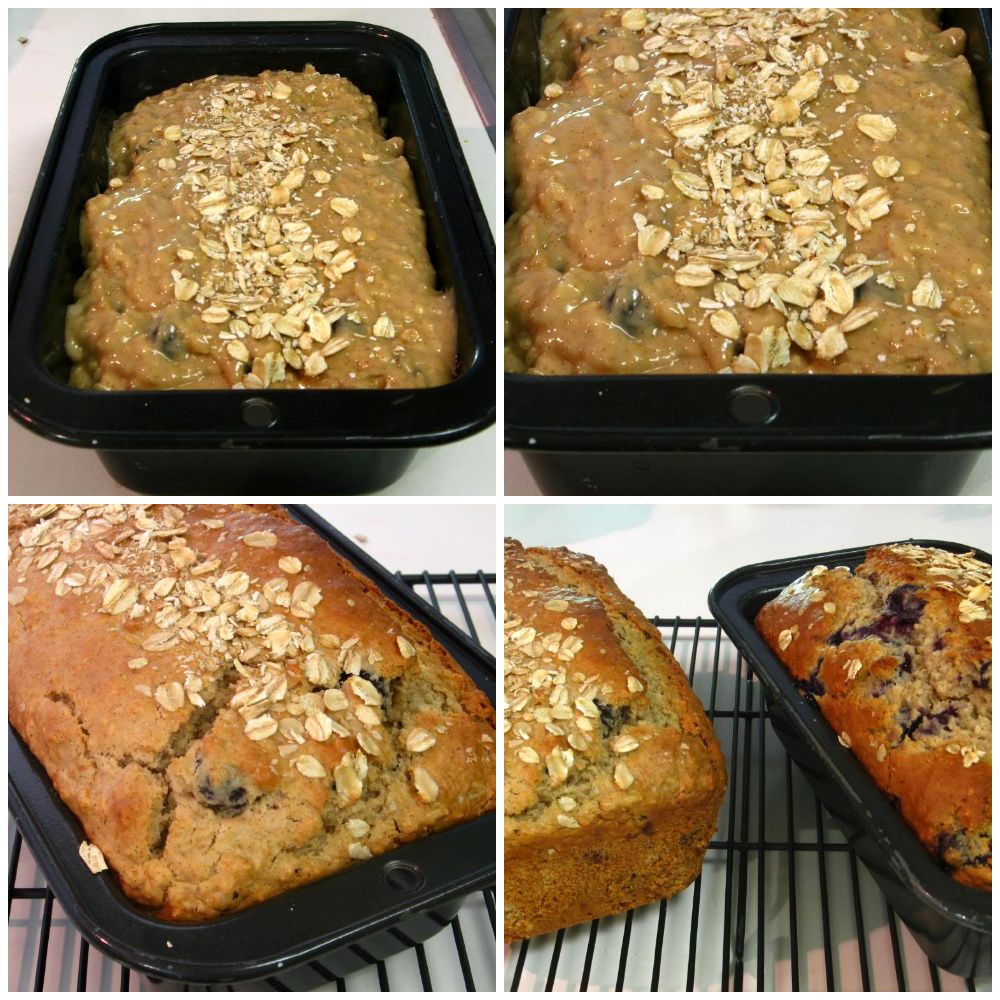
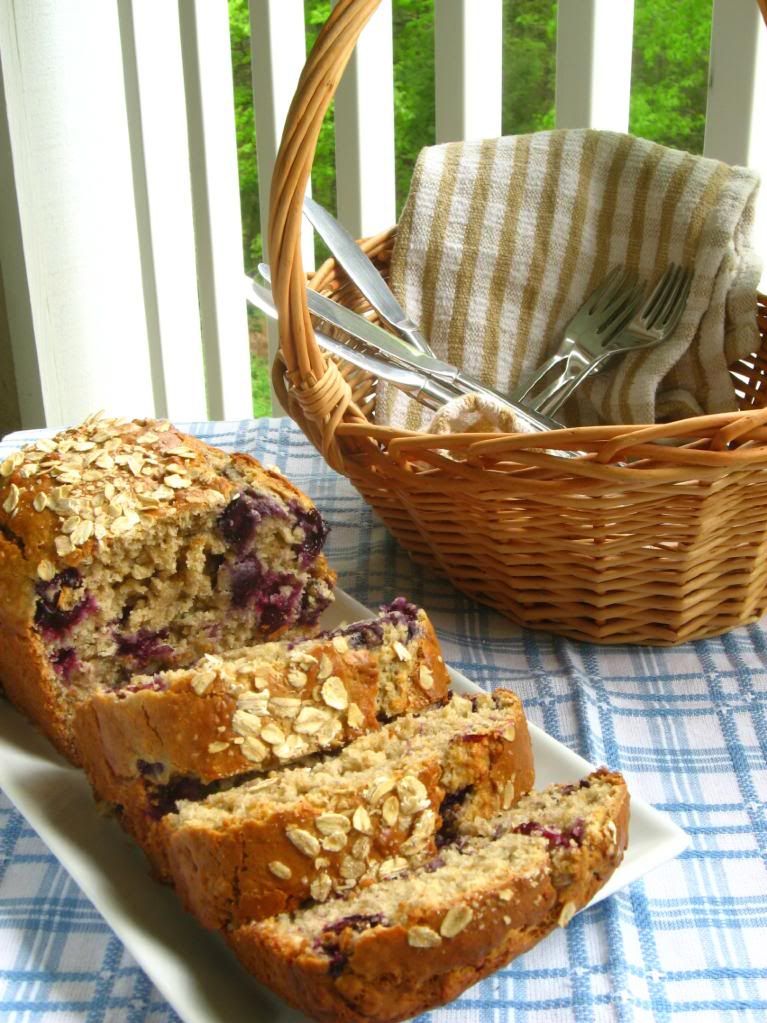
I made this bread awhile back for a bake sale, but kept a slice to enjoy myself. I accidentally underbaked one loaf (and secretly enjoyed the doughy gooeyness), but once perfectly baked, the bread has a fantastic, moist crumb. It’s full of plump blueberries, nuts, and oats. It inspired me so much, I wrote a poem (what, you don’t write sonnets about your food?):

Blueberry Bramble

Bush awkward, lopsided with purple fruit –
Bountiful harvest sprung from tired roots.
Rapt is the quiet bird who nestles thus
beneath the branches, feathers plush and fluffed,
beak sky-stained with the blood of nature’s yield,
breast full of warm air drawn from o’er the field
in which I lie with you now, and we too
consume, until aching, handfuls of blue.
Later half the basket will find its way,
indoors and in the fading light of day,
into batter, the oven, between teeth,
I’ll steal your crumbs for my oatmeal, a thief
willing to be caught, bird in a briar,
hands bright blue, stained now, and throat on fire.

Karly at Buns In My Oven has posted a healthier version of this bread that substitutes some apple sauce and lowers the sugar, if you’re interested! I went all out for maximum enjoyment. Serve this in a bowl with a splash of cream or ice cream for a lovely, fresh summer dessert, or bake up a loaf for breakfast!

Blueberry Walnut Bread


Recipe by: Adapted from Betty Crocker
Yields: one loaf

Ingredients:
2/3 cup packed brown sugar
3/4 cup milk
1/2 cup vegetable oil
2 eggs
2 1/4 cups all-purpose flour
1 cup quick-cooking or old-fashioned oats
3 teaspoons baking powder
1 teaspoon ground cinnamon
1/4 teaspoon salt
1 cup fresh or frozen blueberries (thawed and drained)
1 cup chopped walnuts

Directions:
1. Heat oven to 350ºF. Grease bottom only of 8- or 9-inch loaf pan.
2. In large bowl, mix brown sugar, milk, oil and eggs with spoon. Stir in remaining ingredients except blueberries and nuts; beat 30 seconds. Fold in blueberries and nuts. Pour into pan. Sprinkle with additional oats if desired.
3. Bake 45 to 55 minutes or until toothpick inserted in center comes out clean (NOTE: this took about 55 minutes or even a little longer for me). Cool 10 minutes. Loosen sides of loaf from pan; remove from pan to wire rack. Cool completely, about 2 hours, before slicing. Wrap tightly and store at room temperature up to 4 days, or refrigerate up to 10 days.


Share Share this post with friends!

Lemon Blueberry Cheesecake Squares with Shortbread Crust

This post could also be titled, “Lessons on Planning” (please don’t confuse that with “lesson planning” — I’m on Spring Break!).

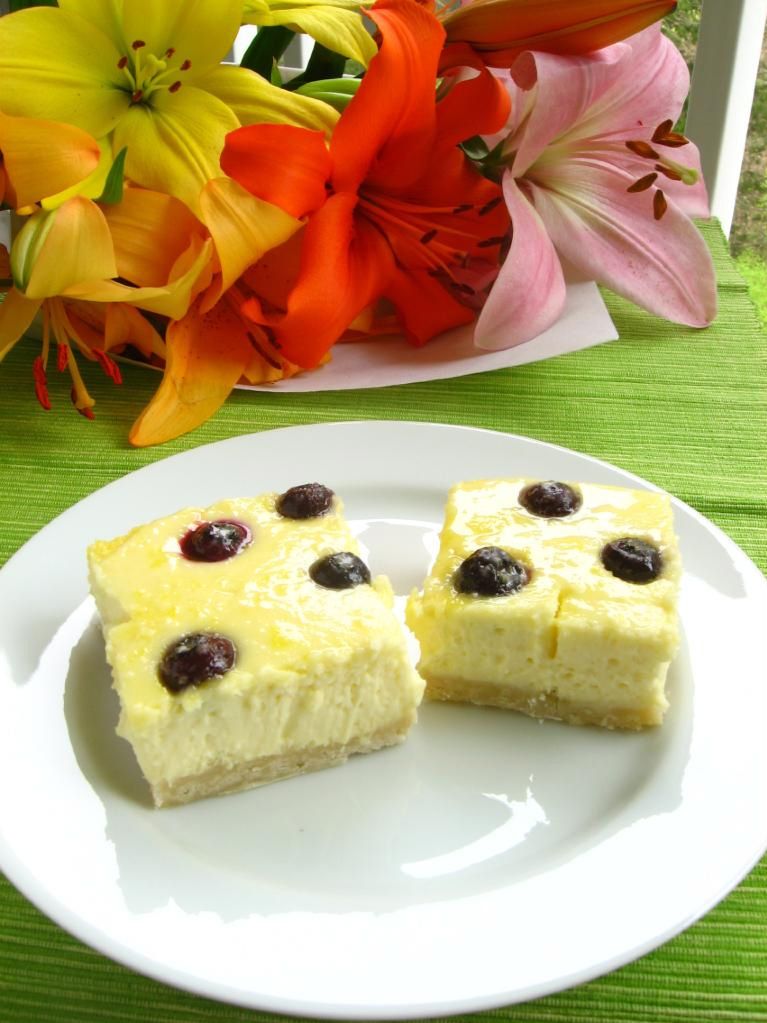
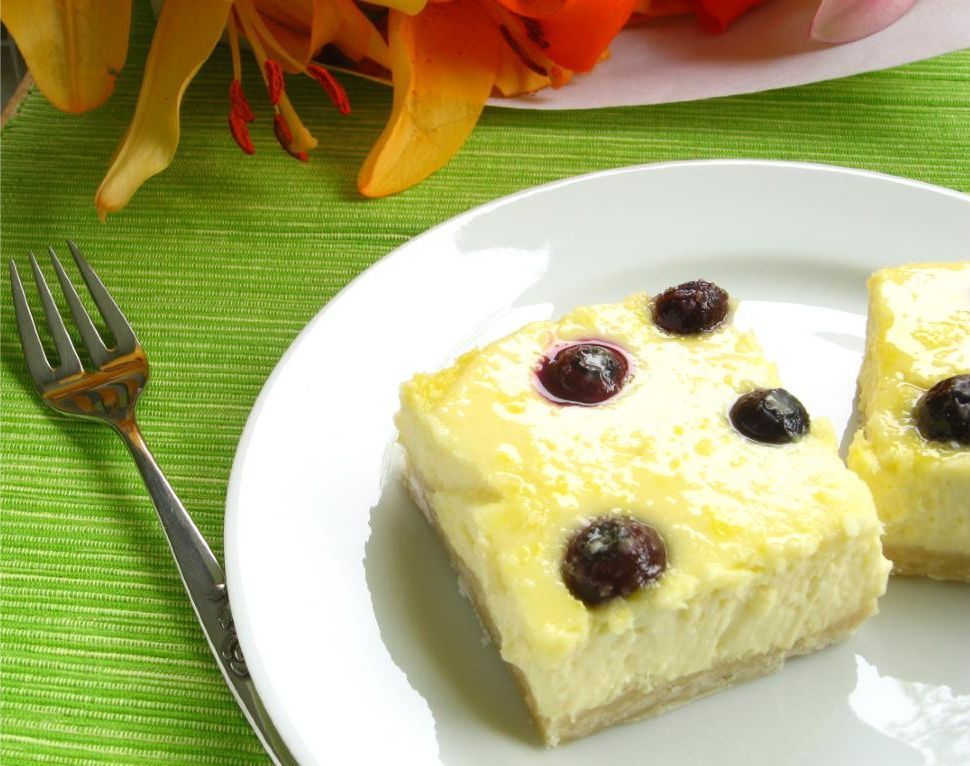
My plans this weekend were exciting. I wanted to create a triple layered dessert with joyful Spring flavors. Doesn’t this sound amazing: lemon squares on a shortbread crust with a delicious layer of blueberry cheesecake. Can’t you see the gorgeous, pale shortbread layer; the bright yellow layer of lemony bliss; the creamy cheesecake layer studded with purple blue orbs — all topped with a fine sprinkling of powdered sugar? Well, take a good look at your fantasy, because that’s the only place you’ll be seeing that image.


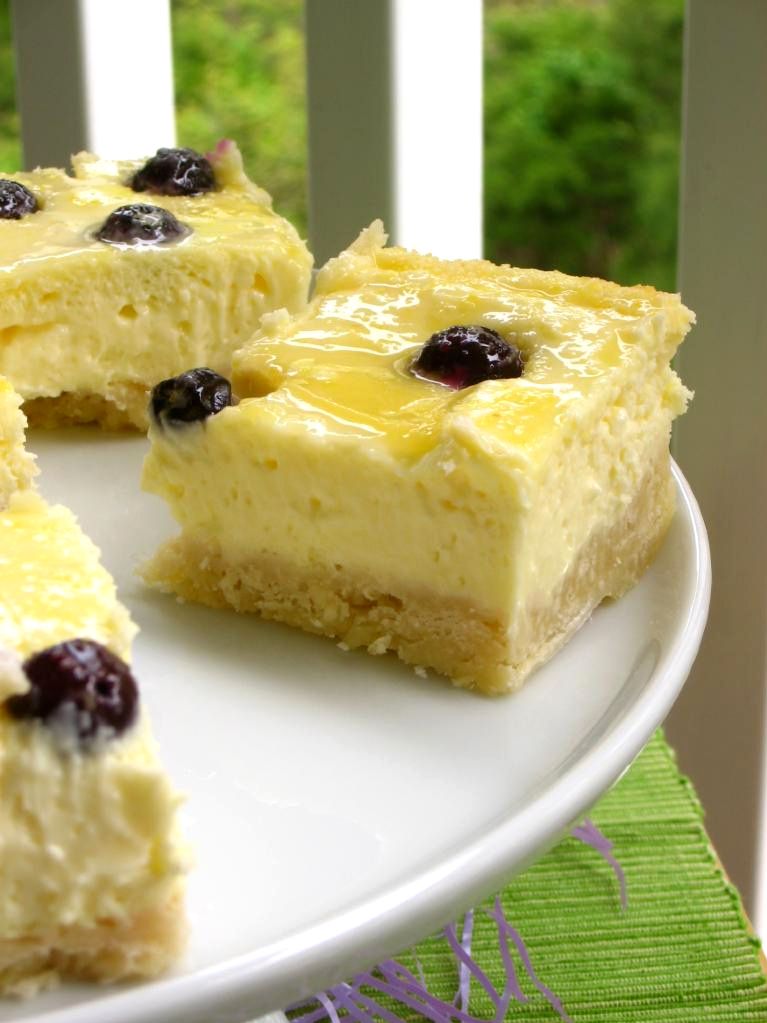
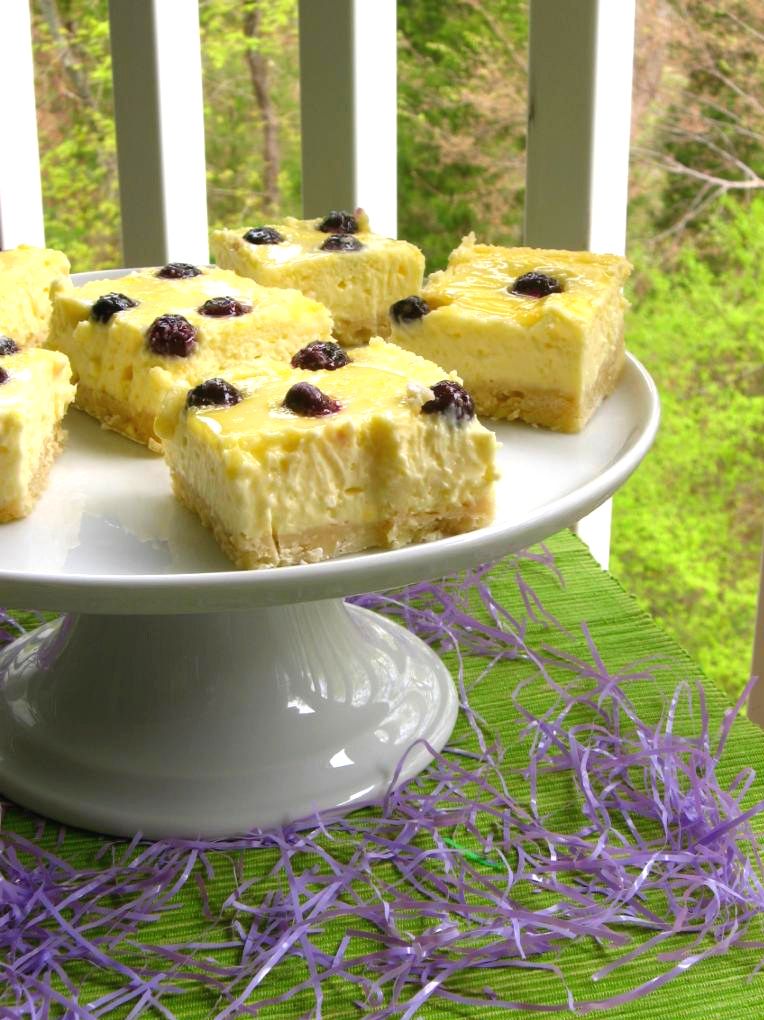
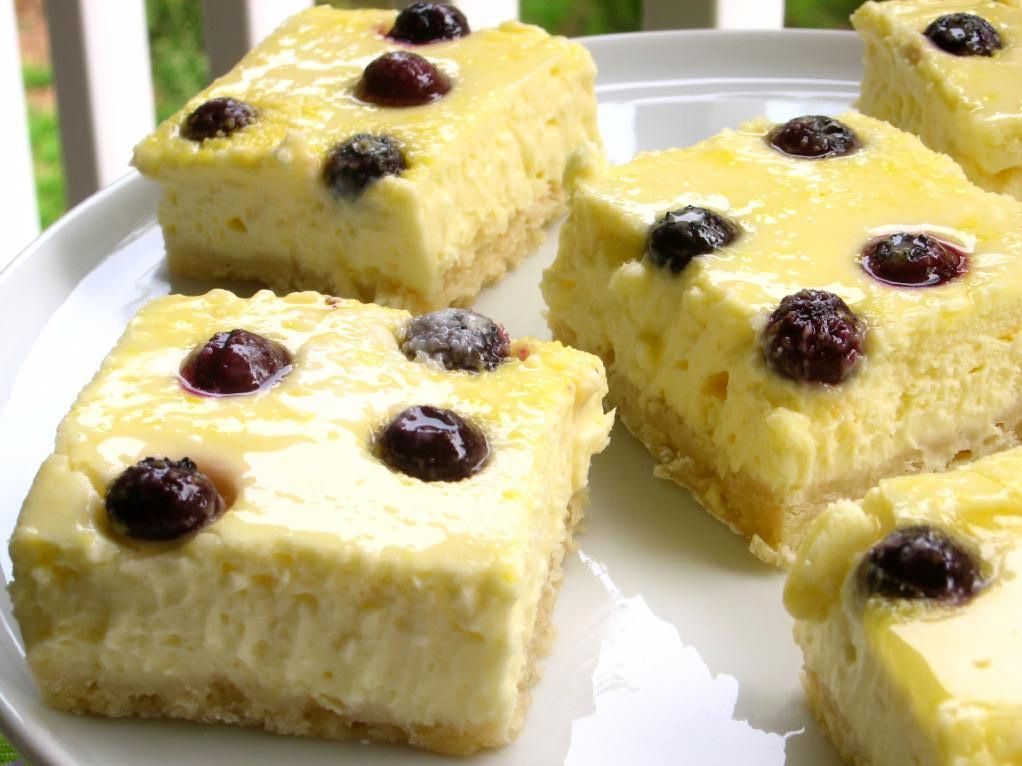
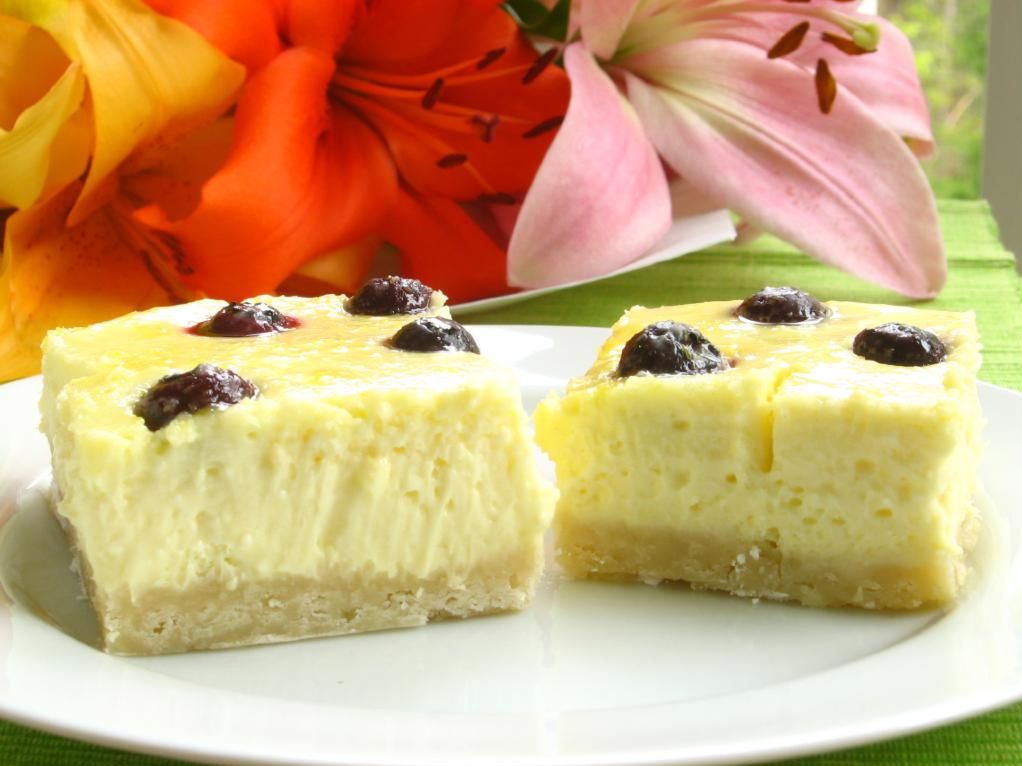
Not exactly as planned, but delicious.

See, it didn’t quite go according to plan. My blueprints for this recipe began when I saw these delicious lemon blueberry cheesecake squares on Shared Sugar. I started pining for them, but I’ve also been pining for lemon squares. Naturally, it dawned on me that I should combine the two.

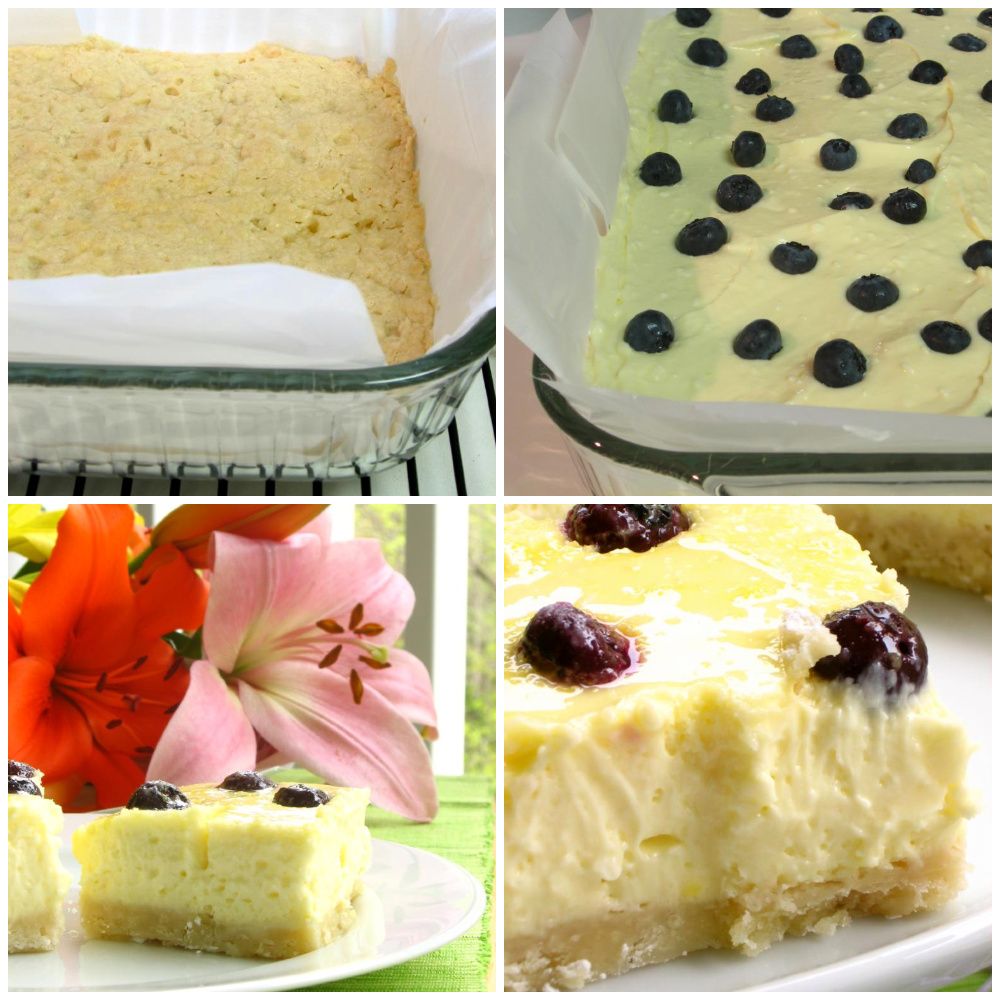
My process (which you shouldn’t repeat) was to bake the shortbread crust for lemon squares as usual, top it with a cheesecake layer, pour the lemon mixture on top, and bake. Sounds great. But what actually happened was that the lemon mixture leaked under the parchment paper I’d lined my pan with and coagulated underneath the entire dessert. Um, so in a way, I actually ended up with a quadruple layer dessert . . . if you count the parchment paper?


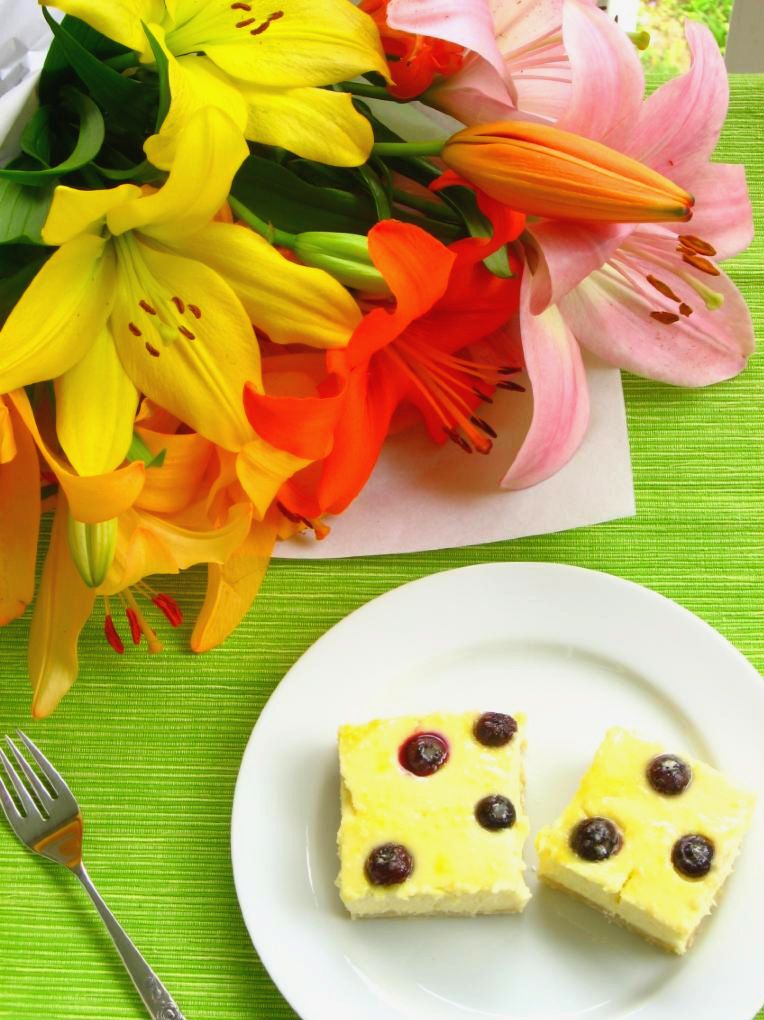
Flowers from a student’s parents! So gorgeous!

Some of the lemony liquid stayed on top of the cheesecake forming an odd lemon “glaze” of sorts. The entire dessert now looks a bit weepy, but I assure you, it tasted amazing. How can you go wrong with these flavors? Nevertheless, I decided you wouldn’t want to repeat the whole frustrating process. I’ve deleted the lemon layer from the recipe below, leaving you with a simple two layer dessert: lemon blueberry cheesecake squares on a shortbread crust. Still amazing, bright, springy, creamy, indulgent.

So much for plans. I’m a big planner, and it can be hard on me when things don’t work out like I think they should (pat on the back for myself, though, because I think I handled this culinary detour well). Thank God that He’s had big plans since before the foundation of the world — plans to send His only Son as a sacrifice for us, even while we were still sinners ignoring the God who loved us.

And of course, with Easter around the corner, thank God for the miracle He had planned for three days after that sacrifice: Christ’s resurrection from the dead to triumph over death and the grave.

My plans in the kitchen and in life don’t always work out. I leave out the baking soda, don’t thicken the fruit filling enough, or who even knows what else (yeah, I never even posted that travesty). But God says, “As the heavens are higher than the earth, so are my ways higher than your ways and my thoughts than your thoughts” (Isaiah 55:9). His plans worked — thank God — and we can now have abundant and eternal life because of them.

So, I can’t be too upset about my cheesecake squares not having a lemon layer. I’ve tweaked the recipe below so you can now go make these amazing cheesecake squares without worrying about that either. I’ll try again soon — I’m thinking of making lemon squares as usual, and then doing a no-bake cheesecake layer on top. We’ll see how that works. But it’s okay if my plans don’t work out, because you know how planning goes!

Lemon Blueberry Cheesecake Squares with Shortbread Crust


Recipe by: Adapted from King Arthur Flour (crust) and Shared Sugar (cheesecake)
Yields: about 18 bars

Crust Ingredients:
1 cup (2 sticks) butter
2 cups all-purpose flour
1/2 cup confectioners’ sugar

Cheesecake Layer Ingredients:
32 ounces cream cheese, at room temperature
4 eggs
4 tablespoons lemon juice
1 cup sugar
2 cup blueberries

powdered sugar for topping

Directions:
Preheat your oven to 350°F. Prepare a 9 x 13 in. baking dish with a parchment paper sling. Cut the butter into the flour and confectioners’ sugar and press into the baking dish (I used a food processor to cut the fat into the flour, and then the bottom of a dish to press the mixture into the pan). Bake 20 minutes or until light brown. Let cool on wire rack.

In a bowl with an electric mixer, add the cream cheese, eggs, lemon juice and sugar. Mix until the ingredients are creamy and the cream cheese is fully incorporated. Pour into the pan with the cooled crust. Then evenly distribute the blueberries.

Bake 30-35 minutes or until filling is set. Remove from the oven and cool completely. Then refrigerate for at least 3 hours. Remove the cheesecake from the pan using the parchment paper. Cut into bars and sprinkle with powdered sugar.


Byrd loves these flowers — imagine a very excited toy poodle with her curly snout stuffed into one of these big blooms. I know: awwww!


Share Share this post with friends!

3.14159265358979323846…

Happy Pi Day! My math geek boyfriend had never heard of it, so go figure.

Here are my favorite pie recipes (and okay, some tarts for good measure). Whether you’re a math nerd or just want another excuse to eat pie, you have my blessing.


Fresh Blueberry Pie


Red Berry Pie


Mini-Pies! Pumpkin, Sour Cream Apple, Peach Crisp


Raspberry Cream Cheese Tart


Chocolate Tart


Peach Crisp Pie

Apparently there’s also a Pie — er, I mean Pi — Approximation Day in July?! Score!


Share Share this post with friends!

Fresh Blueberry Pie

…with a surprising crust. No, the surprise is not the vodka — y’all have all heard about the vodka crust trick by now.

Adding too much water to pie dough makes it tough, whereas adding too little results in a dry, crumbly mess (that was supposed to be a pie pocket. Ahem). Adding vodka and water to your pie dough instead of just water allows you to incorporate more liquid, making your dough workable without making it tough. The alcohol vaporizes while cooking so the final pie doesn’t taste like vodka. This was my first trial of this nice little trick, but it’s old news for many of you.

This was also, incidentally, the first time I’d ever encountered vodka first hand (being a teetotaler). I just want to know why someone would drink something that smells exactly like rubbing alcohol? I guess taste is really not the point? Please fill me in.

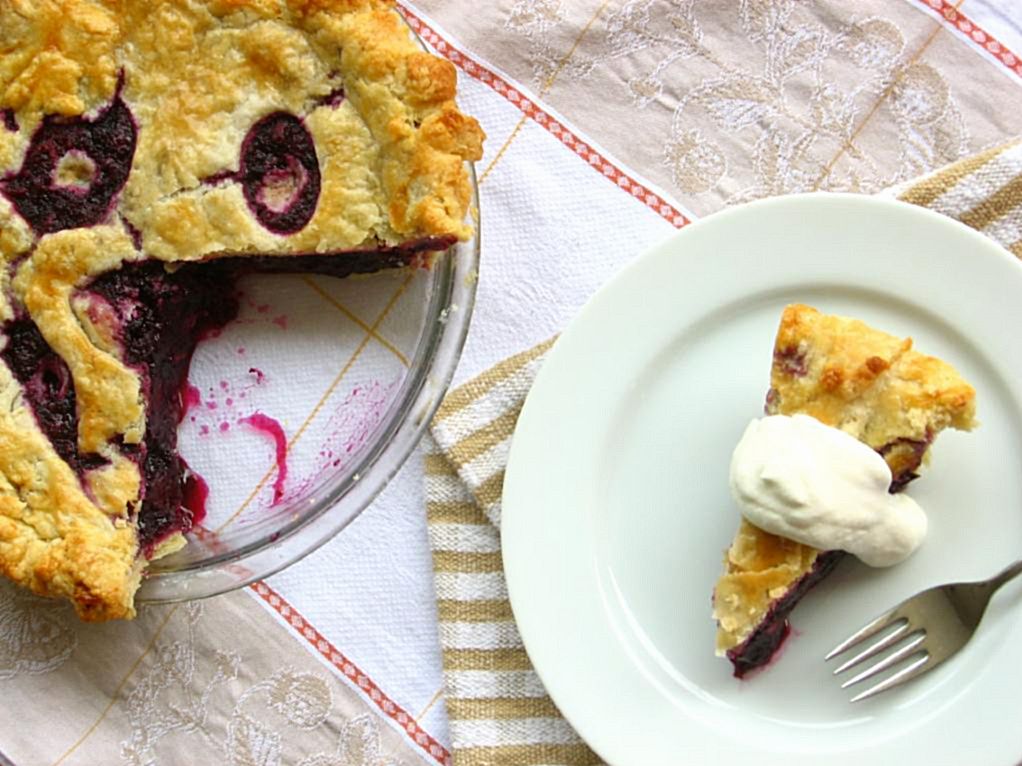
Anyway, vodka’s not the surprise. The surprise is how seriously I debated throwing this pie over my balcony, pie plate and all. It’s not because the pie wasn’t delicious . . . because WOW, it was! It’s a gorgeous flaky, tender crust with a thick filling full of plump, juicy berries. In fact, it’s not because of the finished pie at all. It’s because of what America’s Test Kitchen ironically calls their foolproof pie dough.

Ohhh this dough was a sticky, frustrating mess until I finally got it shoved into the oven with a huff! Despite the utter gobs of flour strewn all over my counter, my cute apron, my cute dog, and my cute boyfriend, the dough stuck to everything it could get its doughy little tentacles on. Even more fun, it tore apart rebelliously whenever moved. If you’re wondering why this pie looks like it got in a fight with an unruly pastry cutter . . . that’s why.

My attempts to crimp the edges resulted in dough-covered fingers and one ragged pie. Let’s just say this kitchen disaster was not weathered gracefully. There may have been some apron throwing. At least I didn’t chuck the pie into the woods behind my apartment after struggling for the umpteenth time trying to roll out the dough, right? Honestly, if it hadn’t been Mike’s mom’s pie plate . . . who knows what could’ve happened!

After eyeing the evil pie dough and the trash can a few times, I finally decided to buckle down and see my recipe through to the end. I rechilled, refloured, griped about America’s Test Kitchen, rechilled again, cried, switched to rolling on parchment, yelled a little, switched back to flour . . . and held my breath every time I moved that pie dough anywhere.

I’m glad I stuck it out. The crust, as I mentioned, is delicious and the perfect texture. I may switch back to my standard lard/butter vodkaless crust next time to avoid a kitchenpocalypse and protect my typically reasonable blood pressure, but it was very good. And let me tell you about these BLUEBERRIES!!

One of the reasons this pie is beautiful to me despite its decidedly Quasimodo-esque appearance is because it has the perfect consistency, bright flavor, and is full of plump, rich berries! ATK, redeeming themselves for now, formulated a recipe for blueberry pie filling thickened with tapioca and a grated apple, which releases its pectin upon being cooked. No runny filling or smushed berries here — just the perfect blueberry pie. It even has a tangy complexity to the blueberry flavor imparted by Ms. Granny Smith. I was such a fan of every bite I took.

So perfect, in fact, that I tried the same nifty apple trick with another sort of pie. A pie that actually turned out pretty and even tastier than this one — but you’ll have to wait until the next post to hear more! For now, here are some tips on managing this beastly dough (that, in all fairness, many cooks on the interwebs apparently loved working with. Go figure):

-Let it chill for a long time. At least overnight, but two days might be even better.
-Don’t be timid about flouring your surface and rolling pins generously. That’s the point of having a wet dough, and you’re gonna need it.
-Rechill any time you (or your dough) are losing your cool.
-Imagine the final product. While struggling with my dough, I was already drafting a post in my head telling you about how the final pie wasn’t worth the trouble, but truthfully . . . it was.

What’s your favorite pie crust trick? Anyone ever actually chucked their dough into the garbage? Tell me your pie secrets!

Best Blueberry Pie with Foolproof Pie Dough


Recipe by: America’s Test Kitchen
Yields: one 9-in, double-crust pie

Crust Ingredients:
2 1/2 cups unbleached all-purpose flour (12 1/2 ounces)
1 teaspoon table salt
2 tablespoons sugar
12 tablespoons cold unsalted butter (1 1/2 sticks), cut into 1/4-inch slices
1/2 cup chilled solid vegetable shortening, cut into 4 pieces (I use butter flavor)
1/4 cup vodka, cold
1/4 cup cold water
1 large egg, lightly beaten with 1 teaspoon water

Blueberry Filling Ingredients:
6 cups fresh blueberries (about 30 ounces)*
1 Granny Smith apple, peeled and grated on large holes of box grater
2 teaspoons grated zest and 2 teaspoons juice from 1 lemon
3/4 cup sugar (5 1/4 ounces)
2 tablespoons quick-cooking tapioca, ground*
Pinch table salt
2 tablespoons unsalted butter, cut into 1/4-inch pieces

Directions:
1. For The Pie Dough: Process 1 1/2 cups flour, salt, and sugar in food processor until combined, about two 1-second pulses. Add butter and shortening and process until homogenous dough just starts to collect in uneven clumps, about 15 seconds; dough will resemble cottage cheese curds and there should be no uncoated flour. Scrape bowl with rubber spatula and redistribute dough evenly around processor blade. Add remaining cup flour and pulse until mixture is evenly distributed around bowl and mass of dough has been broken up, 4 to 6 quick pulses. Empty mixture into medium bowl.

2. Sprinkle vodka and water over mixture. With rubber spatula, use folding motion to mix, pressing down on dough until dough is slightly tacky and sticks together. Divide dough into 2 even balls and flatten each into 4-inch disk. Wrap each in plastic wrap and refrigerate at least 45 minutes or up to 2 days.

3. Remove 1 disk of dough from refrigerator and roll out on generously floured (up to 1/4 cup) work surface to 12-inch circle, about 1/8 inch thick. Roll dough loosely around rolling pin and unroll into pie plate, leaving at least 1-inch overhang on each side. Working around circumference, ease dough into plate by gently lifting edge of dough with one hand while pressing into plate bottom with other hand. Leave dough that overhangs plate in place; refrigerate while preparing filling until dough is firm, about 30 minutes.

4. For The Filling: Adjust oven rack to lowest position, place rimmed baking sheet on oven rack, and heat oven to 400 degrees. Place 3 cups berries in medium saucepan and set over medium heat. Using potato masher, mash berries several times to release juices. Continue to cook, stirring frequently and mashing occasionally, until about half of berries have broken down and mixture is thickened and reduced to 1 1/2 cups, about 8 minutes. Let cool slightly.

5. Place grated apple in clean kitchen towel and wring dry. Transfer apple to large bowl. Add cooked berries, remaining 3 cups uncooked berries, lemon zest, juice, sugar, tapioca, and salt; toss to combine. Transfer mixture to dough-lined pie plate and scatter butter pieces over filling.

6. Roll out second disk of dough on generously floured (up to 1/4 cup) work surface to 11-inch circle, about 1/8 inch thick. Using 1 1/4-inch round biscuit cutter, cut round from center of dough. Cut another 6 rounds from dough, 1 1/2 inches from edge of center hole and equally spaced around center hole. Roll dough loosely around rolling pin and unroll over pie, leaving at least 1/2-inch overhang on each side.

7. Using kitchen shears, trim bottom layer of overhanging dough, leaving 1/2-inch overhang. Fold dough under itself so that edge of fold is flush with outer rim of pie plate. Flute edges using thumb and forefinger or press with tines of fork to seal. Brush top and edges of pie with egg mixture. If dough is very soft, chill in freezer for 10 minutes.

8. Place pie on heated baking sheet and bake 30 minutes. Reduce oven temperature to 350 degrees and continue to bake until juices bubble and crust is deep golden brown, 30 to 40 minutes longer. Transfer pie to wire rack; cool to room temperature, at least 4 hours. Cut into wedges and serve.

*This recipe was developed using fresh blueberries, but unthawed frozen blueberries (our favorite brands are Wyman’s and Cascadian Farm) will work as well. In step 4, cook half the frozen berries over medium-high heat, without mashing, until reduced to 1 1/4 cups, 12 to 15 minutes. Grind the tapioca to a powder in a spice grinder or mini food processor. If using pearl tapioca, reduce the amount to 5 teaspoons. Vodka is essential to the texture of the crust and imparts no flavor; do not substitute.


Want a slice?


Share Share this post with friends!

1 3 4 5 6