cakes

Ina Garten’s Lemon Loaf Cake and Raffaldini Vineyards

So what have you been up to this summer? As you know, up until this past weekend, I had not fulfilled my summer quota of fun sunshiney activities — no beach, no pool, no picnic. With school looming ahead of me (teacher meetings start tomorrow), something had to be done. Quickly.

My friend Vada saved the day (er, the season?). We Jazzercise together and she invited me to join her and a group of her fun friends for a road trip. It was her friend Lori’s birthday and they were headed to Raffaldini Vineyards in Ronda, NC.

When she first suggested it, I wasn’t sure. I don’t drink, so what would I do at a vineyard? Would I end up counting grapes in the corner as everyone else played wine pong (that’s what they do at vineyards, right)? As it turns out, though, Vada doesn’t drink either, and she was certain it would still be fun. I’m up for fun! I told her to count me in.


Vada and Luca

I’m so glad I went, because it was fun. Turns out, vineyards are beautiful — or at least Raffaldini Vineyards certainly were! We drove about an hour out of Charlotte and suddenly it felt like we were in Italy. Vada’s friend Luca, our resident Italian, agreed that it reminded him of home — a nice stamp of authenticity. As promised, fun ensued.

First, we ate a lovely picnic on an outdoor patio overlooking the vineyards and mountains in the distance. The vineyards offered a whole menu of food you could purchase on-site, but I brought a little packed lunch to save money. I also brought this bright, summery Lemon Loaf Cake, which was moist and traveled so well. Vada, who is an absolutely extraordinary cake decorator, brought cupcakes along. We had quite a feast!

After our picnic, we took a brief tour of the vineyard, learning about the soil, growing practices, and types of grapes grown. While others enjoyed a wine tasting, Vada and I took a walk around the grounds and had a photo shoot. Finally, we took a tour of the winery and learned how the wines were made. It was so informative — not being a drinker, I tend to think of grapes as the basis of jelly and “tannin” as something you do at the beach. I learned a lot! The best part? The entire day only cost me $8 — and that included buying a bottled water on-site.


Vada’s gorgeous cupcakes and the quick Lemon Loaf Cake packed for traveling!

This one little day trip kind of made my summer! It was filled with sweet people, good food, beautiful surroundings. How about you? Does one event or activity this summer stand out as your favorite?

You can relive part of my end of summer fun by making this quick, simple loaf cake for yourself. It has a tangy, drenched lemon flavor that will help you kiss the summer days farewell.

5 from 1 reviews
Ina Garten's Lemon Loaf Cake
 
Prep time
Cook time
Total time
 
A delicious, tangy, easy lemon loaf cake. Be careful not to overbake!
Author:
Serves: 6
Ingredients
Cake Ingredients:
  • 1 1/2 cups all-purpose flour
  • 2 teaspoons baking powder
  • 1/2 teaspoons kosher salt
  • 1 cup plain whole-milk yogurt or sour cream
  • 1 1/3 cups sugar, divided
  • 3 eggs
  • 2 teaspoons grated lemon zest or 2 teaspoons lemon extract
  • 1/2 teaspoons pure vanilla extract
  • 1/2 cup vegetable oil
  • 1/3 cup freshly squeezed lemon juice
Glaze Ingredients:
  • 1 cup powdered sugar
  • 2 tablespoons freshly squeezed lemon juice
Instructions
  1. Preheat the oven to 350 degrees F. Grease an 8 1/2 x 4 1/4 x 2 1/2-inch loaf pan (I use Wilton’s Cake Release). Line the bottom with parchment paper and butter and flour the entire pan.
  2. Sift the flour, baking powder, and salt together into a medium bowl. In a large bowl, whisk together yogurt, 1 cup of the sugar, eggs, lemon zest or extract, and vanilla. Slowly add the dry ingredients into the wet, whisking to combine (I did this in 2-3 additions). Use a rubber spatula to fold the vegetable oil into the batter until it’s fully incorporated. Pour into the prepared pan and bake for about 50 minutes, or until a cake tester stuck in the center of the loaf comes out clean.
  3. While the cake is baking, combine the 1/3 cup lemon juice and remaining 1/3 cup sugar in a small saucepan over medium heat and cook until the sugar dissolves and the mixture is clear. Set aside.
  4. When the cake is done, allow it to cool in the pan for 10 minutes before removing it and placing it on a baking rack over a sheet pan. Use a cake tester, wooden skewer, or toothpick to carefully pierce holes throughout the cake (I used a toothpick so the holes wouldn’t be too obvious, but a skewer might have made deeper holes in the cake, allowing more syrup to get through). While the cake is still warm, pour the lemon-sugar mixture over the cake and allow it to soak in. Cool completely.
  5. In a small bowl, combine the powdered sugar and lemon juice, whisking to form a smooth glaze. Pour over the cake. Slice and serve with fresh berries, whipped cream, or ice cream.


Angelic Cherry Mousse Cloud Cake with Mascarpone Whipped Cream

What do you think about at night as you fall asleep? Lately, my thoughts during those last few moments of wakefulness have been occupied by vampires (of a non-sparkly variety), since I recently began Elizabeth Kostova’s premiere novel, The Historian. It’s good so far, but may ruin me for the first Twilight book, which I have coming in the mail. I teach 6th and 7th grade Language Arts — how have I not already read the Saga everyone’s either raving or raging about?


Don’t let that charming, pillowy exterior fool you — there’s a sultry surprise inside.

Though my bedtime thoughts have been rather sanguine of late, I usually try to dwell on something happy and hopeful before I drift off. More often than not, this tends to be baking related. Instead of counting wooly ruminants, I develop ideas for new desserts, visualize the photo styling of my next dish, and ponder new flavor combinations.

It was during this twilight of consciousness a few weeks ago that I first developed an inexplicable craving for angel food cake with cherry cream. (That’s one thing I can already say I dislike about the Twilight Saga — it’s taken a lovely word out of commission. The phrase “twilight of consciousness” probably afflicted over half of you with visions of Taylor Lautner’s werewolflike scowl or Robert Pattinson’s, uh, vampirical eyebrows?)

Perhaps the sudden onset of a cake-n-cherry-cream craving seems normal to you, but it was surprising to me. I haven’t had a cherry in literally years. I haven’t had an angel food cake in even longer. Why all of a sudden did I want to combine the two in a big creamy cherry-rific sandwich o’ love? Ah, the ways of the heart are mysterious — and in this case, spot on. Go heart!


Surprise! A tunnel of love.

My previous experiment with a heart-shaped tunnel of lemon mousse inside a cake left me wanting to tunnel some more, so I decided to use that presentation here, too. It’s relatively simple to do. It also seemed like more fun than simply dolloping a swoosh of mousse on top of a piece of cake, but you’re welcome to do that instead, if you’re not the tunneling sort. Personally, my mole-like tendencies took over.

After cutting the freshly baked and cooled angel food cake in half using ye old dental floss trick, I used a 1-inch square cookie cutter and a serrated knife to mark off the location of my tunnels. I then carefully carved and scooped until I had a tunnel in each layer of the cake. Scooping the luscious cherry mousse into the tunnel, reuniting the layers, and slathering the entire confection with mascarpone whipped cream was a joyful experience.

But not quite as joyful as eating it. The angel food cake is a cloud of toasty, sweet almond flavor — almost like eating airy cotton candy. The tunnel provides the perfect cake-to-cream ratio, so each bite of cloud is accompanied by a tuft of bright cherry mousse. The fluffy mascarpone whipped cream is stable due to the addition of the mascarpone cheese and gelatin, but still has all the subtle sweetness and creaminess of a regular whipped cream frosting.

This cake has it all: it’s creamy, it’s pluffy, it’s moist, it’s fantastic. Mike’s dad commented that it was impressive something so tasty seemed so light, and that really is the magic of both angel food cake and mousse. Putting the two together is a dream.

. . . a dream that I might’ve had 4 slices of, give or take a slice. It’s very easy to keep shoveling forkfuls of this light dessert into your mouth. Pace yourselves, young padawans. I hope you’ll make this angelic summer dessert and serve it cool, right from the refrigerator, some nice, hot evening.

Angelic Cherry Mousse Cloud Cake with Mascarpone Whipped Cream


Recipe by: Adapted from Betty Crocker (Angel Food Cake), Paula Deen (cherry mousse), and Bon Appétit (frosting)
Yields: one angel food cake, or about 10 servings

Cake Ingredients:
1 1/2 cups powdered sugar
1 cup cake flour
1 1/2 cups egg whites (12), room temperature
1 1/2 teaspoons cream of tartar
1 cup granulated sugar
1 teaspoons vanilla
1 teaspoon almond extract
1/4 teaspoon salt

Cherry Mousse Ingredients:
1 envelope unflavored gelatin
1/4 cup cold water
1/3 cup boiling water
2 cup heavy whipping cream
2/3 cup sugar
1/2 cup bing cherries, pitted and chopped
3 tablespoons maraschino cherry juice or cherry pie filling juice

Mascarpone Whipped Cream Frosting Ingredients:
1 8-ounce container mascarpone cheese
2 cups chilled heavy whipping cream
6 tablespoons confectioners’ sugar
2 teaspoons vanilla extract
1 teaspoon gelatin
3 tablespoons cold water
1 tablespoon hot water

Directions:
Make cake: Move oven rack to lowest position. Heat oven to 375ºF. Mix powdered sugar and flour; set aside. Beat egg whites and cream of tartar in large bowl with electric mixer on medium speed until foamy. Beat in granulated sugar, 2 tablespoons at a time, on high speed, adding vanilla, almond extract and salt with the last addition of sugar. Continue beating until stiff and glossy meringue forms. Do not underbeat.

Sprinkle sugar-flour mixture, 1/4 cup at a time, over meringue, folding in just until sugar-flour mixture disappears. Push batter into ungreased angel food cake pan (tube pan), 10×4 inches. Cut gently through batter with metal spatula.

Bake 30 to 35 minutes or until cracks feel dry and top springs back when touched lightly. Immediately turn pan upside down onto heatproof funnel or bottle. Let hang about 2 hours or until cake is completely cool. Loosen side of cake with knife or long, metal spatula; remove from pan.

Make the mousse while cake is cooling: In a small bowl, soften gelatin in 1/4 cup cold water. Let stand 2 minutes. Add 1/3 cup boiling water, stirring until gelatin dissolves. Let this cool almost entirely.

In a medium bowl, beat whipping cream with an electric mixer until foamy; gradually add sugar, beating until soft peaks form. Gently stir in gelatin mixture, cherries, and juice. Cover and chill until cake is ready to fill.

Make frosting: Sprinkle teaspoon of gelatin over the cold water. Let stand for 2 minutes. Add hot water and stir to dissolve. Let cool while you mix the other ingredients.

Place mascarpone, whipping cream, vanilla, and confectioners’ sugar in a bowl and mix to soft peaks (do not overbeat or mixture will curdle). When gelatin mixture is cool, add it to the cream mixture and mix until combined. Place frosting in refrigerator until you’re ready to frost the cake.

Assemble the cake: Trim brown outside crust off of cake if you prefer. Use unflavored dental floss to slice the angel food cake in half. Use a serrated knife and spoon to gently cut a tunnel in the top and bottom of the cake (see photos below). I measured here and there to ensure that these would line up. Be sure to leave a 1-inch cake border on all sides of the tunnel. Fill the tunnel with cherry mousse and place top layer face down on bottom layer. Frost cake as usual. Keep refrigerated. Will hold up nicely for 2 days in refrigerator. Use a large, serrated knife to carve this cloud-like cake.

P.S. Many more Secret Garden recipe and craft posts coming soon!

If you liked this post, please:
Subscribe to Willow Bird Baking
Follow Willow Bird Baking on Twitter
Follow Willow Bird Baking on Facebook
Give this post a thumbs up on StumbleUpon


ShareOther ways to share this post with friends!

Lemon Triumph Cake

The looming summertime has given me the perfect excuse to indulge my love of lemons. Oh! Lemons! The pungent aroma of lemon juice on my fingers from a fresh squeeze! The bright yellow, spoked discs dripping with juice! The tang! The sweetness!

I was thrilled when my mom was pondering what sort of cake she wanted for her birthday and mentioned lemon. She made a fantastic lemon and lemon cream jellyroll cake awhile back from a cake mix and thought she might like something similar. I put on my Dr. Frankenstein hat and began piecing recipes together to oblige.

My first dilemma was how to make a cake from scratch that tasted like a cake mix cake. I always get a kick out of foodies who disdain the taste of cake mix. Being an avid baker, I have news for those folks: many of us are constantly trying to attain a cake-mix-like level of moistness and buttery flavor. There are definitely downsides to cake mix (preservatives and the fact that you don’t get all the fun of baking from scratch, of course!) but in terms of taste . . . yeah, they’re pretty good at that.

So how to make a delicious, preservative-free yella cake that was just as moist and scrummy as a cake mix? While considering this conundrum, I happened to see this recipe for a homemade cake mix and decided to give it a try. It smelled buttery and magnificent while mixing it up, just as it was supposed to, and baked into a lovely lemon cake with a bit of additional flavoring.

Now about that lemon cream. I decided I wanted to do a lemon mousse instead, and had my heart set on a big ol’ fancy mousse layer cake. I was going to buy a cake ring and build the cake with two cake layers sandwiching a thick layer of mousse. Only problem? Well, that first part . . . the part about the cake ring. You let me know if you find one, but after visiting three stores, I’ve come to the conclusion that there aren’t any cake rings in Charlotte. Lame.


And again, with candles!

Well, kind of lame, but kind of awesome, because it gave me an excuse to buy this Wilton Heart Tasty-Fill Pan I’ve had my eye on for months (Note to calm your fears: I always mention if I’ve been asked to review a product or have received something for free to review, but that’s not the case here. Wilton, y’all are welcome to send me free pans and all, but I bought this pan with my own hard-earned money and decided to share it without being asked). I am so excited about this pan! All the filling possibilities! I’m already pondering: banana cake with caramel cream filling, chocolate cake with caramel cream filling, yellow cake with chocolate mousse filling . . . but I digress! Back to the Lemon Triumph Cake at hand.

I did love the Wilton pan, but I think it’ll take a bit of practice to get used to. As you can see in some of the pictures, the heart wasn’t aligned correctly on one side of the pan. This has to do with me forgetting to trim the sides of the cake so that the top and bottom were even. I feel like it might be a bit difficult to get it lined up straight, though, and it’s hard to know until you cut into it . . . at which point (after 8 hours of baking, in the case of this cake) you don’t really want to know if something’s wrong. I’ll let you know next time I use it (which will hopefully be soon!) if it’s easier to align, having had a bit of practice.


Crooked heart this time around!

If you don’t have the Tasty-Fill Heart Pan, don’t worry! You can make this as a regular mousse cake using a cake ring per my original plan. Just layer a 9-inch cake on the bottom and a thick layer of mousse on top of that. Chill until the mousse is firm and place another 9-inch layer of cake on top. Chill again before frosting, taking care around the mousse layer not to mix the frosting and mousse. Alternatively, if your city also has no cake rings, serve this as a regular two-layer lemon cake with the mousse on the side.


Better <3 on this side of the cake.

Nevertheless, crooked hearts notwithstanding, this cake was worth the effort. The yellow cake drenched in lemon syrup was moist and buttery, just like I hoped. This method of making Swiss buttercream produces hands-down the fluffiest, smoothest, silkiest, tastiest frosting I’ve ever had the pleasure of licking off my spatula. And the lemon mousse was, well, a triumph! Lemon curd folded into mousse that sets up like a bright, creamy-tangy cloud in the middle of the cake. Close your eyes and imagine a satisfying summer day — birdsong, sprinklers, green grass, sunshine, lemonade, lounge chair, long naps and good books — with a little sophistication mixed in. That’s what this cake tastes like. If that doesn’t make you want a slice, I don’t know what will!

Lemon Triumph Cake


Recipe by: Willow Bird Baking, compiled from Fine Cooking (lemon curd), Giada DiLaurentis (lemon syrup, adapted), Gina DePalma (Swiss buttercream, adapted), Bon Appétit (lemon mousse), My Kitchen Cafe (homemade cake mix)
Yields: one 9-inch, two layer cake

Yellow “Cake Mix” Cake Ingredients:
2 cups granulated sugar
1 1/2 cups all-purpose flour
1 1/2 cups cake flour
1/2 cup nonfat dry milk powder
1 tablespoon baking powder
1 teaspoon salt
16 tablespoons butter (2 sticks), cut into 1/2-inch pieces and chilled
1 tablespoon vanilla extract
1 tablespoons lightly packed finely grated lemon zest
1-2 teaspoons lemon extract
strands of lemon peel for garnish

Lemon Curd Ingredients:
6 tablespoons unsalted butter, softened at room temperature
1 cups sugar
2 large eggs
2 large egg yolks
2/3 cup fresh lemon juice
1 teaspoon grated lemon zest

Lemon Mousse Ingredients:
1 recipe lemon curd (above)
2.5 tablespoons water
2 teaspoons unflavored gelatin
3 large egg whites
3/8 cup sugar
3/4 cups chilled heavy whipping cream

Lemon Syrup Ingredients:
1/2 cup sugar
1/8 cup water
1/8 cup lemon juice

Lemon Swiss Buttercream Ingredients:
1 cup sugar
4 large egg whites , at room temperature
24 tablespoons (3 sticks) unsalted butter, at room temperature
2 teaspoon vanilla extract
1 teaspoon lemon extract

Directions:
Note on scheduling: I might schedule this cake baking in the following way. Make lemon curd and refrigerate two days in advance. Bake cake and coat with lemon syrup one day in advance, wrapping carefully and freezing. On day of serving, make mousse, trim and fill cake (much easier with frozen layers!), make frosting, and assemble.

To make lemon curd: In a large bowl, beat the butter and sugar with an electric mixer, about 2 min. Slowly add the eggs and yolks. Beat for 1 min. Mix in the lemon juice. The mixture will look curdled, but it will smooth out as it cooks.

In a medium, heavy-based saucepan, cook the mixture over low heat until it looks smooth. (The curdled appearance disappears as the butter in the mixture melts.) Increase the heat to medium and cook, stirring constantly, until the mixture thickens, about 15 min. It should leave a path on the back of a spoon and will read 170°F on a thermometer. Don’t let the mixture boil.

Remove the curd from the heat; stir in the lemon zest. Transfer the curd to a bowl. Press plastic wrap on the surface of the lemon curd to keep a skin from forming and chill the curd in the refrigerator. The curd will thicken further as it cools. Covered tightly, it will keep in the refrigerator for a week and in the freezer for 2 months.

To make cake: Process sugar, flours, milk powder, baking powder, and salt in a food processor for 15 seconds to combine. Add butter and vanilla and pulse until the mixture resembles coarse meal (you want this much finer than, say, a pie crust). Freeze the dry mixture in a zipper-lock bag for up to 2 months or use immediately.

To make the cake, adjust an oven rack to the middle position and preheat the oven to 350 degrees. Grease and flour two 9-inch cake pans (the Tasty-Fill pans, if you’re using those).

With an electric mixer, beat the prepared cake mix, 1 1/4 cups warm water and 2 large room-temperature eggs until the mixture is smooth, about 2 minutes. Scrape the batter into the prepared cake pans and bake until a toothpick inserted in the center comes out clean, about 25-27 minutes for two 9-inch layer cakes. Cool the cakes in pans for 10 minutes, then turn them out onto a wire rack. Poke holes in them and spoon lemon syrup over generously. Cool for about 30 more minutes before placing cake layers in freezer for at least 30 minutes. This helps a ton with trimming, filling, and decorating!

To make lemon syrup: In a small saucepan, combine the sugar, water, and lemon juice over medium heat. Bring to a boil, reduce the heat, and simmer until the sugar has dissolved, about 5 minutes, stirring occasionally, Remove the pan from the heat and allow the syrup to cool, about 20 minutes.

To make the mousse: Pour 2.5 tablespoons water into small saucepan. Sprinkle gelatin evenly over. Let stand until gelatin softens, about 15 minutes. Meanwhile, place 7/8 cups lemon curd in large bowl. Stir 3/8 cup curd in another small saucepan over medium-low heat until very warm.

Stir gelatin mixture over medium-low heat until dissolved and liquid is clear (do not boil). Whisk warm gelatin mixture into 3/8 cup warm curd. Gradually whisk gelatin-curd mixture into curd in large bowl. Using electric mixer, beat egg whites in medium bowl until soft peaks form. Gradually add sugar, beating until whites are thick and glossy. Fold whites into curd mixture in 3 additions. Using same beaters, beat cream in another medium bowl until peaks form. Fold into egg white-curd mixture in 3 additions.

To make lemon Swiss buttercream icing: Combine sugar and 1/2 cup water in a small saucepan and bring to a boil over medium-high heat, stirring to dissolve sugar. Boil without stirring until syrup reaches 240° on a digital thermometer, about 5 minutes.

Meanwhile, in a stand mixer with whisk attachment, beat egg whites on medium-high speed until soft peaks form. With mixer on medium speed, gradually pour in hot syrup in a thin stream; avoid pouring syrup on whisk. Increase speed to medium-high and beat until stiff peaks form and mixture is cool, about 8 minutes. Reduce speed to medium and add butter 1 tablespoon at a time, beating after each addition. (If at any time buttercream appears curdled, beat on high until smooth, then reduce speed to medium and continue beating in butter.) Once all butter is added, beat on high speed until buttercream is smooth and fluffy, about 1 minute. Beat in vanilla and lemon extract.

To assemble the cake: Level the layers using a long serrated knife. If using a Tasty-Fill Heart Pan, align heart and then trim sides of cake to make them even. Fill both sides of the heart with mousse, leveling it off using a spatula (see instructions in the note below for making this a regular mousse cake).* Place the top layer on the bottom layer, aligning the heart. Cover cake with a thin coat of icing as a crumb coat and chill until the icing is set, 20 minutes or so. Frost cake and decorate with slices of lemon peel. Store, covered, in refrigerator. Set out about 10 minutes before serving to soften the icing.

*NOTE: Make this as a regular mousse cake by using a cake ring. Layer a 9-inch cake on the bottom and a thick layer of mousse on top of that. Chill until the mousse is firm and place another 9-inch layer of cake on top. Chill again before frosting, taking care around the mousse layer not to mix the frosting and mousse. Alternatively, serve this as a regular two-layer lemon cake with the mousse on the side.


Share Share this post with friends!

Caramel Fudge Brownie Cheesecake

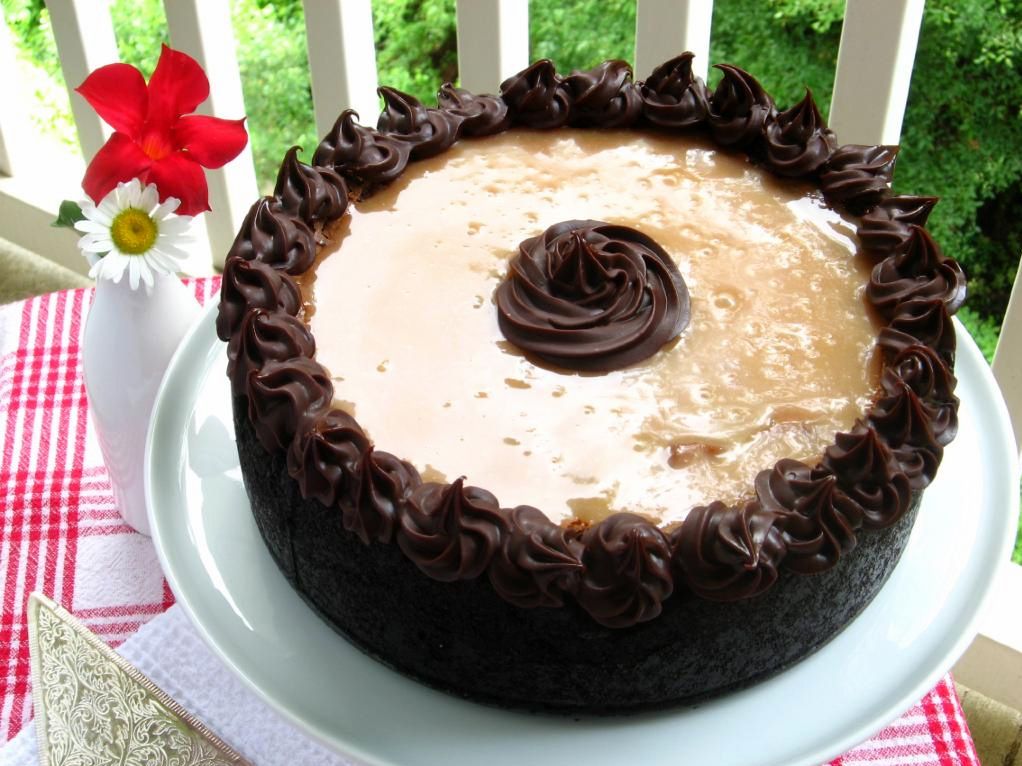
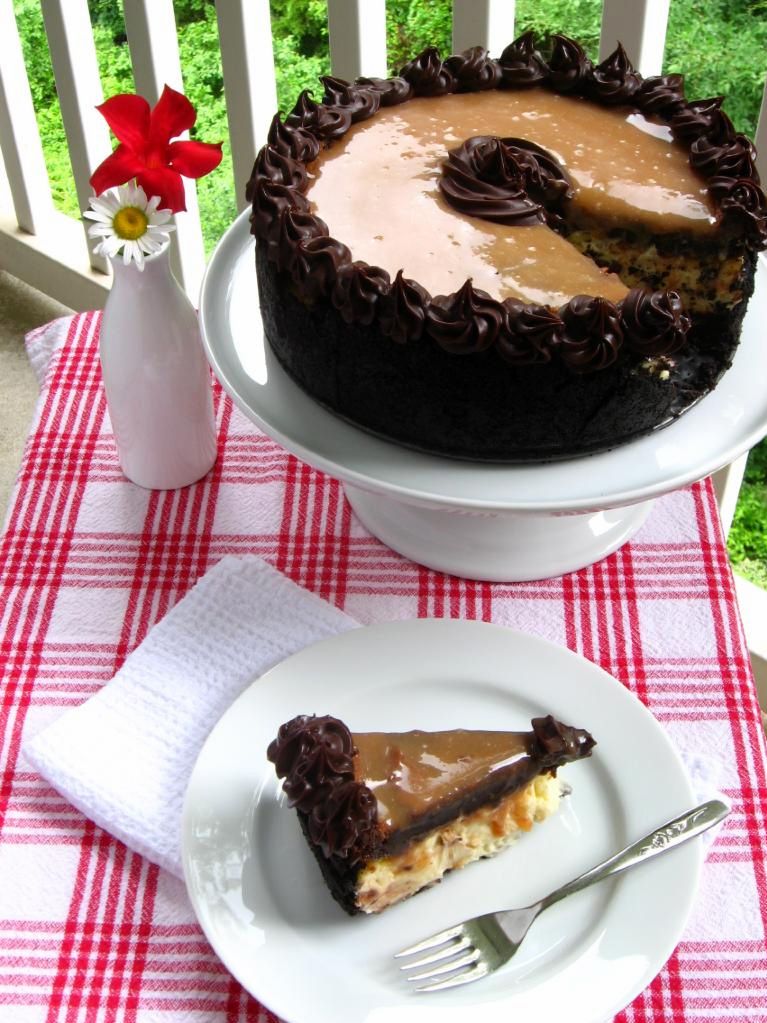
I’ve got to tell you about a special guy. He was shorter than me for most of his life, but suddenly, a couple of years ago, I came home to visit and he was looking down at me. He’s got bright blue eyes and a head full of curls, a dry wit, and really fat rabbit he calls Pilfer. I am not brave enough to wear skinny jeans, but he is. He is my little brother, Joel-called-Alex, and that little chubby cheeked guy you see in the photo next to my Caramel Fudge Brownie Cheesecake . . . that would be him about a decade ago. (Speaking of Caramel Fudge Brownie Cheesecake, it may be the best thing I’ve ever eaten — which is probably not surprising considering it’s a Caramel Fudge Brownie Cheesecake).

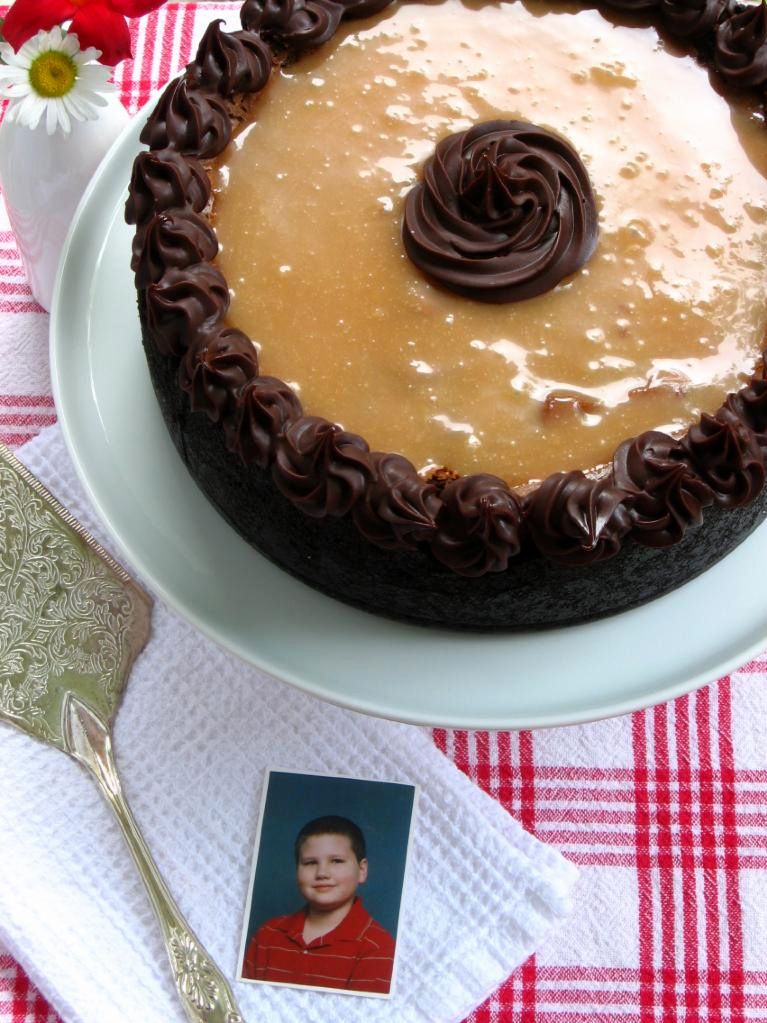
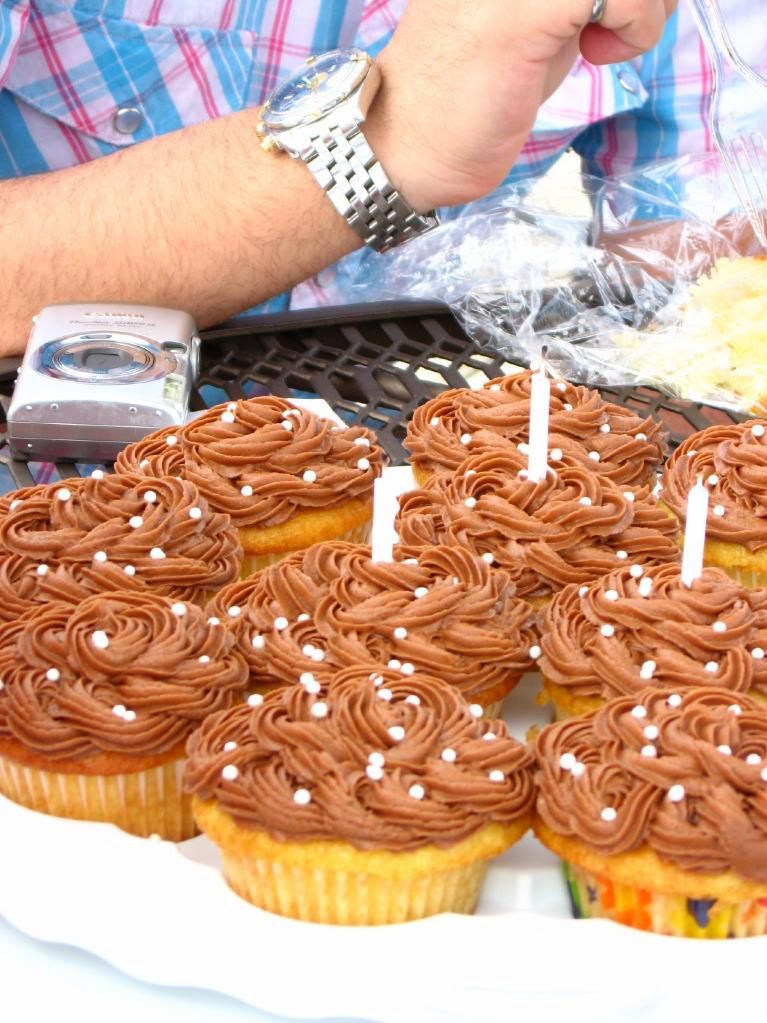
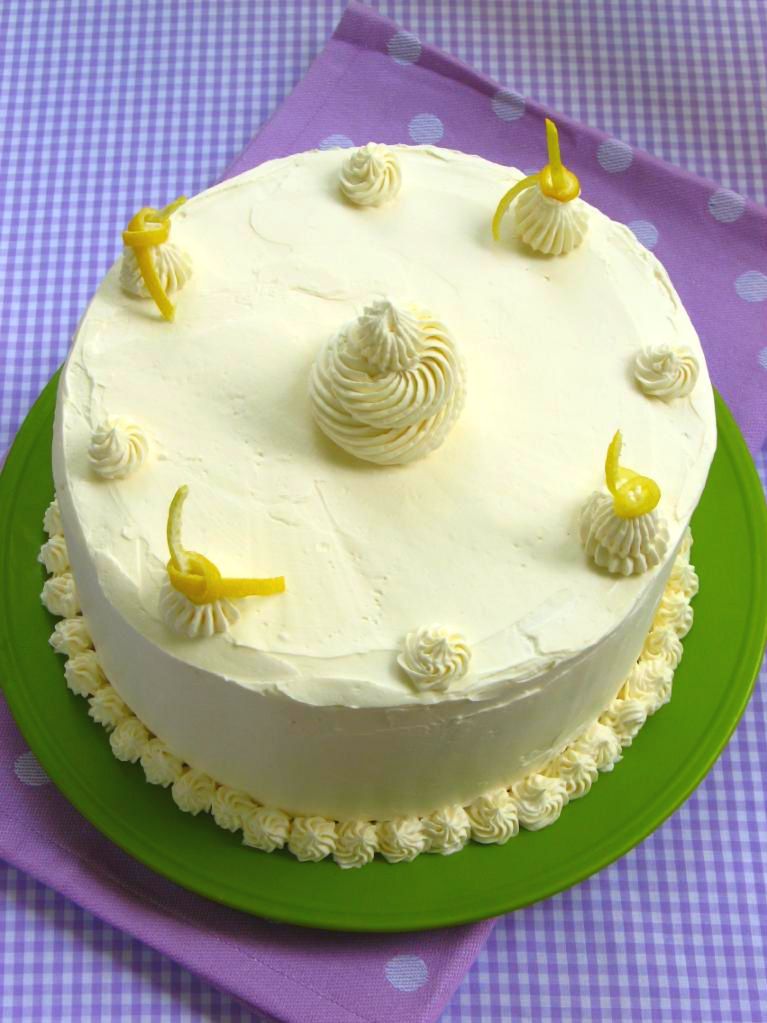
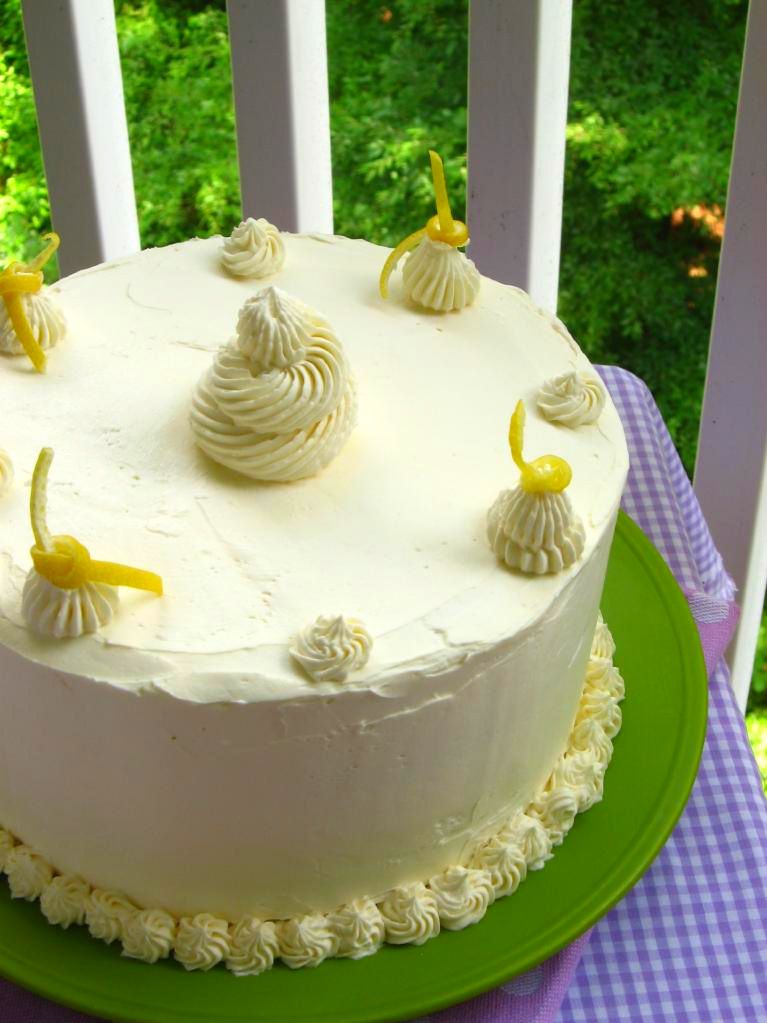
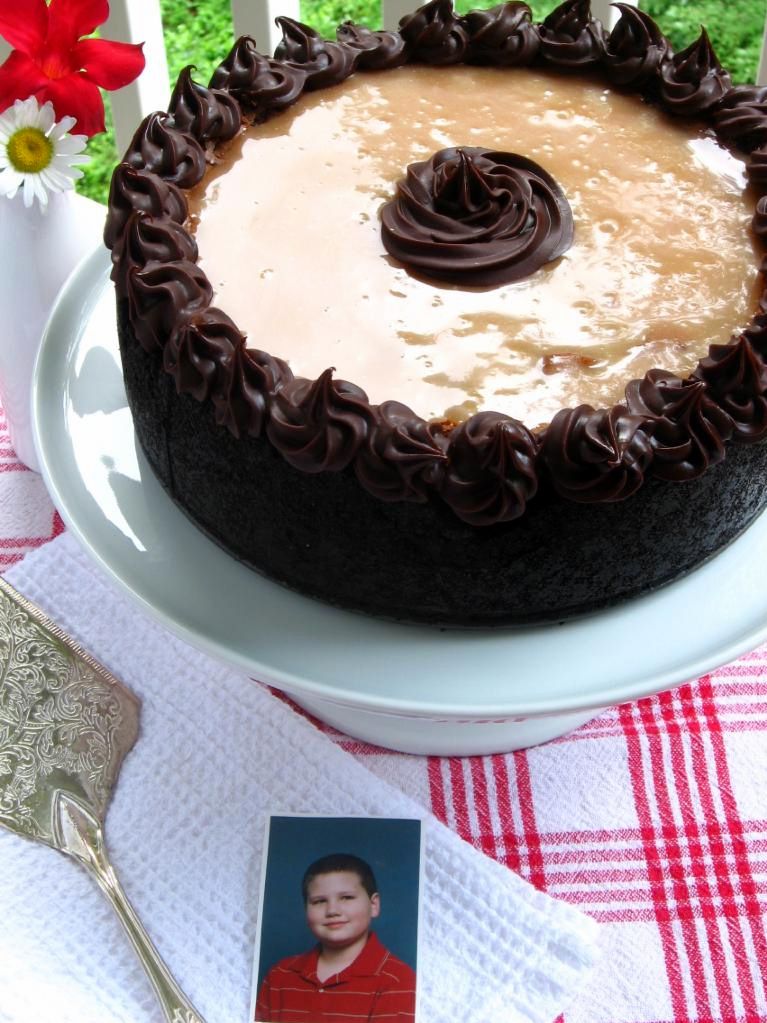
It’s hard to decide which is cuter . . . ganache rosettes or little boy smiles. Look below for a closer view to help you decide. Cakes are nice, but I think he wins!


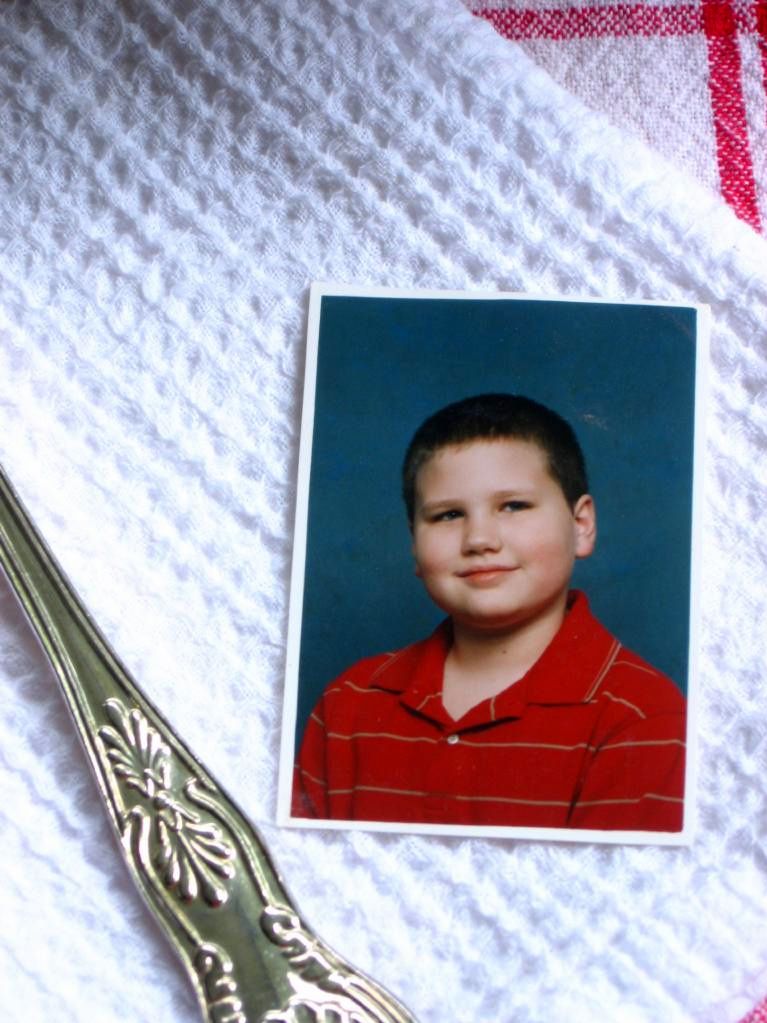
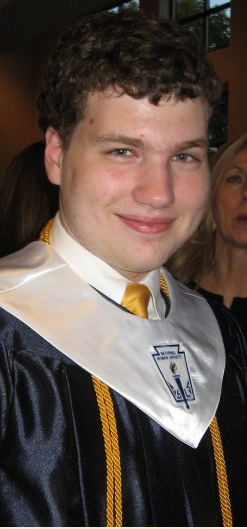
Alex at 8 years old and now!

Something pretty exciting happened in his life on Thursday night: he graduated high school as part of the Hickory Grove Christian School Class of 2010. My family gathered for the occasion, although honestly, I don’t think I really believed that my little brother was actually graduating until this moment:

[youtube=http://www.youtube.com/watch?v=uGLvtJkwDtw&hl=en_US&fs=1&]

And just like that, little Alex — who I remember driving around in his red PowerWheels jeep and running through sprinklers with me as a kid — was a graduate. In the fall, he’ll begin his undergraduate education at N.C. State, the same school Mike is attending for grad school — now I have two reasons to be a Wolfpack fan! I can already tell you that plenty of school nights will find them playing video games together and acting like goofballs.

To fully express my feelings about this momentous occasion, I wrote the following letter and gave it to Alex this week. I thought you might like to read it, too.

DEAR ALEX,

What is this I hear about you graduating high school? I could have sworn that someone told me you were a senior in high school and were graduating this week. But that’s silly. There must be some mistake.

See, you are just a baby. You love your swing, Ernie from Sesame Street, and your older sister, Julie (duh). Soon you will develop a few motor skills and begin arranging your toys: gummy bears and matchbox cars sorted by color (your favorite being “lellow”). You will start using words like “definitely” way before you’re old enough to know four-syllable words. I will be proud to be the sister of such a smart kid. You’re still just a baby!

Or maybe you are still 6 years old. You’re a stout, silly little guy with bright blond curls. Just last week I dressed you up in high heels, a green nightie, a poofy hair bow, and took pictures for future blackmail. You love Barney and Friends, and will soon start watching the Power Rangers movie more times than any human being really ought to.

Or, okay, maybe you’re a little older than that. Maybe you’re a tween. You are obsessed with Pokemon – movies, drawings, you name it. Yu-Gi-Oh is all right too. In a little while, you’ll be admitted into Hickory Grove Christian School for high school. You’ll start staying up late on the internet, playing lots of video games, and hanging out with friends. You’ll become an amazing writer, an excited reader, and an all-around brilliant guy. You’ll be a 9th grader. Suddenly a 10th grader. Maybe even an 11th grader. Maybe you’ll even go to your senior prom.

But graduating? You cannot be graduating. Except . . . you are. In just two days time, you’ll walk across the stage and get your high school diploma. I never thought this day would come (and no, not because I thought you’d flunk out of high school).

Nevertheless, since this day is undeniably upon us, there are a couple of things I want to say. First off, I’m so proud of what a smart kid you are; I hope you’ll continue being an amazing writer and reader. Second, and more importantly, you’re a compassionate kid. Third, you have an amazing personality and amazing character. I expect you to do incredible things at N.C. State next year (GO WOLFPACK!) and beyond. Fourth, and most importantly, I love you and always will.

Oh, and fifth, sorry about that poofy hair bow.

Love, your big sister,
Julie

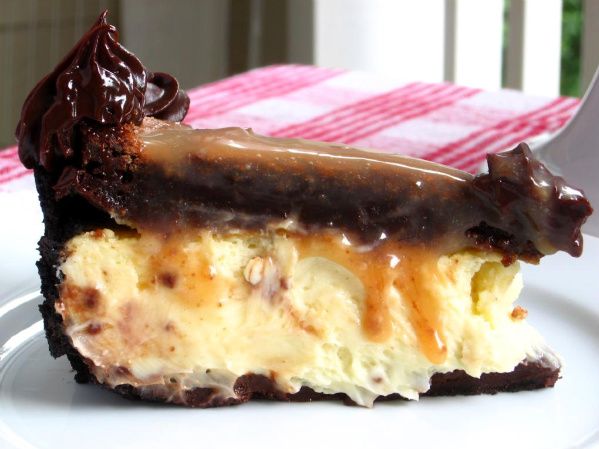
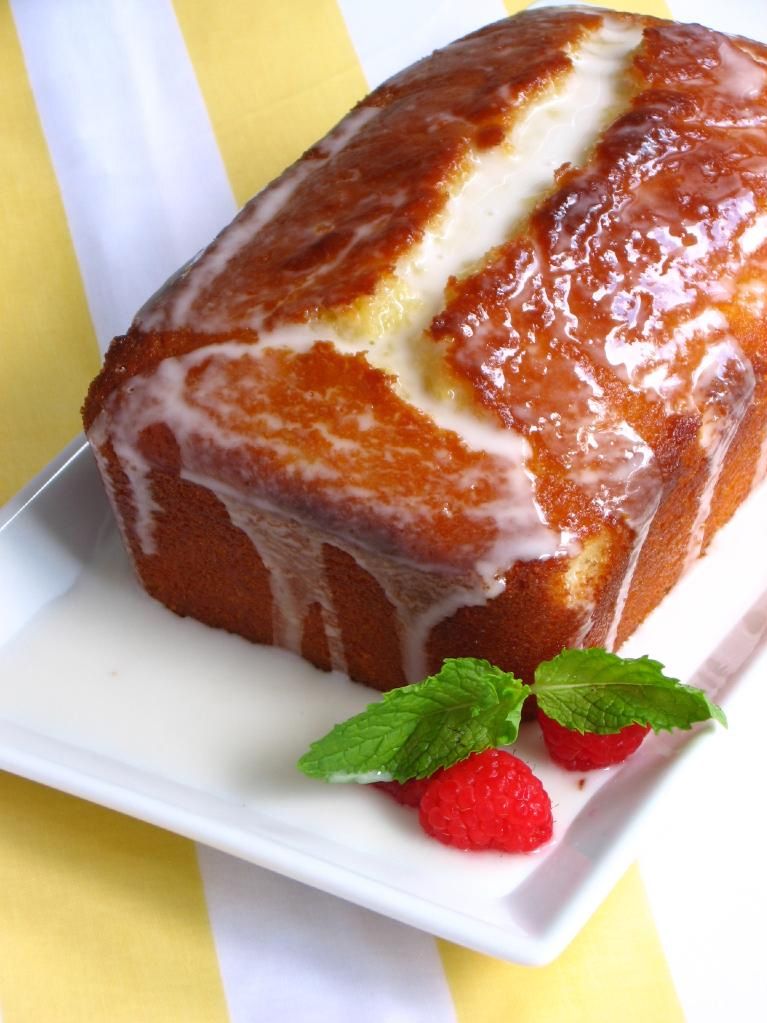
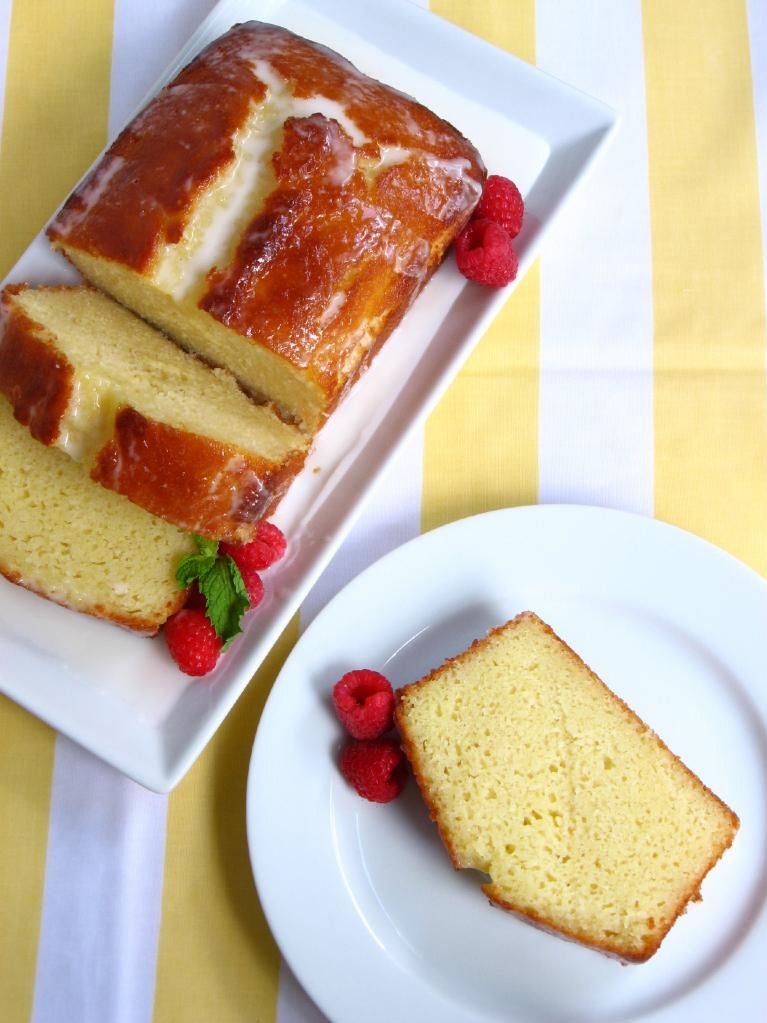
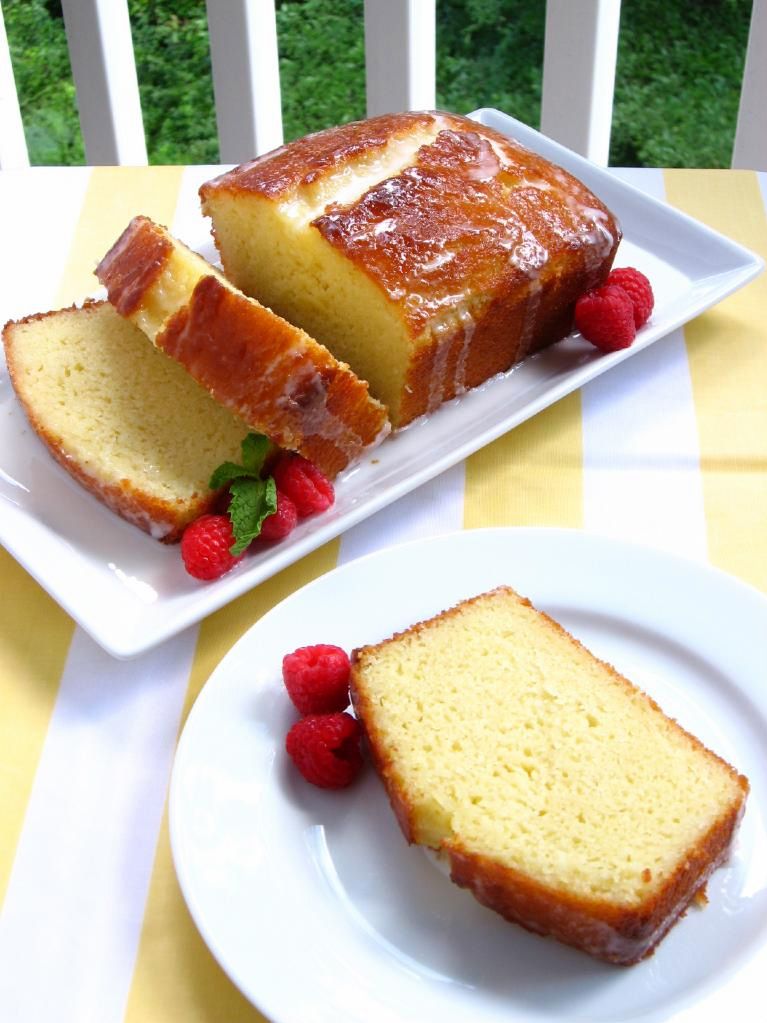
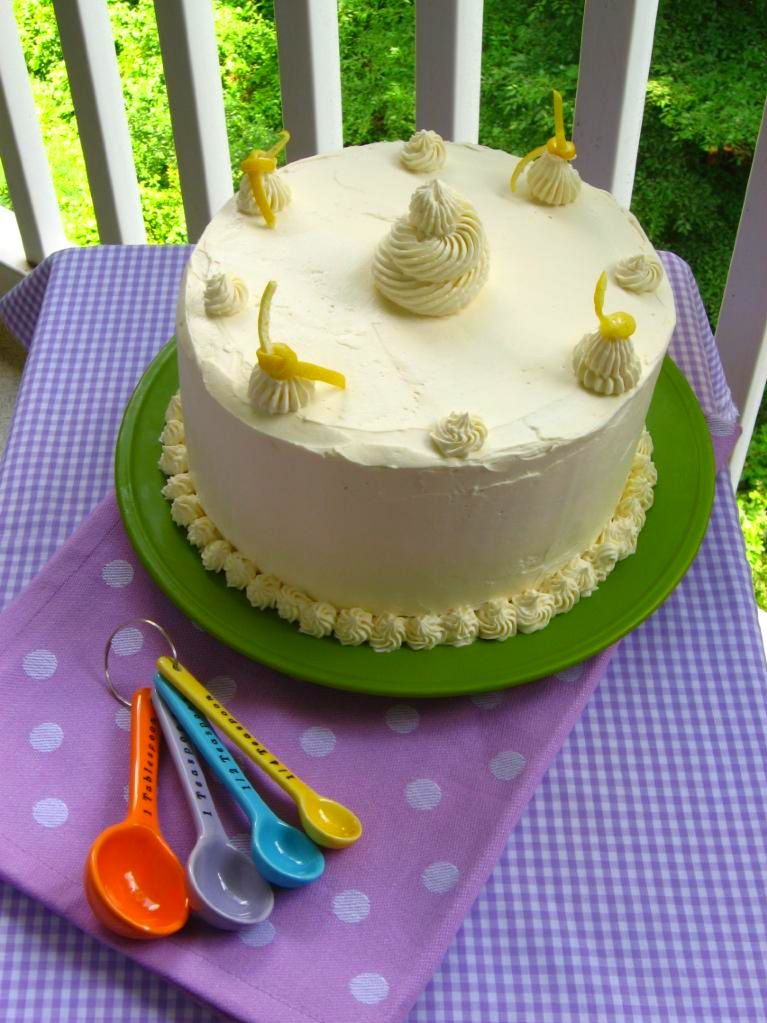
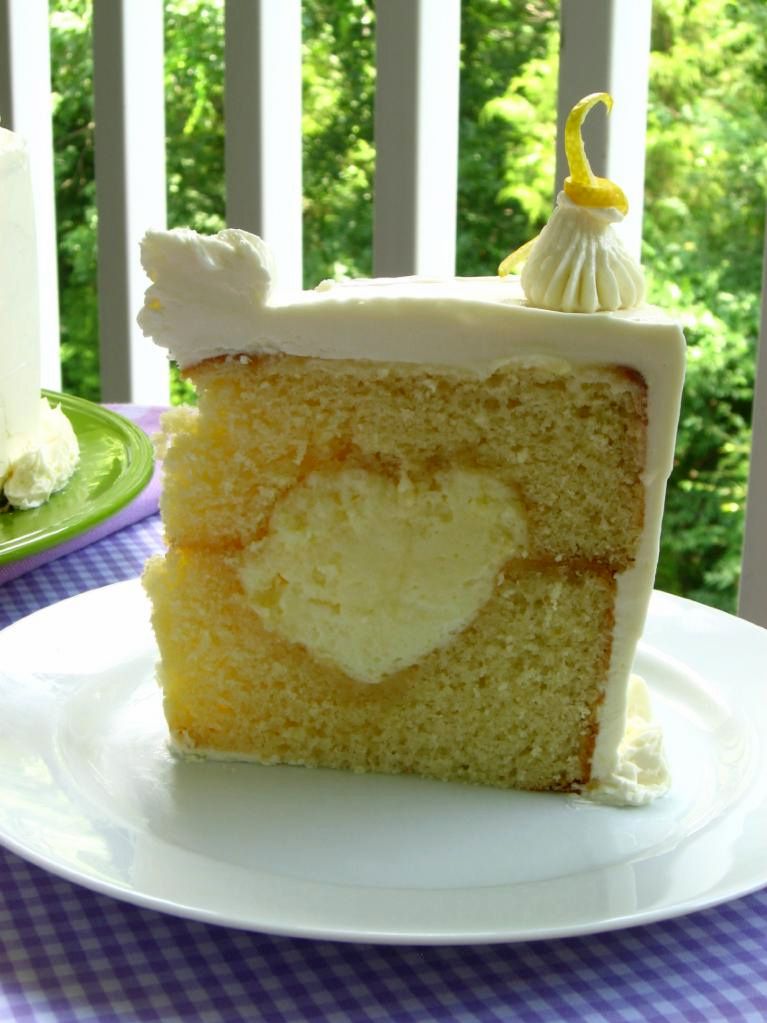
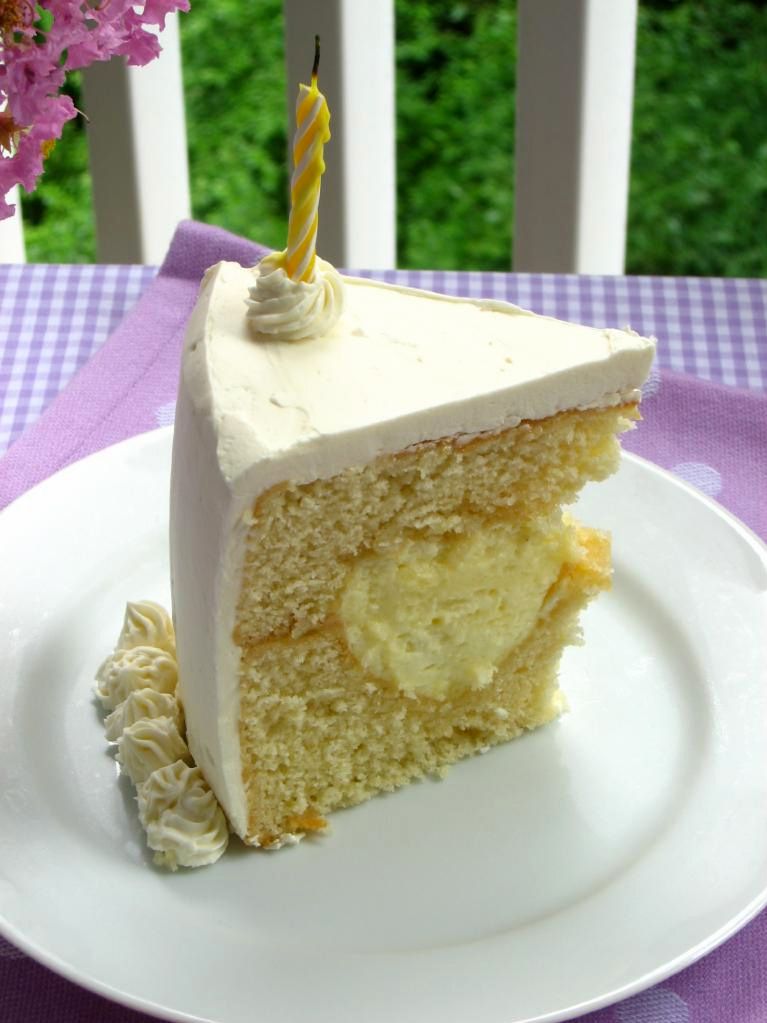
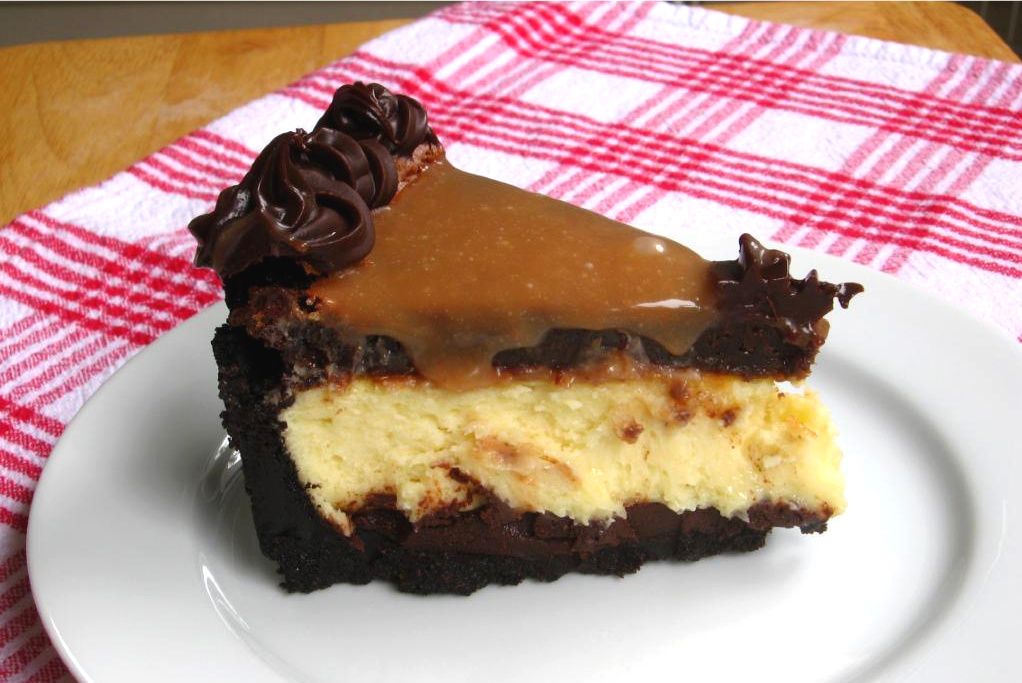
In addition to a boring ol’ letter, Alex will get a nice slab of this Caramel Fudge Brownie Cheesecake on Sunday. This was inspired by my Coffee Cookie Dough Cheesecake, and I love it just as much! While making this cheesecake certainly does require time and energy, it’s a relatively straightforward recipe and is perfect for a special occasion. The multistep procedure produces a thick layer of rich brownie drowning in gooey, buttery-tasting caramel sauce, all on top of creamy cheesecake. It also boasts an oreo crust and decadent ganache.

I think Alex will approve.


Tell me about your graduates! Anyone have a loved one in the Class of 2010?

Caramel Fudge Brownie Cheesecake


Recipe by: Willow Bird Baking, using cheesecake adapted from Bon Appétit, caramel adapted from Martha Stewart, and brownies adapted from a post on Simply Recipes
Yields: one 9-inch cheesecake

Crust Ingredients:
32 chocolate sandwich cookies, finely processed into crumbs
5 1/3 tablespoons unsalted butter, melted and cooled
Small pinch of salt

Ganache Ingredients*:
1½ cups heavy cream
20 oz. bittersweet or semisweet chocolate, finely chopped (I used 3/4 semisweet and 1/4 bittersweet)

Filling Ingredients:
3 (8 oz.) packages cream cheese, at room temperature
1 cup sugar
1½ tablespoons all-purpose flour
2 teaspoons vanilla extract
3 large eggs

Caramel Ingredients:
3/4 cup sugar
1/8 cup water
1/2 cup heavy cream
1/8 cup creme fraiche or sour cream
1/4 teaspoon pure vanilla extract
Pinch of coarse salt

Brownie Ingredients:
10 tablespoons (1 1/4 sticks) unsalted butter
1 1/4 cups sugar
3/4 cup plus 2 tablespoons unsweetened cocoa powder (natural or Dutch-process)
½ teaspoon coffee granules (I added this small amount to impart a richness without a pronounced coffee flavor)
1/4 teaspoon salt
2 teaspoons vanilla extract
2 cold large eggs
1/2 cup all-purpose flour

Directions:
Make the caramel: Prepare an ice-water bath. Heat sugar and water in a medium saucepan over medium-high heat until mixture boils and sugar dissolves, washing down sides of pan often with a wet pastry brush to prevent crystals from forming. Reduce heat to medium, and cook until sugar turns dark amber (about 345 degrees on a candy thermometer), 5 to 7 minutes more. Immediately remove from heat, and carefully whisk in 1/2 cup cream. Return to medium heat, and cook until sugar melts completely and mixture boils. Remove from heat, and pour into a bowl set in ice-water bath. Let caramel cool, stirring often, for 10 minutes. Stir in creme fraiche, vanilla, and salt. Cover and refrigerate at least 2 hours or up to 5 days.

Make the brownie layer: Preheat oven to 325°F with rack positioned in the lower third of the oven. Line the bottom and the sides of an 9-inch round cake pan with parchment paper, leaving an overhang on two opposite sides to make it easier to lift the brownies out of the pan when they are done.

Combine the butter, cocoa, sugar, coffee granules, and salt in a medium heatproof bowl. Set the bowl in a wide skillet of barely simmering water. Stir the butter cocoa mixture from time to time until the butter is melted and the mixture is smooth and hot enough that you want to remove your finger quickly after dipping it in to test. Remove the bowl from the skillet and set aside briefly until the mixture is only warm, not hot.

Using a wooden spoon, stir in the vanilla extract. Add the eggs one at a time, stirring quickly after each one. When the batter looks shiny, thick, and well mixed, add the flour and stir until you cannot see it any longer, then beat for 40 strokes with the wooden spoon. Spread the batter evenly in the lined pan (I used most of the batter, but poured a bit in a separate dish to bake, since I wanted to make my brownie layer a certain thickness – just use your judgment).

Bake until a tester inserted into the center comes out just slightly moist with batter, about 25 minutes. Let the brownies cool completely on a rack and then freeze. When ready to use, lift up the ends of the foil or parchment paper liner, and peel foil away.

Make the cheesecake: To make the crust, preheat the oven to 350˚ F. Position a rack in the middle of the oven. Butter a 9-inch springform pan and place it on a baking sheet. Combine the chocolate cookie crumbs, melted butter and salt in a small bowl. Toss with a fork to moisten all of the crumbs. Press into a thin layer covering the bottom and sides of the springform pan (at least 3 inches up the sides).

Bring the cream to a simmer in a medium saucepan. Place the chocolate in a medium bowl. Once the cream reaches a simmer, pour the cream over the chocolate and let stand 1-2 minutes. Whisk in small circles until a smooth ganache has formed. Pour 1 – 1.5 cups of the ganache over the bottom of the crust. Freeze until the ganache layer is firm, about 30 minutes. Reserve the remaining ganache; cover and let stand at room temperature for later decorating.

In the bowl of an electric mixer fitted with the paddle attachment, beat the cream cheese and sugar on medium-high speed until well blended. Beat in the flour. Add in the vanilla and beat until well incorporated, scraping down the sides of the bowl as needed. Beat in the eggs one at a time, scraping down the bowl between each addition.

Pour the filling over the cold ganache in the crust. Place the springform pan on a rimmed baking sheet. Bake until the top is lightly browned, puffed and cracked at the edges, and the center moves only very slightly when the pan is lightly shaken, about 1 hour. Transfer to a wire cooling rack. Cool at room temperature for at least 30 minutes. Transfer to the refrigerator and let cool at least 3 hours, until completely chilled and set.

Assemble the cheesecake: Wrap a warm towel around the outside of the springform pan to help loosen the crust from the sides. Carefully remove the springform. Transfer the cake to a serving platter. Spread a thin layer of caramel over cheesecake to adhere the brownie layer. Place brownie layer on top of cheesecake (right side up). My brownie layer was almost cup-shaped since the middle didn’t rise as much as the sides, so I poured the rest of my caramel into the concave area and spread it gently (to avoid disturbing the delicate top of the brownies). Place the reserved ganache in a pastry bag fitted with a decorative tip and use to garnish the top of the cake as desired. Chill until the ganache is completely firm, at least 6 hours.

*NOTE: This recipe makes extra ganache. I usually just make it and save the rest for truffles, but feel free to make about 3/4 of this recipe if you’d rather not have leftovers.

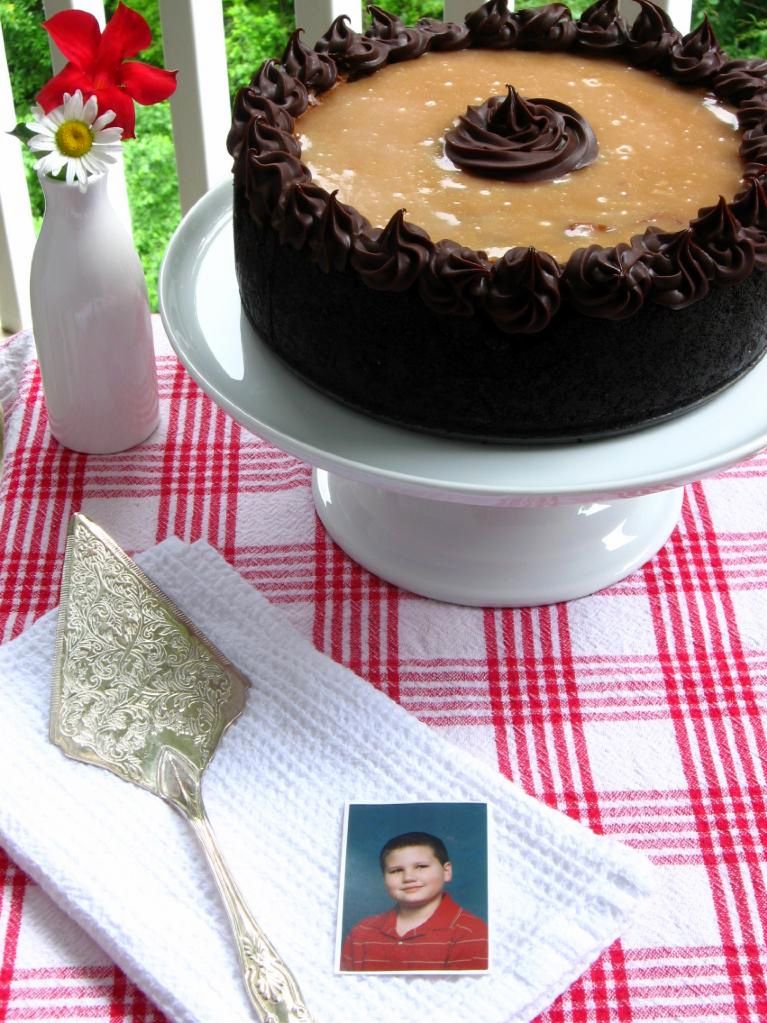
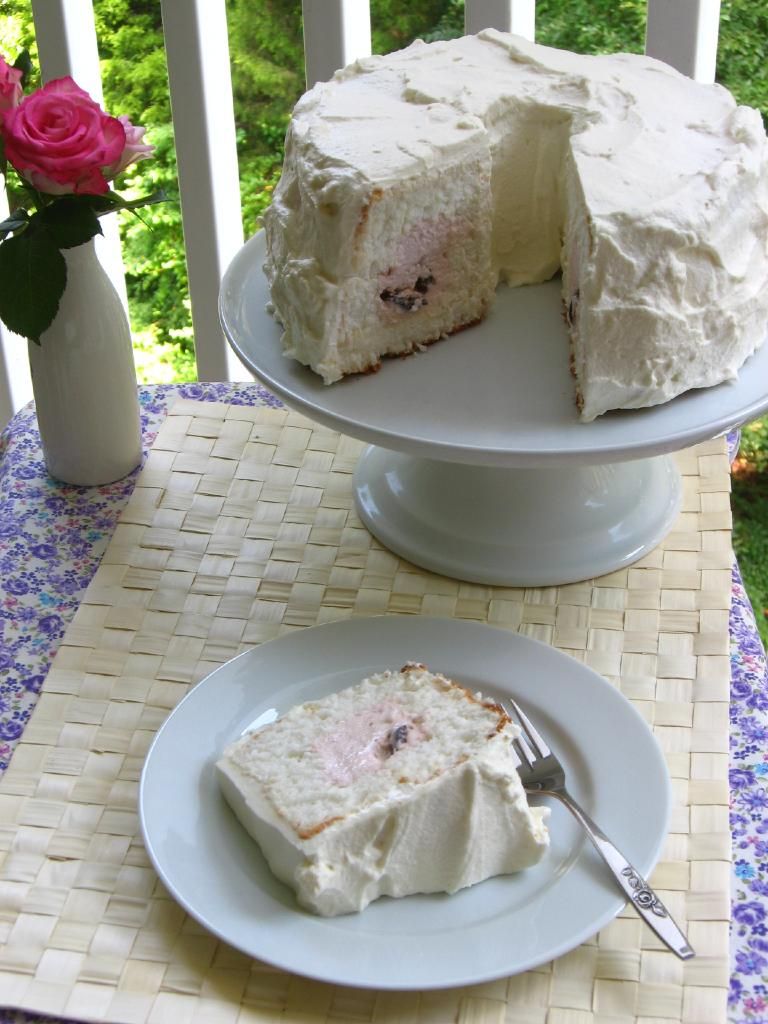
P.S. — Sorry for picking your flowers, Mom, but aren’t they pretty?

P.S. 2 — A serving suggestion for those that want to make this dessert extra-ridiculous: instead of serving with regular whipped cream, whip up some caramel cream.

P.S. 3 — (Am I starting to sound like the evolution of a gaming console?) My talented sister, Laura, wrote a song for Alex’s graduation. It’s called “Alarm of the Freshman,” it’s sung to the tune of “Eye of the Tiger,” and the video I shot of her singing it would be perfect blackmail material, if she had any shame. Love you, Laura! Enjoy, y’all:

[youtube=http://www.youtube.com/watch?v=9tXOCUFGjGo&hl=en_US&fs=1&]


Share Share this post with friends!

Lemon Raspberry Cake

Willow Bird Baking is the namesake of my darling little noodle (read: poodle), Byrd. As I sit here writing this post (and listening to the cooing of mourning doves outside my window), she is at the veterinary hospital recovering from a double knee surgery. Judging by her exuberance about riding in the car yesterday morning, she wasn’t really expecting it.

Apparently both her little kneecaps were popping out of place, and she couldn’t do some of her favorite things (fetching, jumping) without limping. Poor puppy pumpkin. The vet tech just called and said she is standing, but won’t try to walk, and won’t eat a thing. No wonder, since she’s in a strange place without her mama. We go pick her up at 12:30 today, so keep us in your prayers.


Get it? It’s decorated to look like a lemon.

Because of this unexpected $2,400 surgery, my finances have not been my friends lately. I’ve been cutting back: we haven’t been eating out, I’ve been trimming my grocery budget, and the last time I got my hair cut or colored was last August — I’m about ready to pick up some scissors myself. In addition to limiting my spending, another issue needed to be addressed: waste!

I’ve been a bad steward of my kitchen for too long. Buying a bag of cheese with the best intentions, but letting it mold. Buying a bag of fresh herbs, using them once, and letting them brown in the back of my fridge. Buying expensive ingredients (hello, pancetta, I’m talking to you) with the intention of using every last hunk, only to open my fridge drawer a month later and guiltily remember that broken resolution.

So, I’ve been trying to be better. Leftover creams, frostings, and doughs from one pastry become the basis for the next. I survey the fridge for unused ingredients before deciding what to make for Saturday dinner. It’s not perfect, but it’s better than it was!

This past weekend, leftover raspberry curd, nine egg whites left from making the curds, and some extra lemons provided my inspiration.

After buying only some butter, some fresh raspberries, and some white chocolate bark, I whipped up this cool, bright, summer dessert: Lemon Raspberry Cake. The cake itself is my favorite white cake recipe because it’s moist with the perfect crumb. Each layer is brushed with lemon syrup for moisture and tang before being coated in a luxurious raspberry curd. The frosting is rich and decadent, and even the white chocolate decorations added a nice dimension to the overall flavor of each slice.

My “lemon” decoration broke as I was trying to release it from the wax paper I piped it on, so I pieced it together on top of the cake. It’s a little crooked! I’m sure you can do better. I also completely forgot the poppy seed until I made the third cake layer (I mixed it separately), so you’ll notice that only my middle layer has the seeds. Oh well! Crooked citrus or not, seeds or not, we all loved the refreshing taste of this layer cake! Happy eating!

Lemon Raspberry Cake


Recipe by: compiled from adaptations of The Way the Cookie Crumbles (white cake), Notes from my Food Diary (frosting and raspberry curd), Bon Appétit (lemon syrup)
Yields: 12 servings

Cake Ingredients:
3 3/8 cups cake flour, plus more for dusting the pans
1 1/2 cups + 3 tablespoons whole milk, at room temperature
9 large egg whites, at room temperature
3 teaspoons almond extract
1 1/2 teaspoons vanilla extract
2 1/4 cups + 3 tablespoons granulated sugar
6 teaspoons baking powder
1 1/2 teaspoons table salt
18 tablespoons unsalted butter (2 sticks and 2 tablespoons), softened but still cool
1 1/2 tablespoons poppy seed (optional)

Lemon Syrup Ingredients:
1/2 cup sugar
1/2 cup boiling water
1/4 cup fresh lemon juice

Raspberry Curd Filling Ingredients:
1/2 cup (1 stick) unsalted butter
Two 1/2-pints ripe raspberries or one 12-ounce package frozen raspberries, thawed
5 large egg yolks, lightly beaten
3/4 cup sugar
Pinch of salt
2 to 3 teaspoons fresh lemon juice

Lemon Buttercream Frosting Ingredients:
1 cup (2 sticks) unsalted butter, at room temperature
2 tablespoons finely grated lemon zest (I opted for a teaspoon or two of lemon extract instead)
3 cups sifted confectioners’ sugar
3 tablespoons fresh lemon juice

Directions: Make raspberry curd: Melt the butter in a large saucepan over medium heat. Add the raspberries, egg yolks, sugar, and salt and cook, mashing the berries and stirring frequently at first and them constantly at the end, until thickened, about 10 minutes (this took longer for me — about 15+). Pour this mixture through a coarse strainer, pressing to get out the maximum amount of liquid. Add in lemon juice to taste. Allow this to cool and then cover (with plastic wrap touching surface of curd to prevent skin from forming) and refrigerate until ready to use.

For the Cake: Set oven rack in middle position. (If oven is too small to cook both layers on a single rack, set racks in upper-middle and lower-middle positions.) Heat oven to 350 degrees. Spray three 9-inch round cake pans with nonstick cooking spray; line the bottoms with parchment or waxed paper rounds. Spray the paper rounds, dust the pans with flour, and invert pans and rap sharply to remove excess flour. (I brush my pans with Wilton’s cake release, then add the parchment circle and brush again. Be sure the parchment circles reach to the edges of your pan to ensure easily release).

Pour milk, egg whites, and extracts into 2-cup glass measure, and mix with fork until blended.

Mix cake flour, sugar, baking powder, poppy seed, and salt in bowl of electric mixer at slow speed. Add butter; continue beating at slow speed until mixture resembles moist crumbs, with no powdery streaks remaining.

Add all but ½ cup of milk mixture to crumbs and beat at medium speed (or high speed if using handheld mixer) for 1½ minutes. Add remaining ½ cup of milk mixture and beat 30 seconds more. Stop mixer and scrape sides of bowl. Return mixer to medium (or high) speed and beat 20 seconds longer.

Divide batter evenly between prepared cake pans; using rubber spatula, spread batter to pan walls and smooth tops. Arrange pans at least 3 inches from the oven walls and 3 inches apart. (If oven is small, place pans on separate racks in staggered fashion to allow for air circulation.) Bake until thin skewer or toothpick inserted in the center comes out clean, 23 to 25 minutes.

Let cakes rest in pans for 3 minutes. Loosen from sides of pans with a knife, if necessary, and invert onto wire racks. Reinvert onto additional wire racks. Let cool completely, about 1½ hours.

Make lemon syrup: Place sugar in small metal bowl. Add 1/2 cup boiling water; stir to dissolve sugar. Stir in lemon juice.

Make frosting: Beat the butter and zest with an electric mixer on medium speed in a medium bowl until light and fluffy. Gradually add the sugar and beat until light and fluffy. Add the lemon juice and beat for 1 minute longer.

Assemble the cake: I love Smitten Kitchen’s Layer Cake Tips — especially the one about freezing your layers before working with them. It makes it so much easier.

When cakes are completely cool, level each layer using a long, serrated knife. Use a little frosting to attach your bottom layer to a cake board or serving platter. Brush layer generously with lemon syrup. Spread a scant 1/2 cup raspberry curd on the layer (I may have used a little more). Continue building the layers this way, with syrup and curd, until all three layers are stacked. Frost with lemon buttercream frosting. I used white chocolate to create decorations for the sides and top of my cake. Cut into wedges and serve with fresh raspberries. Store in refrigerator.


Enjoy!


Share Share this post with friends!

1 25 26 27 28 29 30