I’m so proud, and instead of quietly congratulating myself on a minor success, I’m going to tell the interwebs all about it like it’s a big deal. Because that’s what blogs are for, right? Okay, then. Drumroll, please . . .
I exercised four days in a row last week.
You may remember that I’ve had exercise successes like this before — over the summer I went to Jazzercise consistently for months! But once August rolled around and it was time to go back to teaching, any physical activity (besides the vigorous use of my grading pen) was put on the back burner.
Recently, though, I finally scrounged around under the furniture and in the closets of my heart until I found enough motivation to get on my elliptical machine. Four. Days. In. A. Row.
Turns out a little Coke Zero and some Teen Mom make exercise almost bearable. Don’t judge me.
Some of you out there are crazy exercisers and are trying your best not to giggle at my “success.” Marathoners, triathaloners, rock climbers, extreme ironers — I know you’re out there, reading this and scoffing. Or guffawing. Or perhaps chortling.
Regardless of what sort of condescending laugh you’ve chosen, I recognize that four days is decidedly unimpressive to some of you hardcore athletes. Nevertheless, it was such an achievement for me that I felt I deserved some sort of reward. A trophy, maybe? A medal? A subscription to Ellipticizing For Life Magazine (which does not exist)?
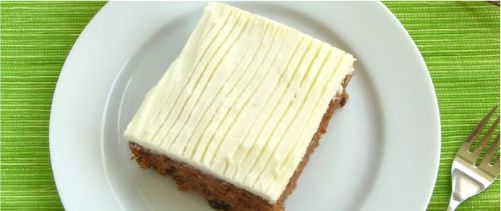
You see where I’m going with this. I deserved a reward after a week of hard work, so I SPENT ALL WEEKEND EATING THE MAXIMUM AMOUNT OF CARROT CAKE COOKIES ONE PERSON COULD POSSIBLY INGEST OVER A TWO DAY PERIOD. That is only a slight exaggeration.
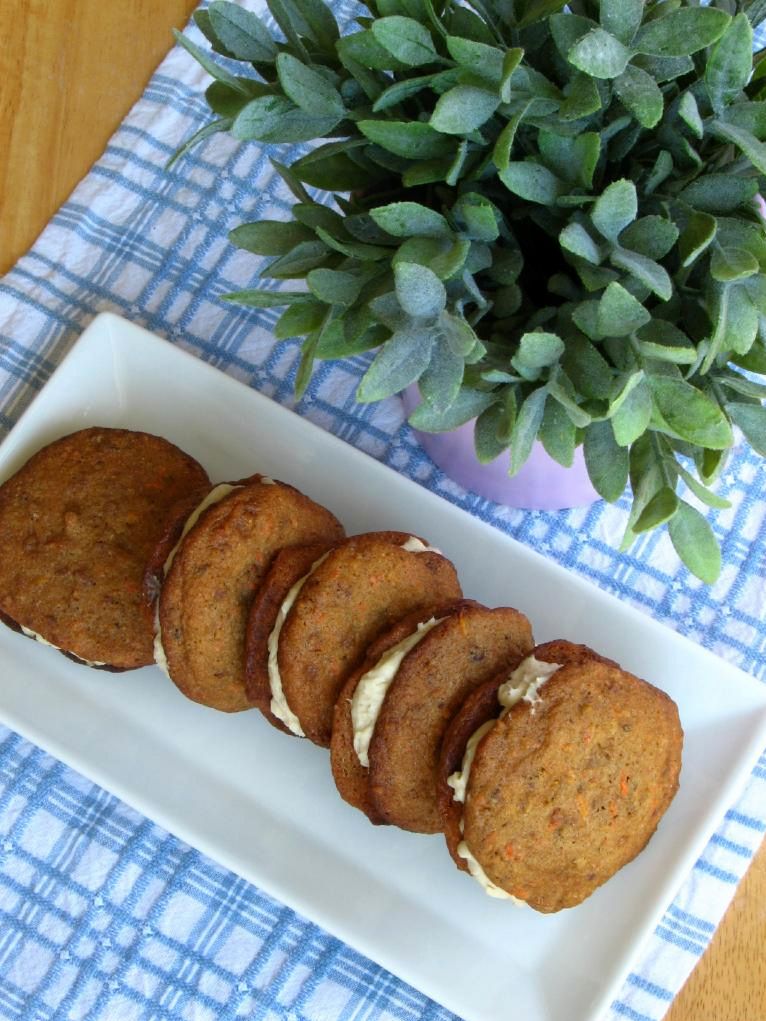
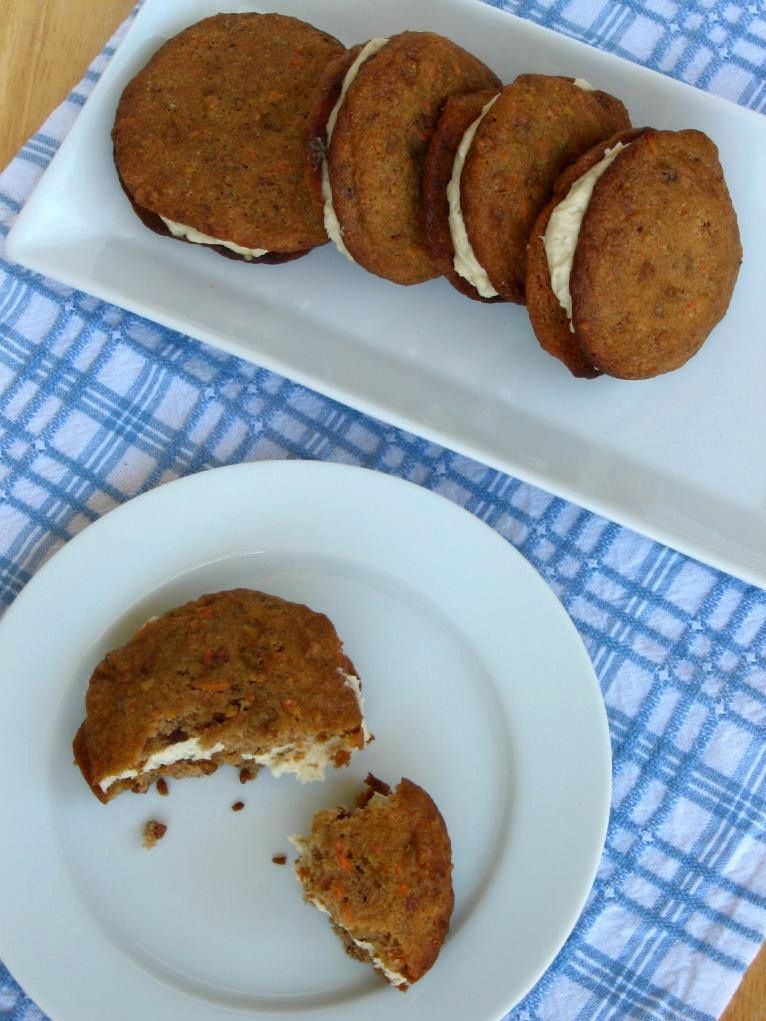
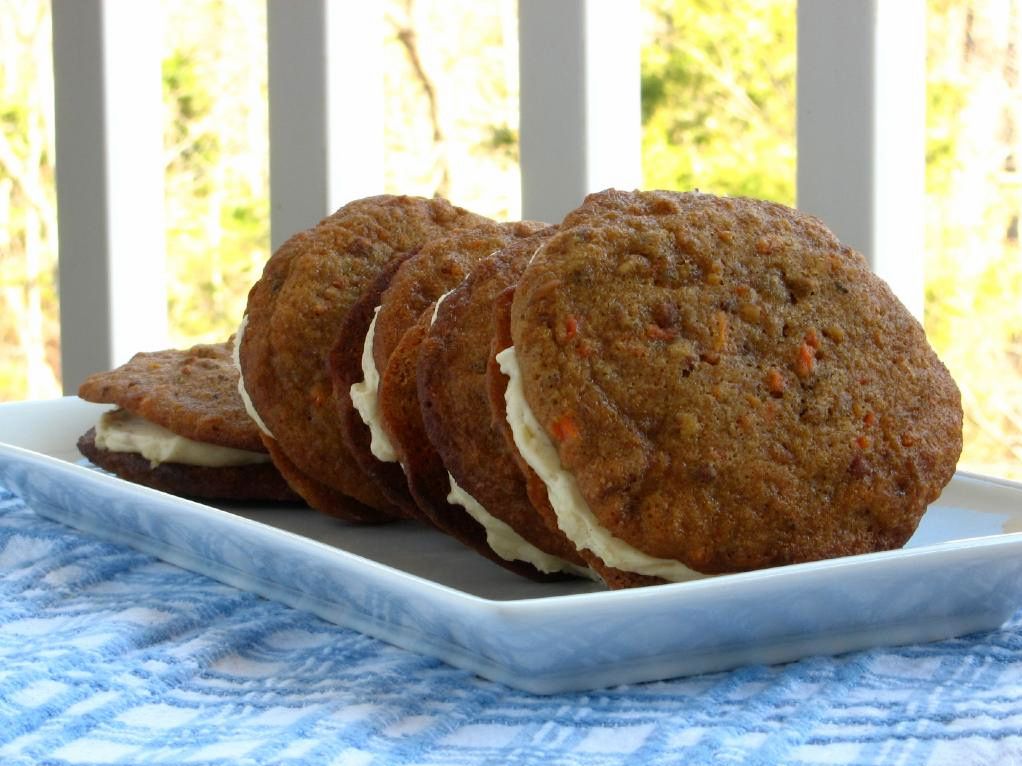
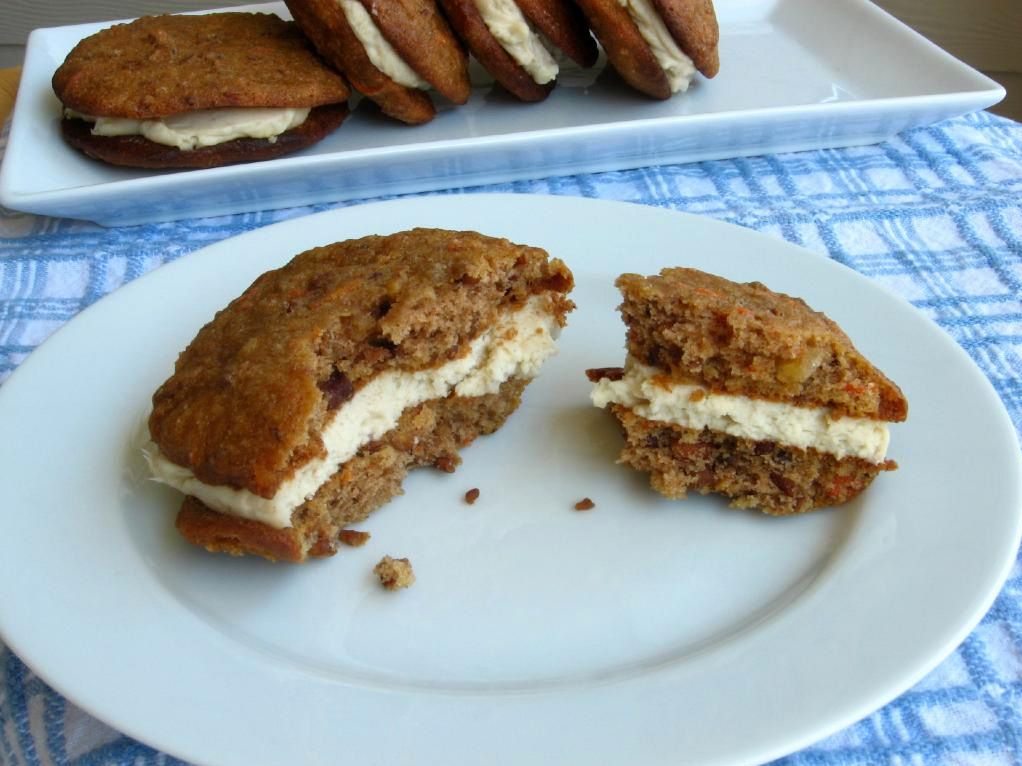
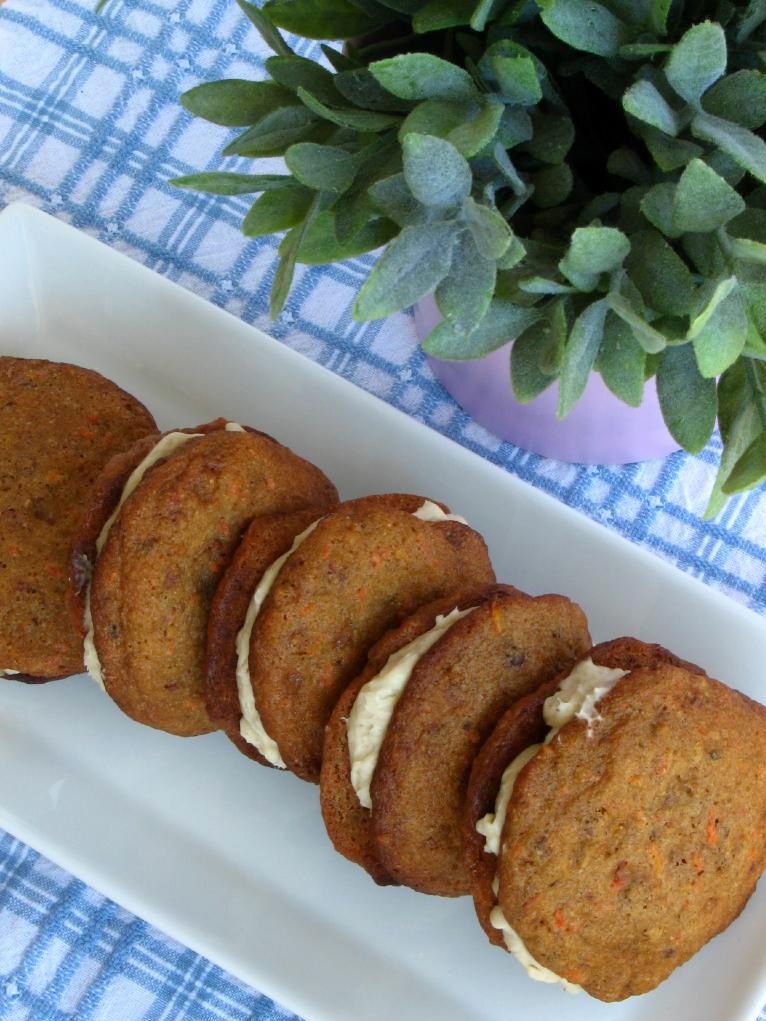
I made these for a Saved by the Bell potluck I went to on Friday night (I know, right? I have cool friends). The sultry honey cardamom cream cheese was an oasis of smoooooth between two spicy carrot cake cookies. Those hunky cookies, by the way, boasted toasted pecan, candied ginger, carrot, and a kick of cinnamon. The final product was perfect for rewarding oneself after four arduous days of exercise: a sweet-but-not-too-sweet, sophisticated, portable bit of carrot cake bliss.
Now to spend the next five days working off the weekend! What about you? How do you reward yourself for a job well done? A special food favorite? Some time to relax?
Carrot Cake Sandwich Cookies with Honey Cardamom Cream Cheese
Cookie Ingredients:
1 1/8 cups all-purpose flour
1 teaspoon cinnamon
1/2 teaspoon baking soda
1/2 teaspoon salt
1 stick (1/2 cup) unsalted butter, softened
1/3 cup plus 2 tablespoons packed light brown sugar
1/3 cup plus 2 tablespoons granulated sugar
1 large egg
1/2 teaspoon vanilla
1 cup coarsely grated carrots (2 medium)
1 scant cup pecans (3 ounces), toasted and chopped
4 tablespoon candied ginger chopped
Filling Ingredients:
8 ounces cream cheese
1/4 cup honey
1.5 teaspoons ground cardamom
Grating of fresh nutmeg
Directions: Preheat oven to 375 degrees F. Line two baking sheets with parchment paper. In a medium bowl, whisk together flour, cinnamon, baking soda, and salt.
In a separate bowl, beat together butter, brown and granulated sugars, egg, and vanilla until pale and fluffy, about 2 minutes. Stir in carrots, nuts, and ginger at low speed. Add the flour mixture and mix until just combined.
Drop about 1.5 tablespoons of batter 2 inches apart on baking sheets and bake until cookies are lightly browned and springy, about 12 to 16 minutes total. Cool cookies on their baking sheets for a few minutes before transferring them to a cooling rack to cool completely.
While cookies are cooling, blend cream cheese, honey, cardamom, and nutmeg together until smooth. Spoon cream onto half the cookies and top with the other half.
Every year around this time, I get the urge to build a mailbox.
Don’t look at me like that. I blame my elementary school teachers. At the beginning of almost every February, my teachers would pull out construction paper, glue, stickers, markers, and paint, and we’d all set to work constructing mailboxes. Sure it wasn’t the most glamorous construction job I’ve ever been a part of, but I was very serious about it nonetheless, because this wasn’t just any mailbox — this was a Valentine’s Day mailbox.
On February 14, we’d all bring in our packets of valentines and circulate about the classroom uncomfortably, dropping one in each of the waiting mailboxes. We tried not to pause too long at anyone’s desk or — heaven forbid — make any accidental eye contact, lest it be misinterpreted during this socially charged process.
Secretly, though, I’d probably spent the night before carefully selecting the perfect Strawberry Shortcake Valentine for the boy I liked. One that could be interpreted as being totally casual — plausible deniability in case he had no interest in me whatsoever — but was also slightly on the mushy side, in case he was just waiting for a sign of my interest. If I was appending candy to my valentines that year, I probably spent another eternity choosing the candy heart or chocolate that I thought he’d like the very best.
(Yes, I now realize that the boy I liked, in contrast, had probably spent the night before Valentine’s Day being hounded by his mother to at least write his classmates’ names somewhere on the valentines she’d bought for him, eating most of his valentine candy before it got attached to anyone’s card, and playing a Teenage Mutant Ninja Turtles video game until bed.)
Anyway, when every valentine was passed out and the time had finally come to sit down and empty our mailboxes, I was always breathless with suspense. Imagine the possibilities! Forget bills and junk mail — these mailboxes were carefully crafted to hold L-O-V-E. Every year I fully expected to receive a long letter handwritten by the boy I liked (actually, any boy would’ve done. Or a secret admirer? Yes, please!) detailing the many, MANY reasons he was smitten with me. He might even include a phone number. Maybe a special conversation heart. Maybe an engagement ring! You never know.
Reality was a little disappointing. I’d dump out all the valentines and quickly shuffle through the boring ones — Scooby Doo holding a bunch of flowers and saying, “Rees are for Roo, Valentine!” or Power Rangers crying, “It’s Morphin’ Time, Valentine!” My eagle eyes were looking for two things: candy and handwritten messages. Candy because it would sustain me on my arduous journey toward discovering the love of my life, and handwritten messages from said love.
Was his heartfelt letter to me in this envelope? Nope, a smurf card. How about this one? Nope, an I Love Lucy valentine — you can tell Mom picked those out. How about the envelope with a heart drawn on the front? Nope, that was from my BFF. Thanks a lot for getting my hopes up, girl. Slowly but surely, my stack dwindled. One after another, the valentines were slapped down onto my “read” pile with barely more than a glance. Finally, the fateful moment came when I’d read and dismissed the very last card.
No proposal. No secret admirer. Not even a lousy paragraph about my eyes being like the sun or something. Nothin’. At this point I’d probably look at my crush across the classroom and sigh, appreciating the suave way in which he used his lollipop as a sword to launch attacks against his friend’s ear.
Childhood is rough. Adulthood is a lot better. Yes, there are bills and junk mail in my mailbox now. And unfortunately, I didn’t get to MAKE my mailbox. And, okay, I’m not going to get a pile of colorful valentines, some of which are boasting candy.
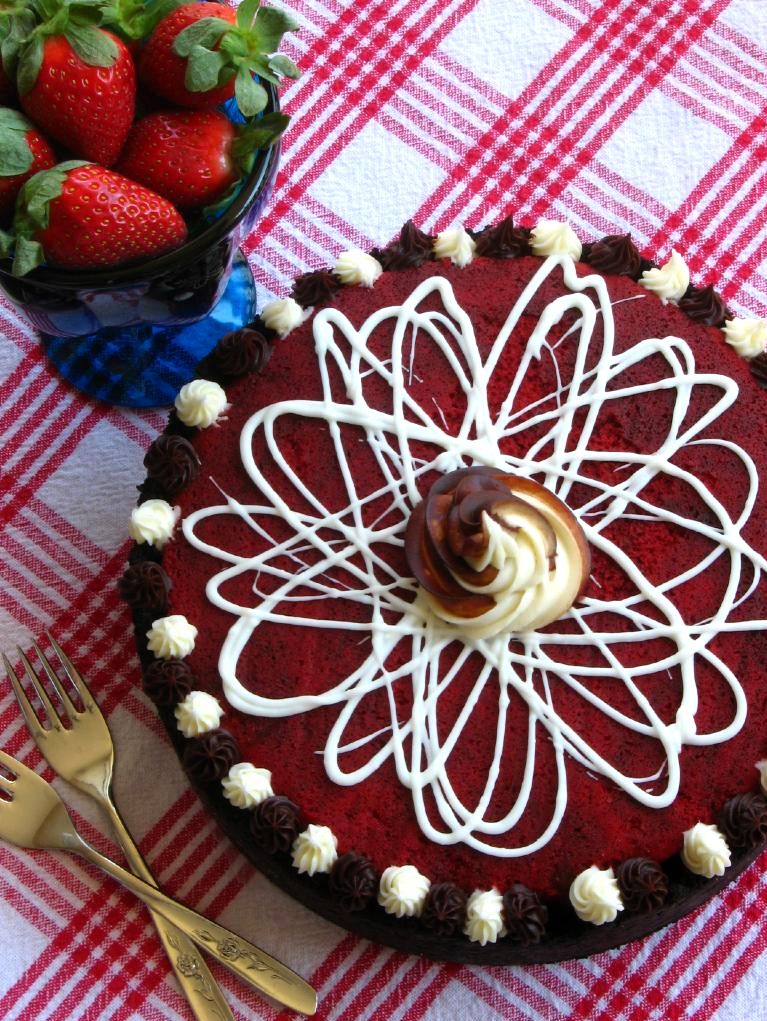
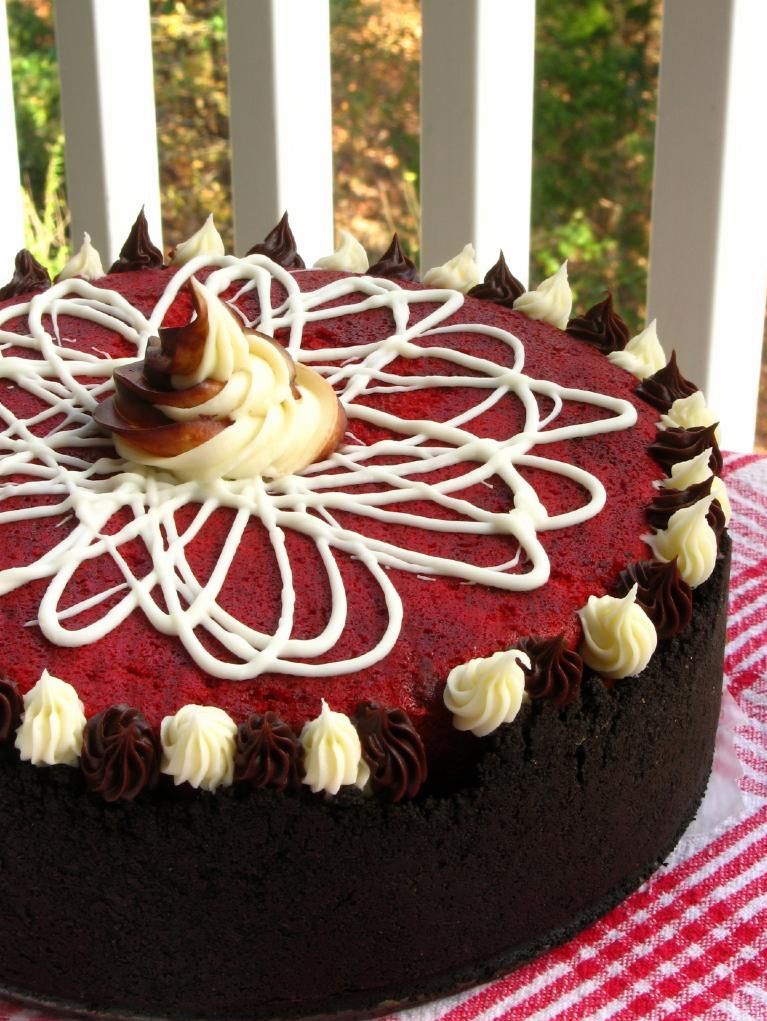
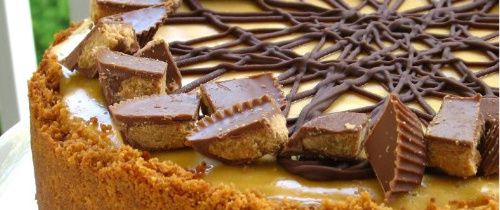
But here’s why adulthood rocks. This year, when Christof Van Snufterplucken (names changed to protect the innocent — or lame) doesn’t turn off his video game long enough to write me a love letter about how awesome I am, I can remedy my disappointment in a mature, adult way: by making and eating a ridiculous amount of cheesecake. Red Velvet Cheesecake, to be exact.
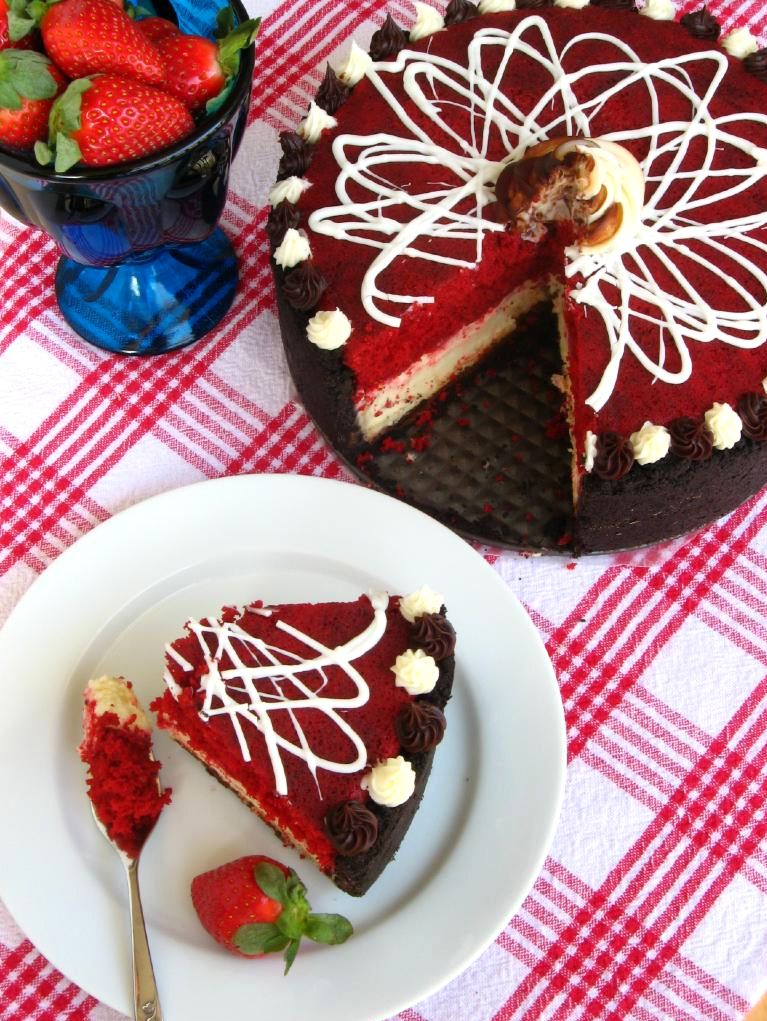
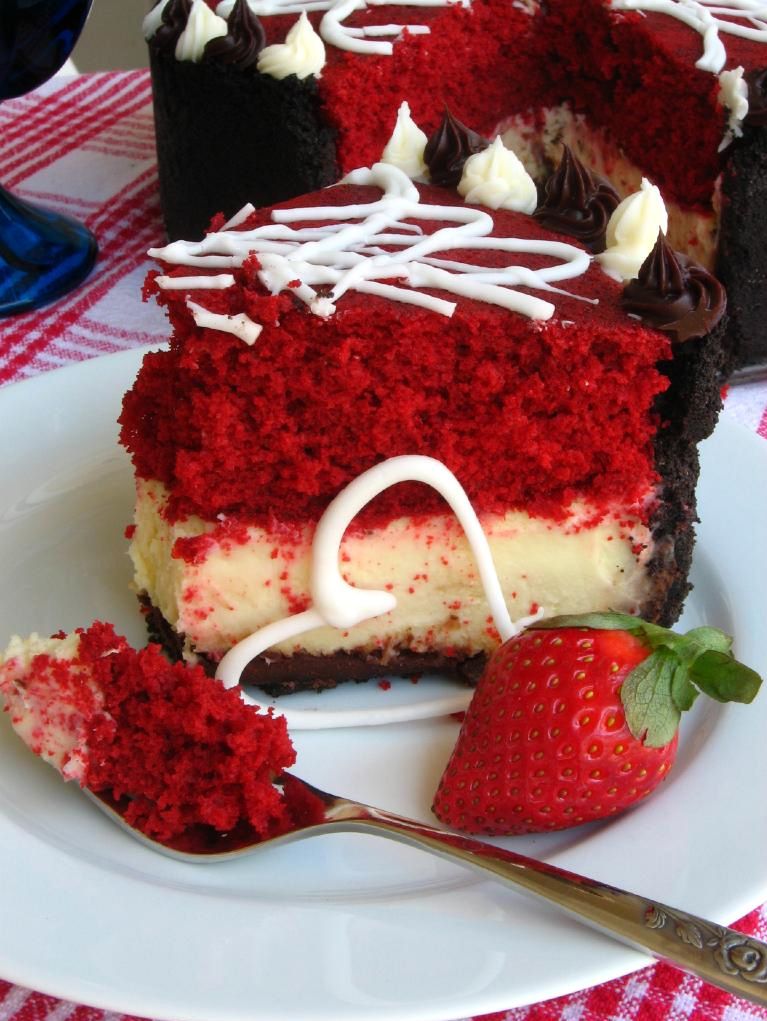
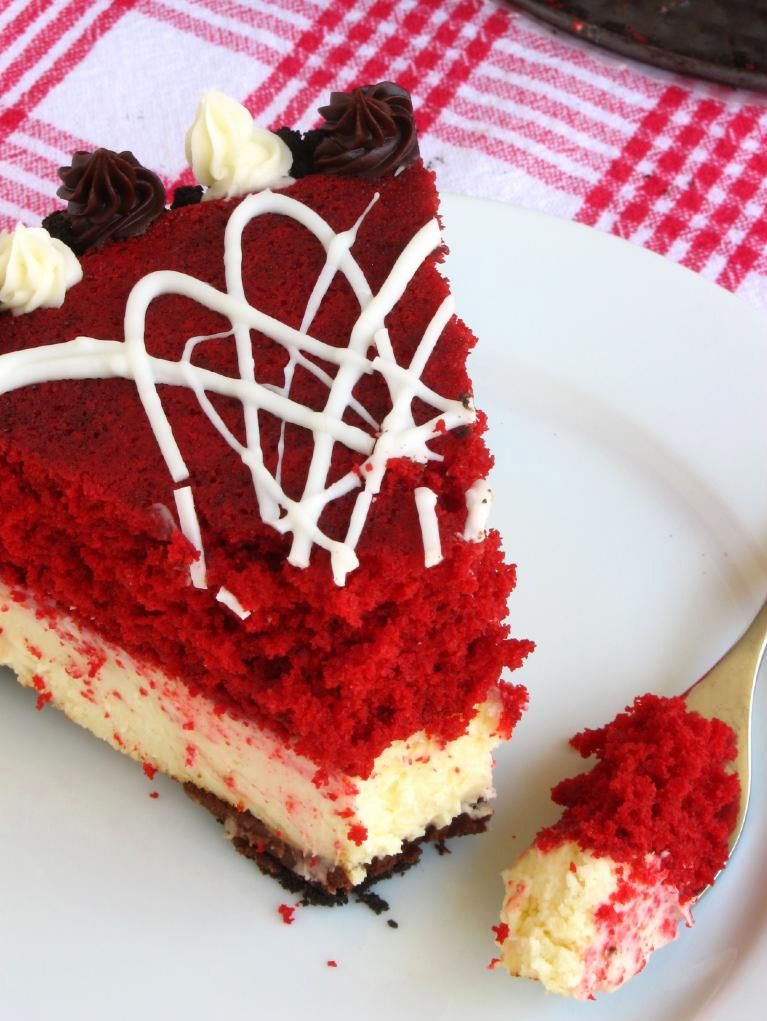
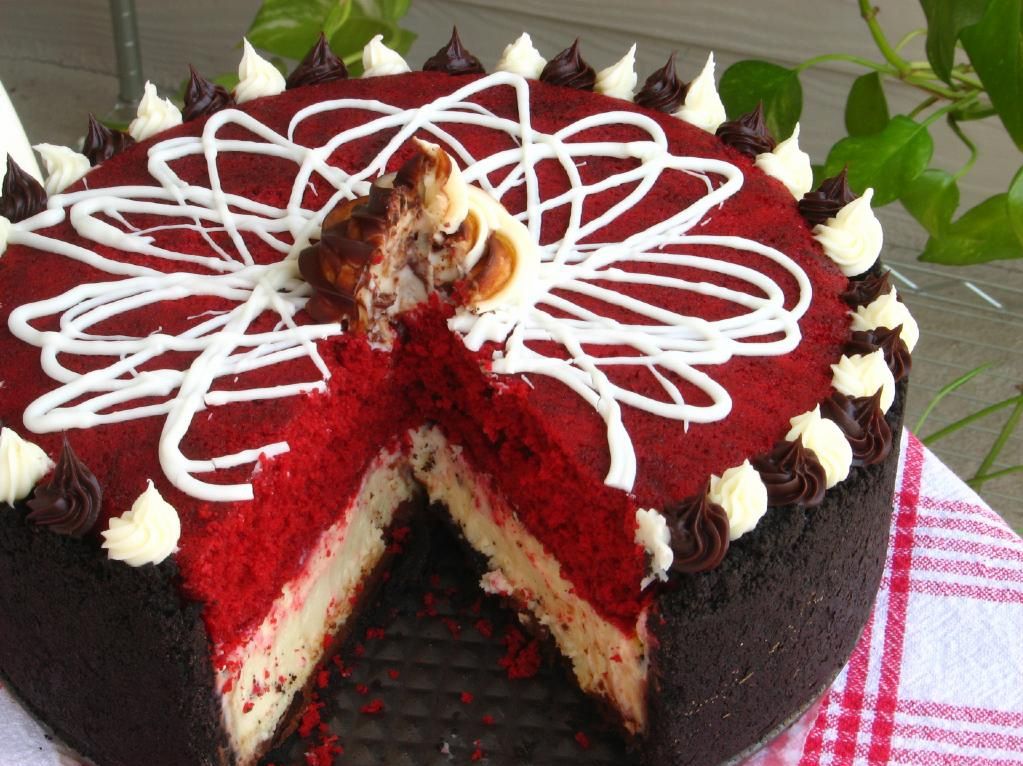
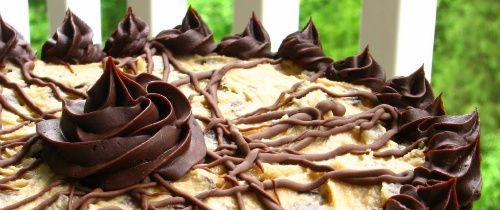
Reader Victoria first gave me the idea for a Red Velvet Cheesecake back in November and I thought it sounded fantastic! She made a beautiful layer-cake-like version, and I went the cheesecake-like route. This ultimate Valentine’s dessert includes an oreo crust filled with layers of ganache, creamy cheesecake, and moist red velvet cake decorated with ganache and cream cheese frosting. Perhaps this is obvious, but apart from being pretty (especially when served with chocolate-covered strawberries and white chocolate hearts), this thing is delicious, indulgent, and yes, romantic. So even if your crush loves radioactive reptilian ninjas more than you, you can have your own little slice o’ love.
Tell me about one of your elementary school crushes. Did you ever receive a fantastic valentine in school?
A delicious dessert that combines two of your favorites into one! Note on cheesecake making: Cheesecakes are simple and super customizable. New to cheesecake making? Watch my 6-minute Cheesecake Video Tutorial for visual assistance! Note on scheduling: This cake is easily separated into two days of preparation, and can be prepared ahead of time. On day one, prepare the red velvet cake, cool it, and freeze it. On day two, prepare the cheesecake. You can then assemble and decorate right away, or leave this for day three.
32 chocolate sandwich cookies, finely processed into crumbs (cream and all – it’ll disappear when you crush them up!)
5 1/3 tablespoons unsalted butter, melted and cooled
pinch of salt
Ganache Ingredients:
3/4 cups heavy cream
10 ounces bittersweet or semisweet chocolate, finely chopped (I used half semisweet and half bittersweet chocolate chips)
Cake Ingredients:
1/4 cup vegetable shortening
1 egg
1 tablespoon cocoa
1/4 teaspoon salt
3/4 cups sugar
1/2 teaspoon vanilla extract
1/2 cup buttermilk
1 1/4 cups flour
1/2 teaspoon baking soda
1/2 tablespoon white vinegar
1 ounce red food coloring
Filling Ingredients:
3 (8-ounce) packages cream cheese, at room temperature
1 cup sugar
1½ tablespoons all-purpose flour
2 teaspoons vanilla extract
3 large eggs
Decorative Toppings (optional):
2 ounces cream cheese, at room temperature
2 tablespoons butter, at room temperature
1 cup powdered sugar, sifted
white chocolate for drizzling
strawberries
Instructions
Make the cake: Preheat oven to 350 degrees F. Line the bottom and the sides of an 9-inch round cake pan with parchment paper, leaving an overhang on two opposite sides to make it easier to lift the cake out of the pan when it’s done. Cream shortening, sugar, and eggs. Make a paste of the cocoa and coloring and add to the shortening mixture. Add salt and vanilla. Add buttermilk alternately with the flour, beginning and ending with flour. Mix vinegar and soda right before using and add to mixture by folding in. Pour batter into the cake pan and bake at 350 degrees for 20-25 minutes, or until a toothpick inserted into the center of the cake comes out clean. Cool completely, cover in wax paper, and freeze for 30 minutes or until firm.
Make the cheesecake: To make the crust, preheat the oven to 350˚ F. Butter a 9-inch springform pan and place it on a baking sheet. Combine the chocolate cookie crumbs, melted butter and salt in a small bowl. Toss with a fork to moisten all of the crumbs. Press into a thin layer covering the bottom and sides of the springform pan (at least 3 inches up the sides).
Bring the cream to a simmer in a medium saucepan. Place the chocolate in a medium bowl. Once the cream reaches a simmer, pour the cream over the chocolate and let stand 1-2 minutes. Whisk in small circles until a smooth ganache has formed. Pour 1 – 1.5 cups of the ganache over the bottom of the crust. Freeze until the ganache layer is firm, about 30 minutes. Reserve the remaining ganache; cover and let stand at room temperature for later decorating.
Preheat the oven to 350˚ F and position a rack in the middle of the oven. In the bowl of an electric mixer fitted with the paddle attachment, beat the cream cheese and sugar on medium-high speed until well blended. Beat in the flour. Add in the vanilla and beat until well incorporated, scraping down the sides of the bowl as needed. Beat in the eggs one at a time, scraping down the bowl between each addition.
Pour the filling over the cold ganache in the crust. Place the springform pan on a rimmed baking sheet. Bake until the top is lightly browned, puffed and cracked at the edges, and the center moves only very slightly when the pan is lightly shaken, about 1 hour. Transfer to a wire cooling rack. Cool at room temperature for at least 30 minutes. Transfer to the refrigerator and let cool at least 3 hours, until completely chilled and set (it’ll sink as it cools).
Assemble topping: Whip room temperature ganache to create a fluffy texture perfect for piping. In a separate bowl, mix together cream cheese, butter, and powdered sugar to make a small amount of cream cheese frosting for decorating.
Assemble the cheesecake: Wrap a warm towel around the outside of the springform pan to help loosen the crust from the sides. Carefully remove the springform. Transfer the cake to a serving platter. Here, you can schmear some ganache on the cheesecake to help the red velvet cake adhere. I didn’t, but it’s a good idea. Then place your red velvet cake layer on top of cheesecake (right side up). If for some reason you seem that your cake layer will stick up beyond your crust, you can use a long serrated knife to reduce its width (freezing it first makes it easier to cut). Decorate top of cake with drizzled white chocolate, piped cream cheese frosting, whipped ganache, and strawberries.
3.2.2925
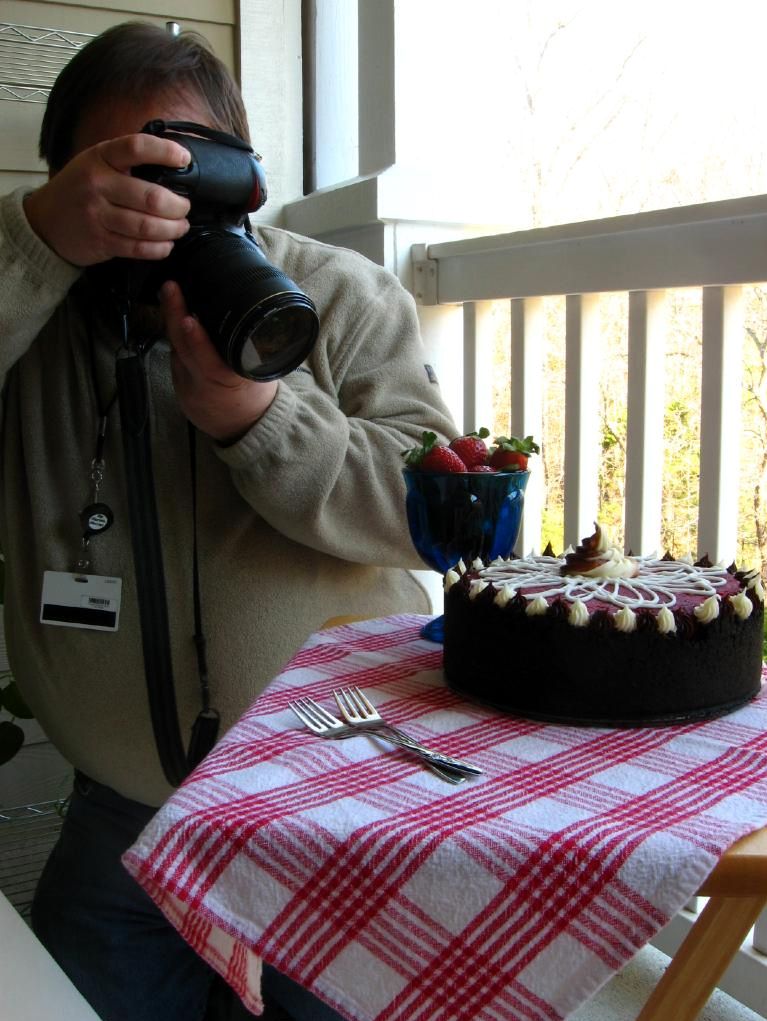
P.S. Who could this photographer be shooting my cheesecake? Find out this coming Wednesday!
This is a hard story to write — hard enough that it’s taken me almost two months to even attempt it. I still feel raw about it, and I still don’t know how to address the situation head-on. So I’ll just muddle through it the best way I can.
On November 28, Mike and I broke up. It was a cold day, and I dropped him off at the train station so he could head back to Raleigh. Watching him close the door and walk into the station was like watching a movie, except that it wasn’t fiction. I knew we were about to travel a rocky road, but there was no way to switch off the television, no credits to roll — just the aftermath to clean up as best we could.
4,237 days (or 11 years, 7 months, and 5 days) earlier, I had just turned 15 years old. I was sitting in my room, looking out the window, and talking to Mike on the phone. He had something to ask me, but was obviously nervous: “If I were to ask you . . . something . . . what would you say?”
I helped him get to the point. Yes, I want to be your girlfriend. I couldn’t have imagined at that moment where the next 12 years would take us. Who knows when they’re 15 that they’re embarking on something monumental?
Over the years, our relationship brought us trials, for sure.
It also brought me through high school. Sometimes I’d leave school and drive straight to his apartment to watch Star Trek and eat Hamburger Helper (my early attempts at “cooking for him”).
It took me to college, coming home to see him every weekend. It took me off to the coast to study marine zoogeography for a semester — I remember the strain of distance, calling every night on my newly acquired cell phone, and his visit out to Atlantic Beach to see me.
Our relationship saw me through my first teaching job, a tumultuous experience for me. In the first hopeful, idealistic days before I began, he came and painted every single one of my lab tables a deep green to cover the graffiti. Later in the year, when my administration decided to switch my classroom and everything went wrong, my clean tables were mixed in with others and his hard work was lost. He was still there, though, helping me pack up boxes and carry them down the hallway to my new room.
The relationship also saw me through my year as a research technician and, finally, to my position at Woodlawn, the wonderful school where I now teach.
It saw Mike through college at UNCC. He rocketed through in 3 years with nearly perfect grades. It also saw him move his life three hours north to a new city this past fall to begin graduate school at NC State. It saw us through celebrations, new beginnings, and difficult endings. I wouldn’t trade a single day.
These Berry Crumble Bars were actually made at the very tail end of summer and are one of the only dishes I ever photographed at Mike’s apartment in Raleigh. I brought them up to share with him and my little brother, who is an undergraduate at NC State. The bars are buttery, crumbly, slightly lemony, and bright — almost cobbleresque, and perfect with a scoop of vanilla bean ice cream.
The original recipe used only blueberries, but throwing in other berries or even combining berries is an easy way to create multiple varieties of crumble bars; I settled on blueberry and raspberry. Mike and I probably ate a billion of them over the course of my visit. I had a way of encouraging him to have dessert after every meal. I’m sure you’re not surprised.
So what do you say at the end of a story about a breakup? I think in this case, thank you. Thank you, Mike, for being who you are, and for 12 wonderful years. Thank you, God, for the promise that all things are working together for good for me (Romans 8:28). Thank you, friends and family and lovely readers, for your support during a rough time. Here’s to weathering loss and embracing the future — and to dessert!
Lemon Berry Crumble Breakup Bars
Recipe by: Adapted from My Baking Addiction
Yields: 9 raspberry bars and 9 blueberry bars
Ingredients:
1 cup white sugar
1 teaspoon baking powder
3 cups all-purpose flour
1 cup unsalted butter
1 egg
1 teaspoon pure vanilla extract
1/2 teaspoon kosher salt
2 teaspoons lemon juice
2 cups fresh or frozen blueberries
2 cups fresh or frozen raspberries
1/2 cup white sugar
3 teaspoons cornstarch
Directions:
Preheat the oven to 375 degrees F (190 degrees C). Line a 9×13 inch pan with parchment paper and spray with nonstick cooking spray. Stir together 1 cup sugar, 3 cups flour, salt, and baking powder in a medium bowl. In a separate, small bowl, beat together the egg, lemon juice, and vanilla. Using a pastry cutter or food processor, cut the butter and egg mixture into the flour to form a crumbly dough. Press half of dough evenly into prepared pan.
In two additional bowls, mix together 1/4 cup sugar and 1 1/2 teaspoons cornstarch. Gently mix blueberries into one bowl and raspberries into the other. Sprinkle berries evenly over pressed dough — I did half the pan with blueberries and half with raspberries, but you could alternate or even mix the berries if you’d rather. Crumble the rest of the dough over top of the berries. Bake in preheated oven for 45 minutes or until slightly brown. Cool completely (and even chilling a little helps to ensure they’ll hold together) before cutting into squares. These bars are fun because you can have two different flavors (blueberry and raspberry) or cut your bars such that you have a combination of both berries.
When I was little, I didn’t lust after coins or stamps or postcards or anything particularly, ah, collectible. Instead, I coveted tiny things. When my mother would head to torturous craft stores to pick up sewing supplies, the dollhouse aisle was a haven. Package after package boasted teensy soda bottles, itty bitty magazines (with readable headlines!), miniature lamps, pint-sized armoires, and on and on. I always tried to pick a particularly adorable item to ask Mom for, but then I’d realize with a measure of disgust that I didn’t really know what I’d do with a set of tiny kitchen utensils. At any rate, miniatures have always had my heart.
Maybe I am secretly a gnome.
One sort of miniature that did frequently end up coming home with me was tea sets. I sought them out everywhere I went — toy stores, souvenir shops, craft stores, department stores, gas stations. You’d be surprised where you can find tea sets. I had medium sets, tiny sets, super-ultra-tiny sets. There were teapots with elegant designs, cutesy designs, holiday designs, and even one where every dish was shaped like a flower.
Despite my plethora of tea sets, I never once sat down and had tea. I displayed them, fiddled with them, and every now and then acted out a sad little version of a teddy bear tea party, but I don’t think a drop of tea or a crumb of a crumpet ever touched a single dish. What a shame, because there are very few food events more classy and sweet than a tea party.
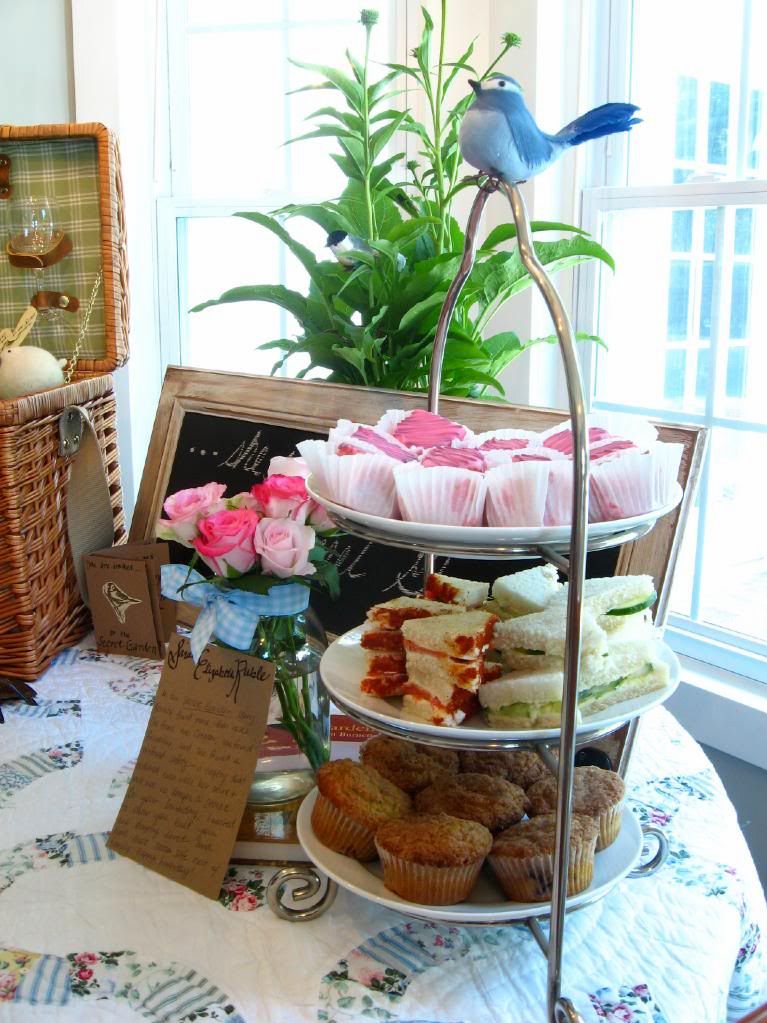
For my sister’s Secret Garden Party, I remedied the situation. It was a tea party to the extreme, complete with a colorful tablecloth, Mom’s best china, some sweet decor, and the most important part: an elaborate spread of indulgent finger foods. These savory, delicate finger sandwiches were one of the biggest hits on the table.
Ingredients:
1 large cucumber, peeled and sliced very thinly
3/4 cup butter, room temperature so it’s soft and spreadable
2 teaspoons minced fresh garlic
20 pieces thin-sliced bread with crusts removed
1 tablespoon lemon juice
1 tablespoon olive oil
Salt
Pepper to taste
Directions:
Place the cucumber slices in a colander, lightly salt them, and let them drain for 1-2 hours to remove some of the moisture.
Combine the soft butter and garlic in a bowl and spread onto one side of each slice of bread. In a separate bowl, stir together lemon juice, olive oil, and pepper. Place the cucumber slices into this mixture and toss to coat them well. On each of 10 slices of bread, arrange overlapping cucumber slices. Top with remaining 10 slices and quarter. Serve immediately.
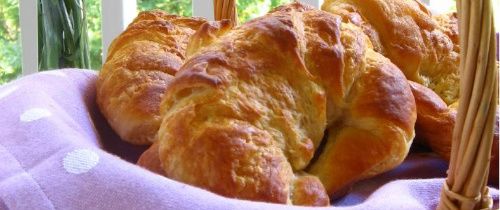
Classic Cucumber Tea Sandwiches were cool, buttery, and satisfyingly crisp. Providing the perfect complement was the salty, bold flavor of Smoked Salmon Tea Sandwiches with a kick of paprika. Both sandwiches were devoured (daintily, of course) in between scones, croissants, and lemonade.
Ingredients:
1 cup cream cheese, room temperature so it’s soft and spreadable
20 slices bread, thin-sliced with crusts removed
1/2 cup capers
12 ounces thin-sliced smoked salmon
lemon juice
Pepper to taste
mayonnaise (optional)
paprika (optional)
Directions:
Spread cream cheese on each slice of bread (one side only) and dot with capers (I liked quite a few capers). Arrange the smoked salmon on 10 bread slices, with a squeeze of lemon juice on each. Pepper generously (to taste), top with remaining 10 bread slices, and quarter (using a serrated knife). Brush long side of each tea sandwich with mayonnaise very lightly and dip into paprika to coat. Tap to remove excess paprika. Serve immediately.
Don’t repeat my childhood mistake of overlooking the tea party. Whether it’s for a gardenful of guests, a roomful of family, or a handful of (conveniently disinterested) stuffed animals, whip up some of these simple tea sandwiches. With minimal kitchen time and a short ingredient list, they provide a ton of pinky-pointing deliciousness. How about you? What’s your favorite tea party friendly dish? Scones, croissants, muffins, pastries, petit fours? Or are you a savory tea sandwich person yourself?
I was reviewing a grammar concept with my 6th graders yesterday and they seemed less than enthusiastic when asked to chant the rule back to me. I tried the usual encouragement: “Come on, guys, say it with enthusiasm!” I was met with the same tired chorus of voices. “Come on, really yell it this time!” Same old song.
After several unsuccessful attempts, I tried a new angle: “Imagine that this grammar rule is the BIGGEST, MOST AWESOME PRESENT YOU’VE EVER BEEN GIVEN, and you’ve JUST torn into it on Christmas morning. Open up the box and SCREAM the AMAZING GRAMMAR RULE you see inside!” Finally, half giggling and half screaming, they belted out the rule with gusto.
They just weren’t sure they wanted to be excited about grammar. I get it. I’m not sure I want to be excited about what I’m being handed right now, either — the unpredictable future, the passage of time. But let’s take a tip from my 6th grade class and open 2011 like it’s a wonderful gift.
Last year was filled with some of the highest highs and lowest lows (more on these later) of my 26 years on the planet. I’ve lost things that were so important to me that I still can’t think of them; instead, I’ve tucked them away for now in the attic of my memory. They’ll sit there like the Times Square Ball, wrapped carefully and waiting for when I’m ready to look through them again.
I’ve also gained so much — and I don’t mean weight, y’all, believe it or not. I’ve grown, I’ve made new friends, and I’ve done so many brave things. Every excursion into unknown social, emotional, and culinary territory has shaped me in some small way, so that I feel like a different version of myself than I did last year at this time. That’s scary, but also valuable. We’re always growing and changing, losing and gaining (once again, not talking about the scales!). Let’s put things into perspective. The truth is, we didn’t know we’d see this new year, and now here it is — ready to be lived as best we can live it.
Here are the top ten recipes from Willow Bird Baking in 2010. Just as these were your favorites, they’re some of my favorites, too! I hope you’ll enjoy them all over again:
10. Chocolate Peanut Butter Bliss Cheesecake
9. Homemade Croissants!
8. A&P Spanish Bar Cake
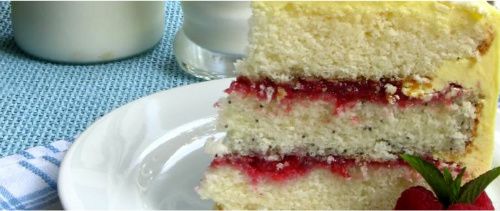
7. Lemon Raspberry Cake
6. Browned Butter Pumpkin Croquemcake with White Chocolate Chai Mousse
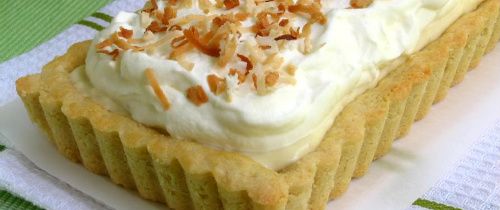
5. Coconut Cream Tart
4. Paula Deen’s Red Velvet Cupcakes with Cream Cheese Frosting
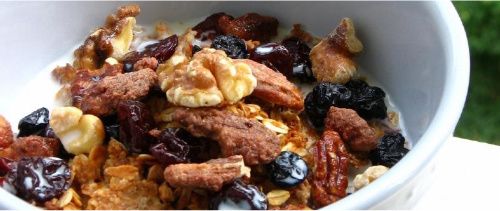
3. 48 Homemade Breakfast Cereals
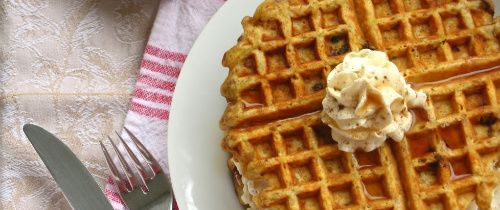
2. Carrot Cake Waffles
AND THE NUMBER 1 MOST POPULAR RECIPE ON WILLOW BIRD BAKING IN 2010 WAS . . .